

There must be a word for the way a fleeting thought of pizza for dinner creeps in and quickly sprouts into a full, blinding desire—the single-minded resolution that pizza is the only option, the only thing that will satisfy. I sometimes wake with the idea of pizza for dinner firmly rooted, and there’s no excising that stubborn weed. Thoughts of scattered melted cheese, plump tomatoes, olives, pepperoni… The simple idea of that harmonious blend of flavors and textures motivates, eventually ushering pizza to the dinner table—again. You know it’s getting worse when the kids ask, “Can we have something else tonight?”
The recipe for this sourdough pizza al taglio is based on the pizza recipe
in my new cookbook, The Perfect Pizza.
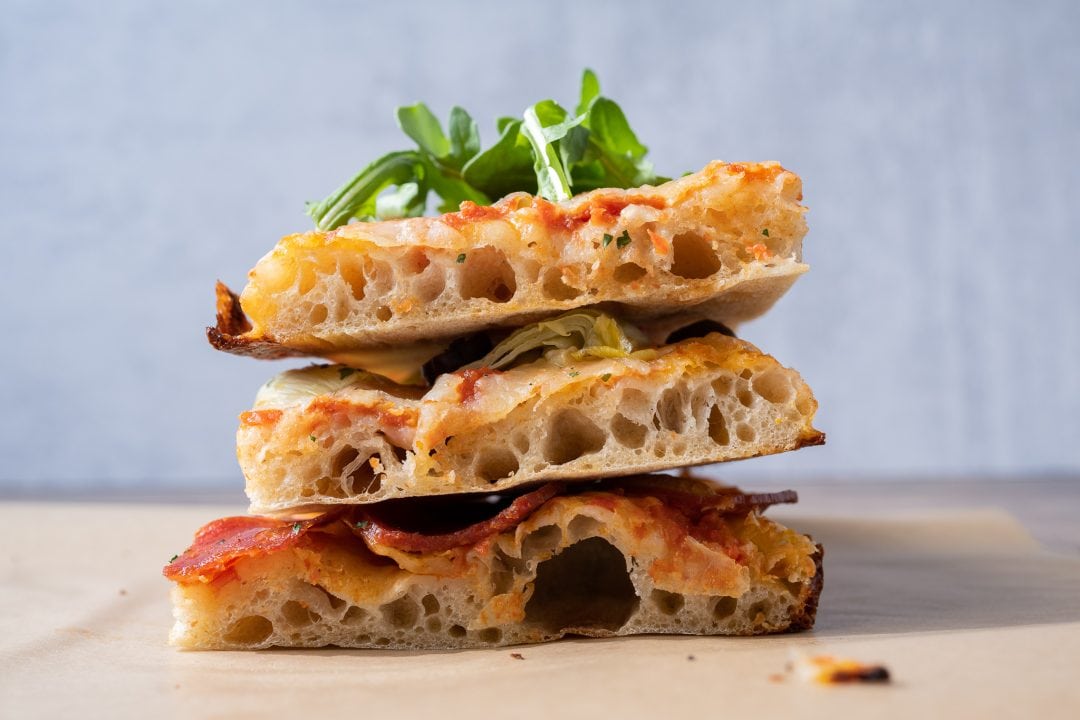
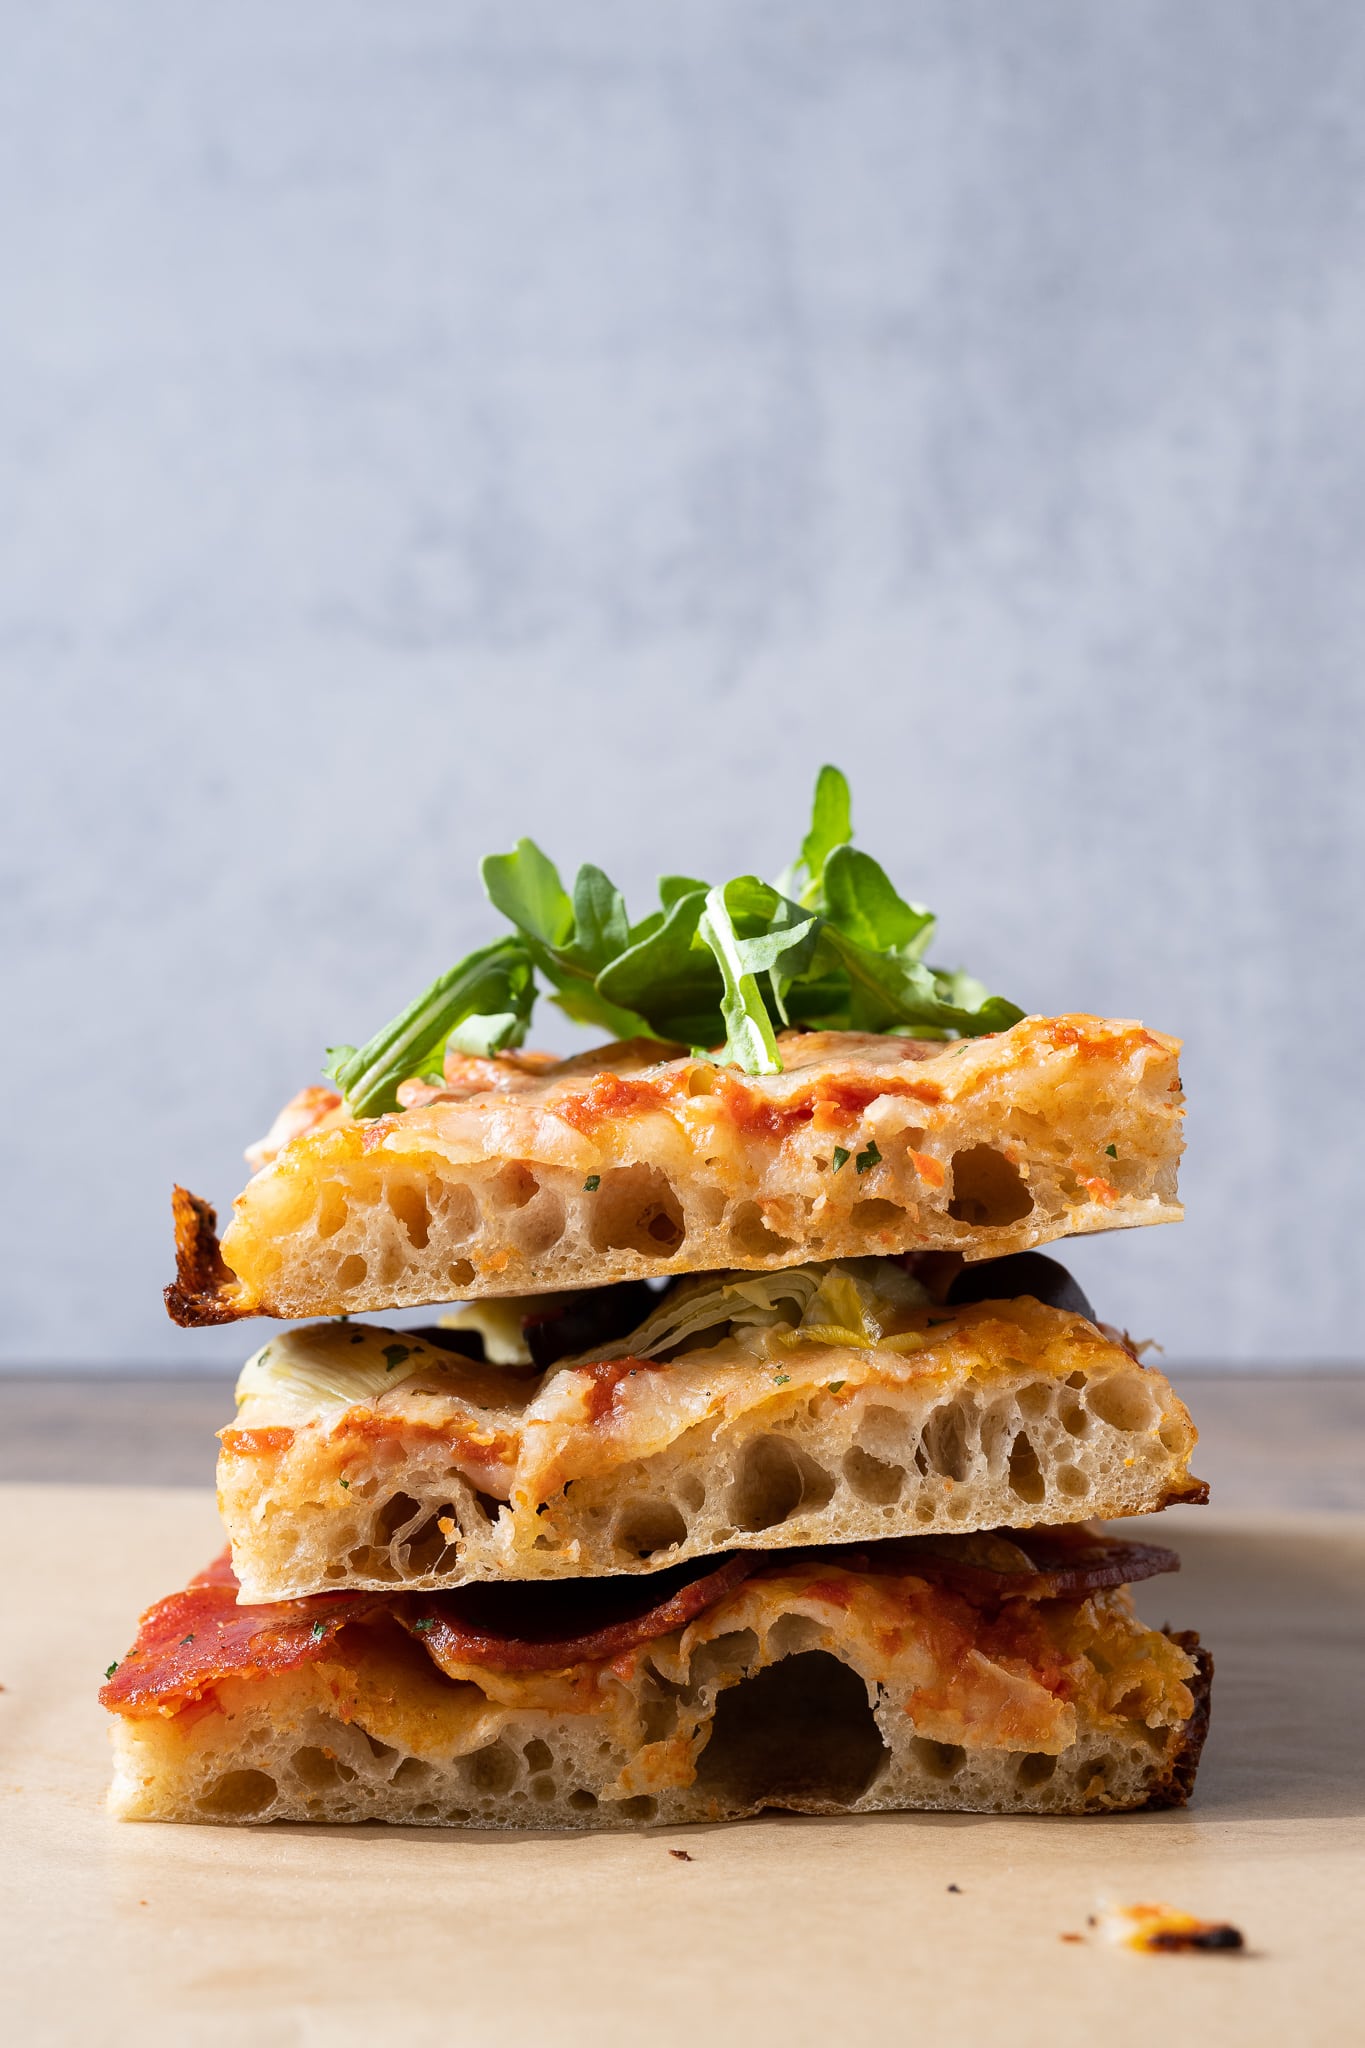
And I’ll come right out and say it: this sourdough pizza al taglio has been stealing the pizza spotlight for so long I’ve all but forgotten how to shape dough round-like instead of rectangular-like. The balance will likely shift once warmer weather arrives, but regardless, there’s a permanent, well-deserved spot in my pizza repertoire for this style. Since I started making rectangular pizzas in a sheet pan, I’ve been hooked on its simplicity and deliciousness. It results in a pizza with a thin and crispy bottom crust, a tender interior, and an overall lightness thanks to strong fermentation and high water content—a perfect contrast of textures.
I’ve been chatting with other bakers about this pizza for a while on The Perfect Loaf’s Discord server, and we’ve all expressed our love for easy pizza in an alternative form. And as we’ve collectively pointed out, a rectangular sheet pan pizza is a crowd-pleaser thanks to easy slicing, flexibility in topping choices, and the ease of doubling or tripling the recipe.
Real quick: Why I Like This Sourdough Pizza al Taglio
- Hands off: there’s very little dough handling
- Use what you have: you can top it with literally anything in your fridge or pantry
- Flexible schedule: the pizza can be made all in a single day or the dough can be refrigerated overnight for pizza the next day
- Great for gatherings: a single sourdough pizza al taglio can feed a large crowd (and kids love it)
Remember, there’s a distinct difference between focaccia and this sourdough pizza al taglio, or pizza by the slice. Whereas focaccia spends most of its time rising directly in the pan it will be baked in, this rectangular pizza spends its time rising in a bulk container and is then shaped into a rectangle just before it meets the oven.
But also, this is thinner (and definitely thinner than Detroit-style pizza) and less pillowy-soft. A prominent crunch at the bottom crust sets this pizza apart.
Flour Selection For The Perfect Sourdough Pizza
This sourdough pizza al taglio is adaptable and flexible. I like to add 15% (to the total flour weight) of finely milled durum flour to usher in all the wonderful flavor and aroma of durum. Durum is a wheat species used heavily for pasta-making, but it often appears in pizza doughs (for more, check out my guide to durum flour).
For bread-making, you typically want to use finely milled durum flour (as I do in my Sicilian bread with sesame seeds), sometimes labeled as “extra fancy” or “semolina rimacinata.” One of my go-to sources is Molino Grassi extra-fancy durum semolina, right from Italy. If you’ve never baked with durum, it adds an incredible flavor to pizza and bread alike—and you can use it to make fresh pasta.
If you don’t want to pick up durum, feel free to substitute the 15% in this recipe for the same weight of whole-grain spelt, khorasan, whole wheat, or even just more white flour. As I mentioned, this recipe is super flexible, and the result will be great with whatever grain flavor you’d like to explore.
If you’re looking for another place to use durum, have a look at my sourdough focaccia Pugliese, which has durum (and potato!) added to the dough for a little more color and flavor.
Sourdough Pizza Pans
I love using the LloydPans “grandma” style pan for this pizza al taglio, and I’m so impressed with its performance that I’ve switched from using my sheet pans and haven’t looked back.
LloydPans has a nonstick coating that still yields a crispy crust and beautiful bottom color. I’m not usually a fan of using a nonstick coating on anything, but with these high-quality pans, the coating is not scratchable and doesn’t decrease performance—and they’re made in the USA. The pan itself is also extra thick for added strength, and the sides aren’t so tall that you’re venturing into deep-dish pizza territory. They’re just awesome.
Highly recommended: LloydPan 12×16-inch Grandma Style Pizza Pan
Baking Schedule
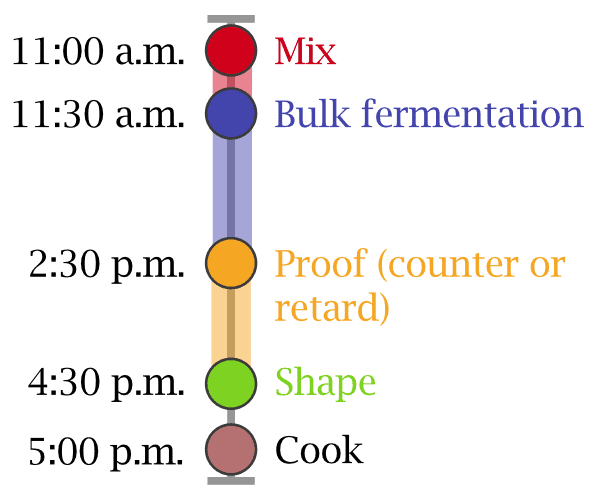
I typically make this sourdough pizza al taglio all in a single day. I start mixing in the morning when my sourdough starter is ripe, and then I have a fresh pizza ready by dinner time. But you can easily extend this to two days by placing your covered bulk fermentation container in the refrigerator right at the start of the two-hour proof. The next day, when you want to make the pizza, take it out, let it warm up for 30 to 45 minutes, and shape it out to cook in the oven.
Sourdough Pizza al Taglio Formula
Vitals
| Total Dough Weight | 900 grams |
| Hydration | 69.0% (plus 2.5% from olive oil) |
| Pre-fermented Flour | 9.0% (83g of sourdough starter is used for this recipe, and my starter is approximately 50% flour. ((83/2)/461 total flour) * 100 = approximately 9%.) |
| Yield | One 12 x 16-inch rectangular pizza |
This recipe makes a single, large sheet pan pizza; if you’d like to make two, double all the ingredients.
Total Formula
Desired dough temperature: 78°F (25°C). See my post on the importance of dough temperature for more information on dough temperatures.
| Weight | Ingredient | Baker’s Percentage |
|---|---|---|
| 400g | Type 00 flour or All-purpose flour (Central Milling Type 00 Normal or King Arthur Baking All-Purpose) | 85.0% |
| 71g | Durum flour, extra fancy or semolina rimacinata (Molina Grassi Extra Fancy Durum Semolina or Central Milling Durum Flour Extra Fancy) | 15.0% |
| 12g | Extra virgin olive oil | 2.5% |
| 324g | Water | 70.0% |
| 9g | Fine sea salt | 1.9% |
| 85g | Sourdough starter | 18.0% |
Additional Ingredients
| One 28oz can of whole peeled tomatoes (I like Bianco DiNapoli or another San Marzano style) |
| Mozzarella cheese (low moisture, shredded) |
| Extra virgin olive oil for drizzling on top of the pizza |
| Any pizza toppings: pepperoni, black olives, artichoke hearts, jalapeños, etc. |
Sourdough Pizza al Taglio Method
1. Mix – 11:00 a.m.
I like to mix this rectangular pizza dough in my KitchenAid stand mixer, but you could use a larger bread mixer or mix and strengthen the dough by hand.
To the bowl of a stand mixer, add the flour, water, salt, and ripe sourdough starter. Mix on speed one for 1 to 2 minutes until the dough comes together, and no dry bits remain. Then, turn the mixer up to speed two and mix for 5 minutes.
Let the dough rest in the mixing bowl for 10 minutes.
Turn the mixer on to speed one for 1 minute, then slowly drizzle in the olive oil with the machine running. Once all the oil is added, turn the mixer to speed two and mix for 2 to 3 minutes until all of the olive oil is absorbed and the dough is cohesive.
The dough will still be shaggy and very soft but not soupy or excessively wet at the end of mixing. Transfer the dough to a container for bulk fermentation and cover.
2. Bulk Fermentation – 11:30 a.m. to 2:30 p.m.
At warm room temperature, around 74-76°F (23-24°C), bulk should take about 3 hours. If your kitchen is cooler, place your bulk container in a small home dough proofer, or extend the bulk fermentation time to give the dough more time to ferment. This dough needs three sets of stretch and folds, spaced out by 30 minutes, during the 3-hour bulk.
This is a wet and extensible dough, so I like to give it three sets of vigorous stretch and folds. After the first 30 minutes in bulk fermentation and using wet hands, grab the north side of the dough in the bulk fermentation container and stretch it up and over to the south side. Then, grab the south side of the dough and stretch it up and over to the north side. Repeat in the east to west and west to east directions for a total of 4 folds.
Give the dough two more sets of stretch and folds at 30-minute intervals. After the last set, let the dough rest in the container until the end of bulk fermentation.
3. Proof – 2:30 p.m. to 4:30 p.m.
At this point, there’s nothing to do: continue to let the dough proof in the bulk fermentation container for 2 hours at room temperature.
About an hour into proof, begin preheating your oven with a rack in the middle to 500°F (260°C) and with a baking surface—I like to use my Baking Steel—inside on the rack.
Overnight proof option: Instead of proofing the dough on the counter for two hours, you can place the covered bulk fermentation container into the fridge to proof overnight. The next day when you want to make the pizza, remove the container and let it warm up for 30 minutes or so. The dough should be warm to the touch, well-risen, and very soft. After it’s warm, proceed with the steps below.
4. Prepare Sauce and Shape – 4:30 p.m.
Prepare Tomato (Pomodoro) Sauce
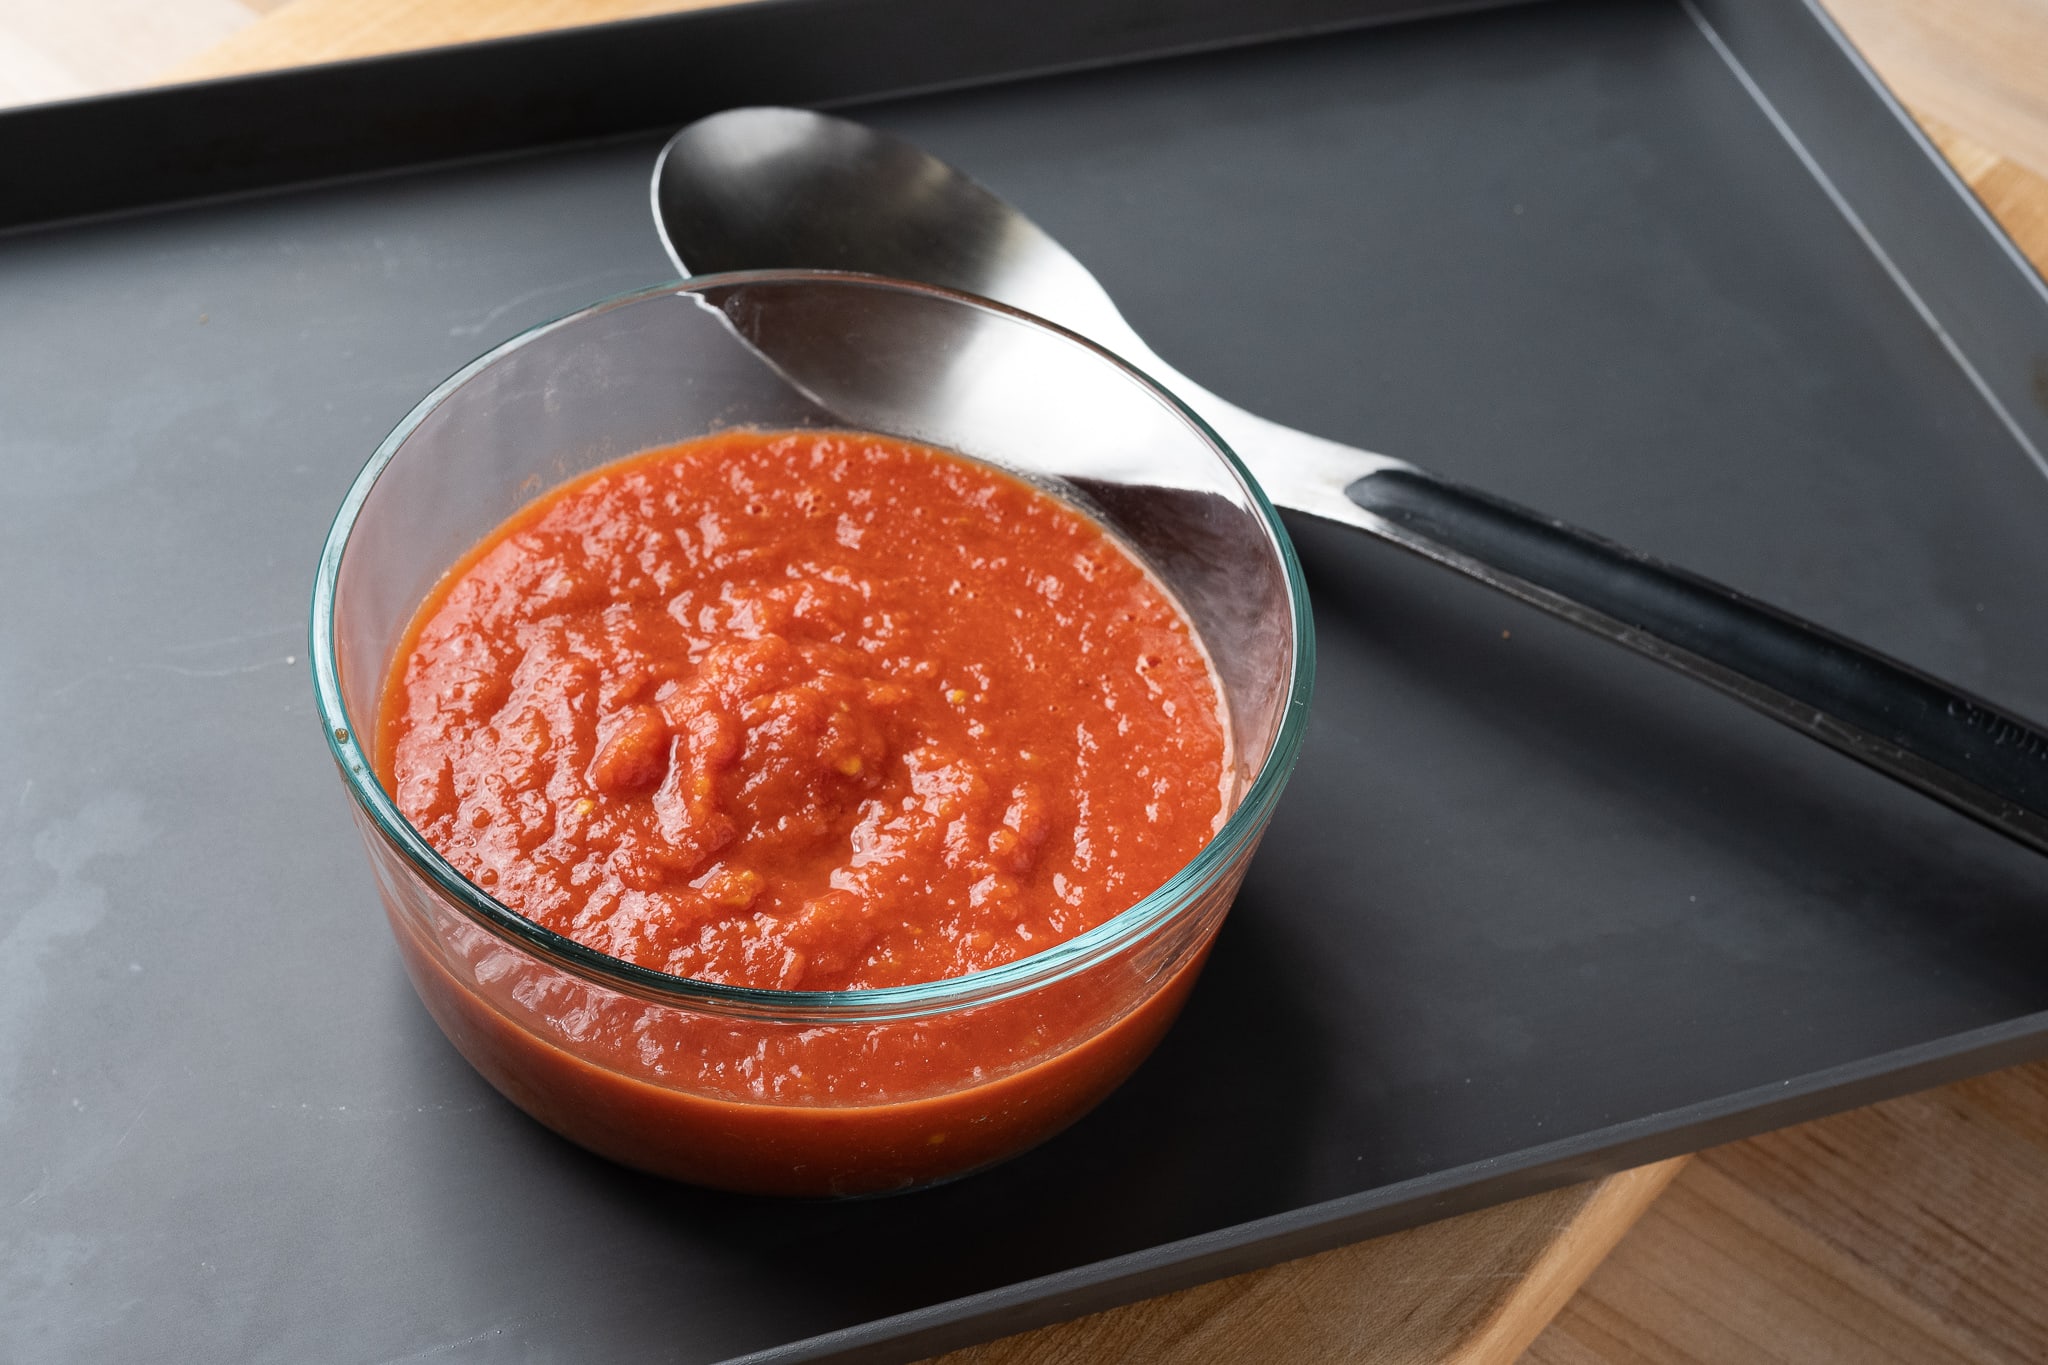
This sauce is very similar to my basic Pomodoro sauce on my other sourdough pizza post. Open a 28 oz. can of whole peeled tomatoes and drain the liquid in the can (you can save this to make pasta!). Place the tomatoes in a blender with about 1/4 teaspoon of dried oregano, 1/2 teaspoon of salt, and a dash of extra virgin olive oil. Blend until smooth but not excessively frothy. I like my sauce for sheet pizza to have a little texture to it, not completely smooth.
Set the sauce aside until you’ve shaped out the dough.
Shape Dough
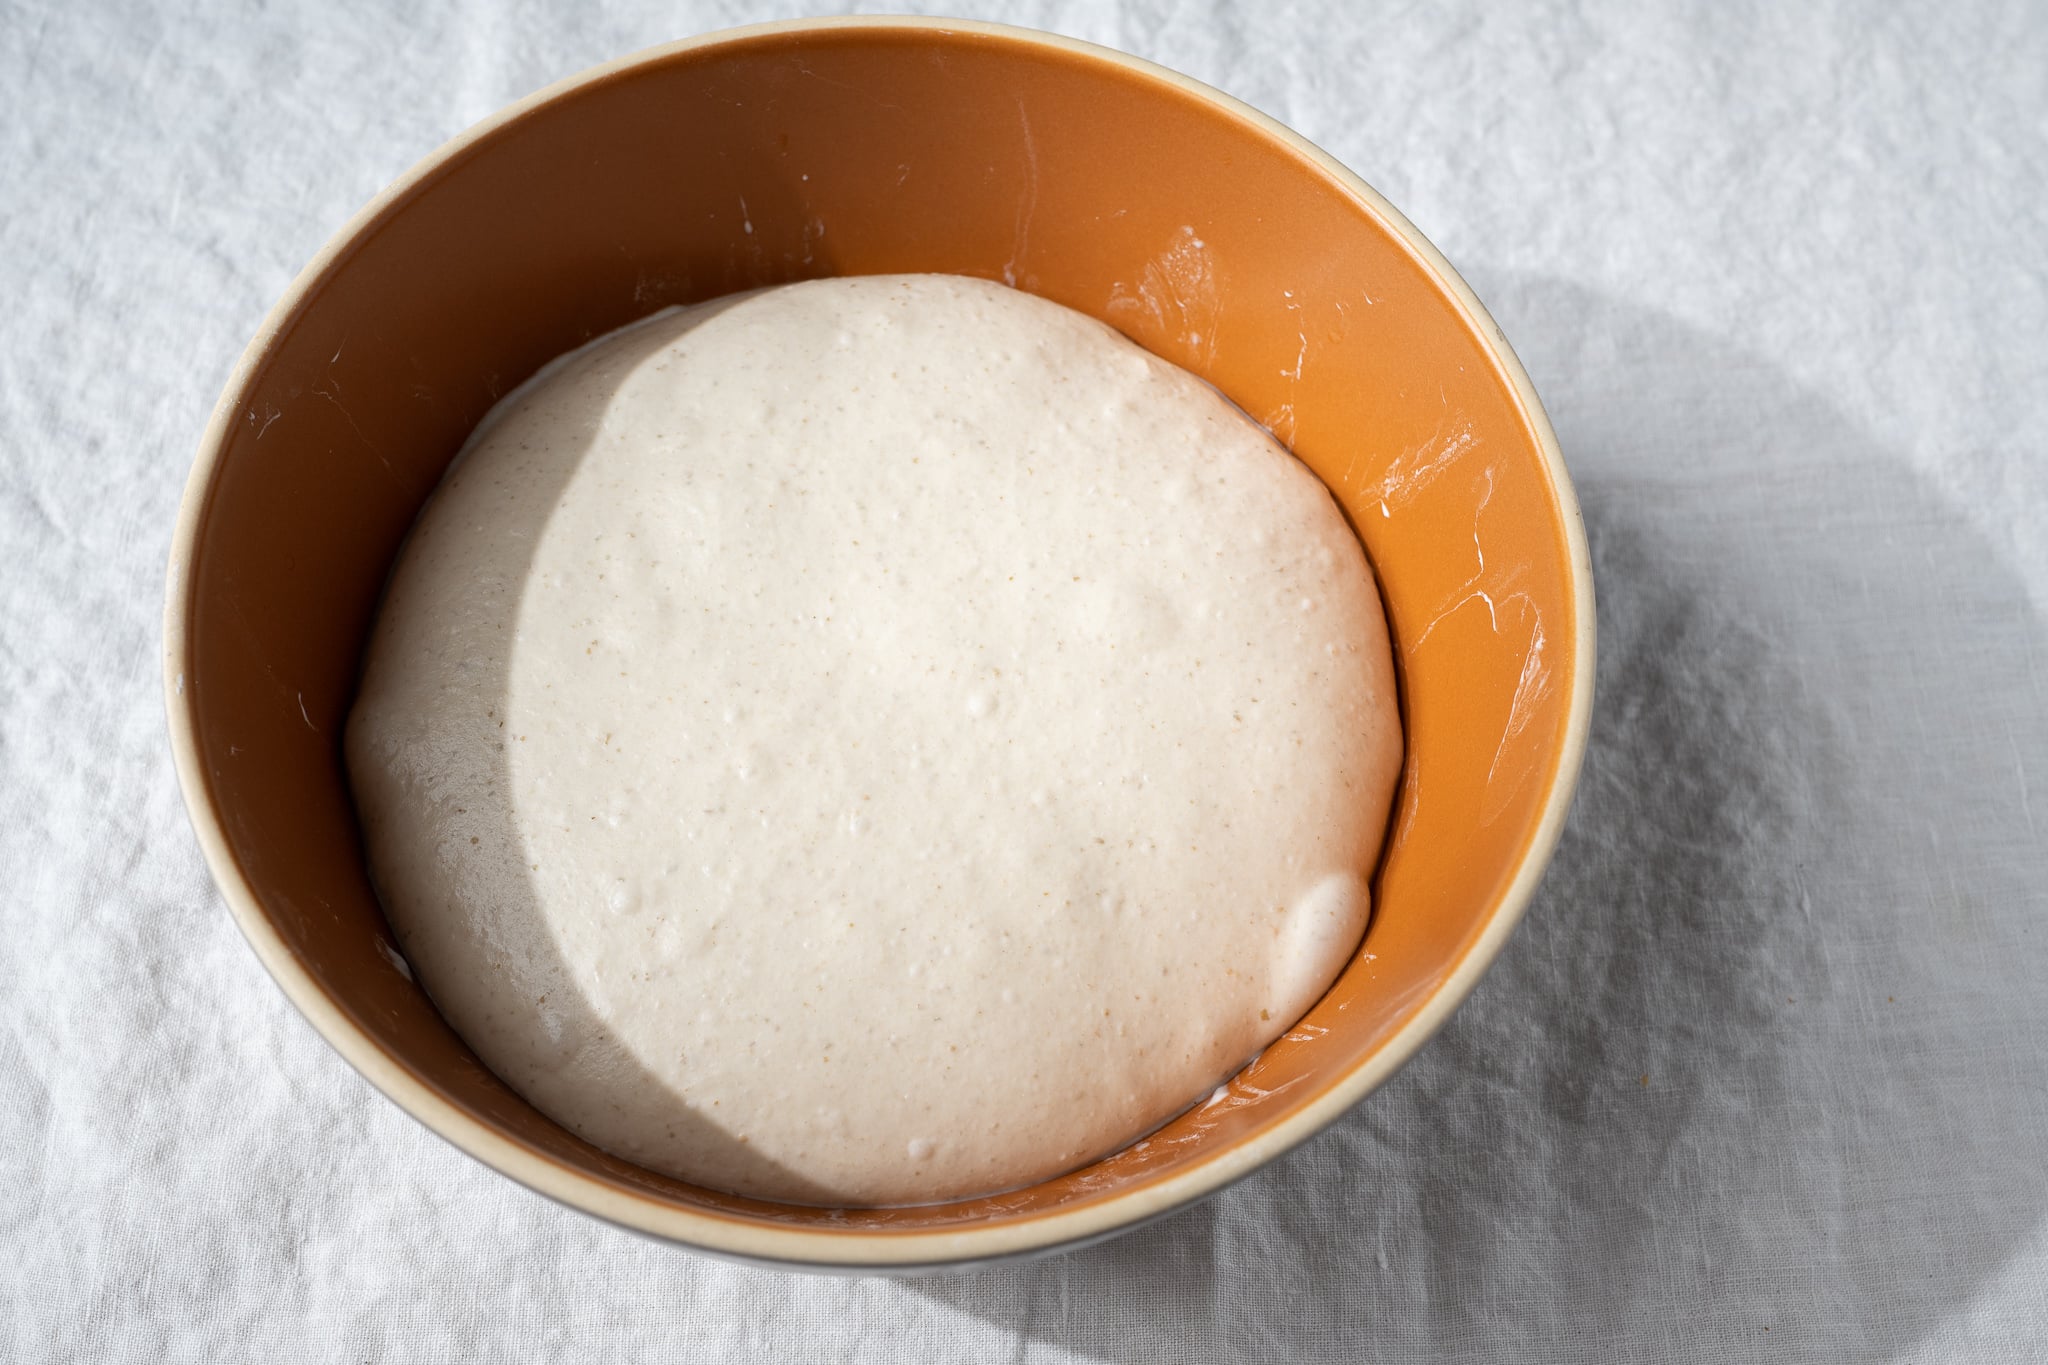
At the end of proofing, your dough should be well-risen, smooth, and very soft to the touch (see below). You should see signs of strong fermentation, but not a dough that’s extremely bubbly or very weak in texture. If the dough is a little under-fermented, give it 15 more minutes and check again.
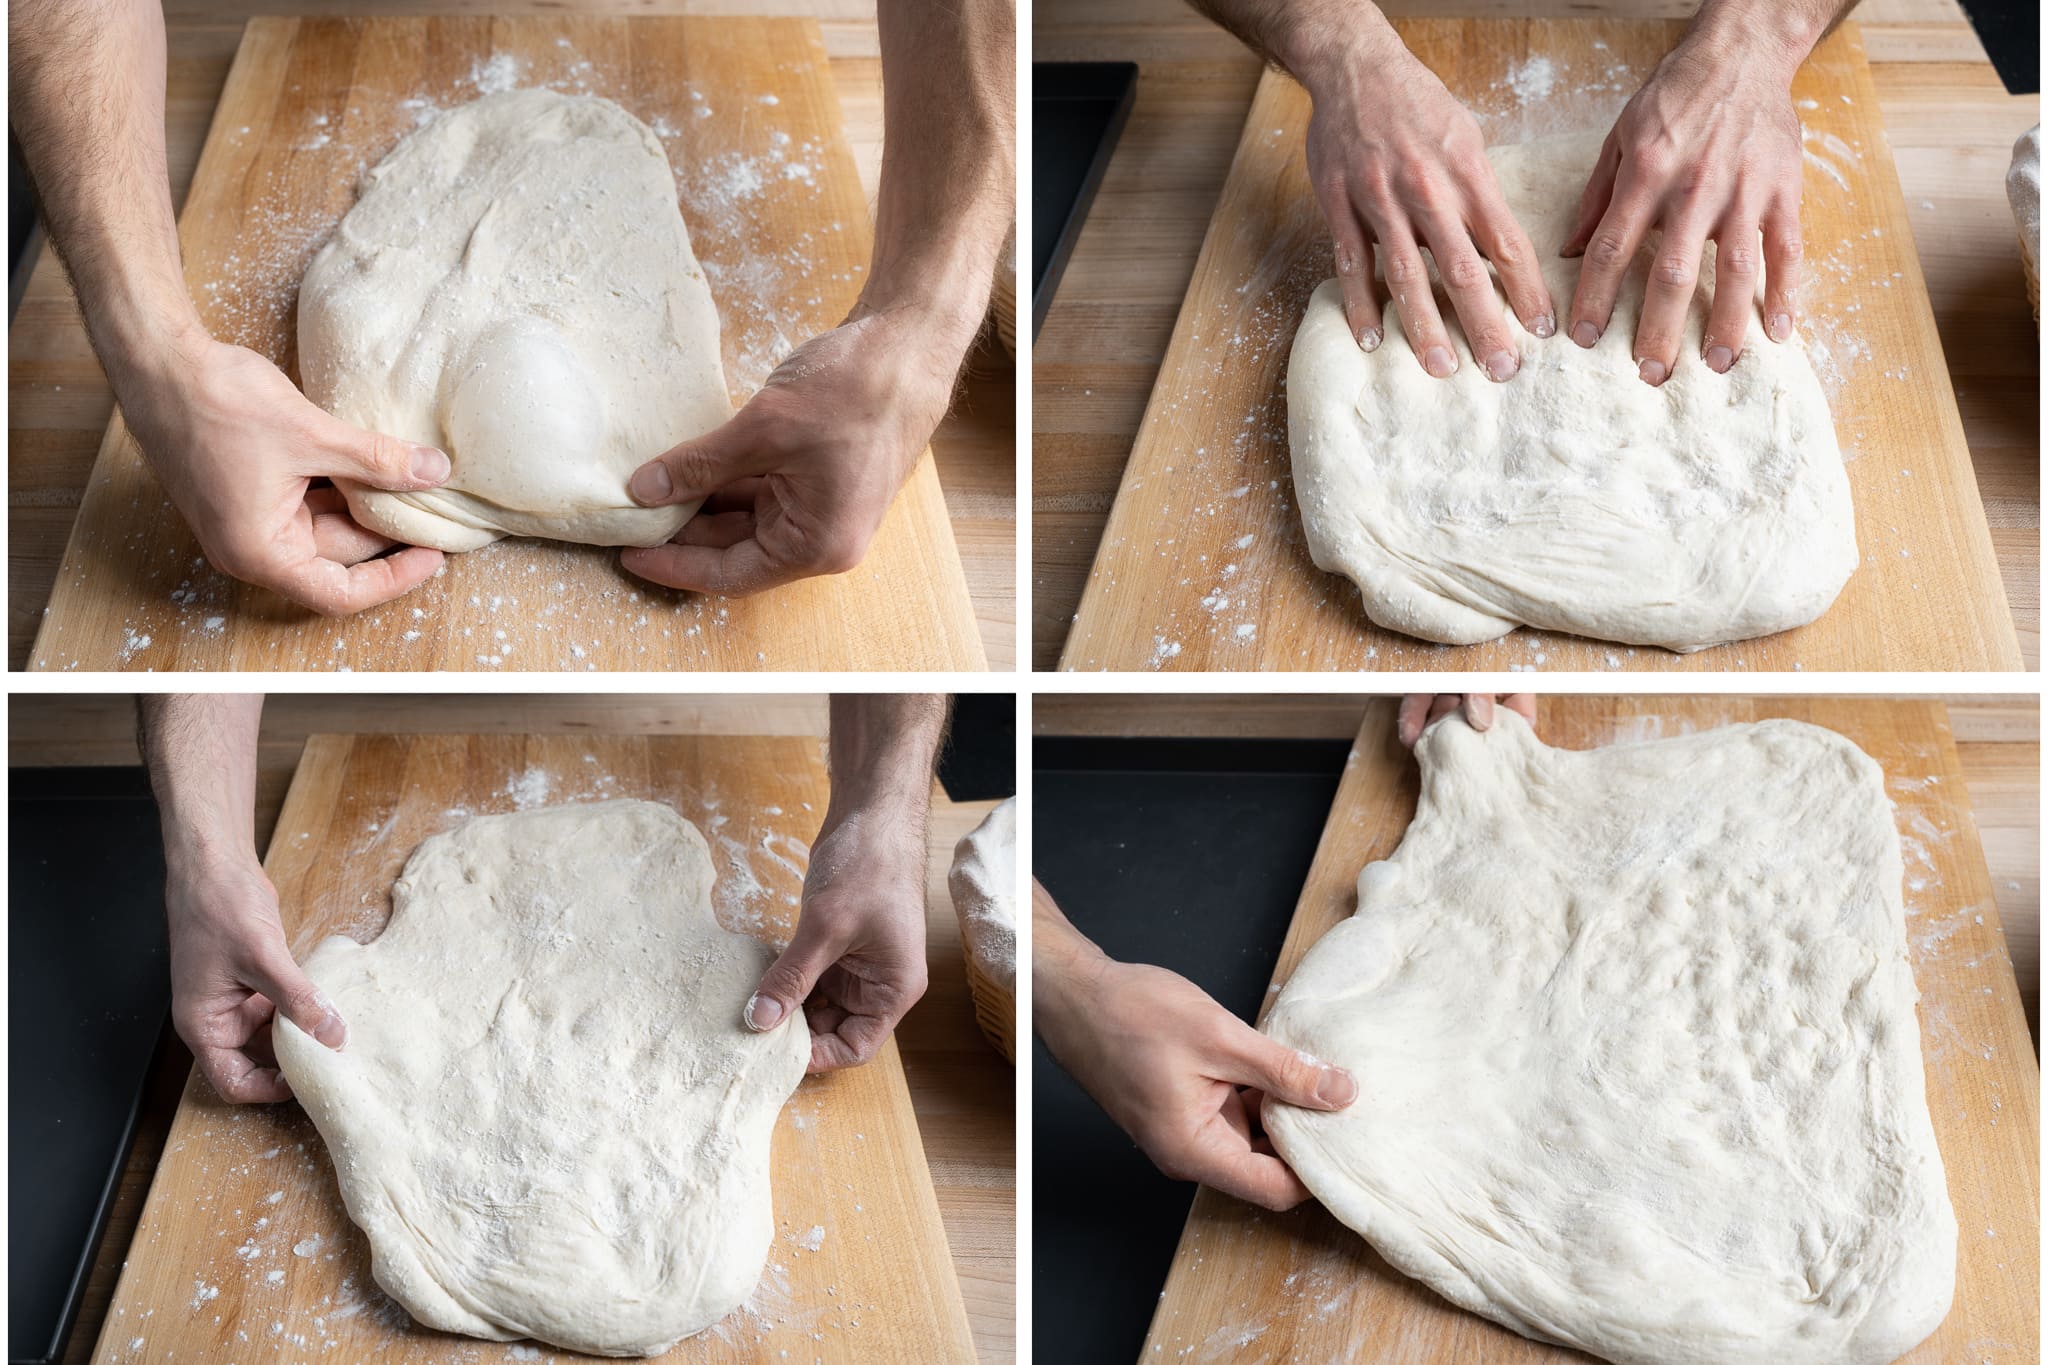
There are really two ways to shape pizza al taglio, and I love using the method shown below in my video. Essentially, you press out the dough in a half sheet pan, then drape it over your arms as you transfer it over to the final baking pan.
Note that my sheet pan is nonstick. If you don’t have a nonstick sheet pan, you may want to oil your pan to prevent sticking!
Alternatively, you can press out the dough on a large cutting board, then drag it over.
I shape this dough on a large raised cutting board so I can set the sheet pan alongside and drag the dough right in. Alternatively, shape it on your counter and pull it over the edge into the pan, or drape it across your arms and gently transfer it.
Be gentle. The dough should be soft, extensible, and spread easily, so avoid yanking it outward or pressing hard enough to tear holes. If it resists, let it rest a few minutes between stretches, and use as much flour as you need to keep it from sticking.
Liberally flour your work surface, scrape the dough out, and flour the top. Dimple it from end to end with your fingertips, then gently grab the sides and spread it outward, working the top and bottom until you’ve coaxed it into a rough rectangle. It doesn’t need to match your sheet pan; you can finish stretching once it’s in.
8. Cook – 5:00 p.m.
At this point, your oven with the baking surface inside should be preheated. Cooking this sourdough pizza al taglio is done in two phases:
Step 1: Spread Sauce and Parbake Dough.
After shaping the dough, spread the tomato on it, then slide the pan onto the baking steel, now preheated in the oven. Turn the oven down to 450°F (230°C) and cook for 10 minutes.
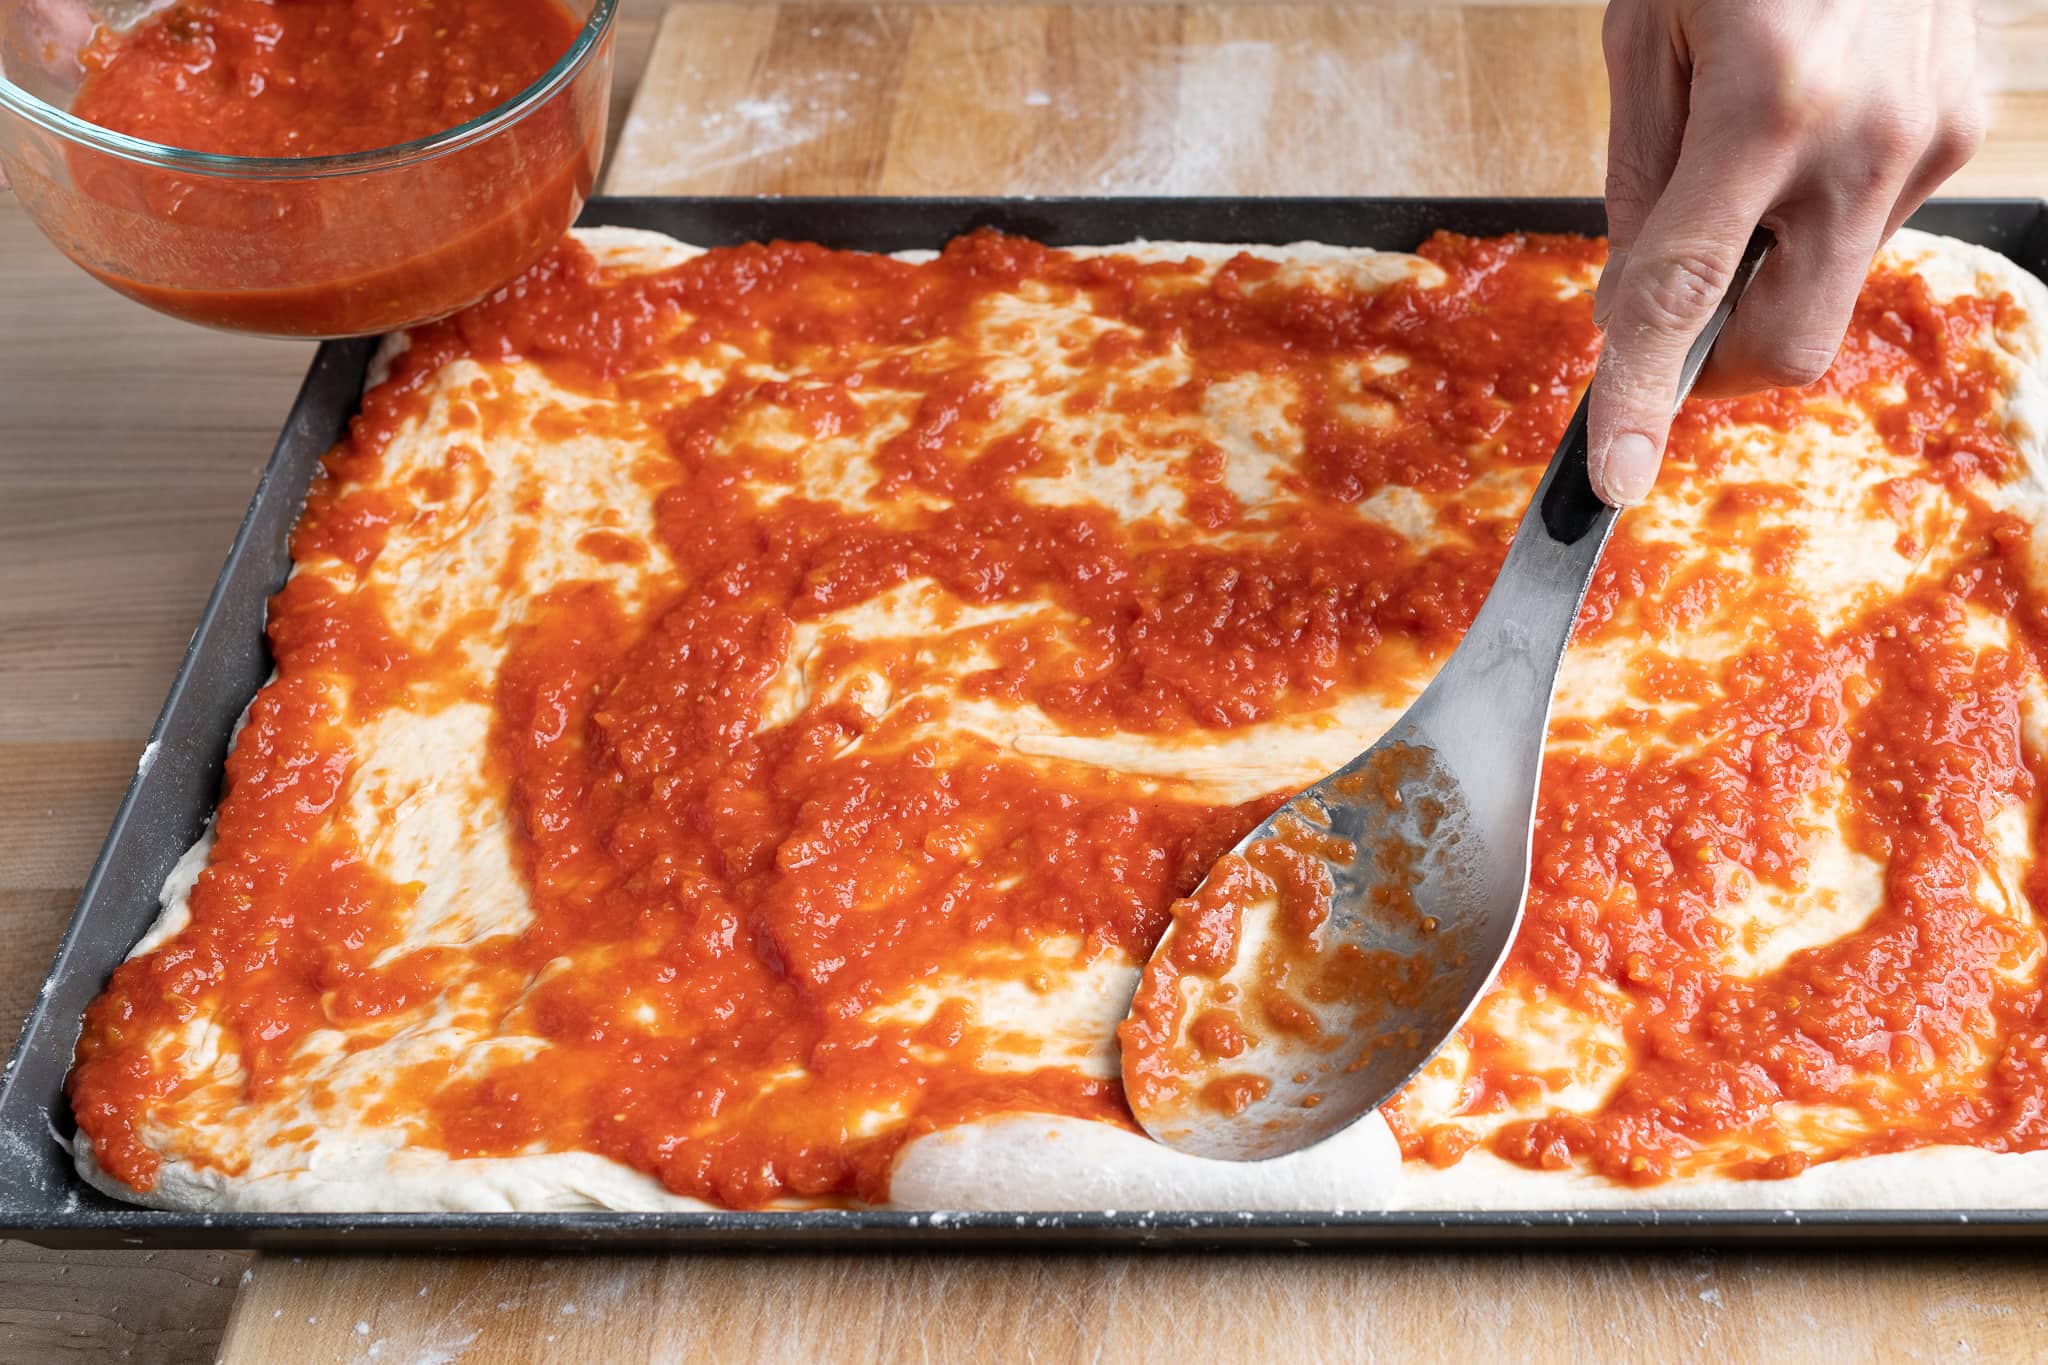
Once the dough is stretched to fit the pan and the tomato sauce is spread in an even layer (as seen above), slide the pan into the preheated oven, right onto your preheated baking surface. Turn the oven down to 450°F (230°C) and bake for 10 minutes.
Step 2: Spread Toppings and Finish Cooking.
Carefully remove the pan from the oven and place it on a heat-proof rack.
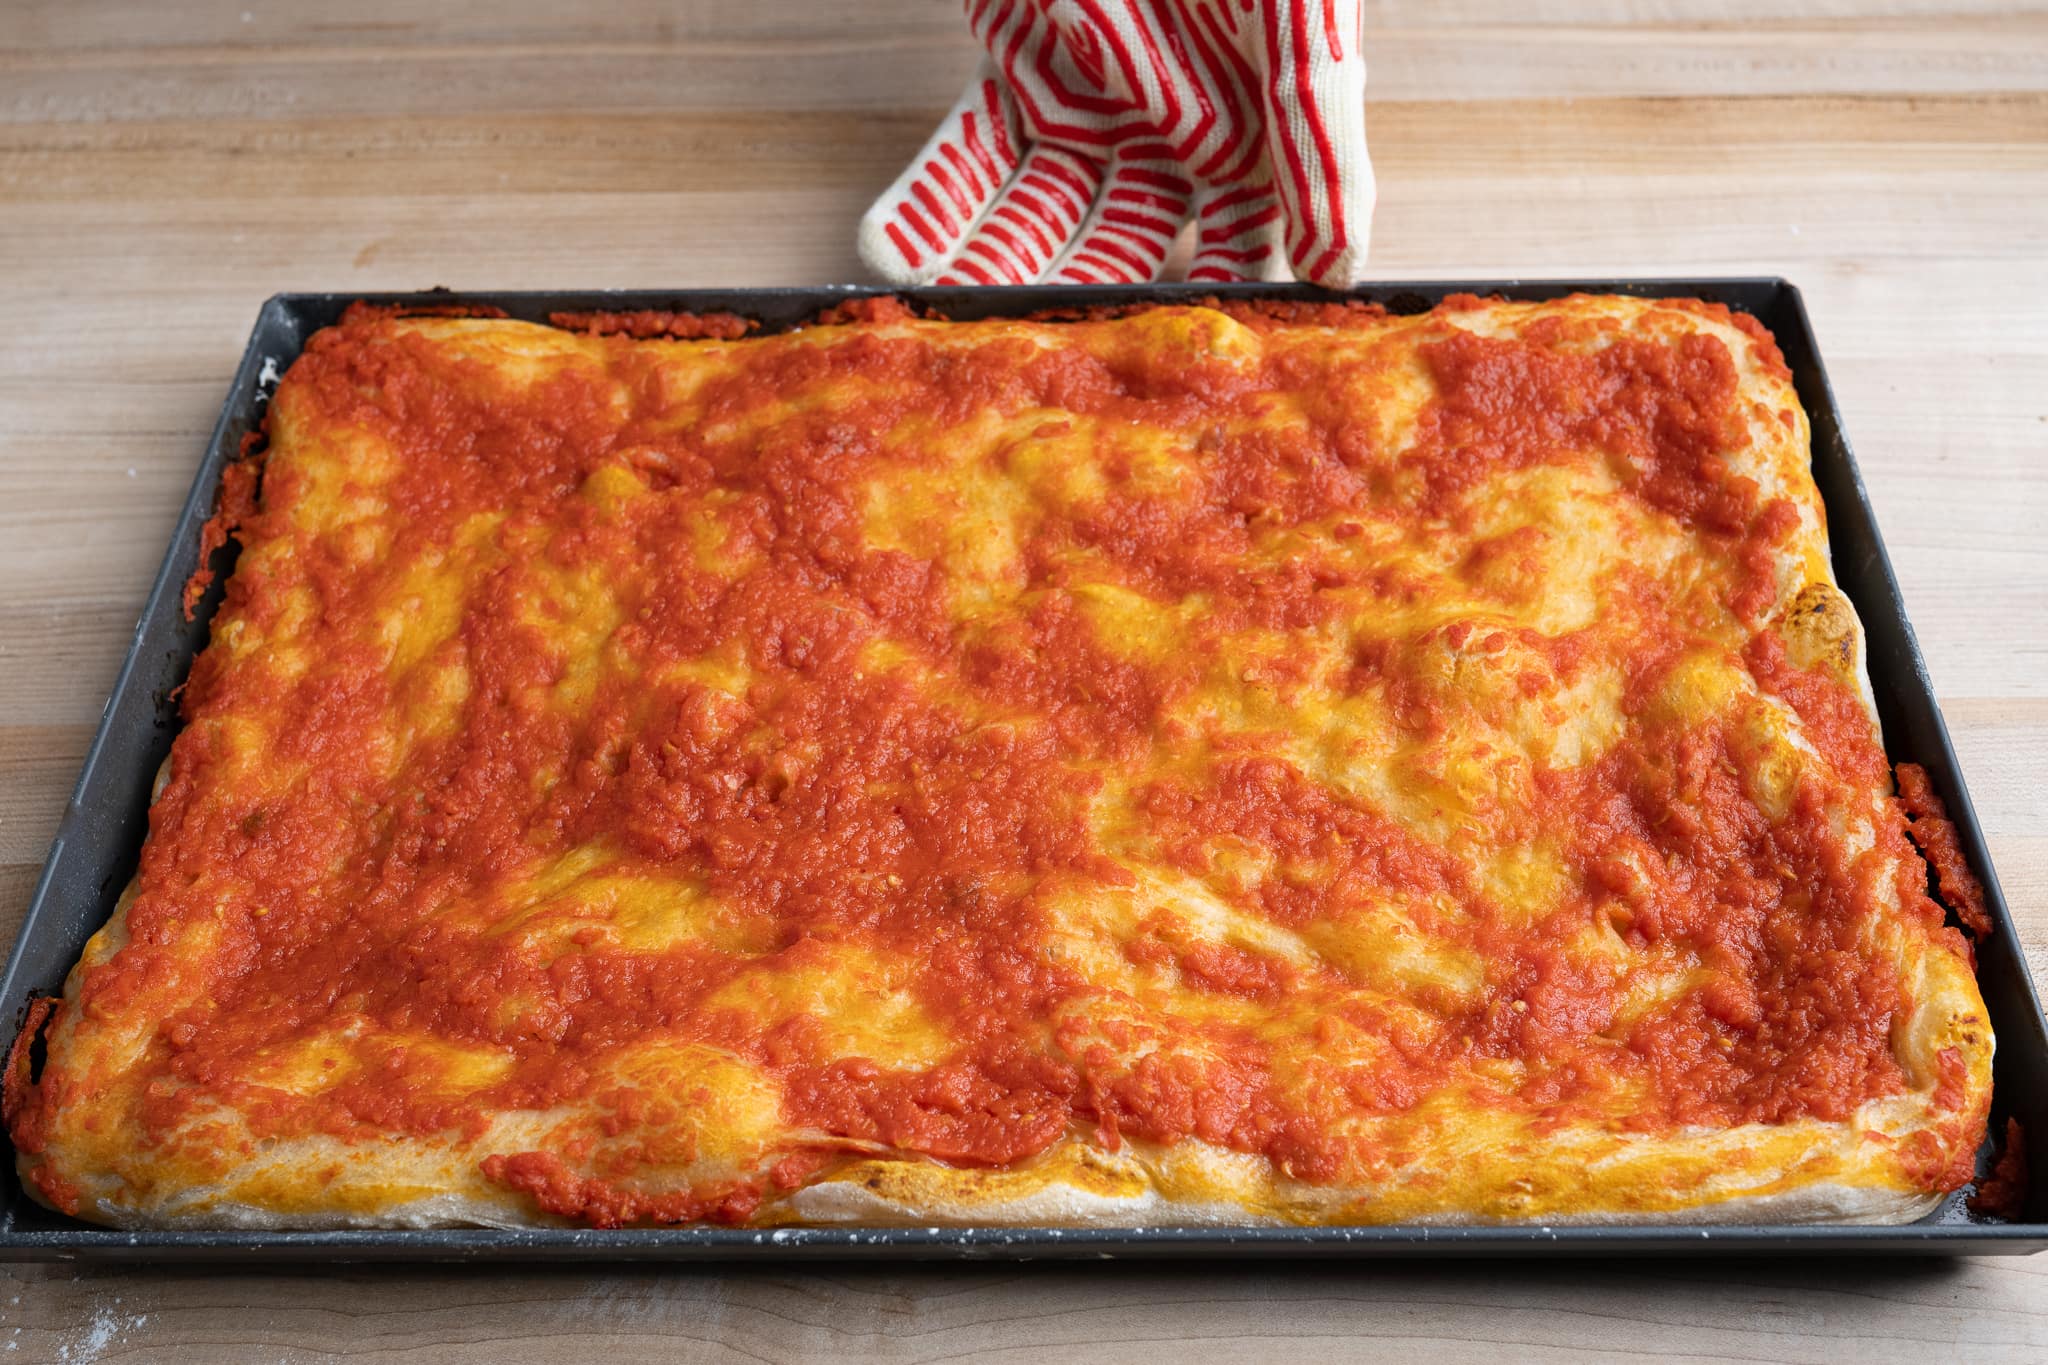
Add cheese and any other desired toppings to the pre-cooked pizza dough.
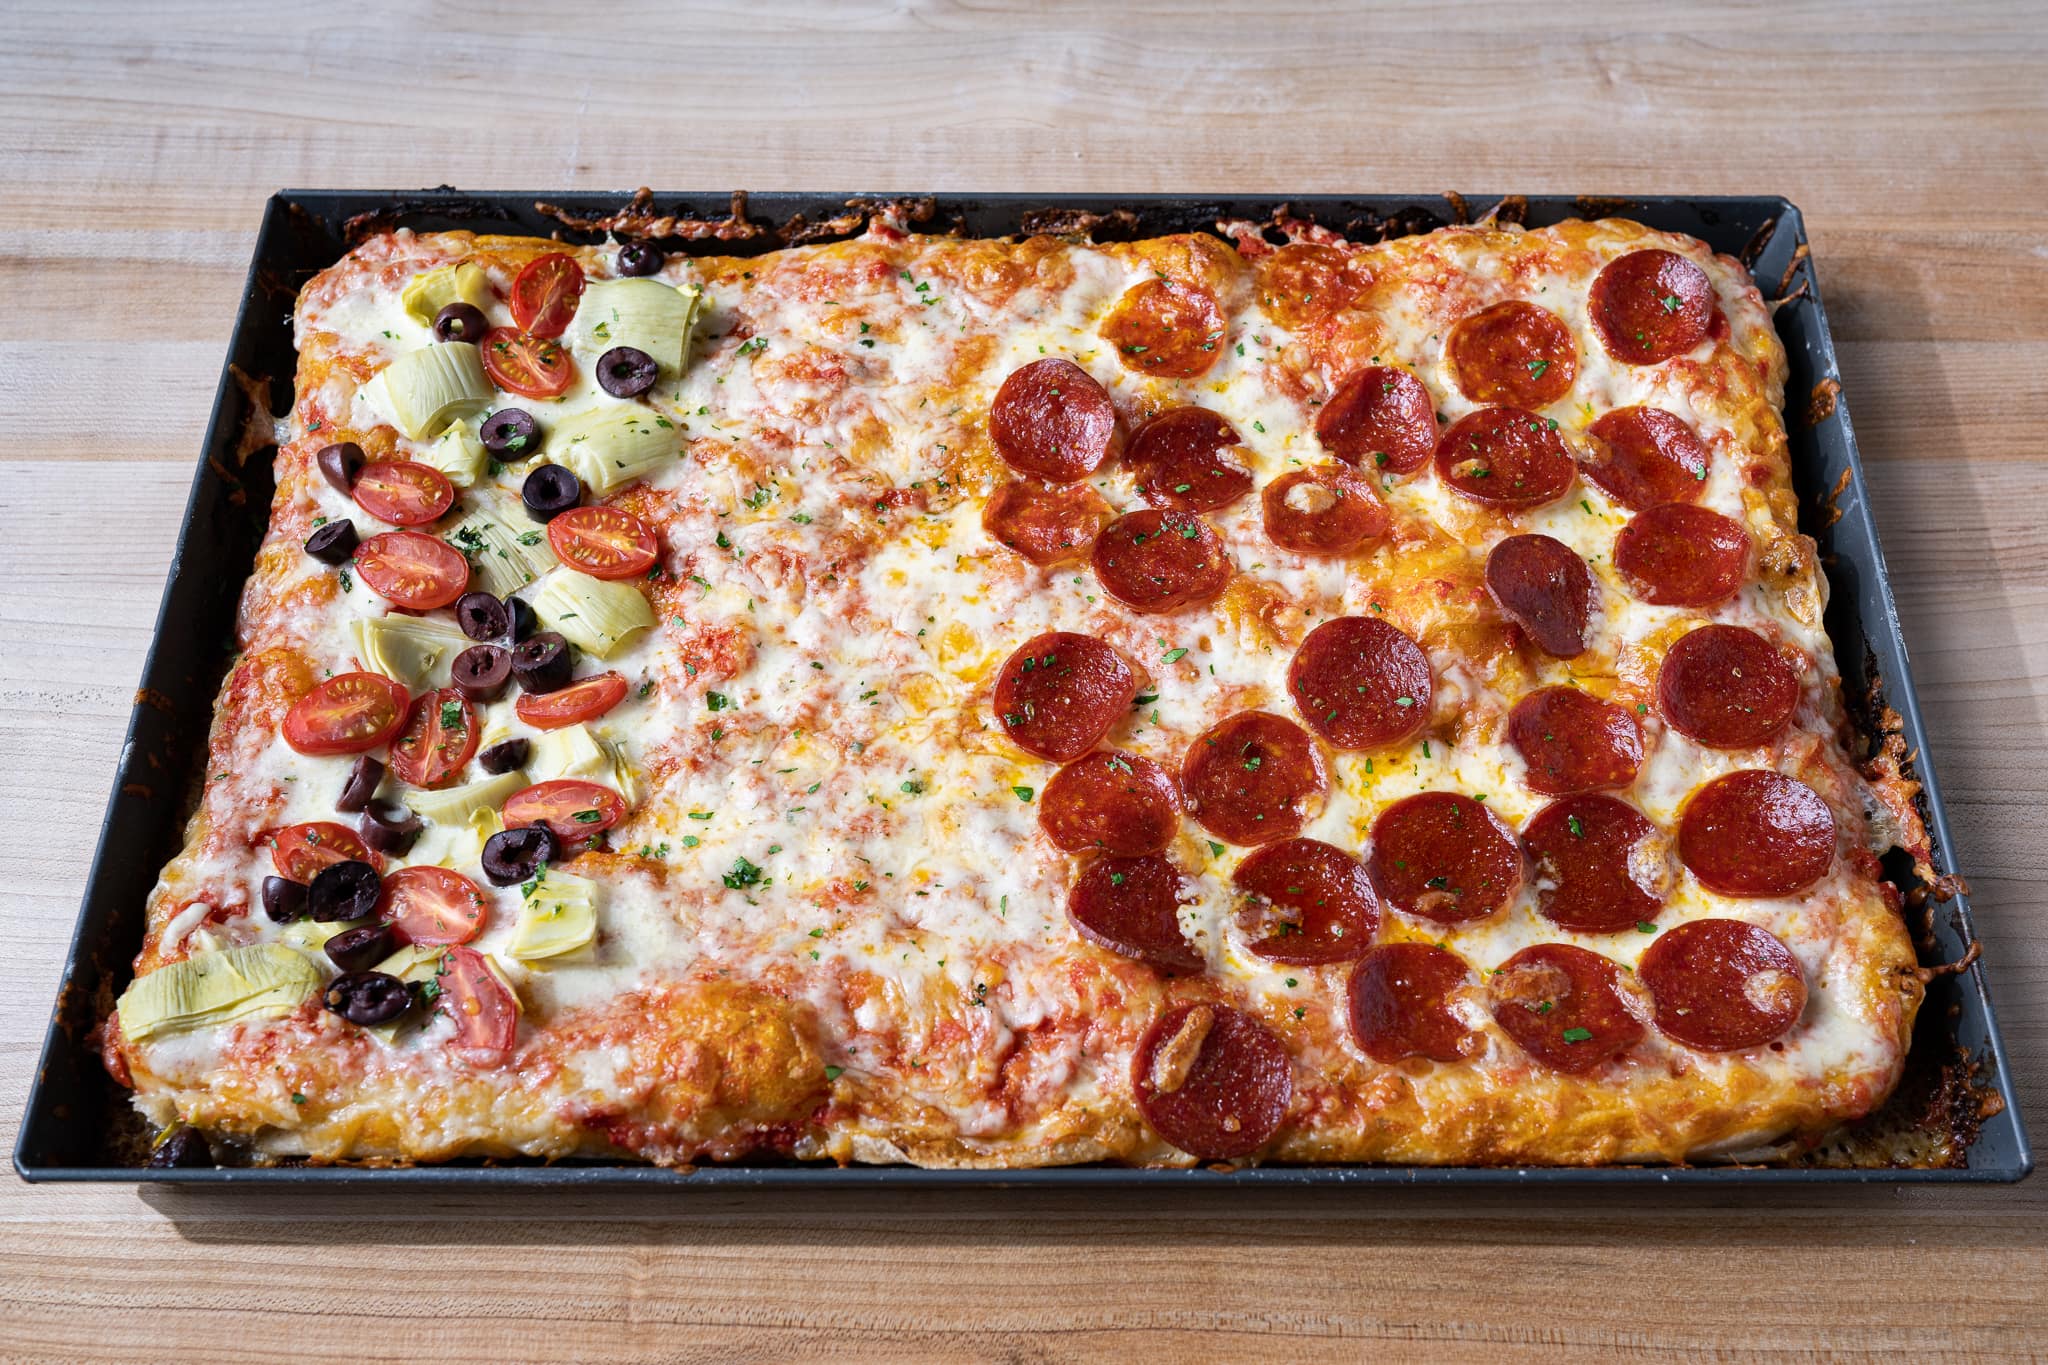
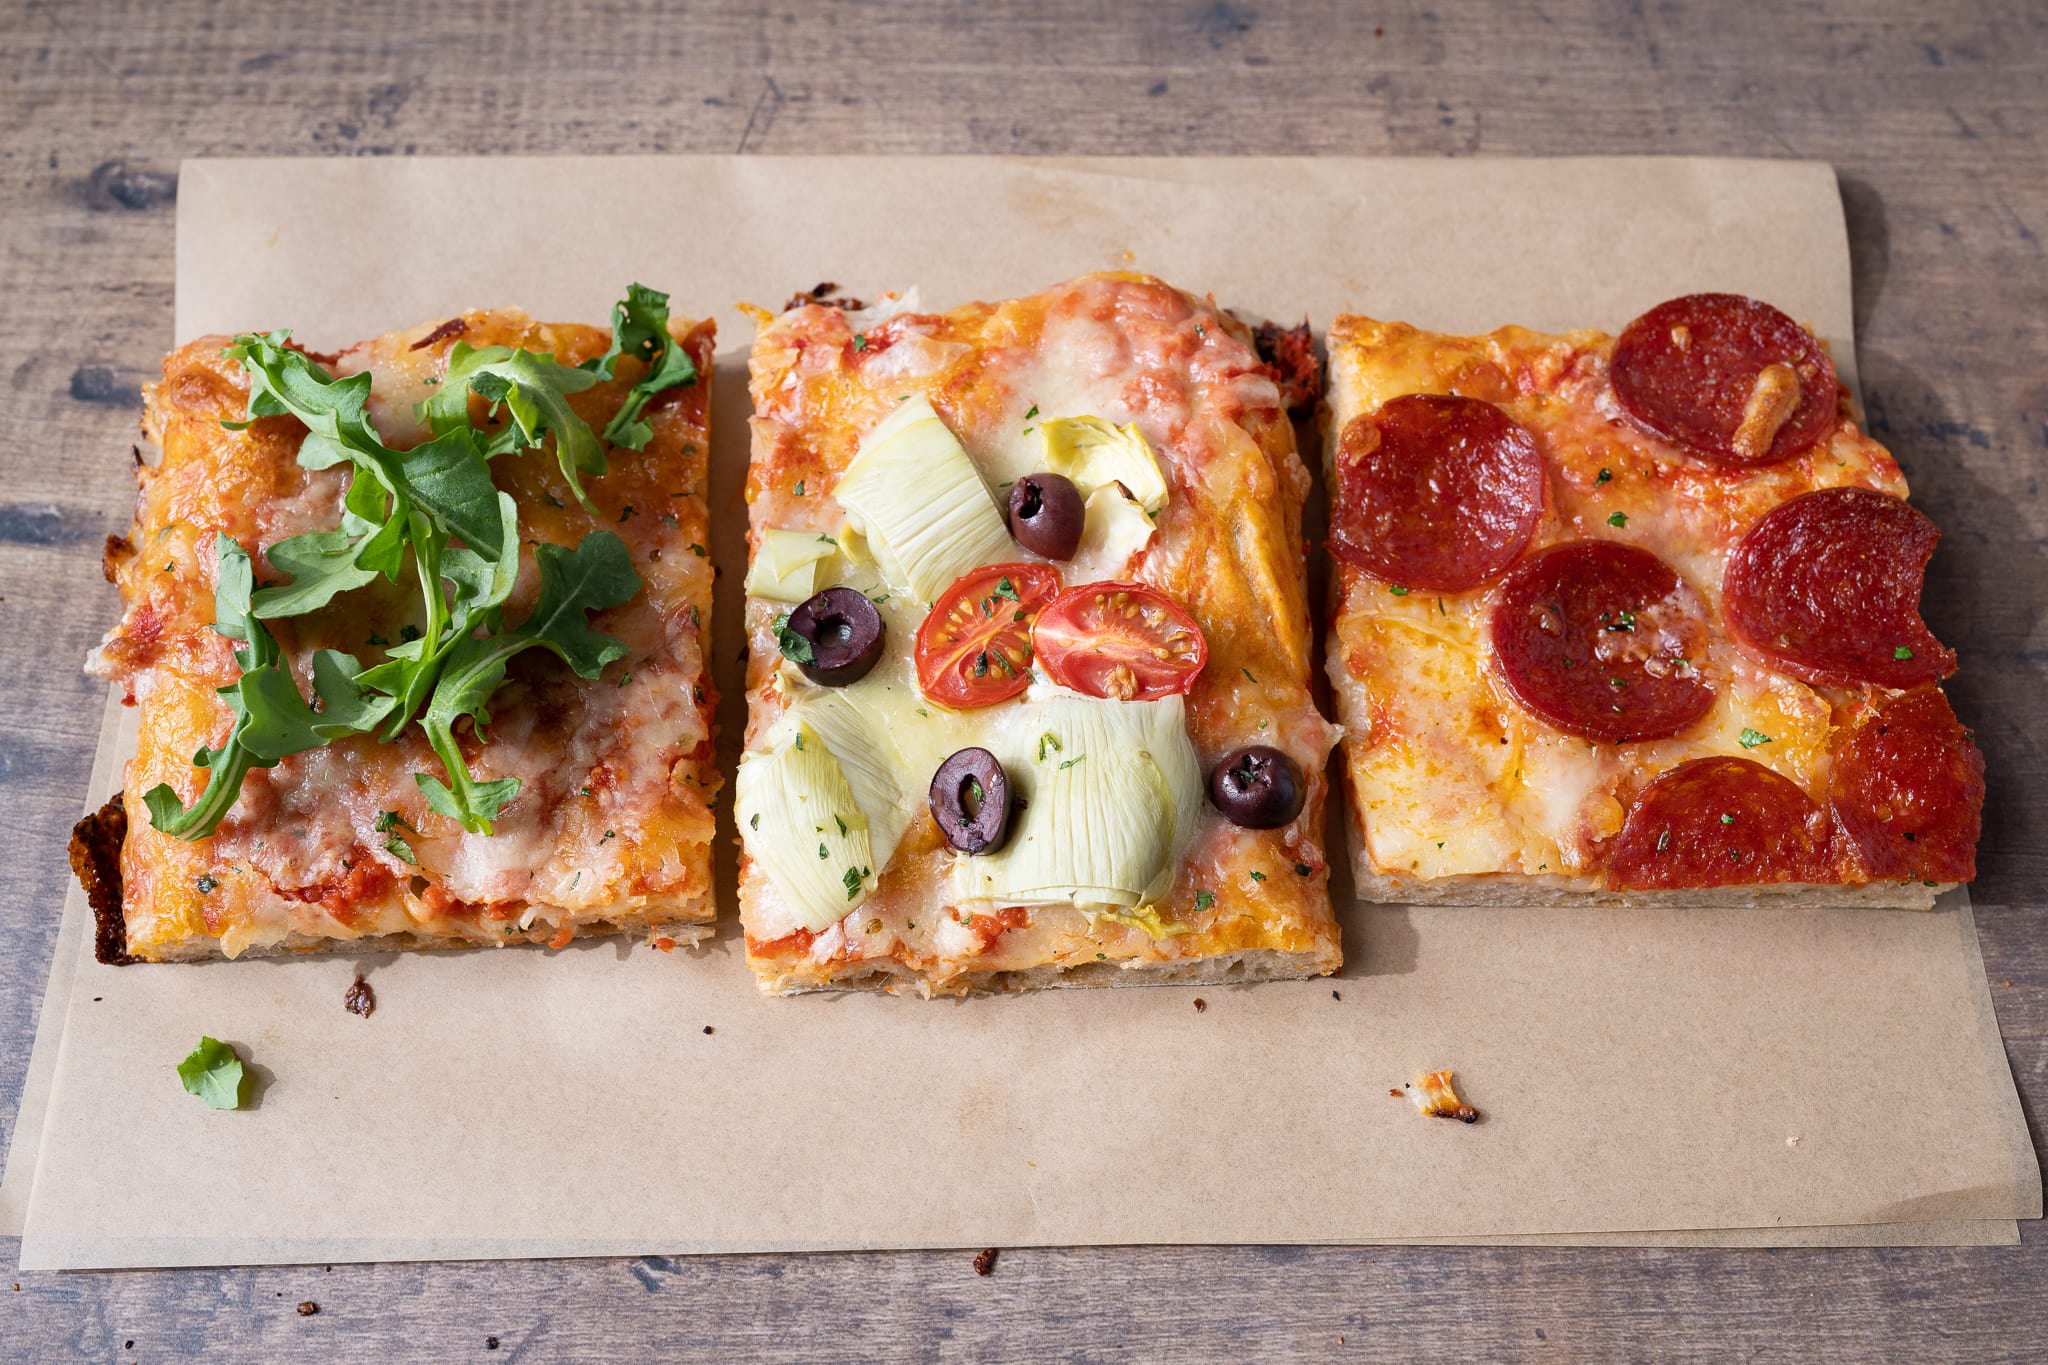
In my pizza below, you can see the kid’s section at right, the “no veggie touching my slices” area in the middle, and the adult section at left (and to be honest, I ate slices from all three 🙂).
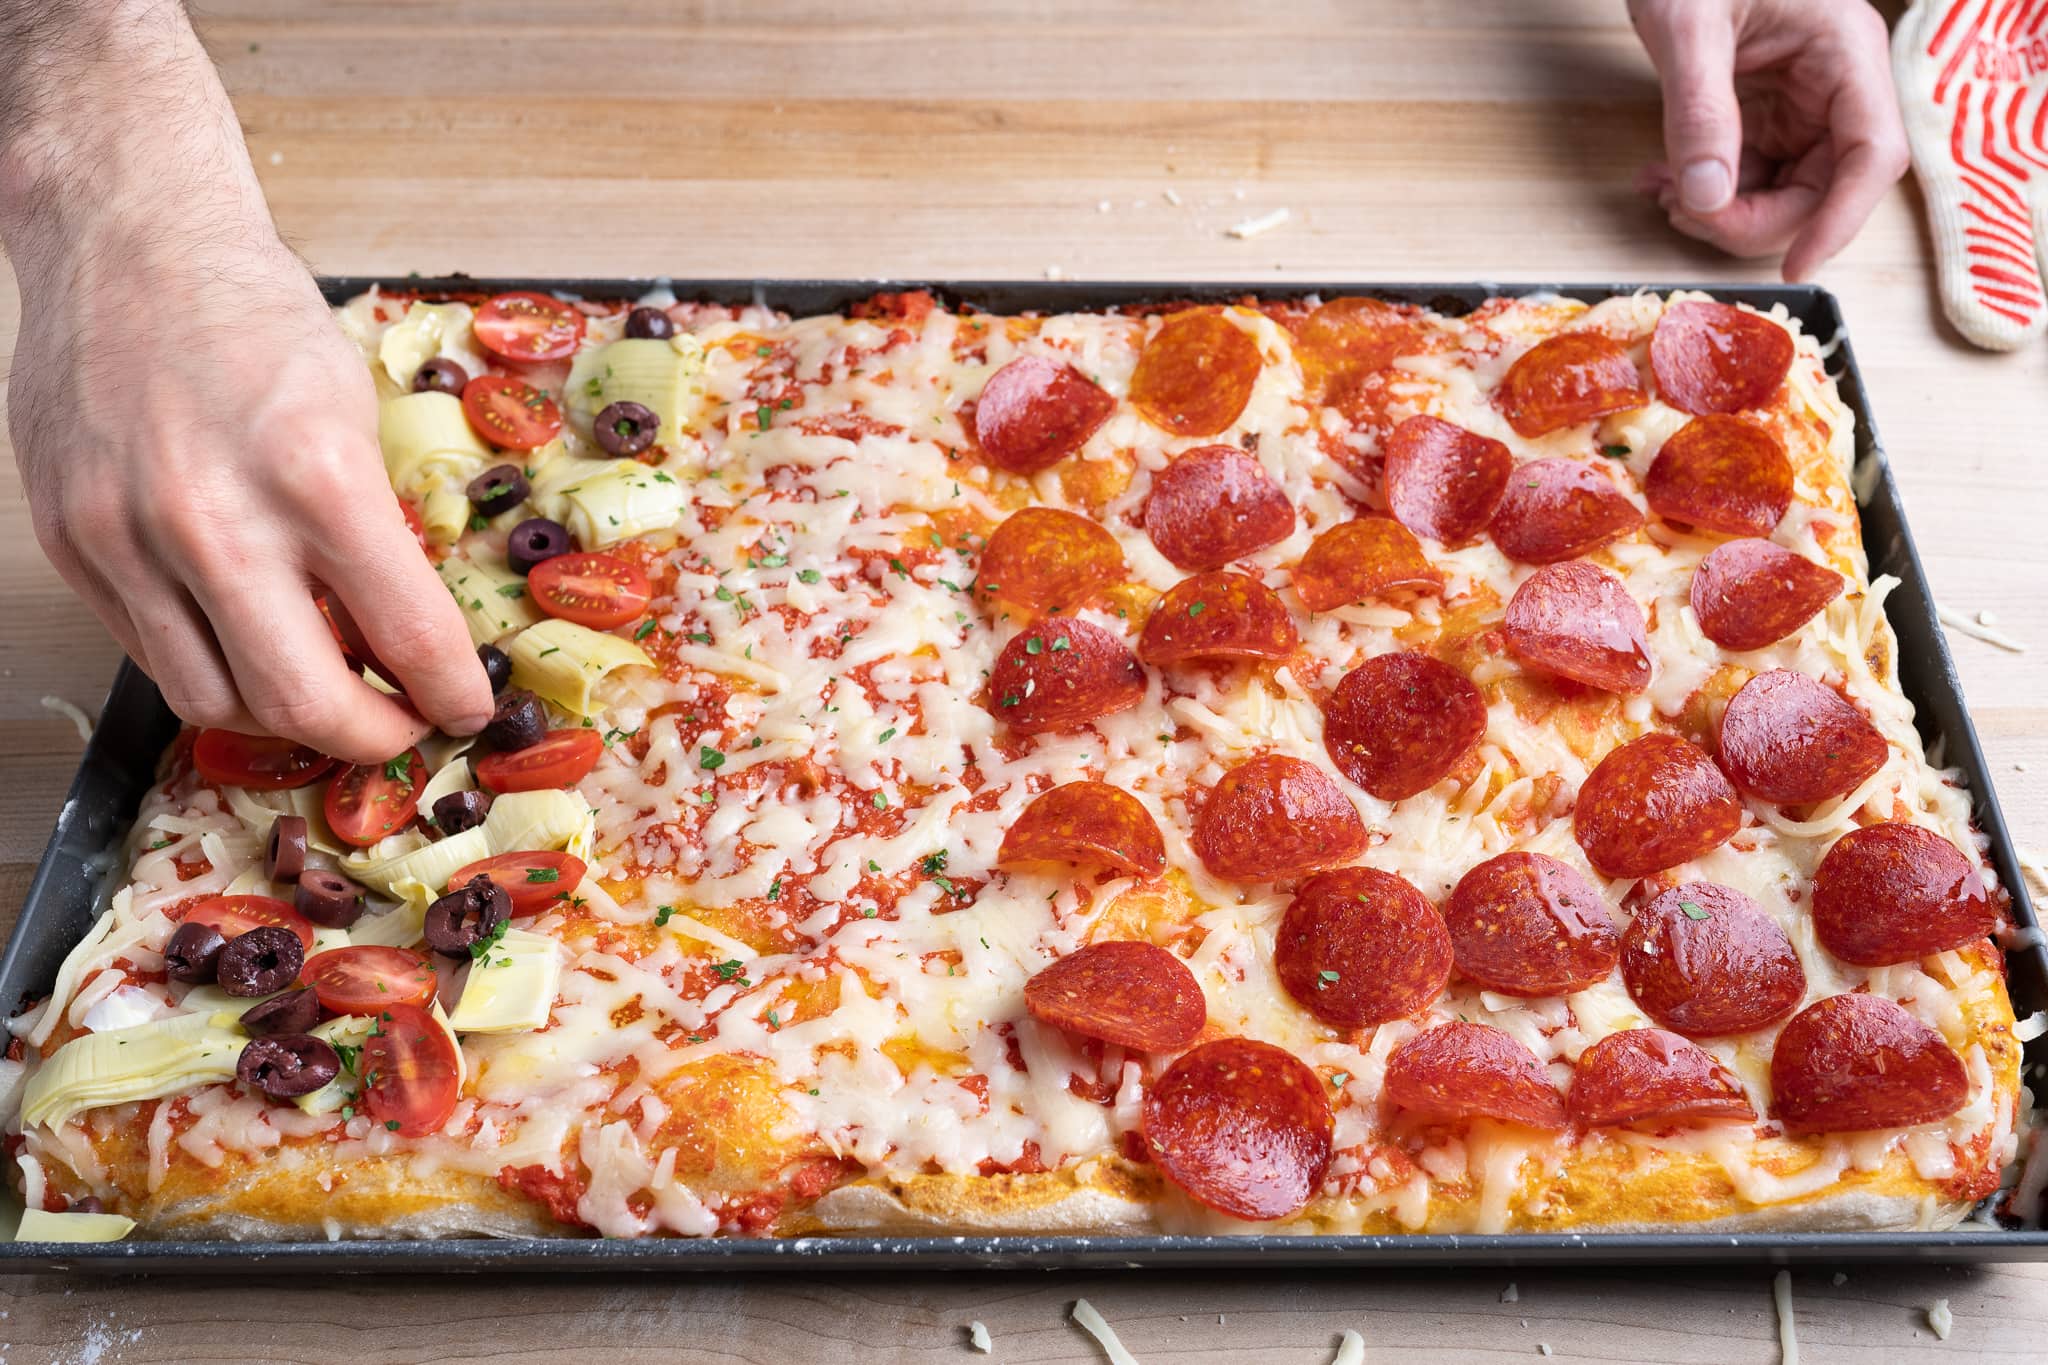
Once topped, slide the pan back into the oven on the baking surface and bake for an additional 10-15 minutes until done.
When finished, remove the pan to a cooling rack and let cool for a few minutes before cutting.
Print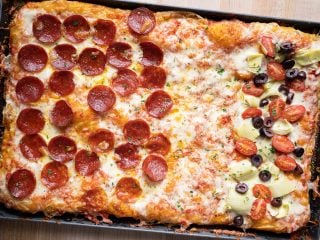
Sourdough Pizza al Taglio
- Prep Time: 6 hours
- Cook Time: 25 minutes
- Total Time: 6 hours 25 minutes
- Yield: 1 pizza
- Category: Main course, lunch
- Cuisine: Italian
Description
My recipe for a naturally leavened sheet pan pizza that’s flexible and a crowd-pleaser. This pizza has a decidedly crispy bottom crust and interior with a little chew—the perfect contrast of textures.
Ingredients
Main dough
- 400g Type 00 or all-purpose flour
- 71g durum flour, extra fancy (or semolina rimacinata, very finely milled)
- 12g extra virgin olive oil
- 324g water
- 9g sea salt
- 83g ripe sourdough starter
Pomodoro (tomato) sauce
- One 28oz. can of whole peeled tomatoes (Bianco DiNapoli or San Marzano)
- 1/4 teaspoon of dried oregano
- 1/2 teaspoon salt
- About 1/2 tablespoon extra virgin olive oil
Instructions
- Mix (11:00 a.m.)
Add all the ingredients except the olive oil to the bowl of a stand mixer fitted with the dough hook attachment. Mix on speed one for 1 to 2 minutes until the dough comes together, and no dry bits remain. Then, turn the mixer up to speed two and mix for 5 minutes. Let the dough rest in the mixing bowl for 10 minutes. Turn the mixer on to speed one for 1 minute, then drizzle in the olive oil with the machine running. Once all the oil is added, turn the mixer to speed two and mix for 2 to 3 minutes until all of the olive oil is absorbed and the dough is cohesive. Transfer the dough to a container for bulk fermentation and cover. - Bulk fermentation (11:30 a.m. to 2:30 p.m.)
Give the dough 3 sets of stretch and folds during this time at 30-minute intervals. After the last set, let the dough rest until the end of bulk fermentation. - Proof (2:30 p.m. to 4:30 p.m.)
Leave the dough covered in the bulk fermentation container and proof on the counter for 2 additional hours (see note for overnight retard). About an hour into the proof, preheat your oven with a baking steel or baking stone inside to 500°F (260°C). - Prepare sauce and shape (4:30 p.m.)
Drain the liquid from the can of tomatoes and place the tomatoes in a blender along with the oregano, salt, and olive oil. Blend until smooth.
Gently scrape the pizza dough out of the bulk fermentation container to a floured surface. Dimple down with fingers and gently stretch out to a rectangle. Drag the dough into your sheet pan and finish stretching it to meet the corners. - Cook (5:00 p.m.)
Spread pomodoro sauce over dough, edge-to, edge with no dough exposed. Slide the pan into the oven on the preheated baking steel, turn the oven down to 450°F (230°C), and bake for 10 minutes. Carefully remove the pan and place it on an oven-safe surface. Spread on cheese and any other toppings. Slide the pan back into the oven on the baking steel and cook for 10 to 15 minutes longer until the bottom is well-colored and as is the top.
Notes
- If you don’t have type 00 flour, use all-purpose.
- Substitute out the durum flour for spelt, khorasan, whole wheat, or even more type 00/all-purpose flour.
- You can refrigerate the dough at the end of bulk fermentation, covered, overnight. The next day, take the dough out and let it warm for 30 minutes and continue with the Shape step.
Sourdough Pizza al Taglio FAQs
Why is this pizza dough so soft?
This dough has relatively high hydration and is enriched with olive oil—it’s supposed to be! This soft texture makes for a pizza with a thin and crispy crust and a tender interior.
Can I refrigerate the sourdough pizza dough?
Yes! At the end of the three-hour bulk fermentation, instead of proofing the dough on the counter for two hours, place your covered container into the fridge until the next day (you can likely even go another day after that). When you want to make the pizza, take the dough out, let it warm for about 30 minutes, then stretch it out, top, and cook.
Can I make this pizza on a regular cookie sheet?
Yes, a typical cookie sheet—or sheet pan—will work just fine with this sourdough pizza al taglio recipe.
I don’t have durum flour, what can I use in its place?
Feel free to substitute out the 15% durum for the same percentage of spelt, Khorasan, whole wheat, or even more type 00 or all-purpose flour.
I don’t have a Baking Steel or baking stone, can I still make this sourdough pizza?
Yes! You’ll need to bake a little longer—check on it near the end and push it farther as needed (use some tongs to lift up and check the bottom). If the top is coloring too fast, turn the heat down a bit to extend the cooking time.
What’s Next?
I see pizza as kind of this distilled embodiment of the perfect food, and this sourdough pizza al taglio has it all: a naturally leavened dough, a beautiful mix of flour, a shape that facilitates large meals (and is great for kids and adults), its flavors and textures are spot on, and perhaps the most importantly, it’s delightful in the only way pizza can be.
If you’re looking for more pizza goodness, check out my sourdough pizza dough recipe for a high-heat oven (wood-fired, Ooni, or Roccbox) or my favorite sourdough pizza recipes, tips, and guides.


225 Comments
This is our fourth time making this pizza. It’s been great every time. We have frozen doughs for your regular sourdough recipe in the garage beer fridge but this allows a yummy alternative. Thanks for all you do chef!
I’m glad I made this before reading the comments because I think they would’ve scared me off. I made this pizza for my boyfriend’s birthday, let it sit in the fridge for about 24 hours, and it turned out great.
It didn’t quite look like the photos or have the focaccia-style texture I was going for, which could be because I used 100% all-purpose flour or maybe didn’t bulk ferment long enough.
Either way, I was really happy with how it came out and would definitely make it again with a few tweaks.
This is an amazing recipe, and the only sourdough pizza I'm making for my family from now on! I truly don't understand the bad reviews. I have stainless steel sheets, I double the recipe and put a very thin layer of olive oil and cornmeal on the pan before spreading out the dough. It's seriously so good. Please don't change a thing!
This was probably the worst pizza I ever made. I've never had it turn out as bad in my life. Followed instructions, it took forever to cook, middle still wasn't done, stuck to pan. Went in the trash. Super disappointed. Will stick to your other recipe next time. Hope others have greater success but this was a huge miss for me.
Hi Mauricio. I made this and it turned out really well the first time. The second time though had some crazy high rise in a couple areas. Thankfully I was able to just kinda flatten it back out. Would it be because it was underproof or because I par baked it without toppings?
hi Mauricio, thank you for such great recipes and instructions. I found the 00 flour but I have a grain maker 99 and was wondering if you had ever used it to grind fresh 00 flour. If so would you do a newsletter on how to grind it to a 00.
Hi Mauricio, Thanks for this recipe. I would like to try it but I don’t have a stand mixer. Is it possible to do it manually?
Love this recipe! If i have extra dough, can I refrigerate it after proofing and when ready to bake, take it out 30 minutes before and then shape?
I make my own Italian dipping sauce with fresh garlic, herbs, and high quality EVOO. I used this for the oil in the dough. The dough is beautiful and smells so good, I can't wait to prepare the pizza!
Oooh that sounds delicious, Sherri!
This recipe did not work for me. The actual recipe section did not contain enough detail, so I had to continually flip between the recipe section and the story behind it, which made it difficult and cumbersome to make. In addition, the crust was tough and stuck to my nonstick pan even when oiled. I am not sure how this is supposed to turn out correctly, as this is like eating pizza toppings on a piece of unleavened whole wheat bread. Being an experienced baker, I have to say this does not bake up like either the focaccias or a pizzas I have made previously.
Sorry about that, KW, I try to keep the printed section more brief (assuming readers will have first read the above part). I'll add more details back in. If your dough is sticking, you might want to use parchment paper on your pan, while still oiling any parts that are exposed. Definitely give this another try because it's really great pizza and once you get the hang of it, very easy to make!
Hi Mauricio, I am trying this pizza style for the first time, and a little worried about it sticking to my very old sheet pans. I have had good success using parchment with your regular pizza recipe (parchment onto baking steel). Would it be a bad idea to line my sheet pan with parchment for this?
I would say go with the parchment just in case!
My pizza turned out much tougher this time. It also has an almost greyish tint. When I parked, I checked halfway through, and the dough had shrunk a lot in the pan. I removed it and stretched it back out and finished the parbake. This seemed to work okay, but the final product was not as crispy and light as my previous attempts. One change was I used Caputo 00 this time vs bread flour on previous bakes. I also bulk fermented til double then placed in the refrigerator for about 48 hours. Do you have any advice, theories about what went wrong, or tips for me? Thanks so much!
Hey Heidi, it almost sounds like the dough overproofed to me!
Not sure why but my pizza was very flacid, just didn't have much oomf. I used about 10% fresh milled durum. The rest was Bob's Red Mill Artisan Bread Flour. Put a half to three quarter way bulk fermented dough in the fridge overnight, then put in pan, spread it out and let rise for about 2 hours, topped then baked at 500F on a stone, forgot to turn down to 450F. The stone was too low in the oven and I charred the bottom before the toppings, but that was the least of my problems. It just didn't rise much. Working on reviving my starter, since I suspect that is a serious issue.
Cooking pizza definitely requires finding that sweet spot between enough bottom heat and top heat—neither in too much of an intensity compared to the other! It's not just a problem in the home oven either 🙂
Hi Eric again – just seen your instruction above to oil the sheet-pan! Made mine last night from my kindle copy of your book – as far as i can see the book doesn’t mention this.
No Worries E
It's okay to oil or not oil the pan! Typically it's either very lightly oiled or not at all.
Dear Maurizio – Want to say thanks for your considerable and consistent generosity in baking and publishing. My question is – i made this (or attempted to) last night. Tasted excellent but came out of my oven WELDED to the sheet pan. Had flour and semolina on the work surface prior to shaping etc. Should i have oiled tjhe pan? Can’t find anything in your instructions that say so! Any thoughts for me Thx Eric
I guess with your pan, yes a light oiling will help 🙂
Hi, Maurizio! Really liking the content you share here!
I would love if you could "convert" the fermentation times into % of rise/growth, as I find it very hard to keep track of room temperature vs. waiting time.
Hey Pedro! I don't usually like to do this because I find it can be misleading. Generally, I'd say in bulk if you see 30-40% rise you're good to divide.
Can I use rye flour for the “whole wheat” flour portion? Or would that not taste good? Newbie here!
I wouldn't with rye… It'll be quite dense! (And welcome, Amanda!)
Thanks for a great recipe, Maurizio! I've made this several times with great results. Just curious, why proof before shaping? Wouldn't shaping before proofing result in an airier crust, in theory?
You're right Gia. The difference, though, is due to this being pizza, which is shaped right before cooking/baking, whereas focaccia is shaped and then left to rise in the pan 🙂
Sir, this was fantastic! I often make a great sourdough discard pizza dough for my grandkids using my cast iron skillet on top of stove and finish in the oven. I saw intrigued by the concept of a sheet pan pizza, so I made a double batch. After the bulk rise, I had to pop in in the fridge and there it stayed for a few days, unintentionally. I pulled it out, divided it, let it get room temp, then put directly into my heavy EVOO'd sheet pans where I them dimpled and stretched as far as the dough allowed. I was reluctant to use the sauce recipe as I have canned my own pizza sauce. Buy I had a quart of canned crushed tomatoes with basil, so used that. HAVE MERCY!!! Last night we had a poolside pizza party with the kids. Adults and kids alike LOVED this beautiful pizza. This is my new "go to" recipe for family gatherings. Thank you so much for sharing! BTW, I didn't have a pizza stone, but my regular oven and the times and temps you recommend gave me a gorgeous crisp crust and chewy center. Excellent! Thank you!
No harm in using canned sauce at all, Angela! Really happy to hear this was a hit, thank you for the comments!
Sourdough has taught me persistence, if not patience. On my first attempt at pizza al taglio I used 00 flour and spelt and followed the recipe quantities. The dough was beyond unworkable…basically mush. I've had trouble before using 00 flour so I switched to all purpose flour. Once again I followed recipe quantities and while the resulting dough was a little better, again it wasn't workable no matter how many folds I did. Tonight I tried again. I used Marriages 'strong' (bread) flour and reduced the water from 324 gms. to 310 gms. The dough was just as Maurizio describes: very soft and extensible and the final pizza great. Having just this week baked my 500th loaf since moving to Ireland, my experience is that the flour already 'carries' some moisture. I've found I get very good spring and open crumb at hydration ranging 68 – 70% and perhaps I'd need to up that if I were still living in Alberta. So, on your first try, you might want to hold back a bit of the water, depending on your ambient humidity.
Very good advice here, and spot on. If you're in Ireland, where humidity is very high and chances are your flour not super strong, you'll need to reduce the hydration. Great way to stick with it and thanks for the comments!
You’re quite right…you can’t use Irish wheat for strong (bread) flour; not enough sun to produce high protein content. As a displaced Canadian I have to laugh…I buy Marriages which is made from ….you guessed it…Canadian wheat!
I know. Sometimes I buy Italian flour which is either USA or Canadian wheat shipped to Italy, milled, then shipped back 🙁 I try not to do this when I can.
tried it yesterday. Followed exactly. Disappointed. Was thin and chewy
Sorry to hear that! It should be rather thin, that's this style of pizza. But it should be a little crispy instead of soggy or chewy. It comes down to your oven, the pan, and how hot you can get it!
Hi Maurizio, Is there any way to adapt this recipe to using sourdough discard that’s been saved up over a few days of bakes?
I would not use refrigerated starter for this recipe. It’s best to use ripe starter or make a levain!
Hi, is there any reason to not dump the dough directly into the tray and spread it out there focaccia style? It is pretty wet after all. I did it your way tonight and ended up ruining the dough because it stuck to my board. I kind of wish I would have stretched it out directly into the pan but maybe you would not recommend to do so?
You can absolutely do this, Oliver! I find it’s a little easier to spread and dimple out on a cutting board, but by all means, go straight to pan.
What is a baking steel? And why does it say baking steel to preheat but then says to transfer to a baking sheet?
You can slide the baking sheet onto the preheated baking steel (like a baking stone) in your oven to help the bottom of the pizza cook a little more and get crispier. If you dont have a baking steel or stone, it’s okay to just bake the dough on the baking sheet in the oven!
Hi Maurizio,
Thank you for this excellent website full of information and recipes. I tried this pizza dough tonight, and it really took our home-baked pizza to the next level. It was almost surreal hearing the oohs and ahhs from my family as they enjoyed this. I can’t remember when we ate pizza this good. How completely satisfying!
I doubled the recipe and subbed durum for the semolina, and the tomato sauce turned out well, too. Right before bedtime, my boys asked me when they could have pizza again. Thank you.
Ahh so glad to hear this worked out so well for you, Sarah. Love the use of semolina. Also, happy kids = happy house 🙂
I made this again yesterday using the recipe in your book. It proofed for longer than in the recipe and rose beautifully. However when I shaped it it totally deflated. I shaped it and baked etc.The finished baked pizza seemed totally flat with a kind of solid layer on the top before the toppings. I looked at a slice today and saw bubbles but there was still that “solidish” layer on the top before the toppings. Any ideas what is going on?? It looks nothing like your photo.
Hmm. It sounds like it might have overproofed (deflating), but I also wonder if a skin formed on the dough. Be sure you keep it covered during bulk and proof!
Made this today for breakfast pizza for the week. Used Corrado, my Italian starter and used a combo of 00 flour and Petra type 9, a lovely whole grain Italian flour I purchased from Gusto’s grocery. It smells great…I’m sure it will be delish in the morning with a fresh egg on top!
Sounds amazing, Gina!
Hi Maurizio, I am planning on re-trying this tomorrow. I see you revised the recipe since the last i tried it. I’ve spent the last 2 weeks just feeding my starter (have taken it out of the refrig.) per your small starter amount suggestions 2 times a day. to see how that changes it. The recipe says to start it at 11:30. So my question is: if the time I normally refresh my starter is 8 am will it hold and be vigorous until 11:00?? I know that is picky…I’m just trying to get all this right!! Thank you!!!!
I think it’ll be just fine, Andrea!
I just made this,
there wasnt a note about greasing the pan… my pizza got stuck!
I actually don’t grease the pan for this!