

There must be a word for the way a fleeting thought of pizza for dinner creeps in and quickly sprouts into a full, blinding desire—the single-minded resolution that pizza is the only option, the only thing that will satisfy. I sometimes wake with the idea of pizza for dinner firmly rooted, and there’s no excising that stubborn weed. Thoughts of scattered melted cheese, plump tomatoes, olives, pepperoni… The simple idea of that harmonious blend of flavors and textures motivates, eventually ushering pizza to the dinner table—again. You know it’s getting worse when the kids ask, “Can we have something else tonight?”
The recipe for this sourdough pizza al taglio is based on the pizza recipe
in my new cookbook, The Perfect Pizza.
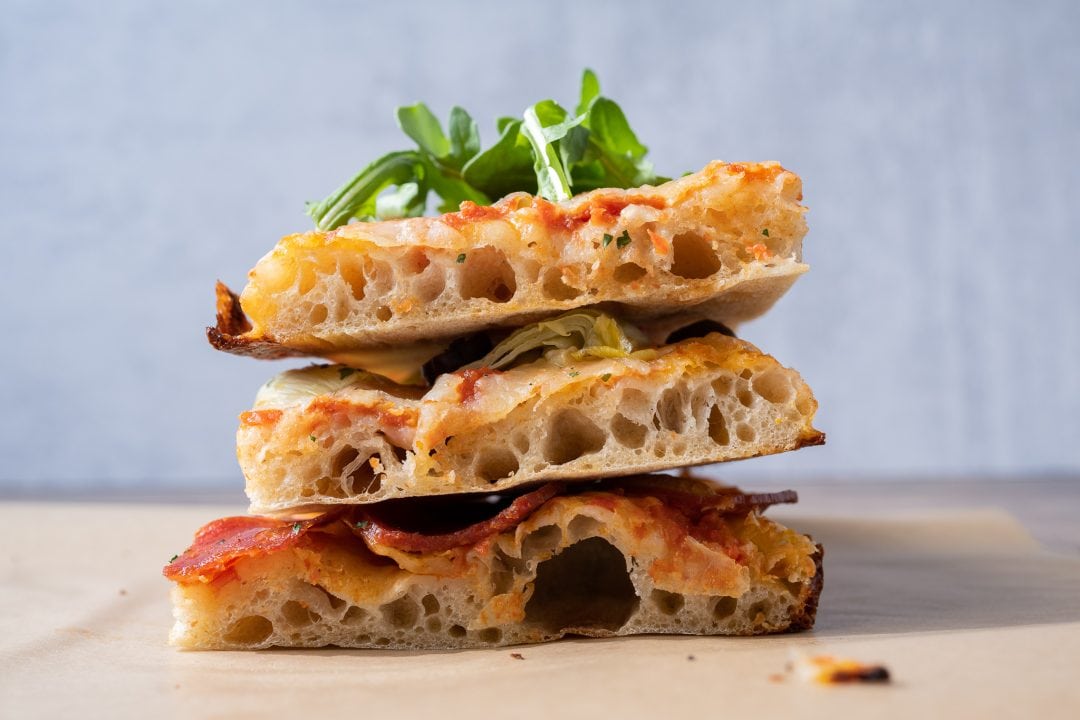
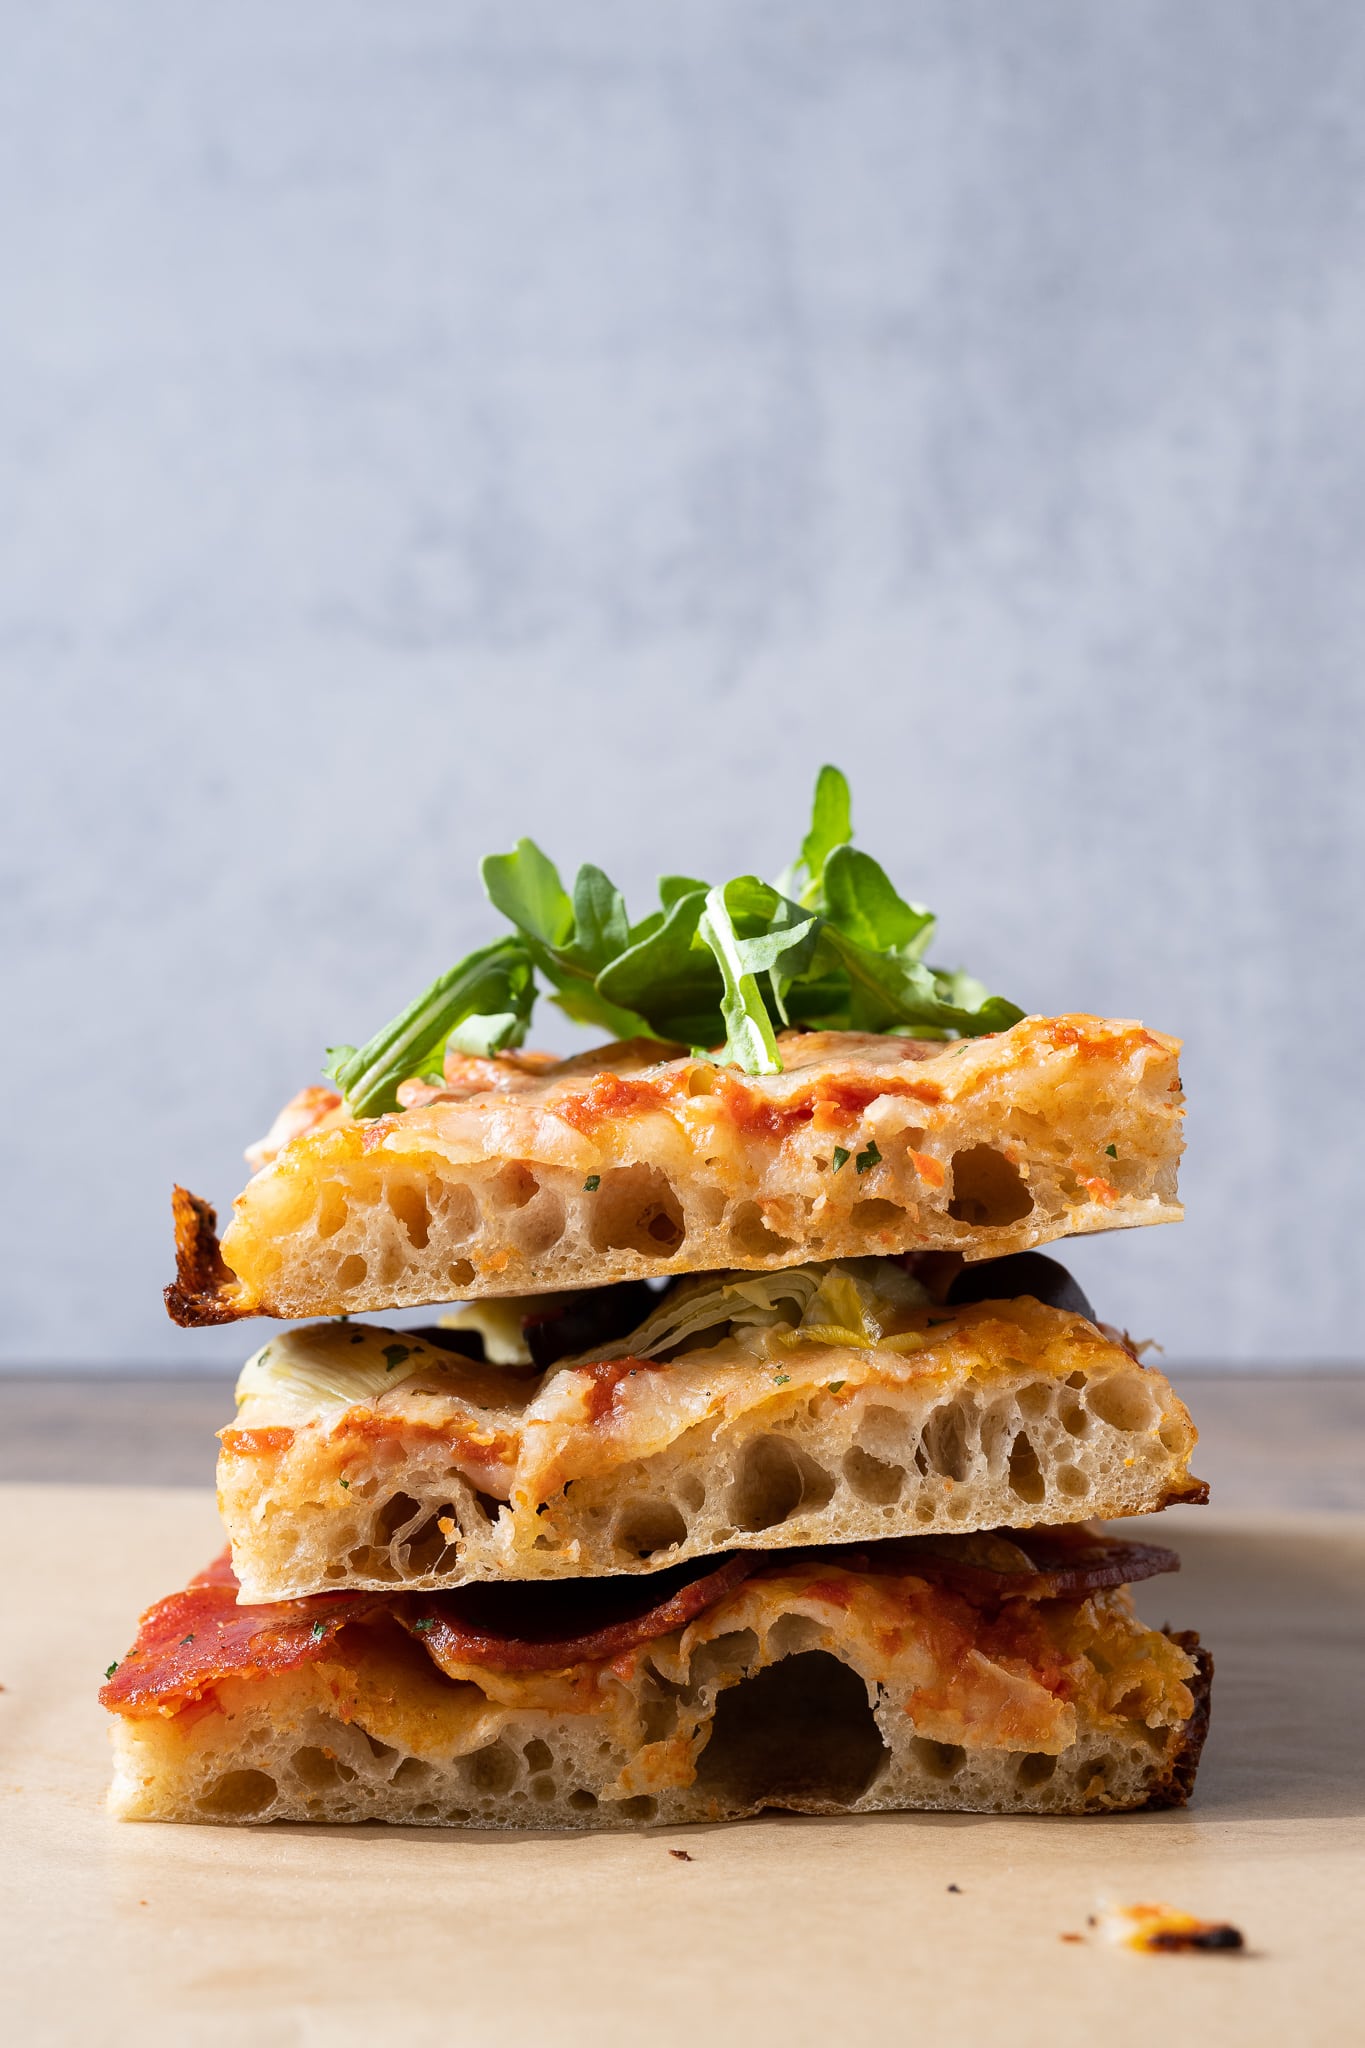
And I’ll come right out and say it: this sourdough pizza al taglio has been stealing the pizza spotlight for so long I’ve all but forgotten how to shape dough round-like instead of rectangular-like. The balance will likely shift once warmer weather arrives, but regardless, there’s a permanent, well-deserved spot in my pizza repertoire for this style. Since I started making rectangular pizzas in a sheet pan, I’ve been hooked on its simplicity and deliciousness. It results in a pizza with a thin and crispy bottom crust, a tender interior, and an overall lightness thanks to strong fermentation and high water content—a perfect contrast of textures.
I’ve been chatting with other bakers about this pizza for a while on The Perfect Loaf’s Discord server, and we’ve all expressed our love for easy pizza in an alternative form. And as we’ve collectively pointed out, a rectangular sheet pan pizza is a crowd-pleaser thanks to easy slicing, flexibility in topping choices, and the ease of doubling or tripling the recipe.
Real quick: Why I Like This Sourdough Pizza al Taglio
- Hands off: there’s very little dough handling
- Use what you have: you can top it with literally anything in your fridge or pantry
- Flexible schedule: the pizza can be made all in a single day or the dough can be refrigerated overnight for pizza the next day
- Great for gatherings: a single sourdough pizza al taglio can feed a large crowd (and kids love it)
Remember, there’s a distinct difference between focaccia and this sourdough pizza al taglio, or pizza by the slice. Whereas focaccia spends most of its time rising directly in the pan it will be baked in, this rectangular pizza spends its time rising in a bulk container and is then shaped into a rectangle just before it meets the oven.
But also, this is thinner (and definitely thinner than Detroit-style pizza) and less pillowy-soft. A prominent crunch at the bottom crust sets this pizza apart.
Flour Selection For The Perfect Sourdough Pizza
This sourdough pizza al taglio is adaptable and flexible. I like to add 15% (to the total flour weight) of finely milled durum flour to usher in all the wonderful flavor and aroma of durum. Durum is a wheat species used heavily for pasta-making, but it often appears in pizza doughs (for more, check out my guide to durum flour).
For bread-making, you typically want to use finely milled durum flour (as I do in my Sicilian bread with sesame seeds), sometimes labeled as “extra fancy” or “semolina rimacinata.” One of my go-to sources is Molino Grassi extra-fancy durum semolina, right from Italy. If you’ve never baked with durum, it adds an incredible flavor to pizza and bread alike—and you can use it to make fresh pasta.
If you don’t want to pick up durum, feel free to substitute the 15% in this recipe for the same weight of whole-grain spelt, khorasan, whole wheat, or even just more white flour. As I mentioned, this recipe is super flexible, and the result will be great with whatever grain flavor you’d like to explore.
If you’re looking for another place to use durum, have a look at my sourdough focaccia Pugliese, which has durum (and potato!) added to the dough for a little more color and flavor.
Sourdough Pizza Pans
I love using the LloydPans “grandma” style pan for this pizza al taglio, and I’m so impressed with its performance that I’ve switched from using my sheet pans and haven’t looked back.
LloydPans has a nonstick coating that still yields a crispy crust and beautiful bottom color. I’m not usually a fan of using a nonstick coating on anything, but with these high-quality pans, the coating is not scratchable and doesn’t decrease performance—and they’re made in the USA. The pan itself is also extra thick for added strength, and the sides aren’t so tall that you’re venturing into deep-dish pizza territory. They’re just awesome.
Highly recommended: LloydPan 12×16-inch Grandma Style Pizza Pan
Baking Schedule
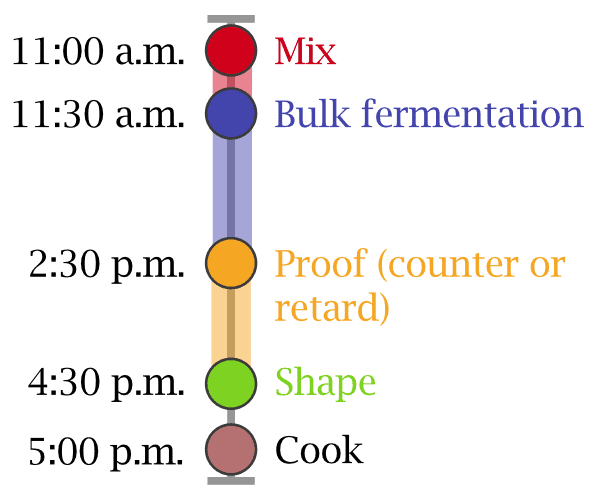
I typically make this sourdough pizza al taglio all in a single day. I start mixing in the morning when my sourdough starter is ripe, and then I have a fresh pizza ready by dinner time. But you can easily extend this to two days by placing your covered bulk fermentation container in the refrigerator right at the start of the two-hour proof. The next day, when you want to make the pizza, take it out, let it warm up for 30 to 45 minutes, and shape it out to cook in the oven.
Sourdough Pizza al Taglio Formula
Vitals
| Total Dough Weight | 900 grams |
| Hydration | 69.0% (plus 2.5% from olive oil) |
| Pre-fermented Flour | 9.0% (83g of sourdough starter is used for this recipe, and my starter is approximately 50% flour. ((83/2)/461 total flour) * 100 = approximately 9%.) |
| Yield | One 12 x 16-inch rectangular pizza |
This recipe makes a single, large sheet pan pizza; if you’d like to make two, double all the ingredients.
Total Formula
Desired dough temperature: 78°F (25°C). See my post on the importance of dough temperature for more information on dough temperatures.
| Weight | Ingredient | Baker’s Percentage |
|---|---|---|
| 400g | Type 00 flour or All-purpose flour (Central Milling Type 00 Normal or King Arthur Baking All-Purpose) | 85.0% |
| 71g | Durum flour, extra fancy or semolina rimacinata (Molina Grassi Extra Fancy Durum Semolina or Central Milling Durum Flour Extra Fancy) | 15.0% |
| 12g | Extra virgin olive oil | 2.5% |
| 324g | Water | 70.0% |
| 9g | Fine sea salt | 1.9% |
| 85g | Sourdough starter | 18.0% |
Additional Ingredients
| One 28oz can of whole peeled tomatoes (I like Bianco DiNapoli or another San Marzano style) |
| Mozzarella cheese (low moisture, shredded) |
| Extra virgin olive oil for drizzling on top of the pizza |
| Any pizza toppings: pepperoni, black olives, artichoke hearts, jalapeños, etc. |
Sourdough Pizza al Taglio Method
1. Mix – 11:00 a.m.
I like to mix this rectangular pizza dough in my KitchenAid stand mixer, but you could use a larger bread mixer or mix and strengthen the dough by hand.
To the bowl of a stand mixer, add the flour, water, salt, and ripe sourdough starter. Mix on speed one for 1 to 2 minutes until the dough comes together, and no dry bits remain. Then, turn the mixer up to speed two and mix for 5 minutes.
Let the dough rest in the mixing bowl for 10 minutes.
Turn the mixer on to speed one for 1 minute, then slowly drizzle in the olive oil with the machine running. Once all the oil is added, turn the mixer to speed two and mix for 2 to 3 minutes until all of the olive oil is absorbed and the dough is cohesive.
The dough will still be shaggy and very soft but not soupy or excessively wet at the end of mixing. Transfer the dough to a container for bulk fermentation and cover.
2. Bulk Fermentation – 11:30 a.m. to 2:30 p.m.
At warm room temperature, around 74-76°F (23-24°C), bulk should take about 3 hours. If your kitchen is cooler, place your bulk container in a small home dough proofer, or extend the bulk fermentation time to give the dough more time to ferment. This dough needs three sets of stretch and folds, spaced out by 30 minutes, during the 3-hour bulk.
This is a wet and extensible dough, so I like to give it three sets of vigorous stretch and folds. After the first 30 minutes in bulk fermentation and using wet hands, grab the north side of the dough in the bulk fermentation container and stretch it up and over to the south side. Then, grab the south side of the dough and stretch it up and over to the north side. Repeat in the east to west and west to east directions for a total of 4 folds.
Give the dough two more sets of stretch and folds at 30-minute intervals. After the last set, let the dough rest in the container until the end of bulk fermentation.
3. Proof – 2:30 p.m. to 4:30 p.m.
At this point, there’s nothing to do: continue to let the dough proof in the bulk fermentation container for 2 hours at room temperature.
About an hour into proof, begin preheating your oven with a rack in the middle to 500°F (260°C) and with a baking surface—I like to use my Baking Steel—inside on the rack.
Overnight proof option: Instead of proofing the dough on the counter for two hours, you can place the covered bulk fermentation container into the fridge to proof overnight. The next day when you want to make the pizza, remove the container and let it warm up for 30 minutes or so. The dough should be warm to the touch, well-risen, and very soft. After it’s warm, proceed with the steps below.
4. Prepare Sauce and Shape – 4:30 p.m.
Prepare Tomato (Pomodoro) Sauce
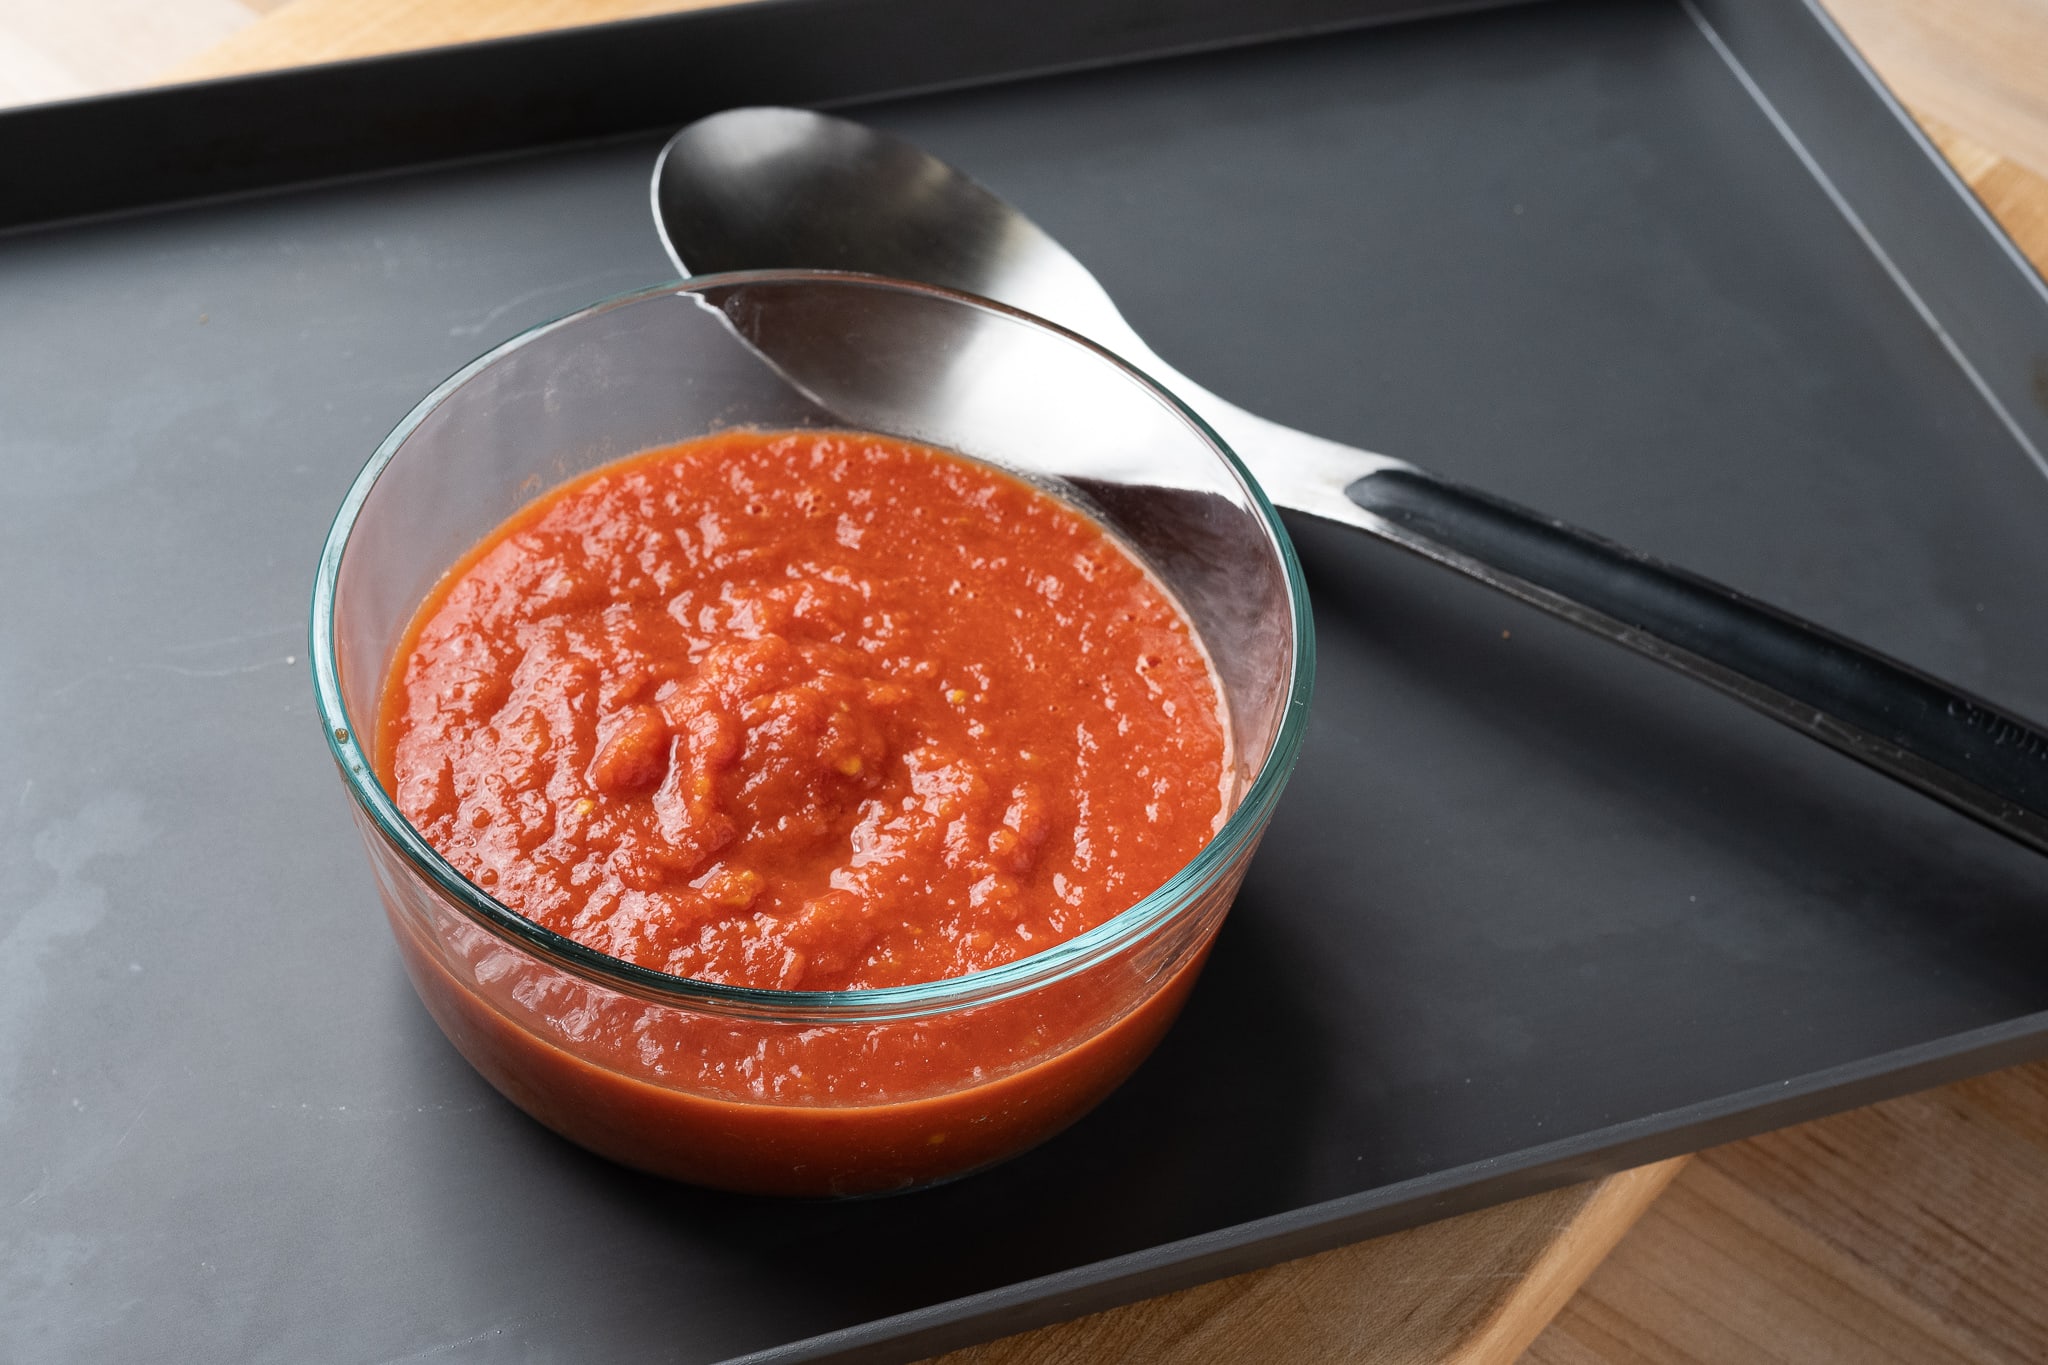
This sauce is very similar to my basic Pomodoro sauce on my other sourdough pizza post. Open a 28 oz. can of whole peeled tomatoes and drain the liquid in the can (you can save this to make pasta!). Place the tomatoes in a blender with about 1/4 teaspoon of dried oregano, 1/2 teaspoon of salt, and a dash of extra virgin olive oil. Blend until smooth but not excessively frothy. I like my sauce for sheet pizza to have a little texture to it, not completely smooth.
Set the sauce aside until you’ve shaped out the dough.
Shape Dough
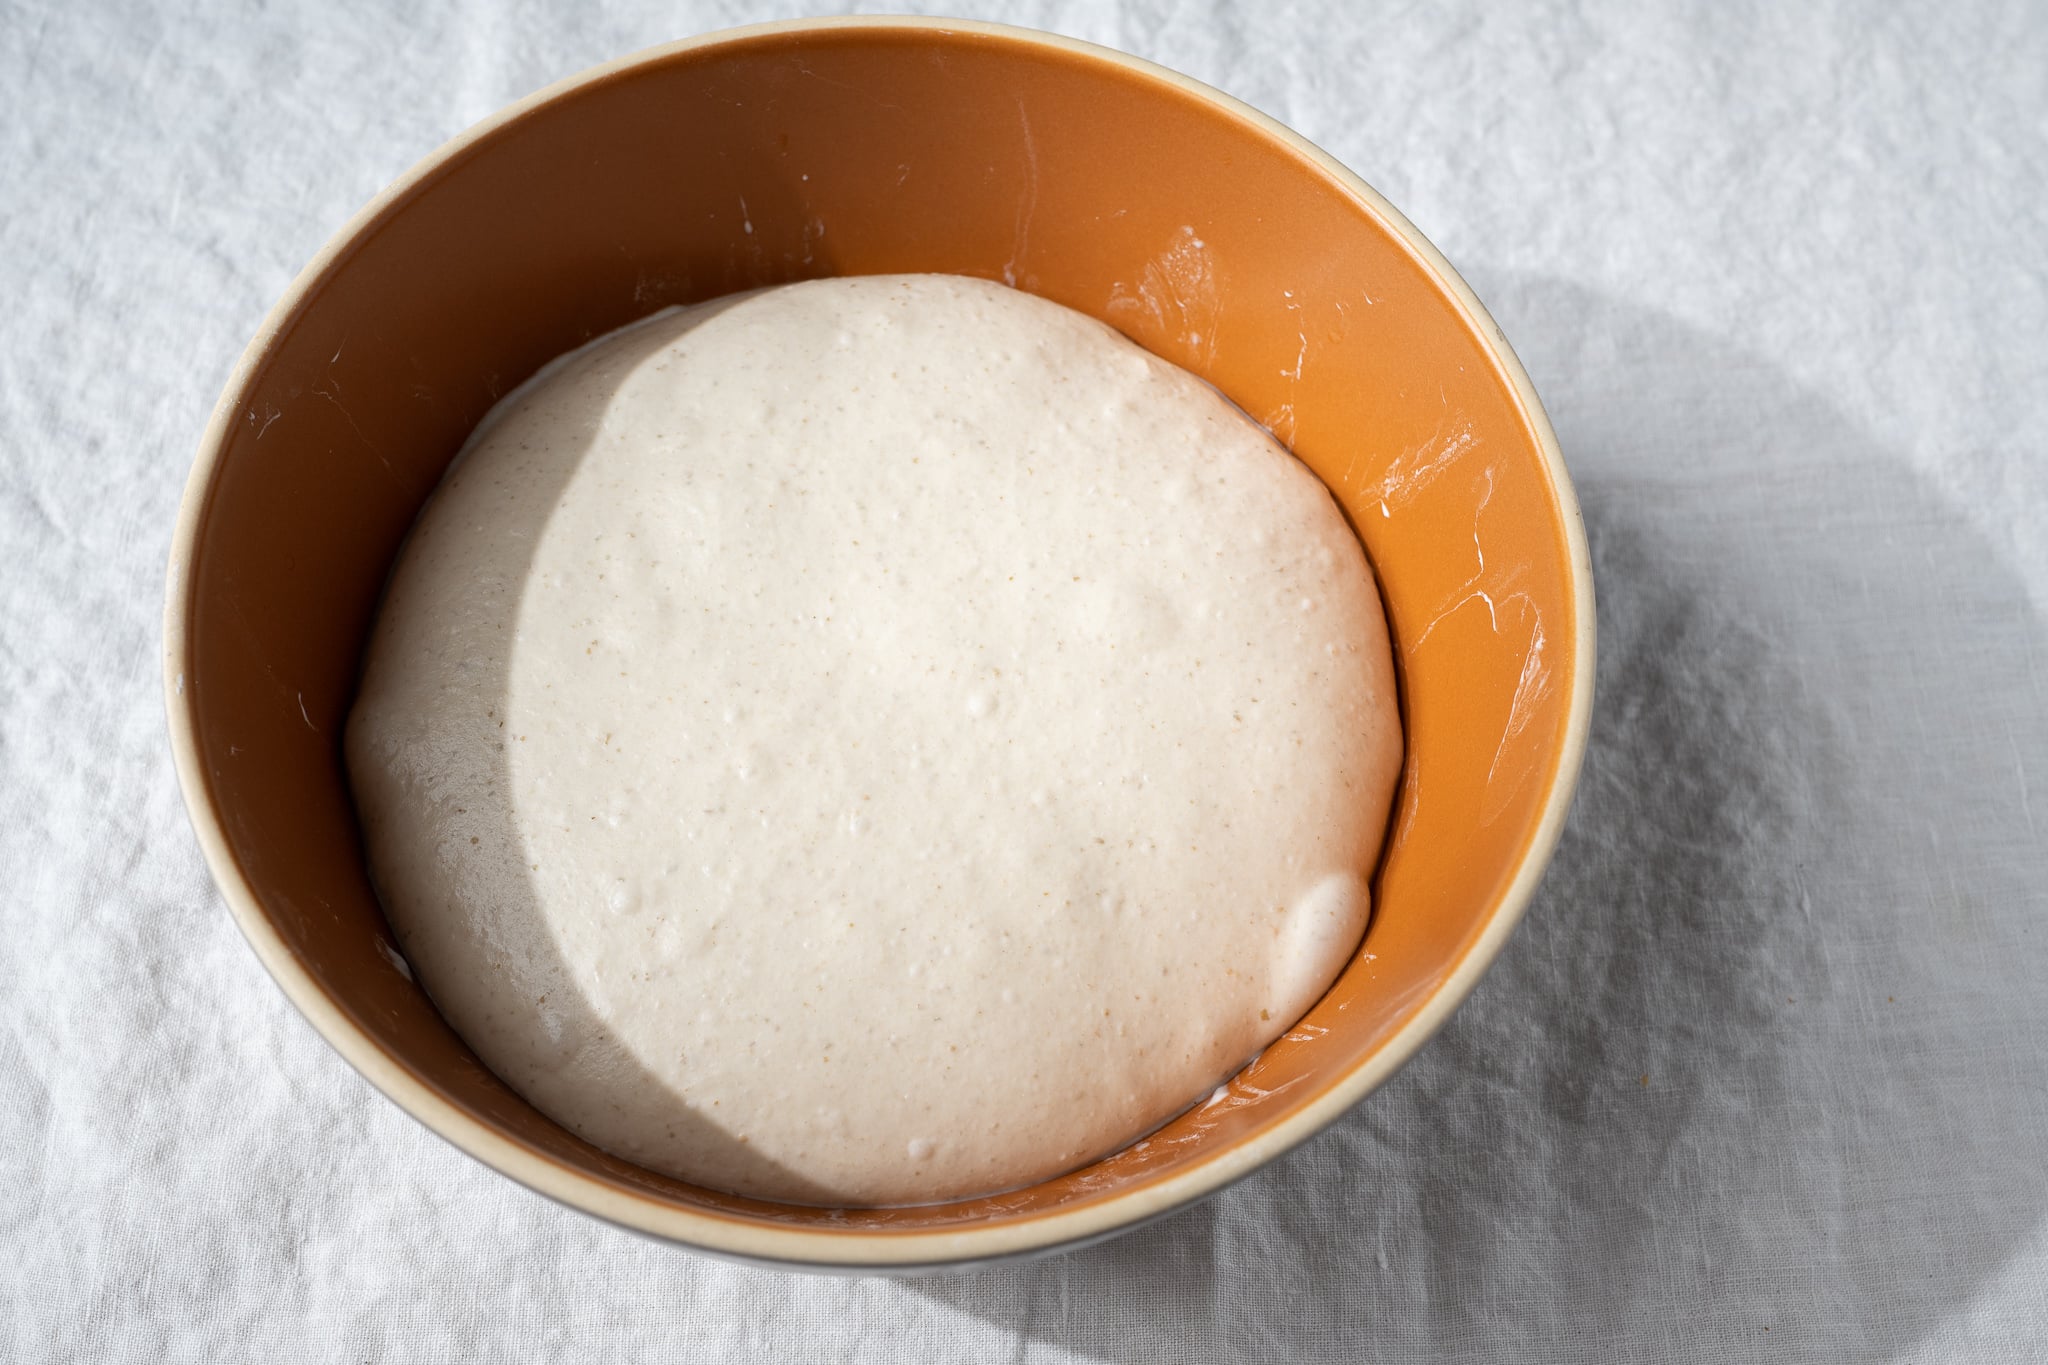
At the end of proofing, your dough should be well-risen, smooth, and very soft to the touch (see below). You should see signs of strong fermentation, but not a dough that’s extremely bubbly or very weak in texture. If the dough is a little under-fermented, give it 15 more minutes and check again.
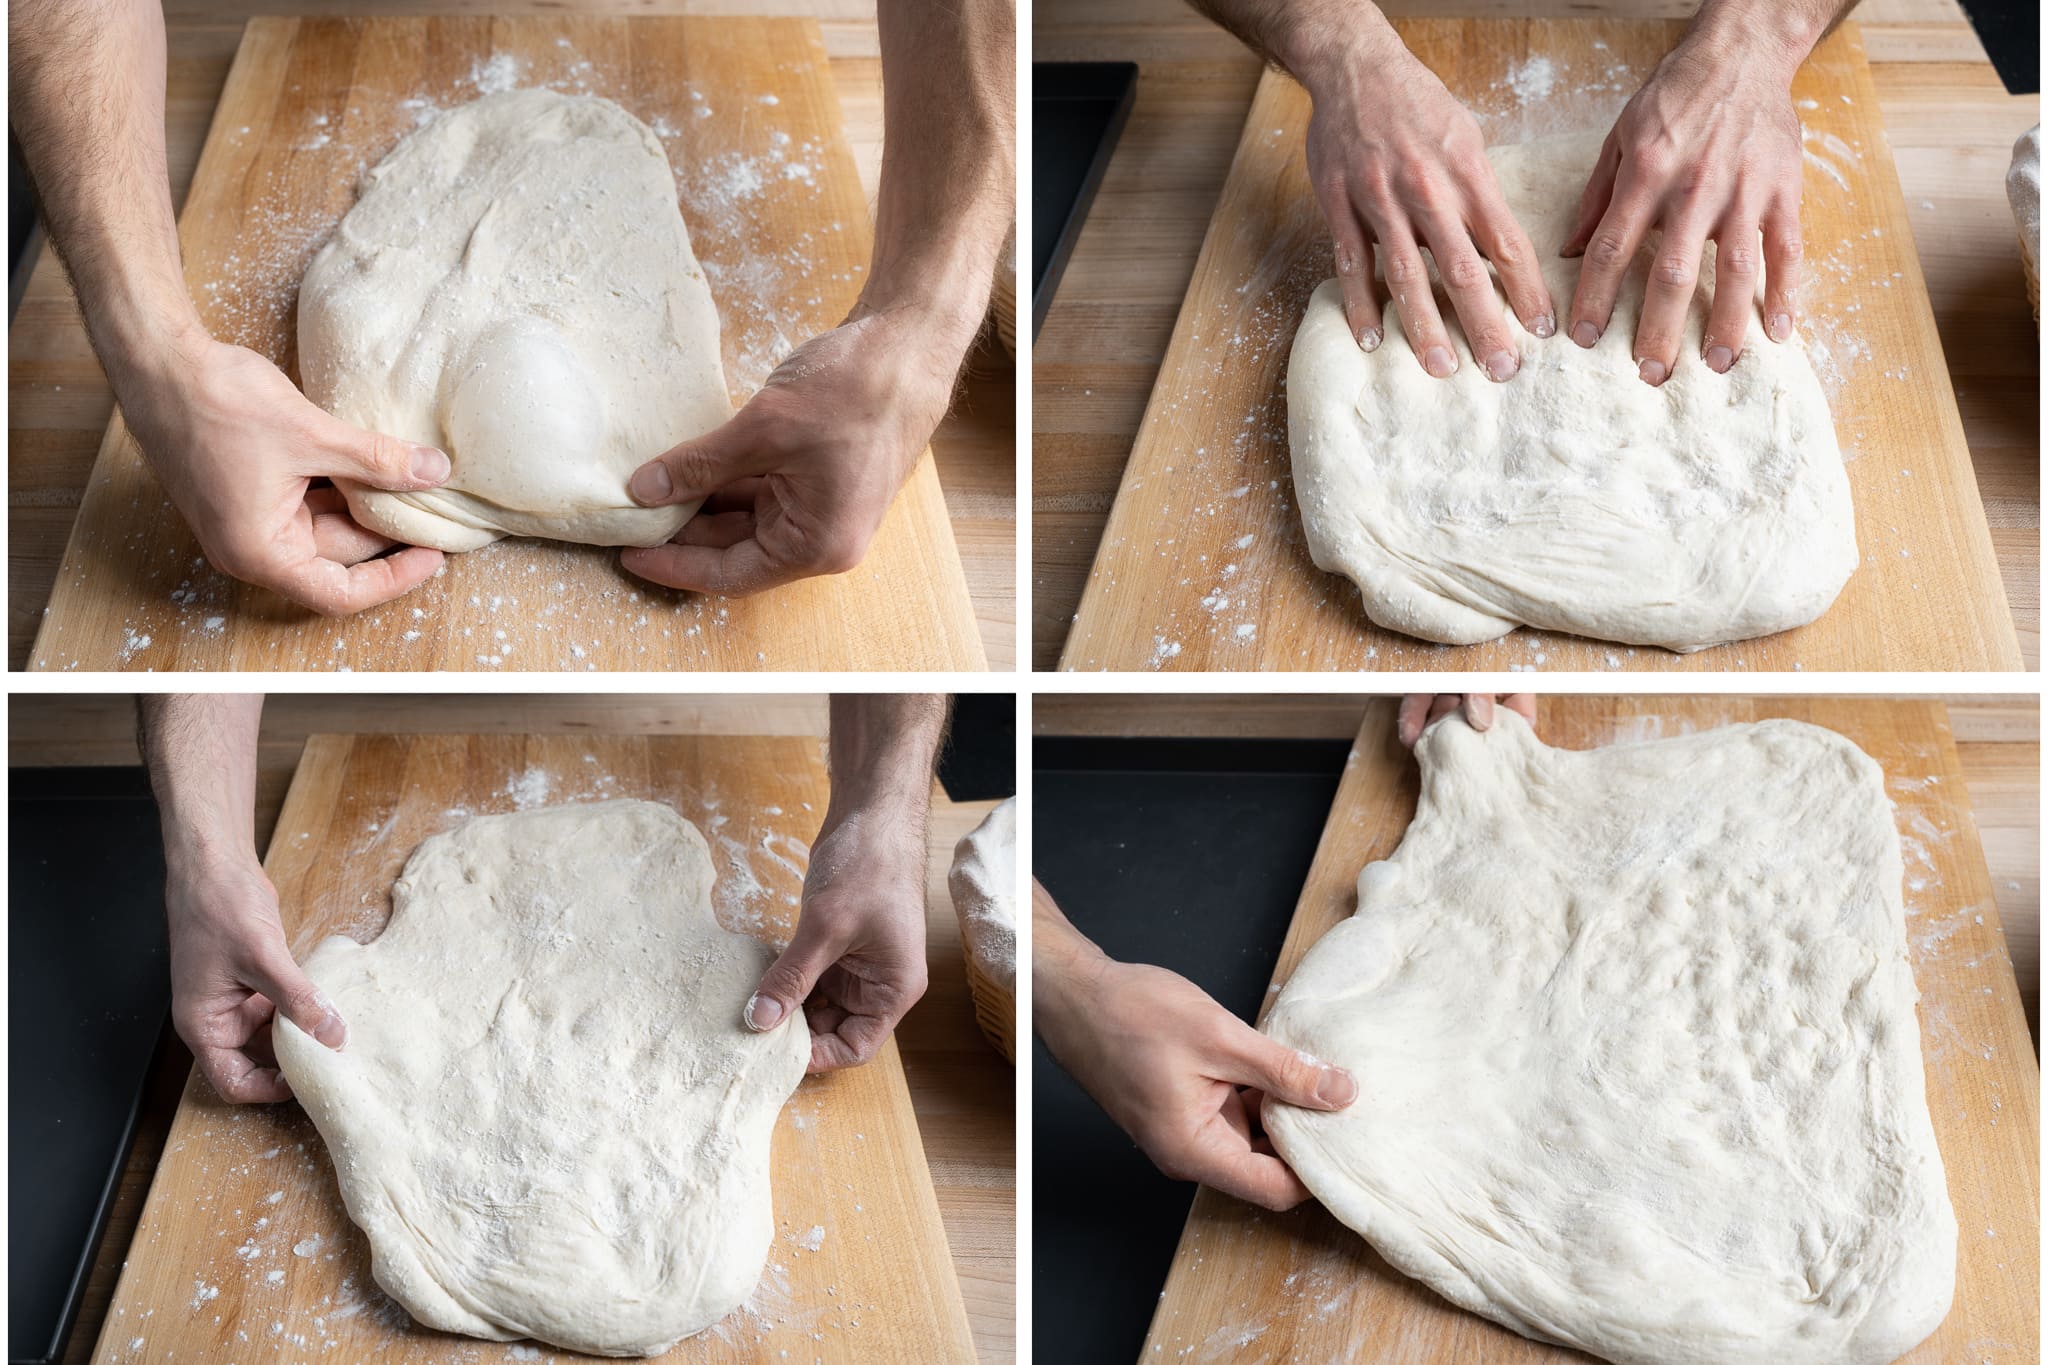
There are really two ways to shape pizza al taglio, and I love using the method shown below in my video. Essentially, you press out the dough in a half sheet pan, then drape it over your arms as you transfer it over to the final baking pan.
Note that my sheet pan is nonstick. If you don’t have a nonstick sheet pan, you may want to oil your pan to prevent sticking!
Alternatively, you can press out the dough on a large cutting board, then drag it over.
I shape this dough on a large raised cutting board so I can set the sheet pan alongside and drag the dough right in. Alternatively, shape it on your counter and pull it over the edge into the pan, or drape it across your arms and gently transfer it.
Be gentle. The dough should be soft, extensible, and spread easily, so avoid yanking it outward or pressing hard enough to tear holes. If it resists, let it rest a few minutes between stretches, and use as much flour as you need to keep it from sticking.
Liberally flour your work surface, scrape the dough out, and flour the top. Dimple it from end to end with your fingertips, then gently grab the sides and spread it outward, working the top and bottom until you’ve coaxed it into a rough rectangle. It doesn’t need to match your sheet pan; you can finish stretching once it’s in.
8. Cook – 5:00 p.m.
At this point, your oven with the baking surface inside should be preheated. Cooking this sourdough pizza al taglio is done in two phases:
Step 1: Spread Sauce and Parbake Dough.
After shaping the dough, spread the tomato on it, then slide the pan onto the baking steel, now preheated in the oven. Turn the oven down to 450°F (230°C) and cook for 10 minutes.
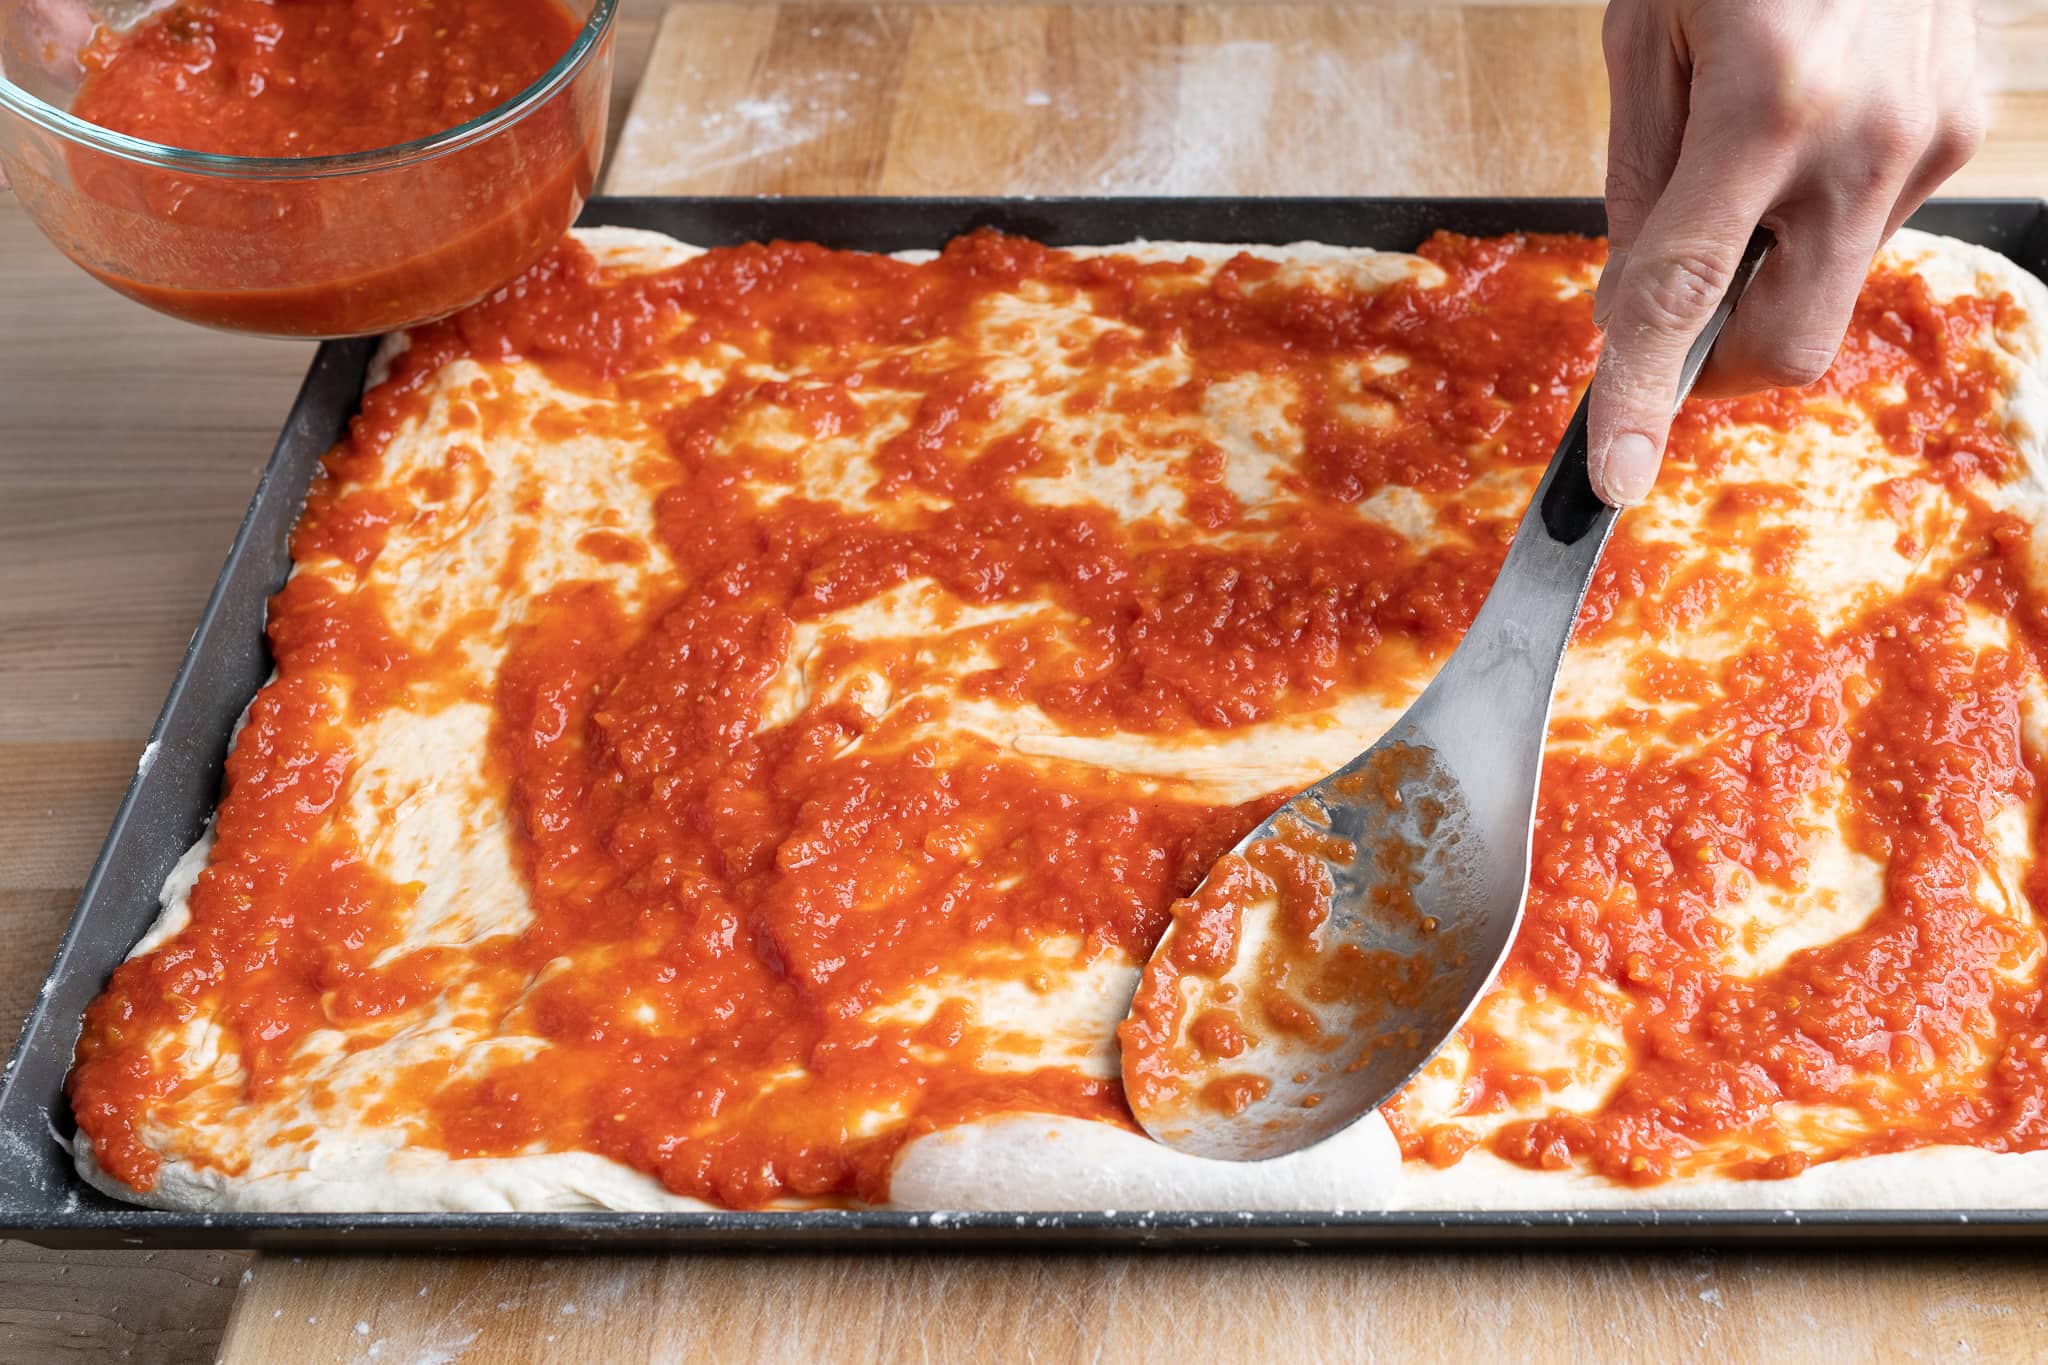
Once the dough is stretched to fit the pan and the tomato sauce is spread in an even layer (as seen above), slide the pan into the preheated oven, right onto your preheated baking surface. Turn the oven down to 450°F (230°C) and bake for 10 minutes.
Step 2: Spread Toppings and Finish Cooking.
Carefully remove the pan from the oven and place it on a heat-proof rack.
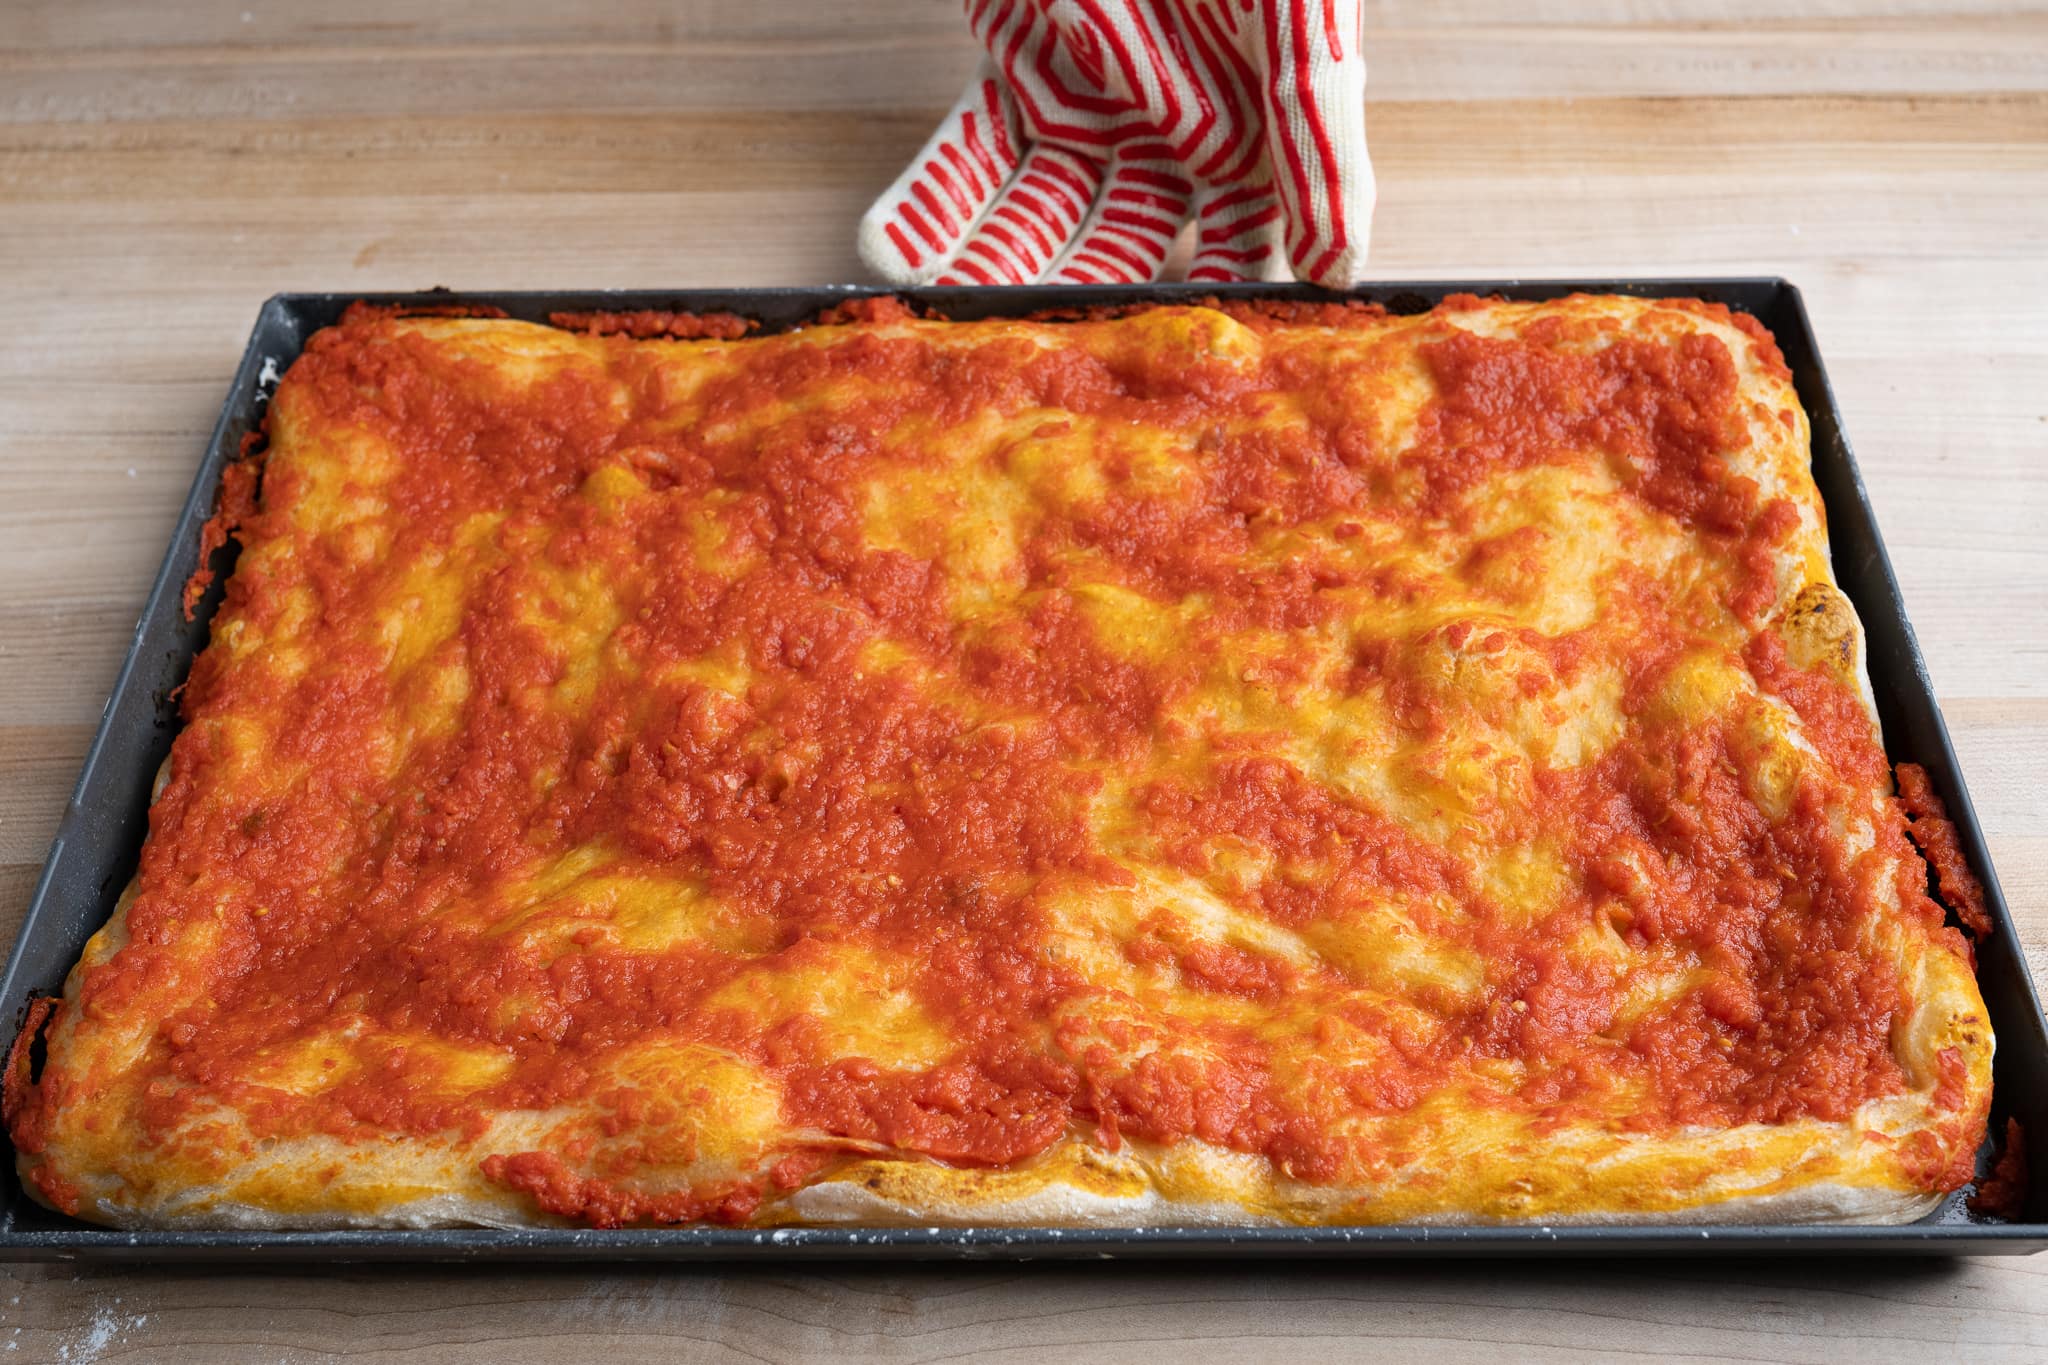
Add cheese and any other desired toppings to the pre-cooked pizza dough.
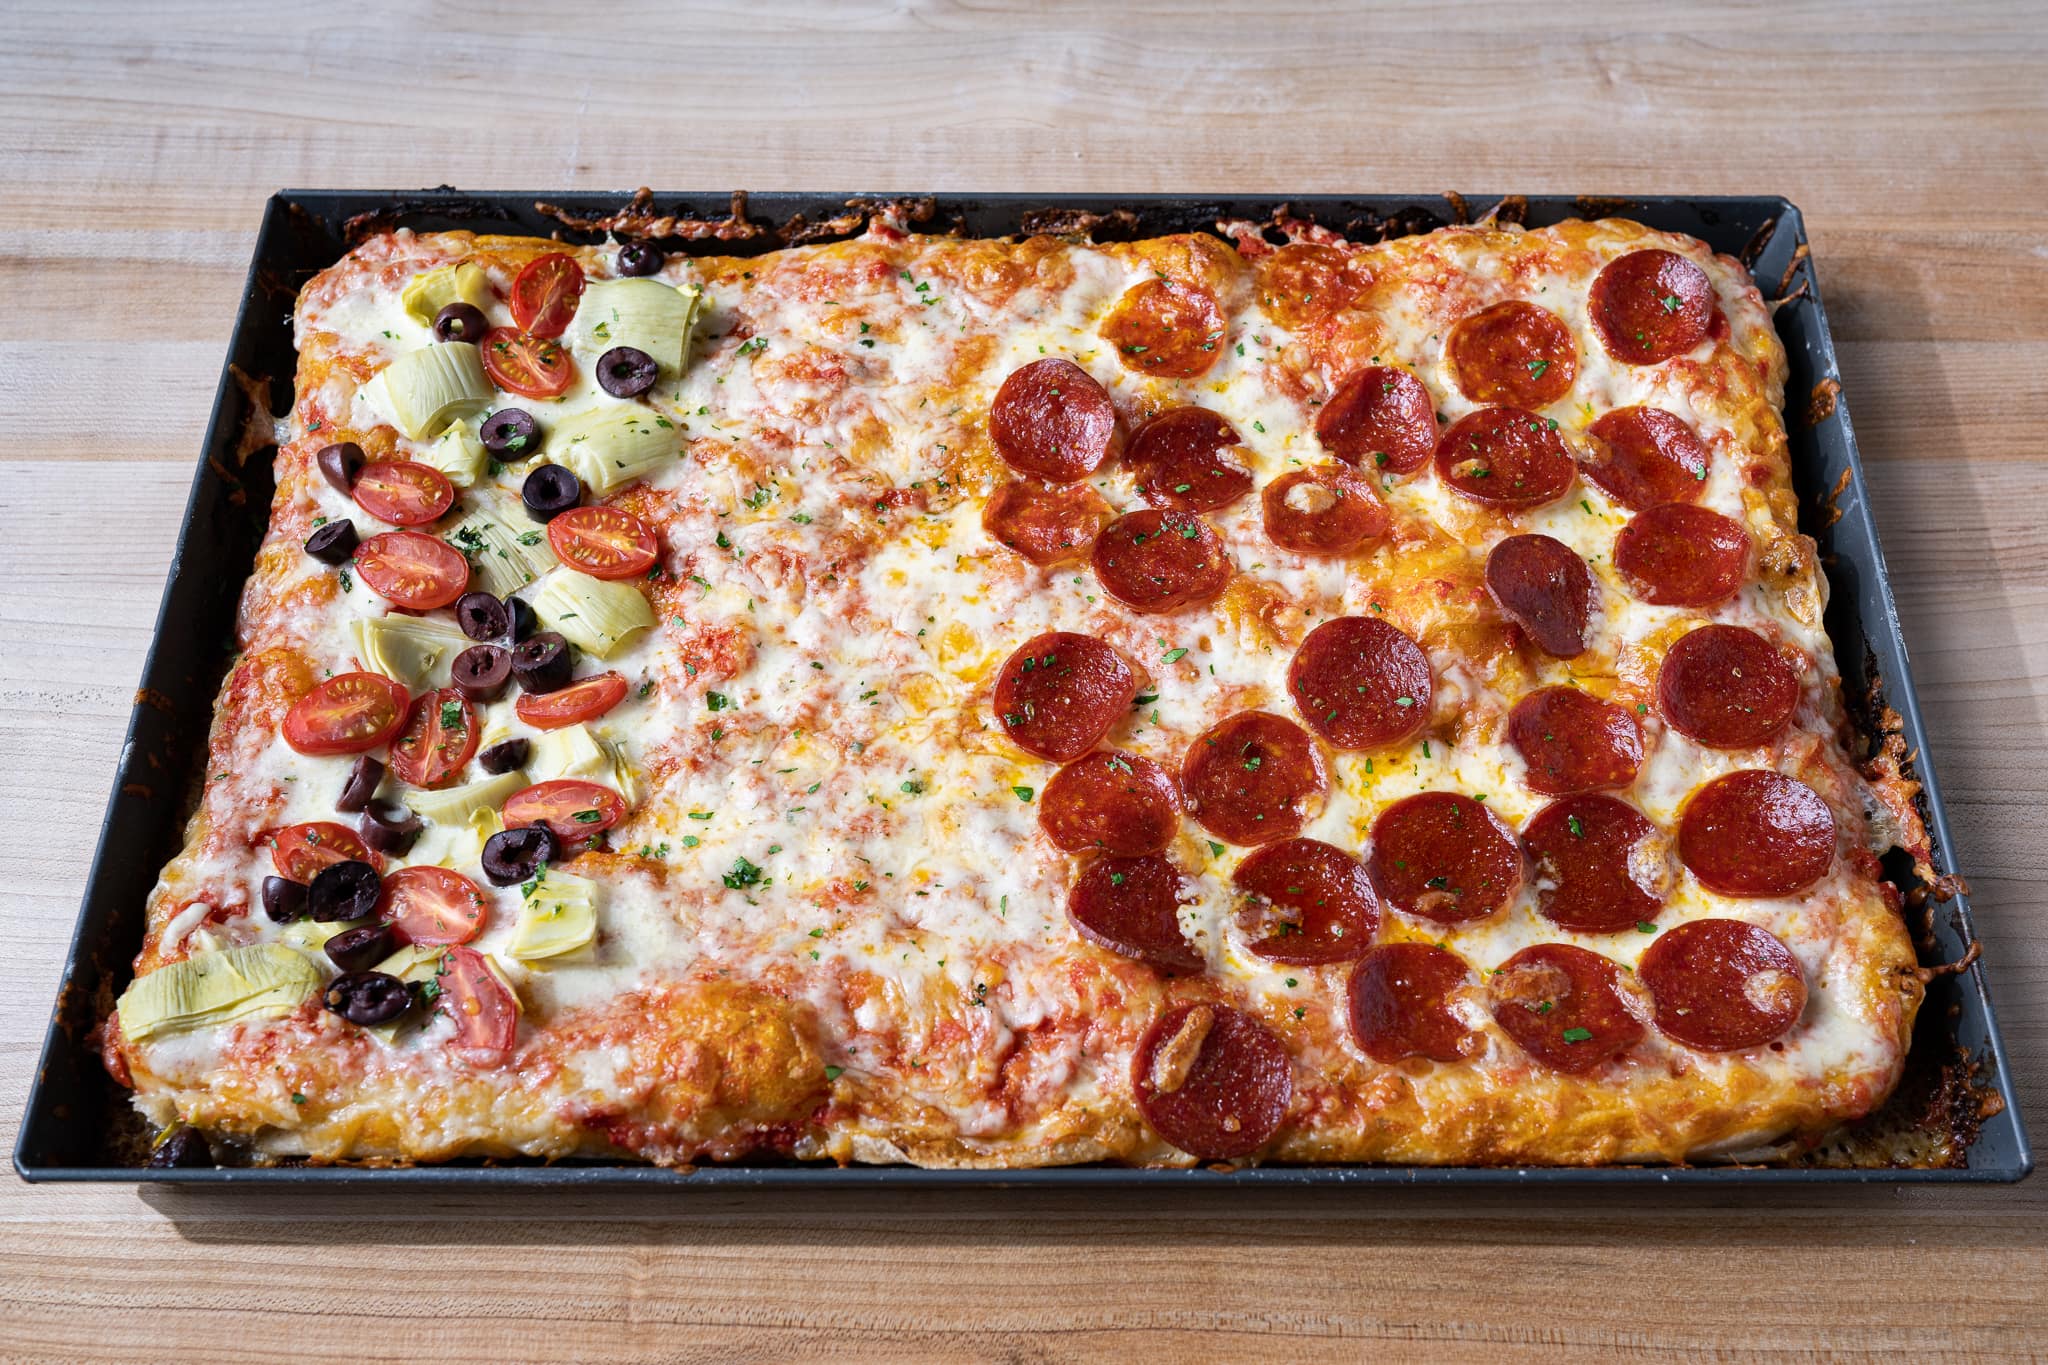
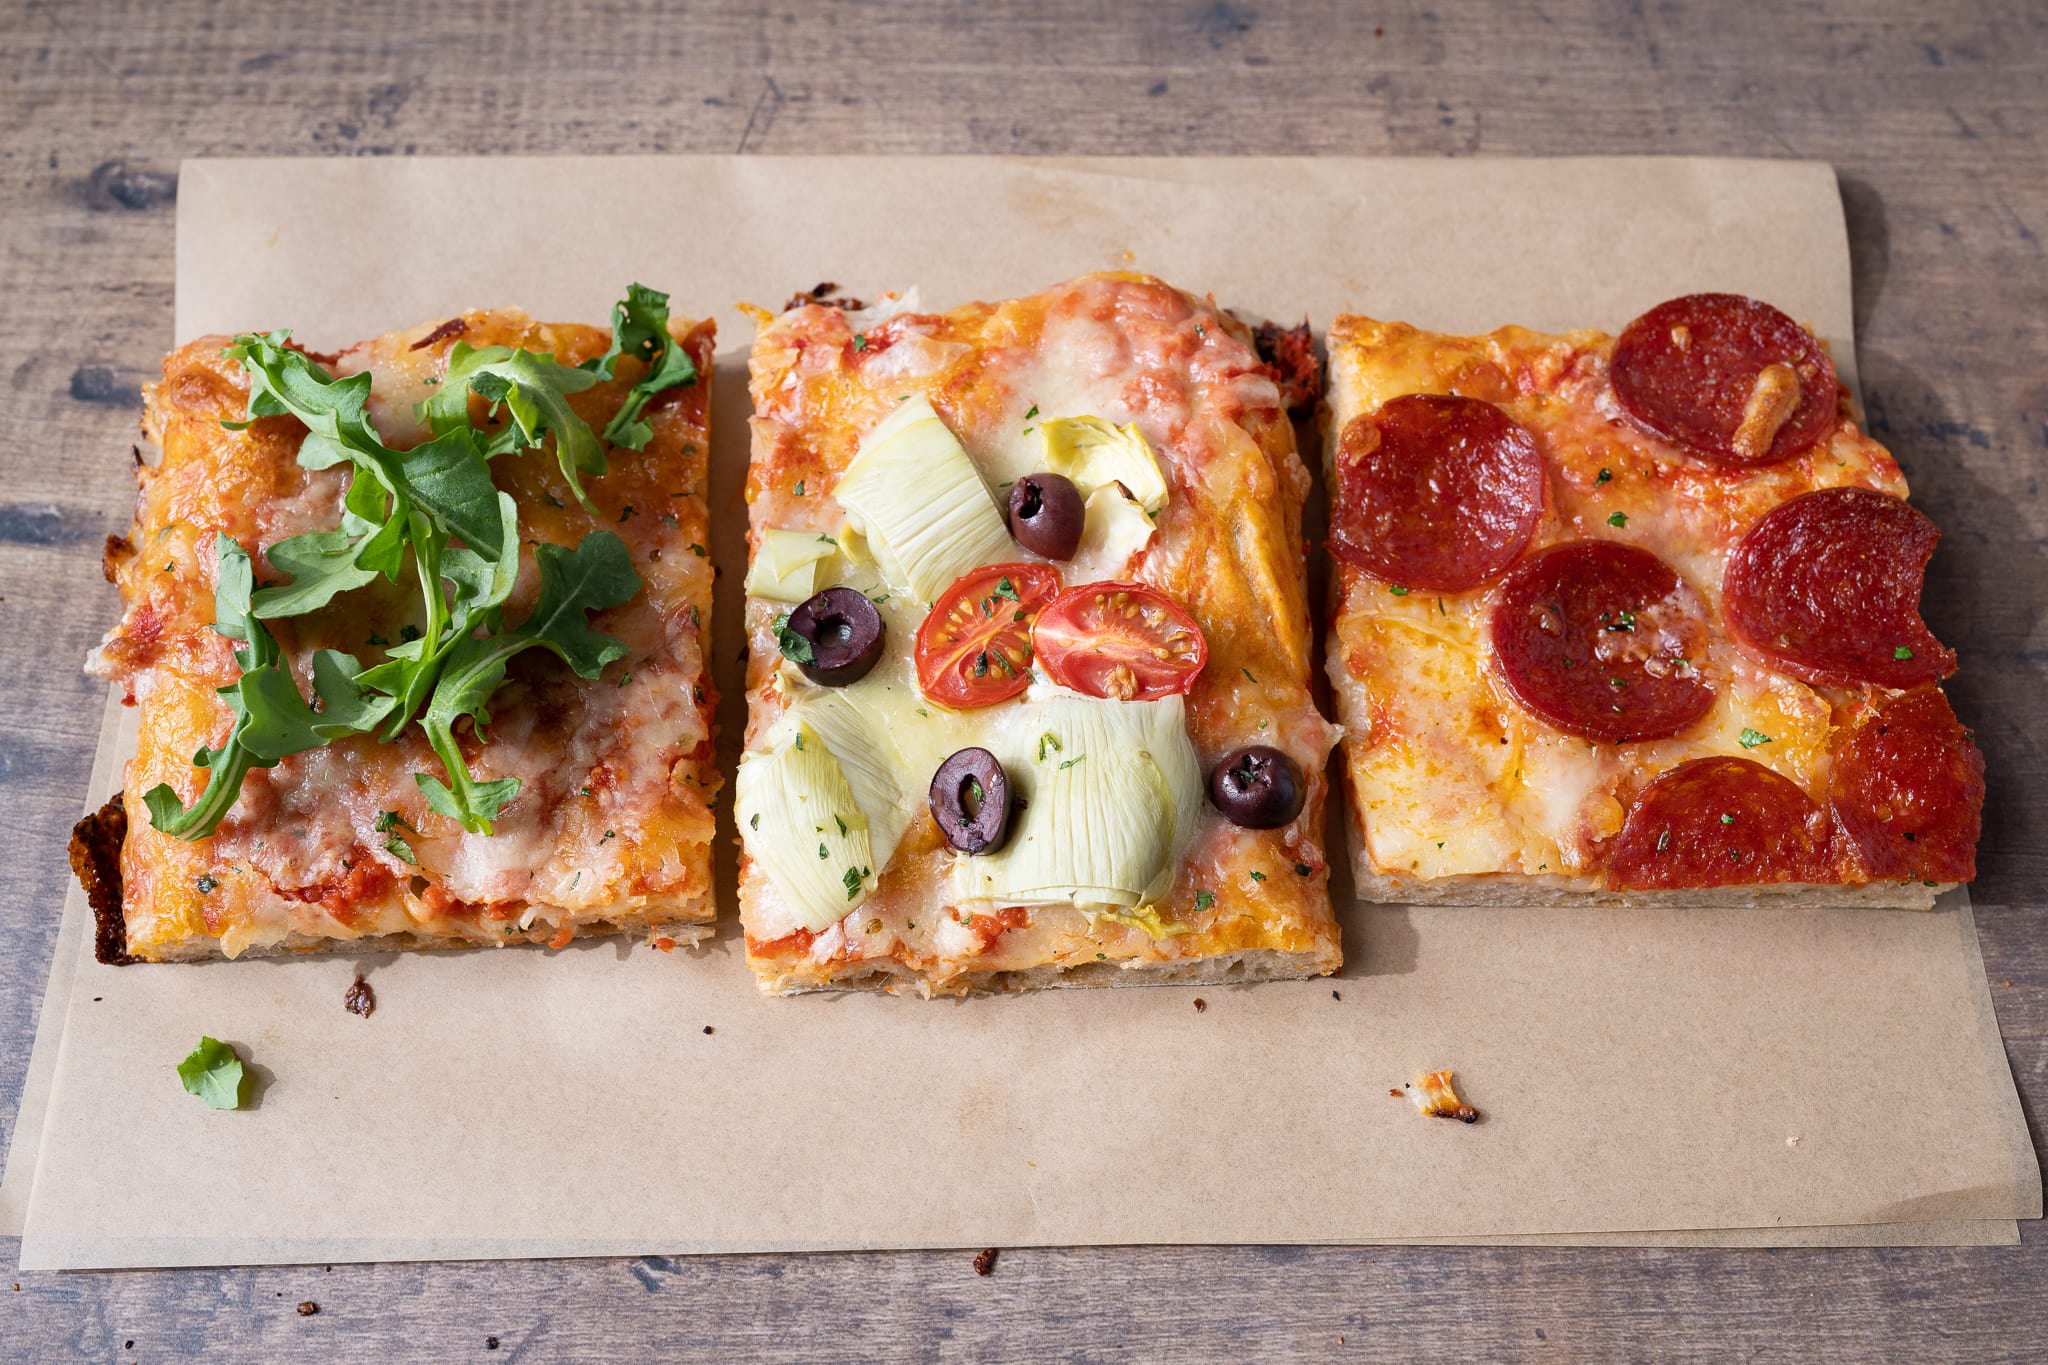
In my pizza below, you can see the kid’s section at right, the “no veggie touching my slices” area in the middle, and the adult section at left (and to be honest, I ate slices from all three 🙂).
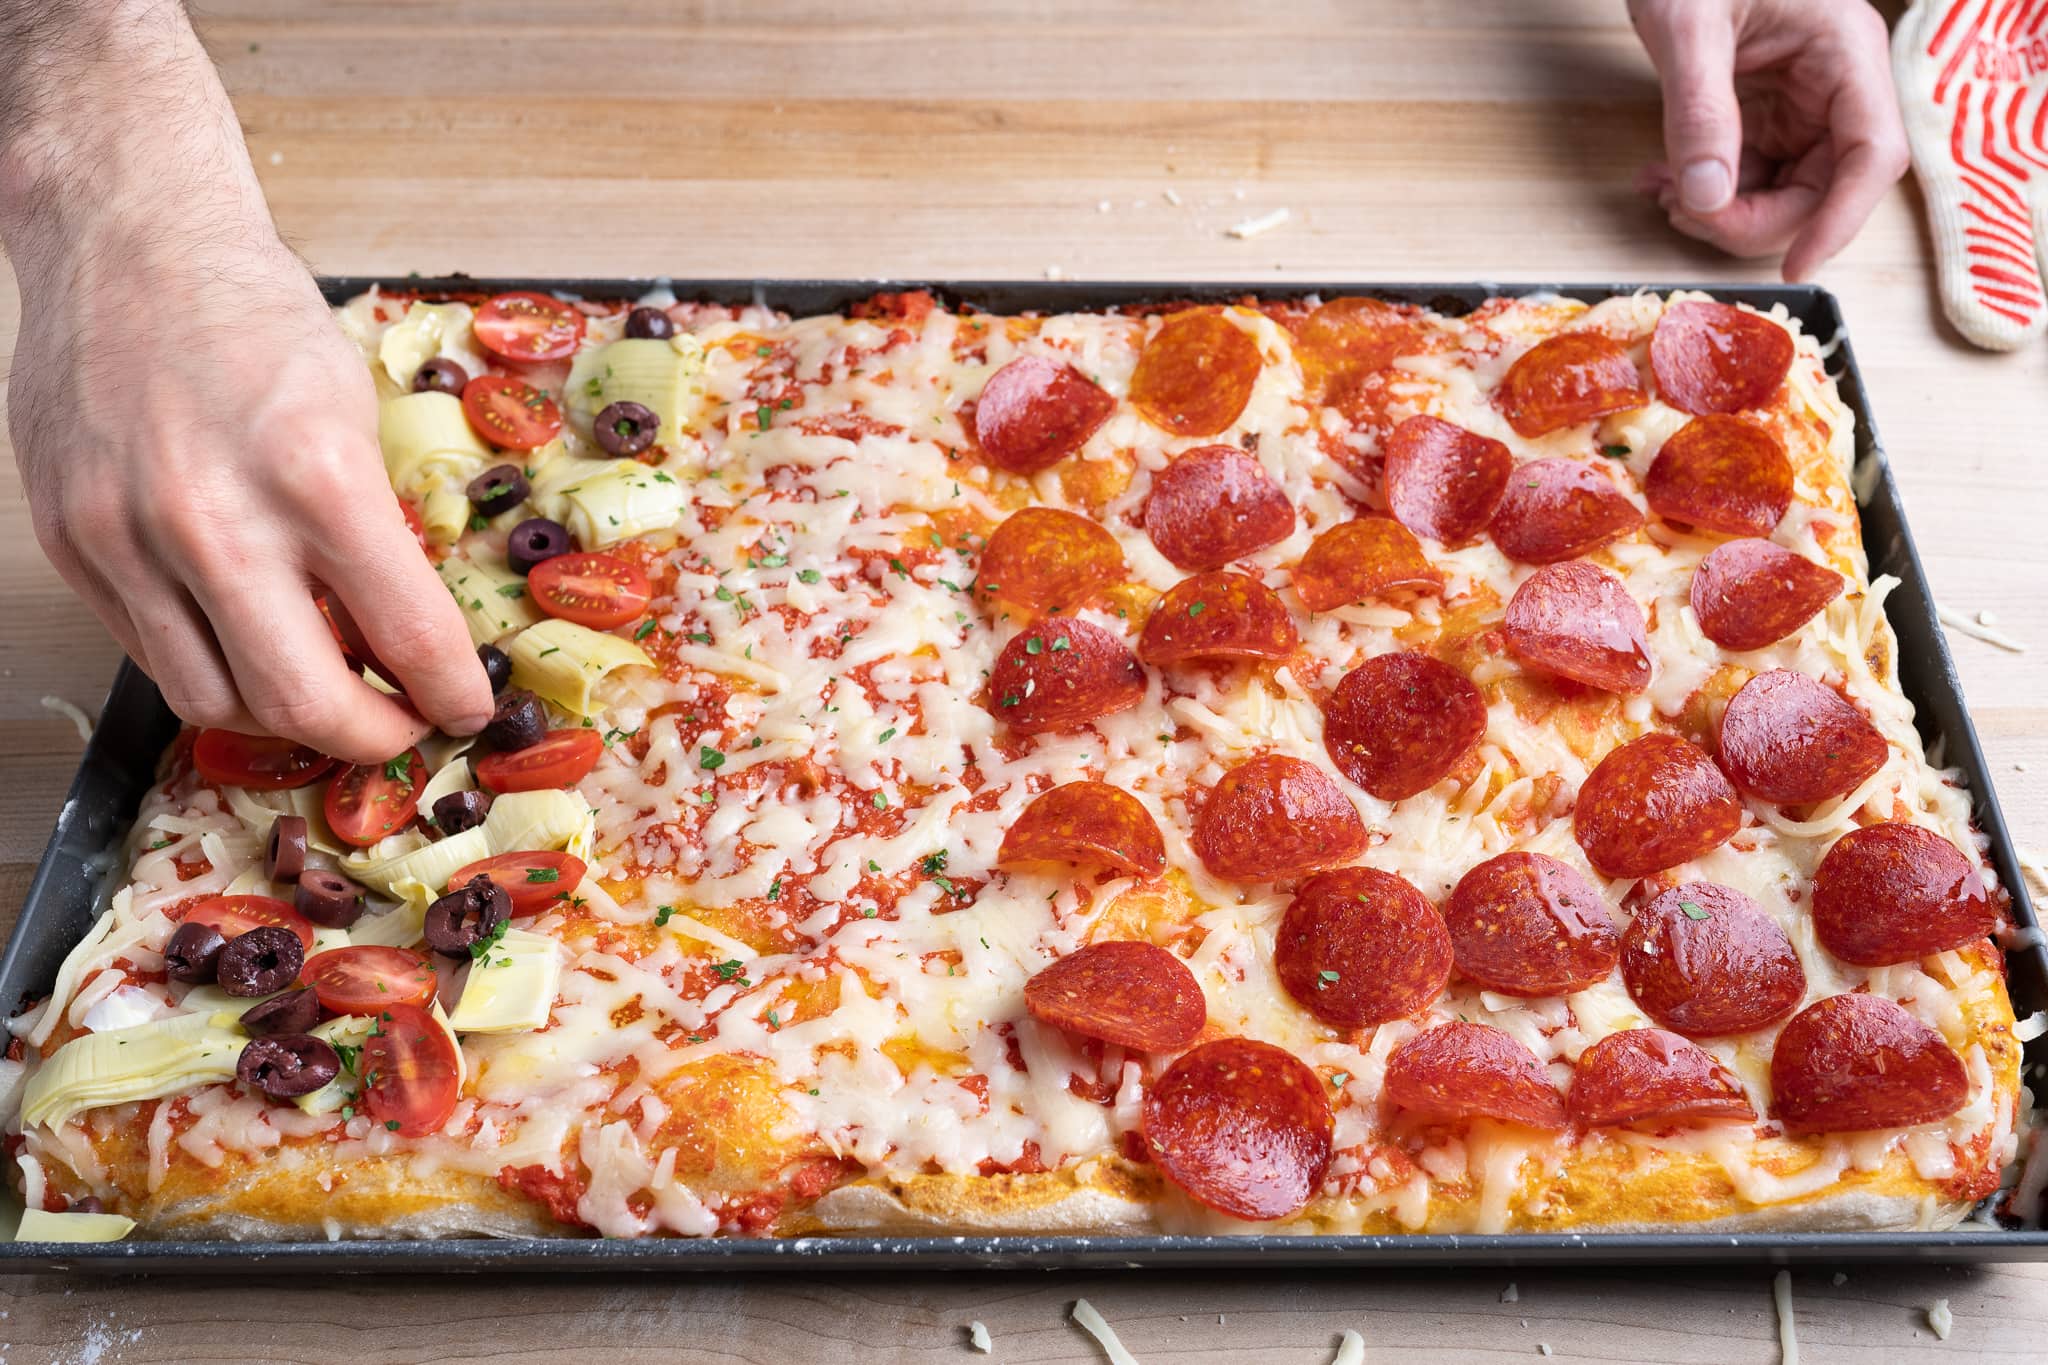
Once topped, slide the pan back into the oven on the baking surface and bake for an additional 10-15 minutes until done.
When finished, remove the pan to a cooling rack and let cool for a few minutes before cutting.
Print
Sourdough Pizza al Taglio
- Prep Time: 6 hours
- Cook Time: 25 minutes
- Total Time: 6 hours 25 minutes
- Yield: 1 pizza
- Category: Main course, lunch
- Cuisine: Italian
Description
My recipe for a naturally leavened sheet pan pizza that’s flexible and a crowd-pleaser. This pizza has a decidedly crispy bottom crust and interior with a little chew—the perfect contrast of textures.
Ingredients
Main dough
- 400g Type 00 or all-purpose flour
- 71g durum flour, extra fancy (or semolina rimacinata, very finely milled)
- 12g extra virgin olive oil
- 324g water
- 9g sea salt
- 83g ripe sourdough starter
Pomodoro (tomato) sauce
- One 28oz. can of whole peeled tomatoes (Bianco DiNapoli or San Marzano)
- 1/4 teaspoon of dried oregano
- 1/2 teaspoon salt
- About 1/2 tablespoon extra virgin olive oil
Instructions
- Mix (11:00 a.m.)
Add all the ingredients except the olive oil to the bowl of a stand mixer fitted with the dough hook attachment. Mix on speed one for 1 to 2 minutes until the dough comes together, and no dry bits remain. Then, turn the mixer up to speed two and mix for 5 minutes. Let the dough rest in the mixing bowl for 10 minutes. Turn the mixer on to speed one for 1 minute, then drizzle in the olive oil with the machine running. Once all the oil is added, turn the mixer to speed two and mix for 2 to 3 minutes until all of the olive oil is absorbed and the dough is cohesive. Transfer the dough to a container for bulk fermentation and cover. - Bulk fermentation (11:30 a.m. to 2:30 p.m.)
Give the dough 3 sets of stretch and folds during this time at 30-minute intervals. After the last set, let the dough rest until the end of bulk fermentation. - Proof (2:30 p.m. to 4:30 p.m.)
Leave the dough covered in the bulk fermentation container and proof on the counter for 2 additional hours (see note for overnight retard). About an hour into the proof, preheat your oven with a baking steel or baking stone inside to 500°F (260°C). - Prepare sauce and shape (4:30 p.m.)
Drain the liquid from the can of tomatoes and place the tomatoes in a blender along with the oregano, salt, and olive oil. Blend until smooth.
Gently scrape the pizza dough out of the bulk fermentation container to a floured surface. Dimple down with fingers and gently stretch out to a rectangle. Drag the dough into your sheet pan and finish stretching it to meet the corners. - Cook (5:00 p.m.)
Spread pomodoro sauce over dough, edge-to, edge with no dough exposed. Slide the pan into the oven on the preheated baking steel, turn the oven down to 450°F (230°C), and bake for 10 minutes. Carefully remove the pan and place it on an oven-safe surface. Spread on cheese and any other toppings. Slide the pan back into the oven on the baking steel and cook for 10 to 15 minutes longer until the bottom is well-colored and as is the top.
Notes
- If you don’t have type 00 flour, use all-purpose.
- Substitute out the durum flour for spelt, khorasan, whole wheat, or even more type 00/all-purpose flour.
- You can refrigerate the dough at the end of bulk fermentation, covered, overnight. The next day, take the dough out and let it warm for 30 minutes and continue with the Shape step.
Sourdough Pizza al Taglio FAQs
Why is this pizza dough so soft?
This dough has relatively high hydration and is enriched with olive oil—it’s supposed to be! This soft texture makes for a pizza with a thin and crispy crust and a tender interior.
Can I refrigerate the sourdough pizza dough?
Yes! At the end of the three-hour bulk fermentation, instead of proofing the dough on the counter for two hours, place your covered container into the fridge until the next day (you can likely even go another day after that). When you want to make the pizza, take the dough out, let it warm for about 30 minutes, then stretch it out, top, and cook.
Can I make this pizza on a regular cookie sheet?
Yes, a typical cookie sheet—or sheet pan—will work just fine with this sourdough pizza al taglio recipe.
I don’t have durum flour, what can I use in its place?
Feel free to substitute out the 15% durum for the same percentage of spelt, Khorasan, whole wheat, or even more type 00 or all-purpose flour.
I don’t have a Baking Steel or baking stone, can I still make this sourdough pizza?
Yes! You’ll need to bake a little longer—check on it near the end and push it farther as needed (use some tongs to lift up and check the bottom). If the top is coloring too fast, turn the heat down a bit to extend the cooking time.
What’s Next?
I see pizza as kind of this distilled embodiment of the perfect food, and this sourdough pizza al taglio has it all: a naturally leavened dough, a beautiful mix of flour, a shape that facilitates large meals (and is great for kids and adults), its flavors and textures are spot on, and perhaps the most importantly, it’s delightful in the only way pizza can be.
If you’re looking for more pizza goodness, check out my sourdough pizza dough recipe for a high-heat oven (wood-fired, Ooni, or Roccbox) or my favorite sourdough pizza recipes, tips, and guides.


225 Comments
Hi Maurizio, I started following you on Instagram, so many inspiring sourdough recipe. I adjusted my recipe by baker percentage. For this Sourdough Pizza al Taglio, I proof in the fridge for two days when I have time to bake. The base came out exceptionally well, thin and crusty. All the kids loved it and it gone in seconds! Thanks for sharing it.
So glad this turned out well for you, Jill!
Ciao Maurizio! In Argentina, I only have the softer pasta 00 flour or the stronger Italian pizza 00 flour (5 stagioni). For this recipe I decided to use the latter, which has about 13% protein and a W 300, so had to increased the hydration to 75%. It turned out to be delicious! Grazie mille!
Really great move! If you used the 00 flour, definitely drop the hydration. Thanks for the feedback and enjoy!!
Hey Maurizio! I see you updated the recipe. I had some success with the previous one but forget to jot down the recipe. What was the original hydration? Love your stuff!
Hey there! Yes, been tweaking this recipe as of late. The original hydration was 73%. If you try the new version, please let me know!
I am a new sourdough baker. I made this yesterday and am stumped. Everything seemed to be going on plan but the crust looked nothing like the photo! It was flat and doughy. I live in the desert so the air conditioning keeps the heat at 70 degrees so I put the dough in the microwave (not on) with the light on to try to get to the right temp. Any ideas on how I can fix this to get the crust right? Thank you!
Hey, Andrea! Was the dough very dry and hard to handle? Was there no fermentation in the dough (did it rise and become airy and billowy?). Is it possible it overproofed on you? Did it deflate?
We’ll get to the bottom of this!
No, it wasn’t dry at all. It was very sticky when I took it out of the bowl but adding the flour to the board and my hands allowed me to shape it.
If anything not airy and billowy. Thank you!!!
Part of the challenge with this dough is learning to handle the dough *just enough* to get it shaped and into the pan, but not so much it deflates and it’s overly degassed. It definitely takes practice!
by deflate do you mean when I took it out of the bowl it collapsed a bit? Yes, it did. Thanks!
What a disaster. This dough is much too hydrated..And for a novice, it will surely make anyone think twice of making pizza…Back I go to tried and true Peter Reinharts’ recipes,.
Eek! So sorry to hear that, Louise. Yes, it’s a high hydration dough, but it definitely should NOT be that hard to handle. I would say, if you’re willing to give it another go, please drop the water a bit in the dough to make it more manageable for the flour you’re using.
As with bread, we need to adjust the hydration based on the flour we’re using that day in the kitchen!
I’m looking forward to trying this recipe out! When the bulk is over, are you looking for the same signs as you are for bread? i.e. smooth top and doming on the sides of the bowl? And do you take the dough out and do any re-shaping to de-gas it before the proof?
Yes, should be similar signs as you would see for a bread dough! No, no reshaping or degassing done, it’ll essentially have that done automatically given the pressing out and handling you need to do to get it into the pan.
Hi Mauritzio, Thank you for this great recipe! We made it once and it came out great. The second time we made it, however, one pizza was perfect but the other one was stuck to the pan so firmly we could barely get a few slices out! We aren’t sure if it was because we left the second one in the oven longer (the toppings needed more time), or because we made it without tomato sauce, or because instead of spreading the dough on the countrr and moving it to the pan we spread it from a ball of dough right on the pan? We also ended up spreading polenta under that pizza to avoid sticking and not the other but it didn’t work. The dough was sticky but manageable but did proof a bit long. Any ideas where we went wrong?
Thanks,
Sue & MJ aka The Herb Blurb
Hey there! Sorry to hear about the sticking. Hmm, I’m not sure why one did but the other did not. I don’t like to oil the pan when making this pizza, but that might be an option! Though, that gets more into focaccia territory at that point…
Have you tried a nonstick Lloyd pan? I know it’s a new pan purchase, but they really are amazing.
Just made this dough and it was waaaaay too wet. I had to add more flour. I’m wondering if there is a difference depending on where we live. I live in BC Canada ans my kitchen humidity this morning is 48. I hope it works with the added flour. It is still a bit wet, and I mixed it a lot more than called for. Video for this and the Whole wheat honey bread would be great as there were hydration issues with both. Also, tips on what to do if the dough is too wet would be VERY helpful! My first week at baking sourdough…getting a bit disheartened. THe Pain de me I made had a bit of a dense solid line of dough on the bottom, after cooking…;-(
Yes, sounds like too much water!! Sorry about that, but it can happen, especially if you’re in a very humid Environment. Definitely cut back the water in the mix. I’d say hold back 100g, add some of that in when mixing if the dough feels okay to you. This dough does not need to be super highly hydrated!
Hi Maurizio, wondering if dough temp of 78 is still important for this recipe? Is it a universal “truth” for all recipes to have dough of 78? I appreciate you!
Hey! Doesn’t have to be 78F, but that is a great temp for strong fermentation. Generally, I like to be around 74-78F, knowing that the warmer the temp, the faster the fermentation. Check out my guide post on the importance of dough temperature for more!
Hi Maurizio !! Love all of your recipes, thank you. 2 questions: I live in the Cali desert. Regarding the levain and pizza….what exactly should I be looking for…doubling..bubbles??? My times/BF are going to be faster than in a “regular” kitchen…so the 5 hours for example….doesn’t work for me….thank you!
Thanks, Jenn! You want the levain to look well-risen with lots of bubbles. It’ll loosen in consistency as it ripens, and you want to use it before it becomes overly loose. I’d say just knock off a bit of the time I have listed here and you should be fine (there’s a window on either side of “ripe” that’ll be okay).
For the dough, you want to see some rise in the bowl and I’d say at warmer temp, maybe shoot for 4 hours. It’s hard to go too far with this dough, because you’re not looking for huge rise anyways!
Hi Maurizio, I only have a circular baking stone that isn’t as large as the rectangular pan with the pizza. Should I put it on the stone or would it be better to just cook it only on the pan for a little longer? I’m just concerned that it will cook unevenly. Thanks!
Hey, Jordan! Even if there’s a bit of overhang with the pan, that’s just fine. I’d use the stone! Alternatively, you can skip using the stone altogether, though I do find it gives you a better crust. Enjoy!
Hi Maurizio, I bought myself the Lloyd Grandma pan and used it. However, the pizza stuck to the sides of the pan miserably. I had to cut the pizza and go from the middle to get pieces out. How do you prevent your pizza from sticking to the sides?
Whoa, that’s interesting. I have had zero sticking issues with this pan! If yours is sticking, oiling it may be the only option. I really do feel like it’s the best pan out there!
Would adding fresh minced garlic cause any issues with the dough? Not sure if it would interact with starter. Can’t wait to try this pan pizza!
Garlic can interfere, but it should be fine if not added in too high of a quantity. Start low and work up.
The fresh garlic didn’t interfere. Pizza was delish!
After having tried many times following strictly the recipe, here are my two cents on this recipe:
a. it will be much better to add 75% of the water at the beginning and then add the remaining 25% slowly while mixing. It makes for a much stronger gluten development
b. It is way better if you shape the “panetto” at the end of the bulk fermentation and then let it rise until strong signs of fermentation will be visible on the bottom of the container (bubbles on top are not significant)
c. the dough is WAY too much for the recommended pan size, you end up more with a focaccia than a pizza. Traditionally, here in Italy 600g are used for a 30x40cm pan.
Thanks for all this feedback Rocco! Really great advice there throughout. I typically do this “bassinage” technique whereby I hold back some of the water during mixing, adding it in slowly (you’ll see it throughout my site). I should mention that here, too.
When you say shape out the panetto, are you making it mostly rectangular at that point and then letting it rise in the pan?
Regarding the size, it isn’t overly thick for me in my 13 x 18-inch pan!
Hi Maurizio! Thank you for your reply. When baking pizza in the pan (“Pizza in teglia” or “pizza al taglio”) the “panetto” needs to have sort of rectangular shape. The most used technique for high hydration dough is “Arletto” https://www.youtube.com/watch?v=gEAWrrfUWRE then it is left to rise in a tray (covered), never in the pan, unless you want a focaccia, as you said. For the weight of the dough, the rule here is to multiply both side of the pan and then divide by 2, so in a 30cm x 40cm pan, the dough should be: 30×40=1200/2=600g.
Hi Maurizio! Thank you for your reply. When baking pizza in the pan (“Pizza in teglia” or “pizza al taglio”) the “panetto” needs to have sort of rectangular shape. The most used technique for high hydration dough is “Arletto” https://www.youtube.com/watch?v=gEAWrrfUWRE then it is left to rise in a tray (covered), never in the pan, unless you want a focaccia, as you said.
Hey there! I love using your recipes! I am just wondering if this recipe can be used to make round pizzas on my pizza steel instead of the sheet pan? It’s appealing since it’s a one-day dough! Thank you!!
Yes, it could absolutely be used that way!
Came out great. Reminds me a little of what folks out on Long Island call a Grandma pizza. Appreciate your detailed instructions, thanks.
Super glad to hear that! Yes, I’ve heard it called that as well, although I think that’s typically thicker? Either way, same principles apply! Enjoy 🙂
I’ve not tried this, but I know others have frozen the dough just after balling it up before spreading it out!
Hi, with all the recipes I have successfully baked from The Perfect Loaf, this one completely eludes me. My dough doesn’t get a good rise in the oven. It’s flavorful but it’s a little doughy and flat, but not entirely. It browns nicely. I do an overnight retard, then take it out about 45 minutes before I’m ready to bake. I haven’t tried doing it all in the same day. I am using double zero flour and the extra fancy semolina flour. Any suggestions? Thank you for all the great work you do Maurizio! I just became a member and I’m looking forward to more baking with you in 2022!
Hey, Linda! Did I reply to you in the TPL Member chat? If so, let’s take this convo there!
Hi @maurizioleo:disqus Looking forward to this one! I’m doubling the recipe and making two. Would it be better to divide before or after proofing? I’m leaning towards before.
As long as it goes far enough in bulk it’ll be fine to divide after that point!
Thank you so much for this amazing recipe! The dough is beautiful every time I have made it. My only issue is that the bottom seems to be way too crispy/hard. I bought the special pizza pan you recommended and I also am using the baking steel. Any suggestions?
You’re very welcome, Kellie! If it’s too crispy, I would reduce the preheat time and/or temperature of the baking steel so it’s not quite as hot. Alternatively, you could try reducing the total bake time—as long as the top is fully cooked you can pull it out!
@maurizioleo:disqus first time caller, long time listener. at the expense of sounding silly, is there a benefit to doing an autolyse here, w/ the high-ish hydration?
Hey there! Not silly at all. You could certainly do an autolyse with this dough if you’d like. It might help reduce mixing time for you. With pizza, I don’t usually do an autolyse since I push the water a bit and I use my mechanical mixer to get the dough started, but it wouldn’t hurt!
This turned out fantastic! I was so worried about how slack the dough was – but the oven spring was incredible. I made a Detroit-like pizza in a Lloyd pan with lots of cheese. Just amazing. Extra hour in proof and moved to my proofer at 78 for the final 2 hours.
Awesome, Kathi! Yes, it’s definitely a higher hydration dough, but that pan makes it totally workable. Enjoy!
Hi maurizio,
I mixed the dough and put it straight in the fridge for 3 hours. Then i realized i was supposed to bulk ferment it first🤦♂️ I have pulled it out and im currently doing stretch and folds. Will it still work? Im not baking it until tomorrow.
Might still be ok! Leave it out to get warm and do some room-temp fermentation time and it should bounce back.
Hi Maurizio
I have made this many times now. But almost every time it sticks to the tray. I have used different trays, greased with oil or flour. Is there something I am doing wrong? Is the dough to wet or have I not cooked the base long enough? Or is my oven temp wrong?
Thanks Joe
I had the same problem so I know how frustrating it is after all the effort you put into it. I partially solved it by seasoning the pizza trays, and then placing the tray with the dough at the bottom of the oven at the highest temp for a few minutes, then move it to the medium or top rack. Yet sometimes it will still sticks to the tray, especially with high-hydration doughs.
I wasn’t sure whether to grease the pan, but my pan is kinda old so I did it anyway. Pizza isn’t done cooking yet so we’ll see how it turns out, but I thought it might be helpful to clarify yes or no in the recipe.
I made this today and followed the timing pretty close. The finished pizza is quite dense and chewy and the bottom didn’t brown much at all. The dough was VERY hydrated, sticky and loose. I’m wondering if I should have reduced the water for the humid environment I’m in. Maybe I over-proofed or might be my starter. I used Bob’s Red Mill Semolina flour, which might not be fine enough. I’ll have to keep experimenting.
It sounds like your dough is most likely over hydrated—your flour likely isn’t able to take on quite a much water, and that’s ok! Try reducing the hydration by 5% and give it another go—the reduced water should bring strength to the dough and you’ll feel it immediately. Once you find a suitable hydration, you can try to push it back up (if desired), but as you do, take note of how the consistency of the dough changes: the dough will start to slacken out as you add more and more water, this means you’ll likely have to mix more upfront or add another set or two of stretch and folds during bulk fermentation.
Drop the water a bit next time and let me know how it goes!
Ange, I had same problem of stiff dough with using semolina flour, even if 50/50 with regular flour. Best flour for pizza is regular or 00 flour, with little percentage of something else (WW, semolina, durum…)
I’ve tried to make regular circle pizza and it was really hard. Using only 00 flour made it much easier to strech.
Hope it helps.
Regards
try this:
– reduce the amount of ingredient to end up with 600g dough for a 30×40 cm pan
– add 75% of the water at the beginning and the last 25% slowly while mixing
– do a real pre-shaping, which means shape the “panetto” at the end of bulk fermentation and let it rise
Hi Maurizio, I’m interested in trying to bake this recipe on our gas grill. Do you have any tips? Or would this just be a total disaster? I’ve had great success with this and several other of your recipes over the past few months – thanks so much for the time and energy you put in here.
Hey, Rachel! I’ve done this in the past, and it works just fine! I should also say, I just put the stone in there and preheated it to max temp. Once the stone is hot, load the pizza and close the grill. Try not to open the grill too often so the top cooks around the same time as the bottom.
If using this gas grill method, assuming the pizza still gets cooked in the baking sheet (on top of the stone), opposed to the dough going directly on the stone? Want to make sure I’m understanding correctly. TIA!
That’s right, place the baking stone/steel on the grill grate and preheat it as you would your stove!
I’m at 7100’/2160m elevation, and a very dry climate. Any suggestions on modifications of the bread formula? Thanks!
The hydration of the dough will likely be ok, but you will probably need to increase the baking time and/or temperature to ensure your pizza is fully baked through. You’ll have to go by how it’s progressing in the oven!
Also, check out my guide to baking at high altitude for more general tips!
hello Maurizio, thanks for the recipe and description. I have a question about the durum flour. You say durum flour, but it’s not that i can homemill my durum wheat, right? I have a Mockmill and i have durum wheat kernels, but what you mean is durum semolina flour = the flour from the kernel of the durum wheat. Is that correct? I get a bit confused with durum and semolina… I used fine milled durum but the pizza and in another recipe focaccia turned out a little bit greyis in colour and i cannot say it tasted better then with the white flour only.
If you mill your own durum it will be whole grain durum wheat, which would be nice in this dough, I’d say! However, the durum flour I’m using is very finely milled and sifted, meaning it’s not whole grain. Semolina is coarser milled durum wheat, typically used for pasta. If you are up for experimentation, I’d say try milling your own durum and use that! The taste will be awesome.
Hi! How would you go about cooking this in the roccbox? With a pan?
Hi! How would you bake this in the roccbox? Or would you advise against it?
You could certainly do it, but you’d have to really pay attention to heat management (when are we not doing that, though!?). I’d likely turn the heat down significantly when I slid in the pan to ensure the top doesn’t overcook while the bottom remains soft. So, preheat the oven until the deck is fully hot, slide in your pan, then drop the temp very low. Check the bottom of the crust by lifting out the dough occasionally, then turn up/down the heat to time things so both bottom and top are finished at the same time.
I’ll give it a try right now. Thanks for the quick reply!!
hi maurizio.
pizza alla taglio is amazing. im making it again for a few guests on monday and had a question for you. i recently read that if the final proof is going to be done in the fridge we should let dough almost double before putting it in the fridge. what are your thoughts?
Hey, Stefano. I’ve never called for a doubling—I think that might push this dough too far, it might over proof if you went that far and then retarded (placed into fridge for proof)!
ok. thanks for the response!
Hi Maurizio! Thank you for providing us with such detailed content and inspiring many with your bakes.
Was wondering if you have any experience par-baking the dough? By that I mean taking the pan out of the oven after 10 minutes, then plopping it back in 15 mins before serving. Since I’m trying this recipe for the first time I want to have time to come up with a plan b if it appears to be disastrous, but I also want to serve it warm lol..
Hey, Emma! Should be just fine doing that, especially with this dough.
Hey Maurizio! Can you do a shortened proof in the fridge? I mixed the dough a little earlier than the schedule calls for, and I want to bake the pizza a bit later. Should i let it proof for, say, an hour on the counter, then put it in the fridge, then let it warm up a half hour before baking? Thanks!
Yes, absolutely (and I’d do it exactly like that). I do this same thing often when I have to adjust for dinnertime. Enjoy, Timothy!
That worked really well, huge thanks!
Hey there,
I love this recipe as it requires very little planning and can be done within 24h. It is a totally different pizza to your other recipe, but both have their time and place.
BUT!!! I always screw up the stretching of the dough and tranfer to the tray. I end up with thick dough areas and really thin / sometimes torn areas in the pizza.
Please please please, could you post a video of this part of the process? It would be very useful.
thanks a bunch!!
Glad to hear that, Phillip! And yes, you’re right, it’s easy to throw together and have fresh pizza by the evening. Yes, I’ll work on a video of this, you’re right it takes a bit of practice to get that right.
FWIW, I just stretched my dough directly on the cold baking tray. I dusted the cold tray with durum flour first, then just pulled the dough out of the container on to the tray. I didn’t get quite the same dramatic lift and big bubbles as Maurizio does, which is possibly attributed to the cold tray (but also possibly attributed to me not being Maurizio haha). Easily the best pizza I’ve ever made and will replace all other pizza recipes even with the cold tray modification.
Right on, glad to hear it worked out well even with those mods!