

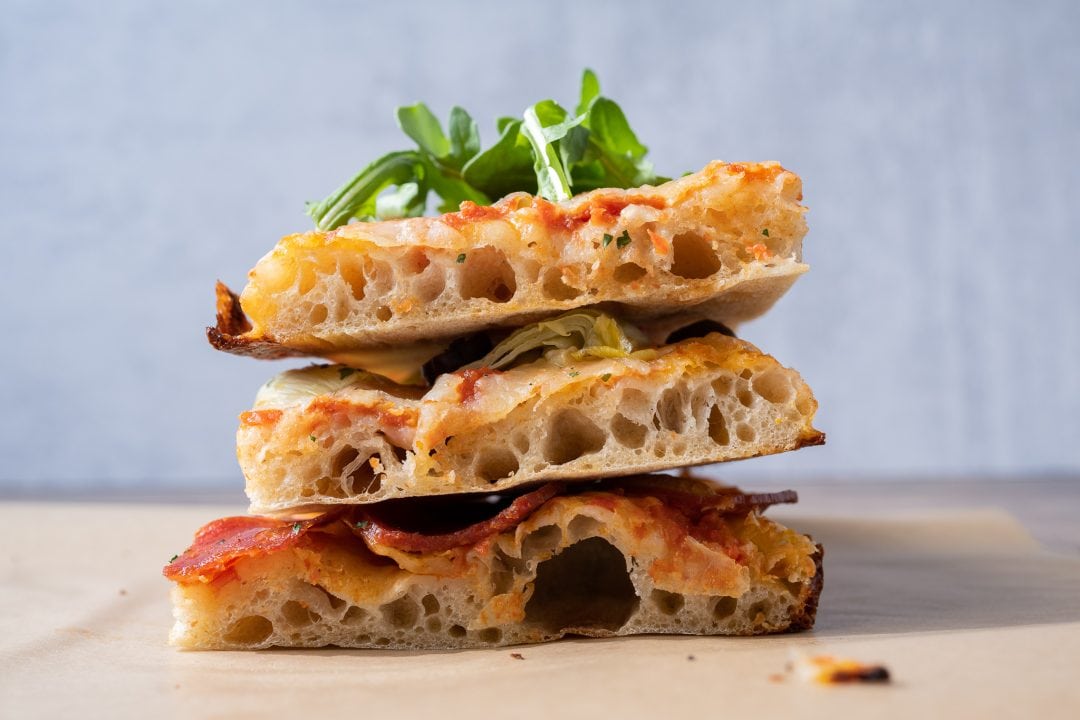
There must be a word for the way a fleeting thought of pizza for dinner creeps in and quickly sprouts into a full, blinding desire—the single-minded resolution that pizza is the only option, the only thing that will satisfy. I sometimes wake with the idea of pizza for dinner firmly rooted, and there’s no excising that stubborn weed. Thoughts of scattered melted cheese, plump tomatoes, olives, pepperoni… The simple idea of that harmonious blend of flavors and textures motivates, eventually ushering pizza to the dinner table—again. You know it’s getting worse when the kids ask, “Can we have something else tonight?”
The recipe for this sourdough pizza al taglio is based on the pizza recipe
in my new cookbook, The Perfect Pizza.
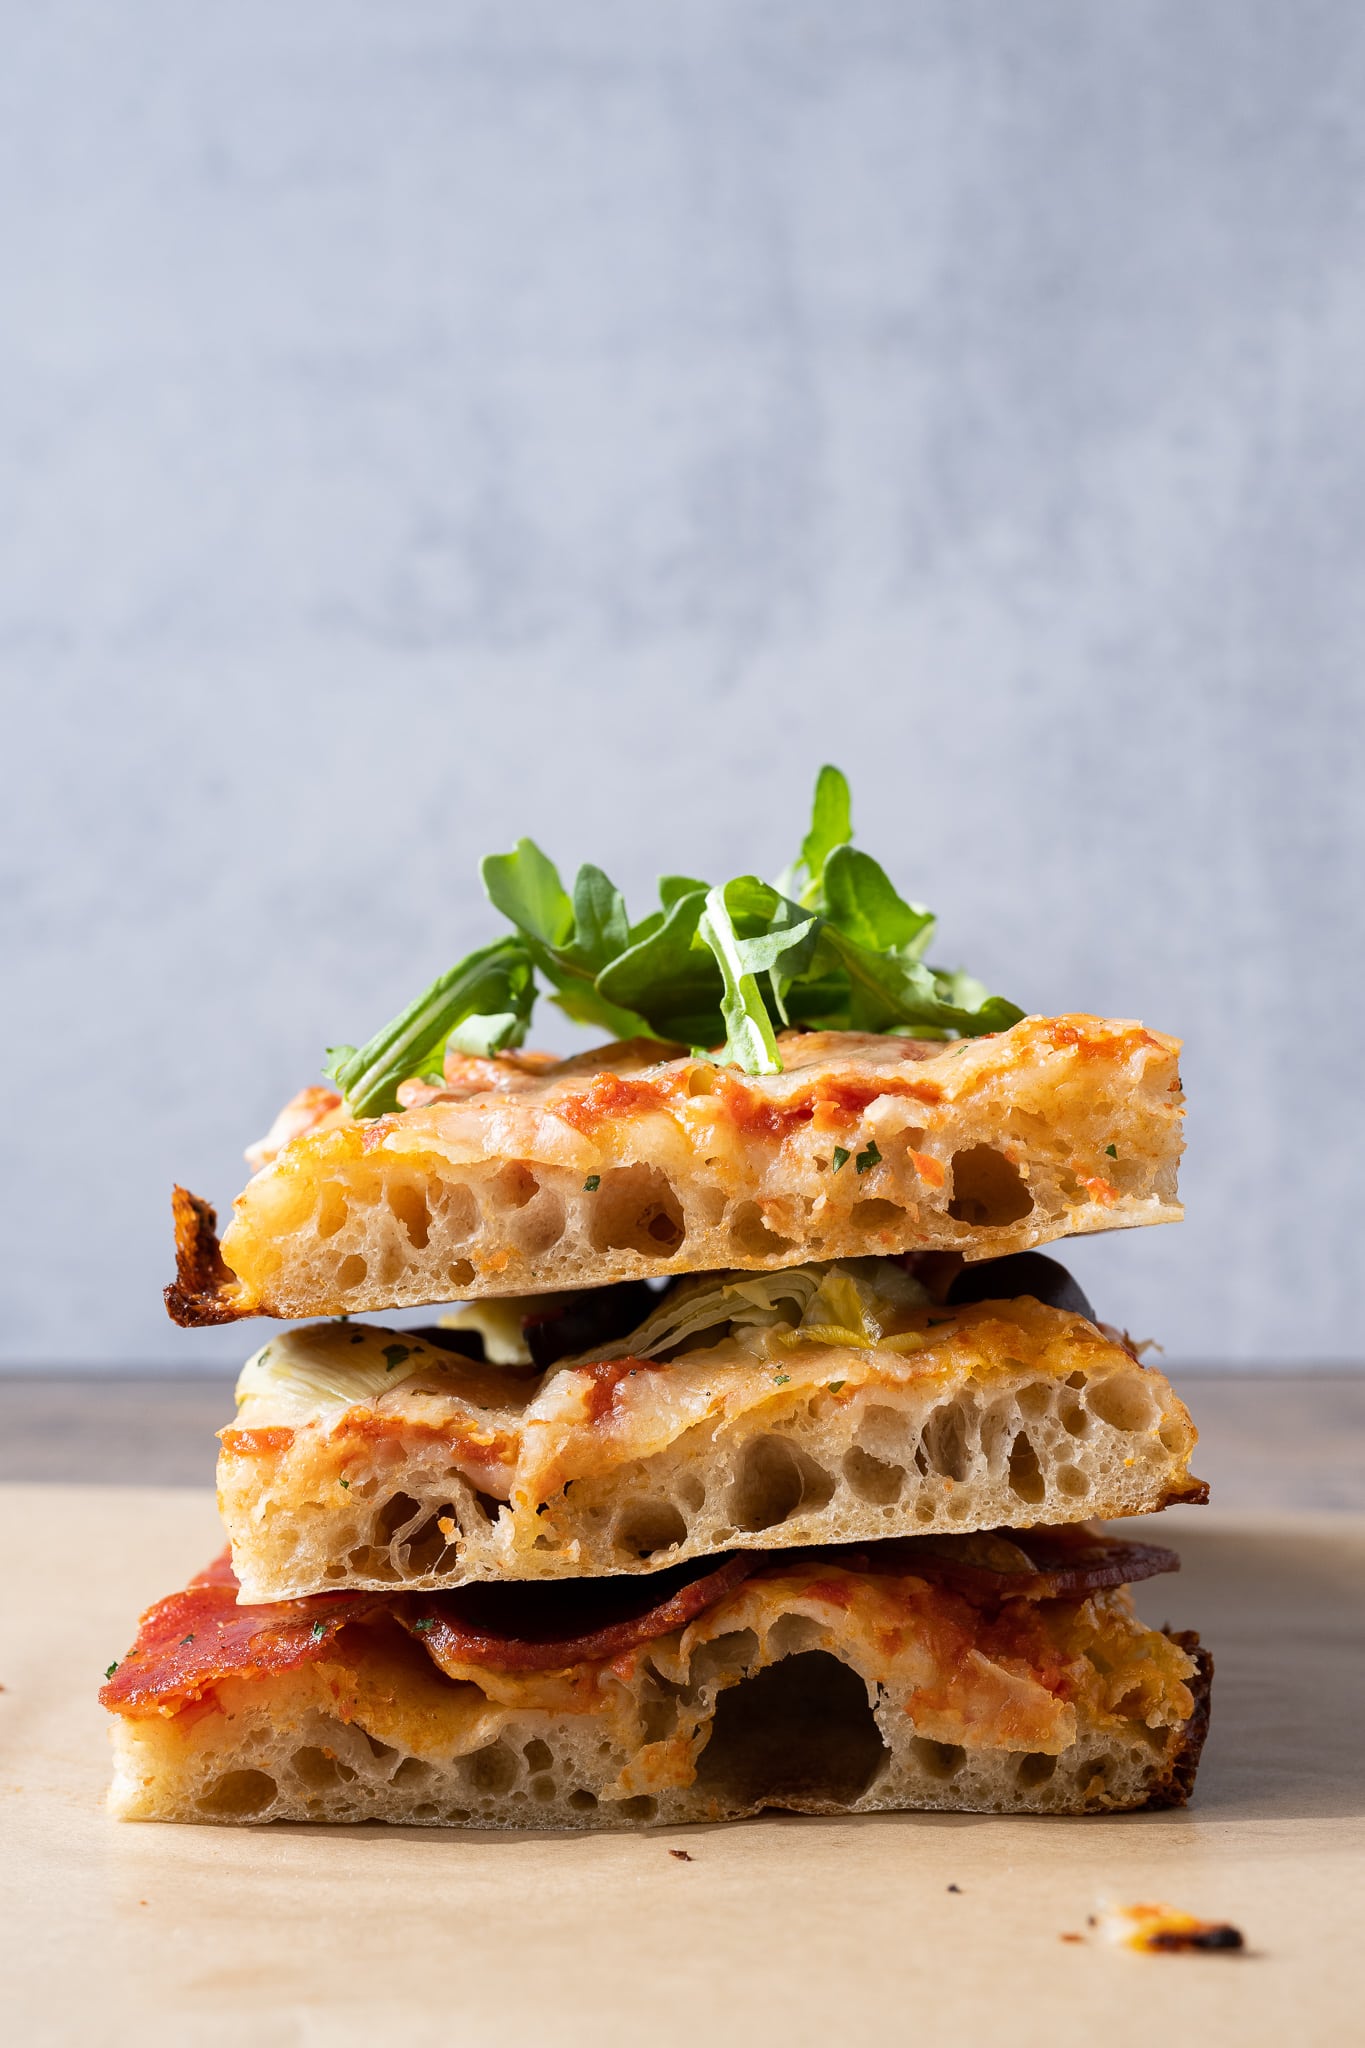
And I’ll come right out and say it: this sourdough pizza al taglio has been stealing the pizza spotlight for so long I’ve all but forgotten how to shape dough round-like instead of rectangular-like. The balance will likely shift once warmer weather arrives, but regardless, there’s a permanent, well-deserved spot in my pizza repertoire for this style. Since I started making rectangular pizzas in a sheet pan, I’ve been hooked on its simplicity and deliciousness. It results in a pizza with a thin and crispy bottom crust, a tender interior, and an overall lightness thanks to strong fermentation and high water content—a perfect contrast of textures.
I’ve been chatting with other bakers about this pizza for a while on The Perfect Loaf’s Discord server, and we’ve all expressed our love for easy pizza in an alternative form. And as we’ve collectively pointed out, a rectangular sheet pan pizza is a crowd-pleaser thanks to easy slicing, flexibility in topping choices, and the ease of doubling or tripling the recipe.
Real quick: Why I Like This Sourdough Pizza al Taglio
- Hands off: there’s very little dough handling
- Use what you have: you can top it with literally anything in your fridge or pantry
- Flexible schedule: the pizza can be made all in a single day or the dough can be refrigerated overnight for pizza the next day
- Great for gatherings: a single sourdough pizza al taglio can feed a large crowd (and kids love it)
Remember, there’s a distinct difference between focaccia and this sourdough pizza al taglio, or pizza by the slice. Whereas focaccia spends most of its time rising directly in the pan it will be baked in, this rectangular pizza spends its time rising in a bulk container and is then shaped into a rectangle just before it meets the oven.
But also, this is thinner (and definitely thinner than Detroit-style pizza) and less pillowy-soft. A prominent crunch at the bottom crust sets this pizza apart.
Flour Selection For The Perfect Sourdough Pizza
This sourdough pizza al taglio is adaptable and flexible. I like to add 15% (to the total flour weight) of finely milled durum flour to usher in all the wonderful flavor and aroma of durum. Durum is a wheat species used heavily for pasta-making, but it often appears in pizza doughs (for more, check out my guide to durum flour).
For bread-making, you typically want to use finely milled durum flour (as I do in my Sicilian bread with sesame seeds), sometimes labeled as “extra fancy” or “semolina rimacinata.” One of my go-to sources is Molino Grassi extra-fancy durum semolina, right from Italy. If you’ve never baked with durum, it adds an incredible flavor to pizza and bread alike—and you can use it to make fresh pasta.
If you don’t want to pick up durum, feel free to substitute the 15% in this recipe for the same weight of whole-grain spelt, khorasan, whole wheat, or even just more white flour. As I mentioned, this recipe is super flexible, and the result will be great with whatever grain flavor you’d like to explore.
If you’re looking for another place to use durum, have a look at my sourdough focaccia Pugliese, which has durum (and potato!) added to the dough for a little more color and flavor.
Sourdough Pizza Pans
I love using the LloydPans “grandma” style pan for this pizza al taglio, and I’m so impressed with its performance that I’ve switched from using my sheet pans and haven’t looked back.
LloydPans has a nonstick coating that still yields a crispy crust and beautiful bottom color. I’m not usually a fan of using a nonstick coating on anything, but with these high-quality pans, the coating is not scratchable and doesn’t decrease performance—and they’re made in the USA. The pan itself is also extra thick for added strength, and the sides aren’t so tall that you’re venturing into deep-dish pizza territory. They’re just awesome.
Highly recommended: LloydPan 12×16-inch Grandma Style Pizza Pan
Baking Schedule
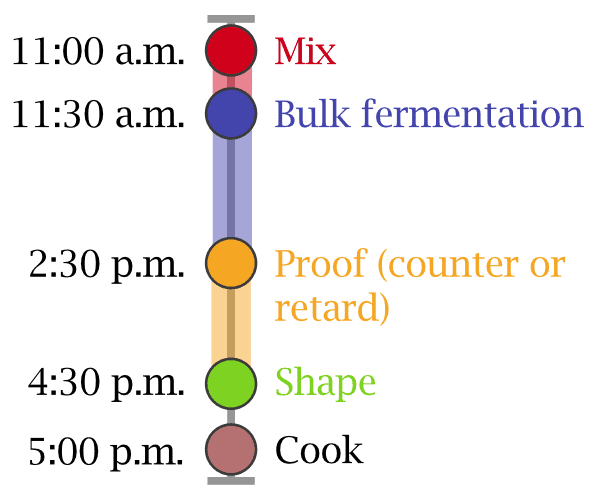
I typically make this sourdough pizza al taglio all in a single day. I start mixing in the morning when my sourdough starter is ripe, and then I have a fresh pizza ready by dinner time. But you can easily extend this to two days by placing your covered bulk fermentation container in the refrigerator right at the start of the two-hour proof. The next day, when you want to make the pizza, take it out, let it warm up for 30 to 45 minutes, and shape it out to cook in the oven.
Sourdough Pizza al Taglio Formula
Vitals
| Total Dough Weight | 900 grams |
| Hydration | 69.0% (plus 2.5% from olive oil) |
| Pre-fermented Flour | 9.0% (83g of sourdough starter is used for this recipe, and my starter is approximately 50% flour. ((83/2)/461 total flour) * 100 = approximately 9%.) |
| Yield | One 12 x 16-inch rectangular pizza |
This recipe makes a single, large sheet pan pizza; if you’d like to make two, double all the ingredients.
Total Formula
Desired dough temperature: 78°F (25°C). See my post on the importance of dough temperature for more information on dough temperatures.
| Weight | Ingredient | Baker’s Percentage |
|---|---|---|
| 400g | Type 00 flour or All-purpose flour (Central Milling Type 00 Normal or King Arthur Baking All-Purpose) | 85.0% |
| 71g | Durum flour, extra fancy or semolina rimacinata (Molina Grassi Extra Fancy Durum Semolina or Central Milling Durum Flour Extra Fancy) | 15.0% |
| 12g | Extra virgin olive oil | 2.5% |
| 324g | Water | 70.0% |
| 9g | Fine sea salt | 1.9% |
| 85g | Sourdough starter | 18.0% |
Additional Ingredients
| One 28oz can of whole peeled tomatoes (I like Bianco DiNapoli or another San Marzano style) |
| Mozzarella cheese (low moisture, shredded) |
| Extra virgin olive oil for drizzling on top of the pizza |
| Any pizza toppings: pepperoni, black olives, artichoke hearts, jalapeños, etc. |
Sourdough Pizza al Taglio Method
1. Mix – 11:00 a.m.
I like to mix this rectangular pizza dough in my KitchenAid stand mixer, but you could use a larger bread mixer or mix and strengthen the dough by hand.
To the bowl of a stand mixer, add the flour, water, salt, and ripe sourdough starter. Mix on speed one for 1 to 2 minutes until the dough comes together, and no dry bits remain. Then, turn the mixer up to speed two and mix for 5 minutes.
Let the dough rest in the mixing bowl for 10 minutes.
Turn the mixer on to speed one for 1 minute, then slowly drizzle in the olive oil with the machine running. Once all the oil is added, turn the mixer to speed two and mix for 2 to 3 minutes until all of the olive oil is absorbed and the dough is cohesive.
The dough will still be shaggy and very soft but not soupy or excessively wet at the end of mixing. Transfer the dough to a container for bulk fermentation and cover.
2. Bulk Fermentation – 11:30 a.m. to 2:30 p.m.
At warm room temperature, around 74-76°F (23-24°C), bulk should take about 3 hours. If your kitchen is cooler, place your bulk container in a small home dough proofer, or extend the bulk fermentation time to give the dough more time to ferment. This dough needs three sets of stretch and folds, spaced out by 30 minutes, during the 3-hour bulk.
This is a wet and extensible dough, so I like to give it three sets of vigorous stretch and folds. After the first 30 minutes in bulk fermentation and using wet hands, grab the north side of the dough in the bulk fermentation container and stretch it up and over to the south side. Then, grab the south side of the dough and stretch it up and over to the north side. Repeat in the east to west and west to east directions for a total of 4 folds.
Give the dough two more sets of stretch and folds at 30-minute intervals. After the last set, let the dough rest in the container until the end of bulk fermentation.
3. Proof – 2:30 p.m. to 4:30 p.m.
At this point, there’s nothing to do: continue to let the dough proof in the bulk fermentation container for 2 hours at room temperature.
About an hour into proof, begin preheating your oven with a rack in the middle to 500°F (260°C) and with a baking surface—I like to use my Baking Steel—inside on the rack.
Overnight proof option: Instead of proofing the dough on the counter for two hours, you can place the covered bulk fermentation container into the fridge to proof overnight. The next day when you want to make the pizza, remove the container and let it warm up for 30 minutes or so. The dough should be warm to the touch, well-risen, and very soft. After it’s warm, proceed with the steps below.
4. Prepare Sauce and Shape – 4:30 p.m.
Prepare Tomato (Pomodoro) Sauce
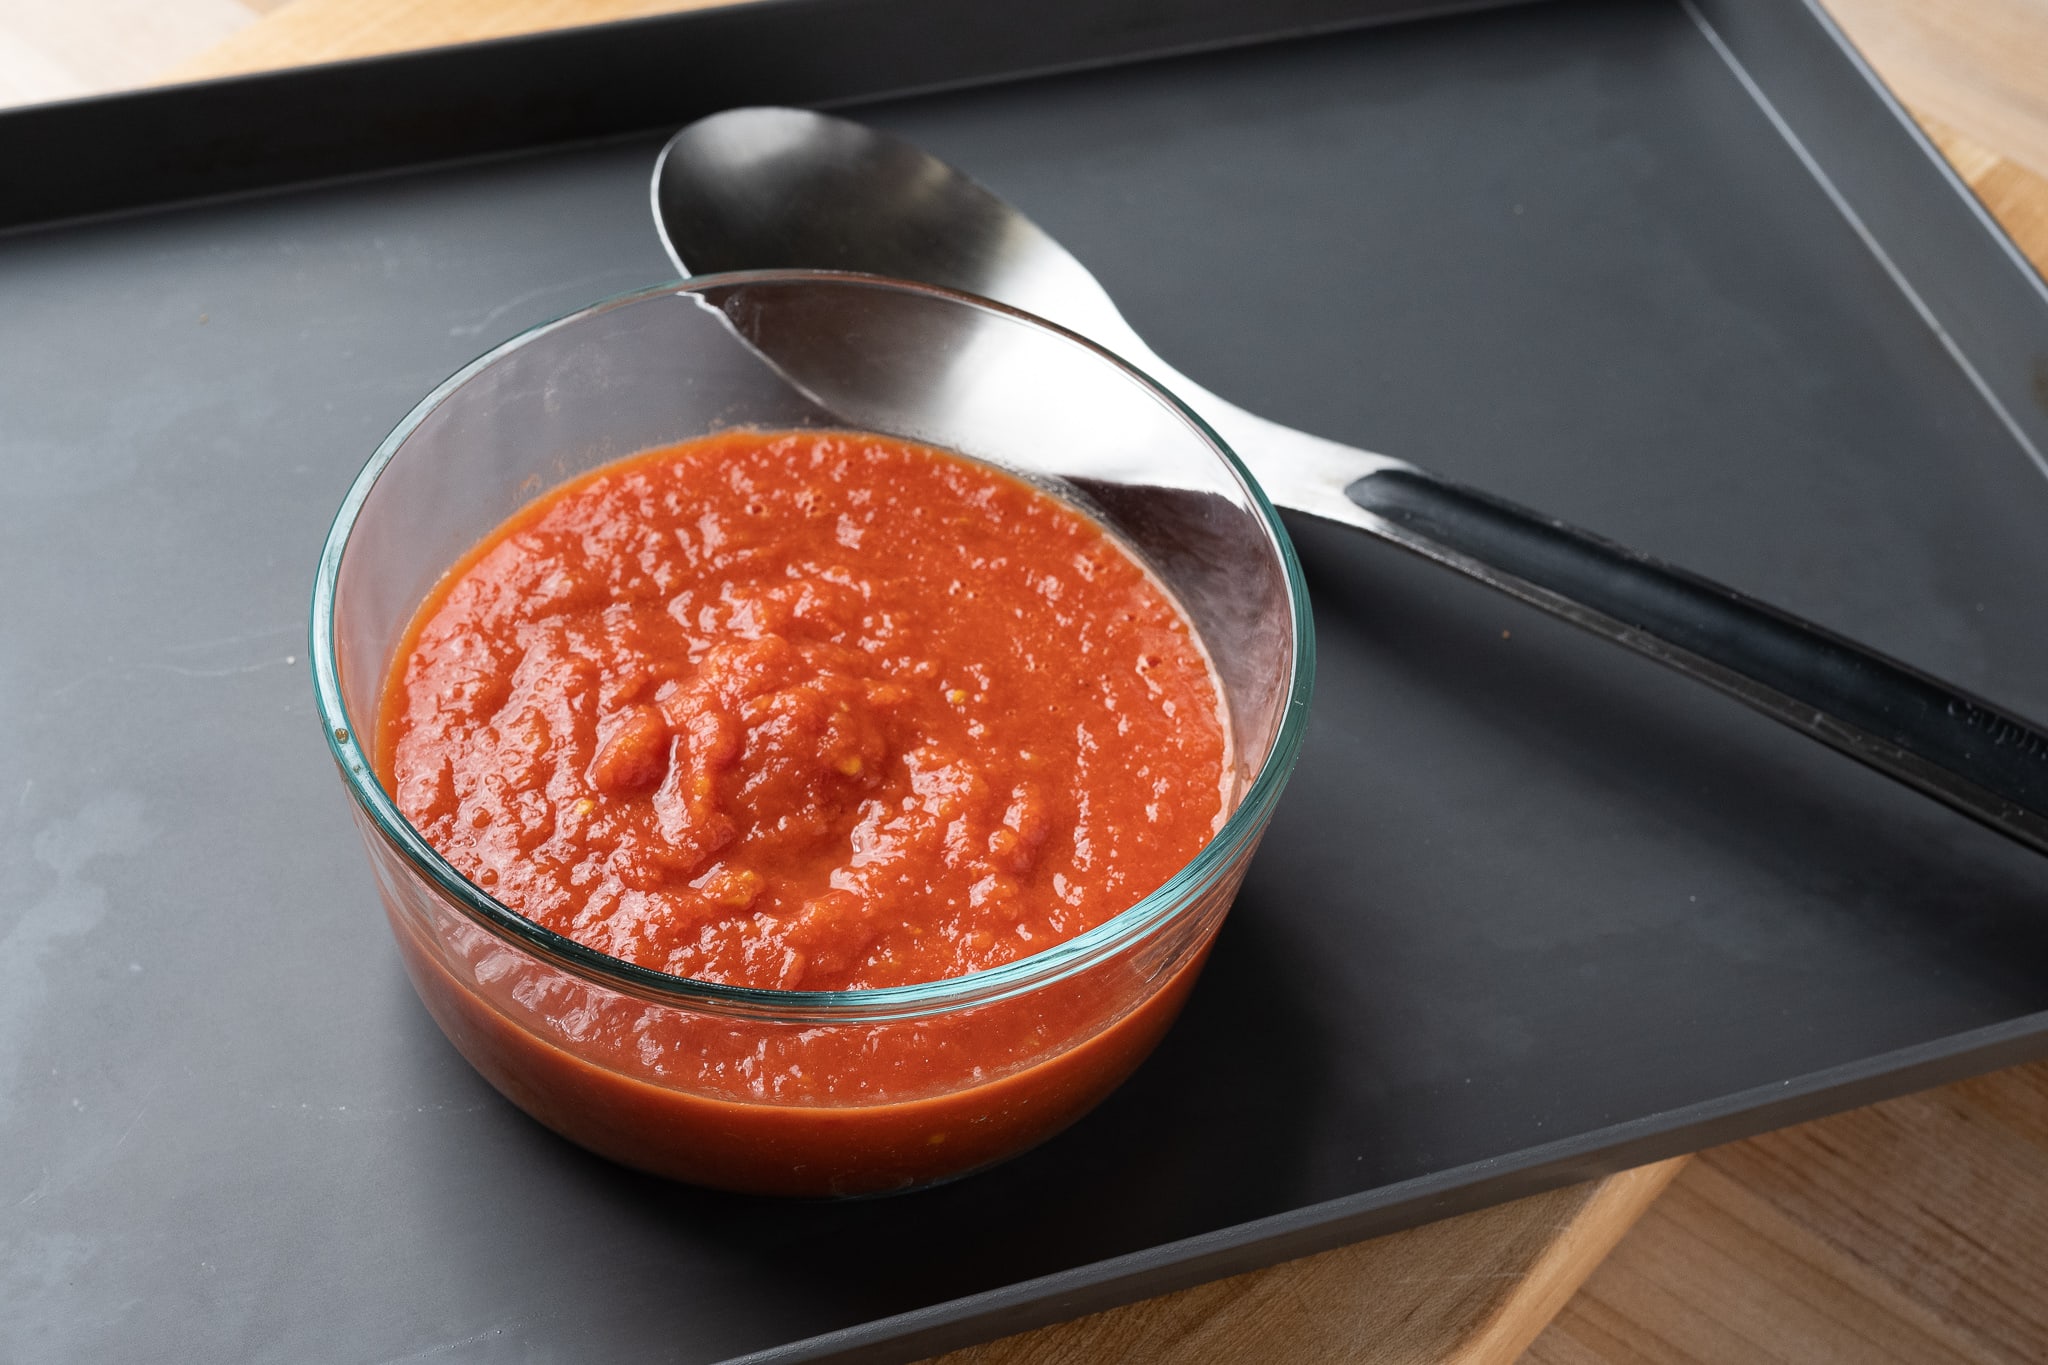
This sauce is very similar to my basic Pomodoro sauce on my other sourdough pizza post. Open a 28 oz. can of whole peeled tomatoes and drain the liquid in the can (you can save this to make pasta!). Place the tomatoes in a blender with about 1/4 teaspoon of dried oregano, 1/2 teaspoon of salt, and a dash of extra virgin olive oil. Blend until smooth but not excessively frothy. I like my sauce for sheet pizza to have a little texture to it, not completely smooth.
Set the sauce aside until you’ve shaped out the dough.
Shape Dough
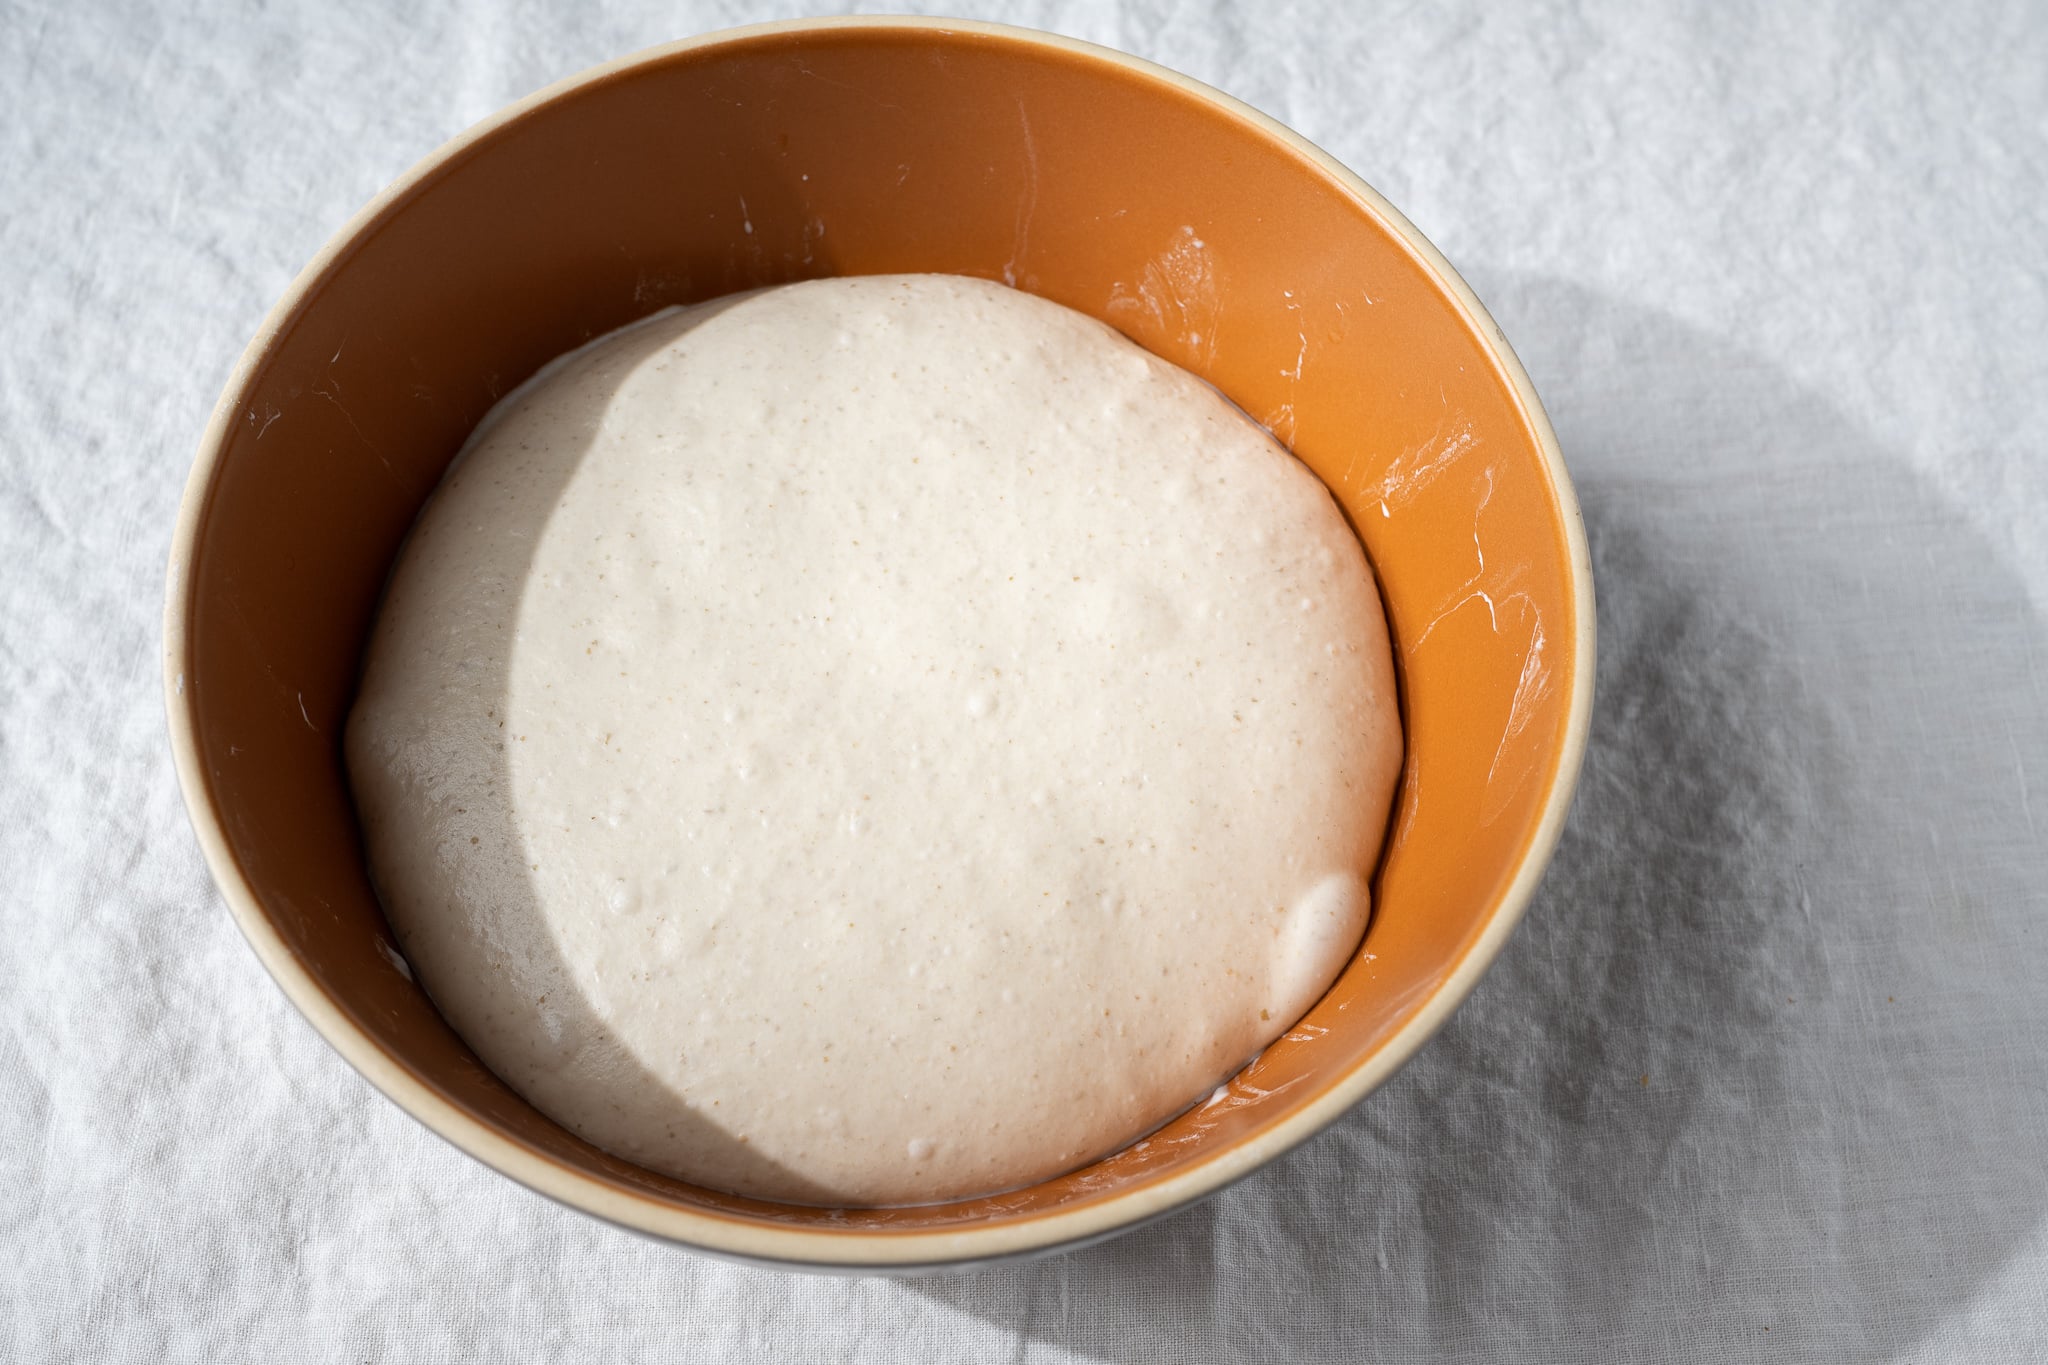
At the end of proofing, your dough should be well-risen, smooth, and very soft to the touch (see below). You should see signs of strong fermentation, but not a dough that’s extremely bubbly or very weak in texture. If the dough is a little under-fermented, give it 15 more minutes and check again.
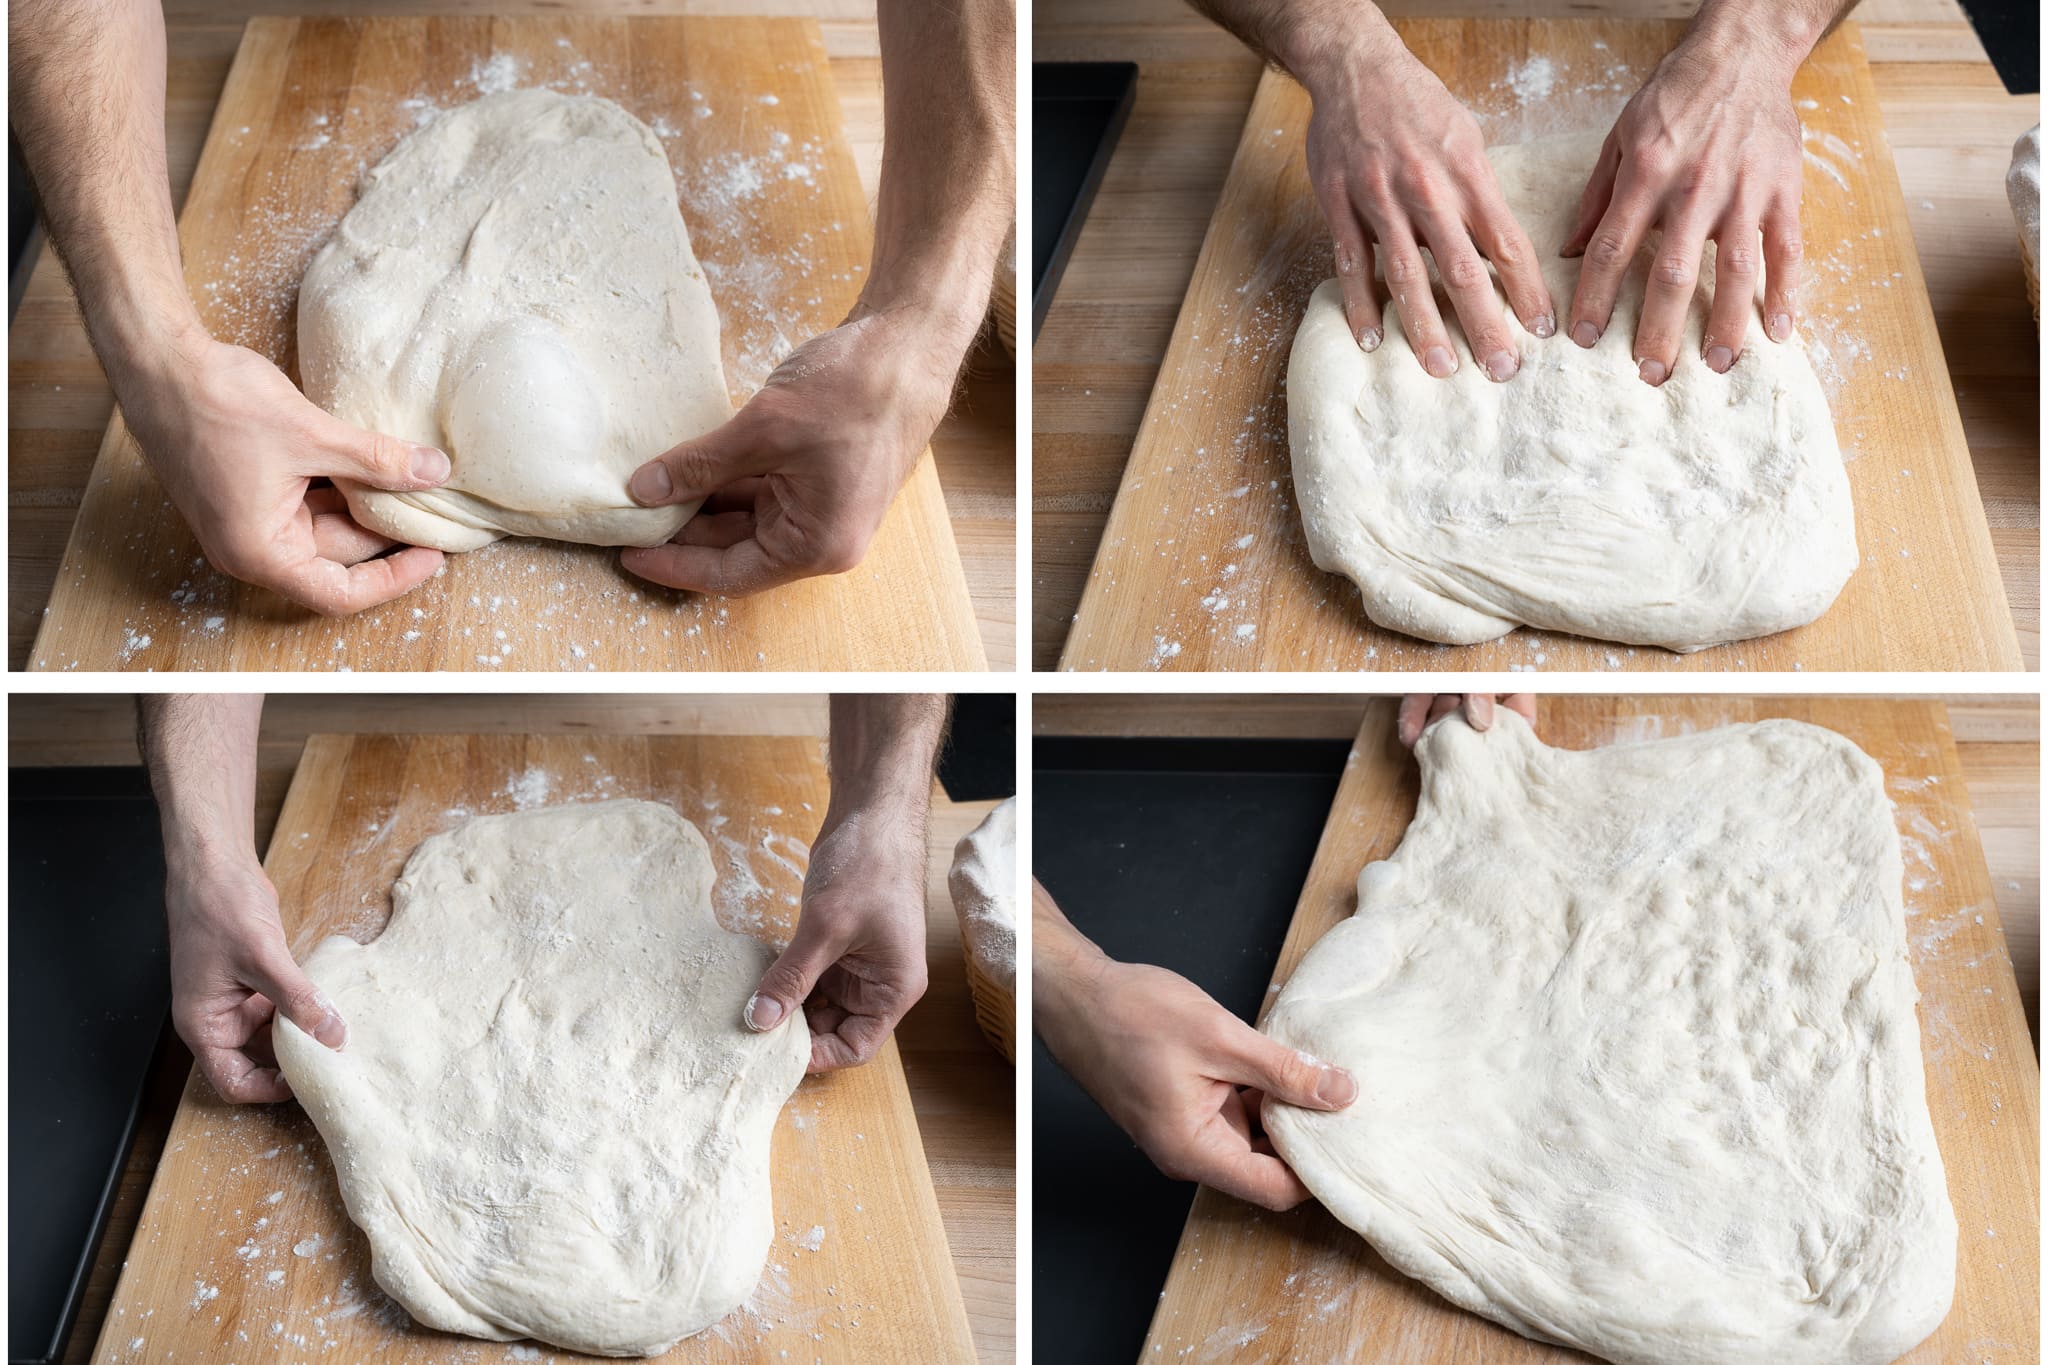
There are really two ways to shape pizza al taglio, and I love using the method shown below in my video. Essentially, you press out the dough in a half sheet pan, then drape it over your arms as you transfer it over to the final baking pan.
Note that my sheet pan is nonstick. If you don’t have a nonstick sheet pan, you may want to oil your pan to prevent sticking!
Alternatively, you can press out the dough on a large cutting board, then drag it over.
I shape this dough on a large raised cutting board so I can set the sheet pan alongside and drag the dough right in. Alternatively, shape it on your counter and pull it over the edge into the pan, or drape it across your arms and gently transfer it.
Be gentle. The dough should be soft, extensible, and spread easily, so avoid yanking it outward or pressing hard enough to tear holes. If it resists, let it rest a few minutes between stretches, and use as much flour as you need to keep it from sticking.
Liberally flour your work surface, scrape the dough out, and flour the top. Dimple it from end to end with your fingertips, then gently grab the sides and spread it outward, working the top and bottom until you’ve coaxed it into a rough rectangle. It doesn’t need to match your sheet pan; you can finish stretching once it’s in.
8. Cook – 5:00 p.m.
At this point, your oven with the baking surface inside should be preheated. Cooking this sourdough pizza al taglio is done in two phases:
Step 1: Spread Sauce and Parbake Dough.
After shaping the dough, spread the tomato on it, then slide the pan onto the baking steel, now preheated in the oven. Turn the oven down to 450°F (230°C) and cook for 10 minutes.
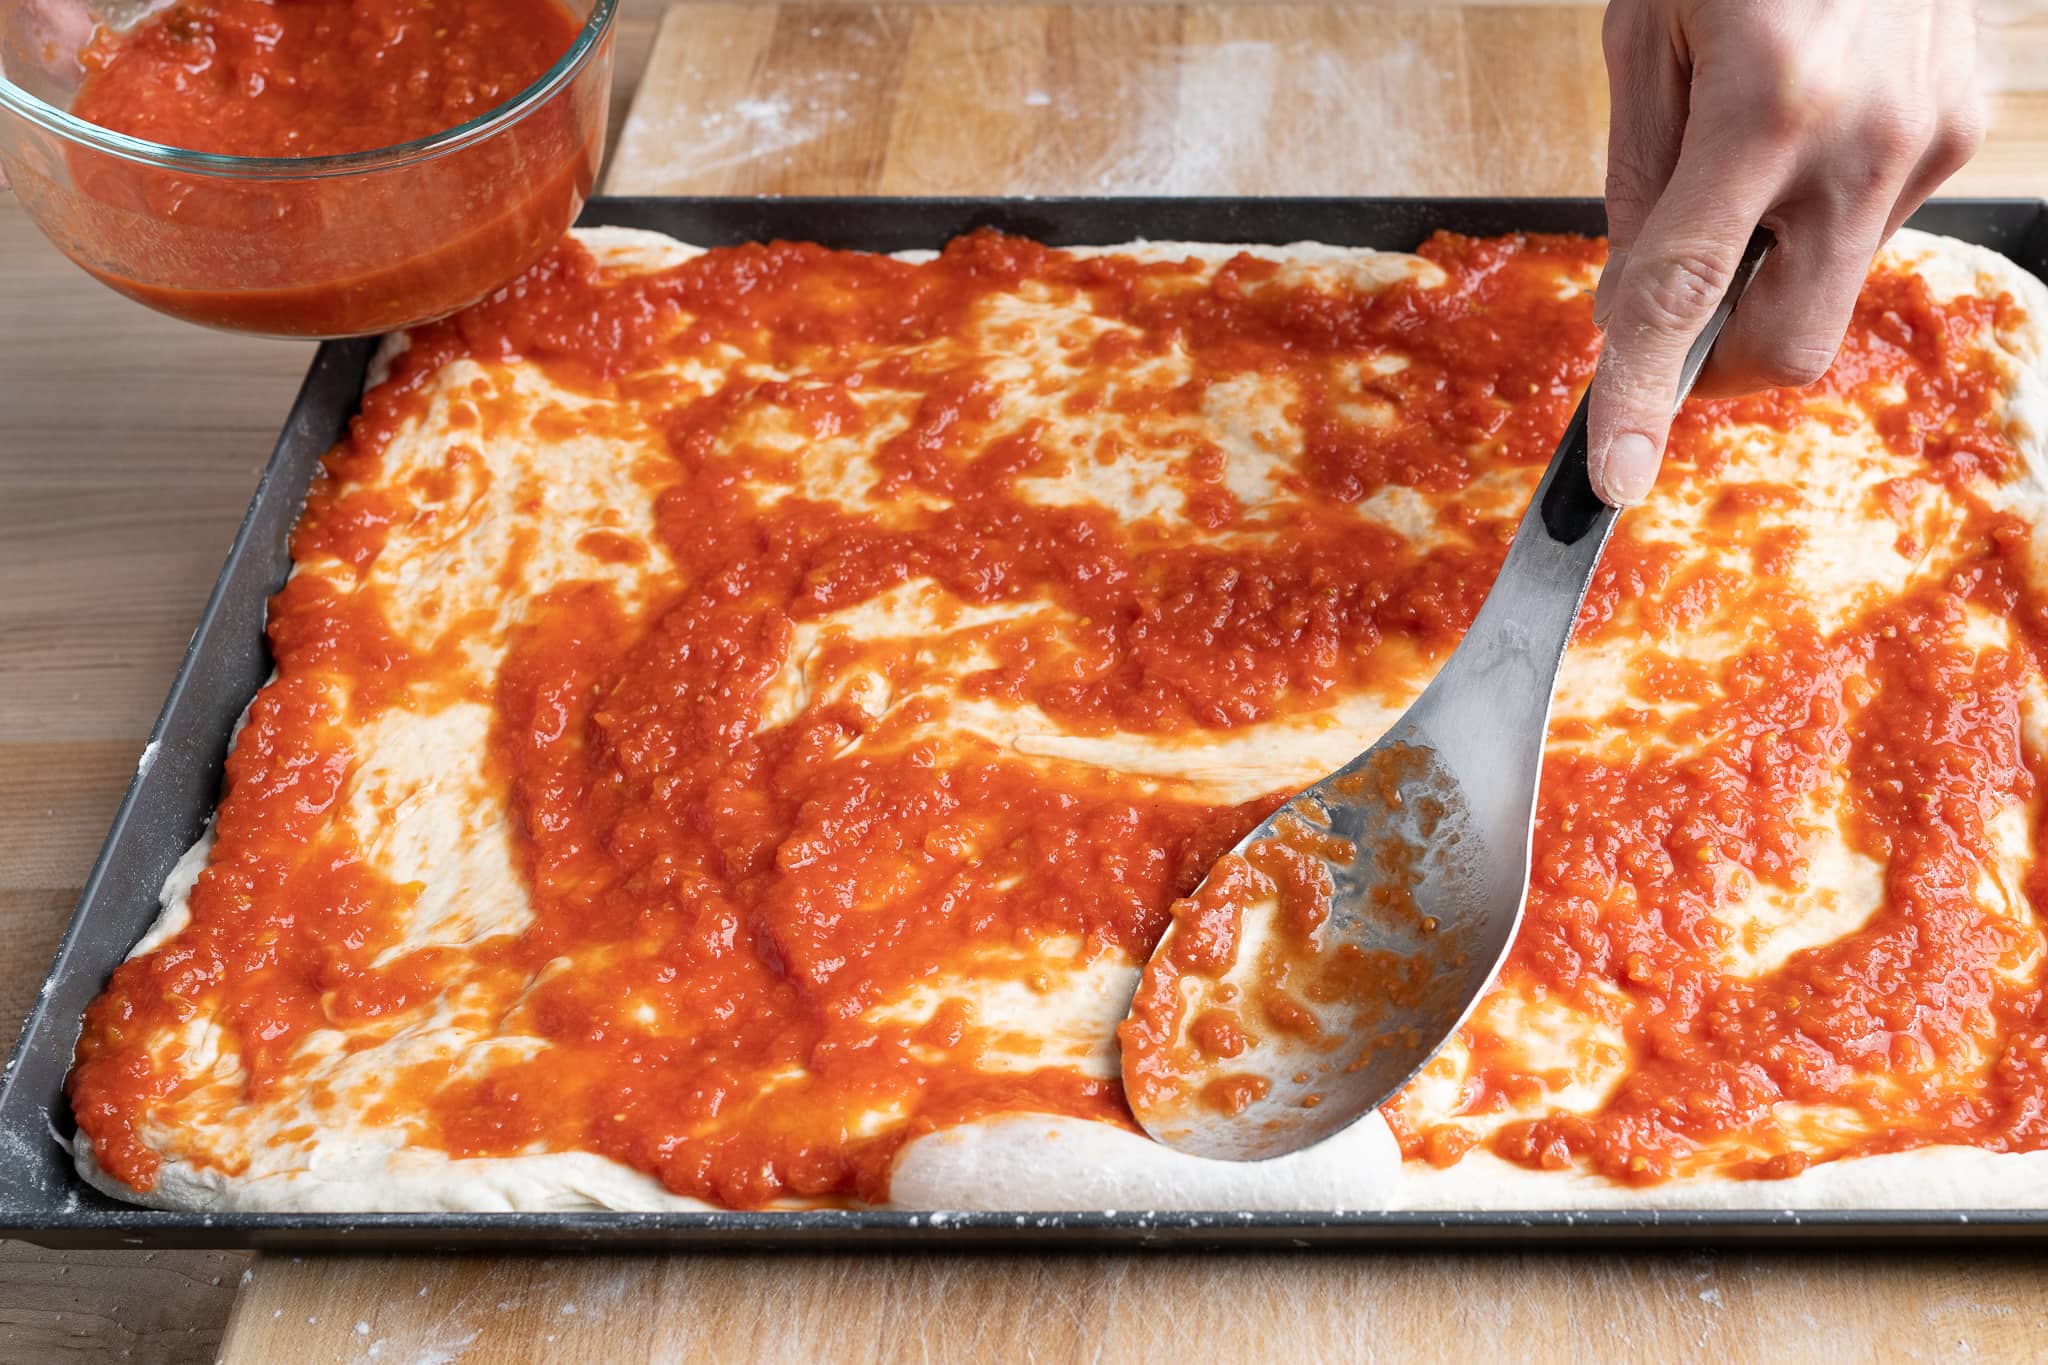
Once the dough is stretched to fit the pan and the tomato sauce is spread in an even layer (as seen above), slide the pan into the preheated oven, right onto your preheated baking surface. Turn the oven down to 450°F (230°C) and bake for 10 minutes.
Step 2: Spread Toppings and Finish Cooking.
Carefully remove the pan from the oven and place it on a heat-proof rack.
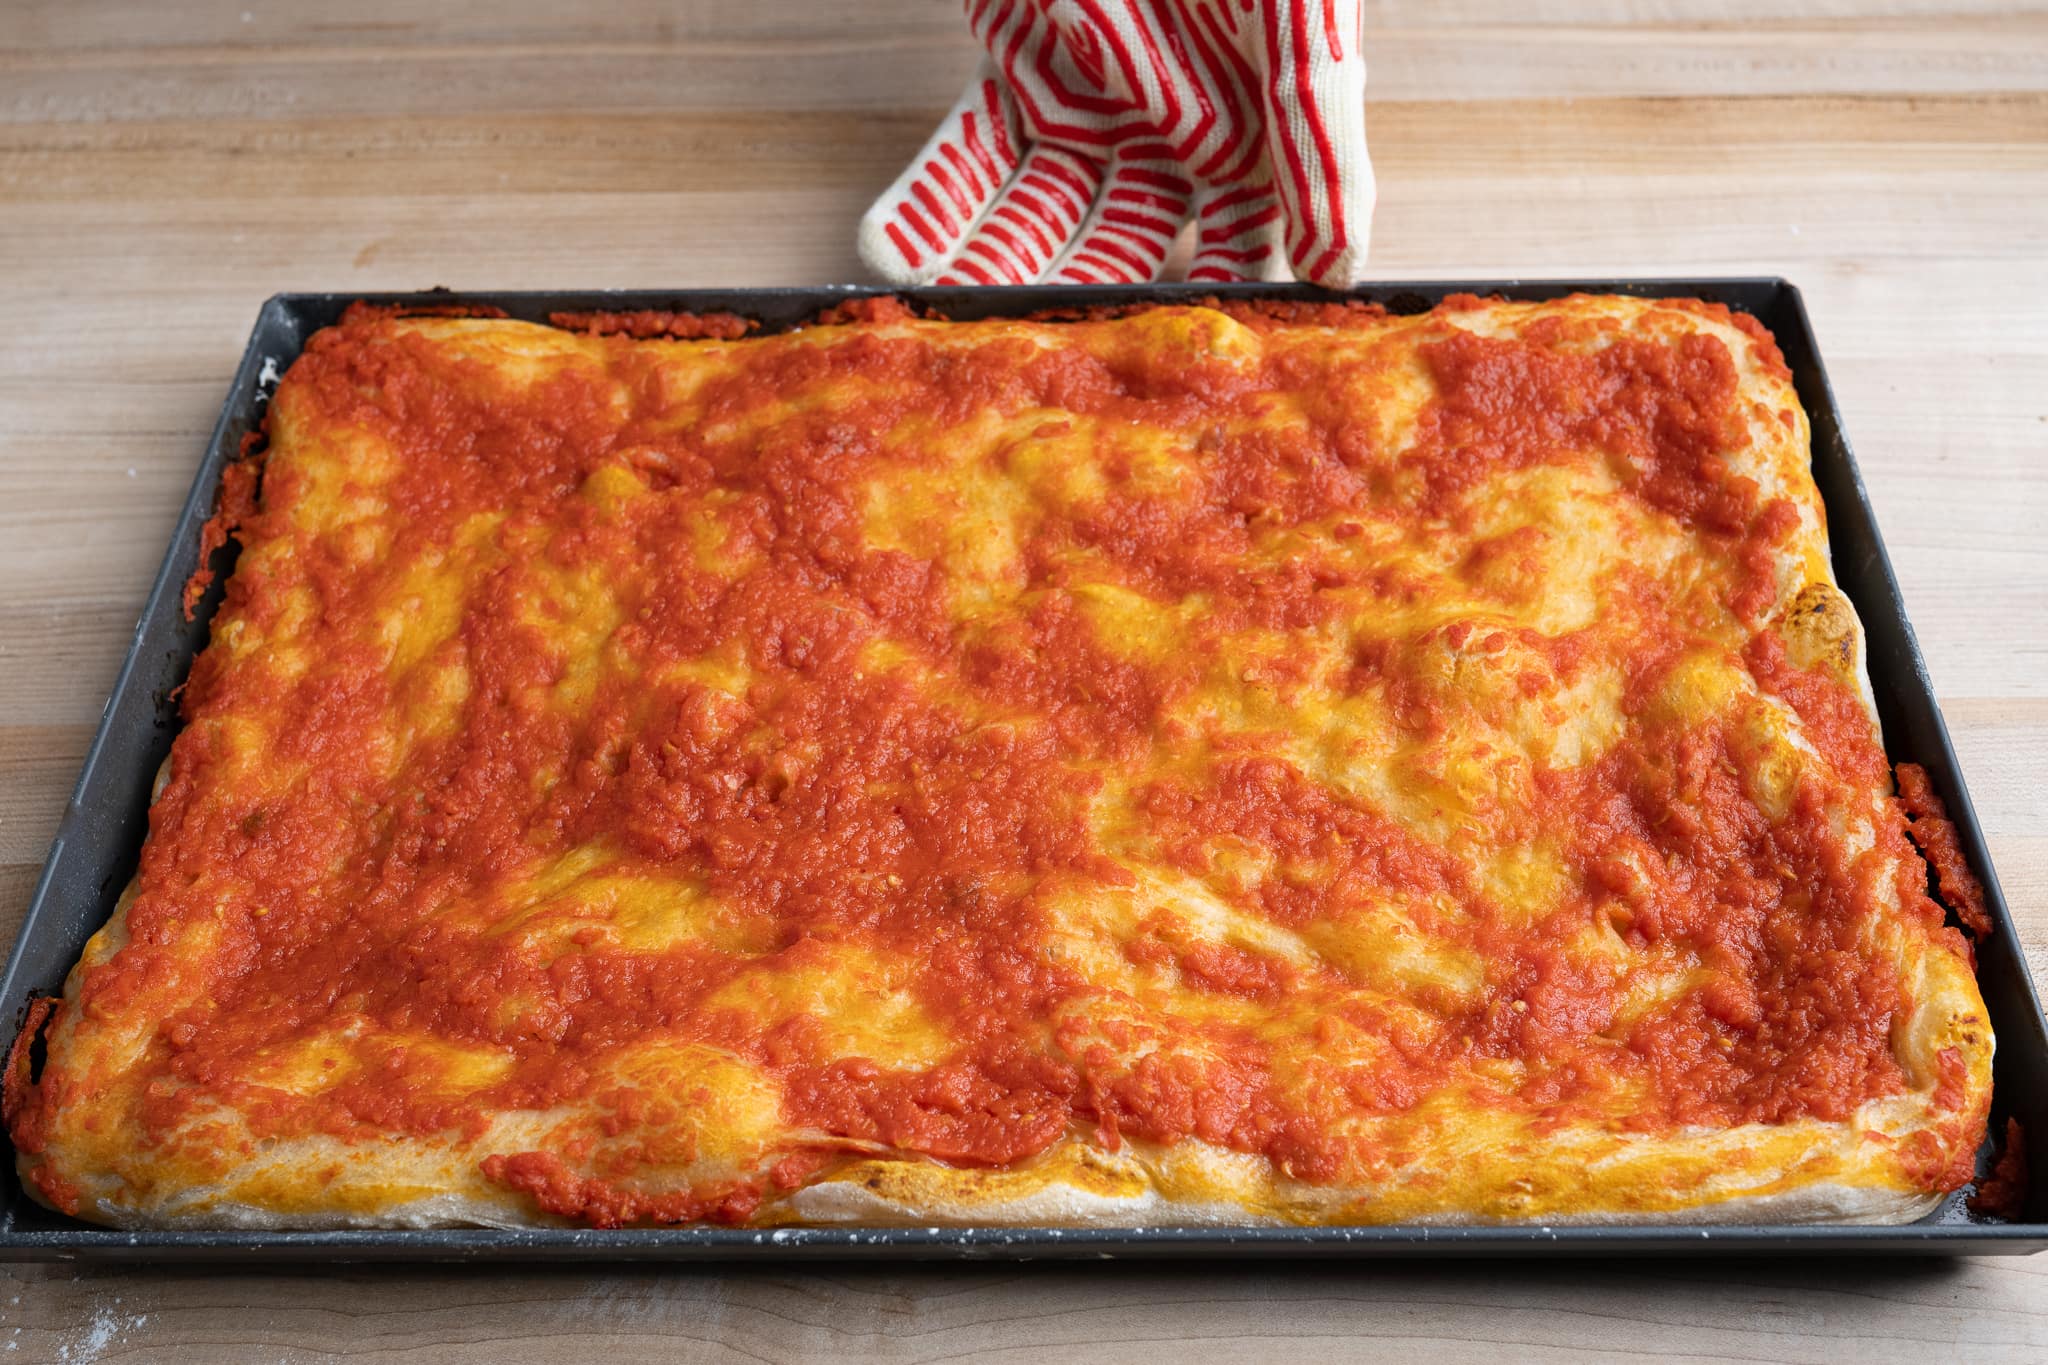
Add cheese and any other desired toppings to the pre-cooked pizza dough.
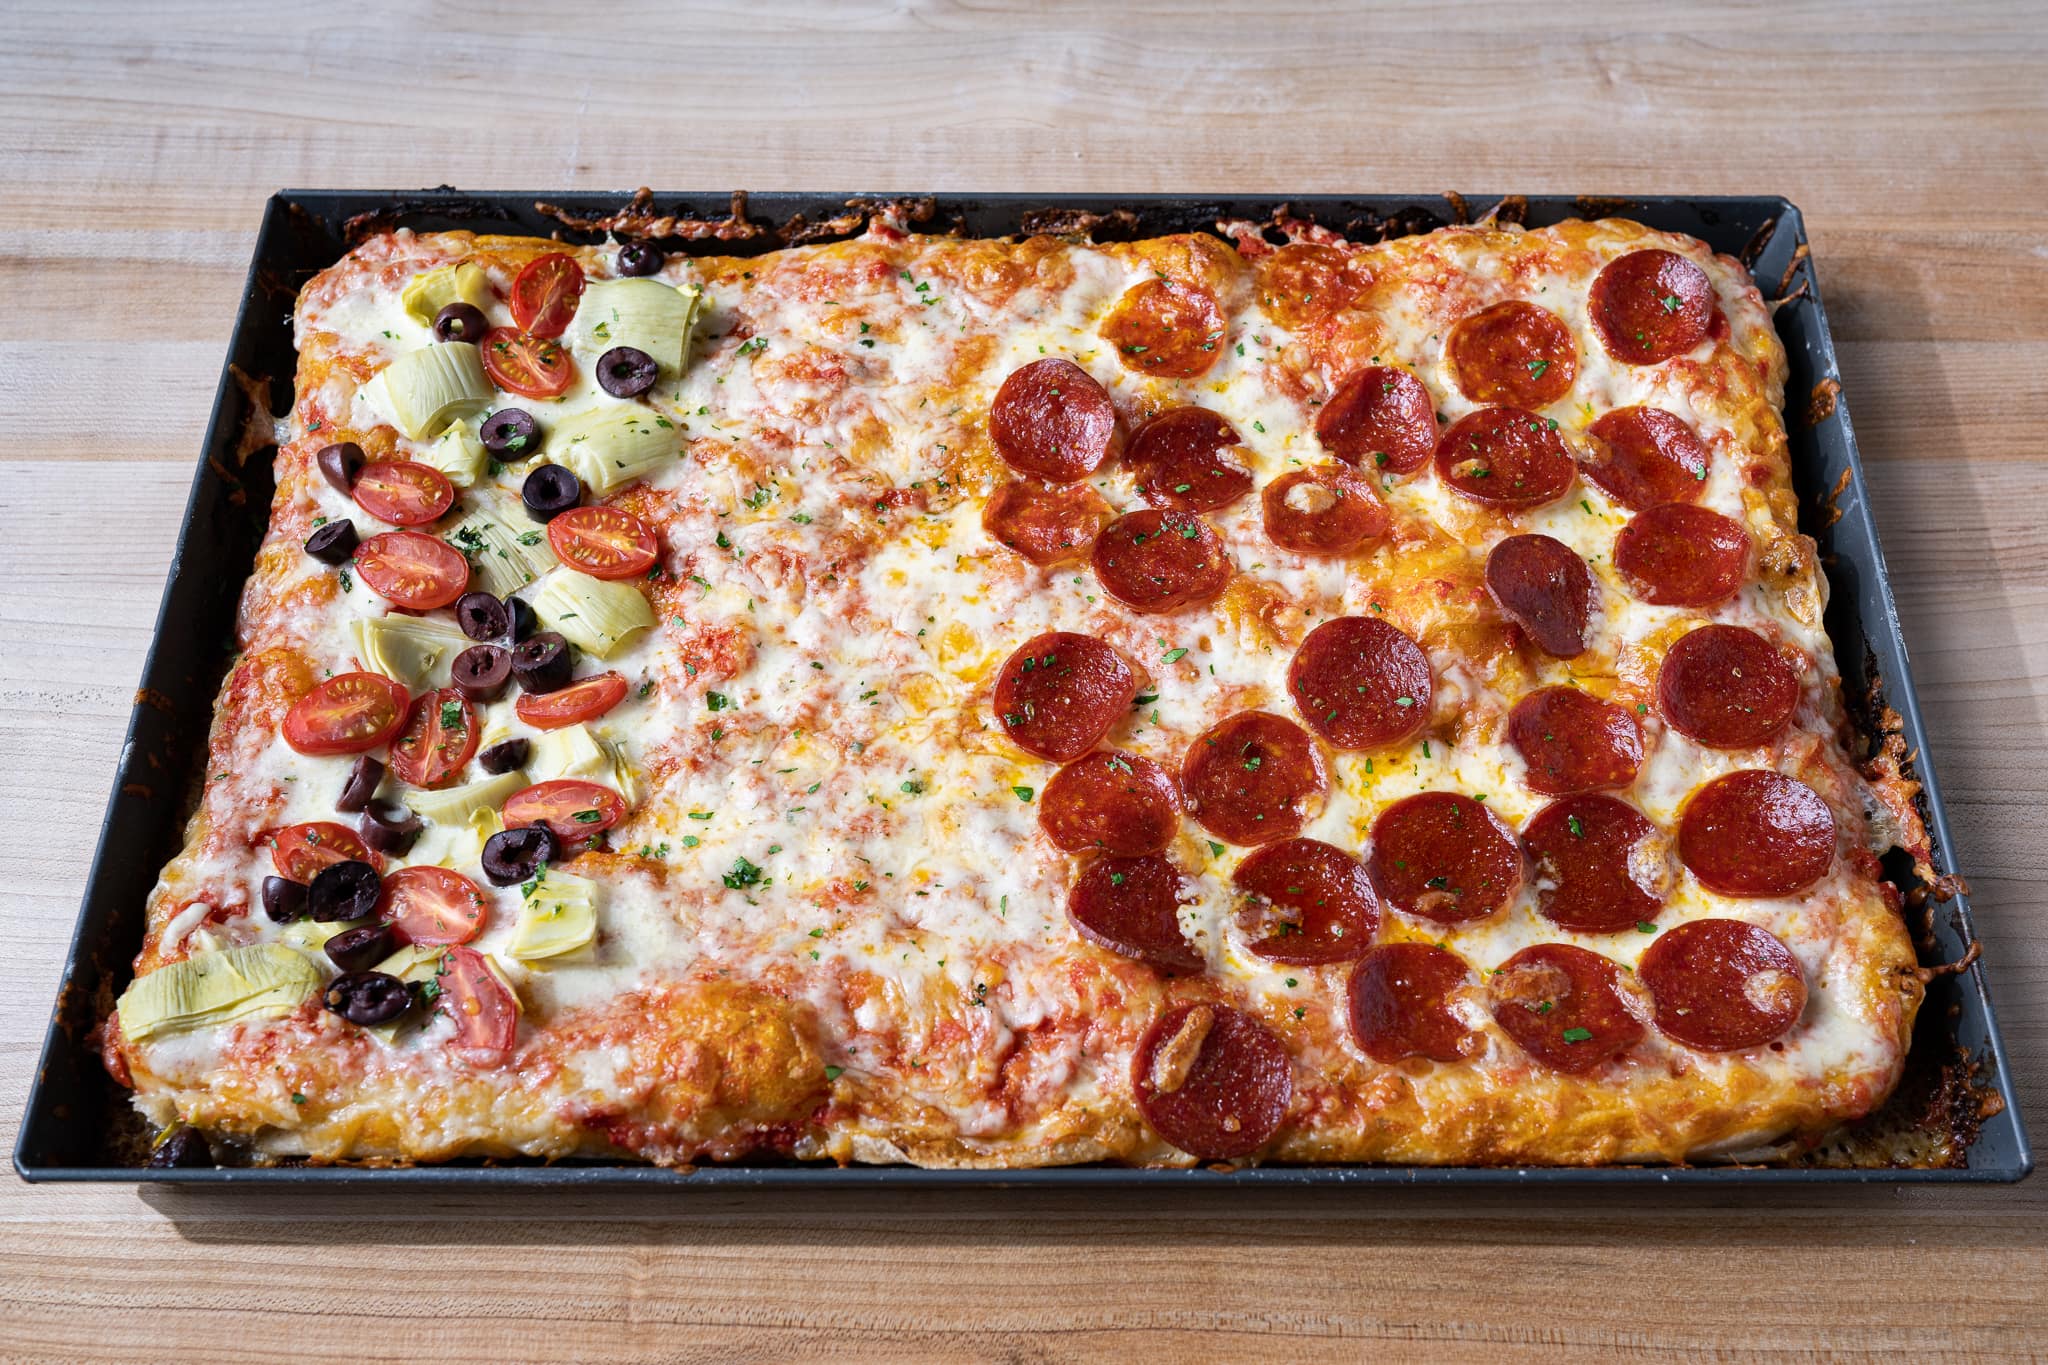
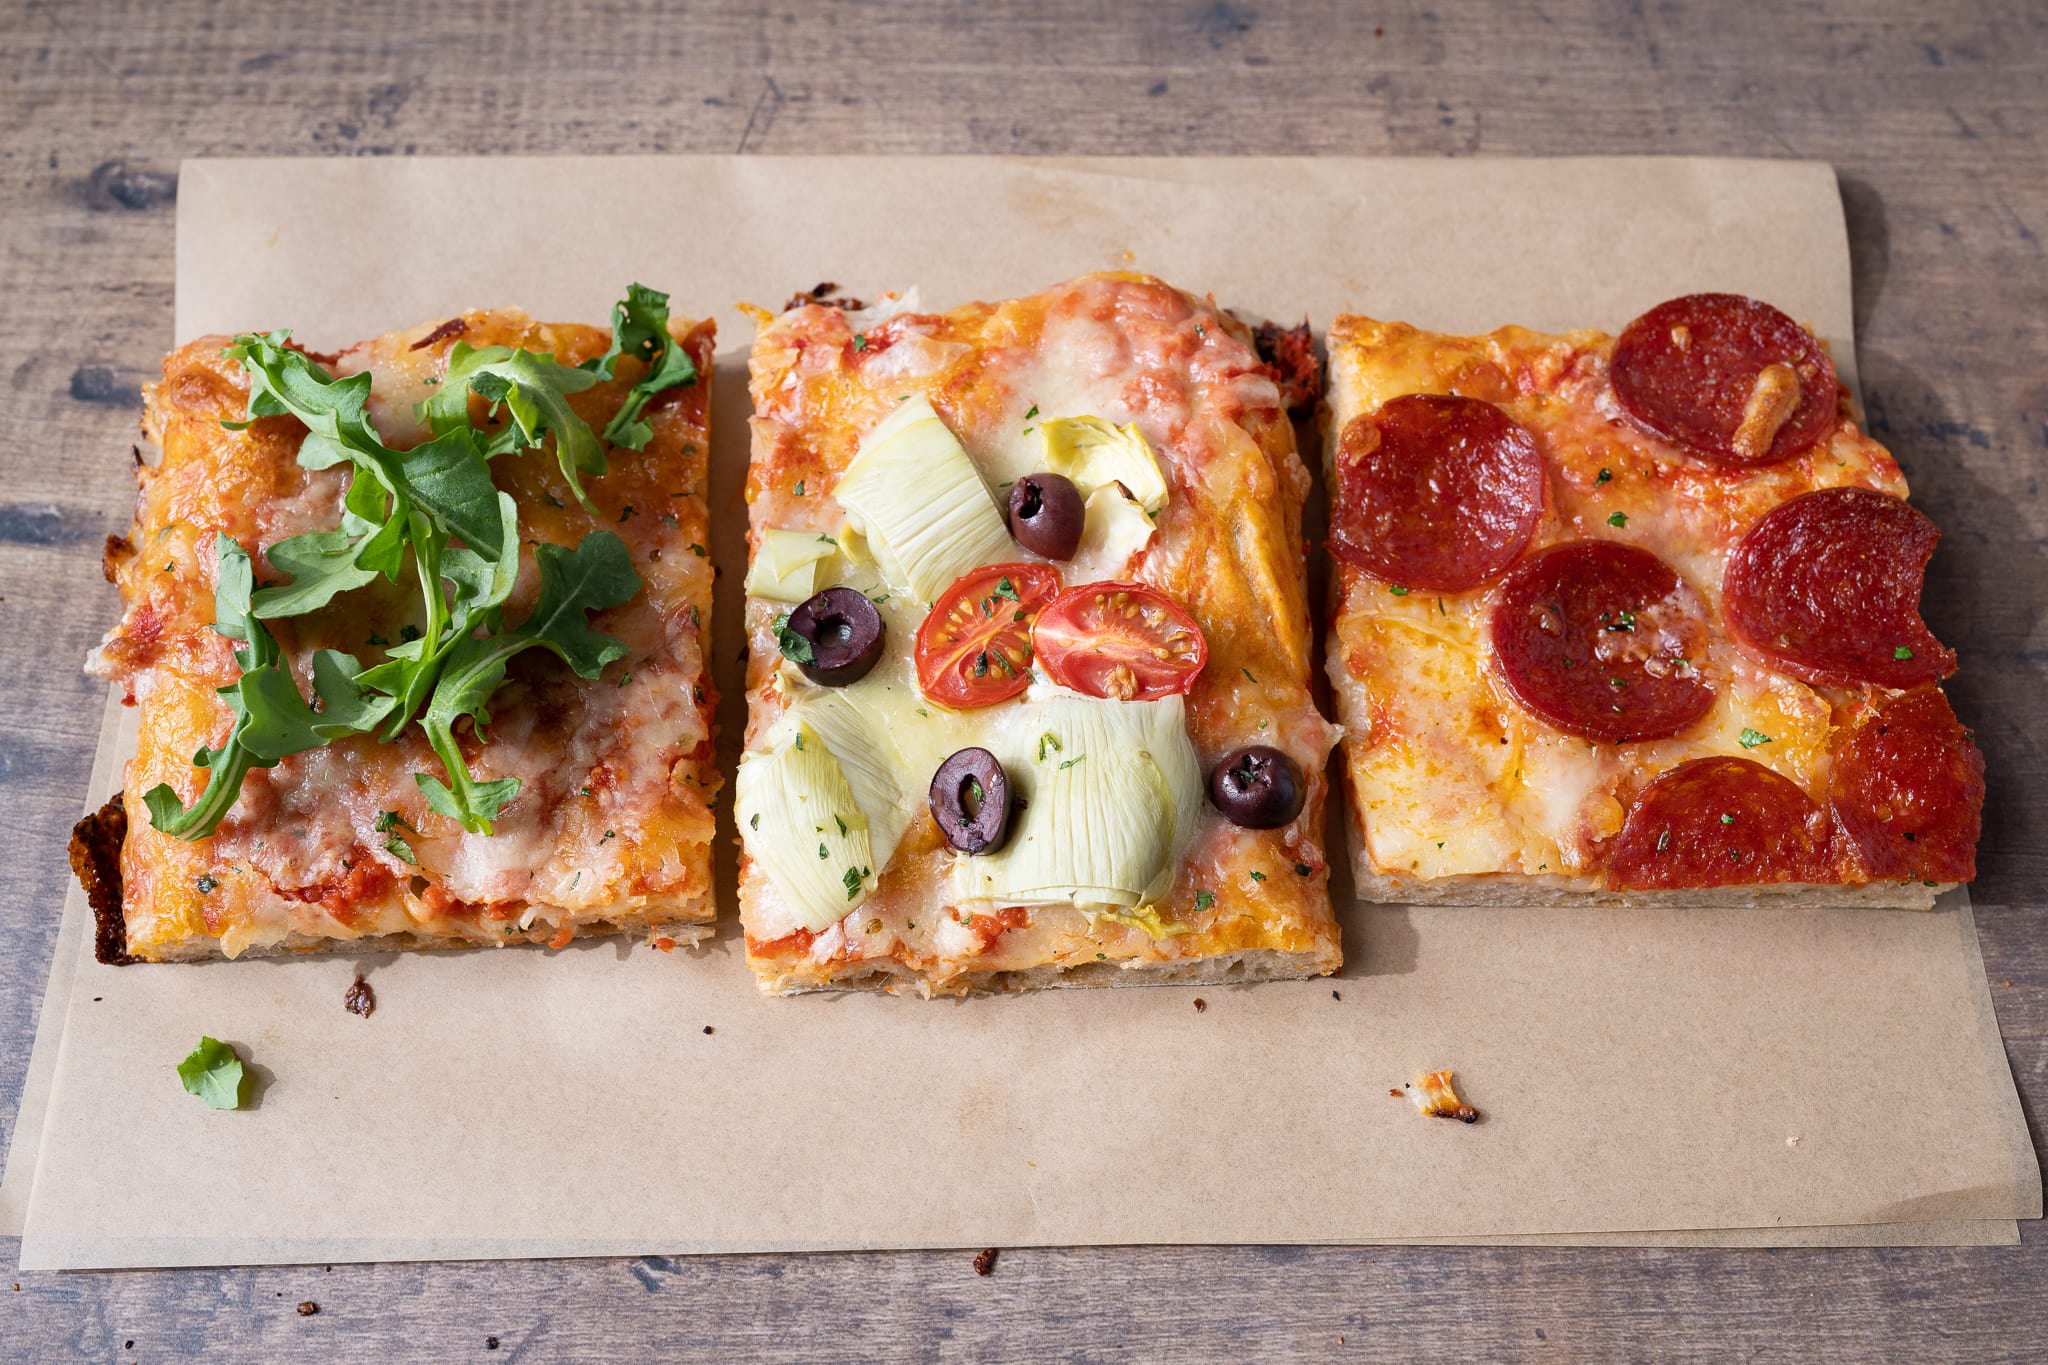
In my pizza below, you can see the kid’s section at right, the “no veggie touching my slices” area in the middle, and the adult section at left (and to be honest, I ate slices from all three 🙂).
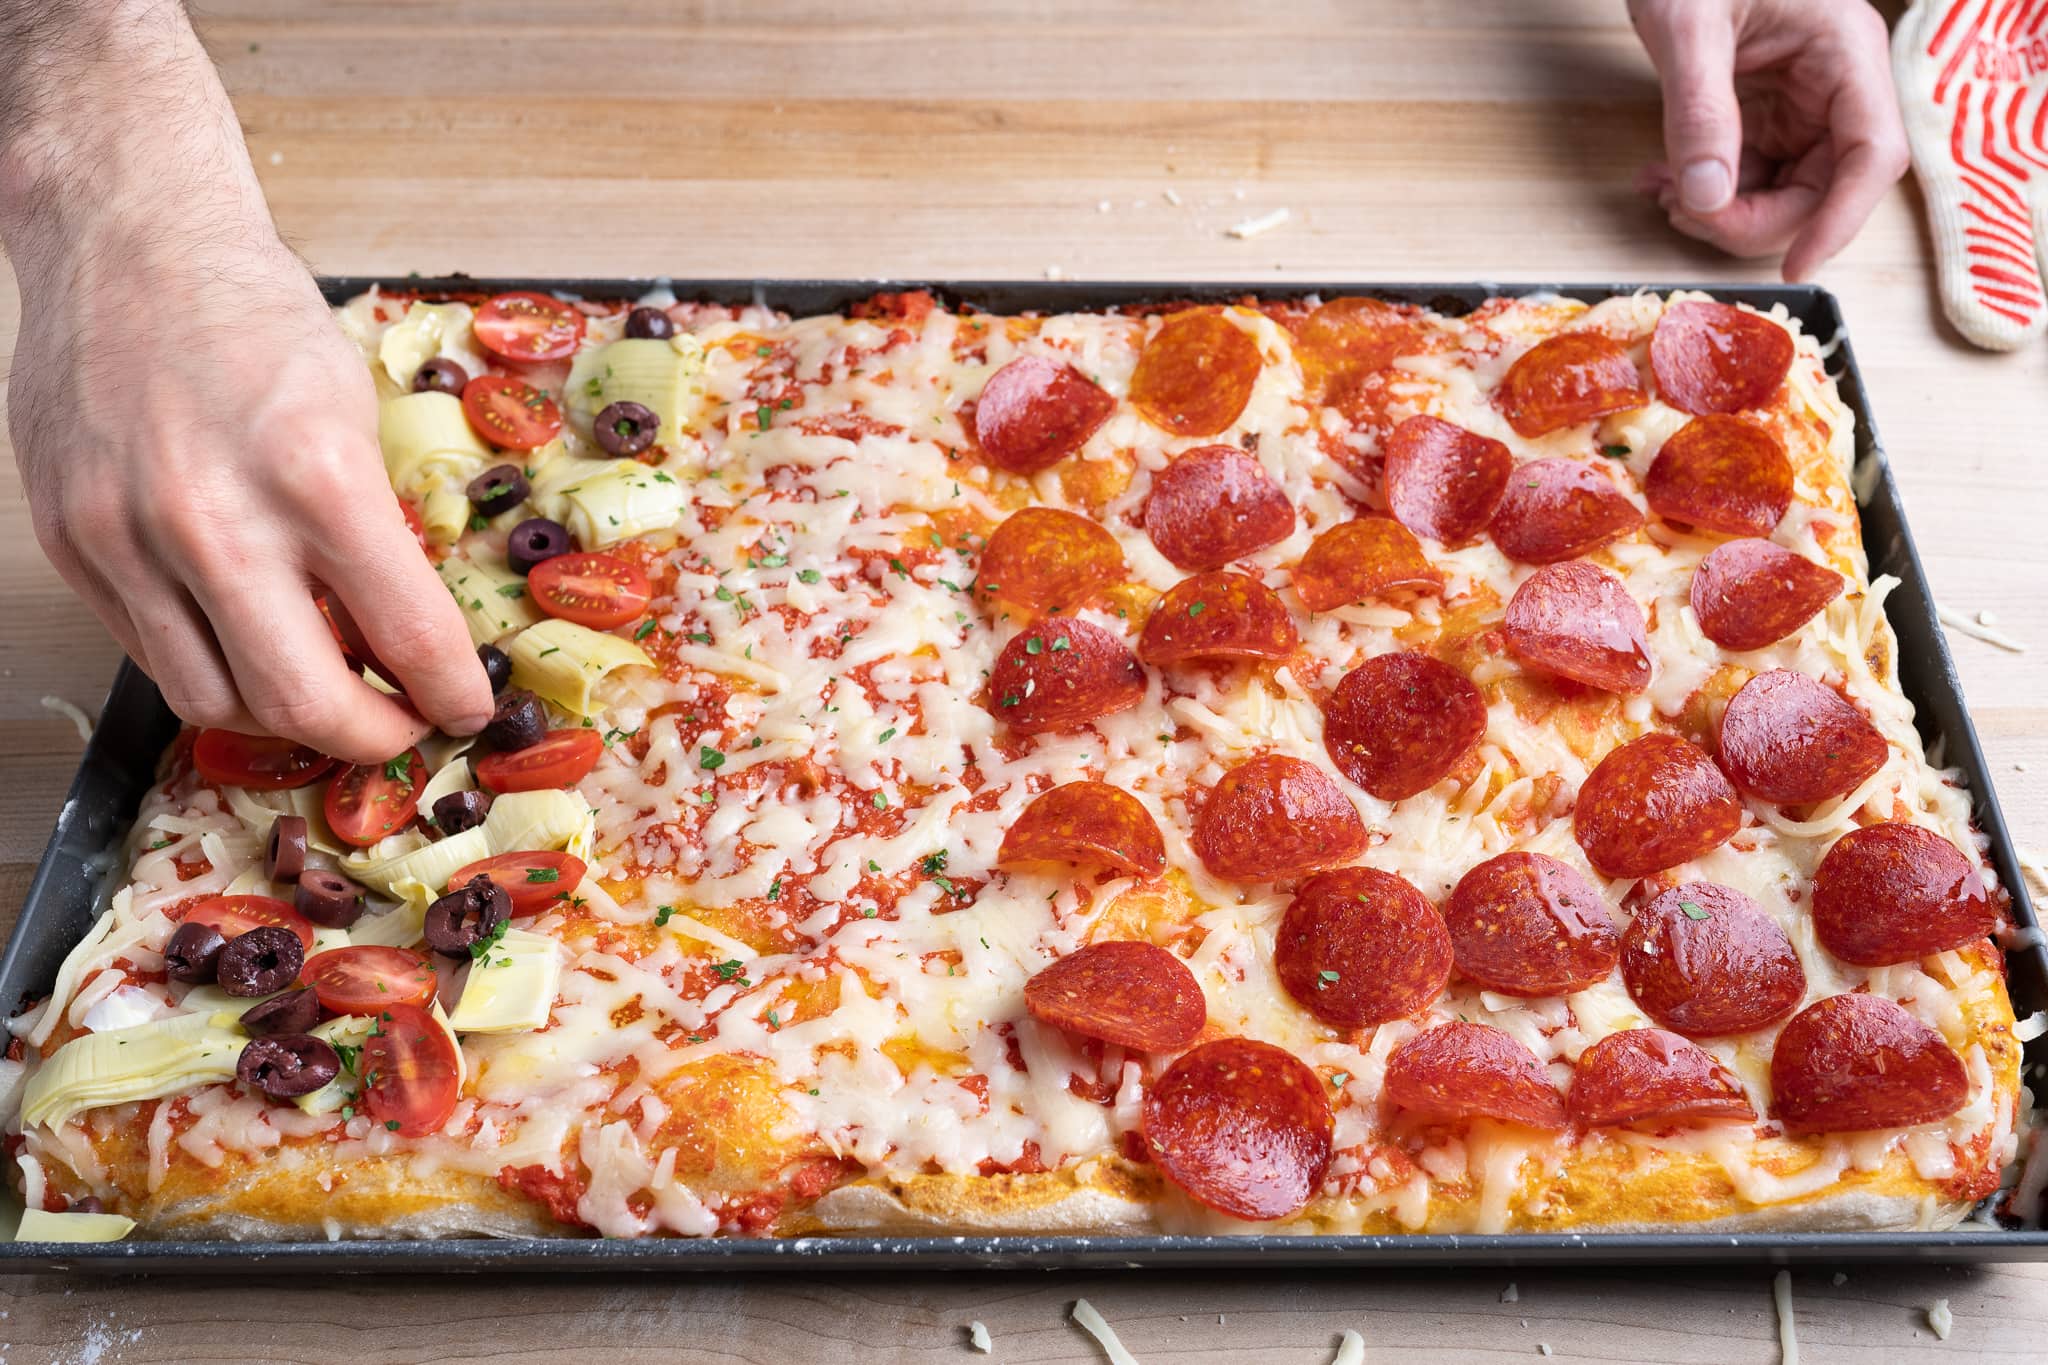
Once topped, slide the pan back into the oven on the baking surface and bake for an additional 10-15 minutes until done.
When finished, remove the pan to a cooling rack and let cool for a few minutes before cutting.
Print
Sourdough Pizza al Taglio
- Prep Time: 6 hours
- Cook Time: 25 minutes
- Total Time: 6 hours 25 minutes
- Yield: 1 pizza
- Category: Main course, lunch
- Cuisine: Italian
Description
My recipe for a naturally leavened sheet pan pizza that’s flexible and a crowd-pleaser. This pizza has a decidedly crispy bottom crust and interior with a little chew—the perfect contrast of textures.
Ingredients
Main dough
- 400g Type 00 or all-purpose flour
- 71g durum flour, extra fancy (or semolina rimacinata, very finely milled)
- 12g extra virgin olive oil
- 324g water
- 9g sea salt
- 83g ripe sourdough starter
Pomodoro (tomato) sauce
- One 28oz. can of whole peeled tomatoes (Bianco DiNapoli or San Marzano)
- 1/4 teaspoon of dried oregano
- 1/2 teaspoon salt
- About 1/2 tablespoon extra virgin olive oil
Instructions
- Mix (11:00 a.m.)
Add all the ingredients except the olive oil to the bowl of a stand mixer fitted with the dough hook attachment. Mix on speed one for 1 to 2 minutes until the dough comes together, and no dry bits remain. Then, turn the mixer up to speed two and mix for 5 minutes. Let the dough rest in the mixing bowl for 10 minutes. Turn the mixer on to speed one for 1 minute, then drizzle in the olive oil with the machine running. Once all the oil is added, turn the mixer to speed two and mix for 2 to 3 minutes until all of the olive oil is absorbed and the dough is cohesive. Transfer the dough to a container for bulk fermentation and cover. - Bulk fermentation (11:30 a.m. to 2:30 p.m.)
Give the dough 3 sets of stretch and folds during this time at 30-minute intervals. After the last set, let the dough rest until the end of bulk fermentation. - Proof (2:30 p.m. to 4:30 p.m.)
Leave the dough covered in the bulk fermentation container and proof on the counter for 2 additional hours (see note for overnight retard). About an hour into the proof, preheat your oven with a baking steel or baking stone inside to 500°F (260°C). - Prepare sauce and shape (4:30 p.m.)
Drain the liquid from the can of tomatoes and place the tomatoes in a blender along with the oregano, salt, and olive oil. Blend until smooth.
Gently scrape the pizza dough out of the bulk fermentation container to a floured surface. Dimple down with fingers and gently stretch out to a rectangle. Drag the dough into your sheet pan and finish stretching it to meet the corners. - Cook (5:00 p.m.)
Spread pomodoro sauce over dough, edge-to, edge with no dough exposed. Slide the pan into the oven on the preheated baking steel, turn the oven down to 450°F (230°C), and bake for 10 minutes. Carefully remove the pan and place it on an oven-safe surface. Spread on cheese and any other toppings. Slide the pan back into the oven on the baking steel and cook for 10 to 15 minutes longer until the bottom is well-colored and as is the top.
Notes
- If you don’t have type 00 flour, use all-purpose.
- Substitute out the durum flour for spelt, khorasan, whole wheat, or even more type 00/all-purpose flour.
- You can refrigerate the dough at the end of bulk fermentation, covered, overnight. The next day, take the dough out and let it warm for 30 minutes and continue with the Shape step.
Sourdough Pizza al Taglio FAQs
Why is this pizza dough so soft?
This dough has relatively high hydration and is enriched with olive oil—it’s supposed to be! This soft texture makes for a pizza with a thin and crispy crust and a tender interior.
Can I refrigerate the sourdough pizza dough?
Yes! At the end of the three-hour bulk fermentation, instead of proofing the dough on the counter for two hours, place your covered container into the fridge until the next day (you can likely even go another day after that). When you want to make the pizza, take the dough out, let it warm for about 30 minutes, then stretch it out, top, and cook.
Can I make this pizza on a regular cookie sheet?
Yes, a typical cookie sheet—or sheet pan—will work just fine with this sourdough pizza al taglio recipe.
I don’t have durum flour, what can I use in its place?
Feel free to substitute out the 15% durum for the same percentage of spelt, Khorasan, whole wheat, or even more type 00 or all-purpose flour.
I don’t have a Baking Steel or baking stone, can I still make this sourdough pizza?
Yes! You’ll need to bake a little longer—check on it near the end and push it farther as needed (use some tongs to lift up and check the bottom). If the top is coloring too fast, turn the heat down a bit to extend the cooking time.
What’s Next?
I see pizza as kind of this distilled embodiment of the perfect food, and this sourdough pizza al taglio has it all: a naturally leavened dough, a beautiful mix of flour, a shape that facilitates large meals (and is great for kids and adults), its flavors and textures are spot on, and perhaps the most importantly, it’s delightful in the only way pizza can be.
If you’re looking for more pizza goodness, check out my sourdough pizza dough recipe for a high-heat oven (wood-fired, Ooni, or Roccbox) or my favorite sourdough pizza recipes, tips, and guides.


225 Comments
Hi! I live in Bombay, India (the new Covid capital of the world) and I tried this recipe out. Because it’s quite warm and humid here I used 20 grams less water. My dough was still very sticky and hard to handle (my hand mixer isn’t working so had to work it by hand). Nonetheless, the final result was great despite the fact that we don’t get all the fancy flours here and I don’t have a baking steel. I made one pepperoni and one pizza Bianca with Brie, mushrooms, olives and arugula. The vegetarian one was even better. Thanks so much. I’ve tried your focaccia too and it’s superb.
Hey, Nita! I hope all is well. We have family out there in India and it’s a very stressful time, no doubt. Glad to hear the pizza and focaccia turn out well! You’ll definitely need that reduction of water, especially with your climate. Keep dropping it until the dough feels manageable to you, although I have to say, a highly hydrated pizza al taglio dough has a wonderful texture! Wishing the best for you and your family.
My pizza had large gas bubbles and very uneven distribution, what did I do wrong? Tasted great!
Hey, Alicia! Usually that’s an ok thing, but it might have been that your dough was slightly under proofed. You could also gently pat the dough down, top to bottom, to redistribute any gasses that have consolidated into one area.
Hi Maurizio! I made this pizza yesterday- amazing!!
While I am a confident sourdough loaf-baker, I’ve been trying to get a good pizza with sourdough for months and I always ended up disappointed (sometimes I doubted of my “italianity” .
Thank you for this recipe!
Haha. Well, so glad to hear the recipe worked well for you, Cristina! Pizza can be challenging to get just right, but for me, this is a great recipe as well! Enjoy 🙂
Instead of durum, has anyone tried a bit of rye, barley or sorghum? Also, any reason not to up the percentage from 15%? TIA.
I have used whole wheat and spelt with great results!
Thanks. Made this one a few weeks ago and enjoyed it. I prefer making a large, single crust pizza as opposed to the time consuming process of baking several smaller pizzas for the family. I usually add 20% ww and 10% rye to my other recipe. I’ll give it a go with the rye and report back.
Hi Maurizio — This recipe would probably work in a large cast iron skillet, right? Maybe back off on the ingredients a bit? I could probably scale it using baker’s percentages based on surface area of pan vs skillet. I think I know the answers but curious if you’ve tried and have any tips. Thanks! Joe
Yes, it certainly would! I’ve not scaled it down to fit a smaller pan, but like you said, baker’s percentages are the way to go. If you have multiple pans, you could divide this dough into two (or thirds) and see how that goes, too.
I’ll let you know how it goes. My crazy plan is to cook it in our large cast iron skillet (about 11″ diameter) on top of an inverted cast iron griddle skillet that will be preheated like a steel or stone. The shallow rim of this griddle skillet means I can tuck the handle under the oven rack presenting a flat surface for the main skillet. I’ll report back!
This sounds like an experiment I would have (should have?) tried!
Ciao maurizio, what is the max time the dough can stay in the fridge overnight, if I use caputo pizzeria flour? Thank you!
It’s so hard to say—there’s no single answer there! I wouldn’t push it much past overnight with this dough, though.
Hi Maurizio, I’m curious about why you wouldn’t push this dough past one night in the fridge? Thanks!
Can you freeze the dough?
See a few comments down, they tried it out and it worked well!
Instead of shaping the dough on a counter or a cutting board and then moving it to a baking sheet, is there any reason why you can’t just shape it on the baking sheet itself? (Or, is the idea that the baking sheet — along with the baking steel/stone — should be preheated?)
I’m going to make the dough tomorrow (with 25% whole wheat flour and bit extra water) and then bake the following day. I just got my B&T proofer delivered and am excited to use it! When you write what the ambient air temperature should be, how does that translate to what the dough temperature should be? Or, perhaps to make it more simple, would I just set the proofer to 75 degrees (if using with the water tray) and not bother with the dough temperature?
The baking sheet is not preheated, but the steel/stone is. You can certainly shape the dough out directly in the pan if you’d like. It’s a small distinction between the two methods, usually focaccia is done that way where the dough is left to rise in the pan, whereas pizza is shaped out and baked right then.
I used to monitor my dough temp as bulk was progressing, but have stopped doing this, expecting that the dough cools very slightly through bulk. I usually just set my B&T proofer to a few degrees where I want to keep the dough at, and let it do its thing. I do recommend still checking in on the dough, though, just to make sure it’s not moving too fast!
If you haven’t seen my guide to using the Brod and Taylor proofer, do check it out!
Thank you! And yes, I have absorbed your guide on the proofer!
Nice job! Any thoughts on freezing this dough (raw in small balls or 3/4 cooked)? Thanks Sven
I haven’t tried this, but others have and said it worked well!
I made this yesterday for the first time and it was excellent! Since I don’t have a non stick pan I used parchment on an aluminum cookie sheet and I preheated my cast iron pizza tray upside down so the handles wouldn’t interfere and then placed the cookie sheet on top and baked it as directed and ended up adding a little time.
Next time I make this I’d like to try baking it in my green mountain pellet smoker pizza oven. However, parchment is not an option in there as the high temp burns the paper. What is your opinion on oiling it first like you do with focaccia? I see in your faq section it says you can just use a regular cookie sheet but will it stick?
Right on, Ken! Glad to hear that. I like your changes and process, that’s definitely a good way to go. I’m sure that Green Mountain is going to make this pizza extremely well. You can certainly oil the pan as needed. I have made this on a regular baking sheet without too much sticking (without oiling, too).
Hey, Pat! I’d go with the proofer, just keep an eye on the dough to make sure it’s not rising too much, but that’s what I do when it’s chilly here!
Yes, mine browns nicely when using the LloydPan on the steel—be sure the steel is super hot, it really does take about an hour to preheat. If it was gummy, try reducing the hydration just a bit, and yes, be gentle with the dough, which is a challenge with this higher hydro recipe, I know! Let me know how the next one goes and enjoy!
I just tried this today with whole wheat instead of durum. The dough didn’t rise at all and just seemed gummy and uncooked after baking the full time. I’m guessing my starter wasn’t ripe enough? I took it out of the fridge last night and fed it, but I’m betting I should have fed it over a few days before using it. I’ll have to try it again!
Ah, sorry to hear that! Yea, sounds like it was definitely under proofed. I’d recommend taking your starter out of the fridge and refresh it daily for a few days before using it to make this dough!
OK, thanks for the confirmation. I will try it again!
Good afternoon 😃. I’m made the dough but it’s really soft. I used the 00 flour and Duran semolina flour. I’ve done the first set of stretch and folds but it’s really soft. Should I add for flour ? Thanks
I used 392 grams 00 flour and 69 grams semolina.
I wouldn’t add flour! Stick with it, give it another set of stretch and folds if necessary during bulk 🙂
I have no stand mixer and no strength for hand kneading, I must rely on the food processor. Is that an option for this dough?
Yes, that’ll work—however you typically mix dough!
Hey Maurizio, I am trying to understand the formula for the starter to build this dough. *83g of sourdough starter is used for this recipe, and my starter is approximately 50% flour. ((83/2)/461 total flour) * 100 = approximately 9%. Can you provide the percentages for the levain? I referenced your starter maintenance guide and I don’t see the percentages mentioned in your notes on the formula. My starter is 1:3:3, starter, flour, water so not 50% four. Should I adjust my starter for this recipe? Cannot wait to try this dough, looks amazing!
Hey, Joseph! That’s ok, I wouldn’t worry too much about it. This dough is crazy flexible and can handle a variety of different starters. Usually it’s the hydration that will require some adjustment to the final dough (e.g., if your starter is stiff, you might need additional water in the dough)—but you can always adjust the dough when mixing to feel. I say go forth with however your starter is, just be sure, as always, to use it when ripe 🙂 Let me know how it goes!
Thanks Maurizio
I am confused as to why you say preheat oven with a baking steel yet you never implicate using it?
Hey, Kim! The baking steel stays in the oven on the rack while preheating. When you go to bake, you slide your pan with dough right on top. I’ll make that more clear!
This dough is lovely to work with. Thanks for the recipe. I mixed it by hand, leaving out some water as suggested below and gradually adding it all in. Will plop it in fridge overnight and have pizza for supper tomorrow. Thank you. Now off to donate.
So glad to hear that! Great work with holding back that water and adding in slowly, always a good move 🙂 Thanks for the support and enjoy!
What do you think about shaping and baking it on parchment paper (if my pan is not really non-stick)? Would that work?
Yes, that’ll work! Kind of how pizza bianca is done as well.
Hmm, it sounds like perhaps it was over proofed. How did the dough feel when you placed it into the fridge? If it was too well-risen, it might have gone over… Did you take the temp of the dough at the end of mixing as well? Sorry to hear that! I bet it was still tasty, though 🙂
I got a little of the rise but more-so the finished pizza dough was dense and gummy under the toppings. It did not rise like yours. I used frozen fresh tomatoes from my garden. They are whole and the skins slide off when thawed. They are about a watery as canned whole tomatoes. I did not drain them but made the sauce. Would that excess liquid cause this dough to not rise much and get gummy?
The heavier the ingredients, the less rise you’ll see. I’m wondering if there was just too much water overall—both in the dough and with the toppings. When I use canned tomatoes, I usually drain the liquid to avoid too much on top of the dough. When using fresh tomatoes, I prefer to slice them into rings and spread them out on the pizza that way! If you’re up for trying this again, I’d say drop the water in the dough a little bit—2% or so—and then reduce that final proof time by 15 minutes to help give the dough a little more spring in the oven. Also, try to be very gentle with the dough when you’re shaping and spreading for the pan. If it’s easier, you can transfer the dough directly to the pan and spread it in there 🙂
If you give it a go, please report back, Renee!
Definitely tasty dough! I had a little trouble getting it crispy enough, but we all enjoyed it.
So glad to hear that, Anastacia! To get a really crispy crust, that super high heat in the oven with a very hot baking surface helps. Also, the LloydPan I have linked in the recipe really does help, as well! Thanks for reporting back and enjoy 🙂
Hi, is the oven C fan or C static?? Thanks
Static 😀
Would love to work in some whole wheat flour for the taste and nutrition, along with the 00 flour (Anna Napoletana) and semolina (Bob’s Red Mill). Any suggestions for a breakdown? Thanks so much – your site is priceless for the new sourdough baker!
As I mentioned in the post, you can easily swap out the 15% durum flour for a whole grain wheat. I’d say you could also go up to 40% or more, you’ll just have to adjust the hydration as needed.
When the recipe printed, the quantity for the durum flour is incorrect, 69g where in the recipe above it calls for 264g. I didn’t realize until the bulk urgent stage, oops! Added more flour, so we will see what happens. 😉
It should be 69g for both! I fixed this, it may not have updated on your end yet!
Can you confirm what the gram weight should be for the 00 flour and the durum flour? Mine printed as 392G double zero flour and 69G of durum which is a total of 461 grams of flour. is that correct? My dough seemed extremely wet . Should it be? And just above my message you said “it should be 69g for both”? I am confused. What are the right flour measurements?
I also use 392g AP + 69g Durham + 83g Starter and 336g Water and it was very wet also. In the future, I’ll add less water, but now, how can it be rescued? Thanks
When finished with bulk, skip shaping it on the work surface and just scrape it into the pan. Spread it out gently in the pan itself.
Will do. Thanks. Any idea why the dough ended up so loose if I used your proportions?
Every flour has different absorbency, I’m guessing yours wasn’t able to take quite as much—and that’s ok! If you want for the next go, drop the hydration a bit to compensate. I like to hold 10% back during mixing, adding it in slowly as long as the dough is cohesive and doesn’t get excessively sticky or too slack.
Mine was extremely wet too. I found I used some extra flour at the end when I took it out of the pan and put it on the board. It worked out perfectly, adding just enough stiffness to the dough to make it easily pliable but not too wet. Came out beautiful. But good idea to just scrape into the pan and spread.
With strict pizza al taglio, the pan isn’t oiled. However, if you want to do that you can to help prevent sticking! I don’t because my pan is nonstick (as I mention in the post). Let me know how it goes!
So, I am not familiar with what a “Baking Steel” is but I do have baking stones… do I put the stone in the oven during preheat and then put the sheet pan on top of the stone for baking? Or do I slide the pizza right on the heated stone…
Place the stones in the oven to heat along with the oven. When ready, slide the baking sheet holding the dough right onto the stones.
Thanks for the reply. Time to feed the starter!
Yum! This looks so good. I have been using your ciabatta dough recipe for a “free form pizza” that I press out to 14″ on the pizza peel and it is SO good. I can’t wait to try this one!
Whoa, that’s a great idea, JH! Let me know how this one goes 🙂
Hi. Would this recipe work for calzones?
Thanks.
It would, but I’d probably opt for a drier dough for that! This dough is so wet and slack it would be a challenge to handle. You could use this same dough just reduce the hydration by 5% or so.
Got it — thank you.
Hi Maurizio. Been making your sourdough in Bermuda for a few years now – had to adapt your recipe for the high humidity – but it is always amazing! Now I would love to try this pizza dough – but no mixer or food processor – would we be able to knead dough by hand ? How long would you suggest? Cheers
So glad to hear that, Jean! It’s 69g durum flour—I fixed the post, not sure why it hasn’t updated for you! Let me know how it goes, it’s one tasty pizza 🙂
Thanks so much for taking the time to reply! Sorry – but my question is no mixer or food processor – can the dough be kneaded by hand and how long would you suggest?
I would go with the slap and fold kneading technique and probably do 5 minutes or so, holding back some of the water (about 10%) to start. This will let you develop the dough sufficiently, then add in the rest back in the mixing bowl.
Hi Maurizio. The blog portion of the recipe and printed version state 2 different prep times. 🙃 Can you please clarify? Thank you. I’m planning on this for dinner tonight.
Hey, Joe! I’m not seeing a difference there. Where’s the discrepancy?
9 hours on the recipe I printed out and the Timeline in the post shows 6?
Oops! I missed that. It populated that, I’ll fix. Sorry for the confusion 🙂 It’s 6!
Hi, I’ve been making pizza with your recipe on food 52 for quite some time now and I was wondering if It was actually possible to overproof this dough and what the effects would be.
I’ve let It sit int the fridge for up to 2 days and the taste was phenomenal ! It had a pretty good rise in the oven as well though you have to be super gentle when handling It (I just drop It in the pan and stretch It gently from underneath).
Your recipes have been a pleasure to read and bake, thank you so much for your hard work !
Glad to hear that, Alexandre! This dough is a little different than that recipe, but I’d say either are really flexible. You can certainly leave them longer in the fridge–you’ll see more flavor (sourness), but less rise, the longer you leave it. Either way, gentle is the way to go!
So glad to hear that and thanks for the comments!
No mixer! Food processor?
Ive not used one to mix a dough, but it should work!
Looks great. If I am using a 1/2 sheet pan do I need to oil it or use parchment?
Thanks for another great recipe.
If it’s not non-stick, I’d probably use parchment if you’re worried! Good call 🙂
I used a regular aluminum half-sheet. It stuck a tiny bit but was mostly fine and even the part that stuck was easily dislodged before serving, with a spqtula.
Looking forward to trying this. I don’t have a baking steel or baking stone. Is there anything else to use in this recipe or can one bake the pizza without it?
You can go without! You’ll likely need to bake a little longer, hard to say just how long. Just check on it near the end and push it farther as needed (use some tongs to lift up and check the bottom). If the top is coloring too fast, turn the heat down a bit to extend the cook time.
Thanks for much for the quick reply! I’m fairly new at baking sourdough and find it a challenge with so many different views on how to bake it. I have a new very active starter which seems works well at my high altitude. Thank you again.
Can’t wait to try this recipe! Quick question: In the formula, it states 264g durum flour. In the recipe, it lists 69g durum flour. Which one is it? Thanks!
Sorry about that–fixed! It’s 69g durum.
Thank you. Bought the LloydPan today so I’ll be all set to try it soon!
Excellent, Sallie! Let me know how it goes. You’re going to love that pan.