

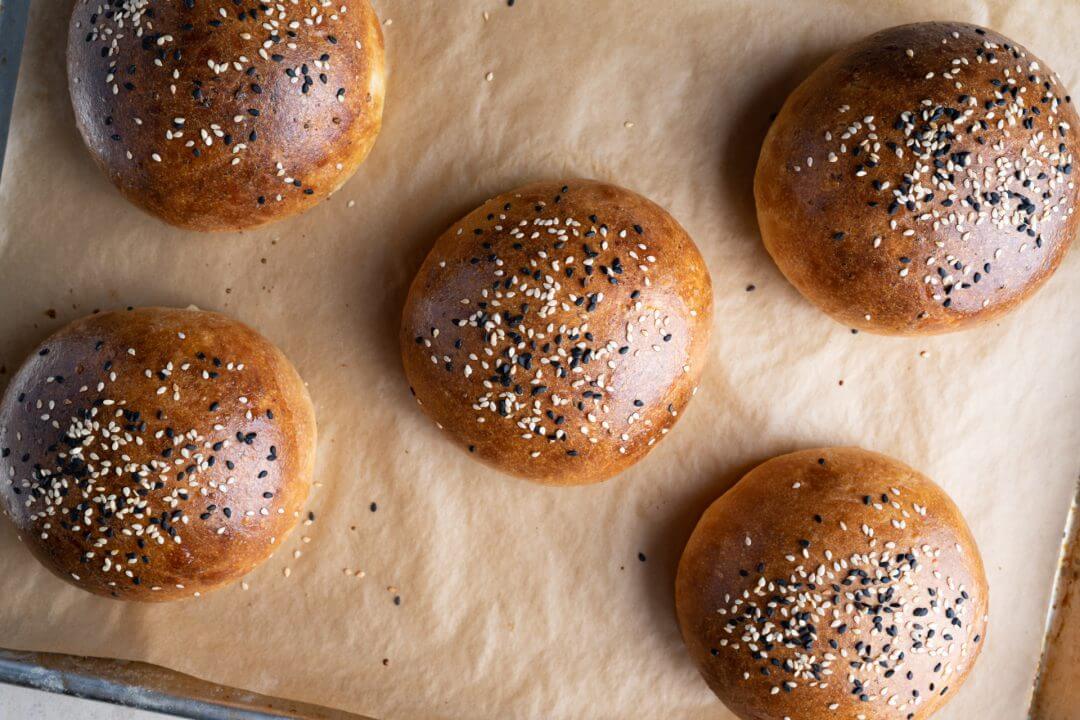
These soft sourdough potato buns call for the addition of an unapologetically high amount of baked and then riced potato. This fluffy potato mess brings all the gelatinized starches of the baked potato straight into the dough mix (similar to adding scalded flour, or tangzhong), imparting the best kind of softness to the baked buns. When you bake a dough with an excess of starches, you transform the result into something delicate and light beyond what you might expect. Right out of the oven, I feared one might disappear into my mouth. And while that may or may not have happened in my last test bake, I’m sure you’ll love this recipe.
In eating these, you’ll find the potato flavor isn’t all that apparent. But our friend, the tuber, has a more critical role: improving the texture. This amplified texture plays so well with the running flavor undercurrent we expect from natural fermentation: subtle complexity, a touch of sourness, heightened “wheaty” flavors, and, thanks to the tiny bit of sugar, the slightest suggestion of sweetness.
These buns are fantastic sliced in half and grilled right on the hot grate; the exterior rapidly becomes crispy, whereas the interior retains most of its initial softness. And the juxtaposition of the two makes for perhaps the best hamburger bun I’ve ever eaten. “Ahh, the platitudes!” you cry—no, these are really good.
When compared to the buns you might find in bags at the market—which always, ALWAYS, disappoint with their marshmallow (in a bad way) texture and flavorless composition—these are in another class altogether. And while they’re a little extra work preparing the potato, it’s justified.
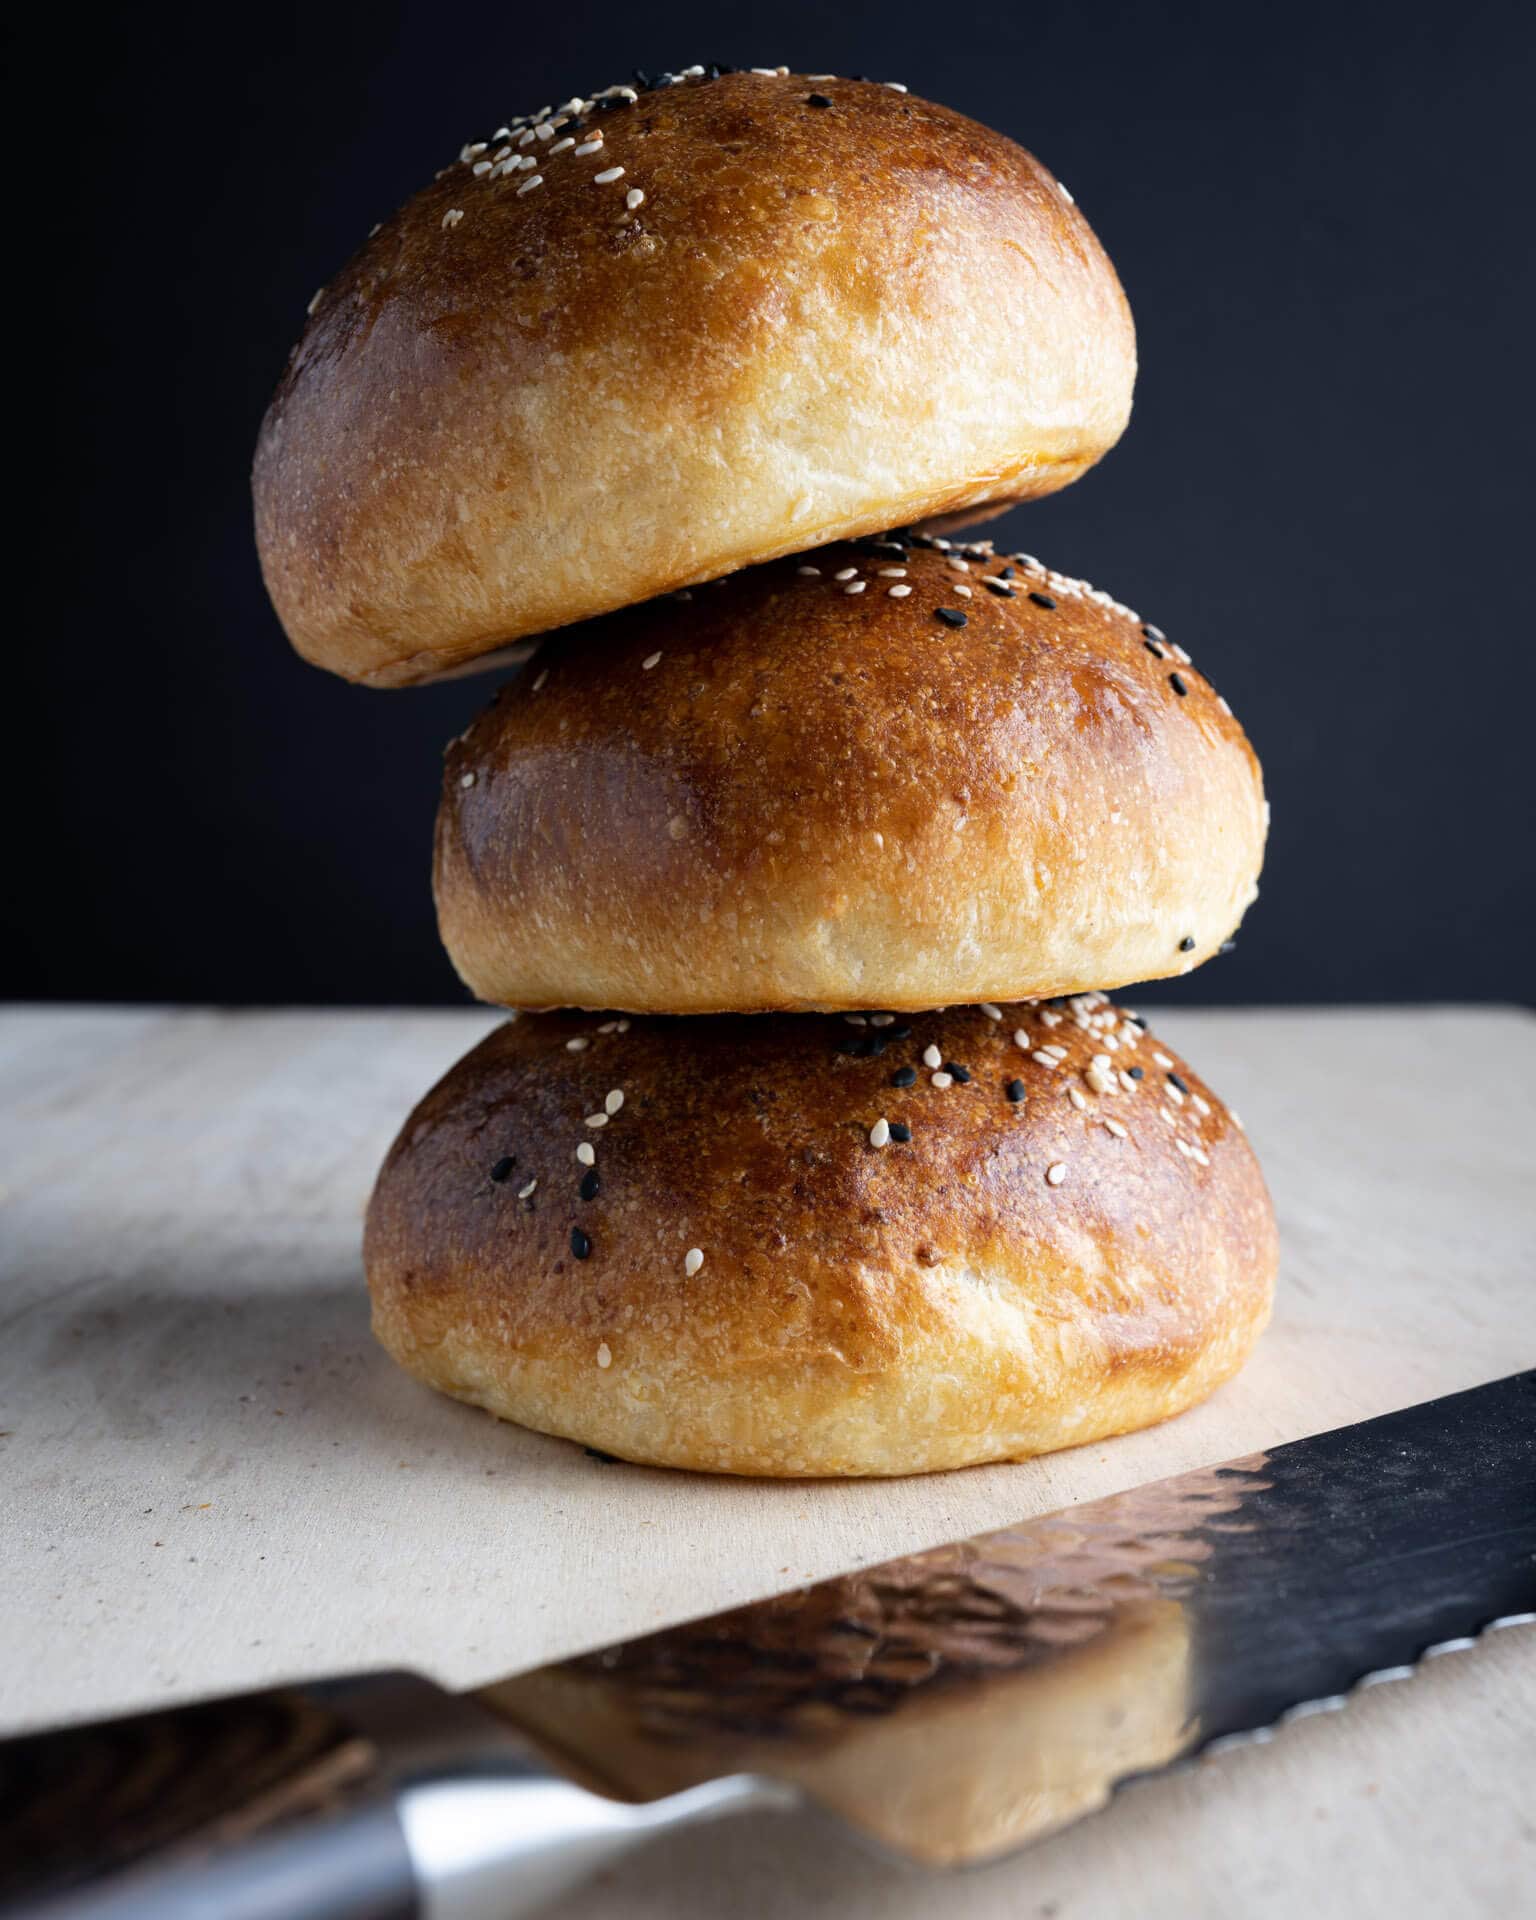
The small margin of extra work isn’t much, but I’ve found a few tools that help make these even more manageable—and all the tools will be helpful in your other baking endeavors.
Video: Soft Sourdough Potato Buns From Start to Finish
Watch me make these potato buns from start to finish in my YouTube video below!
Tools
First, a few of the tools and ingredients I use to bring these buns together:
- potato ricer—for preparing the potato to add into the dough (and making gnocchi!)
- pre-cut, half sheet parchment paper (I also use these in my combo cooker when baking—no sticking)
- KitchenAid stand mixer—the best for mixing enriched doughs
- black and white sesame seeds—my go-to topping these days
- Pastry brush—for spreading on the egg wash
Flour Selection
The goal for these buns was softness, softness, and more softness. But for flavor, I wanted them minimally sour. Building a fast, high-inoculation (inoculation refers to the amount of ripe starter added to the levain build—the levain is inoculated with your starter to seed fermentation) levain with 100% white all-purpose flour will help in this pursuit, and after testing with combinations of whole wheat—and even whole spelt—I dropped back to using all white flour. Whole grains are wonderful in a hamburger bun, but there’s absolute joy in a supremely soft bun with a delicate flavor.
Baking Schedule
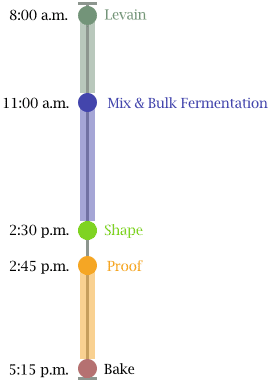
This recipe is a direct process recipe, meaning it’s started and baked the same day with no overnight, cold-proof (retard). You can begin the dough first thing in the morning when your sourdough starter is ready and finished before dinner.
Alternatively, if you want to split this over two days — which might introduce a touch more sourness, I would place the dough after 2 hours into bulk fermentation in the fridge, covered. The next day, take the dough out, divide and shape, and proof until ready (this might be 2-4 hours at room temperature).
Soft Sourdough Potato Buns Formula
For tips on how to calculate baker’s percentages or how to modify this formula, see my post on baker’s percentages (baker’s math).
| Total Dough Weight | 1,250 grams |
| Pre-fermented Flour | 12.00% |
| Yield | 10 x 120g buns or rolls |
Total Formula
My final dough temperature for this dough was 78°F (25°C). See my post on the importance of dough temperature for more information.
Note that this is the Total Formula which lets you know all the ingredients you need for this recipe. Scroll down to the Method section for what you need in each step.
| Weight | Ingredient | Baker’s Percentage |
|---|---|---|
| 508g | All-purpose white flour, ~11-12% protein (Central Milling Artisan Baker’s Craft, Malted Flour) | 100.00% |
| 203g | Potato, russet (about 3 medium; baked, riced, and cooled) (I’d imagine just about any potato would work very well here, even sweet potato.) | 40.00% |
| 112g | Butter, unsalted (pliable, room temperature) | 22.00% |
| 91g | Eggs (cold from the fridge) | 18.00% |
| 25g | Sugar, caster (Caster sugar is superfine white sugar. If you don’t have caster sugar, pulse granulated white sugar in a food processor for 30 seconds or use the finest white sugar you have.) | 5.00% |
| 178g | Milk, whole (cold from the fridge) | 35.00% |
| 61g | Water | 12.00% |
| 11g | Salt (sea salt) | 2.10% |
| 61g | Sourdough starter (100% hydration) | 12.00% |
In addition to the above ingredients, you’ll need one more egg and a tablespoon of whole milk or heavy cream for the egg wash.
Soft Sourdough Potato Buns Method
1. Prepare Levain and Potatoes – 8:00 a.m.
Prepare levain
Mix the following ingredients together in a container and leave covered to ripen for 3 hours. Be sure to keep it warm—and warm the mixing water if necessary—around 78°F (26°C).
| Weight | Ingredient | Baker’s Percentage |
|---|---|---|
| 61g | Ripe sourdough starter (100% hydration) | 100% |
| 61g | All-purpose white flour, ~11-12% protein (Central Milling Artisan Baker’s Craft, Malted Flour) | 100% |
| 61g | Water | 100% |
40.91% levain in final dough mix.
Prepare potatoes
Note: Baking vs. boiling potatoes: I prefer to bake the potatoes instead of boiling them to prevent the absorption of extra water, which might add hydration to the dough. Additionally, baking ensures maximal potato starch gelatinization, which results in a light and fluffy texture.
Preheat the oven to 350°F (178°C) with a rack in the middle. Grab three or four potatoes that together weigh at least 300g or so—you will need a little extra to avoid coming in short (I baked 3 and had a little leftover) and scrub the skin clean under running water. The recipe calls for 203g of potato flesh so make sure the potatoes you’re baking are a little over this to cover any lost potato in processing — go for 300g to play it safe.
Place the whole potatoes into a small roasting pan or dish and, with a fork, prick the skin around the potatoes several times to allow them to breathe during baking. Bake the potatoes for about 1 hour, flipping them halfway through. Remove them from the oven when a knife can easily slide into the center of the potato (internal temp of 208-211°F / 98-99°C).
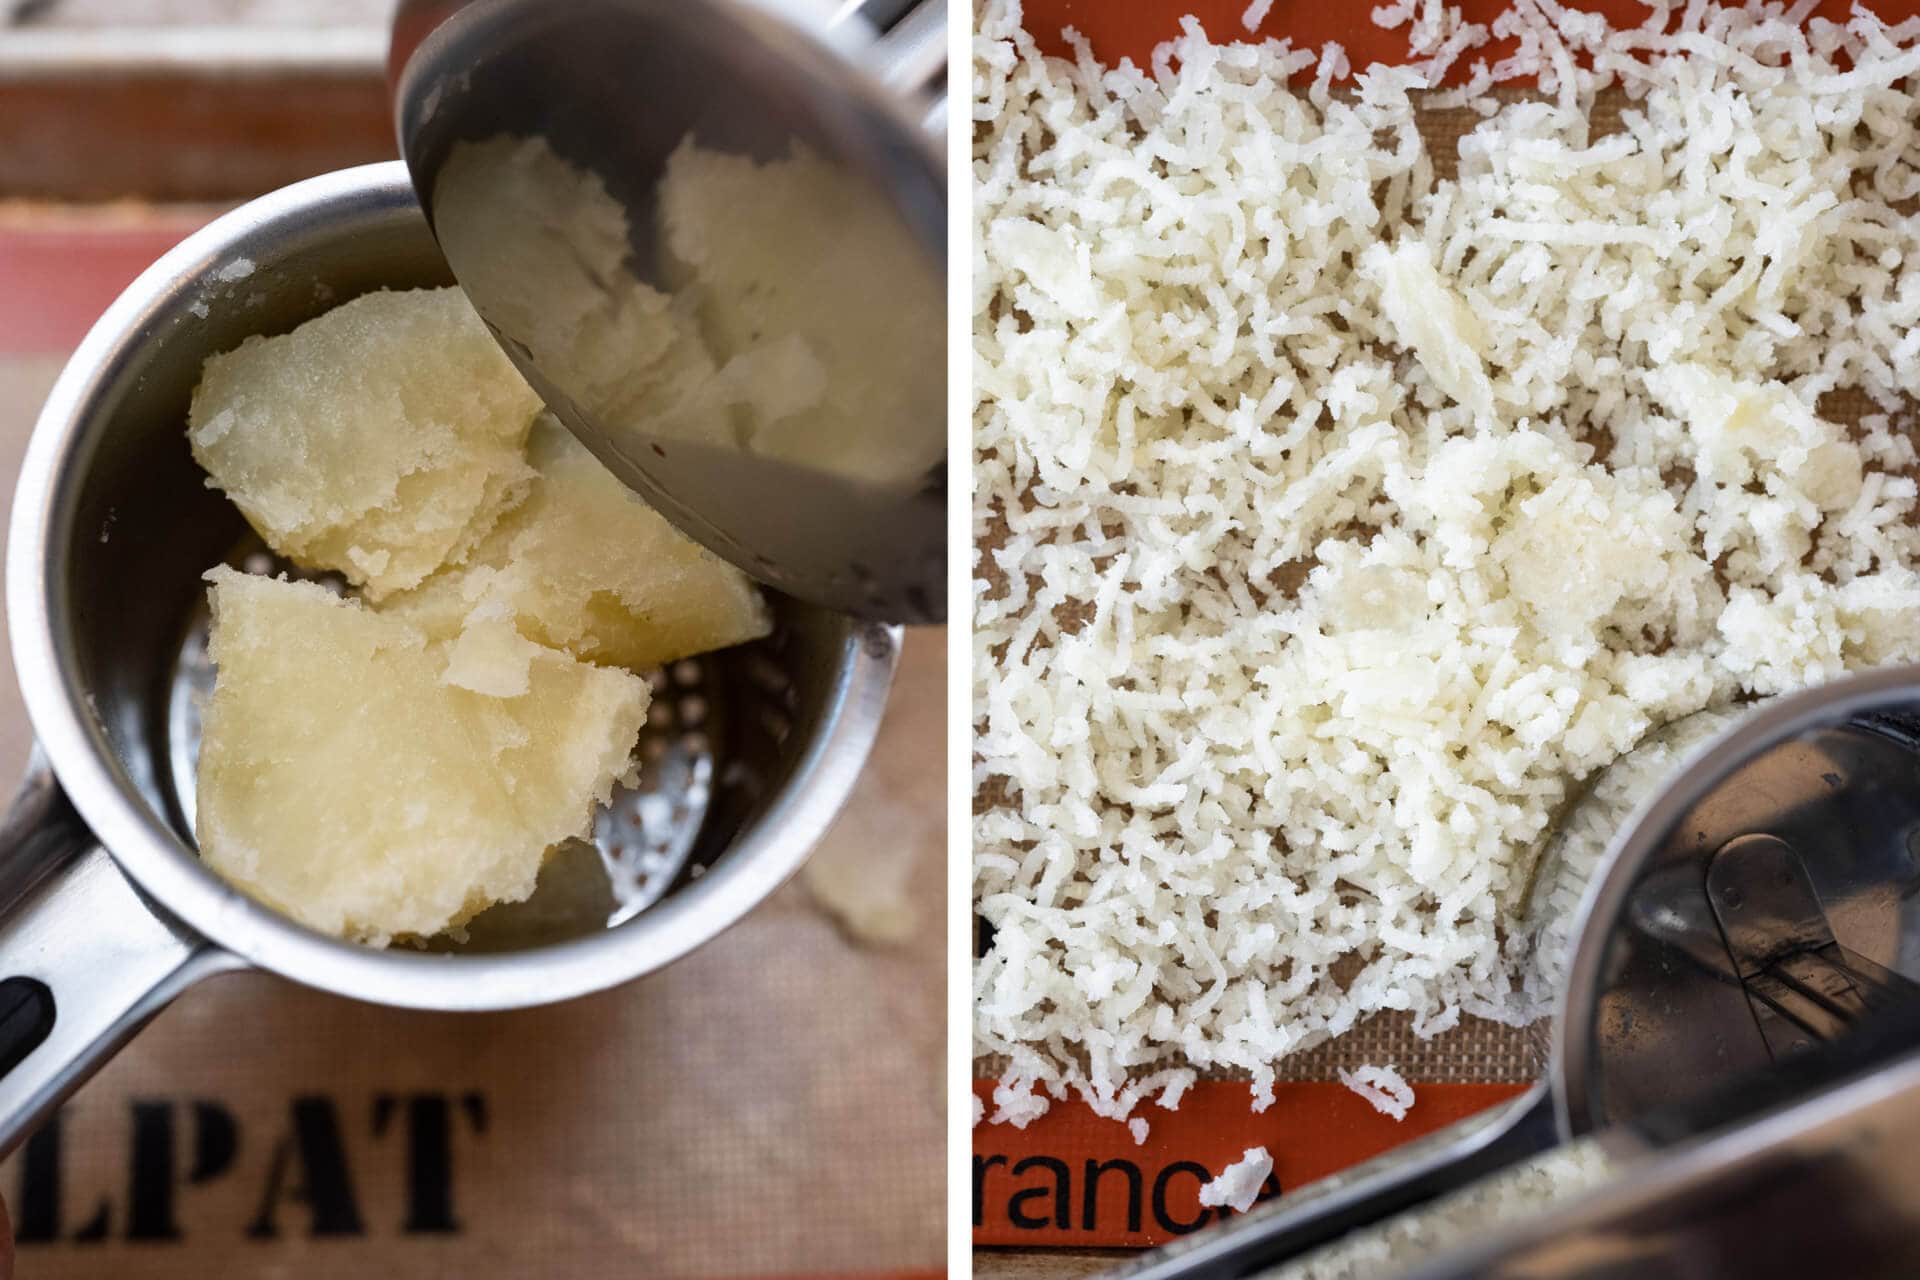
When finished baking, remove the potatoes from the oven. Using oven-safe gloves and tongs, remove the skin from the potatoes while they’re still warm. Then, roughly chop the potato flesh into large chunks. Using a potato ricer, rice the warm potato out onto a baking sheet to cool. If you don’t have a potato ricer, mash the potatoes very well or chop finely and spread on the sheet to cool.
2. Mix – 11:00 a.m.
Soften butter: Take out the called for 112g butter and cut it into 1/2″ pieces. Let the butter sit out on the counter until called for later in mixing.
I used my KitchenAid stand mixer to mix this dough. It’s possible to mix this all by hand, but it will be challenging with the added butter (the potato shouldn’t be a problem at the end). If you choose to do it by hand, you could knead the dough in a bowl with a wet hand or slap/fold on the counter.
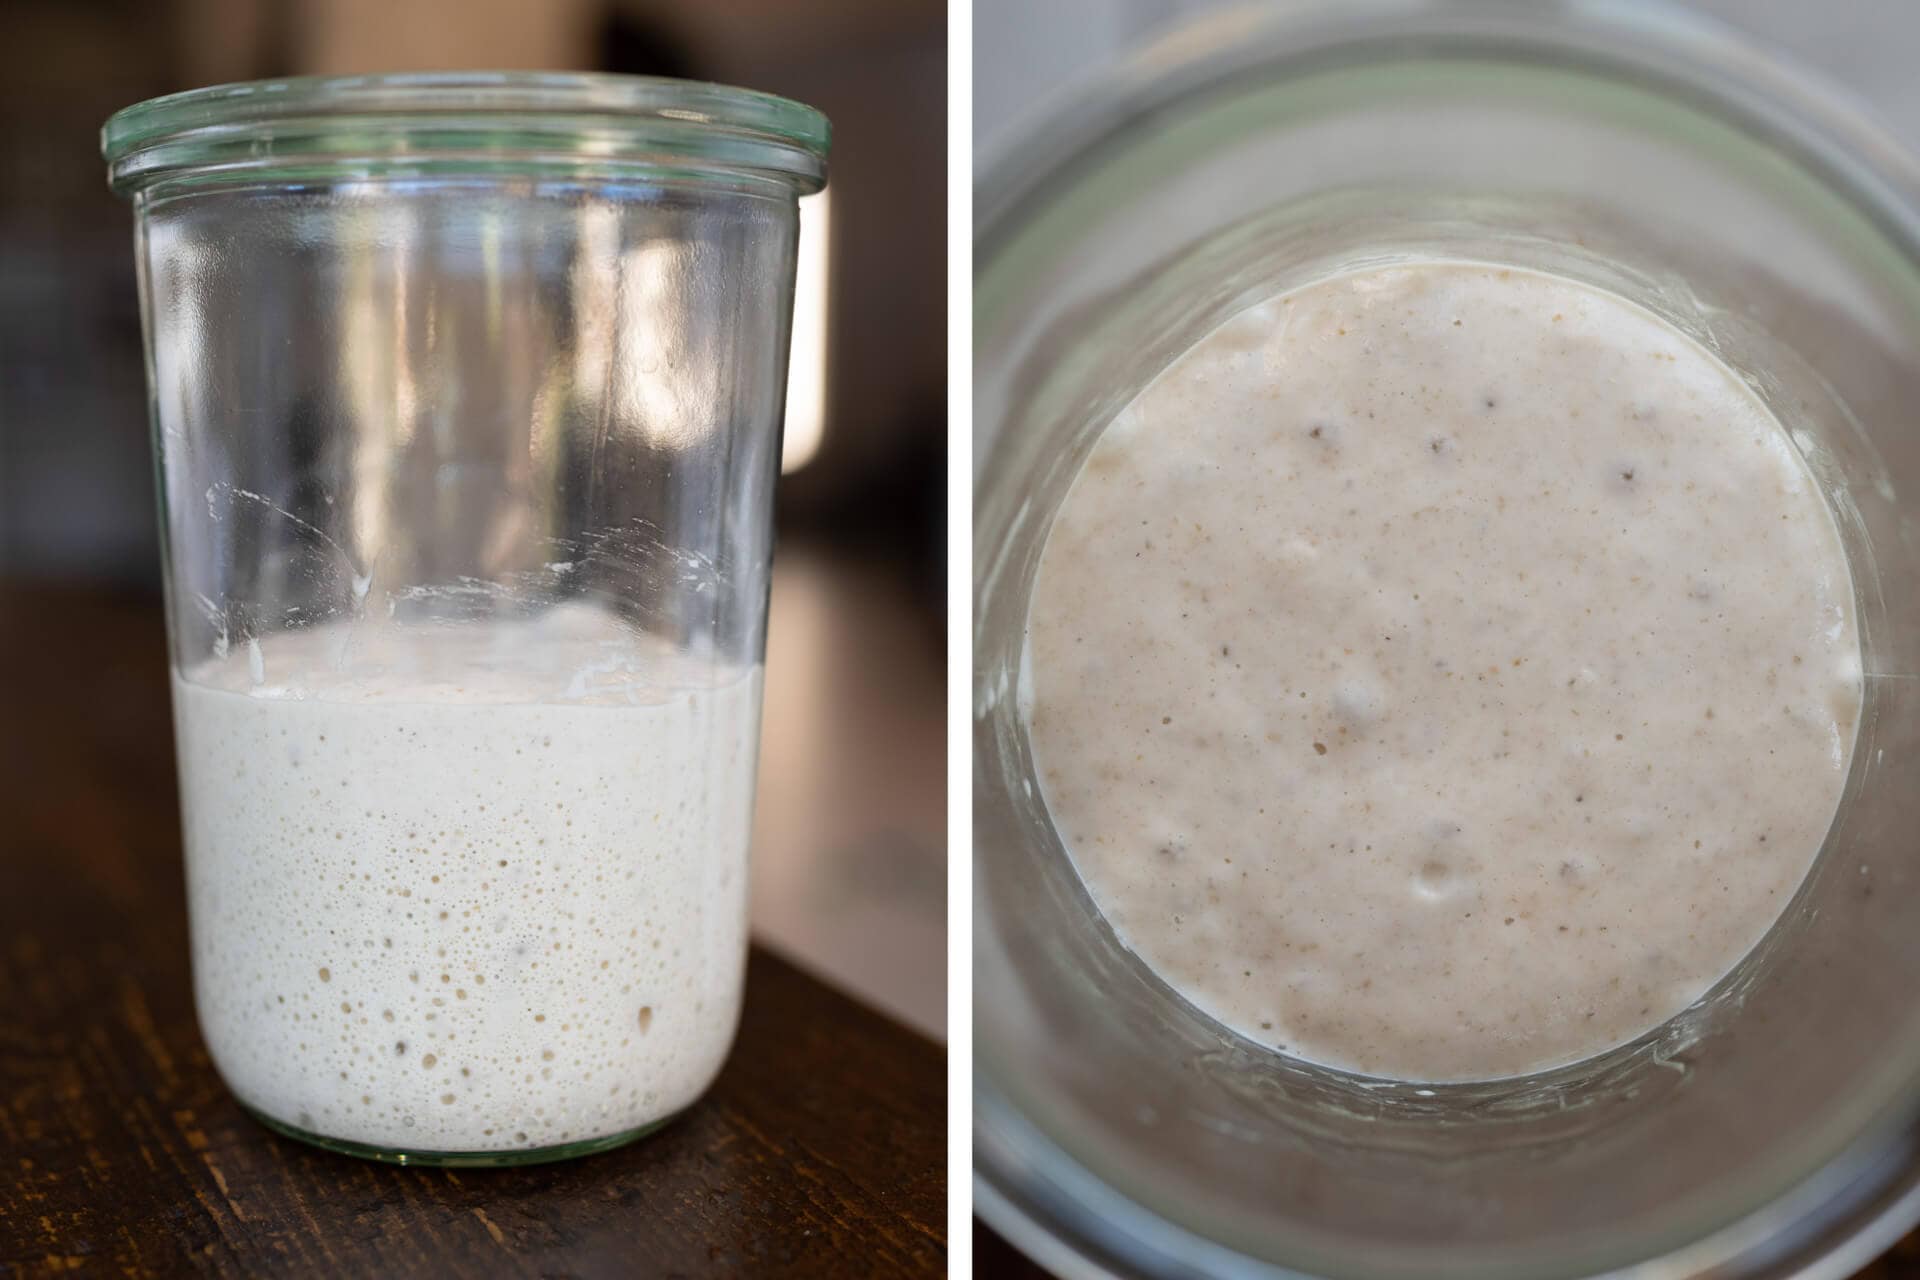
Mix and strengthen the dough: To the bowl of a stand mixer, and when your sourdough starter is ripe (see the image, above), add the ingredients below.
Note: the butter and potato will be added later in mixing once the dough has sufficient strength from mixing.
| Weight | Ingredient |
|---|---|
| 447g | All-purpose white flour |
| 91g | Eggs |
| 25g | Sugar, caster |
| 178g | Milk, whole |
| 11g | Salt (sea salt) |
| 183g | Ripe levain (everything in the Levain Build section) |
Turn the mixer to the lowest speed and mix until everything is incorporated. Scrape the sides of the bowl and dough hook and increase to speed 2, mix for 3-5 minutes until the dough begins to cling to the dough hook and remove from the sides of the bowl. Then, scrape the hook clean, cover the mixing bowl, and let rest for 10 minutes.
After the rest, mix on speed 2 for another 2-3 minutes until the dough again begins to cling to the hook and look smoother. If you did a windowpane test at this point it would not pass, but it would start to show a thin membrane forming.
Add the butter: The butter should be at room temperature at this point: a finger press should easily press into the butter with little resistance. With the mixer set to low speed, add the butter, one pat at a time. Continue mixing on low until all the butter is added and the dough again becomes one cohesive mass.
Add the riced potato: Once all the butter is added to the dough, add in half of the riced potato and mix on low until incorporated (this should not take long). Then, add the remainder of the riced potato and finish mixing until the potato is mostly incorporated into the dough, again, this should not take long.
Transfer your dough to a bulk fermentation container and cover.
2. Bulk Fermentation – 11:15 a.m. to 2:30 p.m. (about 3.5 hours)
At 72-75°F (22-24°C), bulk fermentation should take 3.5-4 hours. During this time, we will strengthen the dough through a series of stretch and folds directly in the bowl.
For each set wet your hands, grab one side and stretch it up and over the dough to the other side. Rotate the bowl 180° and perform another stretch and fold (this forms a long rectangle in the bowl). Then, rotate the bowl 90° and do another stretch and fold. Finally, rotate the bowl 180° and do one last stretch and fold.
Give the dough 3 sets of stretch and folds starting after the first 30 minutes of bulk fermentation, and two more times spaced by 30 minutes. After the last set of stretch and folds, let the dough rest, covered, until the next step.
3. Divide and Shape – 2:30 p.m.
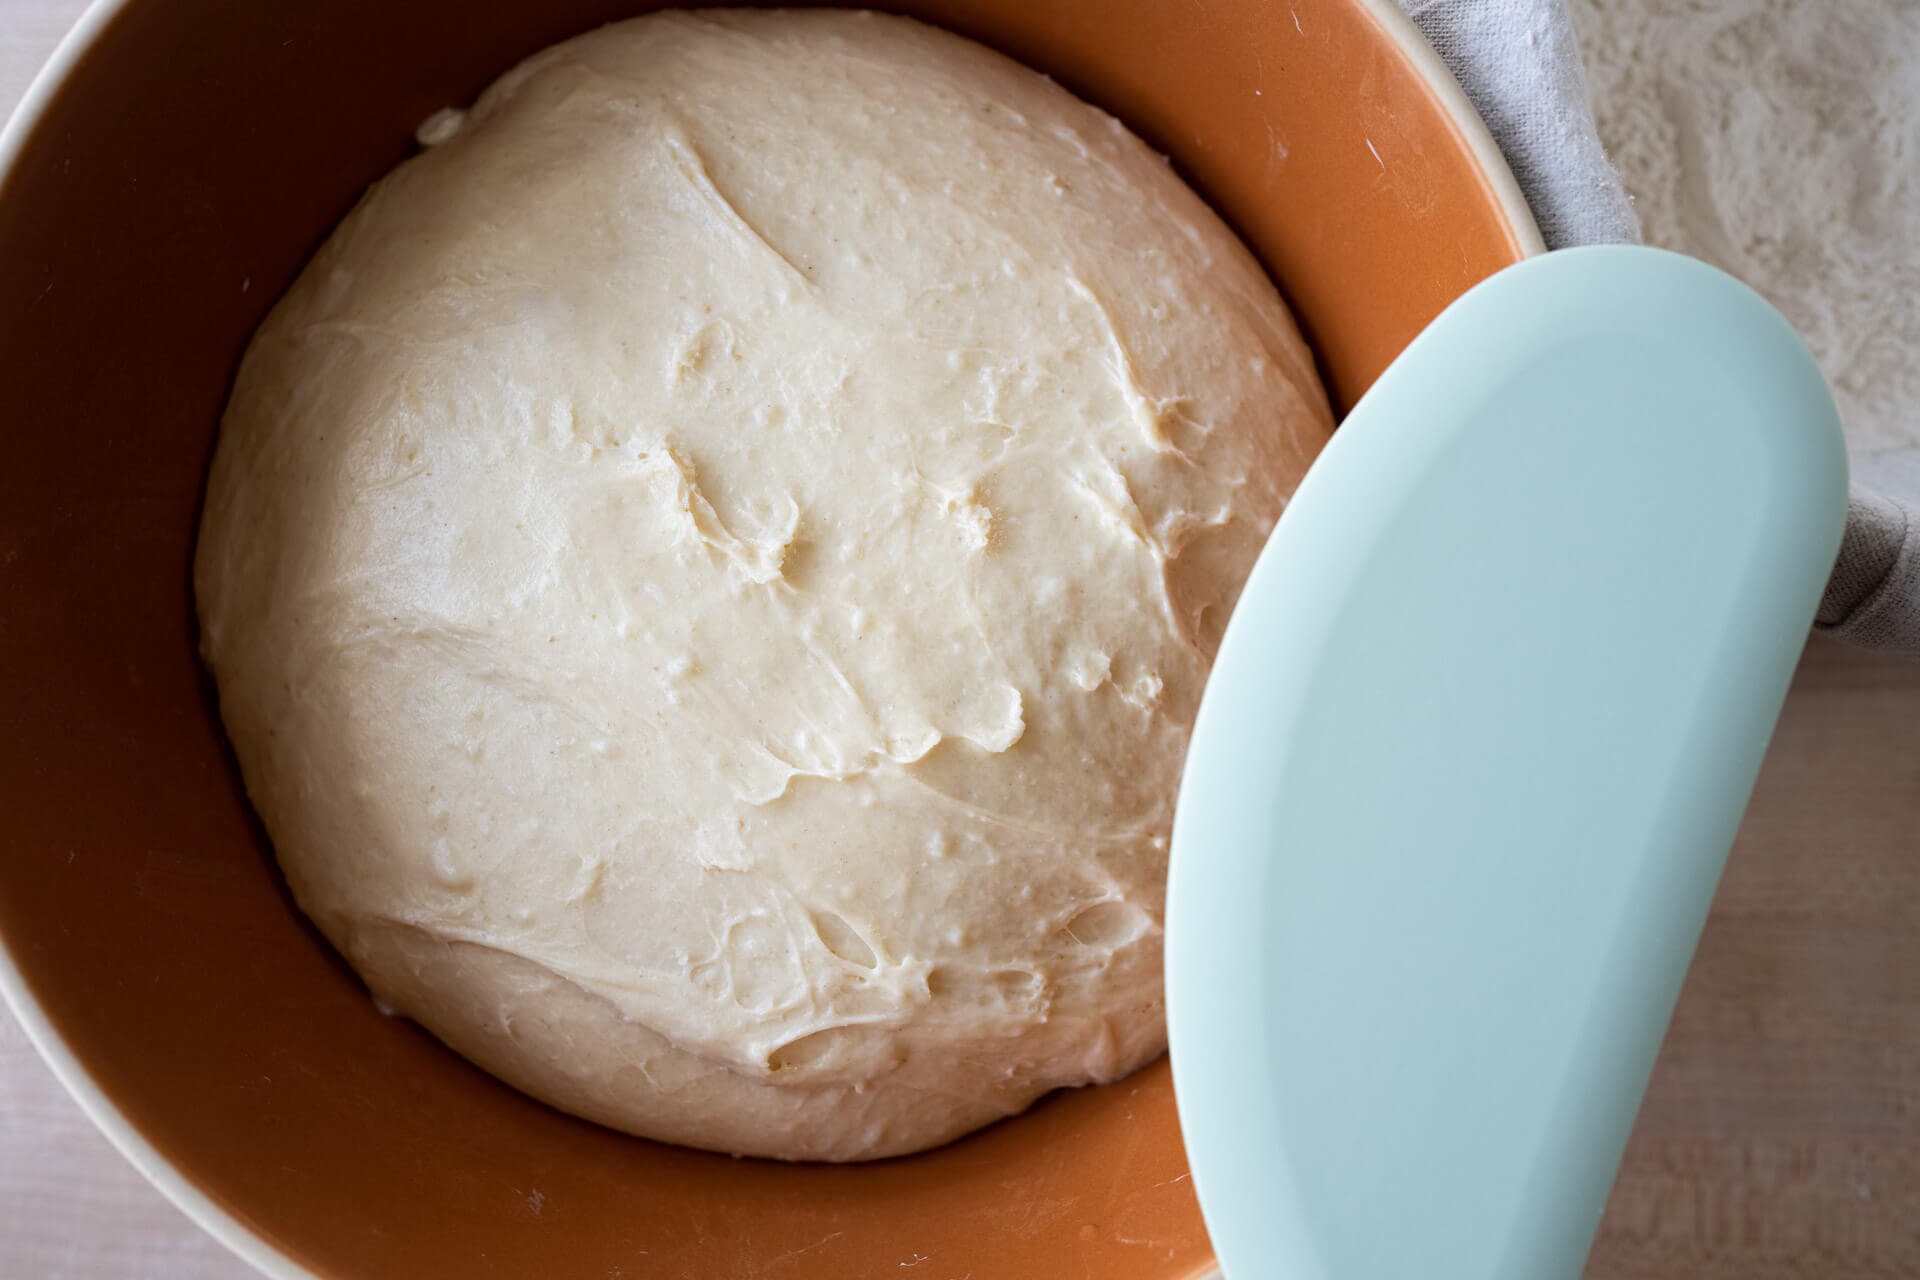
Chilled dough option: This dough is very, very soft. I shaped the dough right at room temperature, but if you want to make shaping a little easier, place the bulk container in the refrigerator for 20-30 minutes until the dough cools and slightly firms to the touch.
This dough is very, very soft. Chill the dough in the refrigerator if you worry shaping might be difficult.
Line two baking sheets with parchment paper. Liberally flour your work surface and, using a bowl scraper, gently scoop the dough out to the floured area. Lightly flour the top of the dough and divide it into ten 120g portions.
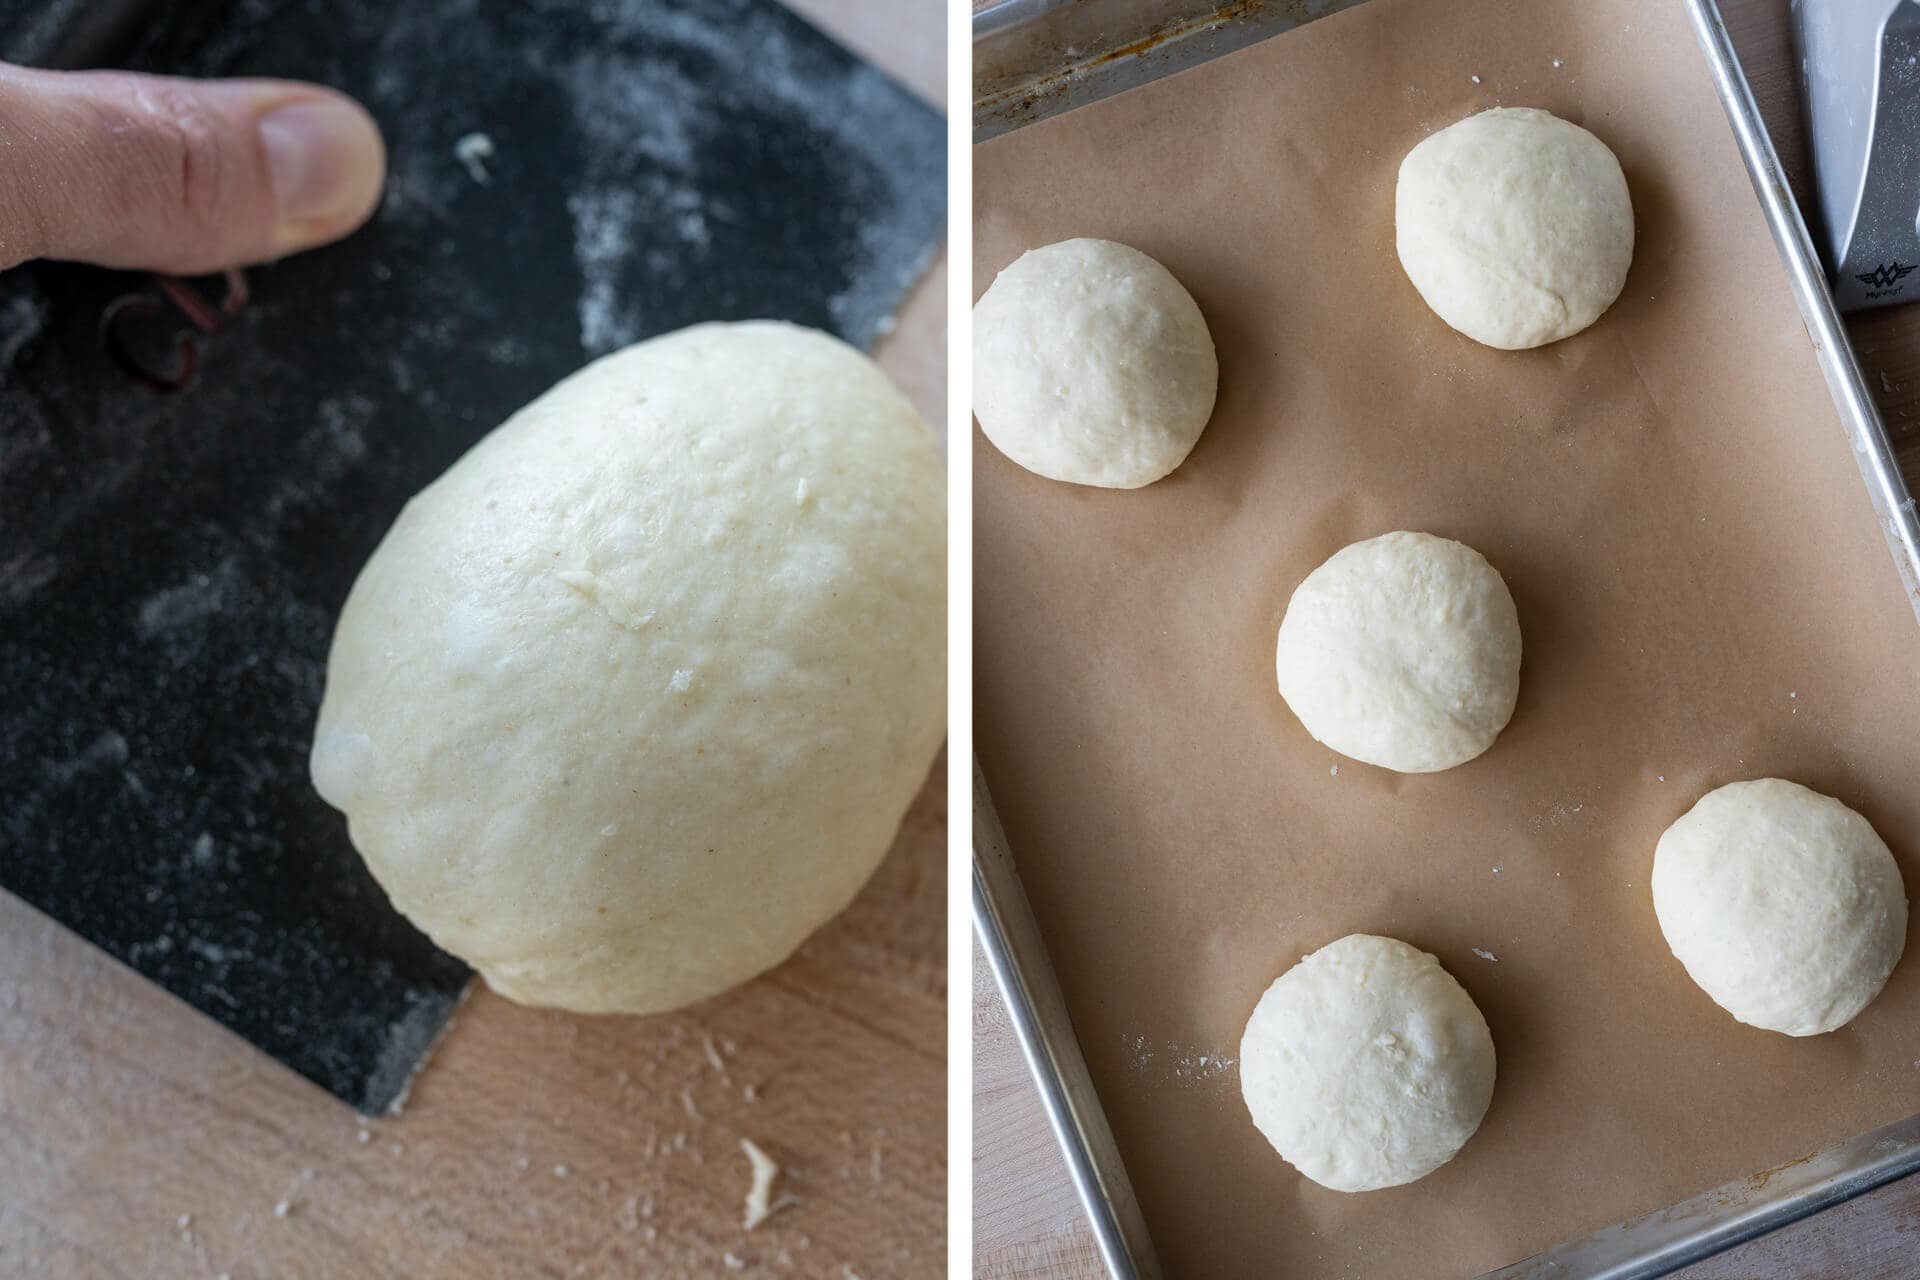
Lightly flour the top of the resting dough pieces. Using floured hands and a bench scraper, shape the portions into tight balls. As seen above, after I shaped the dough into a ball, I used the bench scraper to push the dough against the work surface to impart a tight skin on the outside.
For more shaping instruction, see my guide page to shaping buns and rolls.
4. Proof – 2:45 p.m. 5:15 p.m. (or when the dough is ready)
After all the pieces are shaped, cover each baking sheet with a large, reusable plastic bag and seal shut. To keep the bags up off the dough, place something tall, like a small cup, in the bags before closing.
Or even better, use these snap-on reusable baking sheet covers.
Proof for 2.5 hours or longer until the dough has puffed up considerably. When gently poked, they should feel extremely soft and yield immediately to almost no pressure. If you notice the skin on the dough starts to tear during the end of the proof, bake them immediately.
5. Bake – 5:15 p.m. (pre-heat oven at 4:45 p.m.)
Preheat your oven to 450°F (232°C) with one rack at the bottom third and another at the top third.
Make the egg wash: in a medium bowl whisk together one whole egg and 1 tablespoon of whole milk. Whisk until no lumps remain and the mixture is frothy.
Uncover your baking sheets and, using a pastry brush, paint on an even layer of the egg wash (avoid drenching the dough, the wash will just pool at the base and crack in the oven). Liberally sprinkle on black and white sesame seeds.
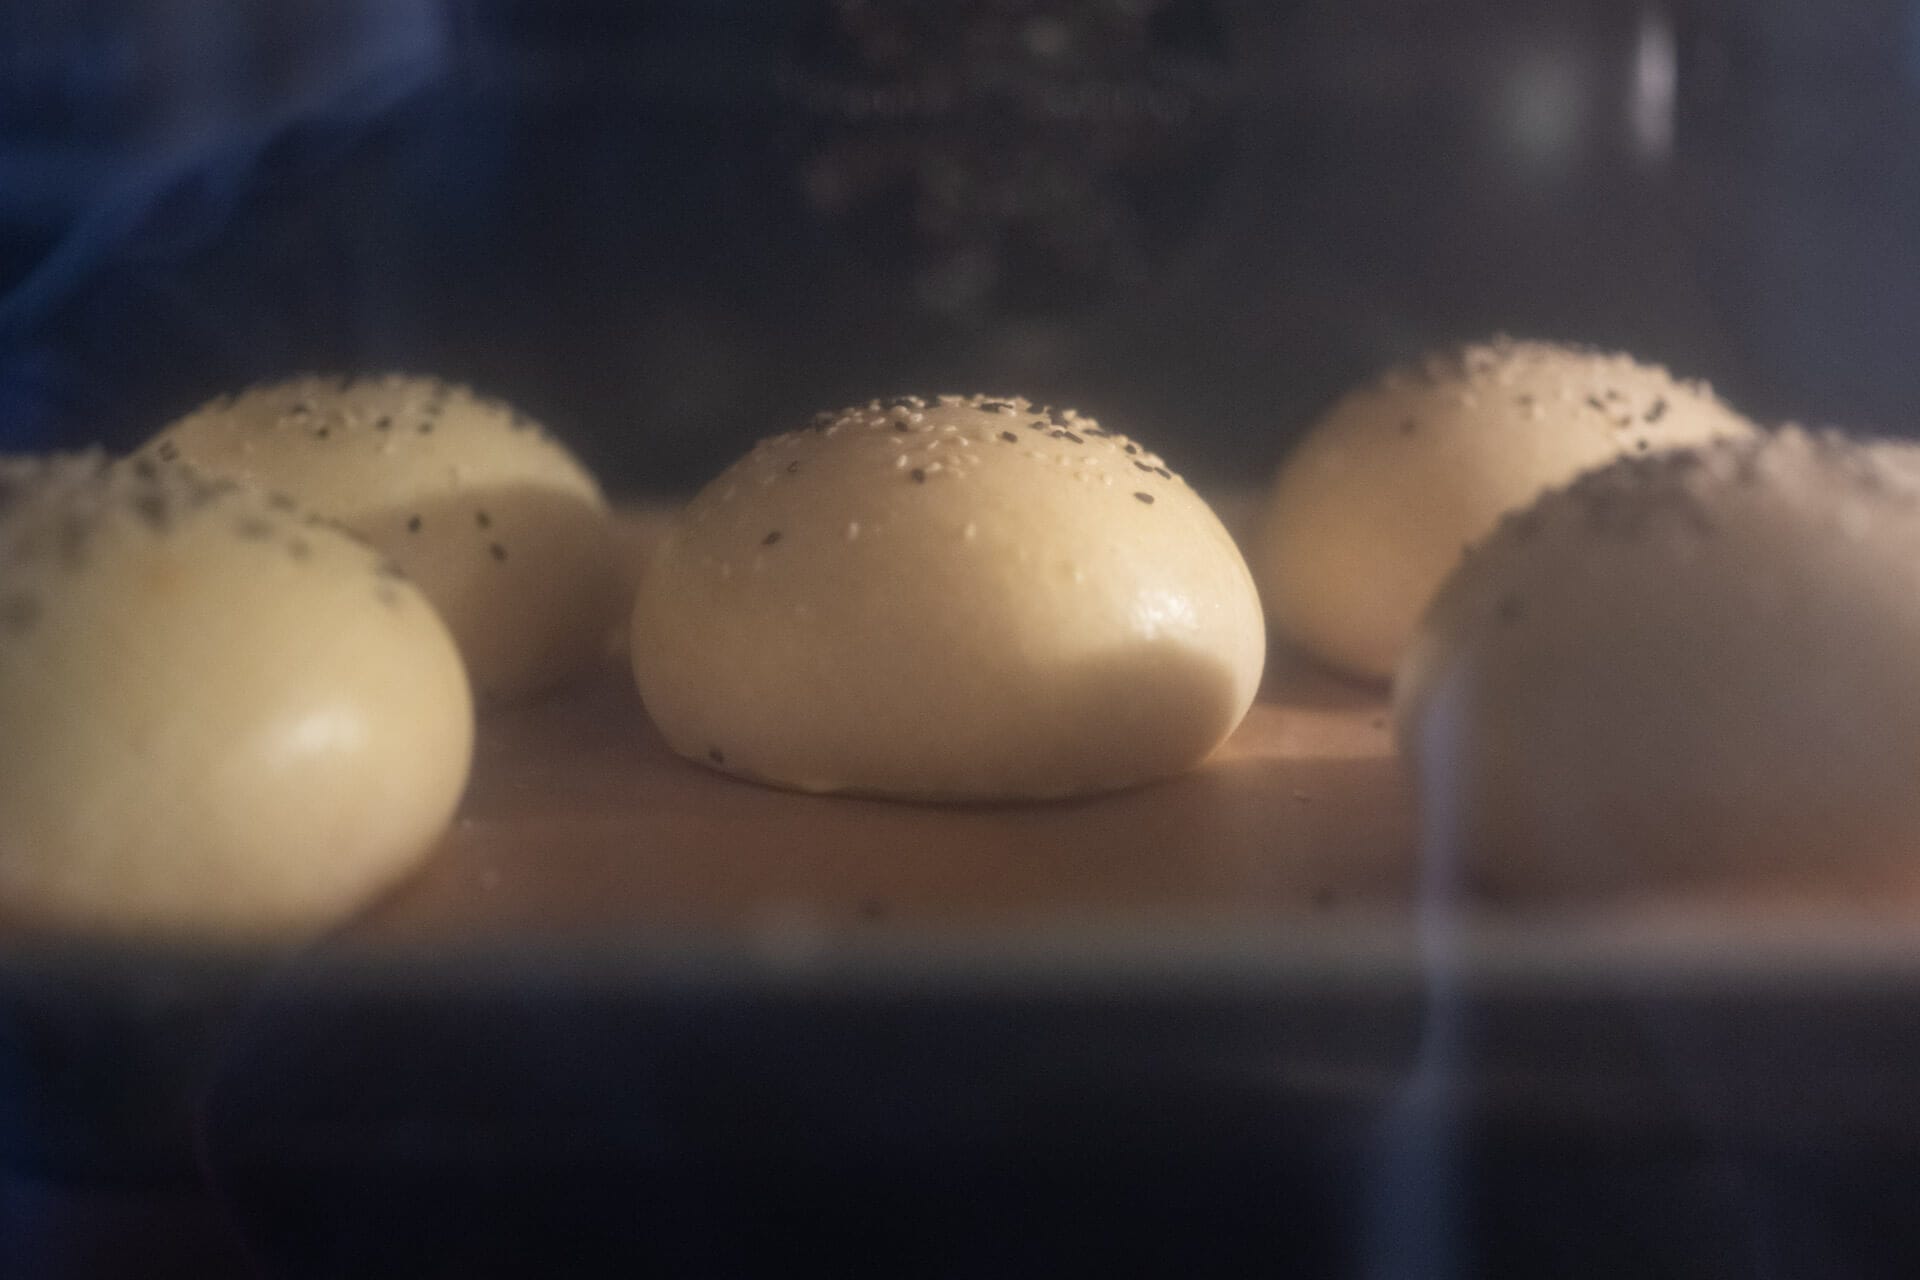
Place the baking sheets into the oven and bake for 25-30 minutes until well colored. Rotate the pans halfway through baking. Because of the egg wash, there is no need to steam the oven.
Remove the buns to cool for 5 minutes on the baking sheets, then transfer to a cooling rack until cool to the touch. If you cut the buns too early (or eat one straight off the baking sheet), they may be excessively soft—better to wait.
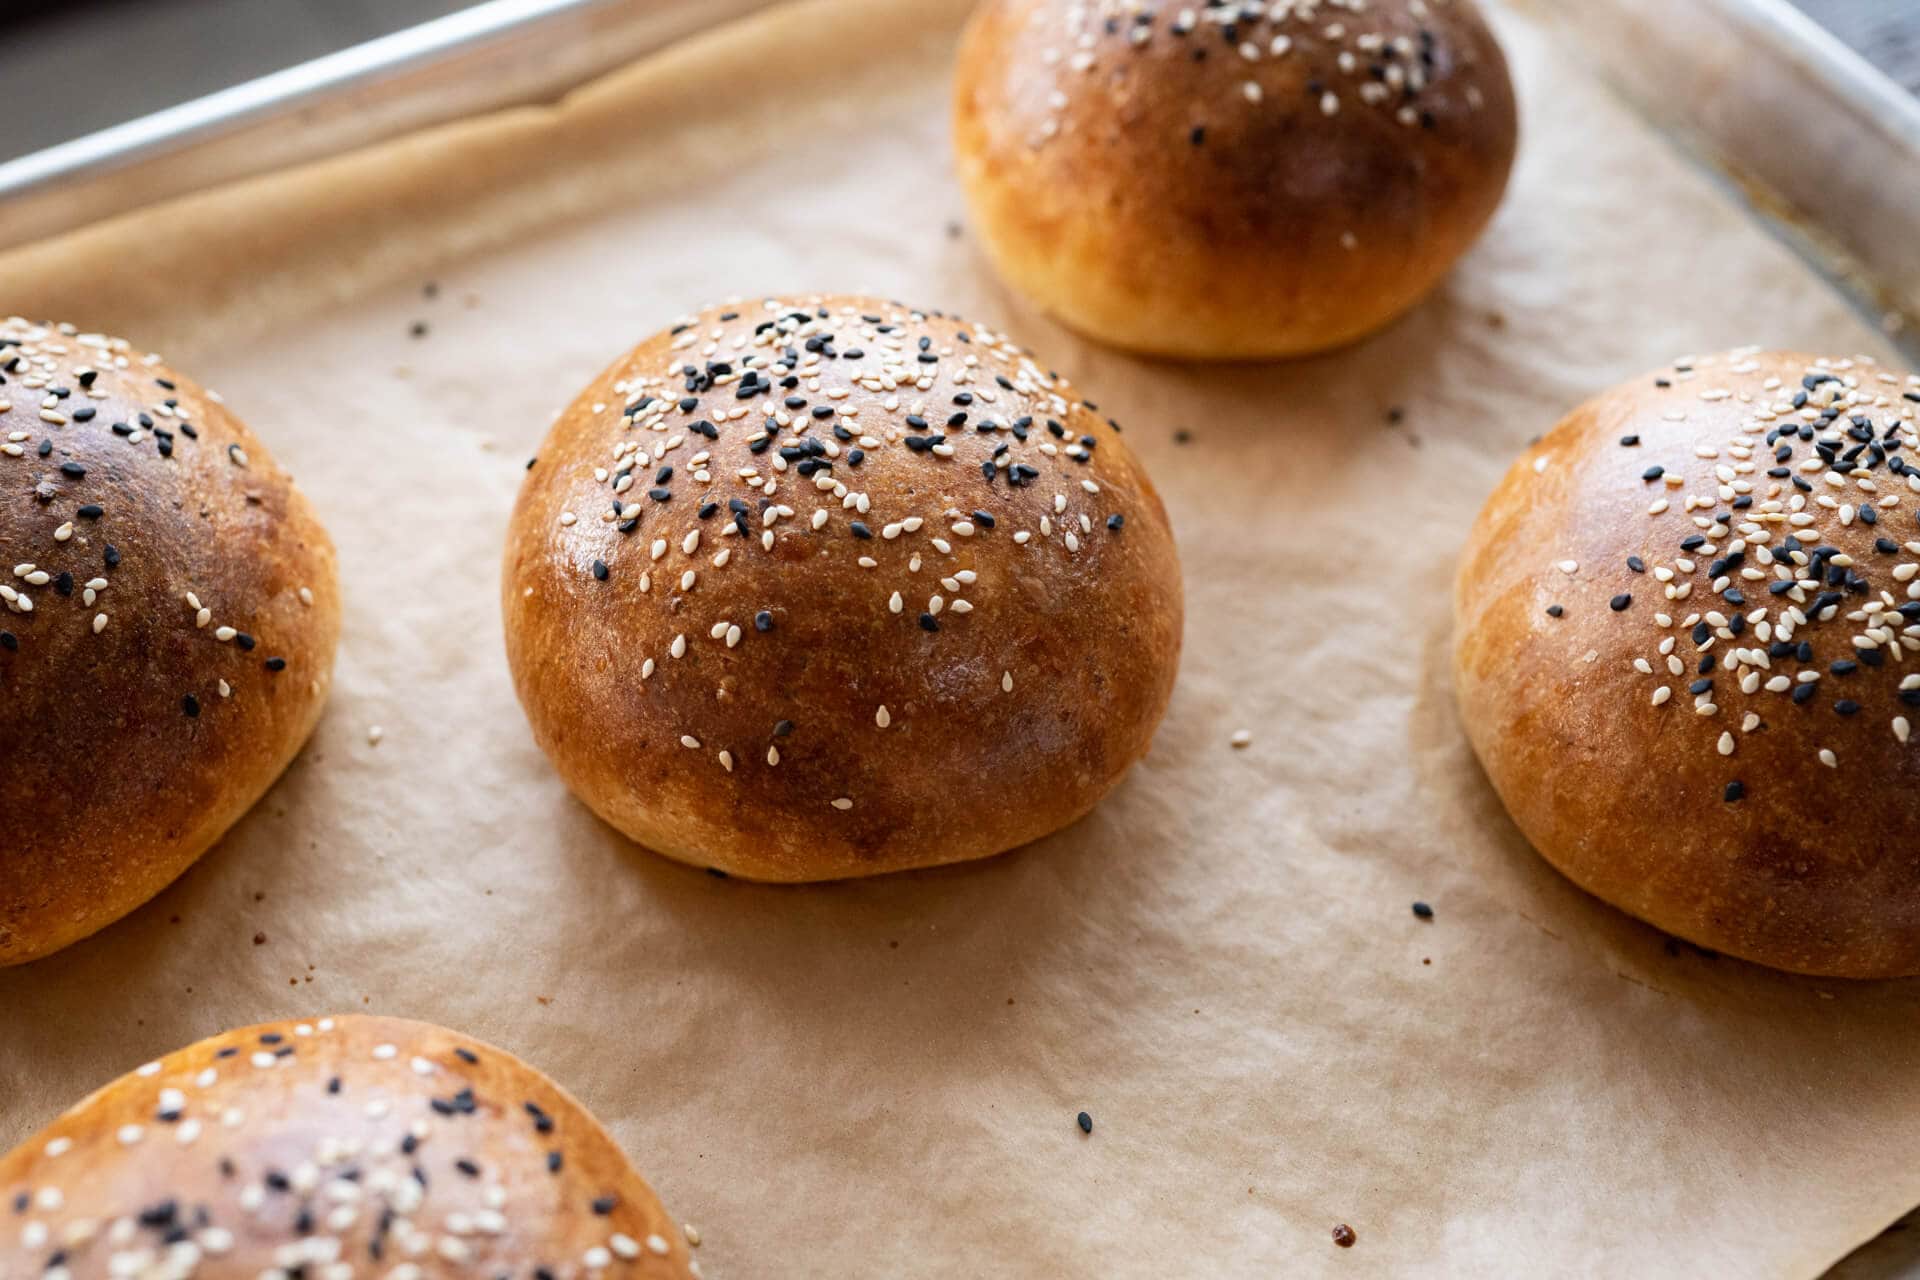
Conclusion
The surprising thing about these soft sourdough potato buns is that they successfully thread the needle between delicacy and rigidity. I’ve run them through their paces as hamburger buns, dinner rolls (torn apart and dipped in all manner of sauces), and playing the structural (but so much more!) component of a classic egg-avo-tomato-arugula-chile sandwich. How’d they fare? They avoided crumbling and completely dodged the dreaded soggy bun syndrome, even with extra doses of that sweet, sweet Tapatío. Success ✅
Crust
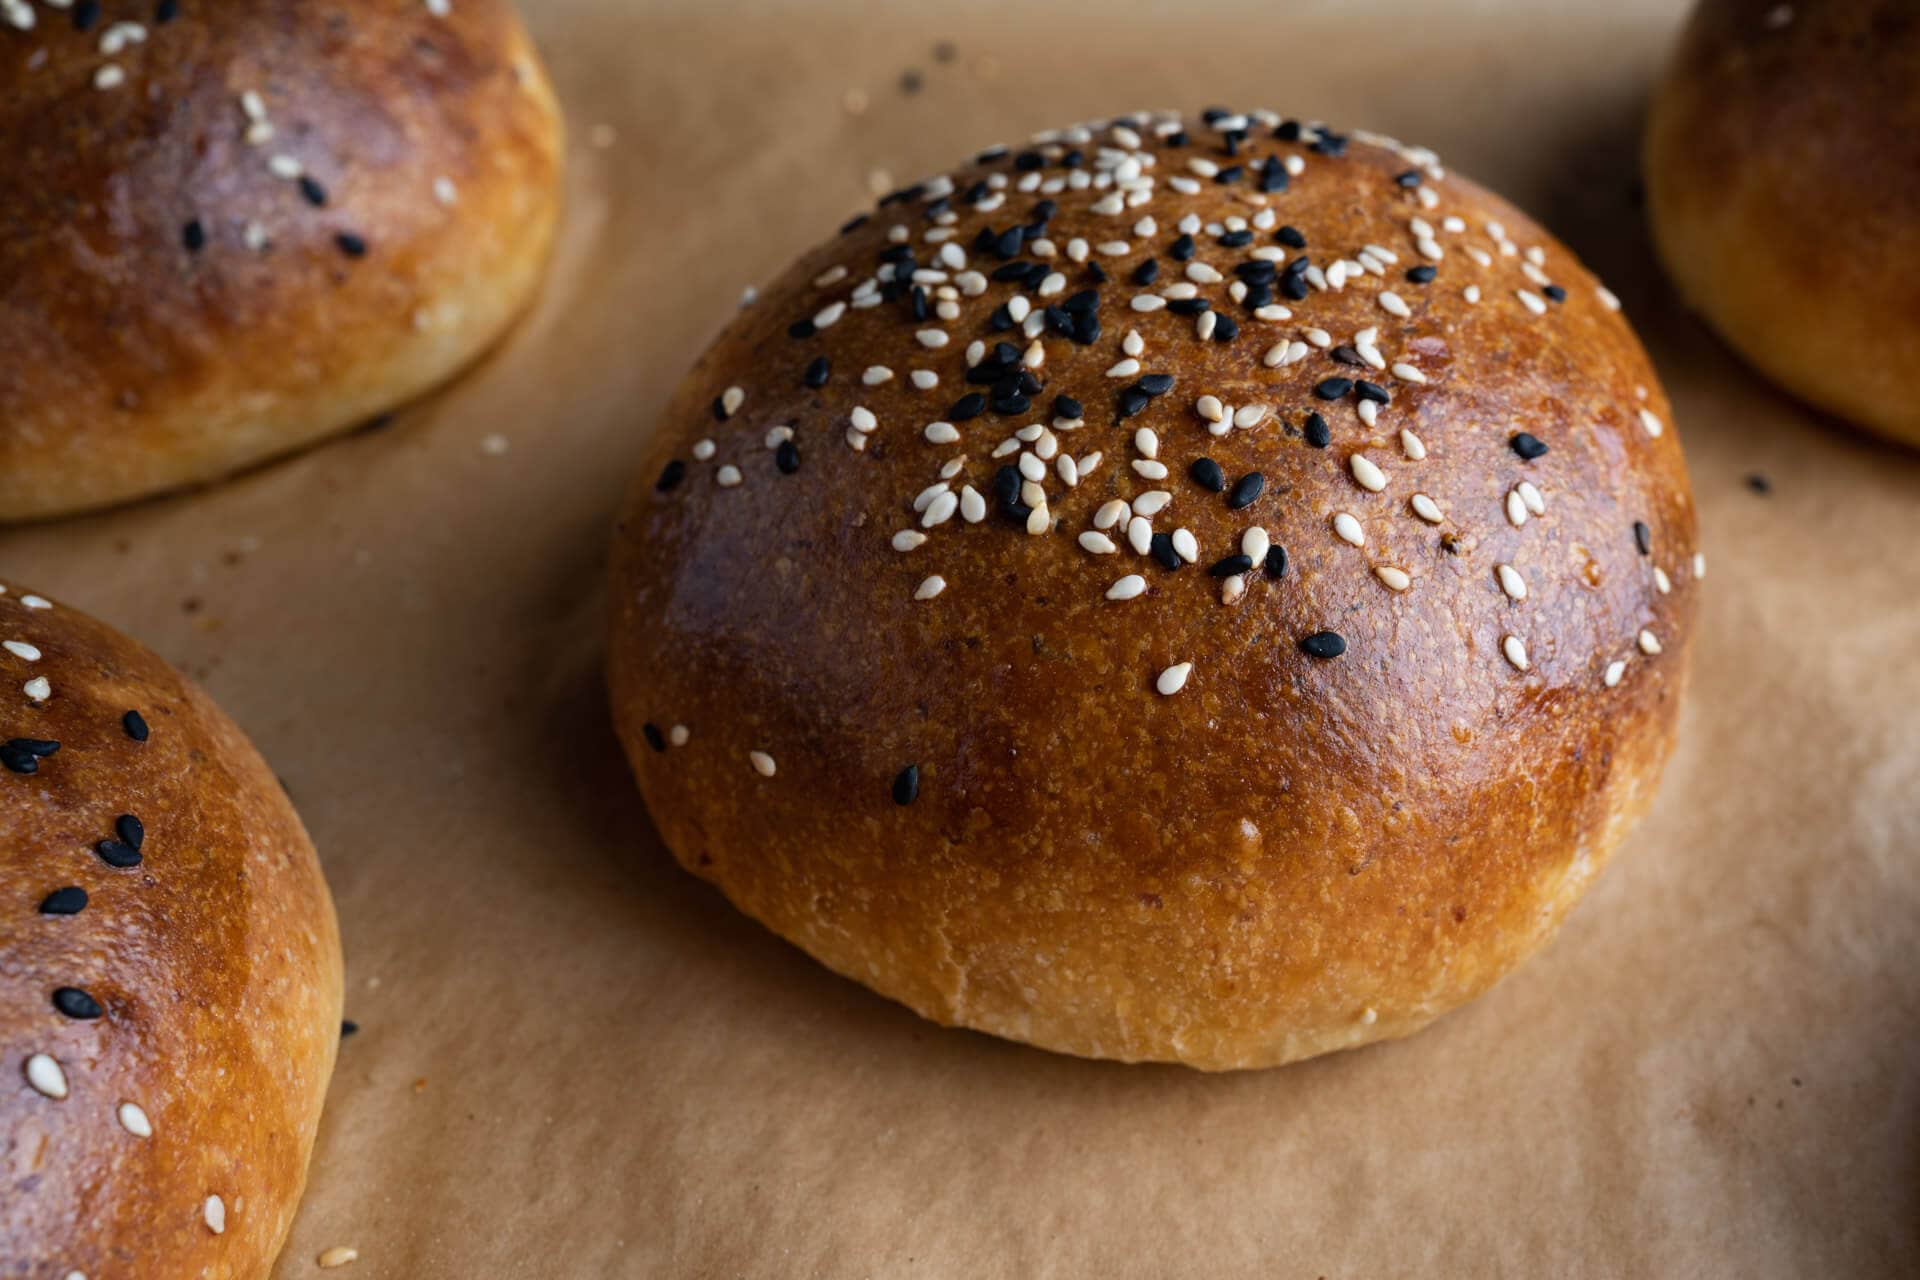
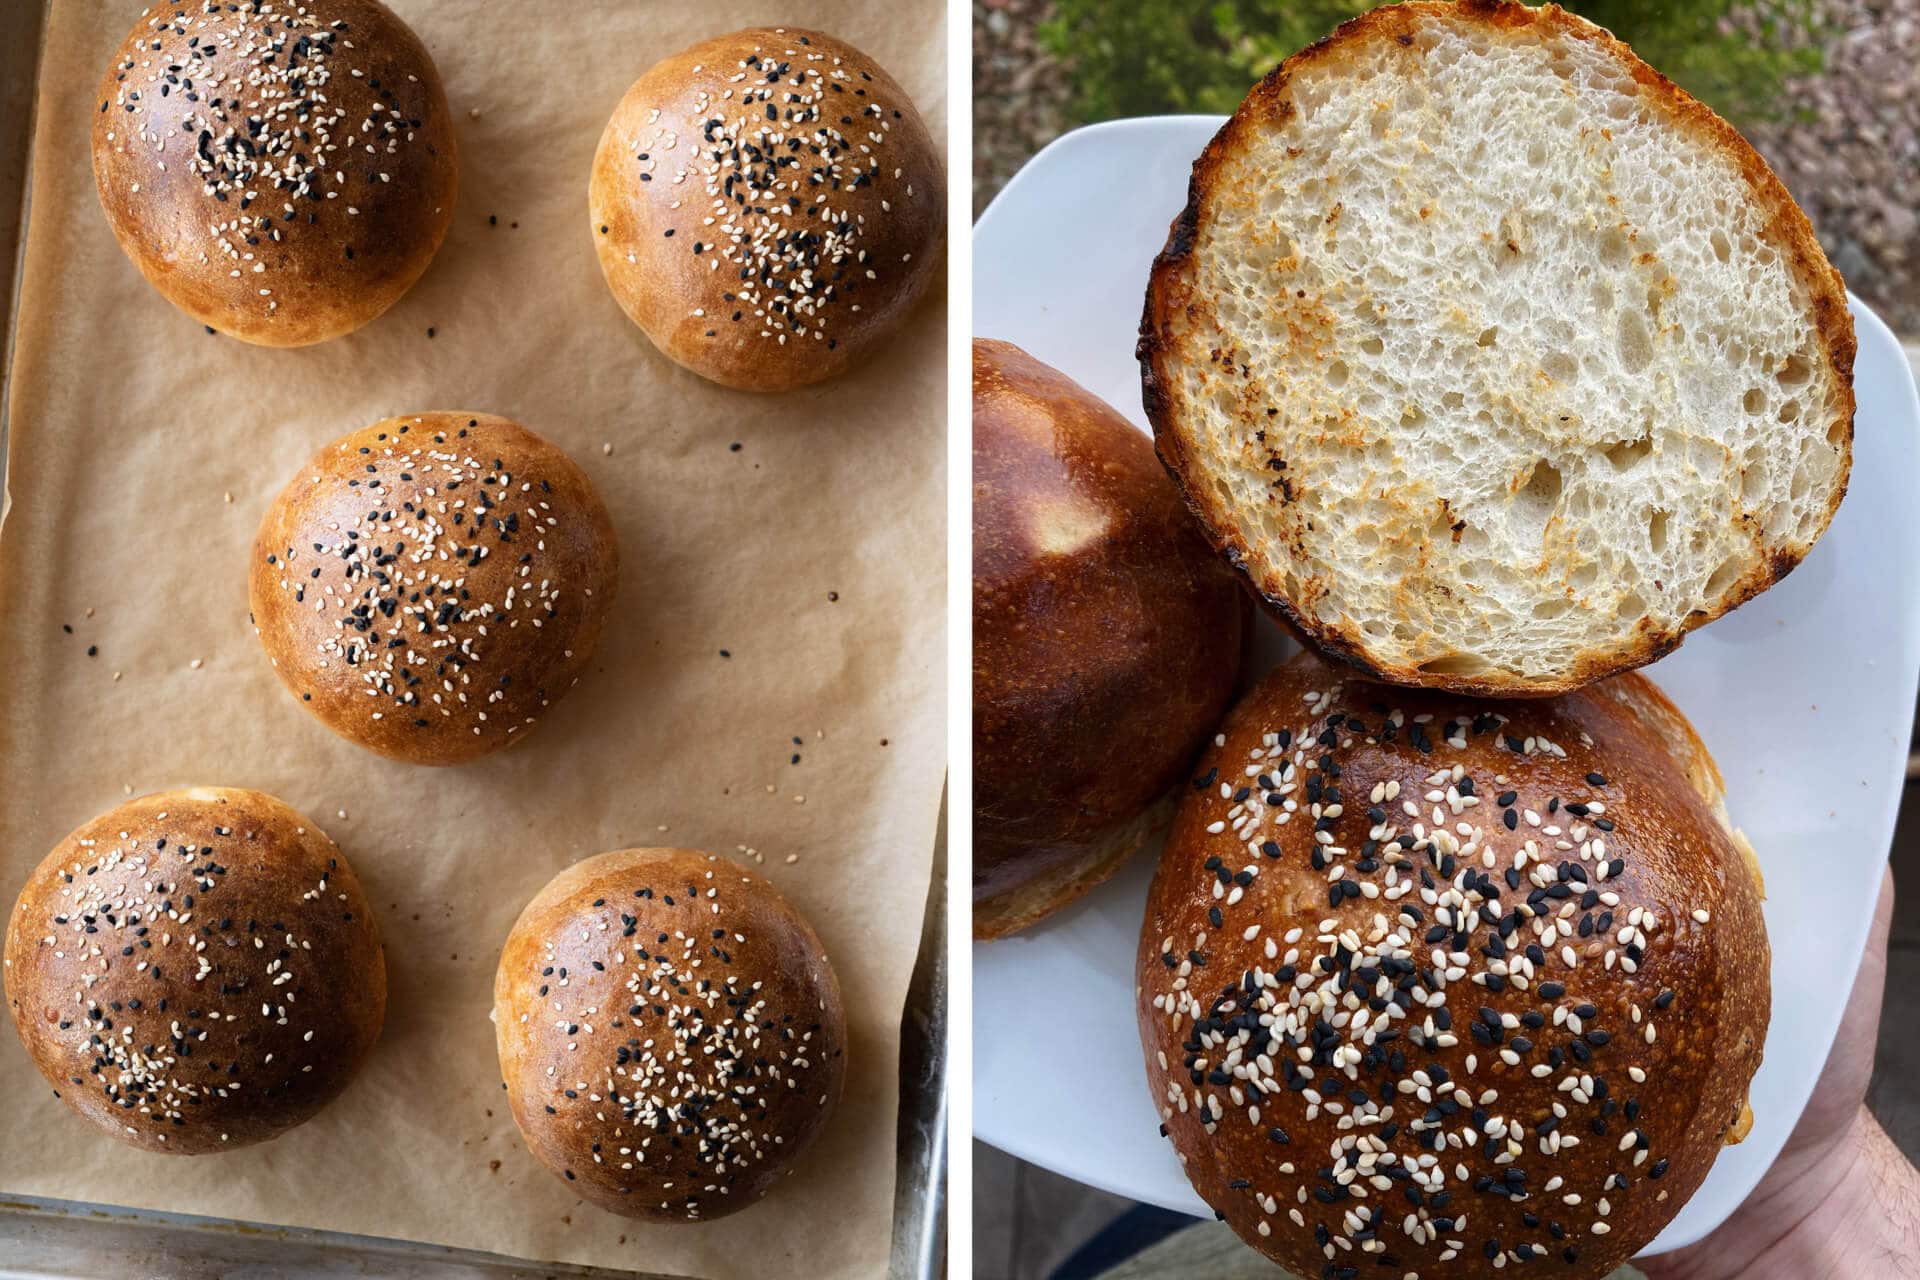
Utterly soft and thin—that is, until they’re grilled or toasted. If you want to keep the buns soft-as-can-be, then eat them as is, but I prefer toasting them directly on the grill grate — the exterior firms ever so slightly with perceptible chew at each bite.
The egg wash turns the crust into a mahogany marvel, but also surprisingly shiny when the light catches them just right. And the two pieces really entice, making it hard not to grab just one more bun…
Crumb & Taste
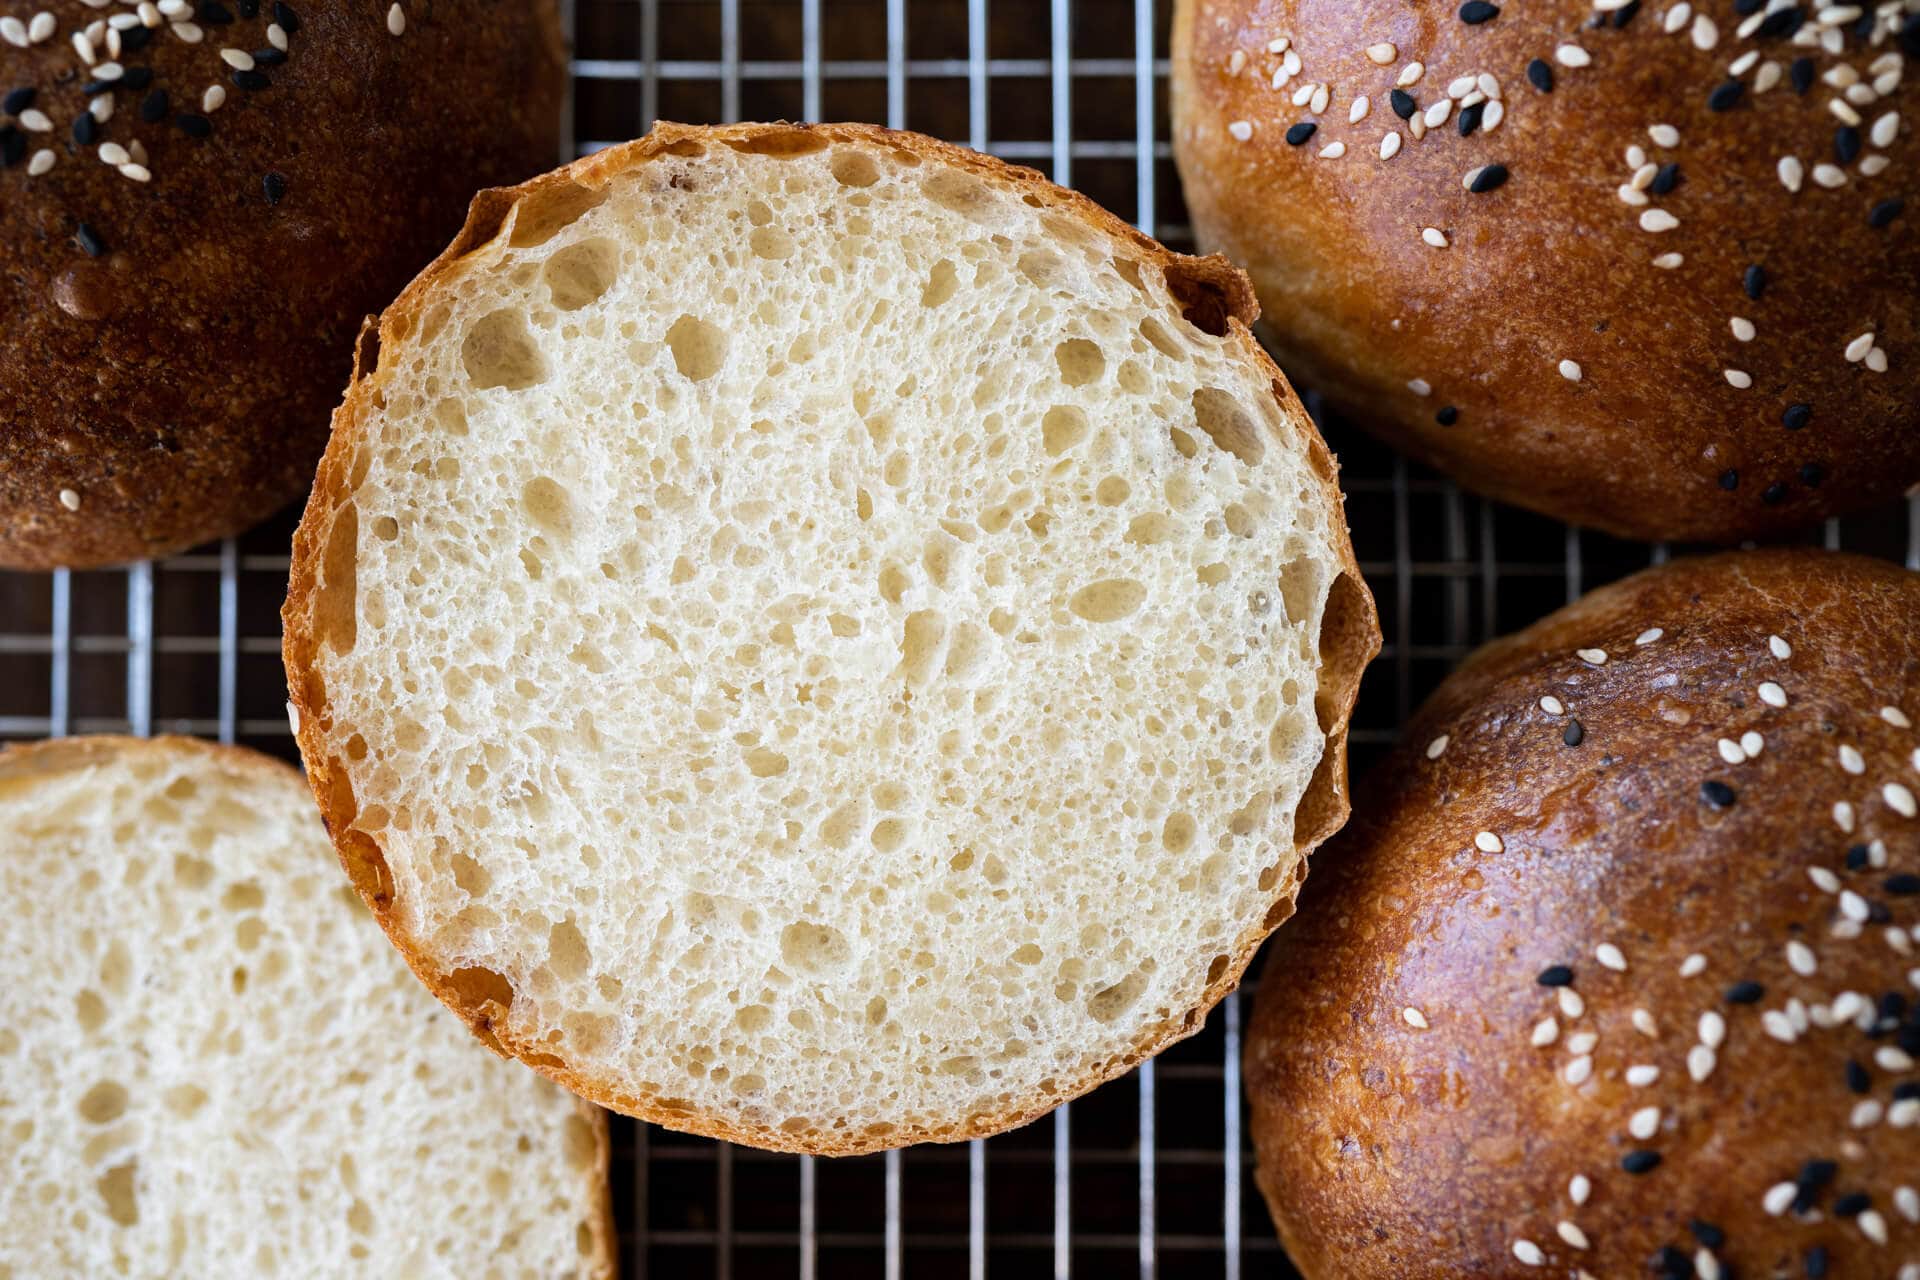
Soft like a cloud—how else better to describe the tenderness imparted by the added potato? The interior is light and airy without being overly open, which would spell disaster for a bun or roll. Even though the potato was riced, in the end, you’d be hard-pressed to find a single potato bit left in its original form (unlike my hearth-style sourdough with roasted potato recipe).
As I mentioned earlier, these are certainly my favorite hamburger buns I’ve yet to create. They have a depth of flavor and subtle sweetness that’s really hard to ignore, even when the buns are stacked with ingredients. If you’re going the hot dog route, check out my homemade hot dog buns for an equally delicious grilling experience.
Buon appetito!
Print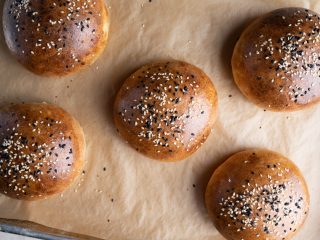
Soft Sourdough Potato Buns
- Prep Time: 9 hours
- Cook Time: 30 minutes
- Total Time: 9 hours 30 minutes
- Yield: 10 buns
- Category: American
Description
These sourdough buns with added potato are the perfect hamburger bun. Extremely soft with enough strength and structure to support anything you might be grilling.
Ingredients
Levain
- 61g all-purpose white flour
- 61g water
- 61g ripe sourdough starter
Main Dough
- 447g all-purpose white flour
- 203g potato, russet (about 3 medium; baked, riced, and cooled)
- 112g butter, unsalted
- 91g eggs
- 25g caster sugar
- 178g whole milk
- 11g sea salt
- 183g ripe levain
Egg Wash
- 1 egg
- 1 tablespoon whole milk
Topper
A mix of white and black sesame seeds, if desired.
Instructions
- Prepare levain and potatoes – 8:00 a.m.
In a small bowl, mix and knead the Levain ingredients. Transfer to a small container, cover, and keep it at a warm temperature for 3 hours. Preheat the oven to 350°F (178°C) with a rack in the middle. Grab three or four potatoes that together weigh at least 300g or so — you will need a little extra to avoid coming in short (I baked 3 and had a little leftover) and scrub the skin clean under running water. Place the whole potatoes into a small roasting pan or dish and, with a fork, prick the skin around the potatoes several times to allow them to breathe during baking. Bake the potatoes for about 1 hour, flipping them halfway through. Remove them from the oven when a knife can easily slide into the center of the potato (internal temp of 208-211°F / 98-99°C). When baked, remove from the oven, skin them and rice them onto a baking sheet to cool. - Mix – 11:00 a.m.
To the bowl of a stand mixer fitted with the dough hook attachment, add all of the Main dough ingredients except the potato and butter (leave the butter at room temp to soften at this time). Turn the mixer to the lowest speed and mix until everything is incorporated. Scrape the sides of the bowl and dough hook and increase to speed 2, mix for 3-5 minutes until the dough begins to cling to the dough hook, and remove from the sides of the bowl. Then, scrape the hook clean, cover the mixing bowl, and let rest for 10 minutes. After the rest, mix on speed 2 for another 2-3 minutes until the dough again begins to cling to the hook. Next, add the room temperature butter, one pat at a time, while the mixer is set to low speed. Once all the butter is added, add half the riced potato and mix on low until incorporated. Then, add the remainder of the potato. Transfer the dough to a container for bulk fermentation. - Bulk fermentation – 11:15 a.m. to 2:30 p.m. (about 3.5 hours)
This dough will need 3 sets of stretches and folds during bulk fermentation where the first set starts after 30 minutes into bulk fermentation and the subsequent sets are at 30-minute intervals. After the third set of stretches and folds, let the dough rest, covered, for the remainder of bulk fermentation. - Divide and shape – 2:30 p.m.
To make shaping easier, place your bulk fermentation container into the fridge for 30 minutes. Line two baking sheets with parchment paper. After the dough is chilled, scrape the dough out to a floured work surface and divide into 120g potions. Using floured hands, flour the top of the dough pieces and shape them into tight balls. Place 5 on each baking sheet. - Proof – 2:45 p.m. to 5:15 p.m. (2.5 hours)
Cover the baking sheets with large reusable plastic and seal shut and proof for about 2 1/2 hours until the dough has puffed up considerably and is very soft to the touch. - Bake – 5:15 p.m., pre-heat oven at 4:45 p.m.
Preheat your oven to 450°F (232°C) with one rack at the bottom third and another at the top third. Make the egg wash: in a medium bowl whisk together one whole egg and 1 tablespoon of whole milk. Whisk until no lumps remain, and the mixture is frothy. Uncover your baking sheets and, using a pastry brush, paint on an even layer of the egg wash. Liberally sprinkle on black and white sesame seeds, if desired. Bake the dough for 25-30 minutes until well colored. When baked, remove and let cool for 5 minutes on the sheets, then transfer to wire cooling racks.
Notes
If you don’t have a potato ricer, mash the potatoes while still warm with a potato masher or fork.
Soft Sourdough Potato Buns Frequently Asked Questions
What can I do if I don’t have a potato ricer?
Instead, mash the warm potatoes into a smooth puree or grate the potatoes on a box grater.
What can I use instead of eggs?
Use a vegan flax egg substitute instead of the eggs in this recipe.
What’s Next?
Are you looking for a lighter—but no less delicious—bun? My fluffy milk bread hamburger buns have you covered.
Or, perhaps, something other than burgers this holiday? Sourdough starter discard tortillas might just be what you’re looking for!


262 Comments
I found the cook time to be a little long for my oven. I baked them 20 minutes and got an internal temp over 210 degrees and some starting to burn a bit on top despite rotating. That said they look delicious and I can’t wait to try them! Burger and brat buns.
Thanks for that information, Jenny! A few others have stated this as well — it might be my elevation (5300ft) or my oven (or both!).
What a great recipe! I just tried it today. The dough felt pretty good, the buns before baking didn’t flatten and in the end they have a perfect form. Unfortunately they are pretty small, just around 8.5 cm and thus pretty compact and heavy. How big are they supposed to be? They are pretty soft and tastes pretty good though! But really too heavy and thus they will be too dominant with the meat.
Next time I try to make the levain the night before so I can start earlier and the dough has more time to proof. Although I must say my starter is pretty active, but it’s a spelt sourdough. Does this affect how well it works with wheat?
I had to make one change to the recipe, but I don’t think this impacted the result: Since I don’t tolerate cow milk I used goat milk powder and added water accordingly.
Also I used brown sugar.
Sounds like you made a few modifications which might have impacted the end result, but overall, it sounds to me like your dough might have been under proofed. These are actually quite large when baked! They puff up, spread out, and become light and airy. Be sure to use your levain (and starter) when it’s very ripe and ready to go. Then, make sure your dough has risen during bulk fermentation and shows signs of strong fermentation. It’s important to let this bulk fermentation go as long as necessary and to keep an eye on dough temperature. From there, proof until they are very light and fluffy, if you press a finger on the dough it’ll feel very soft and fragile.
Thanks for these hints. Today I tried again. I made the levain last night already. Both, starter and levain should have been pretty ripe, they both have doubled in size and showed lots of bubbles.
Also I might have had the wrong potatoes last time. This time I used different ones.
So this time the result was actually a lot better. But I don’t think it’s as good as it should be. I started in the morning at 9 with the dough and baked at 6.30 pm. Due to the long fermentation time they taste a bit more sour, but it’s still fine (when stuffed you don’t even taste it). But it’s hard to see any rise during fermentation when shaped. Sure, a little bit, but I think it should rise more. Maybe I should reduce bulk fermentation time? Room temperature should be also warm enough.
Third try today – pefect outcome!
BUT I have added 2 g of dry yeast to the dough. I can imagine that the spelt starter is not a perfect fit for wheat doughs.
Hi, your recipe calls for all purpose white flour 11-12%, I’m in the UK and I’ve got white bread flour that says its 12%. Do I assume this is fine? I have had to do a bit of research and it appears UK flours tend to have a lower protein content, with my plain(all purpose) being listed at 10.4% Thanks for your help.
I’m in the UK too and I use bread flour (Dove’s Farm 12.6%) in this recipe and also wherever a recipe calls for American All-Purpose – the European/UK ‘plain’ has a lower protein content than American AP. Maybe you could also try with a mix of plain and bread flour? If using all plain flour I would reduce the hydration a tiny bit.
@Maurizio Leo:disqus and @Christina Lipcheva:disqus Thank you both for your help, I may try it both ways and see what works better for me.
@maurizioleo:disqus and @christinalipcheva:disqus thank you both for your help. I may try it both ways and see what works best for me.
I’d say go with your 12% protein flour given the high percentage of potato in this dough. If you want a more tender bun, you could do as @christinalipcheva:disqus suggested and go with a mix of 50% bread flour and 50% UK AP flour.
These were amazing! Great recipe. Have you done it as a loaf? Would like to make this in a 13” Pullman. Any tips for adjustments to bake temp/time?
Glad to hear that, Lori! I havent done this as a loaf but boy would that be delicious. Hard to say on the bake time, I’d have to test, but I’d say similar to, but likely longer than, my pain de mie loaf recipe. Let me know how it works out if you get to this before I do!
It worked in the Pullman but needs some tweaking. I did a longer proof (and actually also let sit overnight in the fridge to develop more flavor). I struggled with the shaping into the pan but that’s probably more my inexperience. Baking required less temp and longer cook time. Still delish.
Made these yesterday—gorgeous with a slow smoked pork roast and cole slaw!
Making me hungry 🙂
Tried these this morning, did not get any rise with the bulk ferment. Have a pair of sourdough loaves going with the same preferment and they are going fine… Any thoughts? Thx!
Same here! Ended up being really heavy, not light and puffy at all. :-/ I think I might have over-kneaded them?
See my reply above!
Interesting. I’m wondering if the small amount of sugar in the dough caused issues with your bulk rise. In making these many times I haven’t seen this happen and usually lower than 6-8% sugar should be no problem. I’d say give them extra time in bulk until you see the dough rise sufficiently. It’s hard to say how long!
I think I’ll try room temp milk and eggs next time, It was a pretty cold dough, maybe that? I gave them 5 hours before giving up lol
That will definitely slow things down!
Thanks for the replies! I totally second guessed myself with the “Cold from the Fridge” for milk and eggs but went with it anyway. I am sure that’s it… Will give it another try and plan to start bulk closer to 78.
Hi! Thank you for another great recipe as my first batch turned out well and reminded me of a brioche bun. I was a bit uncertain as my dough was more sticky and heavy than soft but they looked and tasted great in the end! What should the internal temperature be when they are baked through?
Usually around 200-210°F is a good target for the internal temp, but with these I baked until the top and bottom were well-colored. I’m wondering if your dough needed a little more time to proof!
Hi Maurizio. Hoping to make these tomorrow, however I’ve got all the ingredients other than whole milk. Have you tried these with any other milk (soy, almond, oat)? Thanks!
I have not but I bet they’d be great!
These were perfectly timed for my 87yo father’s Bday on 5/15 and the brisket we served on them. They were divine!! I have black And white sesame seeds on hand b/c seeded sourdough is one of my personal faves on your website!! Since trying this enriched dough I’ve moved on to bombolonis, cinnamon rolls, and the chocolate babka yesterday… all outstanding!!! I followed the recipes as I have been doing since discovering your site in 2015 and have had great success!! Thanks for all you do, Maurizio, and thanks for sharing all your cultured wisdom 🙂
That’s so great to hear, Kiki! Amazing to hear you’ve been following along for such a long while and that I could help. Happy baking!
I have a box of potato flakes in the pantry from another bread recipe. If I mixed those up, could I use them in place of the baked and riced potato here?
I honestly am not sure, but would definitely give it a try. You could try boiling them with a little of the mixing water which should transform them into a gelatinized paste, do that early and let that cool to room temp, then mix that paste into the dough where I call for the riced potato.
How do you think this dough would work out baked in a loaf pan rather than formed into buns?
Absolutely.
These look fantastic, going to attempt to make them tomorrow. One question: It feels like these call for a fair bit of butter, and I didn’t love the strong butter-taste of the previous brioche bun recipe. By how much do you reckon I could reduce the butter content to still obtain a fluffy but less buttery bun?
I don’t find the flavor of these to be overly butter, but you could drop it 5% and see how that goes!
These are amazing – I totally screwed up the recipe – I added the potatoes at the beginning and almost forgot the sugar – I added that right before the butter during the second mix and I only had white sesame seeds on hand so they weren’t quite as pretty, but we all loved them! I can’t wait to try it again since my husband found me black sesame seeds – I can’t imagine how good they’ll be if I follow the directions correctly!! Thanks for another great recipe!!
Glad to hear they turned out well, Lauren! No worries about adding sugar later, in fact, that’s a common practice because sugar almost acts like a liquid and can also interfere with gluten development — so good move 🙂 Anyway, thanks for reporting back and enjoy!
I’m going to ask here because I don’t see a comments option on the page about dough temperatures. What advice do you have for baking in very warm weather (32C)? Should I use ice water?
Yes, definitely cool the mixing water to offset the warmer temperatures and get you close to the desired dough temp!
I did that and also made a cool proof box for the bulk rise in a soft-sided cooler with an ice pack. After each stretch-and-fold I made sure that the colder side was away from the ice. With all the changes I made, my rolls were more “inspired” by this recipe than following it but they were very good, and I will make them again.
Made these today, and as always your recipes do not disappoint! Light and fluffy and delicious. But I’m new to all this
baking and I’m wondering why my dough doesn’t ever seem to develop the “skin” that holds it firm before baking. I’ve evaluated hydration, tried folding more times, shaped using more flour, and it always sags and goes a little flat. Still rises in the oven – still delicious – but would be better if I could get it right prior to baking. Any ideas?
Thanks so much – not giving up!
Awesome, Claire! Are you sure you’re mixing the dough fully in the mixer? It should smooth out and really start to cling to the dough hook — these are signs of getting to sufficient dough strength. If you take a bit of the dough and start to pull it apart slowly between your fingers, it should spread out into a translucent pane (this is called the windowpane test) which won’t be super strong and will eventually tear a bit, but you should still be able to spread the dough light this (I’m working on uploading a video on this soon).
So I’d say try mixing a little longer at the beginning, perhaps another 1-2 minutes. Then, when you’re shaping, be sure to shape tightly enough so they do have a taut surface — this will ensure they rise higher in the oven.
Hope this helps!
I just made these, they are delicious and beautiful. The house smelled like buttered roasted potatoes while they were baking.
It took me a long time to get all that butter incorporated into the dough, but I trusted Maurizio’s recipe and knew it would work out so I soldiered on and, yep, it all worked out
We had burgers tonight and, yes, you can load up on lots of toppings and the buns hold up just fine.
I posted a picture on Instagram if you want to see my first humble attempt at Maurizio’s recipe @mo_selle is the account.
Saw them on IG — they look incredible. Nice work!
Hello! I’m very excited to try these. What if you made your levain the night before can you skip the first step?
Yes, you can definitely do an overnight levain. I’d only add 10% starter to the levain, though, because it’ll be fermenting for 12-14 hours (longer timeline means add less starter to ensure it doesn’t ferment too far).
Very excited to try these this weekend!
nitpick: I think “starch generalization” should be “starch gelatinization”
Hah! You’re right about that — not nitpicky at all. Thanks!
It’s a pat of butter, not a pad.
Thanks!
As always, thanks for the feedback, Branch! Glad to hear it went well even with adding the potato upfront. Yes, I did them just like pizza and used my bench scraper to keep things clean but efficient — and they are big! When I eat burgers I almost look forward to the bun more than anything 🙂
Enjoy!
Would it be possible to use Potato flour instead of actual potatoes?
I considered this but my feeling is that flour would be more for the flavor of potato whereas using baked potatoes contributes gelatinized starches directly. It might be possible to make a potato flour scald (kind of like a roux) and add that — now that would be fun to try.
Thanks! Now I want to try that!
They look amazing! Thank you!
Thank you 🙂
These look great! One question – why do you hold back with adding the potatoes till the end of the mixing?
I want to strengthen the gluten before adding too many stressors (butter included), otherwise mixing time might need to be increased to properly strengthen the dough. You end up with a few little potato bits here and there in the dough, but they completely disappear by the end 🙂
Wow! Another phenomenal recipe to try.
I don’t have a potato ricer, but I have a Microplane box grater that I believe could do the job. I also have a Kull Spätzle Press (Like a huge garlic press) that may work equally as well.
The general idea is to have the potato fine enough to be blended-in with the other dough ingredients. Is that correct?
Thanks! Yes, that’s correct. Sounds like either of those methods will work just fine!
Can you please recommend egg replacement ? I think i can use Oil instead of butter
Others have mentioned oil as well. You might also want to try a “flax egg” replacer.
Hi Maurizio, thanks for this recipe! I believe a clarification needed for the amount of Sourdough Starter to be used. In total formula, it is shown as 61 gr. However, in Step.2, the Mix section, it is 183 gr. (total fed Levain). I believe correct amount is 183 gr., but could you please clarify? Cheers! Umut.
I have not realized that the flour and water amounts are reduced in the Mix section, which is already in the Ripe Levain. Cheers! Umut.
That’s right, the total formula has the starter needed for the overall recipe, and then in Levain Build it’s the starter used to make the levain, and finally, in the mix it’s the full levain from Levain Build.
Thanks and you’re very welcome!
I can’t wait to make these! I really HATE soggy buns. I just bought a big bag of russet potatoes at the store! I only have light sesame seeds, but that’s OK with me. I have unbleached all purpose flour from the grocery store, but I think it will work.
That all should work! Nothing worse than a soggy, flavorless bun 🙂 Enjoy!
I didn’t follow your recipe exactly. I deviated because there are only two of us, so I froze the buns in groups of two shaped buns, and thawed two overnight in the fridge. In the morning, they rose in about 3 hours and I completed them. I’ll let you know how they taste tonight. I did a post on Instagram and tagged you. I wish you had a recipe for hot dog buns. They always go green before the two of us can eat them all.
Hi Maurizio. I heard recently about a bake called “Spudnuts” Evidently a potato dough doughnut. Do you think this recipe would work for that too?? Thanks Judith
I haven’t heard of this, will need to look that up!
Will these freeze? Small household! Thanks.
I haven’t tried yet but I think they will freeze really well! Be sure to knock out as much air as possible out of the bag and you might even want to wrap them individually, too.
These look awesome! Thanks for sharing. What do you think of switching out the butter for oil, for non-dairy eaters? Thanks!
That could work, but you’d have to play with that percentage!
Minor correction needed in your explanation of what is caster sugar. You wrote “flour” when I think you meant “sugar”.
Also, in W. Canada, caster sugar is known as Berry Sugar. Why?, I don’t know!
Fixed, thank you! That’s interesting, never heard of Berry Sugar — although what’s caster mean anyway 🙂 Happy baking!
From Wicki: A sugar caster is a small container, with a perforated top, larger than a salt shaker but similar in form. The sugar caster was part of a set of vessels, and a rack to hold them used to contain spices and condiments on the dining table. The set would have a salt shaker, a pepper shaker, a vinegar cruet, an oil cruet, a sugar shaker, and a mayonnaise jar with spoon. The word is first attested to in 1676.[1]
The set was used by the affluent and wealthy, to cast or sprinkle, pepper, sugar, salt, or the like, in the form of powder. The name comes from the act of casting the contents when using the set. The name was extended to other vessels used to contain condiments at table, and eventually to the type of sugar with crystal size that could easily be cast.
Until well into the 19th century, sugar came in solid blocks called sugar loaves,[2] which needed to be broken into smaller pieces to use. Only the wealthy could afford the effort needed to produce the small granules needed for a sugar caster.[3]
A caster may also be a pierced spoon for sprinkling sugar, with no integral container, to be used with a sugar-bowl (or at least, with a bowl of sugar). Such casters are usually silver or plate.
Planning to make these for my next Impossible Burger meal. A big ask, Maurizio, can you set up a “Print recipe only” with just ingredients and simplified method for the second time a baker makes them? I would print them out, but it looks like 18 pages or so with all the details!
I agree. I always end up spending a lot of time typing up the recipe into a usable format. The recipes and notes are excellent, but a Print option for just the recipe without the narrative would be awesome!
Nancy: There’s a “Print Sourdough Recipe” link at the very bottom of the recipe! You can click on any section in the post to delete it and only print what’s important for you 🙂
at the end there is a large bar saying print the recipe right above the get the newsletter box
There’s a “Print Sourdough Recipe” link at the very bottom of the recipe! You can click on any section in the post to delete it and only print what’s important for you 🙂
For the printing, scroll down!!
I think there might be a typo in the “mix and strengthen the dough” ingredient list: you listed the riced potato among the ingredients to add to the bowl when you start mixing but mentioned that it will be added after the butter.
I can’t wait to try these tomorrow!!
Yes — thank you for pointing that out! Now fixed.
Thanks for the recipe! Can I substitute with sweet potatoes?
Same question here. We use a lot of Japanese sweet potatoes (really starchy and sweet). Would be great to try these and possibly omit the sugar then…..
That’s exactly what I mean to try next time I go to the market 🙂
Yes, I mention this up in the ingredient list and I think it’ll work very well!