


Cinnamon is a spice that didn’t find its way into much of the food from my childhood, but somehow, as I’ve grown older, I find myself enjoying its sharp but warm flavor. It needs a counterweight, though, doesn’t it? Something to balance it, to take off that blunt edge, so the character is more of a warm, inviting thing rather than something that evokes a pucker or cockeyed stare at the baker. Enter raisins. Not just any raisins, mind you, but homemade raisins. And the two of these go so well in this cinnamon raisin sourdough.
As you know, I take things a little farther, just one step beyond. But there’s additional satisfaction to be found in making or carefully sourcing every component of a loaf of bread. Whether you make your raisins or use store-bought, pairing them with cinnamon in a naturally leavened cinnamon raisin sourdough results in a loaf that looks stunning and tastes equally as much.
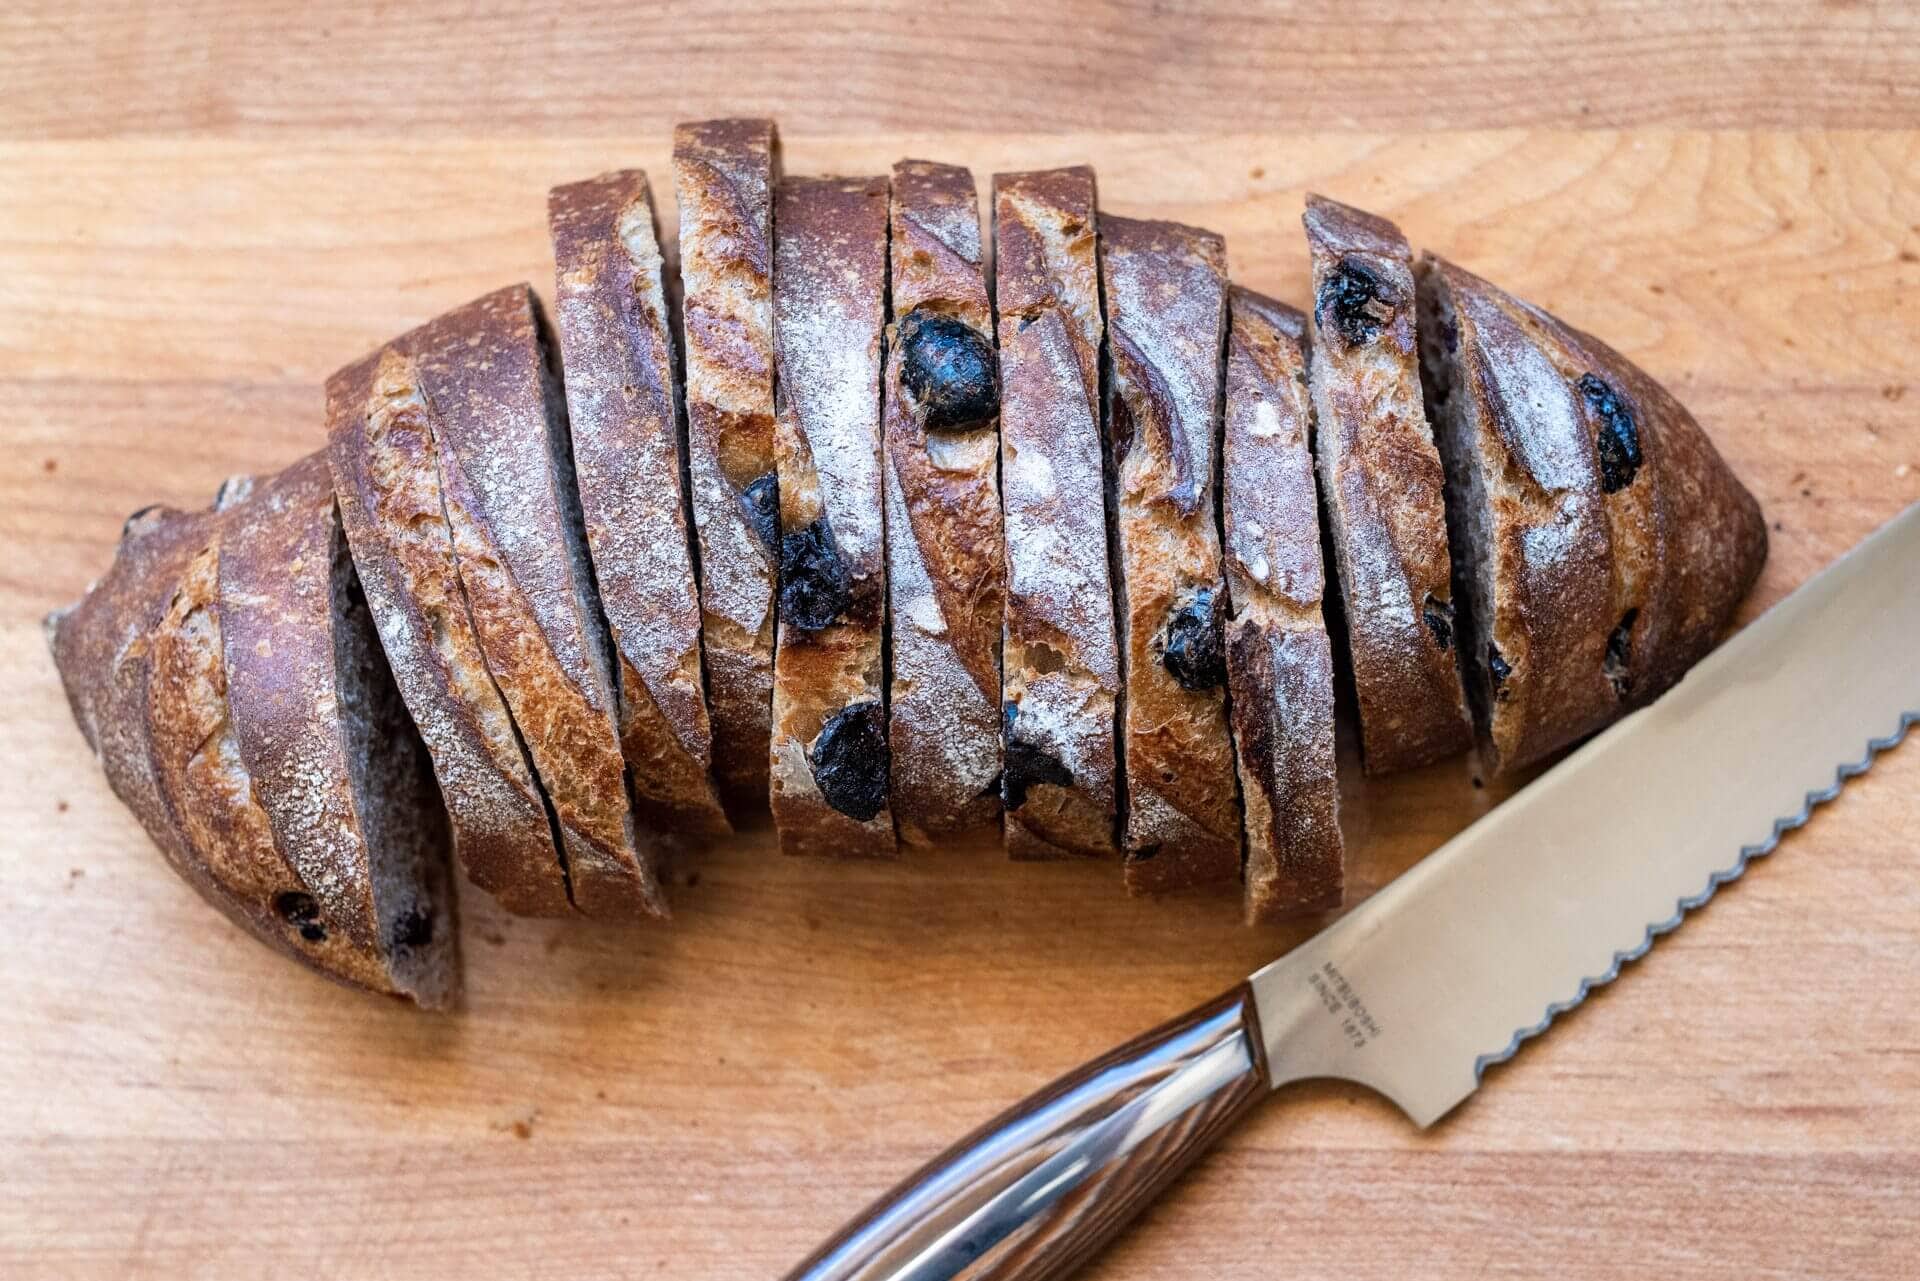
The crust on this bread exudes a slightly reddish hue in the right light, quite the stunning cast and something not totally expected in a loaf of bread. Next, the eye traverses from top to bottom, hopscotching from plump, dark mass to mass, wondering what could possibly be protruding from a crust in such a way. I think the beauty in this loaf starts before you even take a bite, and of course, you’d be let down if the flavor didn’t match the aesthetic, but brush those worries aside: it’s downright delicious.
Depending on your affinity for cinnamon, this loaf might conjure feelings of either warmth or sharp spice—and for me, it’s the latter—but I kept the percentage of cinnamon low enough to keep balance. It’s just right, just enough to stand up to the sweet raisins but not so much that it becomes overpowering. However, feel free to play with this percentage to suit your liking; additionally, cinnamon’s potency can vary.
Flour Selection
I used all Central Milling organic flour for this recipe but use what you have on hand that has similar specifications as listed below (if you have locally milled flour, fantastic!). King Arthur All-purpose Flour and King Arthur Whole Wheat would also work very well.
At thirty percent, the whole wheat flour provides a lovely backdrop for the sharp cinnamon and sweet raisins. Increasing this percentage and freshly milling your flour would undoubtedly lead to an increase in flavor, and it’s something I’ll be playing with once I make another batch of raisins. Whole wheat and cinnamon go incredibly well together.
Cinnamon’s Effect on Fermentation
At high percentage, cinnamon can interfere with fermentation, likely due to its antimicrobial properties. There are a few techniques I used in this recipe to help offset this:
- I increased the pre-fermented flour percentage (and therefore the percentage of levain in the final dough)
- Cinnamon was kept relatively low at 1%
- I increased bulk fermentation to a full 4 hours (with an FDT of 79°F (26°C) it might have previously ended around 3.5 hours)
- I lengthened the final proof time to 16 hours in the fridge
Fermentation was slightly sluggish at the start, but as you can see in the pictures in this post, there was plenty of activity toward the end of bulk fermentation. The key is to adjust my timeline below to fit your dough’s progress. As I always say, “give the dough the time it needs.”
Special Equipment & Preparation
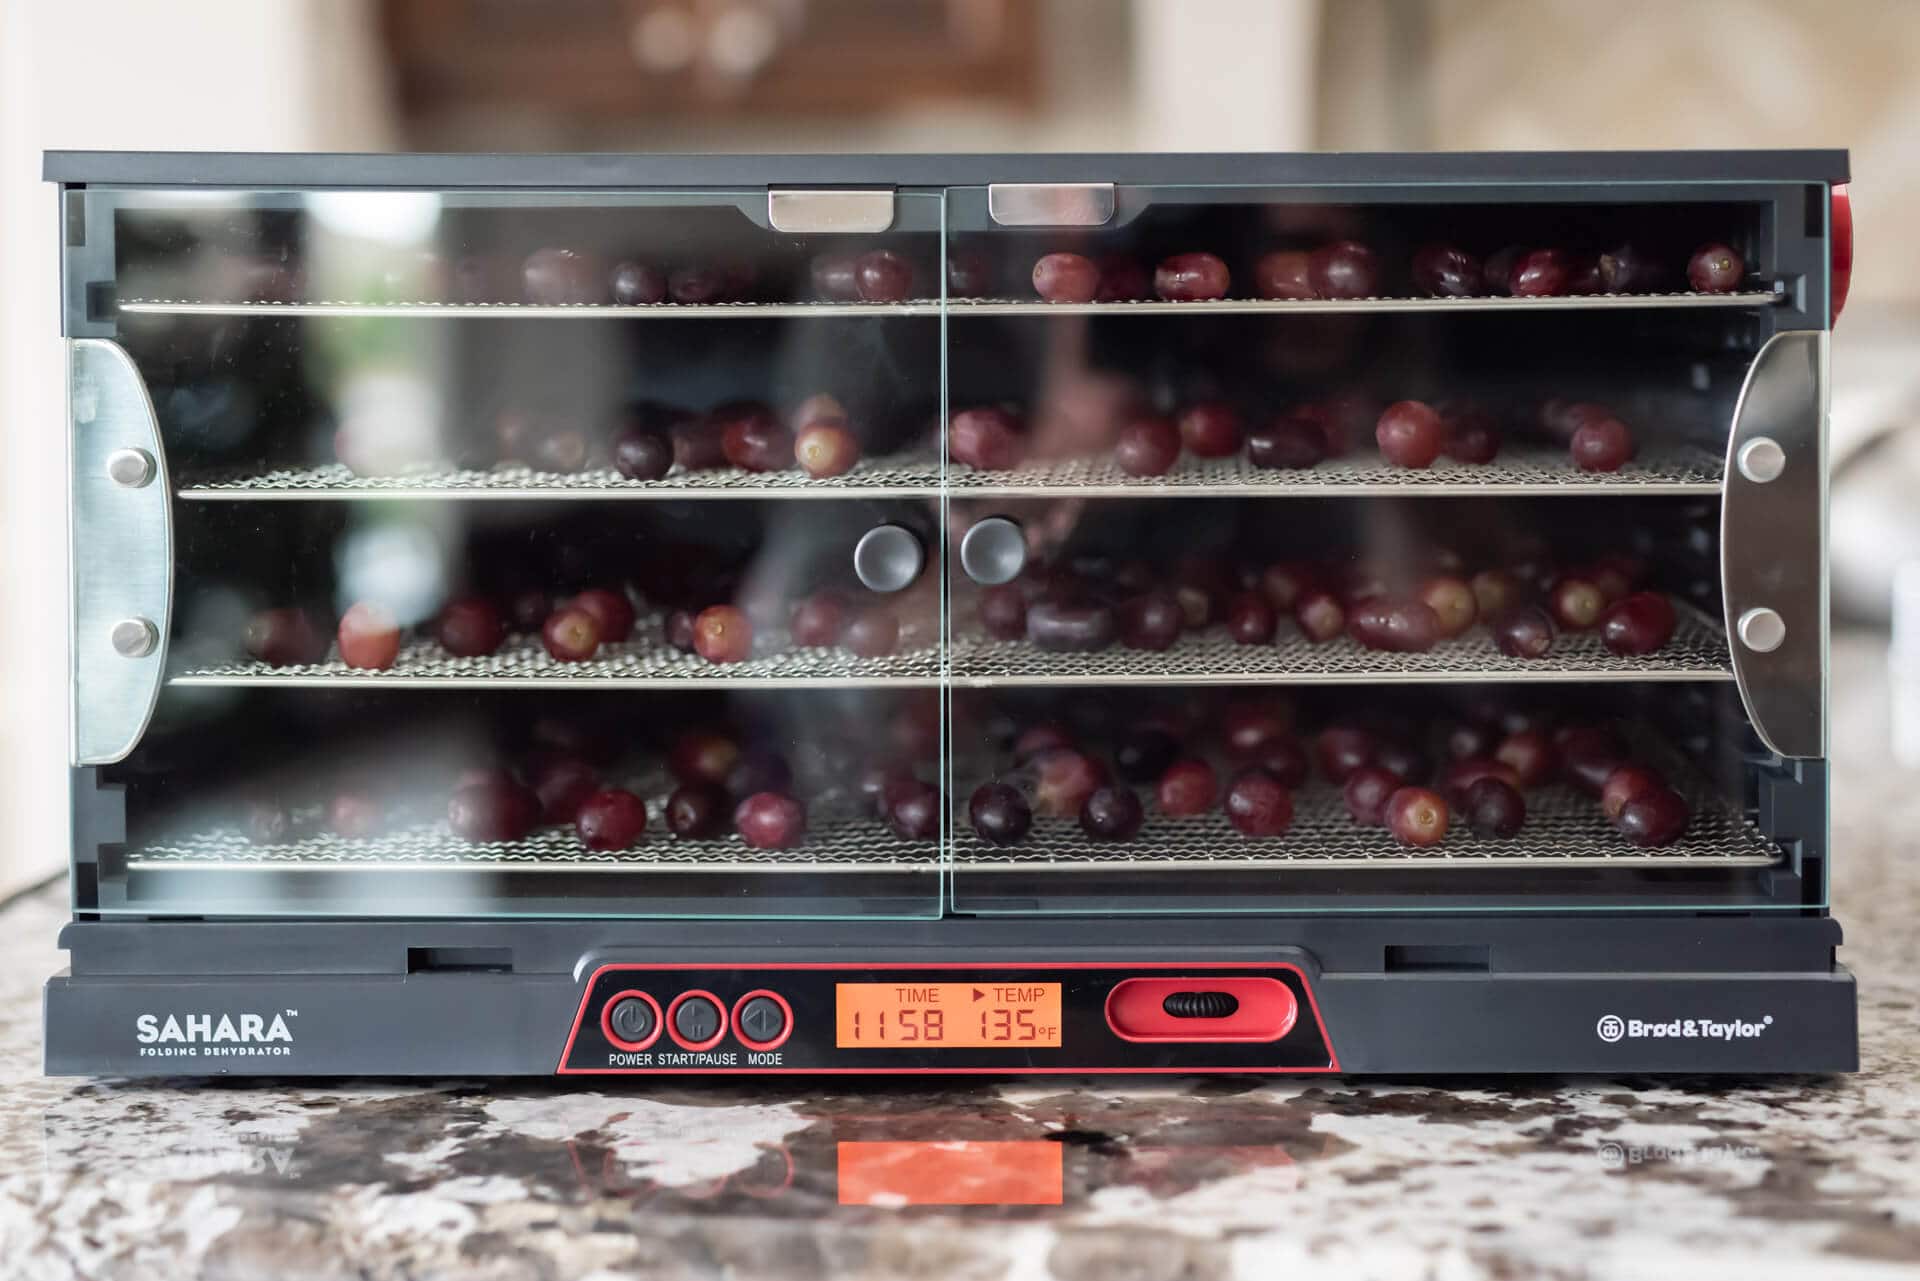
Make Your Own Raisins With a Food Dehydrator
I recently received a new Brød & Taylor Sahara Food Dehydrator (they provided it to me for this sponsored post), a superbly designed dehydrator that eliminates the reason why I’ve not bought one previously. This one folds up into a compact little package for storage.
Upon receiving it, ideas for its use in a baking recipe swirled around in my head, everything from dehydrating my own spent beer grains to making diastatic malt to dehydrating veggies and fruits of all kinds. I settled on making a recipe I’ve meant to tackle for a while now: a cinnamon raisin sourdough bread.
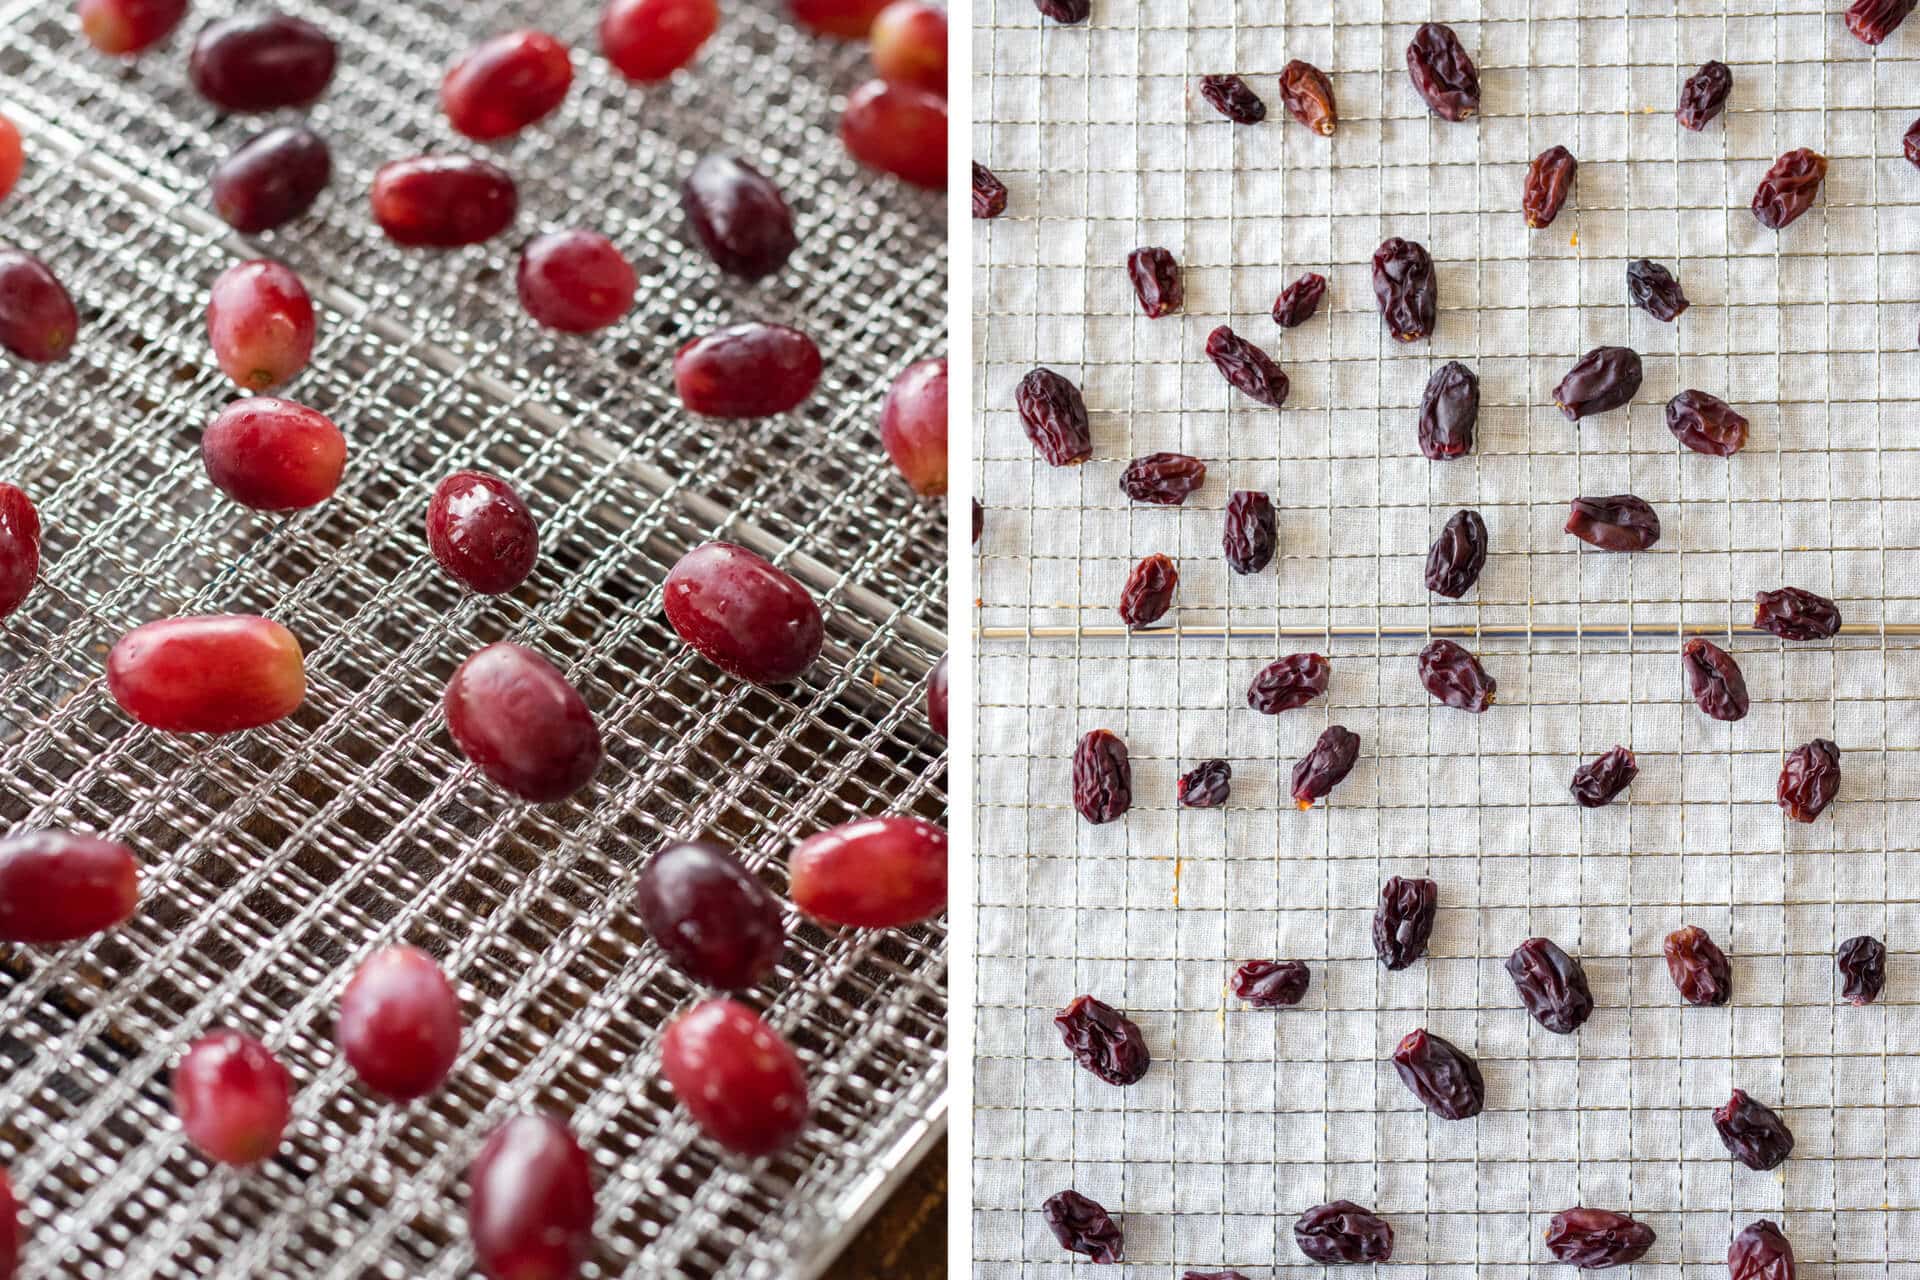
To make the raisins buy a couple of pounds of the smallest red grapes you can find at the market. Pick grapes that are not mushy in any way. You want them firm, ripe, and full of flavor.
Wash the grapes and let them dry. Then, spread them out evenly on the dehydrator trays. Set the unit to 24 hours at 135°F and hit Start. After this time, check on them. They’ll likely need another 12 hours to dehydrate fully—mine took about 36 hours. This process does take quite a while, so plan accordingly for your bake (I did this a few days before preparing my dough).
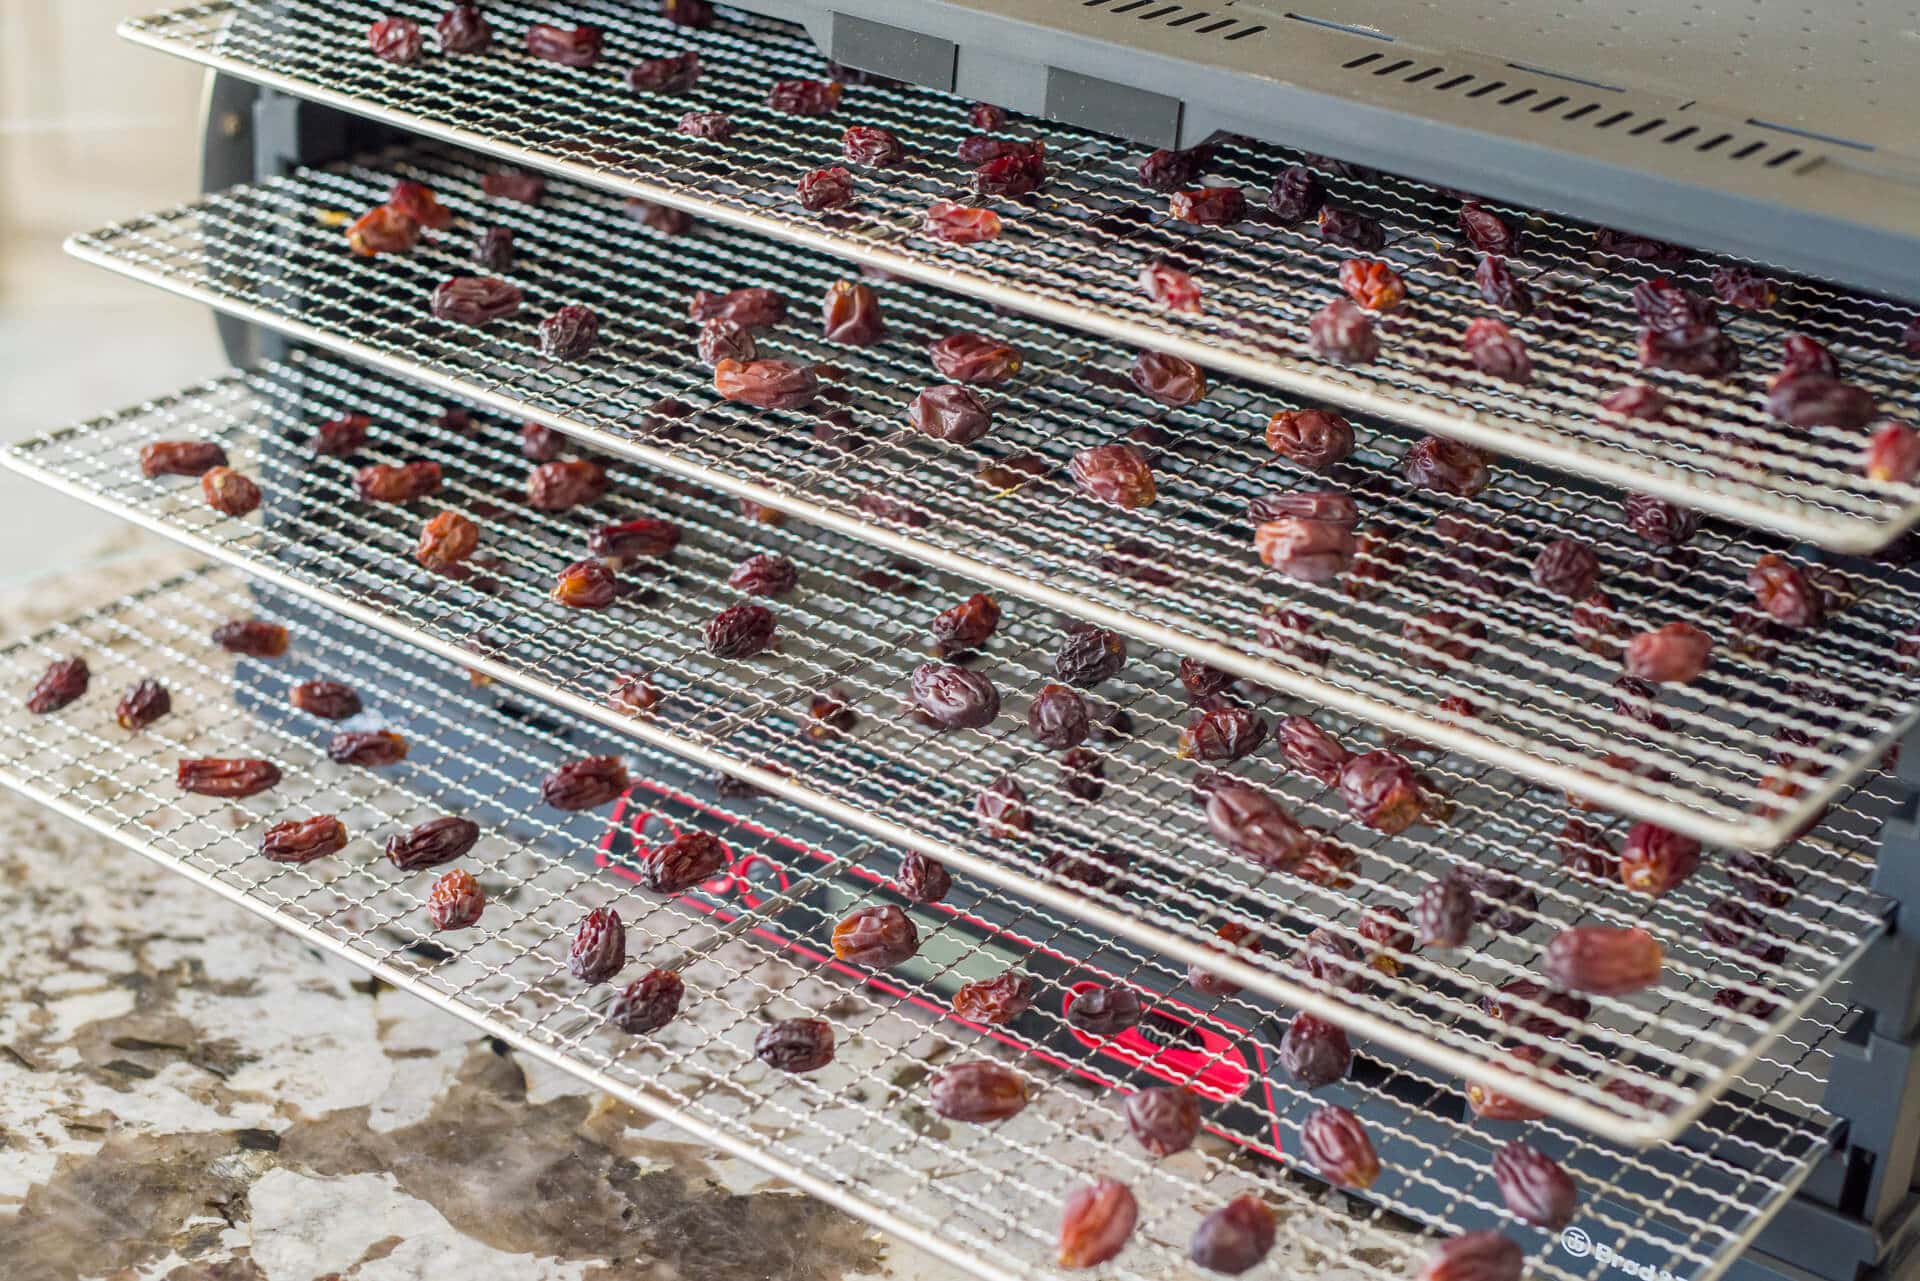
I realize after eating these raisins I’ve never had anything like them in my life. They pack so much flavor. Eating each one makes you pause to really enjoy everything the original grape had to offer—nothing is lost.
Buying and Preparing Raisins
If you don’t have a food dehydrator, pick up some Thompson raisins at the market for this bake. They’ll work quite well (but won’t be as plump and pack the same flavor, to be sure). I’d suggest soaking the store-bought raisins for a few hours, or overnight, before incorporating them into your dough (I didn’t find this necessary with homemade raisins).
Soaking will allow them to absorb water and help prevent burning in the oven if they find their way to the outside of your dough. Be sure to drain them thoroughly before use.
Cinnamon Raisin Sourdough Bread Recipe
Vitals
| Total Dough Weight | 2,000 grams |
| Pre-fermented Flour | 5.4% |
| Hydration | 81.0% |
| Levain in the final dough | 17.1% |
| Yield | 4 x 500g loaves |
Total Formula
Desired dough temperature: 78°F (25°C) (see my post on the importance of dough temperature).
| Weight | Ingredient | Baker’s Percentage |
|---|---|---|
| 669g | Wheat Bread flour, 11-12% protein, malted (Central Milling Artisan Baker’s Craft) | 70.0% |
| 287g | Whole grain wheat flour, finely milled (Central Milling Hi-Pro Fine) | 30.0% |
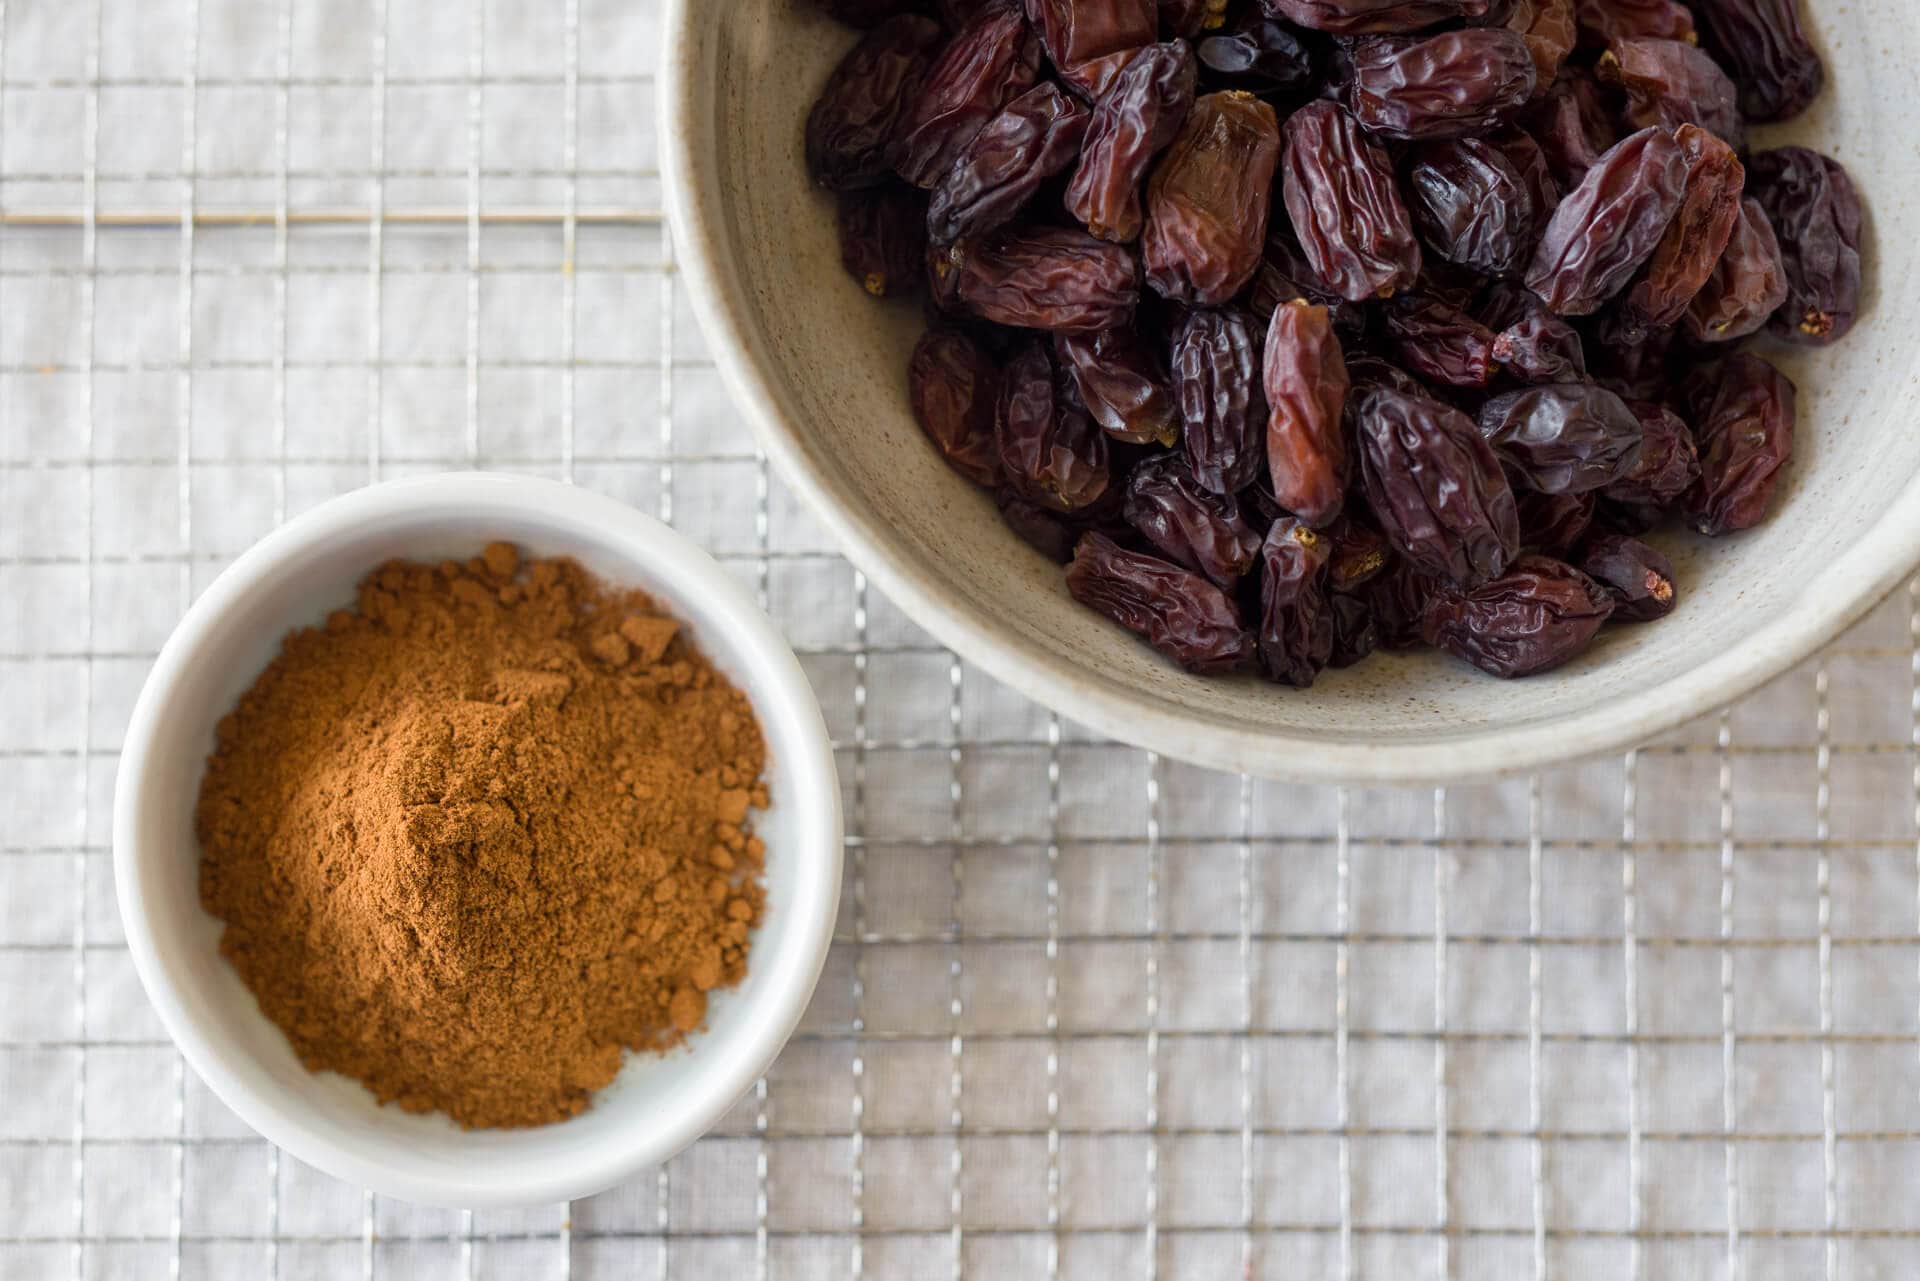
| 10g | Ground cinnamon (I used Vietnamese cinnamon) | 1.0% |
| 191g | Raisins (Store-bought Thompson or homemade dehydrated grapes, see above) | 20.0% |
| 726g | Water 1 (Levain and Autolyse) | 76.0% |
| 48g | Water 2 (Mix) | 5.0% |
| 19g | Salt | 2.0% |
| 52g | Sourdough starter (100% hydration) | 5.4% |
Method
1. Prepare the Levain – 9:00 a.m.
| Weight | Ingredient | Baker’s Percentage |
|---|---|---|
| 52g | Ripe sourdough starter (100% hydration) | 100% |
| 26g | Wheat Bread flour, 11-12% protein, malted (Central Milling Artisan Baker’s Craft) | 50% |
| 26g | Whole grain wheat flour, finely milled (Central Milling Hi-Pro Fine) | 50% |
| 52g | Water | 100% |
To make the levain, mix the ingredients in the chart above in a jar and leave them covered at a warm temperature, 74-76°F (23-24°C), to ripen for 3 to 3 1/2 hours.
2. Autolyse – 11:30 a.m.
| Weight | Ingredient |
|---|---|
| 643g | Wheat Bread flour, 11-12% protein, malted (Central Milling Artisan Baker’s Craft) |
| 261g | Whole grain wheat flour, finely milled (Central Milling Hi-Pro Fine) |
| 674g | Water 1 |
Warm or cool the autolyse water so that the temperature of the mixed dough meets the FDT (final dough temperature) of 78°F (25°C) for this recipe.
Place the flour and water 1 in a large bowl. Use wet hands to mix until no dry bits remain; the dough will be shaggy and loose. Use a bowl scraper to scrape down the sides of the bowl to keep all the dough in one area at the bottom. Cover the bowl and place it near your levain for 1 hour.
3. Mix – 12:30 p.m.
| Weight | Ingredient |
|---|---|
| 48g | Water 2 |
| 10g | Ground cinnamon (Vietnamese cinnamon) |
| 191g | Raisins (Store-bought Thompson or homemade dehydrated grapes, see above) |
| 19g | Fine sea salt |
| 155g | Ripe levain (from Step 1) |
Add the ripe levain, salt, and half of the water to the mixing bowl. Using your hands, mix everything until it comes together into a shaggy mass. Then, dump the bowl to the counter and slap and fold the dough for about 5 minutes to develop some strength. Alternatively, you can keep the dough in the bowl and do a series of stretches and folds with one hand as you rotate the bowl.
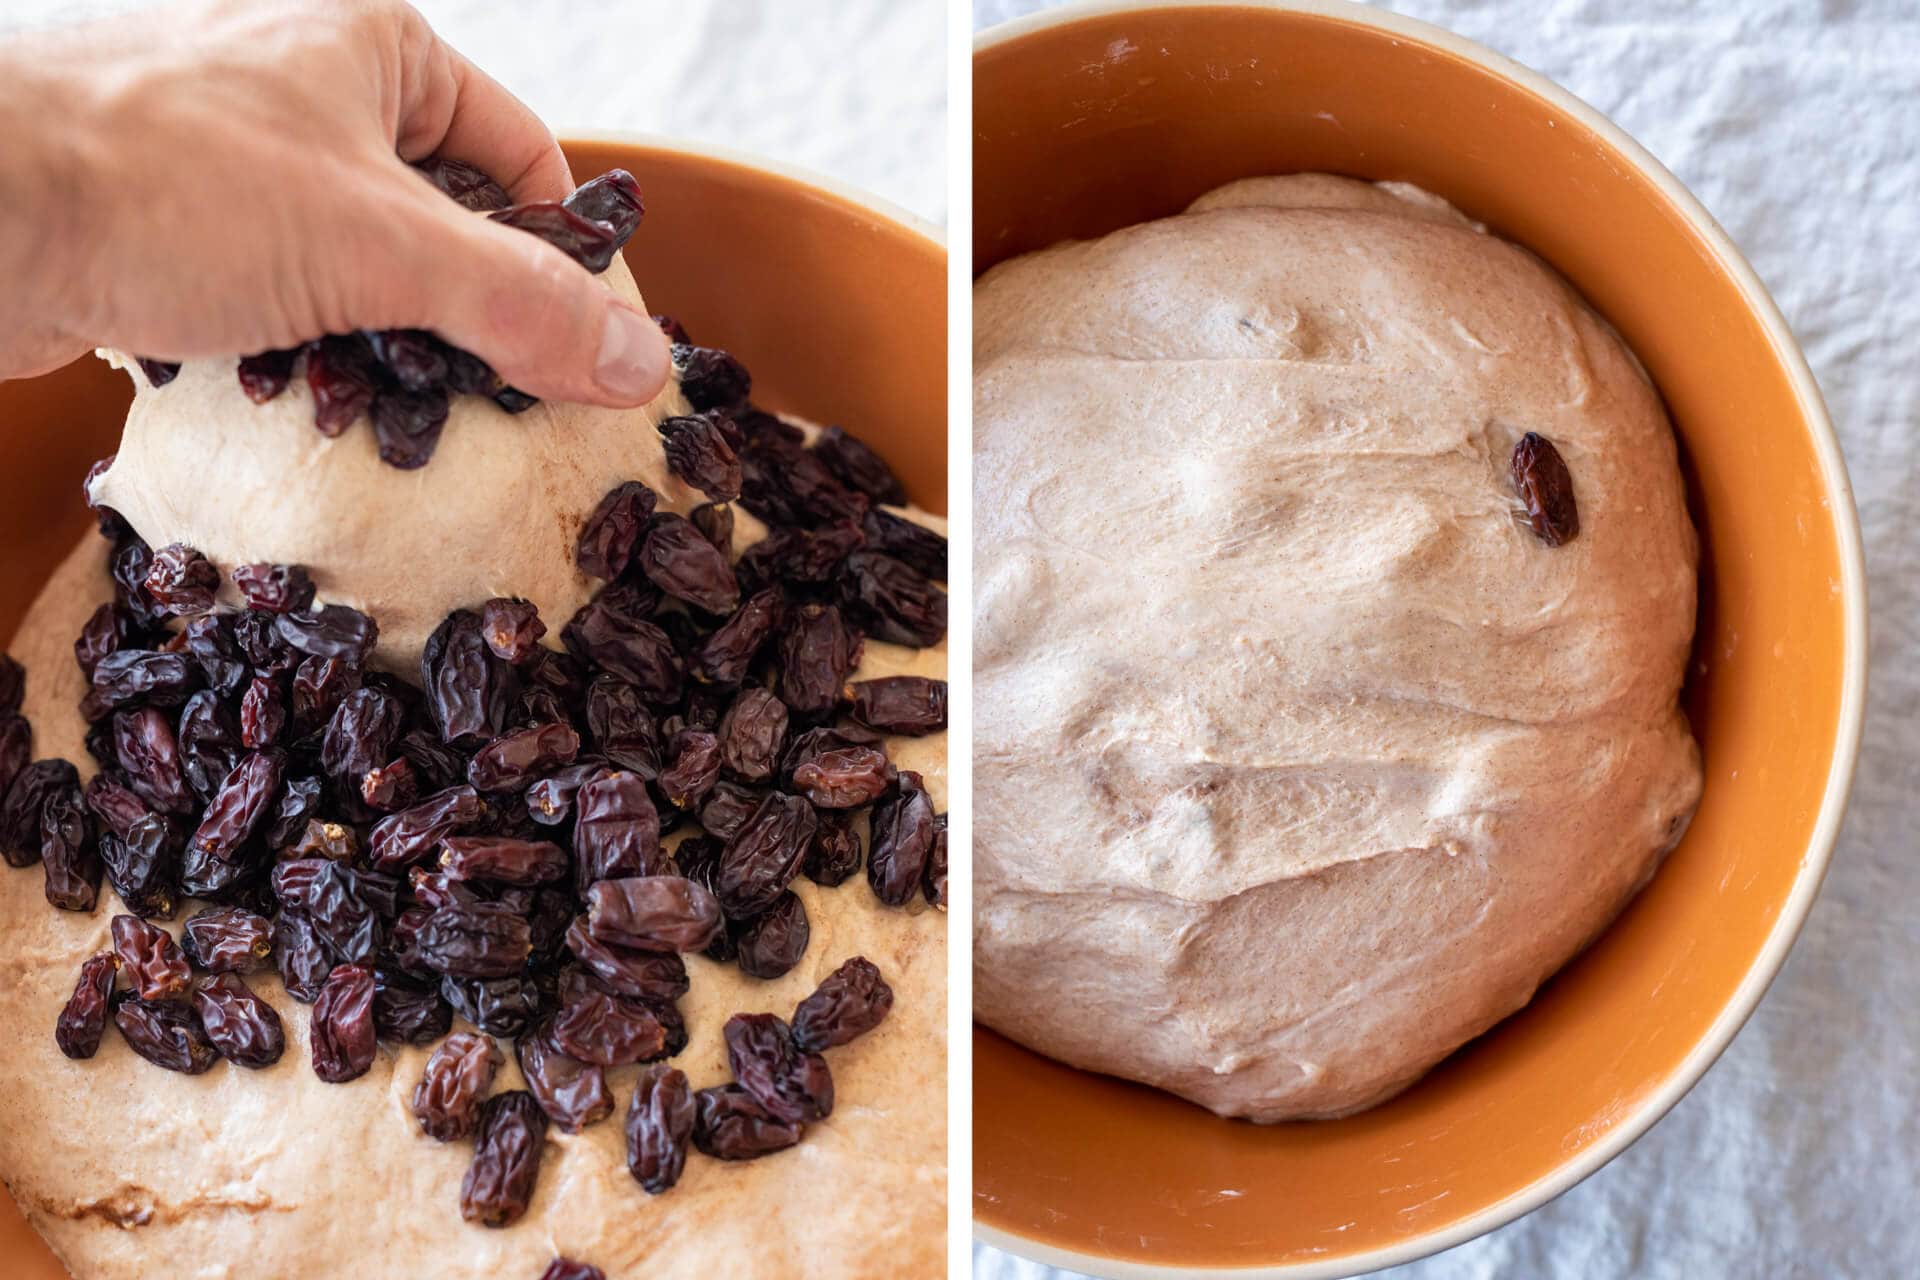
At the end of this initial strengthening, the dough should have smoothed out and will loosely hold its shape on the counter (or in the bowl). Add the cinnamon and remaining water to the dough and gently massage to incorporate. It is unnecessary to overwork the dough to incorporate the cinnamon, just enough to spread it around.
Finally, spread the raisins on top of the dough and perform a few stretches and folds to incorporate the raisins gently. Again, don’t over-mix. The raisins will be further dispersed during our stretch and fold through bulk fermentation.
4. Bulk Fermentation – 12:45 p.m. to 4:45 p.m. (4 hours)
This dough does have slightly sluggish fermentation activity, give it the time it needs in bulk fermentation.
This dough required a little extra fermentation time in bulk fermentation (as described in the Total Formula section, above). Even with a final dough temperature of 79°F (26°C), I went a full 4 hours — you can see the state of the dough at the end of this period below.
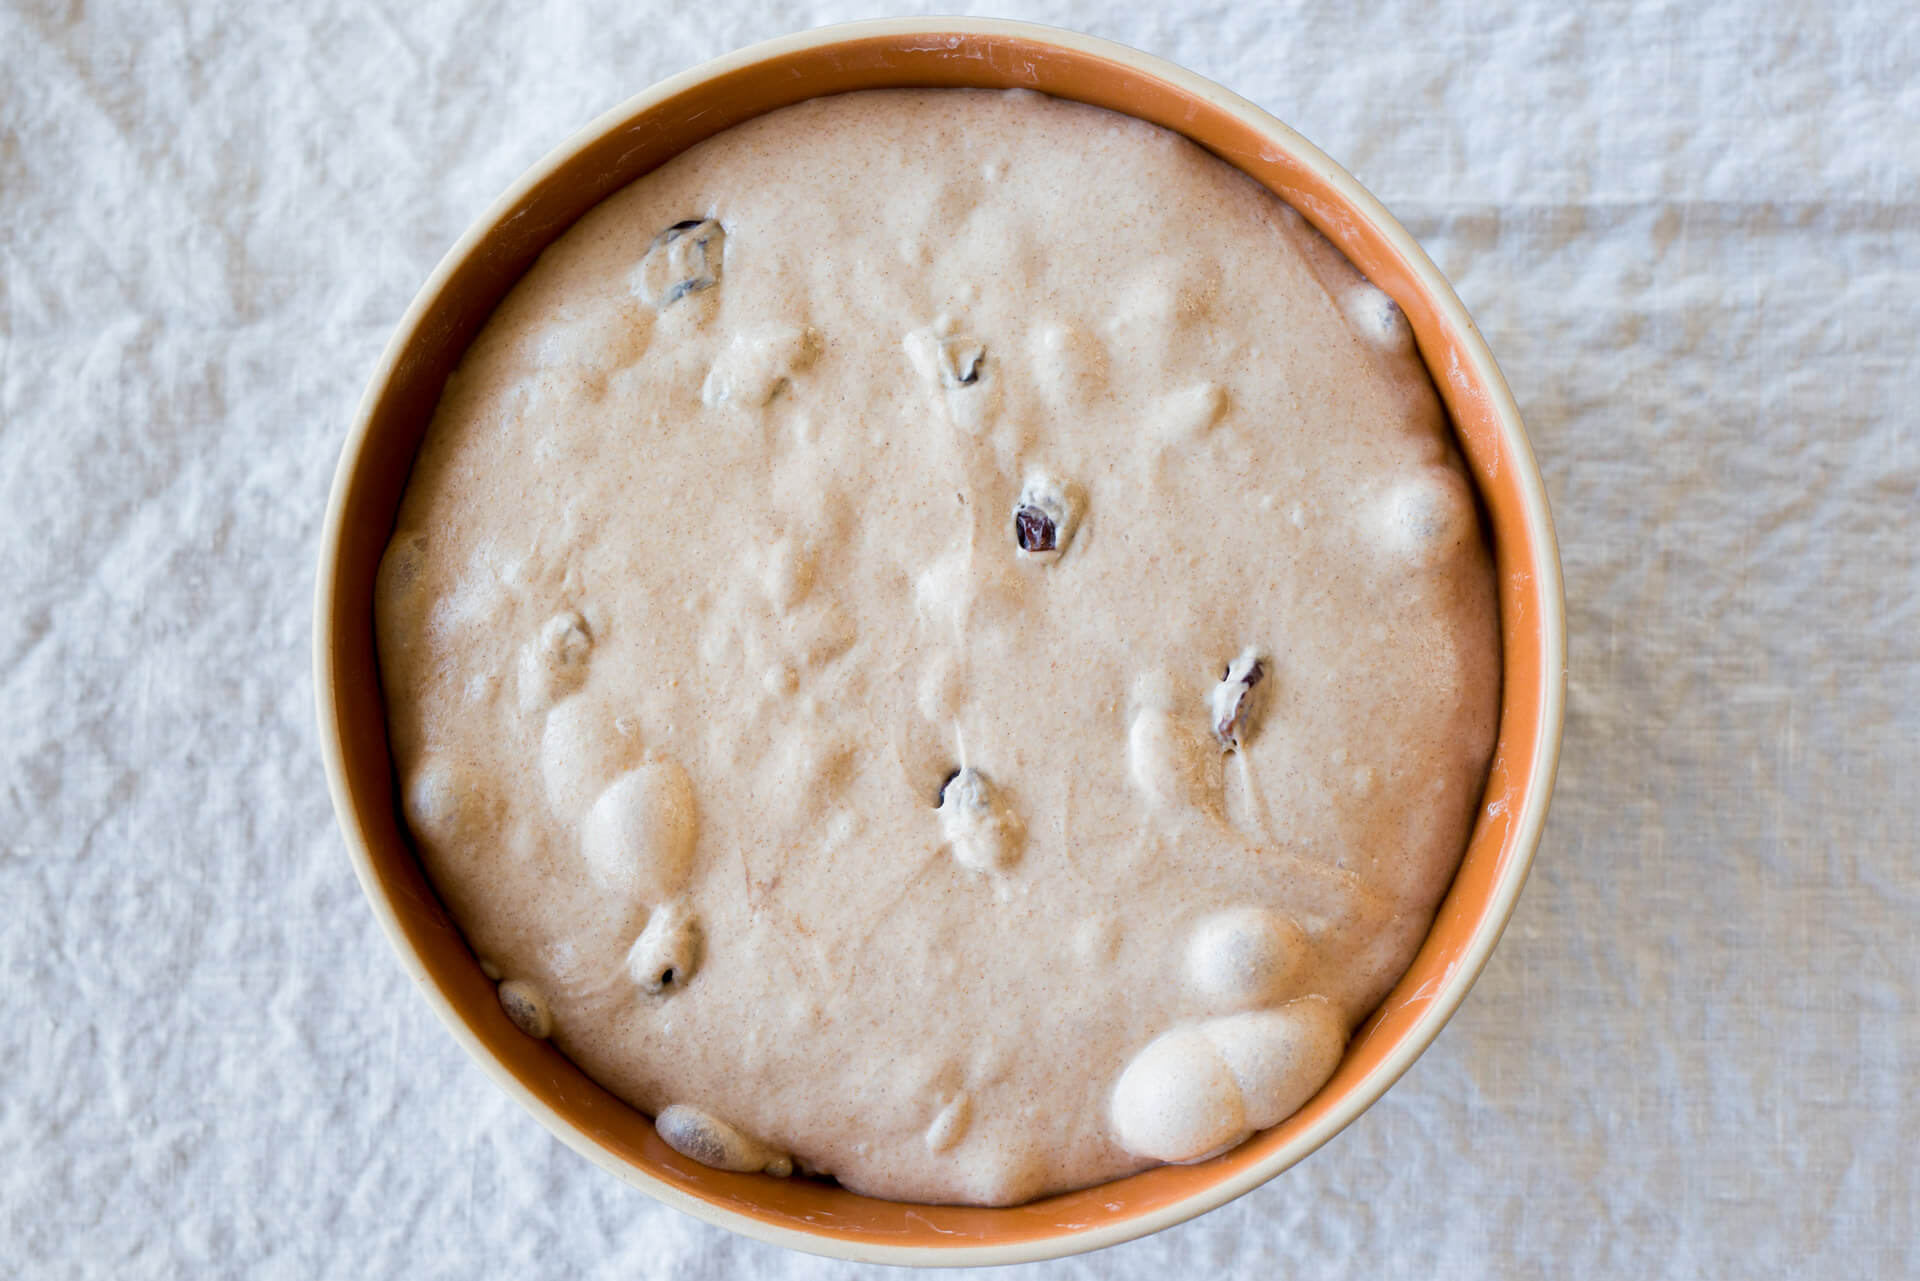
Give the dough 2 sets of stretch and folds during this four-hour period, starting after the first 30 minutes, then 30 minutes thereafter. After the second set, let the dough rest untouched for the remainder of bulk fermentation.
5. Divide and Preshape – 4:45 p.m.
Dump the contents of your bulk fermentation container to an unfloured work surface. Lightly dust the top of the dough with flour and, using a bench knife, divide the mass in half. Then, divide each half in half again to create four 500g pieces. Lightly preshape each piece into a round on the counter using your bench knife and a flour-dusted hand.
Let the dough rest for 30 minutes until it relaxes outward to some degree.
6. Shape – 5:15 p.m.
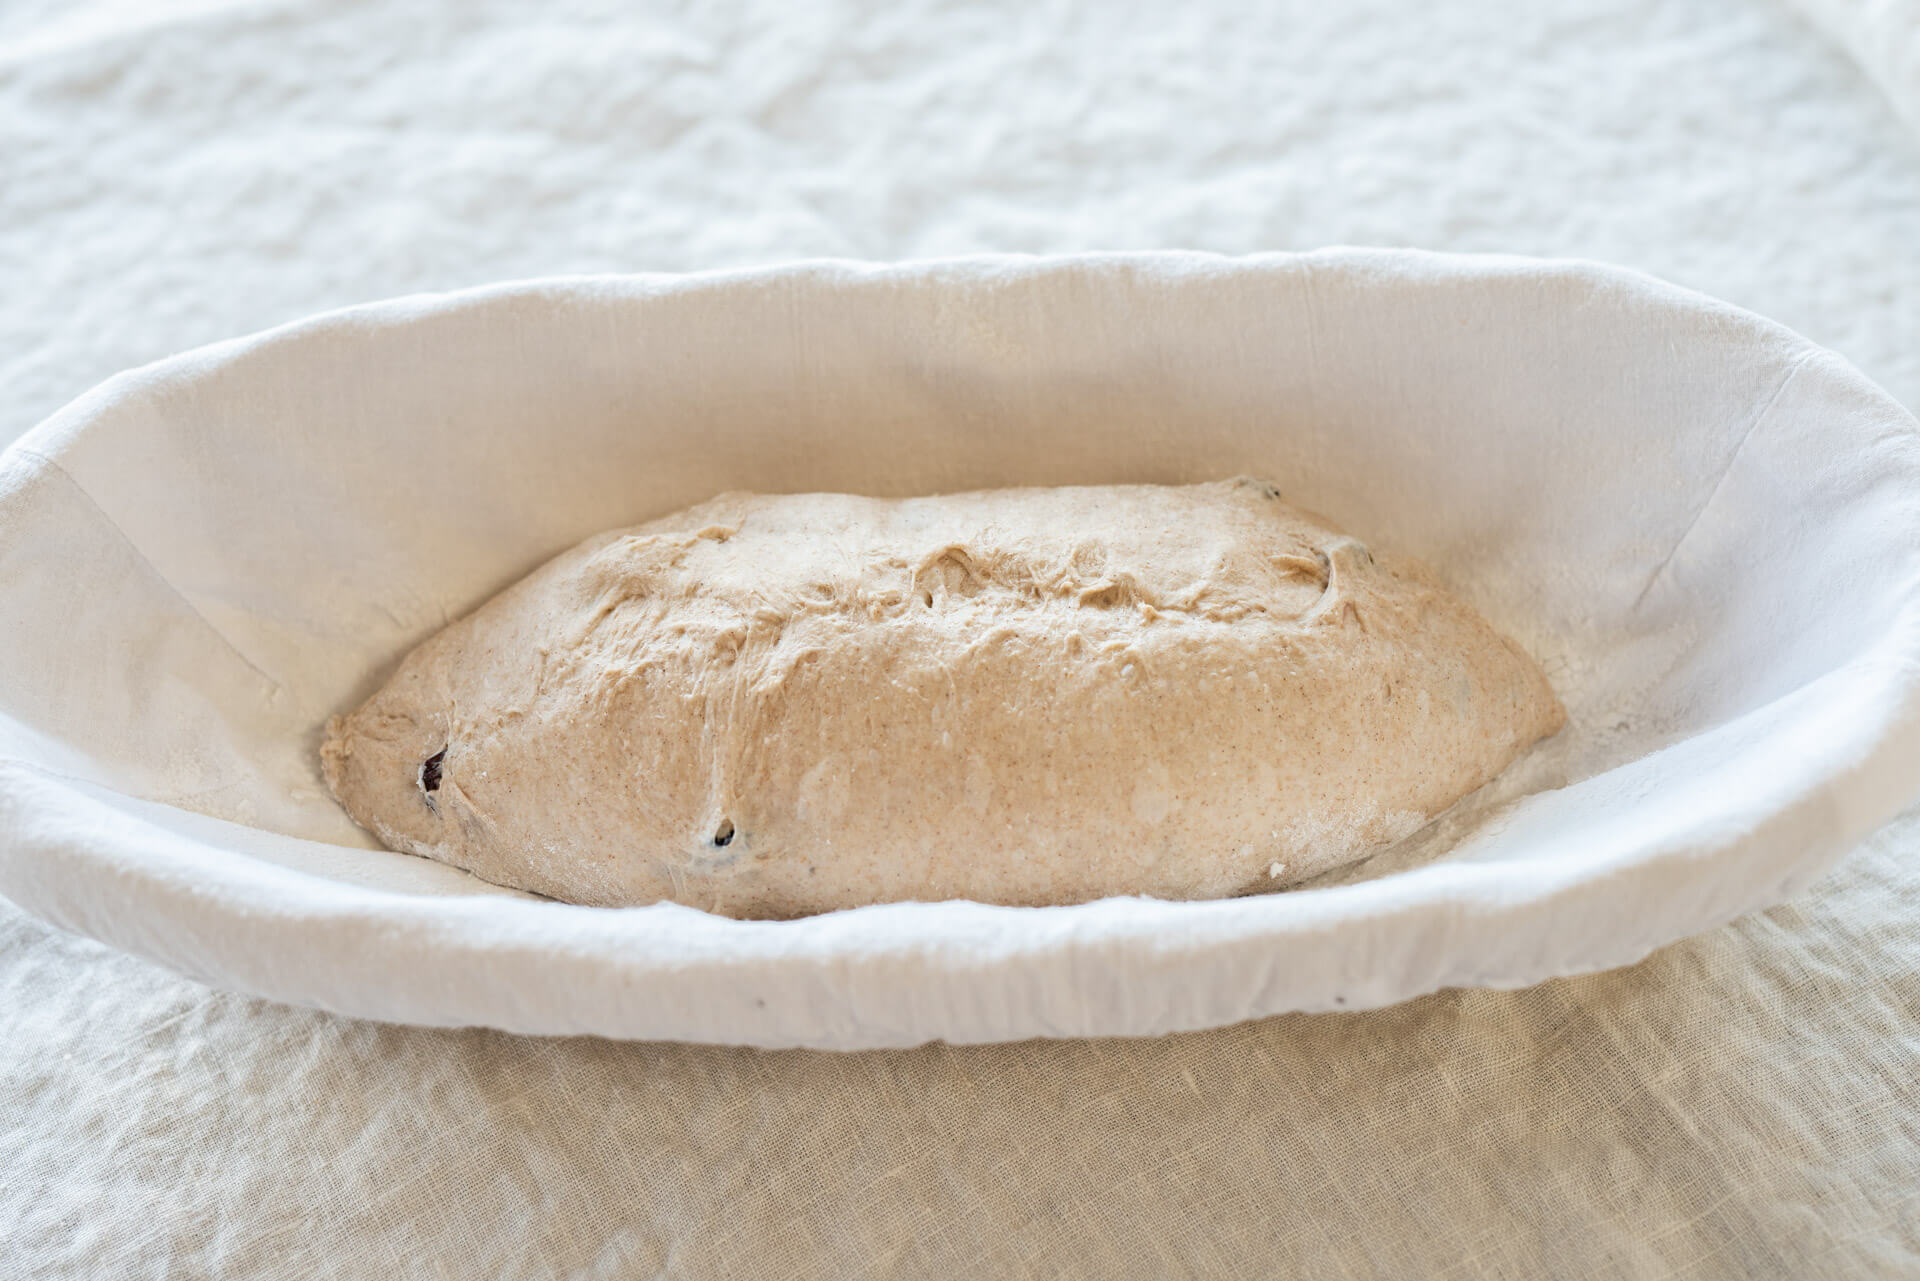
Dust your proofing basket with white flour. This helps to keep the dough from sticking to your basket but also leaves a thin layer that adds to the look of this loaf after it’s baked.
I shaped each 500g into a heavily tapered batard. I essentially used my batard shaping technique but rolled a few extra times out at the ends to create a well-defined tip. You could also shape these as little boules.
7. Proof – 5:30 p.m. to 9:00 a.m. (next day)
Completely cover each proofing basket with reusable plastic and place it in the refrigerator to proof overnight.
8. Bake – 9:00 a.m. (pre-heat oven at 8:00 a.m.)
Preheat your oven to 450°F (230°C).
I baked two of these at a time in my home oven, but you might be able to bake all four side-by-side, depending on how wide your baking stone/steel is. If you do two at a time, keep the other two in the fridge until you’re ready to bake them.
Remove your dough from the fridge, uncover it, and turn out onto parchment paper. Using a straight-edged razor blade, score each straight in at 90° to the dough in a series of slashes from top to bottom. I like the direction of my hand to move at 45° from side to side to create a series of stripes that open evenly.
Slide each piece of parchment paper holding the dough into the oven. Then, after all the dough is loaded, steam your oven and close the door. Bake at 450°F (232°C) for 20 minutes with steam, then open the oven door, remove the steaming pans, and bake for an additional 20-25 minutes at 425°F (218°C). Note that because these loaves have a smaller dough mass than my typical 900g to 1kg, they will bake a little faster than you might expect—keep an eye on them toward the end of the bake time.
Remove the loaves from the oven and let cool on wire racks for 1-2 hours.
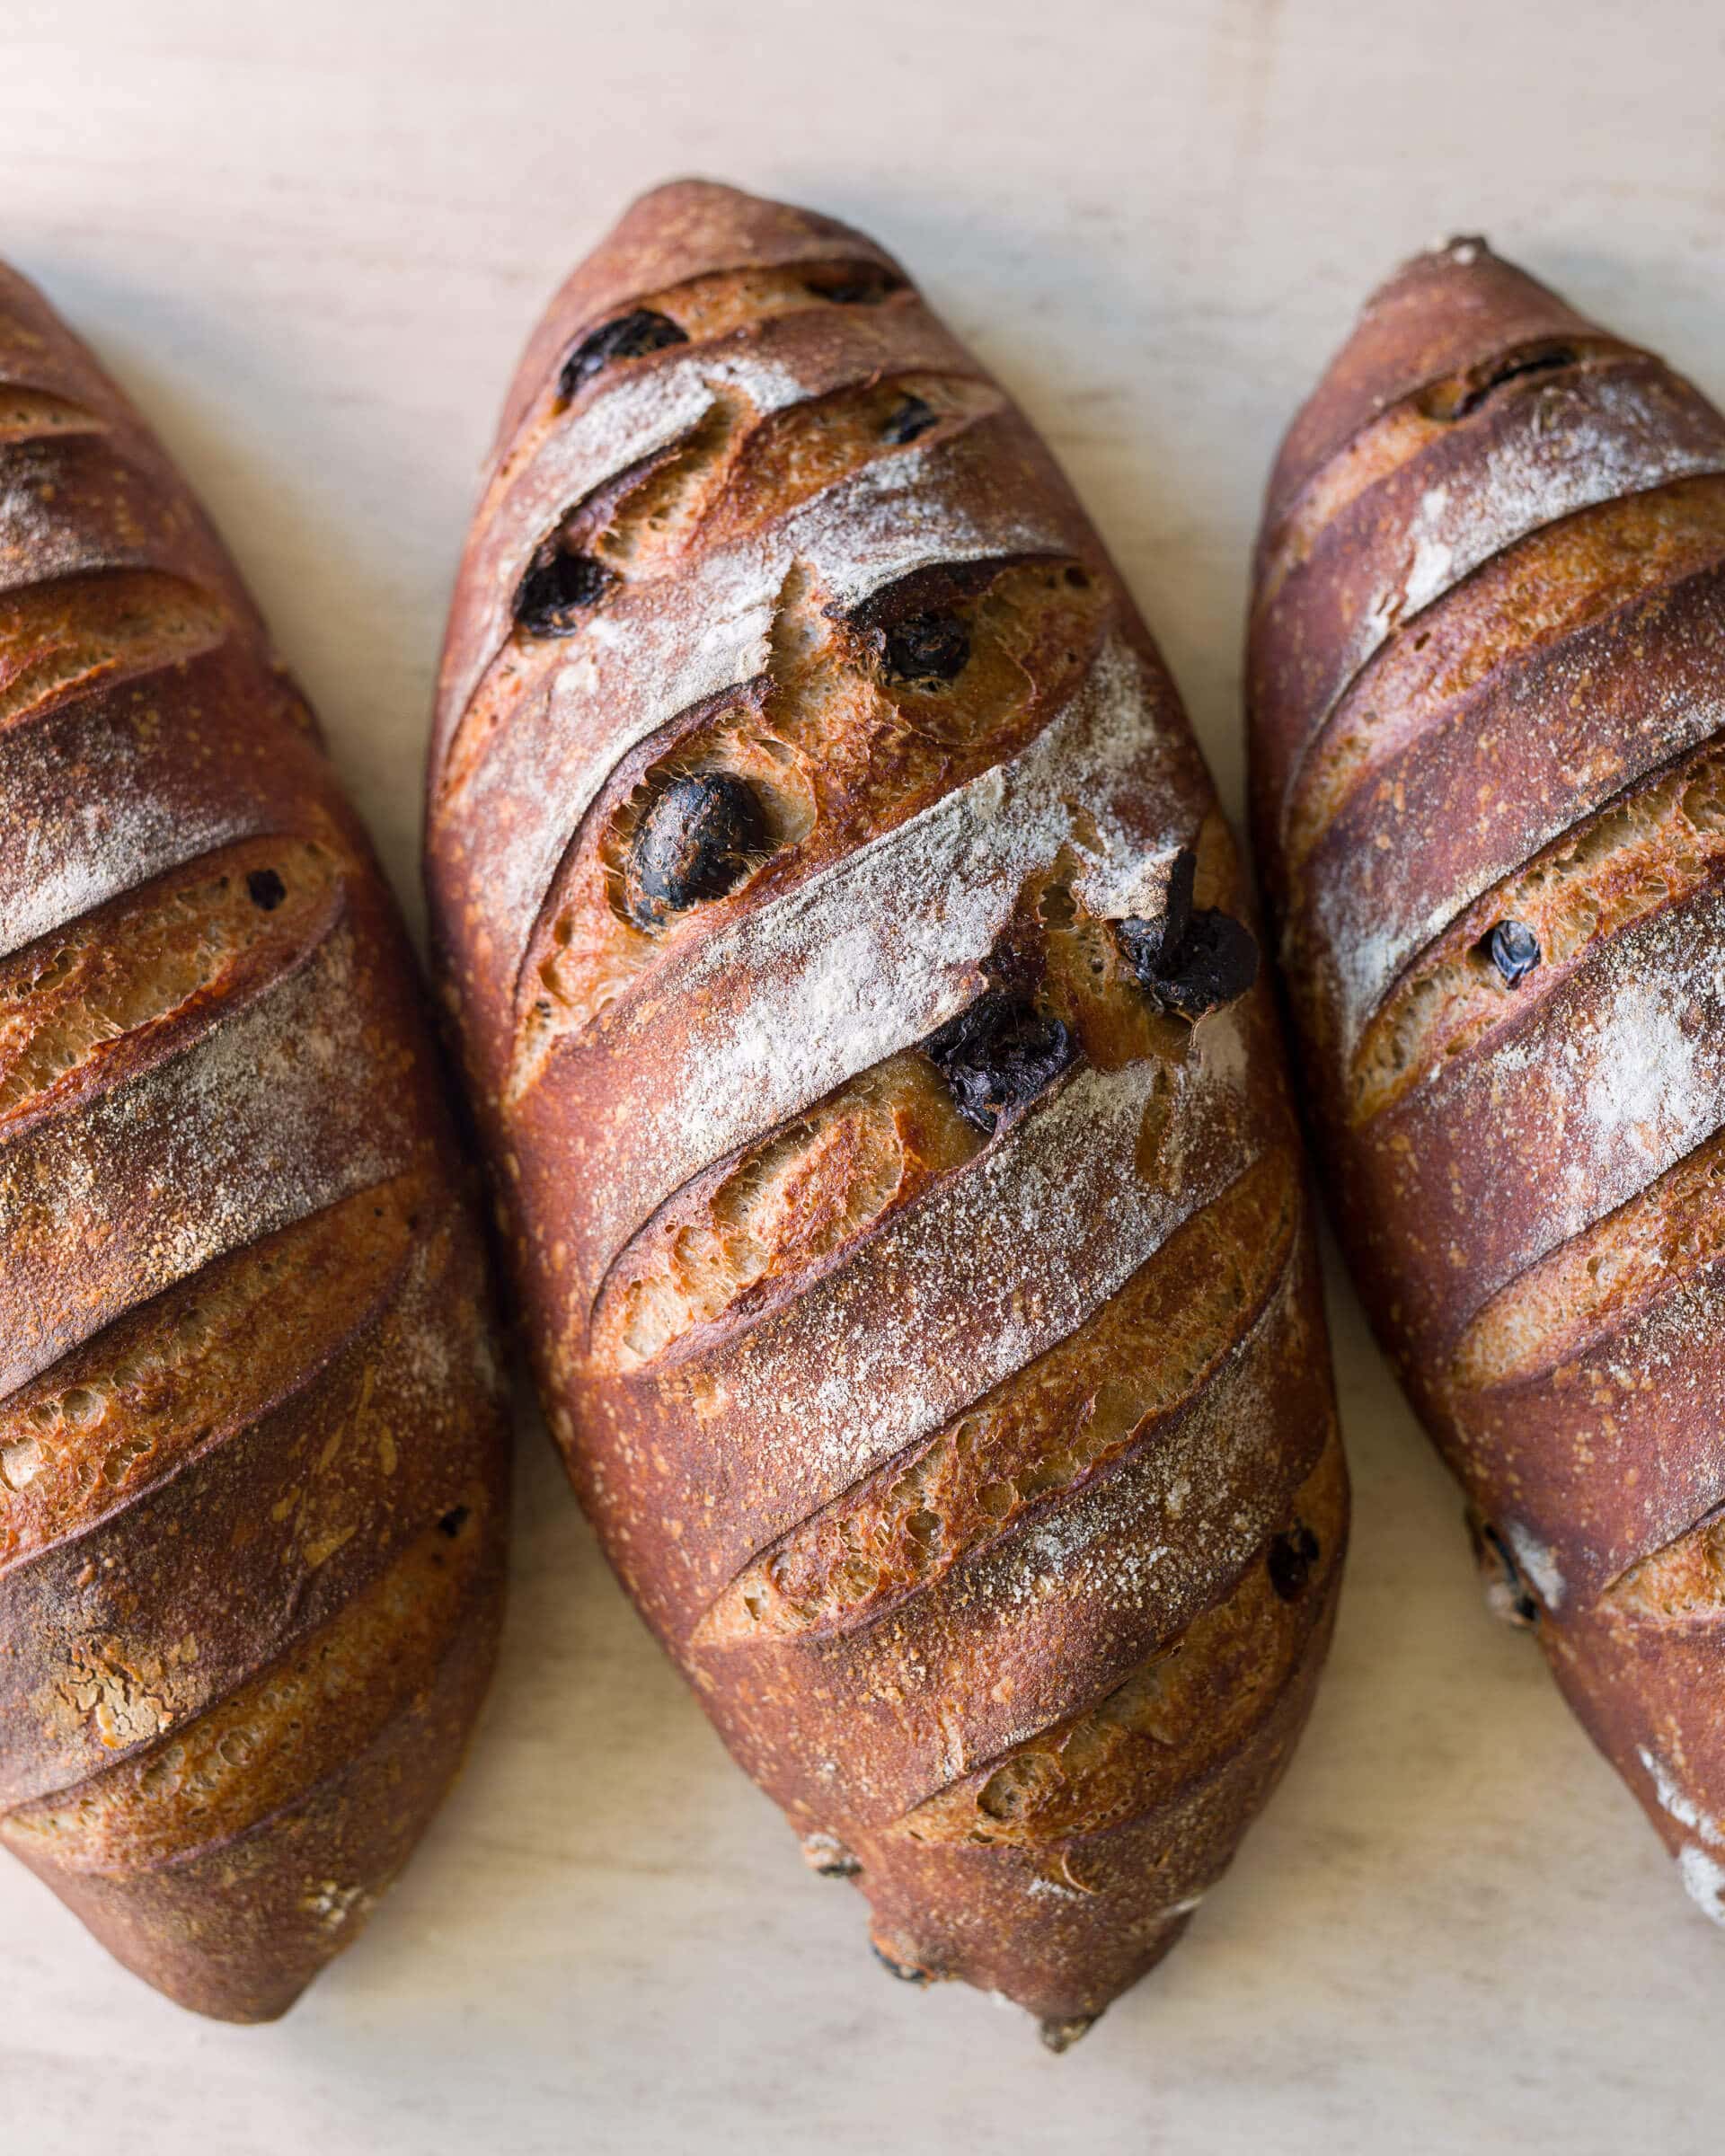
Conclusion
I chose to shape each loaf of this cinnamon raisin sourdough as a smaller, more petite batard because the flavor of each slice is pronounced. The smaller cross-section of each slice still lays up ample flavor and satiety—although, honestly, I always end up slicing two to three at a time… Trust me, you’ll understand once you get to baking this beautiful bread.
These taste exceptional when heavily toasted and topped with a slather of cultured butter. It has that warm, savory, and sweet checklist that is complete.
Crust
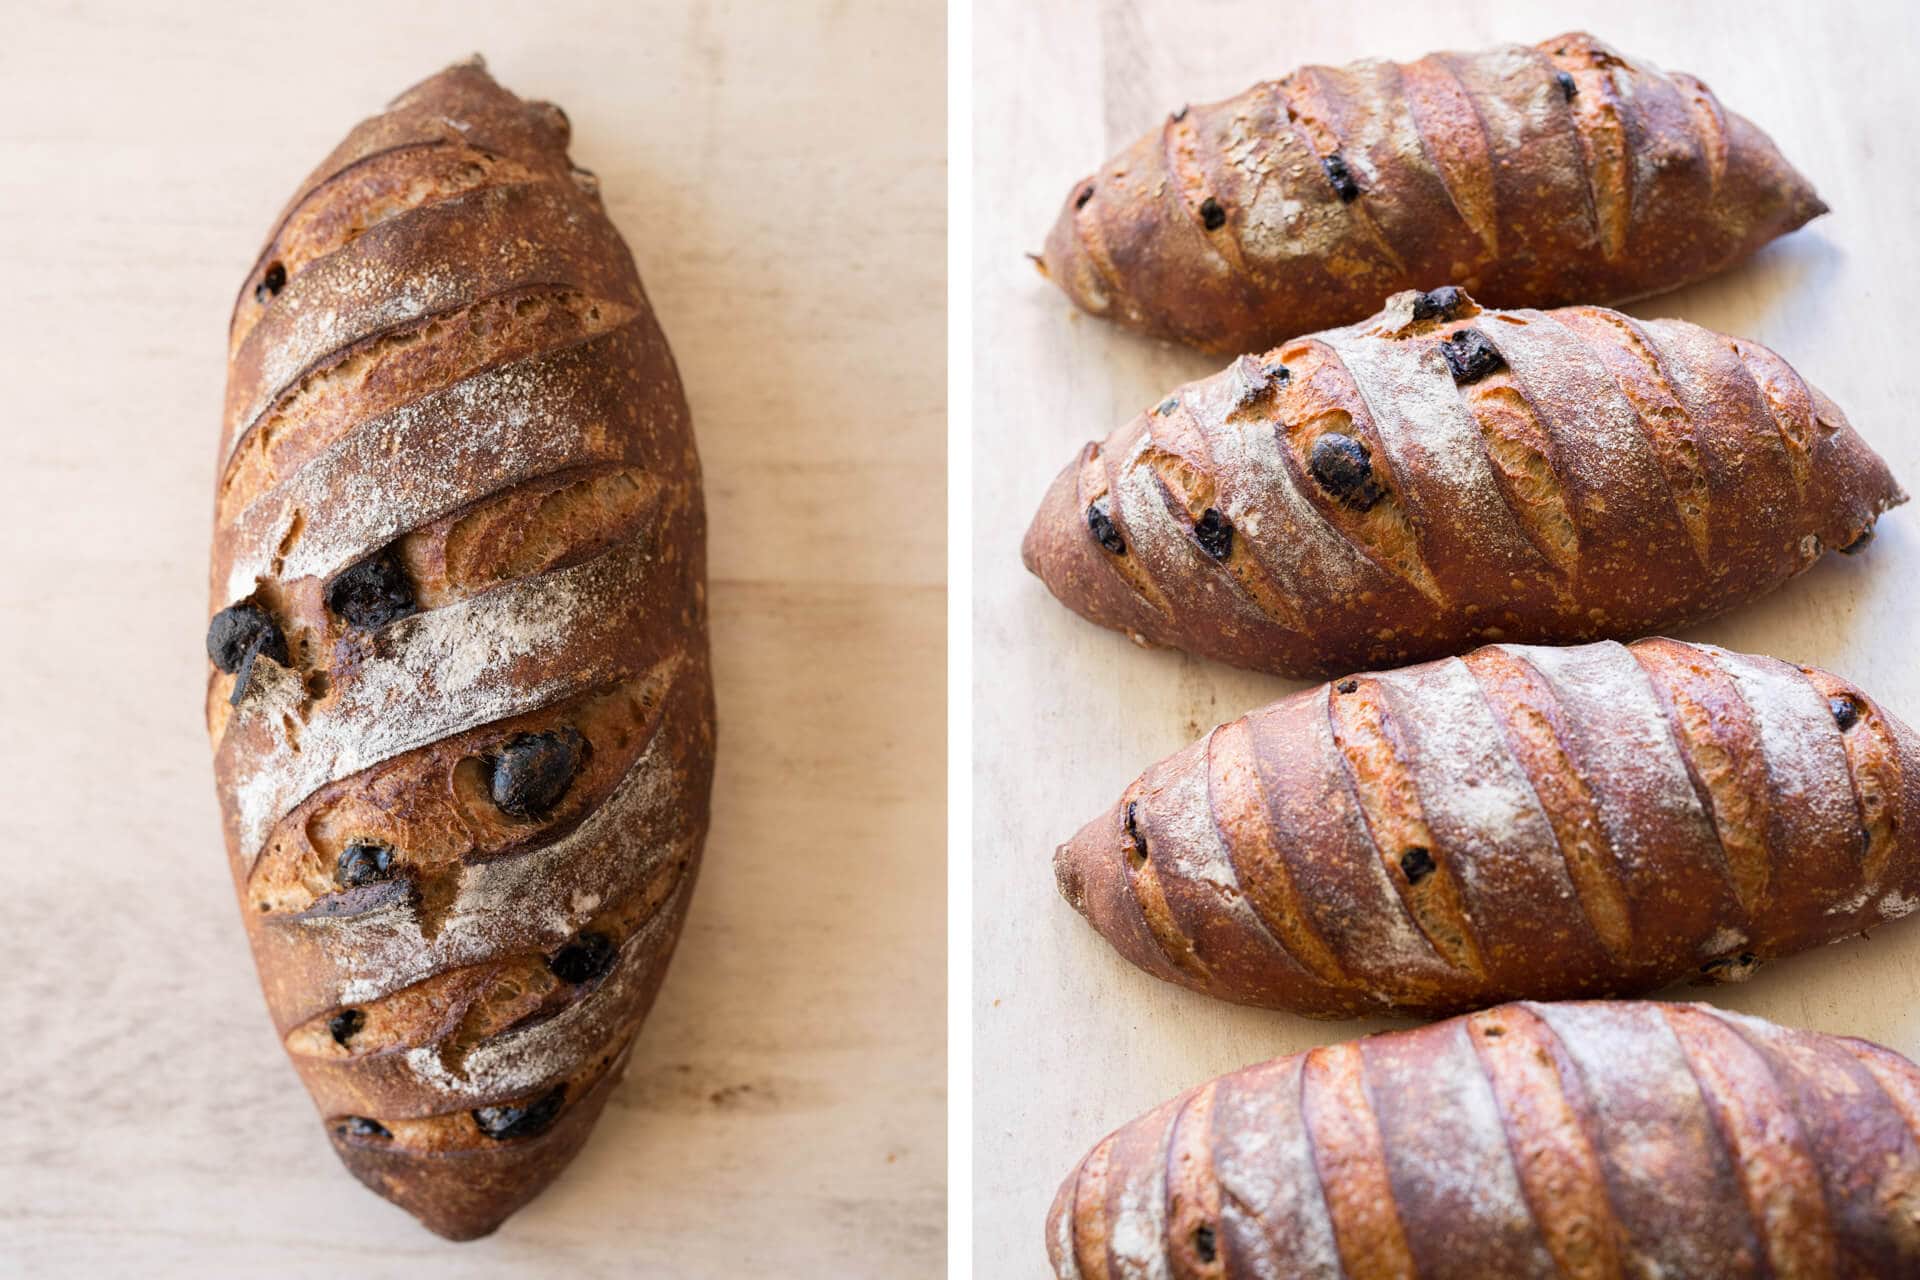
This scoring pattern looks beautiful on small oval loaves like this. In addition, the raisins peeking out, dusting of white rice flour, and reddish hue work together to make an all-around stunning bread.
Crumb
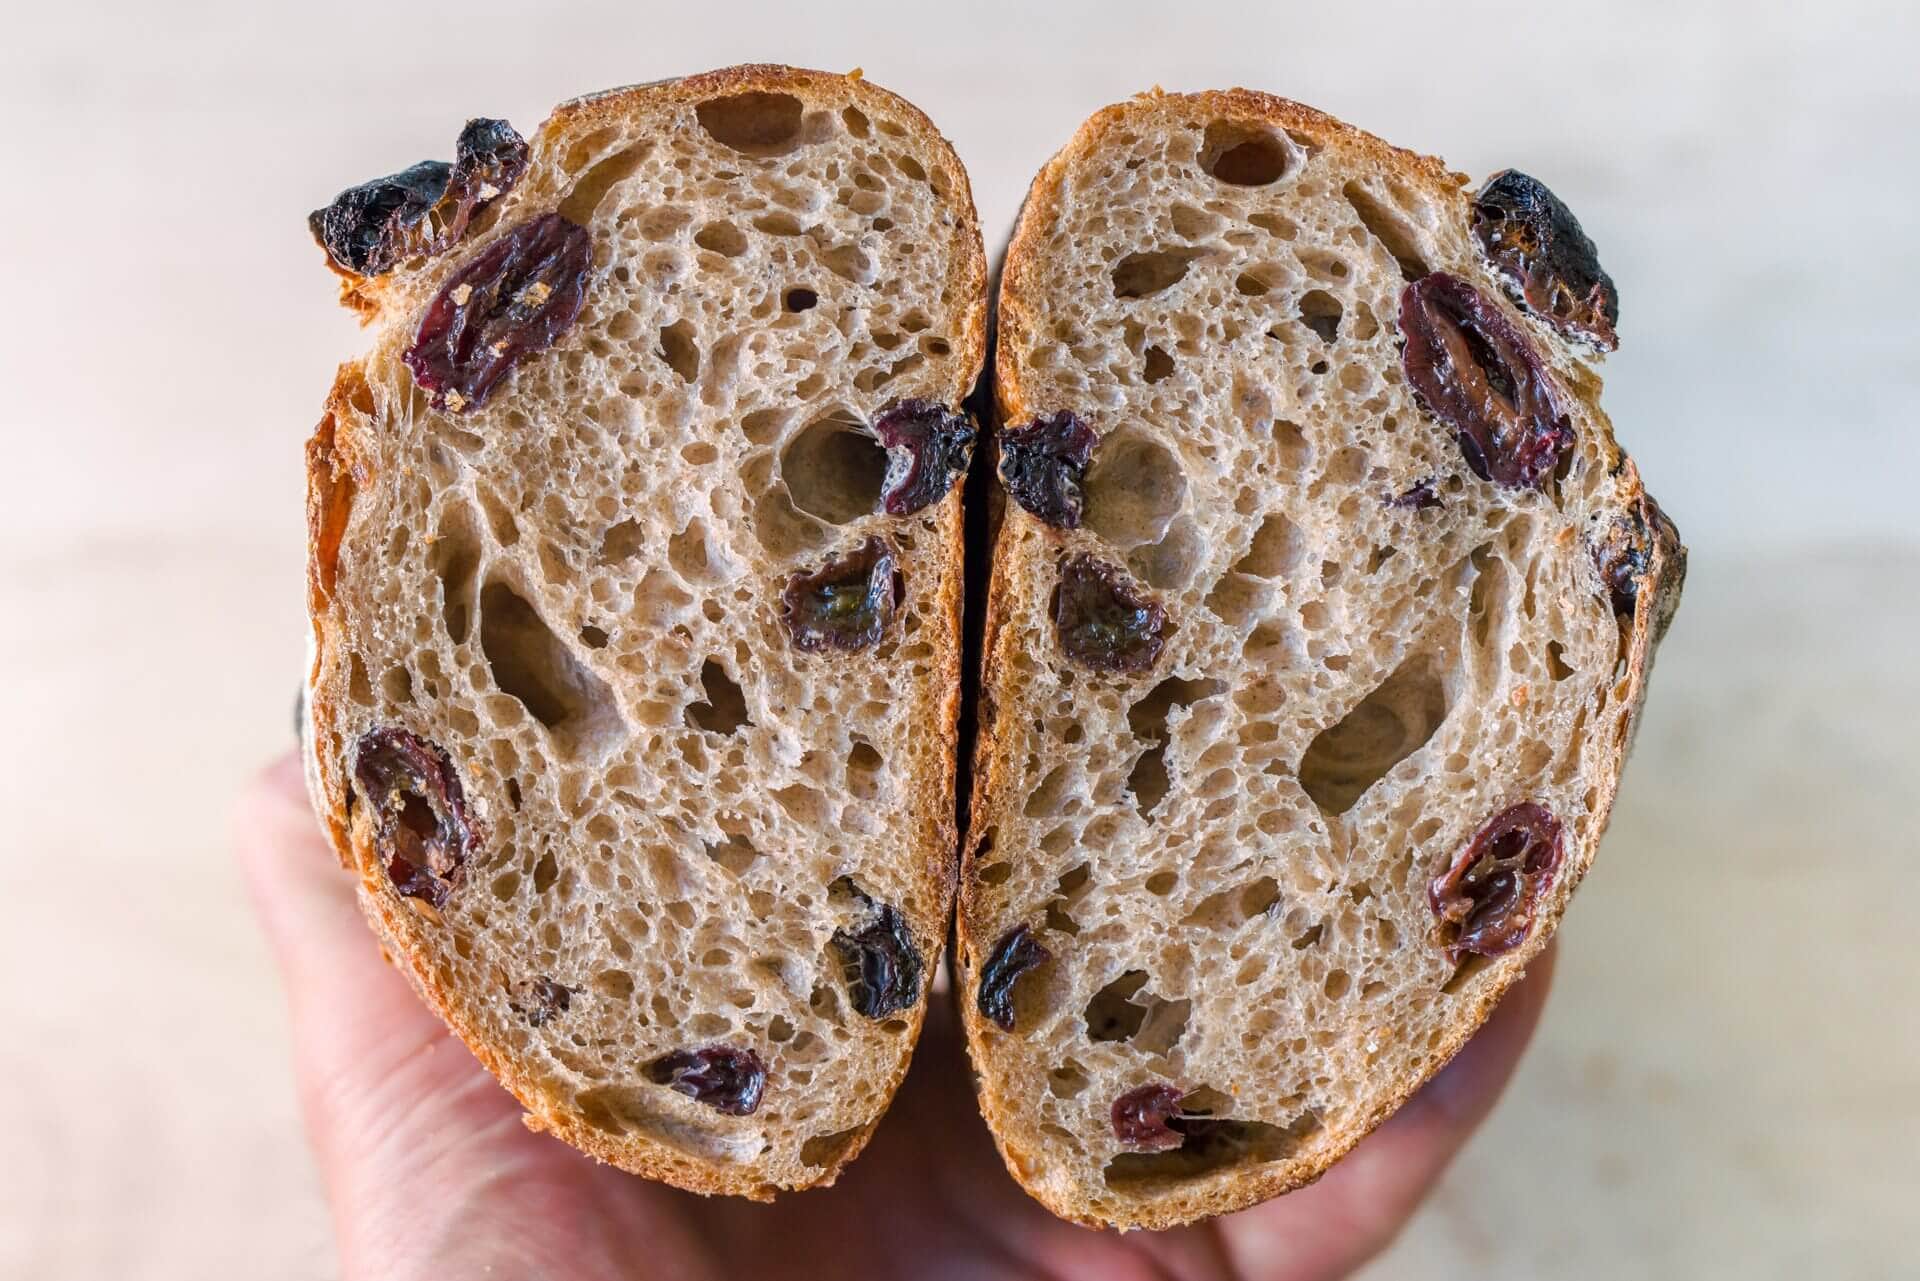
These loaves have consistent and even fermentation throughout. The bread is light in hand and wonderfully open—just what I was looking for. As I mentioned throughout the post, give the dough a little extra time in bulk and proof as needed. For me, a full 4-hour bulk and 16-hour cold-proof provided just the right amount of fermentation to open up the interior sufficiently and produce a tender crumb.
Taste
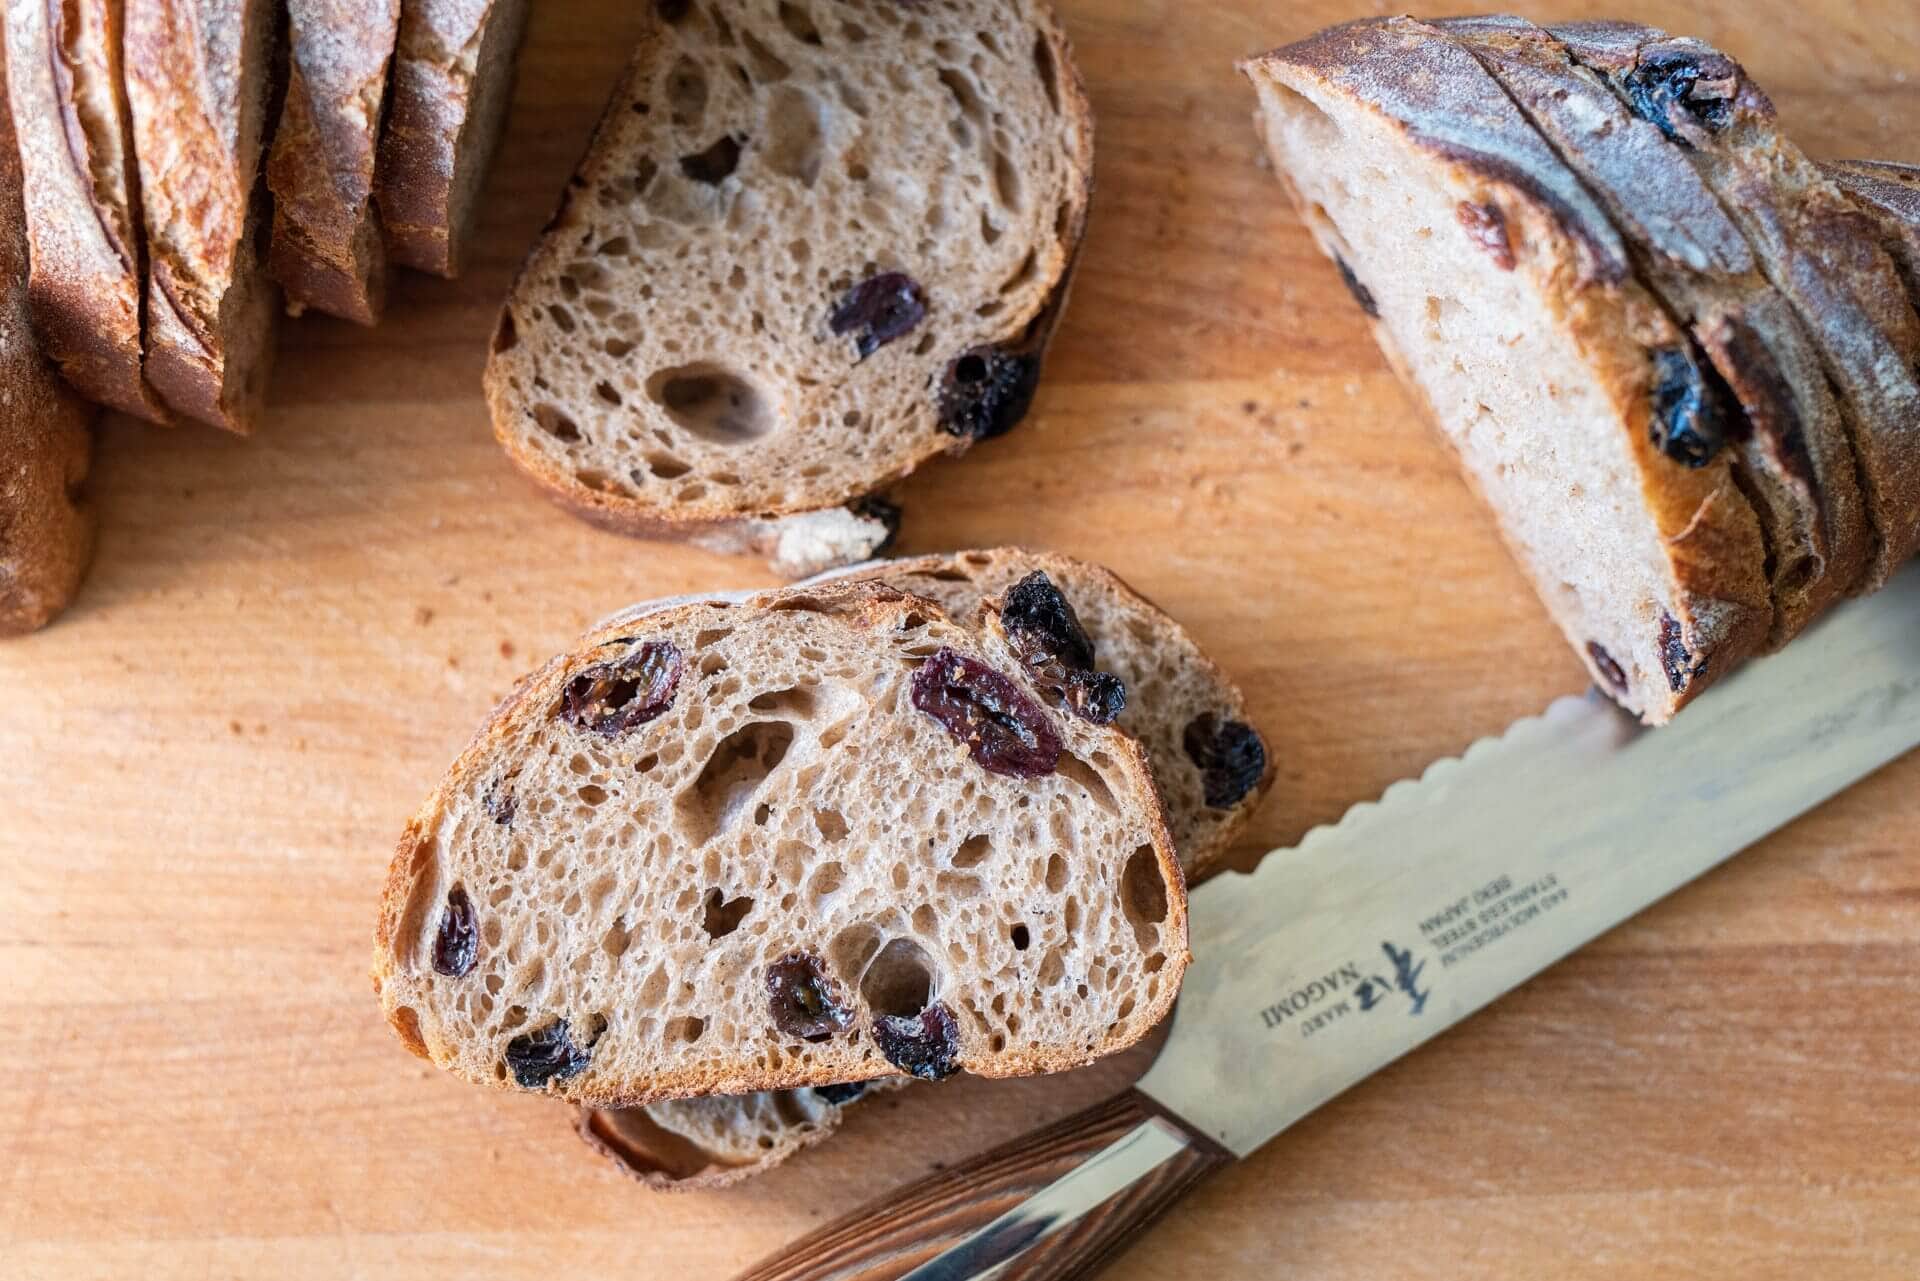
Homemade raisins elevate this bread to the next level. Sure, it takes extra time and a little effort to make them, but it’s that extra step that sometimes brings even more joy to the process of making homemade sourdough bread.
The flavor of the whole grain flour helps ground the taste of the sweet raisins while the cinnamon rounds it all out. It’s a well-tuned concert of flavor, texture, and sensation pleasantly punctuated by the plump raisin at just about every other bite. Those pops of flavor snap your attention back to the task at hand: eating healthy and nutritious sourdough bread made at home with your own two hands.
Buon appetito!
Print
Cinnamon Raisin Sourdough
- Prep Time: 23 hours
- Cook Time: 1 hour
- Total Time: 24 hours
- Yield: 4 loaves
- Category: Lunch, Dinner
- Cuisine: American
Description
A delicious and wholesome sourdough bread with plump raisins and warming cinnamon. Try this loaf sliced, toasted, and topped with salted butter—you won’t regret it.
Ingredients
Levain
- 26g medium-protein white flour
- 26g whole wheat flour
- 52g water
- 52g ripe sourdough starter, 100% hydration
Autolyse
- 643g medium-protein white flour
- 261g whole wheat flour
- 674g Water 1
Main Dough
- 48g water 2
- 10g ground cinnamon
- 191g raisins
- 19g fine sea salt
- 155g ripe levain
Instructions
- Levain (9:00 a.m.)
In a small bowl mix the Levain ingredients. Cover the jar and keep it at a warm temperature for 3 to 3 1/2 hours. - Autolyse (11:30 a.m)
In a mixing bowl, add the Autolyse ingredients until no dry bits remain. Cover the bowl and let rest for 1-hour. - Mix (12:30 p.m.)
Add the salt and levain to the top of the dough in autolyse and use a splash of the remaining water to moisten. With wet hands, mix thoroughly. Add the remaining water if the dough feels like it can handle it. Knead the dough for a few minutes using either the slap and fold technique or folds in the bowl until the dough smooths and becomes elastic. Transfer the dough back into the bowl. Transfer the dough to a bulk fermentation container and cover. At the end of this initial strengthening, the dough should have smoothed out and will loosely hold its shape on the counter (or in the bowl). Add the cinnamon dough and gently massage to incorporate. It is not necessary to overwork the dough to get the cinnamon incorporated, just enough to spread it around. Finally, spread the raisins on top of the dough and perform a few stretches and folds to gently incorporate the raisins. Again, don’t over-mix. The raisins will be further dispersed during our stretch and fold through bulk fermentation. - Bulk Fermentation (12:45 p.m. to 4:45 p.m.)
This dough will require 2 sets of stretches and folds during bulk fermentation at 30-minute intervals. After the second set, let the dough rest, covered, for the remainder of bulk fermentation. - Divide and Preshape (4:45 p.m.)
Scrape the dough out to a clean work surface. Use water and a wet hand, and your bench knife, divide the dough in half. Lightly shape each half into a round shape and let rest for 30 minutes, uncovered. - Shape (5:15 p.m.)
Flour the top of the preshaped round and your work surface. Using your bench knife, flip one of the rounds over onto the floured area. Using floured hands, shape the dough into a bâtard. Gently transfer the dough to the proofing basket, seam-side up. Repeat with the remaining pieces of dough. - Proof (5:30 p.m. to 9:00 a.m. the next day)
Cover proofing baskets with reusable plastic, seal, and place into the refrigerator overnight. - Bake (The next day, 9:00 a.m.)
Preheat your oven to 450°F (230°C). I baked two of these at a time in my home oven, but you might be able to bake all four side-by-side, depending on how wide your baking stone/steel is. If you do two at a time, keep the other two in the fridge until you’re ready to bake them. Remove your dough from the fridge, uncover it, and turn out onto parchment paper. Using a straight-edged razor blade, score each straight in at 90° to the dough in a series of slashes from top to bottom. I like the direction of my hand to move at 45° from side to side to create a series of stripes that open evenly. Slide each piece of parchment paper holding the dough into the oven. Then, after all the dough is loaded, steam your oven and close the door. Bake at 450°F (232°C) for 20 minutes with steam, then open the oven door, remove the steaming pans, and bake for an additional 20-25 minutes at 425°F (218°C). Note that because these loaves are a smaller dough mass than my typical 900g – 1kg, they will bake a little faster than you might expect—keep an eye on them toward the end of the bake time. Remove the loaves from the oven and let cool on wire racks for 1-2 hours.
What’s Next?
Have a little extra cinnamon? My Sourdough Cinnamon Rolls are surely your next step—sweet, soft, and decadent. They’re everything a cinnamon roll should be.


156 Comments
Hi, I just made this bread into 2 boules and 2 batards. I used a dutch oven because it was the only way I knew how to steam. I think next time I will make 2 larger loaves just to give it a try. The smaller loaves are cute and great to gift for the holidays.
I did swap out the raisins for blueberries. I dehydrated the blueberries in the oven, they were very small. I have yet to taste it, but I have to say thank you. I didn't know how this sourdough journey would go and your recipes have never let me down. This one was looser than I expected and I didn't think it would rise. The pointers were great. I left it in bulk fermentation for 4 hours and a little more in the fridge. This dough is sluggish, but so worth it. The house smells amazing and it has such a nice dark color!
So happy to hear everything went pretty well with this dough, Yessy! If the dough is more wet and slack next time, hold back a little water to adjust for your flour. Have fun and happy baking!
This bread looks wonderful! I was curious about the 90º scoring pattern here – if used on a standard batard, would it produce less oven spring and a more vertical loaf with narrower slices as it seems? Or should the oven spring be about the same? Also, curious if you have any thoughts on making this recipe as stated but add in the cinnamon just during the shaping stage, which would have a swirling effect and maybe make fermentation less sluggish? Your book is absolutely fantastic, BTW and I'm loving my new sourdough home!
Id say same oven spring with this scoring. I think adding the cinnamon at shaping would be fantastic! I love that. Thank you so much for getting my cookbook, Chris!
Hi! I love your recipes and in my 6 months of sourdough I use them alone until I get more confident and understand more of the science and whys for ea step. I love USA pans and finally got pullman pans to do your sandwich loaves. I want to make this cinnamon raisin sourdough (eeek alterations) in my new pans. A few years ago you told someone in comments it would work, however I see in your tangzhone sandwich bread(my next recipeto try) you say to use no lid and steam the oven. Is there a reason the lid won't work to steam not only in the sandwich bread but in this? It kinda adds another step for me, hunting for bolts or a chain, old towels…and makes me not want to use the pans if I can't use them to steam. Sadness.
You can definitely add the lid, just be sure there's not so much dough in the pan. I have some weights and pans listed here: https://slimlife.fit/cookbooks/videos/shaping-a-pan-loaf/%3C/a%3E%3C/p%3E
YUM! Just baked this morning at 10am and my husband has already finished off half a loaf by 12:25pm and I split the recipe into two large batards! LOL! Thank you, Maurizio! This recipe is so good!
Love it, so glad you liked these!
Forgot to say I also used the raisin soaking water as part of the total water in the recipe. Would that have been part of the problem?
Yes, that might have increased the hydration too high. They likely would have needed a longer bake time!
I really messed this recipe up. My baked result was almost like raw dough on the inside even though the internal temperature was up where it should be. I don’t know if it was partially due to the effect of the cinnamon on the yeast
Have you ever seen bread that baked up to temperature but was so compact it almost seemed raw? Any thoughts on this?
Can’t wait to try this recipe. I am contemplating baking 2/4 loaves in loaf pans for cinnamon sandwich bread for our kids. Have you done this before?
No but it would work really well, Don!
After my first go, which was pretty good, I cut the recipe in half, added 12 grams of honey, skipped the extra water after the autolyse and instead worked the dough with extra wet hands, and shaped the final unto a single batard. It’s so, so good.
Oh, love the idea of the honey. Glad you adapted this one to work well for you, Chloe!
Could you please do a “print recipe” button for this? It’s 23 pages long if I print the whole recipe as you have it posted here. Thanks!
Sorry about that, Dylia, working on it next!
Dylia—print function now added. Happy baking!
Thank you!! ❤️
The first time I made this recipe, it was a disaster. I baked two bricks that smelled wonderful but were gummy and super dense. I believe my bulk ferment was not near long enough, and I wasn’t paying close enough attention to the dough temperature. This time, I opted to cut the recipe in half and only make one loaf. I soaked store-bought raisins in water with a little bit of bourbon added, then used the soaking liquid as part of the water in the mix. Just for insurance, I added a pinch of commercial yeast at mixing time and held back the cinnamon and raisins until shaping. I was also more careful to keep the temperature of the ferment between 80-85° F. I patted the fermented dough out into a rectangle then spread the raisins and cinnamon over the dough and rolled it up to fit in a loaf pan. After 16 hours in the fridge, it had risen to about 150% of its original size. Because I wanted a softer crust, I brushed the top with butter, then baked at 375° for a bit over an hour until the internal temperature was 190°. We only managed to wait an hour after it came out of the oven before we cut into it but it turned out spectacularly!
So awesome, Alan. Sorry to hear about the initial troubles, but your modifications are spot on!
I baked this today with jumbo raisin medley which I soaked in plum gin in a single batard and the loaf came I
beautiful! Everyone who tasted it loved it and the whole loaf was gone within the hour. It’s going to be one
of my favourites. Thank you!
Oh my that sounds DELICIOUS, Sally! Enjoy 🙂
That link to the “anti-microbial effects of spices and herbs” seems to be a Japanese naughty site. Only thing that made it funnier is that my girlfriend, who is Japanese, was sitting right beside me when I opened the link 😆 Told her that I needed to go back to the link so I can catch up on my Japanese reading skills, but she didn’t buy it. That said, I think bread can be sexy enough……especially a really sleek baguette with nice curves.
Whoa. The site I linked to got taken down and forwarded to some seriously shady material. That’s scary. Thank you for mentioning this, unbelievable!!!
That link to the “anti-microbial effects of spices and herbs” seems to be a Japanese naughty site. Only thing that made it funnier is that my girlfriend, who is Japanese, was sitting right beside me when I opened the link 😆 Told her that I needed to go back to the link so I can catch up on my Japanese reading skills, but she didn’t buy it.
What should the temperature of the bread be when it’s done? I don’t recall seeing it in the recipe. BTW: last year, I asked about adding the raisin liquid in the dough. I do include it in the total amount of water called for. It works out beautifully. My next experiment will be to add a bit of cardamom or allspice with the cinnamon. I love to play with flavors!
I usually shoot for around 204°F internal temp. That will be great experiment, let me know how it goes, I’ve never used allspice in a loaf!
Do these loaves bake on parchment paper straight on the oven racks, or does the parchment paper go on pizza stones?
I use parchment paper to slide them onto a preheated baking stone.
Hi can I replace the raisins by cranberry???
Dried cranberry, yes absolutely!
Thank you for this beautiful formula, Maurizio! This is my favorite CRS I’ve ever made, and I’ve made a few! I had a minor catastrophe last night that happened right at the beginning of bulk fermentation and I knew I wasn’t going to have time for the rest of the evening to give the dough the attention it deserved. So I stuck the whole un-bulk fermented container in the fridge until I could deal with it this morning. This morning I took it out of the fridge, put the warming lights on under my range hood and let it bulk ferment in its covered tub. Divided, pre-shaped and shaped after about 5 hours. Stuck the 2 bannetons in ziplocks back in the fridge for another 4.5 hours, then scored and baked. It didn’t suffer even a tiny bit from all these machinations! You should see the ears on these loaves, and the crumb and hole structure are perfection!
So glad to hear you like it! Really nice adjustments there, sounds like your “baker’s intuition,” as I call it, came in to save the day 🙂 Enjoy!!
Hi! Thanks so much for this recipe! I’m curious if I could make two boules instead of 4 batards? I don’t have anything to proof batards in. Thanks in advance 🙂
Yes, you absolutely can do this, Amber 🙂
I have faithfully made this recipe about eight times and I never get a good rise. Flying saucer like, with about 4 inches of height). I pay attention to all of the factors…and more or less follow your recipe but I always need a few hours more to get any rise. I even left it out overnight once to see if there would be a big improvement but still not great. I have read other recipes and they suggest putting in the cinnamon and raisins later, as when you would add seeds. What do you think? I know cinnamon is difficult to work with with sourdoughs.
Hey, Jody! Yes, cinnamon can cause adverse effects on fermentation if in high enough quantity. This dough is a little sluggish for me, but not terribly so. You can absolutely hold back the cinnamon and add it in later in bulk fermentation if you’d like. Alternatively, you can give the dough longer in bulk fermentation—as much as needed!
When I bake oatmeal cookies, I simmer the raisins in water for about 20 minutes to “plump” them. The raisin liquid is then added to enough water to make 1/2 cup and is added to the dough. Could the raisin liquid I use to soak raisins overnight be incorporated to the total amount of water in this recipe?
That’s such a great idea—yes, you can absolutely do that. If doing this, be sure to use water from the total mix, don’t add additional water, to ensure the dough isn’t over hydrated.
This was a picture perfect recipe. I used my whole wheat starter at 4 days old so she was a bit hungry 🙂 . Thanks for the amazing bread, now I have to work out 2X as hard!! i wish I could upload a pic.
Ah so glad to hear the bake went well, Heidi! This is a delicious bread, to be sure. Thanks for the comments and happy baking (and exercising) 🙂
Hi, I made this and it turned out wonderful! However, I notice that the raisins tasted a bit sour (?) after baking. These were the raisins inside so they were definitely not burnt. I wonder if this is normal. Has anyone also experienced the same thing?
That’s really interesting, Carmen, I haven’t seen that over here!
I was hoping you could help me troubleshoot my loaf… I got to the Mix stage, and after about 20 stretch and folds the loaf looked like it was about to come together. But suddenly it started to lose its shape and wasn’t developing any gluten, or getting stronger or smoother. I let it rest for about 30 min and tried to stretch and fold again, but it seemed to have given up getting stronger. I let it rest another 15 minutes and tried again, to no avail.
My starter was ripe (and not a new one. I also just made a plain loaf that turned out great), the levain was bubbly and doubled in size within 3 hours. The dough temp was about 79.8.
I did have some trouble mixing the levain in at first, and might’ve been a little too rough. But would that have affected the dough? As an aside, what’s the best method to mix the levain in? (Pinching it into the dough? Folding it in?)
Any thoughts on what went wrong?
I don’t think it was the way your levain was mixed in. You really can’t be too rough there, you want it fully dispersed in the dough—pinching, folding, whatever works. My guess is maybe over hydration of the dough—just too much water added.
Mine did not raise well and some were completely flat…not sure what happened.
Yours came out so beautifully. Mine…a work in progress. I’ve learned more about my shaping and proofing…
Hi again,
I just made the dough and was wondering a couple of things. First, why did you choose to make this such a high hydration bread? What is the thinking process when making a bread recipe?
Second, when I added the last 50g of water with the cinnamon it was a sloppy mess I did a few rubaud’s just to bring it together before adding the raisins. Is this expected?
Thanks!
The hydration is all about the flour going in, the dough consistency I’m after, any inclusions (like raisins), and how I want the final eating experience. Lots of factors to weigh! Sounds like your flour can’t take on the higher hydro—and that’s ok! It’s not a set in stone number, it has to be adjusted for your flour and your environment. Next time, leave out that 50g (or more, if necessary) to adjust.
Hi Maurizio,
When do you slap and fold vs rubaud method vs kneading vs a couple of folds in the bowl? Most of the time I just do 3-6 folds during the bulk ferment but this says 50 folds if you don’t do slap and fold. Thanks!
All of those methods will get you to where you need to be: sufficiently developed (strengthened) dough. For this recipe, I found developing the dough a little more to be helpful, not only to ease shaping but to ensure a tall rise and nice structure in the final baked loaves. I usually do slap/fold, but sometimes it’s nice to just keep the dough in the bowl and strengthen it that way 🙂
Great thanks! I haven’t done the slap and fold so looks like today’s the day.
Maurizio – can you put this recipe into a printable format? Thanks!
Yes, will work on this one soon, Susan! Sorry for the delay 🙂
Can this be made in a Pullman loaf style (similar to the pumpkin cinnamon raisin bread)? Or would it be better omitting the pumpkin from that recipe and replacing with 50/50 water/flour?
My wife likes sandwich bread style cinnamon raisin, with lighter crust to make it easier to slice.
Hi. I tried this recipe and used KA Whole wheat (669g) and KA White Whole Wheat (261g)
The crumb came out very dense. Is it because the proteins were too high? Maybe needed more water? Or under proofed? The taste was great and it had a nice rise. just dense. Thank you in advance!
That’s very possible, but I would be surprised! Hard to say without more info, but my guess would be under proofed 🙂
Any reason I could not use White Bread Flour instead of the Whole Wheat. I don’t have any WW Bread Flour at the momment
Will work fine!
Hey, is this correct that I should bake it direct from the fridge? I’ve always let bread proof a final time for at least an hour or two after an overnight cold proof before I bake it off. When I tried this recipe the inside didn’t expand like I was expecting like it hadn’t proofed enough. And I left it in the fridge for 18 hours instead of 16. Suggestions?
It sounds like perhaps your dough was under proofed. It’s absolutely fine to bake straight from the fridge, assuming the dough has fermented sufficiently to do so. What I always do is check my dough in the morning before baking: if it feels very dense, doesn’t look puffy at all, and I’m generally feeling like it’s under proofed, I’ll take it out of the fridge and let it continue to ferment on the counter, at room temp, for 30m to 1h. Another way is to leave your dough out after you’ve shaped it, then place it in the fridge after it’s had more time to ferment.
In your case, I’d say yes, it needed more time on the counter to ferment, either after you shaped, or in the morning before baking. Hope that helps!
Ok that’s what I thought. Take two today. Any recommendations on cooking this in a pizza oven? It’s typically set at 500 but I could put it in before it gets up to temp if that would work?
You’d need some steam in there. You could shape the dough as rounds and bake in a combo cooker or Dutch oven. Or, you could forgo the steam, just spray a bit with a mister, and have a more rustic style crust–either way would be great. I’d say yeah, before it reaches temp. I’m imagining a large, heavy pizza deck and at 500F it might be a bit much. Keep an eye on that bottom of the loaf!
Just something worth a mention…I soaked my store bought raisins overnight, and they were sitting at room temperature. My dough temp was just great until I added the raisins…they cooled the dough down!!!. Drats! So maybe that’s something for others to be aware of.
I have found my stone counters suck the heat out of any ingredient so I need to pop everything into the oven with the light on for a couple of hours before I start, to take them from my house’s 67 degrees up to 80 degrees. Your oven will vary. Mise en place! (Everything in place). 🙂 I look forward to slicing into my loaves tomorrow after they bake!
Hi Maurizio, I have a more general question though I did it encounter when baking this recipe… When doing the slap and fold, and/or the stretches, and even the shaping, my dough seems to be in good shape, but then all of a sudden it seems shaggy and less tension again. Am I overdoing it? Or is it not thoroughly proofed? Thank you for all of your great info.
Lynn
That’s common, Lynn. The dough always seems to bread apart after a little while, and that’s ok. The strength will still be there. You can continue to s/f past that point until it smooths out again, that’s what I usually do! Sorry for the late reply.
Hey Maurizio! Thanks so much for this amazing recipe, excited to make it. I use a stiff starter, 50% hydration. I am wondering if you think this recipe would work that? Would I just add more water to the levain? If it’s 52g of 100% hydration starter, and mine is 50%, would I add 50% more water? meaning an extra 26g of water? Making the total for the water in the levain 78g? Are my calculations correct as far as you can see? PS, thanks for all your research and writing on stiff starters in general. You’re the only resource we have out there!
Hi Harley,
A 50% hydration starter is 75% flour and 25% water. You can divide your desired total (100% hydration) levain mass in half, divide your starter mass by 4, then subtract the second value from the first to determine the amount of water to add. For example, if you use 52g of stiff starter and want 156g of 100% hydration levain, you can end up with 78g-13g=65g of added water. You will also need to decrease the amount of added flour. 52g starter * .75 (% flour)=39g. 78g-39g=39g of added flour. You should be able to use these formulas with any recipe, just substitute your levain and starter mass!