


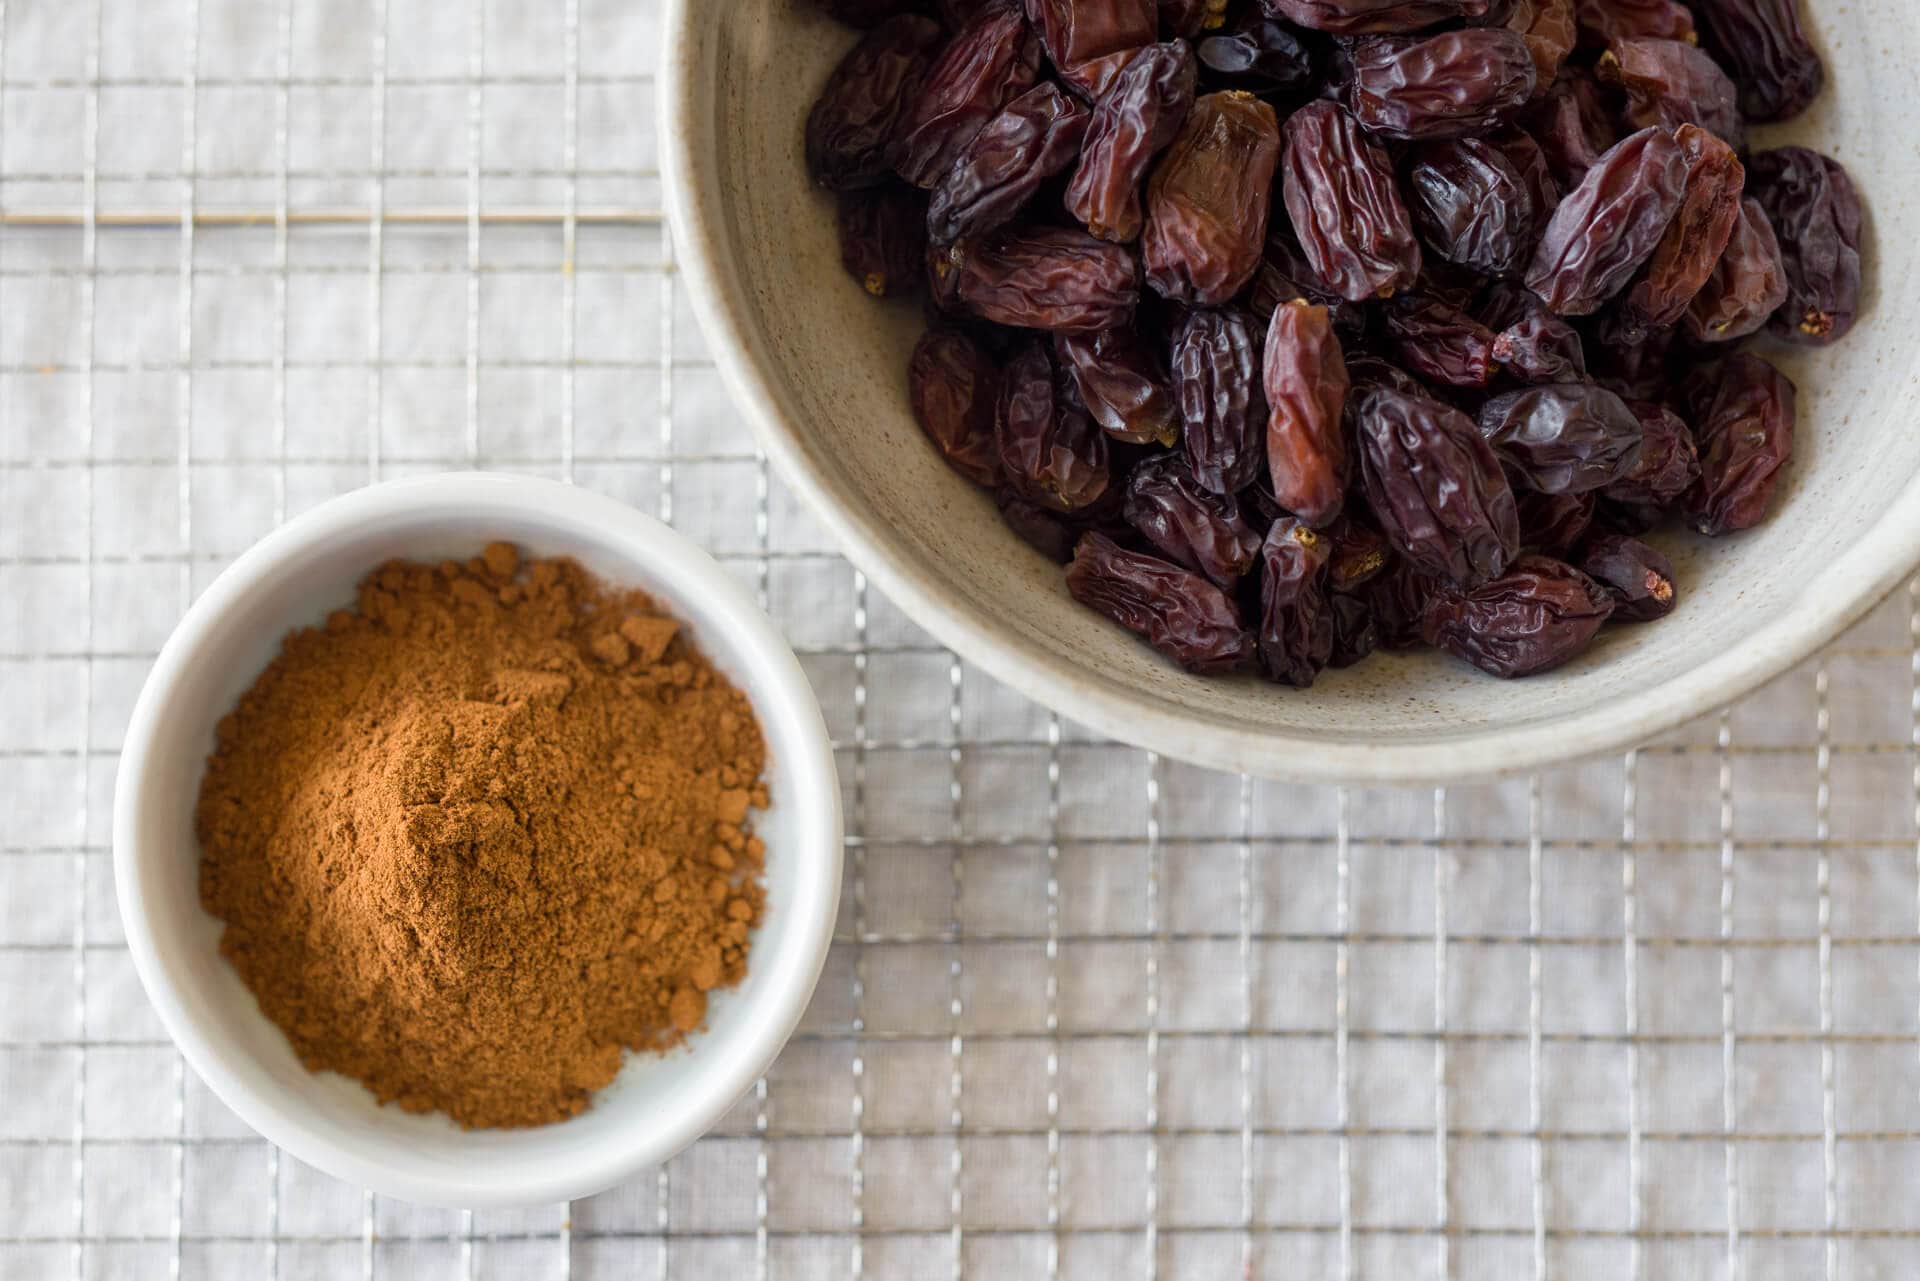
Cinnamon is a spice that didn’t find its way into much of the food from my childhood, but somehow, as I’ve grown older, I find myself enjoying its sharp but warm flavor. It needs a counterweight, though, doesn’t it? Something to balance it, to take off that blunt edge, so the character is more of a warm, inviting thing rather than something that evokes a pucker or cockeyed stare at the baker. Enter raisins. Not just any raisins, mind you, but homemade raisins. And the two of these go so well in this cinnamon raisin sourdough.
As you know, I take things a little farther, just one step beyond. But there’s additional satisfaction to be found in making or carefully sourcing every component of a loaf of bread. Whether you make your raisins or use store-bought, pairing them with cinnamon in a naturally leavened cinnamon raisin sourdough results in a loaf that looks stunning and tastes equally as much.
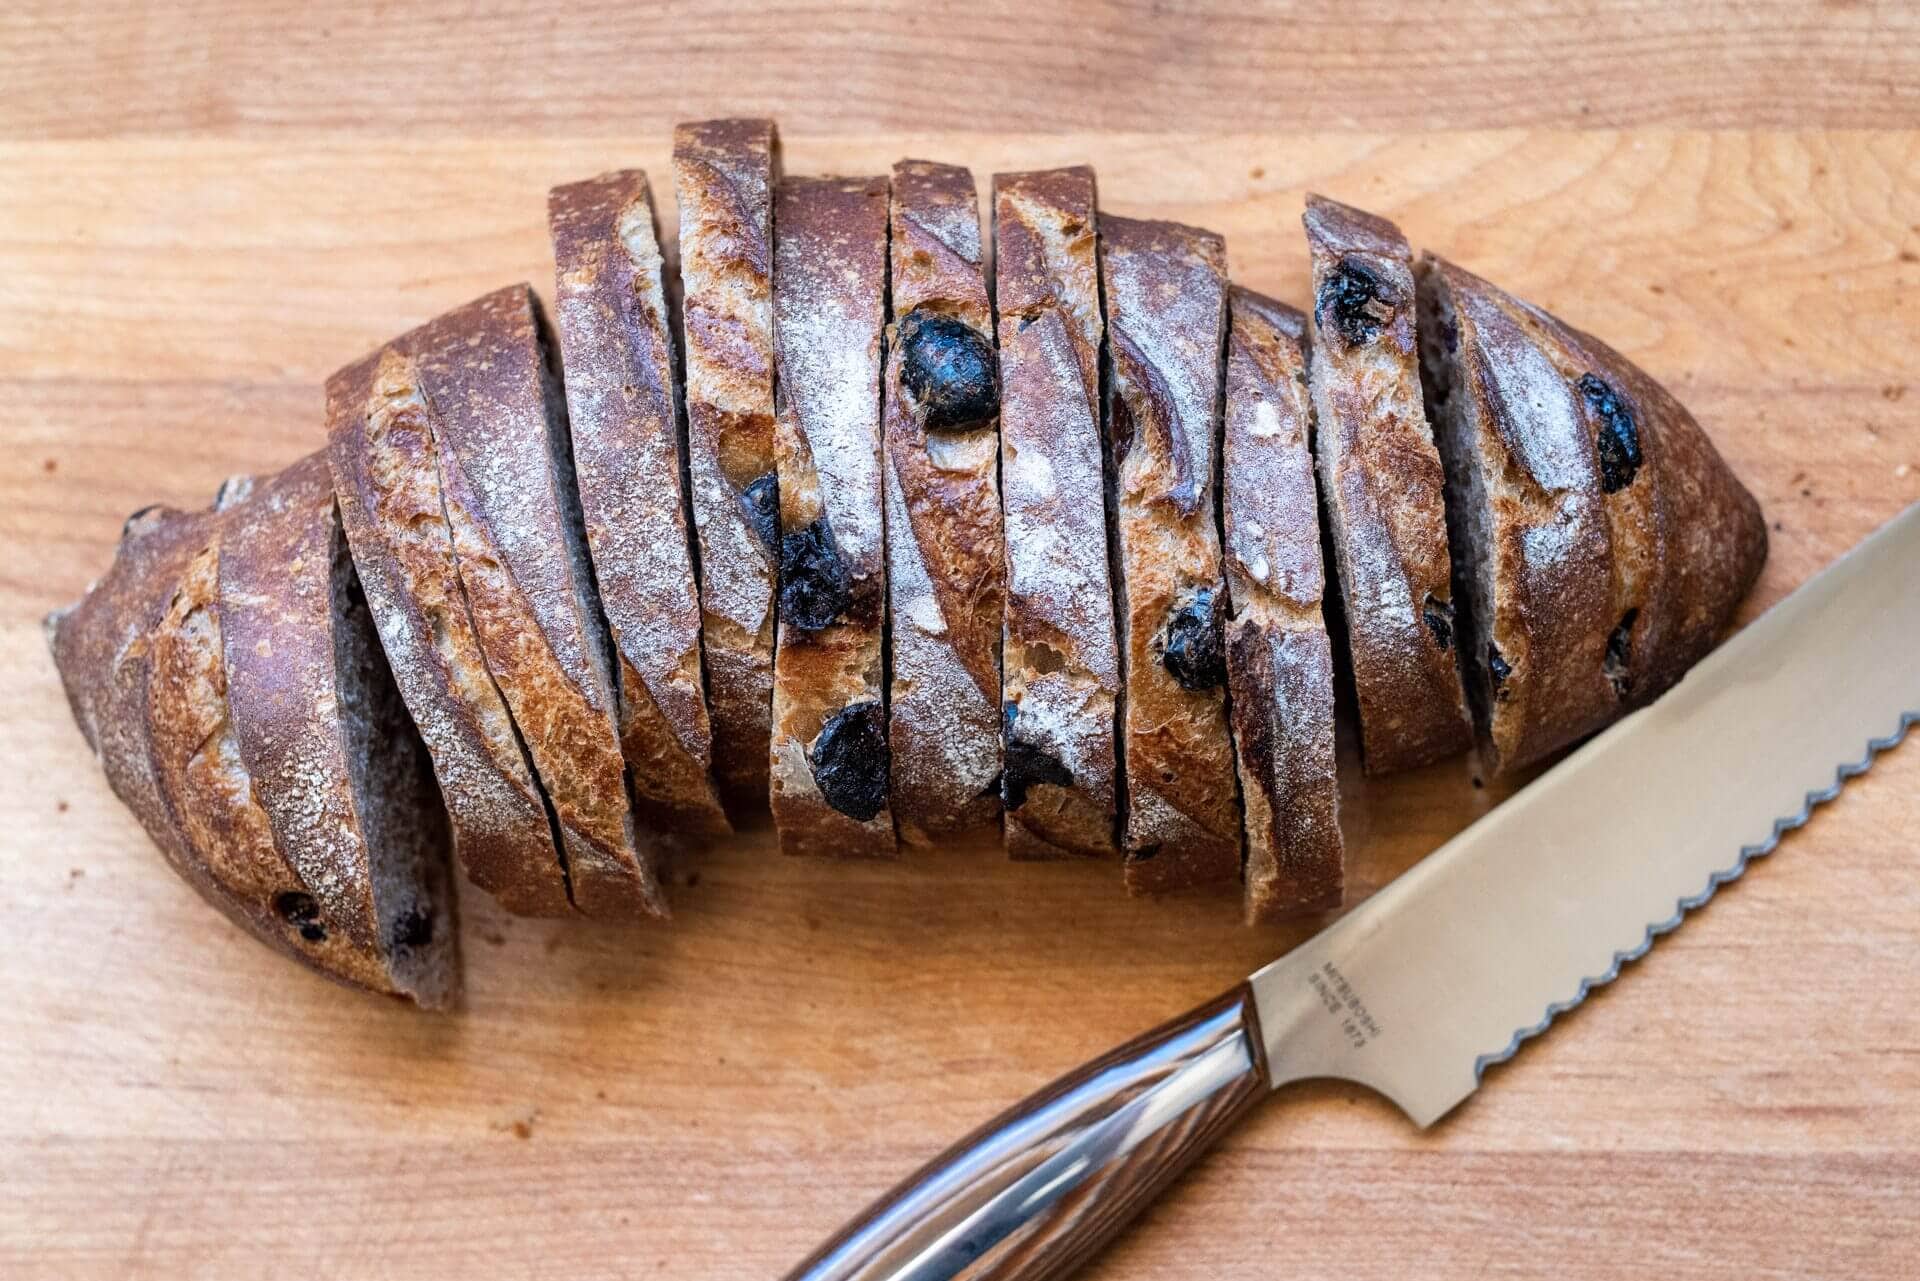
The crust on this bread exudes a slightly reddish hue in the right light, quite the stunning cast and something not totally expected in a loaf of bread. Next, the eye traverses from top to bottom, hopscotching from plump, dark mass to mass, wondering what could possibly be protruding from a crust in such a way. I think the beauty in this loaf starts before you even take a bite, and of course, you’d be let down if the flavor didn’t match the aesthetic, but brush those worries aside: it’s downright delicious.
Depending on your affinity for cinnamon, this loaf might conjure feelings of either warmth or sharp spice—and for me, it’s the latter—but I kept the percentage of cinnamon low enough to keep balance. It’s just right, just enough to stand up to the sweet raisins but not so much that it becomes overpowering. However, feel free to play with this percentage to suit your liking; additionally, cinnamon’s potency can vary.
Flour Selection
I used all Central Milling organic flour for this recipe but use what you have on hand that has similar specifications as listed below (if you have locally milled flour, fantastic!). King Arthur All-purpose Flour and King Arthur Whole Wheat would also work very well.
At thirty percent, the whole wheat flour provides a lovely backdrop for the sharp cinnamon and sweet raisins. Increasing this percentage and freshly milling your flour would undoubtedly lead to an increase in flavor, and it’s something I’ll be playing with once I make another batch of raisins. Whole wheat and cinnamon go incredibly well together.
Cinnamon’s Effect on Fermentation
At high percentage, cinnamon can interfere with fermentation, likely due to its antimicrobial properties. There are a few techniques I used in this recipe to help offset this:
- I increased the pre-fermented flour percentage (and therefore the percentage of levain in the final dough)
- Cinnamon was kept relatively low at 1%
- I increased bulk fermentation to a full 4 hours (with an FDT of 79°F (26°C) it might have previously ended around 3.5 hours)
- I lengthened the final proof time to 16 hours in the fridge
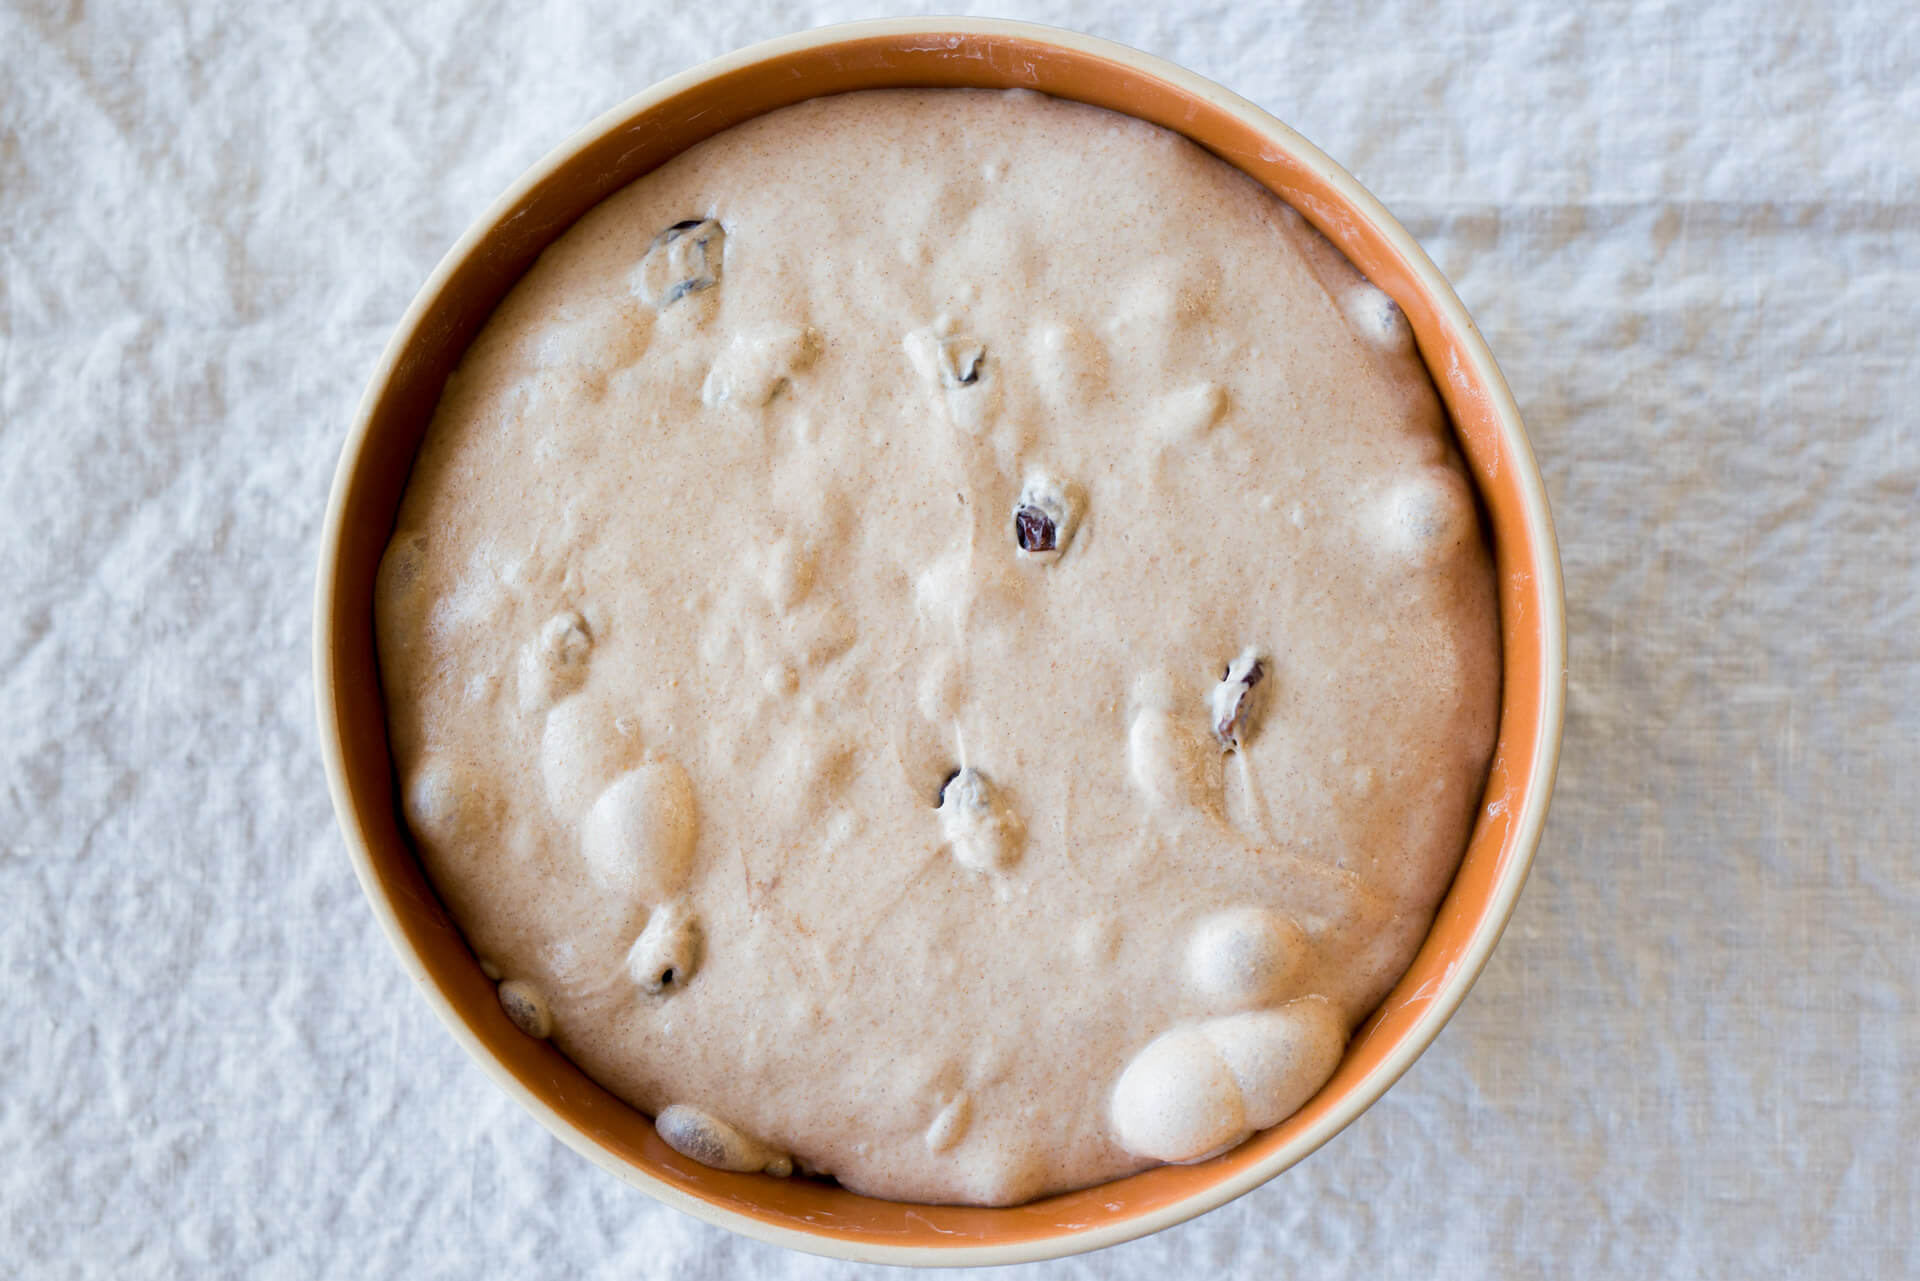
Fermentation was slightly sluggish at the start, but as you can see in the pictures in this post, there was plenty of activity toward the end of bulk fermentation. The key is to adjust my timeline below to fit your dough’s progress. As I always say, “give the dough the time it needs.”
Special Equipment & Preparation
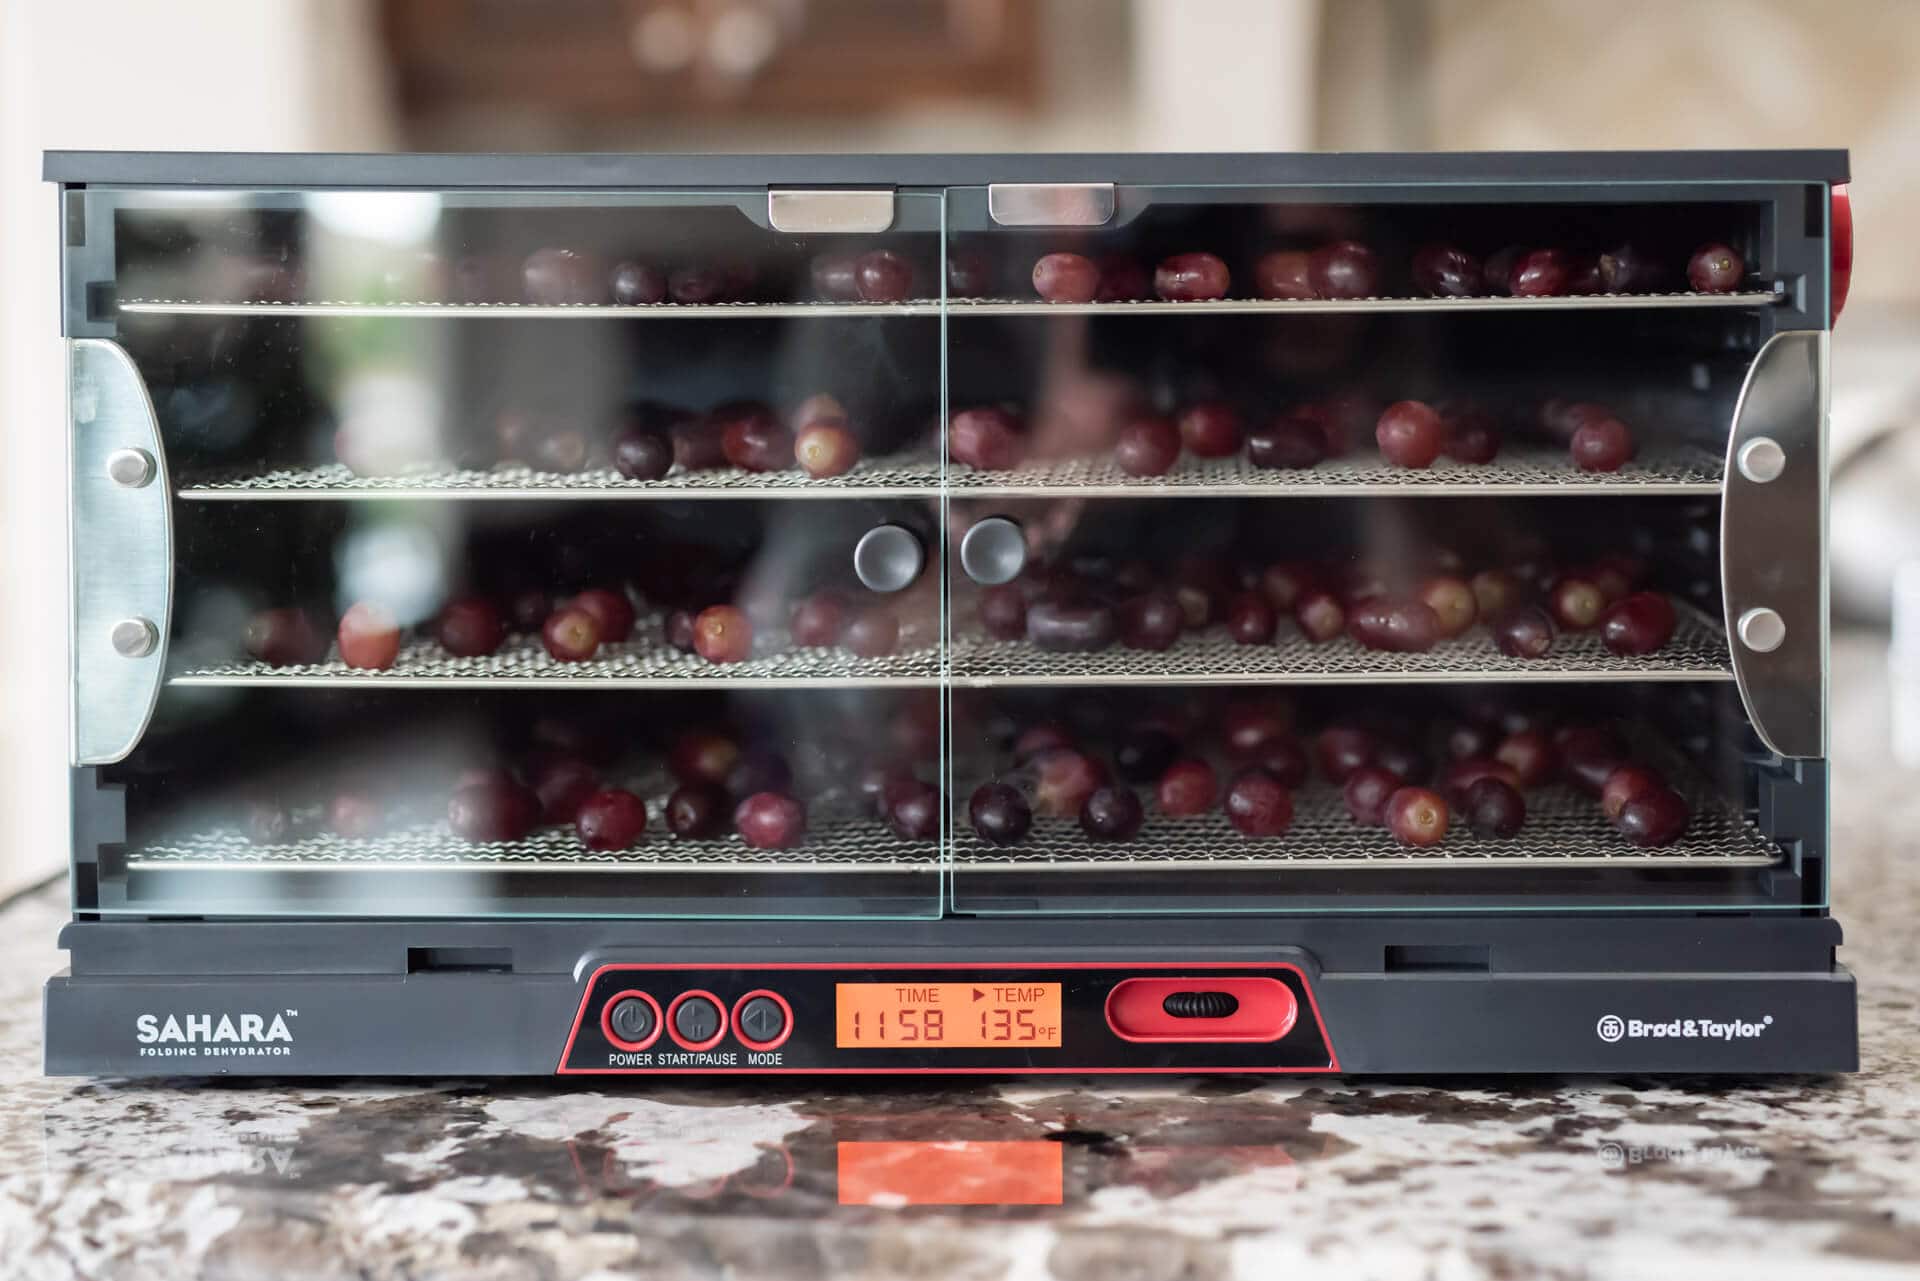
Make Your Own Raisins With a Food Dehydrator
I recently received a new Brød & Taylor Sahara Food Dehydrator (they provided it to me for this sponsored post), a superbly designed dehydrator that eliminates the reason why I’ve not bought one previously. This one folds up into a compact little package for storage.
Upon receiving it, ideas for its use in a baking recipe swirled around in my head, everything from dehydrating my own spent beer grains to making diastatic malt to dehydrating veggies and fruits of all kinds. I settled on making a recipe I’ve meant to tackle for a while now: a cinnamon raisin sourdough bread.
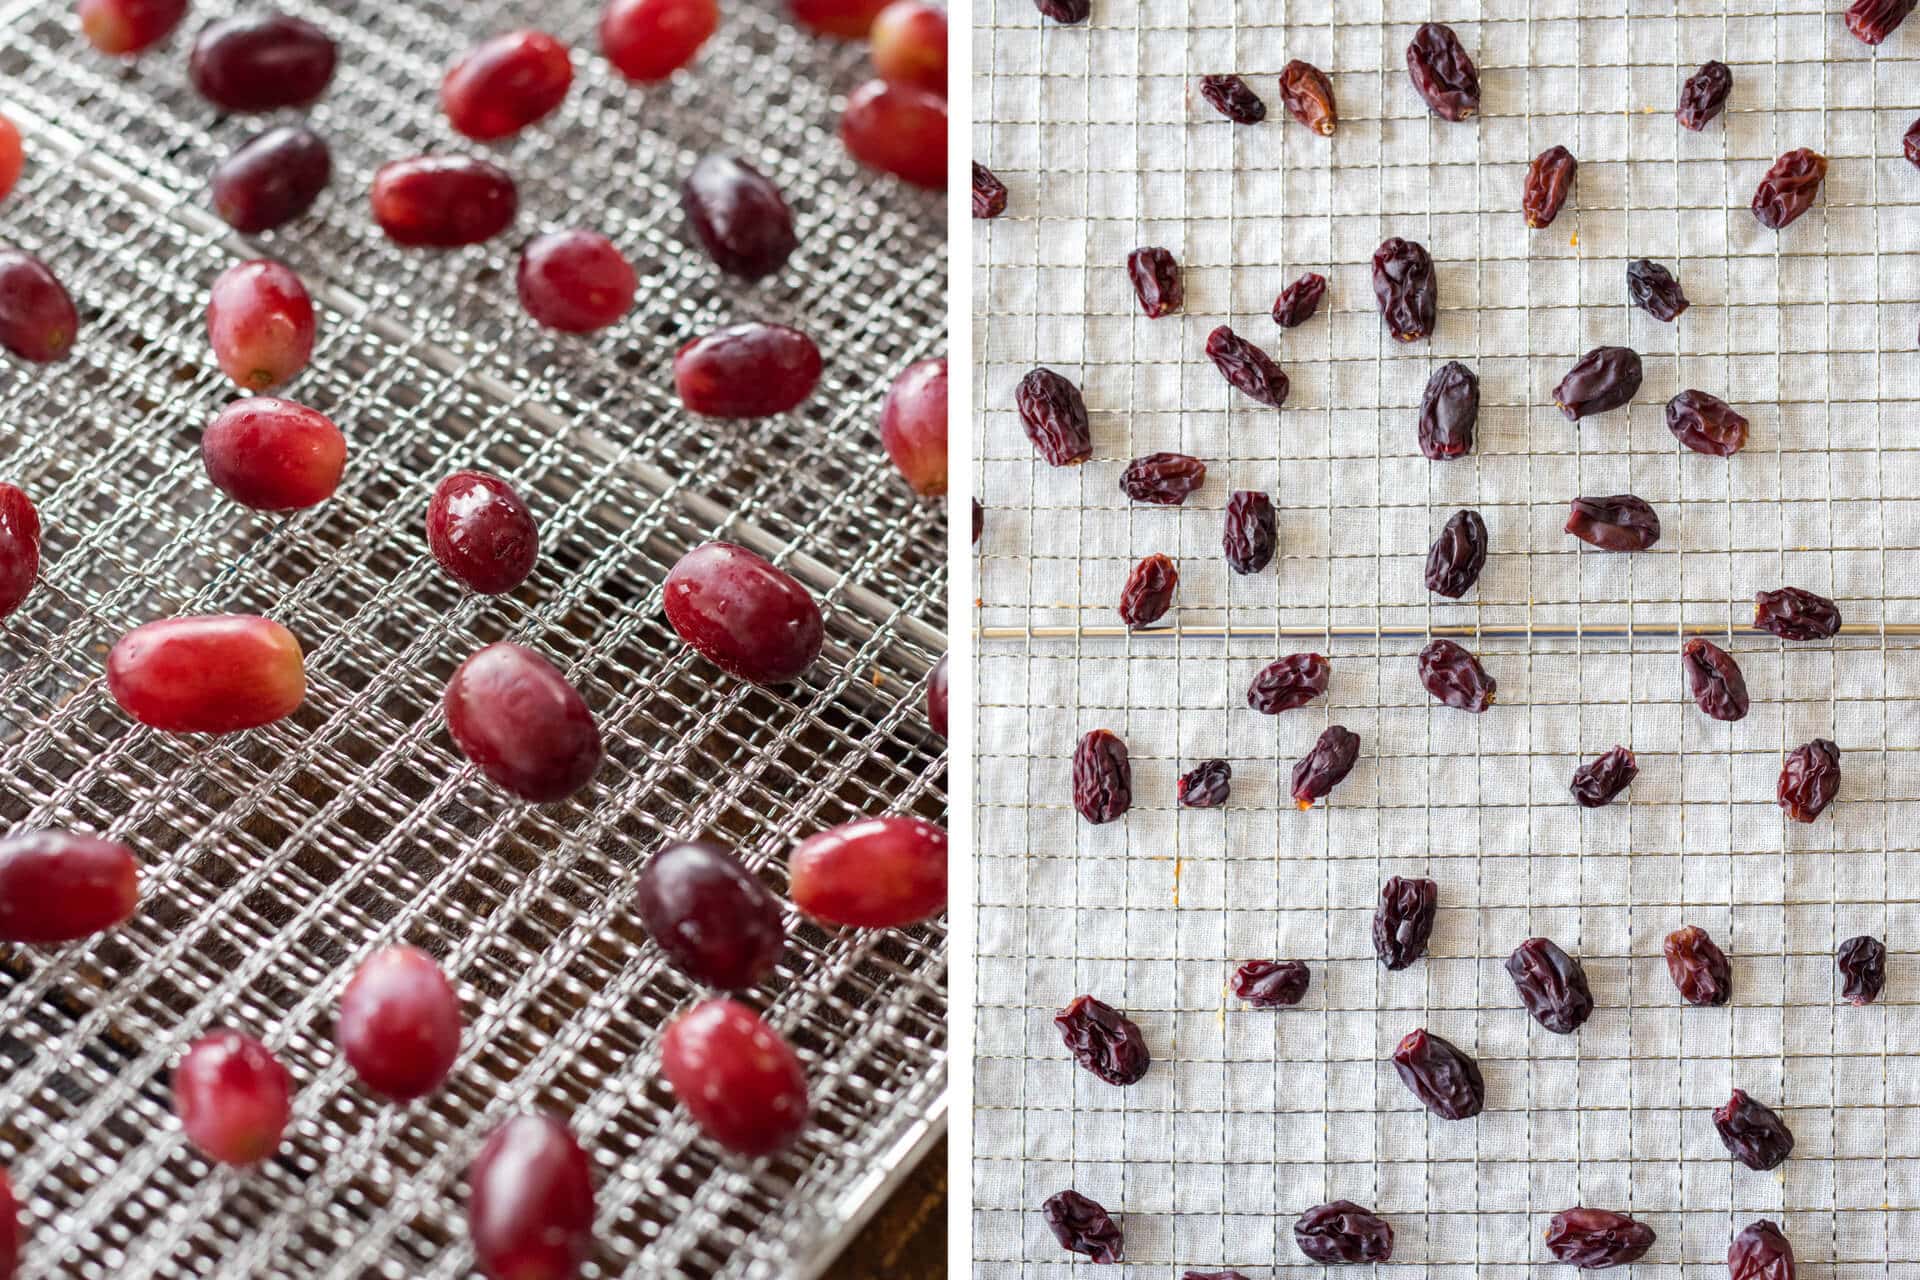
To make the raisins buy a couple of pounds of the smallest red grapes you can find at the market. Pick grapes that are not mushy in any way. You want them firm, ripe, and full of flavor.
Wash the grapes and let them dry. Then, spread them out evenly on the dehydrator trays. Set the unit to 24 hours at 135°F and hit Start. After this time, check on them. They’ll likely need another 12 hours to dehydrate fully—mine took about 36 hours. This process does take quite a while, so plan accordingly for your bake (I did this a few days before preparing my dough).
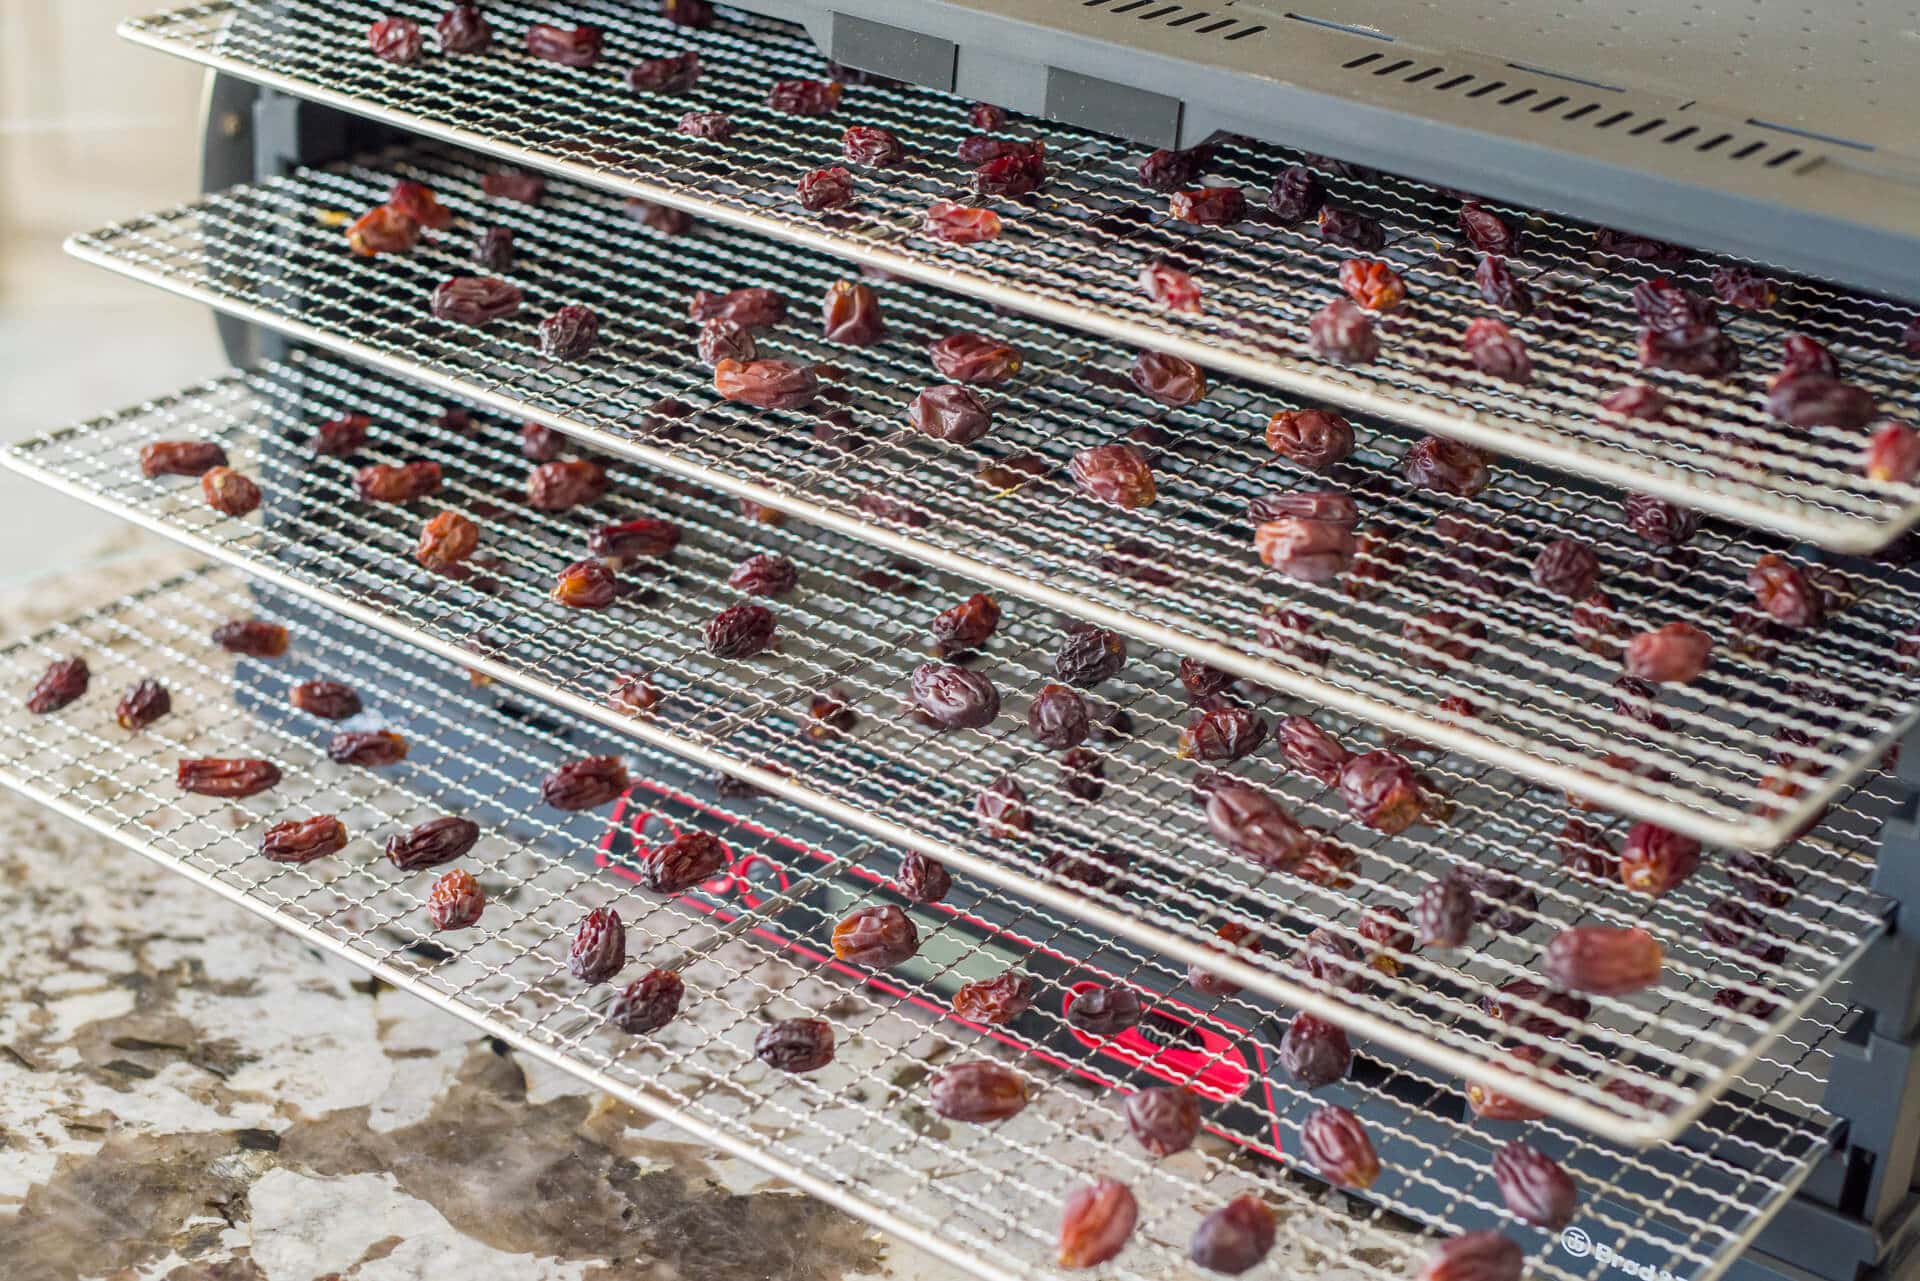
I realize after eating these raisins I’ve never had anything like them in my life. They pack so much flavor. Eating each one makes you pause to really enjoy everything the original grape had to offer—nothing is lost.
Buying and Preparing Raisins
If you don’t have a food dehydrator, pick up some Thompson raisins at the market for this bake. They’ll work quite well (but won’t be as plump and pack the same flavor, to be sure). I’d suggest soaking the store-bought raisins for a few hours, or overnight, before incorporating them into your dough (I didn’t find this necessary with homemade raisins).
Soaking will allow them to absorb water and help prevent burning in the oven if they find their way to the outside of your dough. Be sure to drain them thoroughly before use.
Cinnamon Raisin Sourdough Bread Recipe
Vitals
| Total Dough Weight | 2,000 grams |
| Pre-fermented Flour | 5.4% |
| Hydration | 81.0% |
| Levain in the final dough | 17.1% |
| Yield | 4 x 500g loaves |
Total Formula
Desired dough temperature: 78°F (25°C) (see my post on the importance of dough temperature).
| Weight | Ingredient | Baker’s Percentage |
|---|---|---|
| 669g | Wheat Bread flour, 11-12% protein, malted (Central Milling Artisan Baker’s Craft) | 70.0% |
| 287g | Whole grain wheat flour, finely milled (Central Milling Hi-Pro Fine) | 30.0% |
| 10g | Ground cinnamon (I used Vietnamese cinnamon) | 1.0% |
| 191g | Raisins (Store-bought Thompson or homemade dehydrated grapes, see above) | 20.0% |
| 726g | Water 1 (Levain and Autolyse) | 76.0% |
| 48g | Water 2 (Mix) | 5.0% |
| 19g | Salt | 2.0% |
| 52g | Sourdough starter (100% hydration) | 5.4% |
Method
1. Prepare the Levain – 9:00 a.m.
| Weight | Ingredient | Baker’s Percentage |
|---|---|---|
| 52g | Ripe sourdough starter (100% hydration) | 100% |
| 26g | Wheat Bread flour, 11-12% protein, malted (Central Milling Artisan Baker’s Craft) | 50% |
| 26g | Whole grain wheat flour, finely milled (Central Milling Hi-Pro Fine) | 50% |
| 52g | Water | 100% |
To make the levain, mix the ingredients in the chart above in a jar and leave them covered at a warm temperature, 74-76°F (23-24°C), to ripen for 3 to 3 1/2 hours.
2. Autolyse – 11:30 a.m.
| Weight | Ingredient |
|---|---|
| 643g | Wheat Bread flour, 11-12% protein, malted (Central Milling Artisan Baker’s Craft) |
| 261g | Whole grain wheat flour, finely milled (Central Milling Hi-Pro Fine) |
| 674g | Water 1 |
Warm or cool the autolyse water so that the temperature of the mixed dough meets the FDT (final dough temperature) of 78°F (25°C) for this recipe.
Place the flour and water 1 in a large bowl. Use wet hands to mix until no dry bits remain; the dough will be shaggy and loose. Use a bowl scraper to scrape down the sides of the bowl to keep all the dough in one area at the bottom. Cover the bowl and place it near your levain for 1 hour.
3. Mix – 12:30 p.m.
| Weight | Ingredient |
|---|---|
| 48g | Water 2 |
| 10g | Ground cinnamon (Vietnamese cinnamon) |
| 191g | Raisins (Store-bought Thompson or homemade dehydrated grapes, see above) |
| 19g | Fine sea salt |
| 155g | Ripe levain (from Step 1) |
Add the ripe levain, salt, and half of the water to the mixing bowl. Using your hands, mix everything until it comes together into a shaggy mass. Then, dump the bowl to the counter and slap and fold the dough for about 5 minutes to develop some strength. Alternatively, you can keep the dough in the bowl and do a series of stretches and folds with one hand as you rotate the bowl.
At the end of this initial strengthening, the dough should have smoothed out and will loosely hold its shape on the counter (or in the bowl). Add the cinnamon and remaining water to the dough and gently massage to incorporate. It is unnecessary to overwork the dough to incorporate the cinnamon, just enough to spread it around.
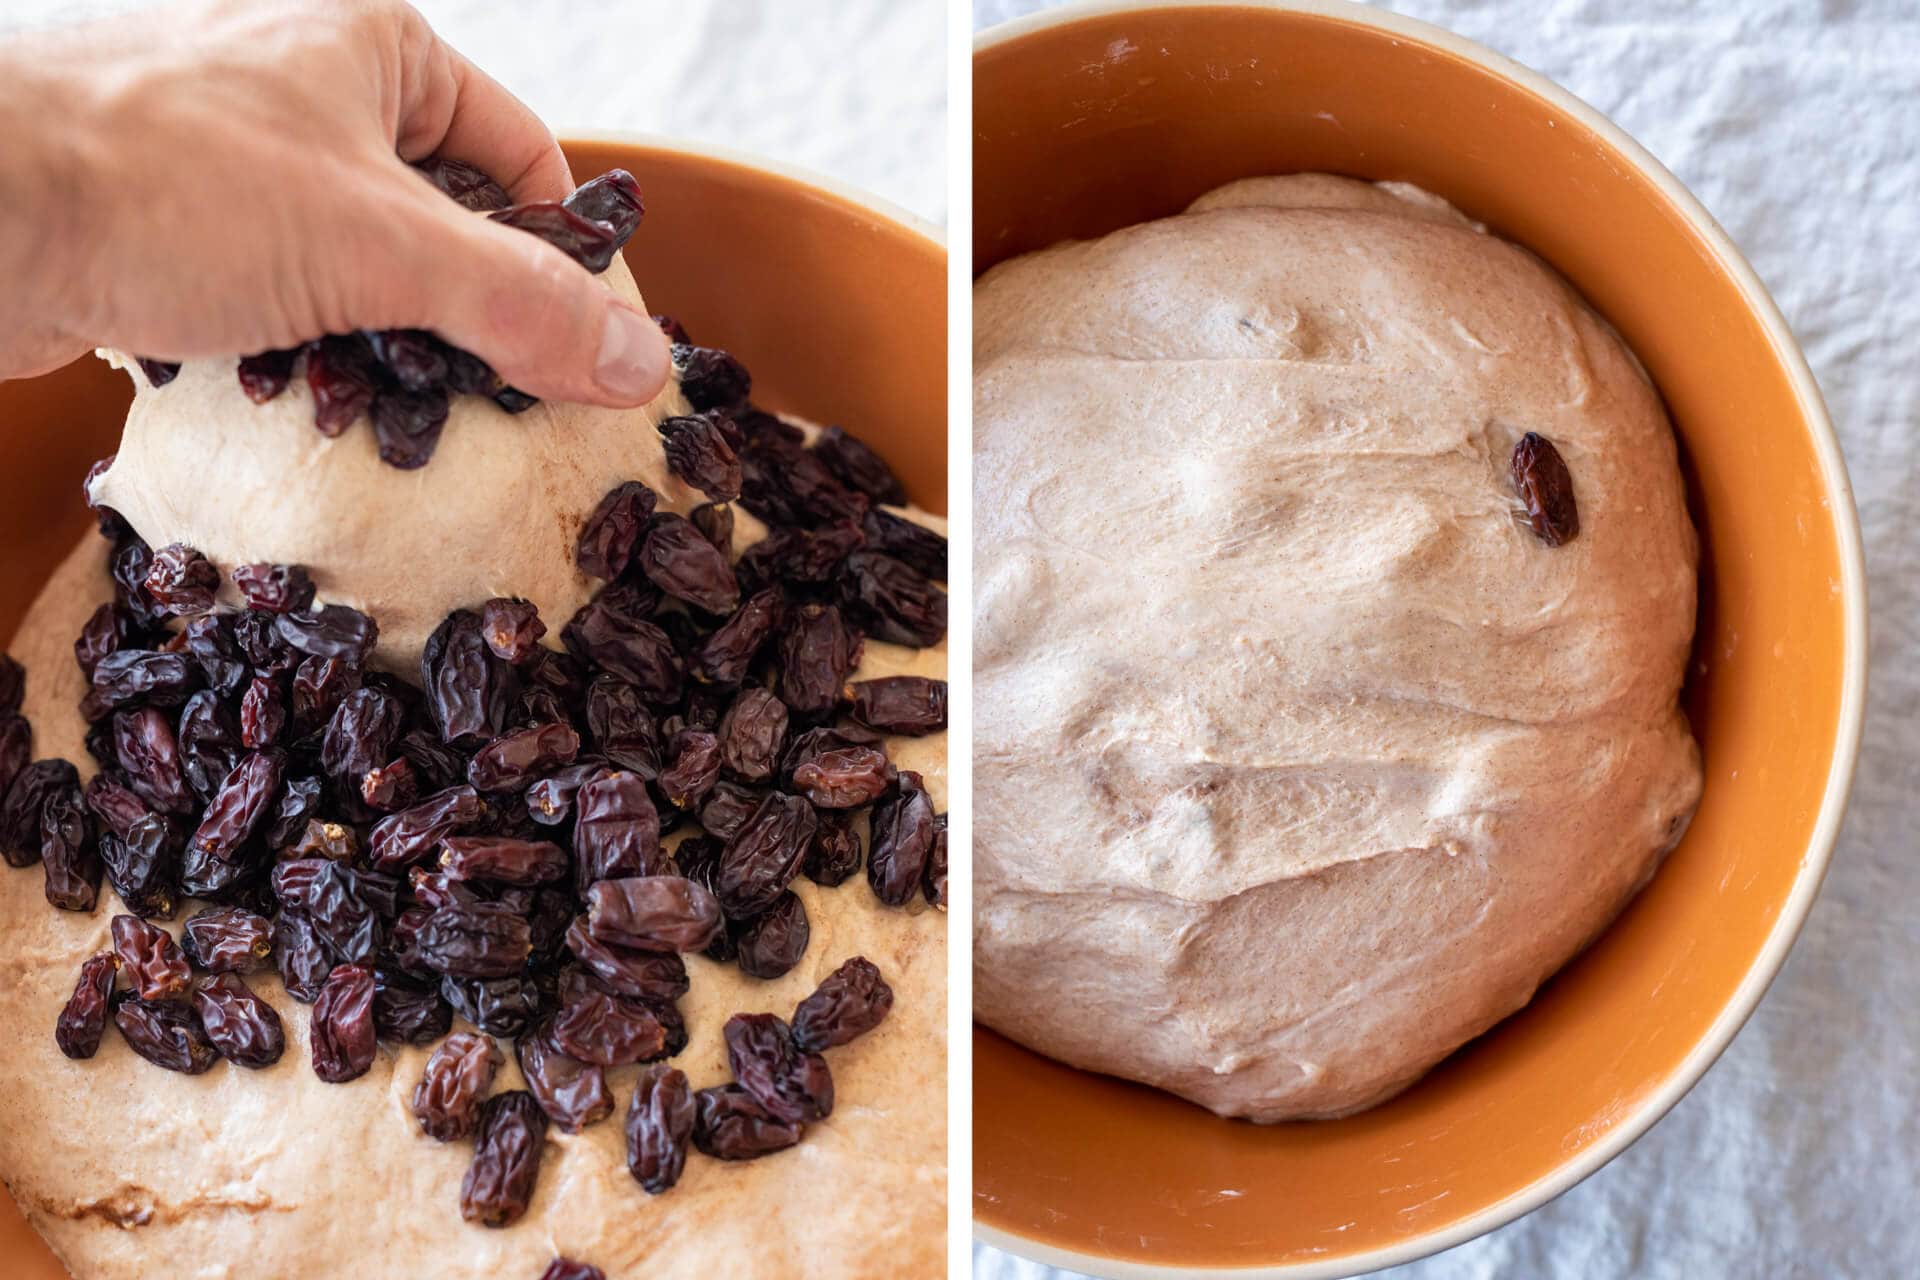
Finally, spread the raisins on top of the dough and perform a few stretches and folds to incorporate the raisins gently. Again, don’t over-mix. The raisins will be further dispersed during our stretch and fold through bulk fermentation.
4. Bulk Fermentation – 12:45 p.m. to 4:45 p.m. (4 hours)
This dough does have slightly sluggish fermentation activity, give it the time it needs in bulk fermentation.
This dough required a little extra fermentation time in bulk fermentation (as described in the Total Formula section, above). Even with a final dough temperature of 79°F (26°C), I went a full 4 hours — you can see the state of the dough at the end of this period below.
Give the dough 2 sets of stretch and folds during this four-hour period, starting after the first 30 minutes, then 30 minutes thereafter. After the second set, let the dough rest untouched for the remainder of bulk fermentation.
5. Divide and Preshape – 4:45 p.m.
Dump the contents of your bulk fermentation container to an unfloured work surface. Lightly dust the top of the dough with flour and, using a bench knife, divide the mass in half. Then, divide each half in half again to create four 500g pieces. Lightly preshape each piece into a round on the counter using your bench knife and a flour-dusted hand.
Let the dough rest for 30 minutes until it relaxes outward to some degree.
6. Shape – 5:15 p.m.
Dust your proofing basket with white flour. This helps to keep the dough from sticking to your basket but also leaves a thin layer that adds to the look of this loaf after it’s baked.
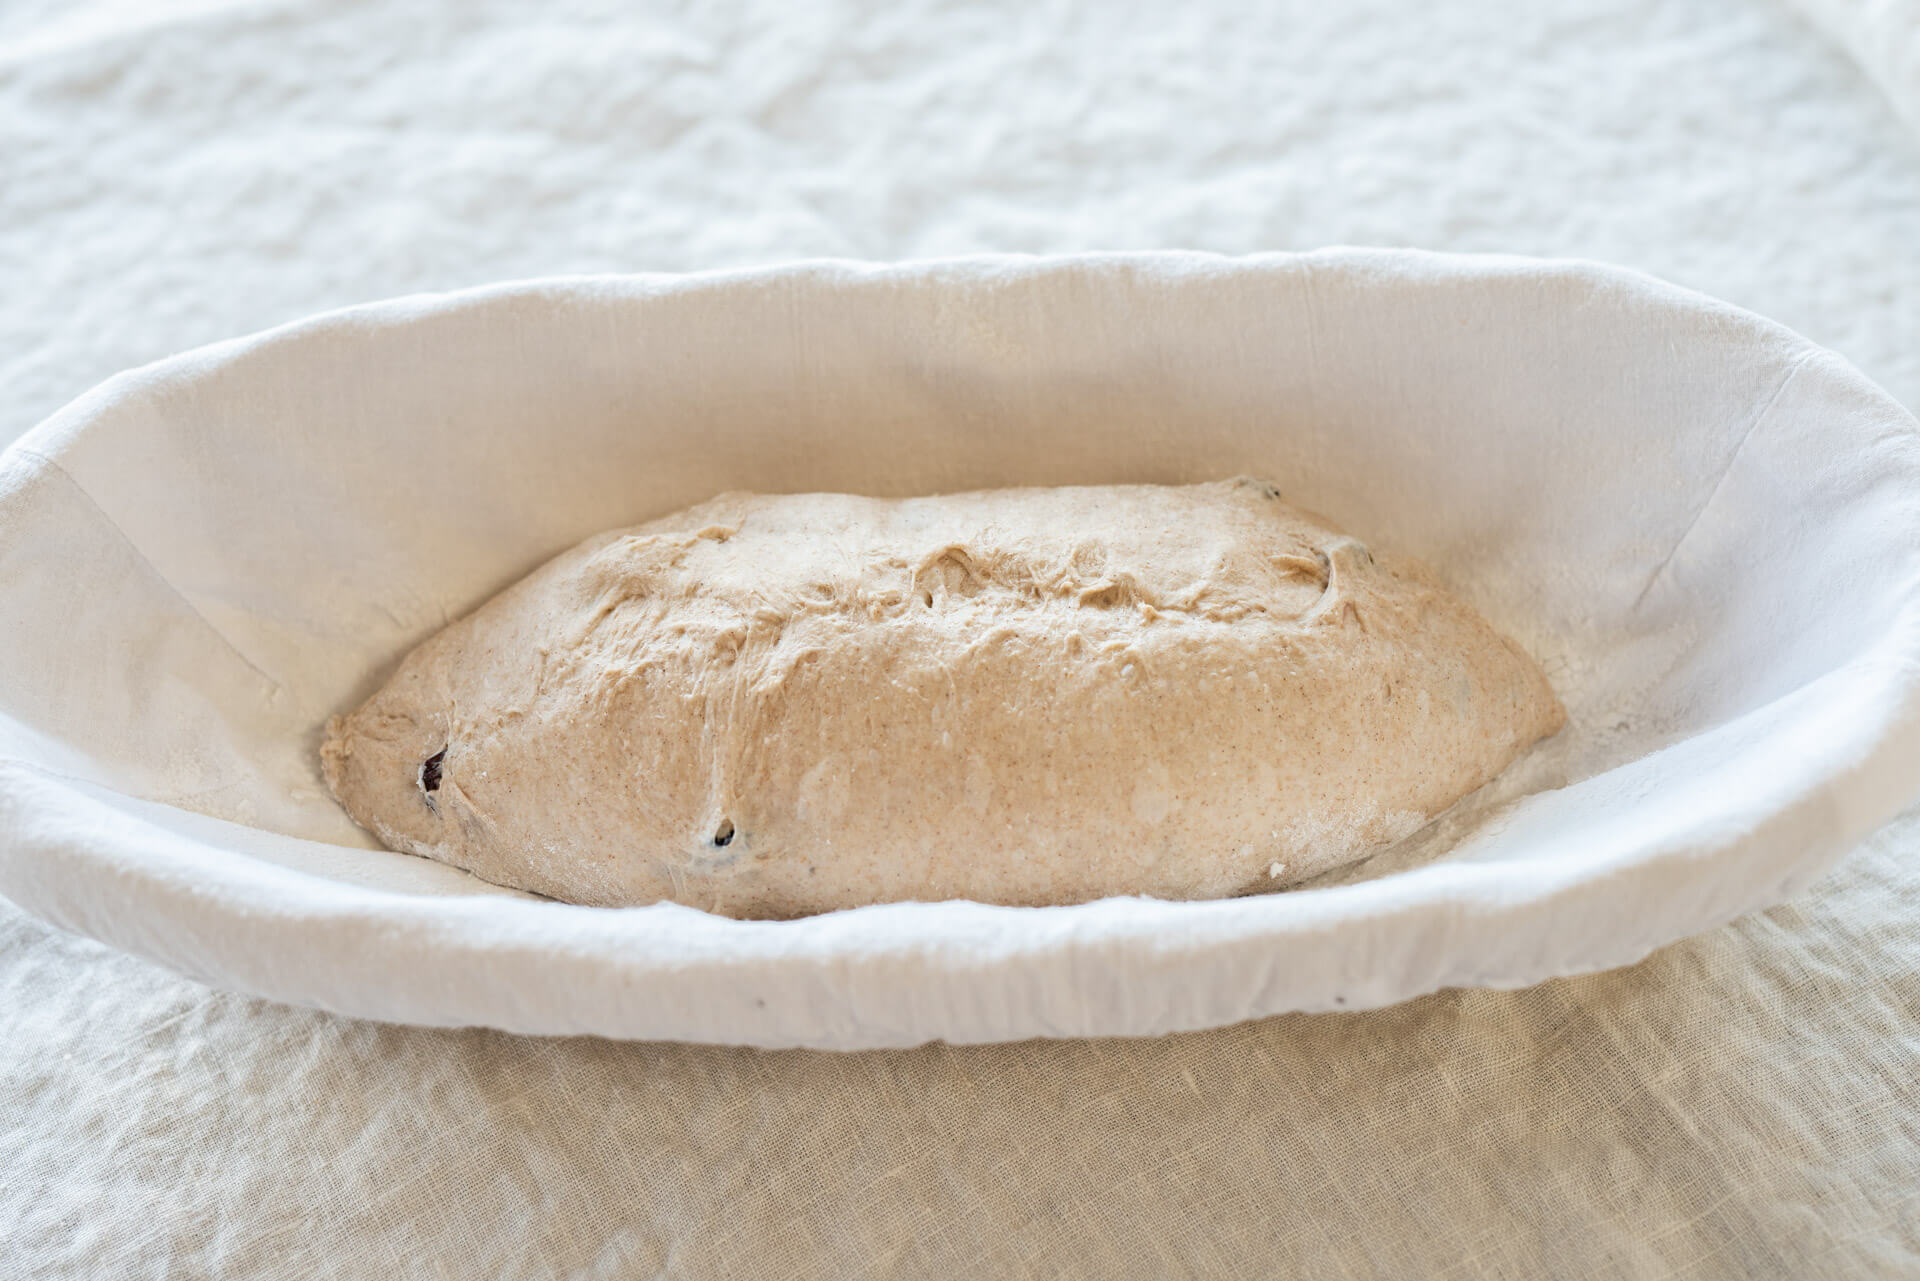
I shaped each 500g into a heavily tapered batard. I essentially used my batard shaping technique but rolled a few extra times out at the ends to create a well-defined tip. You could also shape these as little boules.
7. Proof – 5:30 p.m. to 9:00 a.m. (next day)
Completely cover each proofing basket with reusable plastic and place it in the refrigerator to proof overnight.
8. Bake – 9:00 a.m. (pre-heat oven at 8:00 a.m.)
Preheat your oven to 450°F (230°C).
I baked two of these at a time in my home oven, but you might be able to bake all four side-by-side, depending on how wide your baking stone/steel is. If you do two at a time, keep the other two in the fridge until you’re ready to bake them.
Remove your dough from the fridge, uncover it, and turn out onto parchment paper. Using a straight-edged razor blade, score each straight in at 90° to the dough in a series of slashes from top to bottom. I like the direction of my hand to move at 45° from side to side to create a series of stripes that open evenly.
Slide each piece of parchment paper holding the dough into the oven. Then, after all the dough is loaded, steam your oven and close the door. Bake at 450°F (232°C) for 20 minutes with steam, then open the oven door, remove the steaming pans, and bake for an additional 20-25 minutes at 425°F (218°C). Note that because these loaves have a smaller dough mass than my typical 900g to 1kg, they will bake a little faster than you might expect—keep an eye on them toward the end of the bake time.
Remove the loaves from the oven and let cool on wire racks for 1-2 hours.
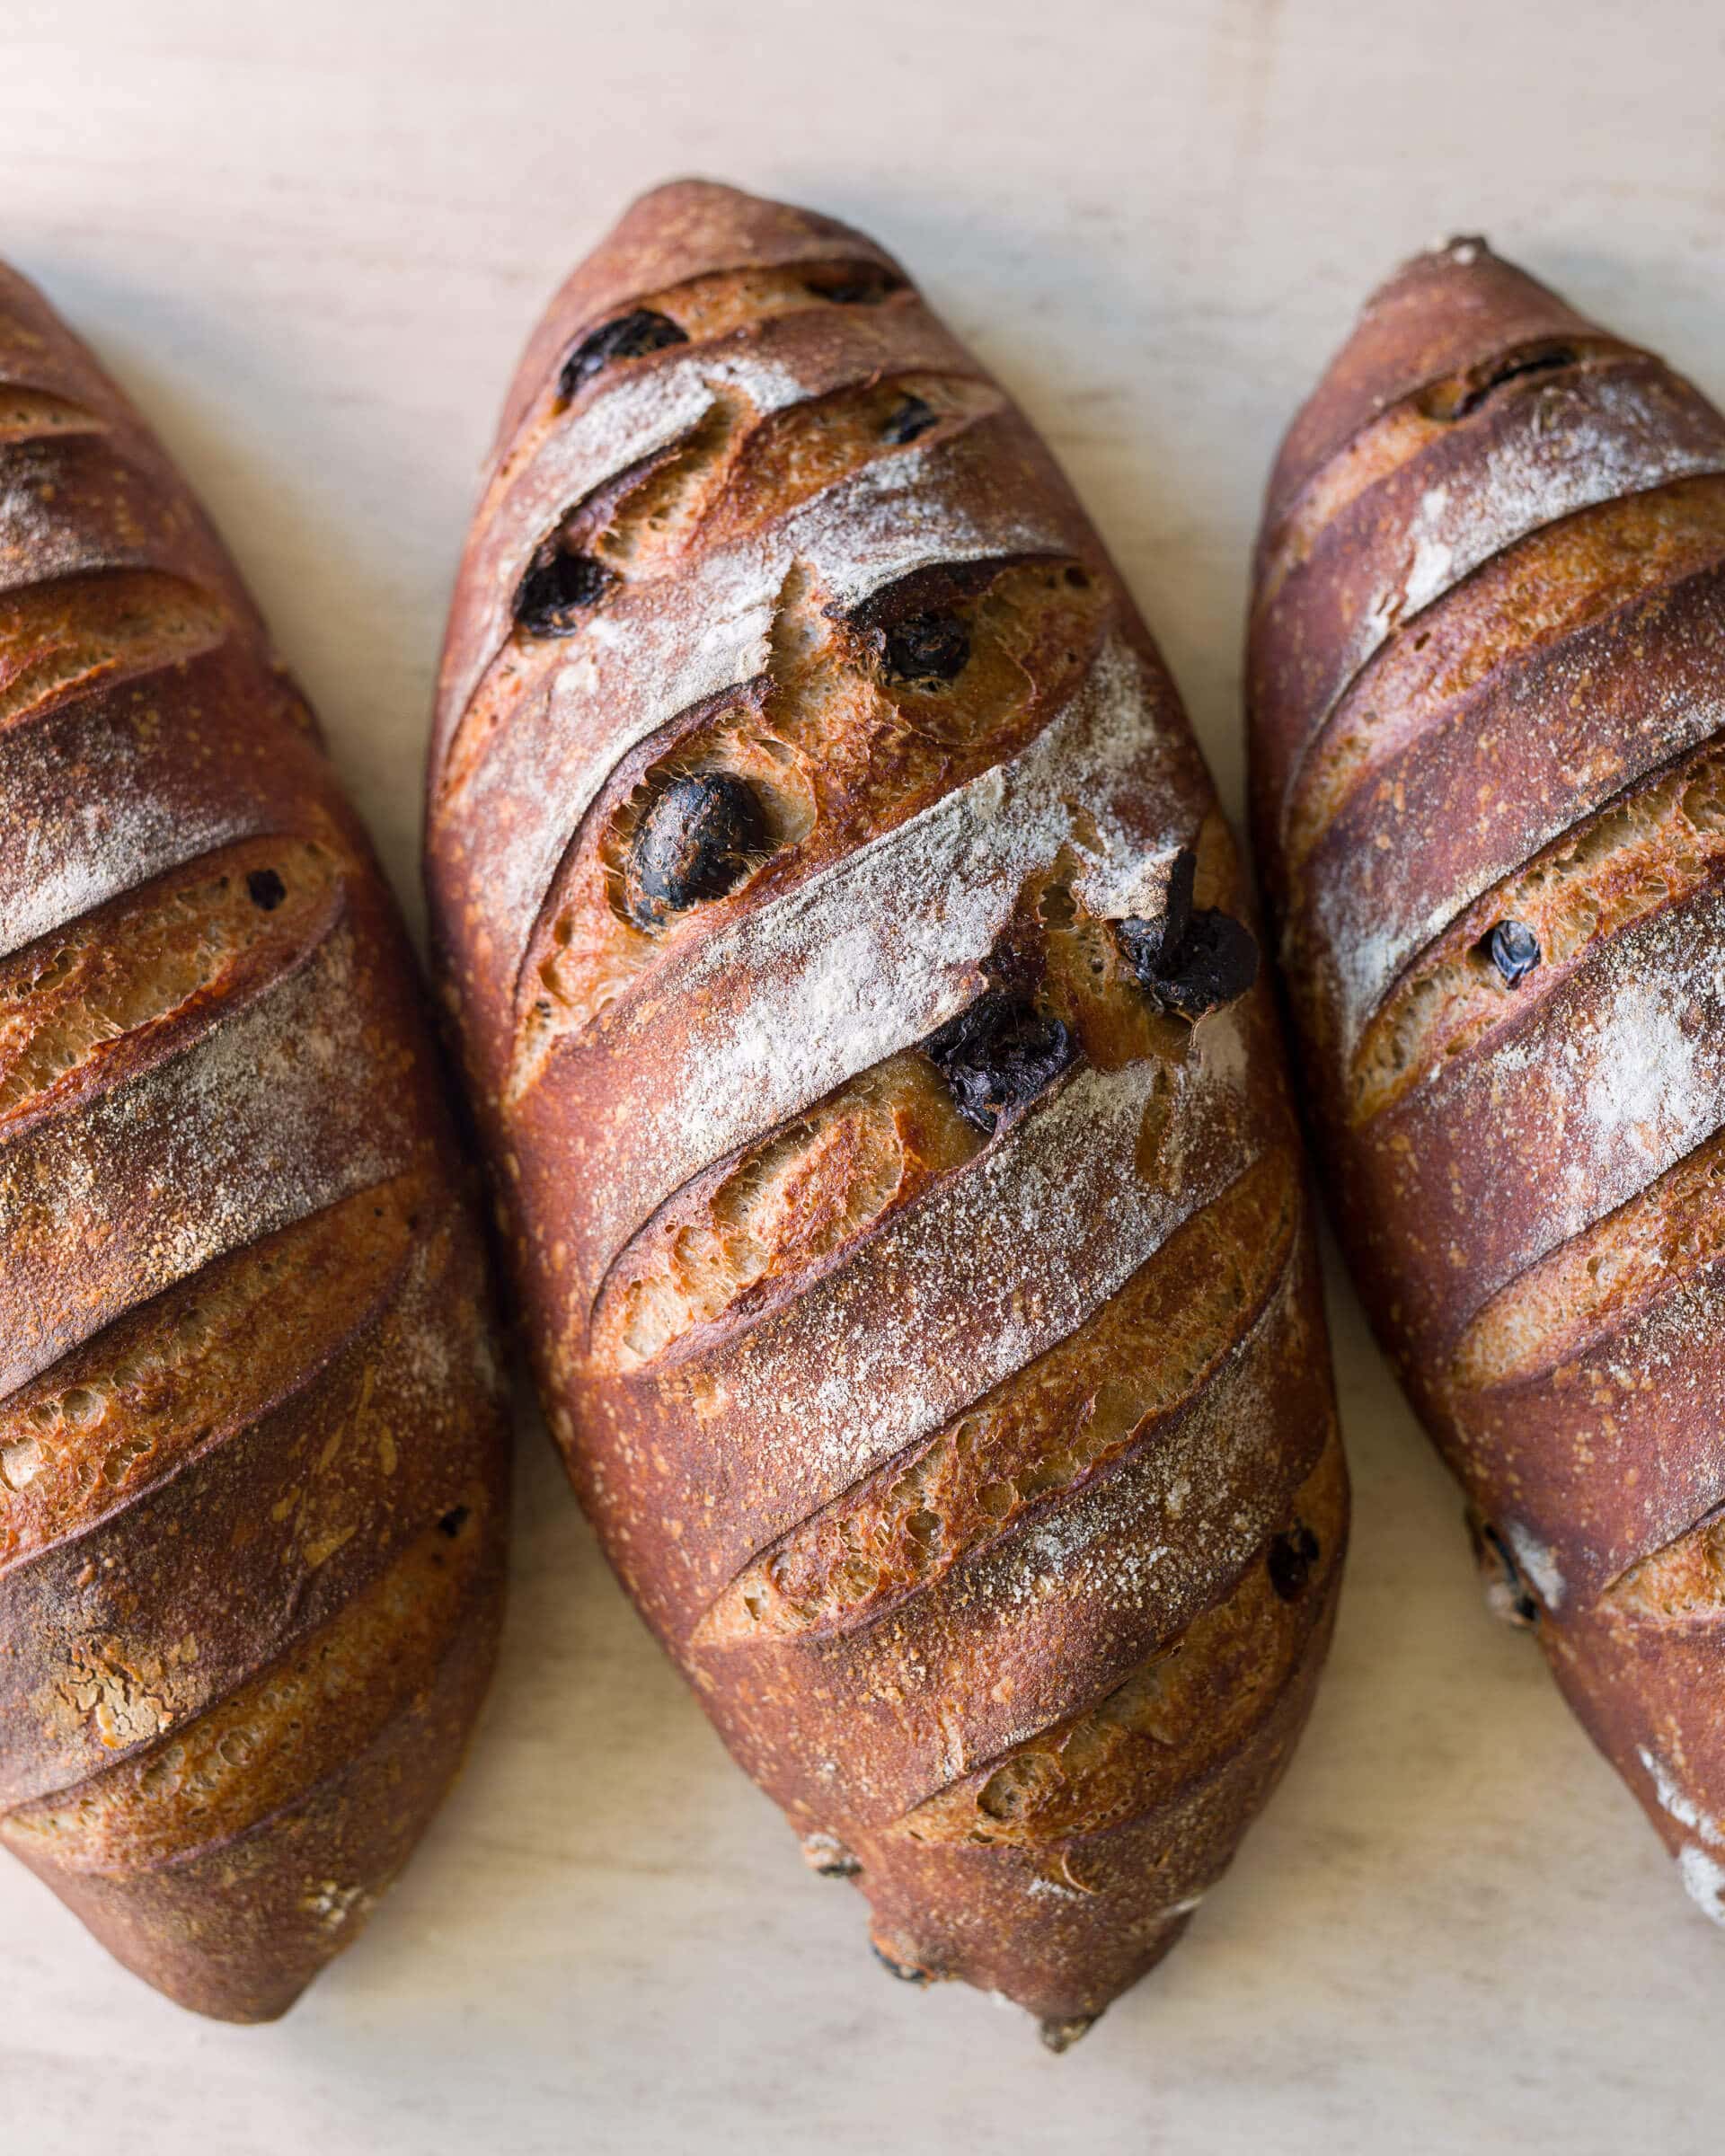
Conclusion
I chose to shape each loaf of this cinnamon raisin sourdough as a smaller, more petite batard because the flavor of each slice is pronounced. The smaller cross-section of each slice still lays up ample flavor and satiety—although, honestly, I always end up slicing two to three at a time… Trust me, you’ll understand once you get to baking this beautiful bread.
These taste exceptional when heavily toasted and topped with a slather of cultured butter. It has that warm, savory, and sweet checklist that is complete.
Crust
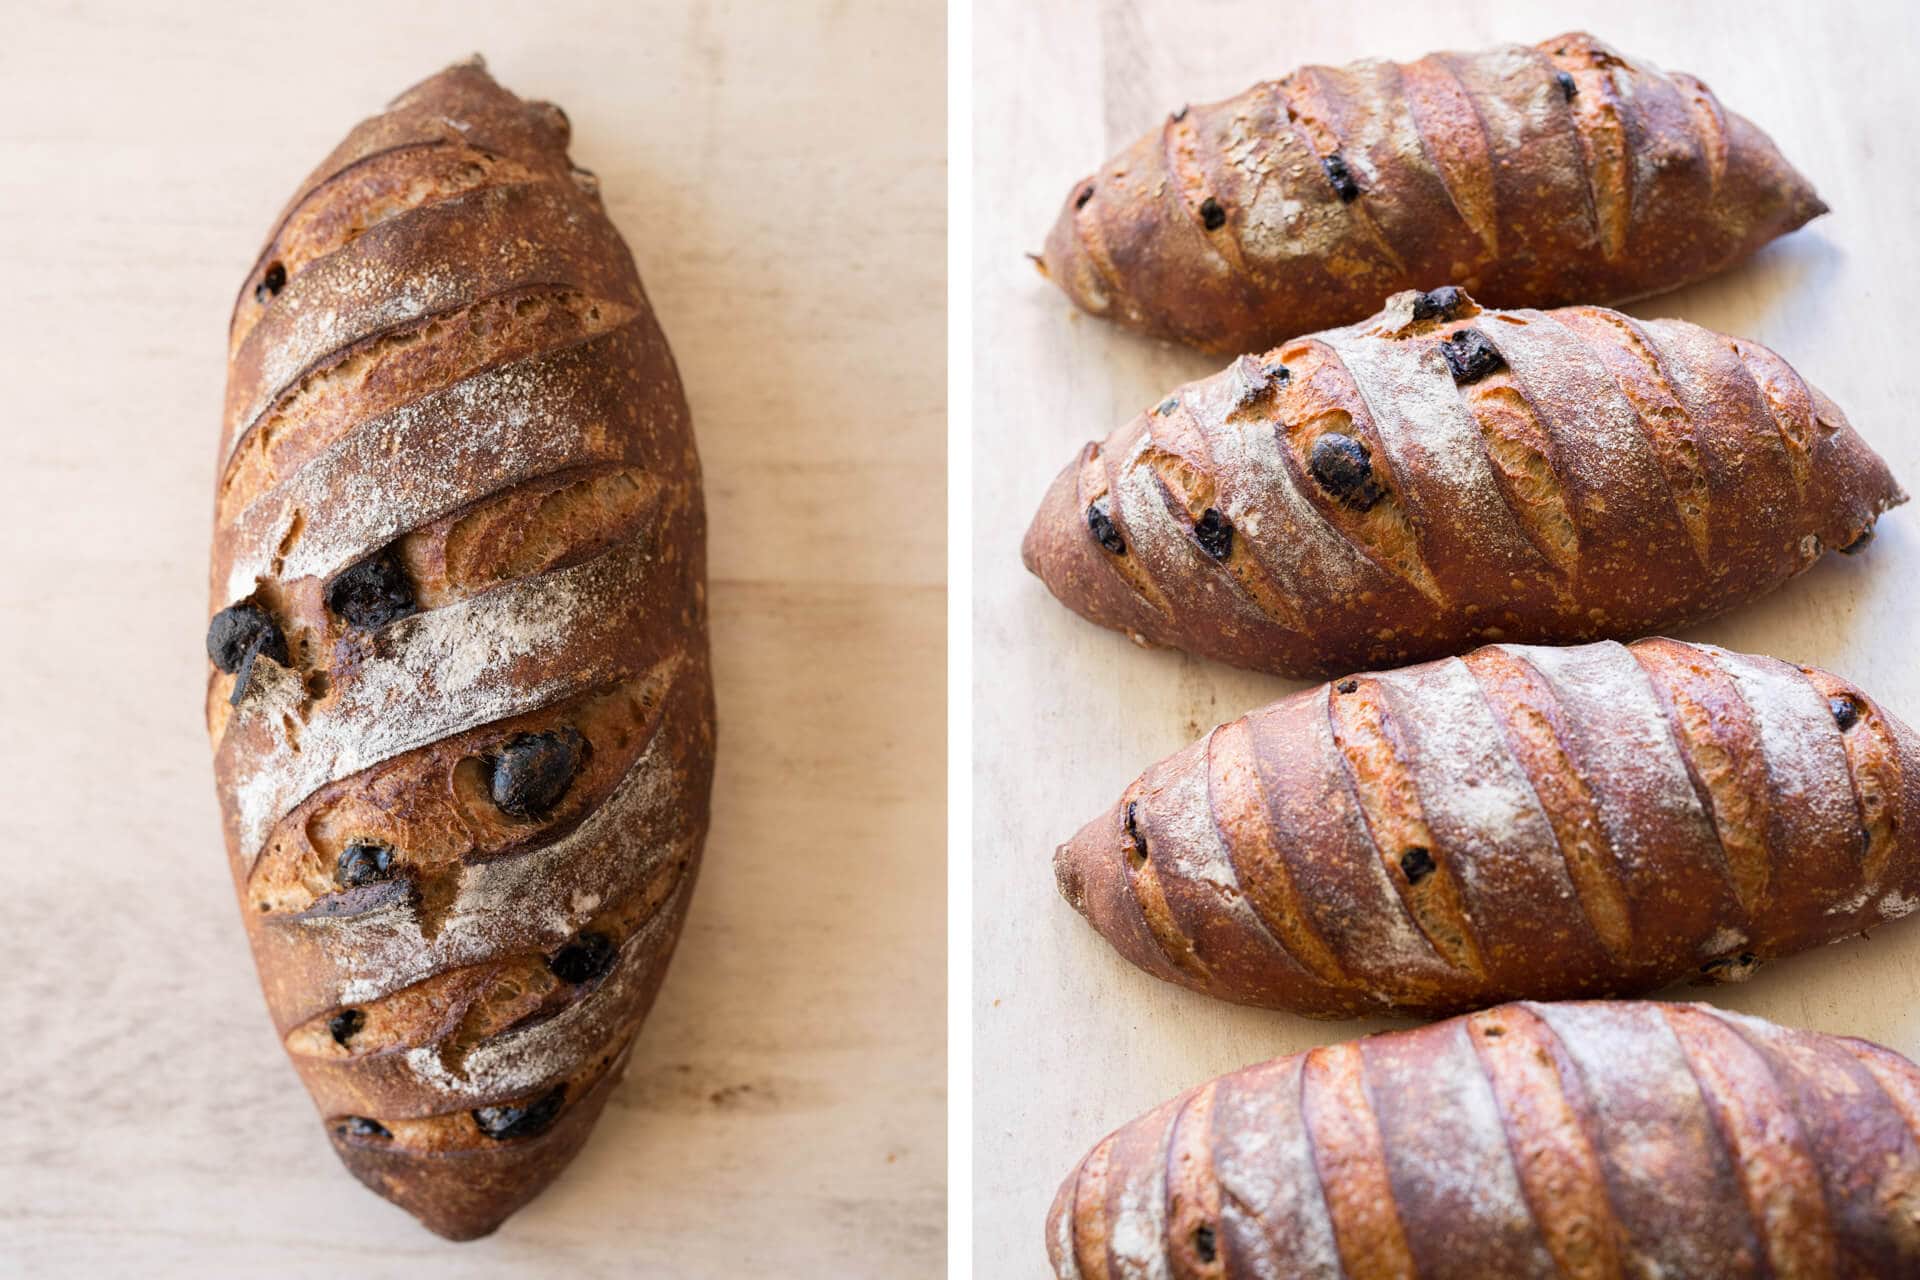
This scoring pattern looks beautiful on small oval loaves like this. In addition, the raisins peeking out, dusting of white rice flour, and reddish hue work together to make an all-around stunning bread.
Crumb
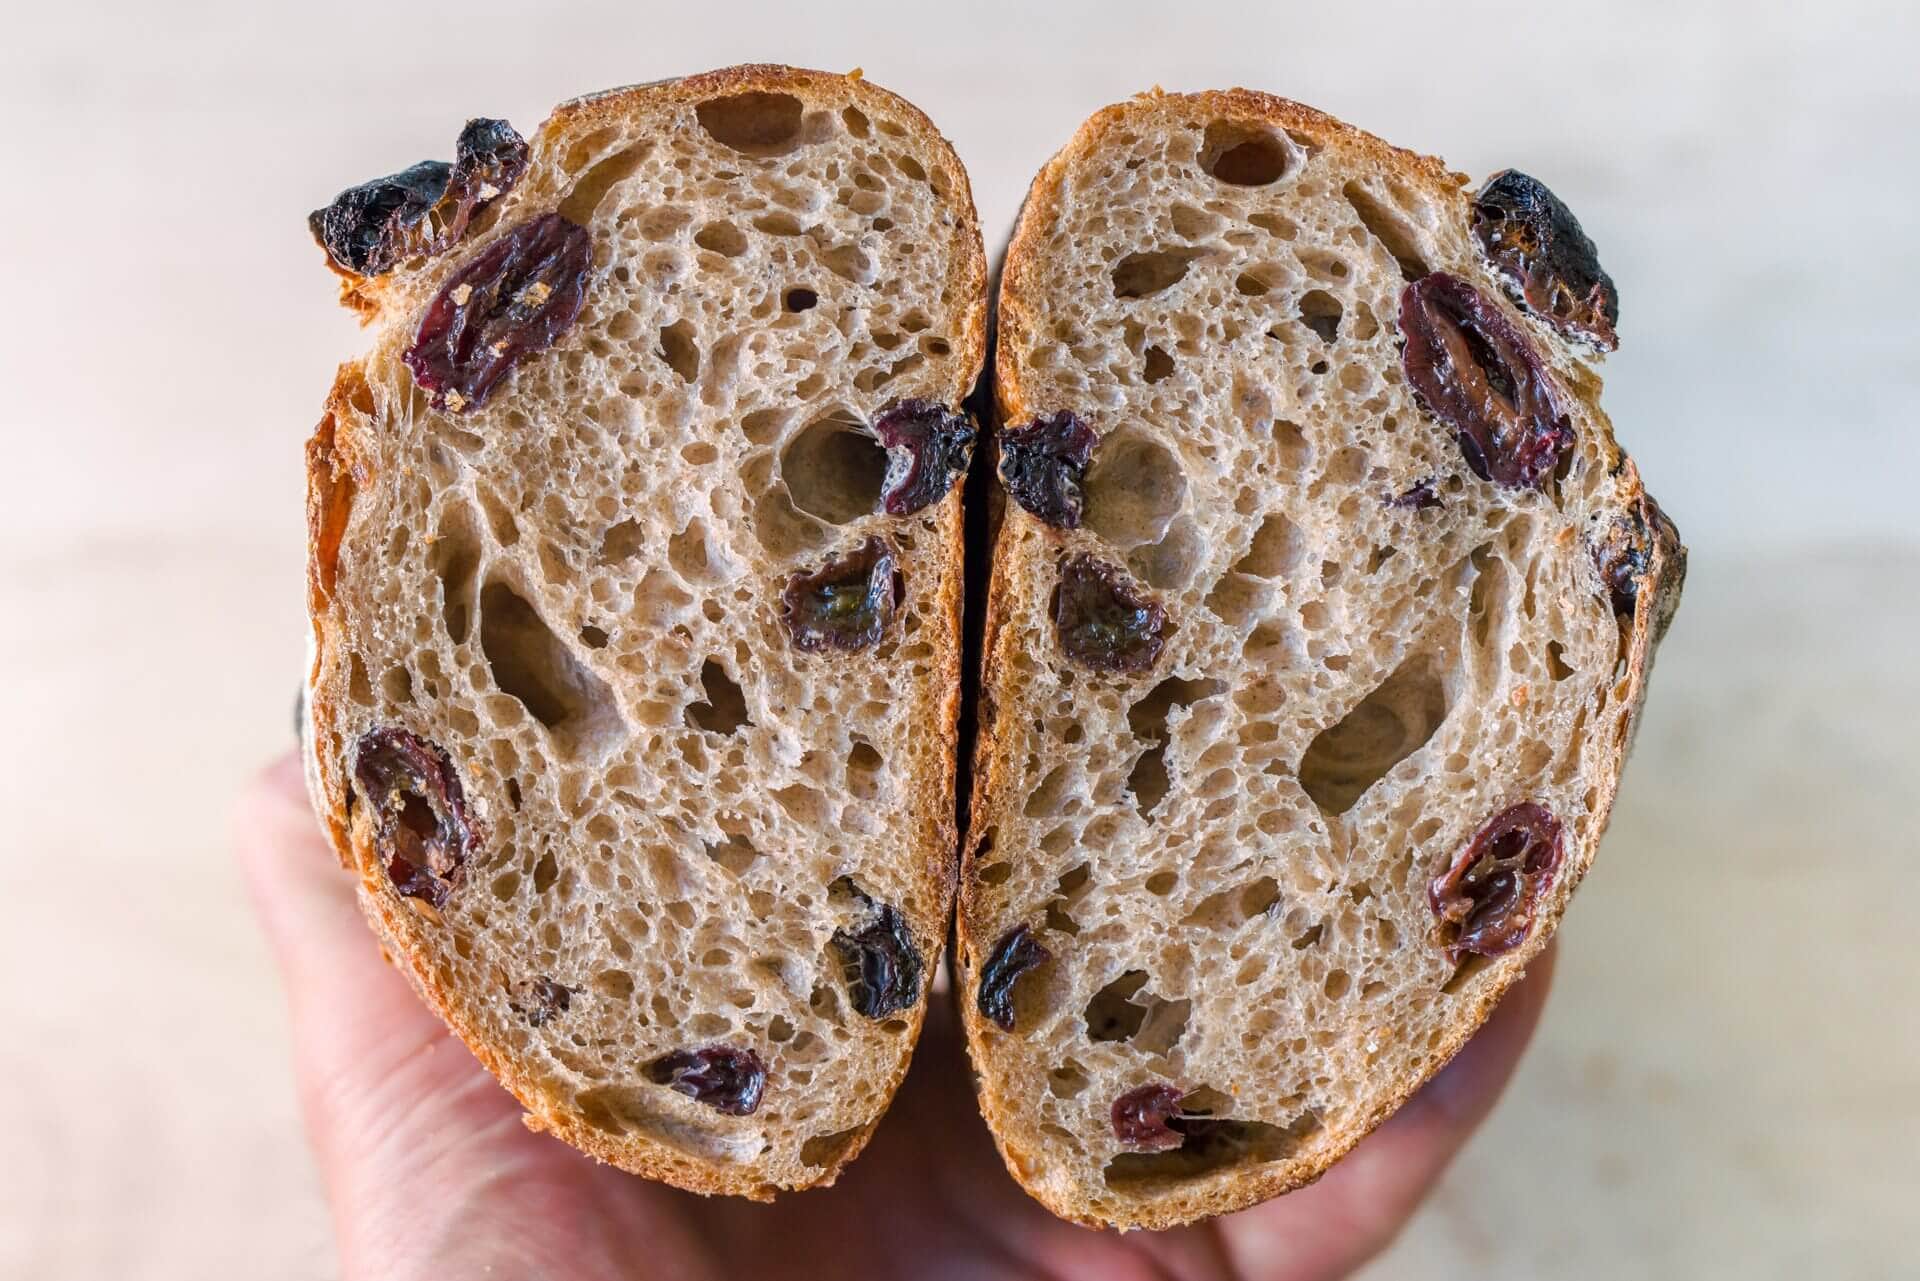
These loaves have consistent and even fermentation throughout. The bread is light in hand and wonderfully open—just what I was looking for. As I mentioned throughout the post, give the dough a little extra time in bulk and proof as needed. For me, a full 4-hour bulk and 16-hour cold-proof provided just the right amount of fermentation to open up the interior sufficiently and produce a tender crumb.
Taste
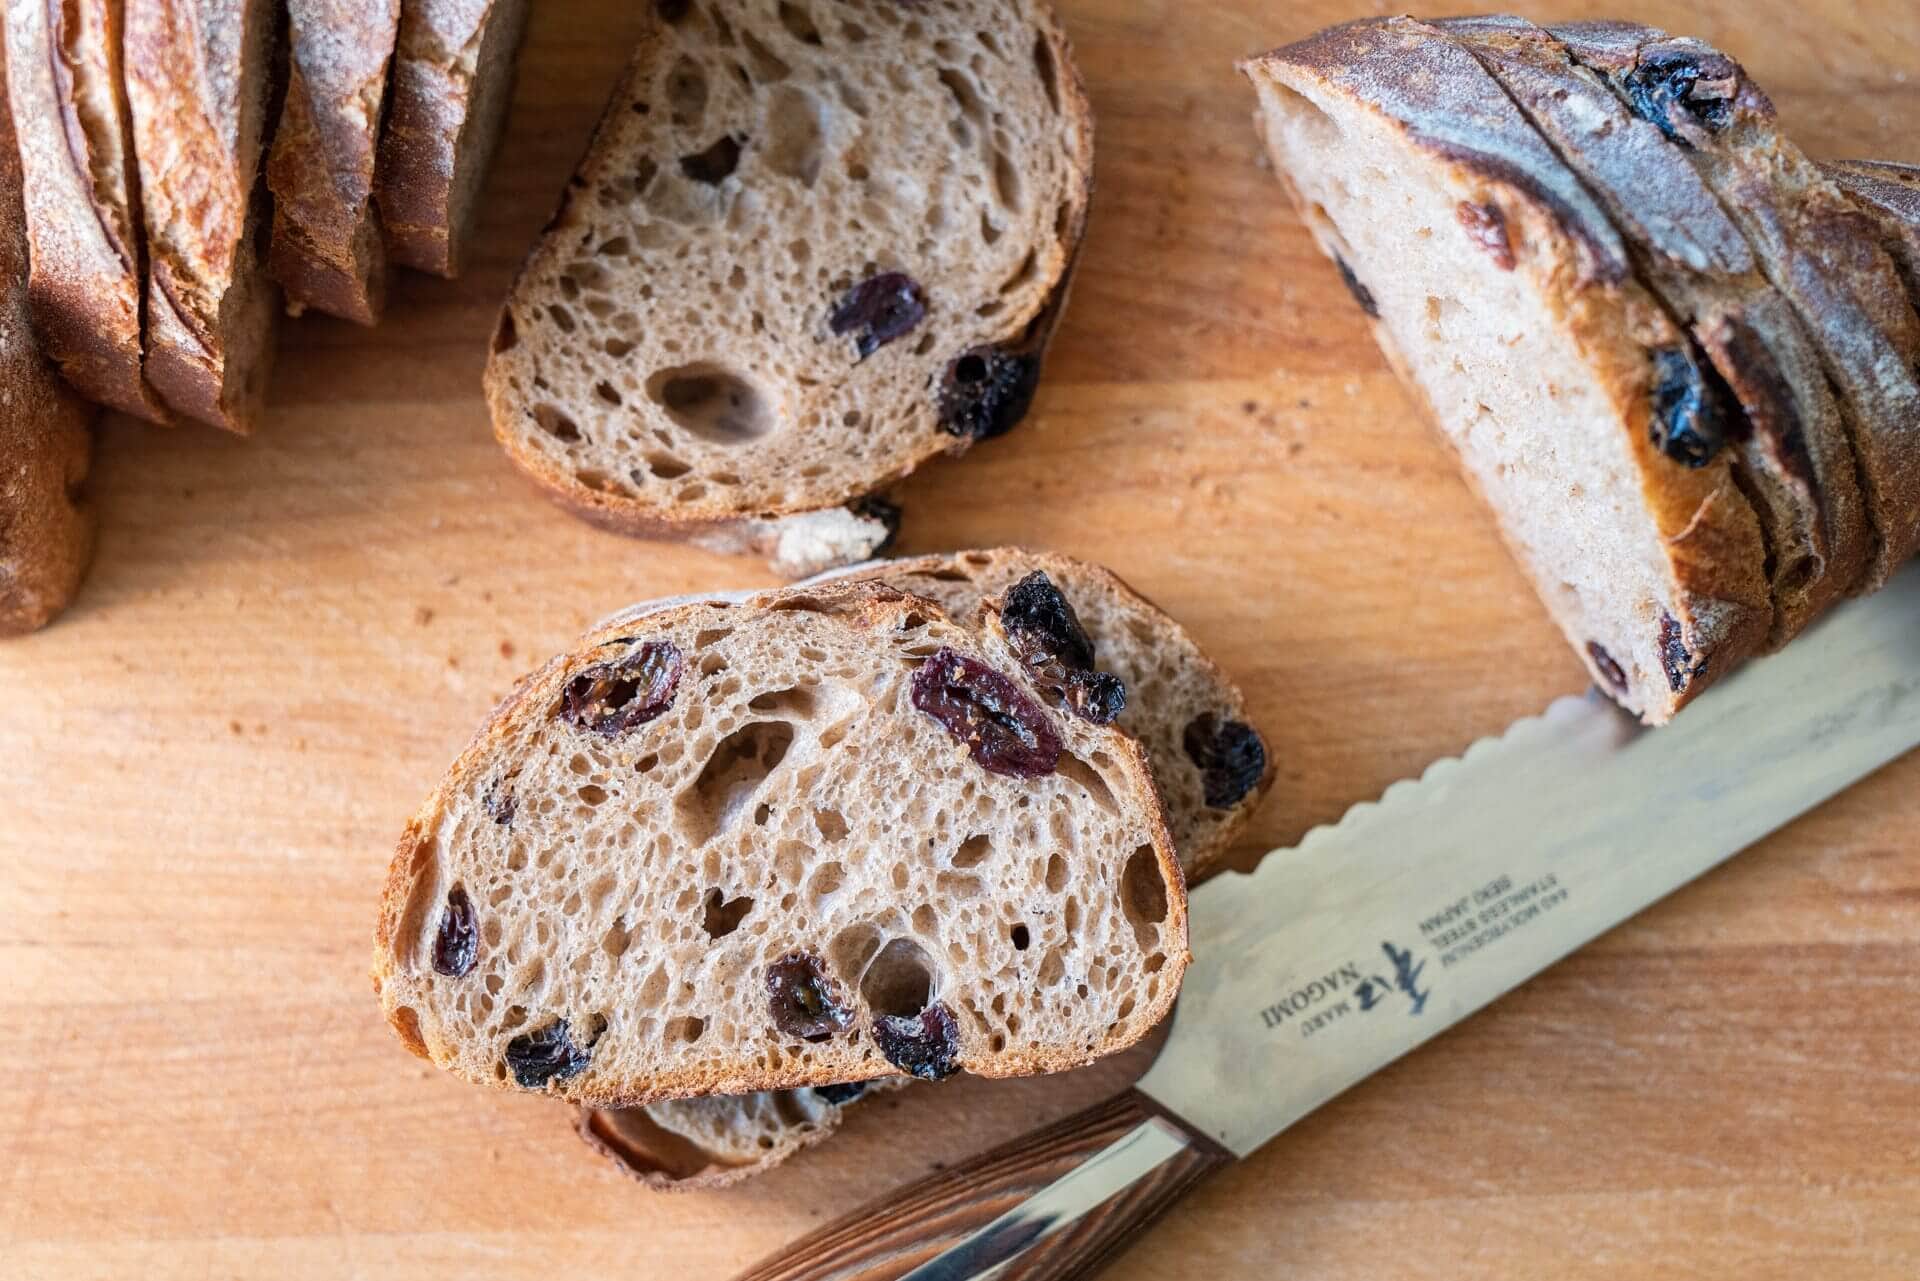
Homemade raisins elevate this bread to the next level. Sure, it takes extra time and a little effort to make them, but it’s that extra step that sometimes brings even more joy to the process of making homemade sourdough bread.
The flavor of the whole grain flour helps ground the taste of the sweet raisins while the cinnamon rounds it all out. It’s a well-tuned concert of flavor, texture, and sensation pleasantly punctuated by the plump raisin at just about every other bite. Those pops of flavor snap your attention back to the task at hand: eating healthy and nutritious sourdough bread made at home with your own two hands.
Buon appetito!
Print
Cinnamon Raisin Sourdough
- Prep Time: 23 hours
- Cook Time: 1 hour
- Total Time: 24 hours
- Yield: 4 loaves
- Category: Lunch, Dinner
- Cuisine: American
Description
A delicious and wholesome sourdough bread with plump raisins and warming cinnamon. Try this loaf sliced, toasted, and topped with salted butter—you won’t regret it.
Ingredients
Levain
- 26g medium-protein white flour
- 26g whole wheat flour
- 52g water
- 52g ripe sourdough starter, 100% hydration
Autolyse
- 643g medium-protein white flour
- 261g whole wheat flour
- 674g Water 1
Main Dough
- 48g water 2
- 10g ground cinnamon
- 191g raisins
- 19g fine sea salt
- 155g ripe levain
Instructions
- Levain (9:00 a.m.)
In a small bowl mix the Levain ingredients. Cover the jar and keep it at a warm temperature for 3 to 3 1/2 hours. - Autolyse (11:30 a.m)
In a mixing bowl, add the Autolyse ingredients until no dry bits remain. Cover the bowl and let rest for 1-hour. - Mix (12:30 p.m.)
Add the salt and levain to the top of the dough in autolyse and use a splash of the remaining water to moisten. With wet hands, mix thoroughly. Add the remaining water if the dough feels like it can handle it. Knead the dough for a few minutes using either the slap and fold technique or folds in the bowl until the dough smooths and becomes elastic. Transfer the dough back into the bowl. Transfer the dough to a bulk fermentation container and cover. At the end of this initial strengthening, the dough should have smoothed out and will loosely hold its shape on the counter (or in the bowl). Add the cinnamon dough and gently massage to incorporate. It is not necessary to overwork the dough to get the cinnamon incorporated, just enough to spread it around. Finally, spread the raisins on top of the dough and perform a few stretches and folds to gently incorporate the raisins. Again, don’t over-mix. The raisins will be further dispersed during our stretch and fold through bulk fermentation. - Bulk Fermentation (12:45 p.m. to 4:45 p.m.)
This dough will require 2 sets of stretches and folds during bulk fermentation at 30-minute intervals. After the second set, let the dough rest, covered, for the remainder of bulk fermentation. - Divide and Preshape (4:45 p.m.)
Scrape the dough out to a clean work surface. Use water and a wet hand, and your bench knife, divide the dough in half. Lightly shape each half into a round shape and let rest for 30 minutes, uncovered. - Shape (5:15 p.m.)
Flour the top of the preshaped round and your work surface. Using your bench knife, flip one of the rounds over onto the floured area. Using floured hands, shape the dough into a bâtard. Gently transfer the dough to the proofing basket, seam-side up. Repeat with the remaining pieces of dough. - Proof (5:30 p.m. to 9:00 a.m. the next day)
Cover proofing baskets with reusable plastic, seal, and place into the refrigerator overnight. - Bake (The next day, 9:00 a.m.)
Preheat your oven to 450°F (230°C). I baked two of these at a time in my home oven, but you might be able to bake all four side-by-side, depending on how wide your baking stone/steel is. If you do two at a time, keep the other two in the fridge until you’re ready to bake them. Remove your dough from the fridge, uncover it, and turn out onto parchment paper. Using a straight-edged razor blade, score each straight in at 90° to the dough in a series of slashes from top to bottom. I like the direction of my hand to move at 45° from side to side to create a series of stripes that open evenly. Slide each piece of parchment paper holding the dough into the oven. Then, after all the dough is loaded, steam your oven and close the door. Bake at 450°F (232°C) for 20 minutes with steam, then open the oven door, remove the steaming pans, and bake for an additional 20-25 minutes at 425°F (218°C). Note that because these loaves are a smaller dough mass than my typical 900g – 1kg, they will bake a little faster than you might expect—keep an eye on them toward the end of the bake time. Remove the loaves from the oven and let cool on wire racks for 1-2 hours.
What’s Next?
Have a little extra cinnamon? My Sourdough Cinnamon Rolls are surely your next step—sweet, soft, and decadent. They’re everything a cinnamon roll should be.


156 Comments
hi, maurizio. i’m from brazil and it’s winter in sao paulo. usually people say to increase the amount of starter when it’s cold, like 30%. i want to give this recipe a try so you recommend keep with the low amount of starter, 5,40%, or increase it? fyi, i baked your recipe of cinnamon buns that is available on king flour’s website and it just came out amazing!
Why do you wait to add the cinnamon with the raisins instead of adding it with the first set of ingredients in the final dough?
Hi there, beginner sourdough baker here but love this recipe. I have got some semolina flour sitting in my pantry. Will it work with this recipe ? Thanks and look forward to your reply.
Hi Maurizio, would you say this loaf has good moisture content? Just wondering how moist it is after 24 hours?
Mine were good for almost a week, kept in a zip bag.
Hi–I’d like to bake these as 2 loaves, rather than 4. How, if at all, should I adjust the bake times/temperature? (I also can’t steam the oven!)
Well that was painful, but delicious .
Started a 9 AM levain 3.5 hours after feeding , Shaped 11 PM, Baked 11 AM .
Is it correct to use the levain 3.5 hours after feeding ? I figured it would be at peak .
Be patient if you try this! My fermentation was really impeded by the cinnamon, it took 10 hours in a warm oven with the light on! And I gave it 30 minutes more after shaping. I will post pics on Insta after baking.
Thanks for those tips, Seth! You’re right about a slow moving dough here in some cases.
Making the bread again and am being more patient as the first loaf was delicious but very underproofed
Hi! I have some raisins that I’ve had marinating in grand marnier, rum + earl grey tea that I was using for hot cross buns – how would the alcohol content affect fermentation?
Thanks!
That’s a good question and I’m not sure I’ve tried anything like this. I’d definitely give it a try, though. My feeling is it’ll be a slow moving dough, but it might work out just fine in the end!
Hi Gianna, I soaked my raisins in rum as well. I don’t exactly know how it affect fermentation, at one point I felt it slowed down the fermentation but I am a newbie and don’t know what to do so I just followed the schedule in this recipe without thinking too much. I found that the alcohol content evaporated in the oven and created beautiful crumbs! The end result was so amazing.
H Maurizo, Can I use mixer for this recipe? Will machine kneading be ok instead of hand kneading? Thank you!
Absolutely!
Hi! I’ve been enthusiastically practicing the beginner recipes (thank you!!!), and I’m finally ready to try something new… I notice you always list the specific flours you use in each recipe, is there a good rule of thumb for swapping for more standard flours? For example, I only have white bread flour, and stoneground whole wheat flour, can those be used interchangeably with whats listed in this recipe?
Glad to hear that, Abby! Yes those flours would work well in this recipe and many here. Generally you can use Bread Flour in place of the Medium Protein (which is like all-purpose) I use frequently here, just watch the dough as you’re mixing and adjust accordingly. BF will usually be stronger and require fewer set of stretch and folds during bulk fermentation, so stop with those when the dough is really hard to stretch out and fold over — perhaps one less set than instructed depending on how strong your dough is after mixing/kneading. Hope this helps!
Thanks Maurizio! It came out gorgeous, maybe my best loaf yet! Can’t wait to dig in.
Hi, Maurizio! I baked off my loaf this morning and have a few questions. I noticed yesterday during the shaping stages my dough seemed quite wet. When I took my loaf out of the fridge (16hr proof in fridge), it didn’t seem to have risen as much as I had anticipated. It felt quite dense during scoring, too. Baked as per instructions, but it came out looking on the flat side and quite dense. After letting it cool, I cut a slice and it was delicious, the crumb is nice, but I’m wondering what went wrong. I soaked raisins overnight, squeezed them out, but I wonder if I didn’t get enough water out. My loaf is definitely cooked, but looks a bit wet on the inside from the raisins. Would love your opinion! Few things to note: I made half a recipe, soaked store bought raisins over night and squeezed before adding to dough, and shaped in a boule. Followed all instructions to a T. Hope to hear from you!
Hey! Yes, sounds like perhaps a bit too much water in the dough. Maybe try skipping soaking the raisins, they should incorporate just fine and they might actually help by pulling some water out of the dough to make things more manageable. Sorry for the delayed reply!
I’d like to see this recipe but there is nothing here?
Hey, Madeline! Some people have said if they have an older version of an ad blocker running in their browser it has caused issues with posts at my site. I’m still looking into this, but have you tried disabling this? Sorry for the trouble (I don’t even really have ads!).
I have tried disabling adblock, and clearing cache and cookies. :/ I can see other all the other recipes so this is weird!
This recipe also doesn’t show up in your archive tag page for ‘raisins’ (https://slimlife.fit/tag/raisins/%3C/a%3E%29%3C/p%3E
That’s really, really weird. It does show up for me in that linked page for the raisin tag…
Just made cinnamon raisin yesterday and it came out just about (almost) perfectly. I think perhaps I should have let it bulk ferment a little bit longer and/or the cold proofed a little longer. The texture was not quite as open as your’s, but still pretty lovely. However, the flavor balance is perfect!! I used King Arthur Organic Bread Flour, One Degree Sprouted Whole Wheat for the W.W portion, regular old organic raisins, and a mature rye/all purpose starter. Very happy! We polished off half the first loaf very quickly. Oh, ALSO, made big batards by accident. I made the sprouted whole wheat/all purpose/bread flour loaves last week, and they also came out great. Can’t wait to try one your other recipes next week! Very encouraging to have so much success so early on in my sourdough bread baking tenure. Thank you for what you do and for sharing your knowledge!
Hi there! I’m making your sourdough cinnamon bread and I was wondering if I don’t have a baking steel how should I bake these breads.
I have a pizza stone and Lodge cast iron and glass loaf pans. Or should I bake them covered and omit the steam?
I love your website and your recipes….never had one fail!
Thanks so much
Hey, Suzanne! Either way would work well: on a pizza stone covered with a deep post or deep roasting pan (omit steam), or you can form them into more traditionally sized loaves and bake them in the Lodge combo cooker/Dutch oven. Either way, covering while baking for the first 20 minutes to trap steam is ideal!
Thanks for the reply! Baked the first two open – one in the shallow part of the lodge and one on a pizza stone. (with steam)
They both came out good – the one on the lodge looks amazing actually. Pizza stone not as much spring but still tasty.
The other two I shaped into boules and baked covered in two lodge cast irons – they look really great and I got some nice blistering too. 3 are being gifted tomorrow. And now working on the Tartine style olive bread! Just getting out the January blahs….thanks again!
How do I find the recipe for the sourdough cinnamon rolls??? I have tried on your website and it takes me to this page for comments. I am very frustrated.
https://slimlife.fit/sourdough-cinnamon-rolls/%3C/a%3E it’s listed under the recipe section, just use ctrl+f
This should be fixed now!
This is awesome! I’ve been using your standard sourdough recipe for the last couple weeks and it has been working great. I have been wanting to make a cinnamon/raisin bread for a while now and I can’t wait to give this a try. Have you, or anyone really, attempted to cut the recipe in half? Does it need any other modifications besides cutting the weights in half? Thanks!
That’s great to hear, Diana! You should be able to cut this recipe in half with no issues at all. Do know that if you’re baking smaller loaves instead of just half, your bake time will need to be adjusted (to be less). Otherwise, happy baking!
I made this bread a few weeks ago and it was incredible! I soaked my raisins over night as I didn’t have a food dehydrator to make my own raisins and it worked out just fine. May I ask why you had us kneed the dough more actively than in other recipes? All others I have done of yours only require stretch and pull method while this one called for slap and pull.
Glad to hear that, Erin! Good move on soaking the raisins, that likely got them to just the right texture. In testing, I felt this dough needed a bit more strength to help support the mix-ins and hydration. I wanted nice and neat oval (bâtard) shape for the end result and that extra strength helped keep them in line.
Thanks for the feedback and happy baking!
I have a question about the ingredients. At one point you say there is 2000 g of flour and this will make four 500 gram loafs. But I do not see that amount of flour in the actual dough mix. It looks like the recipe is really for only two 500 g loafs with a little less than 1000 kg of flour. Am I reading this wrong? I also noticed that discrepancy on your best sourdough recipe. Was going to cut recipe in half to make only two loafs but then when weighing out ingredients, thought this is not right?
I have a question about the ingredients. At one point you say there is 2000 g of flour and this will make four 500 gram loafs. But I do not see that amount of flour in the actual dough mix. It looks like the recipe is really for only two 500 g loafs with a little less than 1000 kg of flour. Am I reading this wrong? I also noticed that discrepancy on your best sourdough recipe. Was going to cut recipe in half to make only two loafs but then when weighing out ingredients, thought this is not right?
Never mind. I realize my mistake. I forgot to add in the water to the weight of the final dough. I did make this dough yesterday. And had two approximately1000 g loaves. I did the slap and fold first and then several stretch and fold. Dough was on counter for 3 hours and in fridge overnight. Took out this morning around 7:30 am and preshaped and shaped and into baskets by 9:15 am. On counter now for final rise. I live in desert so quite warm in kitchen. 81degrees is my normal in the kitchen during summer. So actually kitchen is a proofing box. Hope to stick in oven this afternoon. Really looking forward to this. Thanks.
No problem, Victoria! I hope they turn out great. Yes, it sounds like your entire kitchen is a proofing box! That’s pretty warm, expect that dough to move quickly. Enjoy!
I was concerned about delaying the bulk fermentation. I did bake and at first I was disappointed by flavor after 1.5 hours of cooling. Was trying for a bit more sour. But had it for toast this morning and it was really good. Really good. Not at all disappointed. Thanks. By the way, I used raisins I made from my homegrown Thompson grapes. Just left then in net bag out in our 110 degree heat for a couple of days. They are so much better than store bought. Appreciate your blog.
i do not understand your autolise.. normaly i do autolise with all water and all flour.. and the way you did i could not understand .. and you keep some water for add after the levain, salt, how did you made this folds with less water .. ?
Yes, I usually hold back a little water from the autolyse to help incorporate the levain and salt, later. If the dough is still stiff for you, you probably could use a bit more water in your mix, just increase it a little at a time if the dough feels like it can handle it.
I have doubts in this times .. i could not understand how many times i let the dough rest and have fermentation out of refrigerator and in the refrigerator… i tried make this dough but after the dough is ready i put in refrigerator and it still did not grew up its like the same and i started yesterday morning
In the recipe above a have a sample timetable listed out — try to follow those times and perform the steps when called for, you should end up with a dough similar to mine (that might need a few adjustments here and there, as usual in baking!).
thank you … I made some steps wrongly… i made the folds , but i guess the problems is i keept in refrigerator for longer more than 18 hours and did not let in TA for some hours
If I wanted to make this in a boule instead of a batard (I don’t have a proofing basket), would I need to make any modifications?
No modifications, just shape it as a round at the last step. Enjoy, Molly!
Thanks so much for your quick reply! Can’t wait to try it this weekend.
One more question, re: boules. I shaped this into 2 boules instead of 4 (oops). Do I need to alter the cooking time?
Does this end up being a sweet bread because of the raisins or more of a spiced loaf? I’m surprised no sugar was added.
I’d say more on the sweet side because of the raisins — but not overly sweet, to me at least. In testing, I didn’t find sugar/honey necessary: the raisins brought just enough sweetness to balance out the cinnamon (which I kept relatively low anyway). Overall, a tasty bread to be sure!
yes my bread even did not grow enough is good and sweet
Perfect timing – I was about to modify one of your other recipes to make a cinnamon raisin sourdough! Any particular reason why you added the cinnamon and raisins at the initial mix step instead of after a second set of folds, as with your recipes for other loaves with mix-ins? I noticed that you also only recommend two sets of folds in bulk instead of the usual four, so maybe that’s related?
In experimenting I found adding the cinnamon in a bit earlier to help with incorporation, otherwise you might end up with “ribbons” of cinnamon running through the dough instead of full dispersion (which might be a completely different bread indeed!). It’s ok to hold off adding the raisins till after the first or second stretch and folds during bulk, this will also work. Lately I’ve been adding mix-ins earlier in the process, right at the end of mixing, and haven’t noticed any issues. It means less work once the dough starts bulk fermentation 🙂
Yes, with the flour used in this recipe, and the hydration, for me only 2 sets of stretch and folds were needed. However, if your dough still feels slack and “runny” after the second set, add in a third. Each dough will be different!
Hope that helps!
Hi Maurizio, this recipe looks great! Thanks for sharing. How would you adjust any of the steps to make this bread as a tin loaf? And more generally, how would you adjust any ‘free form’ sourdough bread recipe to suit a tin loaf? Any general tips or things to keep in mind? I love my batards and boules, but sometimes I want a more sandwich shaped bread. Thanks in advance!
This recipe would work very well as a tin loaf, Ana! I’d honestly say you likely don’t need any modifications at all, just shape the dough as a pan loaf, place it in the tin, proof it, and you’re good to go. You might need to increase the bake time and/or temperature as I’ve found tin loaves do take longer to fully bake through. Keep an eye on the internal temperature of the loaf using a thermometer and ensure it’s at least registering 208°F.
One thing I typically like to do with a tin loaf is increase the hydration a bit and push the proof time as well. Usually we cannot increase these too much with a free-form loaf because they’ll spread in the oven, but in a tin the walls keep the dough from spreading so we can push those two a little farther. This isn’t necessary, but something to keep in mind when you’re experimenting.
Happy baking!
Thanks for your reply Maurizio. I made this bread yesterday and the loaves turned out delicious! I ended up making free-form loaves after all but will try tin loaves next time. I did definitely overproof the bread this time so my loaves are a bit flat, oops, but the flavour is great and the crumb is so nice and tender, even despite the overproofing. Looking forward to the next bake. Cheers!
Hi Maurizio,
alfanso here from TheFresh Loaf. I’m lost when it comes to posting on Instagram, sad to admit, but here is a link to my post. http://www.thefreshloaf.com/node/60371/maurizios-cinnamon-raisin-levain-baguettes
A lovely formula indeed and a bread that would feel at home on any fruit and cheese board.
Hey, Alfanso! I just love your bake, what beautiful baguettes. I also like your sentiment about adapting a formula to your environment, schedule, and to adjust for just about anything that comes up. But even further, changes and adaptation is what makes a formula our own, and helps us grow as bakers. Thanks for sharing your awesome bake and feedback — happy baking!
Nope, just leave them out of the dough mix without any other changes.
can anyone help?The total salt is listed as 19 grams but calls for 24 grams in dough mix. What am I missing?
Betsy — I just replied to your email. I had a typo that was fixed, please refresh your view of this page!
Go it and the other changes.
Hi Maurizio! I love the shape of this bread. Do you basically just shape a batard but then roll out the ends with your palm like how you do with your baguettes? Would that degas or flatten too much? Thank you!
That’s exactly right, Diana!
@maurizioleo:disqus next time try real ceylon cinnamon, not the cassia one. You will be amazed how your baking good will fly to the next level 🙂
Will give that a try! Since I started working with cinnamon for this post I realize just how many varieties there are available, it’s staggering. I’ll pick some up and give it a shot, thanks for the suggestion!
Hey Maurizio, a tip for folks who don’t yet have a dehydrator… I’d love to get a dehydrator, but in the meantime I’ve found that my oven on the lowest setting works pretty well! 170F, convection, and I change the temperature calibration setting so that the oven think it’s hotter than it actually is, and that maintains around 145F actual in oven temperature… This is hotter than your suggested method, but the results are decent for not having the prescribed equipment!
As always, great post and great recipe. Thanks!
Thanks for the kind words and the suggestion, Jim. That’s right, if your oven can go low enough 145°F will work (they’ll likely dehydrate a little faster). Happy baking!
Hi Maurizio
I have a stiff dough starter/Desem so should I just use 155g of this as the levain?
Thank you
Suzi — you can certainly skip the Levain phase in this post and just use your starter directly in a dough. Just be sure to catch it at the right time, you want it mature but not overly so. Since yours is lower hydration you might want to consider adding a little extra water to the dough to compensate (depending on what hydration you keep your starter). This is optional, though, and really depends on how your dough feels when you go to mix.
Happy baking!
Hi Maurizio, so what do you think of the dehydrator? Have you used it for anything else? I’m only on my second one in almost 30 years but it is quite bulky and consumes so much space. Thanks!
To be honest, it’s incredible. I’ve not had a dehydrator prior to this one so it’s all I can compare to, but I’m not sure what more I’d want out of one. It’s intuitive, has plenty of capacity, and folds down into a rather thin rectangle. I like that it has glass doors and stainless steel shelves and I pretty much just plug it in, turn it on, and walk off.
I’ve dehydrated all sorts of fruit at this point: pineapple (incredible!), apples, grapes, banana (not that great), kiwi, strawberries, and more. Next up for me will be making “fruit leather” and I’ll definitely be dehydrating tomatoes from my CSA for use through the winter.
All-in-all, I’m really impressed with it!
Check out the “Dough Mix” section below the “Total Formula” table for ingredients needed when mixing the final dough in the bowl. Have fun!
Looks great but I’m a bit confused with the Total Formula vs the Dough Mix. They seem to be for different recipes. Is that just a typo?
Adam — sorry about that, it reverted back my table. It’s now fixed!