


This past weekend, I had the wonderful opportunity to attend a workshop by the one and only Sandor Ellix Katz, author of The Art of Fermentation (essential reading!). I walked away from the workshop infused with inspiration and a head full of fermentation ideas. Of course, it wouldn’t be a hands-on workshop if I didn’t leave with a jar of bubbling veggies — a relish of sorts.
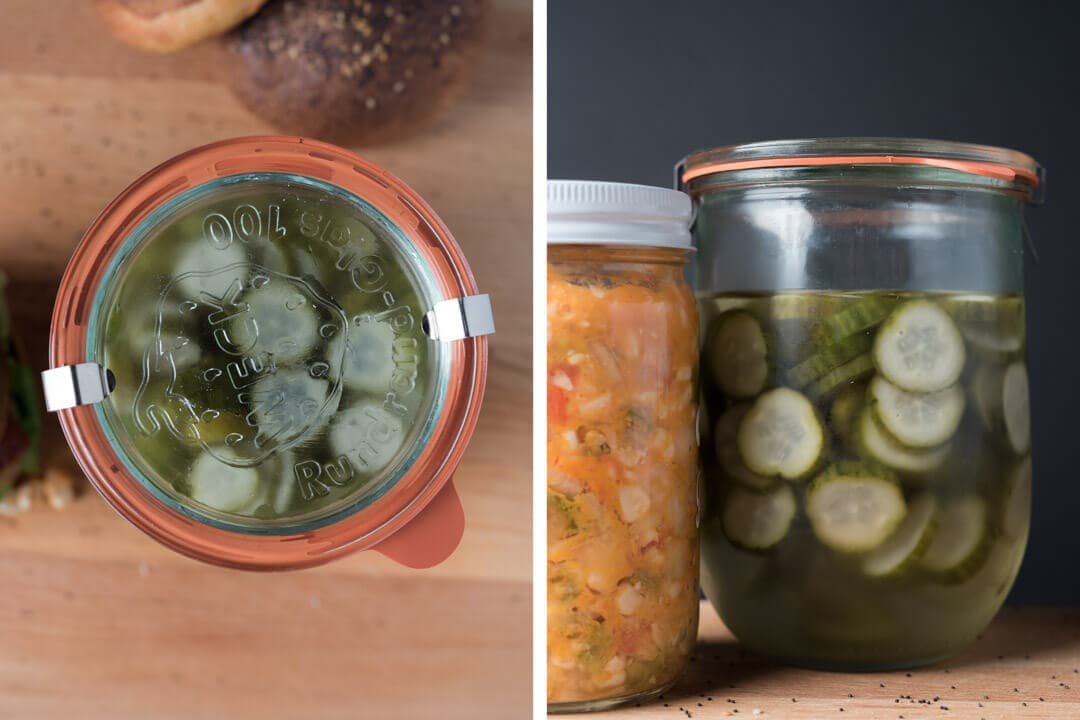
The fermenting relish we created by hand during the workshop had numerous spicy New Mexico chiles (as is the custom here in New Mexico, if it’s not spicy, let’s first make it spicy, then figure out the rest of the details), onion, corn, tomato, sweet potato (cooked), and garlic added to the mix. After getting my hands dirty with mixing, mashing, and packing, I began to ponder what I’d like to use this spicy concoction on, and then it came to me: hamburgers with brioche hamburger buns!
Coincidentally, the upcoming weekend of July 4th has always been a big grilling weekend out here, and what better way to celebrate our Nation’s independence than to fire up the grill and throw on some burgers and veggies?
I’ve made hamburger buns several times but have yet to formalize a recipe for my favorite version. This formula has evolved and is similar to my cinnamon roll recipe in that it’s based on an enriched brioche dough but with changes to butter, milk, and flour types.
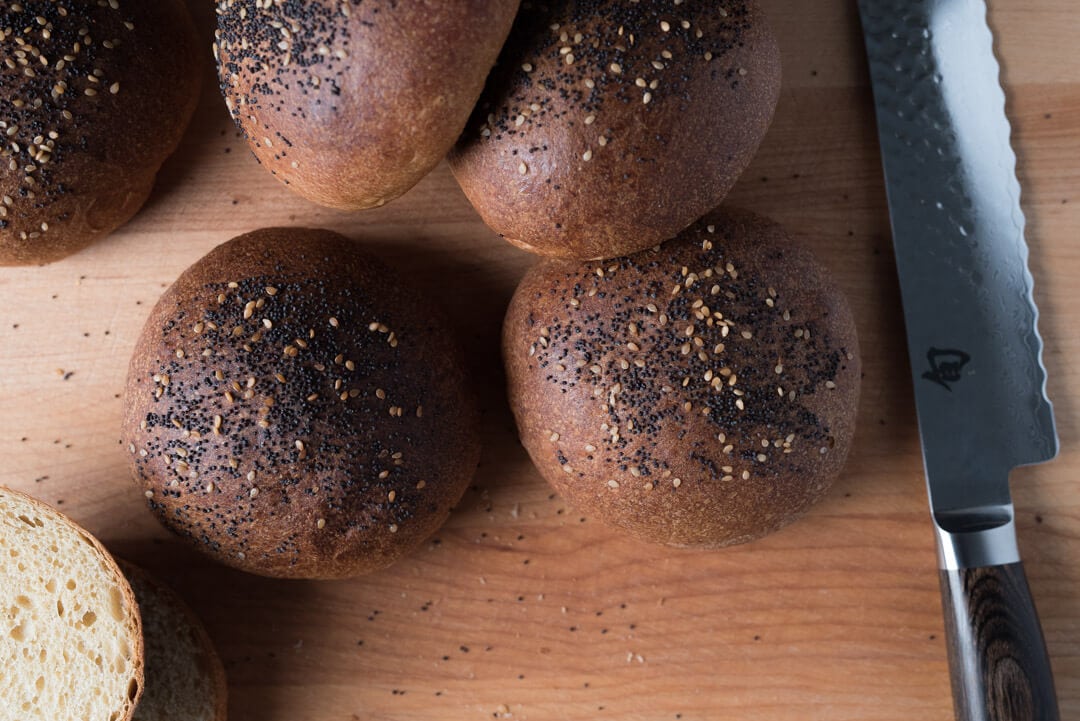
What I like most about this brioche hamburger bun recipe is its versatility. Not only can the dough be chilled in the fridge (similar to my fluffy milk bread hamburger buns) at multiple points before baking, once baked, but these buns also keep very, very well for days after. If you are planning an event, you can easily make these a day or two beforehand and keep them wrapped up so they stay pliable and ready to slice the morning of.
Additionally, these brioche hamburger buns can be used for many more things around the kitchen than just hamburgers—they are secretly a dinner roll that’ll blow those store-bought ones out of the water.
Let’s break out the butter.
Brioche Hamburger Bun Recipe
When compared to my cinnamon roll recipe, you’ll first notice I reduced the butter a smidgen and worked in a significant percentage of whole wheat flour. The added white whole wheat adds a subtle flavor boost to these, promoting them from just another hamburger bun to more of a central player in the overall meal. Further, the whole wheat gives the buns more rigidity after they’re baked, helping them to support the hamburger patty, toppings, and condiments.
However, this brioche hamburger bun recipe would work very well with 100% white flour or a different type of whole grain for the white wheat component—be sure to adjust the milk percentage up or down to suit.
Feel free to change the flour variety used, but be sure to adjust the hydration to suit.
The schedule outlined below has times and temperatures listed for the same day bake. Meaning the dough is started in the morning and then baked in the late afternoon, ready for a late grilling session or early dinner. However, the dough can be retarded overnight in bulk to add even more flavor and make scheduling easier (more on this below).
Note that you don’t have to make a levain for this recipe, just use your ripe sourdough starter (see the difference between the two here). However, make sure the night before when you refresh your starter you build up enough to cover the starter requirement below (185g).
Vitals
| Total Dough Weight | 1200 grams |
| Yield | 10 x 120-gram buns |
Dough Formula
The target final dough temperature (FDT) is 74°F (23°C).
| Weight | Ingredient | Baker’s Percentage |
|---|---|---|
| 278g | White Bread Flour (~11.5% protein), Malted (Central Milling Artisan Baker’s Craft) | 60.00% |
| 185g | White Whole Wheat (King Arthur Flour White Whole Wheat) | 40.00% |
| 162g | Unsalted European Style Butter (Kerrygold Unsalted) | 35.00% |
| 185g | Eggs (about 4 large) | 40.00% |
| 46g | Fine White Sugar | 10.00% |
| 148g | Whole Milk (cold, from the fridge) | 32.00% |
| 10g | Salt | 2.30% |
| 185g | Ripe sourdough starter | 40.00% |
Method
I used my Kitchen Aid mixer to mix this brioche dough. It’s possible to mix this all by hand but it gets a little tricky with the added butter. If you choose to do it by hand you could knead the dough in a bowl with a wet hand or even slap/fold on the counter.
1. Incorporation – 8:45 a.m.
Take out the butter from the fridge and cut into 1/2” thick pats and place in a small bowl. Let the butter come up to room temperature while mixing the rest of the ingredients.
Add the sugar, eggs (from the fridge), milk (from the fridge), and mature sourdough starter to the bowl of a stand mixer. Whisk everything together until incorporated.
Add the salt and flour to the mixing bowl. Using the dough hook attachment, mix the dough on STIR (lowest setting) for 3 minutes until all the flour is hydrated and everything is incorporated. The dough should look very shaggy at this point but should not be overly stiff. You might need to add more milk, a little at a time if the mixture is too dry.
Let the dough rest 10 minutes, covered.
2. Mixing & Butter Incorporation
After the 10 minute rest, the dough will be strengthened further before adding the butter.
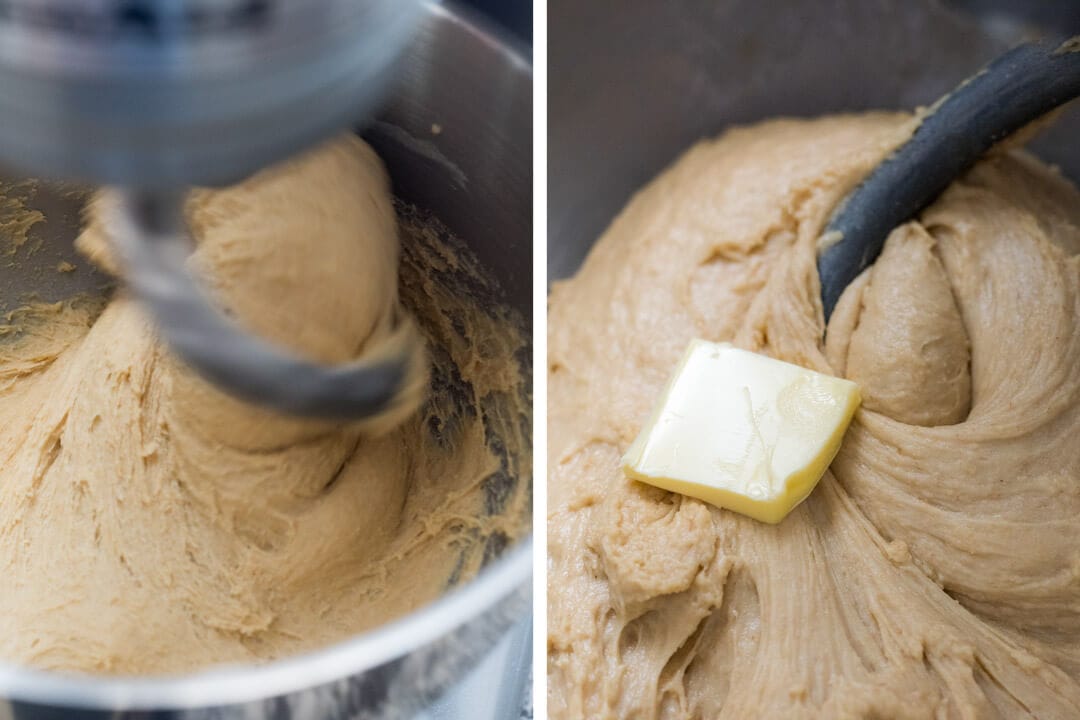
Mix 4-6 minutes on speed 4 (4 notches above STIR for me on my Kitchen Aid, medium speed) until the dough comes together and starts to pull from the sides of the bowl. It will most likely still stick to the bottom, but you’ll notice the dough will strengthen up and become slightly more smooth.
Butter temperature is important! At this point, it should be soft to the touch but not melted (see above, right). It should not be too cold or it won’t incorporate easily, and conversely, if it’s too warm it’ll get greasy and melt. Use the freezer or the microwave (in short increments) to adjust the butter temperature if necessary.
Turn the mixer down to speed 3 and start adding the butter one pat at a time right where the dough hook meets the dough mass. Wait to add the next pat until the previous one is fully incorporated and continue until all the butter is worked into the dough.
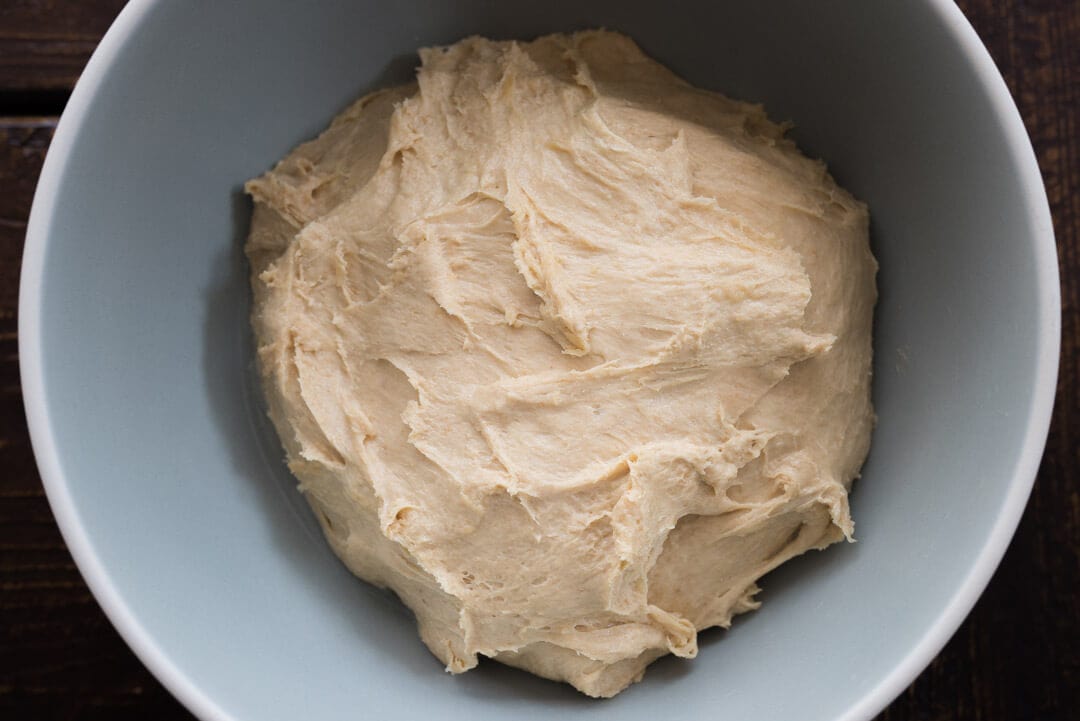
Total mixing time for this step could take 8-10 minutes. The dough will still be slightly shaggy (see below) but this is ok because we will perform a couple of sets of stretch and folds during bulk to further add strength. Additionally, you can see the dough does not look greasy from any melting butter. If your dough temperature is too high, pop it into the fridge for 15 minutes to help cool it down.
Once the butter is added, transfer the dough to a tub or thick-walled bowl for bulk fermentation.
3. Bulk Fermentation – 9:45 a.m. to 12:45 p.m.
As the dough is bulk fermenting on the counter, perform a total of 2 sets of stretch and folds, spaced out by 30 minutes (the first one 30 minutes after you finish mixing). For each set do a letter fold with wet hands (pick up the Northside and stretch up and fold over to the South, and so on).
After the second set of stretch and folds, place the covered bulk container into the refrigerator; chilling the dough for 1-2 hours in the fridge will make shaping much, much easier.
Here’s where the flexibility I mentioned earlier comes into play. You can let the dough chill in the fridge for 2 hours like I typically do, or you could leave it in the fridge overnight and shape the buns early in the morning to bake the next day.
4. Divide & Shape – 12:45 p.m.
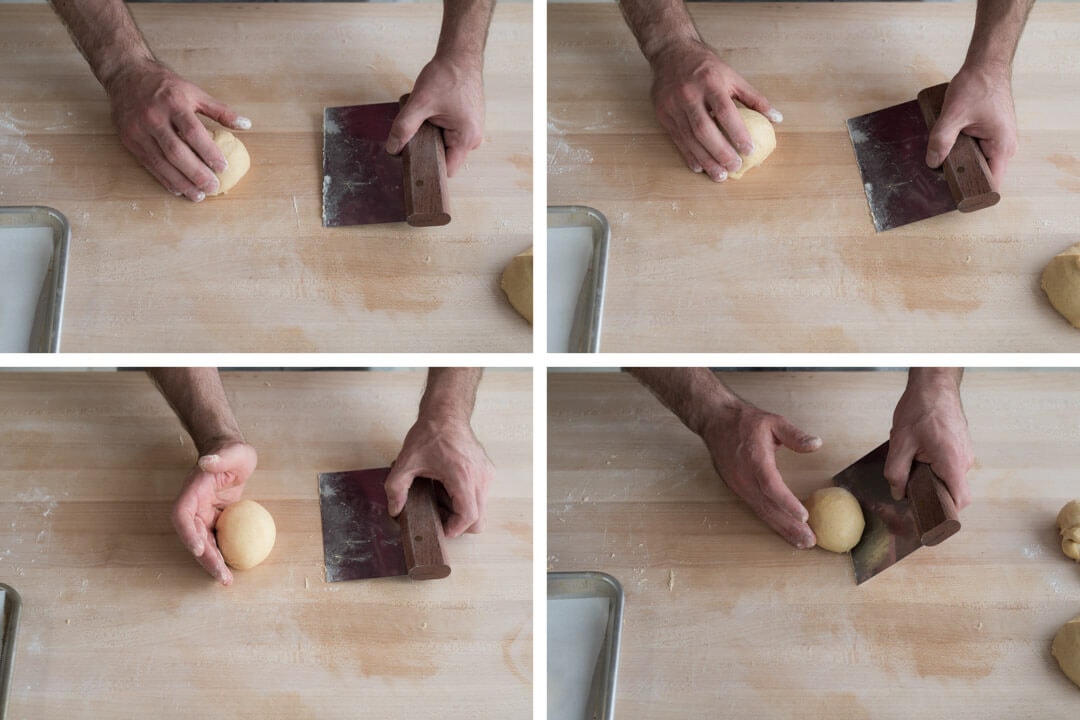
There’s no need to preshape this dough because we’re shaping it directly into small balls for final proofing. Prepare a full-sized baking sheet and another half sheet by lining them with parchment paper.
Remove the dough from the fridge and gently dump it to a lightly floured work surface. Using a scale and bench knife, divide the dough into 10 pieces. Then, using lightly floured hands, shape each piece into a taught ball.
I find shaping these to be very similar to how I shape pizza dough balls, but another method is to use a single hand and cup the dough ball down against the work surface. Then, move your hand in a small circle slightly pressing down on the dough as it moves around and slightly anchors to the bench (see above). Alternatively, you could shape each ball like you would a boule. Either way, be sure the dough has a fairly taut surface.
For more shaping instruction, see my guide page to shaping buns and rolls.
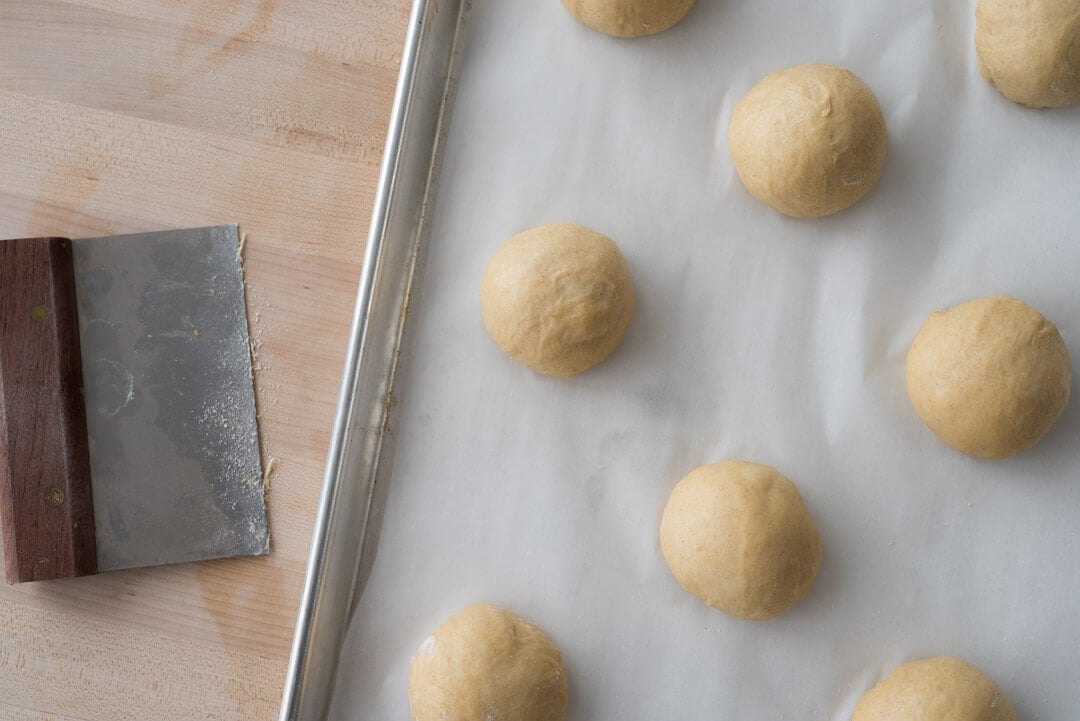
Once a ball is shaped, place it on the baking sheet so each is spaced out by 3″-4” or so. Using your hand gently flatten out each ball so they increase in diameter just a bit.
Cover the baking sheet with plastic to proof on the counter. I use these large plastic liners to cover my proofing baking sheets, they are even large enough to fit a full-sized baking sheet inside.
5. Proof – 1:00 p.m. to 3:30 p.m.
Covered and on the counter at about 73-76ºF (22-24°C), these trays of dough should proof for about 2.5 hours.
6. Bake – Preheat oven at 2:30 p.m., Bake at 3:30 p.m.
Preheat your oven to 425°F (220°C).
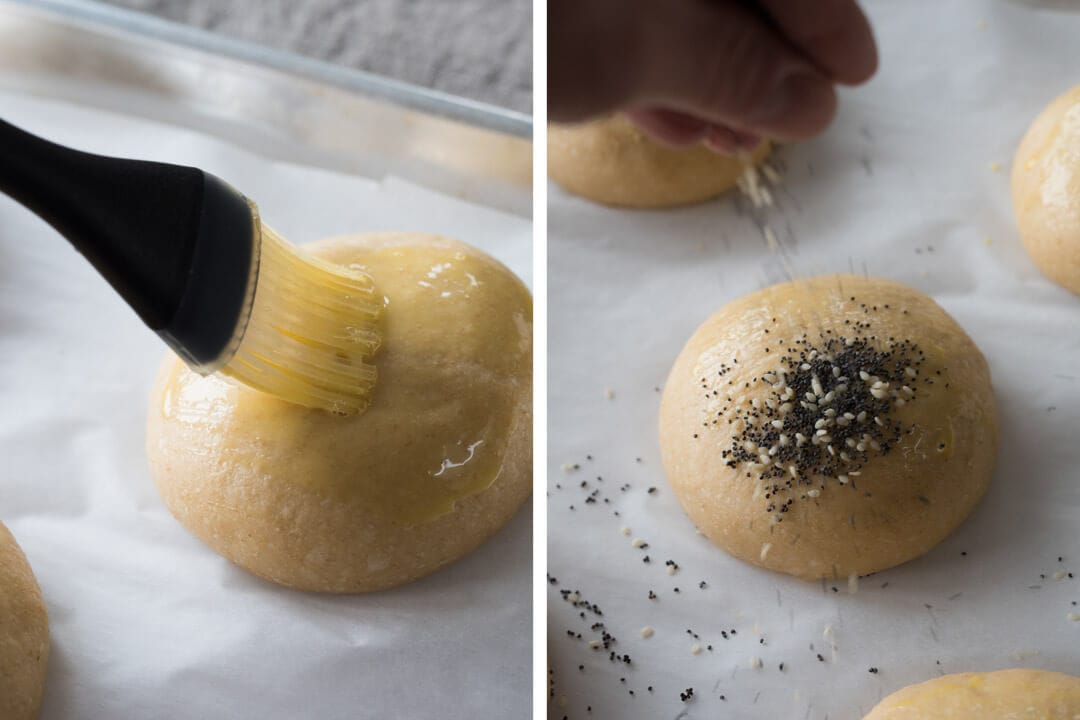
Make an egg wash by whisking a whole egg and a splash of heavy cream or whole milk. When the dough is ready to be baked, uncover the trays and paint on the egg wash with a pastry brush.
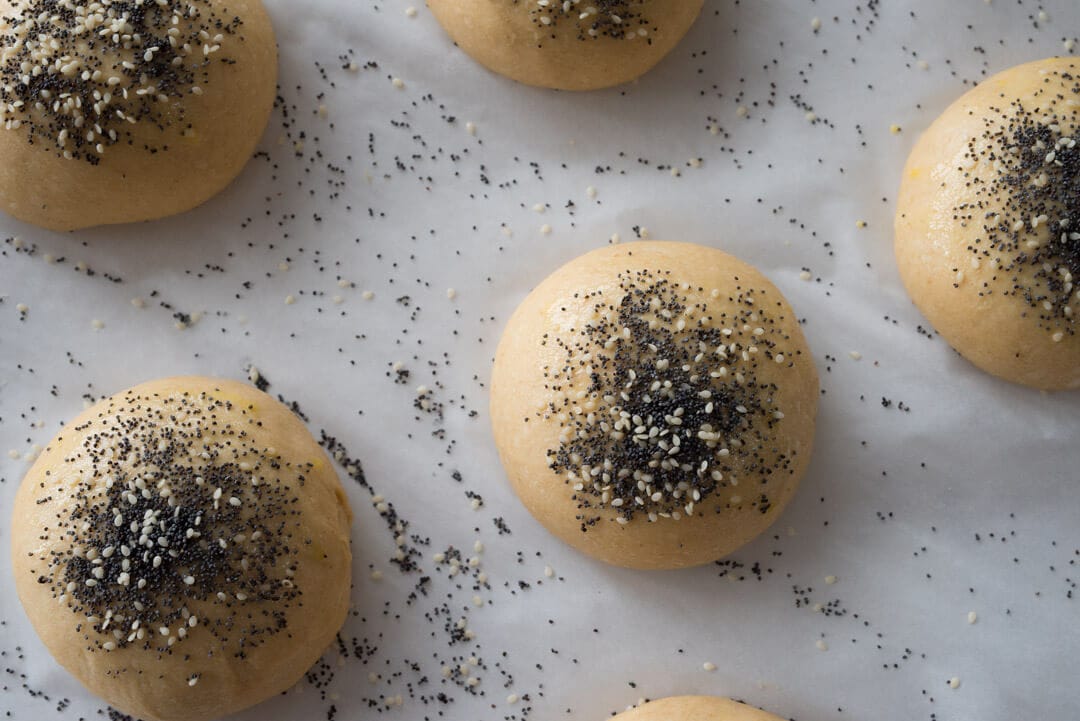
I mixed together 50% white sesame seeds and 50% poppy seeds for the topping of each bun. After the egg wash is applied spread some seeds on top as desired.
You don’t need to bake these on a pizza stone or Baking Steel, they’ll bake right on their own baking sheet. Because these brioche hamburger buns are topped with an egg wash, there is no need to steam the oven.
Slide in the baking sheets and bake the buns for 25 minutes. After the first 15 minutes rotate the trays, front to back, and top to bottom. Do keep an eye on these near the end, they may need more or less time depending on your oven.
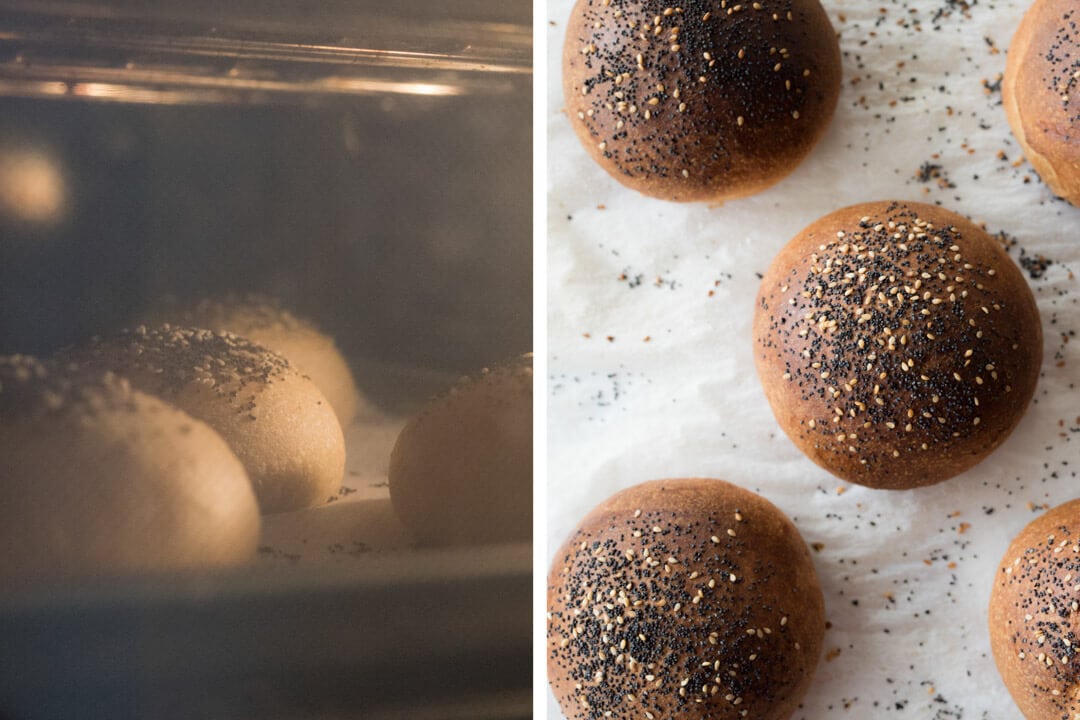
Once baked, remove from the oven and let the buns cool on wire racks.
Conclusion
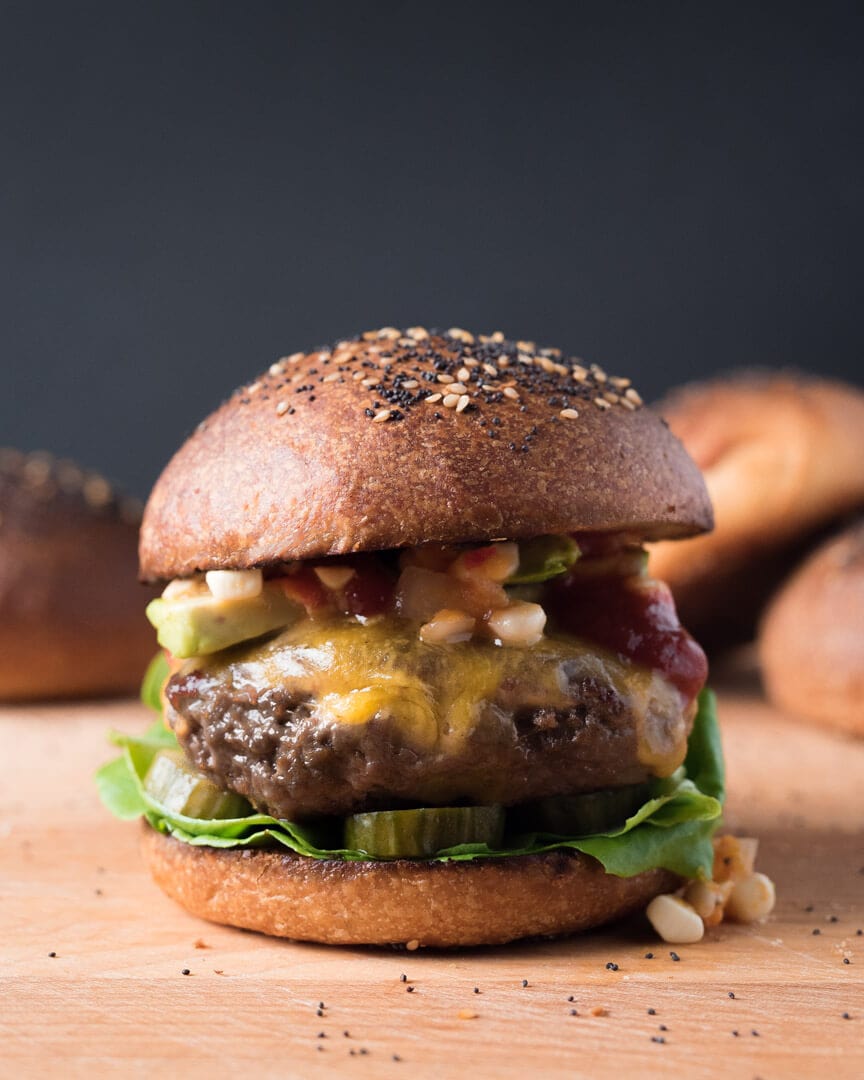
As I mentioned earlier, this was the perfect storm of motivation for me to finalize this brioche hamburger buns recipe and grill some hamburgers: the creation of a fermented relish, a holiday weekend approaching, homemade pickles in the fridge, and the pièce de résistance: homemade brioche hamburger buns.
For my hamburger, I sliced each bun in half and spread on some butter before placing them crumb side down on the grill for a few minutes to get nice and crispy. I mixed up some grass-fed beef with a dash of salt and sriracha and grilled each to medium. Then the burgers were topped with my Katz-fermented relish, homemade pickles, avocado, ketchup, and finally enrobed in the grilled buns. Mighty, mighty tasty indeed.
Crust & Crumb
The crust on these brioche hamburger buns is crispy but not tough or unduly firm. There’s nothing more off-putting for me than a hamburger bun that’s totally soft and mushy; I want some texture! Happy to say these definitely do deliver, and grilling them for a few minutes with butter further amplifies this.
I like seeds as a topping for these, not only for the added splash of flavor but they add a desirable texture to the top. If you don’t like seeds or prefer a different type, by all means, omit or change the toppings to suit.
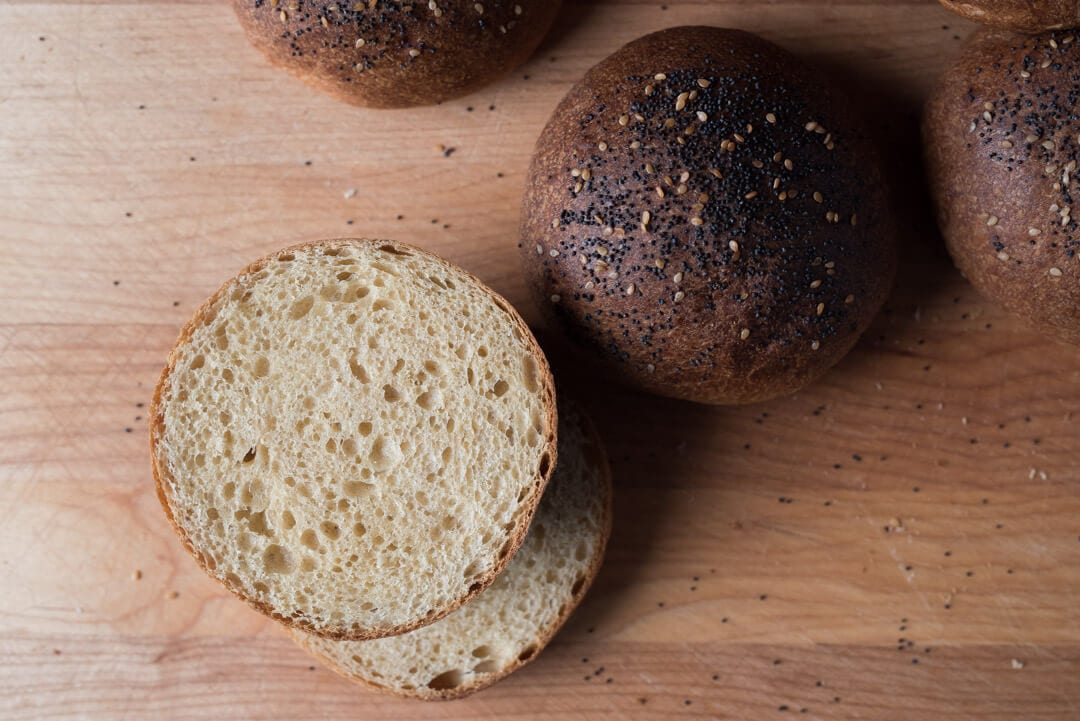
The interior is soft and open with a wonderful yellow tint from the white whole wheat flour and rich butter. You definitely don’t want the interior of these to be too open, but even, full fermentation is key to a light and airy bun. No dense spots and no gaping holes—the middle road.
Taste
With this same-day brioche hamburger bun dough, there’s just a hint of sourness. The added acidity brings additional flavor but is not overwhelming. The buns add subtle wheat and butter flavor to the overall hamburger, which is just what I wanted: a bun that brings more flavor to the stage without overpowering the other ingredients—a well-tuned concert of flavors and textures. And I think the added flavor from Mr. Katz’s well-fermented condiment just pushed these over the top into crazy good territory.
What’s Next?
If something better exists for a weekend by the grill, I might not want to hear about it. These brioche hamburger buns and burgers were heaven, and I’m looking to do a repeat in the next few days. I can now safely say this formula finalizes my question of how to make buns at home.
If you’re looking for another option, check out my sourdough potato hamburger buns, or if you’re making hot dogs, my homemade hot dog buns.
Nice buns ya got there! Had to say it—buon appetito!
If you use this recipe, tag @maurizio on Instagram so I can take a look!


302 Comments
I just made this, but I turned the whole batch into a large brioche loaf. I used 245g kaf AP and 210g freshly ground whole wheat. I also only had 100g of butter on hand so I subbed bacon fat for the remainder of the butter. It’s soo good! I thought the whole wheat would be more prevalent in taste and texture, but it almost feels like white bread, so I think I’ll swap percentages of white flour and whole wheat next time–60%whole wheat, 40% white AP.
Sounds like a good modification for next time! Yes, this is still a very light bread even with the whole wheat, which I love. Thanks for all the comments and enjoy 🙂
Did you try this Allysen? What about the butter?
Has anyone substituted the butter and milk for non diary alternatives for brioche buns? I made your sandwich loaf @maurizioleo:disqus with almond milk and olive oil and it was awesome (even though I say so, myself)
Thanks
Hey, Dan! I haven’t tried this, but I know others have used full fat nut milks to great success!
Cool, thanks. I’ll give it a go. Gonna try olive oil instead of butter.
I subbed vegan butter for butter, almond milk for full fat milk, and aquafaba for eggs, and they turned out GREAT! 🙂
Hey Maurizio!
We have made these buns about 10 times and they are amazing!!! BUT, we are going to try to do them with 90% white and 10% whole wheat. Since you’re from Albuquerque, we are trying to emulate the old Lumpy’s Burgers bun. Remember them?
Any thoughts before we embark on this tweak? I think we are going to proof a little longer since there is less activity when there is less WW. Thanks again!! You truly are the BEST!!!
Hey, J.J.! I don’t think I’ve ever had Lumpy’s—sounds like I missed out! Yea, I think a little longer proof should do the ticket. You could also increase the levain % in the dough if you’d like to as well. I’d first just give the dough additional time and see how it goes. Also, watch the hydration when mixing, with less ww you might need less liquid. Let me know how it goes!
Made these last week and they were spectacular. Four eggs weighed 215g, not 185g, so I reduced the milk by 15g, splitting the difference. If the extra 15g of liquid made the dough extra-wet, it didn’t seem to matter. Processing in the butter pats with my kitchenaid did not go quite as you indicated. Putting it in “where the blade enters the dough” doesn’t really do anything – it still gets thrown to the side immediately, where it is very slowly incorporated as a tiny bit gets scraped off into the batter each time the dough comes whirling round. As a result, butter addition took 22 min. Nonetheless, delicious and perfect! Used them with Kenji’s smash burgers. Recommend. As I write this, I have a second batch proofing.
Great job with the mods, Josh. Yea, it’s a little different for each mixer, but it’s also how the dough is mixing. A stronger dough that’s clumping around the hook might be ok with the butter added there, but it’s also effective to just drop the pats down on the side of the bowl as the mass is sloshing around. Glad you didn’t rush that step! Thanks for the comments and happy baking!
Hi Maurizio,
The last couple of times I made them they are really great, the only thing I have notice is that if I formed them right, they break on top like if they needed to be scored. Any tips so they don’t break on top while baking?
Thanks!!!!
Great, Alfonso! Usually splitting like that is from under proofing, or the egg wash wasn’t evenly applied to the surface. Try giving your dough a little longer to proof, this is a slower moving dough 🙂
Would anything need to be changed in order to make a 3 braid challah?
Not sure, I’ve never really made challah!
So do you let them come to room temp before shaping? Coming out of the fridge it feels more like cookie dough.
I don’t, usually the dough is puffed up and the cold temp of it helps make shaping easier. If the dough is super dense and tight, you might have needed longer in warm bulk fermentation. But, yes, you can certainly let it warm up some if it’s too firm from the fridge.
Thank you! I’ll try a longer warm bulk fermentation next time.
Took another crack at these. I also extended the bulk fermentation and added a 3rd folding. It looked so much better than the 1st go at it. I think i did a better job at the butter temp too. I refridged it over night and once again it was like play dough but that did make it easy to shape once I let it warm up a bit. Not happy still with the size. It turned out nice for rolls but not big enough for burgers. I had ~1100g of final dough to divide. Maybe I don’t make 10 next time? I love the process though!
Right on, Andy! Yea, sounds like maybe drop down to 9 rolls and you’ll be set for larger burgers. Once you get the hang of this type of dough, you can really adapt it to any flour combination, too.
Hi I tried these brioche buns to gift (I follow vegan diet). What a huge success! I’m so so happy with the result. Not sure if I manage to share a photo (will try) but this is an amazing recipe. My son loves French toast. Can I turn this recipe into a tin loaf please? Thank you for your amazing recipes and your support for hobbyists like me. Thank you
Super glad to hear they turned out great! Sure, you can absolutely make a loaf from this dough. I’d probably do around 900g dough weight for a 9x4x4 Pullman pan.
Hi, I love your site and got quite a few tips on sourdough baking. I tried this recipe and followed it to the t. I let it proof a bit longer though. The dough came out perfect.
The temperature and baking time however cannot be right. After ten minutes at 230C they looked burned. I turned down the heat and kept it in the oven for 20 min but the damage was done and they were black and very dry. I might make these again but will bake them much lower temperature and not put an an egg wash on.
Thanks for a great site.
Thanks so much for the feedback and comments, Dirk! Glad the buns came out wonderful—aside from the bake time and temp. I’ve been testing this recipe and will be adjusting the bake time and temp to drop it a bit. This was what worked in my oven, but I’m not suspecting the oven was running a little cool (and so I had to turn the heat up). Thanks for the feedback and happy baking!
Hey thanks for this recipe! Buns turned out wonderful in every way! One thing I had to adjust: time baked at your recommended oven temperature. Haven’t come to a consensus on what my opinion is here, but I have followed through on a number of your other recipes without deviation from your prescribed temperatures and baking times until this recipe. I’ve come to believe my oven runs true to temp, and 25 minutes at 450 degrees was either way too long or way too hot. I pulled mine out at around the 19 minute mark; any longer and they would have burned, so no harm no foul. Thoughts?
Right on, Benjamin! Glad to hear they worked out for you. Sounds like you did the right thing there with the bake time. I’ve found these enriched doughs have more of a wide window for bake times: sometimes they color very fast and other times they take longer. There are oven differences of course, altitude will also cause deviations, but if you’re right on with my other recipes, perhaps something else was at play. I’ll make these again soon and see if I can verify the temp (I do make them often, though!). Thanks for all the feedback and I’ll update the post should they need less time in the oven!
Hello! So I have STRUGGLED with this recipe. This first time I made it, I followed everything exactly and they were perfect. Every time after that, which I’ve tried this again 3 times now, the buns have been heavy, dense, and tiny. They look like hockey pucks. I don’t understand why this recipe is simply not working. The dough definitely feels slack when shaping them, they are not holding their ball shape at all. They don’t really rise much. This leads me to believe that there’s an issue with gluten development and possibly bulk ferment. They are gummy on the inside but I can see within the crumb that something is trying to develop. I’ve been baking with sourdough for 6 years, my starter is over a year old and bakes up beautiful breads, pancakes, everything. But these buns? Disastrous.
Super sorry to hear that, Natalie! Do you think it’s the flour you’re using or has something changed with your sourdough starter (temperatures, refreshment flour, etc.)? Usually when I see a sudden problem like this I try changing flours or blame the changing seasons—summer and winter have issues, alike. Have you discovered the issue? Sorry for the late reply!
Thanks for replying! I haven’t had any
changes in flours or my usual starter routine. I’m in Florida so we haven’t experienced much temperature/season change quite yet.. I have yet to figure out what the issue is. I’m at a loss. Perhaps I need to add an extra fold or add more time to the bulk ferment?
An added fold could give the dough more strength if you think they’re flattening because of that—which is possible. My guess, though, is something related to fermentation activity. If you want to shoot me over some pictures I’d be happy to take a look! My email is on my About page 🙂
I’m wondering how to calculate hydration on this. If I use the liguid in the milk and starter I get something like 43%. How does one count the liquid from the eggs (and butter?)? If I add the full wt of the eggs I get 77%.
Also, I’m making these using Central Milling Artisan Bread Flour Plus (malted, 11.5% protein) and One Degree Sprouted Whole Wheat with no adjustment for hydration. Just completed the second stretch and fold and it looks super. Looking forward to it.
Made it once before with a higher protein bread flour, AFF and an organic whole wheat. My notes say it made great burger buns.
It gets a little tricky calculating hydration for enriched doughs, especially when eggs are added. Eggs are a little complicated because there’s significant water (the whites, mostly) with a viscous yolk (protein). I usually don’t report hydration with doughs like these because it’s hard to guess what the water content of an egg is, but you also have to look at butter (which has water as well!).
Glad it’s going well! I use CM ABCP often and have done so with these buns with great results.
Thanks. What I was really wondering was how much, if any, adjustment I might make for the sprouted whole wheat.
I’ve been loving CM ABCP. My bread-baking has improved enormously since it’s become my go-to white wheat flour.
It’s hard to say with sprouted flour, in my experience. I’ve used some that required much more additional water, and then others that needed a reduction. My best advice is to hold back water (or any liquid) during mixing, and only add it in if the dough feels dry and/or too strong. It’s a little harder with enriched doughs because you have to hold back the butter as well—just remember that the butter will definitely soften the dough! I’m usually more conservative with adding liquids in an enriched formula unless I know the flour very well.
I believe I read on King Arthur’s site to use 85% of the weight of the total egg for water content. That is what I have been using for a couple of years.
Butter I have not bother with except I use salted butter and there is 2.6% salt in that.
Thanks for that info, Dennis! I haven’t seen that, definitely worth noting down.
I’m back to say that these turned out wonderful. Much thanks for an excellent recipe. I used One Degree Spouted wheat flour for the whole grain component otherwise I pretty much followed the directions exactly. The buns were rich, tender and delicious. A huge hit. And I mean huge as i used the recipe to make eight buns instead of ten. Got a few of them a bit too close together, as you can see here.
One thing I would change next time is instead of a whole egg wash I’d use an egg white wash. i thought they came out too dark and i really like the golden look of an egg white wash. Here’s the ones I made a few months ago w/o the egg wash. But, that’s trivial. Thanks for a super recipe and such an informative site.
As there seems to be some issues among those who have tried this recipe I decided to post my notes. I tend to keep notes whenever I try something new so I can go back if things don’t work out as planned.
Bake notes: 9/5/20; used instant yeast instead of SD starter and the dough over 2x in size in 2 1/2 hrs. Final proof 1 hr. Perfect rolls. My first bake was underproofed because of the starter.
Bake notes 9/3/20; 8am, starter was not mature when removed from frig. Portioned out and left to mature on counter, was ready at 1:30pm. Mixed dough and set aside in a straight walled glass container to bulk, so to watch fermentation. Recipe called for 3 hours. Normally use recipes as a guide and use observations to judge. This may have been my downfall on this bake. Research on-line says floor time for brioche is 2 ½ hours before scaling and shaping (they were using commercial yeast which is normal practise and did not mention amounts.) According to the post over fermenting can lead to compromising the gluten structure but the dough does not
seem to be compromised.
My notes from the Orange & Anise Brioche (OAB) I made last month: I used 1.5%
instant yeast, bulked for 2 hours (volume tripled in size) and also added in a bit of hold back flour to make less sticky and more manageable. Baked at 160C (320F)
At 4:30 there was no rise at all to the dough and no bubbles either, it did not look fermented. Left until 7:30 pm and there was a very slight increase in size and a few very tiny bubbles about ½ way up in the dough, it had a fermented smell. I set in frig (40F) 7:30pm. I question now if I should have used the retarder @55F for the overnight hold.
9/4/20; 8am: dough removed from fridge, was very stiff but very quickly became
sticky/greasy to the touch before it could be shaped, which was done immediately. There did not seem to be any difference in the rise of the dough from the hold overnight in the fridge, it did though spread out. The dough felt dense not anything like bread dough that was fermented and much different from the OAB I made last month.
Portioned out for 100g hot dog rolls and placed in New England HD Pans to rise 2 1/2 hours. I did not waste seeds or an egg for a wash as I have my doubts on the outcome of these rolls. Final proof in pan showed no rise at all in the 2 ½ hrs.
10:00am: heated the Rofco to 160C before setting the pan. The rolls baked for 25 minutes and did rise in the oven 75%. Not a failure unless the crumb is bad.
Comments:
1.This recipe had double the butter of the OAB, it did not rise and turned out greasy
the next day.
2. 4 Large eggs 50g each x 85%= 170g hydration + 148g milk = 318 total hydration or 69% total hydration. OAB was 55% including the eggs.
3. Dough was extremely sticky should have added flour to reduce hydration and make
manageable and definitely cut down on the butter.
4. My flours were the same as the OAB but ratios 43% BF/57% WW just the opposite for the grains of this recipe.
5. Because of the spring in the oven they were probably not proofed long enough although completely outside the recipe instructions. The final crumb was soft typical of an enriched bread and no large holes.
Second time around with these! They look great from the outside. After slicing into one, I found it had a lot of holes. Ideas?
Meredith—a lot of large holes? Were there dense areas? If so it might have been under proofed dough!
Hi there! Thanks for posting all of these great sourdough recipes. I love having a source to turn to to make sourdough versions of bread. My recent favorite is your All-Purpose Sourdough Loaf – great results each time!
I’m commenting because I’ve made these buns three times, with success really only the first and I think the directions could use additional information regarding the bulk fermentation stage. The first time I messed up and thought I way over proofed them, but they were excellent. The second and third times I followed the instructions exactly and I think they’re under proofed. I think it might help to add a note of what to look for before dividing and shaping, like you did in the AP sourdough recipe. Suggesting what to look for in the instructions, like you did in one of the comments here, before dividing would be super helpful!
Thanks!
Hi! I made this recipe for a cookout. I ended up with very large holes in the buns instead of a tight crumb. Does this mean I over proofed, or didn’t develop enough dough strength? I wish my sourdough loafs had that same open crumb!
Tasted great regardless!
Hi Maurizio, I finally got around to trying another one of your recipes – this one! I did about 60:40 ratio AP to freshly milled Red Fife. I don’t have a stand up mixer, so I did my usual digging in with my hands and mix using the Rubaud method, then continued with your method for bulk fermentation, stretch and folds. The buns turned out great, nice rise, shape and crumb and were very popular with the family. The only problem I had was the bottoms of the buns were a bit crispy and firm. I had put my baking sheet on top of my baking stone in the oven, and I’m wondering if that leant to an overly baked bottom. Per your article, I note you mentioned, ‘you don’t need a stone, doh!’ Anyhow, great recipe and technique and our burgers were amazing and loved by the whole family!
If I wanted to scale this down for slider-sized buns (say, making 20) would that affect the final proofing time or the cooking time/temp?
Proof time should be mostly the same, but bake time will likely need to be reduced. Same temp, just cut the duration down as needed — once they start to color to your liking, remove from the oven.
Hi! I actually just tried slider sized buns, and found that after 15 minutes they were fairly dark so I took them out. The dough was a little wet on the inside. Would reducing the temperature to 400 and baking it for an additional 5 minutes maybe help with that?
Ah bummer! Yes, lower temperature and bake a little longer. What weight did you divide at?
Didn’t weigh it, but I’m estimating around 60-75 g based on how many buns I got.
Very hard to say without more information! It does sound like either they were under proofed or over proofed. I’d have to see a photo of the interior and exterior to further diagnose!
I haven’t tried but I’ve seen others using full fat oat milk with great results!
Milk would be the way to go.
Hey Maurizio! Followed every little detail and quantities precisely. First 2 attempts on this recipe were disastrous for me. Dough was too sticky, impossible to stretch and fold (only some play with the scraper to add strength, but nothing more could be done), shaping too hard(dough went everywhere) , led to rough surface, which ruptured in the oven. Came out cracked, underbaked, under proofed but still tasty.
In the 3rd attempt, I changed the white bread to WW flour ratio from 60/40 to 75/25 and also increased total flour from 463g to 500g.i am not sure which made the difference but the dough was workable, did 3 good stretch n folds, 3hrs bulk, 2.5hrs proofing. Success! Baked great with perfect spring for 22mins. Nice and fluffy but they still felt a little gummy compared to dry yeast brioches I made the same day. Any way I could help them become a little less dense (already fixed this compared to the first attempts but want to perfect it)? Also, in my grocery store I cannot find a white WW, there is only a single grade of WW and this is… well it is brown not white. Does this make any difference?
Thanks for the amazing recipes!
@maurizioleo:disqus
After my 1st attempt i tried again making several adjustements.
2nd time was better, but i noticed a significant improvement in 3rd & 4th
The 5th attempt was successful.
Allow to share some items which seemed to improve the process (&final result :-))
1. I gradually increased the kneading time in the mixing bowl (before & after adding the butter). In total, i let the mixer knead the dough for 8-10 additional minutes and it seemed to become more solid, easier to handle. i also tried instead of mixer kneading to do more rounds of strech and fold + some slap’n’folds, which were not as effective
2. I found out that adding a little more WW flour helped reduce hydration to a manageable level. About 10-20g made a significant difference to me.
3. Starter quantity was increased by about 15-20g compared to the original receipe. Also, i figured out that (probably) it is better to use the levain before it reaches its maximum elevation, than after.
4. Overnight bulk fermantation in the fridge seemed to deliver a nicer crumb texture (less solid) & improved flavour, more uniquire than a standard brioche like bread.
5. Last, the first buns were much easier to shape as they were the first to touch after taking the dought out of the fridge. Shaping started becoming quite challenging as soon as the dough started to absorb some heat.
I made 10 of them last week for a burger night, they were great indeed!
Thanks & sorry for the long reads!
Super happy to hear you stuck with it, Nikos! Yes, making enriched dough like this requires sufficient dough strength, and with most other breads, hydration always requires some measure of adjustment. Sounds to me like your flour requires less liquid and might be a bit softer, requiring more mixing time. But you tackled both of those — glad to hear you’re now on track! Happy baking 🙂
Can this be adapted in a load pan? If so, should i increase the hydration because i realize this is at the 70 ish hydration, most of the recipes i found in making a sandwich loaf are at the 75th hydration?
Yes, would work really well in a loaf pan. You could bump the hydration up to what you suggested, 75%, by increasing the milk — not mandatory, though.
I’d just adjust the milk down a bit- butter doesn’t have much water in it to begin with, and you want all the leavening power of the levain.
Just finished these up tonight in preparation for some grilling on Monday. I tasted one now that they’ve cooled and its fantastic, so now I am just curious about how others prefer to store them for something like two days… should I freeze them or just bag ‘em and refrigerate?
A few notes: I did opt to bulk ferment in the fridge after my two folds, about 15 hours or so by the time I got back to it this afternoon. As in the past with a somewhat similar sourdough challah, you dont see huge doubling in size at this point. My understanding is the addition of all the protein and fat hinders the natural yeast a bit. However by the time they were shaped proofed on the counter they looked great.
Also tried your steam method with dish towels to great success and backed it up with some addt’l misting from a spray bottle. I might adapt this into my fullsize sourdough boules because the oven spring was phenomenal.
Thanks again for the recipe and thorough explanations.
For two days I’d keep in a bread box or sealed in a plastic bag to keep them very soft.
Hi Maurizio – Thank you so much this exciting recipe. I’m going to start it and then put it in the frig overnight. I have a question about the flour. I do not have whole wheat flour. Can I use an unbleached AP flour? If so, do I have to make any adjustments for the AP flour?
Again thank you for this inspiration. I’m making some tasty ground chicken burgers for these to accompany.
Sure you could sub out the whole wheat. You might want to reduce the milk in this recipe, perhaps 5%, to compensate for the lack of whole grains (which tend to be more “thirsty”).
Hi! Thank you so much for all these amazing recipies. I was wondering if I opted to bake in my dutch oven in batches (I have yet to try the home steaming method), would the cook time be the same? Remove the lid after the first 10 mins perhaps? Thanks again!
You might not end up with the same shiny crust without the egg wash, but worth a try 🙂
Thank you for your wonderful recipes and giving me the confidence to try some new things out! I was wondering if using whole milk was necessary, or if I could replace it with a non-dairy milk substitute. Thank you!
Others have used full fat oat milk with success!
Hi Maurizio,
I’ve just pulled these out of the oven and while they do look and smell delicious, the majority of them have burst/split on the top.
Any idea what may have caused this? I’ve gone through the comments section trying to find an answer but with no luck!
Cheers
Did you steam at all, and/or heavily spritz the tops with water? It sounds like maybe the crust set too early, too long before the yeast died off and max rise was achieved. Since these aren’t scored there’s nowhere for a rise to go other than out the sides or right through the top crust, if the top dries out too fast.
same happened to me! havent steamed them at all. i never knew brioches need any steeming, never done that before with yeasted brioche so i figured it wouldnt make a difference to these either ):
Be sure the egg wash is spread uniformly over the top of the buns — there’s no real need to steam the oven. They might also split if the dough is under proofed, be sure they’re very very soft to the touch.
i had same issue with my buns! almost all of them split, and not just on top but some on the sides or near the bottom where they met the tray. When i was measuring eggs i was at 165 grams with three eggs and then 215 grams for 4 eggs. wondering if i should have stopped at the three eggs and been a few grams short?
Hey, Elle! I usually use one of the cracked shells to scoop out some of the egg white to reduce the liquid down to the desired weight. It’s best to keep the yolk (color, flavor) vs. the white (protein, water). If they burst, it’s likely they needed a bit more time to proof!
Hi Maurizio!
I hope you are well and staying healthy!
I tried this recipe this evening, but the burger buns didn’t rise well. They tasted really good, but didn’t have any poof. I’m jealous of Jessica’s success 😉
I wonder if it may be that my starter has changed a bit. I finally found rye flour and started feeding my starter with it on Saturday. I baked 2 loaves of the AP flour sourdough Sunday, and used most of my starter, then fed it after using and fed it yesterday. It’s doing everything it should but I used almost all that remained for this recipe. Could the small amount of starter and new flour have caused the problem? I wonder if I should have waited until my starter volume increased a bit. it’s very bubbly and active, but there just wasn’t a whole lot of it…
Any input would be appreciated!
Hey! New flour should be fine, but you do need a strong starter when making these. Make sure to use it when it’s at its peak height and nice and ripe — that strong fermentation is key to get this dough moving. Additionally, it is a slightly slow dough, so give it the extra time it needs in bulk fermentation (this is where I believe you might have cut it too short) and proof.
Great! Thanks so much for your reply. I appreciate it!
Maurizio!
I tried this recipe tonight and turned out beautifully. I halved the recipe and topped 3 buns with Everything Seasoning from Trader Joes. WOW! They proofed beautifully covered with a linen couche. I clipped the linen down to prevent extra air when entering. They baked so beautifully!
Thanks for reporting back, Jessica! Glad they turned out great, and I love that topping idea. Enjoy!
Good afternoon, Maurizio. Thanks for the great recipe. Could you also share the hamburger sauce recipe? It looks very appetizing.
Hi! Could this be adapted to make a challah loaf? I love this recipe but want to branch out 🙂
I’m not super familiar with challah loaf (yet!), but I have a feeling that yet, it could!
Does the one egg for the egg wash count towards 4 Eggs in the ingredient list?
No, that’s an additional egg.