


The wonderfully rich flavor profile of whole wheat sourdough bread ranges from sweet caramel notes to robust earthiness depending on the wheat variety used. But what I find even more important is the sense of satisfaction when eating this style of bread, both in terms of satiety and knowing you’re eating all of the nutrition a wheat berry has to offer.
Depending on the wheat variety you use, whole hard red wheat will give an upfront and personal flavor profile, whereas a white whole wheat loaf will be more subtle, thanks to the reduced tannins. Both kinds of wheat and other grain like spelt, Khorasan, and even durum are worthy additions to a loaf, as they serve different desires. My favorite, though, is to use hard red wheat, as I do in this recipe, to get all that robust and punchy wheat flavor.
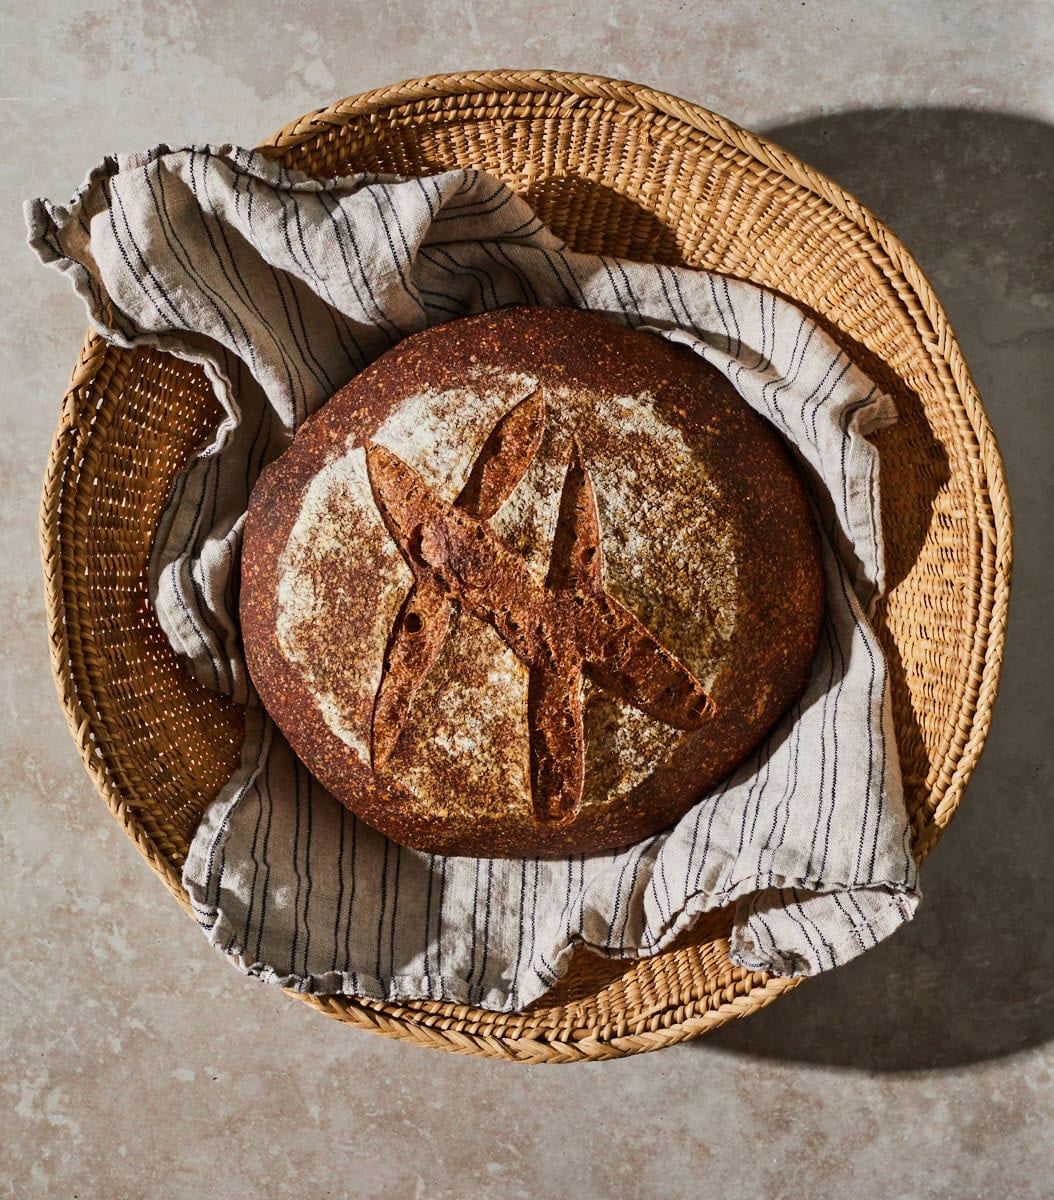
When it comes to whole-grain bread, it’s important to adjust our expectations of what exactly makes a successful loaf. Because whole wheat flour contains the entirety of the wheat berry, including much more of the nutritious bran and germ—and more fiber—the final loaf will be a little more squat than bread made with highly sifted white flour. But! While you’re trading ultra-tall loaves with an open crumb for a squatter loaf with a tighter interior, whole wheat sourdough bread is like a pirate’s ship hauling new bounty, laden with copious flavor and nutrition.
Still, if you want to eke out the highest rise and the most open whole wheat sourdough bread, I have an option with this bread to sift out the bran and germ, create a soaker from these bits, and then work them back into the dough during bulk fermentation. This sifting and scalding, as it’s sometimes called, helps you get more rise in a loaf by softening these nutritious bits by treating them like any seed soaker or other mix-in. This helps preserve a strong gluten network and open interior without forgoing nutrition or flavor.
Note: if you have my sourdough bread cookbook, you’ll find this recipe starting on page 219!
Flour Selection
I used Cairnspring Organic Whole Grain Expresso flour for this 100% whole wheat sourdough bread. This flour, made from hard red spring wheat, has a protein percentage of around 13.5 to 14.5%.
Note that compared to high-protein white flour, also known as whole wheat flour with a high protein content, is not “high-protein” in the same way we think about something like white bread flour. This is because whole wheat flour contains the entirety of the wheat berry, including the brand and germ, which are naturally high in protein. So while whole-grain flour is “high-protein,” it’s referred to as such because it is literally the entire grain, and not because it’s very strong white flour.
Due to the nature of whole wheat flour and the high level of nutrients available for your starter or levain, dough fermentation will be vigorous. Keep an eye on your dough during bulk fermentation, especially if it’s warm in your kitchen, and divide the dough when it looks ready (more on this later).
Can I Use Freshly-Milled Flour for This Whole Wheat Sourdough Bread?
Yes, freshly-milled whole-grain flour can be used for this sourdough bread recipe. Use your home grain mill to mill whole wheat berries into the finest flour possible. If available, I recommend using Yecora Rojo hard red wheat berries.
Be sure to follow my guide to freshly-milled flour at home for more tips on operating your mill for the highest quality flour and storing it after milling.
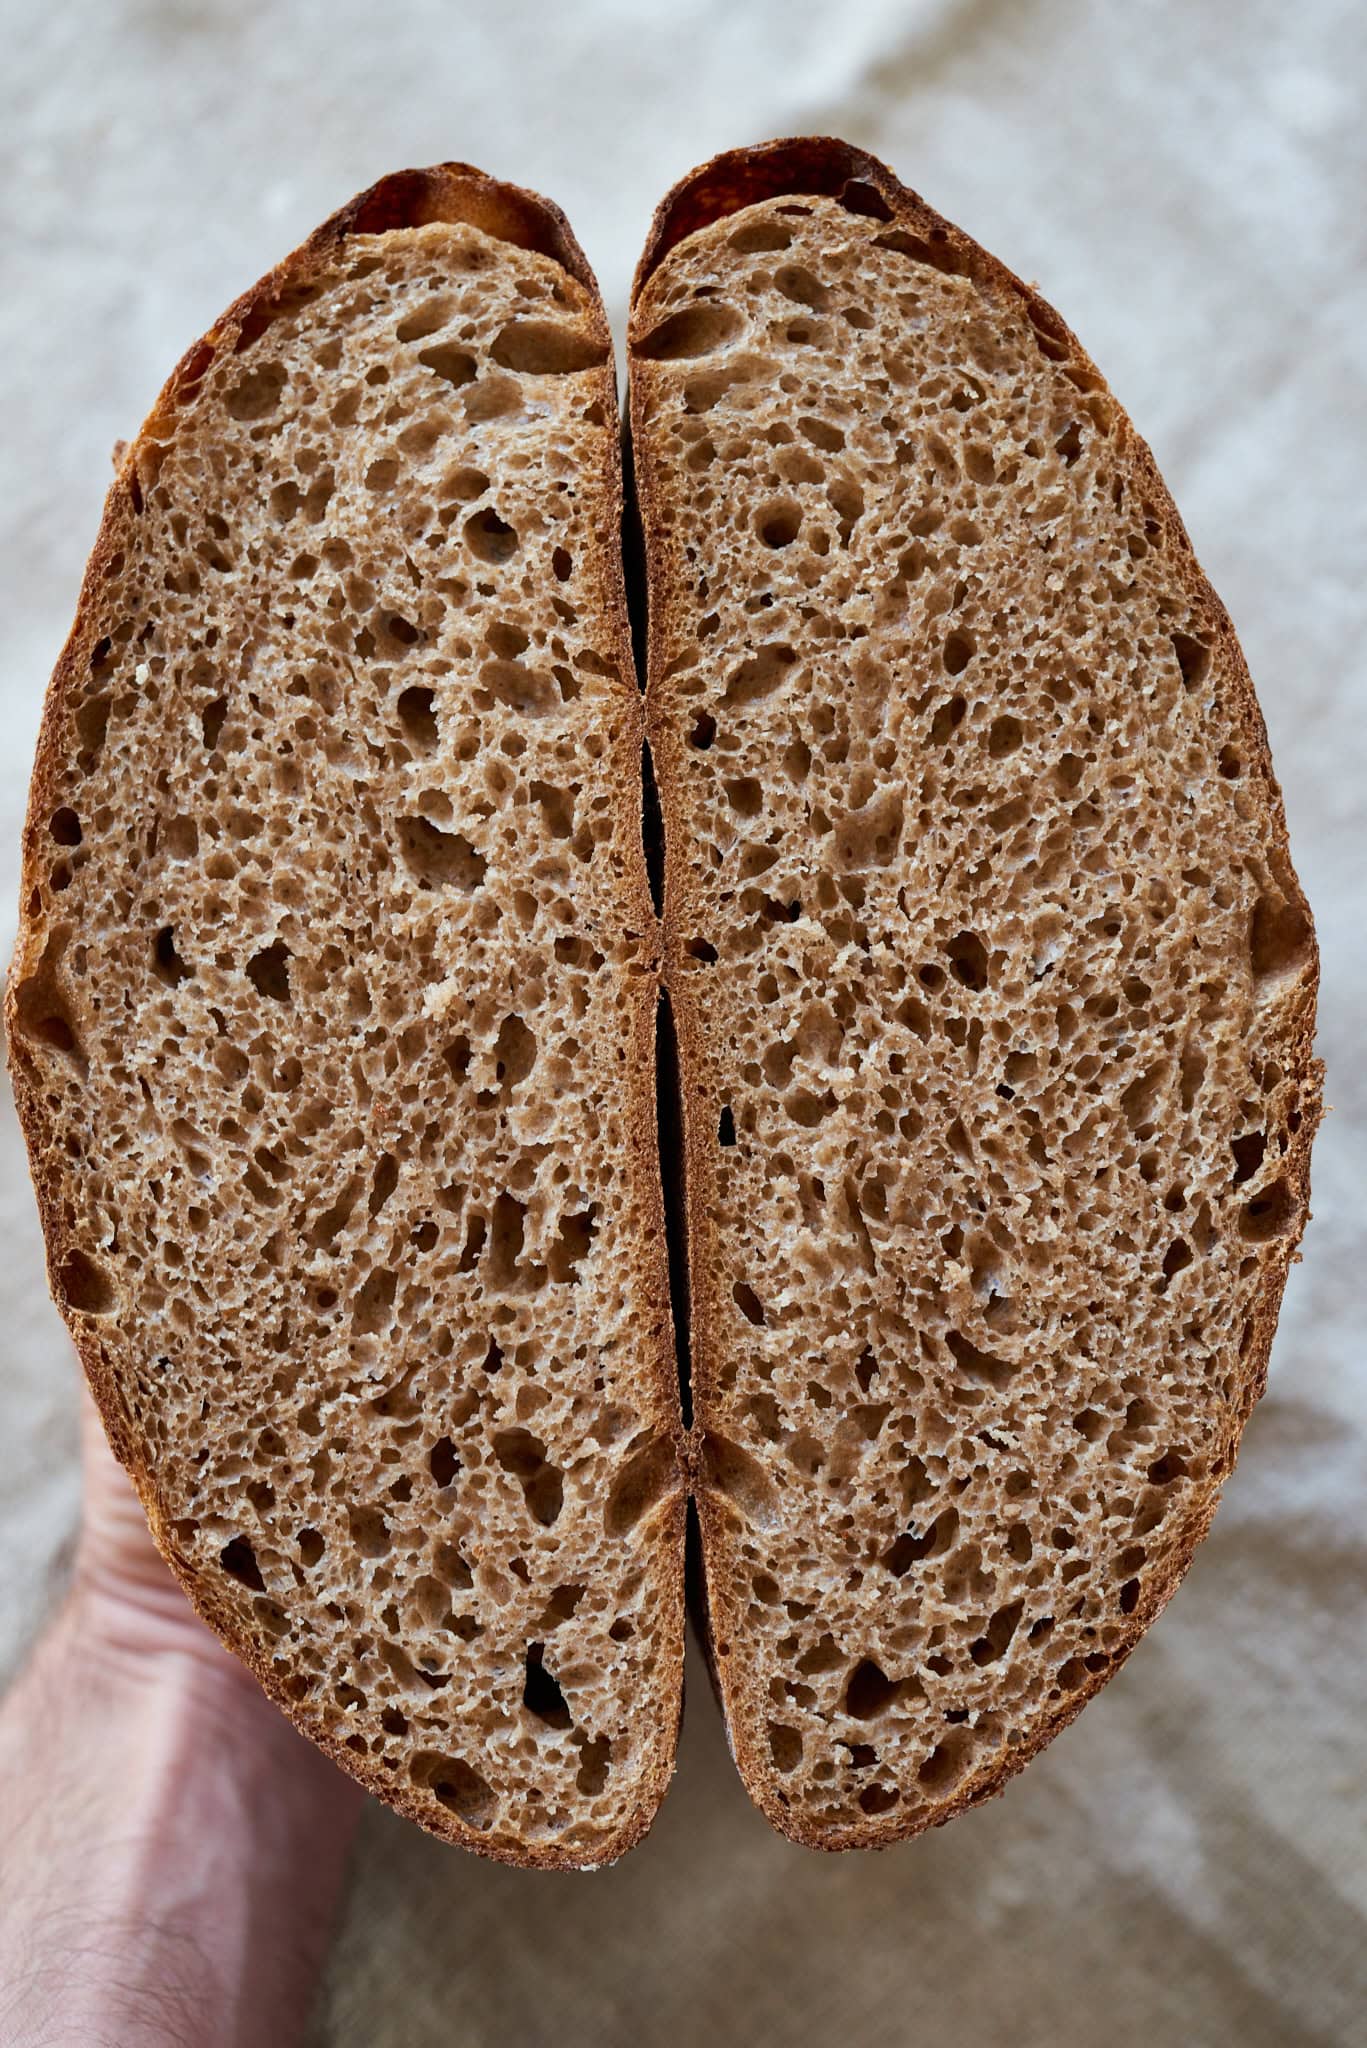
Why is Whole Wheat Bread Dense?
White flour primarily contains only the starchy and strong endosperm part of the wheat berry. When mixed into a dough, white flour produces an extensible and tight-knight viscoelastic dough that excels at trapping the gaseous byproducts of fermentation. With sourdough fermentation, and assuming all else equal, white dough is generally less acidic (higher in pH) when baked, leading to less gluten breakdown.
This means bread with potentially large interior holes, or an open crumb.
One challenge in baking bread with 100% whole-grain flour is that the resulting loaf will have less volume than a loaf made from all white flour (or a mix of white and whole wheat flour). Unlike white flour, whole-grain flour contains the entirety of the wheat berry, including the fibrous bran and germ. These nutritious bits can interfere with gluten development and, to a degree, reduce the volume and openness of a loaf.
But there’s a way around all that.
For Open Whole Wheat Bread, Sift and Scald Your Flour
To reduce the effect of the increased bran and germ in whole wheat flour, which can result in a tighter crumb, these larger bits can be sifted out of the flour, soaked in boiling water, and then reincorporated into the dough at the end of mixing or beginning of bulk fermentation. By performing this, we can soften these large particles and add them in after the dough has been strengthened when mixing (especially if you’re mixing in a mechanical mixer).
In essence, we’re transforming our whole wheat flour into whiter flour, then adding back in the bran and germ using a technique similar to that of porridge bread.
Another way to look at it is to think of the sift-and-scald technique as similar to how seeds, nuts, or other mix-ins might be incorporated gently into dough to reduce their impact on its structure.
Note that it’s a little easier to add the scalded mixture back into the dough at the very end of mixing instead of folding it back in during bulk fermentation—and it’s just fine to do this. (I personally add it back in bulk fermentation to reduce the impact on the dough structure as much as possible, but it does take some work to get it reincorporated.)
Sifting and Scalding Whole-Grain Flour: Step by Step
- Place a flour sifter or sifting screen over a large container or bowl
- Pour all of the whole wheat flour called for in the recipe on top of the screen
- Shake the container and screen to allow the fine bits (endosperm) fall through while the larger bits (bran and germ) are retained on top of the screen
- Remove the sifter and pour the retained bran and germ into a heatproof container or bowl and pour in boiling water to cover
- Let the mixture cool, then cover until ready to add it to dough at the end of mixing or in bulk fermentation
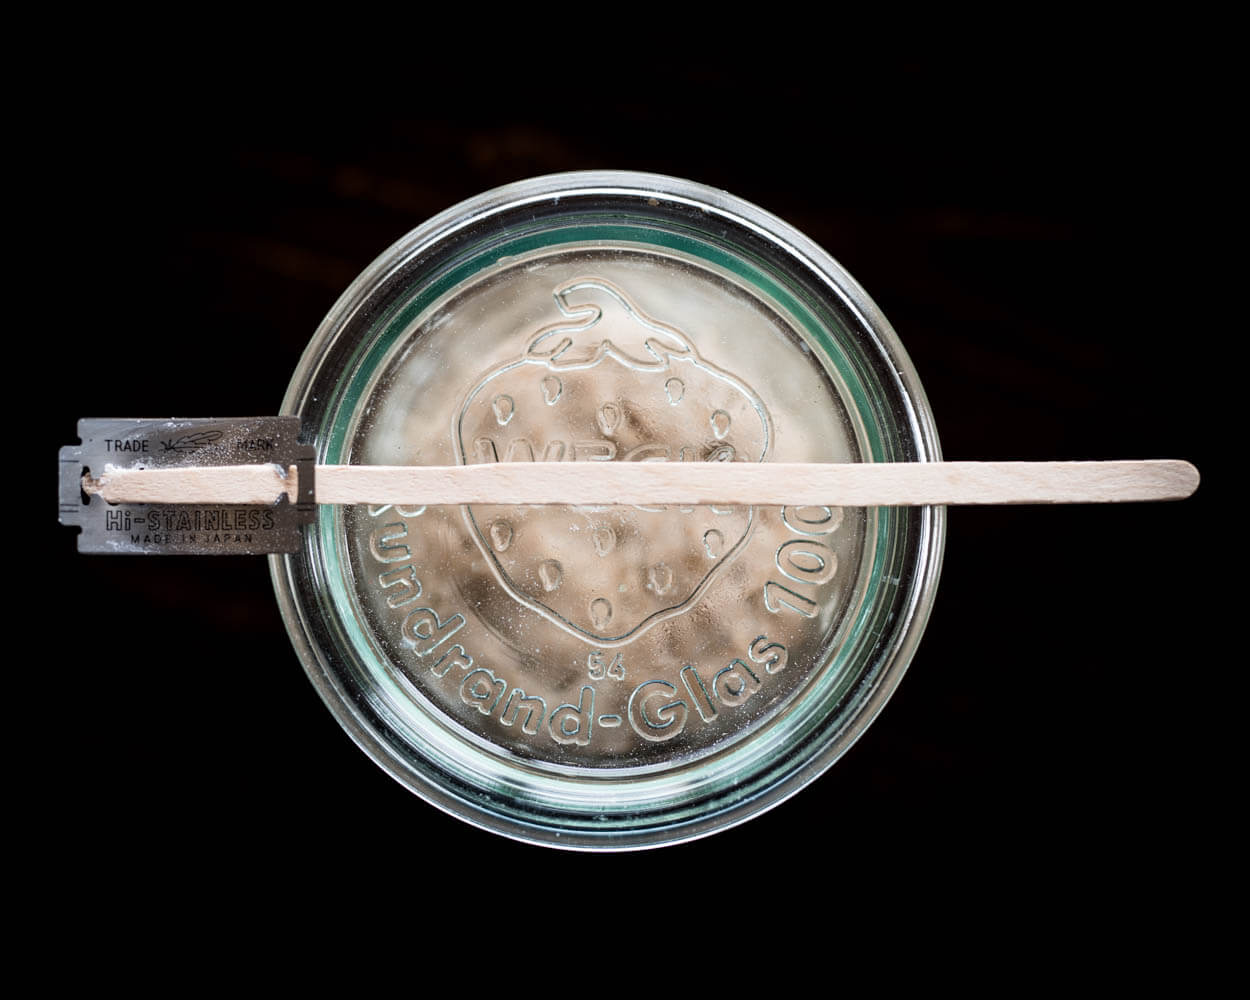
This is the sifting screen I use. After sifting my flour, about 13% remained on the screen. This means if I sifted 1000 grams total whole wheat flour, I’d have about 130 grams leftover to scalded. The final extraction heavily depends on the flour you’re using and how it was milled.
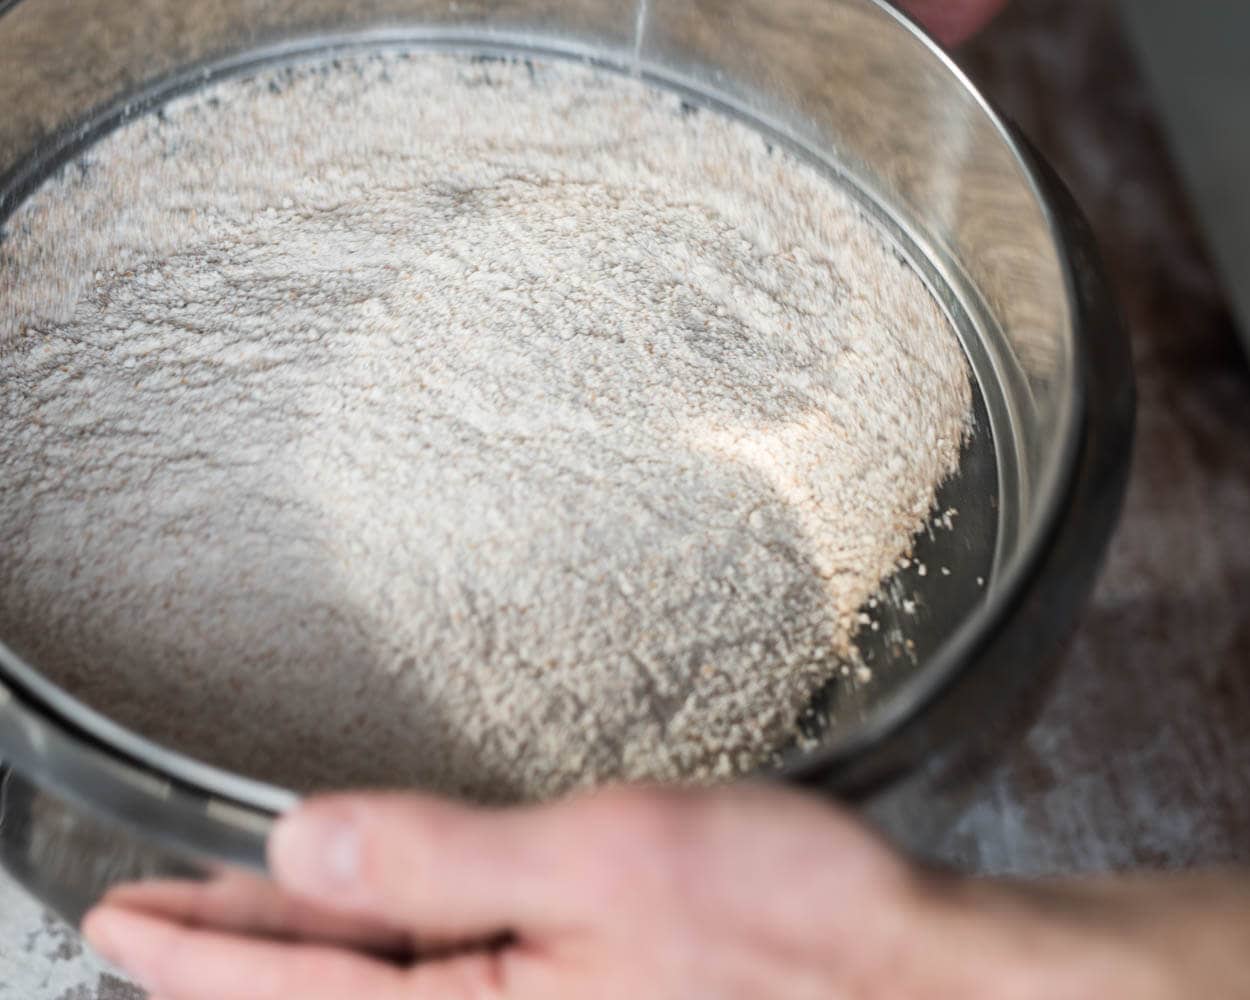
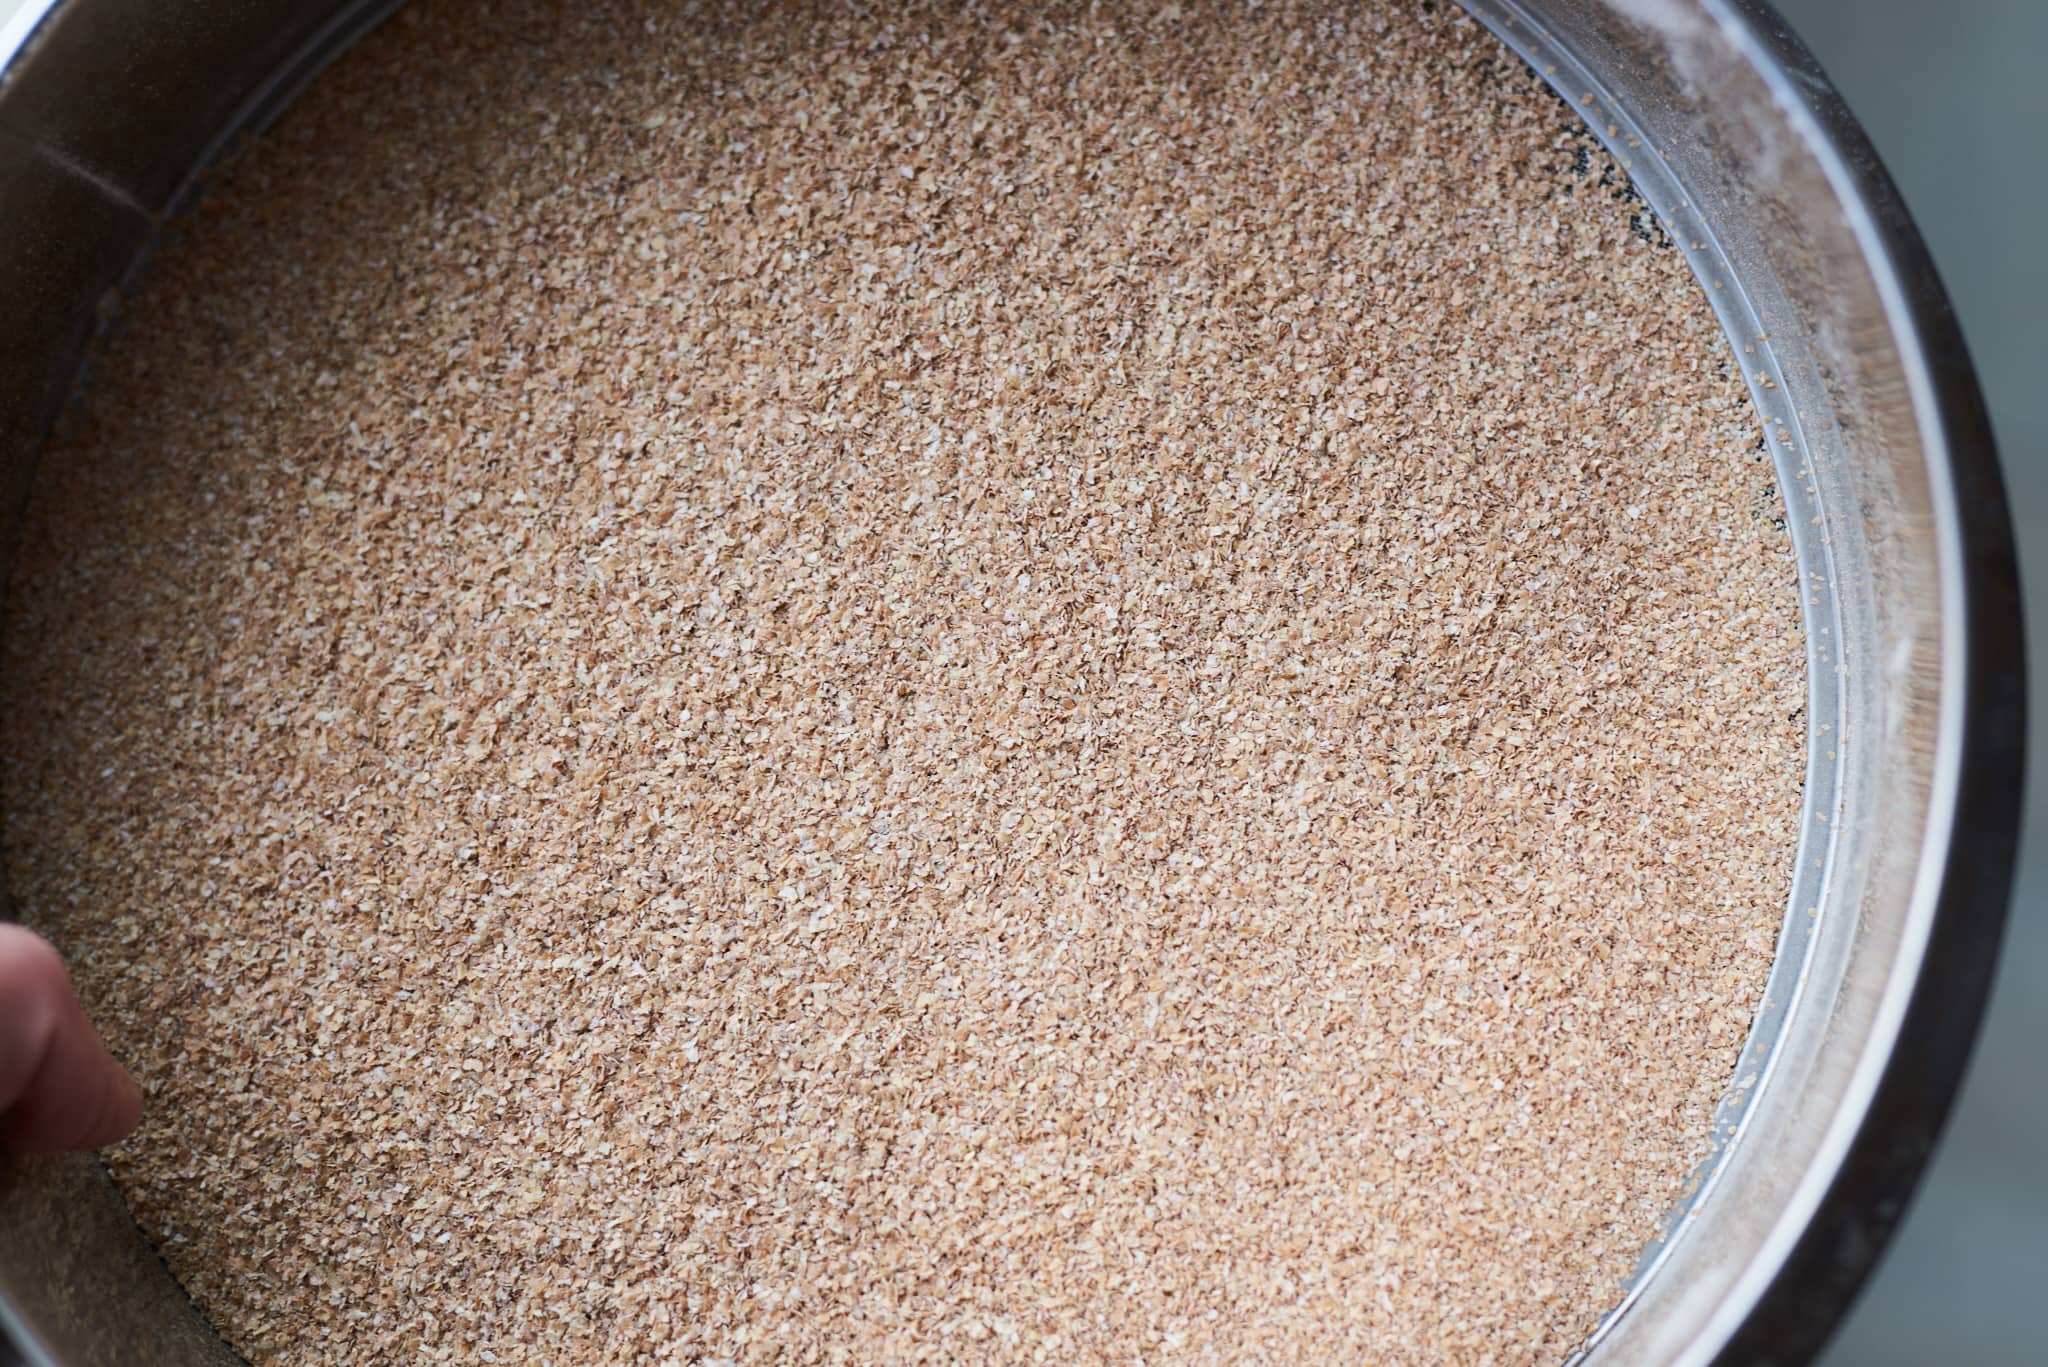
If your screen is more coarse or more fine, it’s okay, too. The extraction percentage here doesn’t have to be precise. Any amount sifted out will help lighten the loaf and it’s okay if more or less flour ends up in the dough.

Note that the amount of water used to scald the bran and germ should be accounted for in the recipe. In other words, I will take water from Water 1 or Water 2 (the water used in the recipe). This way, you’re not adding extra water to the dough, which may result in overhydration.
Baking Schedule
This whole wheat sourdough bread is made over two days for increased flavor and a convenient baking schedule. But it’s also possible to make it in a single day by allowing the dough to proof on the counter, shape it, and cover until it is puffy, relaxed, and passes the poke test (about 2 to 4 hours, temperature depending).
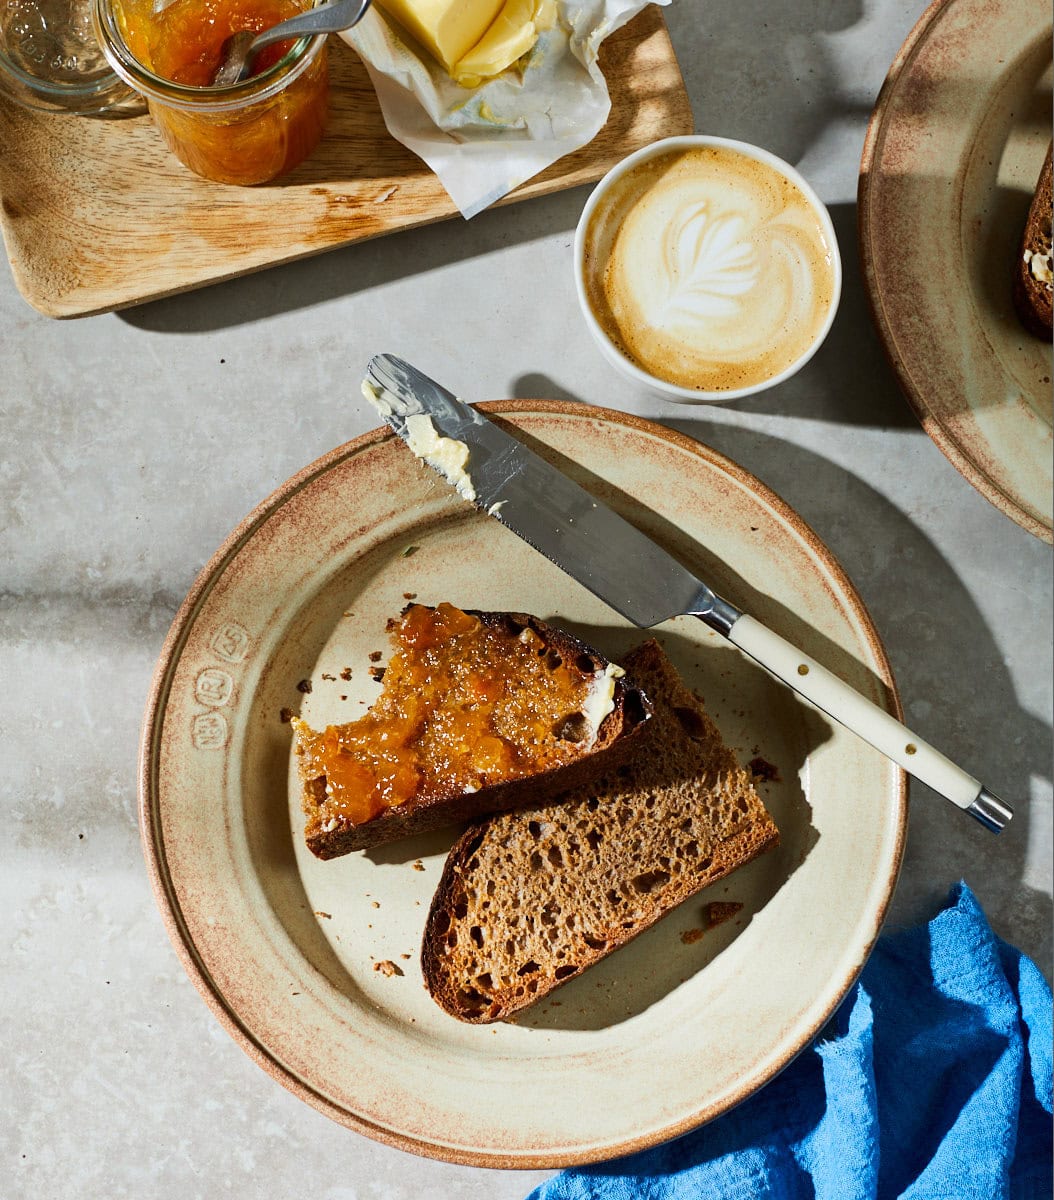
100% Whole Wheat Sourdough Bread Recipe
For tips on calculating baker’s percentages or modifying this formula (including baking only a single loaf), see my post on baker’s percentages (baker’s math).
Vitals
| Total dough weight | 1,800 grams |
| Prefermented flour | 7.0% |
| Levain in final dough | 15.1% |
| Hydration | 90.0% |
| Yield | Two 900g loaves |
Total Formula
Desired dough temperature: 75°F (23°C) (see my post on the importance of dough temperature).
| Weight | Ingredient | Baker’s Percentage |
|---|---|---|
| 921g | Whole wheat flour (Cairnspring Organic Whole Grain Expresso or Central Milling Hi-Pro Fine Whole Wheat) | 100.0% |
| 737g | Water 1 (levain, optional scald, and autolyse) | 80.0% |
| 92g | Water 2 (mix) | 10.0% |
| 18g | Fine sea salt | 1.9% |
| 32g | Ripe sourdough starter, 100% hydration | 3.5% |
Additional Ingredients
About 60g (½ cup) of raw wheat bran or, previously sifted bran and germ, for topping (optional)
100% Whole Wheat Sourdough Bread Method
1. Prepare the levain – 9:00 a.m.
| Weight | Ingredient | Baker’s Percentage |
|---|---|---|
| 64g | Whole wheat flour | 100.0% |
| 32g | Water 1 (levain) | 50.0% |
| 32g | Ripe sourdough starter, 100% hydration | 50.0% |
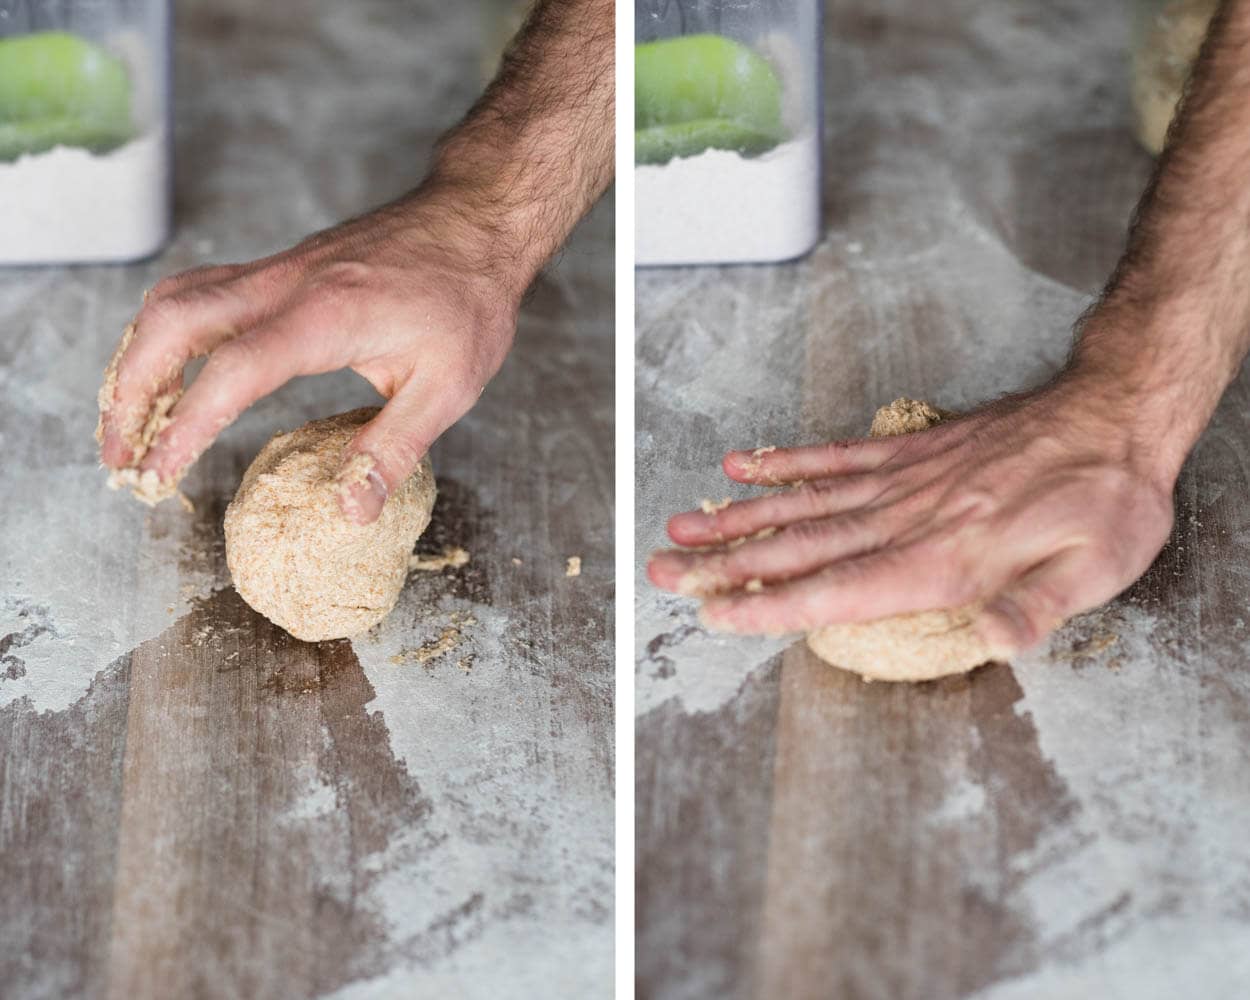
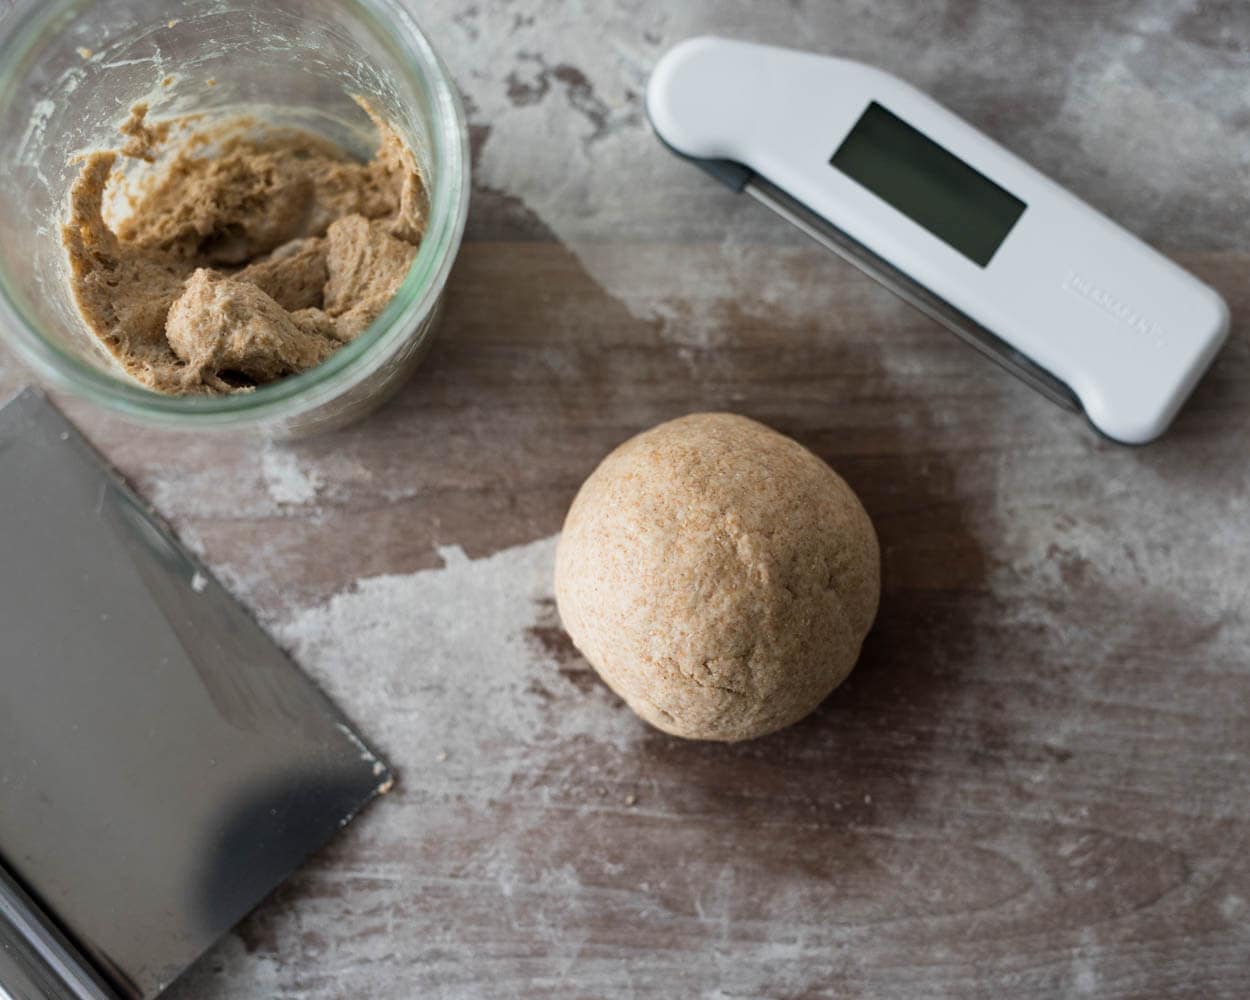
Mix the ingredients in the chart above in your favorite jar and leave them covered at a warm temperature, 74-76°F (23-24°C), to ripen for 5 hours. This is a stiff levain; if it is hard to knead the ingredients together, use more water as needed to make incorporation easier.
2. Optional: Sift and scald flour – 9:10 a.m.
Place your sifting screen over a large container. Pour some whole wheat flour and sift it by shaking the stack. When no more flour falls through, continue until you’ve processed all the flour.
Place the sifted-out bran and germ in a heatproof bowl and pour 200 grams of boiling water on top to cover. Let this soaking mixture rest near your levain until we are ready to mix the dough.
See earlier in this post, here, for more details on sifting and scalding.
3. Autolyse – 1:00 p.m.
| Weight | Ingredient |
|---|---|
| 857g | Whole wheat flour (minus any sifted) |
| 705g (or 505g if sifting and scalding, which will absorb all 200g of water) | Water 1 (autolyse) |
I use the autolyse technique for this recipe to help reduce the total mixing time required, but I also find it helps aid in the dough’s extensibility.
Warm or cool the autolyse water so that the temperature of the mixed dough meets the final dough temperature (FDT) of 75°F (23°C) for this recipe. Place the flour and water 1 (autolyse) in a large bowl. Use wet hands to mix until no dry bits remain; the dough will be shaggy and loose. Use a bowl scraper to scrape down the sides of the bowl to keep all the dough in one area at the bottom. Cover the bowl and place it near your levain for 30 minutes.
4. Mix – 2:00 p.m.
| Weight | Ingredient |
|---|---|
| 92g | Water 2 (mix) |
| 18g | Fine sea salt |
| 128g | Ripe levain (from Step 1) |
This highly hydrated whole wheat dough benefits from extra strengthening during mixing. Below, I’ll discuss mixing this dough by hand, but it’s also possible to use a mechanical dough mixer. In this case, mix the dough until it smooths and holds itself together, about 5 to 6 minutes on speed 2 in total.
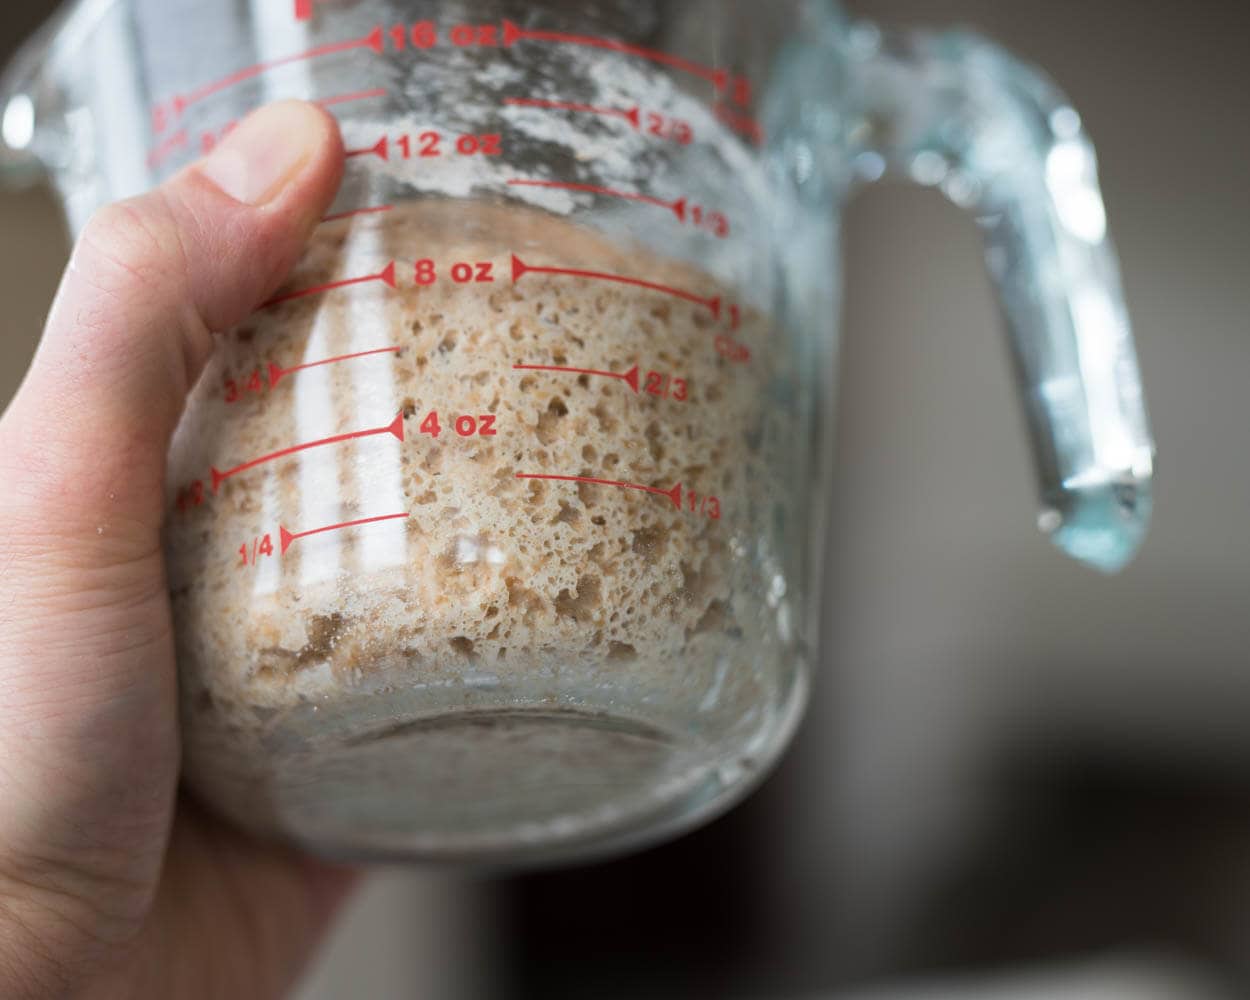
To mix by hand, add the salt and break the stiff levain apart, and spread on top of the dough in autolyse. Use a splash of water 2 to moisten. With wet hands, mix thoroughly. Use wet hands or a dough whisk to help make mixing easier.
Next, knead the dough for a few minutes using either the slap and fold technique or folds in the bowl. For this dough, I kneaded for about 5 minutes until the dough smoothed and became elastic. Transfer the dough back into the bowl, cover, and let rest for 10 minutes.
If the dough feels very wet and soupy, don’t add any remaining water. If it seems cohesive, add the remaining water 2, mixing it in until absorbed. Once again, scrape the dough out to the counter and use wet hands to slap and fold the dough for 3-5 minutes, making it smoother and more cohesive.
Transfer the dough to a bulk fermentation container and cover.
5. Bulk Fermentation – 2:30 p.m. to 5:30 p.m. (3 hours)
At a warm room temperature, 74-76°F (23-24°C), bulk fermentation should take about 3 hours and need 4 sets of stretches and folds at 30-minute intervals.

Before you give your dough its first set of stretches and folds, spread about 1/4 of the scald over the top of the dough (if you decided to do this optional step). Then, grab one side of the dough and stretch it up and over the dough to the other side. Spread on another 1/4 of the scald to the new top. Rotate the bowl 180° and perform another stretch and fold. Spread on another 1/4 of the scald, then rotate the bowl 90° and do another stretch and fold. Finally, spread on the last of the scald, turn the bowl 180° and do one last stretch and fold.
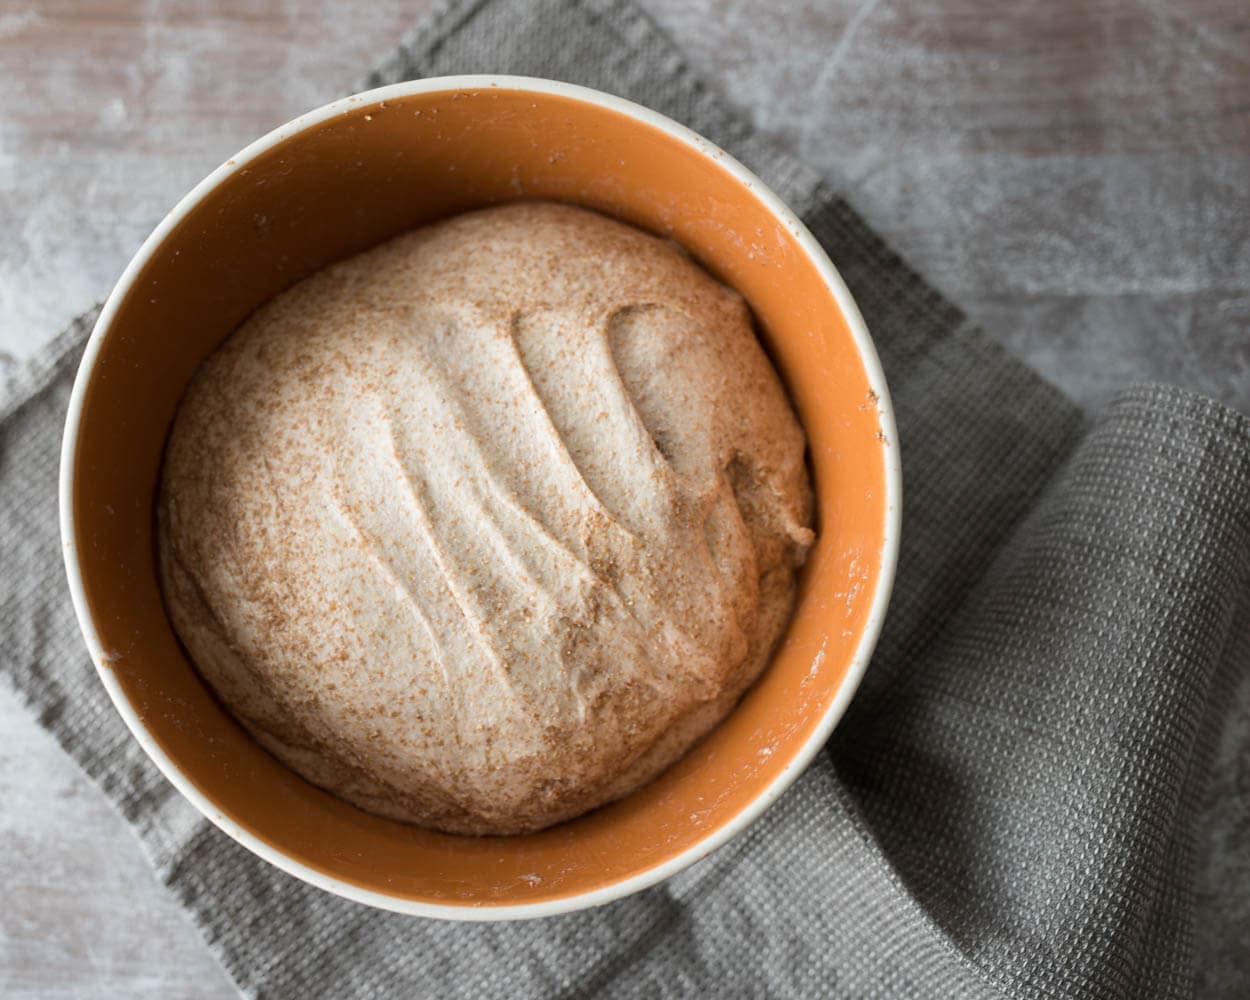
It’s okay if the scald streaks through the dough at this point, there will be more stretching and folding to help it incorporate more thoroughly.
Perform 3 more sets of stretches and folds at 30-minute intervals. After the fourth set, let the dough rest, covered, for the remainder of bulk fermentation.
6. Divide and Preshape – 5:30 p.m.
After 3 hours, the dough should be risen and puffy in the bulk fermentation container. Because of the high percentage of freshly milled flour and whole grains, the dough may not rise as high as a recipe with more white flour. It will be ready to divide when the top of the dough is smooth, bubbly, and the edge where the dough meets the container is slightly domed downward.
Fill a small bowl with water and place it next to your work surface. Scrape the dough onto a clean work surface and divide it into two equal pieces. With one wet hand and a bench knife in the other, preshape the pieces of dough into loose rounds.
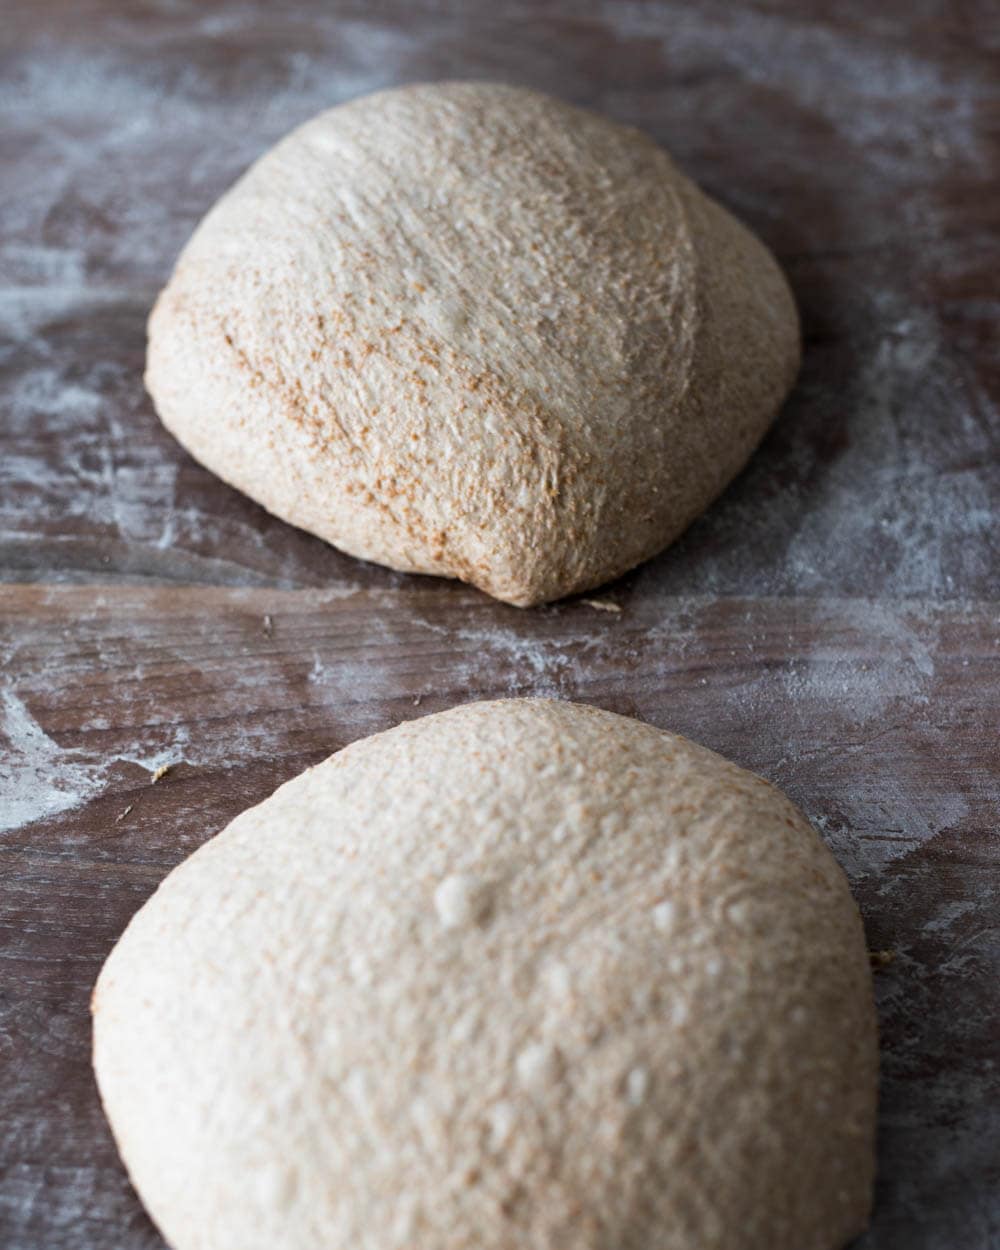
Let the dough rest, uncovered, for 30 minutes.
7. Shape – 6:00 p.m.
Place a baking sheet or clean kitchen towel next to your work surface and, if using, spread an even layer of raw wheat bran or germ on top, if using.
Flour the top of the preshaped round and your work surface. Using your bench knife, flip one of the rounds over onto the floured area. Using floured hands, shape the dough into a bâtard or a boule. Transfer the shaped dough, seam-side up, to the baking sheet with germ, if using, and rock it back and forth so the germ sticks. See my guide to topping bread dough for more help on topping bread dough.
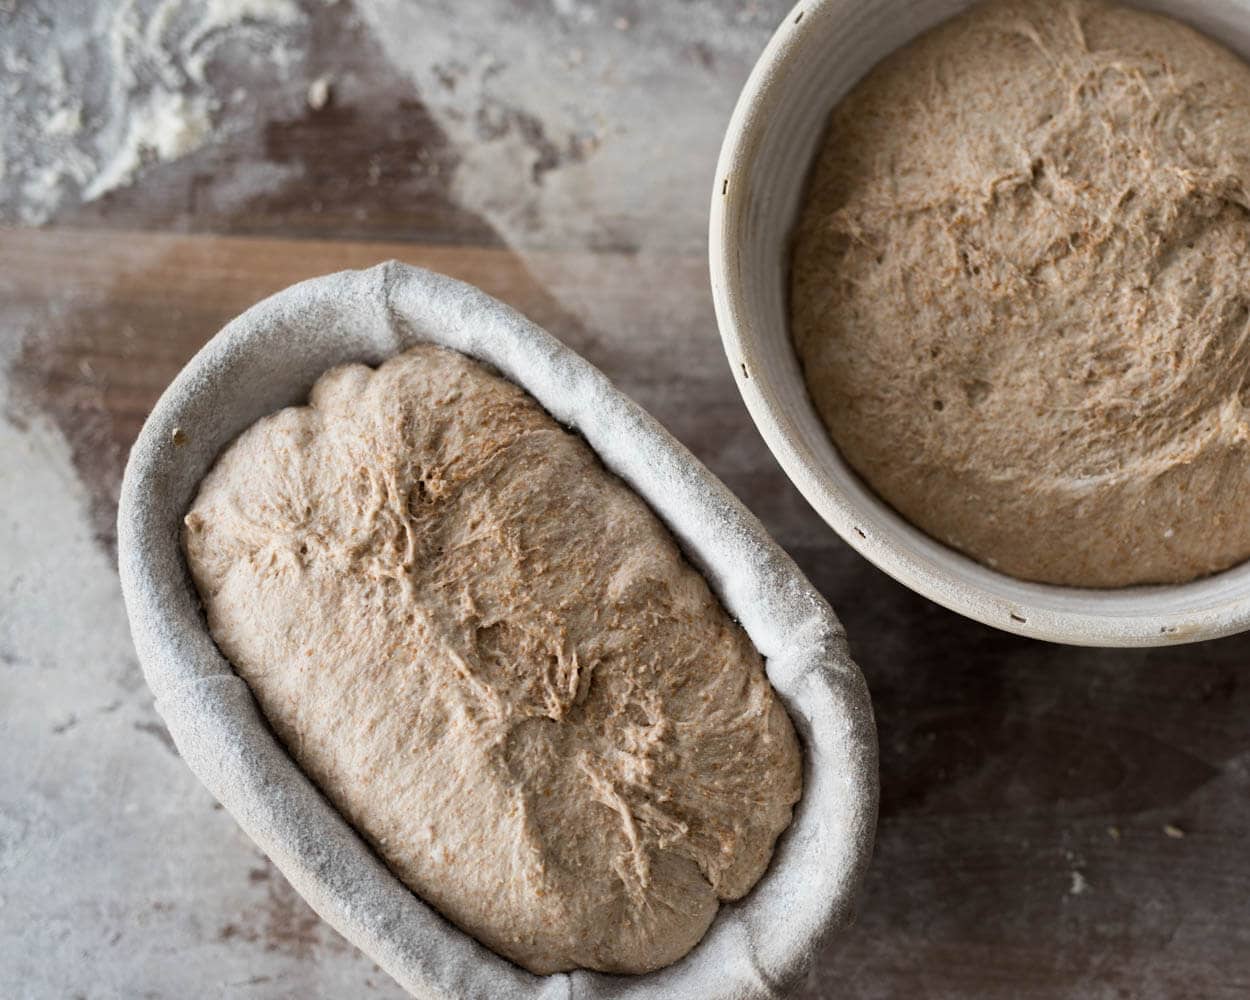
Gently transfer the dough to an 11-inch long proofing basket, seam-side up. Repeat with the remaining round.
8. Proof – 6:30 p.m. to 9:00 a.m.
Cover the baskets with a large, reusable plastic bag and seal shut. Place the baskets in the refrigerator to proof overnight.
9. Bake – 9:00 a.m.
Due to the oval shape of these loaves, you can bake them in a Challenger baking pan as I’ve done here or directly on a baking surface, steaming your oven.
Place an oven rack with an oval Dutch oven in the bottom-third of the oven. Preheat the oven to 450°F (230°C) for 30 minutes.
Take one of the proofing baskets out of the fridge, uncover it, and put a piece of parchment paper over the basket. Place a pizza peel or inverted baking sheet on top of the parchment, and using both hands, flip everything over. Gently remove the basket and score the dough.
Remove the bottom of the preheated Dutch oven and slide the dough into the pan. Return the pan to the oven and cover with the lid. Bake for 20 minutes. Vent the pan of steam by uncovering the pan (remove the lid from the oven or place it on the rack next to the bottom of the Dutch oven). Continue to bake for 35 minutes more. When done, the loaf should have an internal temperature of around 204°F (95°C), and the crust should be deeply colored.
Carefully remove the loaf from the Dutch oven to cool on a wire rack. Return the Dutch oven lid and bottom to the oven to preheat for 15 minutes. Repeat with the remaining dough in the refrigerator.
Let the loaves cool on a wire rack for at least 2 hours, preferably 3, before slicing.


100% Whole Wheat Sourdough Bread
- Prep Time: 24 hours
- Cook Time: 1 hour 15 minutes
- Total Time: 25 hours 15 minutes
- Yield: 2 loaves
- Category: Bread
- Cuisine: American
Description
Sourdough bread made with 100% whole-grain wheat flour. With a robust and Earthy flavor, this is nourishing and wholesome bread.
Ingredients
Levain
- 64g whole wheat flour
- 32g water
- 32g ripe sourdough starter
Autolyse
- 857g whole wheat flour (minus any sifted)
- 705g water (or 505g if sifting and scalding)
Main Dough
- 92g water
- 18g fine sea salt
- 128g ripe levain
Instructions
- Levain (9:00 a.m.)
In a small container, mix and knead the levain ingredients and keep at 74-76°F (23-24°C) for 5 hours. - Optional Sift and Scald (9:10 a.m.)
Place your sifting screen over a large container. Pour some whole wheat flour and sift it by shaking the stack. When no more flour falls through, continue until you’ve processed all the flour. Place the sifted-out bran and germ in a heatproof bowl and pour 200 grams of boiling water on top to cover. Let this soaking mixture rest near your levain until we are ready to mix the dough. - Autolyse (1:00 p.m)
In a medium mixing bowl, mix the Autolyse ingredients, cover and let rest for 1 hour. - Mix (2:00 p.m.)
To the mixing bowl holding your dough, add the Main Dough ingredients: salt, ripe levain (from step 1), and water. Mix by hand or with a dough whisk and strengthen the dough for 5 minutes until it becomes smoother and slightly elastic. Transfer to a bulk fermentation container and cover. - Bulk Fermentation (2:30 p.m. to 5:30 p.m.)
Give the dough 4 sets of stretch and folds at 30-minute intervals, where the first set starts 30 minutes after the start of bulk fermentation. - Divide and Preshape (5:30 p.m.)
Lightly flour your work surface and scrape out your dough. Using your bench knife, divide the dough in half. Lightly shape each half into a round shape. Let the dough rest for 30 minutes, uncovered. - Shape (6:00 p.m.)
Shape the dough into a round (boule) or oval (batard)—place in proofing baskets. - Proof (6:30 p.m. to 9:00 a.m. the next day)
Cover proofing baskets with reusable plastic and seal shut. Then, place both baskets into the refrigerator and proof overnight. - Bake (Preheat oven at 8:00 a.m., bake at 9:00 a.m.)
Preheat your oven with a combo cooker or Dutch oven inside to 450°F (230°C). When the oven is preheated, remove your dough from the fridge, score it, and transfer to the preheated combo cooker. Place the cooker in the oven, cover with the lid, and bake for 20 minutes. After this time, remove the lid (you can keep it in the oven or remove it) and continue to bake for 30 minutes longer. When done, the internal temperature should be around 208°F (97°C). Let the loaves cool for 2 hours on a wire rack before slicing.
100% Whole Wheat Sourdough Bread FAQs
Why is my whole wheat bread gummy inside?
This can be from underproofing, overproofing, or underbaking. Be sure you use your sourdough starter when it’s ripe to make the levain, and ensure the levain is ripe when mixing it into your dough. To spot overproofing, look for a lack of rise in the oven and a dense interior with lots of little holes. Be sure to fully bake your dough until the interior temperature reaches around 204°F (95°C) and let it fully cool before slicing.
What gauge is your sifting screen?
My sifting screen is #20, but any gauge will work as long as it’s not too fine so that nothing falls through, or too large where everything falls through. You’re looking for around 10 to 20% extraction (meaning, for every 1000g you sift, 100 to 200g will be left over).
Can I make the sifted and scalded mixture ahead of time?
Yes. I would sift the flour, scald with boiling water, let it cool, then cover and keep it in the fridge for up to 3 days. The morning you want to add it to bread dough, let it come to room temperature so it doesn’t adversely cool the dough.
Can I add the scald back into the dough during mixing instead of bulk fermentation?
Yes. It’s easier to add the scalded bran and germ back in at the very end of mixing and if you prefer this, by all means, go for it.
What’s Next?
This 100% whole wheat sourdough bread is the purest example of healthy sourdough bread. If you’re looking for a loaf that’s just as flavorful but lighter in texture, my Fifty-Fifty Sourdough Bread is the ticket.
Buon appetito!


261 Comments
Hi Maurizio.
This bread is currently my Everest. It is my nightmare. It curdles my milk and stomps on my roses. I DESPISE it. My miller is currently working exclusively with a red wheat and I haven’t been able to get this loaf to work. I used to get tall, shapely loaves when they had white wheat, your process was wonderful. But now? An hour into fermentation, no mater my dough’s temperature, the dough is grotesquely viscous, all signs of the strength built up through autolysis and stretching it are gone. And that’s before I add in the sifted bran! I’ve tried everything: room temperature water, near boiling water during autolyse, cold water. My starter is always at its peak, nice and strong when I start. All signs point to a good bake but things just fall apart after an hour. I’ve yet to manage getting this monster out of its tub in a single piece after bulk fermentation, about a third of it sticks to the bottom, no matter how long I wait. I’ve tried reducing the water in 50g increments but I don’t want to end up with a tight crumb and a dry loaf.
Is there any hope for me at all? The dough is so sticky after the first hour of fermentation that it feels like I’m working with a 100% rye mix (I’m not, I triple checked – 100% whole wheat goodness). I’d even consider just dumping the dough into pans and working through my supply this way but I don’t wanna give up quite yet.
Save me from these cursed hockey pucks I’ve been baking, I beg of you.
Hey, Jeremy! Yikes, sounds dismal 🙂 It almost sounds to me like the flour might be an issue here, especially if you’ve tried adjusting things and haven’t had an improvement. Granted, a 100% whole wheat loaf can be a challenge, but it’s rare I see a super flat pancake even if I have things very wrong.
It’s possible, and something I’ve run into in the past, where a flour has such high enzymatic activity (amylase in this case) the dough almost falls apart and becomes very sticky by the end of bulk fermentation. Typically this results from a flour that has a very low falling number (and your miller can tell you if this is the case). When I’ve seen this in the past, my loaves always end up coming out of the oven as a flat disc.
If you’re game to try another attempt, I’d say don’t sift out the bran and skip any autolyse (which will only make enzymatic activity carry on for longer). Shoot for a low final dough temp of 73-75F. To add to this test, if you have another bag of ww from a different source, you could mix this up with exactly the same conditions and do a side-by-side bake. See how that dough gets on through mixing/bulk/proof as a sort of control. A standard source like King Arthur or Bob’s whole wheat will work well for something like this.
To be clear: I’m not trying to place blame here on your miller, their flour might be totally fine, but things like this have happened to me in the past! If you give this a go, please let me know how it goes and I hope this helps. I know baking time after time and getting pancakes is frustrating!
What altitude do you live at? I’m having similar issues and timing bulk fermentation has been really hard at 7000 ft. The WW tends to have a faster enzymatic activity and the altitude has less air pressure for the dough to fight against. I am using a mixture of home ground white and red wheats (Organic from Central Milling), some Spelt and sometimes Einkorn. I typically am using about 85+ hydration. I’m getting a pretty good rise, crumb, and taste most of the time, but have more fails than at sea level. I have to be vigilant when in the mountains about every step. Just curious if altitude is playing a part here.
I live at about 5280 ft, and yes, it can be challenging higher up! Check out my guide to baking sourdough bread at high altitude for some tips and more info.
Some Wholemeal can be like that. Get the autolyse down to 30 mins and don’t do anything fancy kneading wise. I find these weaker Wholemeal flours taste much better but require a delicate touch. And maybe a bit less water. Provided the starter is optimal
Hello!! I need to buy some wheat berries from my local grocer for this recipe. Should I get red or white hard winter or spring wheat? (I’m new to buying high quality flour and struggle with the differences). I want to incorproate as much whole wheat flour into my recipes. So it would be nice to have wheat berries that work ground for whole wheat and then ground and sifted as my generic go-to for bread flour. Thanks!!
For this style of bread I like hard red winter wheat. That’s not the only variety you could use, though! But, I’d start there.
Hi Maurizio,
Thanks so much for this wonderful blog! I’ve made two batches from your whole wheat sourdough recipe now, and turned one boule from the second batch into whole wheat pizza dough.
The pizza crust was beyond my dreams. Thank you, thank you, thank you! I modified the whole wheat recipe only slightly, (grinding the sifted-out bran finely in a Vitamix blender before soaking it,) and used your pizza directions after the overnight refrigerated retard. After forming my two boules, I put one in an oiled bowl instead of a bannetton, and after refrigerating it overnight, I divided it and formed 3 tight pizza dough balls in the morning. I refrigerated these until evening, and formed, topped and baked 3 pizzas.) I got a terrific, puffy, crust rim with large bubbles inside, similar to your pizza photos, but maybe a little less airy. Delicious. While I understand your preference for traditional white flour dough, I think any one who wants to make 100% whole wheat pizza shouldn’t hesitate.
My Boules, on the other hand are coming out a little sticky inside. They look like your photos, which is is to say truly amazing, and they taste great, but, when I slice them open (24 hours after baking,) the knife takes on a thin gummy residue. The crust is also quite hard. The first time i made two boules, and I added all of the water in the recipe. In my second batch, I left out the last 50 gm (other than a few grams of it that I used for wetting my hands as I worked the dough.) The first two boules I made, were baked to an internal 210 F and baked exactly as specified in the recipe. The last boule, was at 211 F at the end of the normal baking time but I left it in the oven for an extra 5 minutes. When I took it out, the internal temperature was still 211 F. I’m trying to decide whether to reduce the amount of water further, or to increase the baking time. Any advice on which would be more likely to reduce the stickiness?
Hi Maurizio,
I have used your recipes a lot and follow the new ones when you publish them. Great work, very tasty baked goods and very good detailed descriptions. I had some french t150 whole wheat laying around and decided to try this method with sifting. I am very impressed with the method and I have never had a taller and more airy wholewheat loaf as this one. Normally if I try hydration close to or more than 80% things get really messy and sticky. I am not skilled enough yet to handle these it seems. But with this super high hydration of about 95% I didn’t have any problems handling the dough at all. This will be my go to recipe for healthy whole wheat breads. Thanks a lot!!
Super glad to hear that this technique worked so well for you!
Hey Maurizio! I’ve used the bran sift-out technique for a while now but I always end up tearing the dough and keep having large bran pockets inside. How would you explain your way of folding in the bran while staying gentle on the dough? I’ve read an earlier comment you made saying you lay the bran as a layer on top and ‘massage’ it inside with some extra water, and later break up the remaining large bits. What I wonder is how to you break them up without pinching through the dough, which for me results in tearing it, and how do you massage it in without tearing or over-handling the dough altogether? I’ve really tried different approaches but always end up with tearing and with the dough getting stiff before I can continue. Thanks for your insights!
Same here! I tried reincorporating the hydrated bran previously sifted out, but, even though I tried to be as gentle as possible, it totally ruined the dough :'(
That’s how I do it! With damp hands, I spread it out in a thin layer on top and tuck some down the sides of the dough in the container. Then, I do my stretch and folds and that folding action helps disperse the bran/germ throughout the dough. If I find any clumps or pockets, I’ll pinch them to help them spread out. If you have a hard time, you can hold back some of the water from the mix and use a little at a time to get that bran to incorporate back into the dough.
Hi! When do you add the last 25g of water? I saw that you add the 700g for the autolyse, then 25g when you put the bran in, what about the last bit, or did you not need it? Maybe I missed it!
He warms it up and uses it to dissolve the stiff ww levain and mix it into the dough that was autolysed.
I used it to incorporate the levain!
Hi! I’m wondering what the combination of high protein flour and high hydration does for oven spring? I noticed yours wasn’t quite as sprung as I’ve seen the lower hydration doughs. Mine didn’t come out too high either.
Hello! I am wondering if I could use this 100% Whole Wheat recipe and mix in raisins, nuts and cinnamon – or savory items – such as in your cinnamon raisin loaf or in your cranberry walnut loaf. In normal times, I would just go get the flours you recommend in your other recipes, and follow them. But in CoronavirusTimes, I can’t find those things. I have a 50# bag of Central Milling’s Organic Whole Wheat Hi-Pro Fine, and I need to base my recipes off of that. So, would mix-ins work if added during the second turn? Is this a terrible idea? I could just go experiment, but honestly, my experiments are generally failures, and I figured you might have insights! Thanks again for your excellent site, by the way.
Hi Maurizio, I’ve been following your work and making your recipes for the last 2.5 years. I have been meaning to write you and now finally have a reason. What amount of leavin do you put into this bread? I couldn’t find it on the page so I used the entirety of the recipe. I had super active dough, but unfortunately, flat loaves. Did using too much levain make my loaves flat? They grew by about a third in the fridge, which is pretty uncommon for me.
Anyway thanks for all the work you put into crafting your recipes and this website! Baking bread has become an integral part of my life and I mostly attribute it to your site.
Hey, Webster! Somehow this comment didn’t pop, sorry for the late reply. Yes, it sounds like you had over proofed dough there. I added in the entire levain made in the steps above. If you’re finding your dough is proofing too fast you could reduce this levain percentage added into the dough or try to keep your dough on the cooler side.
Super happy to hear my site has helped! There’s nothing quite like making fresh bread at home 🙂
This recipe is the best thing to ever happen to me and my sourdough! My dad (a store-bought loaf lover) gets so excited about me making bread now that he cuts into it before it’s even cooled! I got the most open crumb I have ever seen in my whole wheat bread, it even looks like your picture.
Thank you so much!
Super glad to hear that!
Hello Maurizio! I’ve been making a whole wheat sourdough with a 8 hour fridged bulk ferment and a 4 hour counter proof after shaping. The bread is nice but it doesn’t come out very airy (holes are super small). I’m planning to try a shorter on-counter bulk fermentation and a longer proof in the fridge as you outline here and wondering– do you think that would affect the crumb? My logic is that I am probably handling the dough too roughly after the bulk ferment and knocking out too much air, so a longer proof would lead to a more open structure. Does this make sense to you?
Also I’m worried the dough will stick to the banneton after all night in the fridge, have you experienced this?
Hey, Mona. I wouldn’t say changing that process will affect the crumb much, in my experience. It’s more about fermentation control/balance and gently handling (as you indicated). I have not experienced the dough sticking, be sure to liberally dust it with flour so it removes cleanly — or use cotton towels/liners, or a combination of both.
I’ve experienced dough sticking to the banneton. Usually happens with high hydration. But I get good results from very generously rubbing rice flour into the banneton liner. Even if the liner gets wet, the dough doesn’t stick if there’s enough rice flour on it.
Ciao Maurizio! Amazing results! I wonder why i can’t handle high hydration doughs really well… After incorporating the levain i always struggle with the stretch and folds, it gets so sticky! What can it be? Maybe my starter is not strong enough? Thanks in advance!
Ciao, Paolo! This is pretty common, the dough IS sticky! I don’t think you’re doing anything wrong. Choosing the right container for bulk fermentation does help, too, if it sticks too much when you do the stretch and folds it can be harder. This is why I like a ceramic bowl or certain plastic tubs.
I will try with the plastic one, thanks!
I just started milling my own wheat, finely ground, and I have a hard white wheat on hand ( from my 20 year old emergency food storage). The berries are still great. After success with the 50/50, I tried this 100% wheat with weird results. Because I fresh mill my own wheat, I am able to mill it very finely, and I don’t have any noticeable bran chunks, so I did not sift and re-soak. After the third stretch and fold, the dough had amazing elasticity. I put my dough in the oven on 100° proof setting, and let it sit for the rest of the rising. Afterwords, it was all bubbly, not sunken at all, but had absolutely no elasticity. It would not stretch and fold at all. It was really a weird texture. I went ahead with trying to shape it with no elasticity, it had lots of small bubbles but tore apart easily. I put it in the fridge overnight and bake to the next day. It was pretty dense, twice as dense as my 50/50 and didn’t have a nice crust build. Where did it go wrong?
Hey, Debbilyn! It sounds to me like your dough probably over proofed on you and you saw degradation of the gluten network (evidenced by the tearing). I’d say dial that back from 100°F — this is very, very warm especially for a freshly milled (which tends to have much higher activity), 100% whole wheat loaf! My feeling is, your dough over proofed in bulk fermentation.
For this kind of dough I like to keep it cooler, around 75-78°F, during bulk fermentation.
Give it another try with a lower temp and let me know how it goes!
I regularly make very similar loaves using freshly ground hard white wheat berries and kamut in a 3:1 ratio, and a rye sour dough starter. I love the taste, (nutty and slightly sweet), crumb, and crust. Thanks for the tip on sifting out and soaking bran. I hadn’t tried that until recently and I could see a bit of improvement in rise and crumb. I still need to work on my shaping game, though. Boules are fine but my batards are not as neat as they should be.
Sounds great to me! I do love white whole wheat and khorasan — both great varieties. If you haven’t seen my batard shaping guide, check it out — the video in there is helpful! Have fun with it, too, even if it’s not perfectly shaped, it’ll still be quite delicious 🙂
Hi. I’ve had reasonable results with white sourdough bread so now I’m trying a mixed grain bread using your method. Only problem in the past has been the crust. Crisp out of the oven, but by next day it has gone tough – top and bottom. Is this normal or am I doing something wrong?
It can certainly be normal, it depends on your location and the bread you’re baking. Here in New Mexico, where it’s extremely dry, I have to keep my bread in a bread box or paper bag starting the second day after baking (usually, unless it’s a very high hydration dough).
Hi, I have just started my liquid sourdough starter following your guide and am very excited to begin making bread in a few days. You mentioned in this recipe that it is fine to use a liquid starter (instead of a stiff starter), does this mean that I can just use the amount of liquid starter (and everything else) will be the same as what you have outlined here?
Thank you so much!
Hey, Diana! Yes, that’s right, it’ll work just fine. I’d recommend you hold back a little more water from the dough recipe, though, because your starter will have more water in it and this will eventually contribute to the hydration in the dough. I’d say around 50g water should do the trick. You can always add it in during mixing if it feels like the dough can handle!
Hi, I have a question on autolyse. I normally do a 3-4 hour autolyse. I watched a video on a 100%whole wheat sourdough bread where the lady autolysed the flour and water in the fridge overnight. Is there a benefit to doing such a long autolyse? Does it make a difference?
I find with whole grain breads an extended autolyse does help, generally. The exception to this would be when I freshly mill my own flour, in that case I usually opt for a very short autolyse or none at all.
With whole grains the added autolyse time will help the flour fully absorb the water given to it (there’s a lot more bran and germ!), it’ll also soften the larger bran/germ pieces which can help improve the interior of the loaf. Keeping it in the fridge would reduce any enzymatic activity typically happening in an autolyse (protease activity, specifically), but it would give the enzymes time to do their work before the dough fully chilled, and then at that point it would simply be hydrating the flour. So in the end, I do find a longer autolyse helps with higher whole grains and typically do this myself.
I also typically employ a longer autolyse when using super strong flour (like 13%+ protein) in large percentages. This helps reduce the elasticity of the dough, allowing it to stretch and extend further.
Hi. I am trying my hand at this for the first time so I might ask some very basic questions.
1) levain means starter? I have a starter and would like to use that. Do I still have to do the whole process of a levain?
2) do I have to add the bran mix? or is it only a suggestion?
3) I have read that I can use left over Whey from homemade cheese, can I add some of that to the water mix? Or should I just use water.
Sorry for such dumb dumb questions…but again I am only just starting with trying my hand at sourdough.
Thanks
Hey, Emily! Answers below:
1) Your starter is your ongoing sourdough culture you feed and keep going indefinitely. A levain is typically an off-shoot of that starter, meant for a single batch of bread. However, you don’t have to do a levain even though I call for one in many of my recipes, you can simply use your ongoing sourdough starter.
2) Adding back in the bran ensures this loaf is 100% whole grain, if you leave it out then you’ll have less than that, which is just fine, it’s up to you.
3) Yes, you certainly can use whey. I do this in my polenta and rosemary sourdough bread recipe: I use leftover whey from making ricotta to cook the polenta that’s then mixed into the bread. You can also use it directly as a substitute for some of the mixing water.
Not dumb questions at all! I hope that helps and sorry for the delay.
Hello! I’m quite new to baking with sourdough and whole grains but have made this loaf successfully a couple of times…it is wonderful! The most recent time, I made it with spelt flour and did not sift it (I don’t own a flour sifter or sieve with a fine enough mesh). I ended up making it at around 93% hydration. It turned out well but felt a little wet and weak to me throughout the process. I’m wondering about the effects of adding the additional 200 g of water without sifting and soaking the bran. Should this extra water be withheld entirely, added fully, or added in part? Still getting a feel for the dough, differences between hydration levels and temperatures, etc, so quite unsure about what effect the water had on my loaves and what difference would be made if I had held more water back.
Great to hear that, Katy! If you’re not sifting and soaking, I’d still add the water (it is part of the formula, it just either is added with the soaked bran/germ, or in the mix if not soaking). However, keep in mind with spelt it can be a tricky grain with high hydration levels. I’d suggest when working with 100% spelt, try reducing the hydration percentage 10% or even more to eek out more strength in the dough. Spelt has a tendency to be extremely extensible (the ability for the dough to stretch out before tearing or showing resistance) which can present as a weak and sloppy dough. The extensibility isn’t “bad,” it’s just a property of the grain and needs a little adjustment. I hope that helps!
Hi Maurizio,
Thank you for your wonderful blog! I have a steam oven that has 3 steam settings Low / Med / High. What would you recommend using? Also the steam function only works at 240 degrees (464F). I have been preheating to 275 degrees (527F) which is the maximum my oven goes up to then when I put the bread in I turn steam on high at 240 degrees. My bread keeps burning so what would you do given this oven? I’m about to try a preheat to 260 (500F) then turn down to 240 degrees immediately. Will report back. Many thanks
Hey! Hard to say on the steaming, I’m not sure what each will output. My approach is to usually start in the middle, then work up/down as results indicate. 240°C should be just fine to bake. If your bread is burning, turn the oven down and preheat at 260°C, then turn down to 240°C. If it still burns, lower the preheat even further and the bake time as well. Hope this helps!
Can you incorporate a preferment such as a Biga instead of a sough dough starter?
Would the quality of the final dough change if I don’t soak the Bran? I don’t seem to have the proper sieve to sift out the bran.
Can a retarded bulk-ferment be possible along side the retarded proof?
Does the dough have to pass the “Windowpane Test”? From my attempts, I can’t seem to get that kind of gluten development.
You can certainly use a different type of preferment, you’ll likely just have to adjust the timeline here depending on what type you make. You don’t have to soak the bran, either, but your end result might be different than what you see here. Lately I’ve been baking 100% freshly milled whole wheat without soaking the bran and the results have been fantastic as well. Soaking is just another tool in your toolkit. You could retard in bulk here as well, just be sure you’re not over proofing your dough. No, I don’t think I ever get a windowpane test pass with a dough like this (I rarely test for this).
It looks like separating and softening the bran is an absolute must to even remotely make whole-wheat bread any good. Even when implementing an autolyse, the bran doesn’t soften enough to act tame with the developing gluten. Every time I try to bring the dough out of the proofing basket (aka some random bowl because I can’t convince my parents to invest in a bannetons), the dough just flaccidly drops out of the bowl as if it I was just retarding the dough and spreads on the board. Is it a cardinal sin if I just reshape it and bake it hoping for the worst, or should I just bake it directly?
Soaking the bran certainly isn’t necessary, but it’s a good technique and can help the end result. It might be that your dough is over hydrated or even over proofed. Also, it’s possible your dough wasn’t shaped tightly enough or have enough strength going into proof.
It’s not a sin to reshape before baking, especially if the dough needs it!
I’ve never had any trouble with this type of dough passing the windowpane test. I mill my grains on the finest setting; maybe that’s why?
I’d definitely recommend milling on the finest setting — I notice the best results this way.
I’ve just read through the recipe/article, and hope to start this as my 1st wholewheat loaf. I understand the need for sifting/soaking the bran before incorporating it … but that’s if you _have_ coarse bran.
I just opened up my bag of KingArthur Organic WholeWheat flour (https://www.kingarthurflour.com/shop/items/king-arthur-100-organic-whole-wheat-flour-5-lb), and as far as I can tell it’s been thoroughly sifted arleady; there are no large bran particles.
If that’s what I’m working with, and therefore will skip the “add & fold in the wet bran” step, where would I add the 200g of water that would’ve been carried in by the soaked bran?
That will work, KA whole wheat is usually milled extremely fine and it would be hard to sift any larger particles out. However, if you have a sifter I guarantee you will pull some large pieces out (depending on how fine your mesh is on the sifter). You can certainly skip the sifting step with that flour.
Hello! I’ve read though the recipe and comments a handful of times, and can’t find the answer to the following:
If I am using King Arthur Whole Wheat Flour (or the KA Sprouted Whole Wheat Flour – both are 14% protein), and I am NOT able to sift out any bran because I don’t own a flour sifter presently, should I add the 200g water during the initial time when I mix the entire amount of flour and the 700g water to autolyse?
(Also, your blog is amazing, as are your patient, thorough and kind comments. This is my first loaf of whole wheat sourdough, although I’ve made GF sourdough before. Thanks for writing up such a beautiful and understandable description of how this should work.)
Hey, Kim! Yes, if you’re not sifting then use the water at autolyse time. But, I’d perhaps hold back 50-100g of the water — as is the case with many of my recipes (and I recommend this always with bread!) hold back some of that mixing water and add it in through mixing if it feels like the dough can take it. Generally, whole wheat is able to take on quite a bit, but it’s easy to add water, we can’t remove it 🙂
You’re very welcome, glad you’re finding my site helpful. Happy baking, Kim!
Thanks for the speedy reply! I used 900g water in the initial autolyse (because I wrote the above and then, of course, dove right in) – I wound up putting in 35g when I did the mixing in of the levain (I used my existing liquid levain). I think more than that would’ve been way too wet (but what do I know?). I’ll look for a sifter and banneton and something other than a razor blade when this whole coronavirus thing dies down – I believe everyone on earth is baking these days, so not only is flour scarce, but so are all the tools. 🙂
Also, a week or so ago, I read your Beginner’s Sourdough Bread post, got completely overwhelmed by all the math+my phone screen and wandered off. I am reading it again and laughing, because it is so interesting now that I’m neck deep in sourdough interest. Thanks, ADHD research mode!
I know, it can be overwhelming at first. I’m working on a post that will hopefully explain a lot more of that math stuff in an easy way — I hope! Should be out next week. Happy baking 🙂
Just as an update, the two loaves came out quite well for the first go-around with 100% whole wheat. They were, IMO, a tad damp, but everyone who tried them, loved it. Good flavor, and a beautiful crumb. The crust was a touch hard, but I think that I can fix that next time. Less water, and a little bit less time in the covered cast iron pan. Thanks again for your help and excellent resources here at TPL.
This recipe led to the production of my very first decent 100% wholemeal loaf! I’ve been struggling for a while now to create one and have mostly ended up with a lot of fudgey bricks. Turns out the flour sieving and dry levain steps were really vital contributors to the end product! I got a very decent crumb and a loaf that actually held its shape in the oven. Thanks so much!
That’s great to hear, Kaitlyn! The two steps add a bit of work into the process, but they definitely are worth it. Enjoy!
I do wonder how you get your soaked bran incorporated back into the autolysed dough–I’m finding it kind of tricky. A couple of stretches and folds definitely doesn’t do it. Do you have any tips?
I usually spread the bran back over the dough in a flat layer and use a bit of water to massage it back in. After this, during bulk I’ll break up any large bits remaining and keep massaging things back in. The goal for me is to always work this bran back in as early as possible, this way the dough is handled as little as possible during bulk.
Hello Maurizio. (I’m commenting using my husband’s Disqus–oops!) Are you aware that whole wheat should never taste bitter and that that means it’s rancid? It should indeed smell sweet.
Thanks for this post. I actually saw it quite a long time ago, but I didn’t like the complication of sifting and reincorporating the bran. I’ve been baking with 100% whole wheat for a few years and had better results back before I moved to France. Since being here I’ve had terrible results in fact. I’m not an expert, but I figured it was my oven, as I only have a mini oven and, up until very recently, had no possibility to use a dutch oven. My bread was never well aerated. I acknowledge also that I’m not vigilant in maintaining my starter. I also suspected that there was an issue with my flour (brand Moulin des Moines, the only organic whole flour available to me in hermetic packaging), as the bran bits are really large. You’ve confirmed that to me. I’ve been trying the semi-complete flour, but now I should get serious about my starter and see if this can work. But will I never be able to get a good crust using a mini oven?
You might be able to get good results with your oven, but high heat in the beginning of the bake really does help with oven spring. If you’re able to preheat a cast iron Dutch oven in there you might be able to get sufficient heat — I’d definitely test it! If you have an IR thermometer you could verify what your oven is able to achieve as well (I’d take a reading on the cast iron Dutch oven). In any case, sometimes we have to work with what equipment we have access to — see what you can do, you might be surprised!
Well, after looking at the picture, I guess I did ok. I was quite disappointed not so see the oven pop not I got with my first loaf (best recipe). I cooked in a covered dutch oven, not on stones. The sourness of this bread is quite high. I used King Arthur starter and fed it with 75g whole wheat/25g ap flour the last 3 days prior to baking. I also tried the stiff starter. I used KA whole wheat flour do you think I would have less sourness using a different flour?
Do you think it would work well with whole Spelt or whole Rye flour as well? 🙂 I am making a 100% whole rye starter and I definitely want to try this!
hey, i return with the results, the flavor Really was a bit more sour. and time of the last Fermentation was two hours and half – three hours.
hey, my name is lior and I wanted to know is it possible to make the recipe with liquid rye sourdough ?? Thank you.
This was the recipe that first drew me to your site…all batches of bread with my wild yeast up to that point had been made from adapting recipes from the beloved Laurel’s Kitchen Bread Book. I came back to it this time in search of a bread that would be ‘softer’ for my husband. I substituted milk for most of the water to enhance its chances toward that end and used all freshly-milled flour. I just took them out of the oven this morning, but couldn’t contain myself until tomorrow and cut into the little one made from the extra dough after shaping two 2.5 pound loaves. The crumb looks just like yours and it has such a sweet, brannie taste. Chewy crust but very soft (the hubbie said ‘nice sponginess’) texture. I think I see sandwiches in this week’s future! And I might use the same method of removing, soaking and reincorporating the bran more often as all my loaves are made with at least 80% whole wheat.
Hi Maurizio, great post as always! I’ve just started milling my own flour and got a bag of 20kg of wheat. The problem is that the grain has low protein (around 9g according to my calculations) and I’m only making 100% whole wheat bread. Needless to say I’m having major difficulties making anything taller than 2 inches.
Do you have some general advices on how to threat a low protein flour? I’ve tried putting less water, being as gentile as possibile, putting in the bran later (as you suggested) but the dough still feels so weak and slabby. Yes, I could mix it with some higher protein flour, but I want to believe that God sent me that bag for a reason and the reason is that I should make a good decent whole wheat bread out of it (either that or that I should inform myself better next time I take a 20kg bag of grain and take a higher protein one :D).
Thanks in advance,
Nikola
Thanks, Nikola! You could try mixing this dough with a higher percentage of levain which will bring a lot of strength to the dough and could help with the rise issue. The tricky thing there is to keep a very close eye on the dough, mix it to a lower temp (perhaps 75°F final dough temp), and move the process along as it requires. I would say try around 20% stiff levain.
All that said, sometimes a wheat is inherently difficult to work with and no matter what you do it just won’t bake up correctly. I’m not saying your in that situation, just try a few more approaches and see how it goes. Shoot me an email through the Contact link up top and let me know how it goes, perhaps there’s a few other things we can try!
I admire your will and time you dedicate to help and reply to everyone. Much respect! 🙂
Back to the low protein challenge: I’ve read that oxidation of the flour helps strengthening the gluten and that the minimum time required to have some decent gluten strength is from 2-3 weeks of oxidation. Considering that I’ve just finished the milled batch I have to wait around 2 weeks or so in order to have the flour ready. I’m generally using 20% of levain and the last one was really stiff and I think it helped making the dough stick together better (20% is my standard fixed amount, maybe I can increase it to around 35%. I’ve never actually thought of changing the levain amount, in general…).
I’ve tried lowering the hydration and I think it helped but the crumb was pretty dry so I think I need to put the right amount of water and learn how to handle it. I’ll share some more info as soon as I do some more experiments.
Thanks!
Nikola
I’m looking forward to hearing your progress, Nikola! When milling flour I like to use it the day (or a few after) I mill it — bakers I’ve talked to and material I’ve read suggests that the flour is stable to use shortly after milling but if you wait too long you’ll have to wait several weeks for it to stabilize again (essentially oxidize). I’d suggest upping the hydration to your preference, use a stiff levain at perhaps 25%, mix to cooler temp, and see how that goes!
Interesting, I’ve never heard of that. I suppose that having such a weak flour I could really benefit from that 2 week oxidation but I think I’ll try a small batch with fresh milled flour and apply your suggestions and see how it goes. Thanks again, I’ll keep you updated 🙂
Thanks for your recipe! I tried your method today with 400g WG rye and 500g WG wheat. I used standard flour available here in Norway.From the rye I sifted out 279g (70%) bran and from the wheat i sifted out 191g (38%) of bran. So the flour are quite different! I fermented in the fridge over night, one I took out 90 min before oven the other direct from fridge to oven. The latter looks better, I will wait til tomorrow before cutting in them.
Hi, this is an interesting article and great pics, btw. I just want to weigh in on the whole wheat bitterness issue you brought up. Im fairly new to baking with sourdough, and have never done a whole wheat batch, so therein may reside my ignorance, however, I have baked yeasted 100% whole wheat bread regularly for a long time. the only time I have ever had an issue with bitterness was from an old batch of flour. the wheat germ in milled flour, once exposed to oxygen, is volatile and will only stay fresh for a few weeks at most. Basically, the bitter flavor comes from the germ going rancid. Fresh whole wheat flour makes lovely bread with a wonderful fruity aroma!
Thanks for the comments, Lou! I think some of the issues I had early on with overly bitter whole wheat was due to the fact that the wheat I was sourcing was left on the shelf for too long. However, there is inherent bitterness to some degree in particular wheat varietals due to the extra tannins in the bran/germ. When wheat is kept properly and it’s high quality I rarely detect this these days. I agree, a 100% whole wheat (or even less) is something absolutely incredible to eat!
What Heath bowl do you use? Is it still available? Ir’s Beautiful, I’m a big fan of their glazes.
They make incredible ceramics! The bowl I use for bulk fermentation is their “Large Serving Bowl.” You’ll find it over at their site, they pretty much always have it in stock.
Thanks!
What do you do with the 2nd loaf? Bake it after the 1st? Could I bake them at the same time in Pyrex loaf pans in a regular electric oven? Can you use steam under Pyrex loaf pans?
Thanks so much, Viki
If there’s enough room in my oven I usually will bake two loaves at a time, otherwise I will do one while the other rests in the fridge to slow fermentation.
So yes, you can definitely do two at a time. Be careful using glass baking vessels, especially if you’re spraying cold water into a hot oven, because they could hot. Also, ensure they are rated to handle the temperatures your baking at. I’ve never used a glass container to bake bread.
Hope that helps and happy baking!
Great article as always. I’m having issues with the bottom crust of my bread. The top is always hard and hollow when you tap with your fingernails, but the bottom is softer, not raw but definitely softer, and won’t sound the same way. I’m using your method of pizza stone and pan of water and towels under it. Any suggestions? Also from this article – do you make the bread directly out of the fridge? Do you not let it to get to room temperature?
Thanks so much! Are you preheating your oven for at least one hour? If you have an infrared thermometer you might want to check the temp of your baking stone, it might not be sufficiently heating through, thus causing a slightly under cooked bottom. That would be my guess!
I also bake straight from the fridge almost every time, unless I notice the dough needs more time on the counter to proof at room temp before baking (but this is rare for me).
Hope that helps!
Thanks for your insight, I’ll try longer preheat and straight fridge to oven and see what happens next time 🙂
I can get a nice crumb but maybe I m cutting too deep … I use 5 different seeds and I mix with brans its working so far !!
Right on, that’s great!
Pls help me out here Maurizio. Can you tell me the best way to preserve the bread ?
I usually just cut it in half and keep the interior facing down on my cutting board for 1-2 days after baking. After this, I use a bread box to store the bread and keep it from going stale (it’s very, very dry here in my climate). Hope that helps!