


I call this batch number 33 of the Tartine sourdough country bread recipe, while it may actually be my thirty-third pair of these I’m not 100% positive. I know for sure it can’t be any less, but it’s probably more. On to the entry.
Another Sunday, another pair of Tartine sourdough country loaves shaped and proofing. My family has come to expect this bread to be on hand during the week, and in the rare case where we have to buy some bread from the grocery store, we are always disappointed. Baking bread is a relatively simple act when you boil it down, and yet getting that perfect loaf out of the oven does not always work out — but I still strive forward.
If you’re brand new to baking sourdough, read my Beginner’s Sourdough recipe post first, it has longer in-depth explanations on every step in the baking process!
Sunday started out a bit lazy; waking in the later morning after attending a friend’s birthday party the night before. I stumbled into the kitchen and took a look outside to see completely clear skies—a good sign a warm day was ahead. Given the rising temperature, I knew Sunday would be a day of quick dough handling and preparation. As you can see, even my German shepherd Arya (yes, that Arya) was a bit lazy this morning. I suppose too many rabbits, pigeons, and tennis balls chased the day before; oh, what a life.

Although the leaven was prepared later than usual on Saturday night, it was ready to go (left-hand side image below). As you can see, the bubbles on top indicate there was significant fermentation activity overnight, and judging by the smell (like ripe fruit, almost a hint of vinegar), hopefully, it didn’t go too far.
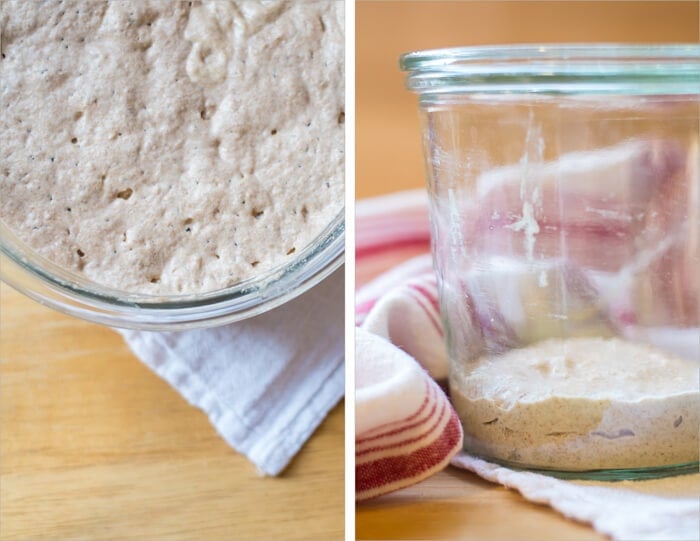
Over my starter’s lifetime, I’ve experimented with using different flour and grains and have settled on a formula that my particular strain seems to thrive on. Instead of following Chad Robertson’s Tartine starter formula in his book where he feeds 50% whole wheat, and 50% all-purpose, I feed my starter 100% rye flour. I’ve found that my starter shows noticeable activity when fed rye exclusively. If you’re interested in reading about how to create and manage a sourdough starter like mine, head over there and read on.
Also, if you’re one who frequents Instagram, head over and check out my Instagram feed. I typically post many “daily bakes” and those behind-the-scenes shots that sometimes don’t make it into these posts!
Tartine Sourdough Country Bread Recipe
Prepare the leaven – 12:00 a.m.
The night before you plan to prepare your dough, mix the following, lightly cover, and set out on the counter overnight:
| Weight | Ingredient | Baker’s Percentage |
|---|---|---|
| 31g | Mature sourdough starter (100% hydration) | 28% |
| 110g | Whole Wheat Flour | 100% |
| 116g | Water | 105% |
Mix the flour + water, autolyse – 9:00 a.m.
For this loaf, I decided to try and tweak the whole wheat to white bread flour percentages. I still wanted some of the WW taste and texture, but a bit more “white” in this loaf. Due to the WW reduction (from the last Tartine recipe), I’ve also reduced the amount of water to 79%.
Note that this is not a traditional “autolyse,” which only has water and flour mixed, but this is how Chad performs this step in Tartine—let’s follow suit for this bake. In my more recent baking adventures, I no longer mix flour, water, and levain for this step.
Gather the following:
- 250g of your new leaven
- 300g whole wheat flour (I’m currently using Great River Organic whole wheat flour)
- 700g unbleached all-purpose white flour (King Arthur)
- 20g salt
- 740g water and 50g water (reserved for step 5, below)
Method:
- Add 250g leaven to your large mixing bowl
- Pour in 740g water and mix with your hands until the leaven is completely dispersed
- Add 700g white flour and 300g whole wheat flour and mix with your hand until all the dry bits of flour are gone
- Cover your bowl with a towel, or if in a dry climate, plastic wrap and let autolyse for 30 minutes
- After 30 minutes, add 20g salt on top of the dough and slowly pour the remaining 50g of your reserved water on top. Squeeze the dough with your hand to incorporate the salt throughout
- Now reach your hand under the dough and pull the side up and over onto itself. Continue to do this as you spin the bowl; grab, pull, and push. Do this just until the dough comes together and becomes super sticky. Generally, this will only be between 5-10 turns
- Transfer your dough to your plastic or glass container, set a timer for 30 minutes
Next, we tackle the bulk fermentation step.
Bulk Fermentation
At this stage, we want to do four sets of turns, plus 1 – 2 hours of rest on the counter. A “turn” consists of reaching under your dough, grab the bottom and pull up the dough on top of itself. Do this four times, one of each side of your container (if it’s square, that is). Additionally, you want to do this rather vigorously. The stretch up and down on itself is what gives the dough strength.
- 10:10 a.m. – Turn 1
- 10:40 a.m. – Turn 2
- 11:10 a.m. – Turn 3
- 11:40 a.m. – Turn 4
- 11:40 a.m. to 1:40pm – Rest on Counter
Pre-shape – 1:40 p.m.
When the dough has risen about 20-30%, and you see a bunch of little air pockets throughout, it’s ready for pre-shaping. Take the dough out of the container onto your *unfloured* work surface.
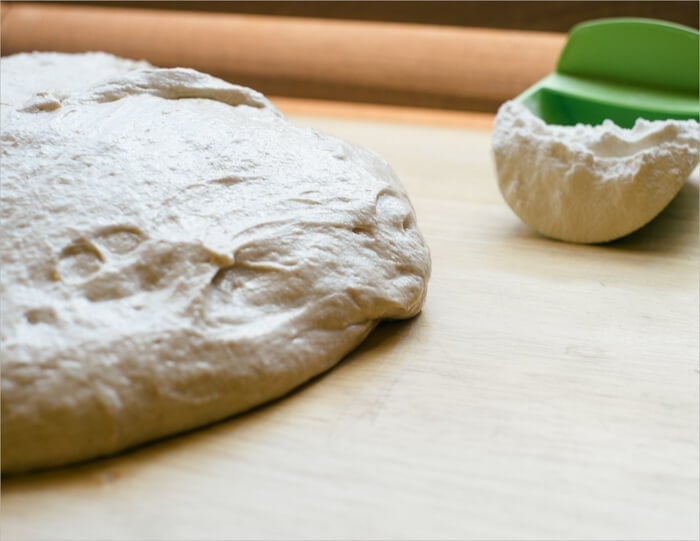
Sprinkle some flour on top of your dough and divide into two halves. Take a half, flip it over and pull each of 4 edges from under onto the top. Then, flip the folded dough over, so the seam is on your work surface. You want to form loose boules here by using your hand and your dough knife. Your work surface grabs the bottom of the dough slightly as you spin the dough around to make a little ball. Repeat with the other half and cover (I cover with two inverted mixing bowls) for 30 minutes.
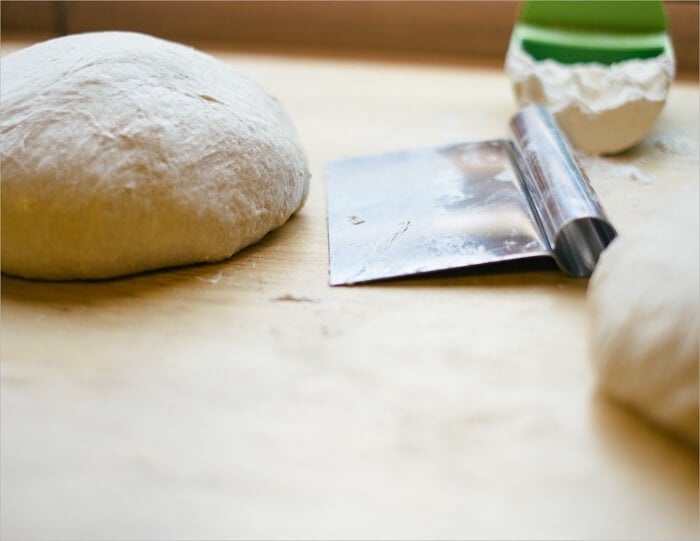
Shape – 2:10 p.m.
The resting dough should have spread out, but not quite into a pancake shape. If it has formed a pancake, you can strengthen it by pre-shaping one more time and waiting another 40 minutes.
Flour the top of one of the boules and flip it over with your lightly floured hand and dough knife. Take the part of the dough that’s closest to you and fold it up and over in half. Take the part that’s to the right, stretch it out as far as it will stretch, and fold it up and to the left. Repeat with the left side and the side of the dough farthest from you. Then take the edge that’s closest to you, pull it up and over again towards the back. When performing this last motion, you will lift the entire dough up and over until the seam side is now down on your work surface.
Spin the dough using your two hands to shape into a boule. As you slightly pick up the dough and spin it, the bottom snags the unfloured work surface and creates tension. I do this several times to create a very taught surface on the top of the boule. Sometimes small air bubbles will be visible.
If you’d like to shape this dough as a batard instead of a boule, check out my batard shaping guide.
Proof – 2:20 p.m.
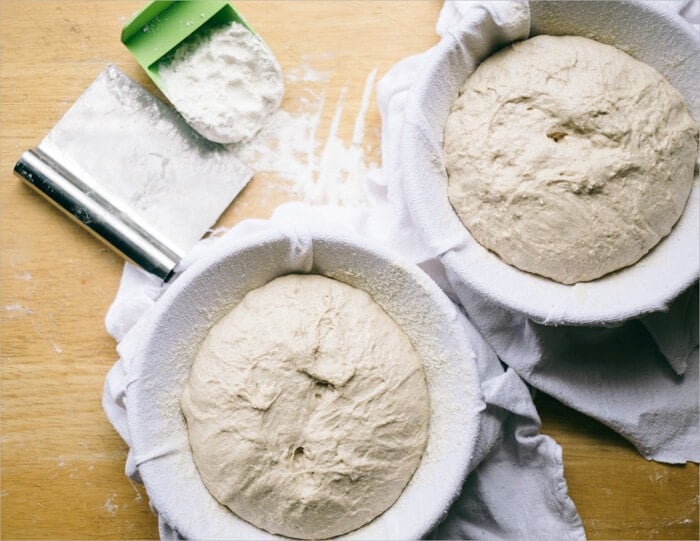
Place towels into small mixing bowls or proofing baskets and dust with white rice flour. These bowls will hold the dough as they proof in the fridge overnight. Take your taught boules and place them into the floured bowls with the seam *up* facing you. I place each of my bowls into plastic bags and then into the fridge.
Score + Bake – 9:00 a.m.
Gather your tools:
Speaking of tools, if you’d like to see all the tools, I use when baking head over to my tools page and take a look.
The first of these sourdough loaves was retarded for 18 hours. The Tartine formula lists an 8-hour cool fermentation in the fridge but 18-20 hours seems to be the sweet spot for me as my bread takes on a complex flavor with this extended fermentation time. It also seems to help open up the crumb more than what you would typically see; I strive for that light and soft interior.
In the morning you first want to get your oven ready. I place the rack in the bottom third of the oven. Turn your oven on to 450°F (230°C) and let it preheat.
Once your oven is preheated, get your dough ready. I bake this dough straight from the refrigerator—no warmup time is necessary. Take one of your loaves out of the fridge, cut a circular piece of parchment paper, and place it on top of the bowl. I then place a pizza peel on top of the parchment paper (and bowl) and invert the whole thing quickly to get the dough out of the bowl and onto the paper + peel. Get your razor blade out and score the top of the loaf to allow the bread to expand while rising in the oven. For these sets of loaves, I scored one with my “Roman numeral three” pattern and the other with a single long slash.
Quickly take out the shallow half of your hot combo cooker and drag in the parchment paper and dough.
Cover with the other half of the combo cooker and bake for 20 minutes with the lid on. After this time, open the oven and lift off the combo cooker lid (you can leave it in the oven to the side), close the oven, and bake for an additional 35 minutes. These times and temps are a drastic change from the Tartine book, but I’ve found them necessary due to my elevation and climate. I want the crust to be nice and dark brown.
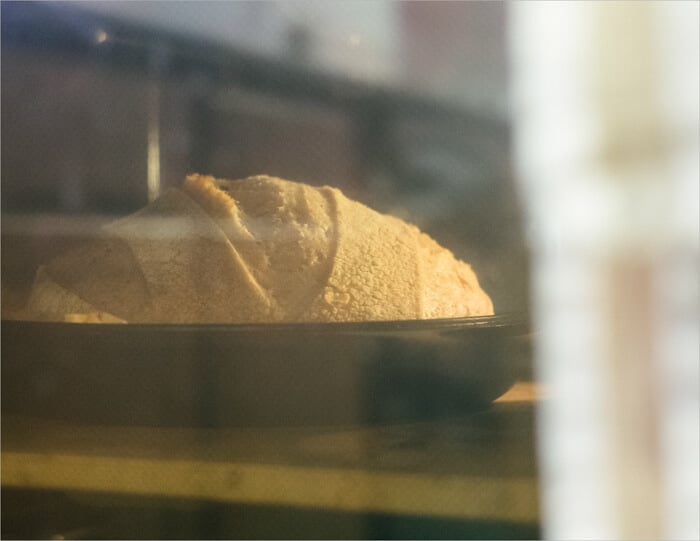
After pulling the loaves from the oven, I cool them on a wire rack for at least one hour before cutting into them. Cutting too soon can cause the crust to harden drastically and the inside to become quite dense. Easier said than done, however.
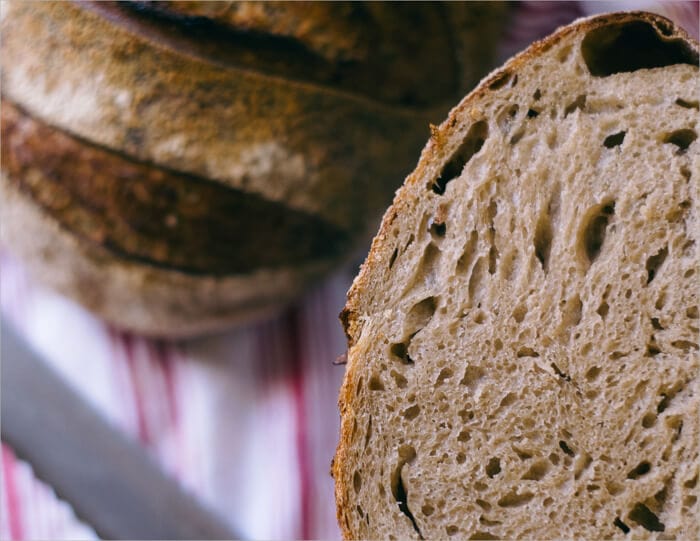

What a pair of beautiful loaves this morning. There’s no doubt the lazy Sunday morning/afternoon turned out to be a success in the kitchen, and this Tartine sourdough country bread recipe couldn’t be more delicious.
Buon appetito!
Now that you’ve attempted this recipe try your hand at the higher hydration version for a bit more challenge, and an even better tasting loaf!
If you use this recipe, tag @maurizio on Instagram so I can take a look!


374 Comments
It’s Chad Robertson, not Chad Robinson.
Oof. That's embarrassing, given how long I've followed him, his writing, and his baking. I can only say it must have been autocorrect!
Found this to be a fascinating article. Used to work across the street from the Tartine Manufactory in SF and absolutely loved the Old World Loaf and will be interested to see how close I can get to their bread. Lately, I’ve been trying to follow a little of Alton Brown’s philosophy of not purchasing single task items and a combo cooker would likely fall in that camp. Thoughts on just a pizza stone (used for pizzas, some baked goods, etc) and a preheated inverted mixing bowl to achieve the same effect of the combo cooker? Also, I noticed no additional moisture being added during cooking, thoughts on using 4-5 ice cubes to increase the moisture content in the oven?
I’ve done the inverted mixing bowl thing and it works fine, great even. I prefer it to the combo cooker. I put in one ice cube in for the first 20 minutes while the loaf is covered. I think more than one or two ice cubes would cool the vessel down too much and over steam, but I don’t know for sure.
The combo cooker is so useful for so many other things! It's essentially a cast iron pan AND pot. I use it for tons of stuff. But yes, you can always just bake directly on a baking surface, too (which is great for many things, including pizza). My tips to that are here: https://slimlife.fit/guides/the-ultimate-guide-to-baking-bread-dough/%3C/a%3E%3C/p%3E
Very novice baker here – I've used 3L cast-iron pot I have due same reason Matt mentioned. Works perfectly, but a bit limited on size and ofc you can do only boules.
You don’t mention the temperature of the dough or of the room where the dough is fermenting. Are you saying it doesn’t matter if your kitchen is 68 degrees or 76 degrees? That it doesn’t matter if the water is cool or warm? I would have thought these “details” were crucial to the success of the bake, yet the recipe doesn’t seem to place any importance on these make-or-break matters. (Chad Robertson, of course, does specify that the dough should be maintained at a 78-82 degree range. That’s a temperature that’s a lot warmer than most kitchens, especially in the winter, so proceeding with the recipe with 70 degree dough would not be likely to yield success). By not mentioning temperature, you’re going to have a LOT of people trying to follow your guidance and not knowing why their bread turned out so bad.
Usually, my kitchen is between 74-76F!
Hi Maurizio! Happy New year! Love all of your info! I have a question about flour. I mill all of my grains, mostly ancient grains (Spelt, Kamut, Einkorn, etc). Can I still use this recipe as is, or should I change the hydration since whole grains sucks more water. Will it turns ok? less rise I suppose due to the heaviness of the flour, but very tasty! Thanks!
If you're fresh milling and using that flour as whole grain flour, you're right, it may require more water to properly hydrate your dough! I trust you've probably figured this out by now, sorry for the late reply Neta!
Just returned from San Francisco, where we visited–thank you, Maurizio–Tartine Bakery. A great lunch experience, and their croque monsieur on a big slab of sourdough was divine. Another check off the sourdough bucket list. We also lunched at Boudoin with clam chowder in sourdough bowls. I’m home now and planning to combine the two with chowder in Tartine 33 bowls. Cheers, and Happy New Year.
It's such a wonderful place! glad you enjoyed, Glenn 🙂
Some confusion in the bake portion of this-unless I am missing something, and that is a distinct possibility! You state to preheat the oven with a pizza stone on top of the middle rack, yet then go on to say, “Quickly take out the shallow half of your hot combo cooker and drag in the parchment paper and dough” without ever talking about using the combo cooker.
What am I missing here?
A typo, sorry about that! If you’re baking with a pot or DO, you don’t need the stones 🙂 Will update!
Hello, I’ve been enjoying this recipe (sometimes with great success and sometimes I mess it up) but overall it’s fun and definitely gets eaten around my house. If I don’t want to proof overnight is there another way? Can I simply proof it on the counter for half an hour and then bake? Would love suggestions for same day baking.
Check out his piece on proofing: https://slimlife.fit/guides/proofing-bread-dough/%3C/a%3E; you can do this same day!
Yes, proof on the counter 2-4 hours until the dough is ready for baking. Use the poke test to determine when:
https://slimlife.fit/how-to-use-the-dough-poke-test/%3C/a%3E%3C/p%3E
Good morning! I have a question about halving this recipe, because in a two person house, two loaves is a lot. Do we halve the ingredients right down the middle, or are other adjustments to be made for making just one boule? Thanks for any advice!
Yup, just divide all the ingredients by 2.
Hi Maurizio! Love all the info, but I do have a flour question. In the tartine book, it says ‘bread flour’ and then in the detailed section he said that bread flour makes a tougher crumb. Do you ever use bread flour, and what are your thoughts? Thanks!
Jenny
I agree with this. I talk about it in my guide to higher protein flour, here:
https://slimlife.fit/sourdough-bread-high-protein-white-bread-flour/%3C/a%3E%3C/p%3E
Hey, Maurizio! First things first – I’m a huge fan of your site, style, and work. That said.. I’m a little confused about something in this recipe and was wondering if you could please help? For reference, I’m somewhere between brand new and intermediate.
Here’s the ask: could you please help check my math for calculating hydration between two of your recipes?
The first is this receipt, the “Tartine Sourdough Country Loaf”, and the second is your “High Hydration Sourdough” recipe, referenced at the end of the first as the potential higher hydration challenge for readers. The confusion results when I attempt to calculate the hydration for the first recipe (Tartine) as it wasn’t mentioned explicitly. My result of my calculation is 82.6% hydration, whereas you call out the second ripe (High Hydration) as 80%. Immediately, I see that my calculation’s including the leaven and realizing that I don’t know how to factor that in, haha. So, I recalculate the Tartine and end up with 79%; lower than the other recipe so that makes way more sense. However, the 1% difference still didn’t seem like a substantial difference to me. Does 1% really make that much of a difference? Reaching here.. it seems like maybe you’re pushing some boundaries with hydration, so the difference is more dramatic between 79>80% than it would be between 69-70%. Is that the idea? Going further, Is there an additional variable affecting the second recipe, such as the type of flour being less absorbent of the water?
Sorry, none of the above is meant to be smart-alecky! I’m genuinely curious.
Cheers,
John
Thanks for the kind words, John! Sorry about the late reply. Everything you said is correct, the hydration does become more meaningful, in a way, as you get higher. I need to update these posts to have my typical hydration calculation (especially the Tartine posts!)—stand by and I’ll try to do that soon!
As far as the hydration with the levain, I do take that water into account in the overall recipe. If you haven’t yet, check out my guide to baker’s percentage where I try to break all these things down and go into them in detail.
Let me know if you still have Q’s!
Hi Maurizio! Thanks for all your recipes. You’ve changed my life! I was wondering about the Tartine autolyse. It says to include the Levain. I see that you only use the flour and water, as I want to do. How long should I autolyse before adding the Levain and salt?
Hey Lisa! Sorry for the late reply. All is answered in my guide to the autolyse technique!
Hello, what temperature is your refrigerator at for the overnight proof? Thanks!
It’s around 39°F (4°C). Happy baking, Sarah!
Thank you! That is perfect. Mine seems to be around 40°F. I just finished the two hour rest after the four turns; however, the top of the dough does not look very bubbly so I was going to left bulk fermentation go a little longer. Looks like it has increased in size though. Thank you for responding so quickly! All your resources are very helpful.
Hi Maurizo, Thank you for this incredibly detailed, and helpful take on the Tartine Country Bread recipe which I’ve tried many times to varying success. You’ve filled in the gaps in the Tartine recipe! This last attempt with your help was almost perfect! Sadly, my bread as to as sour as I would have liked, so next time I’ll do the final rise in the refrigerator. One question, I live at 6000 feet. You say you adjust your recipe based on your altitude and climate. At what altitude do you live? Any suggestions for altitude adjustments? Thank you so much for this fantastic website and for help with my question!
Hey there! I live at 5280 ft–anything here should work well for you! Also, check out my guide to high altitude baking for more tips!
What temperature would you recommend the water be to mix with the discard?
It depends on your kitchen temperature! The water can be used to cool or warm as necessary. I typically like my resulting mixtures to end up around 76-78F.
Hi Maurizio,
I’ve been baking bread for many years, but recently had a string of failures with sourdough bread. For the most part, I use the Forkish “Overnight Blonde/Brown” methods with some success. I thought that I would give this method a try. It appears to me that the biggest overall difference in this method vs. Forkish method is the fact that there is a long bulk fermentation time in the Forkish method (overnight) and with your method (Tartine), bulk fermentation is fairly short with a very long retarded proofing time. I followed your instructions exactly, except that I pre-shaped twice (the dough seemed a bit too slack on the first pre-shape). To be frank, when I went to bake this morning, I thought that the loaves would turn out to be under proofed and flat. They only appeared to have risen maybe 20% overnight.
When I took the lids off of my Dutch ovens after the first 20 minutes of baking, I couldn’t believe the oven spring, maybe 50 percent! These loaves are the best I’ve baked in a long time. I got the sense with the Forkish method that there wasn’t much ooompf left during proofing, and I probably over proofed when they turned out flat. With your method, proofing seems to be foolproof. The other main difference is that you proof seam side up and with the Forkish method, it’s seam side down.
Thank you! I’ll keep using this recipe. Happy Baking!
Rick
Glad to hear the bake went well for ya, Rick! Yes, sounds like your dough with Forkish (big fan, btw) was likely going over. If you’re seeing massive rise with. my formulas, you might want to try pushing the bulk just a bit longer, perhaps just 15m to 30m. That should help temper that explosive rise a bit. No worries though, delicious regardless— happy baking!
I made this with disappointing results. Way to wet. Was able to salvage one loaf but was very flat. Why use AP flour? I made the beginners sourdough with very good results.
Sorry to hear that, Jamie! It’s a different bread with a different intention. Yes, typically AP will take on less water than bread flour. If you give this a try again (I hope you do!) drop the water 2-5% and you should be in the ballpark. Happy baking!
This is what happened to me, sadly. Taking the loaves from the oven now and they are terrible.
Hi – I didn’t see a comment area under your “Best Sourdough” recipe so I am posting my question here (sorry). I have been making the Best Sourdough (85% hydration) recipe a bunch and love it. Today I made 3 900g loaves from the same batch of dough.The first two came out great and the last one was a bit flatter overall and a slightly gummy inside. I am trying to troubleshoot and would appreciate your thoughts? I narrowed it down to maybe not reheating the oven long enough before the bake, or poor scoring (which I sometimes stink at), weak shaping or over-proofing? All three were baked sequentially in a dutch oven after reheating the oven to 500 degrees. Thanks for all of your help and dedication to teaching this community.
Jennifer–when you say you didn’t see comments, did none load? That’s strange, I should have comments on every page at my site.
To your question: it could be any, or a combination of, all three of those things 🙂 I’d say if the dough was kept in the fridge, over proofing would not be super likely. My thought would first be the heat in the oven, if it’s too low you won’t get the same kick as you did for the others. It’s definitely important to fully preheat between bakes. It could have also been shaping and/or scoring… Hard to say on those two without more details.
Hope that helps and I’m happy to help, of course!
Thanks for the quick response! Yep it was in the fridge. I am leaning more toward not waiting long enough in the oven for the 3rd round and the shaping. Will keep practicing –
Yes – I didn’t see the comments section loading on the Best Sourdough recipe page. Just double checked – using Mac/Chrome version 87.0.4280.88 and iPhone 11/iOS 14.3/Safari
Ok, let me know how it goes!
Thanks for the info. Really strange, I haven’t seen that here. One other person has said this as well. Looking into it!
slightly gummy sounds like the third one may have overproofed..? I wonder if having three loafs to shape, score and preheat pushed out the time for that third one.? From what I understand with this, the fridge slows fermentation but it does not stop fermentation. If time (and perhaps overall kitchen temperature?) were the only variables that different across them then I would put my money on overproofing.
Hi Maurizio, many thanks for this tweak, will definitely try at as I prefer my bread a little less sweet than the Tartine recipe gives me. My question is about using a mixer, as I have tendonitis in my hands that flares up when I bake too much (which is basically always): can I use the mixer for both the initial mixing; and short kneadings every 30 minutes instead of doing folds?
Yes, you can absolutely use your mixer! If you want to use it to do the “stretch and folds” during bulk, just turn it on very briefly on the lowest speed to agitate the dough a bit.
I don’t have whole wheat bread flour. Would it work for this recipe (or any other) to use white bread flour — the same weight as called for using WW bread flour — then use “regular” WW flour (King Arthur in my case), plus the remaining weight of white flour use the AP?
For the “whole wheat bread flour” use whole wheat flour!
Hi Maurizio, big fan of your website and IG account, thank you for sharing all of this with us. I made this recipe this past weekend and had an extremely extensible dough, however, it would not hold its shape. I think I may have confused extensibility for strength, because the dough did not do a great job of holding shape and came out rather flat despite being well proofed. Is the cure here simply doing more folds?
Hey! Super sorry for the late reply and I’m happy to help! To reduce extensibility I’d try eliminating any autolyse (see my post on the autolyse technique for more information), perhaps reduce the hydration of the dough if that doesn’t help, and finally, yes adding in even one more set of stretch and folds will strengthen up the dough quite a bit!
Thank you for sharing your craft through your website. I really enjoy reading the backstories before delving into the recipes. I also find reading through the comments and your responses instructive before attempting to bake.
I have a scoring question: This morning I baked Tartine #33 scoring it in a box shape, with crossed corners to create room to rise. The resulting crust is crispy, deep color and absolutely delicious. However the parts of the bread that are scored are completely flat. I was expecting the scored edges to be more pronounced. Maybe the scoring was not sufficiently deep? So I’m wondering if there’s an optimal scoring angle and depth of scoring to achieve the maximum rise as well as pronounced scored edges on the crust for that quintessential sourdough? Maybe I’m too tentative with the blade?
You’re very welcome! Yes, it could be you didn’t score in deeply enough. However, there are other factors at play there. If the dough is really pushing it close to over proofing, you might see the score sort of fuse together. This can also happen if you don’t have sufficient steam in the oven at the first part of baking (if you’re baking in a Dutch oven this is not likely the case).
I find it best to adjust the scoring depth based on the dough. Give it a gentle poke here and there and if it feels very weak and soft, score more shallowly, if the dough feels very strong, go in a little deeper. I like to always do this little test before baking, to build my intuitive sense for how the dough feels and how fermented the dough is.
Hope this helps!
Wonderful recipe! I just made these loaves a couple of days ago and we love them! I noticed a slightly more sour taste as well. Just a quick question, for the pre-shape, you noted to cover the dough for the 30 minutes, is there any particular reason that you do this? I was just wondering as the other loaves that I’ve made from your site, remain uncovered.
Glad to hear that, Sammy! I used to cover the dough during this time, but there’s no need to do this (unless you have a draft in your kitchen or AC running, which could develop a thick skin on the dough and make shaping difficult). These days, I never cover my dough during this time. Enjoy!
Thank you!
What should be happening between 2:10pm and 3pm? You say to shape the dough, but then not what to do with it? Does it rest on the counter for 50 minutes? Does it go directly into the proofing baskets and into the fridge? Thanks!
Typo! Proof should begin right after shaping. After shaping, right into proofing baskets, cover, and into fridge.
help! dough too what and not shaping
I thought everything okuntil I started folding the dough. I am in Tahoe I started folding at 2:30 pm by 8:30pm the dough was still weat but I did not feel gluten development It still had bubbles but it never rounded up I added more flour as I was trying to shape it on the counter, then ended up folding in bowl for another hr. I then transfer to surface with flour again try to shape and let it rest for 30m, it was still not working. I put back in baskets & now in the fridge overnight advise please
It sounds like your dough is most likely over hydrated. Try reducing the hydration by 10% and give it another go — the reduced water should bring a lot of strength to the dough and you’ll feel it immediately. Once you find a suitable hydration, you can try to push it back up, but as you do, take note of how the consistency of the dough changes: the dough will start to slacken out as you add more and more water, this means you’ll likely have to mix more upfront or add another set or two of stretch and folds during bulk fermentation.
Try to keep everything else as consistent as possible and let me know how the next attempt goes!
Hello, I noticed that you did not specify the ambient temperature for your bulk fermentation, and for the final two hours of bulk fermentation you say “rest on the counter”. What was the temperature of your initial bulk fermentation, and is your counter temperature different?
Hi
my sourdough in not getting that spring open explosive look when i bake it. my starter looks like its working-double in size. float test works. gluten seem to have develop. Any suggestions? could my starter be to weak? my cuts are not at correct angle.
thanks for all the tips.
I love your recipes on this site. I’ve followed many of your guides !
Can I use bob’s wholemeal flour instead of whole meal bread flour ? I cant find any wholemeal bread flour anywhere
I am doing this Tartine for the 2and time, 1st bake with my newer starter. My wife and I are discussing the air pockets. She says a french bakery would not sell such bread if it has the large pockets mine has (not complainingly). Fact?
Hi, je préfère, de beaucoup, quand le pain est bien aéré avec de gros trous.
C’est notre bon pain de campagne traditionnel.
Hey Maurizio! First, thank you so much for all of this. I’ve been making bread following your recipes and Chad’s book for two years on/off now and i’m getting very nice results.
I keep baking hoping i’ll someday get to that perfectly oven-sprung-honey-comb-super-round miche and feel i’m really close to my goal but there are a couple questions I’ve been searching the whole internet for answer and can’t seem to find an answer.. here they are!
I feed my starter 50/50 locally (Québec, Canada) stone milled rye and bread flour.
When building the leaven, should i switch to whole wheat and bread or keep my mix to make sure the culture stays happy? Will the rye content of my leaven impart changes to the dough?
In the bulk fermentation, I understand that the dough must rise and feel lively, but to me this window is very large… There is about 2 hours from 20% rise with soft feel to 50% rise with very soft feel. Is there a way to know when I should stop this? I have know problem shaping even after the 50% rise, in fact the dough shapes very nicely. Am I looking for maximum rise to shaping capacity ratio or an in between that will leave me more control in the proofing stage?
Regarding shapes and oven spring, have you noticed a difference between boules and bâtards? If so, have you ever tried shaping a boule using part of the bâtard technique ( rolling the dough on itself )?
Finally, I keep trying fridge proof with hit or miss. Is the dough suppose to rise in the fridge? Mine doesn’t.. I check periodically looking for changes in size but over 12 or 14 or 18 hours, no change. What fridge temp works for you? Mine seems to be on the cold side at around 34F. Could this be the issue or maybe my dough is over-fermented at 50% rise and that’s why there no change in the fridge?
Thank you so so much!
Dominik
HELP… my bulk fermentation went great! Nice air bubbles and a really nice rise. Bench rest was good too I think. But final rise was a disaster. Never rose or if it did, it was microscopic. Did I not do the fold correctly…not stretching and pulling and making it a tight enough package? I put the 2nd dough in the fridge overnite and thought it would rise. NO. So I proceeded to use the proof feature on my oven because it wouldn’t hurt. No rise either. I’m lost. The crust on the other hand turned out fantastic and had a good flavor. Nice sour taste but not overly in your face sourdough. The inside was very doughy. Good news, I make croutons out of it. Any hints or ideas would be most appreciated. Thanks so much.
Hey, Cathy! It’s hard to say, it could be over proofed dough but it could also be under proofed. Because you said you tried to proof longer and this didn’t help, it makes me think the dough was under proofed.
Make sure to build your levain from a starter that’s strong and mature (meaning it’s risen to it’s peak height before you take some to use). From there, bulk fermentation is very important! Make sure your bulk fermentation goes sufficiently far, you want the dough to look smooth, it should have risen considerably, and have bubbles here and there. If you tug on the dough a bit it should offer resistance to your tugging, it’ll feel stronger. For this recipe it should be around 3.5-4 hours at warm room temp, like 76-78F. If you go much longer than this you might start to get close to over proofing!
Thanks for the response…my starter was strong, at least I thought so and the bulk fermentation resulted in a great rise. My kitchen is not warm so I put in the oven (not on) where the temp was 72-78 degrees. I let it go about 4 hrs. Lots of good bubbles and good rise. The folding may not have gone well is what I’m thinking. I will try again and again. But thank you again. Appreciate your thoughts.
I have been struggling with my dough being quite sticky and not firming up as it should going into the proofing baskets. I get significant sticking in the baskets and it ruins the shape (not to mention bad cleanup). Any tips on things I may be missing or doing wrong?
If your dough is on the weak side it won’t be as smooth and as strong as needed to cleanly remove from the liner. Try adding in another set or two of stretch and folds to impart a little more strength, and be sure when you shape the resulting dough is smooth, strong, and taut. A good test here is to just shape one loaf very, very tight and see if it cleanly removes next time (still dust your basket, though).
Over hydration is related to dough strength also: if your dough is over hydrated and not commensurately strengthened, it’ll lose shape during proof and stick to the liner. Reducing hydration is a quick way to give your dough strength to ensure it removes cleanly.
Finally, the longer your dough proofs the more it begins to lose strength: fermentation has the effect of strengthening gluten up to a point, but as acidity builds up in the dough it begins to degrade. This is actually a good (and necessary) thing up to a point, but too far and your dough will lose shape, get overly sticky, and eventually collapse. If you’ve tried shaping tighter and this isn’t working, try pulling back your proof time a bit to see if that helps.
Let me know how it goes!
I did less water this time and it worked really really well. Easily my best loaves to date and it was much much easier to deal with. Thanks so much!
Hi Maurizio, I was wondering if you could advise when to feed starter before making the levain?
Hey, Chloe! Check out my post on starter maintenance, it has ample description (with photos!) on when to refresh your starter, what a mature starter looks like, and how I generally keep my culture strong day to day.
I’ve been making this loaf for the last month and am finally in a good place with understanding the time and process this takes. These loaves are eaten up so quickly by my family that I am now about to make a second batch within three days of making the first! Any problems with pushing the fridge proof to 20-21 hours? What should I be looking for when stating the bread is ready to bake from fridge? Also any comments on spraying some water gently on the loaf before putting it in with lid on? I’ve seen this done elsewhere and am curious of your opinion.
Glad to hear this, Micayla! It takes a few iterations, but once you get the process down it’s like second nature. That should be just fine to push the proof in the fridge longer, you might see a little less rise and more sourness, but it’ll still be fantastic. Because the fridge is so cold I can be hard to judge whether the dough is ready, but I like to gently poke the dough to see how it feels (the famed “poke test” isn’t super accurate with cold dough, but it can still help give you insight), judge how much it’s risen, and then use experience to finalize an assessment. The best way to build up this experience is to try and bake the same recipe over and over (sounds like you’re doing this!) trying to keep as many things consistent as possible. This way you can directly see whether 20 hours is too much, or perhaps it could even go longer. Once you start seeing less and less rise in the dough, you’re going to far.
I like to also spray the loaf before putting the lid on — no problem there!
Happy baking 🙂
I would like to know how you achieved the snow leopard coloring of the loaf in the main picture? I have made a couple of recipes from your blog and all have turned out really nice. Loved the Guinness recipe. Thanks and keep turning out those great recipes.
Hey, John! The proofing basket was dusted with white rice flour and it stays on the exterior of the loaf (and also helps it remove from the basket cleanly), giving it that mottled coloring. Happy baking!