


I call this batch number 33 of the Tartine sourdough country bread recipe, while it may actually be my thirty-third pair of these I’m not 100% positive. I know for sure it can’t be any less, but it’s probably more. On to the entry.
Another Sunday, another pair of Tartine sourdough country loaves shaped and proofing. My family has come to expect this bread to be on hand during the week, and in the rare case where we have to buy some bread from the grocery store, we are always disappointed. Baking bread is a relatively simple act when you boil it down, and yet getting that perfect loaf out of the oven does not always work out — but I still strive forward.
If you’re brand new to baking sourdough, read my Beginner’s Sourdough recipe post first, it has longer in-depth explanations on every step in the baking process!
Sunday started out a bit lazy; waking in the later morning after attending a friend’s birthday party the night before. I stumbled into the kitchen and took a look outside to see completely clear skies—a good sign a warm day was ahead. Given the rising temperature, I knew Sunday would be a day of quick dough handling and preparation. As you can see, even my German shepherd Arya (yes, that Arya) was a bit lazy this morning. I suppose too many rabbits, pigeons, and tennis balls chased the day before; oh, what a life.

Although the leaven was prepared later than usual on Saturday night, it was ready to go (left-hand side image below). As you can see, the bubbles on top indicate there was significant fermentation activity overnight, and judging by the smell (like ripe fruit, almost a hint of vinegar), hopefully, it didn’t go too far.
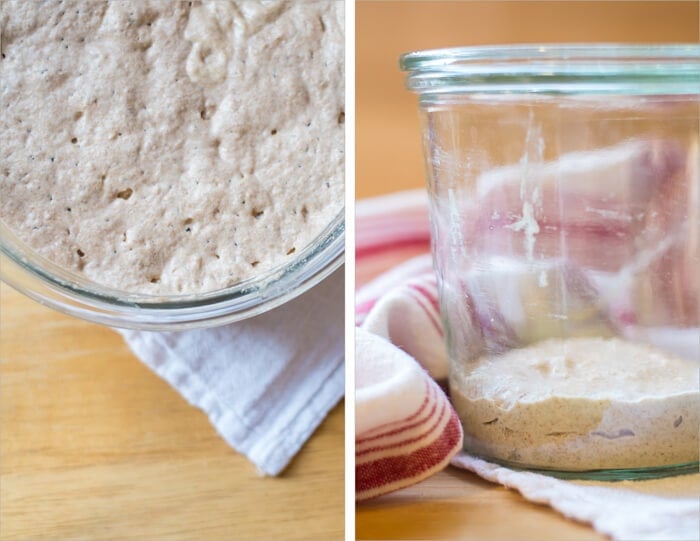
Over my starter’s lifetime, I’ve experimented with using different flour and grains and have settled on a formula that my particular strain seems to thrive on. Instead of following Chad Robertson’s Tartine starter formula in his book where he feeds 50% whole wheat, and 50% all-purpose, I feed my starter 100% rye flour. I’ve found that my starter shows noticeable activity when fed rye exclusively. If you’re interested in reading about how to create and manage a sourdough starter like mine, head over there and read on.
Also, if you’re one who frequents Instagram, head over and check out my Instagram feed. I typically post many “daily bakes” and those behind-the-scenes shots that sometimes don’t make it into these posts!
Tartine Sourdough Country Bread Recipe
Prepare the leaven – 12:00 a.m.
The night before you plan to prepare your dough, mix the following, lightly cover, and set out on the counter overnight:
| Weight | Ingredient | Baker’s Percentage |
|---|---|---|
| 31g | Mature sourdough starter (100% hydration) | 28% |
| 110g | Whole Wheat Flour | 100% |
| 116g | Water | 105% |
Mix the flour + water, autolyse – 9:00 a.m.
For this loaf, I decided to try and tweak the whole wheat to white bread flour percentages. I still wanted some of the WW taste and texture, but a bit more “white” in this loaf. Due to the WW reduction (from the last Tartine recipe), I’ve also reduced the amount of water to 79%.
Note that this is not a traditional “autolyse,” which only has water and flour mixed, but this is how Chad performs this step in Tartine—let’s follow suit for this bake. In my more recent baking adventures, I no longer mix flour, water, and levain for this step.
Gather the following:
- 250g of your new leaven
- 300g whole wheat flour (I’m currently using Great River Organic whole wheat flour)
- 700g unbleached all-purpose white flour (King Arthur)
- 20g salt
- 740g water and 50g water (reserved for step 5, below)
Method:
- Add 250g leaven to your large mixing bowl
- Pour in 740g water and mix with your hands until the leaven is completely dispersed
- Add 700g white flour and 300g whole wheat flour and mix with your hand until all the dry bits of flour are gone
- Cover your bowl with a towel, or if in a dry climate, plastic wrap and let autolyse for 30 minutes
- After 30 minutes, add 20g salt on top of the dough and slowly pour the remaining 50g of your reserved water on top. Squeeze the dough with your hand to incorporate the salt throughout
- Now reach your hand under the dough and pull the side up and over onto itself. Continue to do this as you spin the bowl; grab, pull, and push. Do this just until the dough comes together and becomes super sticky. Generally, this will only be between 5-10 turns
- Transfer your dough to your plastic or glass container, set a timer for 30 minutes
Next, we tackle the bulk fermentation step.
Bulk Fermentation
At this stage, we want to do four sets of turns, plus 1 – 2 hours of rest on the counter. A “turn” consists of reaching under your dough, grab the bottom and pull up the dough on top of itself. Do this four times, one of each side of your container (if it’s square, that is). Additionally, you want to do this rather vigorously. The stretch up and down on itself is what gives the dough strength.
- 10:10 a.m. – Turn 1
- 10:40 a.m. – Turn 2
- 11:10 a.m. – Turn 3
- 11:40 a.m. – Turn 4
- 11:40 a.m. to 1:40pm – Rest on Counter
Pre-shape – 1:40 p.m.
When the dough has risen about 20-30%, and you see a bunch of little air pockets throughout, it’s ready for pre-shaping. Take the dough out of the container onto your *unfloured* work surface.
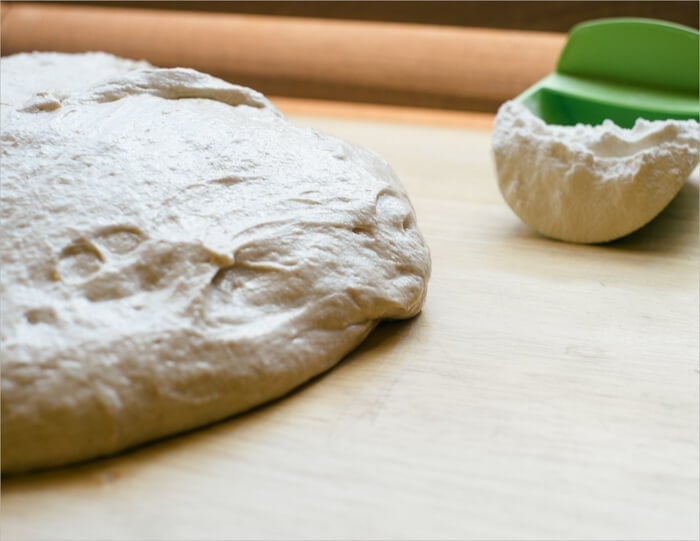
Sprinkle some flour on top of your dough and divide into two halves. Take a half, flip it over and pull each of 4 edges from under onto the top. Then, flip the folded dough over, so the seam is on your work surface. You want to form loose boules here by using your hand and your dough knife. Your work surface grabs the bottom of the dough slightly as you spin the dough around to make a little ball. Repeat with the other half and cover (I cover with two inverted mixing bowls) for 30 minutes.
Shape – 2:10 p.m.
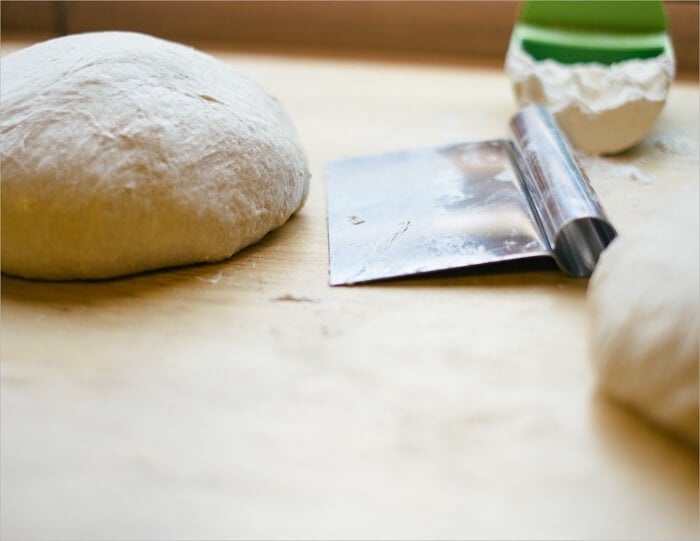
The resting dough should have spread out, but not quite into a pancake shape. If it has formed a pancake, you can strengthen it by pre-shaping one more time and waiting another 40 minutes.
Flour the top of one of the boules and flip it over with your lightly floured hand and dough knife. Take the part of the dough that’s closest to you and fold it up and over in half. Take the part that’s to the right, stretch it out as far as it will stretch, and fold it up and to the left. Repeat with the left side and the side of the dough farthest from you. Then take the edge that’s closest to you, pull it up and over again towards the back. When performing this last motion, you will lift the entire dough up and over until the seam side is now down on your work surface.
Spin the dough using your two hands to shape into a boule. As you slightly pick up the dough and spin it, the bottom snags the unfloured work surface and creates tension. I do this several times to create a very taught surface on the top of the boule. Sometimes small air bubbles will be visible.
If you’d like to shape this dough as a batard instead of a boule, check out my batard shaping guide.
Proof – 2:20 p.m.
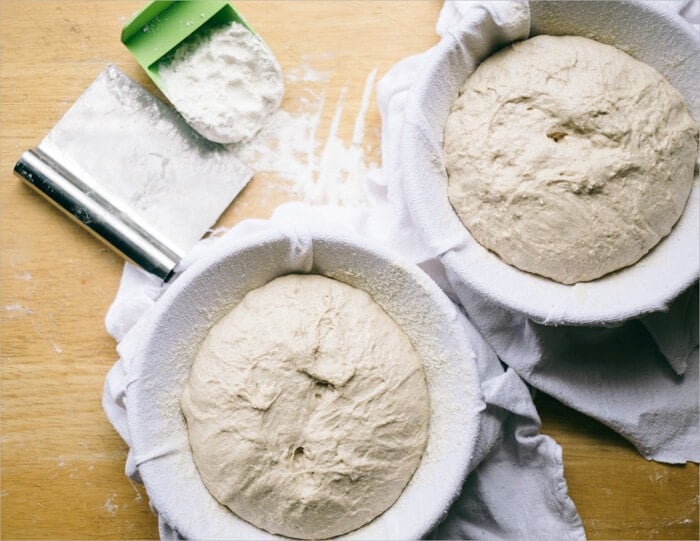
Place towels into small mixing bowls or proofing baskets and dust with white rice flour. These bowls will hold the dough as they proof in the fridge overnight. Take your taught boules and place them into the floured bowls with the seam *up* facing you. I place each of my bowls into plastic bags and then into the fridge.
Score + Bake – 9:00 a.m.
Gather your tools:
Speaking of tools, if you’d like to see all the tools, I use when baking head over to my tools page and take a look.
The first of these sourdough loaves was retarded for 18 hours. The Tartine formula lists an 8-hour cool fermentation in the fridge but 18-20 hours seems to be the sweet spot for me as my bread takes on a complex flavor with this extended fermentation time. It also seems to help open up the crumb more than what you would typically see; I strive for that light and soft interior.
In the morning you first want to get your oven ready. I place the rack in the bottom third of the oven. Turn your oven on to 450°F (230°C) and let it preheat.
Once your oven is preheated, get your dough ready. I bake this dough straight from the refrigerator—no warmup time is necessary. Take one of your loaves out of the fridge, cut a circular piece of parchment paper, and place it on top of the bowl. I then place a pizza peel on top of the parchment paper (and bowl) and invert the whole thing quickly to get the dough out of the bowl and onto the paper + peel. Get your razor blade out and score the top of the loaf to allow the bread to expand while rising in the oven. For these sets of loaves, I scored one with my “Roman numeral three” pattern and the other with a single long slash.
Quickly take out the shallow half of your hot combo cooker and drag in the parchment paper and dough.
Cover with the other half of the combo cooker and bake for 20 minutes with the lid on. After this time, open the oven and lift off the combo cooker lid (you can leave it in the oven to the side), close the oven, and bake for an additional 35 minutes. These times and temps are a drastic change from the Tartine book, but I’ve found them necessary due to my elevation and climate. I want the crust to be nice and dark brown.
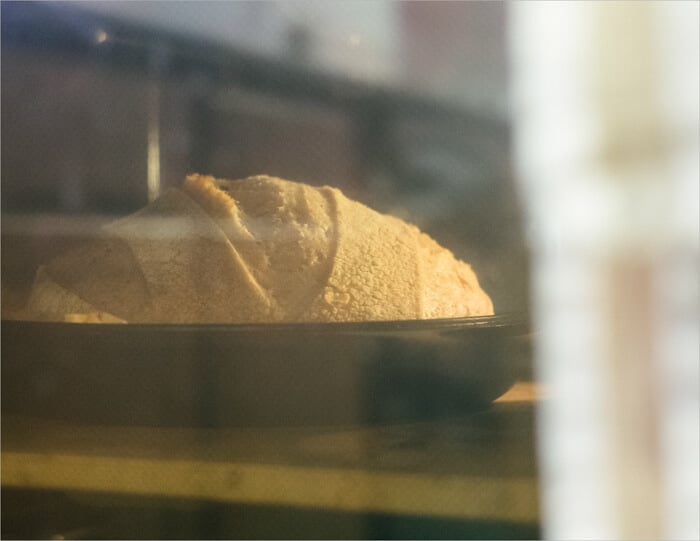
After pulling the loaves from the oven, I cool them on a wire rack for at least one hour before cutting into them. Cutting too soon can cause the crust to harden drastically and the inside to become quite dense. Easier said than done, however.
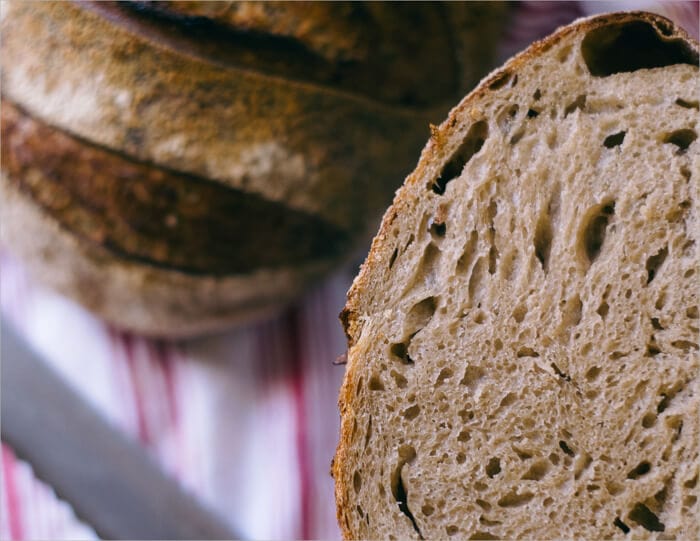

What a pair of beautiful loaves this morning. There’s no doubt the lazy Sunday morning/afternoon turned out to be a success in the kitchen, and this Tartine sourdough country bread recipe couldn’t be more delicious.
Buon appetito!
Now that you’ve attempted this recipe try your hand at the higher hydration version for a bit more challenge, and an even better tasting loaf!
If you use this recipe, tag @maurizio on Instagram so I can take a look!


374 Comments
Just got a mini fridge to do my overnight proofs in, and I’m wondering what temp I should set it at. I have a couple glasses of water in there right now and I’ll take their temp in the morning; I’m guessing I should aim for around 40*F? What would you recommend?
The retard temperature of your dough can be set to whatever your preference is, I’ve actually been playing with this temperature quite a bit lately, trying everything from 38ºF to 55ºF. I noticed my dough is much more expanded in the morning with warmer retard temps but you have to take this into account in the overall process otherwise the dough can easily overproof.
At lower temps, like 38ºF, there’s very, very little activity going on in the dough overnight. Most of the activity takes place in the timeframe where your dough cools from room temp down to 38ºF — this could take a while depending on the fridge.
I’m working on a writeup now where I built my own retarder using a mini-freezer. I hope to have it published pretty soon, I think you’ll find it really interesting and applicable, especially since you have that fridge!
Thank you! That is helpful, and I look forward to reading more. The weather is getting warm and we don’t have AC so it’s throwing EVERYTHING off now. Hopefully I can use the fridge to help right the ship 🙂
Love this one. Just finished first bake and published on Instagram. Will run a second loaf soon so have two different cold proof times to see variation. Found this to be pretty easy and straightforward and the result is excellent. Good general purpose loaf.
Awesome, really glad to hear that! It’s a pretty solid loaf of sourdough, that’s for sure 🙂
I realise others have already asked this question, but I’m still a little confused. I want to make a smaller loaf and will therefore halve the amount of ingredients. Maurizio you recommend making the same amount of levain (i.e. not halving), but should I still add the whole amount to the dough mix, or only add halve the amount of levain and bin the rest of it? Many thanks!
Hey, Craig! Yes, I like to still make the same amount of levain since it’s really a small amount to begin with. Halve all the ingredients in the Dough Mix section, even the levain added.
In other words, the levain build will still be the same quantity, but the amount of that build added to the dough will be halved.
Happy baking!
Thanks Andy! Bertinet’s books are great. Have fun with the Tartine recipe, it’s a keeper. Happy baking!
I live at 1320 ft or something close to that should I just lower the cooking temp and cooking time? Or what
Yes, I’d reduce the cooking time. Watch the dough near the end of the bake and stop baking when it looks well colored and done to your liking. I find my temps and times are usually a little higher than those at lower elevations but not significantly so.
Hi Maurizio, I’m looking to do my first bake with your sourdough starter recipe tomorrow (thanks for all the excellent posts!), and I just noticed you’d mentioned being at a higher altitude and thereby needing a higher temperature and bake time. What would you recommend for someone at sea level? Any big changes, or should I just keep an eye on the bake, as you’d recommended to James?
Also, the dough during my shaping phase was quite sticky, making it difficult to shape and pick up; next time, should I attempt a less sticky dough or just add more flour when shaping it?
Thanks!
Marshall
You bet! I’d suggest just keeping an eye on the bake. If you’re using a Dutch oven to bake these loaves then you could preheat your oven at 475ºF, I’ve found DO’s to sometimes get too hot even at my altitude!
There are many reasons why the dough could be sticky, but it’s such a relative thing it’s hard to say why that happened (for me “sticky” might mean something completely different than for some one else). But yes, use enough bench flour until you get the hang of things. As you gain more and more experience you’ll find you will start to use less and less bench flour.
Hope that helps!
Love this recipe and method. I usually use 100g of whole wheat and 900g of bread flour, and slightly less water. The bread is fantastic.
Really glad to hear that and sounds like your modifications work quite well! Happy baking 🙂
Hi Maurizio! Love your site. I have successfully brought up a natural starter using your methods and techniques and its extremely gratifying. One quick question that i feel like I can’t seem to find the answer to anywhere is, why do you make such a large Leaven (465g total) when you only use 250g in your final dough? Also, is there a general rule of thumb as to a certain percentage of leaven to total flour or anything like that?
The extra large levain here is not really necessary. I will update this post to use my more recent methods of making just enough levain to cover the recipe and no more. Sorry about the confusion!
There’s no set rule for levain percentage in a formula. Many things go into it: flour choices, flavor, desired dough texture, etc. I usually am in the range of 10-20%, depending on the formula and my testing.
Hope this helps!
Hi! Thank you for your website- it has helped me be successful at natural yeast when I wasn’t sure if there was any hope left for my loaves! What is your elevation? I am at 4,500 ft and found my loaf to be burnt a good 8 minutes before time was up. I am not sure if I should lower the temperature due to my high elevation or just cook for less time. Thanks again.
Really glad to hear my site has helped so much! I live around 5280 ft. and I actually notice my bread takes longer to cook than most. But yes, if your bread is burning then reduce the temperature and/or bake time to suit! Hope this helps — happy baking!
Hi Maurizio! I’m curious about your choice to push the final rise longer and longer, in this recipe and others. I often find that I’m having to shorten my final rise to avoid overproofing- after just a few hours in the fridge, my bread starts failing the poke test. But I’d love to reap the benefits of a long, slow fridge rise. Is there anything you do to keep that long final rise from turning into an overproofing situation when you’re already using a pretty standard percentage of levain at the outset like you are here?
Hi, Caroline! That final proof is very dependent on many factors (amount of whole grain flour, temperatures, percentage of levain…). I like to push my final proof as far as possible (even more so lately) without my dough overproofing — it results in the best texture and flavor, in my opinion. If you want to try and lengthen that final proof you could reduce the levain percentage, cut bulk a little short (say 30 mins or so) or bulk at a slightly lower temperature to help slow things down.
One thing you should keep in mind is that I do find the poke test to be somewhat unreliable when the dough has chilled in the fridge. As your dough gets colder it becomes more and more firm, compromising the efficiency of the test.
Hope this helps!
Right, I’ve heard that about the poke test. After yesterday’s bake I wonder if maybe I was mistaking some of the signs of underproofing as overproofing- I pushed the second fermentation to about 8-9 hours in the fridge (for 100% whole wheat from Grist and Toll) and it looked pretty great. Thanks!
Inspired by this mini-discussion I tried to write out the timing for the original tartine recipe from the book and compare it to Maurizio’s timing, and I was totally stumped. If I follow Chad’s description in the book, it overlaps with Maurizio’s timing exactly, except then in the end he says to put it in the fridge for 8-12 hours. So if I’m done with all the steps by 3pm, then leave in the fridge for max 12 hours, I’d have to get up to bake at 3am the next day? Even taking into account that Chad might have a loose definition of “morning” and might start the autolyse let’s say around 11am instead of 9am, that would still have me baking at 5am on Sunday… Or am I missing something?
You’re right about that, with certain timelines you’ll end up having to wake up super early or go to bed super late. The important thing here are the durations for each step, not necessarily when they take place. For example, you could shift the entire timetable to the right so that after 12 hours you actually bake in the morning at 8am or sometime thereafter. This would mean your shaped dough would need to go into the fridge around 8pm the night before.
Hope that helps!
Hi hi! So exciting my first 80% hydration sourdough loaf is in the oven. How do I know for sure it’s done baking? I don’t have a thermometer so I can’t check the internal temperature. And I’m afraid to take it out and knock the back for that hollow sign…. am I just looking for colouring at this point? (Great blog by the way.)
That’s great, hope it turned out well! Yes, would just look for color at that point. At long as the duration is close to what I have here go by color to determine doneness after that. I’d highly recommend a thermometer at some point, though, to also help with dough temperature during the whole process. It really helps!
Thanks for the kind words and happy baking!
Hello everyone! Very new bread baker here – I don’t go through much bread myself and was curious if this recipe can be halved to make one loaf instead of two? I apologize if this has a blatently obvious answer!
Hello Alissa, and welcome! Yes, just go ahead and split the recipe in half — that’s exactly how to do it 🙂 Happy baking!
I am also new to bread baking, but I have been making 2 loaves and wrapping one tightly and freezing it after it is done cooling. It is pretty fresh and convenient in between baking opportunities!
This is exactly what I do quite often as well! I also like to slice the second loaf completely, place the slices in a freezer bag, and then use my Breville toaster with the “defrost” button to quickly defrost and toast entire slices of bread. It’s magic, actually.
Thanks for the comments!
Really happy to hear that! Yes, at lower elevations I’d probably end up baking this bread for less time overall. Just keep an eye on the bread nearing the last 10 minutes and turn down the oven and/or reduce the total bake time until the bread looks done to your liking. It’s hard to give exact temps/times to reduce as I’ve only baked here at my altitude but with a few tests you can dial it in perfect for your environment.
Hope that helps and happy baking!
Do I bake right out of the refrigerator or should I let the dough come to room temperature? Thanks again for your help and your attention to this wonderful blog.
I almost always bake right from the fridge. Thank you!
Ciao Maurizio! I’m loving my sourdough cookbooks but it is your blog that I visit for the actual bread baking instructions. Thanks for sharing your talent! Could you please offer suggestions on reducing the thickness of the bottom crust? And what a beautiful dog! Thank you.
Wow, really happy to hear that thank you! If you’re using a Dutch oven (DO) it can be hard sometimes to reduce the thickness of that bottom crust, it seems to happen more often for me in a DO than when I bake directly on baking stones or a Baking Steel. One thing you could try to do is preheat the oven for less time so it’s not quite so hot when you load your dough, or preheat at a slightly lower temperature. That might fix it for ya!
Would it be okay to let the dough ferment for about 36 hours? I didn’t read through the directions before I started and won’t be home to bake it until then :/
It’s hard to say definitively, it depends on how well developed/fermented the dough was when you put it in the fridge. I’d say bake it up and see how it turns out, chances are it will still be delicious!
I just today throughout my third batch of dough. Everytime I make it I follow the Tartine recipe to a “T”. After all is said and done the dough comes out loose and wet. I am very careful about my measurements but cannot figure out why it is so unmanageable. Any suggestions? I am ready to give up.
Ahh sorry to hear that Franco! It sounds to me like your dough is very much over hydrated, you need to reduce the water called for in the recipe as your flour might not be able to handle it. I would recommend reducing water 10% and see if that helps the next bake. Stick with it, we’ll get you there!
Thank you so very very much. I will try that tomorrow and post after it is done. I appreciate your kind response. I will keep trying.
Great job Maurizio. Dropped the water by ten percent and got two beautiful loaves of bread. Really really appreciate your help.
Excellent!!
Hi Maurizio,
Thanks for the amazing blog. I’m still having throuble getting a lot of spring and I was wondering how much you expect the loaf to increase in size after shaping the loaf and when it’s ready to cook. You note 20-30% increase before shaping but I’m curious how much bigger you do expect it to be prior to baking. Thanks!
You’re very welcome! The final rise of the dough in the proofing baskets, if kept at cold temperature for the proof, might not really rise all that much. I notice the dough usually puffs up just a tiny, tiny bit more than when I placed it into the fridge the night before but nothing significant. Home refrigerators are actually very cold for the dough at typically 38ºF — not much activity will happen at that temperature in terms of the dough rising. This is ok, though, because we’re looking more for flavor development (acid production) at this point.
I hope that helps!
Okay, thanks Maurizio. Do you ever do the final rise for this loaf out of the fridge or part of the rise out of the fridge?
I don’t usually — I love the subtle complexity imparted on this bread with the overnight proof. That cold, long period in the fridge builds up subtle sour notes in the bread that really fleshes out the flavor profile of this bread. You can definitely do that, though!
Hi Maurizio,
I gave this a try and had a reasonable looking final loaf http://m.imgur.com/zUpmKUa , but the crumb was really tacky and dense. I cooked to an internal temperature of 210F and waited 2 hours before cutting, but it was still very gummy. It left a film on the knife. One thing I was thinking was that it could be the King Arthur 100% whole wheat flour I used. I also soaked the whole wheat flour overnight but made sure to keep all the liquid percentages the same.
Have you ever had any experience with a gummy crumb?
Hi! I sometimes see a gummy crumb if the loaf is underbaked but 210ºF should be sufficient. It could be a few other things but first I’d focus on developing fermentation just a bit more in your bread. Make sure your bulk fermentation step goes long enough to develop the dough. At 78ºF or so it usually takes me around 4 hours. The dough should look very alive and if you tug on it you’ll notice it will have strength to it, it will resist stretching out.
I think if we let your dough ferment longer we’ll see some, if not all, of that gummy texture go away. Also, have a look at my Beginner’s Sourdough recipe, I have some great photos there showing my dough development and when I call bulk fermentation quits.
Happy baking!
Hey Maurizio,
Thank you for your guide and thorough explanations. I baked this bread today and it turned out wonderful. I have a couple of questions though: my loaves didn’t rise as much as I wanted them too, they spread out instead of up. I could’ve preshaped again to get a more taught top, but I’m curious what could effect the rising. Will ambient temperature effect rising during proofing? My starter hasn’t risen as much as yours during feeding but I am using a larger vessel. (I have fed it for about 2 weeks) Is there anyway to kick-start that rising from the starter? Would steam help it during cooking? I would also like to tone down the acidity a bit. Also do you ever add fruit to your levain?
Sorry for the many questions! but now that I’ve started this process I can’t help but improve
Thank you
You’re very welcome! Glad it’s helped. There are many reasons why your loaf might not have risen as high as possible. If you read down on this page a few comments below yours you’ll see my explanation for over proofing which is one such possibility. It could also be the dough wasn’t strong enough or you didn’t develop enough tension at shape time. Make sure when you’re shaping the dough is sufficiently taut, it should hold its shape on the counter after you shape it.
Warmer temperatures will speed up fermentation activity so if you keep your starter warmer you’ll directly see this. I like to keep my starter at 75ºF and my dough around 78-80ºF.
I’ve never added fruit to my levain, sorry!
Hope this all helps, happy baking Michael!
Hi Maurizio,
Have used your starter guide to get a nice strong-ish starter at two feeds a day (and LOTS of great sourdough pancakes with the cast-offs.)
Today I used your Tartine #33 to make my first loaves, and they are sat in the fridge ready for baking in the morning. So far, so good!!
A few questions I had:
1. I am new to sourdough and relatively new to bread full stop. What hydration is this? I calculated approx 81% is that correct?
2. Bulk Fermentation took about an hour longer – 3hrs15 in total – til I was comfortable it was ready. Could this just be because I have a cool kitchen? Any harm in that extra hour sitting around?
3. I have a baking stone which I have used for non-sourdough loaves along with the pan of water for steam, but a fellow baker has suggested to bake it in my thick-bottomed metal saucepan instead (as I do not yet have a dutch oven or similar.) Any thoughts? Maybe try one loaf in each method?
4. Finally my starter is currently 50% rye 50% strong white. What has more effect on the eventual loaf you make – the makeup of the starter or the makeup of the flour you use after the leaven? So if I wanted a more white loaf, should I make a more white starter or just use my 50/50 starter with more white for the bake?
5. Oh one more – if I want to make one loaf, do I literally just half the levels on this recipe? (Although I read that it’s still best to make the same amount of leaven.)
Thanks and great job on this blog (and the awards!)
I baked the loaves. I have stuck one of them on Instagram.
https://www.instagram.com/p/BN_u9MyAuGK/?taken-by=edbartlett
Crumb looks pretty good, and it’s tasty as hell!
But when I removed them from the fridge at 9am this morning they were pretty ‘wobbly’ and started spreading as soon as I took them out of the proving bowls. As you can see from the Instagram, I didn’t get the spring I was hoping for. It did rise a bit but also spread out the front. Any thoughts on why? Should I perhaps have strengthened it up a bit more before proving?
I just commented over at Instagram, your bread looks great! To me it looks like it was slightly over proofed, thus the sluggish rise and lots of small holes throughout. The longer your dough ferments the more the structure (gluten) will breakdown and that’s why your loaves spread and were wobbly (this can also be due to insufficient tension when shaping the dough, but I’m guessing over proof here). As long as you gave the dough enough of a tight “skin” on the outside when you shaped it they should be fine enough to rise nice and high.
Next bake try to reduce your final proof time a few hours or so and see if that helps increase the rise in your bread. There’s a balance of course, you want it to be “fully” proofed but not so much that it starts to breakdown like you experienced. You are definitely on the right track here with your bread, you just need a little tweaking to the proof and you’ll be set!
Answers:
1. Yes, about 81% hydration taking the 100%-ish hydration levain into account. In later recipes I clearly state the hydration so there’s no guessing.
2. Yes, the lower the temperatures (within reason) the longer it will take the dough to develop. No harm in giving the dough the time it needs to be ready, in fact this is something most beginner bakers have trouble with… as they say, watch the dough not the clock 🙂 I like to keep my dough around 78ºF.
3. You could try it, sure. I find baking directly on baking stones to work really well, though. I’ve never baked in an open pan/pot on top of stones but it might work well for you.
4. The flour you use in your final mix has more of an effect as it’s in a much higher quantity than your starter or levain. I almost always use the same exact levain for my bread, no matter what type I’m making (50% ww and 50% white).
5. Yes, just halve everything. I do suggest keeping the levain build the same quantity but even that isn’t 100% necessary, you just want to make sure you have enough levain to cover the recipe! One caveat to this is when the levain build starts to get incredibly low, like less than 40-50g or so, it becomes difficult to judge when it’s ready to be used (there’s just not a lot there!).
Hope that helps and thank you for the comments!
My poor little loaf ended up about 2″ high – more like a disc than a loaf. The air bubbles aren’t are pronounced as in your pic. Any suggestion on what might have gone wrong? The starter seemed great, and was trucking along.
It sounds like perhaps your dough was over hydrated, especially if it was overly sticky as you mentioned in your comment below. Try reducing hydration 5-10% and see how it goes next time. Once you are comfortable with the process and shaping you can slowly increase the water as your flour allows.
Keep a close eye on the temperature of your dough during the entire process, it’s very important. Keeping your dough around 78F is a great place to be.
in the middle of preparing for autolyse and realize I don’t have granular salt, only rock salt. Would it be reasonable to mix this in the water so it dissipates, rather than trying to grind 20g by hand? Thanks!
Sure, that would work. As long as it’s fully dissolved in the water you add to your dough that will be just fine. Happy baking!
Thanks Maurizio! I’m in the bulk fermentation process, on turn 4. The dough is still very sticky. Next steps are to pre-shape on an unfloured work space. I can’t imagine putting this on a counter! it’s so sticky! Is this normal?
This is a delicious bread! I made it for the first time today. In the instructions, I would recommend indicating that you should take the loaf out of the fridge right before baking. I was unsure, so I tried it both ways; once right from the fridge and once on the counter while the oven was preheating. I didn’t notice a difference and have since found a note in the comments that it should be baked right from the fridge. Putting that in the instructions might avoid some confusion for another person. Thanks for all the great work on this page!
So glad to hear that! Thanks for that feedback and I agree, I’ll add that wordage to the instructions so there’s no ambiguity in the future. Thank you and happy baking!
First time sourdough baker here. I love your site and IG page! I find myself coming back to it several times to get recipe ideas and tips. Question about the leaven: I ended up making a lot more than what’s actually used in the final dough. Can I reuse the leaven for baking the following week and if so do I just keep it in the fridge? Will it still be active to rise bread a week later? For example the recipe here makes about 465g leaven but only 250g is used in the autolyse. What do you do with the extra?
Thanks in advance!
Thanks, Eddie!
I would not suggest using leftover leaven for baking, but you could use it for pancakes, waffles or banana bread or even pie and galette crust!
Instead of reusing the leaven, just scale back the amount you make, only enough required for this recipe. I posted this quite a while ago back when I used to make much more leaven than was required by the recipe (and this is how they do it in Tartine) — but it’s not really necessary. Just keep the percentages of everything the same and make just enough for what’s called for in the final dough mix. You can see I do this in all of my more recent recipes.
I hope that helps, let me know if you have any more questions!
Thanks for the quick response! Appreciate you taking the time to answer questions from everyone. I have another question about the mixing (prior to bulk fermentation). Your method says to do just 5-10 turns before the before the dough comes together. My dough was still a wet, sticky mess with no elasticity after 10 turns. Also your IG page shows a slap and fold technique that, after a while, you can really see the dough taking shape. Can I implement slap and fold prior to bulk to get that shape and texture that you do? I just want to make sure I’m not overworking the dough as I’ve heard that can make the final product dense and chewy?
Not a problem!
If after 10 turns it was still very sticky and wet you can certainly add in more turns — sometimes I’ll do 30-40 when not doing slap/fold, if necessary. Alternatively you could do the slap/fold technique I frequently use. Both of these arrive at the same end goal: adding strength to your dough before bulk fermentation where it’ll be further strengthened using sets of stretch and folds.
It’s hard to over work the dough at mix time by hand. It can definitely make the end result more chewy and tough (plus other adverse side effects) but usually this is a result of mixing in a mixer for too long.
Hope that helps!
Been having a fair amount of success with your amazing blog. Just trying to adapt your recipes to baking in the UK and so far so good.
BUT… I made my leaven at about midday and, then as so often happens, my day flipped and I’ve not had a chance to make my bread. I popped the leaven in the fridge when I eventually got home 7 hours later… Will it be okay to bake with the following morning?
That’s great to hear! I’ve not had a chance to bake with any UK flour and I’ve heard there can be quite a difference.
I’ve actually never refrigerated a levain and then baked with it, it’s hard for me to say definitively how this will work out. I would guess that as long as you give the levain time to warm up in the morning and resume fermentation it might be strong enough to bake with.
I’d be interested to hear how it works out Stephen, in fact I should try this myself sometime soon! Please keep me posted 🙂
Well it worked. I’ve put a pic on my Instagram and tagged you in it.
Let me know what you think.
Also what do you think is the best way to store my loaves? I’ve tried plastic bags which I’ve found make the bread sweat. So now wrapping in grease proof paper which seems to be working better.
It’s interesting baking here. Despite being the middle of summer the temperature still isn’t as high as you like it. So I’m find the process a bit slower. I’m also having to use less water.
Thanks for the blog it’s really fantastic!
Excellent! Stephen, can you send me your IG username or DM the picture? I’m not sure which it was!
I like to keep my loaves in a bread box or in a paper bag on my counter.
It sounds like you have a good grasp of what things to change to work with your environment and flour though, that’s a great sign! Everyone will have to make changes, and I try to state that, it’s the nature of baking and something we all have to get used to.
Glad you’re well on your way!
I am preparing dough for my first attempt at baking a loaf.
My dough is in the first 30 min. autolyse stage.
What do you do with the leftover leaven?
Fantastic! These earlier recipes I have here on my website build a larger leaven than is needed, that excess can be composted/discarded or fed with water & flour if you’re using that to keep a “mother” starter going. In other words it’s just extra that’s not needed.
Later recipes I have listed here make a leaven that has only the amount you need for the recipe (plus a small amount just in case).
Happy baking, Lorrie!
Hi there! I’m, unfortunately stuck at an early stage in the process. I managed to follow your instructions back on the starter page and now have, what I think, is a pretty healthy colony that looks similar to a lot of your photos (no more molding issues!). The starter can pass the float test, no problem. I followed your instructions at the top of the page to prepare the leaven the night before. The following morning my leaven looked pretty similar to your photo, with lots of bubbles throughout and some bubbling through to the surface. Proceeding forward to the bulk fermentation process, i’m getting absolutely no rising! My house in the Bay Area is quite warm at the moment ~80 degrees, but no matter how long I leave it out the dough just sits there staying the same shape with zero indication of ever rising. Today i’ve tried keeping the dough covered and in a slightly warm oven…still nothing after several hours.
Do you think this is attributed to the starter being weak, or more of a temperature or flour issue? At the time I didn’t have any whole wheat flour handy, so I just used the King Arthur white flour for the entirety, could that be the main issue? I would expect to see SOME rising regardless of the flour, but I’m still new to this whole process, maybe the yeast just isn’t chowing down as much on the white flour?
Any advice would be appreciated! I’ve been trying to get this to work for weeks now! I’m jealous of all the people below who have had such success!
P.S. I’ve seen other sourdough recipes that have you add sugar to the mix for the yeast to really nom on. Is there a reason you’ve decided to not do this?
Glad your starter is doing so well now! That’s interesting you’re seeing zero rise during bulk, you definitely should see some, even if it’s just a little. Using 100% KA flour is fine, no problem there. Also, 80ºF is a good temp to bulk that, you should have significant activity at that temperature.
Is it possible you’ve over hydrated your dough? does it look like it’s not holding together when you are doing your turns in the container during bulk? When you do a turn set (a turn at North, South, East and West) does the dough hold its shape in the container? You should notice strength developing in the dough throughout the 4 hour process.
One thought: is the flour you’re using very old? I’ve never experience this happening but something I just thought of. Have you tried any other flour?
I’ve never added sugar to my dough, no reason to do that! There’s plenty of starches in the flour 🙂
Thank you very much for the prompt response! The flour was new, so I don’t think that was the issue. Maybe i’ll try some whole wheat flour/mixture the next time I try. When I did a turn set of the dough, the mixture was quite damp and sticky. It would separate from the sides and allow for me to do a turn, but it would settle back into its container quickly. When it was out on a work surface it would settle down into a pancake shape, similar to that first ‘pre-shape picture’. Still it didn’t show any signs of rising at all over an entire day. I guess i’ll just keep at it!
It sounds like maybe it was a bit over hydrated as well, I’d try reducing water a bit more, maybe 5%, and see if that helps. Keep me posted!
I love this recipe ! The favor is just wonderful. I’ve tried Chad and Ken’s pure levain recipes but has all failed.
Would I get more oven spring if I let the my dough sit out to room temp before baking ? Thank you for your blog.
Thanks, glad to hear that! Leaving it out will not necessarily get you more oven spring. It all depends on how much fermentation you have by the end of bulk and how long you plan to proof your dough in the fridge. More fermentation helps but up to a point, if you go too far your loaves will have very little spring as the food (flour) that is present in your dough is completely used up by your levain.
The best way to test is to keep all things consistent but tweak that final time you let your dough rest before putting into the fridge.
Hope that helps!
Do you have any videos available where you demonstrate some of your dough handling? Some of the steps I am unsure of.
Unfortunately I do not… I am working on that, though!
i’m finding this really helpful for dough handling:
https://www.youtube.com/watch?v=vEG1BjWroT0
but also just found this, which is perhaps more approachable and simple, and shows mixing, pre-forming and loaf shaping:
https://www.youtube.com/watch?v=zgz0oAhgwyg
Both of those videos are fantastic guides. Mac (the first video) makes some incredible bread and Trevor (in the second video) is a top notch baker! You can find more videos and recipes of Trevor’s at his website.
yup! 🙂 this video and article has really helped me in my last couple of batches:
http://www.breadwerx.com/make-tartine-style-country-bread-video
…love the use of hands!
Not sure how I missed this message so long ago! I’m working on videos and I hope to have more up soon 🙂 Sorry for the late reply.
Hello again! I’ve made a few loaves now and it feels like I’m getting the hang of it! I do keep encountering the same problem though and I’m not sure how to fix it. I’m using the lodge combo cooker and each time the top crust is perfect but the crust on the bottom is so thick and hard I can barely get through it with my knife. I’m assuming it’s because it’s in contact with that very hot surface the whole time, but does this happen with your loaves? Should I reduce the cook time? Or I also thought about only preheating the pizza stone for the whole 45 minutes and putting the combo cooker in with like 20 minutes of preheating left? Any advice would be appreciated!
Excellent! My crust on bottom is a little thicker than the top, but not by much, certainly not impossible to cut through. There might be a few things we can try to reduce the heat there on the bottom. When you take the lid off your combo cooker (partway through cooking), place it down on the stone flipped over and the pan with your loaf inside the bottom. This way you’ll create a little insulation so the bottom doesnt cook as quickly. I think your suggestion will work well also, place the dutch oven in there with, like you said, 20 mins left on preheat. This way it’s not super hot, but still warm enough to get ample oven spring.
Hope that helps, let me know if either of those work well for you just in case I run into this myself! 🙂
Hey again!
I’m about to start baking in the next few days, but I’m unclear on the flours. I’ve not been able to find whole wheat bread flour for the 300 g portion. Would it be okay to use just whole wheat flour? Does a bread flour need to be incorporated into the recipe somehow? All i have is all purpose and regular whole wheat. I also have regular bread flour on hand. What do you suggest?
Thank you always!
Laura
Hello, Laura! Sorry for the confusion, no need for “whole wheat bread flour”, it’s simply whole wheat flour, that’s all. I’d suggest using the whole wheat flour you have and the bread flour. Once you get the hang of the recipe try using a mix of bread and all purpose, or just all purpose on its own. I prefer the taste of the all purpose (lower protein) flour in bread and only use proper “bread flour” when the added strength is necessary.
Okay I’ll start with bread flour and whole wheat! Thank you so much! I can’t wait to get started! This blog is so fun to read and so very helpful.
You’re very welcome, good luck and happy baking!
I am really enjoying your posts but do have a question. In the cooking process, you indicate:
Cover with the other half of the combo cooker. Turn the heat down to 450ºF and cook for 25 minutes. After this time, open the oven and cook for an additional 35 minutes at 440ºF.
Do you really mean to keep the oven door open for an additional 35 minutes? Or did you mean to open the hot combo cooker and cook, with the oven door closed, for an additional 35 minutes at 440F?
Stephane, thanks so much for the comments! Holy smokes, I can’t believe that typo has been there for so long! Good catch, I’ll fix it now.
What you guessed is correct: after the initial cook time, open the oven, remove the combo cooker lid (you can leave it in the oven to the side), close the oven and continue to cook for an additional 35 minutes.
I’m still working on my starter and haven’t tried baking with it yet, but for when I do I was wondering about the cook times and temperatures! You said yours were altered for your elevation and climate, but I live in north Florida. It’s winter so temperatures will range from the 40s-60s but we’re a low elevation and pretty much always humid, lowest will be 45% in the coming week. How would you suggest I alter the cook times and temperatures? I’m absolutely eating up all of the information on this site by the way! Thank you!
Hi, Katie! Honestly, after baking for a few years after writing this I’ve come to believe times and temperatures really depend on a lot of other factors rather than elevation. I think you can use the temperatures listed here with no problem. As for duration of the bake, just continue to bake until it looks deeply brown, or until your liking. I like to bake dark, but not quite as dark as some. A good benchmark for “doneness” is if the interior of your loaves reach around 212ºF — if you have a handy instant read thermometer carefully poke into your bread near the end and see where it’s at. From then on you’ll be able to just look at the bread and decide when dark is dark enough 🙂
Thank you so much! I do have one more question for you! I’ve been using your post on the rye starter and something strange happened. By day 3 there was TONS of activity, lots of little bubbles and some larger ones, with the sour smell I was hoping for, but then suddenly after feeding it on day four all signs of life were gone. I haven’t changed a thing in my feeding: same flour mixture, same water, same timing, same method. As for the weather if anything it’s gotten a tad warmer, which I would expect to be a good thing. I fed it again this morning (day 5) and now there are some signs of life again, but it’s almost as if I’ve re-started. Any idea what may have caused this?
You’re welcome, Katie! Yes, that is totally normal, it doesn’t happen to everyone but it can happen. Sometimes early on you’ll see activity like this that will disappear after a day or so. This can actually be yeast/bacteria that you won’t want to keep around in the long term and it eventually dies off as the good, beneficial yeast/bacteria starts to take hold. Just keep with the schedule and eventually signs of life will emerge and be quite strong. Oh, yes warmer temps are definitely welcome! Good luck, it will get there soon enough and you’ll be baking in no time.
I started bread making in July. To date I have successfully made the Tartine recipe several times and even home made baguettes (Pate Fermente method). We love the Tartine but I’m intrigued by your idea of decreasing the WW and increasing the White. Can yo give me some insight into the changes this makes to the Tartine? Does it change the crumb? What effects does it have on flavor? Would you say it makes this easier or harder than the Tartine to get right? Thank you!
Dan, thanks for the comments! Increasing the ration of WW to white will typically result in less rise and a tighter crumb, but a completely different flavor profiled (and a bit more nutrition to boot). I would say that working with whole wheat, especially at the extremes such as a 100% whole wheat loaf, takes more practice and can be challenging, however, the flavor is worth the experiment. Whole wheat sourdough is some of my favorite, it has a heartier flavor to it and it’s much more complex. If you visit my recipes page I have a few recipes for varying levels of whole wheat, from 20% all the way up to 100%. You could start at a lower level and work your way up, you won’t be disappointed!
My first attempt at making this bread was successful. Bread was delicious. Can the leftover leaven (the other roughty 250g) be “regenerated” and used? And if so, how? Thanks,
Steve
Steven, excellent! You really do not need to make this much leaven, since the recipe only calls for 250g reduce everything so you have the same percentages (i.e. 50% mature starter, etc.) but only a total of 250g leaven for the recipe. I wrote this recipe quite a while ago when I was making an excess about of leaven per the Tartine instructions, but nowadays I only make what’s necessary to do the bake.
If you have leftover leaven you can always use it for something else, I have a page with my top 3 leftover sourdough starter recipes — give them a shot!
Hi love all the detail in your posts. What is the right ratio of mature starter to flour and water to make the levain? You say ‘50% mature starter etc’. Does that mean 125g of starter to make 250g of levain? Or is it the 1:1:1 ratio? Thanks!
Thanks Alistair! For this recipe I am using a ratio of 1:4:4 (1 mature starter, 4 flour, 4 water), approximately. This recipe was written up quite a while ago and nowadays I pare down my levain quite a bit but also use a ratio of 1:2:2.