


Olives—there’s something about them, isn’t there? How can there be so many different types, yet still, all of them taste so good? I have yet to find an olive I did not like. I got lucky this week and had many extra olives. We had planned to make another Moroccan dish (our current obsession) for dinner one night, but we never had the chance. No worries, I could do something with all those incredible little things—enter this Tartine olive Sourdough.
Before I started baking sourdough at home olive bread was always one of my favorites. I knew baking my version would go well, but I didn’t realize it would go this well. The result is just so dang tasty having it sit out on the counter is just a bad idea. One more slice, sure why not.
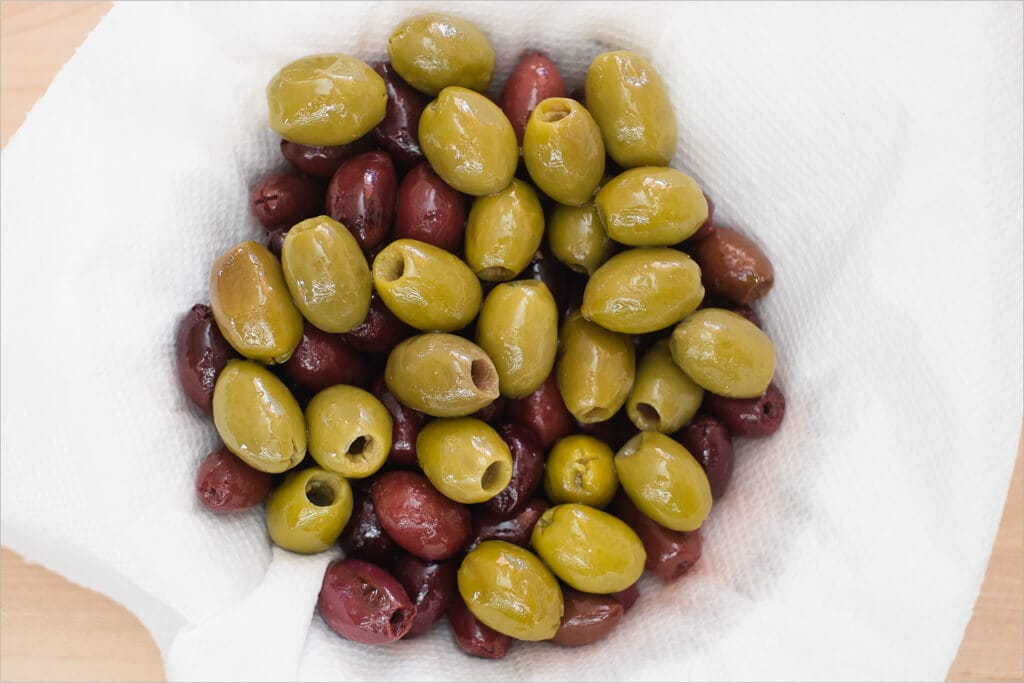
The olives I used for this were marinated in a salty garlic sauce that wasn’t what I had intended to use at the onset. The olives sure tasted good, but I think they contributed just a little bit too much flavor to the bread — just some straight pitted kalamata and Castelvetrano olives would be perfect. We recently signed up for a bi-weekly local produce box here in town, and I was pleased to find I could get organic olives in the shipment. I doubt they are local, but they don’t come drenched in spices. This will be perfect for the next iteration of this bread.
Prepare the leaven – 10:30 p.m.
My typical 100% whole wheat leaven, prepared the night before:
- 31g ripe sourdough starter
- 110g whole wheat flour
- 110g water
After mixing the above in a glass container, cover it and set it out on the counter for an overnight rest. I started with water, just a bit cooler than usual; I had some errands to take care of in the morning and needed more time to mix after waking up.
I’ve realized that water temperature is one of the most useful tools in the baker’s arsenal.
Temperatures are crucial in baking, and they are usually hard to control. The flour temperature is possible but not easy/practical, and the ambient temperature can be controlled to some level, but even a few degrees can drastically affect things. All that’s left is water temperature; this is easily modified in the microwave. Based on your schedule, mix with warmer water to speed things up or colder water to slow things down.
Mix the flour, water, olives & spices and autolyse – 9:00 a.m.
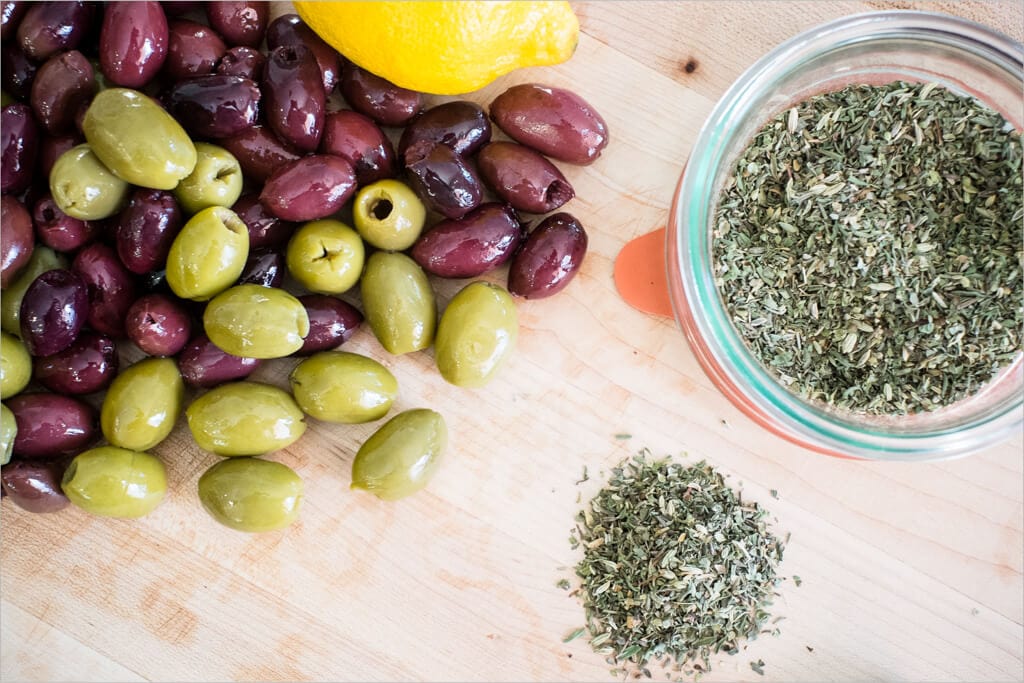
Ingredients:
- 250g (25%) leaven
- 800g (80%) white bread flour
- 200g (20%) whole wheat flour
- 20g (2%) salt
- 730g water and 50g in reserve for after you add the salt (step #5 in Method below)
- 3 cups pitted olives (I did 2 cups kalamata and 1 cup green), loosely chopped
- 2 tsp herbes de Provence
- Zest of one lemon
You might also notice that I’m pushing 78% hydration with this loaf. I’ve slowly been increasing the water amount to try and achieve a softer and more tender crumb. I’ll journal my experience with these wet doughs in a future post. It can get challenging! You could reduce the water amount by up to 5% with no problem here.
Method:
- Add the 250g of leaven to a large mixing bowl
- Pour in the 730g water & mix with your hands until the water and leaven are thoroughly mixed and dissolved
- Add 800g white flour and 200g whole wheat flour and mix with your hand until all the dry flour is incorporated
- Cover your bowl with a towel and let it autolyse for 40 minutes
- After 40 minutes, add 20g salt to the dough and slowly pour your 50g reserved water on top. Squeeze the dough with your hand to incorporate the salt
- Now reach your hand under the dough and pull one side up and over onto itself. Do this several times until you notice the consistency of the dough to turn sticky
- Transfer your dough to a large bowl for the bulk fermentation step. I usually use a clear-sided plastic container for my bulk fermentation, but adding the olives will be too much for the smaller container. Instead, I use my trusty large Heath Ceramic bowl (nice and thick for insulation).
After transferring to the large bowl, I read the final dough temperature: 75°F (24°C). Wow, it’s COLD out! This means the duration of bulk fermentation will need to be lengthened, or I will have to improvise and keep the dough warmer. In hindsight, I should have used much warmer water, maybe even up to 90°F (30°C).
For more on dough temperatures and how they affect fermentation, see my post on the Importance of Dough Temperature.
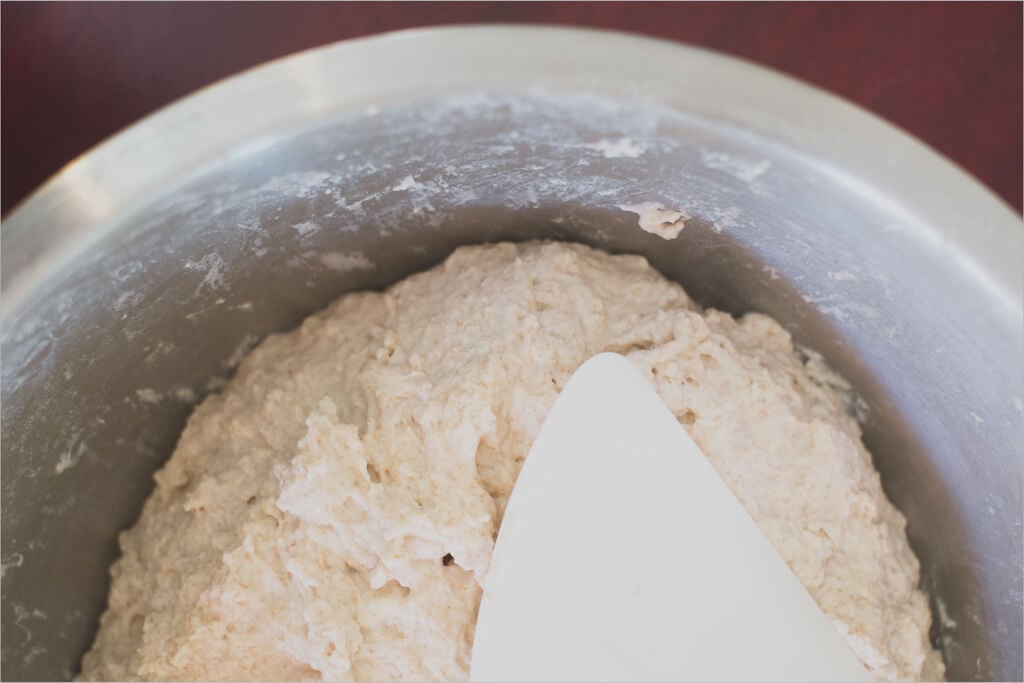
Bulk Fermentation – 9:45 a.m.
During bulk fermentation, you want to do six sets of stretch and folds spaced 30 minutes apart. The stretch and folds should be quite intense to strengthen your dough over the next several hours. After the first set, add the olives and herbs de Provence. If the mixture is overly dry after the addition, add a splash of water to help incorporate the ingredients. If you follow my recipe exactly, you might not need any extra water (because of the already high 78% hydration).
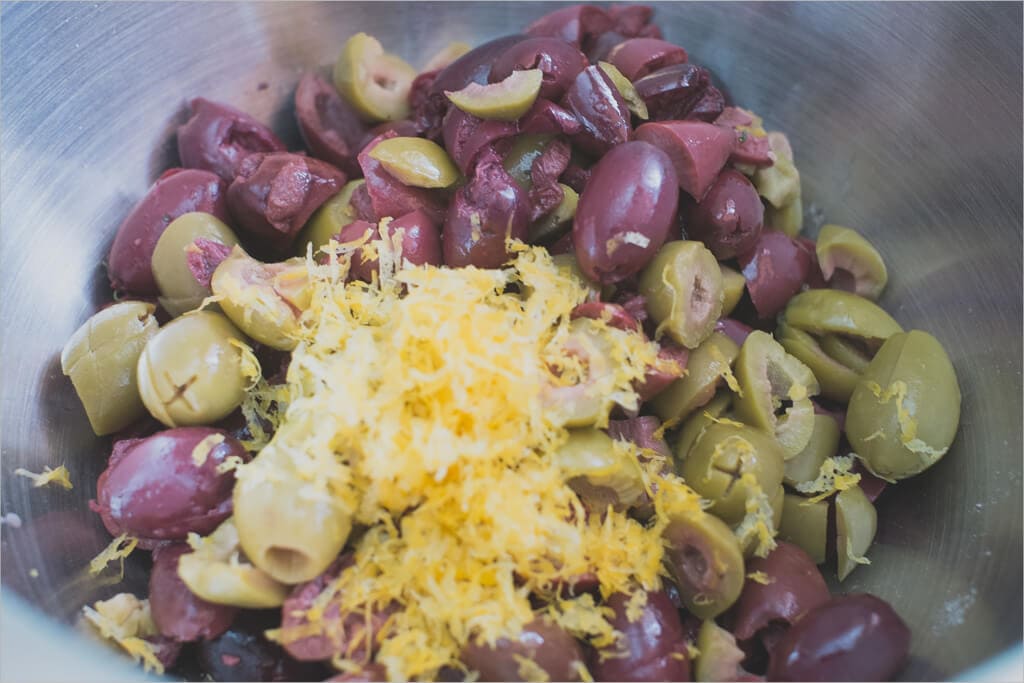
Mix the olives, herbs, and lemon zest in a medium bowl before incorporating into your dough. Set this mixture aside, and we’ll add these to the dough after the first turn; get started:
- 10:30 a.m. – Turn 1
After the first turn, add 3 cups olives, 2 teaspoons herbs de Provence, and lemon zest. Mix thoroughly with your hand, and cut the olives into the dough with your thumb and index finger.
- 11:00 a.m. – Turn 2
- 11:30 a.m. – Turn 3
- 12:00 p.m. – Turn 4
- 12:30 p.m. – Turn 5
- 1:00 p.m. – Turn 6
- 1:00 p.m. – 3:30 p.m. – Rest on counter untouched
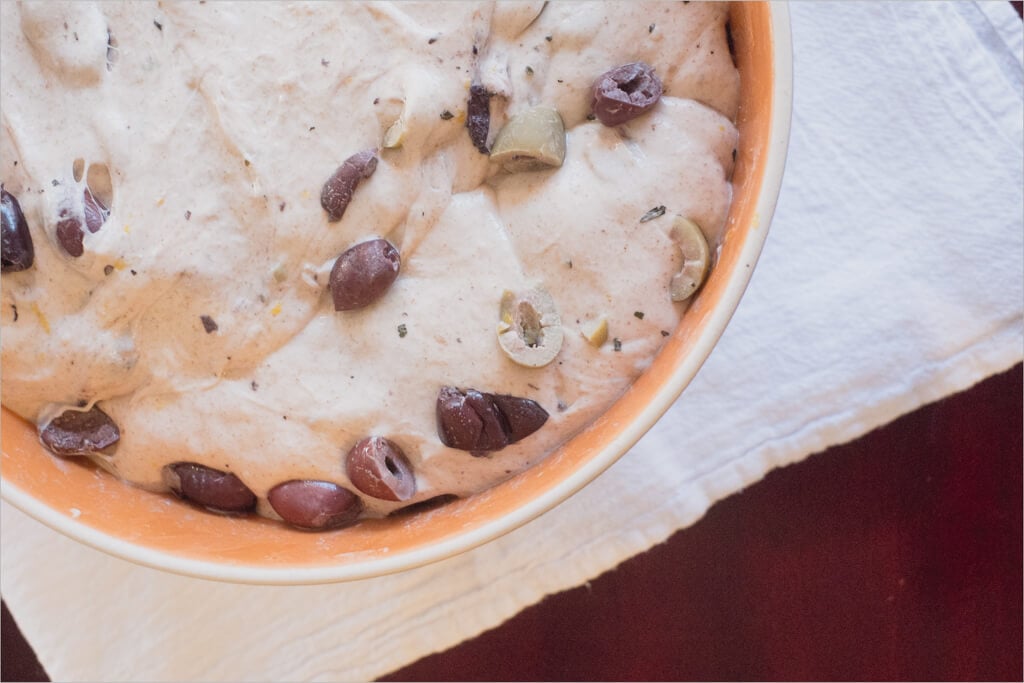
By 3:30 p.m. the dough had risen almost to the top of my bowl and was ready to be shaped. The olives dotted the dough and had me wanting to pick one or two out while shaping. It’s impossible to cook/bake good food without tasting the ingredients as you go along, right?
Pre-shape – 3:40 p.m.
Remove the dough from the container onto your unfloured work surface and sprinkle some flour on top before dividing. Divide the mass into two halves and flour the top of each half. After shaping, I inverted a bowl on top of each shaped mass to keep it from drying out and set a timer for 30 minutes.
I recently purchased another set of oblong proofing baskets so now I can do two batards instead of one batard and one boule. I much prefer the look of the batard, especially that single long score down the middle. Now that I have four baskets I can do a double batch of bread (that’s the plan for Christmas) and have all of them shaped in my favorite style.
Lightly dust your two linen-lined bowls with white rice flour. These bowls will hold our fermenting dough overnight in the fridge to proof.
Shape – 4:10 p.m.
Higher-hydration doughs such as this can be very tricky to handle. I try not to incorporate any more flour than necessary, but there is a fine line between too much flour and too sticky. Finding that balance only comes with experience.
I shaped each piece as an oblong, as seen in my guide to shaping a batard.
Proof – 4:30 p.m.
After shaping, gently place the dough into their baskets and the fridge for overnight proof. My wife keeps telling me we need either a bigger fridge or a dedicated breadproofing fridge, not enough space for food with double batches of dough! “It’s worth it,” I keep telling her. She silently agrees each time she toasts a piece of bread in the morning with her eggs.
Score + Bake – 7:30 a.m. (the next day)
Gather your tools:
I baked these loaves using the combo cooker above, but a Dutch oven also works well. See my guide to baking bread in a Dutch oven for tips and more guidance!
Preheat your oven with an empty combo cooker (or Dutch oven) inside to 500°F (260°C) for one hour.
After one hour, take one of your loaves out of the fridge and cut a piece of parchment paper to place on top of the basket containing the dough. Take your peel, then put it on top of those two and quickly invert it so the dough rests on the parchment paper and the peel.
Get your razor blade out and score the top of the loaf to allow the bread to expand while rising in the oven. I’ve been practicing more with my single long slash for the batard, and I think I’ve found my perfect angle. Place the razor 90° over the loaf and then rotate left (I’m left-handed. If you’re right-handed, rotate right) by 45° and score.
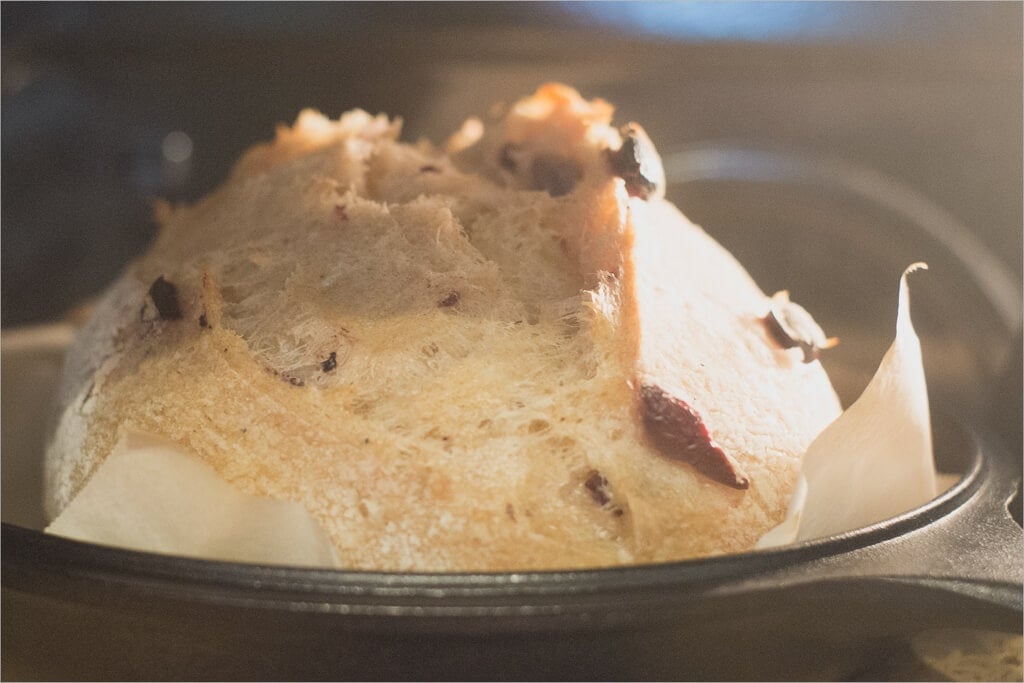
Place the dough in the combo cooker, turn the heat down to 450°F (230°C), and bake for 20 minutes. After this time, open the oven, remove the top lid of the combo cooker, close, and bake for an additional 35 minutes or until done to your liking.
Repeat for the second loaf.
Conclusion
The salty taste of the olives set this loaf off. I could hardly wait for the two loaves to cool before cutting into the first one. When you bake these, start early so you aren’t tempted at lunchtime to just cut right in and make a sandwich.
Crust
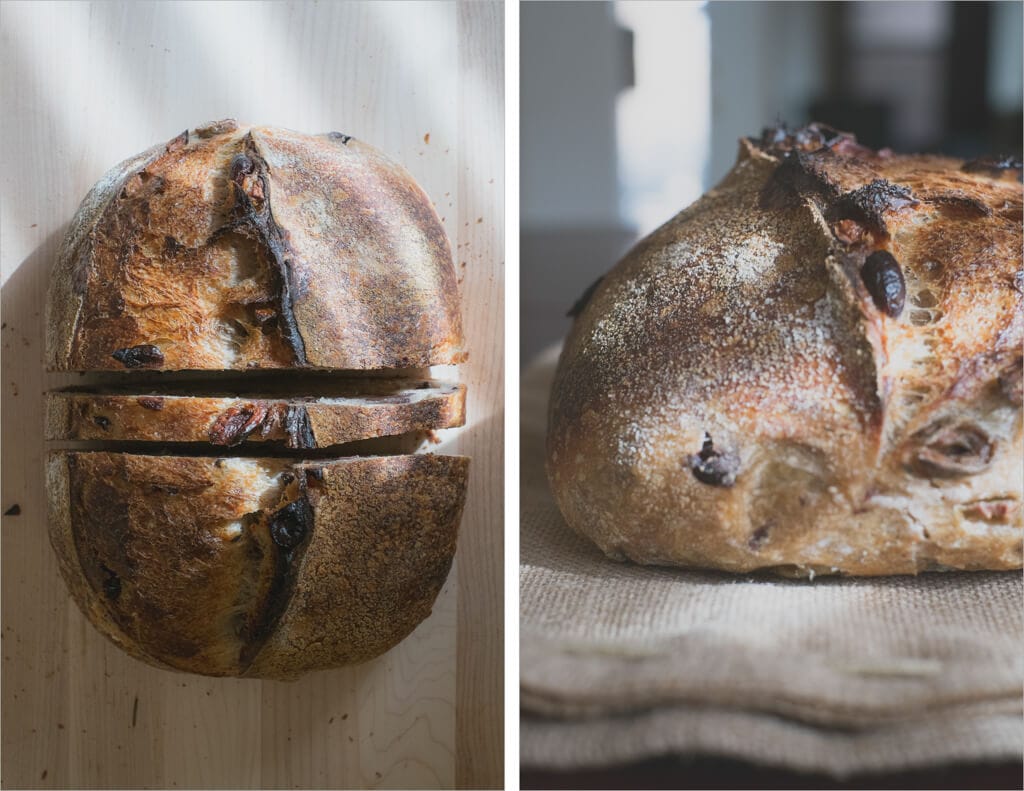
It is a beautiful crust; the color, tears, and openness are all just great. I love how the olives dot the surface of the bread, hinting at what’s inside. The crust turned out to be thin and very brittle. After a few days, it hardened a bit more, but that just added to the beautiful rustic nature of this bread.
Crumb
Soft and open, a great combination. Next time, I will try to have a more decisive yet gentle hand when shaping. Perhaps I squished out too many precious air pockets developed during bulk fermentation. Still, the crumb was very lovely.

Taste
I’ve probably already beaten this to death, but I’m serious: this bread is something. Bake it and find out. You’ll be happy you did!
If you want to try another olive-based loaf, check out my green olive and herbes de Provence sourdough bread for another winner!
If you’re a big fan of Tartine like I am, check out this Bread Baker’s Date and Banana Tea Cake made with sourdough starter discard—it’s incredibly delicious.
Buon appetito!
If you use this recipe, tag @maurizio on Instagram so I can take a look!


246 Comments
Hi, what a great website! I’m very new to baking bread and baking with sourdough. I tried this recipe with whole spelt flour instead of whole wheat bread flour. It worked ok-ish (as far as I can tell ;)). I followed the recipe closely. However, the bread doesn’t have as many nice big holes as the one in your picture, just a few, and the crust is very strong and hard. I wonder if a longer bulk fermentation could have helped? The room temperature in our house is rather cold, about 19-21°C (67°-68 °F), so I thought this might be a problem. Do you have any advice? Thank you!
There are a lot of factors that can help open up the crumb. Make sure you use as much water as the recipe says and don’t add extra flour, as well-hydrated dough has more holes when the water turns to steam. Spray the top surface of the dough with water before scoring and putting it in the oven to help keep the surface elastic. Throw in a pan with water into the oven to add steam, and crank up the temperature to maybe 475 or 480 for the first 10 minutes of cooking to really encourage the bread to rise as much as possible before the crust forms.
Also, make sure not to knead or punch down the dough, only gently stretching and folding it during the bulk fermentation.
Some great tips below by @jessicamillner:disqus and I’d also say there are many, many factors that go into achieving a nice and open interior.
First, the flour used is very important, it needs to be strong enough (protein) and have the proper gluten properties to trap the gasses produced during fermentation. For example, no matter how hard you try with rye flour, the gluten properties in the grain just won’t lead to an open interior.
From there, a very strong and well-fed starter is important — it all begins there. Fermentation in general is so critical, it’s worth spending some time really stepping back to look at how your starter is performing and how well-fermented your dough is during bulk fermentation and the final proof. Without strong fermentation your loaf will never rise to its full potential.
Sufficient dough strength through mixing, and also organically through fermentation, is also important. Think of your dough as a balloon: you want it strong enough to trap gasses and expand in the oven, but not so strong that it won’t relax and expand out. Finding this sweet spot takes some practice.
A full and complete bulk is also very important. Cutting bulk fermentation short before the dough is sufficiently fermented will hinder the development in final proof.
I also find that, and this depends on the dough you’re working with, a very gentle preshape and shape are key to maintaining an open interior. If you’re rough with the dough during these times the delicate interior will quickly break down and become more dense. That said, the dough does still need enough strength through shaping to hold its shape during baking.
Sorry for the long winded answer but really all of these things are important! Each part plays into the next and overall what we’re searching for as bakers is balance. Balance between the extremes in each phase of the process.
Can I bake this in the evening if i leave it out of the fridge for the final proof? Thanks!
Yes, that will work well!
Hi Maurizio, thanks for your great website. Your recipes and detailed instructions produces great results which boosts my confidence on my sourdough bread making journey. I made the olive loaf using olives cured in brine. I froze one loaf and it was mushy when it defrosted. Should I have used olives in oil?
Hi Maurizio,
Regarding autolyse can I just add the flour and water without the levain and leave it for 3-4 hours while I am out and about? Is there any problem with long autolyse? I love this recipe but trying to see if there is flexibility with times. Also regarding stretch and fold, can I during this process ( or just before I start stretch and fold) put the dough in the fridge for a couple of hours and then take it out and continue with stretch and fold? Thank you again for all your help!
Hi – why are there more turns in the olive bread than in the country loaf #33? And, if I want to make two loaves, one regular and one olive, when do I split the dough and add the olives? Thanks!!
Hi Maurizio. I’ve been very good success with your recipes, even the high hydration ones! I made this love bread a couple of weeks ago – delicious! I have a question. Do you use Durum wheat at all – or have you baked with it? I recently tried a couple of recipes with durum and it wasn’t a happy outcome. Not sure what went wrong but it ended up dense and weird. I’ve used semolina in pizza dough but wanted to bake bread using some.
Just wondering!
Thanks, Sharon
I made my levain tonight and I’m looking forward to working on this tomorrow! Olive bread is my FAVORITE but somehow the ones I’m served never have enough olives…..
When you say “turn” for the dough – does that just indicate a set of stretch & folds (like in the beginner’s recipe)? Or is that a different technique?
I hope the bread turned out awesome, this is one of my favorite recipes! Yes, a turn is the same as a stretch and fold. Happy baking!
i noticed the you had ingredients for the leaven which totalled 455 grams. Out of this you used 250 grams. What happened to the rest?
i am planning to make this bread tomorrow.
thanks for sharing your recipe.
Shidu
Shidu — the levain build for this recipe is a little larger than needed. You can reduce the build (keep the percentages the same, just reduce the quantity) if you’d like, or use the excess levain for waffles, pancakes, and/or banana bread — which are all delicious!
This is what I’m making today (per our FDT discussion in the other post)… but I see you are using 250g of levain, versus the usual 200g per Tartine. Any particular reason?
That’s the amount of levain I found worked best for this dough for me at my temperatures in the kitchen. I also believe it had to do with the flour I was using at the time and the way I maintained my starter. Since writing this I have reduced my levain percentage down to 18% or so, depending on the weather and other factors.
You could adjust that percentage if you know the levain percentage called for in the original tartine recipe will work well for you!
Well the original percentage is 20% if I recall. You have 100g of flour and 200g of levain (along with water). So it sounds you’ve dropped it even further.
In my more recent bakes I do drop my levain very low — I’ve been liking the results using a lower levain percentage but bulking at warmer temperature or for a longer period.
That makes sense. I’m still trying to get my crumb the way I’d like it (open/irregular or open/regular).. instead I usually get some pretty good oven spring, but a semi dense crumb. Perfect for butter and jam, but not quite what I want visually.
Once I can achieve those with regularity I’ll start tinkering with other variables.
I am also working on getting better more open and even crumb, and more oven spring. I baked your Beginner’s recipe today (built it yesterday) and I’m liking how it looks (haven’t cut into it, yet). So, I was going to try your olive herb loaf next, and I’m wondering about the differences in techniques. 1) Why, in the Olive Loaf, do you add the levain before the autolyse, and with the Beginner Loaf you don’t add it ’til after an hour? 2) Why, in the Olive Loaf, do you feel the need for 6 S&F, and in the Beginner Loaf you only feel the need for 3? 3) Also, with the Olive Loaf, you start the night before (with the Levain), and with the Beginner’s Loaf you start the levain in the morning. Can’t I follow the time schedule of the Beginner’s Loaf, but with the ingredients of the Olive Loaf? I’m trying to understand how the dough starter levain should feel look, before I move on to the next stage. My thoughts about the fewer S&F (in the Beginner Loaf)was that I was giving the dough the time to do what it wants to do anyway, that of creating gasses and expanding. I think, however, I might be over proofing – or even over fermenting – because I live at 6100 ft. elevation, and things rise faster here. I understand that I could play around with the water temperature – and I’m expecting to get to that point – but for now, I’m really trying to go by the book.
Really great questions. Answers:
1) A lot of the changes between this loaf and the Beginner’s Sourdough are simply due to me having baked for numerous years between the two, testing, tweaking, and refining my style and process.
2) The number of s & f’s per dough is totally dependent on the flour, the hydration, and other factors. You need to give the dough the strength required. For example, if I had a dough that was very highly hydrated (90% hydration, let’s say) I might have to give it 6 sets of stretch and folds, whereas a dough that’s around 75% hydration might only require 2.
3) I build a levain in various ways and the different approaches are usually based on my schedule. If I want to do dough early in the morning I’ll adjust the levain to go overnight (less starting mature starter, lower temp, etc.) but if I want to do a same-day levain I’ll mix in the AM with a higher starter inoculation to speed things along.
You can definitely use either process for either of these loaves. Just adjust the levain to suit your schedule and adjust the amount you mix to suit the dough.
I hope this helps!
Thank you, Maurizio!! I anticipated those answers, glad to hear I’m on the right track. In the meantime, I did make the recipe, and we all are loving your recipe. So, how do you know that the 6 (say) S&Fs are enough, and you don’t need to do a 7th? That’s where I’m at in my education . . . thank you!!!
btw, since I’ve started using my thermometer – at your suggestion – I’m having MUCH better, consistent results.
Awesome to hear that! Regarding the stretch and folds — it comes with experience. Over time you’ll develop a sense for how much strength is enough, and stop there. Usually I stop when the dough is hard to stretch and fold, or it’s holding it’s shape in the bowl and isn’t relaxing out fully by the next set. Usually I find that under strengthening is better than over, as under can be adjusted for during shape time but shaping tighter!
Hey – I just realized you’re in Albuquerque! I live in Abiquiu, and have a home-based (for now) bakery there.
Yes, I’m in ABQ! Wow that’s really cool, you’re close by then. I’d love to have a home-based bakery — one day 🙂
I’m so thankful for this post. I have the Tartine cookbook and have attempted the recipe twice. Flavour and texture has been great. I have the holes in the crumb. But it doesn’t seem to rise and “puff up” like my plain sourdough. It’s quite flat and the scoring doesn’t expand. I use the same the Tartine sourdough recipe but add the ingredients at the 2nd turn. Do you have any advice for this? I will definitely try your version of this recipe next!
You’re very welcome, Monica! There are several reasons you could run into a sluggish rise when baking this loaf. I’d first guess that maybe your dough is over proofed, sluggish rise and a lack of opening at your score seems to point to this. Have you tried pulling back on the final proof in the fridge by a couple hours? This might help!
Thanks for responding! I proofed my dough in the fridge but you could be right… it was longer than usual. The finger indent test seemed ok to me, but next time I will keep an eye on the dough more closely and have it proof for a shorter time. I was wondering if the ingredients make the dough proof faster. My plain sourdough can proof for 6 hrs in the fridge and turn out quite beautiful.
Yes, ingredient add-ins can definitely make the dough ferment faster (especially with some fruit additions like figs, etc.). It’s possible the olives have impacted fermentation in some way, but I haven’t experienced it too much with this dough. As always, I just keep an eye on that dough and adjust as necessary!
Oh.My.Word. This bread is sublime. The smell, texture, taste…wonderful. I finally figured out that you were (I think) putting your cast iron ON the pizza stone to bake. My loaves were getting too dark on the bottom. (Didn’t affect our ability to eat them!) Bu these were so crunchy, crackling, and it just gave way under the knife. Thank you for the wonderful recipes and method. I am very new to this and am quickly becoming an addict!
Excellent, glad to hear this recipe has worked out so well for you! I too have noticed that when I place my Dutch oven directly on a preheated baking stone the bottom of the loaf can get a bit too dark. Lately, when using my DO, I’ve been placing a rack on top of the baking stones so the DO is not sitting directly on it, reducing the bottom heat. This has helped quite a bit!
Happy baking, Gena, and thanks!
Hi (again!), I have *finally* gotten your pizza recipe down perfectly, and I’ve partially succeeded with some other sourdough breads as well. I just tried this one, and although the taste is delicious, it didn’t rise up too well. After unloading the dough onto the parchment paper, I realized that the dough had not held its shape at all. … and the result was a rather flat loaf. This problem seems to be reoccurring for me… do you have any suggestions? Also, my starter can get pretty active, but I’m using only half-white/bleached (I don’t know the exact translation from French into English) flour for feeding my starter. Do you think using some rye flour would help with the rise? You’re so great at answering all these questions, thanks a lot !!! Best, Jessica
Awesome! Well there could be a few things causing the issue with this recipe. It sounds like either your dough is under proofed or it could be over proofed.
There are a few indicators your dough could be over proofing: sluggish rise in the oven, the score on top of the dough might not open with a nice “ear” and instead just kind of fuse together, the interior will have lots of small holes and perhaps one or two large ones near the top (but no dense areas of unfermented flour), and finally the loaf could be a little on the sour side.
There are a few indicators your dough could be under: explosive rise in the oven, dense interior with potentially scattered large holes, gummy texture to the interior and finally it’s possible the bottom of the loaf is slightly bowed upward (like the letter “U”).
Finally, it could be that your dough needs more strength! Make sure it holds its shape in the bowl after you perform your sets of stretch and folds. You should see over the course of bulk fermentation the dough will become more and more smooth and have defined edges and lines to it — you won’t see any shaggy or overly wet sections.
Hope this helps!
Thanks so much for your response… turns out that I’m a serial overproofer ! I have tried this recipe again (it was a bit better, but I need some more practice I suppose), and I recently tried your ‘best ever’ sourdough that turned out much better. Thanks again 🙂
You’re very welcome and it happens to all of us! 🙂
made this for first time today, I kind of rushed the folds and bulk ferment but I love this. My wife was like “olive bread??” but then she tried it and loves it. The smell while cooking is fab.
Olive bread has gotten a bad wrap but it’s dang delicious (when made right)! Glad to hear your bake went so well!!
Hi, I love this site! I’ve been making the basic country loaf to great success almost every week for several months now. I’m trying this olive loaf this weekend for the second time.
I was wondering why we need to wait until the first turn to add in the olives? Last time I did that but it was a lot harder to incorporate than I was expecting. It seems it would be easier to just add the olives in with the salt, but is there an important reason to wait? Thanks!
Another question for you: I’ve been thinking of making smaller “bread bowls” out of the standard dough recipe to go with a chili night. Have you done that? Would you change the recipe at all to accommodate a smaller loaf? I’m thinking i might make 4 or 6 loaves out of the standard 1000g batch to get the size I would need for a chili bowl.
Thanks so much Tyler, appreciate that! Glad to hear your bakes have gone so well.
You can add the olives in earlier if you’d like, some bakers prefer to do this (especially if using a mixer). I find it helps when adding the mix-ins until the gluten is a bit developed before adding things in. This way there’s only a small amount of strength we still need to do (maybe one more fold) before the dough is strong enough. If we add the ingredients in early, with several sets of stretch and folds still to do, it could have a cutting action on the gluten in the dough, leading to a tighter crumb. However, olives are very soft and shouldn’t be a problem — I’d say try adding it in whenever you like and see how the bread turns out!
I’ve not made a chili bowl (sounds awesome, though) but you could just cut up the dough for this recipe into 4 equal, but smaller, loaves and shape them as boules (rounds). That would work quite well!
Hope this helps, happy baking 🙂
Hello, love your site…I have tried your olive tartine many times and always tastes real good..I have few questions though: 1- why do you make so much leaven when all we need is 250g? for strength? also I noticed that I do not get that much of big holes..wonder why…I also always have hard time knowing when to get the dough out of the fridge
since each time I touch it it feels the same alive and move under my hand, even at the beginning of the final fermentation..I should appreciate your advice
Really glad to hear that, thanks! In some of these earlier recipes here at my site I build quite a large levain (mostly so there was a buffer if I wasn’t able to get to the levain in time). It’s not necessary to make such a large levain, though, and I keep meaning to head back and update all these recipes (I have updated some but not all).
There could be a lot of reasons for the lack of openness in your crumb. Usually it’s due to under fermentation, make sure your dough is at the temps I’ve listed here and keep it warm during the entirety of bulk fermentation. You want the dough to look and feel alive by the end of bulk, it should jiggle a bit when you shake the bulk container.
I hope that helps!
thanks for your time..i always touch the dough during bulk fermentation and i feel it jiggles…i followed everything…not sure…will pay closer attention next time…i also baked your perfect liaf, more holes for sure yet again not as big as yours
Maurizio,
I love your site, the combination of beautiful pictures and well described science of sourdough, makes it a pleasure to read. This is a fabulous recipe. I have a smaller combo cooker so made 3/4 of full recipe and did one loaf of olive and one loaf of provolone and proscuitto. I do my shape and ferment in an oiled bowl rather than floured banneton and it worked well for this. The crust was crackling and thin as described, although I lost some of loft when I “dropped” the loaves in the heated cooker for the actual bake, the crumb was tender and the taste of the bread was lovely.
My starter is currently all purpose white flour fed and I purposefully used 20 degree colder water as I was off time cycle and needed the extra hours. I did halve the starter recipe, since it still provided more than the 187g needed. I admit I was guessing a bit on starter readiness since I didn’t have clear surface bubbles with the whole wheat feed to go by but it all worked out fine. I did end up with closer to a 74% hydration than your 78% since I was a little worried about runny dough but will try upping on next round.
Many thanks!
Thanks so much, I really appreciate the kind words! Sounds like your bakes have been going very well, glad to hear that! When I use my combo cooker I like to drag in the dough on top of a piece of parchment paper cut to fit, this helps reduce that high drop and potential degassing.
Yes, I build a little bit extra levain for this recipe that’s not really needed (it can make it easier if you’re not able to get to the levain in time, a little buffer if you will), sounds good. Sounds to me like all of your modifications were spot on, fantastic. I’m glad you made the necessary changes for your environment.
Happy baking and thanks again for the comments!
I’ve made the basic sourdough recipe from Samuel Fromartz many times without issue – this dough is unbelievably runny and difficult to work with. When I finally poured it on the countertop it almost ran off. Where did I go wrong? Or is that how funny it should be? I bake in the AM.
Thanks!
So sorry for the late reply, I hope the loaf turned out ok! The dough should not be “runny” by any means. It should be wet, for sure, but it should have strength to it and not run on the counter. I would recommend you try and reduce the amount of water used in my recipe to suit your flour and environment, ti sounds to me like it was over hydrated — this is normal! Each bag of flour is different and each baker’s kitchen is different, these things just need a little adjustment from each baking recipe.
Try to reduce the hydration 5-10% next time you bake and see if that helps firm up the dough. Let me know if you’re still having issues and we’ll get to the bottom of it!
Hello! I am planning to try this recipe but I only need to make 1 loaf. Can I just cut every ingredients in half including leaven?
Hi there, so sorry for the late reply I’ve been out on travel! Yes, you can just cut everything in half for this recipe and it will work out just fine.
Usually I like to keep the levain build at it’s full quantity, but this recipe has a little bit extra built in so cutting it in half will not be a problem.
Happy baking!
Thank you! I saw you were in the city on Instagram. Did you like any NY bread?? Hope you had a good time : ) I cut everything in half and it worked great! (Yes I built levain with full amount) Thanks again!
You’re very welcome! I had a chance to visit the Union Square Market and picked up a sourdough batard from She Wolf Bakery — seriously good bread! Happy baking 🙂
Wait, you bake it 40 minutes wih open oven door?
Typo! Thanks for catching that — it’s fixed. Open the oven and remove the top of the combo cooker to vent the steam, then close the oven and cook for an additional 40 minutes.
Happy baking!
Ok thanks. That makes more sense. 🙂
Hi Maurizio,
I always admire your beautiful loafs. i do bake sourdough bread, but I also preheat my le creuset ( like comobo cooker) when I preheat the oven .Do you preheat your combo cooker?
Thank you in advance!
Than you! Yes, when using my combo cooker I always preheat it along with the oven — it’s important to do so!
Happy baking 🙂
Thank you! Right now, I am done with pre-shaping and waiting for the final shaping for my pain aux olives. Always love your blog and instagram!^^
You’re very welcome! Thanks I appreciate that 🙂
I have a question? I have looked all around, How does chad shape batards? I see on his tartine video. that he shapes boules but puts it in batard banneton.
He also does something super cool where almost braid the dough as he shapes it to close the seams.
Do you have any idea ? Or do you just shape it like he shows in the books but put it in to batard baskets as well. There are so many different ways to shape as I am sure you know.
If you search YouTube you can find a video called “Chad Robertson Masterclass” that will show you how he shapes batards. It’s a “stitch” style shaping and takes a bit of practice! That’s the braiding you mentioned.
Tons of different ways to shape, yes! I do this stitch style as well, but also use Hamelmans batard shaping style, he mentioned it in his book Bread.
Hope that helps!
What do you mean 90º over the bread?
I bake the loaves, one at a time, in this combo cooker, closed for the first 30 minutes of the bake (according to my directions). I will spritz the dough a few times just before putting the lid on top to generate a bit more steam.
You can, alternatively, do what you mentioned: have an old pan in the bottom of your oven and throw in a cup of ice or water to generate steam. Be careful when doing this though, you can easily burn your arms with the steam and not every oven can handle a wet interior (electronics, etc.)!
Let me know how it goes!
Hi Maurizio,
Thank you very much for your fast answer and for the advices.
About my starter: I see that you are using both rye and white wheat flour for your starter….I’m feeding mine with white flour only (I used rye only in the beginning), 2 times / day (morning and evening).
It usually triples its volume. But not more.
I will try the rye/white wheat combination, too…
About the fermentation: the bulk fermentation was 4 hours, at 78-82F. Too long, probably?
And for sure it increased in volume with more than 30% (actually at the end of the bulk fermentation, the volume was double)
….It was over-proofed, isn’t it?
Thanks’ again,
Dana
It sounds like you are getting good activity with your starter then. Yes, I use part rye flour to do my feedings, it really pumps it into high gear and there are other beneficial side effects for me and my schedule.
That is a bit long for bulk fermentation at that temperature range, and it sounds like it by the 50% increase in volume. You might want to cut it short next time, say 3 hours if at that same temperature. Try to hit around 30% volume increase.
Yes, I would guess over proofing was the cause there. Easy fix for that though! Let me know how your modifications work out.
Hi Maurizio,
Thank you.
I have tried the recipe again last Friday. 🙂 I have reduced the bulk fermentation time. The result is for sure much better:
https://www.facebook.com/photo.php?fbid=10152301903363775&set=gm.10153116457053009&type=1&theater
One more question(not so important): why did you make 455g of levain, but used only 250? 🙂
( 🙂 I wonder if the first time I didn’t accidentally used all the levain, instead of half of it! Hmmm….This might be possible!)
Thanks’ again,
Dana
Dana — looking great right there! It looks a little more open and some nice olives scattered throughout.
You’re right, I made much more levain than is necessary. If you’re following any of the recipes here at my site you can safely halve the levain build and have plenty for mixing.
I’ve done the same thing before: I accidentally used the entire levain build and my bread fermented WAY too fast and was super sour.
Keep at it!
Hello,
My name is Dana and I’m a beginner bread-maker.
Because your olive sourdough recipe sounds / looks great to me, I have decided to give it a try.
Yesterday I have baked my bread, but it came out flat and without oven spring.
My scoring turned into some kind of channels.
The crumb is soft, elastic and a little bit sticky.
…I have started a post on Facebook with photos of my flat-bread. Can you, please, take a look and help me with some advices?
Thank you,
Dana
I apologize, but it looks like a forgot the Facebook link:
https://www.facebook.com/groups/ArtisanBakers/permalink/10153089648713009/
Dana,
Is your starter in good working order? Do you see a predicable rise & fall after feeding? If you need help with starter management check out my post on how to get your starter working super fast with lots of strength.
How long did you do your bulk fermentation step for? It’s typical to do around 3-4 hours at 74ºF to 78ºF. You need to look for the signs there though: during bulk your dough should increase in volume by about 30% and have air bubbles throughout. It should also be stronger in that it will lift easily from the sides of the container and prefer to stay together in a cohesive mass instead of tear.
Let me know if those two help, if not we can try a few more things!
That’s great news! Yes, practice does make all the difference; I bet your next attempt will be even better 🙂
Yes, your scoring technique will definitely have an impact. If you score too deeply your loaf will open up very quickly, possibly reducing overall oven spring. You can control the speed and amount your loaf opens up during baking by changing the angle of scoring and the depth. If you do a shallow score that is at, say, a 30º angle to the surface of the dough it will open up slower as it bakes. This is my typical slash for the “batard” (the oblong type loaf) you often see here on my site. When I do a boule I usually make an “X” on top so the blade is at a 90º angle with the dough, but I do not slash in too deep.
Scoring your dough really is a personal preference type thing and, again, just takes practice. In the end you find what works for you and what effect you like depending on your shaped dough.
I’m glad to hear my writeup helped, let me know if you have any other questions and I’ll do my best to help. Happy baking!
Welcome and thanks for reaching out, I’m glad the olive loaf went reasonably well! A 4 hour bulk time is pretty typical, but what were your ambient and water temperatures? If your ambient temp is relatively high (like close to 85ºF, or more) you might need less bulk fermentation time. Instead of watching the clock for this though, you should observe how the dough is developing during this time. After your 4th or 5 turn, take note on how your dough is behaving, does it jiggle in the bowl? Do you have air bubbles on top and on the sides (if you’re using a clear container this make this easier), does it hold together well and lift from the bowl easily? Adjust one parameter at a time and take note of how things are progressing, this way you can pin point what has helped. For instance, try reducing your bulk time by 30m next time and see if your crumb opens up a bit more.
What was your dough’s hydration? If you are in the 70% range (in baker’s percentages like I list above) or higher there will be sufficient water.
With some more practice and careful attention I know we can get your crumb a little more open. Good luck and let me know how it goes!
33C is pretty warm, but not too bad. One thing you can do to offset this is play with using water thats a few degrees cooler when you do your mix. This will help cool the mass of dough down a bit and slow things down.
I’ve kept my dough in the fridge (which I think is around 3C or 4C) for up to 24 hours with no real problems. 16 hours actually sounds perfect!
Why did you prepare 455 gr8. Of leaving to only use 250 of it? Great loaf by he way.
Ray
Ray,
Thank ya! I actually have been following the Tartine method for building a levain since the very beginning of my baking days. It is definitely possible to reduce the amount of levain to only what you need.
One reason I believe it’s recommended to end up with so much excess is to give you a larger window of time before you must use your levain in your dough. This way you can be almost sure your starter won’t consume all the food you’ve given it the night before. Just my thought.
Happy baking!
Hi Maurizio — giving this recipe a try this weekend, couldn’t resist the photographs on your site! Quick question, what are the approximate dimensions of the proofing baskets you use? I, too, prefer the batard shape, but the baskets I have results in a loaf that’s too long to fit into the combo cooker, so instead I’ve been baking them on a baking steel and adding steam. Would love the simplicity of the combo cooker instead if I could find the right proofing baskets. Thanks!
Great! I’d love to hear how this loaf turns out, it’s so great tasting I just had to share with everyone.
The batard bannetons I use are 6.5″ wide by 13″ long. If you have your dough take up the entire basket you will definitely *not* be able to fit the proofed dough in your lodge cooker in the morning. But, what I do is when I divide the dough I put one half of the shaped dough into one end of the banneton, so it essentially only fills up half of the entire basket. I’ve had some close calls where it almost doesn’t fit in the combo cooker, but I’ve always made it work.
You can see a picture in my latest post of the batard in the morning, takes up about 1/2 the banneton.
I do love the result of the combo cooker vs. a baking stone + steam — I’ve just had more consistent and better results.
Hope that all helps, happy baking!
This is really a dumb question but do you bake it with the cover on the dutch oven or not. I have never baked bread using a dutch oven before and that’s why I am asking.
There are no dumb questions! You bake with the lid on for a total of 30 minutes to create a steamed environment for the bread to rise (water will escape the dough and get trapped in the closed dutch oven, allowing your loaf to rise). After the 30 minutes, you take the lid off for the remainder of the bake to allow the crust to crisp up and interior to finish cooking.
So it takes a day to cook this sort of bread? Now I think the supermarket price is totally justified!
It does take a fair amount of work, but most of the work is very easy and not time consuming. The end product is far superior to what you’d find in the supermarket and definitely worth it!
Motti,
Sorry for the unclear step there. You want to reserve 50g of the total water for that 5th step. First pour on your 20g of salt on top of the dough, then slowly pour on top that reserved 50g water to dissolve the salt, then mix throughout.
thank you very mouch
You’re welcome, would love to hear how it works out for you. Happy baking!
nice post man. great job. which makes me wonder – the boules are nicely shaped for a typical Dutch Oven – but how do you place an oval shaped loaf in the DO?
Thanks Gingi.
The boules do fit much easier, but I actually am able to fit the batard in the dutch oven as well — just barely. It touches both ends of the dutch oven, barely squeezed in there.
oh wow I would not have imagined that. if you can, a picture of the pre and post baking if the batard will be amazing…
Will do on the next batch!