

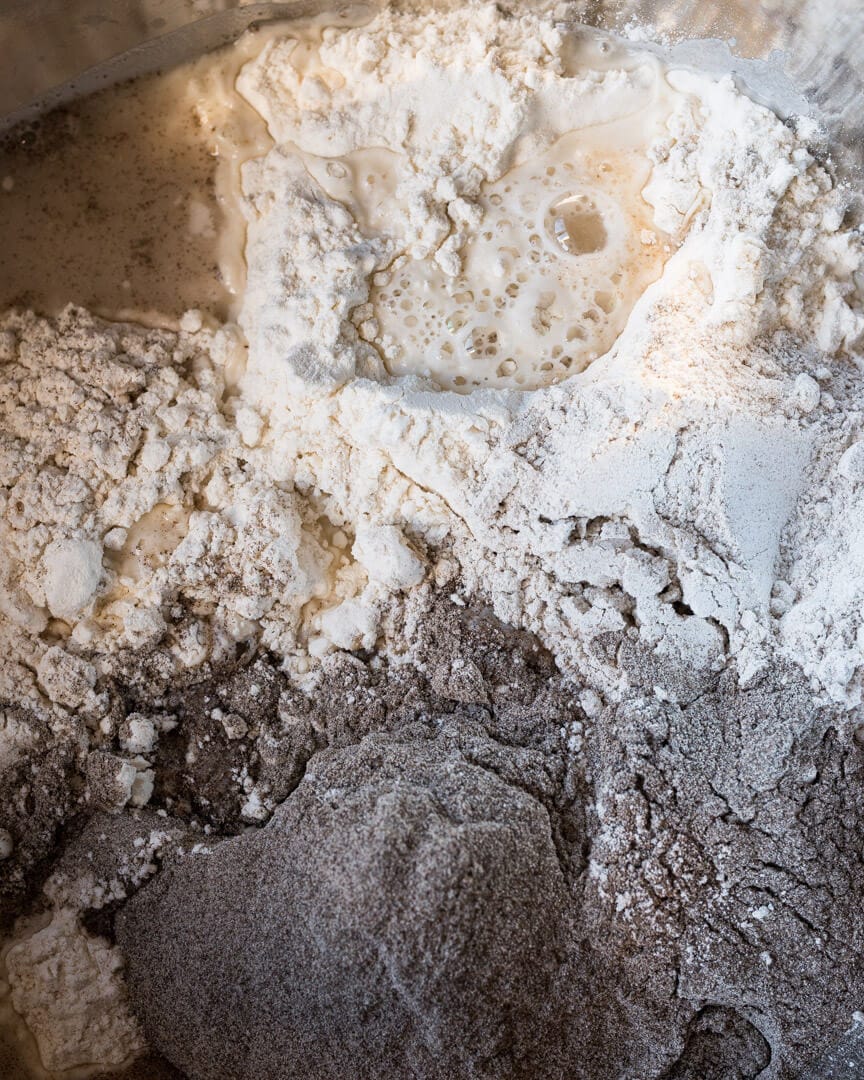
After a few minutes shy of finishing my typical hand mix, I looked down at the dark dough oozing between my fingers and thought to myself: “Wow, this looks and smells remarkably wonderful.”
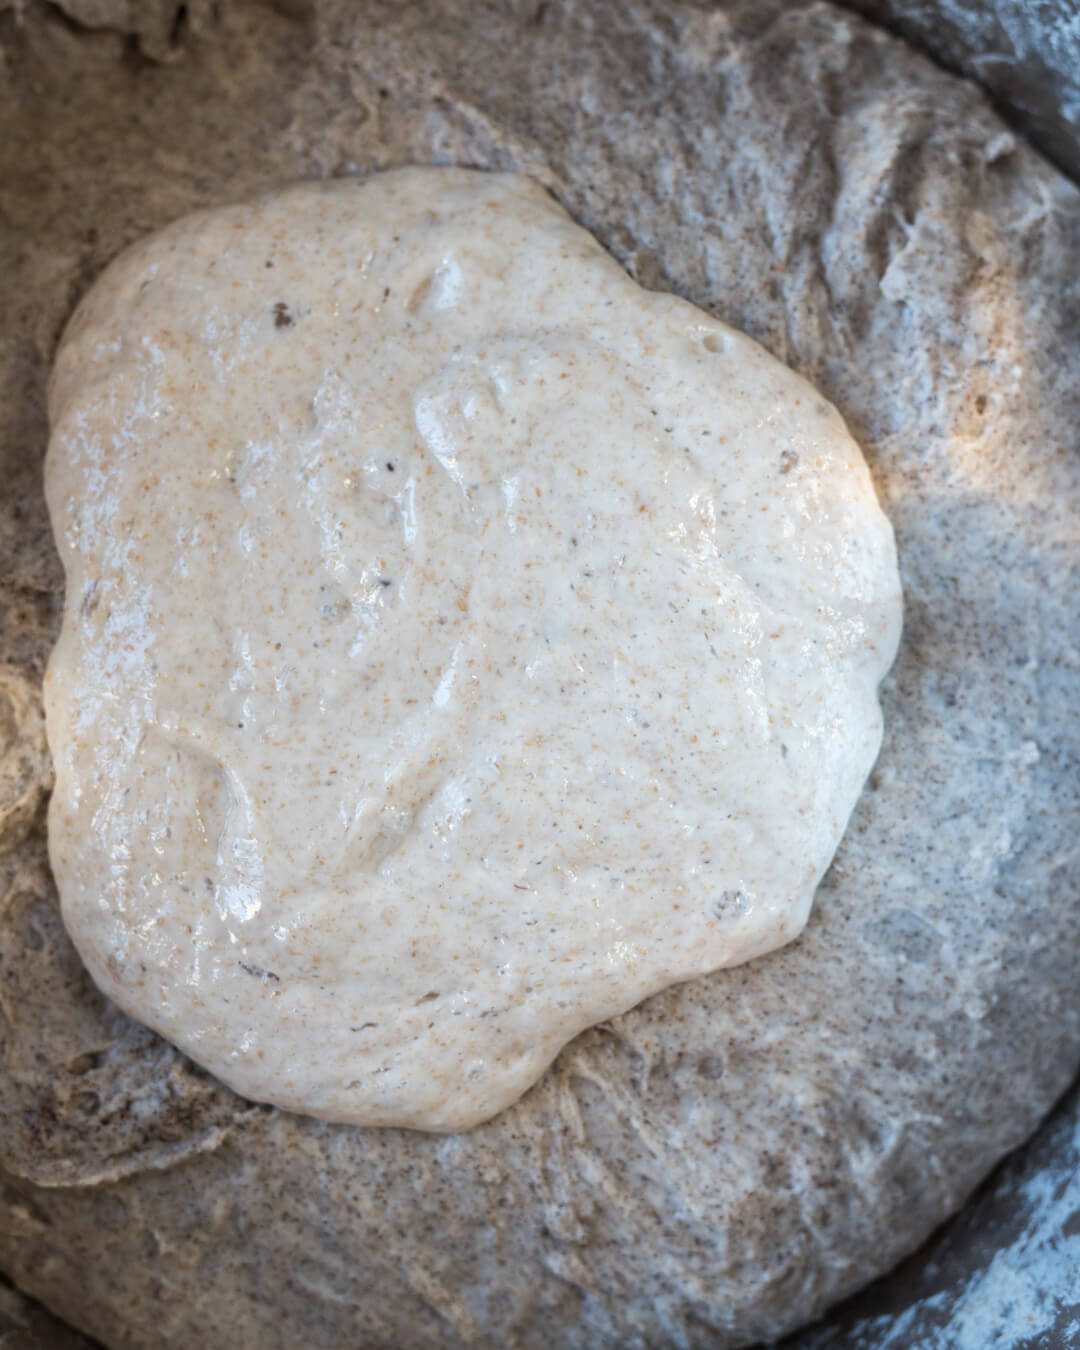
When working again and again with bread dough, you come to expect a certain color palette: deep reds, nut-browns, soft tans, milky whites, and every possible shade therein—for the most part, this palette neatly defines your bread baking world. Even when changing to freshly milled flour or a new type of grain, you can usually be assured the color will be along that spectrum. Not so with whole grain buckwheat. Just a small percentage of the milled, dark, and menacing grain-like seed transformed the entire dough to something more like itself: a stunning dark gray, almost black, hue. The earthy aroma stirred memories of fresh-cut soba noodles I had at a modest yet astounding restaurant in Japan.
I can vividly recount this exposure to buckwheat: it was during my recent trip to Japan when we serendipitously visited the smallest restaurant I’ve ever encountered. In fact, the only indication it was a restaurant was the unpretentious and familiar symbol on the door indicating it as such. No open windows, no lit-up flashy signs, no line snaking around the corner. Just a haven inside that sheltered diners from the hustle and liveliness a short distance from their tables. Almost every seat in the restaurant was occupied, and a survey of the diners immediately told me the dish to order was a large bowl of steaming soup.
The small shop was run by an elderly gentleman and his wife, who welcomed us inside with a bow and an open hand. After ordering kitsune soba, per their recommendation and the unintentional recommendation of all other patrons, I proceeded to have one of the best meals of my entire trip. The vaguely strong flavor of buckwheat noodles in their delectable broth was nothing like any food I had had before, and, to the astonishment of the owner, I ordered a second bowl to split with a friend. That one restaurant visit opened my eyes to this wonderful pseudocerealand piqued my desire to work with buckwheat flour in my own kitchen—and of course in baking bread.
With the arrival of very cold weather here in New Mexico and soups on the regular in my kitchen, I found myself thinking back to that meal, and the stage was set for me to begin experimenting with the earthy, dark buckwheat flour.
Sometimes when trying to create a sourdough formula, I find myself in the mood for bread that’s uncomplicated, light as air, crisp, and very crunchy. Other times I want something more elaborate, something deep flavored with many layers of complexity, a touch more sourness, and very flavor-forward. Buckwheat fits perfectly into the latter category, and channeling inspiration from my recent experience in Japan, I knew it would be a perfect fit for this season.
Flour & Seed Selection
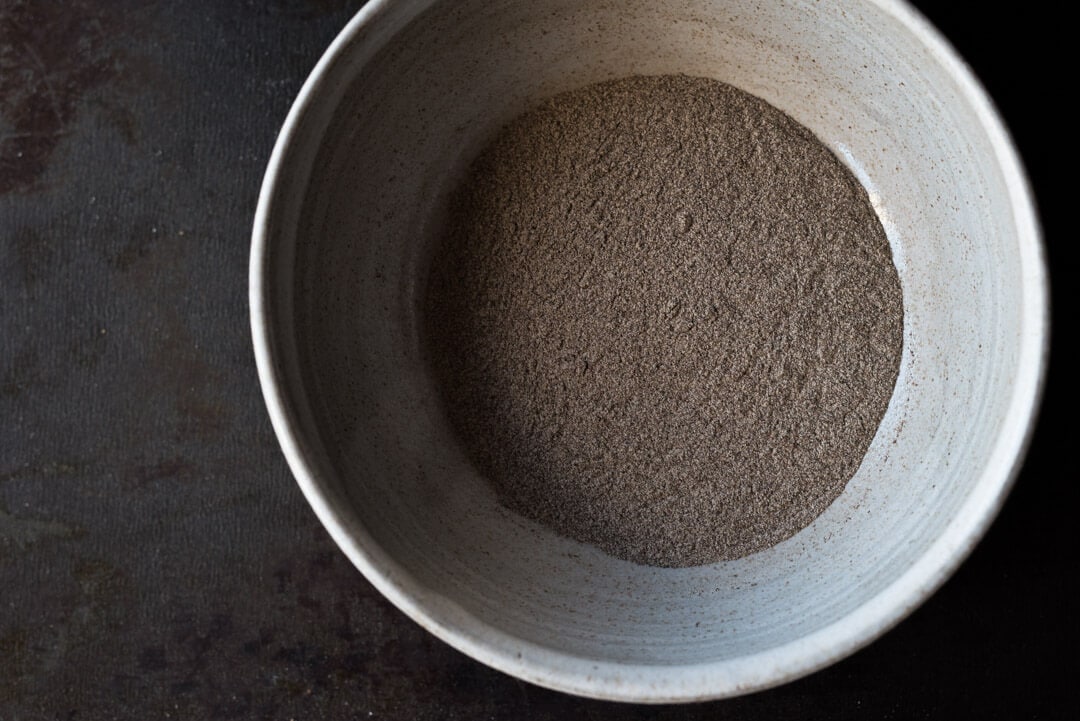
Originally, I intended to use freshly milled buckwheat in this formula, but was unable to find the whole grain variety at my local market—I only found buckwheat groats (hulled buckwheat). Unfortunately, it’s the outer, hard hull in buckwheat that gives the flour its dark appearance. And while I’m not one to usually choose appearances over taste, I found the whole buckwheat to also have an incredible aroma and flavor. I was committed.
When experimenting with the total percentage of buckwheat flour used in this formula, I ran the gamut from one percent all the way up to ten percent. However, because buckwheat has no gluten, at 10%, the interior of the loaf was rather dense—it was shocking how big an impact this small percentage imparted on the structure of the loaf. Additionally, at this percentage, I felt the intense buckwheat flavor was a bit too prominent, overshadowing almost everything else. I finally dialed things back to 5% and found the sweet spot: just enough of that earthy flavor without overpowering the rest of the wheat and fermentation flavors.
In addition to buckwheat, and channeling a little of my previous Multigrain Spelt Sourdough formula, I decided to work in a small amount of rye flour. The flavor of light rye complements the earthy buckwheat without adding any additional bitterness. It also slightly increases acetic acid production, adding a touch more sourness to the result. I find that the slightly sourer flavor complements the overall profile and my desire for a more complex bread.
Sprouting Buckwheat Groats
Since I’m already using buckwheat flour, why include sprouted buckwheat groats? I treated the sprouts as an “add in” to enhance the bread’s flavor, much like seeds or nuts. As I mentioned, because I had intended on milling fresh buckwheat for this recipe, I had a sack of (raw) buckwheat groats lying around. I decided to try and sprout them to see just how hard it might be.
Sprouts represent the point of greatest vitality in the life cycle of a plant.
Paul Pitchford, Healing with Whole Foods
Turns out it’s incredibly simple, and my test bakes with added buckwheat sprouts had a subtle sweetness that I just couldn’t part with; I felt their addition only added to the overall appeal to this loaf.
In addition to adding flavor and texture, sprouting seeds begins the transformation from seed to plant. This transformation makes their nutrients more bioavailable to us during digestion, a kind of “predigestion” in which the nutrients in the seed become easier for our bodies to absorb and use.
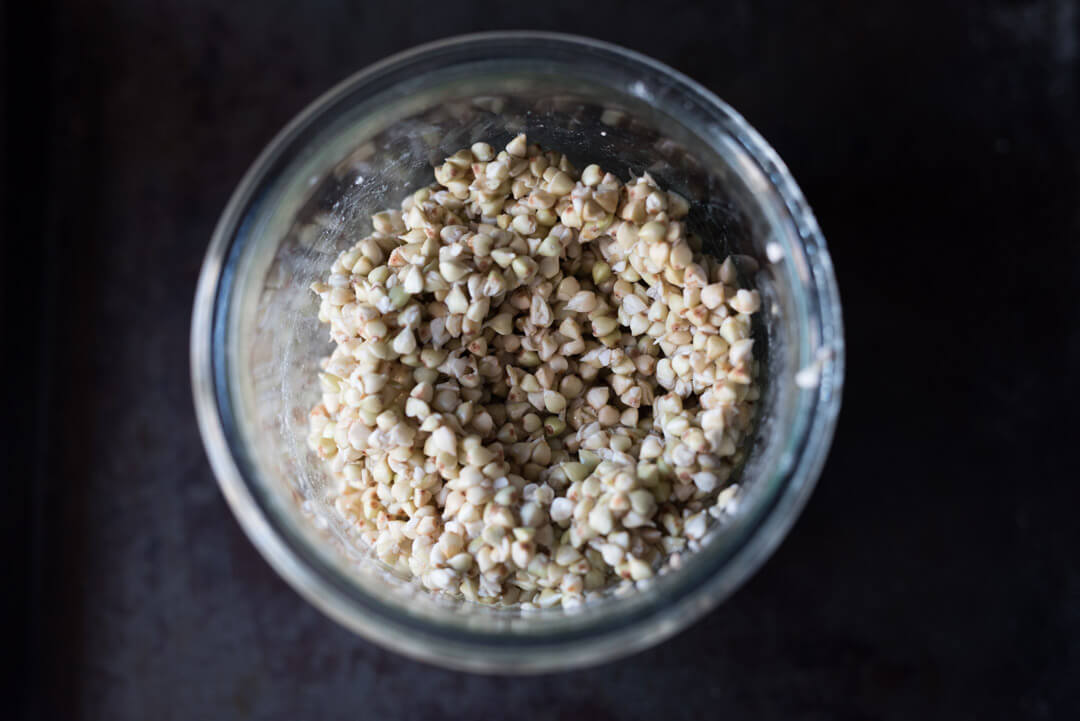
Sprouting the groats is a very straightforward process with a few caveats.
First, ensure the groats are not toasted (these will not sprout). Raw groats will have a light color that is almost green, opposed to toasted groats which are darker brown and, well, look toasted.
Second, the warmer the ambient temperature at which the groats are stored the better; sprouting seems to move at a faster pace when groats are kept at around 75°F – 80°F (23-26°C). I got into a routine of preparing groats the evening before a bake, keeping them warm so they would be ready the next afternoon, when bulk fermentation began. I would suggest trying to sprout a small amount, say 50 grams, a few days before you plan to bake this recipe, to judge just how long it takes for the groats to sprout for you and your environment.
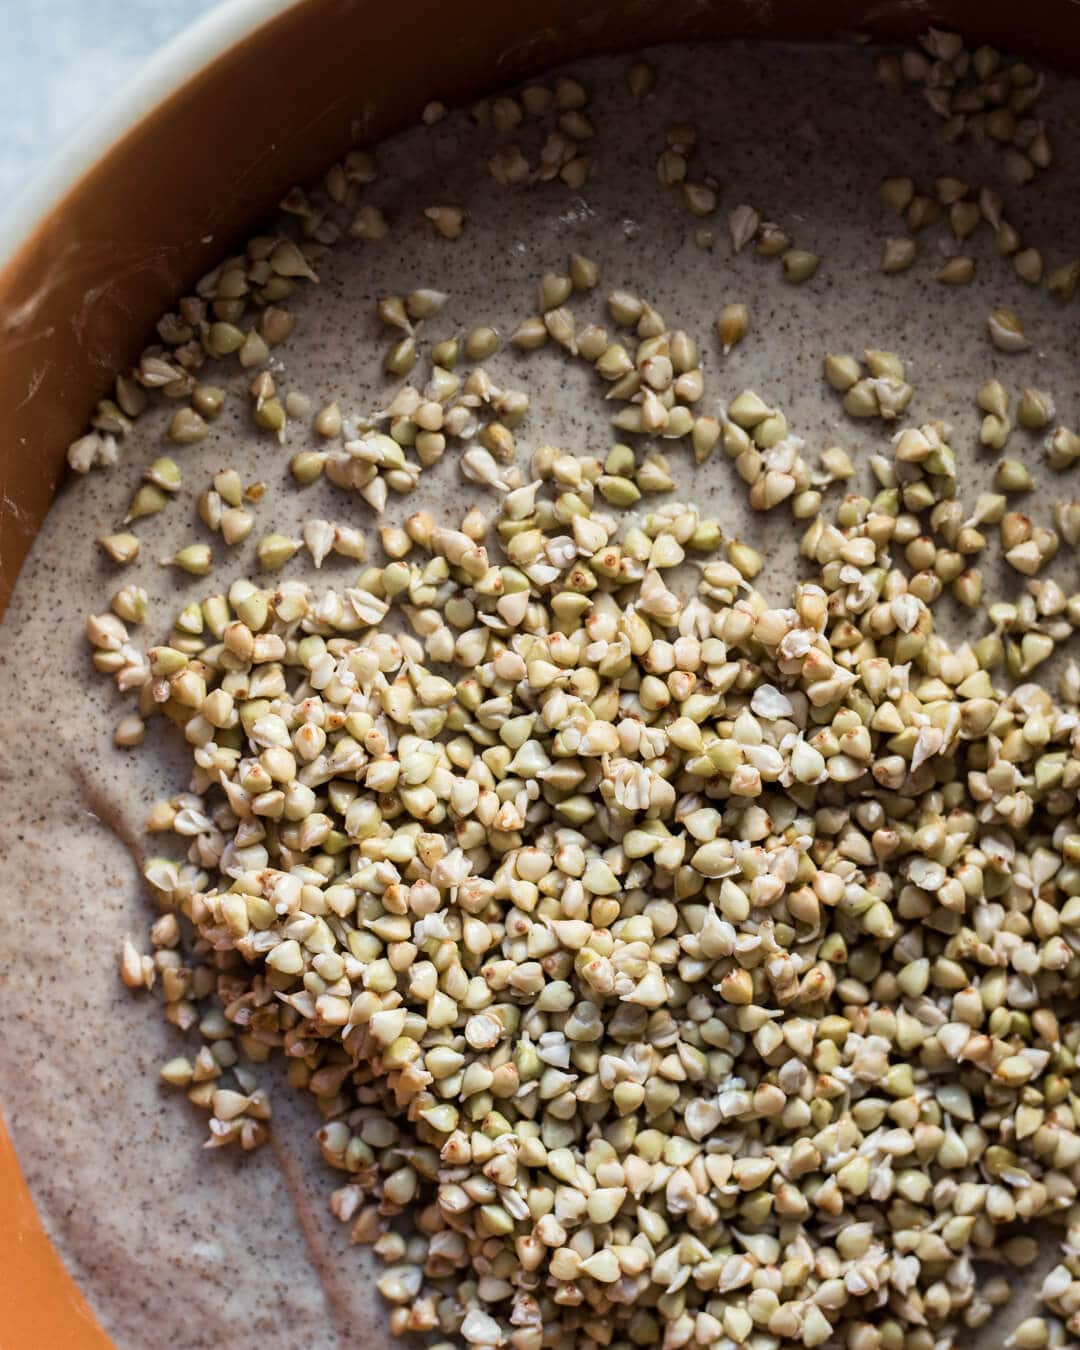
Finally, you can use the refrigerator to stall the sprouting process: if the sprouts are extending shoots too quickly, place the jar in the fridge and pull it out just as bulk fermentation begins. This way the sprouts come up to room temperature by the time they are needed (after the second set of stretch and folds, about 1 hour into bulk).
Sprouting process:
- Rinse the raw buckwheat groats several times under water (I used a mesh sieve to hold them).
- Place the groats in a jar and cover with water for 1-2 hours.
- Drain the jar and rinse the groats with water (again, using a mesh sieve). Place the groats back in the dry jar and cover with a kitchen towel or a very loose-fitting lid.
- After several hours (I waited 8 hours or so, until the morning) drain the jar, rinse the groats under water again, place back into the jar and fluff them up with a spoon to aerate (good airflow is essential for sprouting).
- Wait several hours, then check whether sprouts are emerging; if not, continue draining, rising, and aerating until sprouting occurs.
My very first time I tried to sprout these groats, I saw activity after one day—it’s not a difficult thing, and the fridge is always a great option to help synchronize the timing between dough development and sprouting.
Sprouted Buckwheat Sourdough
Vitals
| Total Dough Weight | 1900 grams |
| Pre-fermented Flour | 6.50% |
| Hydration | 85% |
| Yield | 2 x 950 gram loaves |
Levain Build
| Weight | Ingredient | Baker’s Percentage |
|---|---|---|
| 6g | Mature liquid starter (100% hydration) | 10% |
| 63g | Type 85 Flour (Central Milling T-85 Malted) | 100% |
| 63g | Water | 100% |
Dough Formula
Target final dough temperature (FDT) is 77°F (25°C).
| Weight | Ingredient | Baker’s Percentage |
|---|---|---|
| 481g | Malted Bread Flour (Giusto’s Artisan Baker Flour Malted) | 53.48% |
| 178g | Type 85 Flour(Central Milling Type 85 Malted) | 19.79% |
| 144g | High Gluten Bread Flour, ~13.5% Protein (Central Milling High Mountain) | 16.04% |
| 48g | Whole Grain Buckwheat Flour (Bob’s Red Mill Whole Grain Buckwheat) | 5.35% |
| 48g | Medium Rye Flour (Central Milling Medium Rye Flour) | 5.35% |
| 96g | Sprouted Buckwheat Groats | 10.70% |
| 755g | Water | 83.96% |
| 18g | Salt | 2.03% |
| 131g | Mature, 100% hydration liquid levain | 14.60% |
Method
1. Sprout Buckwheat Groats – the night before mixing the dough
Following the above process, rinse the buckwheat groats several times, then soak them in water for one hour. Afterward, rinse them and place them in a dry jar overnight.
1. Levain & Fluff Groats – 6:30 a.m.
Build the liquid levain (everything listed in the Levain Build section above) in the morning and store it somewhere around 77-80°F (25-26°C) ambient.
Check the buckwheat groats: rinse them under running water, then return them to their jar and fluff them a little with a spoon to ensure they are aerated.
2. Autolyse – 3:30 p.m.
Mix flour and water (reserve 100g water for the mix, later) in a bowl until all dry bits are hydrated. Cover bowl and store somewhere warm (around 75-78°F/23-26°C) for 2 hours.
3. Mix – 5:30 p.m.
Add the called for levain and about half of the reserved water to the mixing bowl, mix until well combined.
Dump the dough onto the counter and slap and fold it (French fold) for about 5 minutes, just until it begins to show a smooth surface. If you aren’t comfortable with the slap-and-fold method, or you don’t like it, you can do stretch-and-folds in the bowl until the dough tightens and becomes harder to stretch and fold.
Let the dough rest 15 minutes.
When finished with the slap-and-fold, sprinkle the salt on top of the dough and use the remaining water to help it dissolve. Pinch through a few times and fold the dough over itself to help incorporate. Perform an additional 3 minutes of slap-and-fold to build even more strength in the dough. It should come together and be slightly smooth but still a tad sticky.
Transfer the dough to a tub or thick-walled bowl for bulk fermentation.
4. Bulk Fermentation – 6:00 p.m. to 9:30 p.m.
At an ambient temperature of 77-80°F (25-26°C), bulk fermentation should go for about 3 hours and 30 minutes.
Add the sprouted buckwheat groats to the dough before the second set of stretch and folds. Spread a thin layer (about 1/4 of the total sprouts) on top of the rested dough with wet hands and do one fold. Then, spread another 1/4 of the spouts and fold again. Repeat for four folds using all the sprouts.
Perform 3 sets of stretch-and-fold during bulk fermentation, spaced 30 minutes apart. If, after the last set of stretch and folds, the dough feels overly slack, give it another set of stretch and folds for a total of four. After the final set, let the dough rest for the remainder of bulk.
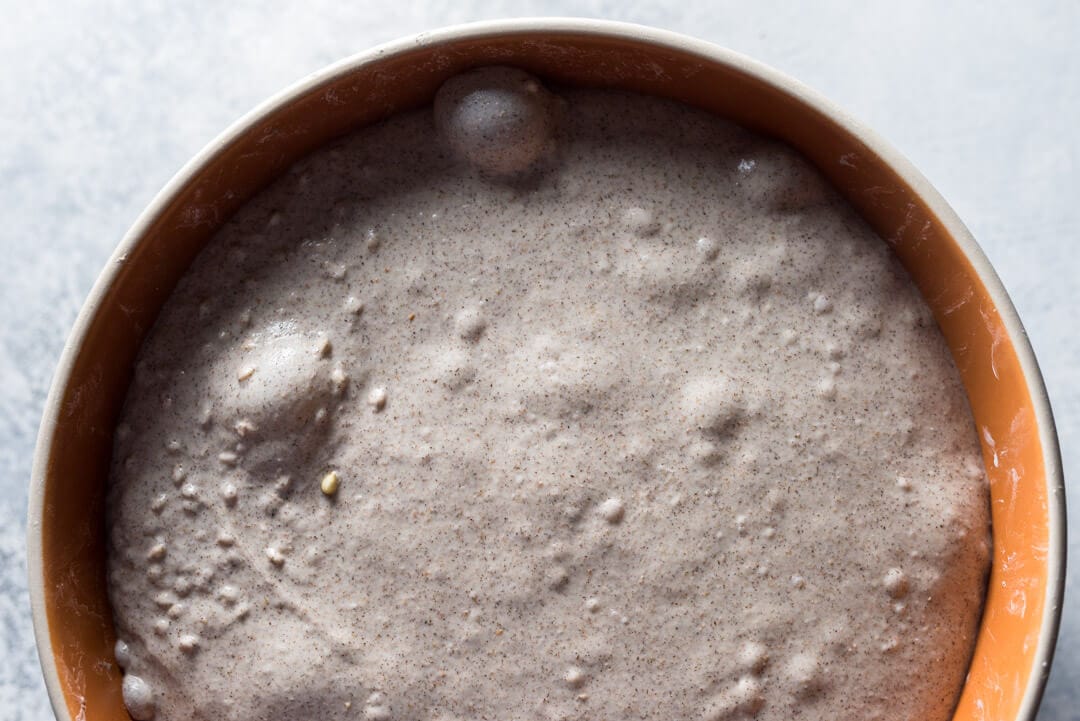
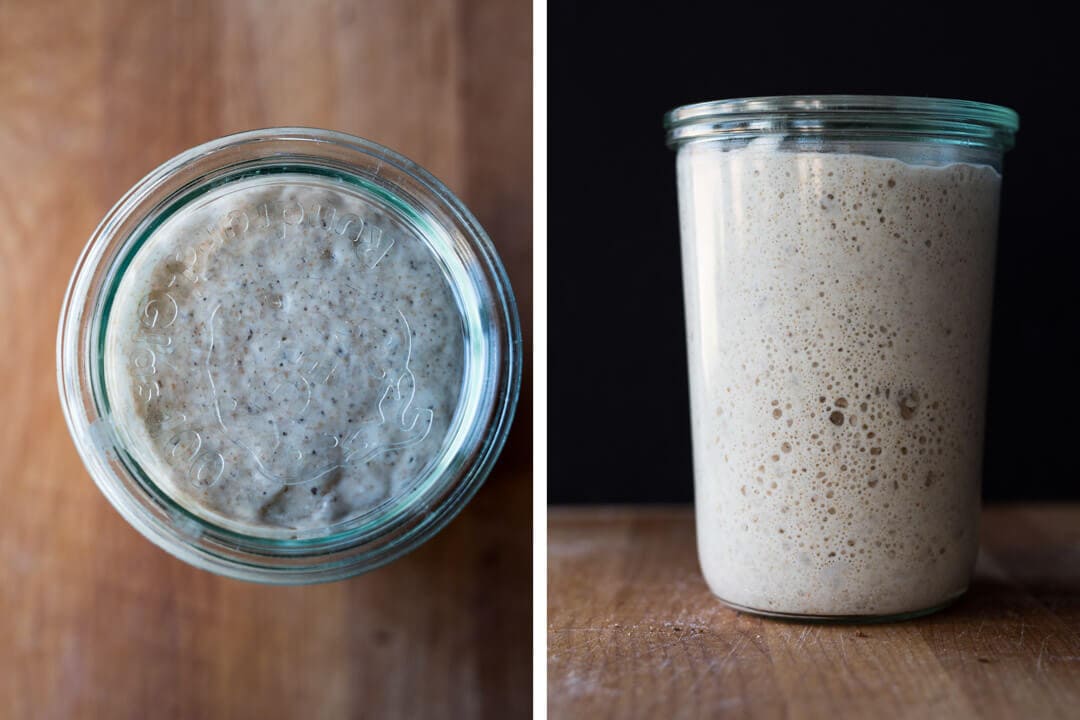
I decided to end the bulk fermentation when I saw the dough look like in the picture below. You can see that it’s risen significantly, there are plenty of bubbles on top and just below the surface, and most importantly, the edge where the dough meets the bowl is domed, convex. This is a good sign your dough is strong enough and ready to be divided.
5. Divide & Preshape – 9:30 p.m.
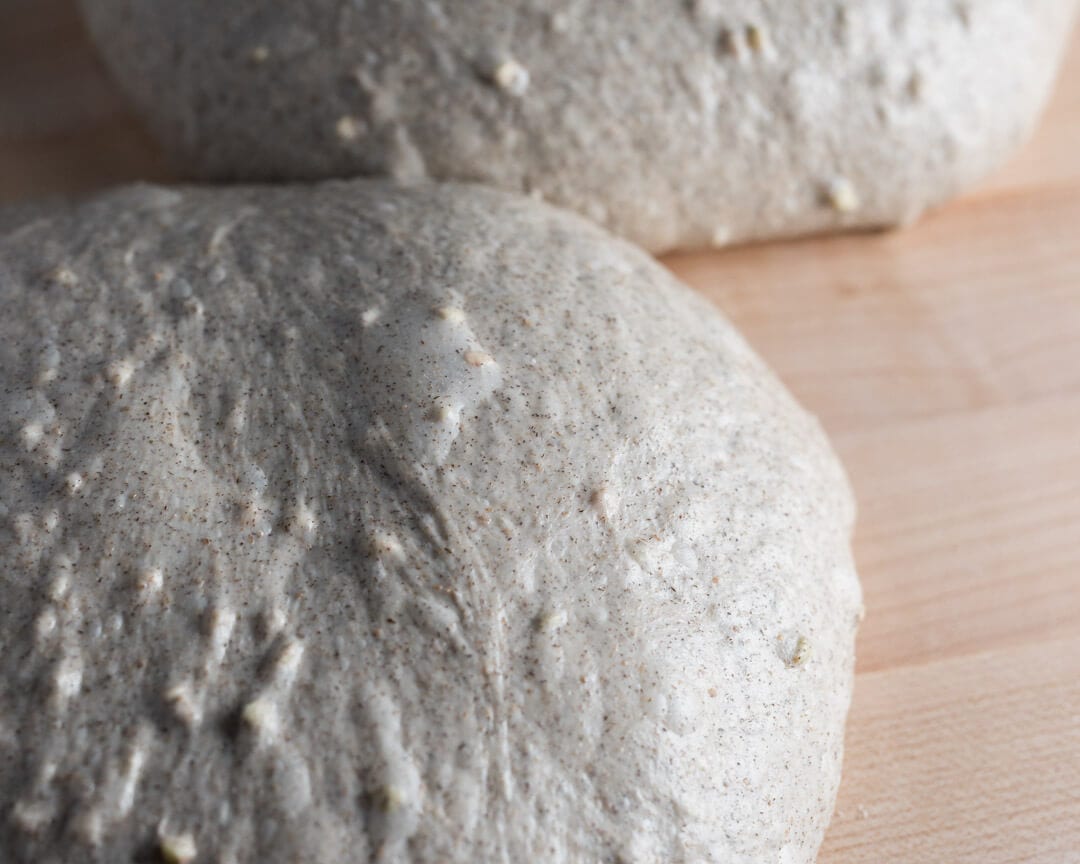
Dump the dough from the bulk container to an un-floured work surface. The dough will be sticky and a little slack, so use a bench knife and floured hand to gently preshape the dough into two round boules. Let rest 25 minutes uncovered.
6. Shape – 9:55 p.m.
Flour the work surface and the top of each rested dough. Working with one at a time, flip the resting round over onto the floured surface and fold the top half up and over to the middle and the bottom half up and over the recently folded top. You’ll have a long horizontal rectangle sitting in front of you. Turn the rectangle 90° and grab a small portion of the top, pull up and fold over a little bit, pressing down to seal. Take the rolled top and continue to gently roll it down toward your body with two hands working together. As you do each roll and work your way down the vertical rectangle, use your thumbs to gently press the dough into itself.
For more instruction on how to shape this dough as an oblong loaf, see my post on how to shape a batard.
Once shaped, transfer each to a basket lightly dusted with white rice flour, seam side up.
7. Rest & Proof – 10:00 p.m.
Cover each basket with plastic and then place it in the refrigerator at 38ºF for 9-10 hours.
8. Bake – Next Morning: Preheat oven at 6:30 a.m., Bake at 77:30 a.m.
Preheat oven for one hour at 450°F (232°C).
Take out both of the baskets from the fridge and cut a piece of parchment paper to fit over the top, quickly invert each basket onto each piece of parchment. Using a sharp razor blade fastened to a stick (or a lame) score the top of each at a shallow angle to the dough and just deep enough to cut below the top skin of the dough. Start at the top of the oblong loaf and with a single decisive stroke cut from top to bottom with a slight outward bend.
Bake the loaves at 450°F (232°C) for 20 minutes with steam, then remove the steaming pans from inside the oven. Bake the loaves for an additional 30 minutes or until done.
I steamed my oven in my usual way, described here in my post on how to steam your home oven for baking.
Conclusion
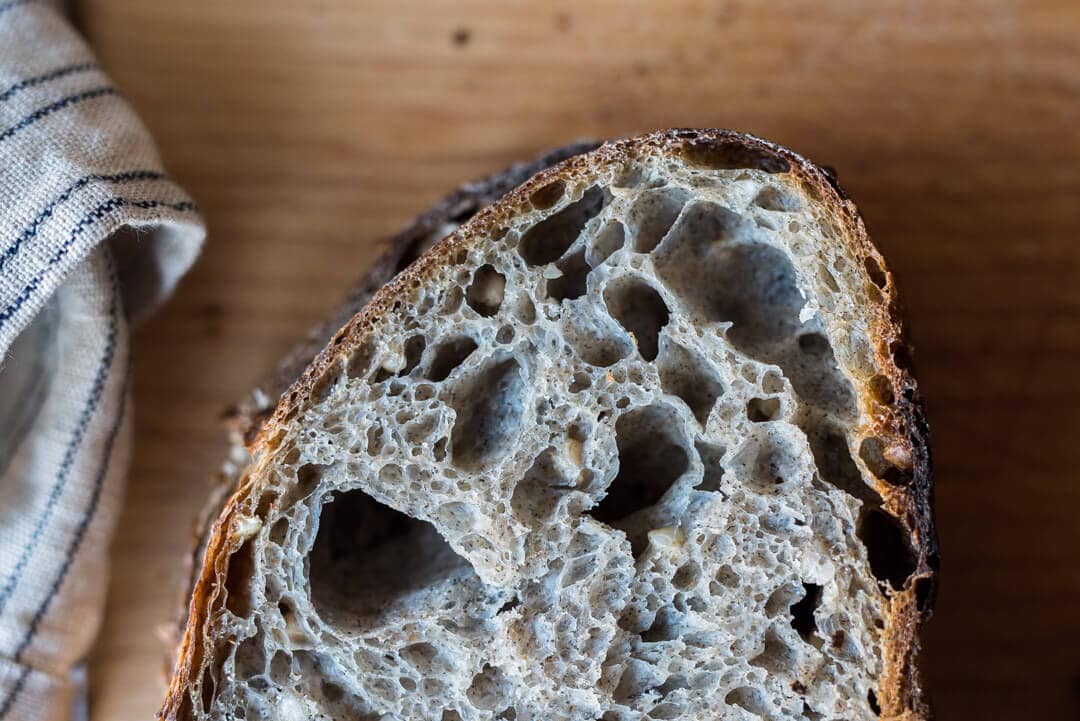
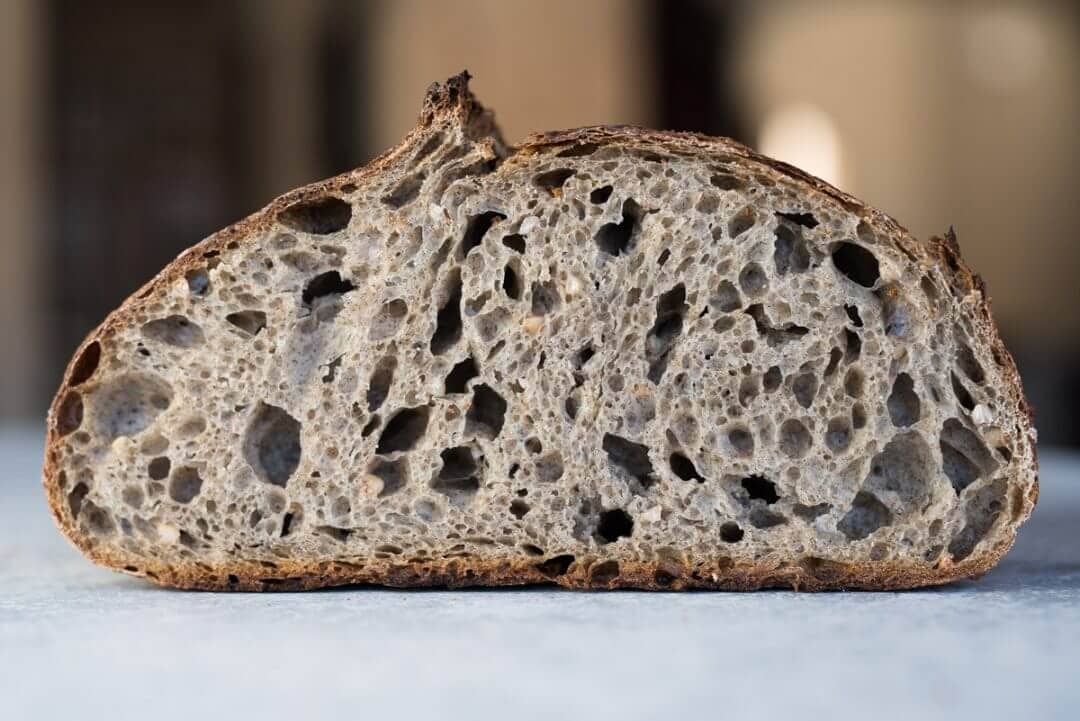
At first sight, this enigmatic sprouted buckwheat sourdough spurs the question every time: “What kind of bread is this?” The deep dark fissures and a slight gray cast are a prelude to what this bread is all about. A touch of sweetness, slightly sour, earthy, and creamy—a concert of flavors and textures in this sprouted buckwheat sourdough. This bread is a perfect companion for the cold days ahead.
Crust
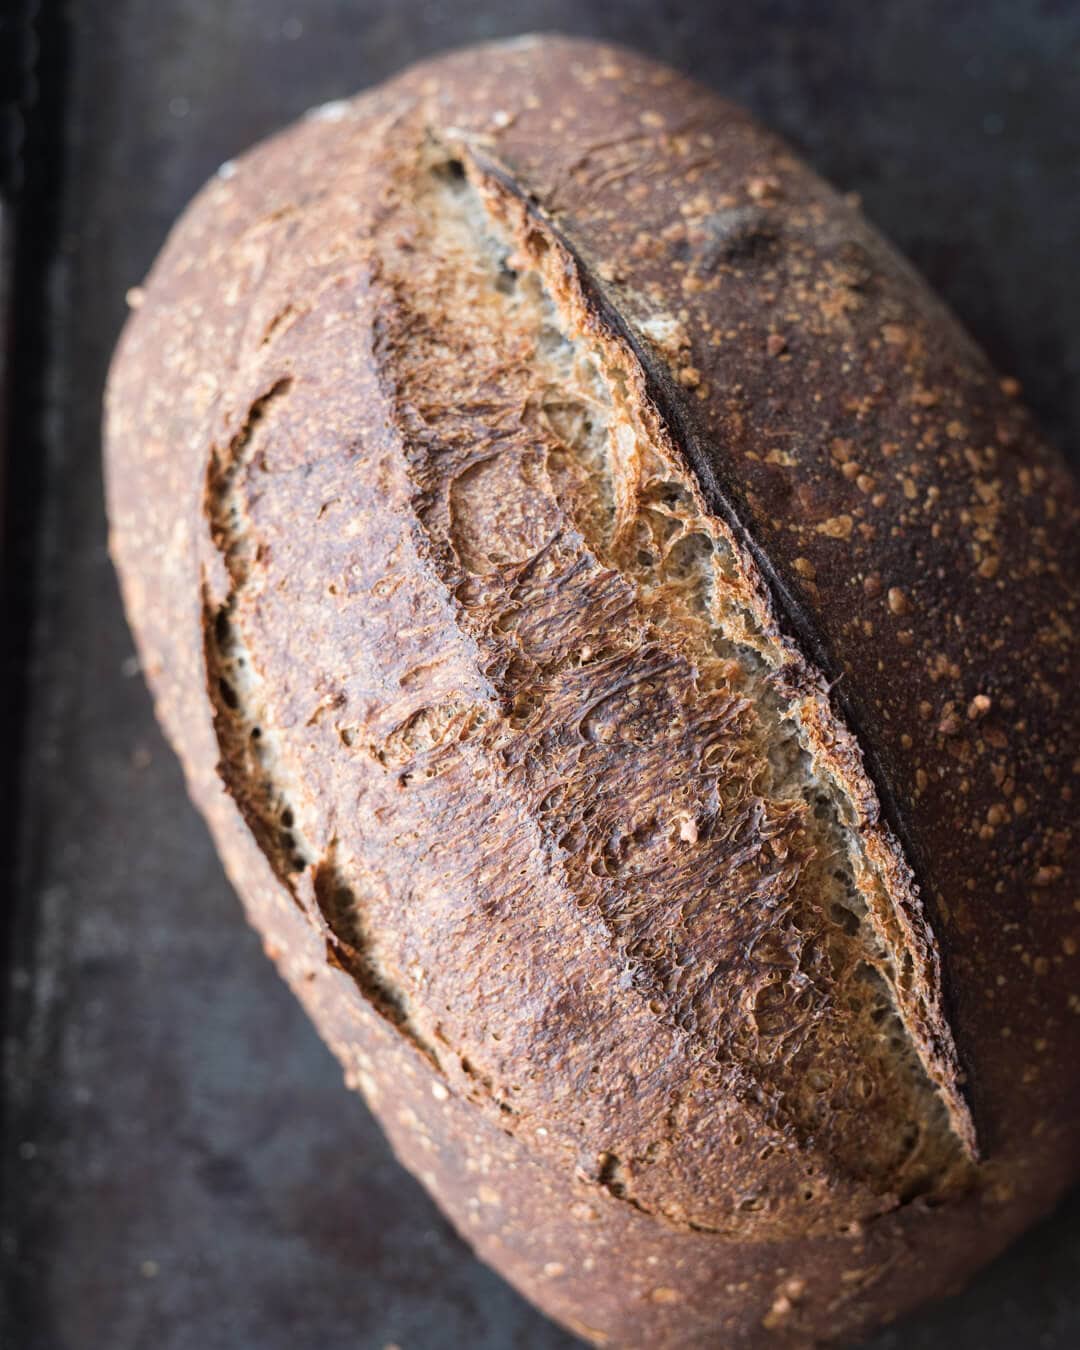
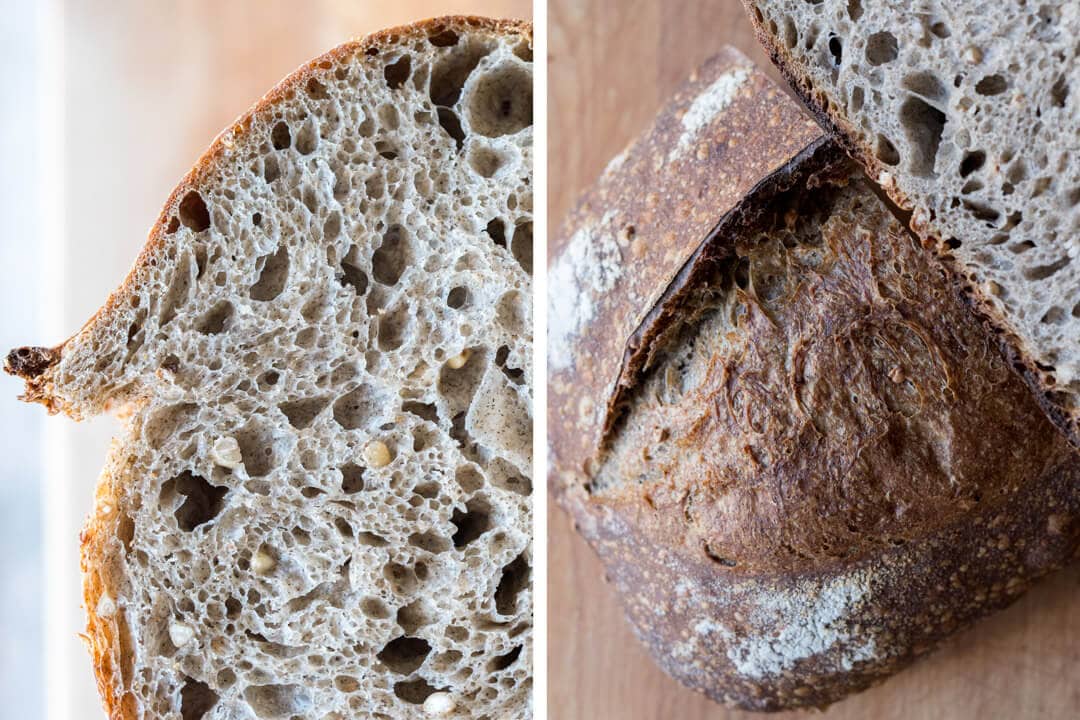
Wonderful colors, ample crunch, and yet very thin. The crust seems to have a little added color by the increased sugars from the sprouted groats—very evident at each bite. When toasted even further, the crust transforms into a delicious and brittle cracker.
Crumb
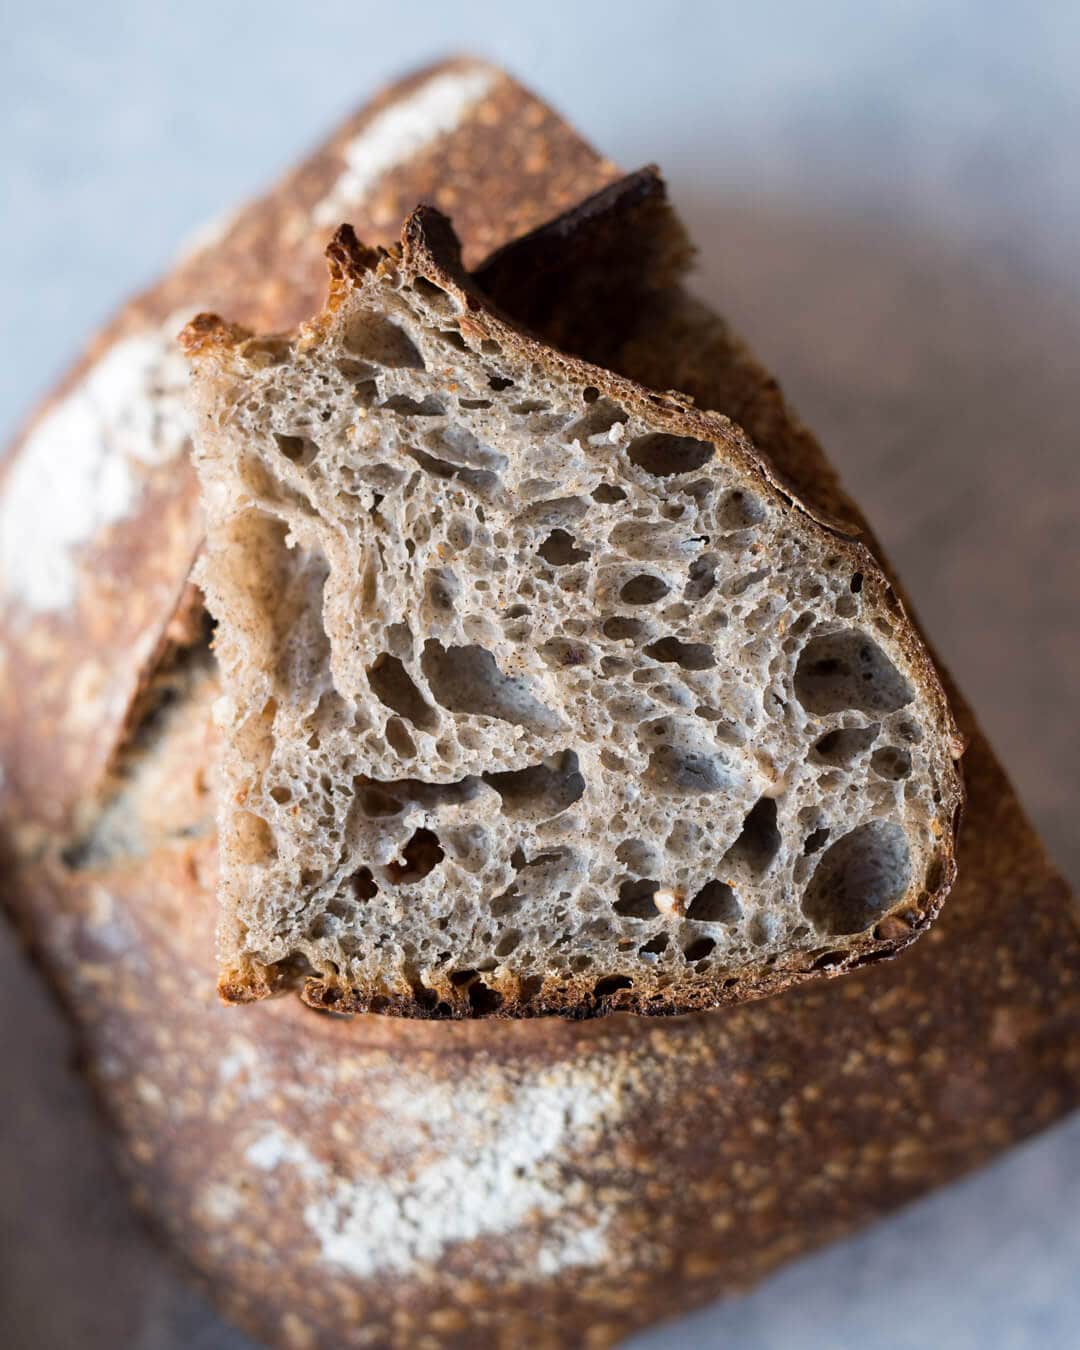
The dark gray interior hue on the crumb is a stunner. It’s something not usually seen in bread, and it only adds to the charm of this loaf—it breaks from the traditional baking color palette in an unexpected and delightful way. The interior texture is not gummy but rather soft and interjects with a crunchy chew at each sprouted buckwheat discovery.
Taste
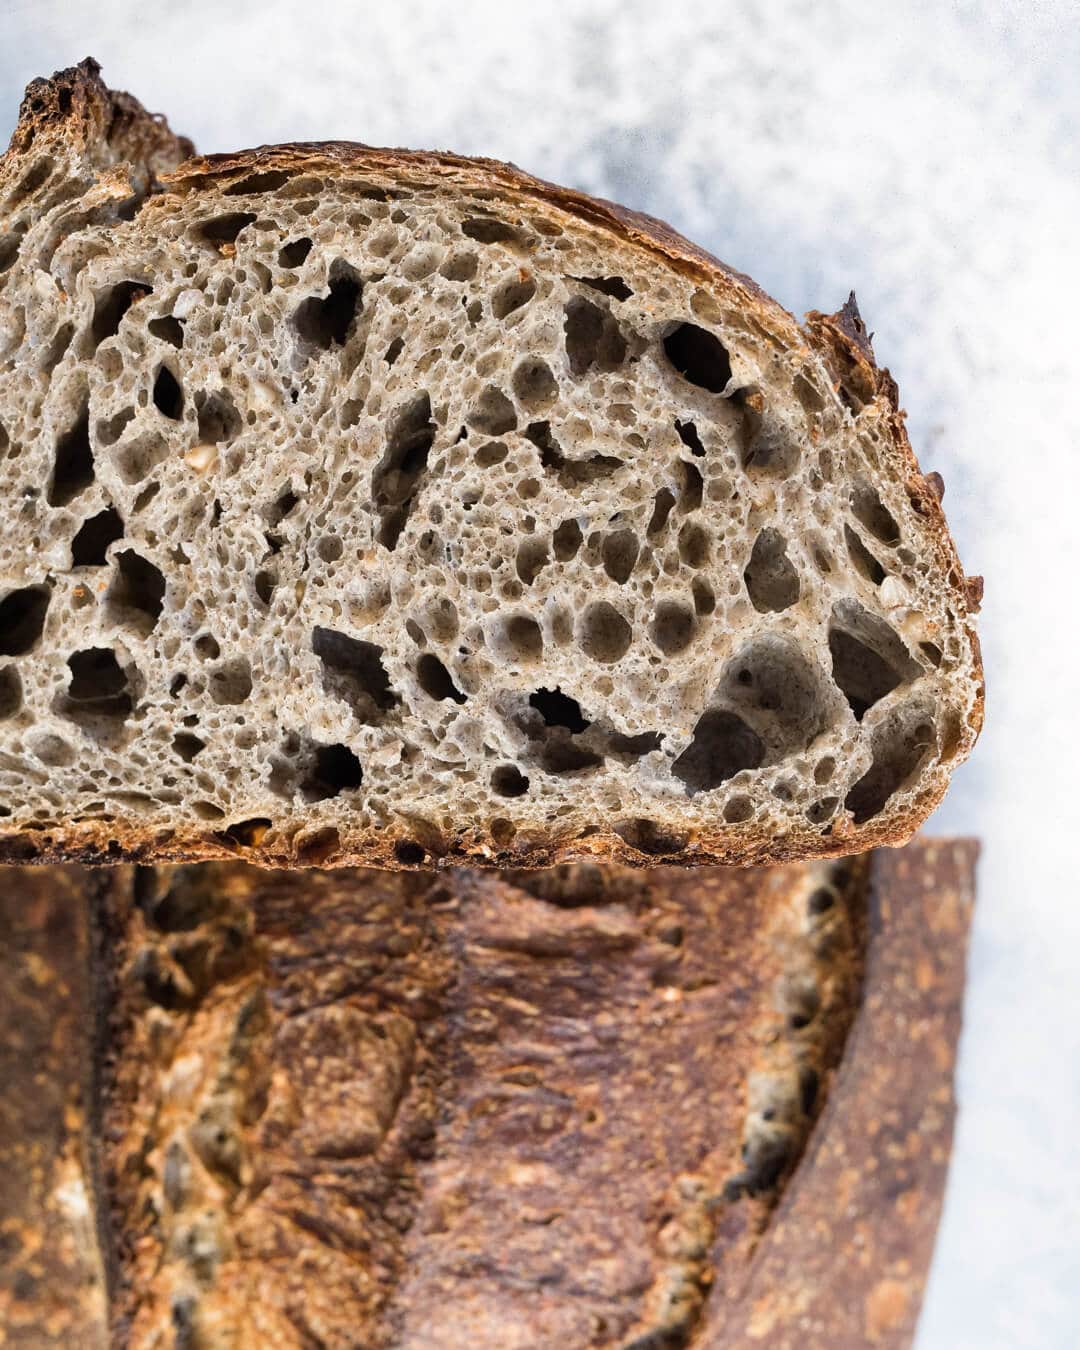
This loaf met the expectations I had for it from the outset: I wanted a complex, multifaceted bread with a subtle sweetness from the sprouted groats, earthy flavors from the whole buckwheat flour, increased sourness from the longer proof time and rye flour, and an overall balanced flavor profile when paired together.
While I still find myself dreaming of that steaming hot bowl of fresh soba I had in Japan several months ago, at least this bread, with its earthy whole grain buckwheat flavor and subtle sweet contribution from the sprouts, brings me back, even if just for a moment.
I know one thing for certain: this sprouted buckwheat sourdough will be a regular staple here in my kitchen throughout this cold winter.
For another loaf using this menacing—yet irresistible—grain, check out my Scalded Buckwheat and Malt loaf, where the sweet malt balances the assertive buckwheat in such a beautiful way.
Buon appetito!
If you use this recipe, tag @maurizio on Instagram so I can take a look!


66 Comments
I'm from the Netherlands, where we do not have the time 77:30 am 🙂 (Step 8)
Can I also make this bread without adding the sprouted buckwheat? I just don't have it in my kitchen at the moment, can imagine it would be a great addition. Do I need to change anything in the recipe when I leave it out? Thanks!
Hi Maurizio! Is this recipe in your book?!
No, unfortunately, this one isn't Barbara!
Recepy for dough using buckwheat flour please Thank you
Here you go, Imelda!
https://slimlife.fit/soft-honey-buckwheat-sandwich-bread/%3C/a%3E%3C/p%3E
Thank you for all your excellent recipes and explanations, Maurizio. Your book is really my guide towards becoming a (micro)baker, after also reading and using many of your online recipes.
My question about this specific recipe: although I understand that the sprouts really improve the taste of this bread, could I leave the sprouts out without further changing the recipe? Or should I adjust the water amount?
Thank you,
Sytske
Super happy to help and thank you for getting my cookbook! You could leave them out, sure 🙂
Hello! Thanks for all your awesome advice. I followed the beginner recipe with a starter a friend gave me and it turned out amazing. Unfortunately it happened on the same day my wife got her blood test results back diagnosing her with celiac disease. Any experience with gluten-free sourdough? Thanks again!
You’re welcome, Konane! Ah, sorry to hear that. Unfortunately, I don’t have any gluten free recipes here!
Hello Maurizio 🙂
Thanks for your efforts, it is a real inspiration.
If i don’t have access to malted flour, can I use malt syrup?
You’re welcome! You don’t have to use malted flour—if your flour bakes up well, you likely won’t need it. The maited syrup you probably have is non-diastatic where as the flour typically has diastatic malt (enzymes still active).
Thanks anyways! The recipe was delicious!
Hello 🙂
Thanks for your efforts Maurizio, it is a real source of inspiration.
I don’t have access to malted flour. Is it possible to use malt syrup? if yes, what percentage should I use?
Cheers!!
Hi Maurizio,
I’ve just received my brand new Mocmill Pro 200. Yes, I’m crazy !
As I live in Canada, it is impossible for me to obtain flour from the United States …
However, I have access to a wide variety of grains. So, I would like to know which grains to use to produce the different flours you use in your recipes.
Thank you !
That’s awesome, Joanne! Congrats, you’re going to love the mill. You can’t go wrong with using any hard red wheat, that is the base for most of the flour I use here and in my recipes. Sometimes I’ll use a white wheat (whole white wheat) for a milder flavor, and I just love that variety in pan loaves. If you’re looking for great grain, check out Flourist up in CA!
Thanks for answering me, Maurizio. I made sourdough pancakes with freh milled flour. Next, your sprouted buckhweat soudough bread. After Christmas time, maybe 🙂
Following your ricotta recipe, I ordered 2 books on cheese making. Did I tell you, I’m crazy about cooking and you inspire me ! Thank you !
Hey Maurizio,
First, thank you so much for writing this incredible blog!
I see that the levain build is 1:1:1, which should peak within a few hours, but then in this recipe you only mix it into the dough after 9 hours, long after it has peaked. Can you please explain why that is?
Thanks!
Roy
Hey, Roy! Strange, the post was not correct. I’ve updated the formula and the timeline to what they should have been. Either it’s been this way for all these years or something else was off! The levain is a 12-hour build that starts early in the morning and has a low seed percentage of 10%. You’re right, a 1:1:1 build would be ready in usually 3-4 hours.
Hope this helps and please let me know if you notice anything else amiss (I updated the whole post, though). Thank you and happy baking!
Thanks for correcting the post and for answering my question!
Would you mind also explaining the choice and the implications of the 10% seed percentage here? So far, I mostly saw 1:1:1 or 1:2:2 in your recipes, so was wondering…
I do a mix of various build times, flour types, and other parameters to adjust the performance, flavor, and timetable of the levain. I find with a longer running overnight levain, you’ll get even more flavor transferred over to the final dough mix. That’s not to say shorter builds aren’t great, I use them often, but with this bread—which packs tons and tons of flavor—it just brings that much more flavor in the end.
Got it, thank you!
Please keep writing – it’s such a joy reading your blog and learning from you!
Thanks so much Roy, I appreciate that. And no sign of me stopping any time soon 🙂 Happy baking!
Buckwheat is quite an important, traditional food where I live and so is our buckwheat bread with walnuts (although usually with a higher percentage than yours). I’ve only made it once before and was so thrilled to find your recipe for buckwheat sourdough! So I’m gonna make yours this week 🙂
Anyway, I have a question. All recipes I’ve seen here suggest pouring boiling water over the (roasted) buckwheat flour. I tried searching online but can’t seem to find a good answer to what difference does it make. I’m wondering if there’s a reason you don’t scald it and if you tried that method at all before?
Thanks for all the amazing guides, tips and recipes!
Hey, Maja! I’ve done a scald with other flour, which helps gelatinize the starches, bringing significant softness to the resulting bread. However, I’ve not tried this with buckwheat — I will have to! Thanks for suggesting that and your kind words. I hope this bread turned out great for you!
Amazing recipient, a love your blog. I will try to do. I hope to be great.
Thank you, Giovanna!
By any chance do you know the Ash content for “Malted Bread Flour (Giusto’s Artisan Baker Flour Malted)”? I found the protein content (11.5%), but not the Ash. I’m excited to make this bread; it’s next in my queue!
Hey, Wendy! Unfortunately they don’t list the ash value on their website. They might be able to get that info to you via email!
Email sent. If I get an answer I’ll post here.
Thanks! I typically stick to 0.5% to a maximum of 2% (rare) with diastatic malt powder — any more and the crumb could get a bit chewy…
I got a reply from Giusto’s. The #s…
Artisan Malted Unbleached Bread Flour: Protein 11.5% (+/- 0.5%), Ash 0.52-0.58, Falling# 230-270 seconds.
Fantastic. Thanks for reporting back on that, I’ve been asked in the past. 🙂
I use buckwheat flour and groats in as much stuff as I can because I love it! Recently I sprouted some then cooked it to a porridge. It is the most delicious thing ever! I plan to make my nest dough using that and possible some raw sprouted for texture. Well worth toasting some of the flour, it really enhances the flavour of it.
it’s incredibly flavorful — and delicious! The flavor of this bread is incredible, I hope you enjoy it. Happy baking, Leona!
I’ve obviously had issues finding all of the right flours as well. I think I found some subs for it. But none of them are malted. I have a jar of pure malt in the fridge, how would you recommend using it or adding it to increase the enzymatic activity?
Tommaso, sorry for the late reply! I’ve never used “pure malt” but diastatic malt is what we’re after for this recipe — enzymes still need to be active. That said, if you omit the malt altogether your result will still work just fine!
I don’t have access to any of the flours that you do so I’ve used your recipe as inspiration. I added in 5% roasted buckwheat flour and it smells amazing so far. went for 500g flour weight but kept the 100g of buckwheat so will see how it goes. i thoroughly recommend roasting buckwheat flour though, it is incredible. got the idea from this http://www.shipton-mill.com/baking/recipes/the-menhir-sarrasin-a-breton-buckwheat-loaf.htm
One of my goals here is to inspire bakers to branch out and try new recipes — great to hear that! I’ve never thought of roasting the buckwheat flour, what a great idea. I’ll give this a shot, thanks so much for sharing this suggestion, Leona!
Ah, after searching for a sprouted buckwheat (a colleague has given me a sack from her parents farm in Poland) bread recipe you have delivered. Looking forward to making this!
Great site Maurizio.
Regards from London.
Nick,
Nick, thank you I really appreciate that! I really, really love the flavor of buckwheat and adding sprouted buckwheat just takes it to the next level. Enjoy!
I just notice. The new logo. Simple and so meaningful. well done!
So this bread… Congrats!
Thanks Ana, really appreciate that!
Can’t wait to make this. I have all the ingredients and have been experimenting with sprouting groats (found them at Whole Foods), and while I was at it, red wheat berries (I am excited by the flavor and texture of the wheat and will incorporate that into another loaf soon.
One question — I don’t see where you added the levin. Do you add it to the autolyse, or at the first part of mix? Normally I would think the first mix, but I don’t see it so I’m asking.
Great site, Maurizio. I found it around Thanksgiving and I’ve been making at least 2 loaves a week ever since, trying to perfect my technique with your #33 Tartine, and your sourdough. Ready to branch out now!
Thanks.
Awesome — yes I picked up the groats in this recipe from my local Whole Foods as well. I have sprouting wheat on my to-do list!
Sorry about that, it was an omission. I’ve updated the post to indicate you add the levain at the Mix step. Thanks for catching that!
Thanks so much, really glad to hear you’re enjoying my website! This is a really awesome recipe to branch out with, the flavors will knock your socks off!
Happy baking 🙂
Hey Maurizio,
Love this post.
I have a question. Do you find that you need to reshape your proofed dough from the fridge the next day ?
I’ve often found that my dough was not as firmly holding the air bubbles the next day.
Could be many things but I just was wondering if the pre shape again is an exception not a rule.
Thanks, appreciate that! No I don’t usually reshape the dough the next day before baking. It could be, like you said, you didn’t give enough tension to the dough at shape time or it could be that your dough is slightly over proofing and thus wanting to spread out more than it should.
Thanks Maurizio.
Yeah I think I am over proofing too. It’s unusual because I’ve proofed overnight for 10-12 hours.
My kitchen temperatures fluctuate so I’m still searching the best proof times. I could also work on my shaping.
You bet. Maintaining consistent temps can definitely be a challenge, especially in the winter!
AzureStandard.com has un-hulled Buckwheat. Not sure if they deliver near you, but I’d check it out! That said, not sure if the mill you use would be supported.
Thanks for the link, I’ll have to order some and give it a try!
Thanks for this post. The pictures are beautiful and I can’t wait to get started on using other grains after mastering a standard country loaf.
What are your thoughts on a crust being too “hard”? I’ve experimented with various bakes (from pale brown like a traditional SF sourdough to “dark” bake) and the result is usually a tough crust that isn’t easy to slice or eat (gets tougher over time). One time my bread knife even slipped and gave myself a cut on the finger because it could not penetrate the crust. I compared this with breads I get from local farmer market (i.e. Acme, Manresa, etc.) and their loaves are definitely easy to slice and chew (and the bread has been baked and sitting out there for a while).
I bake my loaves in a dutch oven and I experiment with temperatures ranging from 450 to 500 degrees Fahrenheit. Is the fact that the bottom of my loaf is usually burnt a tell tale sign of something else I am missing?
Thank you! I’ve found that my crust when baking in a dutch oven is a bit thicker than when I use my steaming method for baking. I think I’m just able to introduce a lot more steam in the oven which helps produce a thinner and more brittle crust. Occasionally I’ll go back and use the DO to bake a porridge loaf or something similar and it does usually result in a thicker crust. I really like the DO as a way to easily make bread and it does do a fantastic job, however.
You might want to play with spritzing the dough with some water when you load it into your DO along with lowering the temperature to see if you can help reduce that thickness some. You could also try removing the bread from the DO for that second half of the bake if the bottom burns but this might be a challenge given how hot it is! Another option would be to preheat the DO for a shorter time so it’s not quite as hot when you load your dough.
Hope this helps and thanks again!
Thanks for the reply!
I think it’s about time I invest in some lava rocks to try the steaming method. But before then, my next loaf I will try to spritz with water to see how it turns out.
Thanks again.
Beautiful. Your commitment to excellence paid off. Please send me a frozen loaf. It must be amazing toasted! Thank you.
Thank ya! Yes, this bread is incredible toasted and with a little butter 🙂 Really though, it goes incredibly well with homemade soup, just perfect for winter. Happy baking!
really a perfect loaf ! ^-^ this year, twice I have baked Tartin buckwheat bread, mixed with half wholegrain ( self ground) and really enjoying. I would like try your recipe , too ! then I noticed, that my buckwheat groats are brown ! I did not know that they are roasted, when I milled, it was sticky , so I wondered if buckwheat is soft grain, but now I know why. At moment I bake always in our wood oven , so that the timing of raising and temperature is not a easy thing, but I really enjoy it. Thank you always for good inspiration ! ( and have a good year ! )
Thank you! Yes, when I was researching buckwheat for this post I discovered the difference between the toasted groats, raw groats and then whole grain buckwheat. Very interesting! Hope you enjoy the recipe — happy baking Pietra!
Beautiful article and pix Maurizio! FYI I think you meant to write “Kitsune” instead of ‘kutsune”. Kitsune means fox in Japanese and is usually refereed to the marinated fried tofu pouch in the dish, Thanks for the inspiration with your beautiful baking.
Thank you so much! And yes, you’re right, I did mean Kitsune, it was a typo! You’re welcome and happy baking!
Thank you! I love the effect walnuts have on the dough, they release that wondeful purple-ish hue to the surrounding area. I hope you give this a try, it’s really good!
Hi Maurizio,
About your last recipe, may I asked you what you mean by “pre-fermented flour”?
Cordially,
Guy
Pre-fermented flour is the amount of flour in this recipe that’s fermented ahead of time, before the final dough mix — in this case it’s simply the levain that’s added to the dough.
Hope that helps!
Hi Maurizio. I have a question. I’ve read and re-read your formula/description of this scrumptious loaf but I don’t see an amount for the weight of the sprouted buckwheat groats to be added to the dough. Can you point me in the right direction?
Thanks,
Tortoise
Oops, sorry about that! Fixed, should be 10.50% (or 100g for this recipe). Thanks!
This looks amazing! Can you clarify the quantity of groats in the recipe? Thanks!
Thank you! Sorry about that, it’s been updated!