

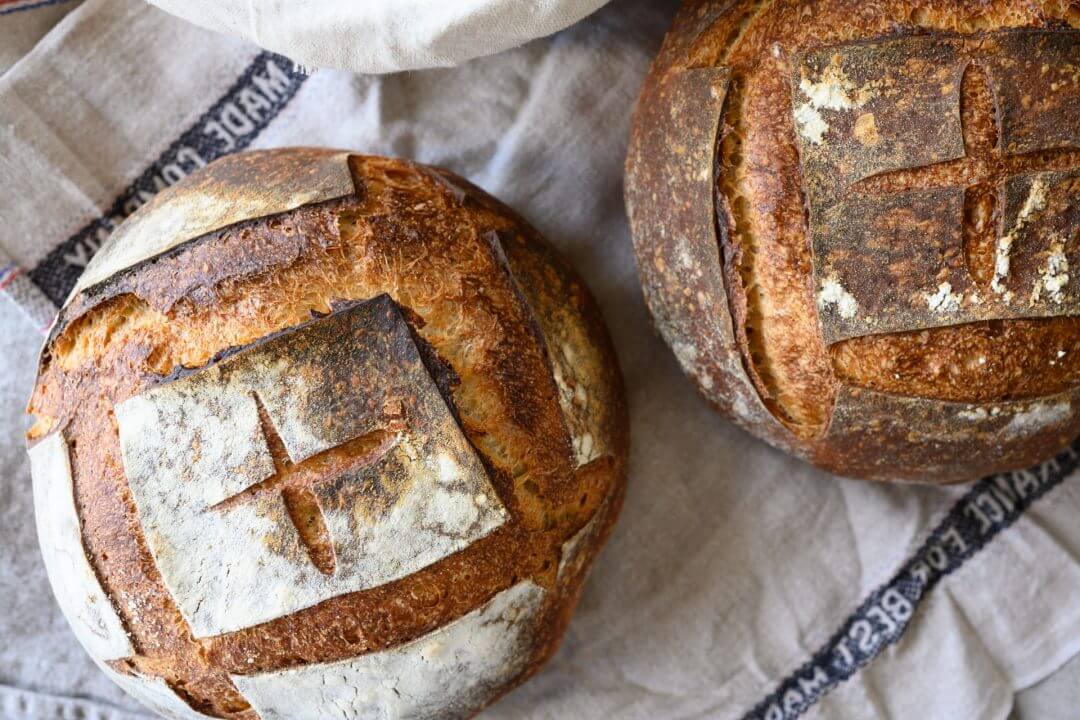
Baking a healthy and nourishing loaf of sourdough bread with your sourdough starter is gratifying, to be sure, but what if you’re not home all day to check in on the long-fermented dough? I mean, some of us do have to work, right? This simple weekday sourdough bread recipe and schedule are uncomplicated for mixing and baking a loaf of bread during the busy workweek.
This post includes pictures and videos that clearly and concisely convey the full sourdough bread-making process. But why is this recipe so easy compared to others?
Real Quick: Why is This Sourdough Bread Easy?
- It’s a no-knead sourdough bread recipe: mix everything in one bowl
- It uses only two types of flour: bread flour and whole-wheat flour
- It’s moderate hydration—no messy dough or counters
- It’s baked in a Dutch oven or combo cooker
- Timing is extremely flexible
Let’s go over the workweek schedule.
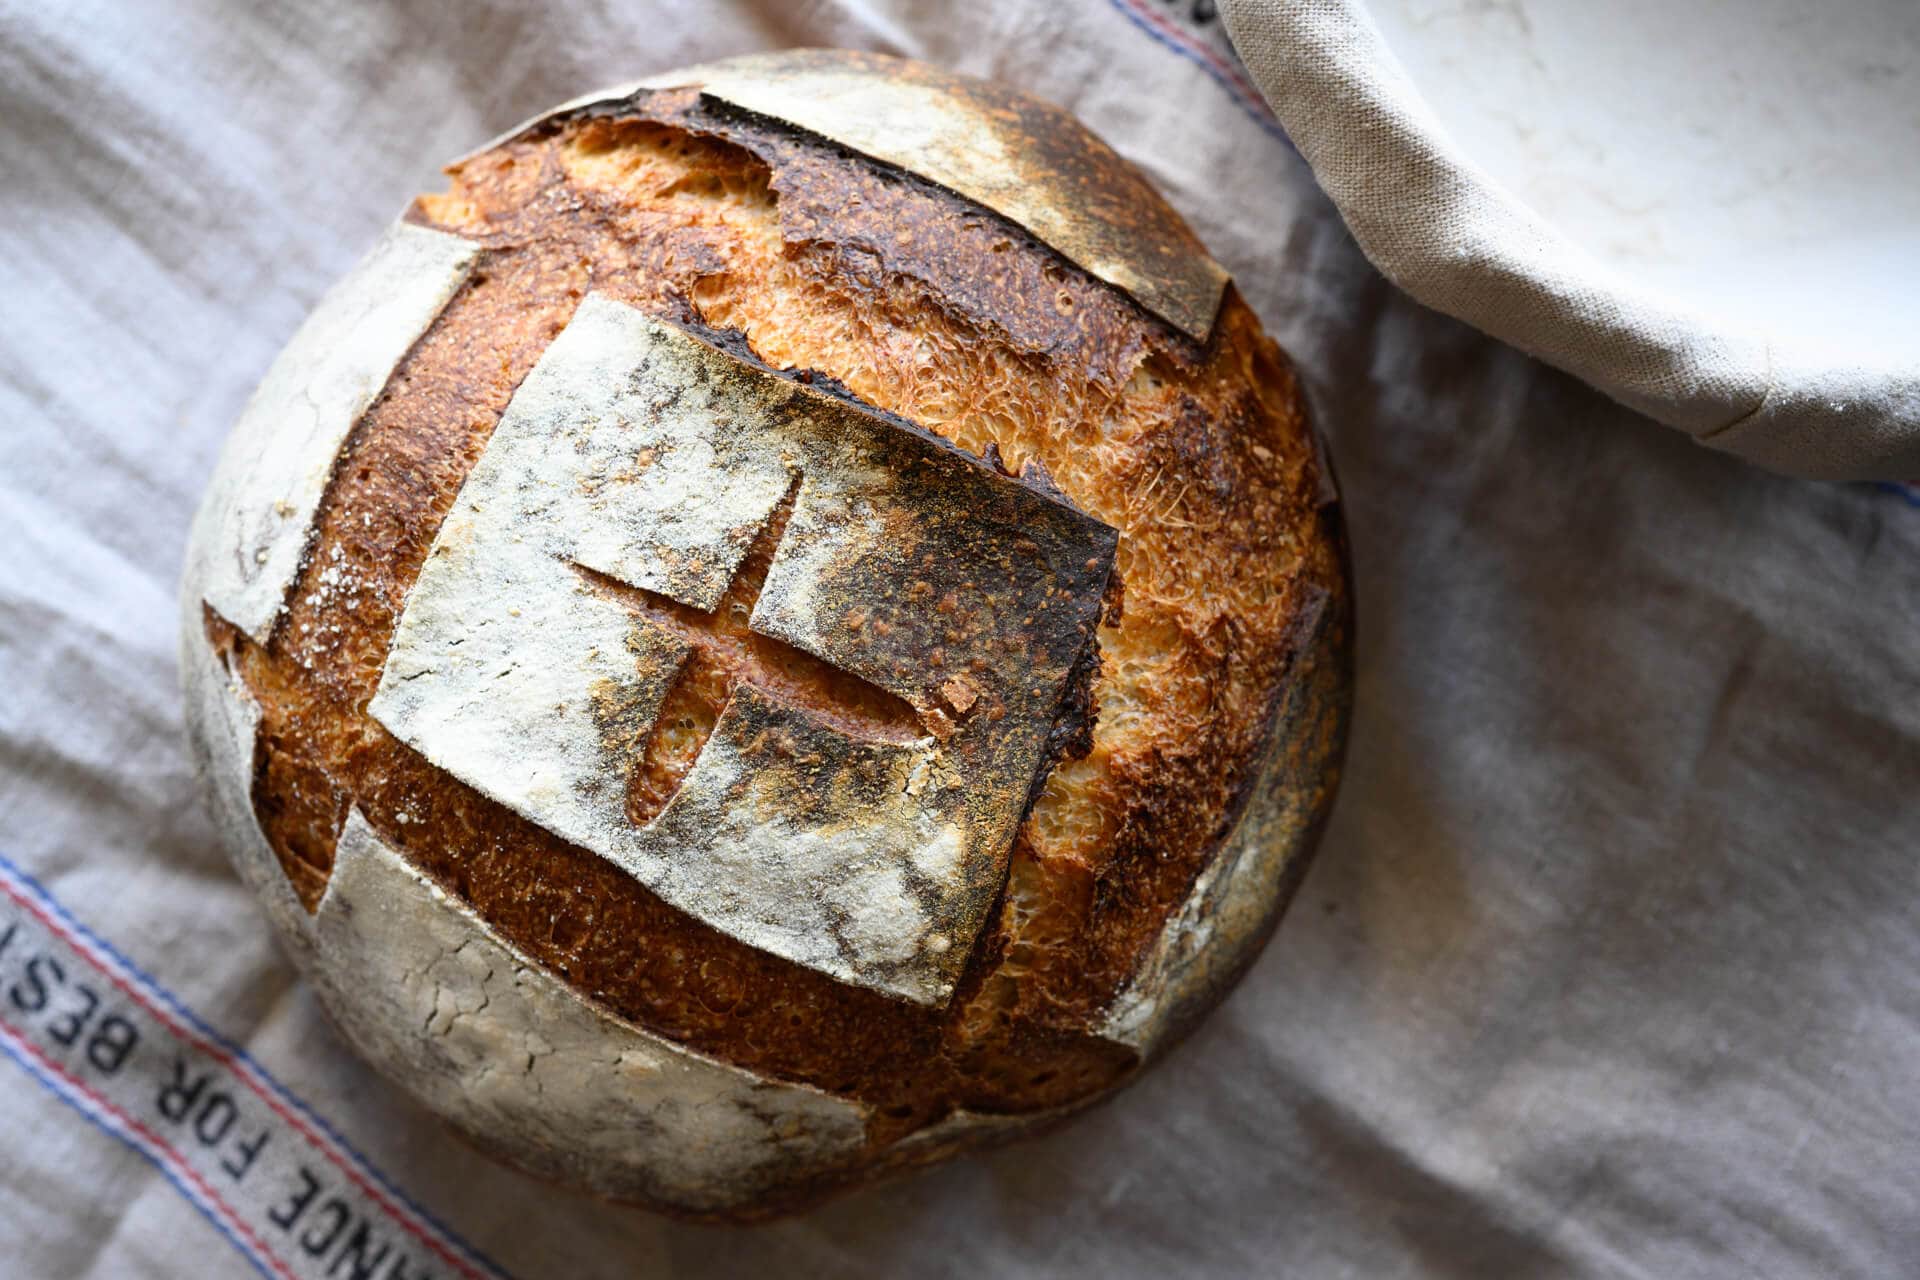
A simple weekday sourdough bread schedule
In the past, I’ve discussed a weekend baking schedule that outlines a schedule for low maintenance during the week with a bake on the weekend. The following schedule, however, allows baking during the week around a typical nine-to-five workday. It’s also quite flexible, and you always have the option to place the dough in the fridge longer to bake when you get a chance.
Read through my ultimate guide to dough proofing for more information on adjusting the proofing period for this sourdough bread.

| Time | Step |
|---|---|
| 7:00 a.m. (before work) | – Make the 10-hour levain (ready ~5:00 p.m.) – Save time later, scale-out flour & salt into bowls and cover |
| 5:00 p.m. (after work) | When levain ready, mix dough for autolyse |
| 5:30 p.m. | Finish mixing and begin bulk fermentation |
| 9:00 p.m. | Divide, pre-shape, and bench rest |
| 9:30 p.m. | Shape and place into the refrigerator to proof overnight |
| 7:00 a.m. (next day) | – Bake the next day before work – Alternatively, bake after work |
The schedule above has example times, so shift the timeline to earlier or later according to your schedule. Don’t worry if you don’t hit the times precisely as they’re written. There’s some flexibility there.
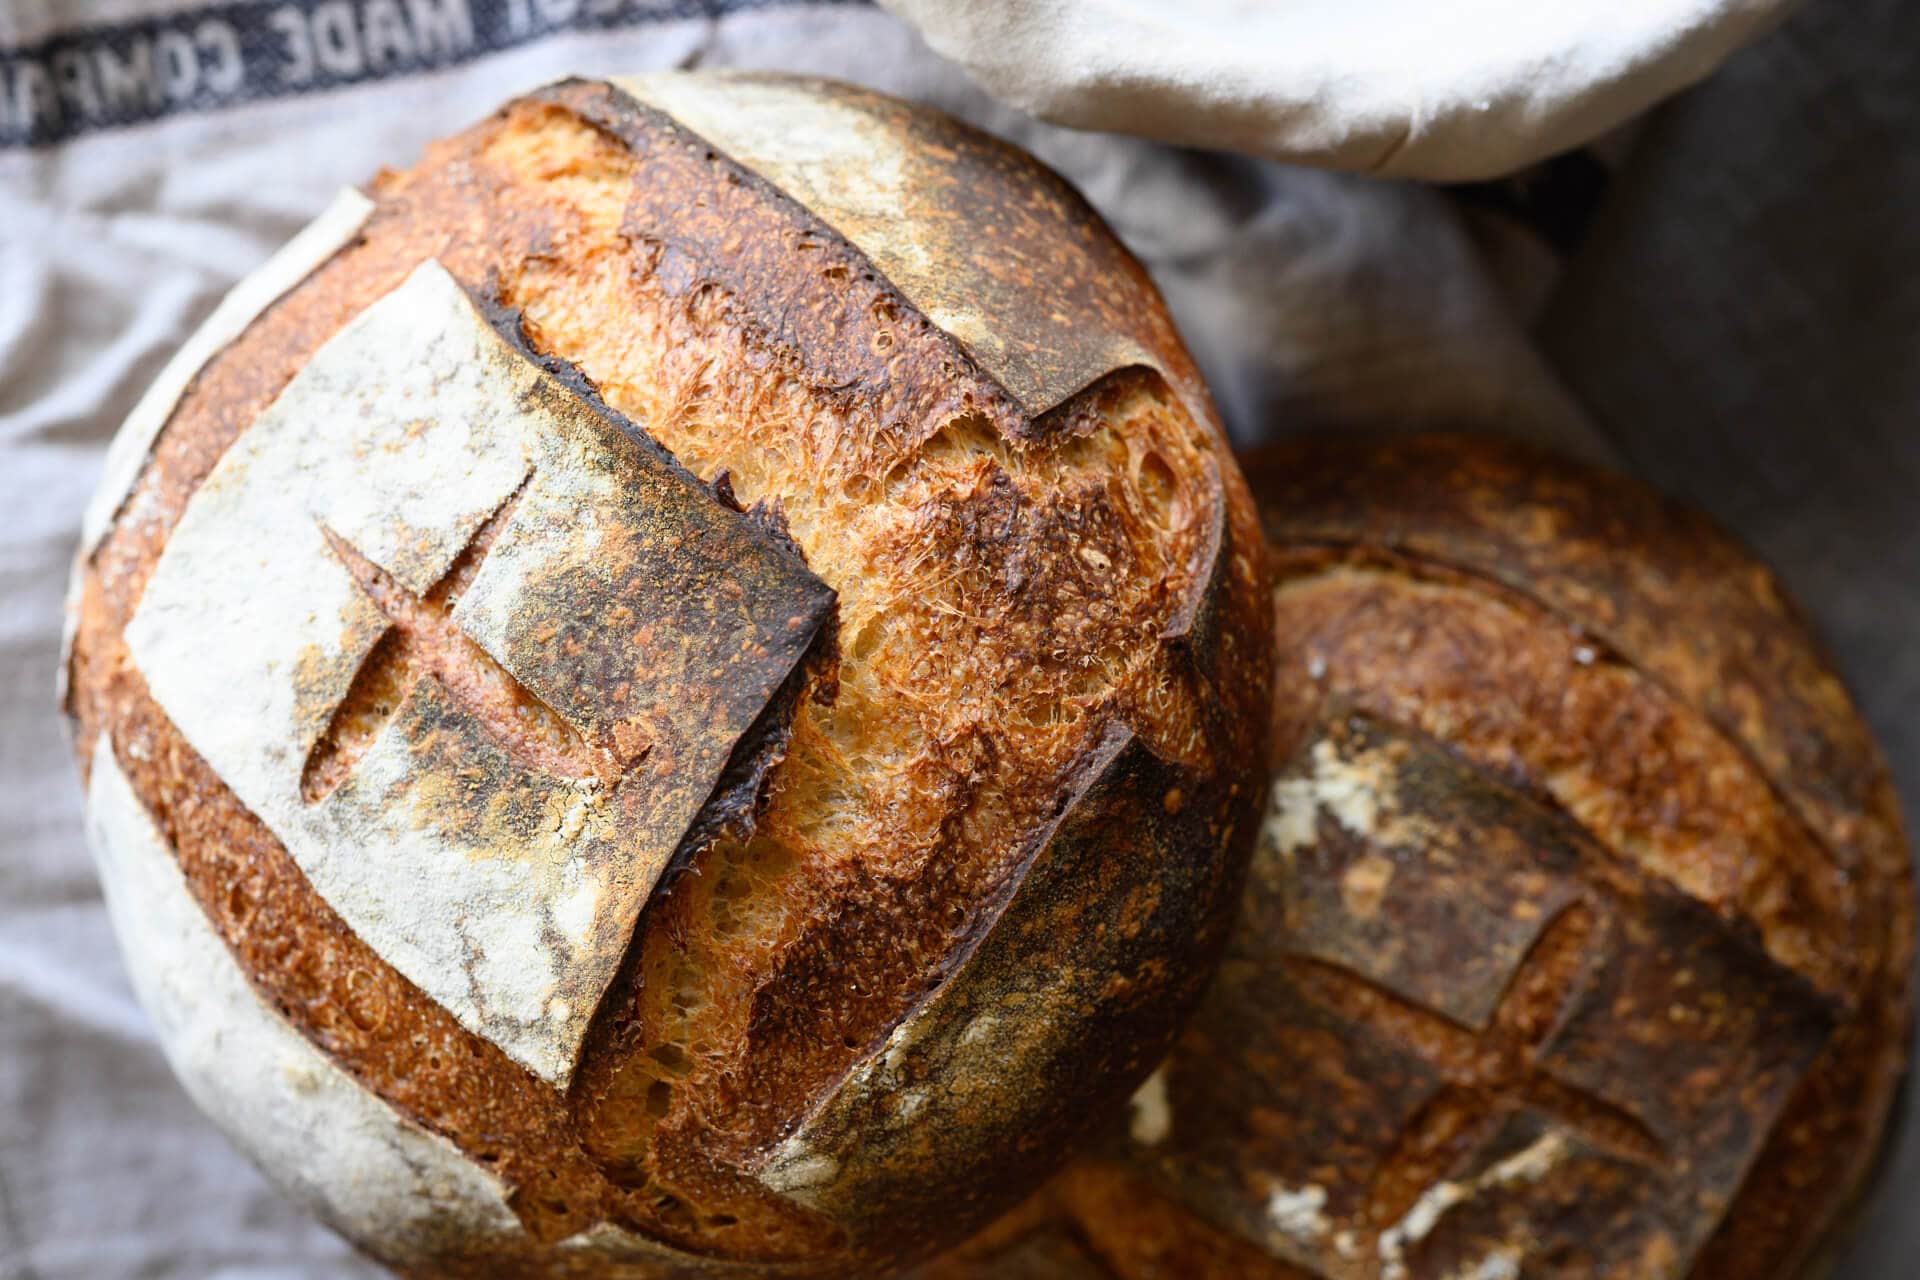
A Simple Weekday Sourdough Bread Recipe
Vitals
| Total Dough Weight | 1,800 grams |
| Pre-fermented Flour | 8.0% |
| Hydration | 76.0% |
| Yield | Two loaves |
Total Formula
The following table shows all the ingredients needed to make this bread. Each ingredient will be called out as needed in the method steps below.
My final dough temperature for this simple weekday sourdough bread was 75°F (24°C). For more information, see my post on the importance of dough temperature.
| Weight | Ingredient | Baker’s Percentage |
|---|---|---|
| 806g | High-protein white bread flour, malted (King Arthur Bread Flour) | 80.0% |
| 202g | Whole wheat flour (King Arthur Whole Wheat Flour) | 20.0% |
| 766g | Water | 76.0% |
| 19g | Fine sea salt | 1.9% |
| 8g | Ripe sourdough starter (100% hydration) | 0.8% |
Method
1. Prepare levain – 7:00 a.m., before work
A levain is simply an off-shoot of a sourdough starter. A sourdough starter is never used up completely; it’s continually fed day after day indefinitely. A levain is created with a small bit of a sourdough starter and left to mature (ferment) until ready to be mixed into a dough. Ultimately, it meets the same fate as the dough: baked in the oven.
In the morning before work, mix in a jar:
| Weight | Ingredient |
|---|---|
| 40g | Bread flour |
| 40g | Whole wheat flour |
| 81g | Water |
| 8g | Mature sourdough starter |
Loosely cover the jar; it should be ready after about 10 hours at room temperature, 72-75°F (22-24°C).
2. Autolyse with Levain – 5:00 p.m. after work
Performing an autolyse gives our dough a chance for the flour to fully hydrate and begin the gluten development process (all without kneading). I typically don’t do an autolyse with the levain included, but we’ll do that in this simple weekday sourdough bread recipe because it’s a short period.
Add all the ingredients below to a mixing bowl. Mix with wet hands until all the dry bits are incorporated. Cover and keep somewhere warm at room temperature for 20 minutes.
Note: the water in the table below is 50g less than the total water for this recipe; the water (and the salt) are held back for the next mixing step.
Dough Mix
| Weight | Ingredient |
|---|---|
| 766g | High protein bread flour, malted (King Arthur Bread Flour) |
| 161g | Whole wheat flour (King Arthur Whole Wheat Flour) |
| 635g | Water, Autolyse |
| 169g | Ripe levain (created in Step 1) |
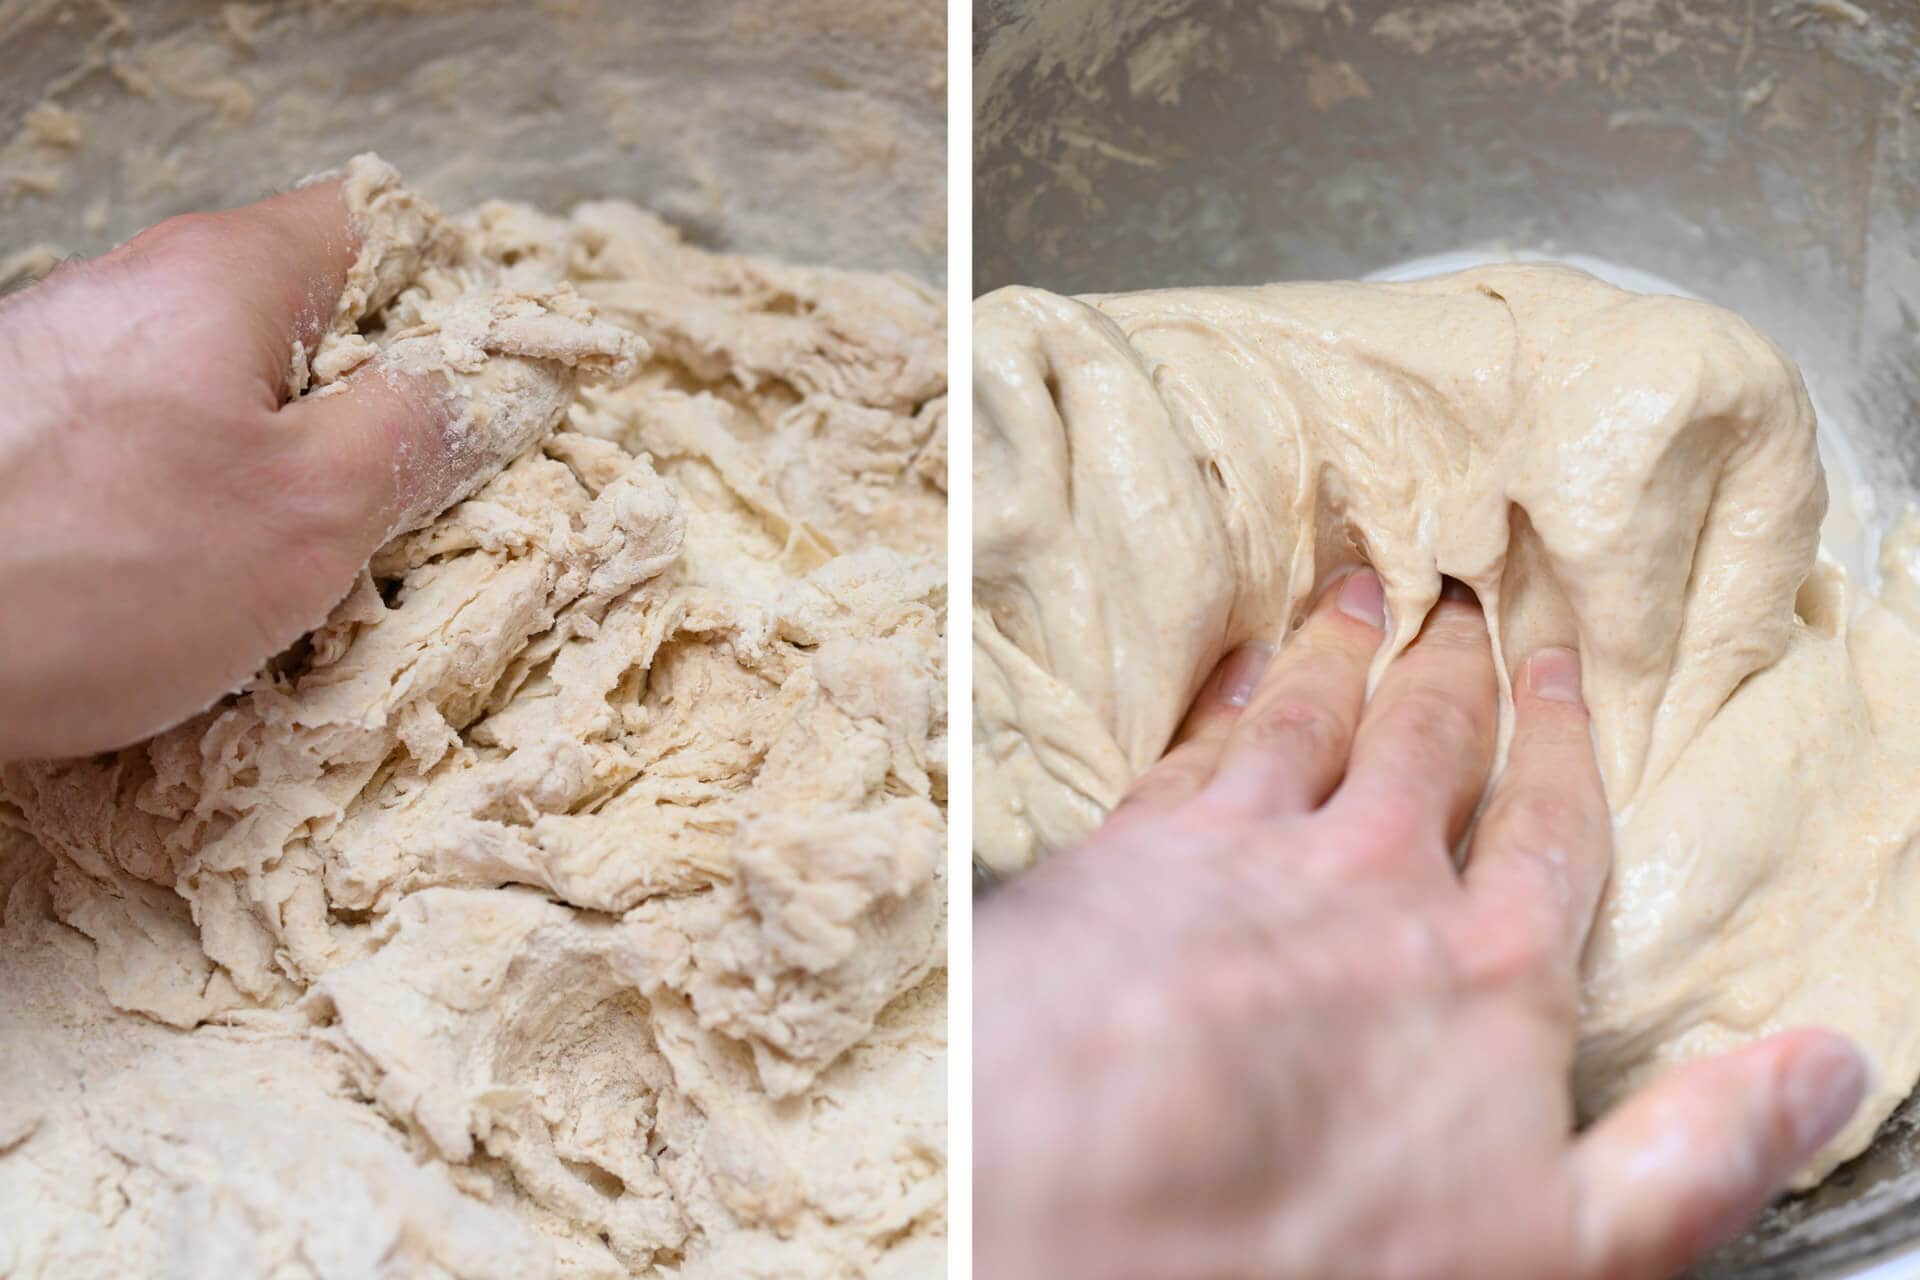
The image above shows the direct result of even a short autolyse. The left image shows the shaggy mass just before I finished incorporating everything. The right image shows how smooth and strong the dough becomes simply by resting. Let’s take this further with a little mixing.
3. Mix – 5:20 p.m.
Add the ingredients in the table below to the top of the dough: first, add the salt and then add the reserved water slowly to help dissolve the salt. Add the water a little at a time, depending on how the dough feels: it should be shaggy and loose, but not “soupy.” You can pause midway through pouring the water to incorporate it with a wet hand. If it feels like the dough can handle the rest of the water, add it all.
| Weight | Ingredient |
|---|---|
| 50g | Water, Mix (as needed) |
| 19g | Salt |
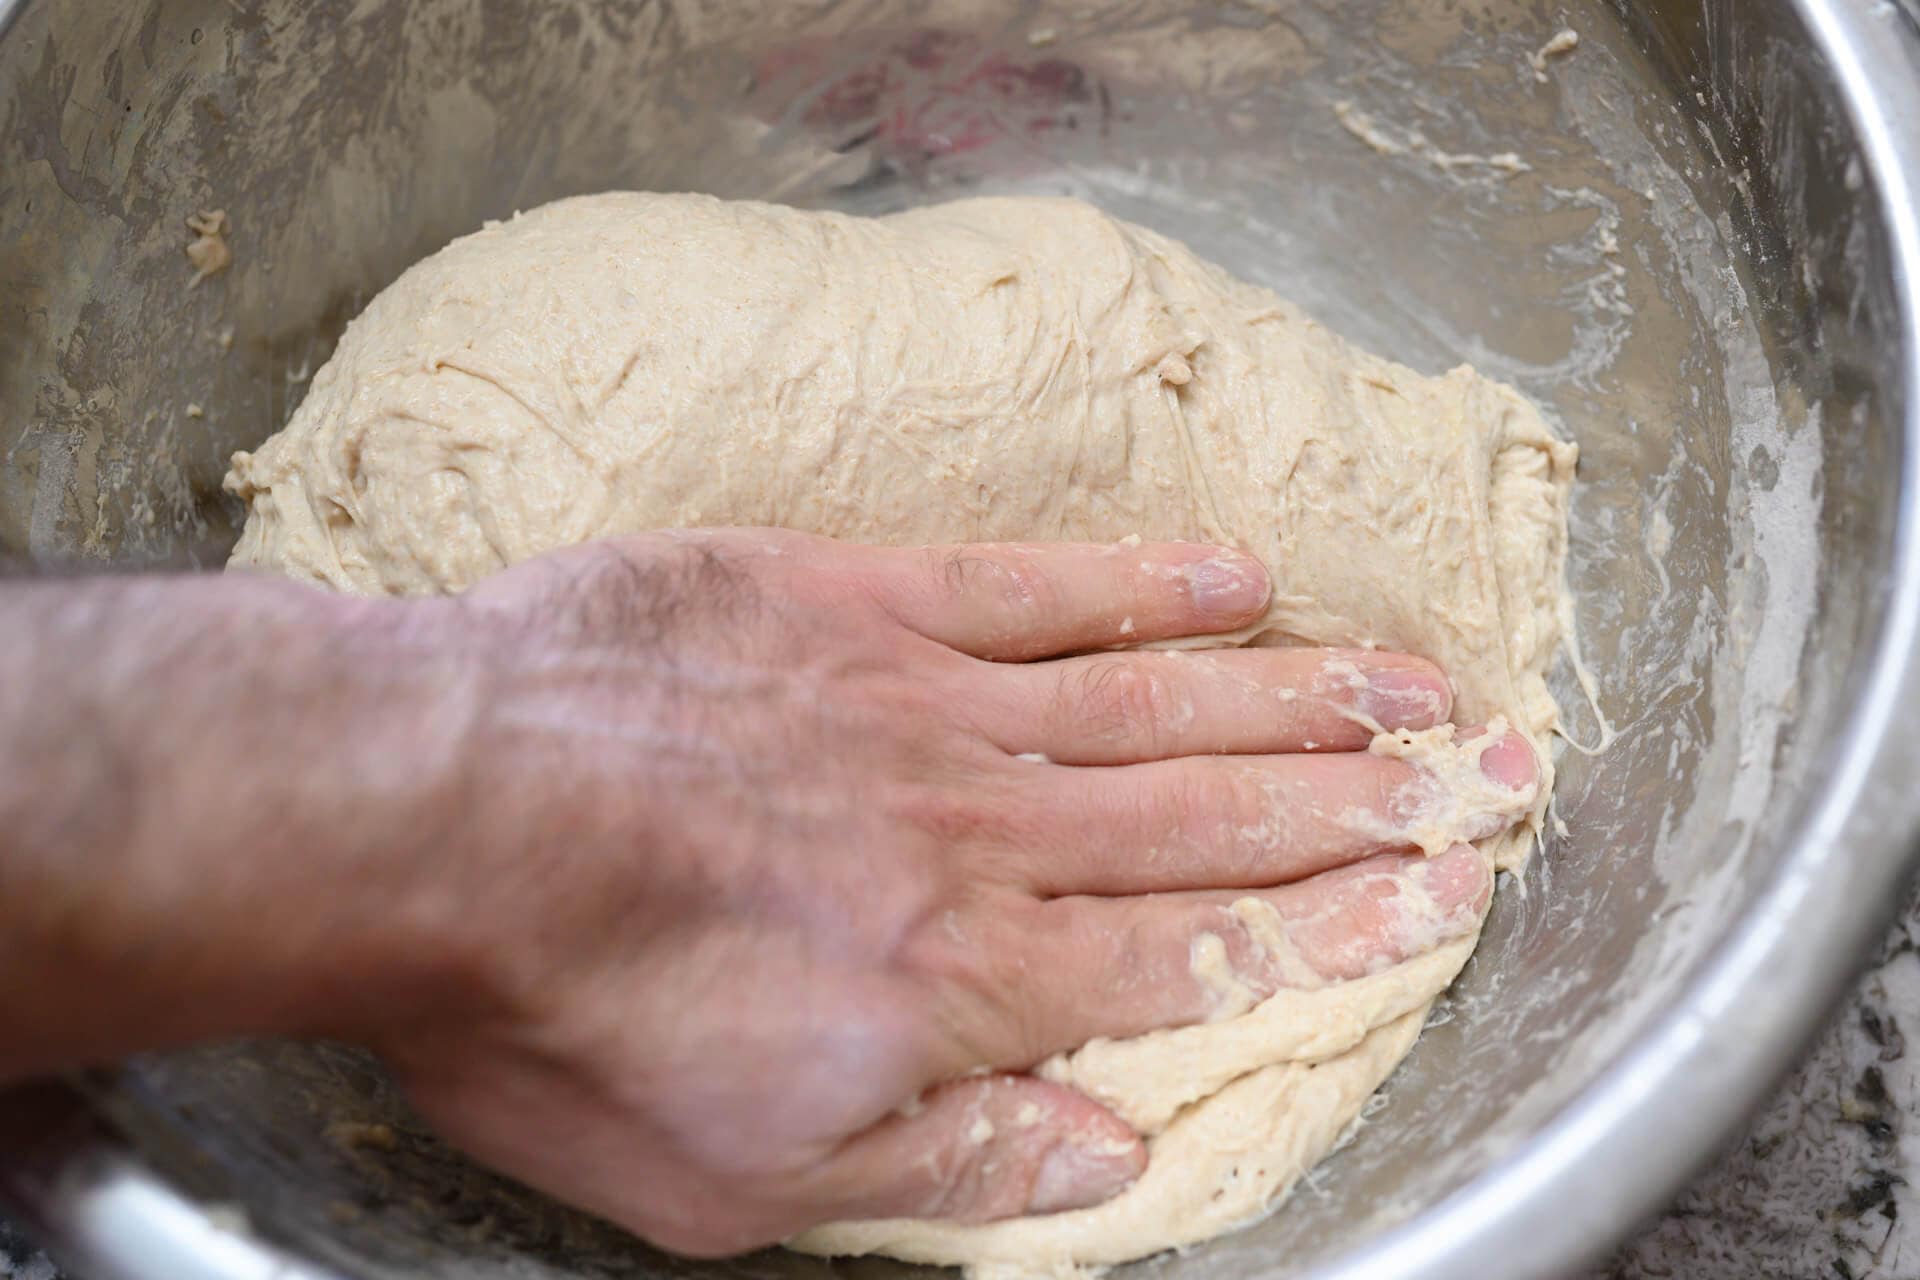
Since this dough uses a fair amount of high-protein white bread flour, it doesn’t require extensive mixing or kneading.
Using wet hands, mix everything until it comes together into a shaggy mass. This dough is rather strong and doesn’t require intensive mixing or kneading, but give it a few folds in the bowl, perhaps 5-10, until it smooths slightly (see the image, right).
Cover the bowl with reusable plastic and keep it somewhere warm in your kitchen for bulk fermentation.
3. Bulk Fermentation – 5:30 p.m. to 9:00 p.m.
Bulk fermentation, or first rise, occurs when the dough is leavened (through the production of carbon dioxide gas) and flavored (through the production of organic acids) as a result of natural fermentation. Below, you can see how much my dough rises during this 3-hour and 30-minute bulk fermentation at 75°F (24°C).
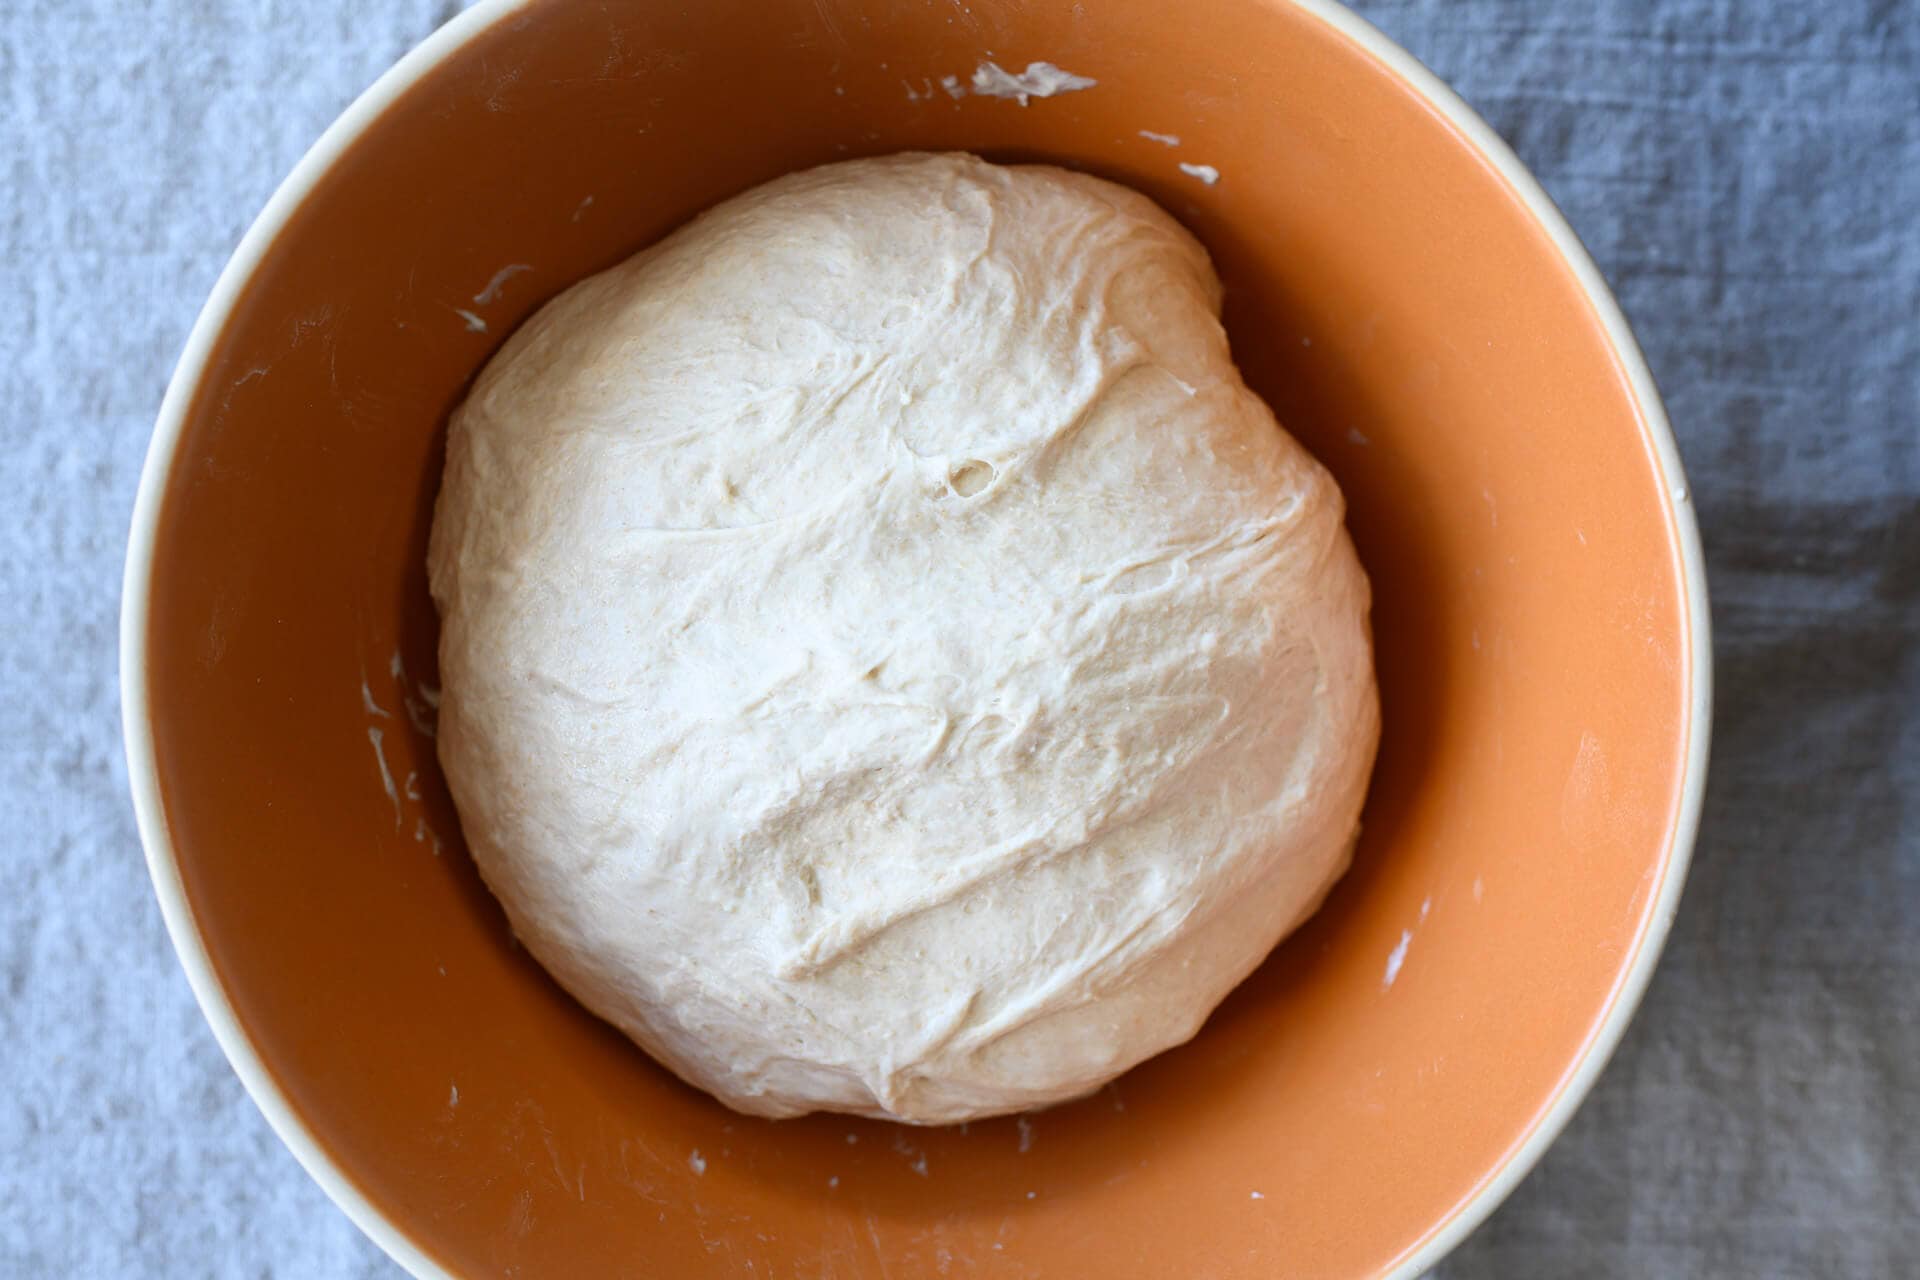
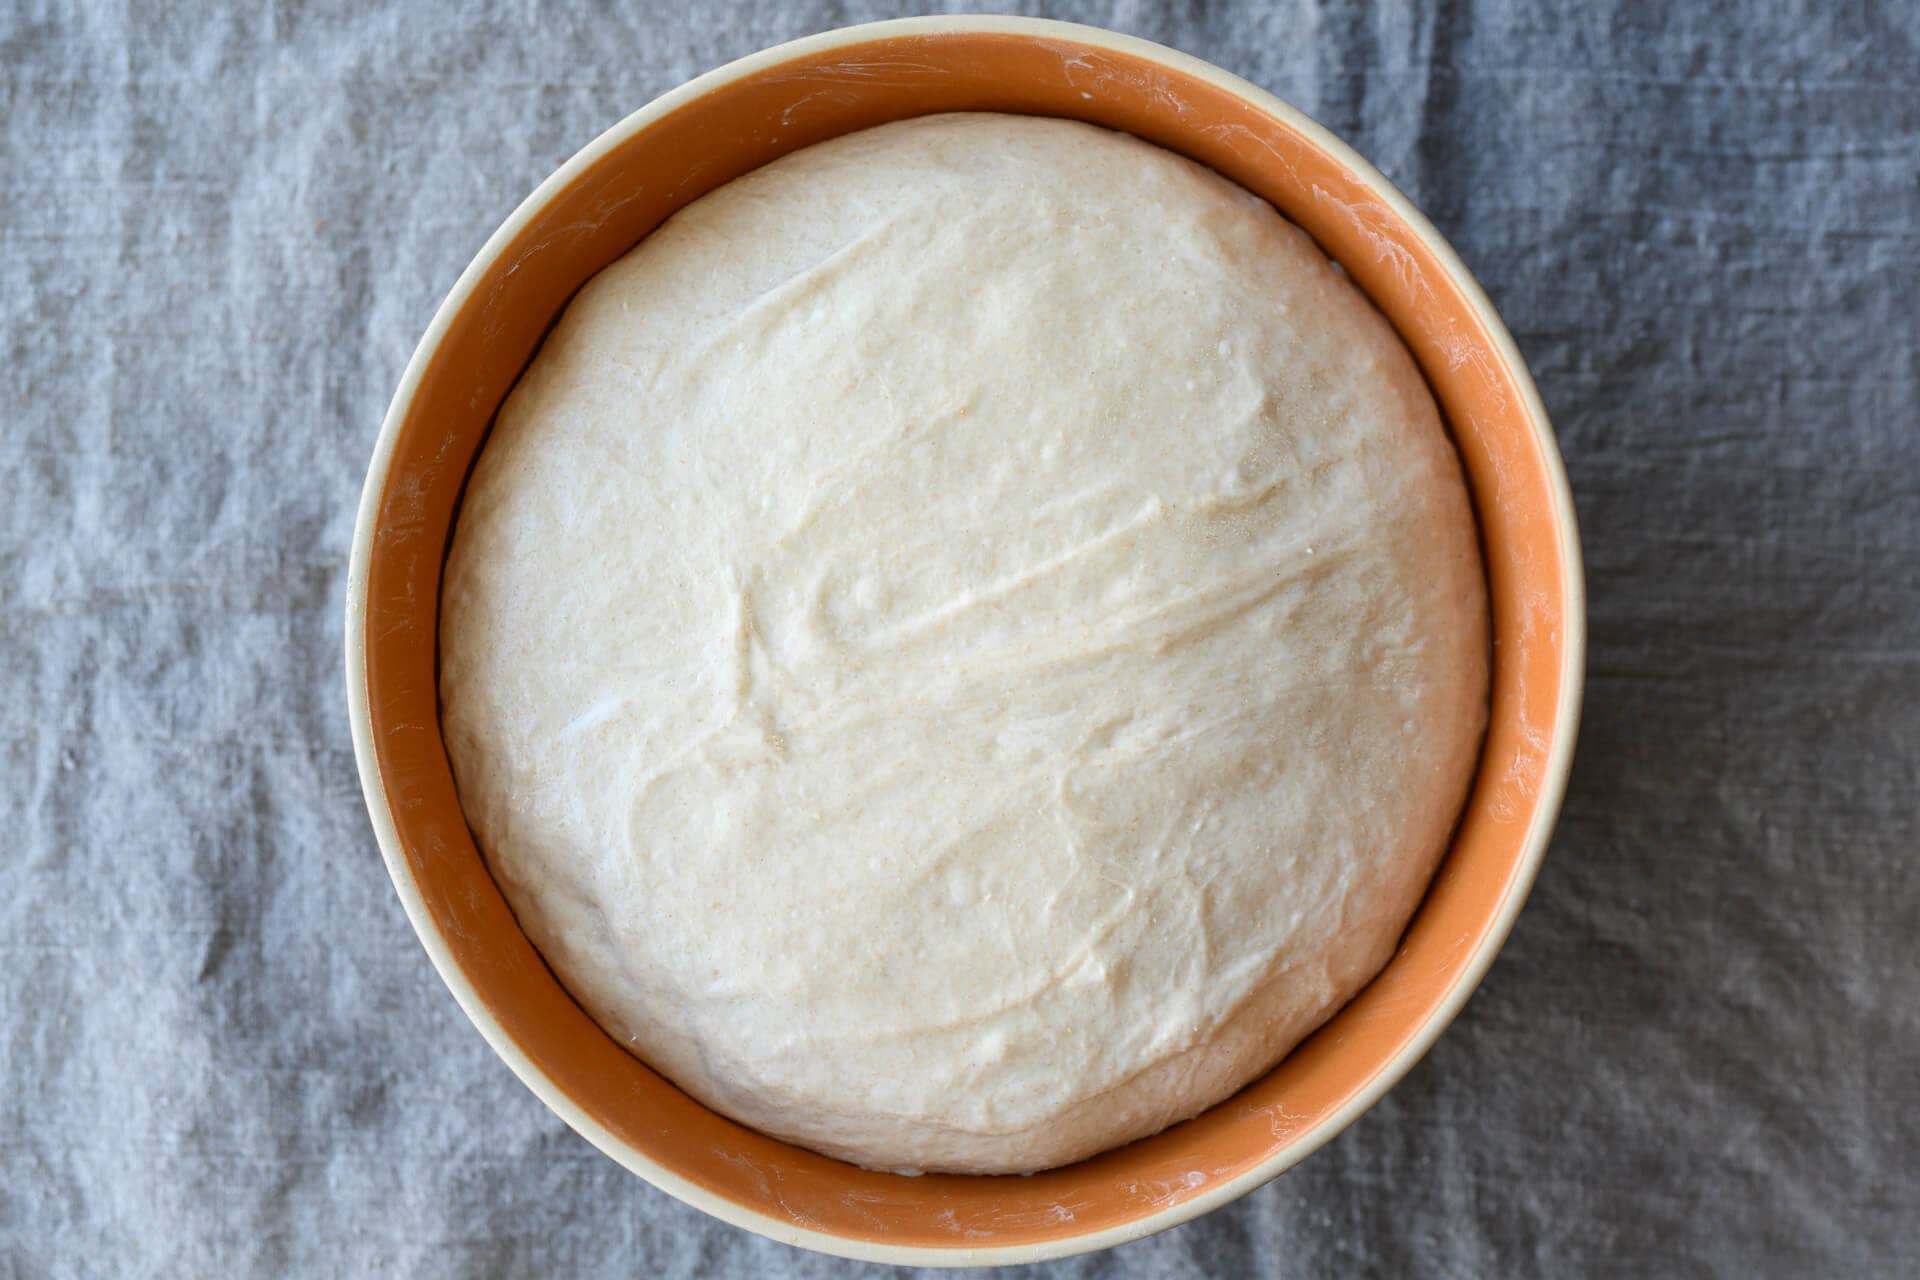
During this time, give the dough 2 sets of stretch and folds: the first set is 30 minutes after the beginning of bulk fermentation, and the second set is 30 minutes after the first. After the second set, let the dough rest, covered, until the next step.
As you can see in the video above, each set of stretches and folds is simple: With wet hands, grab one side and gently stretch it up and over to the other. Perform this fold in each direction: North, South, East, and West.
4. Divide & Preshape – 9:00 p.m.
Fill a bowl with some water and place it on your work surface. Scrape out your dough from the bulk container onto your dry counter. Divide the mass in half using a bench knife. Using a wet hand and the knife in the other, gently preshape each half into a loose round. Let the dough rest, uncovered, for 30 minutes until it’s relaxed outward.
See my guide to preshaping bread dough for a video and more instructions.
5. Shape – 9:30 p.m.
As seen in the video below, flour the top of the round with your hands and flip it over. Take the bottom edge and fold it up to about the middle. Take the left and right sides in your hands and fold the right over to about 2/3 of the left side. Repeat for the left side. Then, take the top and fold down to about the middle and gently seal. This should form a little envelope shape.
Now, flip over the entire thing and begin dragging and sealing the dough underneath itself (top-right, above). Using both hands, rotate and drag the mass toward you to create tension on the top. Repeat the dragging if necessary.
Read through my guide to shaping a boule for more instruction.
6. Proof – 9:45 p.m. to 7:00 a.m. or 6:00 p.m. (the next day)
Cover both proofing baskets entirely and put them in the fridge to proof overnight. The fridge allows us to slow fermentation to bake before or after work the next day.
7. Bake – 7:00 a.m. (pre-heat oven at 6:00 a.m.)
Preheat your oven with the rack at the bottom third to 450°F (230°C). Place your Dutch oven inside, with the lid and bottom side-by-side.
Take one basket out from the fridge and uncover it. Your dough might not have risen considerably in the fridge, but that’s fine. Cut a piece of parchment paper to fit over the basket and place a pizza peel (or large cutting board) on top. Using both hands, flip the entire stack over and remove the basket.
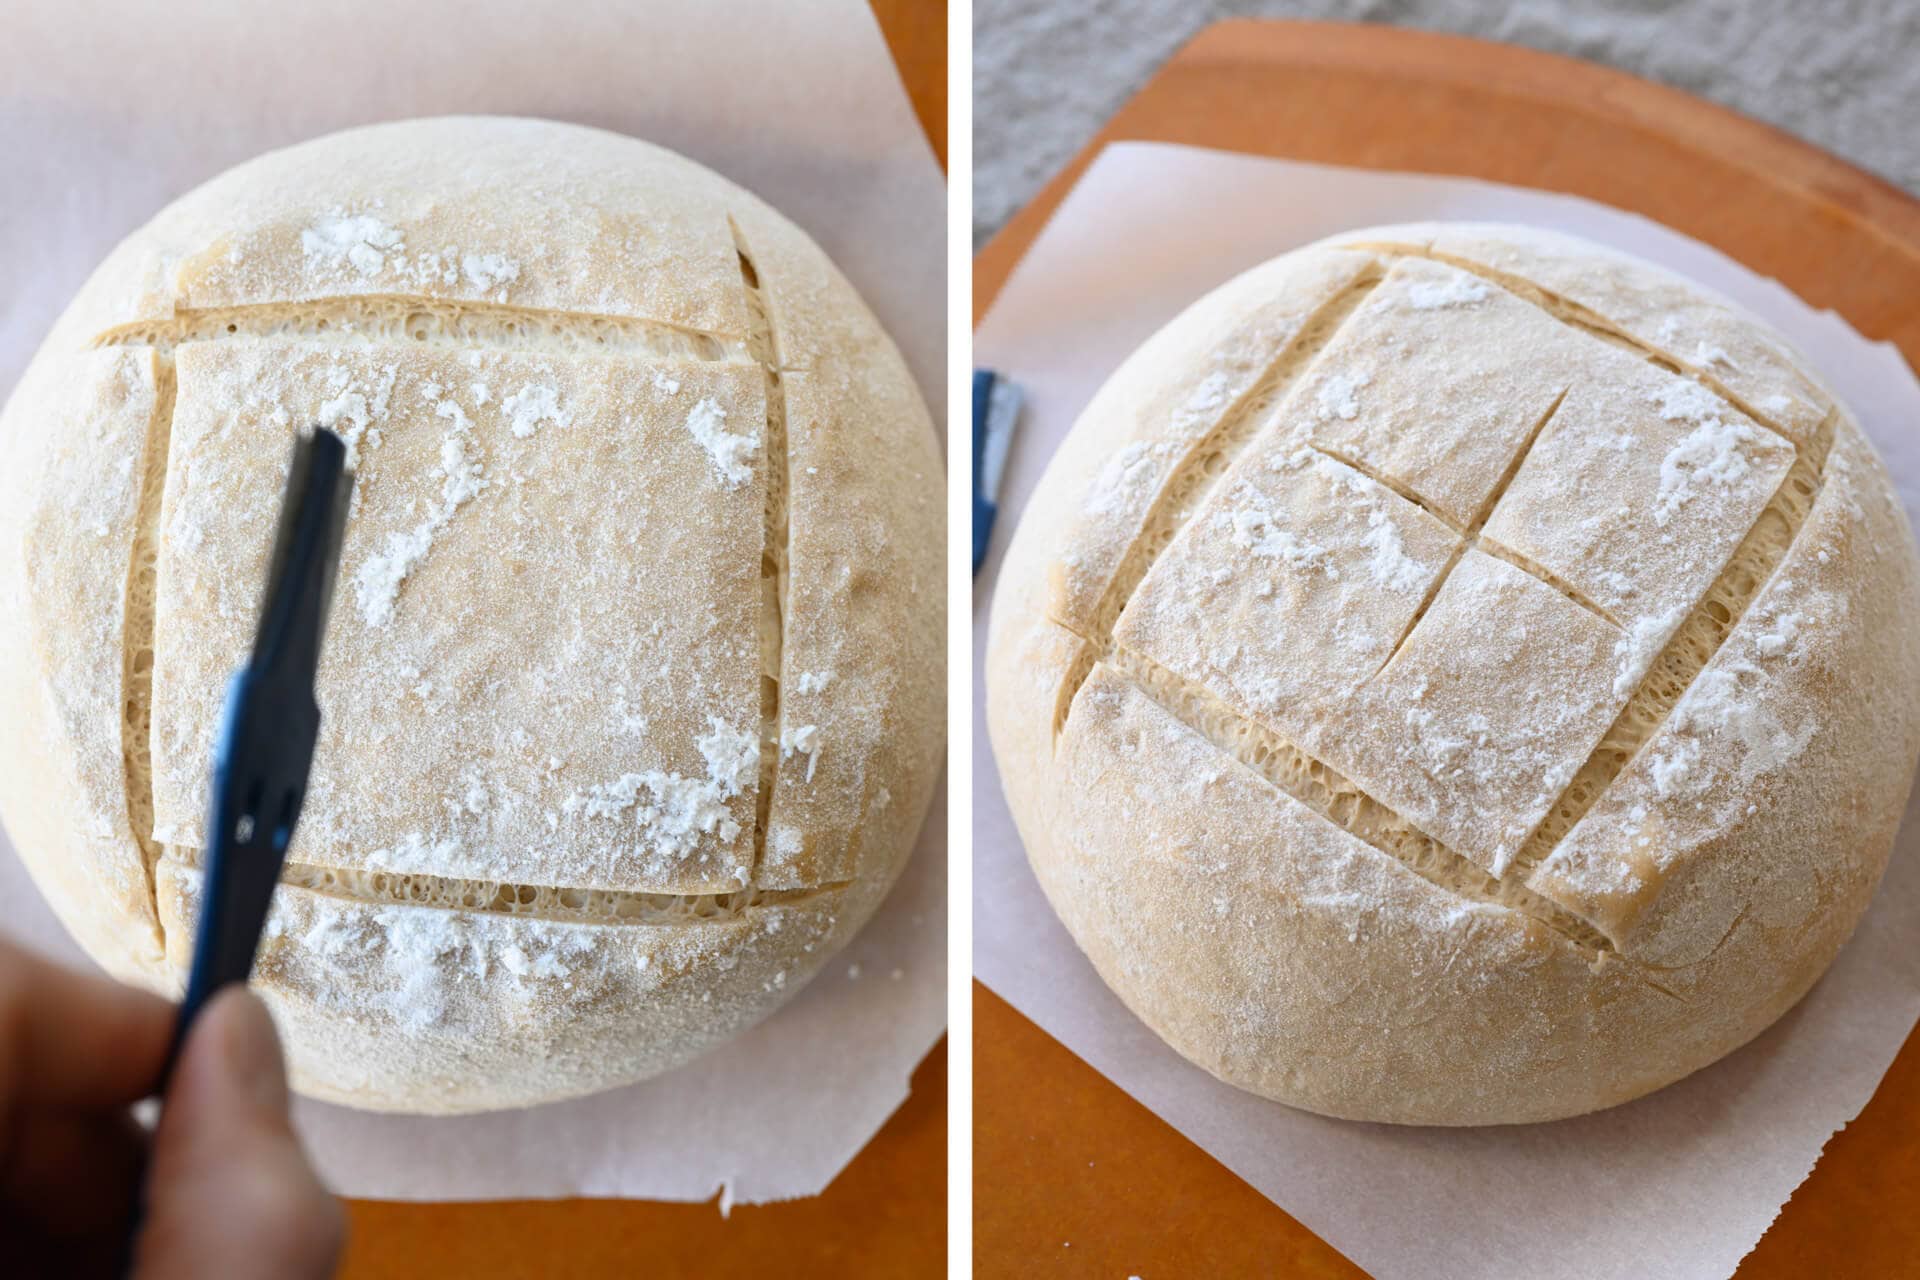
Score the dough using your favorite design. As you can see above, I love the “box top” score. Check out this video of me scoring this style (and a few others) below:
Now that your dough is scored, carefully slide it into the Dutch oven and bake for 20 minutes, covered.
After this time, remove the lid and bake for 30-35 minutes or until done. The internal temperature should be around 205-210°F (96-99°C).
(Note that If you’d like a thinner crust on this bread, increase the covered bake time to 30 minutes and reduce the second half of the bake (without steam) by 10 minutes. This increased baking time with steam can help reduce the thickness of the crust.)
Remove the loaf to a cooling rack for 2 hours before slicing. This lets the crust and crumb fully set and the flavor develop. Return the Dutch oven to the oven (without parchment) and bring it back to temp to bake the second loaf.
Follow my guide to storing sourdough bread to keep it fresh for the next week (or freeze it for longer!).
Print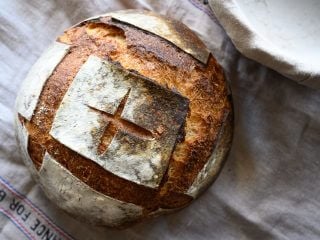
Simple Weekday Sourdough Bread
- Prep Time: 24 hours
- Cook Time: 1 hour
- Total Time: 25 hours
- Yield: 2 loaves
- Category: Bread, Sourdough
- Cuisine: American
Description
A loaf of delicious sourdough bread designed around a busy workday. The levain is prepared for this bread in the morning and left to ripen while you’re at work. When you get home, continue with the baking process. The dough can then be baked at night or the next day in the morning, or after work.
Ingredients
Levain
- 40g bread flour
- 40g whole wheat flour
- 81g water
- 8g ripe sourdough starter
Main Dough
- 766g bread flour
- 161g whole wheat flour
- 19g salt
- 685g water
- 169g ripe levain
Instructions
- Levain (7:00 a.m. before work)
In a small container, mix the Levain ingredients and keep it at a warm temperature for 10 hours. - Autolyse with levain (5:00 p.m after work)
In a medium mixing bowl, add all of the levain, 766g bread flour, 161g whole wheat flour, and 635g water (50g was reserved for mixing, later) and mix until no dry bits remain. Cover the bowl and let rest for 20 minutes. - Mix (5:20 p.m.)
To the mixing bowl holding your dough, add 19g salt and some of the reserved 50g water (or all if the dough feels like it can handle it). Mix thoroughly and strengthen the dough for about 5 minutes. Using wet hands, mix everything until it comes together into a shaggy mass. This dough is relatively strong and doesn’t require intensive kneading (like slap and fold), but give it a few folds in the bowl, perhaps 5-10, until it smooths slightly. Transfer the dough to a bulk fermentation container and cover. - Bulk Fermentation (5:30 p.m. to 9:00 p.m.)
This dough will need 2 sets of stretch and folds during bulk fermentation, the first set 30 minutes after bulk fermentation begins. Perform the second set 30 minutes after the first, and then let the dough rest the remainder of bulk fermentation. - Divide and Preshape (9:00 p.m.)
Lightly flour your work surface and scrape out your dough. Using your bench knife, divide the dough in half. Lightly shape each half into a round shape. Let the dough rest for 30 minutes, uncovered. - Shape (9:30 p.m.)
Shape the dough into a round (boule) or oval (batard), then place the dough in proofing baskets. - Proof (9:30 p.m. to 7:00 a.m. or 6:00 p.m. the next day)
Cover proofing baskets with reusable plastic and seal shut. Then, place both baskets into the refrigerator and proof overnight. - Bake (The next day, bake at 7:00 a.m. before work, or 6:00 p.m. after work)
Preheat your oven with a baking surface or combo cooker/Dutch oven inside to 450°F (230°C). Remove your dough from the fridge, score it, and transfer it to the preheated baking surface or combo cooker. Bake for 20 minutes with steam. After this time, vent the steam in the oven or remove the lid (you can keep it in the oven or remove it) and continue to bake for 30 minutes longer. When done, the internal temperature should be around 204°F (95°C). Let the loaves cool for 2 hours on a wire rack before slicing.
Notes
- This recipe is wonderful left plain, or you could top the dough with rolled oats, white sesame seeds, or flax seeds.
If you use this recipe, tag @maurizio on Instagram so I can take a look!
What’s Next?
There you have it; this simple weekday sourdough bread can be made daily and adjusted to fit your schedule. Now, there’s no reason not to bake. This recipe is also a great place to experiment: mix 125g of nuts like walnuts and pecans and dried fruit like cranberries, cherries, or raisins.
Many recipes on my site can be adapted to this simple weekday sourdough bread schedule, most notably my Beginner’s Sourdough. Both recipes use flexible doughs, and the fridge provides even more.
For a more hands-off approach, check out my easy no-knead sourdough bread recipe. It can also be adapted to bake in a single day or ferment longer for an easier schedule.
Happy baking!


903 Comments
Thank you for your easy to follow recipe and schedule. Have made this regularly once a week with consistently great results! Lately, I have refreshed my starter twice, then let my levain ferment overnight, mixed dough in morning, shaped in afternoon and baked following morning. Since I have 2 Dutch ovens and we devour bread within 2 days, I made 2 batches and baked 2 loaves back to back, so had 4 loaves. Really not much more work and probably saves energy.
Super happy to hear that, Linda! Having 2 Dutch ovens really helps crank out these loaves in short order. Once your oven is up to temp, you’re right, a lot less energy to keep it going than start from cold. Thanks for the feedback and happy baking!
Thank you, thank you and thank you! Finally after 4 months of little to no success, this recipe worked really well. Crunchy crust, moist and tender inside, tangy, and delicious! I added 1/2 tsp of sour salt to up the tartness. Mmmmm. Also, after removing the lid of the dutch oven, I poured hot water into an iron skillet at the bottom of the oven. That gave the crust it’s lovely color. Thank you Maurizio
That’s so great to hear, Kate! Enjoy 🙂
I have a healthy batch of starter ready to go. Unfortunately my oven has gone down and will not be back until sometime next week. I have fed my starter and it is living in the fridge until I can get back to baking. Is a once a week feeding OK?
Ahh, sorry to hear that. But yea, that will work fine for your starter. Check out my starter maintenance routine guide for steps on how to keep it going!
HI there. About to try this for the first time tomorrow morning. But I don’t have any wheat flour. Can I do it with all regular flour? Or does it have to be half regular/half wheat? Thanks!
I had the same question the first time I made this. Pretty sure the author of this page responded that not using wheat is fine. I’ve done it without several times and it has been just fine.
You can certainly use all white flour!
Hello! I’ve been making this recipe weekly for over a year, and I have been using bowls for my overnight cold proof since that’s what I had available. I recently invested in the proofing baskets you use, and ever since, my loaves have come out beautifully shaped but so pale and with a very soft crust! I have tried spraying mist directly into my dutch oven at several points during baking, I’ve tried adjusting my oven’s starting temperature both up and down, but to no avail! Any suggestions?
Okay, I’ve actually solved half the problem by reading some these comments. I took the lid off my dutch oven and used a pan full of water to keep the oven steamy, and it helped the color tremendously. But there’s still no shine… what next??
Hey, Jillian! It might be that the baskets are ever so slightly pulling some water from the exterior of your dough, which might reduce caramelization when baking. When loading into your Dutch oven, use a handheld spray bottle to spritz the top of the dough and inside the Dutch oven just a bit, then quickly close the lid. That added steam in there will help!
Regarding Maria N’s comment below-‘my loaves out of the fridge after resting overnight they were ‘runny’. I too have had this happen. Does adding more flour help or hinder the runny dough problem?
It sounds like your dough needed more strength through kneading and/or stretch and folds during bulk fermentation. You could also bring strength to your dough by reducing the hydration when mixing (try leaving out 25g of water and see how that helps!).
Hello, I am just beginning and after several bakes with great results, I cannot seem to make enough levain. I follow the recipes and on the last 3 attempts I have been 20-30g short. I just add from my starter and that has worked fine. Not sure why I am not getting a larger levain. I am in Tucson and it is hot so I am struggling with consistent temp for starter and levain creation. Thx
Shannon—this is a common issue and usually isn’t a problem, but 30g would be a bit much. If you’re still having this issue, make a larger levain while still keeping the ratios the same (just add 10g to each component of the levain: ripe starter, flour, water).
I want my bread to be sour. I mean SOUR! Like Boudin. Any suggestions?
Google can help you there.
Use a more mature starter, leave the loaf to proof longer in the fridge!
You might also try adding some Citric Acid as well. See the King Arthur Tangy Sourdough recipe about adding this for additional sourness.
Thank you! I tried that several weeks ago. Something about it just didn’t taste right. But I appreciate your suggestion!
I bought some citric acid from Amazon to try the King Arthur recipe. (It tasted kinda funny.) But thank you for your suggestion!
I’m working on a recipe for a more sour bread I’ll be posting soon! I’m not going for SF style sour, but definitely more sour than usual. As Rudy said below, using citric acid will definitely bring more sourness, but I’ve never experimented with that additive.
I tried the citric acid. Didn’t taste quite right.
Almost there with my post, I’m certain some of the tips I outline will help!
Looking forward to it….
How long can I hold the loaves in the fridge without them overproofing or becoming too sour? Lets say I don’t plan to cut into the second loaf for 4 or 5 days – can I wait at least 2 or 3 days before taking it out and baking it? Thanks!
That will depend on the strength of the dough, the flour type, how long you let it bulk ferment/proof on the counter. Many variables. You can go 2 days pretty easily, but going beyond that will take some extra effort on your part.
I’d agree with @jeannine888:disqus, two days is probably as far as I’d go, perhaps three, but you’d see less rise in the end. I much prefer baking both loaves and then freezing one!
Hello, I need to make my bread in a loaf pan due to need for uniform slice size. Is there anything special I need to do to make sure it rises properly and cooks properly in a loaf pan without a lid?
Don’t know if you still need to know, but if you are baking bread uncovered, you just need to find another way to introduce steam. I like to use a preheated cast iron pan and pour some boiling water in it, and put it on the bottom rack below the bread. You can also just spray some water into the oven when you put the loaf in.
This dough should work well in a loaf pan. Just be sure your pan will have sufficient room for the dough to rise during proof (match the pan to the dough weight). As @disqus_39dKbg8Hr7:disqus suggested below, you’ll need a different way to steam the oven, check out my guide to steaming a home oven for a way to steam the entire oven when baking!
Ciao Maurizio, I’ve been baking this recipe twice a week, with sometimes a focaccia in between, for a couple of months now. Love the results and it’s very difficult to go back to store bought bread!
I have a question though: my dough is never as fluffy and “gummy” as yours in the pictures or videos, it rather looks a bit viscous. Is because it’s too much water in the recipe for my flour? Thanks for your advice!
Wonderful to hear that, Francesco! It could be too much water, under baking, or under proofed dough—in my experience. Under baking is easy, just bake until the interior is around 206F or so, deeply colored, and a tap to the bottom sounds mostly hollow. Water is an easy one as well, you can try to reduce the dough hydration by 5% and see if the interior improves, if so, keep adjusting until you dial that in. For the proof point, be sure to use your starter/levain when it’s very ripe, perhaps try pushing bulk a little farther (esp. if your FDT is low!), and give the dough a full and complete proof.
Hi Maurizio. Really enjoying your site! We’ve had great success with our starter. A week after creating it, it now rises and falls between feedings as predicted. We tried making this bread and the levain didn’t rise (we noticed side bubbles but not much else). We continued anyway. The dough came out really sticky and almost impossible to handle after bulk fermentation. Is this all down to the levain, or could hydration be the main problem? Thanks
I had the same issue; some bubbles on top but not a whole lot of rise. And then very sticky and hard to handle. I’ve got the first loaf in the oven as I type this, and I suspect it’ll be pretty flat. I would also like to figure out why the levain didn’t do a whole lot, as my starter is pretty pampered.
How did your loaves turn out? I have a really sticky and hard to handle dough as well – leaving it out to ferment for longer hoping it will rest with more time before I proceed with adding the salt and water.
See my reply above, Brittney!
Thank you! I went ahead with my recipe and the first loaf is baking now. But I believe you’re correct that my starter was maybe not active enough. If this doesn’t turn out great I’ll do my best to get that starter more active. It’s hard during the colder weather to keep my house temp regulated. Thanks for all of the great tips!
Hey, Richard! I hope the loaves turned out well. Check out my reply to Kelsie, above.
Hey, Kelsie! Sorry to hear that. It sounds like maybe there wasn’t enough activity in your levain and then that directly translated to the bread in the end. If your levain is super sluggish, you could either leave it longer, keep it warmer, or use more ripe sourdough starter when making the levain (i.e. instead of 8g ripe starter mixed in, go for 15g, or even 20g if you’re really not seeing activity). It’s important to use your sourdough starter when it’s ripe, it should be very bubbly, have a sour aroma, and have been hours since the last refreshment. I hope that helps and sorry for the delay!
So when I’ve been making the levain, after 10 hours when it’s ready I have 15g or so less than the total amount I put in –
I’ve checked with my starter when feeding as well (50g starter:50gAP:50g rye:100g water) and was about 15g less when ripe than the total mass put in…
is there a reason for this? What should I increase to help achieve 169g levain (at maturity I had 154g) ?
Thanks, sorry if this is a silly q
I am also curious if you have any recipes that would use a smaller amount of salt for people who are on heart healthy diets.
My second attempt is in the oven now. The first time the loaves came out relatively flat, probably because I used toO much water in the final phase when the salt was added. This time I used only half the amount of water and the dough seemed fine. How tall should these loaves be when they are fully baked?
Hello Maurizio, when should I add the nuts? At the end of the Mix when you finish adding the salt.
Thank you very much, excuse my english
I like to add them just before the first set of stretch and folds during bulk fermentation.
thank you
Hello, thank you for your website. I’m very new in the sourdough world and I just made my first bread after your beginner’s recipe. I’m pretty excited and the result it’s good to start with. I want to know what can I change so my bread will rise more, to achive those big holes.
Hi Maurizio,
Thanks for the guides and recipes on your site–I’ve baked this recipe and the Beginner Sourdough, both have been great. A quick question: how much can I increase ratio of whole wheat flour and still keep to this recipe and timetable? I like being able to manage this around my work day, but I’d like to have a greater percentage of wheat. Are there any adjustments to make if we go with more wheat?
Thanks again!
Generally, with increased whole wheat you’ll find the dough might need additional water (increase hydration) and it will increase fermentation activity. I’d say if you bump up in 5% increments you should be able to see/feel the difference as you keep increasing that percentage. Be observant of the dough and how it changes and adjust accordingly (add water if necessary, reduce bulk/proof times).
Hi Maurizio. Love love love your website!! A lot of your recipes involve overnight proofing though. What happens if you don’t want to overnight proof and bake the same evening? Can I leave it to proof at room temperature between say 5-9 PM and bake then?
Thanks, Ashima! You can certainly skip the cold proof and simply proof, covered, on the counter. Typically, the dough will be ready between 2-4 hours after shaping, but do keep an eye on it to judge the dough that day!
Hi Maurizio, I’ve been making this bread every week for the past few months with great results, thanks for sharing.
I’ll be heading back to work soon and want to continue a weekly bake. Right now, my levain takes about 7 hours at 77 to be ready to use. Assuming I can’t reduce the temperature much, how can I increase the amount of time it takes for the levain to be ready. Should I just try reducing the amount of starter (or conversely, increasing the amount of flour /water in the build)? Many thanks!
That’s great to hear, Andrew! If you want to lengthen that period between first refreshing and when its ripe, leave less starter in the jar (assuming it’s kept at the same temperature and with the same flour).
Ciao Maurizio! For this recipe, What temperature do you recommend to retard the fermentation in the refrigerator for about 12 to 18 hours?
Ciao, Francisco! Home fridge temps works really well, 39F (4C).
Hi Maurizio. I love this recipes! Thank you for sharing! Is it OK to use same recipes for one big Batard or 2 better? What would be the baking time for one? Is there certain recipes better for Batard? I just became a proud owner of Staub La Cocotte!
That’ll work! If you keep the dough in a single mass you’ll have to bake longer. Just be sure the interior reaches that 206-210°F range!
When I pulled my loaves out of the fridge after resting overnight they were ‘runny’ They shaped well prior to going into the fridge and I achieved nice tension. Would this most likely be due to to much water?
Yes, sounds like over hydration and/or under strengthened dough. Try reducing the hydration by 10% and give it another go — the reduced water should bring a lot of strength to the dough and you’ll feel it immediately. Once you find a suitable hydration, you can try to push it back up, but as you do, take note of how the consistency of the dough changes: the dough will start to slacken out as you add more and more water, this means you’ll likely have to mix more upfront or add another set or two of stretch and folds during bulk fermentation.
Try to keep everything else as consistent as possible and let me know how the next attempt goes!
Hi Maurizio,
As a fairly new sourdough baker, I was wondering if I need to proof this in the fridge? Could I bake it immediately after a room temp proof? If so, how long do I need to proof it for and what signs would I look for?
Thank you, I appreciate all your hard work and dedication to this website!
Lauren
Yes, you can bake straight away. Give it 2-3 hours time to proof on the counter and bake once a gentle poke slowly springs back, but not completely.
Hi Maurizio,
I wanted to thank you for all of the wonderful work you have shared.
I have a question about the Simple Weekday Loaf. I have baked this twice now and have really enjoyed the bread. Both times I have noticed that the bread leaves a sticky residue on my electric slicer blade. Also on the first bake the interior center of the loaves seemed a little gummy. I did check the internal temps of the loaf at the end of baking and they were 208-212 on my Thermapen. I also used my B&T prooofer for bulk fermenting at suggested times and temps.
Any ideas on what might be causing the stickiness?
Thanks in advance for your help.
It could be over hydrated or under proofed. Try reducing the water a bit, perhaps just 2-5%, and see if that helps!
Hi Maurizio! thanks for the recipe. My dough didn’t raise too much after the 3:30 hours bunk fermentation, at 25ºC room temperature. What might have happened? What should I do?
Be sure to use your starter when it’s very ripe before making your levain, and wait until your levain is very ripe before mixing it into a dough. 25°C should be sufficient temperature to get things going! If your dough still hasn’t shown signs of significant fermentation in bulk, give it more time, perhaps another 30m or 1hr and see how it looks. If you used your starter or levain on the early side it will slow things down!
Hi Maurizio, thanks for your help! I waited 2 more hours in bulk fermentation and continued the process as you teach us. The result was a super beautiful bread! Thank you
Thinking about trying this recipe and I’m wondering: it calls for the use of “mature starter (unfed)” to make the levain. Doesn’t it need to have been fed to reach maturity/ripeness?
No, you want to use your starter when it’s ripe (bubbly, risen, ready for a refreshment).
Thank you! What do you mean by “ready for a refreshment”?
And I think it would help if you removed “unfed” from the instructions – I found that aspect very confusing.
When you’d normally give it a feeding (refreshment). For example, I typically discard some of my ripe starter, add fresh flour and water, let it ferment overnight, and then in the morning it’s ripe again, ready to be used to make a levain or refresh again.
I updated the post to remove that wording — thanks for the suggestion!
Thank you for the recipes and detailed instructions!
I have now made the “Beginner Sourdough” and the “Simple Weekday Sourdough” and they both turned out beautiful in every single way except sourness.
I am new to this, but my starter has provided the sourness I am seeking in other, all white bread flour recipes.
Am I doing something wrong, or is the sourness level of these recipes on the mild side?
Thanks in advance for any advise you might have for me!
Yes, I aim for a mild sourness generally in my recipes. I’m working on a more-sour bread for a future recipe, though!
I’ll be waiting.
Thank you!
Hi, I hoping somebody will be able to help. I am new to sourdough and have made this three times now but this time the dough was so runny I couldn’t do anything with it – it just ran onto the work surface after bulk fermentation. Up to this point is seemed fine. Do you think it was it overproofed? (I followed the schedule!) if so, how much should I decrease the proof time to improve the texture. I used white bread flour and a country grain granary bread flower in place of wholemeal. I scooped it up and put it into the basket and its in the oven now so will see what it cooks like but I am not holding out much hope of a decent loaf 🙁
It’s possible it over proofed, but unlikely if you followed the timeline. It might have been over hydrated. I’d say try holding back more of the mixing water next time, perhaps 50g, and see if that helps! You might also want to give it one or two more sets of stretch and folds during bulk fermentation to give the dough more strength.
OK, so this baked and it looked lovely but it was a very “doughy” texture inside. It tasted great so am not overly worried and will keep practising
Thanks
@disqus_NxC8AmCaqi:disqus If the inside texture was on the raw side, as you say, then perhaps it didn’t get hot/cooked enough. Without an instant read thermometer, you have no idea. the outside may look fine, but there’s a BIG difference between 200º internal and 210º. Sourdough can go to 210º to remove that “doughy” texture you have.
I’m a newbie and been able to follow the recipe and get a good tasting loaf, but find that the dough is super sticky and slack. Shapping the young is the hardest as I don’t have a banneton. Shaping on the bench eventually leads to a very flat loaf, no matter how much tension I try to create on the dough surface.
It sounds like your dough is most likely over hydrated. Try reducing the hydration by 5% and give it another go — the reduced water should bring a lot of strength to the dough and you’ll feel it immediately. Once you find a suitable hydration, you can try to push it back up, but as you do, take note of how the consistency of the dough changes: the dough will start to slacken out as you add more and more water, this means you’ll likely have to mix more upfront or add another set or two of stretch and folds during bulk fermentation.
Try to keep everything else as consistent as possible and let me know how the next attempt goes!
how do i calculate nutritional information for this recipe?
Hi Maruizio! When I let the loaves rest for 30 mins before shaping, they both developed a tough outer skin on top, which made it a bit awkward to handle when shaping. This resulted in some lumpy loaves…where did I go wrong?
I’m not a sourdough expert, but it sounds like the surfaces dried out a bit. Cover with a plastic wrap or a wet kitchen towel during the bench rest next time!
@gabrielleruizfunes:disqus If you’re going to take up this Hobby, its wise to invest in some nice linen tea towels. google “linen tea towel”
I don’t want to bake two loaves but just one. Can you halve this recipe?
Yep! Just halve the weights. There’s an example of how to in more detail using this recipe in this post: https://slimlife.fit/reference/introduction-to-bakers-percentages/%3C/a%3E%3C/p%3E
Thanks for this recipe! I’ve made it three times, each with some modifications as I learn, but I’m still having some trouble getting my bread to rise in the oven and break open from the scoring. I’ve seen great rise at the bulk fermentation stage and in the final proof. Significant size increase each time, lots of bubbles, very light and gassy. But I still feel like my dough doesn’t end up strong enough to keep its shape in the oven and rise more. I added in an extra fold this last time, did a tighter preshape, shaped (what I thought was) firmly until I got a skin, and scored at a low angle so I could get the ear in the bake. Though, scoring was a little difficult and I think the dough wasn’t strong enough to do it in one quick motion. My blade kept getting stuck and didn’t leave me with a totally clean score like the ones you have here.
Any recommendations? I’m using KA Bread flour and Bob’s Red Mill whole wheat. I have some pictures here. Should I be getting more rise from this loaf?
https://drive.google.com/drive/folders/1-2ntRJ7WDxZ-hm_e6fqHszbFLhv7j5SY
those look great on the inside!
It’s probably mentioned somewhere, but do you let the proofed dough come up to room temp after overnight in the fridge (before baking)?
Nope, I bake straight from the fridge!