

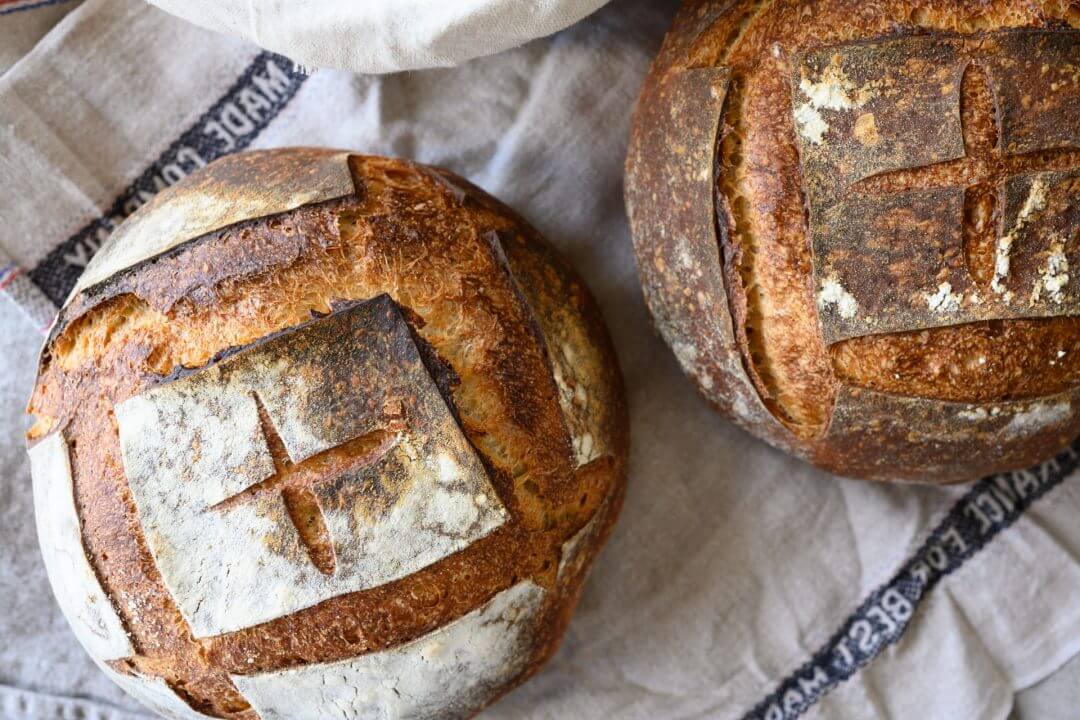
Baking a healthy and nourishing loaf of sourdough bread with your sourdough starter is gratifying, to be sure, but what if you’re not home all day to check in on the long-fermented dough? I mean, some of us do have to work, right? This simple weekday sourdough bread recipe and schedule are uncomplicated for mixing and baking a loaf of bread during the busy workweek.
This post includes pictures and videos that clearly and concisely convey the full sourdough bread-making process. But why is this recipe so easy compared to others?
Real Quick: Why is This Sourdough Bread Easy?
- It’s a no-knead sourdough bread recipe: mix everything in one bowl
- It uses only two types of flour: bread flour and whole-wheat flour
- It’s moderate hydration—no messy dough or counters
- It’s baked in a Dutch oven or combo cooker
- Timing is extremely flexible
Let’s go over the workweek schedule.
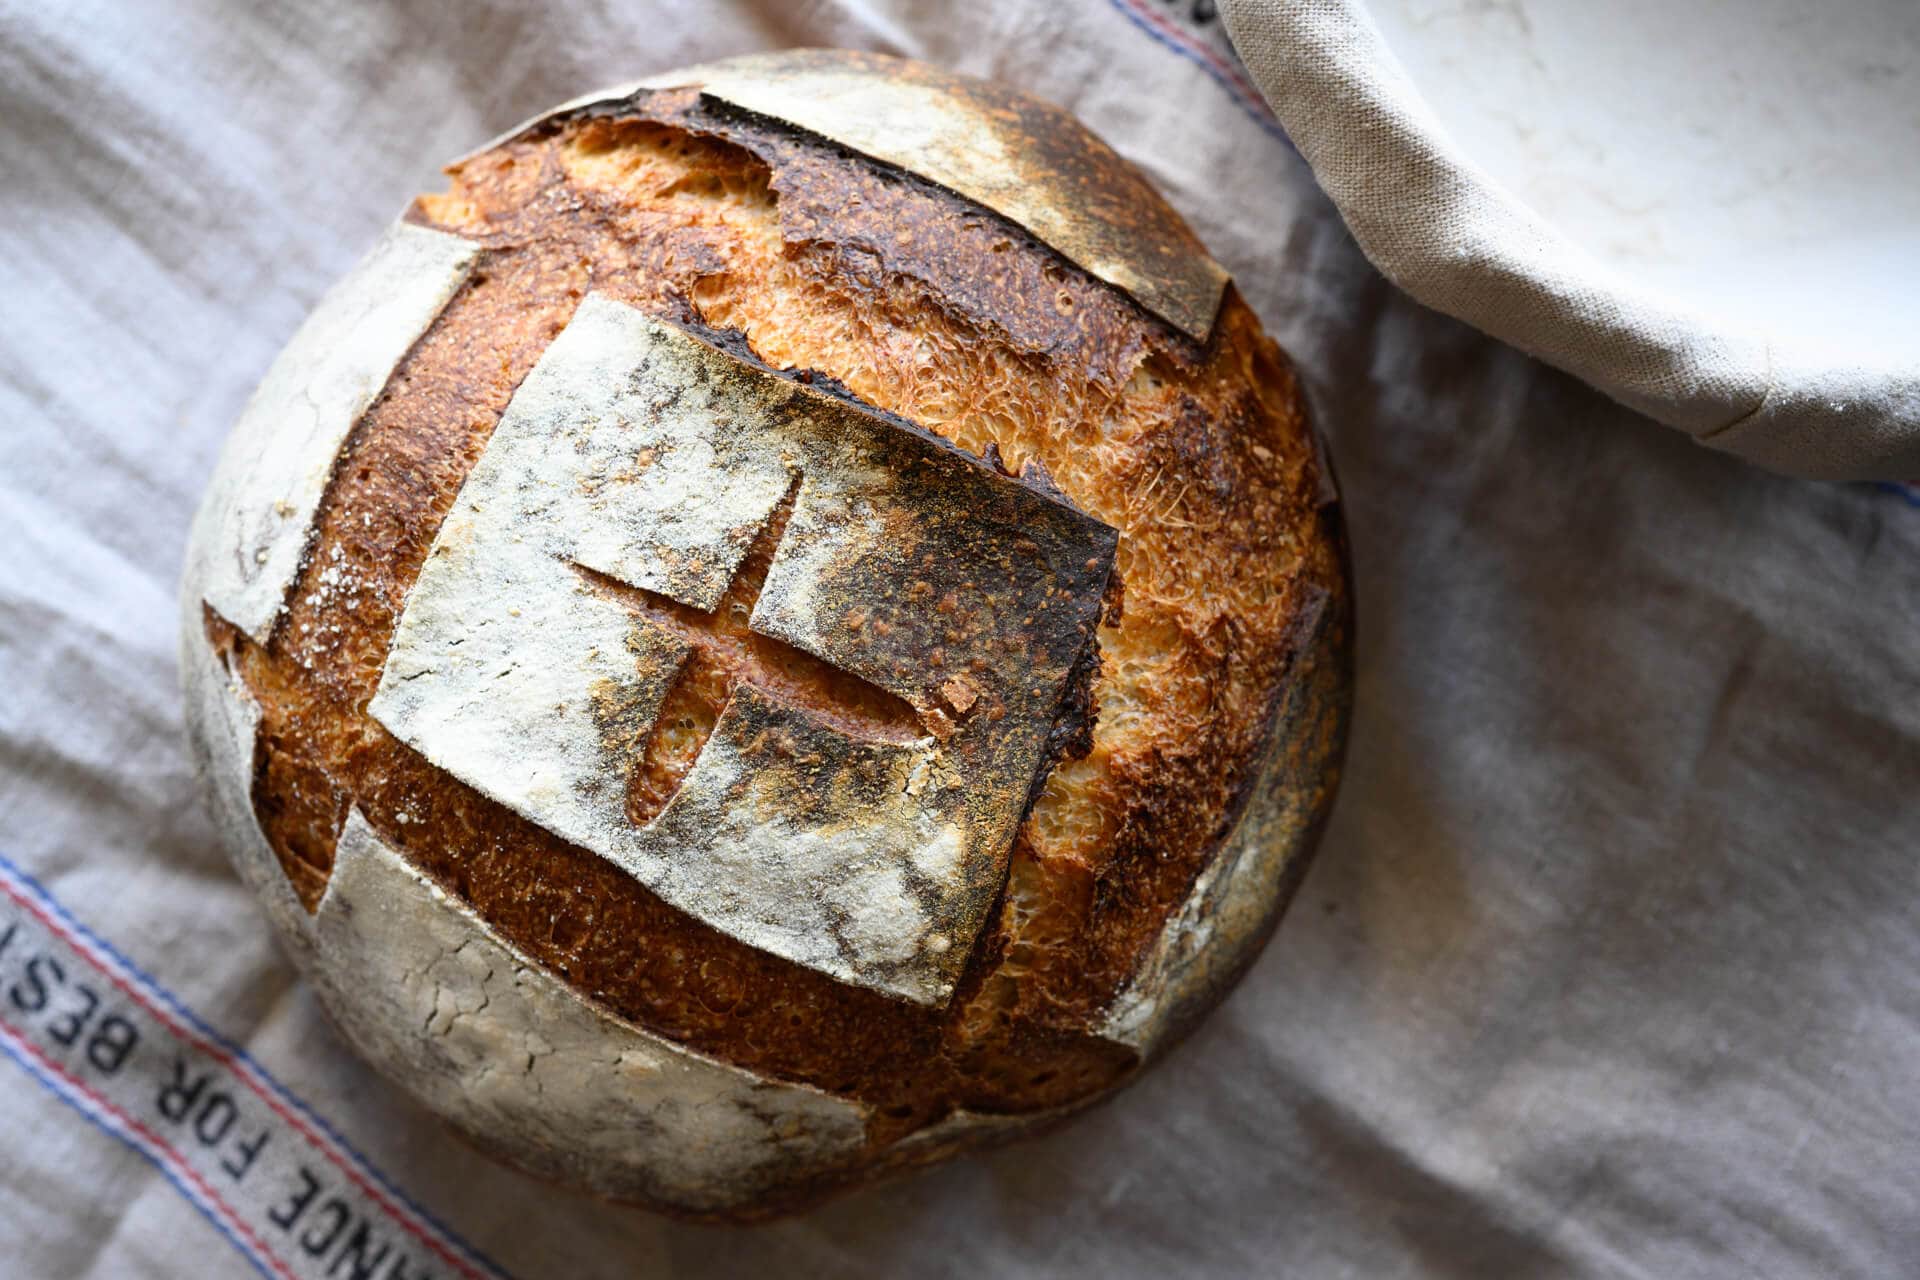
A simple weekday sourdough bread schedule
In the past, I’ve discussed a weekend baking schedule that outlines a schedule for low maintenance during the week with a bake on the weekend. The following schedule, however, allows baking during the week around a typical nine-to-five workday. It’s also quite flexible, and you always have the option to place the dough in the fridge longer to bake when you get a chance.
Read through my ultimate guide to dough proofing for more information on adjusting the proofing period for this sourdough bread.

| Time | Step |
|---|---|
| 7:00 a.m. (before work) | – Make the 10-hour levain (ready ~5:00 p.m.) – Save time later, scale-out flour & salt into bowls and cover |
| 5:00 p.m. (after work) | When levain ready, mix dough for autolyse |
| 5:30 p.m. | Finish mixing and begin bulk fermentation |
| 9:00 p.m. | Divide, pre-shape, and bench rest |
| 9:30 p.m. | Shape and place into the refrigerator to proof overnight |
| 7:00 a.m. (next day) | – Bake the next day before work – Alternatively, bake after work |
The schedule above has example times, so shift the timeline to earlier or later according to your schedule. Don’t worry if you don’t hit the times precisely as they’re written. There’s some flexibility there.
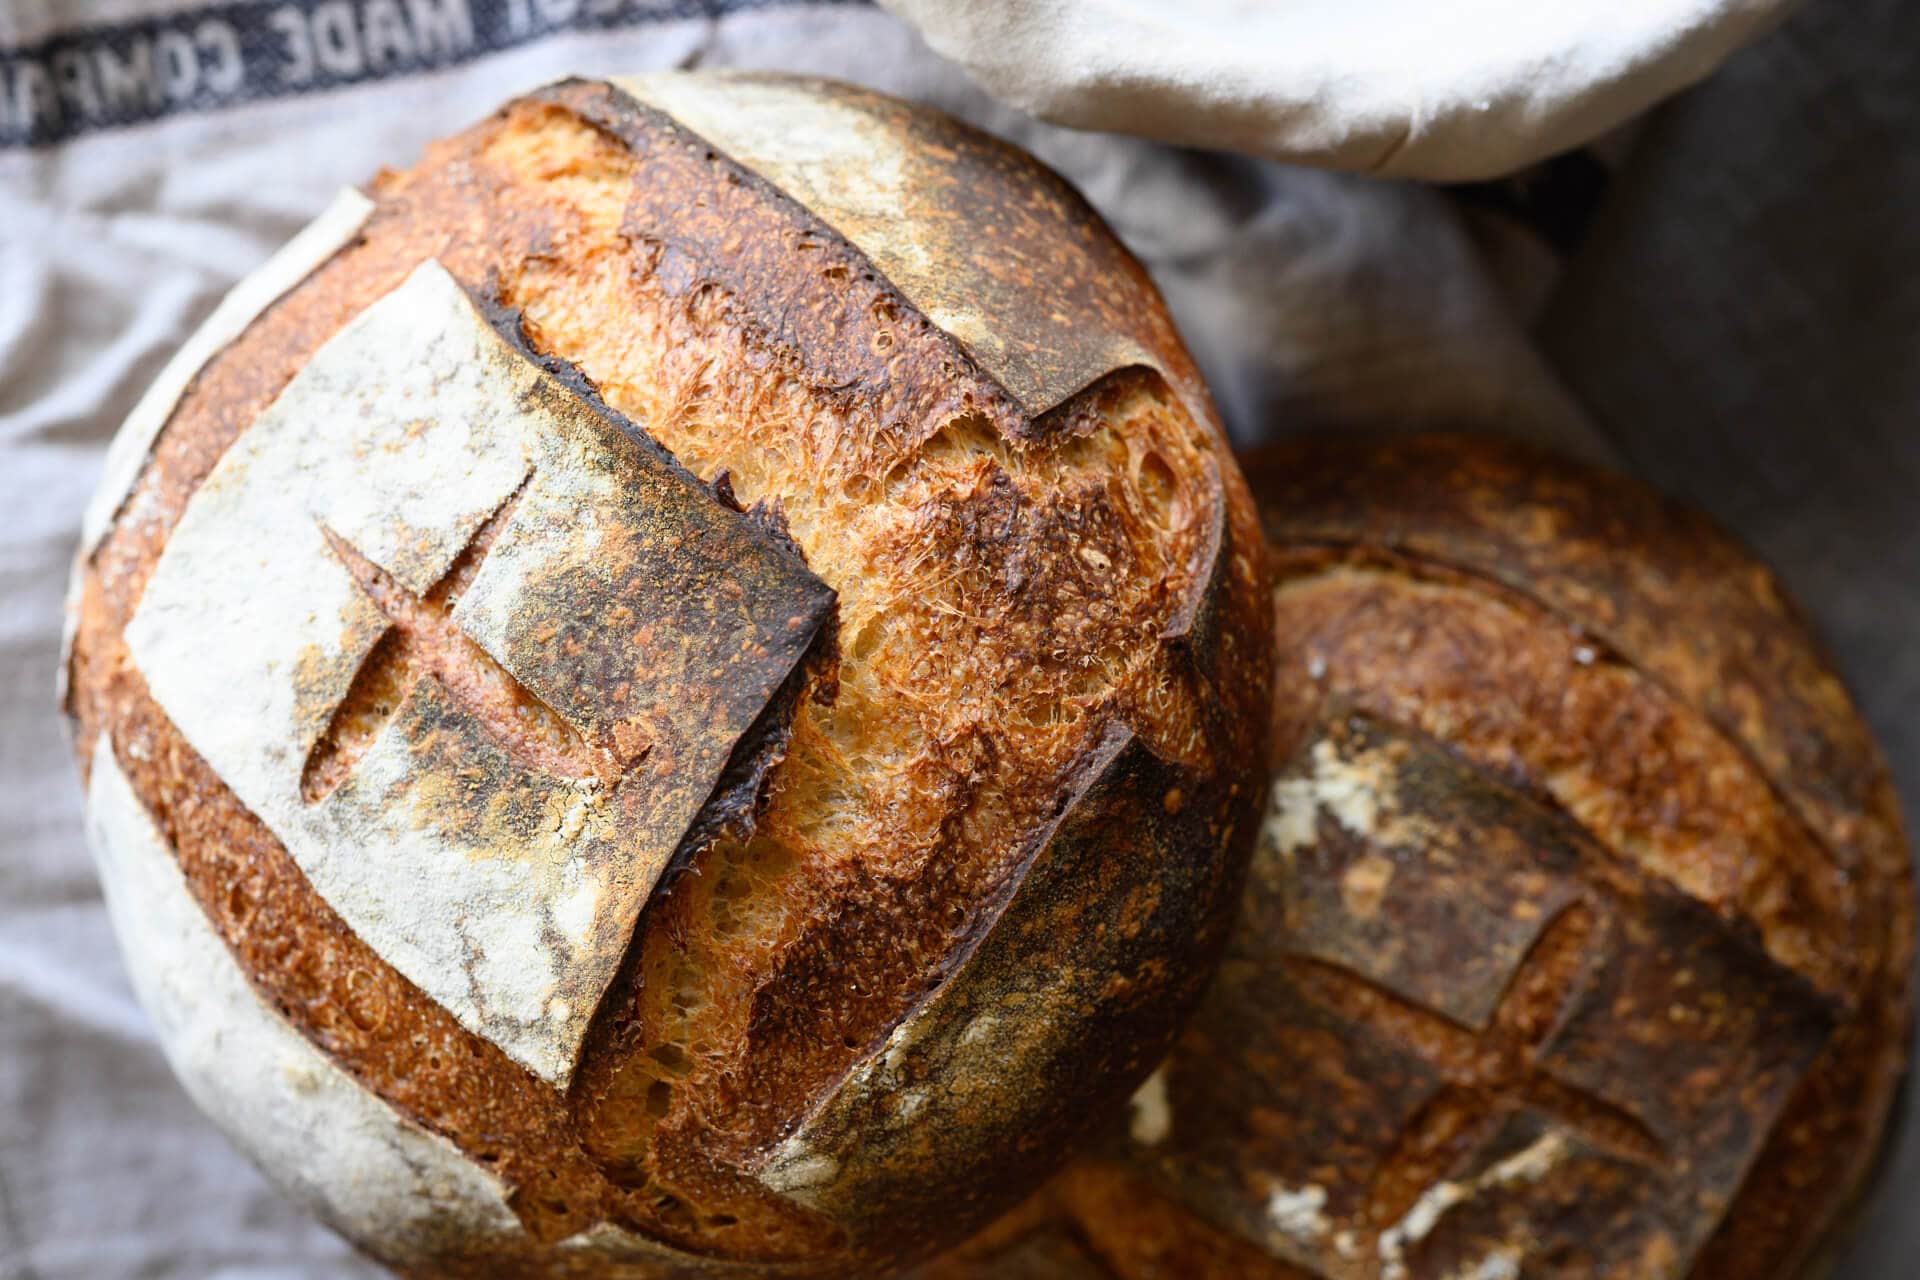
A Simple Weekday Sourdough Bread Recipe
Vitals
| Total Dough Weight | 1,800 grams |
| Pre-fermented Flour | 8.0% |
| Hydration | 76.0% |
| Yield | Two loaves |
Total Formula
The following table shows all the ingredients needed to make this bread. Each ingredient will be called out as needed in the method steps below.
My final dough temperature for this simple weekday sourdough bread was 75°F (24°C). For more information, see my post on the importance of dough temperature.
| Weight | Ingredient | Baker’s Percentage |
|---|---|---|
| 806g | High-protein white bread flour, malted (King Arthur Bread Flour) | 80.0% |
| 202g | Whole wheat flour (King Arthur Whole Wheat Flour) | 20.0% |
| 766g | Water | 76.0% |
| 19g | Fine sea salt | 1.9% |
| 8g | Ripe sourdough starter (100% hydration) | 0.8% |
Method
1. Prepare levain – 7:00 a.m., before work
A levain is simply an off-shoot of a sourdough starter. A sourdough starter is never used up completely; it’s continually fed day after day indefinitely. A levain is created with a small bit of a sourdough starter and left to mature (ferment) until ready to be mixed into a dough. Ultimately, it meets the same fate as the dough: baked in the oven.
In the morning before work, mix in a jar:
| Weight | Ingredient |
|---|---|
| 40g | Bread flour |
| 40g | Whole wheat flour |
| 81g | Water |
| 8g | Mature sourdough starter |
Loosely cover the jar; it should be ready after about 10 hours at room temperature, 72-75°F (22-24°C).
2. Autolyse with Levain – 5:00 p.m. after work
Performing an autolyse gives our dough a chance for the flour to fully hydrate and begin the gluten development process (all without kneading). I typically don’t do an autolyse with the levain included, but we’ll do that in this simple weekday sourdough bread recipe because it’s a short period.
Add all the ingredients below to a mixing bowl. Mix with wet hands until all the dry bits are incorporated. Cover and keep somewhere warm at room temperature for 20 minutes.
Note: the water in the table below is 50g less than the total water for this recipe; the water (and the salt) are held back for the next mixing step.
Dough Mix
| Weight | Ingredient |
|---|---|
| 766g | High protein bread flour, malted (King Arthur Bread Flour) |
| 161g | Whole wheat flour (King Arthur Whole Wheat Flour) |
| 635g | Water, Autolyse |
| 169g | Ripe levain (created in Step 1) |
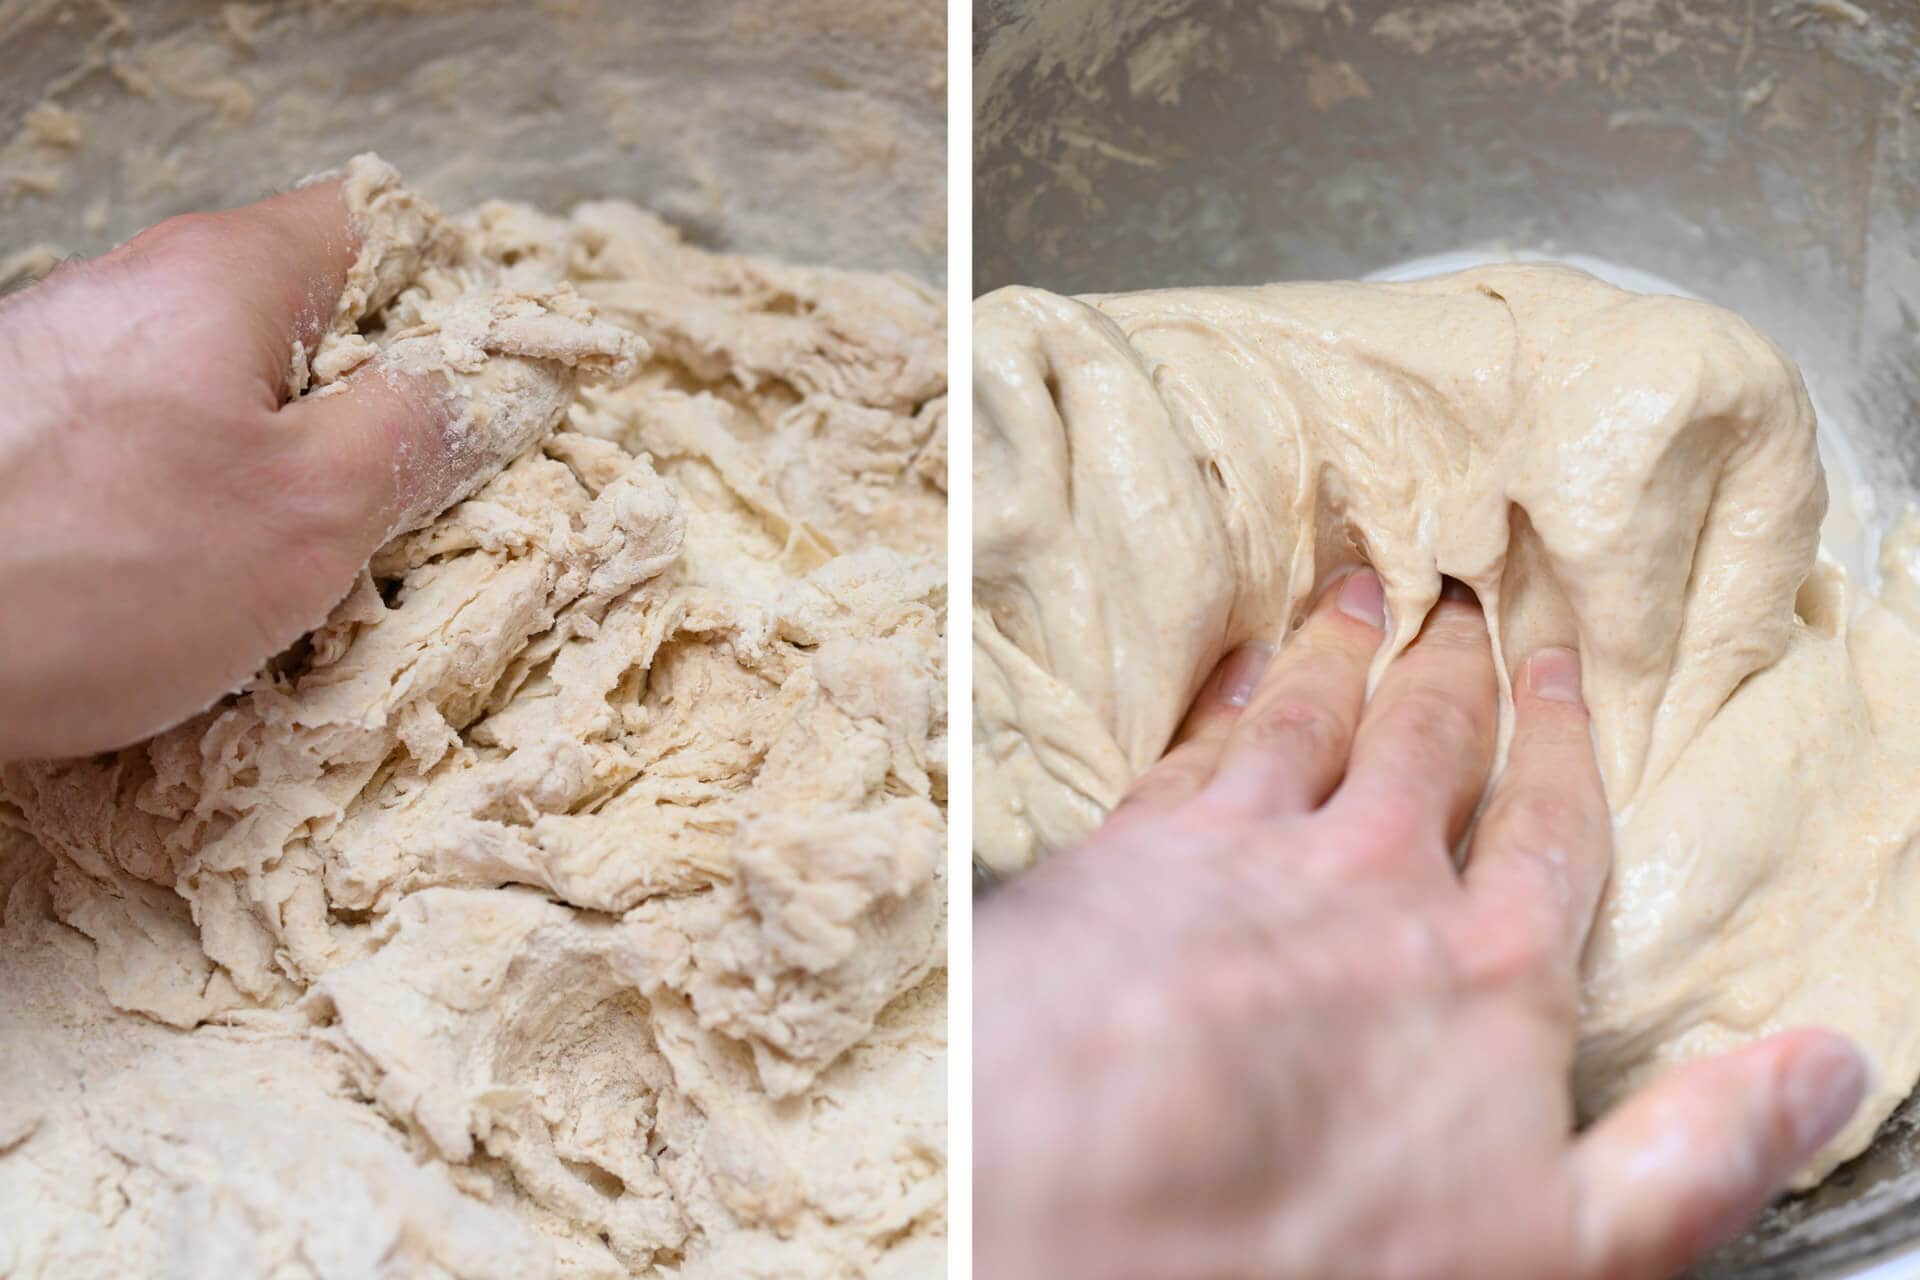
The image above shows the direct result of even a short autolyse. The left image shows the shaggy mass just before I finished incorporating everything. The right image shows how smooth and strong the dough becomes simply by resting. Let’s take this further with a little mixing.
3. Mix – 5:20 p.m.
Add the ingredients in the table below to the top of the dough: first, add the salt and then add the reserved water slowly to help dissolve the salt. Add the water a little at a time, depending on how the dough feels: it should be shaggy and loose, but not “soupy.” You can pause midway through pouring the water to incorporate it with a wet hand. If it feels like the dough can handle the rest of the water, add it all.
| Weight | Ingredient |
|---|---|
| 50g | Water, Mix (as needed) |
| 19g | Salt |
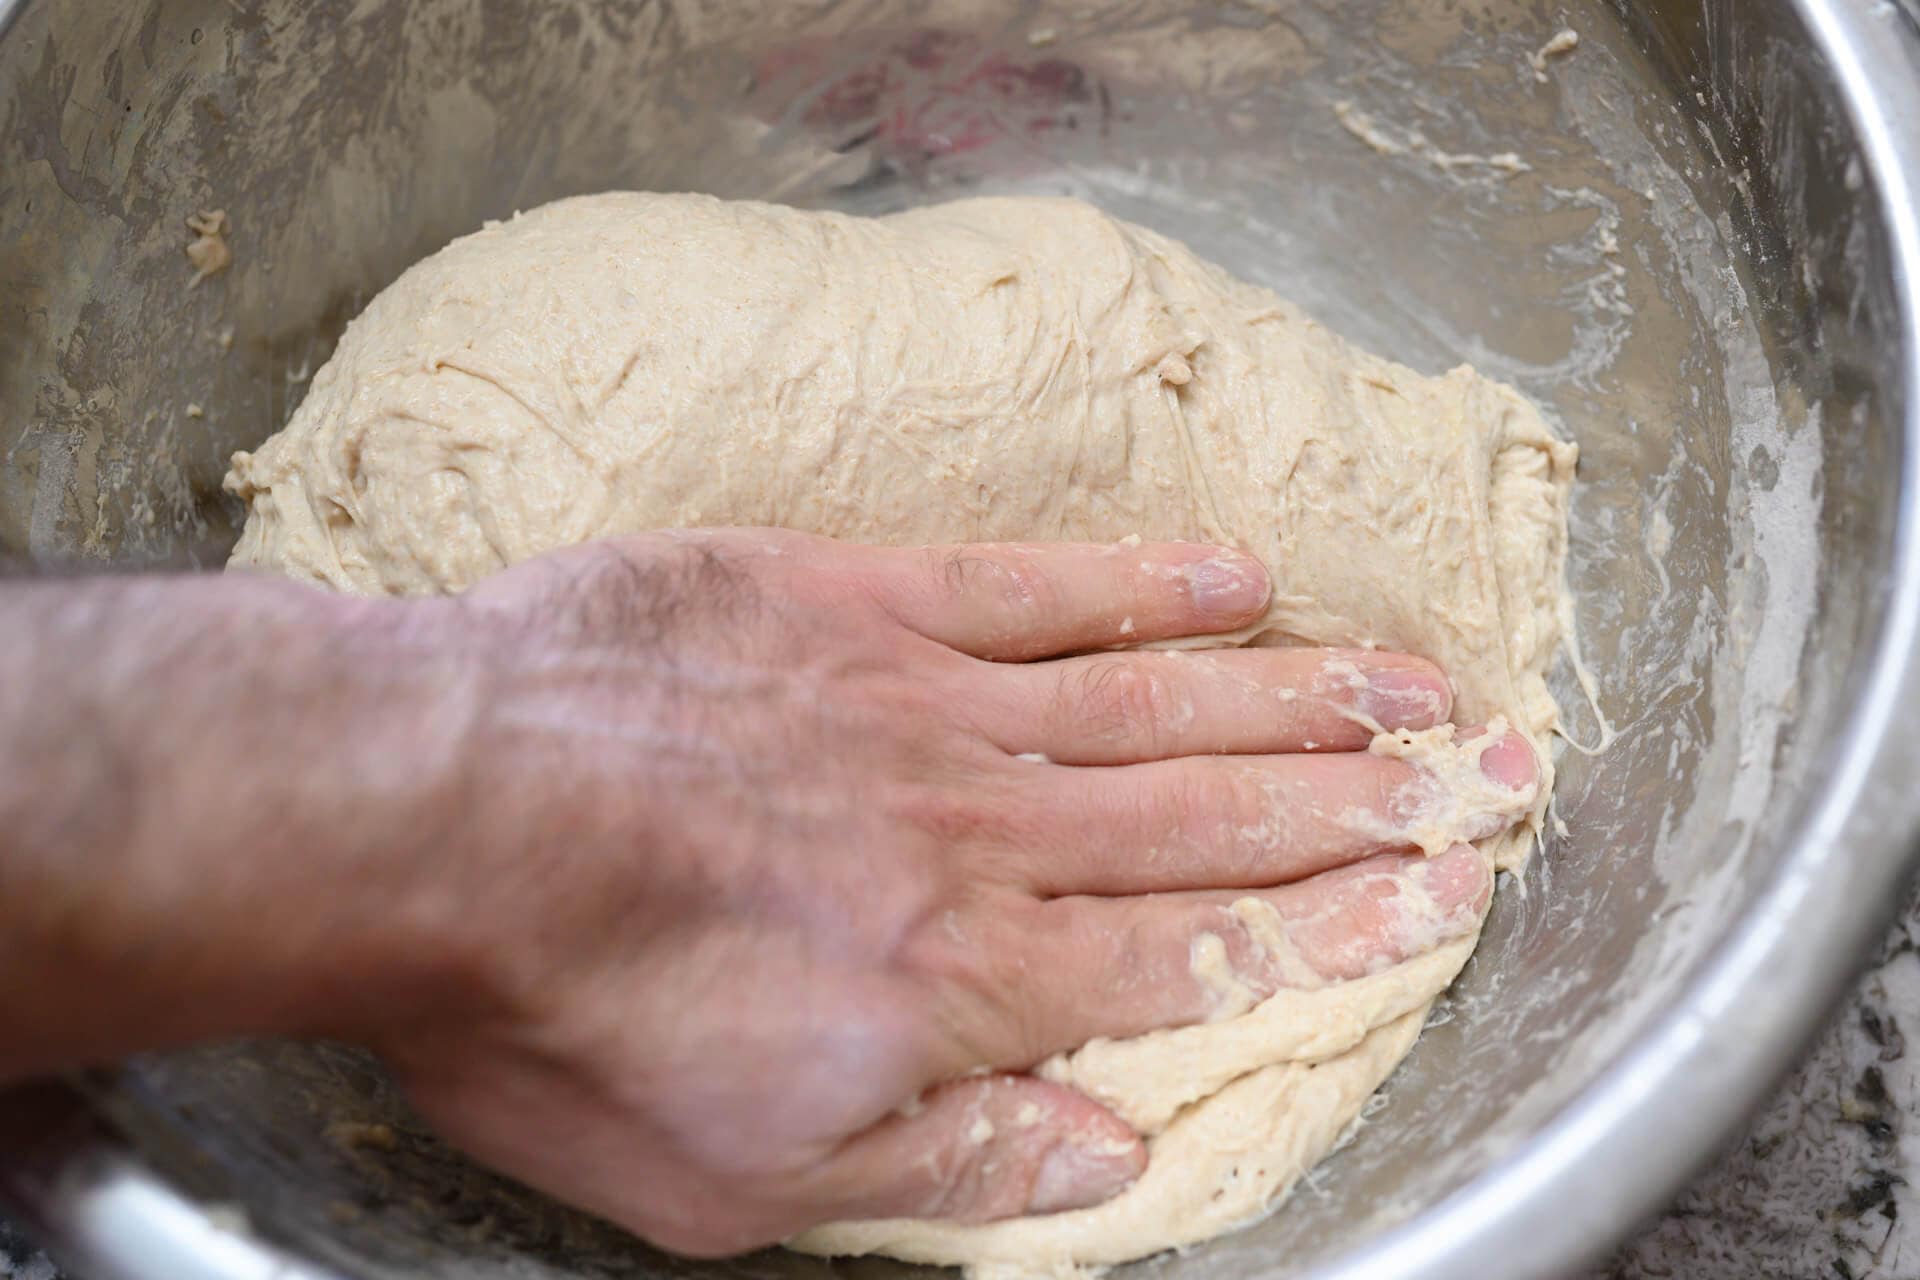
Since this dough uses a fair amount of high-protein white bread flour, it doesn’t require extensive mixing or kneading.
Using wet hands, mix everything until it comes together into a shaggy mass. This dough is rather strong and doesn’t require intensive mixing or kneading, but give it a few folds in the bowl, perhaps 5-10, until it smooths slightly (see the image, right).
Cover the bowl with reusable plastic and keep it somewhere warm in your kitchen for bulk fermentation.
3. Bulk Fermentation – 5:30 p.m. to 9:00 p.m.
Bulk fermentation, or first rise, occurs when the dough is leavened (through the production of carbon dioxide gas) and flavored (through the production of organic acids) as a result of natural fermentation. Below, you can see how much my dough rises during this 3-hour and 30-minute bulk fermentation at 75°F (24°C).
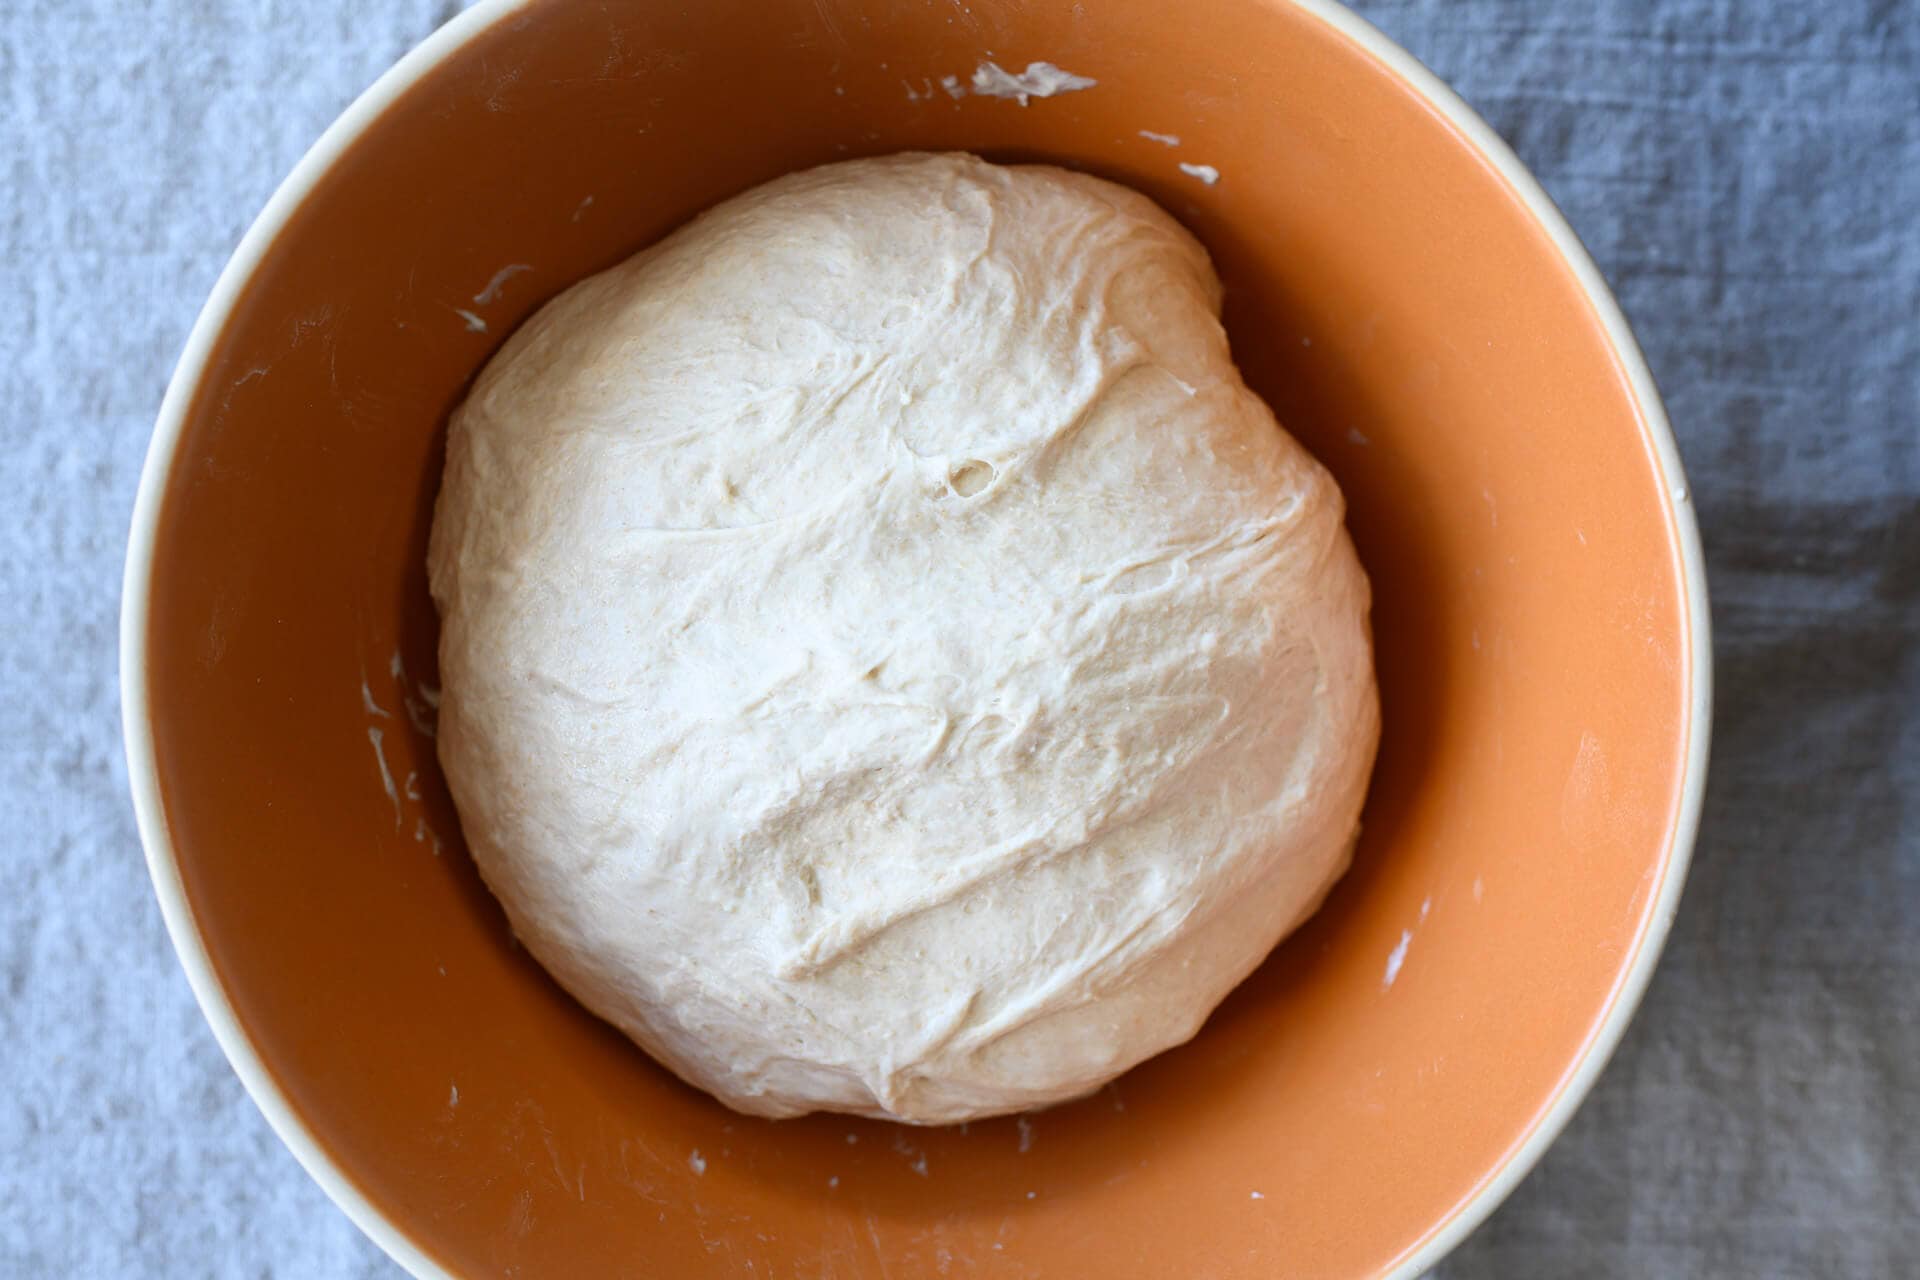
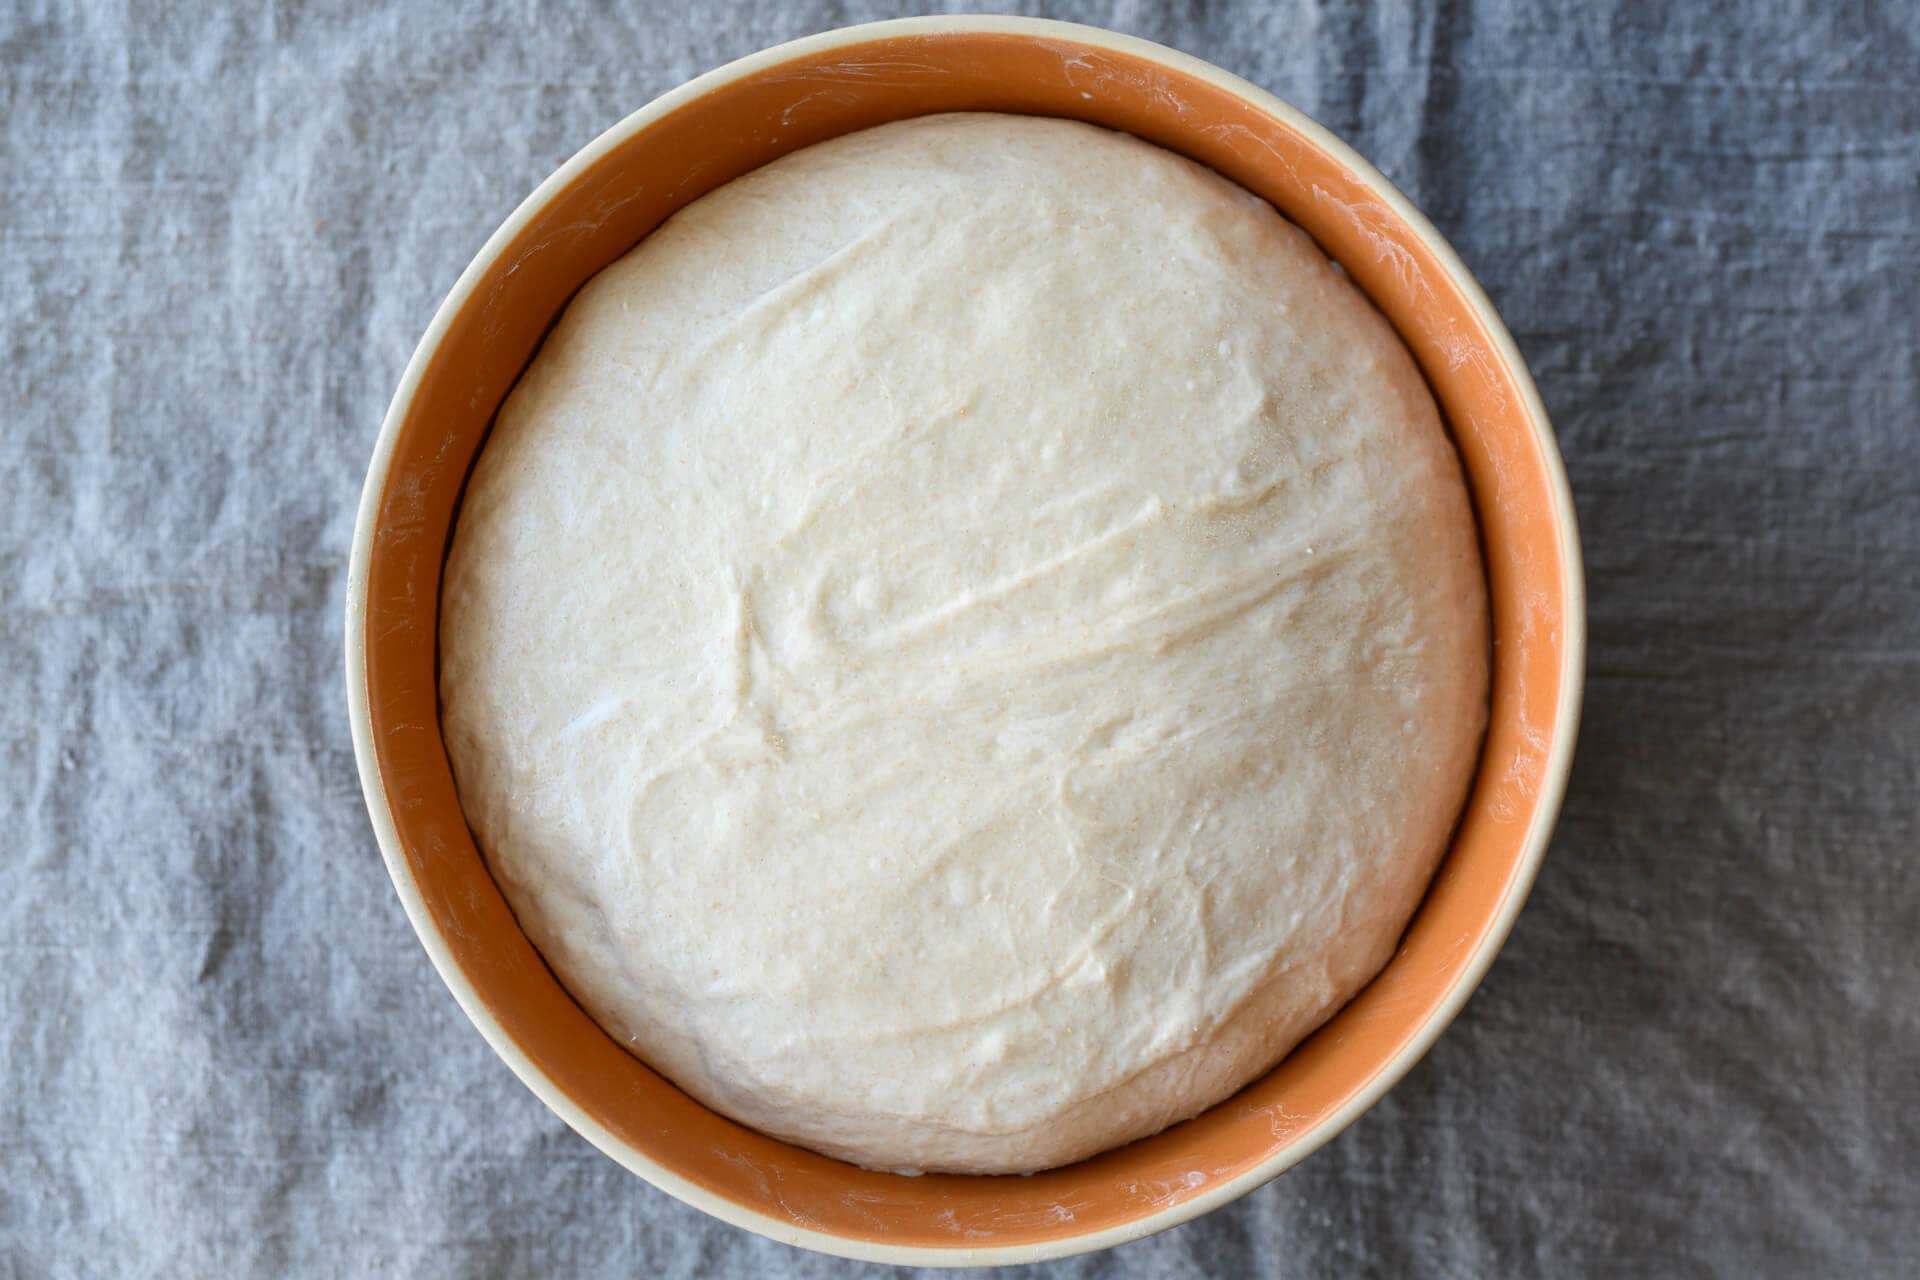
During this time, give the dough 2 sets of stretch and folds: the first set is 30 minutes after the beginning of bulk fermentation, and the second set is 30 minutes after the first. After the second set, let the dough rest, covered, until the next step.
As you can see in the video above, each set of stretches and folds is simple: With wet hands, grab one side and gently stretch it up and over to the other. Perform this fold in each direction: North, South, East, and West.
4. Divide & Preshape – 9:00 p.m.
Fill a bowl with some water and place it on your work surface. Scrape out your dough from the bulk container onto your dry counter. Divide the mass in half using a bench knife. Using a wet hand and the knife in the other, gently preshape each half into a loose round. Let the dough rest, uncovered, for 30 minutes until it’s relaxed outward.
See my guide to preshaping bread dough for a video and more instructions.
5. Shape – 9:30 p.m.
As seen in the video below, flour the top of the round with your hands and flip it over. Take the bottom edge and fold it up to about the middle. Take the left and right sides in your hands and fold the right over to about 2/3 of the left side. Repeat for the left side. Then, take the top and fold down to about the middle and gently seal. This should form a little envelope shape.
Now, flip over the entire thing and begin dragging and sealing the dough underneath itself (top-right, above). Using both hands, rotate and drag the mass toward you to create tension on the top. Repeat the dragging if necessary.
Read through my guide to shaping a boule for more instruction.
6. Proof – 9:45 p.m. to 7:00 a.m. or 6:00 p.m. (the next day)
Cover both proofing baskets entirely and put them in the fridge to proof overnight. The fridge allows us to slow fermentation to bake before or after work the next day.
7. Bake – 7:00 a.m. (pre-heat oven at 6:00 a.m.)
Preheat your oven with the rack at the bottom third to 450°F (230°C). Place your Dutch oven inside, with the lid and bottom side-by-side.
Take one basket out from the fridge and uncover it. Your dough might not have risen considerably in the fridge, but that’s fine. Cut a piece of parchment paper to fit over the basket and place a pizza peel (or large cutting board) on top. Using both hands, flip the entire stack over and remove the basket.
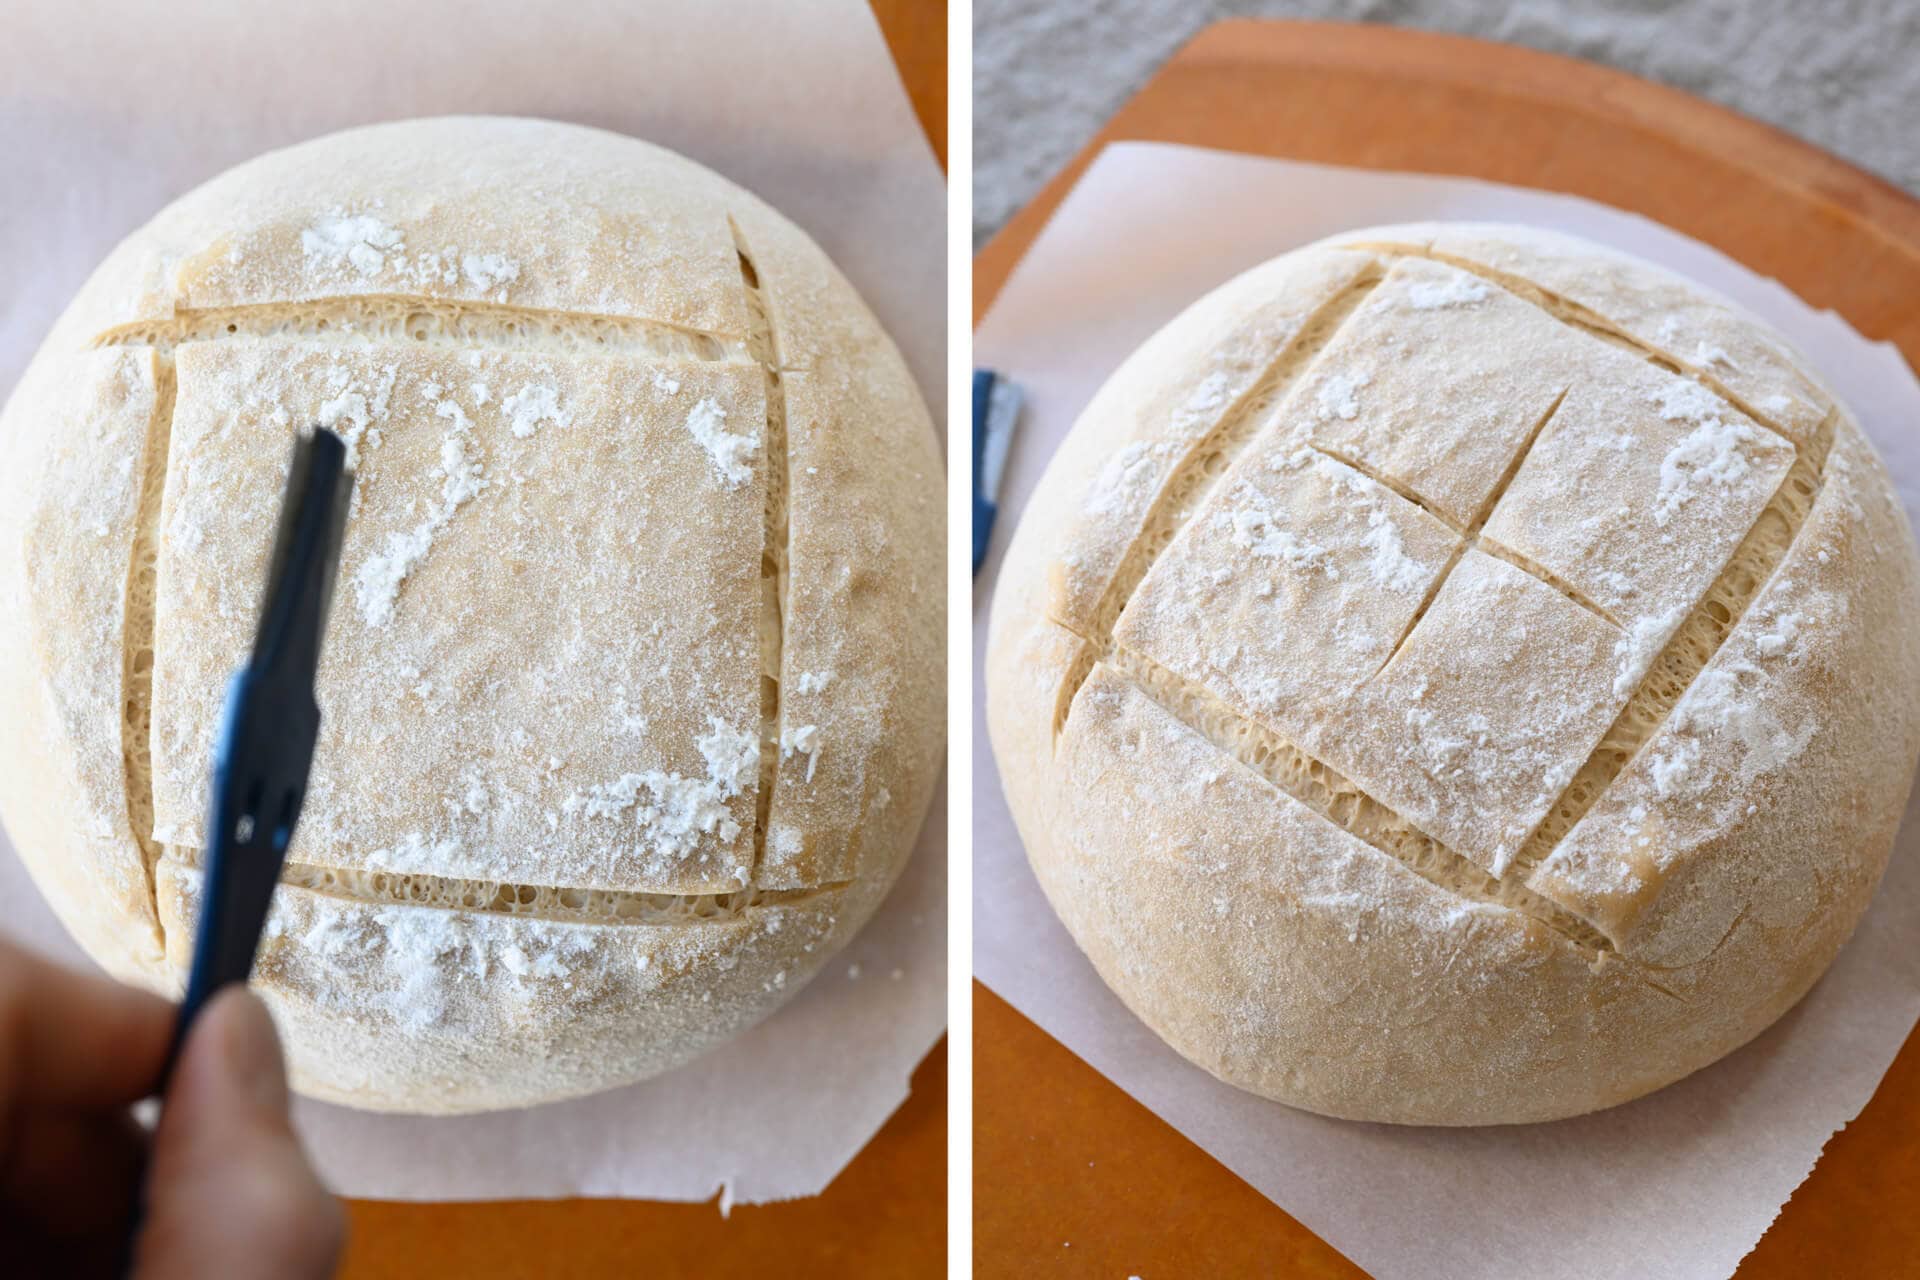
Score the dough using your favorite design. As you can see above, I love the “box top” score. Check out this video of me scoring this style (and a few others) below:
Now that your dough is scored, carefully slide it into the Dutch oven and bake for 20 minutes, covered.
After this time, remove the lid and bake for 30-35 minutes or until done. The internal temperature should be around 205-210°F (96-99°C).
(Note that If you’d like a thinner crust on this bread, increase the covered bake time to 30 minutes and reduce the second half of the bake (without steam) by 10 minutes. This increased baking time with steam can help reduce the thickness of the crust.)
Remove the loaf to a cooling rack for 2 hours before slicing. This lets the crust and crumb fully set and the flavor develop. Return the Dutch oven to the oven (without parchment) and bring it back to temp to bake the second loaf.
Follow my guide to storing sourdough bread to keep it fresh for the next week (or freeze it for longer!).
Print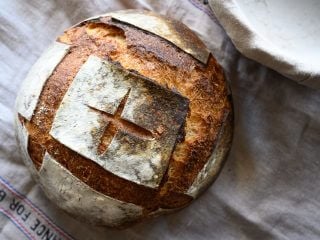
Simple Weekday Sourdough Bread
- Prep Time: 24 hours
- Cook Time: 1 hour
- Total Time: 25 hours
- Yield: 2 loaves
- Category: Bread, Sourdough
- Cuisine: American
Description
A loaf of delicious sourdough bread designed around a busy workday. The levain is prepared for this bread in the morning and left to ripen while you’re at work. When you get home, continue with the baking process. The dough can then be baked at night or the next day in the morning, or after work.
Ingredients
Levain
- 40g bread flour
- 40g whole wheat flour
- 81g water
- 8g ripe sourdough starter
Main Dough
- 766g bread flour
- 161g whole wheat flour
- 19g salt
- 685g water
- 169g ripe levain
Instructions
- Levain (7:00 a.m. before work)
In a small container, mix the Levain ingredients and keep it at a warm temperature for 10 hours. - Autolyse with levain (5:00 p.m after work)
In a medium mixing bowl, add all of the levain, 766g bread flour, 161g whole wheat flour, and 635g water (50g was reserved for mixing, later) and mix until no dry bits remain. Cover the bowl and let rest for 20 minutes. - Mix (5:20 p.m.)
To the mixing bowl holding your dough, add 19g salt and some of the reserved 50g water (or all if the dough feels like it can handle it). Mix thoroughly and strengthen the dough for about 5 minutes. Using wet hands, mix everything until it comes together into a shaggy mass. This dough is relatively strong and doesn’t require intensive kneading (like slap and fold), but give it a few folds in the bowl, perhaps 5-10, until it smooths slightly. Transfer the dough to a bulk fermentation container and cover. - Bulk Fermentation (5:30 p.m. to 9:00 p.m.)
This dough will need 2 sets of stretch and folds during bulk fermentation, the first set 30 minutes after bulk fermentation begins. Perform the second set 30 minutes after the first, and then let the dough rest the remainder of bulk fermentation. - Divide and Preshape (9:00 p.m.)
Lightly flour your work surface and scrape out your dough. Using your bench knife, divide the dough in half. Lightly shape each half into a round shape. Let the dough rest for 30 minutes, uncovered. - Shape (9:30 p.m.)
Shape the dough into a round (boule) or oval (batard), then place the dough in proofing baskets. - Proof (9:30 p.m. to 7:00 a.m. or 6:00 p.m. the next day)
Cover proofing baskets with reusable plastic and seal shut. Then, place both baskets into the refrigerator and proof overnight. - Bake (The next day, bake at 7:00 a.m. before work, or 6:00 p.m. after work)
Preheat your oven with a baking surface or combo cooker/Dutch oven inside to 450°F (230°C). Remove your dough from the fridge, score it, and transfer it to the preheated baking surface or combo cooker. Bake for 20 minutes with steam. After this time, vent the steam in the oven or remove the lid (you can keep it in the oven or remove it) and continue to bake for 30 minutes longer. When done, the internal temperature should be around 204°F (95°C). Let the loaves cool for 2 hours on a wire rack before slicing.
Notes
- This recipe is wonderful left plain, or you could top the dough with rolled oats, white sesame seeds, or flax seeds.
If you use this recipe, tag @maurizio on Instagram so I can take a look!
What’s Next?
There you have it; this simple weekday sourdough bread can be made daily and adjusted to fit your schedule. Now, there’s no reason not to bake. This recipe is also a great place to experiment: mix 125g of nuts like walnuts and pecans and dried fruit like cranberries, cherries, or raisins.
Many recipes on my site can be adapted to this simple weekday sourdough bread schedule, most notably my Beginner’s Sourdough. Both recipes use flexible doughs, and the fridge provides even more.
For a more hands-off approach, check out my easy no-knead sourdough bread recipe. It can also be adapted to bake in a single day or ferment longer for an easier schedule.
Happy baking!


903 Comments
Hello!
I baked this recipe using AP flour in place of the bread flour (kept ratio of AP flour/whole wheat the same) and decreased the initial water by ~75g. I added very little of the reserved 50g water with the salt. Despite adding an extra set of stretch and folds and 1.5 hours to the bulk fermentation time (in oven with the light on to warm things up a bit), I didn’t get as much rise. The dough felt heavy and not very elastic and produced a fairly dense crumb: https://photos.app.goo.gl/rCr1sUawCCTW7sMA7
Any thoughts on correcting for next time? I loved the flavor of this loaf and the baking schedule is so convenient. Thank you for curating such a fantastic wealth of knowledge on this site and for sharing your wisdom with all us sourdough newbies!
Hey! Looks like good rise. I’d say the dough could actually take more water and probably use a bit more time in bulk fermentation as well — maybe 15-30 minutes. Give that a try and see how it goes!
Hi there!
Tried this recipe with AP flour (in place of the bread flour, I should say—kept AP/wheat ratio the same!) decreasing initial water by ~75g and adding in very little of the reserved 50g. Despite an active starter/levain, the dough didn’t rise as much in bulk fermentation as I’d hoped (added an extra set of stretch and folds & extra 1.5 hours to time). Resulting crumb (https://photos.google.com/share/AF1QipPHaIQM5lKfqXy2KHMYKwBPnieUKM-WEvmteSAUWOoA3bCKu3mTvvW-NwkysEyqPw?key=QWNqQzdvSXJiQ3ZvVC1pTEhEQzVpT2tUX0tOUllR) was quite dense. Any thoughts on what to do differently next time?? Thank you for the super thorough resources and taking time to respond to all us sourdough newbies!
Had my first bake this morning and I am very pleased! Need to improve my lame skills but otherwise a very successful first sourdough experience. I used artisan flour from Janie’s Mill and Shop Rite Whole Wheat. I would make a little extra levain next time as mine was a little short. I also omitted some of the water when adding the salt as my first try with another recipe ended up as a soupy mess. Thanks for the great directions!
Good adjustments, glad to hear it worked out well fo you Eileen!
Baked my very first rounds this morning and I am very pleased with the results. I was a little short on the levain but it worked out ok. I also did not use all of the water when I added the salt.
Thank you for this recipe! I finished bulk fermentation and shaped my loaf and it seems really sticky. I’ve been having this issue with all of the loaves I’ve made except my first one. Any ideas/tips?
Thank you!
Mia
Drop the water in the mix, Mix. Try omitting that reserved 50g and see if that helps. If it does, but it’s still sticky, drop more water until it feels right for your flour.
Hello Maurizio – if I were to bake this bread in higher altitude (7000ft), would you recommend adding 1oz of water and 55g of flour to the dough mix? Or should I try it with the current recipe? Thank you.
Thinking that the higher hydration would compensate for the higher elevation, I ended up baking ‘as is’ your “Best Sourdough” recipe (half recipe) and it came out ok. The oven spring (ie. balloon like baked loaf) was not quite reached but looked like a good loaf of sourdough. (I’ve baked it for a friend) As I read some of the previously written comments, it looks like I might want to try this “weekday” recipe since it’s less in hydration. For the mixing part of the dough – I know you mentioned about 30 folds (or there about) or was it 30 sets? – how many minutes would you say we should ‘knead’ it if I’m doing a ‘forked fingers pulling up on the side of the bowl’ mixing (LOL) Only because I seem to lack in arm muscle strength in doing the ‘folds’ for 30 times (LOL) 5 mins? Or is folding for mixing the sure fire thing so I should try that? What would be the visual cues for sufficient kneading @ Mix 1 & 2? (I have a feeling that my lack of oven spring could be in that area – not kneading enough……) Thank you 🙂
I live at almost 6k ft — you could add more water if necessary but I wouldn’t add flour.
G’day fellow bakers.
I have made this recipe a few times now with great success. I have added 30g of water for a little higher hydration (my personal prereference, not to generally improve the recipe as it is great as it is) and the cobbs comes up with a beautiful crust and texture.
This last batch, I decided to try a bit of maturing of the dough. I made the levain (times as per Maurizio’s schedule) on Thursday. I baked the first cobb on Friday but saved the other in the fridge until this morning – Sunday.
The scoring turned out to be easier, the handling between banneton and Dutch Oven was easier and the bread was beautiful.
My second fridge where I rest the dough is rather cold, about 3-4C, but it went straight from fridge to bench, scored and in to the hot DO and in the oven for baking. My oven tends to cook this bread a bit faster than in the original recipe. I cook on 230C with lid for 20 minutes and then for 21-22 minutes without lid.
I very often mature my pizza dough 5-7 days (yes no BS, 7 days) and the difference is incredible both in flavour and texture.
I make a few extra dough balls and we have pizza the next day (or atleast 12 hours after making the dough) and I leave a few in a deep tray covered with plastic and place it in the fridge. The following Friday night pizza turns out fantastic.
It’s great to be able to prepare the dough when you have time, leave it for a few days and bake it when needed.
I wish I could post a picture of my loaf here but I will try to add a link instead. Apologies if it does not work.
https://m.facebook.com/story.php?story_fbid=2351017408534006&id=100008773080971
Have fun.
Hi Maurizio.
Thank you so much for this article, it’s very useful for beginners.
I have a question, probably a stupid one. How can I understand the moment in which I have to stop the bulk fermentation and pre-shape? Someone says that the dough has to double, do you agree? And how can you see if the dough has doubled with a round bowl like the one you used? (I use something similar too)
Thank you.
Nadia
I am looking to try this recipe tomorrow. Love the clear instructions with timing. I have on hand two several flours: an Artisan Blend organic flour from Janies Mill and a High Protein flour also from Janie’s. I had to order online as there is no flour in the stores. I also have a Heckers Unbleached AP and a Shop Rite whole grain whole wheat. Please advise.
Hi Maurizio, thanks for this fantastic recipe. Worked out perfectly for me at the first try (very first sourdough bread, using your starter recipe). Now at my second try. What is the longest time you could you let the shaped loafs proof in the fridge? I would plan on placing the shaped dough in the fridge this evening (Thursday evening where I am) and am wondering if I could bake one loaf tomorrow morning and leave the second in the fridge until Saturday morning. Thanks for your help!
Should the levain be bubbly like the sourdough starter at the end of 10 hours?
Hi Maurizio, I fed my starter at 12 noon today and its active and happy at 7:30pm. Do I now start the levain process? (mixing 40 g bread flour, 40 whole wheat flour, 81 grams water, & 8 grams starter) or is the 169 grams of happy active starter enough to satisfy this step?
Could you shape this loaf into a loaf pan? I am looking for something more sandwich shaped. Thanks for the great recipe!
Yes, you could certainly do this. Also, check out my recipes page, I have a Pan Loaf section!
First time using this recipe, started the Levain this morning, and it was not ready by 5/6pm tonight. AS of 10pm, it is not quite doubled, so it’s working, but slowly…I’m wondering if I can leave it overnight and start the Autolyse first thing in the morning, or will my levain have run out of energy? I can’t stay up for another couple hours to do the dough mixing and folding at this point. Please help!
It’s hard for me to say, Liz! Next time you could try doubling the amount of starter you use to build the levain to speed things along, or try to keep it someplace warmer. I hope things turned out well!
My dutch oven holds 4 litres of water. Will that be big enough for this?
I’m using a 3.2 quart (~3 liter) combo cooker so that should work!
I am in the process of making this loaf a second time. I followed the measurements precisely but once mature, my levain only weighs 161g opposed to 169, what could I be doing wrong? Will this effect my loafs?
Not a problem, it’s ok if it’s a little short!
I haven’t been able to find high-protein bread flour, but was able to get Giusto’s artisan bread flour. How would you modify your beginner recipes (like this one, and your Beginner Sourdough) for a lower-protein flour like this? I have been finding that the dough does not have sufficien strength by the end of bulk so would love to hear your advice – could my flour choice be the issue?
That’s great flour. I’d simply reduce the hydration in the recipe by 50-100g and see how the dough feels. You could also do a little extra strengthening through kneading or stretch and folds during bulk (add a set or two). Also, I just posted a recipe for a loaf made from 100% AP flour which would also work well.
Thanks – I’ll give it a try with lower hydration and extra strengthening. Appreciate the advice!
Also I have another question. To make levain I am supposed to use mature starter (defined as right at its peak), is that correct?
If so and if I want to start making levain at 7 am (as per suggested schedule) does it mean that I need to feed my starter a few hours before so that starter has risen at its peak for 7 am? Thank you!
You would probably feed it the evening before (around 7pm).
That’s right, mature starter when it’s at its peak. You’d likely want to feed it the night before so it has time to fully ferment to it’s peak.
Hi! If I just want to make 1 loaf of bread could you please confirm I can divide all the quantities mentioned above (including for the levain) by 2? Thank you!
Yes, that will work.
I tried this recipe and got some hilarious, though tasty results. The loaves looked fine from the outside, but when I cut into them, they both had several GIANT holes, like 1” x 2” big! I’m an experienced sourdough baker; usually I use the NYT recipe, but thought I’d try this one since it takes less time. Thoughts? Clues?
Based on the description of your loaves it could be that they were slightly under proofed. There are a few indicators your dough could be under: explosive rise in the oven, dense interior with potentially scattered large holes, and gummy texture to the interior. Finally, it’s possible the bottom of the loaf might be slightly bowed upward (like the letter “U” — the top will kind of dome).
Make sure to build your levain from a starter that’s strong and mature (meaning it’s risen to it’s peak height before you take some to use). From there, bulk fermentation is very important! Make sure your bulk fermentation goes sufficiently far, you want the dough to look smooth, it should have risen considerably, and have bubbles here and there — it should look alive. If you tug on the dough a bit it should offer resistance to your tugging, it’ll feel stronger. Give the dough the time it needs in bulk fermentation! If you have to give it another 30m or hour to see these signs, do so. It’s important for this step to go sufficiently far for the dough to have enough fermentation activity before its proof.
I tried this recipe and got some hilarious results. I’ve been making sourdough for a while now, using the NYT recipe with great success. But I thought I’d try this simpler recipe since it takes a lot less time. My loaves looked fine from the outside, but when I cut into them, both had GIGANTIC holes … a crumb that was a LOT more open than I was hoping for! I’m talking 2” x 1” inch or bigger holes. The bread tastes good, but the holes are ridiculous. Thoughts? Clues?
Hi, I live in the UK where we are (by and large) used to cooler houses; if I kept mine at 24c I’d have the windows open! Will this process work at about 20c, and how much longer should be allowed for each stage?
Yes it will work at cooler temperatures but the timeline will need to be extended (how much is hard to say). However, you should also warm the mixing water so the final dough temperature is close to what I list up in the recipe. This way, the dough gets a start at a nice warm temp, and if you keep it insulated some, it should stay rather warm all the way through bulk.
This recipe should be just fine if you’re using all bread flour and no whole wheat. Keep an eye on the hydration of the dough, though, and don’t add that held back 50g of water if the dough already feels overly wet. Whole wheat typically can absorb quite a bit more water than white flour (thanks to the extra bran/germ present), but bread flour is typically able to handle higher hydration — so it might even out but adjust as necessary!
It can happen faster, but usually takes a few days longer to ensure you’re getting consistent rise and fall each day — which is very important! Keep feeding it for a few days to ensure it’s consistent, then it’s ready to go.
I tried proofing overnight and got absolutely no rise. The fridge temp was 38 and was in there between 10pm and 8am. Ive made plenty of loaves that turn out great so not sure if the fridge was too cold. Any tips?
That’s pretty typical since a home fridge is definitely very cold, but that’s ok, your dough should still rise some while it’s cooling down to 38F. This assumes you covered your dough baskets completely so their airtight (which slows the cooling process). If you’re finding your dough is not fermented enough, let it sit out longer after shaping before you place it in the fridge. Additionally, in the morning if it looks like your dough is still not proofed sufficiently (it feels dense and not risen), give it some time on the counter before baking it — and you can then use the “poke test” to determine readiness.
Thank you! I had left it in a proving backer, but will be sure to let it proof a bit before the fridge and be sure to have it covered.
Is there any way to “save” my dough? I added the whole suggested amount of water. I had the feeling the dough could take it, but then after the first 30min of Autolyse I realized it was too wet. Can I just add some more flour later? And if yes, which one do I rather add? White or Whole Meal? Thanks 🙂
Sure, you can do that if necessary! Add either flour but I’d prefer adding white flour at that point.
I started making the Beginners Sourdough Recipe, but it turned into this. It was the most successful baking project I’ve ever done in my 58 years of dilettantish experimentation. I was amazed that it resulted in actual bread with rise, body, and flavor. How encouraging! I use a 13-inch dutch oven, so I don’t divide the dough, but bake the whole thing at once. So, I’ll have to adjust the baking time, but, even so, the result was spectacular.
I was skeptical about the minuscule amount of starter the recipe calls for, but the result was a loaf that wasn’t overpoweringly sour. It tastes like good bakery bread. That’s how they must have done it in the old days. One question is whether I can substitute rye flour for whole wheat. I have some wheat gluten. Can a few tablespoons of that offset the rye’s lack of gluten?
Fantastic, Steven! Glad to hear that. I’m not a huge fan of using vital wheat gluten (in fact I haven’t ever used it) but you can if you’d like. I’d likely just sub out some of the whole wheat for rye, starting at 10% and working up if desired. Expect that the higher rye you include, the more dense the final loaf will be as that’s the nature of rye and it’s different gas-trapping characteristics. In turn, you’ll be rewarded with added crust color and fantastic flavor. Have fun and experiment!
I plan to bake again next weekend. I can’t wait to see how the next attempt goes. I’m also using your recipe for small batch starter and suggestions for a stiffer, less active starter for the refrigerator. I take it out once a week and revive it a couple times. When it warms up, it also bubbles right up. Judging from the pancakes I make, it is good and sour. They’re light and fluffy, too. I enjoy tending the garden. This is like tending a little garden in the kitchen.
Is it possible to make this with only bread flour? Or a mix of bread flour and AP? It’s all I’m able to find at the store these days, but I’m itching to try your recipe! Is the whole wheat mostly for added flavor?
Yes, you can omit the whole wheat and go with all bread flour if you’d like. I like to add some whole wheat for flavor and nutrition, but it also helps increase the fermentation activity in the dough. If you’re looking to use all AP flour, check out my recent sourdough bread with AP flour recipe!
I’ve been baking this recipe for 2 weeks now – LOVING IT – using a mix of plain (all-purpose) flour and bread flour in place of the whole wheat flour. I was lucky enough to score 25kgs of plain flour at the start of lockdown and I’m nearly out of bread flour, so I decided to eke the bread flour out.
This recipe works really well using these flours. I’m curious to try it with 100% bread flour once I get my hands on some more!
(Btw – just saw your new recipe for plain four sourdough. Will be trying that one next!)
Wonderful site – my sister and I are so appreciative.
Can i make this with just AP flour? I dont have any whole wheat flour. Flour is hard to find now.
Also this is my first time, Can I just make one loaf instead of 2?
I am curious about the same thing. Would love to us AP flour. Bread flour and Wheat are so hard to find.
Check out my recent sourdough bread with AP flour recipe!
My attempts in baking this using primarily AP Flour showed that different Flour types are able to soak a different amounts of water… while it works to use AP exclusively you will want to tweak your ratios as the dough will most likely become overly hydrated (atleast that is what happened to me).
And yes you can make just one loaf instead of two… just use half of everything (though i am not sure if one loaf alone justifies the time and effort put into this… but to each thier own i suppose)
Check out my recent sourdough bread with AP flour recipe! That uses 100% AP flour and makes only a single loaf.
Just made this. Wow…fantastic bread. I did add 30ml extra water as I do like bread with a higher hydration but otherwise followed the recipe. Awesome! Thank you.
Did that increase the crumb patterning??
Glad to hear this, Perry! Thanks for reporting back and happy baking.
Hi Maurizio- I have made this recipe a few times and am loving it! I am wondering what you mean by this being a “strong” dough and not needing slap and folds/much kneading. What does that mean- is strength related to hydration of the dough? Why do some recipes require slap and folds, more stretch and folds, and others require little to none? Thanks! 🙂
Strength is a nebulous term but one you’ll instinctively “feel” the more your baking experience increases. This recipe has a lower hydration (which brings strength as more water means a more loose and slack dough) but it’s also made from a high percentage of high protein flour — bread flour.
How do I make the sourdough starter to begin with?
Here’s my 7 steps to making a sourdough starter from scratch!
Similar question to @davideleonelli:disqus davideleonelli – 8g of starter for 80g flour & 80g water is quite different from the ratio I usually use to feed my starter. If I know that my starter will be at peak activity in 10 hours with a different ratio (for me it’s more like 1:1:1), presumably because of temperature differences where I am compared to you, is that what you would recommend for the levain? I assume the point is just to have a ripe, very active 50/50 water/flour starter, and that the % starter you list here is just what your conditions require. Is that right, or am I missing something? Thanks for any advice!
Yes, do what works for you, your starter, and the temperatures there in your kitchen. The reason I have a low inoculation there for the levain is because it’s a lengthy duration and it’s kept quite warm. If your kitchen is cooler, use more than the 8g.
Thanks for the info! I made this recipe today and it was my best loaf yet. Question about starter now: I’ve got an all-white-flour version that I feed 1:1:1 starter:water:flour, and it takes around 12 hours to mature. It seems pretty strong to me (more than doubles in size, is very sticky), but obviously not as strong as one that only takes 10 hours to mature at 1:10:10! My loaves haven’t had *quite* the amount and size of holes in the crumb I’d want (this most recent loaf, with this recipe has been the best so far!), and I wonder if one factor might be that my starter isn’t strong enough?
All that said, I made an offshoot with 50/50 whole wheat:white flour. This one grows even faster, reaching peak in only ~6 hours. Is that normal? It also doesn’t feel as strong in the sense of it’s sticky/stretchiness at peak. I haven’t tried baking with it yet, but am curious about why the speed of growth would be so much faster for this one. Thanks for any info!
I think you forgot a 0 in the grams of starter for the levain. U
You probably mean 80g, same proportions of your other recipe?
Hey, David. No, 8g is correct. This is a longer running levain (12-14 hours) and it’s kept warm. If you used 80g it would be ready in 3-6 hours! See my reply to @ckn above.
So I finished baking today and i am, given that it was my first time on this recipe and i didn´t even have a DO, pretty happy with how it the loaves turned out. so yea thanks for your effort in writing out these detailed recipes.
That being said i still had one major issue while preparing the Dough.
my levain had a “somewhat thicker than heavy cream” consistency and throughout the whole process my dough felt … stickier and more moist than it should be( i even left out most of the water for dissolving the salt). i may very well be mistaken here but i do not believe – considering how the loaves look on your photos – that they should be as sticky as mine were after proofing to the point that i had to reshape one of the loaves because it stuck to my hands and messed up the shape pretty bad. needless to say the result after baking was not pretty at all … still tasty so i do not mind for now. the other loaf was lacking in firmness as it was not able to keep shape. it spread out and flattened quite a bit.
should i simply adjust my flour/water ratio to soak the excess moisture or can the issue be something else entirely?
Do your temperatures assume conventional heating or do they assume fan heating?
on a side note: ever since i reduced my mature starter to a smaller amount it became quite firm with very little visible activity (still works when building levain) is it supposed to be like this?
TLDR Bread tasty, Dough incredibly moist and sticky how can i try to fix this?
Glad to hear it turned out pretty well, Markus! It sounds like maybe the dough was over hydrated — I’d definitely leave out the reserved 50g of water next time and perhaps leave out more if it is still overly wet/slack during mixing.
I don’t use the convection option when baking (no fan).
Even if you’re maintaining a smaller starter you should still see some activity!