

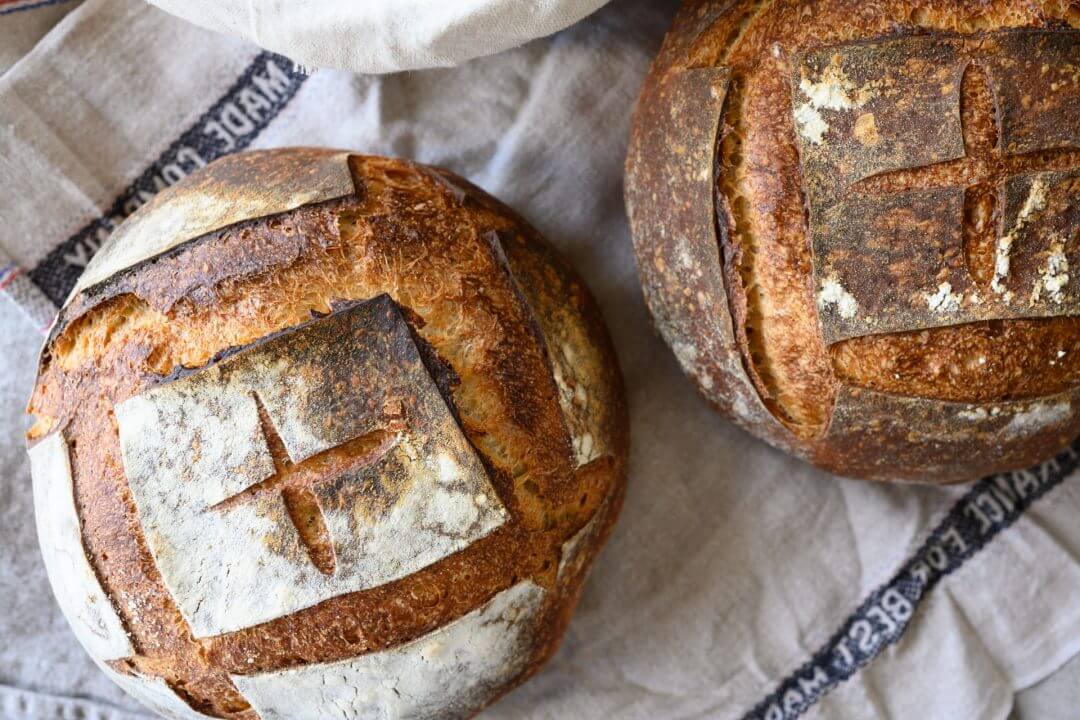
Baking a healthy and nourishing loaf of sourdough bread with your sourdough starter is gratifying, to be sure, but what if you’re not home all day to check in on the long-fermented dough? I mean, some of us do have to work, right? This simple weekday sourdough bread recipe and schedule are uncomplicated for mixing and baking a loaf of bread during the busy workweek.
This post includes pictures and videos that clearly and concisely convey the full sourdough bread-making process. But why is this recipe so easy compared to others?
Real Quick: Why is This Sourdough Bread Easy?
- It’s a no-knead sourdough bread recipe: mix everything in one bowl
- It uses only two types of flour: bread flour and whole-wheat flour
- It’s moderate hydration—no messy dough or counters
- It’s baked in a Dutch oven or combo cooker
- Timing is extremely flexible
Let’s go over the workweek schedule.
A simple weekday sourdough bread schedule
In the past, I’ve discussed a weekend baking schedule that outlines a schedule for low maintenance during the week with a bake on the weekend. The following schedule, however, allows baking during the week around a typical nine-to-five workday. It’s also quite flexible, and you always have the option to place the dough in the fridge longer to bake when you get a chance.
Read through my ultimate guide to dough proofing for more information on adjusting the proofing period for this sourdough bread.

| Time | Step |
|---|---|
| 7:00 a.m. (before work) | – Make the 10-hour levain (ready ~5:00 p.m.) – Save time later, scale-out flour & salt into bowls and cover |
| 5:00 p.m. (after work) | When levain ready, mix dough for autolyse |
| 5:30 p.m. | Finish mixing and begin bulk fermentation |
| 9:00 p.m. | Divide, pre-shape, and bench rest |
| 9:30 p.m. | Shape and place into the refrigerator to proof overnight |
| 7:00 a.m. (next day) | – Bake the next day before work – Alternatively, bake after work |
The schedule above has example times, so shift the timeline to earlier or later according to your schedule. Don’t worry if you don’t hit the times precisely as they’re written. There’s some flexibility there.
A Simple Weekday Sourdough Bread Recipe
Vitals
| Total Dough Weight | 1,800 grams |
| Pre-fermented Flour | 8.0% |
| Hydration | 76.0% |
| Yield | Two loaves |
Total Formula
The following table shows all the ingredients needed to make this bread. Each ingredient will be called out as needed in the method steps below.
My final dough temperature for this simple weekday sourdough bread was 75°F (24°C). For more information, see my post on the importance of dough temperature.
| Weight | Ingredient | Baker’s Percentage |
|---|---|---|
| 806g | High-protein white bread flour, malted (King Arthur Bread Flour) | 80.0% |
| 202g | Whole wheat flour (King Arthur Whole Wheat Flour) | 20.0% |
| 766g | Water | 76.0% |
| 19g | Fine sea salt | 1.9% |
| 8g | Ripe sourdough starter (100% hydration) | 0.8% |
Method
1. Prepare levain – 7:00 a.m., before work
A levain is simply an off-shoot of a sourdough starter. A sourdough starter is never used up completely; it’s continually fed day after day indefinitely. A levain is created with a small bit of a sourdough starter and left to mature (ferment) until ready to be mixed into a dough. Ultimately, it meets the same fate as the dough: baked in the oven.
In the morning before work, mix in a jar:
| Weight | Ingredient |
|---|---|
| 40g | Bread flour |
| 40g | Whole wheat flour |
| 81g | Water |
| 8g | Mature sourdough starter |
Loosely cover the jar; it should be ready after about 10 hours at room temperature, 72-75°F (22-24°C).
2. Autolyse with Levain – 5:00 p.m. after work
Performing an autolyse gives our dough a chance for the flour to fully hydrate and begin the gluten development process (all without kneading). I typically don’t do an autolyse with the levain included, but we’ll do that in this simple weekday sourdough bread recipe because it’s a short period.
Add all the ingredients below to a mixing bowl. Mix with wet hands until all the dry bits are incorporated. Cover and keep somewhere warm at room temperature for 20 minutes.
Note: the water in the table below is 50g less than the total water for this recipe; the water (and the salt) are held back for the next mixing step.
Dough Mix
| Weight | Ingredient |
|---|---|
| 766g | High protein bread flour, malted (King Arthur Bread Flour) |
| 161g | Whole wheat flour (King Arthur Whole Wheat Flour) |
| 635g | Water, Autolyse |
| 169g | Ripe levain (created in Step 1) |
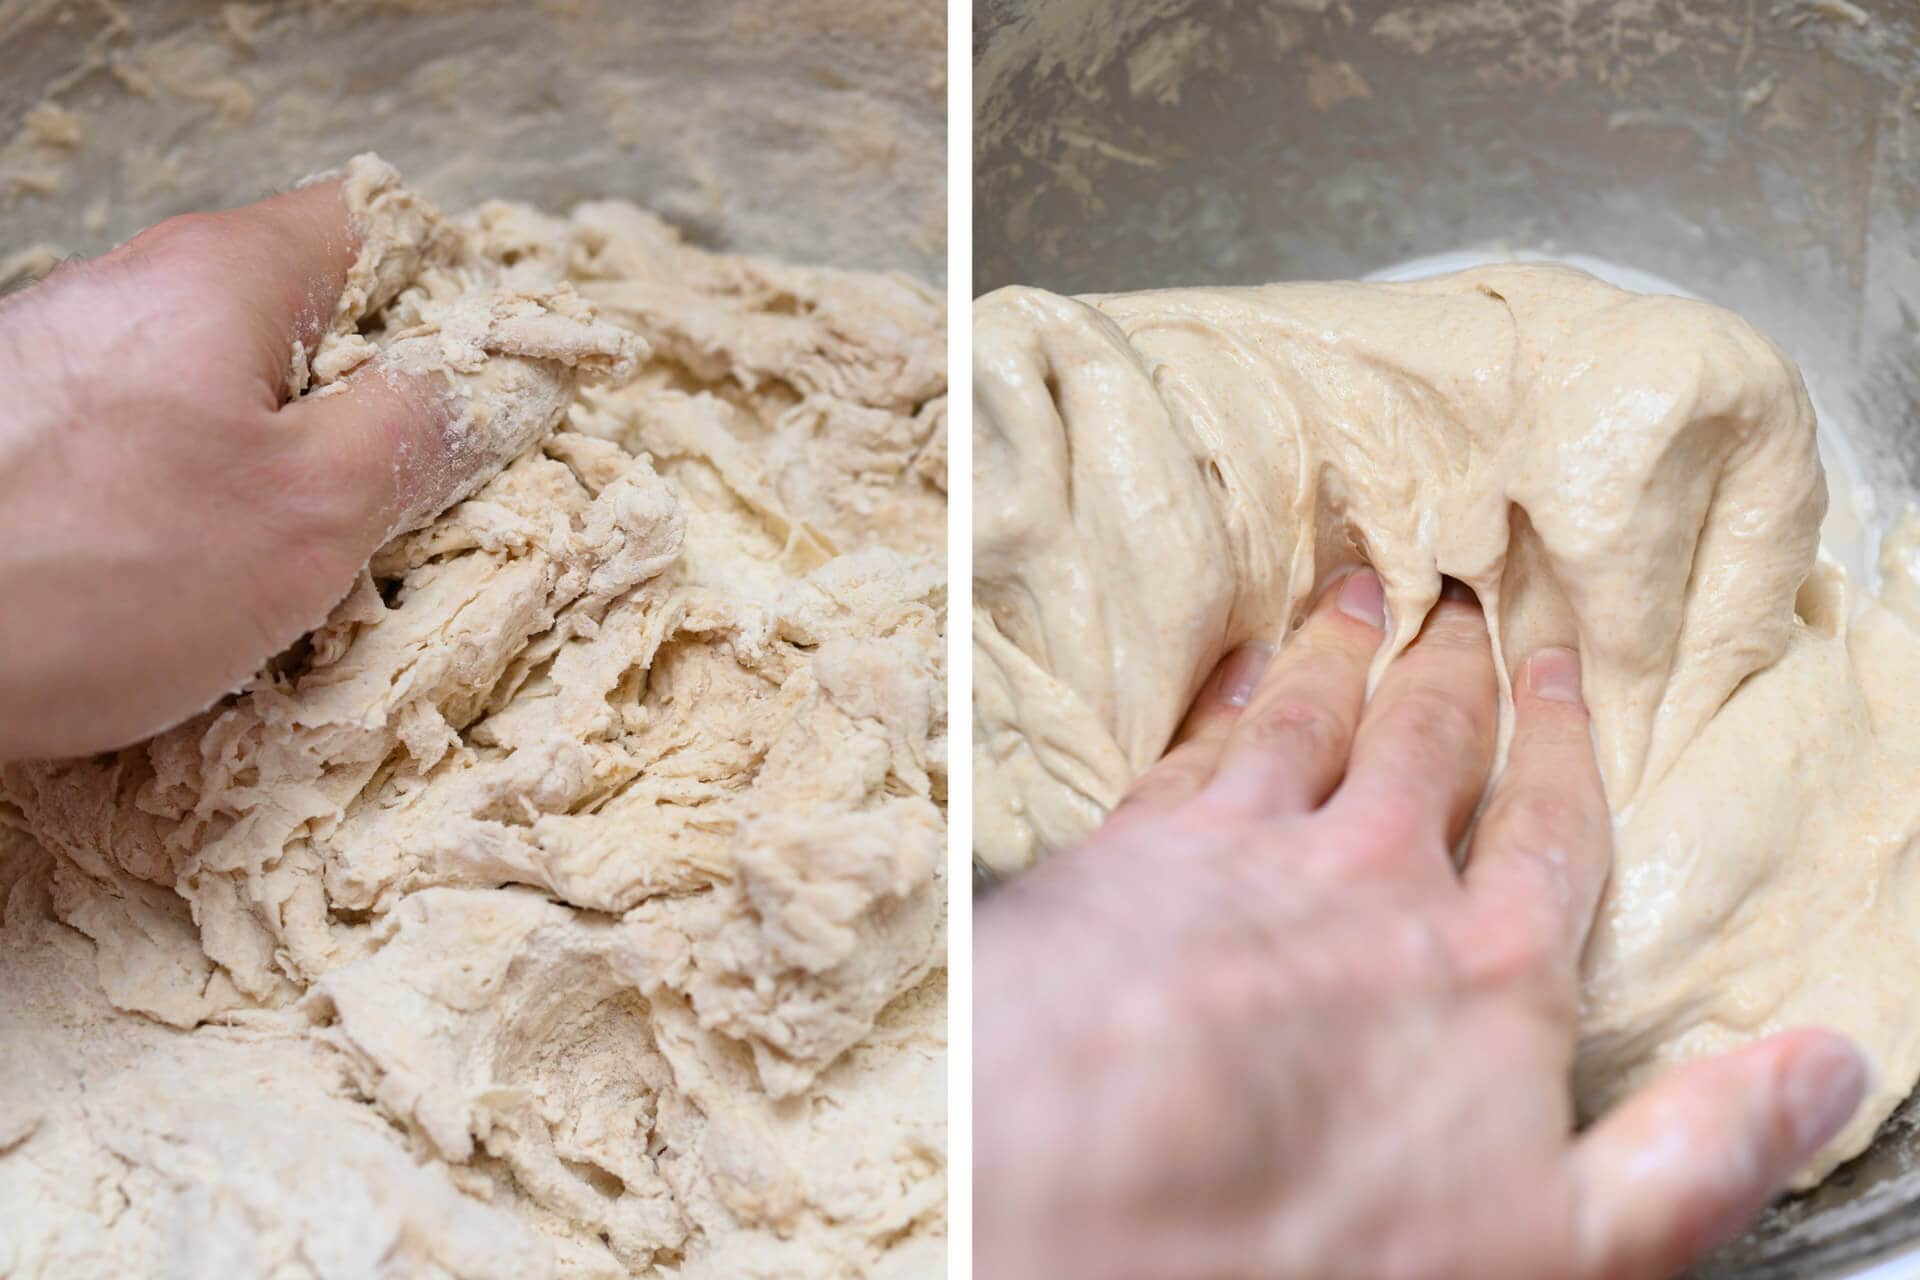
The image above shows the direct result of even a short autolyse. The left image shows the shaggy mass just before I finished incorporating everything. The right image shows how smooth and strong the dough becomes simply by resting. Let’s take this further with a little mixing.
3. Mix – 5:20 p.m.
Add the ingredients in the table below to the top of the dough: first, add the salt and then add the reserved water slowly to help dissolve the salt. Add the water a little at a time, depending on how the dough feels: it should be shaggy and loose, but not “soupy.” You can pause midway through pouring the water to incorporate it with a wet hand. If it feels like the dough can handle the rest of the water, add it all.
| Weight | Ingredient |
|---|---|
| 50g | Water, Mix (as needed) |
| 19g | Salt |
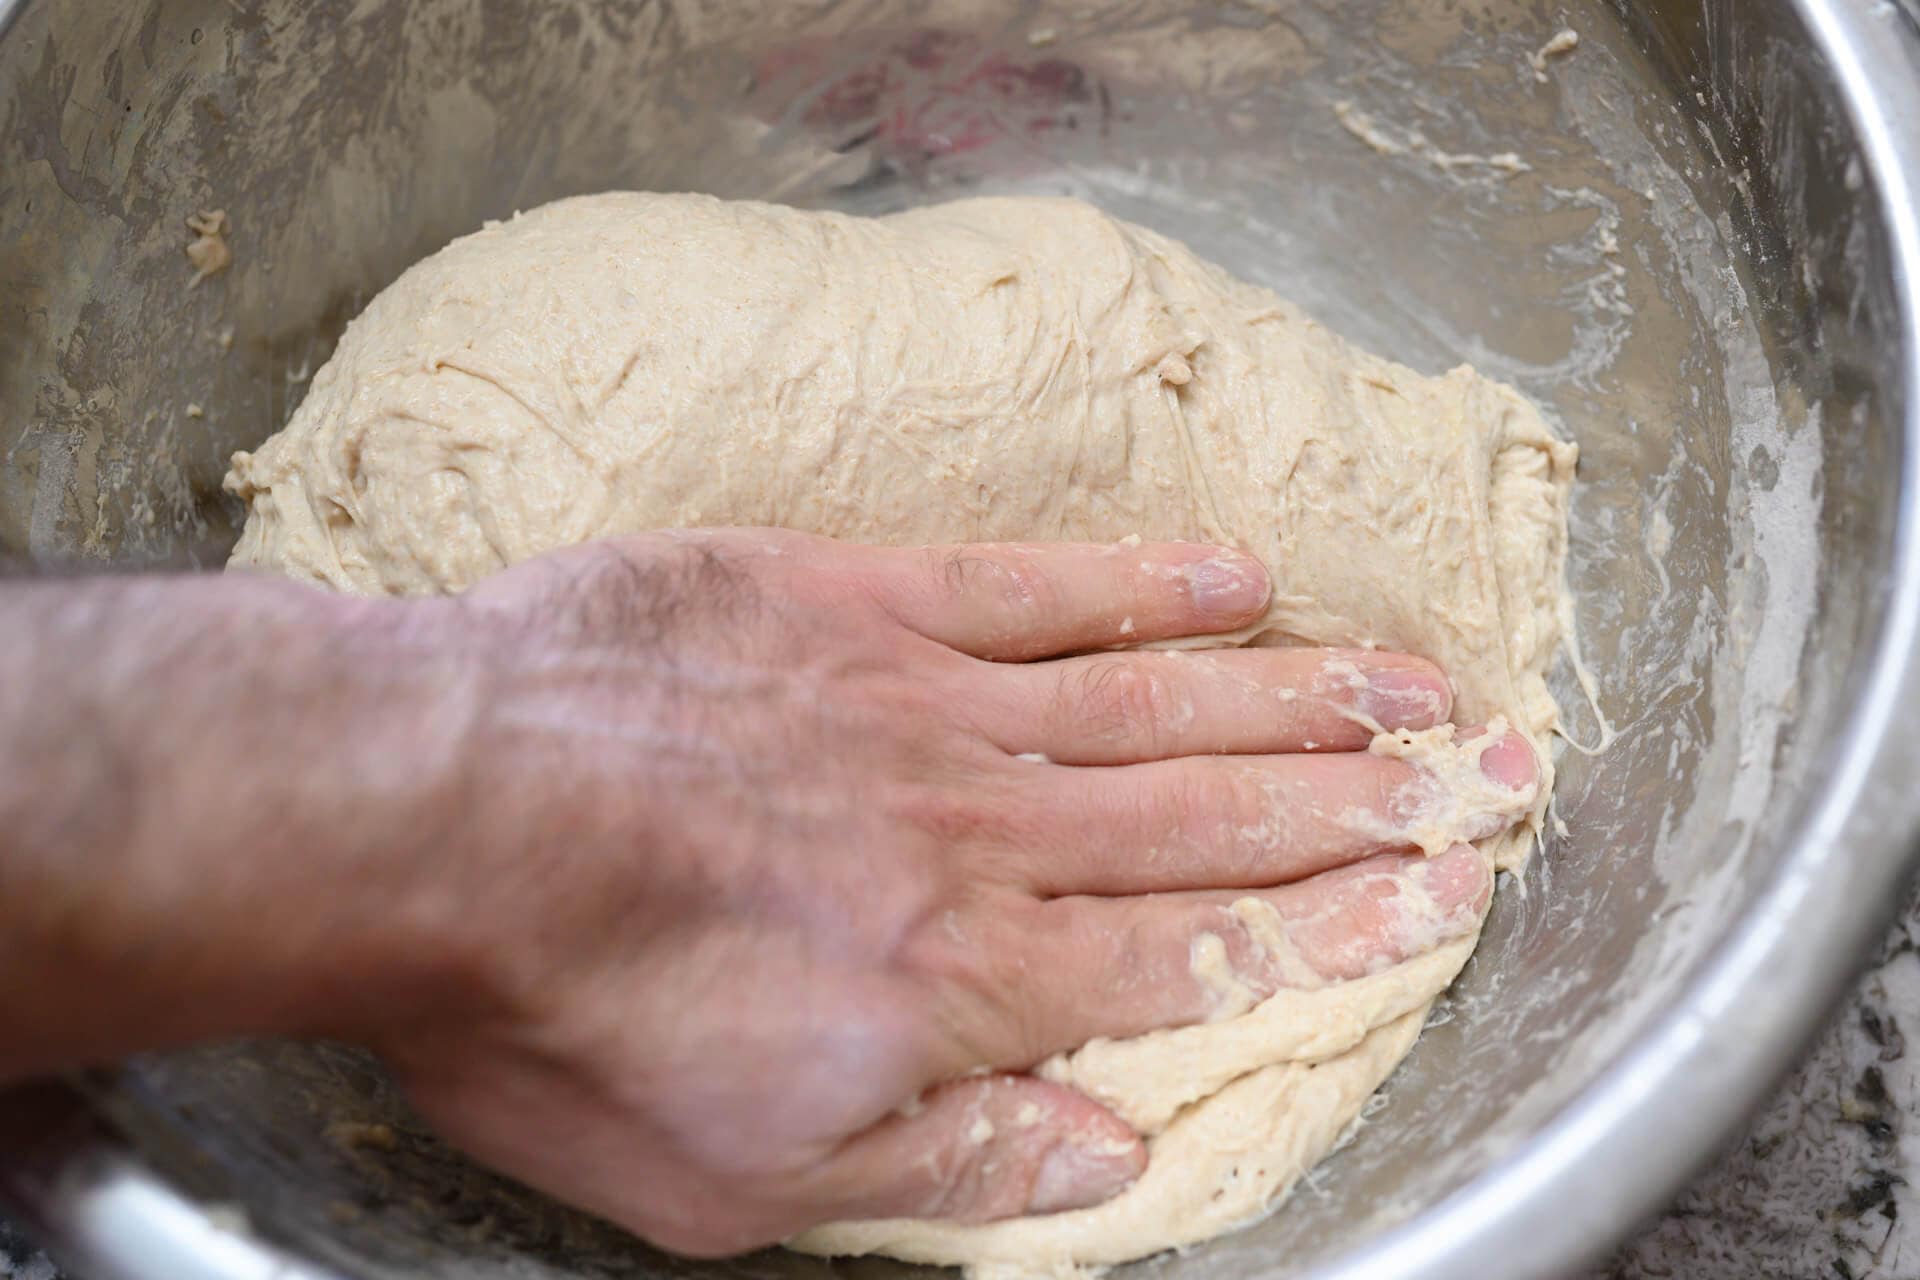
Since this dough uses a fair amount of high-protein white bread flour, it doesn’t require extensive mixing or kneading.
Using wet hands, mix everything until it comes together into a shaggy mass. This dough is rather strong and doesn’t require intensive mixing or kneading, but give it a few folds in the bowl, perhaps 5-10, until it smooths slightly (see the image, right).
Cover the bowl with reusable plastic and keep it somewhere warm in your kitchen for bulk fermentation.
3. Bulk Fermentation – 5:30 p.m. to 9:00 p.m.
Bulk fermentation, or first rise, occurs when the dough is leavened (through the production of carbon dioxide gas) and flavored (through the production of organic acids) as a result of natural fermentation. Below, you can see how much my dough rises during this 3-hour and 30-minute bulk fermentation at 75°F (24°C).
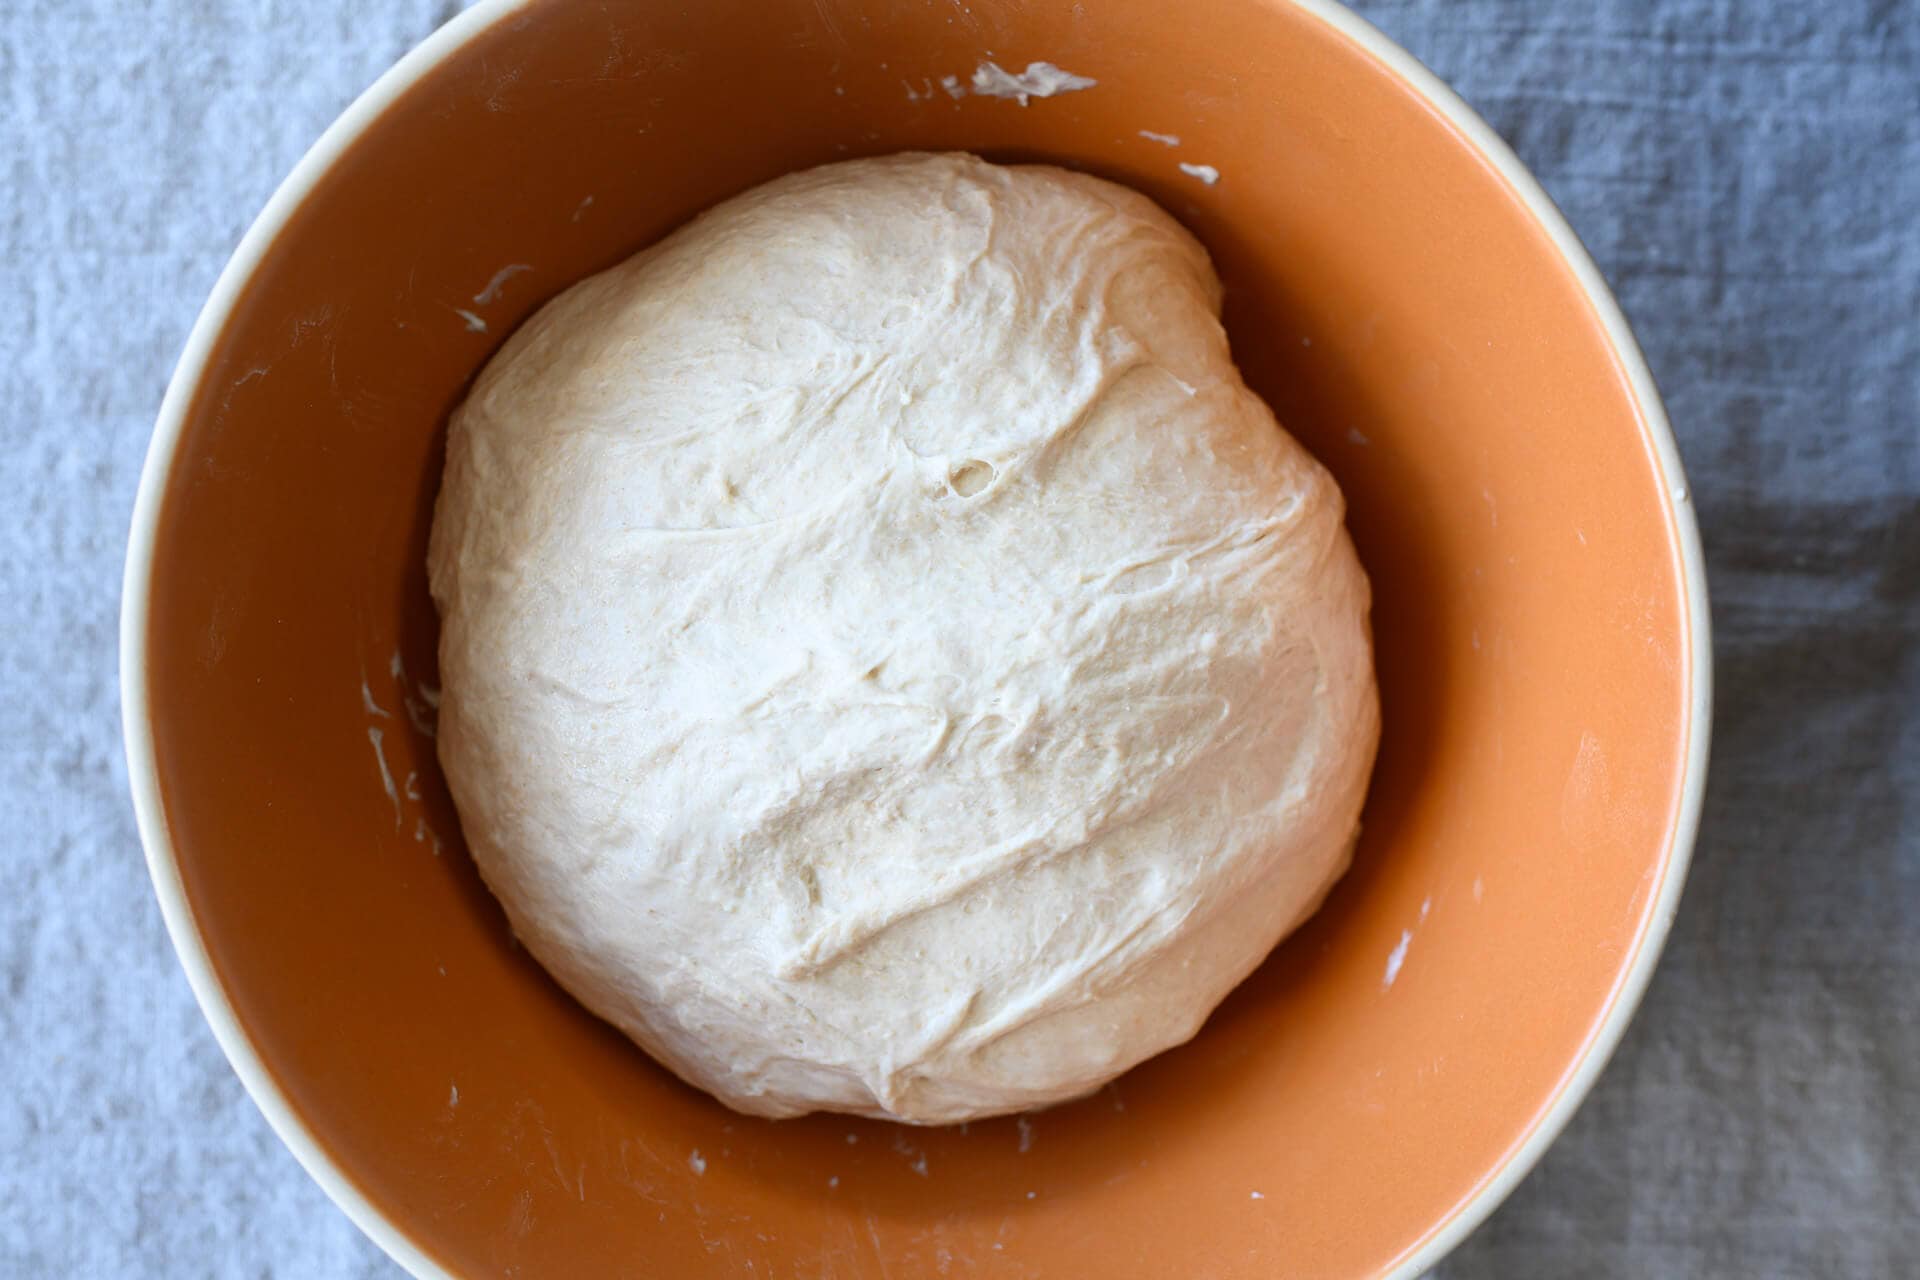
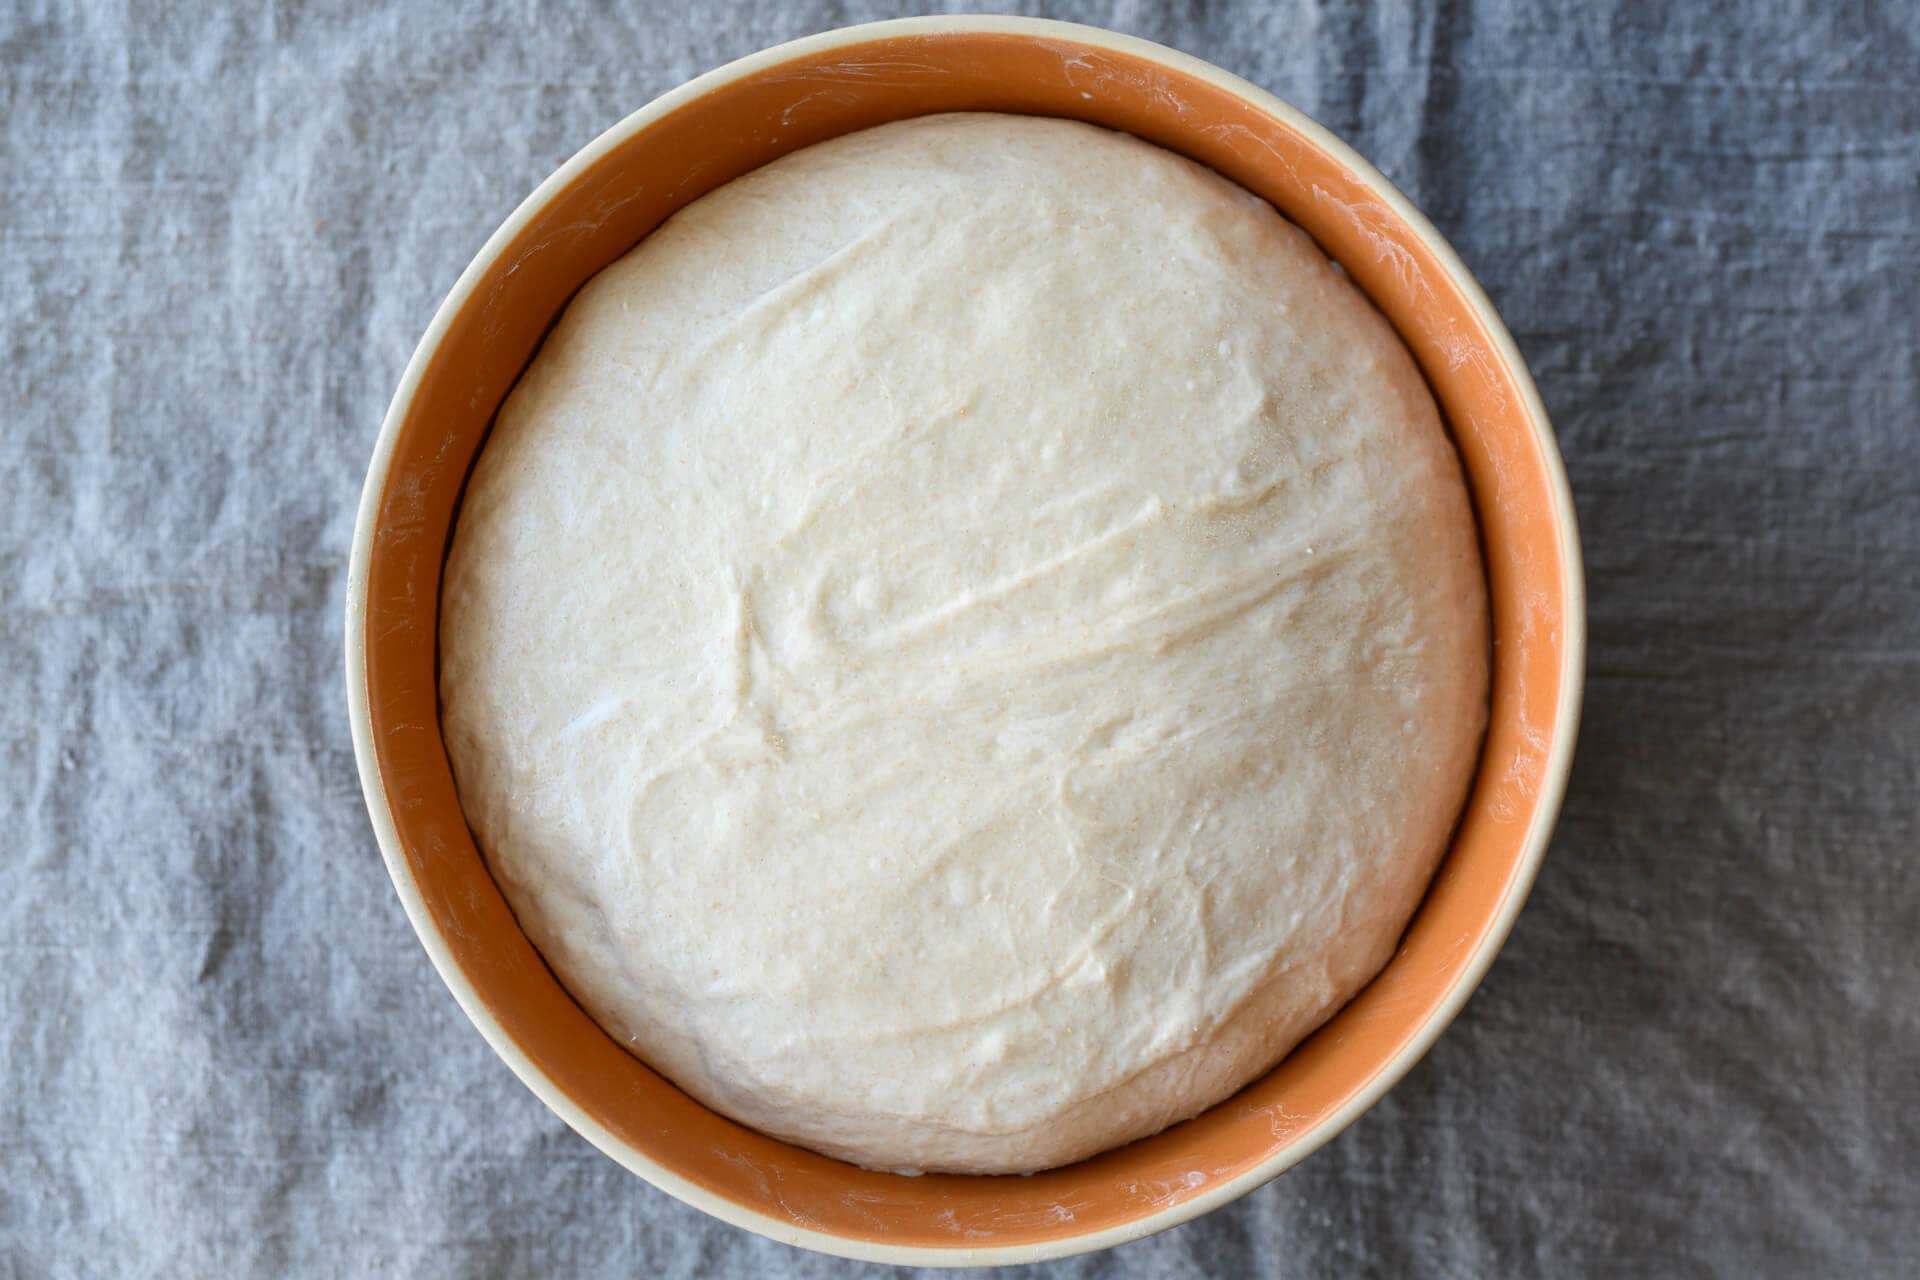
During this time, give the dough 2 sets of stretch and folds: the first set is 30 minutes after the beginning of bulk fermentation, and the second set is 30 minutes after the first. After the second set, let the dough rest, covered, until the next step.
As you can see in the video above, each set of stretches and folds is simple: With wet hands, grab one side and gently stretch it up and over to the other. Perform this fold in each direction: North, South, East, and West.
4. Divide & Preshape – 9:00 p.m.
Fill a bowl with some water and place it on your work surface. Scrape out your dough from the bulk container onto your dry counter. Divide the mass in half using a bench knife. Using a wet hand and the knife in the other, gently preshape each half into a loose round. Let the dough rest, uncovered, for 30 minutes until it’s relaxed outward.
See my guide to preshaping bread dough for a video and more instructions.
5. Shape – 9:30 p.m.
As seen in the video below, flour the top of the round with your hands and flip it over. Take the bottom edge and fold it up to about the middle. Take the left and right sides in your hands and fold the right over to about 2/3 of the left side. Repeat for the left side. Then, take the top and fold down to about the middle and gently seal. This should form a little envelope shape.
Now, flip over the entire thing and begin dragging and sealing the dough underneath itself (top-right, above). Using both hands, rotate and drag the mass toward you to create tension on the top. Repeat the dragging if necessary.
Read through my guide to shaping a boule for more instruction.
6. Proof – 9:45 p.m. to 7:00 a.m. or 6:00 p.m. (the next day)
Cover both proofing baskets entirely and put them in the fridge to proof overnight. The fridge allows us to slow fermentation to bake before or after work the next day.
7. Bake – 7:00 a.m. (pre-heat oven at 6:00 a.m.)
Preheat your oven with the rack at the bottom third to 450°F (230°C). Place your Dutch oven inside, with the lid and bottom side-by-side.
Take one basket out from the fridge and uncover it. Your dough might not have risen considerably in the fridge, but that’s fine. Cut a piece of parchment paper to fit over the basket and place a pizza peel (or large cutting board) on top. Using both hands, flip the entire stack over and remove the basket.
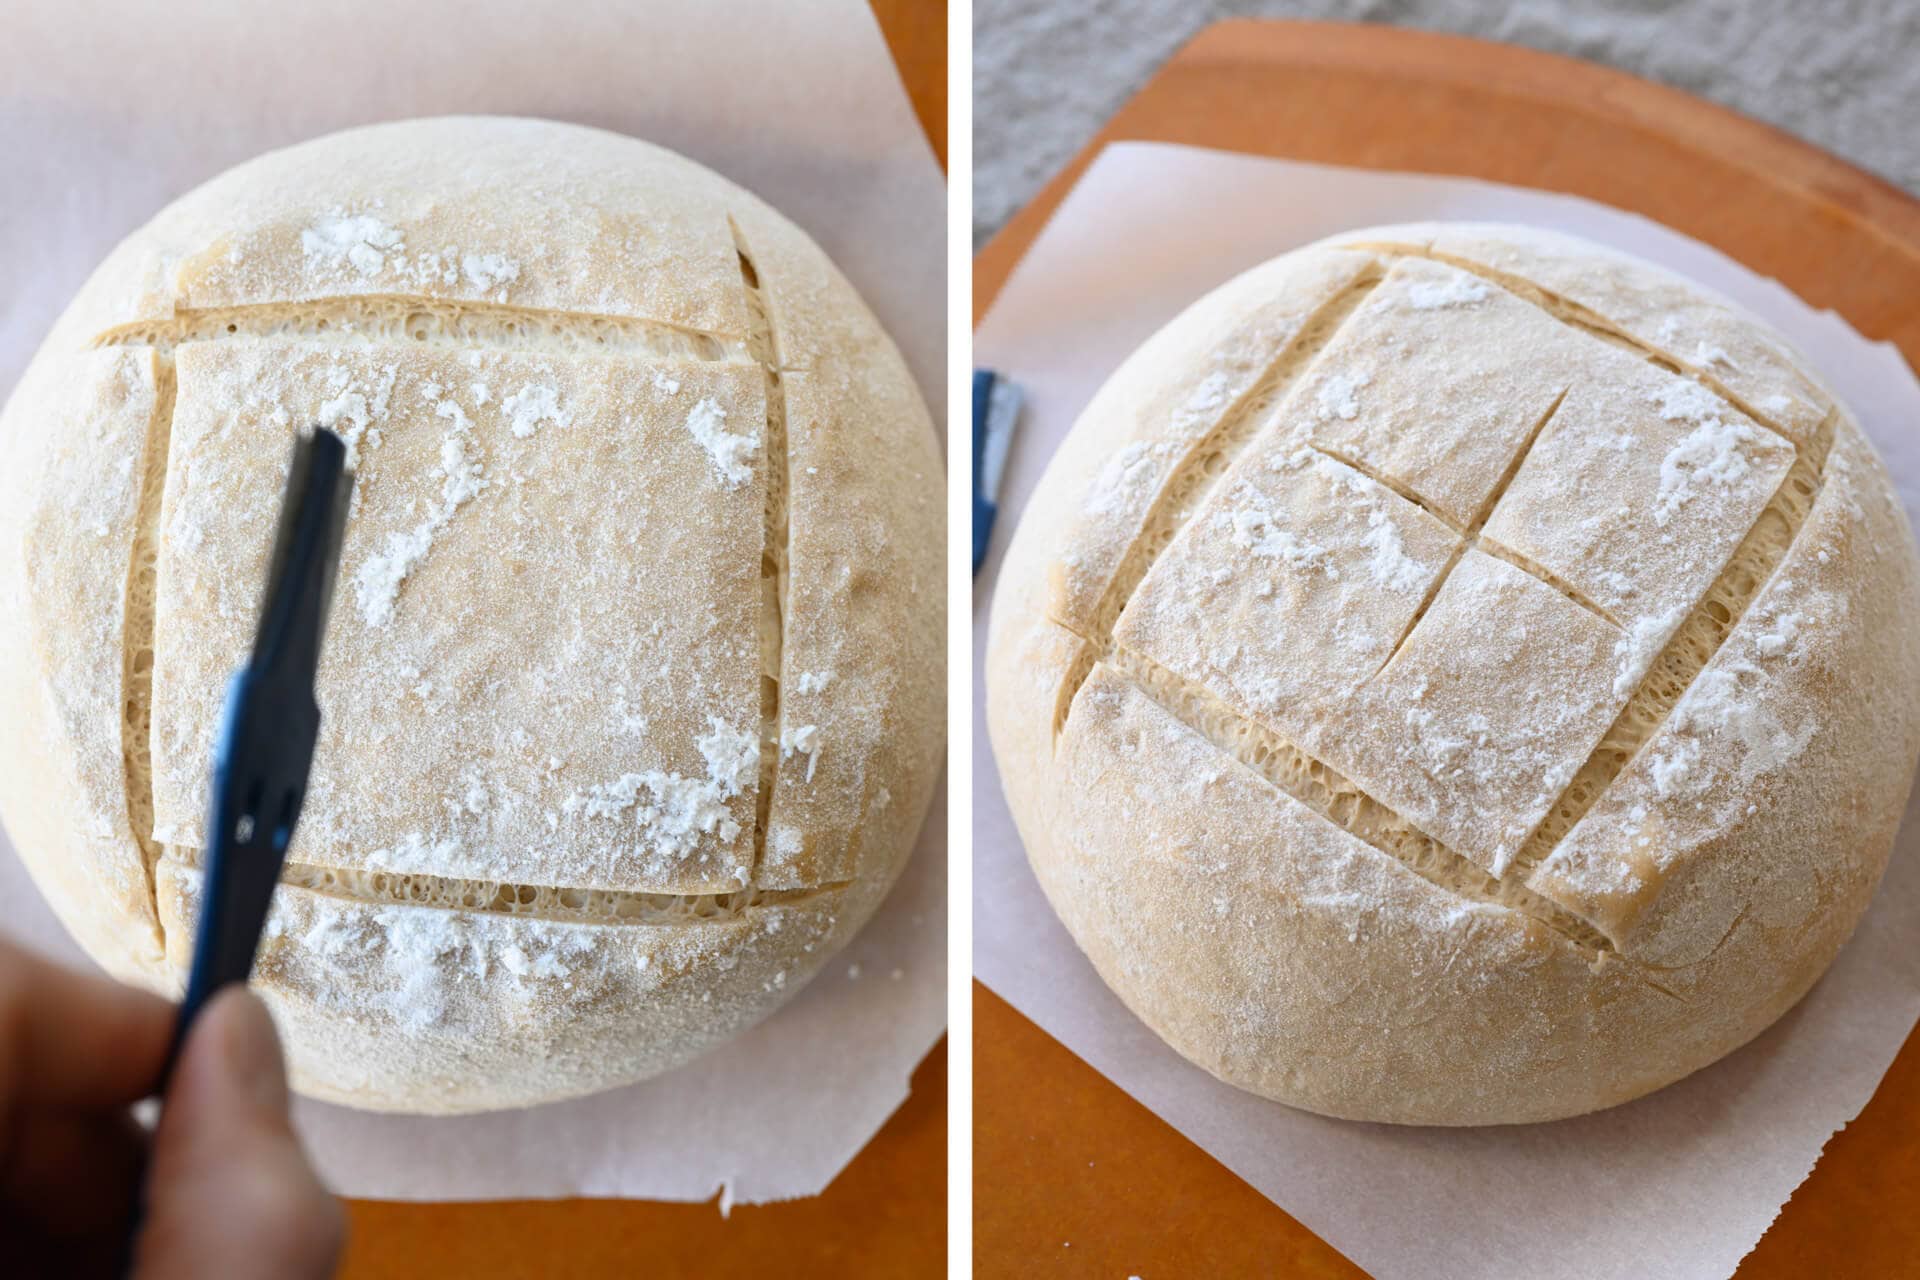
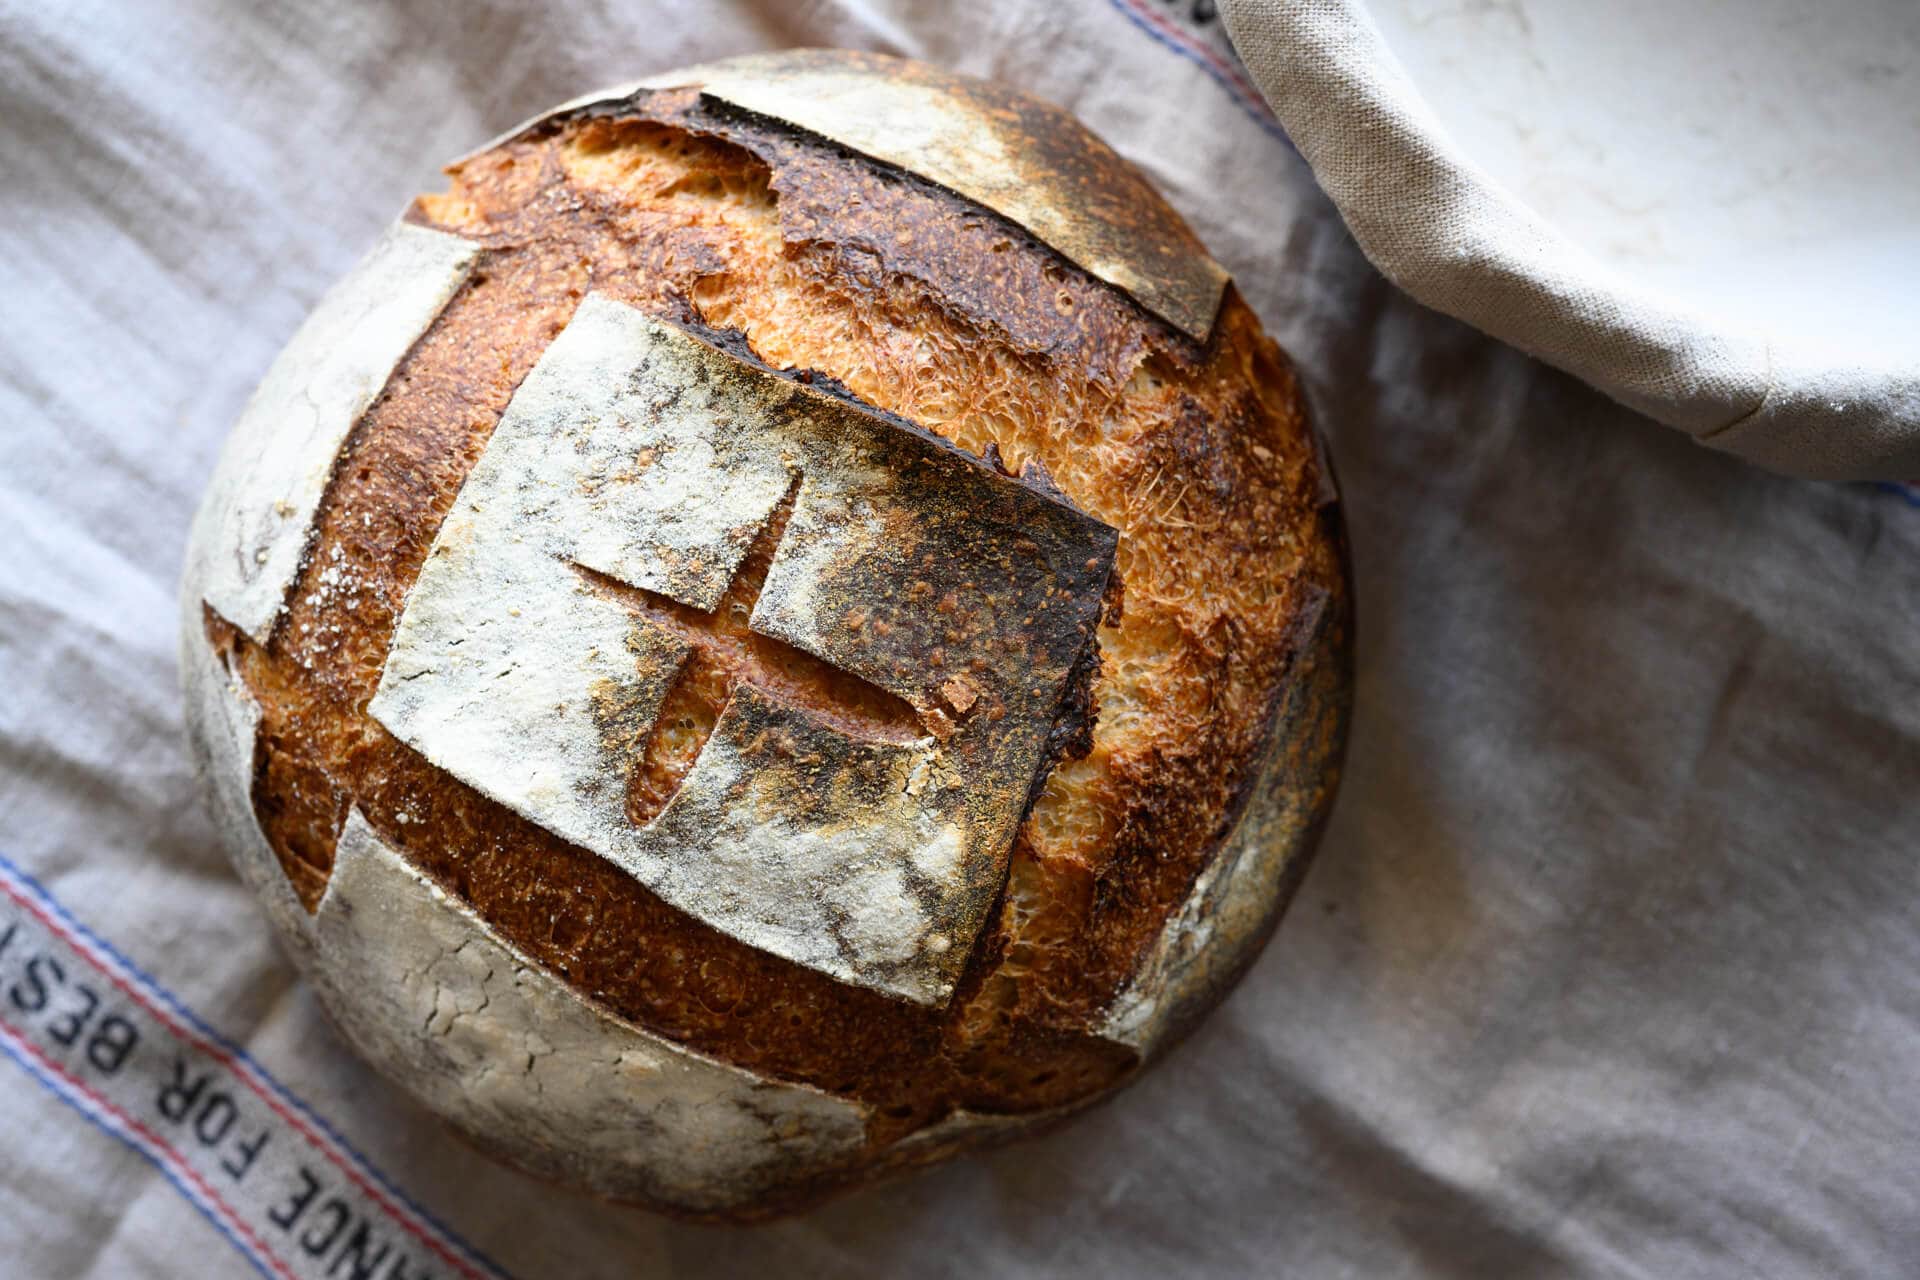
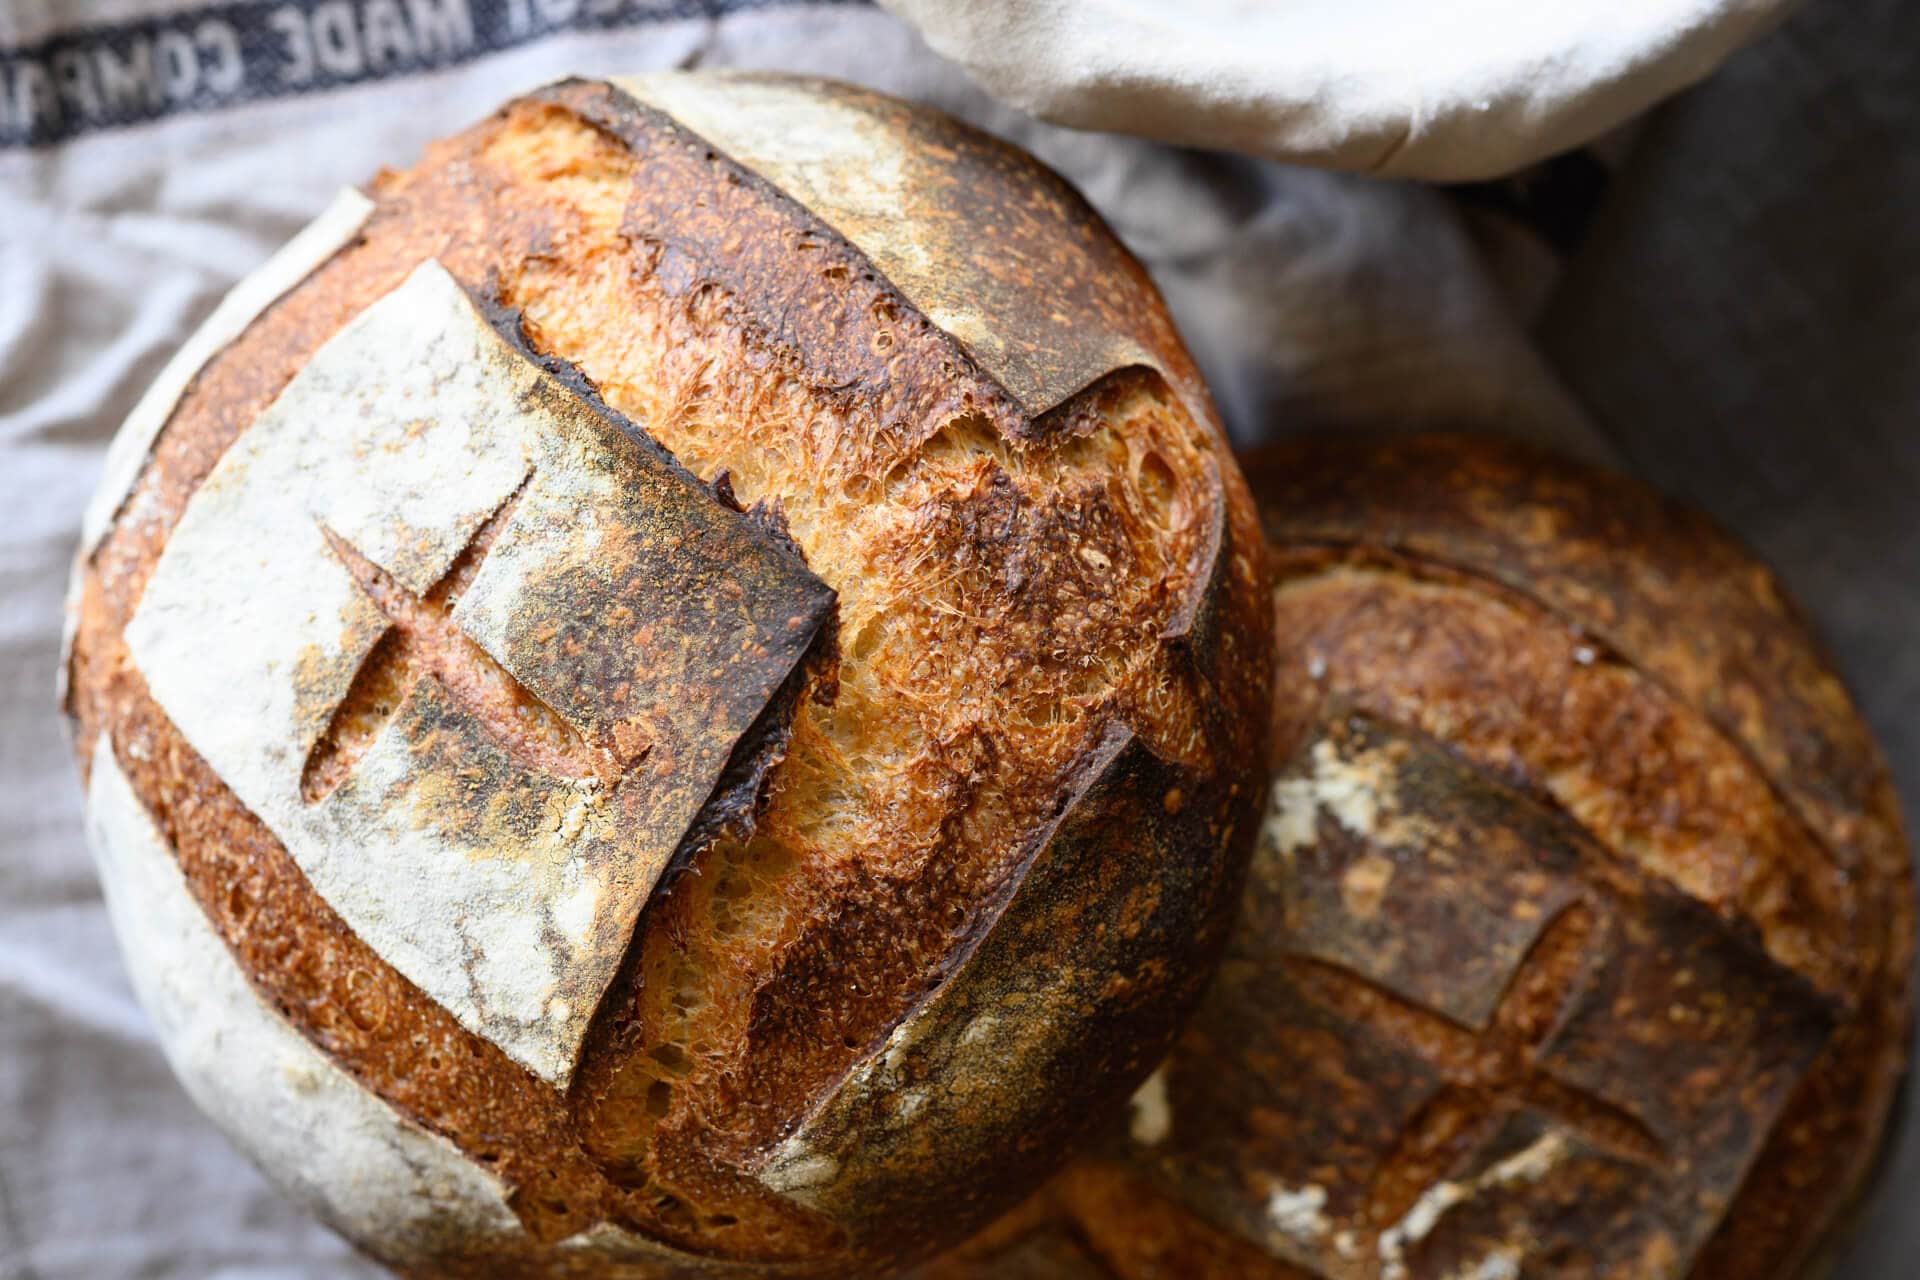
Score the dough using your favorite design. As you can see above, I love the “box top” score. Check out this video of me scoring this style (and a few others) below:
Now that your dough is scored, carefully slide it into the Dutch oven and bake for 20 minutes, covered.
After this time, remove the lid and bake for 30-35 minutes or until done. The internal temperature should be around 205-210°F (96-99°C).
(Note that If you’d like a thinner crust on this bread, increase the covered bake time to 30 minutes and reduce the second half of the bake (without steam) by 10 minutes. This increased baking time with steam can help reduce the thickness of the crust.)
Remove the loaf to a cooling rack for 2 hours before slicing. This lets the crust and crumb fully set and the flavor develop. Return the Dutch oven to the oven (without parchment) and bring it back to temp to bake the second loaf.
Follow my guide to storing sourdough bread to keep it fresh for the next week (or freeze it for longer!).
Print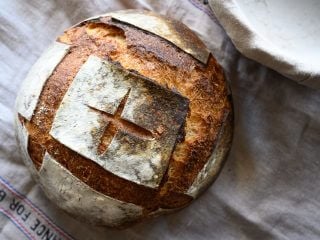
Simple Weekday Sourdough Bread
- Prep Time: 24 hours
- Cook Time: 1 hour
- Total Time: 25 hours
- Yield: 2 loaves
- Category: Bread, Sourdough
- Cuisine: American
Description
A loaf of delicious sourdough bread designed around a busy workday. The levain is prepared for this bread in the morning and left to ripen while you’re at work. When you get home, continue with the baking process. The dough can then be baked at night or the next day in the morning, or after work.
Ingredients
Levain
- 40g bread flour
- 40g whole wheat flour
- 81g water
- 8g ripe sourdough starter
Main Dough
- 766g bread flour
- 161g whole wheat flour
- 19g salt
- 685g water
- 169g ripe levain
Instructions
- Levain (7:00 a.m. before work)
In a small container, mix the Levain ingredients and keep it at a warm temperature for 10 hours. - Autolyse with levain (5:00 p.m after work)
In a medium mixing bowl, add all of the levain, 766g bread flour, 161g whole wheat flour, and 635g water (50g was reserved for mixing, later) and mix until no dry bits remain. Cover the bowl and let rest for 20 minutes. - Mix (5:20 p.m.)
To the mixing bowl holding your dough, add 19g salt and some of the reserved 50g water (or all if the dough feels like it can handle it). Mix thoroughly and strengthen the dough for about 5 minutes. Using wet hands, mix everything until it comes together into a shaggy mass. This dough is relatively strong and doesn’t require intensive kneading (like slap and fold), but give it a few folds in the bowl, perhaps 5-10, until it smooths slightly. Transfer the dough to a bulk fermentation container and cover. - Bulk Fermentation (5:30 p.m. to 9:00 p.m.)
This dough will need 2 sets of stretch and folds during bulk fermentation, the first set 30 minutes after bulk fermentation begins. Perform the second set 30 minutes after the first, and then let the dough rest the remainder of bulk fermentation. - Divide and Preshape (9:00 p.m.)
Lightly flour your work surface and scrape out your dough. Using your bench knife, divide the dough in half. Lightly shape each half into a round shape. Let the dough rest for 30 minutes, uncovered. - Shape (9:30 p.m.)
Shape the dough into a round (boule) or oval (batard), then place the dough in proofing baskets. - Proof (9:30 p.m. to 7:00 a.m. or 6:00 p.m. the next day)
Cover proofing baskets with reusable plastic and seal shut. Then, place both baskets into the refrigerator and proof overnight. - Bake (The next day, bake at 7:00 a.m. before work, or 6:00 p.m. after work)
Preheat your oven with a baking surface or combo cooker/Dutch oven inside to 450°F (230°C). Remove your dough from the fridge, score it, and transfer it to the preheated baking surface or combo cooker. Bake for 20 minutes with steam. After this time, vent the steam in the oven or remove the lid (you can keep it in the oven or remove it) and continue to bake for 30 minutes longer. When done, the internal temperature should be around 204°F (95°C). Let the loaves cool for 2 hours on a wire rack before slicing.
Notes
- This recipe is wonderful left plain, or you could top the dough with rolled oats, white sesame seeds, or flax seeds.
If you use this recipe, tag @maurizio on Instagram so I can take a look!
What’s Next?
There you have it; this simple weekday sourdough bread can be made daily and adjusted to fit your schedule. Now, there’s no reason not to bake. This recipe is also a great place to experiment: mix 125g of nuts like walnuts and pecans and dried fruit like cranberries, cherries, or raisins.
Many recipes on my site can be adapted to this simple weekday sourdough bread schedule, most notably my Beginner’s Sourdough. Both recipes use flexible doughs, and the fridge provides even more.
For a more hands-off approach, check out my easy no-knead sourdough bread recipe. It can also be adapted to bake in a single day or ferment longer for an easier schedule.
Happy baking!


903 Comments
Hi Marciano if I do not have inflatable baskets what can I use instead? And if I do not have bread flour what a substitute
Hi Maurizio – I’ve made this a couple of times and it’s turned out great. It’s my wife’s new obsession which is a good thing! One question I have is the the final loaf weight (after baking) is about 750g/ea or 1,500g total vs 900g/ea or 1,890 total. Any thoughts on why this may be the case? Thanks!
Glad to hear that, John! That’s expected. You actually want the dough weight to drop after baking, it signifies sufficient water has been baked out of the loaf! Enjoy 🙂
Can I halve the recipe OR can I bake it in a big pan as a loaf instead of two loaves in two separate pans ?
You can almost always halve the recipe with no problem—and that’s definitely the case with this one. If you bake as one large loaf, be sure to extend the bake time as necessary, the interior should be around 205F.
I just wanted to leave a comment to thank you so much for this recipe and timeline. I started baking sourdough a couple of years ago and always gave up because it was just so time consuming and I would find myself getting up at like 3am, to bake or do some part of the process. You’ve really made the process so easy, I’m baking every week now with honestly, the best results I’ve ever had. Thank you so much, I really appreciate you providing this page
So, so happy to hear that! Comments like these are why I started my site so long ago. Happy baking!
I was supposed to end the bulk fermentation around 11pm last night and move onto to preshaping but I fell asleep. When I got up at 6:30 today, the dough had risen almost over my container. Is my dough doomed or can it still move onto the next steps. One thing to note…it is quite hot where I live and inside the house must be at least 75-80 degrees because our AC cannot keep up.
Ah bummer! It’s almost surely over proofed by this point, especially at those temperatures. You can scrape the dough out into a baking pan and make focaccia!
Hi. If I want to make a small loaf with a less sour flavour, how would it impact the proofing time and bulk fermentation?
I’ve made this recipe many times, and I can say with confidence that the sourness is barely noticeable at all
Hi, I wanted to bake a small loaf, abut 1/4 of the recipe mentioned here. How should I alter the proofing time and bulk ferment?
It’s really hard to say, but it should still be close to as written as long as the dough temperatures are the same as listed. That is a very small dough, though! Instead of going that route, I’d probably choose to make the full recipe and freeze the other loaves.
I absolutely love this recipe, I’ve been making it for over a year and it honestly never disappoints. I really love olive bread, and I’m curious if it would work if I were to use this recipe as the base loaf and your Tartine recipe for when and how much olive to put in… I just trust this recipe so much, that I honestly get nervous trying more advanced recipes, especially since I want to bring the loaf to a BBQ and impress all my loved ones with this delicious loaf 🙂 I will be brave and so the Tartine recipe if its just a better idea, but curious if adding olives to this recipe will change the chemistry at all… Thanks for this amazing website, you have changed by kitchen forever!
Yes, it will! I replied to your Q in our TPL Discord server 🙂
Hi. Thanks for all this great information on the site. New to sourdough baking, and finding all of the information a little overwhelming, so I apologize if these are obvious or basic questions…
The levain calls for 8g of mature starter – is that the same as ripe starter, or does it not need to be fed since the dough will be fermenting and proofing for quite a while? If it must be ripe…doesn’t that mean the process really needs to start ~12 hours earlier (to feed the starter and allow it to ripen)? I will be keeping my starter in the refrigerator, so will need to work that into the schedule if I need to allow it to ripen.
Thank you.
No worries! You want to use your starter when it’s ripe (after it’s fermented for a number of hours) before using it to make your levain. Alternatively, in some recipes here I skip making a levain altogether and just use the ripe starter to mix into a dough directly.
Check out my new post on how I feed my sourdough starter for more info on all this!
Hi Maurizio! Thank you for this great weekday recipe, now I can bake all week:)
I have a question about the proof time. Normally you do a cold proof for about 16 hours but this recipe says you can do it much longer(if you bake after work). How come it doesn’t over proof after such an extended time?
Thank you!
Nick
You’re welcome, Nick! The cold temperatures in the refrigerator really slow fermentation so this helps extend the proof time. There is a limit, though, and eventually your dough will have less rise, more sourness, and begin to lose structure.
I just mixed my Levain with King Arthur Flour’s White Whole Wheat Flour as opposed to King Arthur Flour’s Whole Wheat Four. I’m assuming the end result might be different, but still delicious. Right? The Levain will still be just as effective, no? Thank you so much!
Yes, those are both whole grain flours so it should be just fine!
Aloha Maurizio! I’ve been keeping a starter and baking for about a year now and loving it! Thank you so much for all the tips, stories and recipes. I do have one question tbough, please. I bought some beautiful proofing baskets with cloth covers and they worked great for a few months. But here in the humid tropics of Hawaii on the rainy side they are not holding up well. Mold n some kind of termite- like bug have made them unusable for me. Do you have other recommendations. When I use ceramic bowls coated with flour of any sort, they stick. Though rice does work a tad better thsn wheat! Thank you and Mahalo nui loa!
You’re very welcome, Jill! It’s definitely important to dry the baskets and liners out thoroughly after every use. What I do is either leave the baskets directly in the sunlight (might still be too humid for you?) or place them in the oven I just baked the bread in to dry in the residual heat while the oven cools. To clarify: the oven is off and I leave the oven door open so there’s no threat of fire or burning there, just enough residual heat to dry the baskets through and through.
One thing is to be sure and avoid stacking the baskets unless they are 100% dry. Additionally, you can remove the covers to let them dry separately from the baskets.
I hope this helps!
Just to confirm, Jill, I live in Honolulu, and I had the exact same problem you described, right down to the bugs living in my proofing baskets. I’ve since been drying them in the post-baking oven as Maurizio suggests, and once they cool, I store them in sealable plastic bags. Problem solved, no more mold, no more bugs.
oh. I like the storage in sealable bags idea. mahalo Jedediah! I am definitely going to try again! Just for curiosity, did you trash the baskets with the bugs or did you dry them out in the oven to kill the bugs n reuse them? We get pretty hearty living here in the tropics, as you know, so if that worked for you, I will try it too. Otherwise. I will trash them and buy news ones.
I like my baskets, Jill, and didn’t want to trash them. So I took a scrub brush and scrubbed out all the undesirables, and I have been using them ever since. They’ve been working fine ever since.
Thank you for your encouragement to keep my baskets jedediah. I soaked them in bleach water and cleaned the liners in hot water with oxy clean. Everything came out clean and fresh with no mold or bugs. I used them to bake bread last weekend and then afterwards, cleaned them again with water and put them in the hot oven to dry where they remain….except when its in use of course. So far so good! Mahalo nui loa!
Me pu oe, Jill, glad to hear it. Happy baking! And try Maurizio’s focaccia if you haven’t yet, it’s amazing!
thank you so much for this useful info. I will buy some new baskets and try again.
I use a mixing bowls with a heavily floured teatowel inside. Have had great results with round loaves
I just finished baking this a couple hours ago and it came out so great! The laid out schedule of this is perfect for helping me learn as well as making it easy to fit around my work schedule. I’m a professional baker and don’t have a lot of energy to do more baking when I get home but this was pretty minimal effort for a big, tasty reward! I also loved that I was able to use my King Arthur Flour since that’s what I currently have on hand. Thank you for such a helpful guide!
Glad to hear that, Becca! It’s a long timeline, but most of the time is letting the dough do its thing—I think it’s pretty darn easy as well! Enjoy 🙂
Hi there! Thank you for your easy-to-follow
recipe with suggested times! I’ve been baking sourdough for the past year straight from my starter (vs levain) – levain timing always seems so tricky to me, which is why I appreciate the schedule you include. I followed it all but I unfortunately I didn’t see much rise to my loaf – any suggestions on how to correct this? Thank you
You’re welcome, Therese! It sounds like perhaps your dough was slightly underproofed. There are a few indicators your dough could be under: explosive rise in the oven, dense spots in the interior with potentially scattered large holes, and a gummy texture to the interior. Finally, it’s possible the bottom of the loaf might be slightly bowed upward (like the letter “U” — the top will kind of dome). Make sure to build your levain from a starter that’s strong and mature (meaning it’s risen to it’s peak height before you take some to use). From there, bulk fermentation is very important! Make sure your bulk fermentation goes sufficiently far, you want the dough to look smooth, it should have risen considerably, and have bubbles here and there — it should look alive. If you tug on the dough a bit it should offer resistance to your tugging, it’ll feel stronger. Give the dough the time it needs in bulk fermentation! If you have to give it another 30m or hour to see these signs, do so. It’s important for this step to go sufficiently far for the dough to have enough fermentation activity before its proof.
Thank you for the quick reply Maurizio! Yep, I think it was a little underproofed given its dense interior as you described. I thought I was going to be okay because the levain looked bubbly and active, and the dough had air bubbles/pockets after bulk fermentation. I’ll give your tips a try next time. I haven’t been too successful with cold proofing in the past (usually do this on the counter over night, but then sometimes end up overproofing). However, maybe it’s always been a case of not being patient enough with bulk fermentation. More trial and error to come…
Hi Maurizio,
Great website, can a “Stiff Leaven” be used for this recipe ?
Yes, it can!
Hi! I’m curious if the cooking times need to be adapted to better suit baking at sea level if the recipe is for high altitude?
Hey, Bri. It should work well for you at sea level, just keep an eye on the dough during baking, it might require less time.
Hi Maurizio! I am curious if you’ve ever baked using the Emile Henry bread and potato pot and if you would adjust the baking time if using that. Thank you!
Hey, Yael. I’ve not personally used it, but many bakers have commented it’s worked well for them! Sorry, I don’t know if they adjusted the bake time/temp with it, but do be sure it’s ok to preheat it empty, some ceramic pots advise against it.
A question about when a loaf is ready. At 204 degrees, the thermometer probe comes out with wet crumb. The first loaf made to temperature, didn’t turn out, although it could’ve been expired flour?? Second time with new flour the wet crumb was still there at 204 degrees so I baked it until about 210. Better loaf, but not ideal and it hadn’t risen much. Then I made the cranberry walnut loaf, again baking to 210. Crust and outer fruit and nuts were burned, but the loaf was good. So, should I go ahead and trust in temperature or also look at crumbs? Thanks so much!!!
That final temp really is a guideline and not a hard and fast rule. Typically, I like to say over 206F or so, I need to update this post. But at high altitude you may not even get up to that temp and the loaf will be baked through, so it takes a little experimentation there. In the end, you want a well-colored crust that cracks when you gently squeeze on it, the bottom should be well-colored as well. The loaf should feel light in your hand, and internal temp around 206F or higher. Also, be sure to let the loaf rest a couple hours before cutting, if you cut too early the interior will be wet/gummy/damp!
Success at last!!! Thank you Maurizio for this recipe, I made a starter then levian using your guides and the weekday loaf turned out amazing.
One minor mistake I made was placing the rounds seam side down in the proofing baskets, resulting I think, in tearing when I was scoring the loaves, would you agree?
Lastly is there a temperature range you recommend for the water used in the mixing stage?
Right on, so glad to hear that! Yes, that can happen if it’s proofed in that way, the dough will expand upward and create a lot of pressure on the taut skin formed during shaping. No worries though! The water in mixing needs to be whatever is necessary for the dough to reach the desired dough temp. In the winter, it might be warm water, in the summer, it might be cool.
Hi Maurizio! I tried this recipe with quite good results using just regular bread flour. I was wondering if it could come out even better though. You use malted flour, looks like it’s not available in my country. Is there a a way to substitute malted flour that could give similar taste/texture? Thanks!
Great, Magdalena! It’s likely your ‘bread’ flour has malt in it (check the ingredients list!).
Thanks so much for all your wisdom and advice! Would you mind helping with the timeline of keeping the starter going? 7:00am build levain, do you then feed the starter too? Or would this be done in the evening after the dough goes into the fridge? Thanks again x Meg
Hey, Meg! Yes, use your ripe starter at 7am to make a levain and refresh (feed) the starter at the same time. At the end of that, you’ll have your starter fed and fermenting in its jar and a new jar with a new levain.
Hi! Thank you so much for your recipe. It fit in perfectly with my school schedule. the crumb and crust are super great. Do you have any suggestions for making the sour flavor more pronounced? Would adding more starter to the levain help? Or what would you suggest? It’s a great flavor, I just really enjoy the sour flavor :).
Glad to hear that, Ryan! To add more sourness you could try working in more whole wheat flour into this recipe. Additionally, you could make the levain with 75% whole wheat, or even 100%, and reduce the hydration of that levain down to 50% or so. Also, you could do a longer proof in the fridge, which I find brings more sourness.
My first win! After reading over your site for many months I decided to make the leap into sourdough baking at 66. After the mixed dough recipe and a somewhat failed spelt loaf I think this recipe is my best effort. I am determined to make that spelt recipe my own because the taste is wonderful, thankfully, not at all like whole wheat. It made a nice loaf but it was too gummy.
Back to this Weekday Sourdough: I began 3 weeks ago with a starter from KAF and after developing it I now have a 100% spelt in the fridge as well as the small starter recipe.
The color of the exposed dome is wonderful but uneven (lighter) down the sides. I used a pot rather than a dutch oven but preheated an hour and added steam with your washcloth method. The crust is slightly chewy. The crumb is cream colored with a little spring in the chew. It has a slight stretchiness to it and pulls apart cleanly. It smells almost floral like honey. Has some nice holes no bigger than dime size and doesn’t appear over/under worked althoughI’m to inexperienced to know It was not dense and not gummy. I gave it another 5 minutes after it reached 204F. Had to turn it on its end to cut it to avoid squishing it. I could use a new knife.
I used about 25g water in the final mix and followed the recipe. I ordered some tools off your site which will make things easier.
I’m very satisfied with these loaves and enjoyed a nice fat slice with o/o and balsamic this morning. I’m so proud of it and want to thank you for the detail you’ve put into this site. What a gift!
Ah that’s so wonderful to hear! You should be proud of your loaf, it’s an accomplishment! A lot goes into baking that first one, and trust me, it gets easier from here on out 🙂 Happy to help—here’s to many more!
Hi, I’m wondering if anyone has had a chance to compare results from steam vs Dutch oven, I have a Neff full steam oven and have tried using 100% steam for first 20 mins then turning off steam for remainder, also using a big cast iron casserole dish as Dutch oven with a small splash of water and get decent but variable bread from both, but each of my batches is too inconsistent to compare accurately.. wonder if anyone has any advice on use of steam function in domestic ovens?
Thanks for great recipes and resources, was able to get great bread even first time from the descriptions and tips.
You’re welcome, Brendan! I find I get a thinner crust when I don’t use a Dutch oven, but it all depends on the size of your DO (smaller means thicker crust, I’ve found).
Hi there! At the advice of a friend, trying this recipe for the first time today. In the past I’ve used straight, at-peak starter in my breads (vs. levain) and was surprised by how little starter this takes. Will the bread still have that sourdough tang? My old recipe calls for 100 g starter to 500 g flour and 300 g water, so this is a lot different! Thanks!
6 hours into my levain and its doing nothing at all! I checked the temp and the spot where I have it resting is 73 degrees. Any advice?
Did you use your starter when ripe? You should see some activity!
It wasn’t at peak when I made the levain – does that make a difference?
It does! Not so much the “peak” in terms of height, but a general ripeness to it—you want to use your starter when it’s bubbly, well-risen, and very active. This is usually after it’s fermented for a long while and you’d normally give it a refreshment.Check out my guide to maintaining a sourdough starter for tips on when to spot when it’s ready for use 🙂
Thank you! The levain had some decent activity to it after the 10 hours so moved ahead. The dough didn’t rise much during the bulk ferment though. Any thoughts as to what might have gone awry?
Perhaps it was cooler in the kitchen or you used your starter/levain just a bit too early. Make sure it’s nice and ripe!
Maurizio, thanks so much for all these amazing articles and recipies. I am new to bread baking, obsessed with trying to achieve those yellowish super sour french style loafs. i ve read all your articles on how to increase the sour-ness so now trying to incorporate all these.. Is there a flour that would be best to use? Some greek recipies mention yellow flour, is this type 00 flour? or semolina flour? what is the best flour to achieve this elastic yellowish super sour dough? thanks so much and thanks loads for this amazing site 🙂
You’re very welcome! I’m not sure what yellow flour they’re referring to. In my experience, durum flour and khorasan flour will both impart a very distinct flour, perhaps it’s one of those they’re referring to. For sourness, usually an increase in whole grains goes a long way, as well as using your starter/levain when they’re very ripe. A cold overnight proof also helps. I’m working on a post on all these tips, too!
Hope this helps 🙂
Hm..it must be durum then. Thanks Maurizio, I have left my levain to ripe for 48hrs (it is cold in london ;)). Can’t wait for your post, please don’t let us wait too long 🙂
Any adjustments using fresh milled hard Red wheat thank you I have hard white too but would like to use up some of my red if it will workout thanks in advance
No adjustments, that’ll work just as well, Robin!
Hi! I’ve made this recipe now about 20 times. It’s fantastic. Tweaked a few things here and there, but what a foolproof recipe. Love it. Have shared with a few others. Thank you so much for sharing it here with all the guidelines etc…
That’s just awesome to hear, Leila! Thanks for the comments and here’s to another 20 🙂
Hi Maurizio, I’m wondering if I can make this with only bread flour – King Arthurs unbleached – and if I do that, is there a substantial change in the water that I need to make? And if I use more starter and reduce the flour and water amounts equally for my levin will it need less time to develop? Thanks so much!
Yes, certainly. You’ll likely need to add water during mixing. Just add a bit here and there until the dough feels “right,” my guess would be around 25g more or so but it really depends on the dough that day!
Hey! I’m having some issues in the leavin stage. I made my leaving at 7am and at 5pm (when i should have started the next stage) the starter was very inactive. I performed the float test and it sank right away. I check again an hour later, and another hour later to find the same results. Perhaps this ones a bust? Or does a cold climate reallyyy slow down the process (-20 most days). Thanks!
What is the temperature in your kitchen? The colder it is the longer it will take to mature. A 5 degree temperature difference can add/subtract hours from my starter ripening.
As BK was suggesting, that cold temperature in your kitchen is certainly slowing things down. Warm the mixing water to raise the temp of your levain!
Hey, i unfortunately don’t have a dutch oven, so i used a pizza stone, but the dough spread out very much almost into foccacia hight.. is this not a good method of baking instead of a dutch oven?
If you don’t have a Dutch oven you can bake on a sheet tray. You will need to add steam to your oven or else the crust will set up too quickly and you will not get enough spring.
Preheat the oven with a secondary sheet tray or oven safe baking dish. And as you add your dough to the oven add 1ish cups of water to the preheated tray. And quickly close the door. (Do not open the oven door again.) This will create a similar effect as the Dutch oven.
That will work just fine (see my guide to baking on a pizza stone/baking steel). It sounds like your dough was likely under strengthened or over hydrated!
I don’t have a dutch oven (newbie) so can I make this recipe to make bread rolls instead of a large loaf and how long should I cook them for and what temperature C?
You could do that! I usually bake rolls at 425F for 30 minutes or so with steam or without steam and with an egg wash.
Hi Maurizio .What would be the 10 hr starter and what ratios?
You are referring to the Levain. It’s listed in the second table.
HI- Just baked my first 2 loaves of sourdough ever using this recipe. My timing was different as I ran out of time last evening. So it was all the same up to the bulk fermentation. My house is cold so I had it in a 77 degree oven (oven off) for 3 hours. I did the 2 stretch and folds as directed during that time. Then, I put it covered with plastic wrap into the refrig. overnight. (9:30pm to 7am). I took it out, did the pre-shape, rest, shape and proofed for 3 hours 10 min (I was late getting back from errands). My oven is large enough to hold my 2 covered Dutch ovens so I backed them both at once. I think they turned out well. I have posted photos on insta.
IMHO Great crust, very tender inside, It was 207 degrees maybe could have pushed it to 210?
Oh, the other mistake was that I did not weigh the first water addition (I didn’t have a large enough container that I could weigh all at once so I was adding it directly to the flour and starter in increments) so I estimated the weight based on the weight of the second increment. It was pretty wet compared to other sourdough mix my wife has made with other recipes. Ah well, live and learn.
Each and every bake is a learning experience! And always ends up edible, no biggie 🙂.
207°F would likely be just fine for the internal temp.
hi, very excited to try this recipe! if i want to cut it in half, does that affect rising times, or can i stick with the same schedule? thanks!
Same schedule! Check out my guide to baker’s percentages for more on how to adjust quantities. Happy baking, Julie!