


I’ve baked this loaf, or some variant of it, so many times I’ve lost count. This bread was born when I first got my hands dirty with flour and water. Its parent—if you could call it that—was originally Chad Robertson’s Tartine loaf with his liquid levain, brought to life, not with intensive kneading, but rather a series of folds during bulk fermentation.
My best sourdough recipe has grown since then. It has developed a personality of its own as I’ve expanded my baking repertoire and investigated the many facets of baking naturally leavened sourdough. It’s taken on and lost traits from many great bakers out there, borrowing from their inspiration and giving me a direction to raise this bread into something of my own. This bread is one that doesn’t entirely taste like anything else I’ve had, and yet, still employs many of the same processes and ingredients.
That’s one of the greatest things about bread: it can taste and look dramatically different just by changing the two hands that create it. Calling this post “my best sourdough recipe” is a lofty claim, but honestly, I do believe this is the best bread I’ve made thus far.
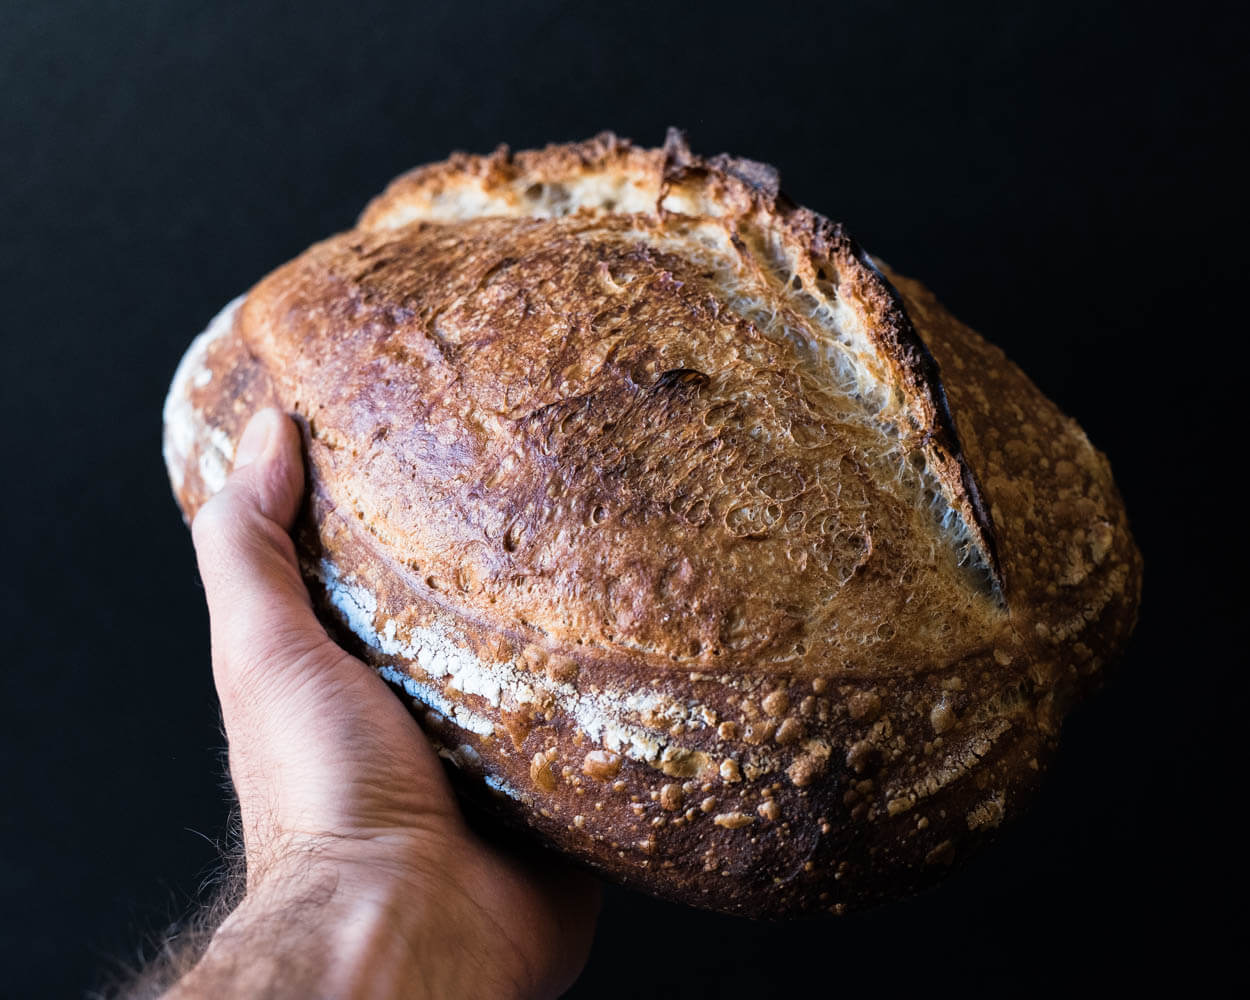
I sometimes revisit a discussion I had with a few readers of this site and their comments: “bread is just bread, it’s something to be eaten and is something life-giving, isn’t that enough?” I agree, but when something becomes a passion for you it’s important to set lofty goals and get excited when breakthroughs are made. Isn’t that the definition of a craft and the relentless honing required?
I’ve taken my best sourdough recipe from its most nascent form to its current stage and can trace through the years each change to its formula or process — and I’m sure I’ll be changing things well into the future as it continues to evolve — a work-in-progress.
Yes it’s excessive in some way, but there’s an excessiveness to ambition as well.
John Mayer
Maybe the actual recipe for this bread isn’t the most important part, but rather, the lessons and insights learned along the way as I continually hone my baking proficiency. I’m not claiming this recipe will yield the perfect loaf every single time, but I dare say it comes the closest for me—and that’s exciting.
This bread is the bread that I want to make the most often, the one my family asks for the most often, and the one I share most often. I have a special place for whole wheat bread, and taste-wise, it might make me want to call that my favorite one day, but the versatility of this bread is pretty hard to beat. In fact, I bake this so often that my freezer has an entire shelf lined with pre-sliced loaves wrapped and in bags labeled pane perfetto.
While the actual formula for my best sourdough recipe is simply a mix of flour, water, salt, and levain, there are many nuances here to pay close attention to; here are a few key things to successfully making this bread:
- An active starter
- An autolyse
- A high hydration
- Sufficient dough strength
- A warm and complete bulk fermentation
- A long, cold proof
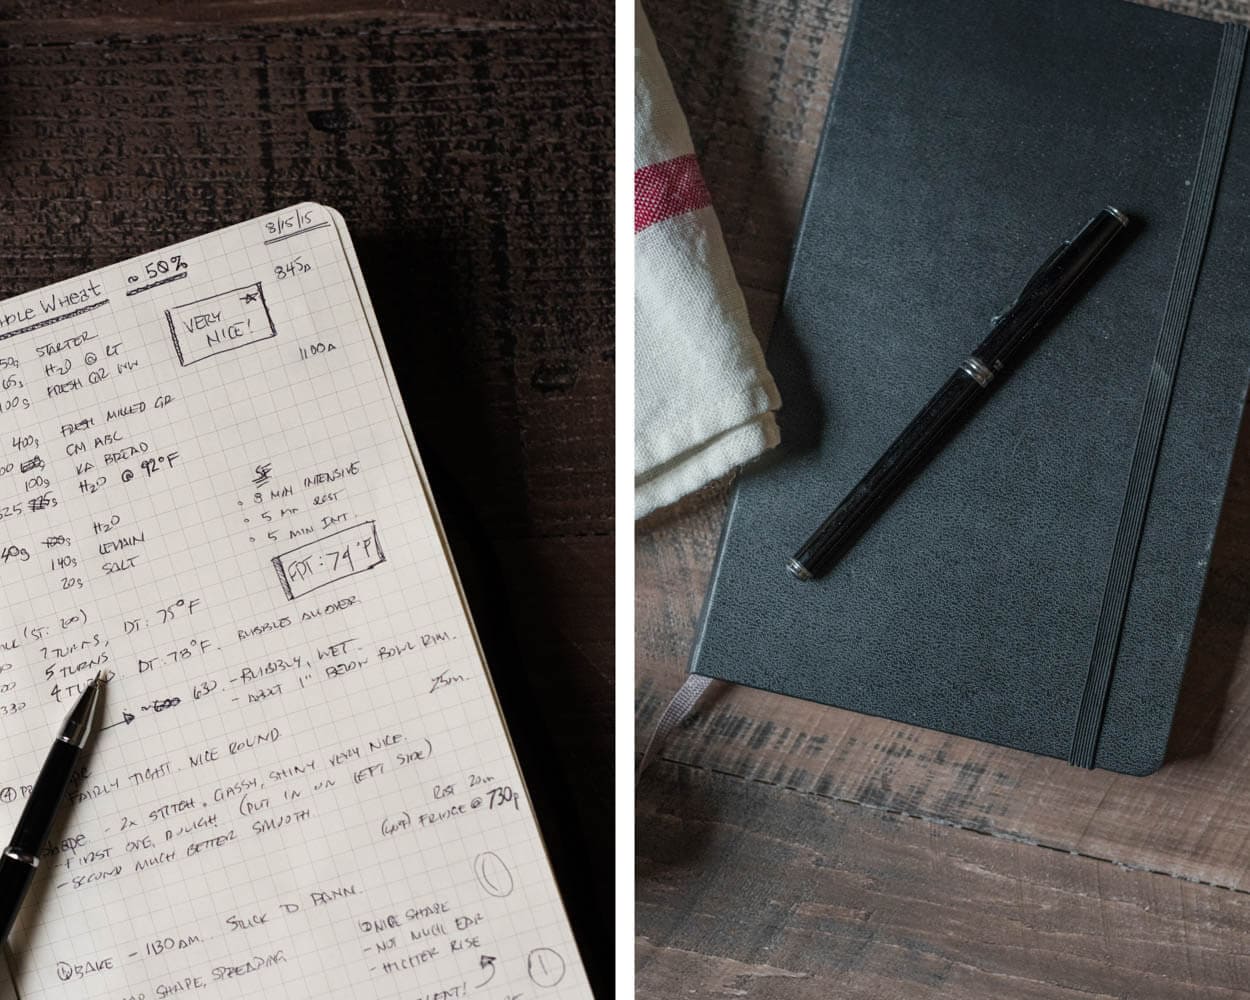
Before writing this post, I pulled out my trusty notebook (or use my free baker’s note sheet!) and paged through the handwritten (and flour-ridden) pages to find any scribbled “ah-ha” moments or little notes jotted down in the margin, along with a few curse words peppered throughout, and have bundled them up into this entry (sans curse words to keep it clean). A compendium of sorts containing my insights, breakthroughs, and ah-ha moments.
My best sourdough recipe doesn’t require an exotic blend of hard-to-find flour, a complicated multi-step levain build, or the use of a mechanical mixer. It’s built around making this bread in your home kitchen.
My best sourdough recipe is very highly hydrated and can be challenging. When mixing, be watchful for the signs and adjust the dough hydration to suit your environment and flour. If you’re not used to working with high-hydration dough, please start with hydration somewhere in the middle and slowly work up.
Flour Selection
I’ve tried a lot of flour out there (and am an avid user of freshly milled flour), indeed not everything there is, but I’ve ordered enough now that the UPS guy thinks I might have a bakery in my backyard. I have baked some great bread with Hayden Flour Mills, Central Milling, and Giusto’s. I’ve also had great success with King Arthur Baking high-protein white flour.
I have consistently made incredible loaves with Giusto’s flour; I only wish it were organic. Nevertheless, I find myself ordering a box of it here and there and enjoying the results every time. Of course, as I mentioned before, try whatever is local first (sadly, my source for local, organic flour is no longer available) and whatever you like.
When trying new flour, remember to hold back more water than you might otherwise, and then slowly add it in at the end of mixing or throughout bulk fermentation. Now, on to my best sourdough recipe.
Watch Me Make This From Start To Finish
I absolutely love this bread and make it often, but it can be challenging for first-time bakers. Be sure to watch my YouTube video below for a look at how I handle the dough and every step of the process.
If you’re brand new to baking sourdough, check out my Beginner’s Sourdough Bread recipe; it has in-depth information on every step in the baking process. Then come back and bake this!
My Best Sourdough Recipe
Vitals
| Total Dough Weight | 1,800 grams |
| Pre-fermented Flour | 6.4% |
| Levain percentage in final dough | 17.1% |
| Hydration | 85.0% |
| Yield | Two 900g loaves |
Total Formula
The target final dough temperature (FDT) is 78°F (25°C). This dough loves a warm ambient environment. Try to keep the dough at the listed temperatures if possible; use your oven with its light on inside, your microwave with a bowl of steaming water, or a proofer. I use my instant-read thermometer to check the dough temperature periodically throughout bulk.
For more information on how to calculate DDT, monitor temperature, and maintain temperature have a look at my post on The Importance of Dough Temperature in Baking.
| Weight | Ingredient | Baker’s Percentage |
|---|---|---|
| 852g | Medium-protein bread flour (~11.5% protein, Giusto’s Artisan Bread Flour) | 90.00% |
| 94g | Whole wheat flour (Giusto’s Organic Stoneground Whole Wheat) | 10.00% |
| 710g | Water 1 | 75.00% |
| 95g | Water 2 | 10.00% |
| 17g | Salt | 1.80% |
| 30g | Ripe sourdough starter (100% hydration) | 3.20% |
As I mentioned above, my best sourdough recipe is an extremely high hydration. If this is your first time working with this recipe, reduce the total water or hold water back during mixing to ensure your dough can handle the addition. The amount of water your dough will handle will vary based on your particular flour and environment—play it safe the first few bakes and work the water up gradually once you get a feel for the dough.
My Best Sourdough Recipe Method
1. Levain – 9:00 a.m.
Build the liquid levain in the morning and store somewhere warm around 77-80°F (25-26°C) ambient for 5 hours.
| Weight | Ingredient | Baker’s Percentage |
|---|---|---|
| 30g | Ripe sourdough starter (100% hydration) | 50% |
| 30g | Medium-protein bread flour (~11.5% protein, Giusto’s Artisan Bread Flour) | 50% |
| 30g | Whole wheat flour (Giusto’s Organic Stoneground Whole Wheat) | 50% |
| 60g | Water | 100% |
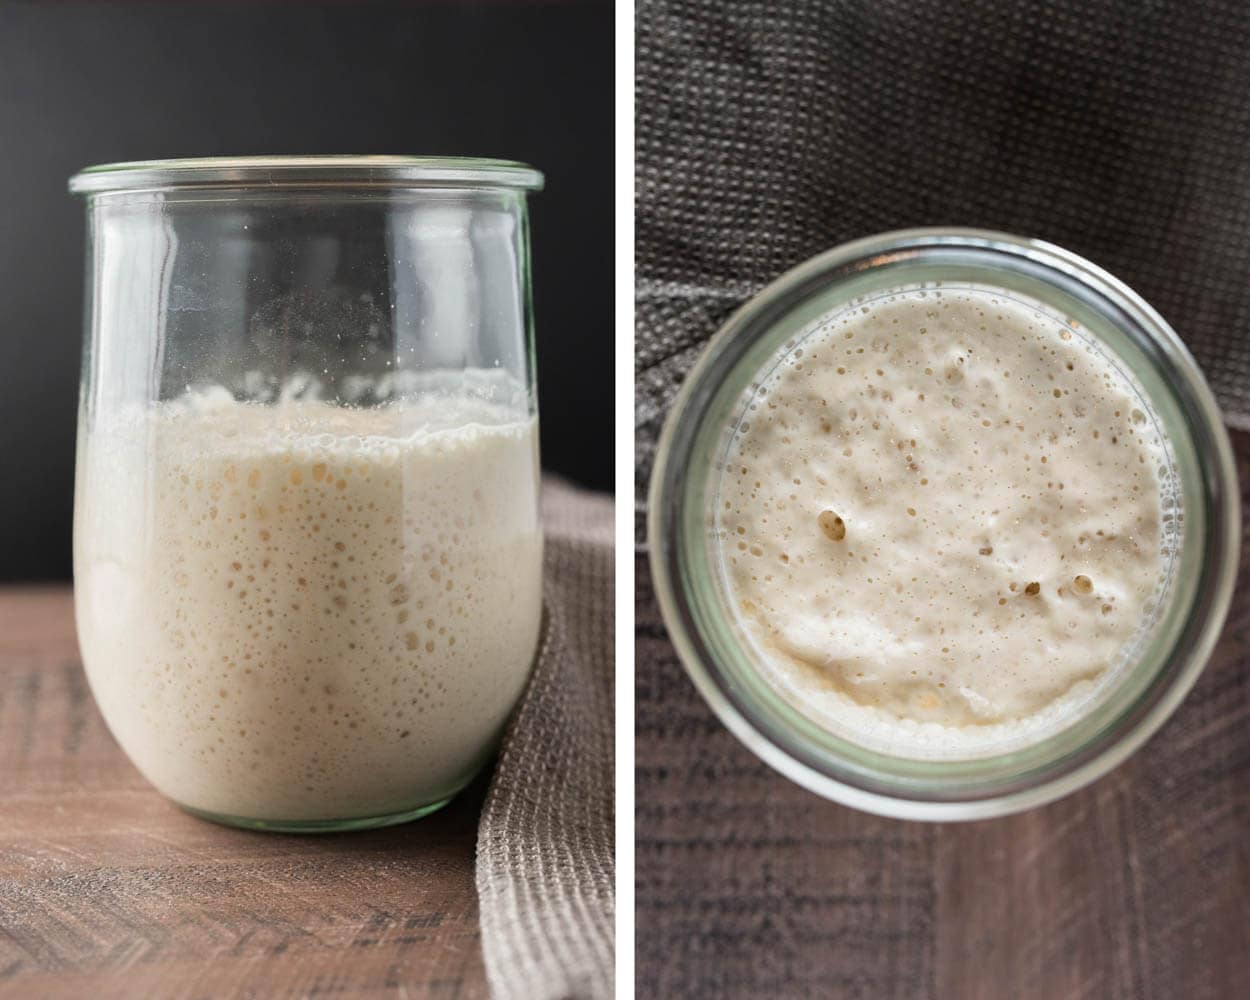
If you haven’t yet read through my post on my sourdough starter maintenance routine, check it out for some helpful hints on what to look for when your sourdough starter and levain are ripe and ready to use.
2. Autolyse – 12:00 p.m.
This highly hydrated dough can be mixed by hand or with a mechanical mixer (like a home spiral mixer). Either one will yield great results, but here, I’ll discuss mixing this dough by hand.
Mix the flour and water in a bowl until all the dry bits are incorporated, then cover. Ensure all the dry flour is hydrated—store near levain (we want the dough’s temperature to remain warm).
| Weight | Ingredient |
|---|---|
| 822g | Medium-protein bread flour |
| 64g | Whole wheat flour |
| 650g | Water 1 |
3. Mix – 2:00 p.m.
| Weight | Ingredient |
|---|---|
| 95g | Water 2 |
| 17g | Fine sea salt |
| 151g | Ripe liquid levain (see above) |
Add the ingredients to your dough in the mixing bowl that underwent an autolyse. Add the water slowly, in stages, while you’re mixing, and stop adding water if the dough feels excessively wet or soupy at any point.
Perform folds for about 2-3 minutes in the bowl. Grab under one side, pull up and over to the other side, then rotate the bowl a bit and repeat. I do this probably 30 times or so (it goes fast and easy). In the end, the dough should still be shaggy, but it will be more smooth and will start to hold itself together more in the bowl.
If you’re a fan of the slap & fold mixing technique I’ve described in the past, you can do this but be aware that it is difficult at this hydration. It’s best to first slap and fold the dough without adding all the reserved water to get the dough smooth and strong. Then, return the dough to the mixing bowl and slowly add the remaining water while folding the dough.

I find that the correct level of dough strength at this point is important. You want the dough to be smooth, elastic, and strong, but it doesn’t have to be fully developed, and it will still be shaggy. We will continue to strengthen the dough through stretch and folds in bulk fermentation.
Transfer dough to a tub or thick-walled bowl for bulk fermentation.
5. Bulk Fermentation – 2:15 p.m. to 6:15 p.m.
At 78°F (25°C) ambient temperature, bulk fermentation should go for about 4 hours. Perform six sets of stretch and folds during the bulk. The first three are at 15-minute intervals, and the last three are at 30-minute intervals. After these folds (2 hours and 15 minutes have gone by), let the dough rest for the remainder of bulk fermentation.
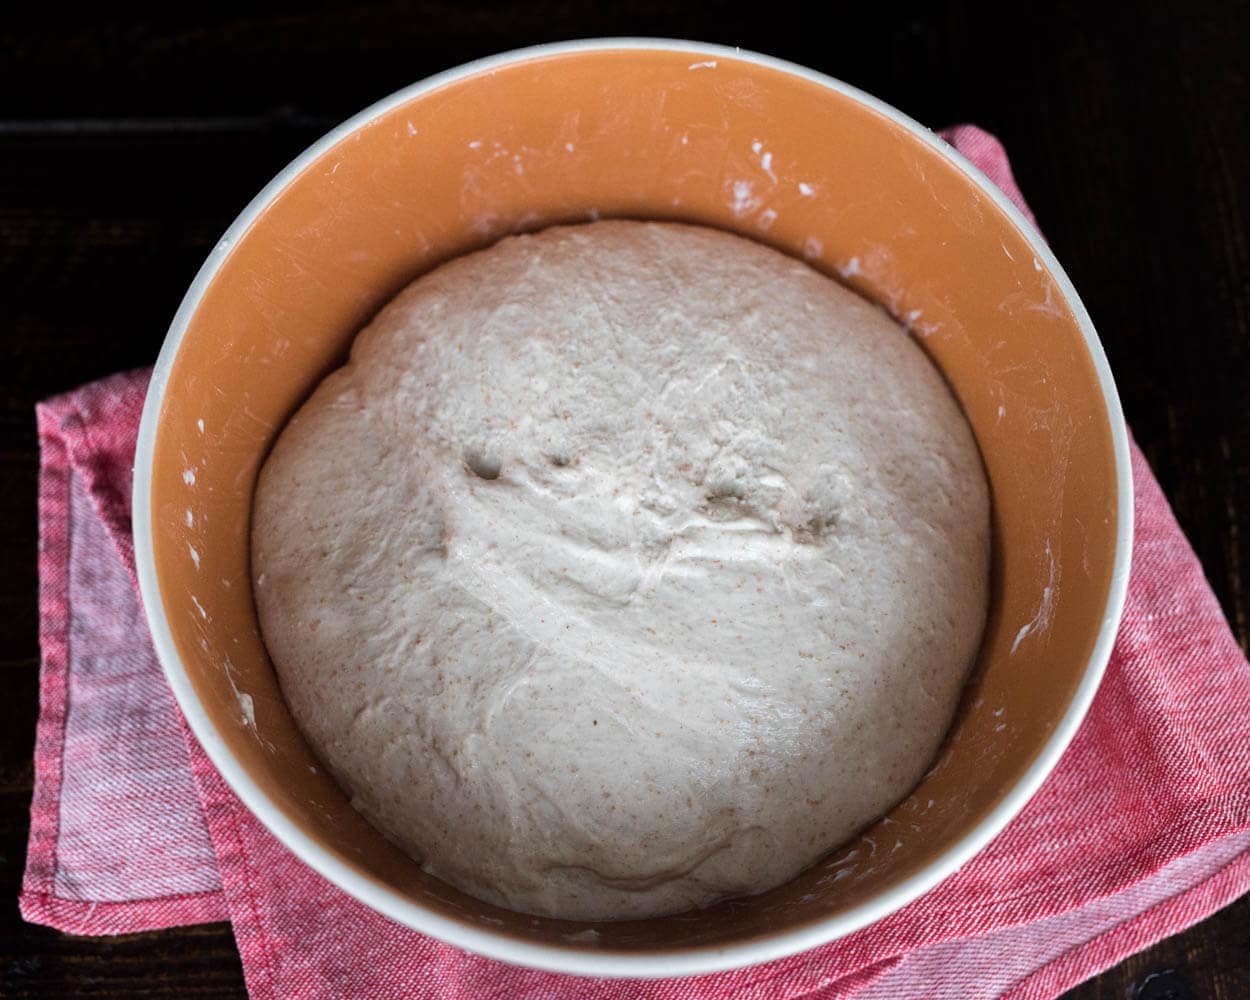
I stretch and fold more vigorously at the beginning of bulk than usual since it is extraordinarily slack and extensible (due to this recipe’s high hydration and autolyse). Pick up one side of the dough with both hands and pull it up, just before tearing, and fold it over to the other side. Rotate your container and repeat 4 or 5 times. That is one set.
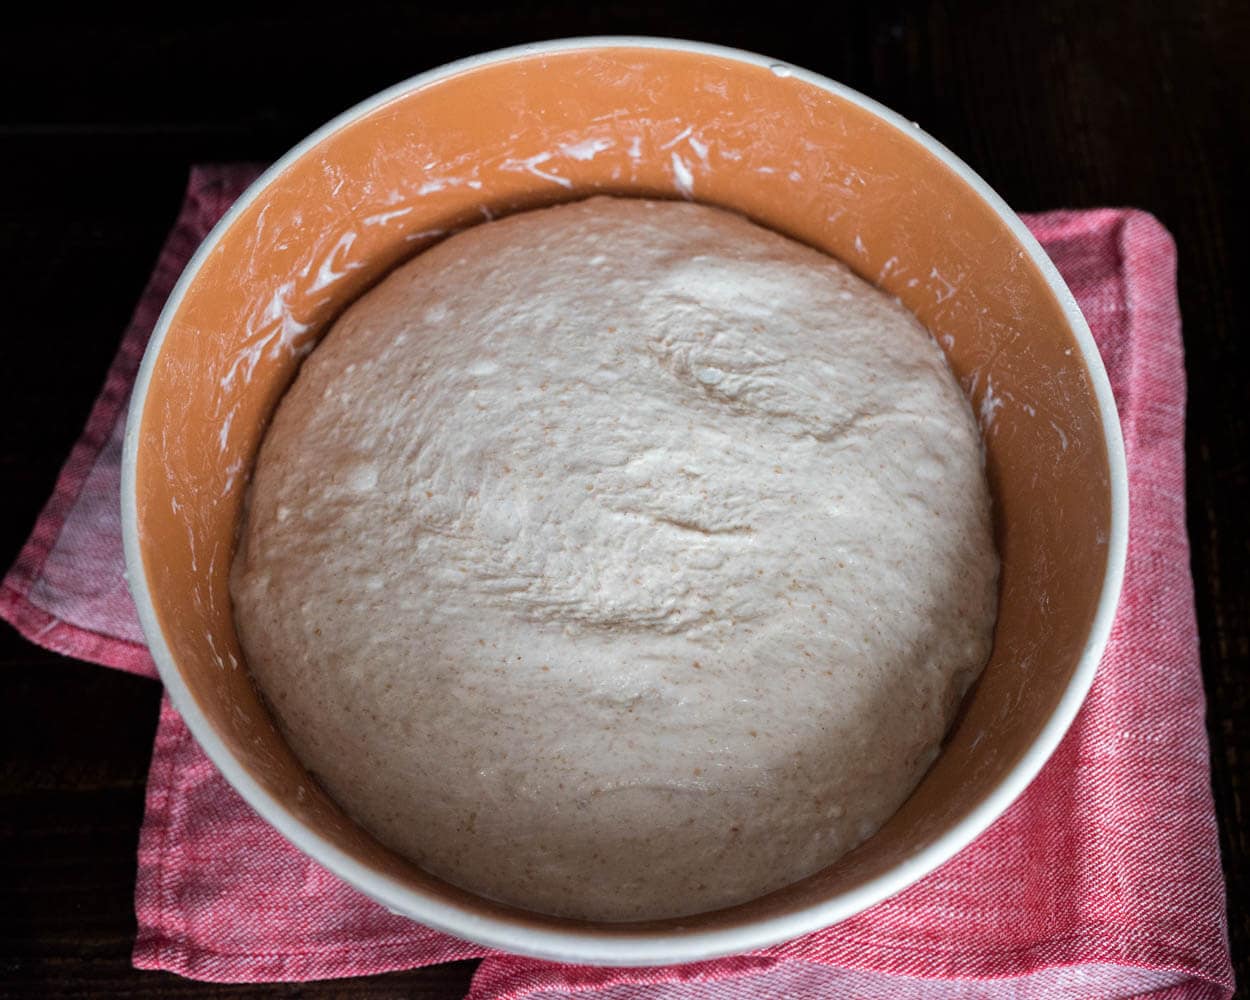
Above, you can see my best sourdough recipe dough halfway through bulk, after about 2 hours. There is no significant rise as of yet, but the edges are beginning to dome downward, and the dough’s texture is smoothing out slightly. We still have several more folds to do and more strength to build.
It is essential that the dough is kept near 78°F (25°C) as much as possible (minor fluctuations up and down are ok). If temperatures dip down too far, you might have to extend the bulk fermentation duration to compensate, and vice versa. Use your judgment, the signs described below, and be flexible.
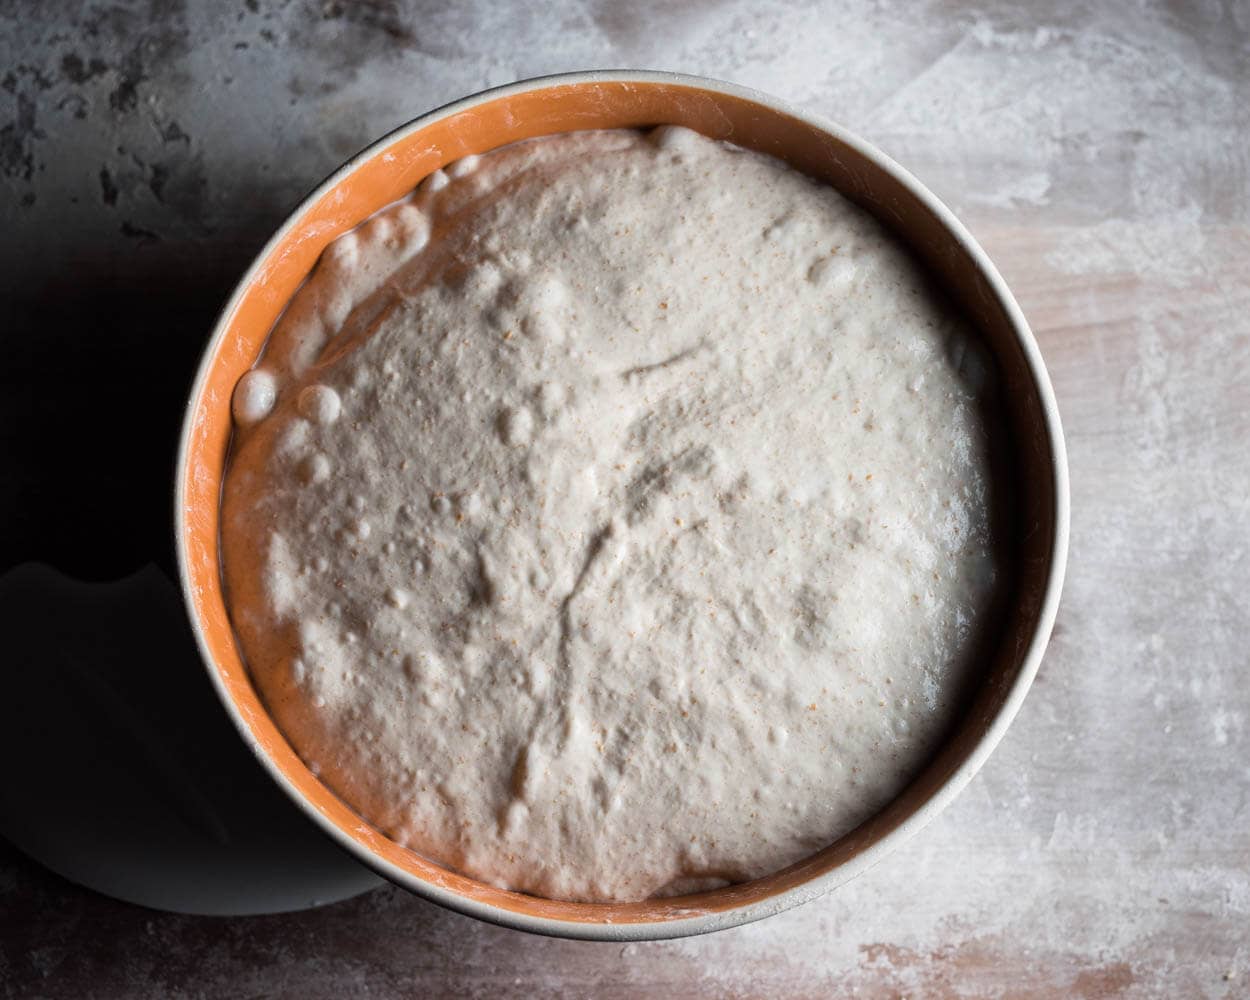
At the end of bulk, your dough should look very gassy, with some bubbles here and there, and the edges where the dough meets the bowl should be slightly domed. You can see all these signs in the image above.
When you gently shake the bowl, the entire mass jiggles from side to side—very alive. You’ll also notice that compared with the photo at the beginning of bulk, the dough is smoother and holds its edges, folds, and creases more readily (most of the bumps and ridges you see are due to trapped gasses from fermentation).
6. Divide & Preshape – 6:15 p.m.
Divide the dough into two halves and gently preshape each piece of dough into a round. Then, let the dough rest for 30 minutes, uncovered. Act quickly when handling this dough and rely heavily on your bench knife. I try to use my hands as little as possible when dealing with the dough at this point.
7. Shape – 6:45 p.m.
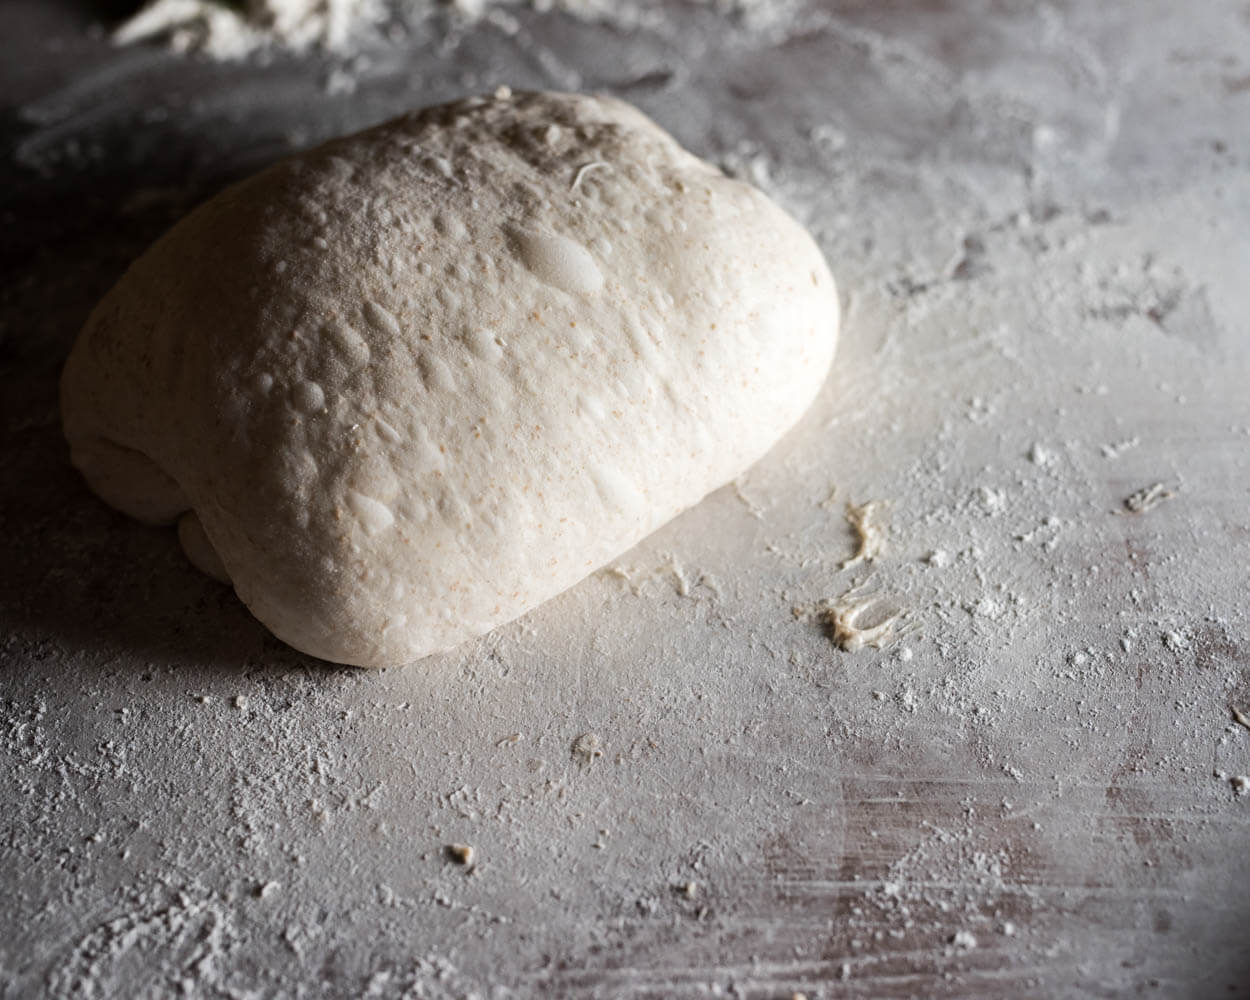
Lightly flour the top of your dough rounds and flour the work surface. With this recipe use a little more flour on the surface than normal, the dough will be extremely sticky and wet. Flip each round and shape into a batard (see notes below) or boule, whatever your preference.
Here’s a video of how I shape a bâtard. With this dough, be sure to use the “slack dough” shaping method since the dough is such high hydration.
I prefer to shape these as batards, and my shaping method is as follows:
- Flip pre-shaped round
- Fold the bottom up to about halfway
- Fold the left side over to about 3/4 to the right
- Fold the right side over to cover left
- Stretch top up & away from the center and fold down to about half (you’ll now have a “letter”)
- Grab a little of the dough at the sides near the top and stretch it over the center, so the dough crosses. Imagine lacing up a shoe where you first grab your laces and cross them over
- Repeat three times from top to bottom (the result will look like a laced up shoe)
- Take the bottom and gently roll the dough up to the top and try to seal it slightly when done rolling
Alternatively, if the dough feels pretty strong, you could shape it by “cinching” up the dough. For more instruction on how to shape this dough as an oblong loaf, see my post on how to shape a batard (with video!).
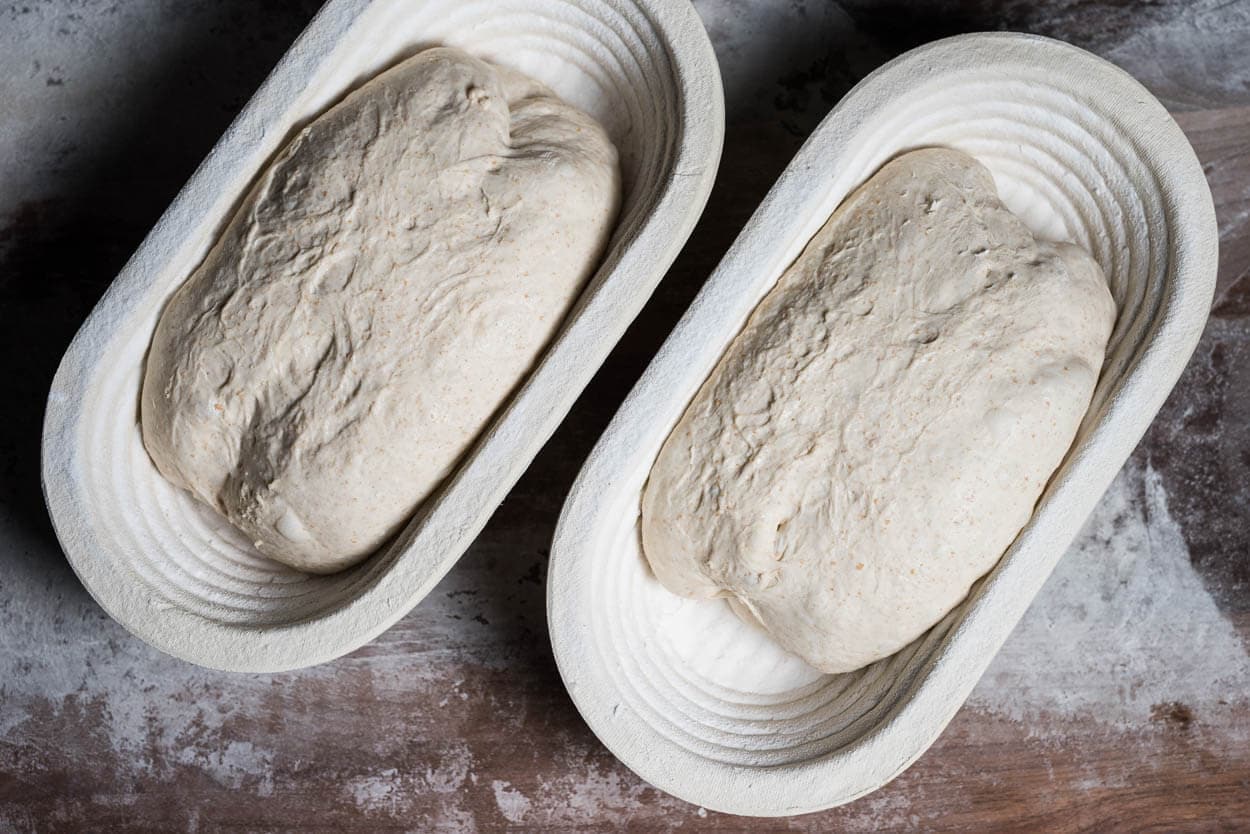
After shaping, let the dough rest on the bench for a few minutes and then place it into a banneton that is lightly dusted with white flour. You’ll see above my bannetons give the dough plenty of room to relax and expand in the fridge overnight. If your proofing container is on the smaller side, and you find your dough almost spilling over the edges, it might be time for a larger basket.
8. Proof – 7:25 p.m. to 9:00 a.m., the next day
Cover your banneton with plastic and place it in the refrigerator at 38°F (3°C) overnight.
9. Bake – Next Morning: Preheat oven at 8:00 a.m., Bake at 9:00 a.m.
Preheat your oven to 450°F (230°C). Remove the dough from the fridge (there’s no need to let the dough come to room temperature) and uncover. I scored the dough with a single, long slash to get that dramatic opening when baked. I keep the blade at a reasonably shallow angle so the taut skin created during shaping will “peel” back as the loaf rises.
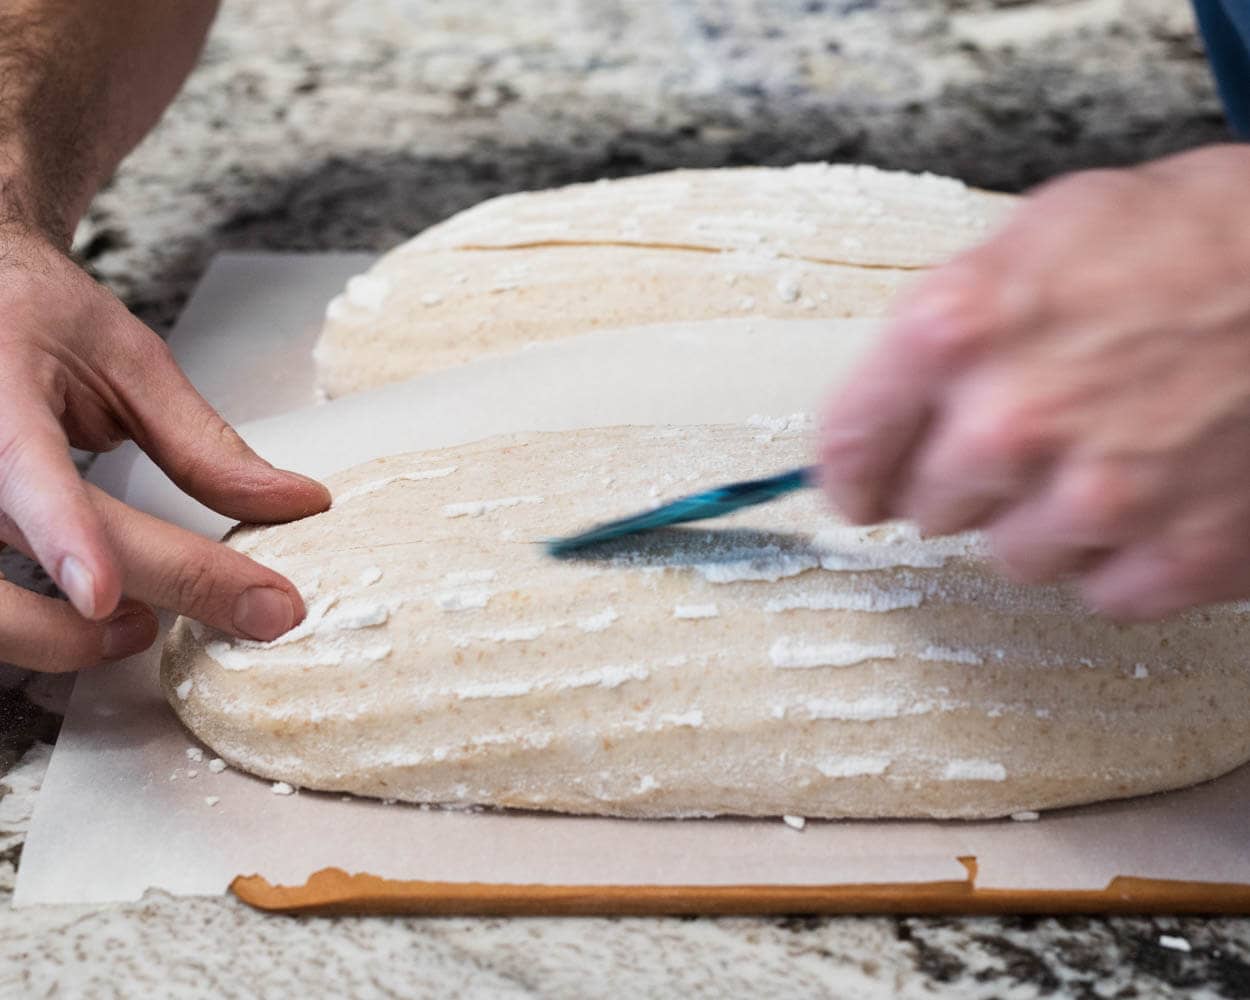
I steamed my oven in my usual way, described here in my post on how to steam your home oven for baking. But you can also bake in a pot or Dutch oven.
Bake for 20 minutes with steam, then remove your steaming pans if baking on a surface or Dutch oven/combo cooker lid. Then, bake for an additional 30 minutes until done to your liking. I like to bake rather dark, so I sometimes extend this second half of baking until I get the crust I’m looking for.
Once your loaf is done, remove and let cool on a wire rack for 1-2 hours. See my post on the best way to store the bread after it’s baked for a few tips on keeping it on the counter and freezing if you think you won’t get through both loaves in a week.
Conclusion
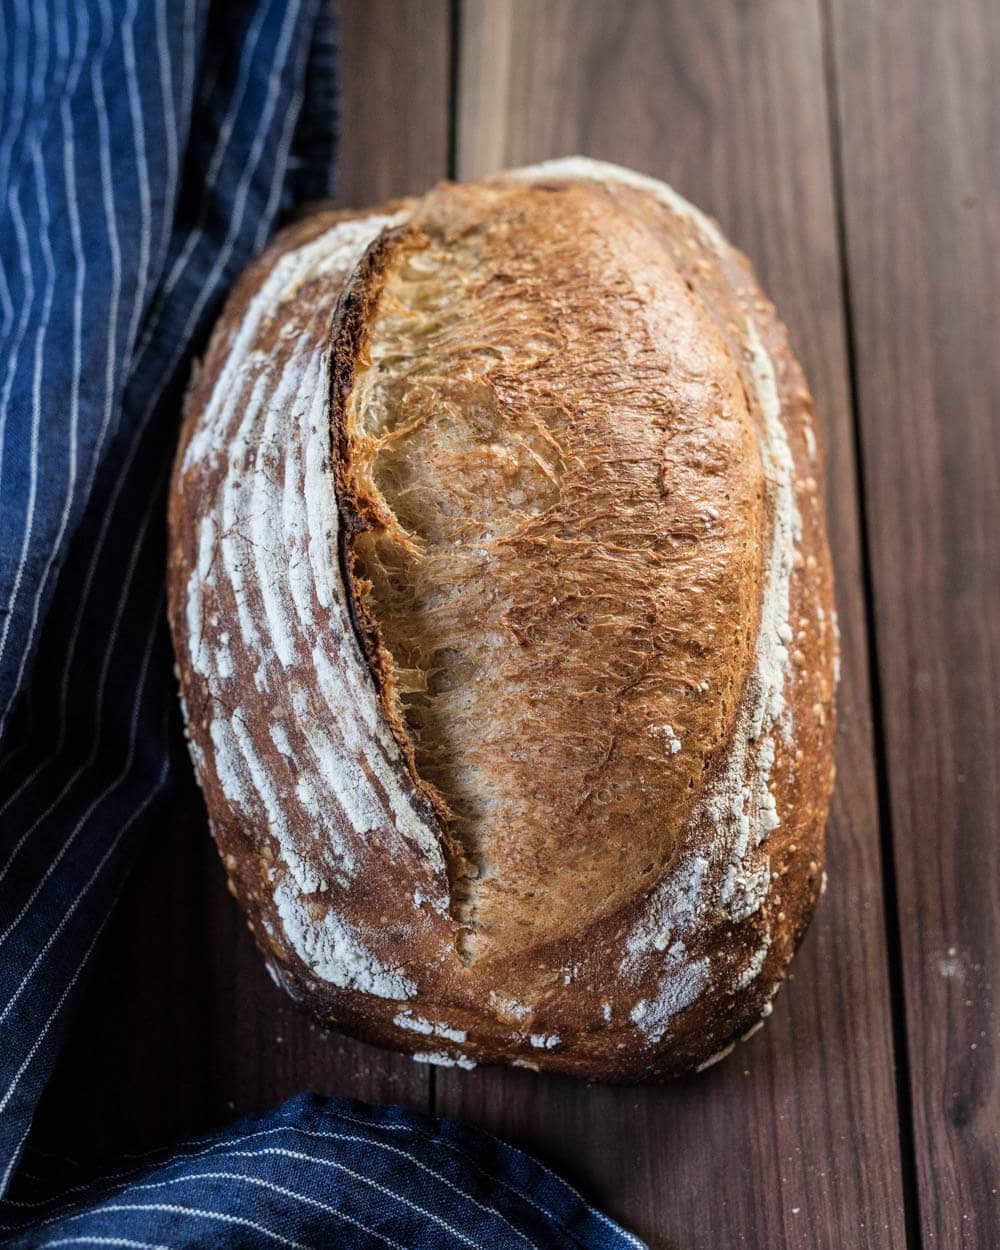
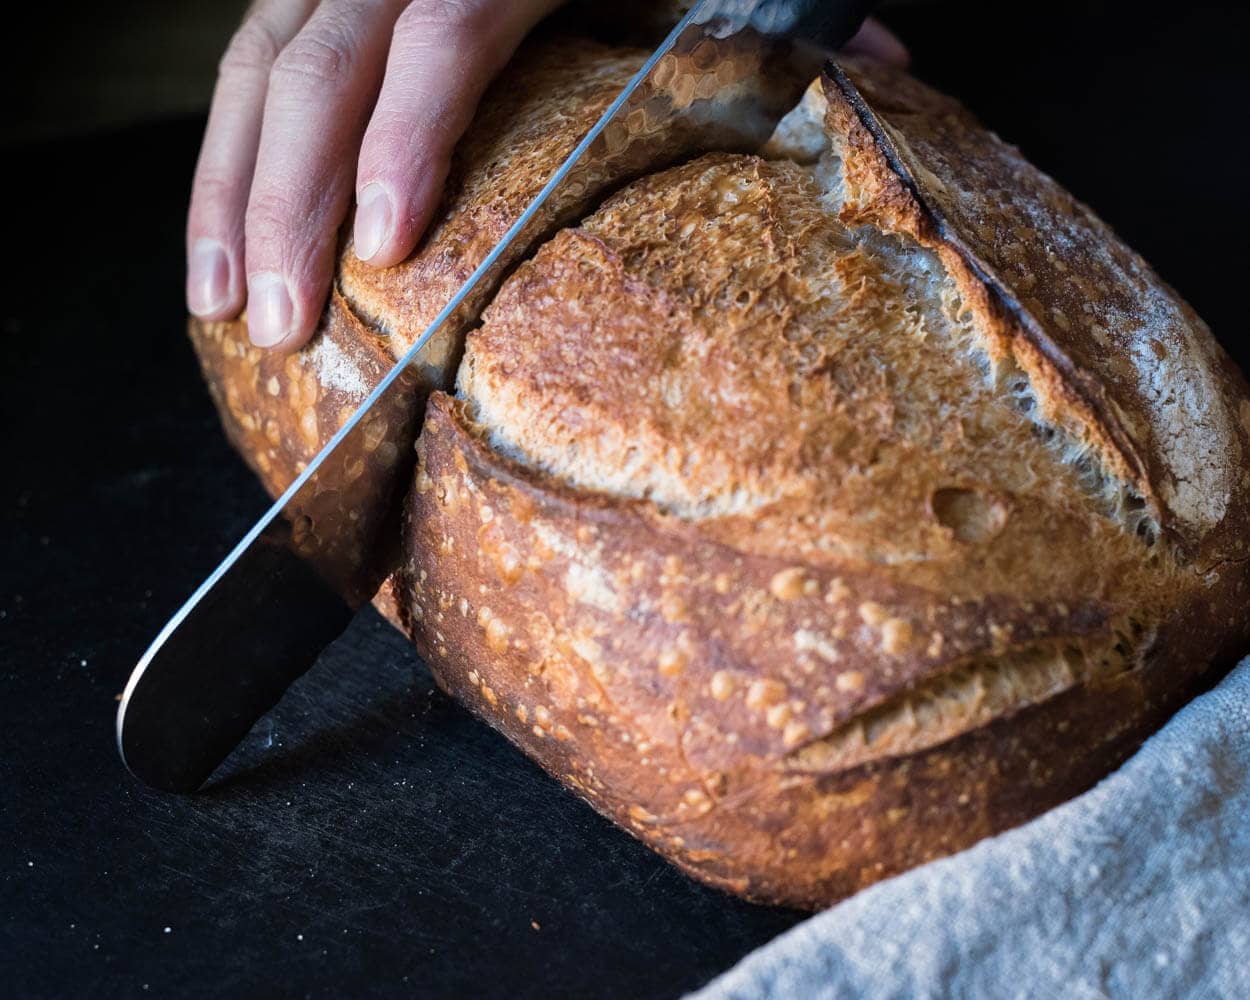
It’s hard to put into words just how much I enjoy this “my best sourdough recipe.” I bake it almost every week (sometimes multiple times if baking for friends and family), and yet every time I pull it from the oven, I smile. The crust color, the open and light interior, only the smallest perception of sour notes, and the way it crunches when toasted. I could go on and on.
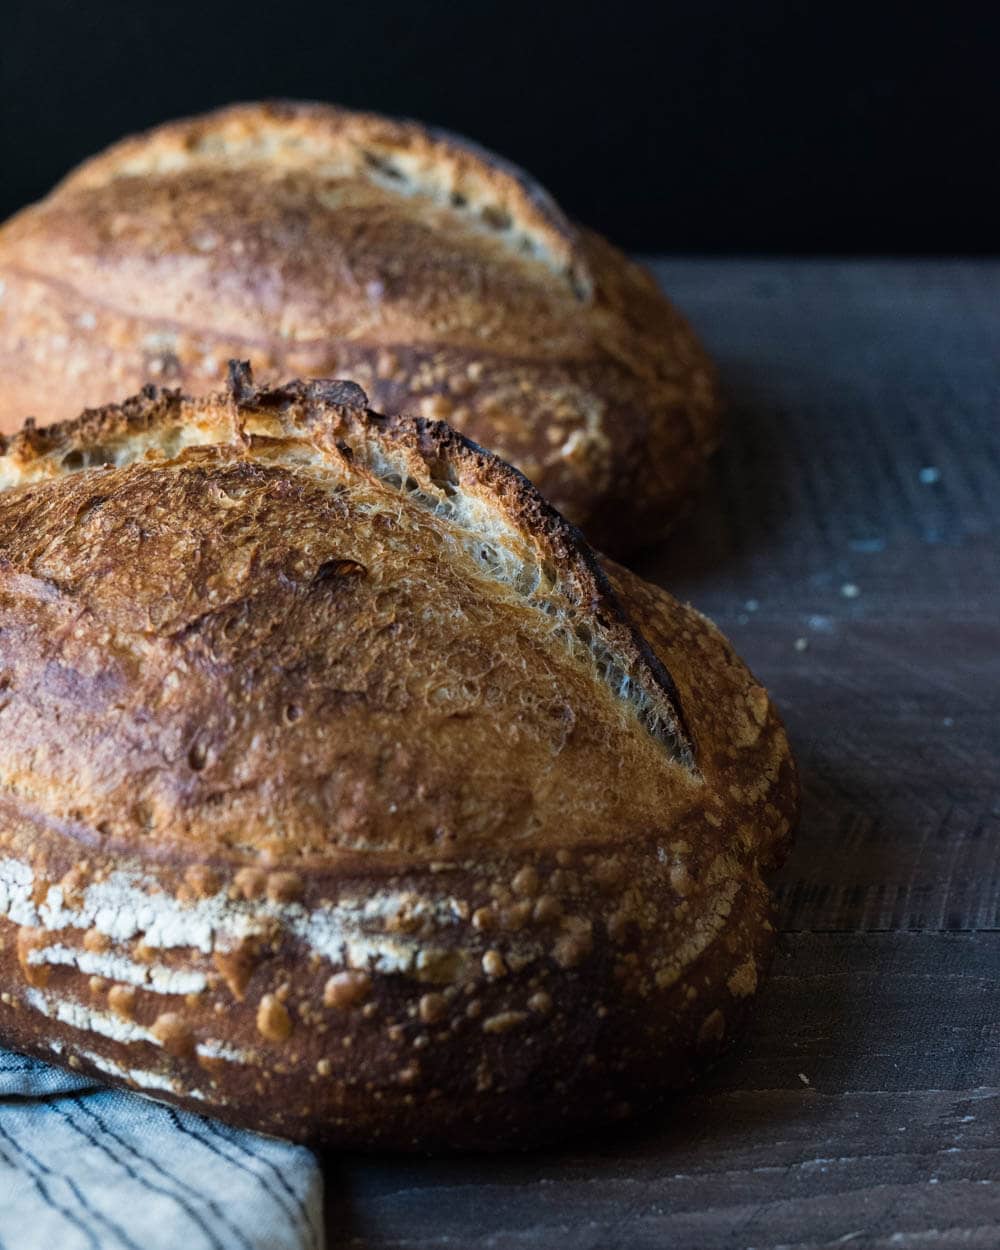
The photos to follow are the results of scattered recent bakes that all followed this process exactly and have a slightly different outcome. You’ll notice some are a bit darker, some have more or less flour on them, some expand differently in the oven, and some are taller and some are shorter—that’s the nature of baking.
With baking, every single bake is different no matter how consistent you try to be. It’s the same with my Dad and his Italian restaurant, and the reason I’ll sometimes get a call in the middle of the afternoon: “hey, the pizza dough is incredible today, you should head over and grab some.”
Crust
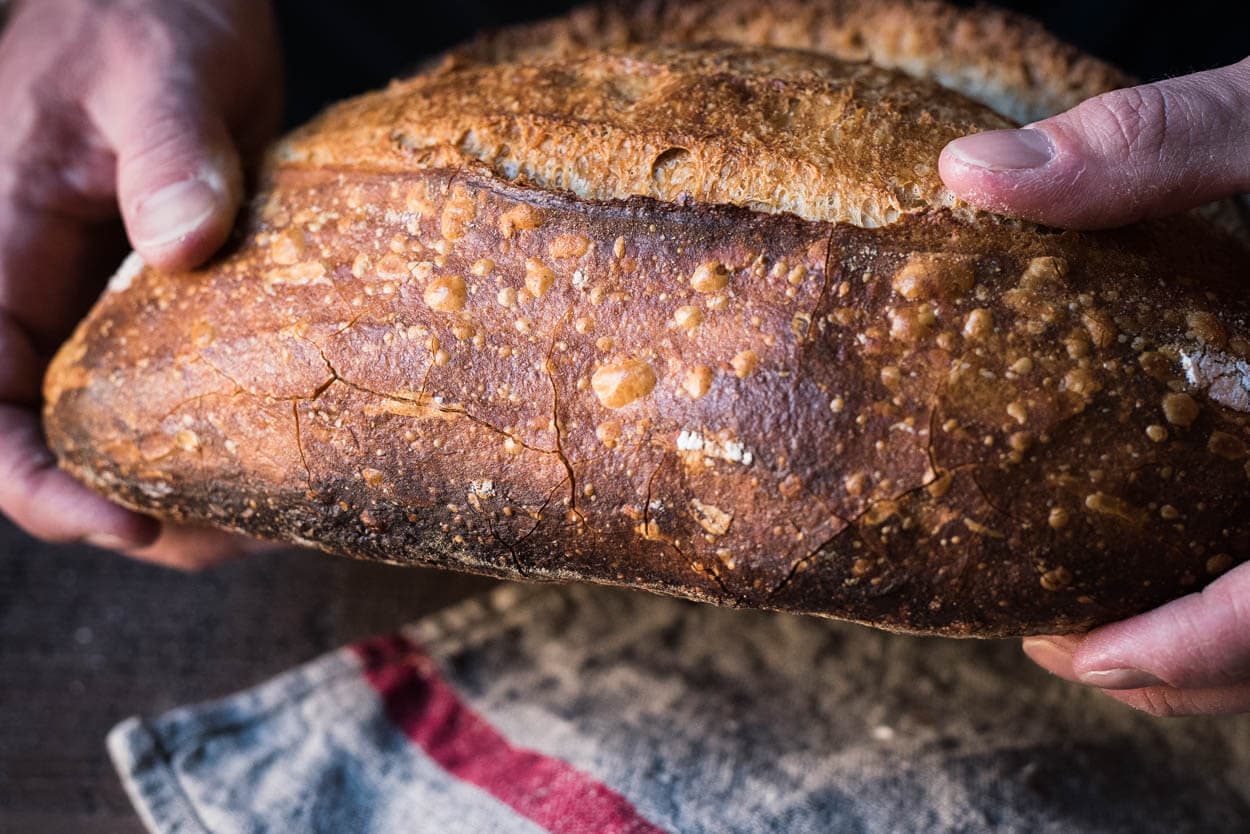
As a kid, I was known to take slices of bread, cut out the center, and eat the crust. It used to anger my family because they’d reach into the breadbasket only to find slices of only the soft parts. That’s how much I love the crust! Can you blame me, though?
I enjoy bread with a chunky, chewy crust, but this bread with its delicate and cracker-like crust takes the top spot for me. Even though I bake these rather dark, the crust remains thin and brittle, crackling under the slightest pressure. I love using the “heel” (the very end) of this bread to eat soup or combined with hefty slices of cheese. It’s delicious.
Crumb
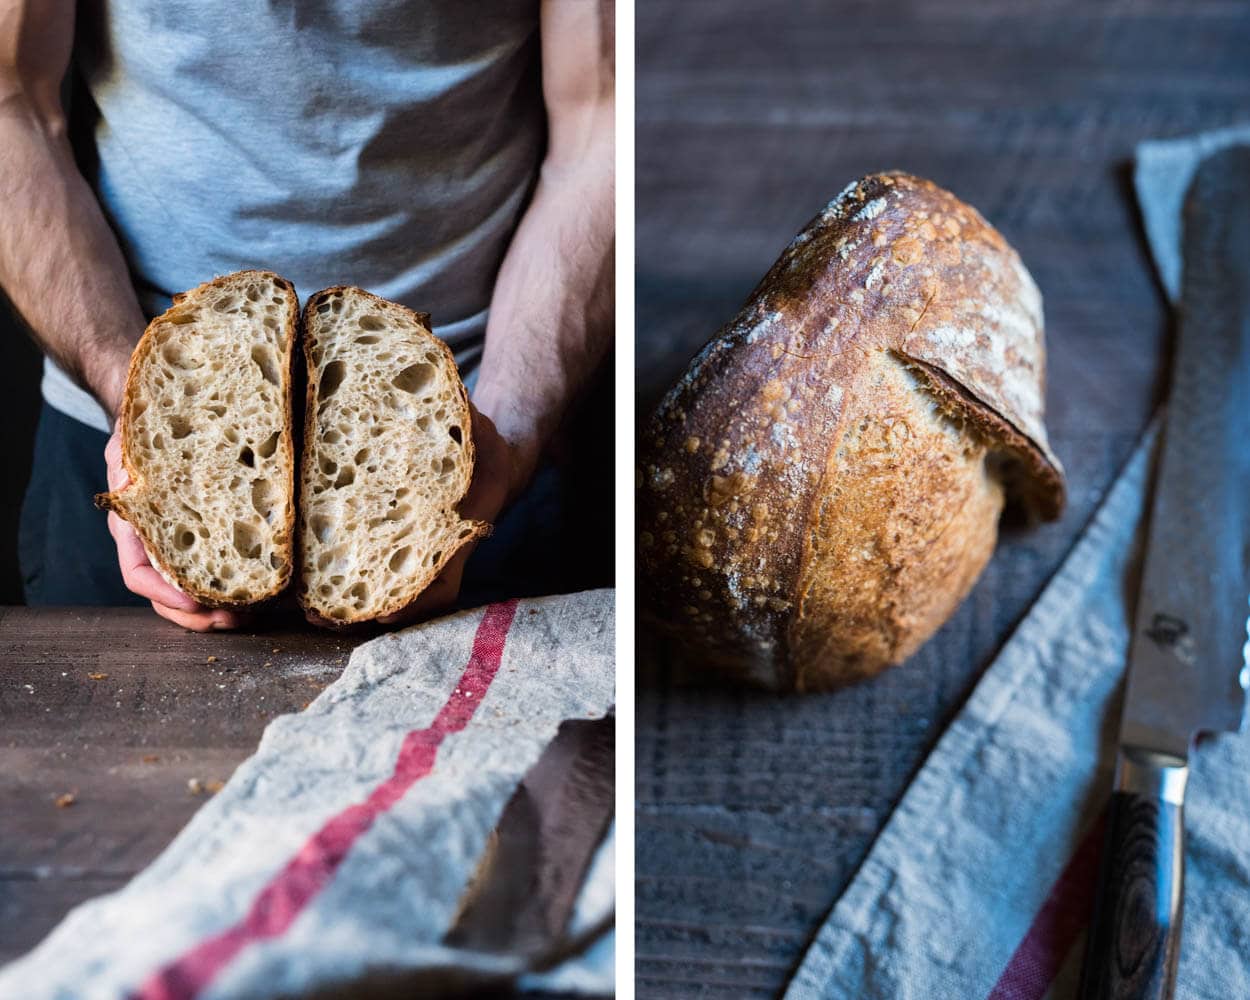
I think there’s a balance to be had with bread like this. It’s possible to let the crumb open up too much, but for me, this is just right. Scattered open areas with that translucent webbing spanning from wall-to-wall, a dynamic movement to these areas, almost show you how shaping was carried out.
Taste
This bread has an almost imperceptible hint of sour, and because of this, the wheat flavors from the flour come forward. It has an incredibly tender, soft crumb that almost dissolves in your mouth. It’s one of those rare foods whereupon taking that first bite your mouth begins to water.
In the end, bread is just bread. But it’s also the staff of life and has been for thousands of years. It’s is also more than the sum of the ingredients you add to the mixing bowl. It’s how it makes you feel when you give some to a friend, and they grin ear-to-ear as they take a big bite. It’s the knowledge that you created this thing over a few days that once was a lump on your counter and is now an incredibly delicious food meant to be shared. To me, this is real bread and my best sourdough recipe to date.
Buon appetito!
Print
My Best Sourdough Recipe
- Prep Time: 24 hours
- Cook Time: 55 minutes
- Total Time: 24 hours 55 minutes
- Yield: 2 loaves
- Category: Sourdough, Bread
- Cuisine: American
Description
This sourdough bread is one of my favorite recipes. It’s a highly hydrated dough that results in a loaf with an open and lacey interior contrasted by a thin, crispy crust.
Ingredients
Levain
- 30g medium-protein bread flour
- 30g whole wheat flour
- 60g water
- 30g ripe sourdough starter
Main Dough
- 822g medium-protein bread flour
- 64g whole wheat flour
- 745g water
- 17g salt
- 151g ripe levain
Instructions
- Levain (9:00 a.m.)
In a small container, mix the levain ingredients and keep at 78°F (25°C) for 5 hours. - Autolyse (12:00 p.m)
In a medium mixing bowl, add 822g medium-protein bread flour, 64g whole wheat flour, 650g water, and mix until no dry bits remain. Cover the bowl and let rest for 2 hours. - Mix (2:00 p.m.)
To the mixing bowl holding your dough, add 95g water (holding back any as necessary if the dough is too wet), 17g sea salt, and the ripe levain (from step 1). Pinch and mix all the ingredients together and do folds in the bowl for 2 to 3 minutes until the dough smooths and is cohesive. Then, transfer your dough to a bulk fermentation container and cover. - Bulk Fermentation (2:15 p.m. to 6:15 p.m.)
Give the dough 6 sets of stretch and folds. The first three sets are at 15-minute intervals, and the last three sets are at 30-minute intervals. - Divide and Preshape (6:15 p.m.)
Lightly flour your work surface and scrape out your dough. Using your bench knife, divide the dough in half. Lightly shape each half into a round shape. Let the dough rest for 30 minutes, uncovered. - Shape (6:45 p.m.)
Shape the dough into a round (boule) or oval (batard) and place it in proofing baskets. Cover the baskets with a reusable plastic bag. - Proof (7:25 p.m. to 9:00 a.m. the next day)
Cover proofing baskets with reusable plastic and seal them shut. Then, place both baskets into the refrigerator and proof overnight. - Bake (Preheat oven at 8:00 a.m., bake at 9:00 a.m.)
I steamed my oven in my usual way, described here in my post on how to steam your home oven for baking. But you can also bake in a pot or Dutch oven. Preheat your oven with a combo cooker or Dutch oven inside to 450°F (230°C). Remove your dough from the fridge, score it, and transfer it to the preheated combo cooker. Place the cooker in the oven, cover with the lid, and bake for 20 minutes. After this time, remove the lid (you can keep it in the oven or remove it) and continue to bake for 30 minutes longer. When done, the internal temperature should be around 208°F (97°C). Let the loaves cool for 2 hours on a wire rack before slicing.
Notes
This is a very highly hydrated dough. Don’t add in all the reserved water during mixing if it feels like the dough is becoming overly weak, slack, or soupy.
What’s Next?
If you want more help getting an open crumb with this bread, I’ve created a 100+ page book with step-by-step instructions. Learn the best flour to use, the right fermentation schedule, and all my tips in my Bread Baker’s Handbook.
Are you a TPL Member? If so, the handbook is free for you!


2,142 Comments
I have been trying the tartine country loaf for a while now and just started with your recipe and I am finally much closer to being successful with the type of loaves I want to make. I attribute this to using a mature starter and levain (that you suggested) instead of a young one; and a higher temp. I adjusted the hydration to 82.5%, which suits my flour better, but I think I am having trouble with overproofing as I am not getting any oven spring. Do you have a ballpark for the % rise I should have at the end of bulk fermentation? I’m currently getting about 50% rise at 4 hours at 80 degrees. And how about % rise with the final rise? Thank you for your blog and all of your comments/help!!!
You’re welcome! I don’t typically measure a percentage rise for my dough during bulk because I find it can be misleading (eg more while grains will rise less that usual). I look more for the signs described above: dome edges between the dough sides and the bowl, the dough should jiggle a bit when shaken, if you wet a hang and tug a little it should resist your tugging a bit and finally bubbles on top and at the sides. You should see some rise of course and you can kind of see the amount in my pictures above. That’s typical for me and my flour. For me and this formula it’s usually 3.5-4.5 hours at around 80F.
If you find its over proofing try to cut bulk a bit short (try 30m) and if you still get this you could try to reduce your proof time by a few hours as well. I don’t like to go less than 3 hours for bulk.
As far as the final proof I actually don’t notice much rise in my baskets at all. The dough will spread out and be a little puffy but there won’t be significant rise.
I hope that helps, let me know how it goes!
hello, what a great loaf. I have been baking bread for last 3 years, but i use different proportions: 2 cups flour, 0.5 cup water and 1.5 cup sourdough starter which is 60% hydration. My bread has nice holes inside and looks great but i wanted to try higher hydration bread and am not sure but something is off in your recipe or i am doing something wrong or my flour does not work as yours? Should the first fermentation be done with a cover of without? The mixture is very watery and nevertheless the fact that it is stretchy after 4 hours of fermenting it still does not hold its shape after shaping and it flattens on the table. Is this normal and expected? It would be good if you would make a video to show the consistency of the mixture during each process as it is hard to imagine how sticky or how watery your bread is at each stage.
Thanks! I keep my dough covered at all times. During bulk it’s covered in the bowl with reusable plastic wrap (see my tools page at the top) and during my proof in the fridge I place my entire baskets in a large plastic bag tied shut.
It sounds like the hydration of this formula is probably too much for your flour. Try reducing by 5-10% and see if your dough handles better and is more manageable.
I agree about the videos, this is something I’m working on and will have more up soon!
thx, I was not sure what to do so I went by a feel and I added some flour during the bulk fermentation until I reached consistency that made sense. The bread turned out to be great and had little more holes then one I make with 60% hydration. Yes, videos would be great. I do have some experience with baking bread but those who never did it might get confused when they see very watery dougt. Thx again for great tips and recipe.
You’re welcome! Definitely will be working on more videos 🙂
Buongiorno Maurizio). Explain to me please …. You do autolysis 1.5 hours – mix only water, flour and one tablespoon Levian. After 1.5 hours – add all Levian. Wait 30 minutes … add salt and mix everything in a blender. That’s right, I realized that autolysis lasts 2 hours (1.5 and 0.5 hours) ??????????
A true autolyse doesn’t include the levain, it’s only water and flour. Once the levain is added fermentation begins, the 30 minute rest before adding salt let’s fermentation start without any inhibition (salt tempers fermentation). Additionally, that 30 minutes let’s the dough rest and relax so adding salt becomes a bit easier. Hope that helps!
Grazie miele )
Awesome site. I live in Arizona and they sell hayden mills at our local Whole Foods and Sprouts. I’ve tried them with little success, but I will try your recipe … I’m think the ratios were off in in mine. What type of banneton is that? I have been looking for ones with the flat top piece.
Thank you.
Very lucky to have flour like that at your local market! Jealous 🙂 Definitely give my recipe a shot and let me know how it goes.
I got that banneton at Breadtopia.com, they have a number of “wood pulp” baskets like this, I really like them.
Because I’m lazy – how long exactly does the 2nd day take to make the dough, stretch & fold, etc?
Did you mean the first day? There are a lot of factors that go into the total time and you can increase/decrease it as needed (to a point), but I typically will start my levain in the morning around 11:00am and then finally put the loaves into the fridge at 9-10:00pm. That seems like a long time but really you only come in at several parts during the whole process to guide things in the right direction. Most of the time you can do other things 🙂
Hello there, I was wondering how long this bread lasts and the best way to store it?
One of the incredible things about sourdough bread is its natural keeping qualities — this bread will stay great for a week or slightly longer. If I’m going to eat it that week I’ll keep it in my bread box on my counter or in a paper bag.
If I’m going to eat it within the next month I’ll slice the entire loaf after it cools and then place it into a freezer bag. I can then take out bread a slice at a time, defrost it in my toaster (it has a defrost function) and eat it straightaway.
If I’m going to eat the bread after a month (long term storage) I’ll wrap the loaf after it cools several times with plastic cling film, then into a freezer bag and into the freezer. When I want to eat the bread i’ll take it out and let it defrost on the counter or the fridge.
Hope that helps!
Hi Maurizio,
First of all, I adore your website. The pictures are mouth-watering, and your nerdiness about bread shows through which I love.
I am having trouble with my bread. The crust and flavor are fantastic, but for some reason I always end up with this gummy, dense structure, often with large holes, which is nowhere near the light and airy crumb you seem to achieve. I’m sure it could be several things making this happen to me, but what would you suggest I look at first?
Thanks Richard, I appreciate that! Bread nerd right here, through and through 🙂
When I see those results it’s usually due to under fermentation. Make sure you’re doing a full bulk (around 4 hours at 78-80ºF if using mostly white flour) and if you’re retarding overnight around 12 hours at 38-40ºF. Another clue under fermentation is the cause is when your bread has a few large holes but other areas of your bread are dense and gummy.
Hope that helps, let me know if that fixes the issue if not we can look at other things!
I’m having some issues with this dough I’m not sure where I went wrong. After bulk fermentation I pre-shaped the dough into two loaves and they were very wet. After 20 minutes or so I tried shaping them but the dough took no form. I didn’t want to add to much flour but with each dusting it just got quickly absorbed and it didn’t help me out too much. I was able to get them into lined bowls and into the fridge, but the forming process failed so I’m not sure what Ill get. Maybe too much water? I used less than the recipe so I’m not sure, I know Ill try again next week. Some pointers would be appreciated. I love your site I’ve been making the 100% wheat sourdough for the last few weeks and its been a big hit, I’m hoping to eventually have the same success with this recipe.
Yes, it sounds like too high of a hydration for the flour you are using (and/or your environment). Try reducing hydration by 10% and then see if that helps!
Glad the WW recipe is working so well for you (and your fans), I love that bread.
Let me know how the hydration reduction goes — happy baking!
I just made this and it’s awesome! I found you because in the middle of my first Tartine loaves a few weeks ago I thought, “Hmmm, I wonder if altitude makes a difference.” I’m in Taos, and I’m so glad I found you! Today’s (made with Sangre de Cristo flour and in the combo cooker) is way better than my first loaf. https://www.instagram.com/p/BEwFCWgzEuwmuBtfwDiilhrBQ0uanSv0p6tyDE0/?taken-by=h.corning
That’s great, nice to meet someone here in NM! I’ve used Sangre de Cristo flour in the past and loved it — where you buy it these days? I used to get it at the co-op, I need to head back there soon to see if they have any. It used to be organic flour, but I”m not sure if that’s still the case.
Your bread looks fantastic! Glad my instruction has been helping 🙂
I buy the Sangre de Cristo flour in the bulk section at the main health food store in town–Cid’s. I’m not sure if it says “organic” or not. I’ll check next time. I should have made 2 loaves! It’s almost all gone.
Ill check again at La Moñtanita co-op, they might have it back in stock! Always a problem here… good bread disappears rather fast 🙂
Love your site! Tons of great info. For the past 2 months I have been baking bread every weekend. The
results have been great. A couple things I have noticed are my dough gets huge bubbles and is very gassy. The giant bubbles make it very difficult to shape. Also, I am almost getting too much spring in my loaf. They turn out massive! Lastly, I am having a hard time getting “ears” on my bread. I fill the oven with steam prior to baking but my loaves are rising so fast that the area I scored just inflates.
Thanks for the comments, Clayton! It sounds like perhaps you have too much fermentation going on during your bulk fermentation step. This could be because it’s warm in your area currently, you have a lot of whole grains in your dough mix, you are using a large percentage of levain or your bulk is going too long. I’d first try to reduce your bulk fermentation time, you could go down to 3 hours (from the typical 4) and that should help with shaping. Alternatively, you could use cooler water when you mix your dough as colder temperatures will slow fermentation down some.
I hope that helps — happy baking!
Well I just took it out of the oven. Smells great and I cant wait to cut into it. Not to happy about the lack of oven spring. It rose but not like the other I made several months ago. I think I over proofed it. My fault trying to put it together late in the day, taking the wife to dinner, and I believe the levain was to warm during its ferment time.
It is a little hard dealing with the high hydration dough but since making my first bread 4 months ago I’ve learned a lot and this time it wasn’t really a problem.
Thanks Maurizio for the great recipes.
Jerry
Jerry, excellent! Yes, if you proofed it a bit too long it could compromise spring a bit. Easy fix though 🙂 With practice the higher hydration dough definitely gets easier and easier to handle, things slow down and you learn to move quick.
You’re very welcome, I’m glad my recipes are working out well for ya! Happy baking 🙂
I finished mixing up this dough at midnight and will be baking it around 3:00pm. I made this once before and it was a great tasting bread hope this one comes out great also
I cant remember if i baked it right out of the fridge or if i let it come up to room temp while the oven was heating up. Think ill put ut in directly from the fridge
Jerry
Awesome! Straight from the fridge is how I always do it 🙂
I’m trying this recipe for the first time; wondering if I don’t want to retard for 15 hours in frig, how long should/could this second proof take? 2 to 3 hrs like other recipes I’ve seen? Thanks in advance! -Beth
It depends on how you’re doing is progressing through bulk… I’d say at about 72-75ºF somewhere around 3-4 hours should work. Try the “poke test” as it’s proofing on the counter after a couple hours and see how the dough responds. Once you bake this way a few times you’ll learn how your dough responds to the ambient temperature and what looks ready to bake.
Hope that helps!
Hopefully last question. I am confused about something. My starter becomes fully active in only about 3 hours. If I was to create my levain the night before I plan to mix the levain with the dough, my levain would have already reached its peak and receded when it came time for mixing. It wouldn’t be fully active anymore. Why do so many people say to make your levain the night before mixing? On the other hand, if I activate my starter in the morning, then make my levain, then wait and mix, I am shaping late, at 10 pm. So, does it really matter if my levain has peaked and receded already when I mix the dough? Then I could make it the night before. Thank you!
You’ll need to adjust the percentage of starter you put in your levain mix to change the time it takes for it to mature. For example, if you want to let it ferment overnight, and not peak till the morning, you can do something like only 20% starter to 100% flour to 100% water. This lower percentage of starter causes fermentation to take several more hours than if you were to use 50% or even more.
Hope that helps!
That makes sense. Thanks!
Quick question regarding creating my levain: if my just-unfridged-and-fed starter takes about six hours to quadruple in size, is that about how long my levain should be proofed before incorporating into my dough? Basically, until it is at the peak of its activity?
Aaron — yes that’s exactly what I look for, that peak. Keep in mind, though, if your levain uses more whole grains that time period will decrease (and vice versa if you use more white flour).
Awesome. After a month of waiting (created my own starter–it is strong!), I’m finally doing my 1st bake this weekend. Wish me luck. Thanks!
Right on, good luck! 🤘🏼
Hi, Maurizio. I have a question mainly about appearance. My loaves have turned out well: nice airy holes, brown shiny crust, decent oven spring. But when my loaves expand in the oven they don’t push the crust up at the places I scored them. So the crust doesn’t form “ears” or have a sort of 3D appearance. It’s rather flat. I thought maybe the dough was too hydrated, but this last batch definitely wasn’t. I follow your recipe pretty closely. I don’t know – could it be my fridge is too cold, the oven temp isn’t right? There are just so many possibilities. Any ideas?
There are quite a few things that could cause this. I’d first start with perhaps you’re not building a tight enough skin on the dough when you’re shaping. You want to make sure your loaf is shaped tight enough so that when you toss it into the oven it rises and has nowhere to expand except the area you scored, if that makes sense.
Make sure your score is deep, but not too deep to where the loaf collapses at the score site. Try to do an angle to it, so the blade is almost parallel with the dough, this will ensure it “peels back” when you bake, and it helps to lift the loaf a little more.
If your dough is not active enough you wont get explosive spring needed at bake time. Check the interior of these loaves, are they super dense with little aeration? If so you might not be fermenting enough OR you’re over proofing too much. Usually it’s the first case.
Other than that, it’s what you said, it might be too highly hydrated. It sounds like you’ve eliminated that possibility though.
I hope those suggestions help! Try one at a time and see if things improve, it can sometimes be hard to narrow things down when there are so many variables!
Hi! I know you’re measuring in grams, but–when a recipe asks for so many “cups” of starter, is it referring to stirred-down starter or un-disturbed starter? Thank you so much!
That’s one reason to use weights 🙂 I like to stir down my levain before using it. You’re welcome and happy baking, Aaron!
I’m really excited that I found your blog on my journey to sourdough baking! I do have a question though: after the overnight proofing, do you let your dough get to room temperature or do you bake it straight out of the fridge?
Glad to have you along, thanks for the comment! I like to bake the dough straight from the fridge, I don’t let it warm up unless I feel it needs more time to ferment at room temperature (not often). Hope that helps!
Just baked off two loaves that were based on this recipe. Second time I did this recipe and both times the results were impressive. There was one difference I can’t quite figure out. On this go round the crust was nice and thin with a slight crackle, but it was really more soft and chewy than crisp and crackly. The first time I did the recipe I had that great crackly crust. At that time I could hear the bread crust crackle as it cooled, this time not so much. I’m thinking it might be one of two things: 1) I let it steam a little too long or 2) the hydration was too high. The dough was really wet when I loafed it, but it had good gluten development and plenty of gassy holes. I think it was where it was supposed to be as to the bulk fermentation. The Bread had ok ovenspring but because of the wet dough it expanded more outward rather than upward.
By the way, from appearance, the crust lookd identical to the first time, much like your photos. It just wasnt as crisp as I would have liked. Any ideas? Again, thanks for the fantastic blog.
Hey, Christopher! I would guess that the second time hydration was just a tad too high, especially if you didn’t quite get the rise you’re used to. It could also be over proofed, but if the interior was nice and open I tend to side with over-hydrated.
You could try cracking your oven door open the last 2-4 minutes of your bake to really get that dry heat in the oven, that also helps build a little more crunch in the crust towards the end.
That’s my two cents! Hope it helps, sounds like your bread is turning out fantastic, though!
I reccommend fooling around with sourdough brioche and whey sourdough. Pretty cool. (or sourdough whey brioche)
I’ve made brioche a few times but based it on the recipe found in Tartine, they use a mixture of sourdough and instant yeast. I’ve love to try a full sourdough version! Thanks for the suggestions, might be time to revisit that.
Hello! I am a pastry chef by profession. I have tried this recipe twice, and each time, I have had giant air pockets at the top,of my finished loaves. I first attributed that to not enough to gluten formation to hold the gas, however, the second batch had more gluten development, and even larger air pockets. (Like…the entire top of the loaf.). My next instinct is to decrease the water (therefore decreasing the steam),but I wanted to know what your thoughts were. ( it is almost like I have made a hybrid bread/cream puff dough when these loaves are baked) I am using King Arthur flour at the moment.
That’s very interesting, I’ve never seen anything like that happen. Are you performing your turns during bulk as described in the writeup above? I’m wondering if you’re dough might be sitting and developing large pockets that are never re-distributed. Another suggestion would be to try and degas your dough just a tiny, tiny bit at shape time to help squish some of those larger bubbles. Just lightly tap down on the dough from top to bottom when you’re shaping.
Other than that I’m kind of at a loss why you’d get these holes more than once in the same area…
Yes, I am doing everything according to the directions. To the point that I am setting alarms. (Obsessive, yes.) Haha. Especially the second time, because the first time did not produce the results that I was seeking. I have had success with many high hydration bulk stretch and fold doughs in the past. When I am shaping the dough, I am shaping in boules, so…I am degassing pretty much entirely, working it into a taught boule. The dough is quite slack, which was to be expected, but not unworkable. I will try again. Maybe I need to go less than the 15-16 hr. Final rest in the cooler. I will also take a look at the steam I am incorporating and perhaps use less, so that the crust sets sooner. (I have access to steam injected ovens with the push of a button.). Meh. I should take a picture, but the crust rises from the crumb on the top of the loaf like pita bread, and leaves a good two inches of crumb in the bottom. Kinda awesome for sandwiches. :). Always tastes amazing. Best tasting bread I have had, and as such will keep baking it until I find out what’s going wrong. Thank you for sharing the recipe, and thank you for responding.
Glad it tasted great, at least! Any chance the dough is overproofing? Were there any dense areas in the dough? I’ve seen some loaves that underproof with large pockets and other areas that are quite dense.
I suppose that it is possible that they are overproofing. I never checked the temp of the cooler, perhaps it’s running a little warm. The pockets in the rest of the crumb were nice, and a lot like what are in your photos, just with big holes above. I will start the dough again tomorrow, and make a couple of adjustments. (Only regarding shortening the final cold proof and the steam in baking). I will let you know, if you’re interested! Baking troubleshooting is fun for me anyway. (I once spent 6 months perfecting macarons, 3 months with croissants, and another four working on the perfect 80% hydration baguette.). And all that after baking all day at work. I have that kind of mind (the slightly crazy kind). Thanks again!
Definitely interested to hear how it works out! Trust me, I know what it’s like to work like crazy on a baking endeavor 🙂 While I’m not a professional I’m either planning my next bake or baking late at night! One of my next ventures is going to be croissants… It’ll be a challenge, just as bread as been, but I’m excited. Keep me posted on the next attempt!
Well, I figured out my problem. Too much steam in the oven. It allowed the crust to expand too long after the crumb inside started to set, giving all that air a big, open space to occupy. I have baked without the giant hole problem twice now. I also have been leaving out 55 grams of water, and find my current flour to be able to handle less liquid a tad better. (I have an artisan flour I plan to try, hopefully it can hold more water than King Arthur.)
Thank you for this awesome recipe!
-Casey
Wow that’s very interesting — I guess in a home oven it’s pretty hard to have too much steam, I feel like I’m constantly fighting the vents in my oven. Thanks for the feedback, I appreciate that!
You’re welcome and happy baking, Casey!
Hi again Maurizio! This has always puzzled me. How do you make starters by bulk? Like when you have a bakery or something? You have to have kilos of starter noh? But recipe for starters are maybe just 500g or less at the end. How can you make more? Let’s say 1500 g of starter?
I’ve never worked in a situation where I’ve needed that much levain, but it should be the same process as creating one in your home, just at a larger scale. If you needed 1500g levain for a bake you’d still use the same percentage of ingredients, just the quantity would be higher.
If you needed something like 1500g of levain for a bake you’d only need a small portion of mature starter to make that happen, for this recipe you’d only need like 300g mature starter to build a 1500g levain (I have spreadsheets to calculate all this out). So my point is you just make it the same but all the quantities are higher (percentages are the same). If you don’t have enough mature starter to make that levain then you might have to increase the amount of flour/water you give your starter the night before to ramp it up and ensure you’ll have enough.
I hope that makes sense!
Hello Maurizio,
First off all congratulations for your blog! I’m baking for a while some Tartine (Chad R. recipes) loaves with 70 to 75% Hydration, and didn’t getting too much holes or oven spring. Then I found your blog and I accepted the challenge of 86% hydration. I changed some steps to fit your recommendations like longer autolyse and mixing. Everything was doing well until the end of bulk fermentation. After mix #2 and S&F steps, as recommended, the dough was wet but I could work. After four hours by the end of bulk fermentation the dough was really soak, very wet and no strength at all. The temperature was stable at 79F and the Humidity around 50%. I am using a French Flour – Bagatelle T65 with 11,5% protein 90% and 10% with local whole wheat Flour.
Could you help me understand what happens? Maybe the flour can not holds as much hydration? Thank you!
Eduardo, thanks for the comments! Yes, it sounds like your flour is not able to go quite as high with hydration. You could try this same recipe again with perhaps 10% lower hydration and see how your flour handles it, if it does well slowly increase water each bake until you get to the taste/texture you are after. Each flour has its relative hydration level it can take on and adjustments are needed not only on a flour-by-flour basis but sometimes with each sack of the same flour! Constantly adjusting 🙂
Hope that helps — happy baking!
Great Thanks!
More protein more hydration? This is correct to say? Thank you!
You’re welcome! No that’s not necessarily true, protein isn’t an indicator for water absorption. However, higher hydration means you’ll need to strengthen your dough appropriately!
OK Thanks again!!
Do you ever do the second rise of 4 hours, not in the fridge?
You can certainly do that! I prefer the longer, colder proof overnight to develop complexity and the type of sourdough I’m after. A proof on the counter works really well, though!
Wow! Great pictures! Just wondering, have you experimented with a retarded bulk fermentation? I don’t have time to do a 4 hour bulk, can I do it in the fridge? Thanks!
Thanks, Brandon! I have done a retarded bulk with pizza dough but have yet to do it with my sourdough loaves. I do plan on experimenting with it more. You should be able to retard your bulk with no problem, just watch the dough after 10 hours or so and see how it’s developing. You can take it out of the fridge after that time, preshape and shape with a final proof in baskets. Once the dough is then ready, bake it. I hope that helps!
Hello Mauriziu. I am very happy to have discovered your beautiful blog. Thank you for it. As I read through it, I ran to the kitchen to start the process of making yout perfect loaf. I am so very happy with the results. It is the first time i have been baking 2 loaves at a time (at home) and without covering the loaves. I would like to post the fotos of the loaves, but I dont know how..The only odd thing that happened is that one of the loaves came out unbelivably beautiful, but the other, which was made from the exact same batch, didnt come up so nice:) maybe its my cutting, my oven.. Did you ever had this kind of an experience? Thank you very much. I will keep baking your recipes one by one!!
Thanks Lilach, I appreciate the comments! There are definitely many factors that could lead to the difference between the two loaves: different shaping, rising baskets, and of course the score in the morning. I definitely have had that experience, each loaf seems to take on a life of its own at the end — it’s beautiful and expected 🙂 Consistency is one of the hardest things in baking, takes a lot of practice!
Happy baking 🙂
@ThePerfectLoaf – thank you SO MUCH for sharing your knowledge!! Absolutely LOVE your site and just took 2 beautiful loaves out of the oven after following your advice! Thank you Thank you Thank you!
I replied below but thank you for the kind words! You’re very welcome, glad my site and recipes have been helping you make awesome bread at home 🙂
With the exception of implementing a few techniques acquired from Ken Forkish’s book (like working the dough from start to finish in a 12qt. tub) and using locally available flours, I baked this recipe(today) as instructed. The results were Amazing. Crunchy crust, chewy crumb, great flavor, and giant, glorious air pockets. I had half a dozen people, who are accustomed to sampling my “bread experiments” say this was the best yet. Up until now I’ve only baked from a poolish. This was my first natural levain bread and I couldn’t be happier!
One thing to note to other first time natural levain bakers… Having used instant yeast for every bake up until this point, I’m use to seeing my dough double or somtimes triple in size during bulk fermentation. This was not the case today and I was worried I had messed it up. After bulk fermentation and retarding for 16 hours at 40 degrees, my dough rose only slightly. However, after 20 minutes at 500 degrees, the dough doubled in height and when cut into later, many 1/2″-3/4″ diameter air pockets were scattered throughout the slice.
As Iv’e said, this loaf was fun to bake, delicious to eat and I can’t wait to do it again. I only wish I could figure out how to bake it on a work day.
Couldn’t agree more! This was my 2nd attempt making bread without commercial yeast and ditto to everything that you wrote! I was super nervous that the dough didn’t rise like I was used to, but just took out gorgeous, puffy loaves from the oven! Cooling now!
Awesome! Really happy to hear that 🙂
Thanks so much for the feedback, sounds like your baking some awesome bread at home! I have little experience with commercial yeast but yes, I’d expect there to be quite a number of differences. I’m glad the recipe turned out well for you, this really is the bread I go to time and time again — it’s just delicious!
For baking on a work day I typically do most things at night. I build my levain in the morning and then mix right when I get home, bulk in the evening and then retard somewhat late. If you do this on a Friday then you can bake Saturday morning/afternoon after the dough has proofed. Just a thought!
Thanks again for the comments and happy baking!
Tania — I live at 5280 ft above sea level so everything you see posted here on my site is baked at that altitude. I really don’t believe you’ll need to modify anything!
Thanks, I really appreciate that! Sounds like you’re definitely on your way to making some awesome sourdough 🙂
Hi!
I would like to know what changes there would be to the recipe if I was to bake this as one loaf instead two.
thank you
Hi, Kim! Just halve the entire recipe (take all the weights in the mix and divide by 2). I would suggest, though, that you keep the “Levain Build” at the same quantities (so still make 175g total levain, but only use 150/2 = 75g in your mix). It’s useful to have a levain build that has a little extra than what you end up using, just in case you’re not able to use your levain at the right time, it’ll still have food to consume before it becomes too acidic.
Happy baking!
Getting ready to make a batch of this dough. I came across your recipe a few weeks ago, tried it out, and my family loved it. Going to try for double the recipe and hold the dough in the fridge while pulling out enough for a loaf every other day. It worked out well in my cast iron loaf pan, nice crust all around.
Sounds like a great idea. Glad my recipe has worked out so well for you guys! I love hearing that. Happy baking!
I made a terrible mistake! I mixed the salt before adding the levain. Is there anything I can do?
Not a problem: just add the levain in at the same time and go forward with it! Hope this isn’t too late…
Thanks so much Maurizio! You are helping me alot. Im already selling my stuff here where I live. It’s amazing they love artisan bread! I never thought it would be such a hit here. I owe you this one
You’re welcome — that’s really great to hear! I think once people have “real bread” they can’t ever go back!
Hay man your pics and process are fantastic!
Just 2 question…
1) when u leave the dough rising for 4 hours, during this period u do stretch and fold? Every stretch and fold is made of 2 actions ( i mean s&f on one side then turn the dough and s&f to the other side)?
2) When u cook the bread, do you do it from fridge directly to the oven? Or do u leave it at r.t. any minutes?
Thx have a good day!
Marco
Thanks I appreciate that!
1) Yes, for this bread perform 6 sets of stretch and folds during bulk. The first three are at 15 minute intervals, and the last 3 are at 30 minute intervals.
2) I bake the bread directly from the fridge. I don’t let it rest at all, just straight from fridge to oven!
Thanks again and happy baking, Marco!
Hi Maurizio and thx for your kind reply!
I’m not sure I correctly understood point n.1…
If u do 4 hours rising how do u plan the s&f?
(15 rest time) 1st s&f + (15 rest time) 2nd s&f + (15 rest time) 3rd s&f +(30 rest time) 4th s&f +(30 rest time) 5th s&f +(30 rest time) 6th s&f
but the total is = 2hrs and 15min…
Thx again.
M.
Yes, that’s exactly correct! The rest of the time (about 1 hour and 45 minutes) you just let the dough rest in bulk — no more stretch and folds.
I’m in the middle of following this recipe and so far I love how this dough feels! I was confused about the bulk ferment time also…wouldn’t hurt to update the recipe and add that last 1 hr 45min rest bulk. Anyways, just discovered your blog and l really love it.
Great to hear! Ok, I’ll update the post with those details — thanks guys for the feedback!
My loafs are out of the oven and I have to say this recipe is a game changer for me. I’ve been struggling through the Tartine recipe for the last two years producing mediocre loafs that tasted great but didn’t have the soft texture and open crumb that I yearned for and on my first try with your recipe I finally achieved that! The crumb is open with large irregular holes and the texture is silky and almost creamy soft. Flavor is also fantastic. This has just become my go-to bread recipe! Thanks so much for posting this!
That’s really great to hear, glad it’s working out so well for ya! What you describe is exactly what I’m after with this recipe, perfect! Thanks for the comments and happy baking, Danny!
Hi Maurizio-
Looking at the pictures here, I can’t quite tell what type of bannetons you use. Are they cane with linen liners, or are they something else that mimics a lined cane banneton? In the photos, it appears that they are lined because the cane is not distinctly visible, yet the rim appears to be flat and uniform in appearance, which would not indicate that a liner is wrapped over it. Perhaps you could link me to the exact item you use. The reason I ask is that I have started to used unlined cane bannetons in order to achieve a “striped” loaf appearance, but even when dusting with a fine rice flour, I still sometimes get some dough sticking. When I use the liners, I don’t get any sticking, but I of course sacrifice the desired stripes.
By the way, you might remember that I was previously living in London, but I have now moved back to the US, which means that I have been able to try the Giustos flours. They have greatly improved the quality of my loaves.
Regards-
Scott Schmidt
Bainbridge Island, WA
Scott — The bannetons I used here, and find myself using more and more, are these wood pulp bannetons. I don’t use a liner, just a light dusting of white rice flour. I find that even my highly hydrated loaves have yet to stick to the sides of these.
Glad you’re enjoying Giusto’s flour, and welcome back to the US! I really love their product, not only the taste but the performance is really great.
Happy baking!
Hi Maurizio, Great stuff. Thanks! Question on these oval wood pulp bannetons. The link goes to some pretty small baskets (9″x4″). Is this what you meant? Seems to small for 900g of dough each. I want to try these, but looking to be sure to get the right size. Thanks again.
Paul, yup those are the bannetons! They are quite long and easily fit 800-900g of dough for me. The pictures in this post are using those bannetons with about that same amount of dough!
Awesome writeup and pictures! Desperately trying to mimic :). I’m on my second try and could use any input – first one fell flat for possibly many reasons, flavor good but I think overhydrated and just ended up with ultra dense crumb but flavor was amazing. I’m at the end of the bulk phase but my dough still doesn’t look like yours. I’m using AP flour (reduced water by 30g this time) and temperature here is probably closer to 70 than 80. The post-bulk dough has some big bubbles but still seems too wet compared to yours. Am I possibly still using too much water or do you think I might still need more time in the bulk phase due to temperature?
Should add that it doesn’t seem like the dough has really risen much during the bulk phase. Just shows some gas bubbles.
Thanks! Definitely possible you’re over-hydrating your dough. I would suggest cutting back to 75% hydration, see how the dough feels then, and work up from there. If you over-hydrate the dough will not be able to hold on to gasses and will just look like soup.
Your dough should definitely rise during bulk, 30% at least, with lots of bubbles on top and around the sides. If this isn’t happening, even at 75% hydration, then it could be that your starter isn’t strong enough or stable enough. First try dialing back hydration and then see how it behaves. Let me know how it goes!
Quick update for future viewers, I worked on a few things all at the same time: stronger starter, more aggressive S&H for gluten development early in bulk, and cut hydration back to 75% (I’m using a weaker AP flour). Made one loaf that night after a ‘warm’ proof (gf wanted some that night) and baked the other after a nice cold proof. Both turned out Amazing with a great crust and soft/chewey/open crumb. Thanks for the photos and writeups!
Thanks for the update, really appreciate that! Sounds like you’re dialing things in just right for your flour — perfect! I’m constantly adjusting the hydration depending on what flour I source, an important step for sure.
Happy baking, Alan!