

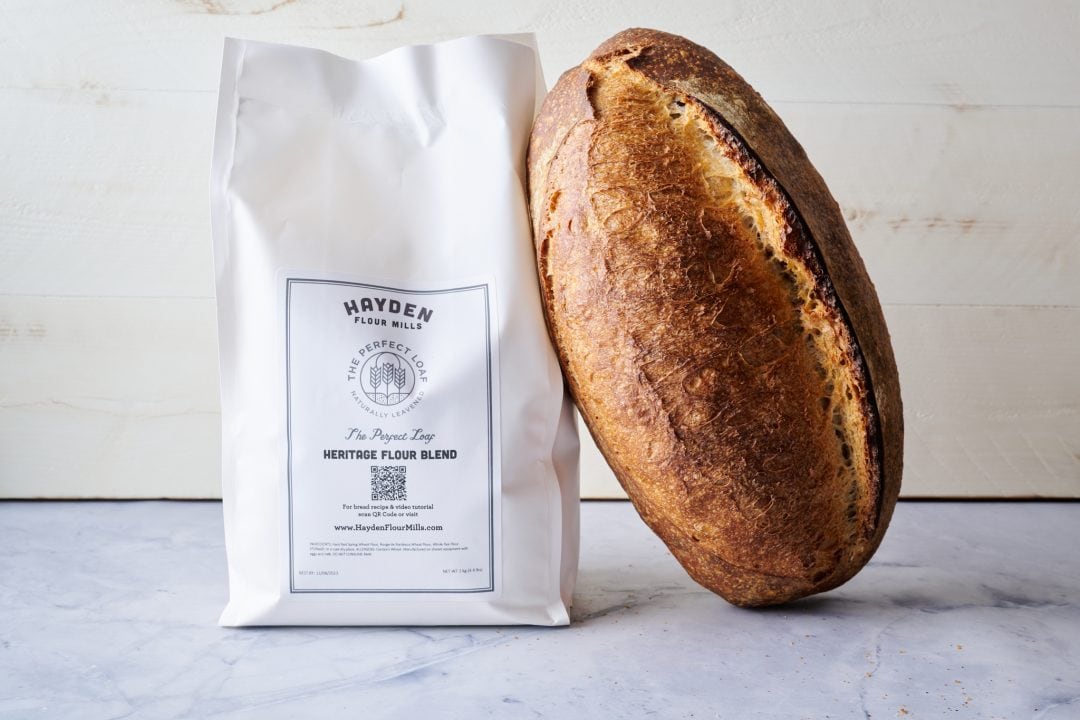
I’ve always wanted to create a unique flour blend explicitly designed for naturally leavened sourdough bread. When combined with the proper process, this custom bread flour would result in a loaf with a vast depth of flavor, the crispiest crust with a golden hue, and an interior crumb that’s open and melts in the mouth. This is the kind of bread that got me started baking sourdough in the first place, the ideal loaf that inspired the name of this website.
With this flour, I’ve done all the blending for you so you can simply open a bag of this freshly milled flour and start mixing.
Well, the day has finally arrived and I’m delighted to announce The Perfect Loaf Bread Flour. Hayden Flour Mills is a small, family-run mill to the west of me in Arizona, and I’ve long been a fan of their products. I’ve spent lots of time blending, tweaking, and testing various fresh flours from this mill to create a specialized blend I’d be happy to use in any sourdough recipe as 100% of the flour.
I almost always develop recipes with multiple flours in varying percentages, combining the qualities of whole grain, white flour, and even whole rye to end up with the perfect loaf of bread. But with this flour, you don’t need to mix and match, since I’ve already done that work for you.
Real Quick: Why do I love this custom flour blend for sourdough bread?
- The blend of grains in the flour results in bread with a deeply colored crust, open and light interior, and intense flavor
- The flour has an incredible aroma that makes bread irresistible
- The flour is freshly milled and shipped close to the mill date
- The flour is designed specifically for sourdough bread (though it can be used in many other things; see below)
Let’s take a closer look at what makes this custom flour special.

With this flour, I’ve done all the blending for you so you can simply open a bag of this freshly milled flour and start mixing. I’ve combined three fabulous flour varieties from Hayden Flour Mills:
- White bread flour (a sifted hard red spring wheat)
- Type 85 Rouge de Bordeaux
- Whole grain Gazelle rye
Bread dough made with this custom flour is silky, extensible yet strong, and easy to work with. The result will be bread that surprises you with its flavor and texture. It can be used for shorter fermentation timelines for same-day bread, and it also performs very well with extended fermentation times (like using an overnight cold proof, as in my recipe below).
In this post, I will go into my decisions in choosing the flours that make up this custom flour blend, the different grain varieties, and the various baker percentages. Then, I’ll share my simple recipe for making two loaves of sourdough bread with this flour.
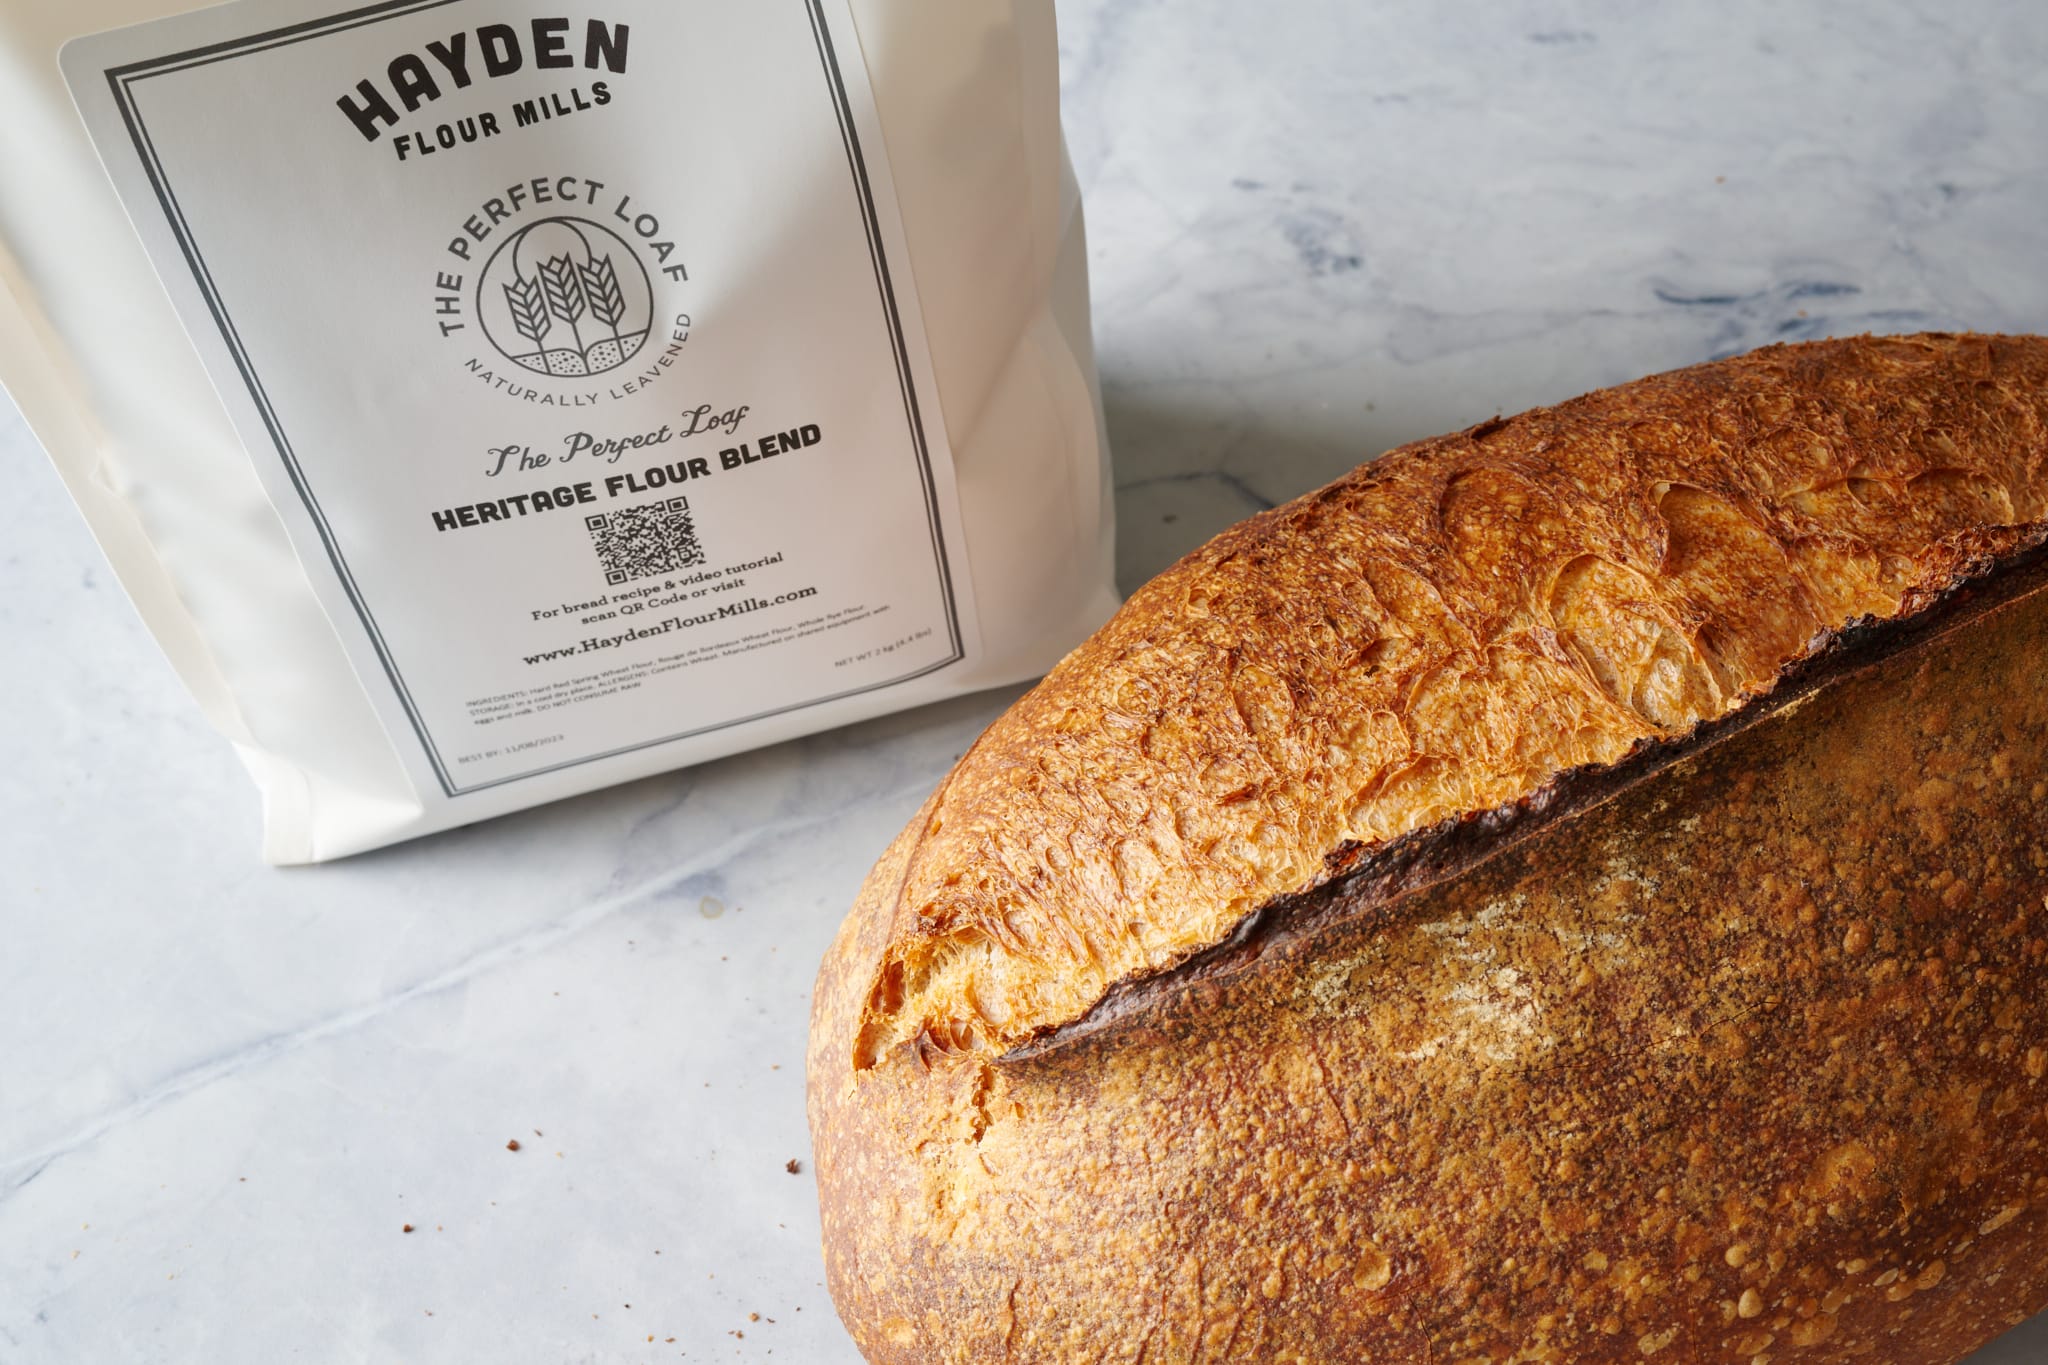
All About The Perfect Loaf Bread Flour
My flour blend is labeled as “Complex, nutty, and sweet”—and that’s the perfect way to describe it.
These wonderful flavors are mostly attributed to the blend of grains used, but in addition, Hayden Flour Mills stone mills and blends this flour every couple of weeks in small batches, so you get flour at peak freshness. Additionally, orders are shipped just a few days after receiving and directly from the mill (no middle man or fulfillment centers). This means that the flour is fresh, flavorful, and ready for baking sourdough bread.
The Perfect Loaf Bread Flour Grain Blend
| Flour | Percentage |
|---|---|
| White bread flour (sifted hard red spring wheat) | 70.0% |
| Rouge de Bordeaux Type-85 Flour | 25.0% |
| Gazelle Rye (stone-milled 100% whole-grain rye flour) | 5.0% |
The flours listed above are exactly what goes into this custom bread flour and their percentage relative to the other ingredients.
The Perfect Loaf Bread Flour Specifications
| Protein | 11.82% |
| Moisture | 11.96% |
All of the flour in The Perfect Loaf Bread Flour is:
- From wheat grown in Arizona
- Freshly milled
- Non-GMO
How I Developed The Perfect Loaf Bread Flour
Whenever I set out to develop a new sourdough bread recipe, I first ask myself if the bread will be mostly whole grain or primarily white flour. One or the other is usually the majority of the flour in a recipe, and which flour I choose sets the recipe’s tone, if you will. More whole grains are undeniably delicious and wholesome, but I also like to balance that with a very light texture and an open and airy interior.
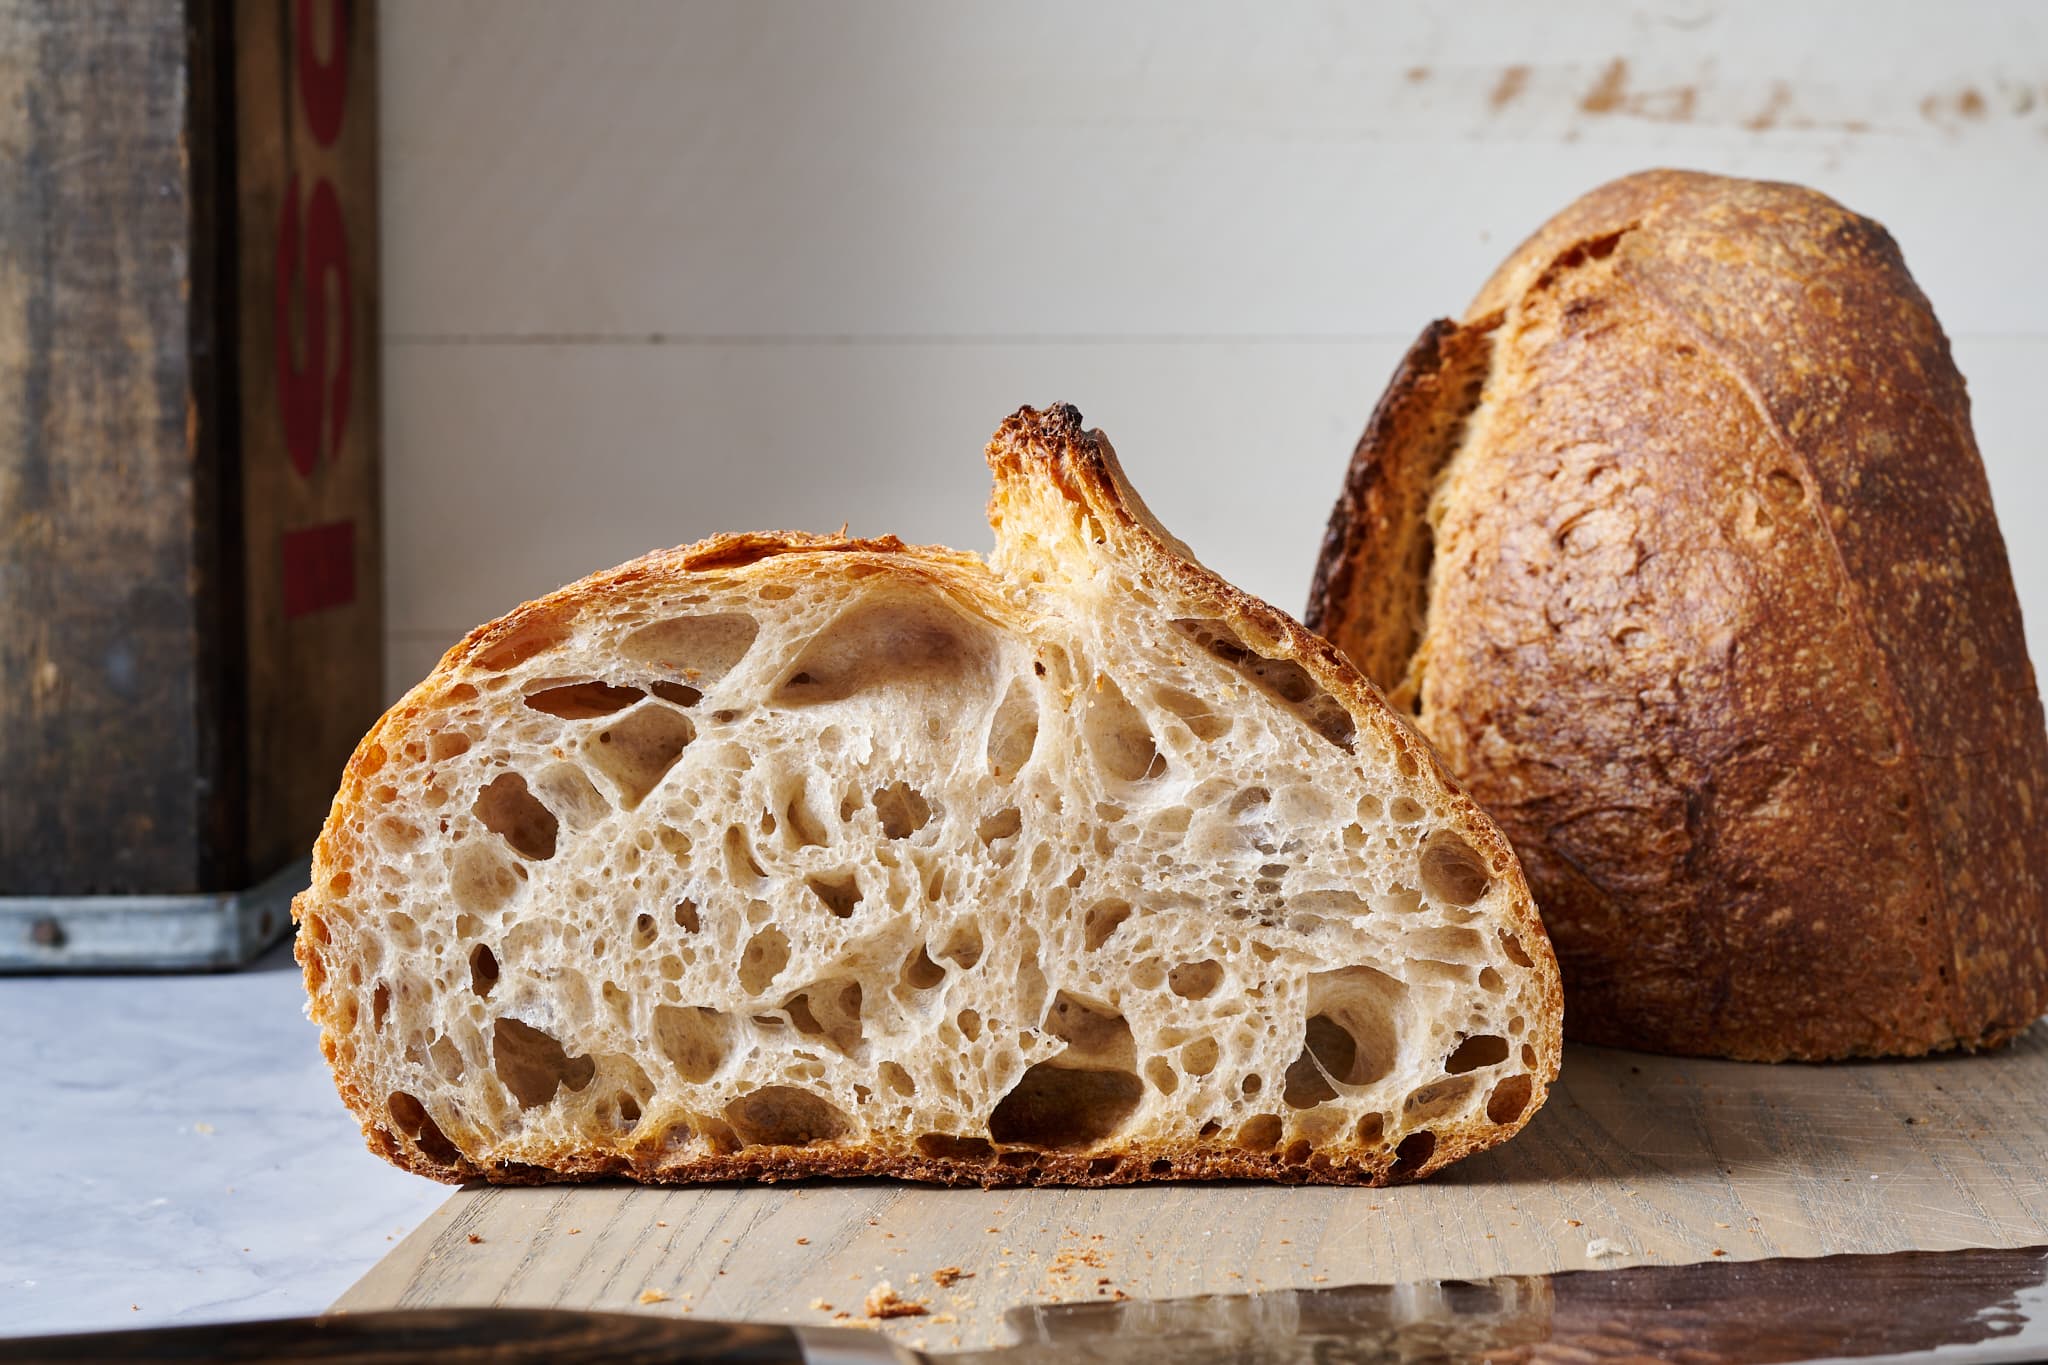
As I thought about my ideal bread and the flour needed to achieve it, I decided I wanted a loaf with excellent volume and that open crumb you often see here in my recipes. So, I knew I wanted at least 70% of the flour in the blend to be reliable and consistent white flour. But this large percentage of white flour also makes this flour easy to use in other baking applications. And I can always tweak how much whole grains to add in for flavor and additional nutritional value, if I want that for a specific recipe.
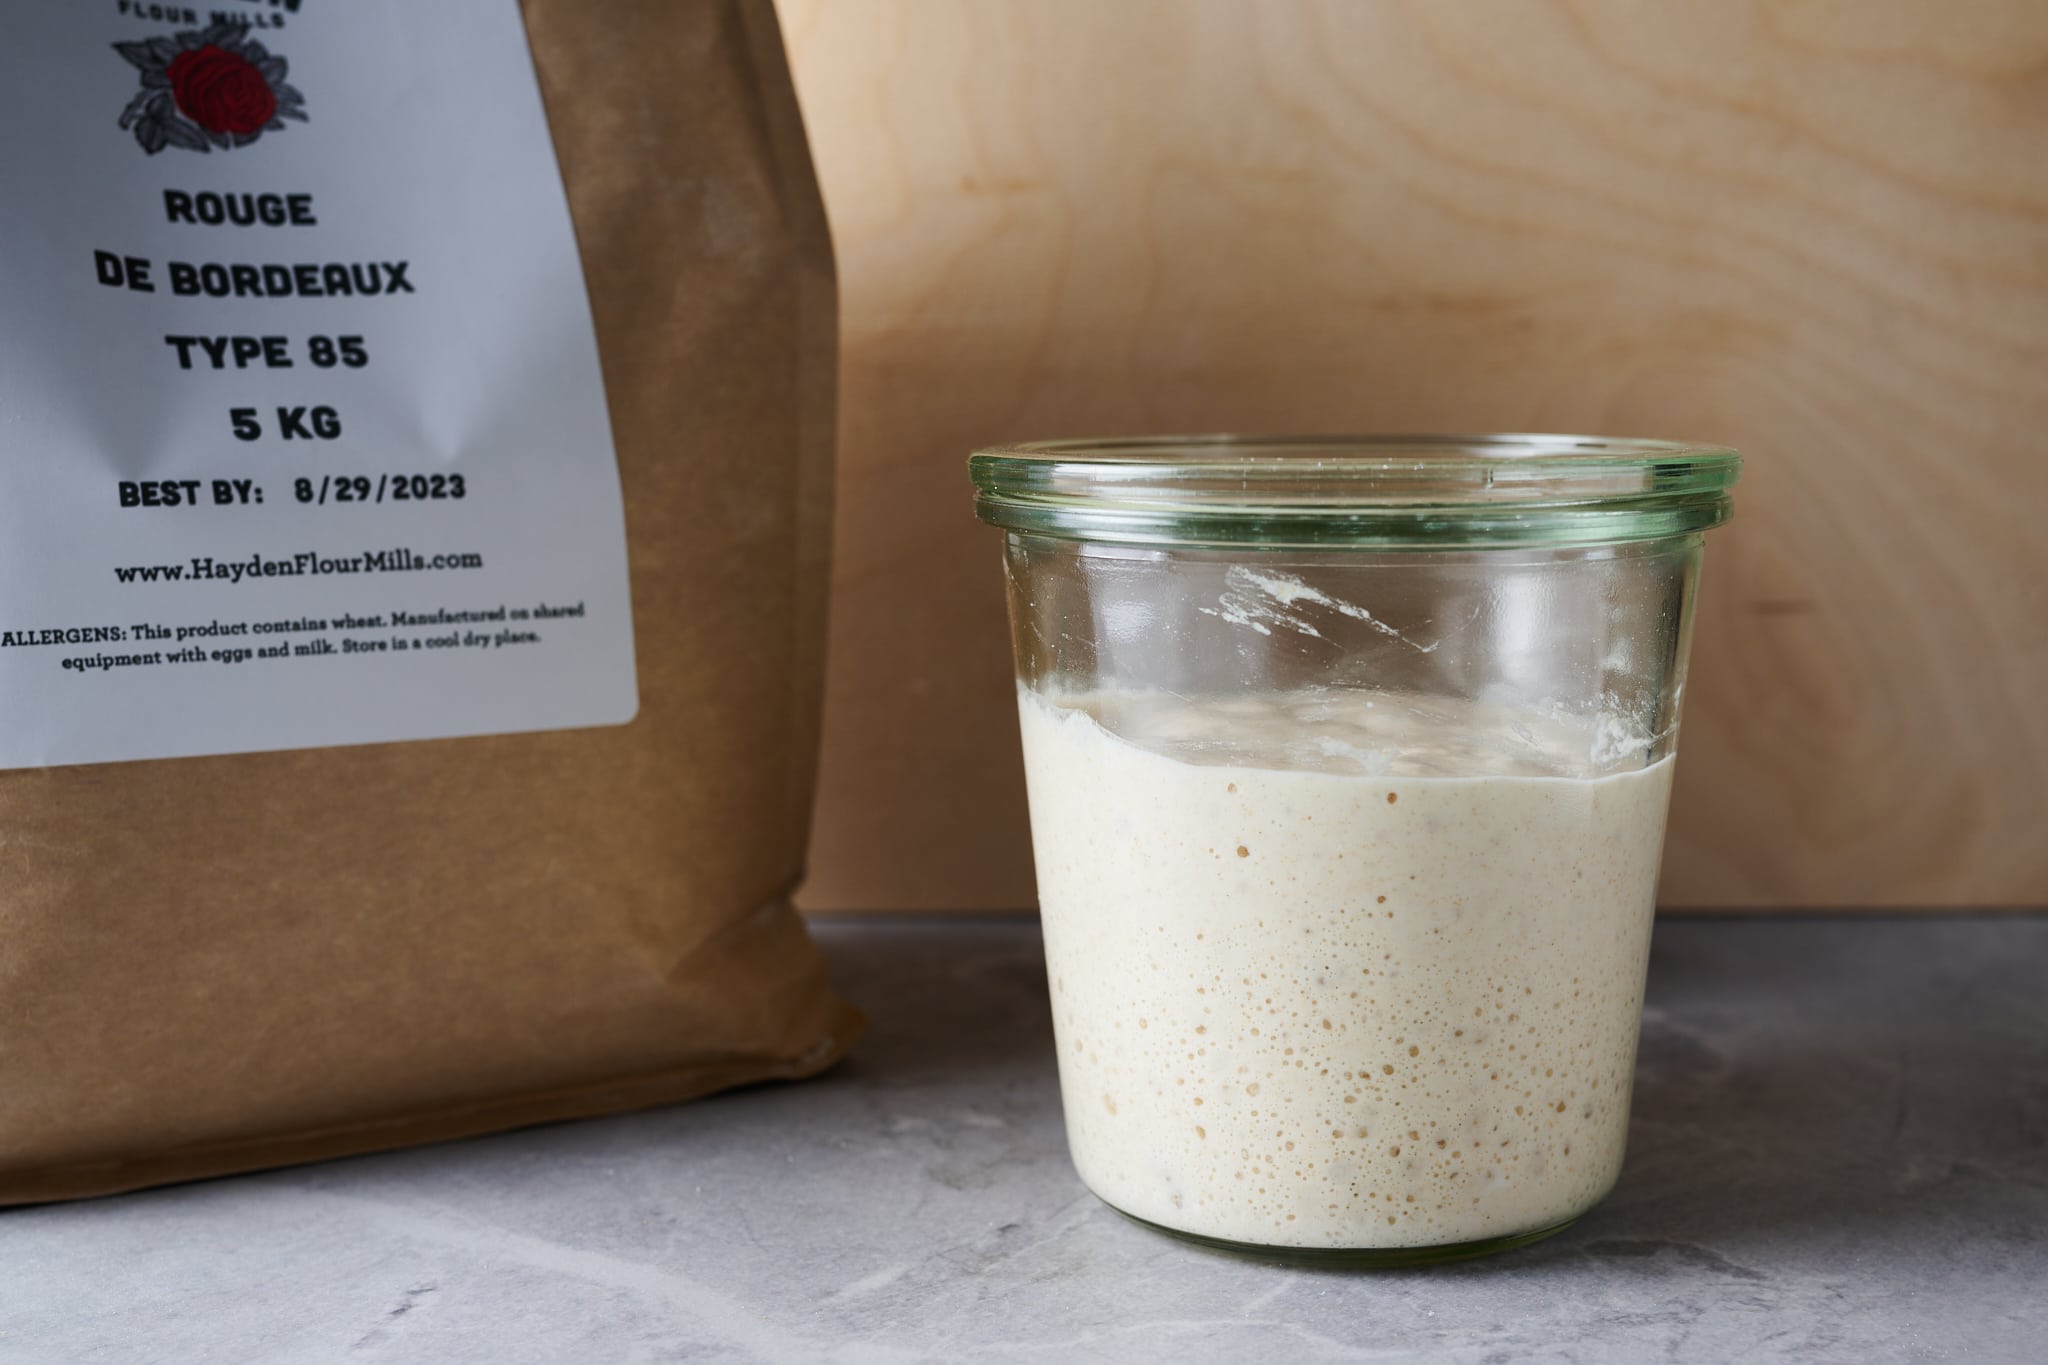
What is Type-85 Flour and Why Include It?
Type-85 flour is between white and whole wheat, as it has more bran and germ left in the flour than white but not as much as whole wheat. This flour is strong thanks to the increased whole grains, but it performs like white flour when milled finely. So it produces bread with the added flavor of whole grains but with a light and open texture.
These days, I use type-85 flour often in my baking; it’s the sweet spot between whole grain flour and sifted white flour, with the benefits of increased flavor without compromising crumb structure.
For my custom flour blend, I chose type-85 Rouge de Bordeaux, a variety of wheat popular in France with a perceptible nutty flavor and rich aroma with an earthy backdrop. The flavor is unique and delightful.
Why Add Whole Grain Rye Flour?
If you’re a frequent baker here, you’ll know I often use a small percentage of rye in my recipes (and in my sourdough starter). Adding whole grain rye helps encourage vigorous fermentation, a deeply colored crust, and, perhaps most importantly, a sweet, grassy flavor in the final loaf. Because rye lacks the same gluten qualities as wheat, it’ll result in a closed, dense crumb if used at high percentages (which isn’t necessarily bad!). To avoid this, I typically keep the rye to around 5% of the total flour in the recipe (in baker’s percentages).
For this custom flour blend, I chose Hayden’s Gazelle rye, which is an ancient variety that has prominent grassy flavors and, to me, an almost sweet aftertaste.
How To Use The Perfect Loaf Bread Flour
In practice, this flour is incredibly robust and flexible in terms of how you can use it in any bread formula. It can handle short or long fermentation times, be used as 100% of the flour in a bread recipe, or even be used in a reduced percentage to complement your existing bread recipes.
It is a strong flour that needs ample hydration for the best texture and result. In addition, as you’ll see in my recipe, I like to perform a 1-hour autolyse to help bring extensibility to the resulting bread dough.
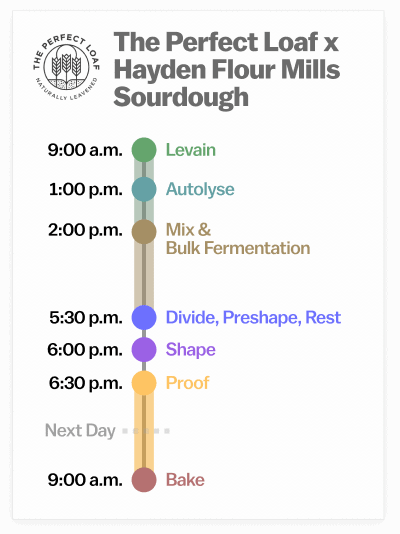
Baking Schedule
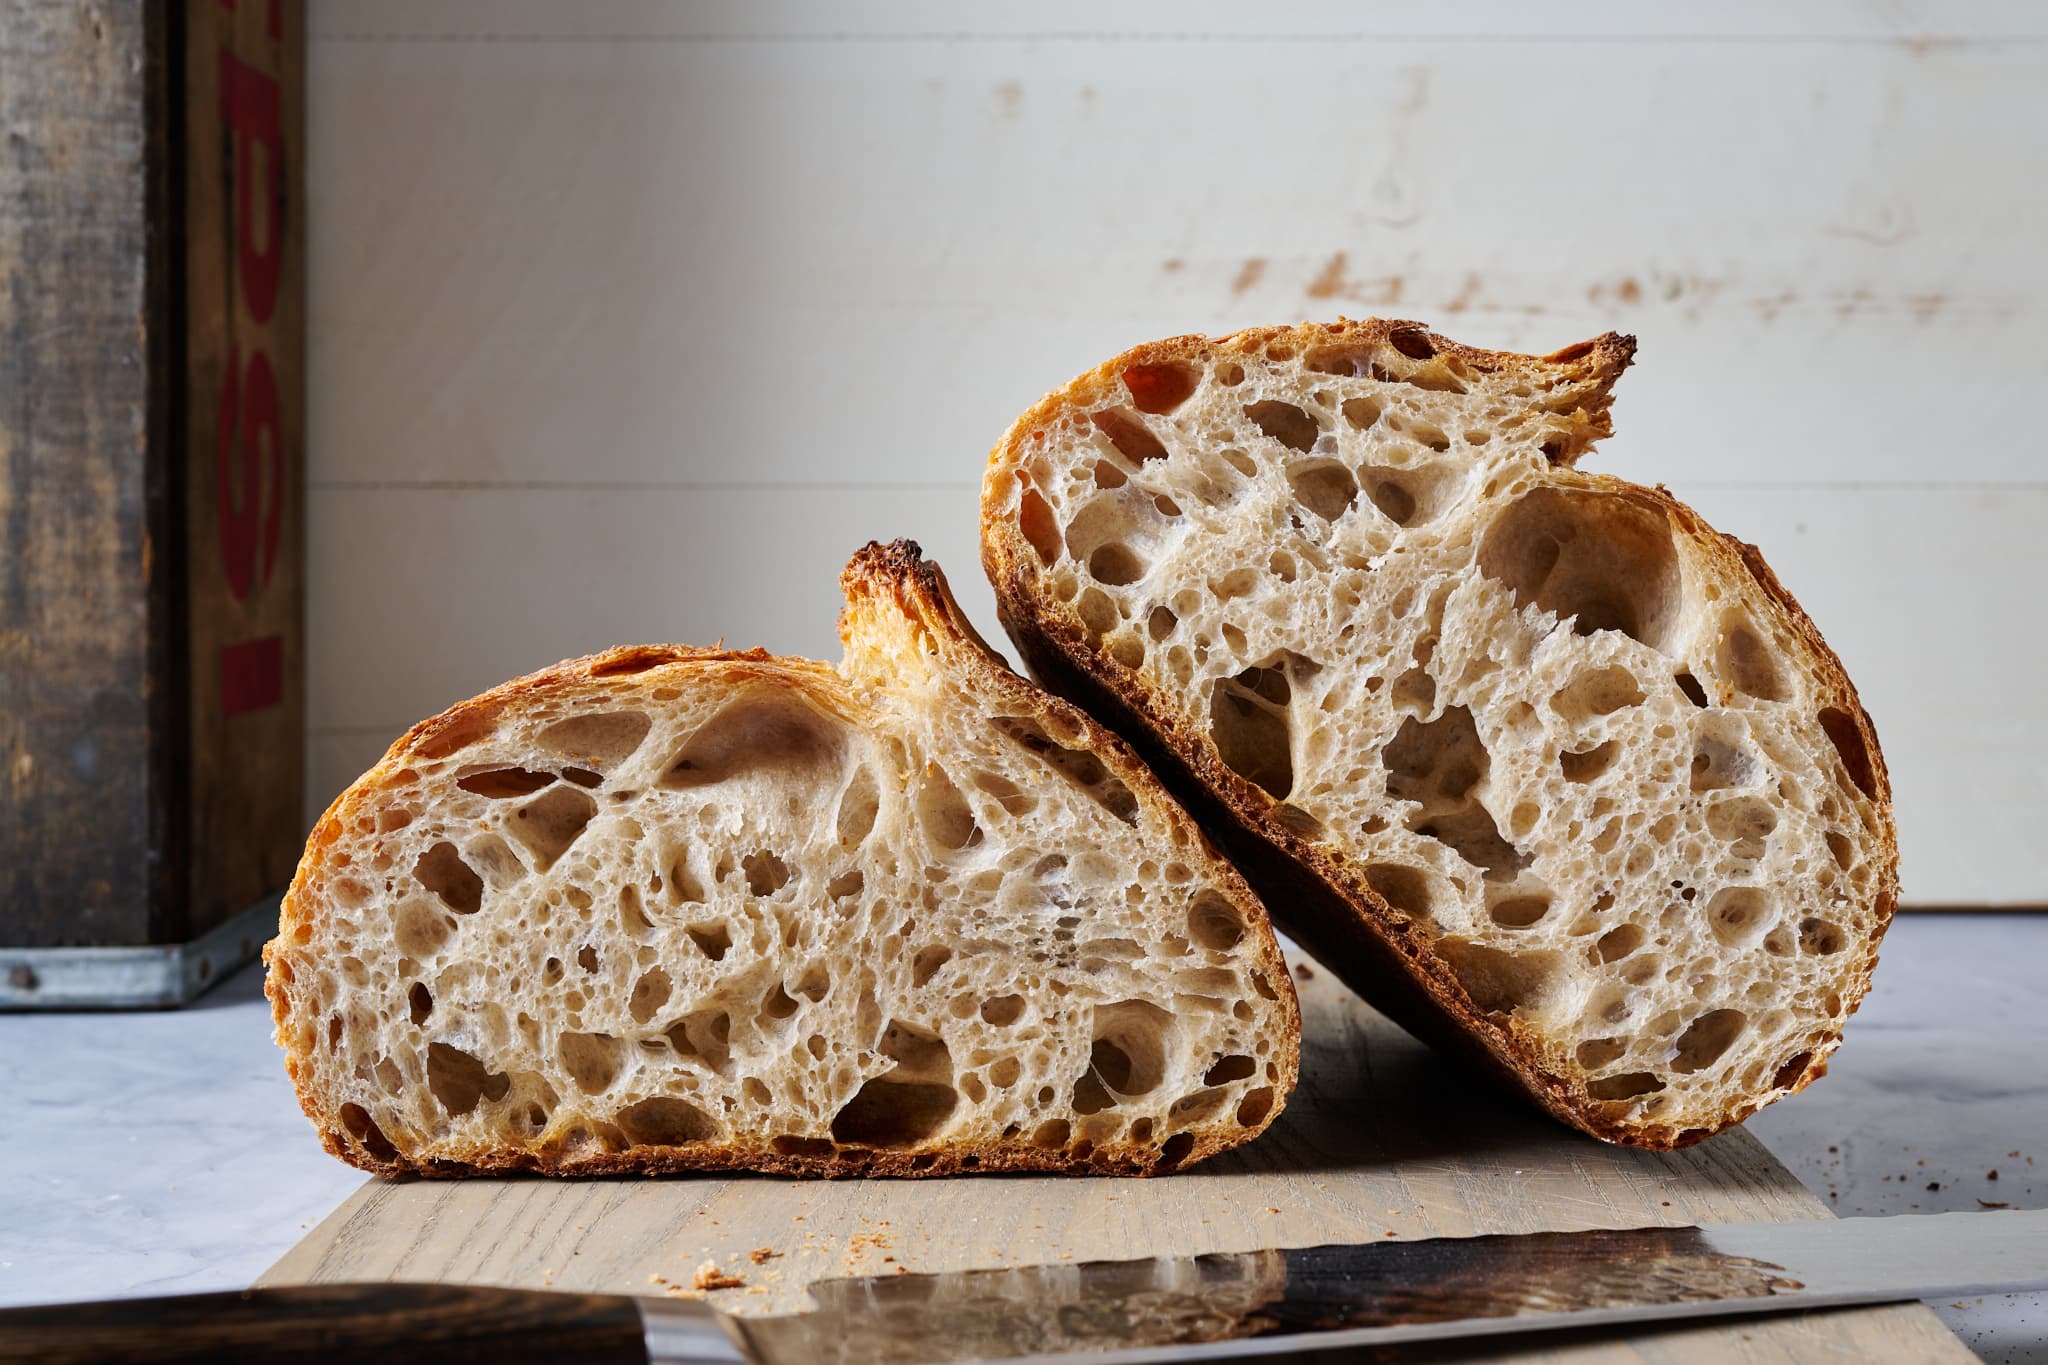
This bread can be baked the same day for a milder result or proofed in the refrigerator and retarded overnight for a deeper, more complex flavor profile. I like to retard this dough more often than not because this flour blend handles long fermentation times beautifully, resulting in bread with lots of flavor and beautiful crust color.
The Perfect Loaf Bread Flour Recipe
Vitals
| Total dough weight | 1,800 grams |
| Prefermented flour | 7.3% |
| Hydration | 75.0% |
| Levain in the final dough | 19.7% |
| Yield | Two loaves |
Total formula
Desired dough temperature: 78°F (25°C) (see my post on the importance of dough temperature).
| Weight | Ingredient | Baker’s percentage |
|---|---|---|
| 997g | The Perfect Loaf Bread Flour (Hayden Flour Mills custom blend) | 100.0% |
| 698g | Water 1 (levain and autolyse) | 70.0% |
| 50g | Water 2 (mix) | 5.0% |
| 1g | Diastatic malt powder (optional) | 0.1% |
| 18g | Fine sea salt | 1.8% |
| 36g | Ripe sourdough starter, 100% hydration | 3.7% |
Method
1. Prepare the levain – 9:00 a.m.
| Weight | Ingredient | Baker’s percentage |
| 73g | The Perfect Loaf Bread Flour | 100.0% |
| 73g | Water | 100.0% |
| 36g | Ripe sourdough starter, 100% hydration | 50.0% |
To make the levain, mix the ingredients in the chart above in a jar and leave them covered at a warm temperature, 74-76°F (23-24°C), to ripen for 5 hours.
2. Autolyse – 1:00 p.m.
| Weight | Ingredient |
|---|---|
| 924g | The Perfect Loaf Bread Flour |
| 1g | Diastatic malt powder (optional) |
| 625g | Water 1 |
Warm or cool the autolyse water so that the temperature of the mixed dough meets the FDT (final dough temperature) of 78°F (25°C) for this recipe. Place the flour, malt powder, and water 1 in a large bowl. Use wet hands to mix until no dry bits remain; the dough will be shaggy and loose. Use a bowl scraper to scrape down the sides of the bowl to keep all the dough in one area at the bottom. Cover the bowl and place it near your levain for 1 hour.
3. Mix – 2:00 p.m.
| Weight | Ingredient |
|---|---|
| 50g | Water 2 |
| 18g | Fine sea salt |
| 181g | Ripe levain (from Step 1) |
Add the salt and levain to the top of the dough that was just in autolyse and use a splash of water 2 to moisten. With wet hands, mix thoroughly. Add the remaining water if the dough feels like it can handle it. Next, knead the dough for a few minutes using either the slap and fold technique or folds in the bowl. For this dough, I kneaded for about 5 minutes until the dough smoothed and became elastic.
Transfer the dough to a bulk fermentation container and cover.
4. Bulk fermentation – 2:30 p.m. to 5:30 p.m. (3 hours)
At a warm room temperature, 74-76°F (23-24°C), bulk fermentation should take about 3 hours.
This dough will require 2 sets of stretches and folds during bulk fermentation. After the first 30 minutes, wet your hands, grab one side of the dough, and lift it over to the other side. Rotate the bowl 180 degrees and repeat. Then rotate the bowl a quarter turn and stretch and fold that side. Rotate the bowl 180 degrees again and finish with a stretch and fold on the last side. The dough should be neatly folded up in the bowl. Cover and repeat these folds once more after 30 minutes. Then let the dough rest, covered, for the remainder of bulk fermentation.
5. Divide and preshape – 5:30 p.m.
After 3 hours, the dough should be well-risen in the bulk fermentation container and puffy to the touch. The edge where the dough meets the container should be domed downward, showing strength and rise.
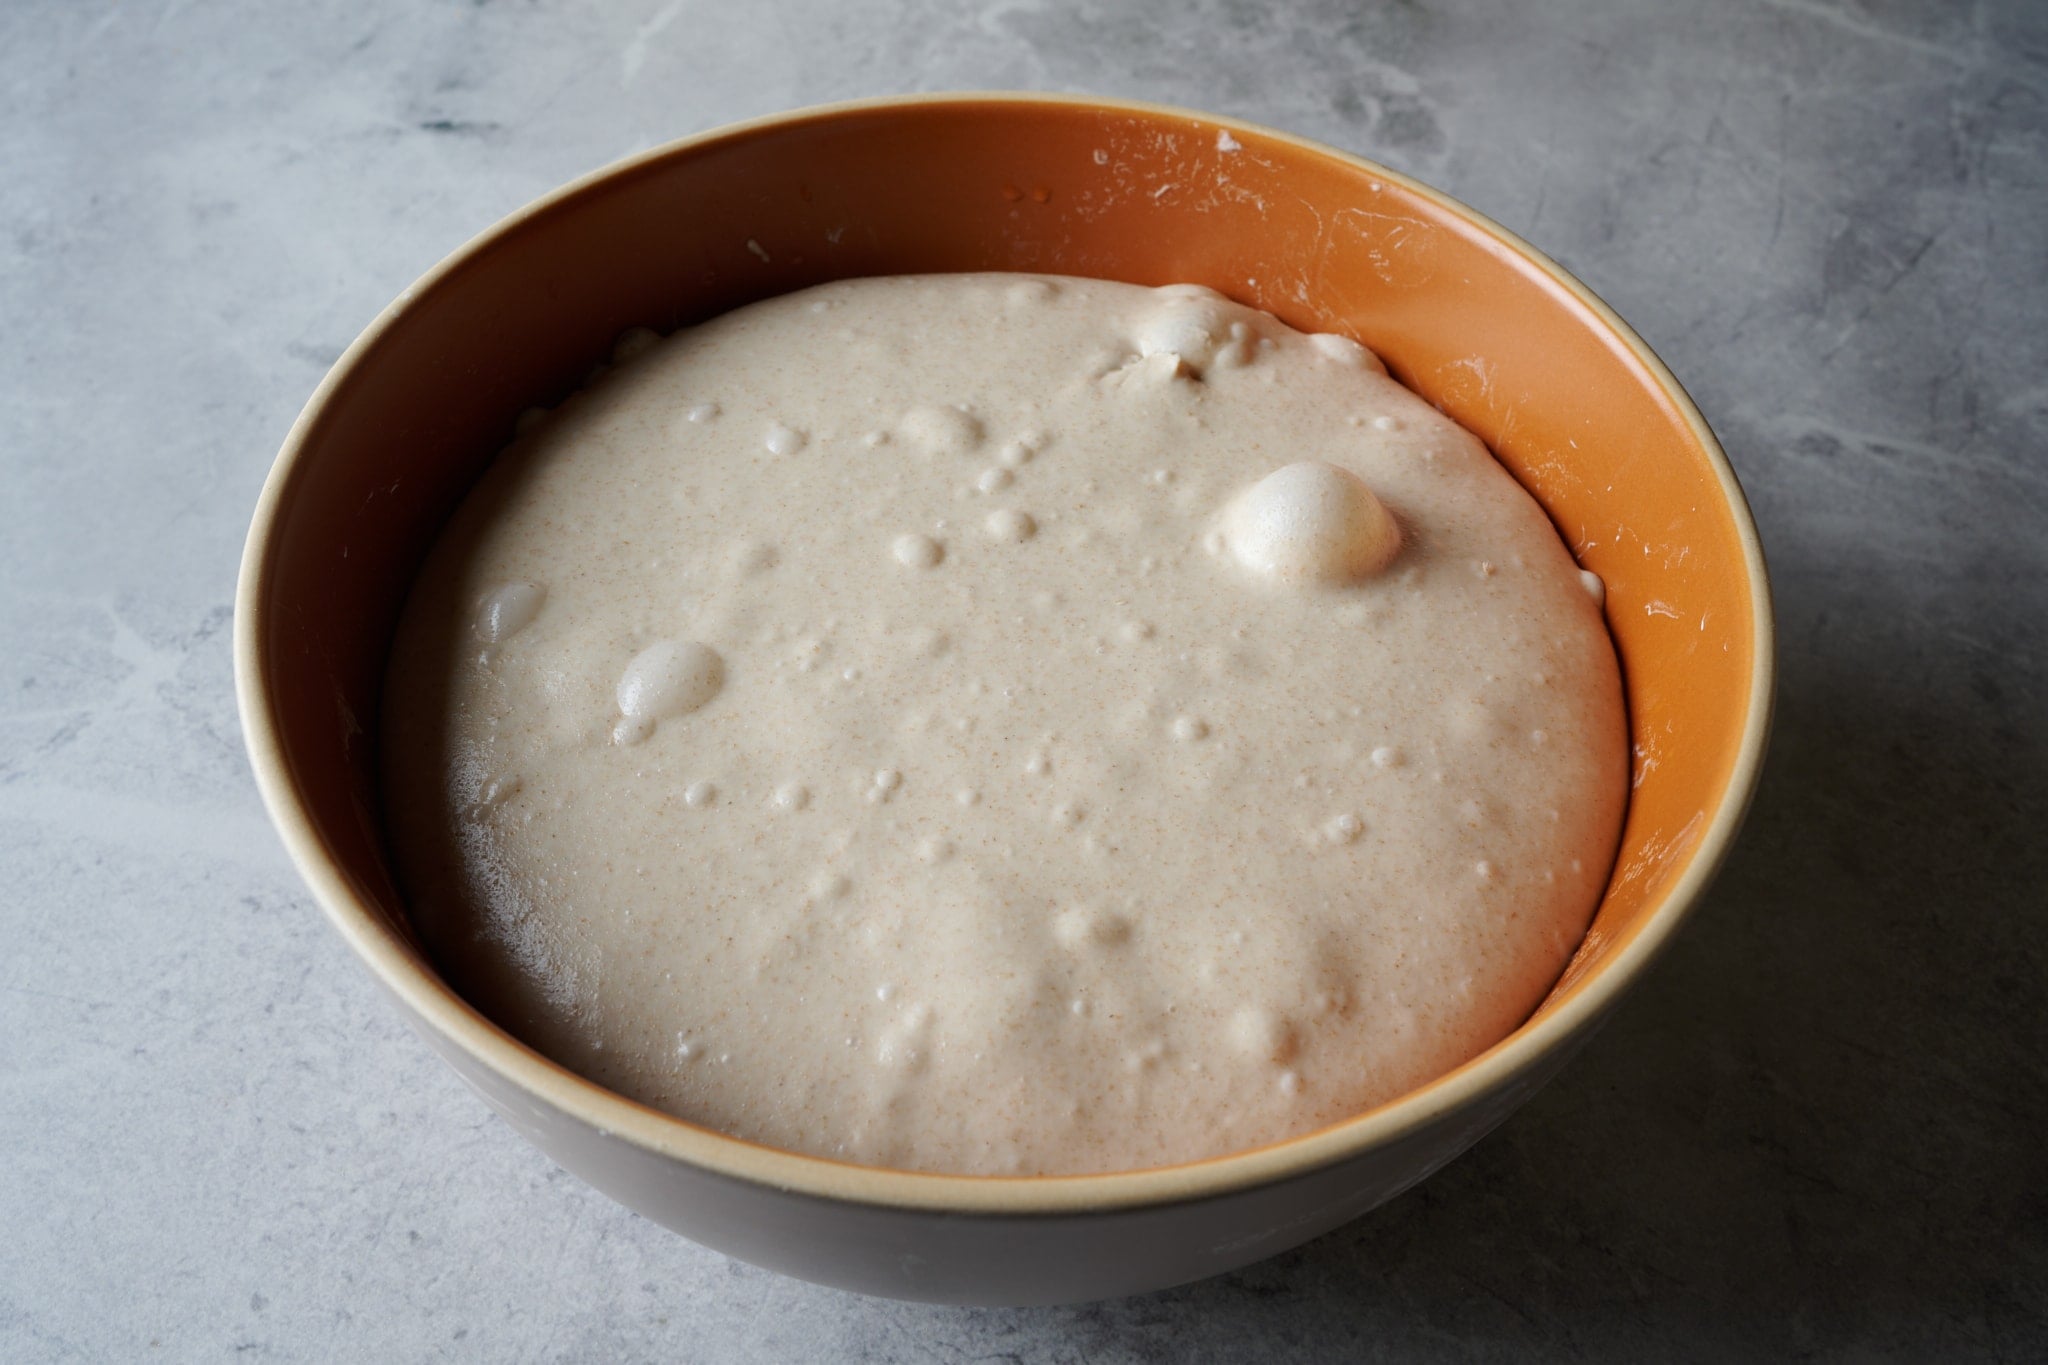
Fill a small bowl with water and place it next to your work surface. Scrape the dough onto a clean counter. Divide the dough into 2 equal pieces and preshape the pieces into loose rounds.
Let the dough rest, uncovered, for 30 minutes.
6. Shape – 6:00 p.m.
Flour the top of the preshaped rounds and your work surface. Using your bench knife, flip one of the rounds over onto the floured area. Using floured hands, shape the dough into a bâtard (oval). Gently transfer the dough to a 14-inch-long proofing basket, seam-side up. Repeat with the remaining round.
7. Proof – 6:30 p.m. to 9:00 a.m. (overnight)
Cover the baskets with a large, reusable plastic bag and seal shut. Place the baskets in the refrigerator to proof overnight.
8. Bake – 9:00 a.m.
Place an oven rack in the bottom-third of the oven. Due to their oval shape, I baked these loaves in my long Challenger bread pan. Or, see my guide to baking with a Dutch oven or steaming your entire oven.
Preheat the oven to 450°F (230°C) for 30 minutes.
Take one of the proofing baskets out of the fridge, uncover it, and put a piece of parchment paper over the basket. Place a pizza peel or inverted baking sheet on top of the parchment and, using both hands, flip everything over. Gently remove the basket and score the dough.
Slide the dough into the oven. Steam the oven: either cover the Challenger bread pan or pour ice into the preheated pan at the bottom of the oven. Bake for 20 minutes. Vent the steam oven: uncover the Challenger bread pan and remove the lid or steaming pans. Continue to bake for 30 minutes more. When done, the loaf should have an internal temperature of around 204°F (95°C), and the crust should be deeply colored.
Let the loaves cool on a wire rack for at least 1 hour before slicing with your favorite bread knife.
Print
The Perfect Loaf x Hayden Flour Mills Custom Bread Flour Blend (with Recipe!)
- Prep Time: 23 hours
- Cook Time: 1 hour
- Total Time: 24 hours
- Yield: 2 loaves
- Category: Main course
- Cuisine: American
Description
My recipe for an open, light, and crusty loaf of sourdough bread using The Perfect Loaf custom bread flour blend from Hayden Flour Mills.
Ingredients
Levain
- 73g The Perfect Loaf Bread Flour
- 73g water
- 36g ripe sourdough starter, 100% hydration
Autolyse
- 924g The Perfect Loaf Bread Flour
- 1g diastatic malt powder (optional)
- 625g Water
Main Dough
- 50g water
- 18g fine sea salt
- 181g ripe levain
Instructions
- Levain (9:00 a.m.)
In a small bowl mix the Levain ingredients. Cover the jar and keep it at a warm temperature for 5 hours. - Autolyse (1:00 p.m)
In a mixing bowl, add the Autolyse ingredients until no dry bits remain. Cover the bowl and let rest for 1-hour. - Mix (2:00 p.m.)
Add the salt and levain to the top of the dough in autolyse and use a splash of the remaining water to moisten. With wet hands, mix thoroughly. Add the remaining water if the dough feels like it can handle it. Knead the dough for a few minutes using either the slap and fold technique or folds in the bowl until the dough smooths and becomes elastic. Transfer the dough back into the bowl. Transfer the dough to a bulk fermentation container and cover. - Bulk Fermentation (2:30 p.m. to 5:30 p.m.)
This dough will require 2 sets of stretches and folds during bulk fermentation at 30-minute intervals. After the second set, let the dough rest, covered, for the remainder of bulk fermentation. - Divide and Preshape (5:30 p.m.)
Scrape the dough out to a clean work surface. Use water and a wet hand, and your bench knife, divide the dough in half. Lightly shape each half into a round shape and let rest for 30 minutes, uncovered. - Shape (6:00 p.m.)
Flour the top of the preshaped round and your work surface. Using your bench knife, flip one of the rounds over onto the floured area. Using floured hands, shape the dough into a bâtard. Gently transfer the dough to a 14-inch long proofing basket, seam-side up. Repeat with the remaining round. - Proof (6:30 p.m. to 9:00 a.m. the next day)
Cover proofing baskets with reusable plastic, seal, and place into the refrigerator overnight. - Bake (The next day, 9:00 a.m.)
Place an oven rack in the bottom-third of the oven. Due to their oval shape, I baked these loaves in my long Challenger bread pan. Using my oven-steaming technique, you could also bake them directly on a baking surface. Preheat the oven to 450°F (230°C) for 30 minutes. Take one of the proofing baskets out of the fridge, uncover it, and put a piece of parchment paper over the basket. Place a pizza peel or inverted baking sheet on top of the parchment and, using both hands, flip everything over. Gently remove the basket and score the dough. Slide the dough into the oven. Steam the oven: either cover the Challenger bread pan or pour ice into the preheated pan at the bottom of the oven. Bake for 20 minutes. Vent the steam oven: uncover the Challenger bread pan and remove the lid or remove the steaming pans. Continue to bake for 30 minutes more. When done, the loaf should have an internal temperature of around 204°F (95°C), and the crust should be deeply colored. Let the loaves cool on a wire rack for at least 1 hour before slicing.
Frequently Asked Questions
Can I make this bread recipe if I don’t have your flour blend?
Yes, absolutely, though it won’t have quite the same flavor! Try to find a similar flour to the white flour, type-85, and rye that are in my blend, then mix them to the same ratios (you can use the member’s spreadsheets to do this quite easily) and use your blend for all of the flour in this recipe.
What’s Next?
Though I can honestly say the search will probably never be over for my ideal bread—and that’s one of the reasons I love bread baking, that never-ending quest— I often catch a glimpse of perfection when the conditions are just right, when everything seems to fit its proper groove. My new flour blend will help get you there too.
This The Perfect Loaf custom bread flour will also work exceptionally well in my Beginner’s Sourdough recipe (use it for 100% of the flour), my Sunflower and Sesame Sourdough, and last but not least, my Sourdough Pretzel.
I do hope you love this flour. It’s something special. Buon appetito!


49 Comments
I am fairly new to sourdough bread making. I've made this recipe using your Hayden flour blend with success. A couple of questions – first, can this recipe be made with the seed and oat soaker in your High Fiber Seeded Sourdough recipe and if so, what adjustments should I make? Second, can this recipe be made in a loaf pan? Thanks.
Are the temperatures above for a fan oven, or do I need to make adjustments?
They are for a regular oven, no convection.
Hi Maurizio! Scored some of the TPL Hayden flour blend and so psyched to make this bread! Quick timing Q: You have mix at 2:00, bulk at 2:30, first stretch and fold “After the first 30 minutes.” Are you assuming that it takes until 2:30 to get the mixing done, so S&F at 3:00 (or 30 minutes from whenever you finish mix and start bulk)? Or are you timing 30 minutes from starting the mix and doing the first S&F at 2:30? Thanks!!
Hey there, Eben! Yes, I usually allot about 30min for mixing. So yes, you got it. Let me know what you think of the flour, it's so great. I also have another recipe coming soon to the site (next week!) using the flour. Keep an eye out 🙂
Hey Maurizio! Perfect timing–your reply was right there when I was getting ready to mix. Thanks! Currently in bulk rise, and so far I'm just amazed at the texture of the dough–unlike any I've made so far. Can't wait to bake in the morning!! And looking forward to the new recipe!!
Ok, wow. Just, wow! The bread is absolutely delicious, and hands down the most beautiful loaf I’ve ever baked. (I bake about a loaf a week, for several years now.). Several of your recipes here are favorites of mine (and I’ve learned a ton technique-wise from you too) and this one goes right to the top of the list. The flour is amazing to work with, and the outcome—just superb. Thanks!
Right on, Eben! So glad you are liking the blend—it's fantastic. I also just posted another recipe using the Hayden blend, this could be your next project (they are SO good):
https://slimlife.fit/green-olive-filoncini-twisted-baguettes/%3C/a%3E%3C/p%3E
Oooooo. That does look good! May have to give it a shot. Round 2 on this recipe today, though 🙂
Hi,
A couple of Challenger pan questions:
-I have been heating the pan while I preheat the oven, but I now notice the recipe doesn’t call for that. Have I been mistaken in preheating the pan?
-I have seen a suggestion to add ice cubes to the Challenger pan. Thoughts?
Many thanks,
-Ken Meyer
I do always preheat the pan, Ken! Sorry that wasnt clear here. I usually do add a single ice cube to the pan, helps add a bit more steam in there.
Can I use this flour blend as the white flour portion of your higher hydration dough recipe. I’m also at about 5000 feet. Or would I omit the whole wheat and sub 100% of this flour?
Yes, you absolutely can and that would be a good swap!
So I must say, while this is an easy recipe especially for those of us who are novice bakers it absolutely yields some of the most delicious loaves I’ve ever made! I only bake for myself, family and friends so I don’t mind paying for specialty flour.
One thing to note, just an observation I’ve made is paying attention to elevation when it comes to hydration. And please correct me if I am wrong, but we live in western NY, considerably lower of an elevation than what I believe most of these recipes were designed. I have finally figured out out that just decreasing the hydration by 50g to 75g per recipe depending on the flour has made such an immense change in how my bread turns out! The dough is much sturdier upon the finally proof, and retains shape better. The crumb is perfection! That all being said, I am a very particular person when it comes to measuring, proofing temperature and the type of water I use to bake with. All these things make a huge difference when they come together!
Amazing, thank you for all the wonderful feedback, Ashley. Really happy to hear you enjoyed this recipe. Also, good move adjusting down the hydration to suit! Enjoy 🙂
Could this be baked as a boule? My banneton is a 9 ” round.
Yes, absolutely, Mike!
Thanks for this recipe. Like another commenter it took more like 5 hours for the bulk fermentation, even in a controlled 75° environment. But the bread came out great, excellent in all respects except the sour flavor was very subtle. I’d like it to be just a bit more sour; should I use an even longer cooler fermentation? I used King Arthur starter, well ripened (tripled in a few hours).
Yes, go for a longer colder proof, Darius! Also, if bulk is taking too long, you can increase the amount of levain you make by 2-5%.
Wow! Has it been a busy few weeks since I tapped into TPL Flour and Hayden Mills. First off, the TPL Flour is a winner! My dough handles easier, comes together better, develops strength and extensibility faster. It also adds a rich flavor depth that I don’t get with just straight bread and whole wheat flour.
But there’s more. Inspired by Maurizio’s recipe for incorporating cooked brown rice in the bread, I decided to experiment with adding cooked wheat berries. So, I scored some farro, white sonora and purple barley berries from Hayden Mills. My family and I have been cooking einkorn berries in our Zojirishi rice cooker for a few years, using them as a side starch at mealtime or adding them to Mediterranean country salads. I found out the hard way, however, that you have to use a ratio of at least three parts water to one part wheat berries to get them tender enough to eat without feeling like you’re grinding double-aught buckshot.
I tweaked the brown rice recipe to substitute the wheat berries for rice, and I used TPL Flour instead on all Type 85 and made two batches, one with farro and the other with purple barley. Both were over-the-top tasty. They also rose well and yielded a nice open crumb and really crispy crust. Adding the berries gave the final product a really nice texture without seeming like “sileage”. Overall, I thought the barley was the more interesting flavor, but I still love the farro. Next up will be einkorn berries, adding some einkorn flour to the dough.
Overall, TPL’s new relationship with Hayden Mills is a real winner! AND, imagine my joy when I found that my local Whole Foods market carries Hayden Mills flours and whole berries!
Peter Giuliani
Weston, CT
Thank you so much, Peter! I just love this flour blend, glad to hear you are liking it too. It’s super versatile, you can use it in many of the recipes here at TPL—and esp. one with rice mixed in!
Can I use 11” banner one?
Yes, you can!
I just received my Hayden flour. Now I’m waiting for my Challenger bread oven. You have created a bread baking monster, or so says my husband. Now I can perfect my Batards with abandon. Thanks Maurizio! I’ve been sharing your site with friends, my physical therapist and my neighbor (an internet chef).
You and me both. So glad I can help and sorry for the delayed reply!
I have the flour! However, I don’t have 14″ bannetons. Can you recommend another size? Another shape? Thanks, Maurizio.
Hey! You can use 11″ baskets no problem. Let me know what you think of the flour when you bake with it!
Thanks, Maurizio!
This flour is magic! I hope you will give us more ways to use it.
More coming!
I ordered 20 pounds, trusting the expert! Right choice. Finally got a chance to use some in bread that finished today, and wow, wonderful! I’m always playing around with flour blends, as I I have a consumer grade mill and a bit too many types of grains. One, perfect amount of rye. Two, the really fine milling felt odd to work with at first, but really loving how it performed compared to the coarser milling I can do.
My go-to recipe I have developed over the years is higher hydration and has a longer retard, but results with this blend were the best I have had to date.
The flavor and texture are wonderful. Thanks for making it available! (Hayden is a great company too.)
So happy you like the flour, Christine! And you’re right, they make incredible flour 🙂
Hi Maurizio,
Since I am in The Netherlands, I do not have access to this specific blend, but created my own using Caputo Doppio Zero, Caputo Tip0 1 and a French whole rye. I made this recipe already three times and the flavour is great. Last time my starter was not super active maybe, so I had to increase bulk time and temp a bit. What I notice is that with my blend the thought gets quite slack if I do only 3 folds and use the amount of water you give. Next time, I will try reducing the water a bit and also adding a few folds (maybe towards the end of the bulk?) to give the build more strength. What are your thoughts?
Keep up the great work you do!
Bets regards,
Daniela
Nice work, Daniela. Yes, that sounds like a good approach to me!
Very fun bake-along! I thought my dough stalled-out overnight in the fridge, yet the resulting loaf was one of my best ever. Semi-open crumb, subtle tanginess, and gorgeous to look at! I’m stoked to build up some more confidence with this recipe, the flour blend is great! Perfect for honing those sourdough skills.
Just amazing to hear all of that, James, thank you!
The flour made an incredible loaf of bread! I did end up having to bulk ferment for 5.5 hours to get to 40% rise, even with my Brod & Taylor proofing box set to 82F. 3 hours seems very short for a bulk ferment, but maybe your starter is just incredibly strong given how often you refresh it
My starter is quite vigorous, but I found I didn’t need extended BF time if my levain was used when very ripe. Great work adjusting to suit your situation! Happy that you liked the flour and result, thank for the comments, Jacob!
My starter is quite vigorous, but I found I didn’t need extended BF time if my levain was used when very ripe. Great work adjusting to suit your situation! Happy that you liked the flour and result, thank for the comments, Jacob!
Would this blend work for bagels?
Yes, absolutely. Swap all the flour in my sourdough bagel recipe for this one!
Hello from Hillsboro NM, I assume I can cut this recipe in half and it will be alright? Also my challenger
Dutch oven is only 12 inches at the base, so is the 14 inch oval bannaton you put the dough in on the recipe
A mistake? Anyway I purchased the flour from Arizona this morning and can’t wait to try out this recipe.
PS. We love your sourdough punkin pancakes to death.
Hey there! Yes, you can always do that—check out my guide to baker’s percentages for a walkthrough.
I use the 14″ basket but my dough does not fully relax to fill that entire basket—that would be a huge loaf. I just am sure I shape it tightly so it doesnt spread excessively, but the larger basket gives it plenty of room to relax and expand.
Let me know how you like this flour! So happy to hear you like those pancakes, I make them year round, a can of pumpkin puree is an easy thing to keep on hand 🙂 Happy baking!
I tried Hayden’s Proof blend, based on the recipe from the bakery in Phoenix. It was really disappointing. I found to have decent results the highest blend was 50% Proof flour with regular bread flour. Any higher and the gluten structure was lacking and I’d end up with a flat loaf. I wasted almost 3 pounds of expensive flour to figure that out! I trust Maurizio to say this is good to go without blending, but I am cautious!
Ah sorry to hear that, Seth! Well I can tell you I’ve tested extensively with this flour, and it works really well here. If you have more questions or concerns about it, shoot me an email to discuss!
You mention olive oil, but I think it’s either a mistaken carryover from another recipe or that you forgot to list it in the primary ingredients.
Just fixed the typo, please refresh the page! Thanks for reporting this 🙂
Grazie Maurizio, I just ordered it! I’ve been loving your book and blog. Too bad I discovered this site after we moved from NM, my husband is from Puglia, we would have loved to meet you in person and visit your dad’s restaurant. Maybe when we come visit our long time friends. Cheers!
I hope you love this flour and are loving my book, Elena! Oh wow, just like us (living in ABQ from Puglia!). Next time you travel through ABQ, please shoot me over an email. Ciao!