


Having just recently devoured every episode of the inspirational Michael Pollan series Cooked on Netflix, I came away with a sudden urge to drop everything and get some fresh dough between my fingers and mix up this spelt sourdough bread. Throughout the entire series, he was on screen rallying behind slow food, especially so in the “Air” episode where Pollan points out that humanity lost something when we transitioned from quality, slow food to abundant, fast food—most significantly when it comes to bread. There’s truth to the old saying that all good things take time, right? I agree.
With this amped up baking gusto I’ve been baking more and more this past month, not only baking my staple weekly bread but also milling fresh spelt flour and testing a spelt sourdough formula. Chances are you’ve heard of spelt, an ancient species of wheat that has been used since long ago, and as Pollan alluded to, you feel a sort of connection with ancient bakers when baking bread this way, and especially for me with this ancient grain.
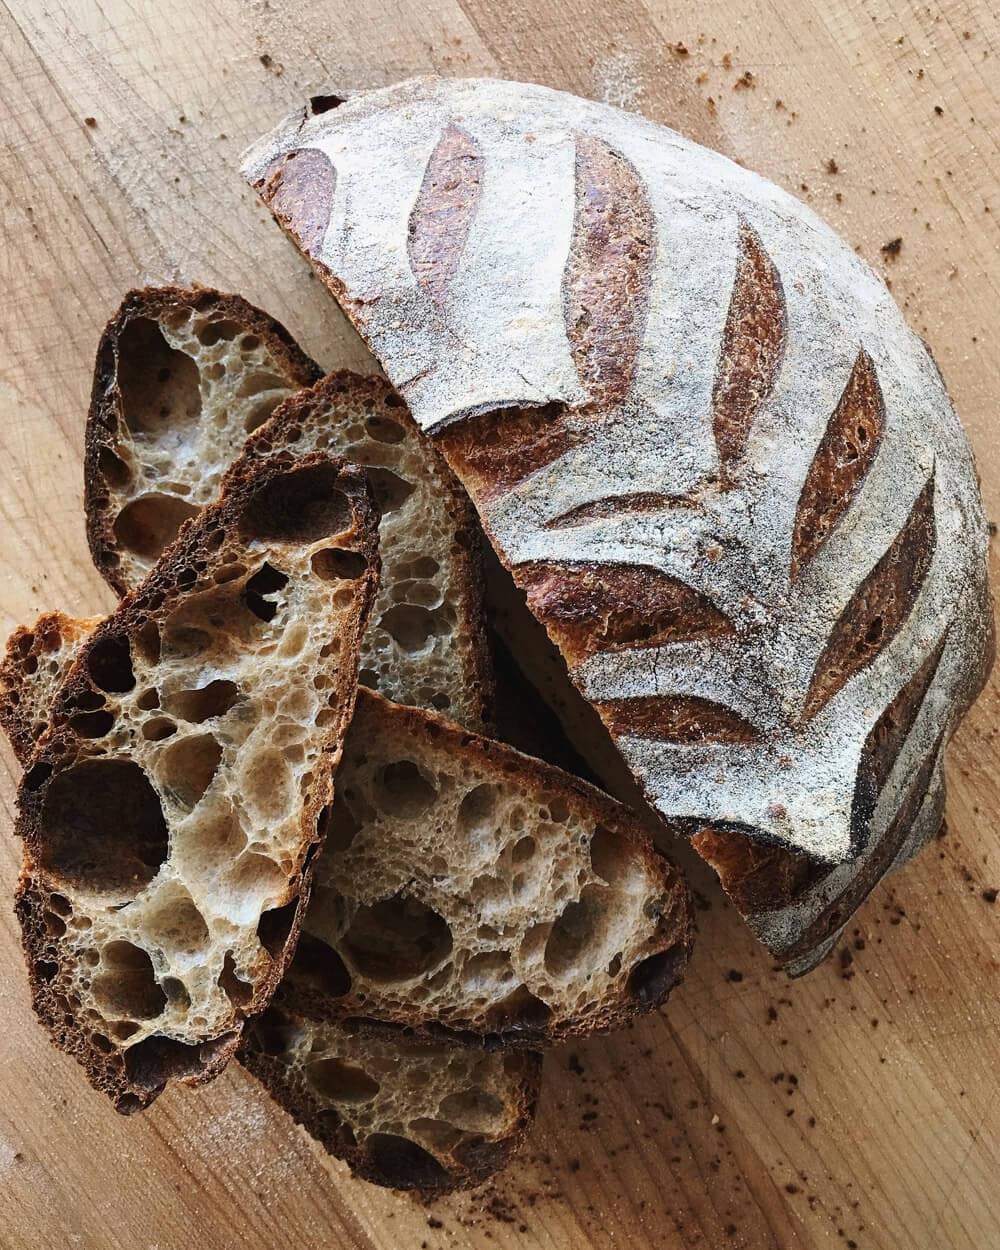
There are many ways to ferment food, and he goes into the science behind the magic of fermentation: how through a lengthy process flour and water are transformed from raw, inedible ingredients into something not only edible but delicious. This fermentation makes food more bioavailable for humans, and in many cases, it adds significant flavor. And oh is spelt delicious! It has a slightly nutty taste that also gives the crust a refreshing bite to it—a little thicker and a little crunchier. Spelt is known for its extreme extensibility (the ability to stretch out before resisting or tearing), and at high percentages, it can be a little tricky to incorporate into a dough formula — the dough feels perfectly strong at the beginning of bulk fermentation, but it becomes slacker by the end.
As I’ve heard some bakers say, baking takes a lot of time, but for the most part, it’s not your time.
Michael Pollan
To adapt, I quickly realized I needed to back off from my usual high hydration and also add in a little more strength to the dough through mixing. But still, be ready for some spreading on the counter at the end of pre-shape and cut it short if necessary. This bread harkens back to my oat porridge sourdough which displays many of the same characteristics.
For this bread, I built strength at the get-go through a few minutes of slap/fold and then utilized my traditional stretch and folds during the bulk. If you prefer only to do stretch and folds in the bulk container, load the front of bulk with a few more sets than usual. For example, perform four sets in the first hour of bulk at 15-minute intervals, and then continue with this recipe as outlined below.
Flour Selection
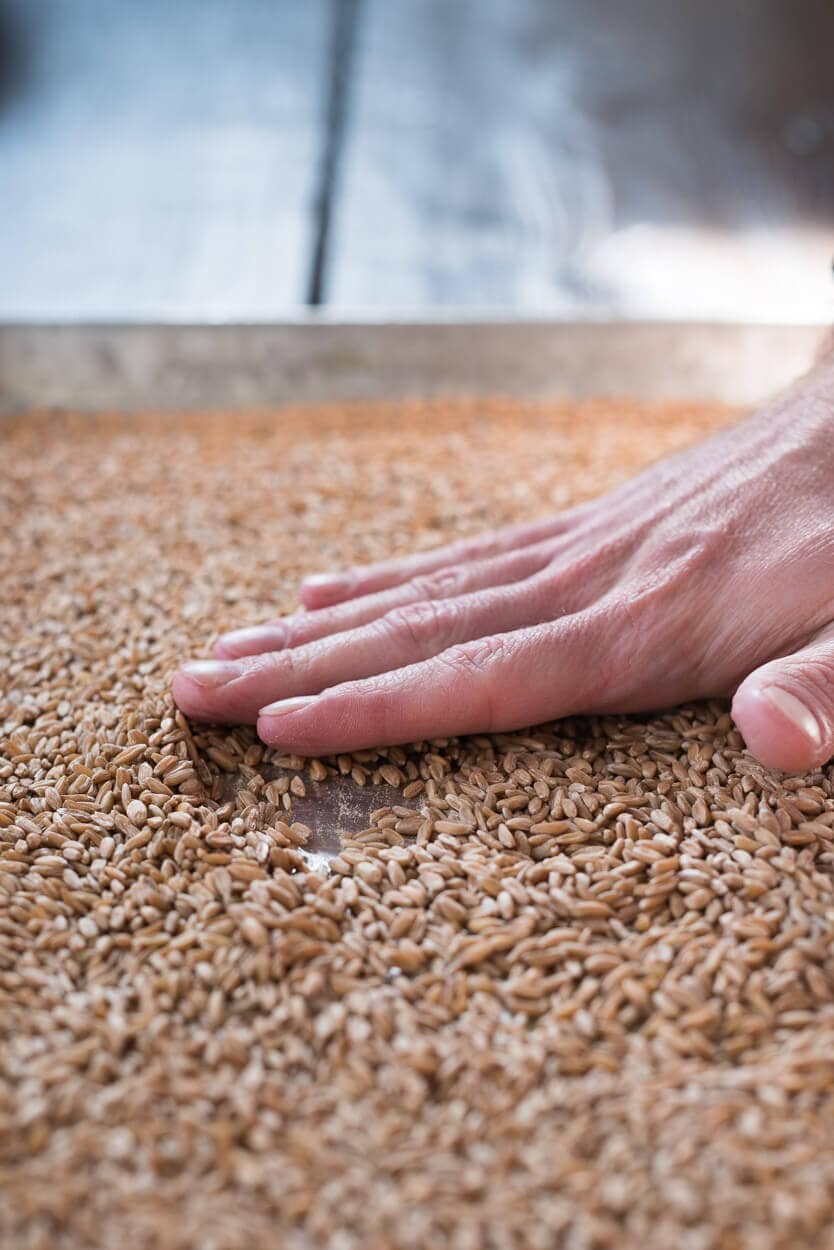
An important step when milling fresh flour is first to inspect your grain. I’ve experienced a varying level of cleanliness when it comes to the berries I’ve purchased, some having hardly a rock or pebble whereas others have a few more. You do not want this debris finding its way into your mill, let alone your bread. I first weigh out the amount of grain per my formula requirements, plus a few extra grams, and then dump the grain out onto a clean baking sheet. This process lets me quickly pick through the berries looking for anything out of place. Even with quite a bit of grain to inspect I can do this rather quickly. Once I have picked over the grain, it goes straight into my mill to be hand-milled: a slow process that produces an exceptionally fine flour. By keeping the flour temperature low, I’m able to retain more nutrients and essential oils present in the grain.
I don’t expect many to have a grain mill at their disposal if you don’t check with your local market to see if they have whole grain spelt flour for sale, chances are they will. If you can only find white spelt flour that will work just as well, perhaps with a little less overall flavor. If you do use white spelt, I’d recommend reducing the overall hydration 5-10% to accommodate. If you use aged spelt flour, please see my note about the levain percentage at the beginning of the formula below.
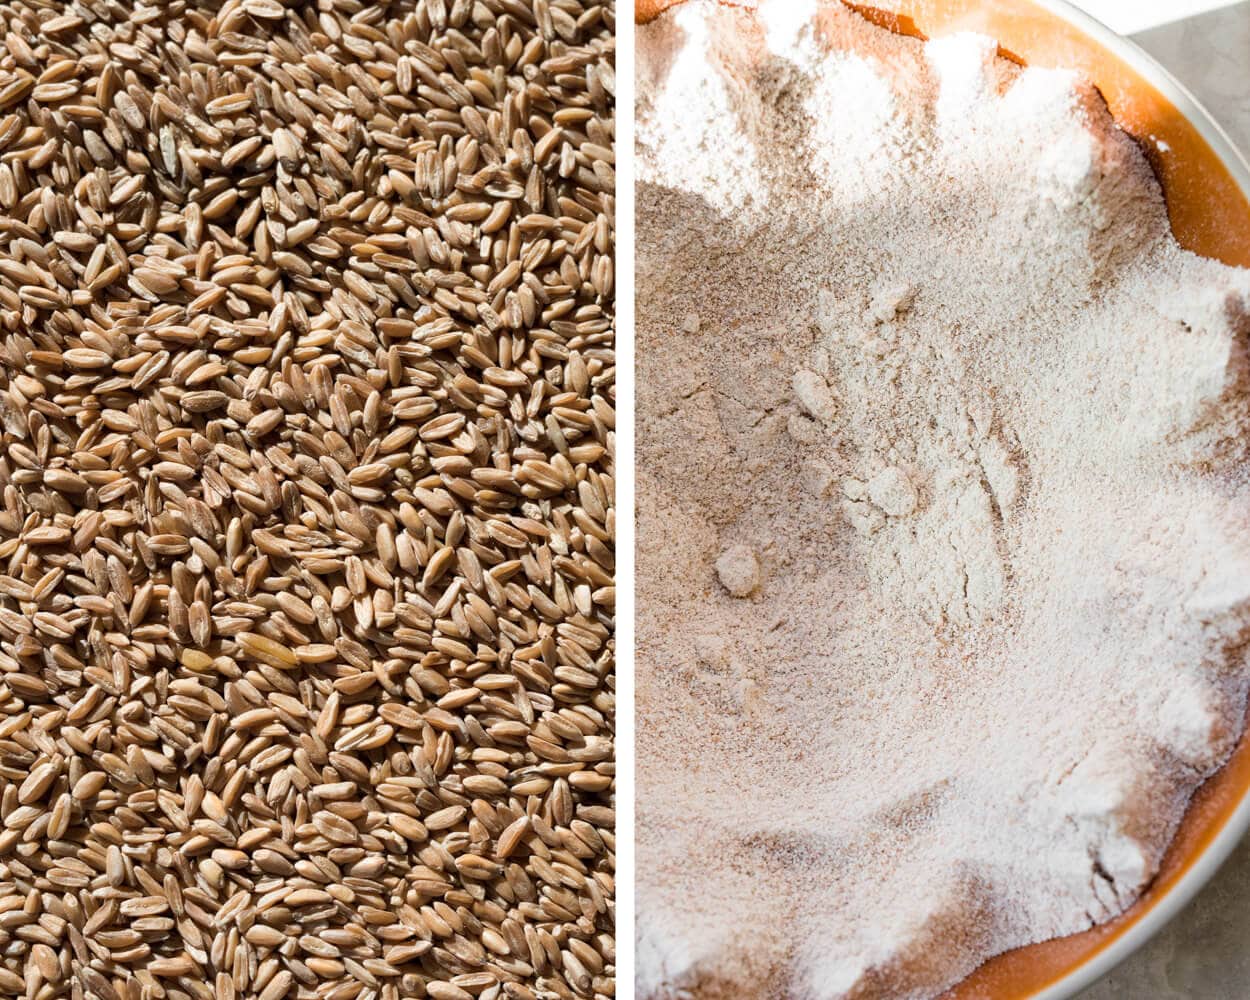
My formula also calls for “type 85” flour, which I source from Central Milling. If you don’t have type 85 on hand (I don’t expect many to have this) a good way to approximate this high-extraction flour is to mix half bread flour with half whole wheat, as described by Chad Robertson in Tartine No. 3. I like the level of extraction of this flour, it has just the right amount of bran/germ left to provide serious flavor but just enough removed to provide strength and loft still. I am relying on the strength of this flour to help support the extreme extensibility of the spelt at this hydration, and the added whole wheat flavors are just icing on the top.
Spelt Sourdough Formula
If any of the terms or steps below are new to you, have a look at my Beginner’s Sourdough post from a few weeks ago for more description and photos of each.
You will notice this formula has a low percentage of levain used in the Dough Formula (the pre-fermented flour is only 3.9%). If you are not using freshly milled spelt you might want to increase the levain from the 10% I used to around 15% or so. Just keep an eye on your dough during bulk and if it looks like it’s moving slow at 15%, lengthen bulk until the dough seems ready, and vice versa. Be flexible.
Vitals
Total dough weight: 1800g
Pre-fermented flour: 3.90%
Hydration: 85%
Yield: 2 x 900g loaves
If you want to halve this recipe, take all ingredients in the Dough Formula section and divide by 2, keep the Levain Build as-is (but still reduce the amount of levain in the Dough Formula by half).
Levain Build
| Weight | Ingredient | Baker’s Percentage |
|---|---|---|
| 25g | Mature liquid starter (100% hydration) | 50% |
| 25g | Central Milling Type 85 | 50% |
| 25g | Giusto’s Artisan Bread Flour | 50% |
| 50g | Water | 100% |


Dough Formula
Note that the baker’s percentages listed below are with respect to the final dough ingredients and do not take into account the levain. In other words, the levain ingredients are not represented in the percentages below.
Target final dough temperature (FDT) is 78°F (25°C).
| Weight | Ingredient | Baker’s Percentage |
|---|---|---|
| 362g | Giusto’s Artisan Bread Flour | 39.59% |
| 285g | Freshly milled spelt | 31.22% |
| 267g | Central Milling Type 85 | 29.19% |
| 771g | Water | 84.39% |
| 22g | Fine sea salt | 2.45% |
| 93g | Ripe, liquid levain | 10.15% |
Method
1. Levain – 10:00 a.m.
Build the liquid levain in the morning and store somewhere around 78°F (25°C) ambient for around 5-6 hours.
2. “Autolyse” (with levain) – 3:15 p.m.
I used the word “autolyse” in quotes because this isn’t a true autolyse (which is simply flour and water). Because I’m letting the dough rest for only 30 minutes, I decided to add the levain along with mixing the flour and water.
Mix flour, water (reserve 100g water for further mixing later), and the levain in a bowl until all dry bits are hydrated. Cover bowl and store somewhere warm for 30 minutes.
3. Mix – 3:45 p.m.
Sprinkle the salt on top of the rested dough and use the remaining water to help dissolve. Pinch through the dough with your hand and mix until all the water is incorporated. The dough will break apart a little and then come back together — it should only take a few minutes.
To build some more strength in this dough at the beginning I did slap/fold for about 5 minutes, just until it starts to show signs of a smooth surface. If you aren’t comfortable with the slap/fold method or don’t like it, you can do stretch and folds in the bowl until your dough tightens up and becomes smooth and slightly hard to stretch out and fold over—medium development.
Transfer the dough to a tub or thick-walled bowl and cover for bulk fermentation.
4. Bulk Fermentation – 3:50 p.m. to 8:20 p.m.
At 78°F (25°C) ambient temperature, bulk fermentation should go for about 4.5 hours. Watch the dough here and shorten or lengthen bulk fermentation based on how it’s developing. There are a few signs to look for that signal the end of bulk fermentation:
- the edges where the dough meets your container should be slightly domed (convex)
- your dough should have risen anywhere between 30% – 50%
- if you slightly jiggle your bulk container, the dough should also jiggle and look alive
- if you wet your hand and tug at the dough, it should provide some resistance and want to pull back
Perform four sets of stretch and folds during the bulk, spaced out by 30 minutes (your first stretch and fold will be 30 minutes after you finished mixing). Be vigorous with your first set of stretch and folds (really stretch that dough up and high, just until it starts to show resistance and before it begins to tear) and be more gentle with the remaining sets. After your last stretch and fold, let the dough rest in the bulk container for the remainder of the bulk time (for me it was 2.5 hours).
5. Divide & Preshape – 8:20 p.m.
Divide the dough into two masses. Lightly shape each mass into a round and let rest for 20 minutes uncovered.
6. Shape – 8:40 p.m.
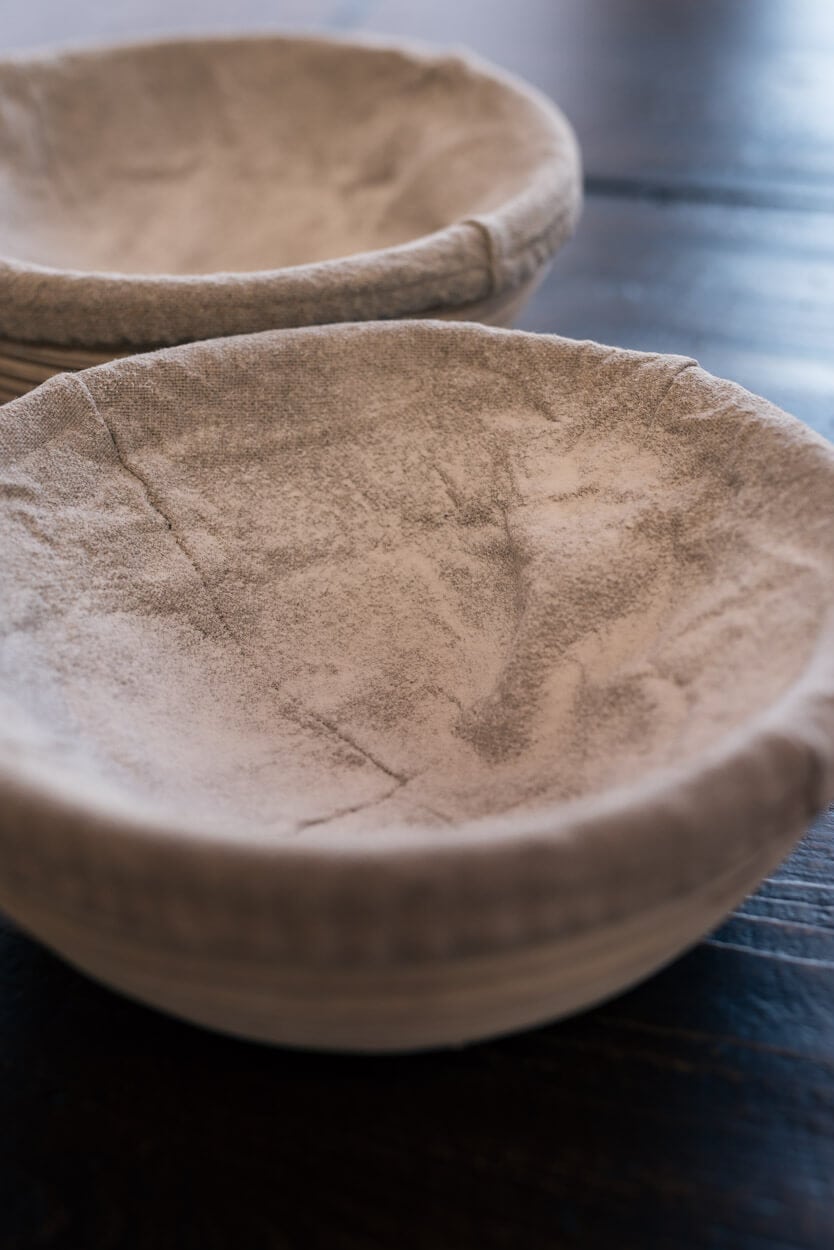
Lightly flour the top of your dough rounds and flour the work surface. Flip each round and shape into a boule. Try to get some good tension on the top of these loaves, but don’t over-handle the dough. After shaping, let rest on the bench for a few minutes and then place into a banneton seam-side-up. I prefer to use linen-lined bannetons for this moderately wet dough: it removes easier from the basket, and any liquid that escapes from the dough will go into the linen, which is far easier to clean. Only lightly dust the bannetons with white rice flour, just enough so the dough easily removes from them but no more.
7. Rest & Proof – 9:05 p.m.
Cover your banneton with plastic tied tight and let the dough rest on the counter for 25 minutes. Then, retard in the refrigerator at 38ºF for 14 hours.
8. Score & Bake – Next Morning: Preheat oven at 9:00 a.m., Bake at 10:30 a.m.
Preheat your oven to 450°F (230°C).
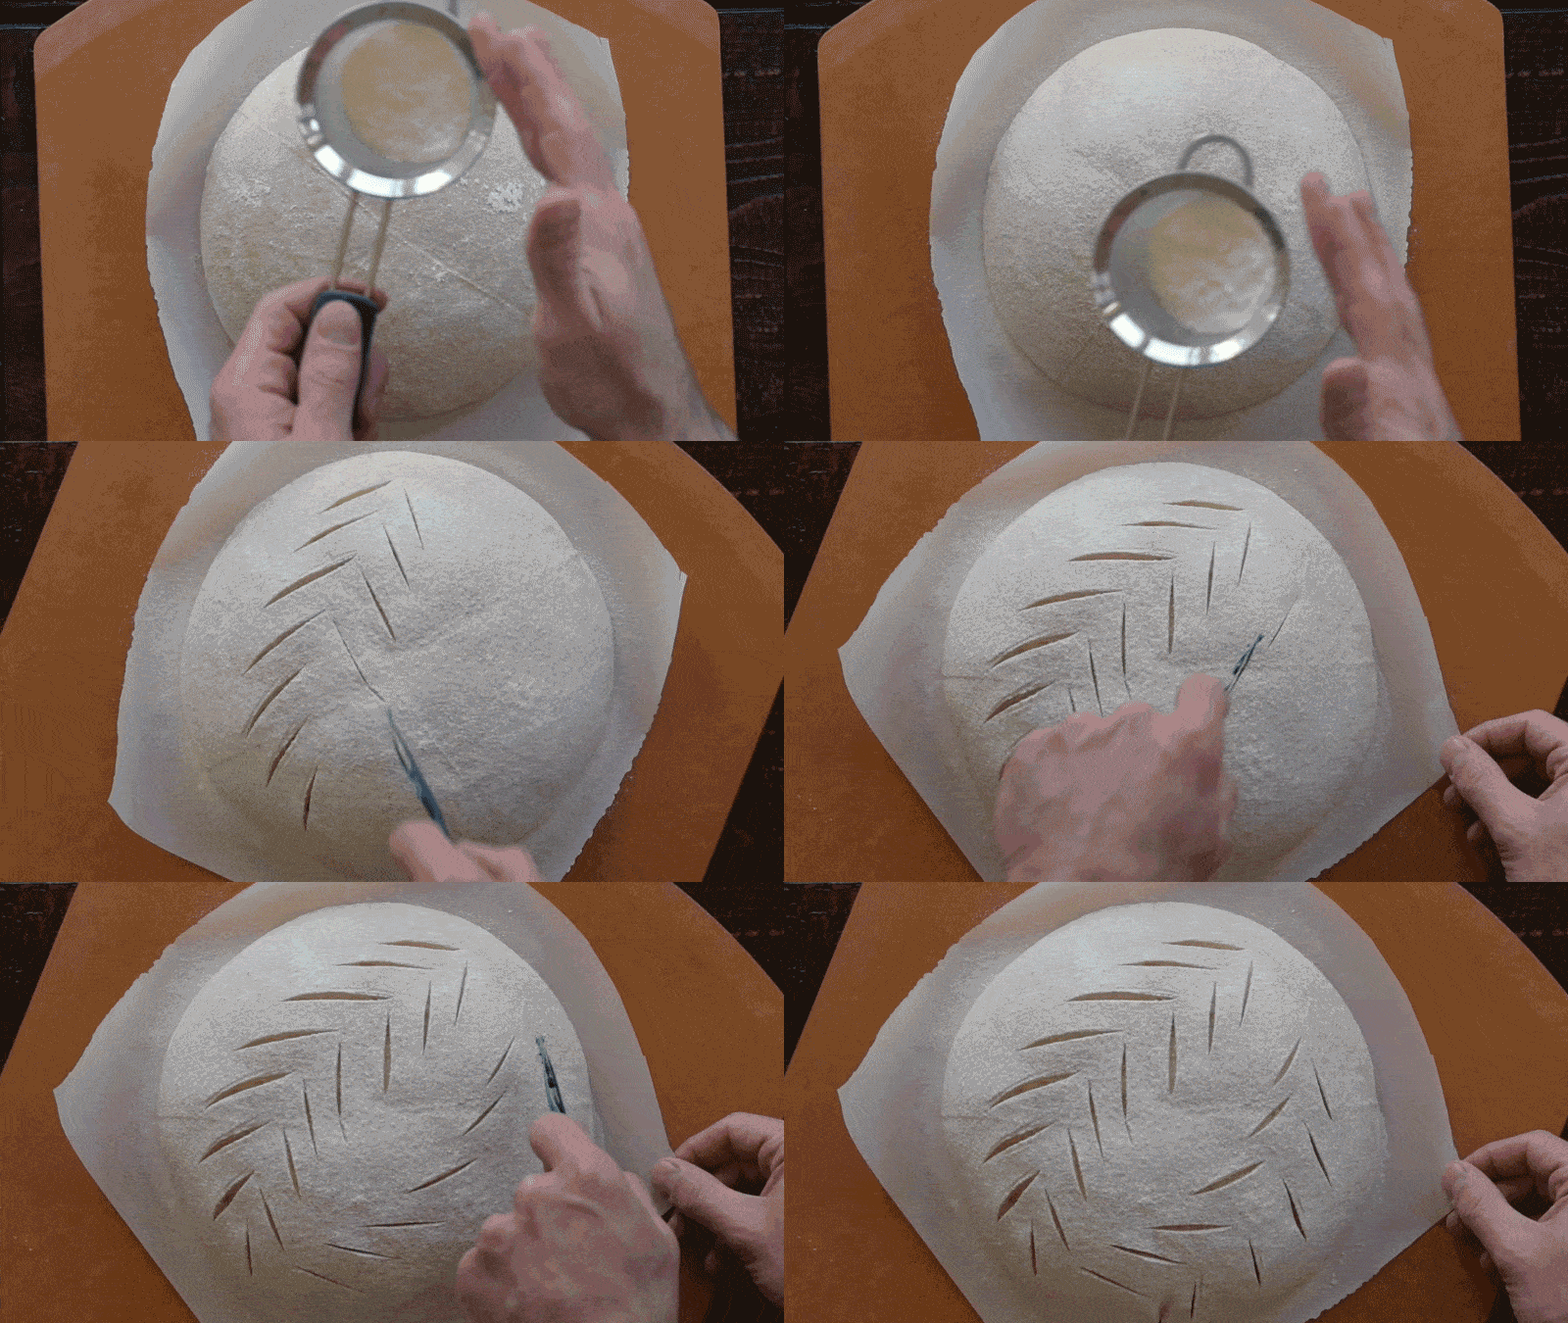
Take out your first boule and cut a piece of parchment paper to fit over your round banneton. Place the peel on top of the banneton and quickly invert the entire stack (banneton, parchment, and peel), gently pull off the basket and your dough should now be resting on the parchment that’s on top of the peel. Using a small sifter and some white rice flour lightly cover the entire boule with flour. Then use your bread lame to score the top. You can see the process below.
To ensure your design stays intact in the oven don’t mist your loaves with any additional water if this is your usual procedure. Drag the parchment paper directly into your preheated Dutch oven, if using, or slide right onto your hot baking stones.
I baked these loaves using a Dutch oven a few times but also straight on my baking stones with steam. Both methods produce an excellent loaf, but I do find that using my Dutch oven produces a slightly thicker crust.
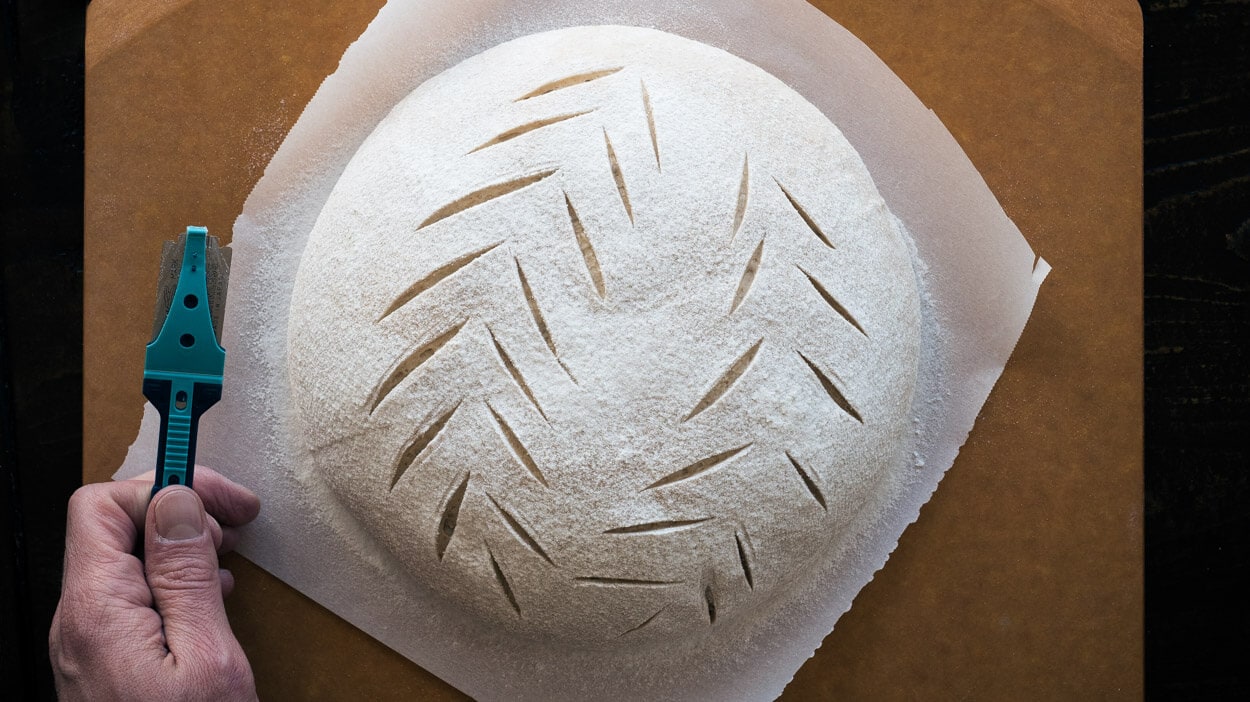
Bake 20 minutes with steam. After 20 minutes vent your oven (or remove Dutch oven lid and place next to the bottom in the oven), and finish baking for about 30-35 minutes. Go for a nice dark color on the crust. Remove from the oven and cool on wire racks.
Conclusion
I’ve seen may bakers fall head over heels for spelt and after baking with it, I get it. The flavor is delicate but heady at the same time, at 30% I appreciate all that extra flavor and depth it brings to this bread. Lately, I find myself gravitating more and more toward bread with higher percentages of whole grain, mostly for the flavor but also for the added health benefits. Because I’ve used spelt in so many other things around my kitchen I think some incarnation of this bread will become a mainstay in my regular baking rotation—I just posted a variation of this bread, a multigrain sourdough with spelt that’s different but incredibly delicious!
Crust
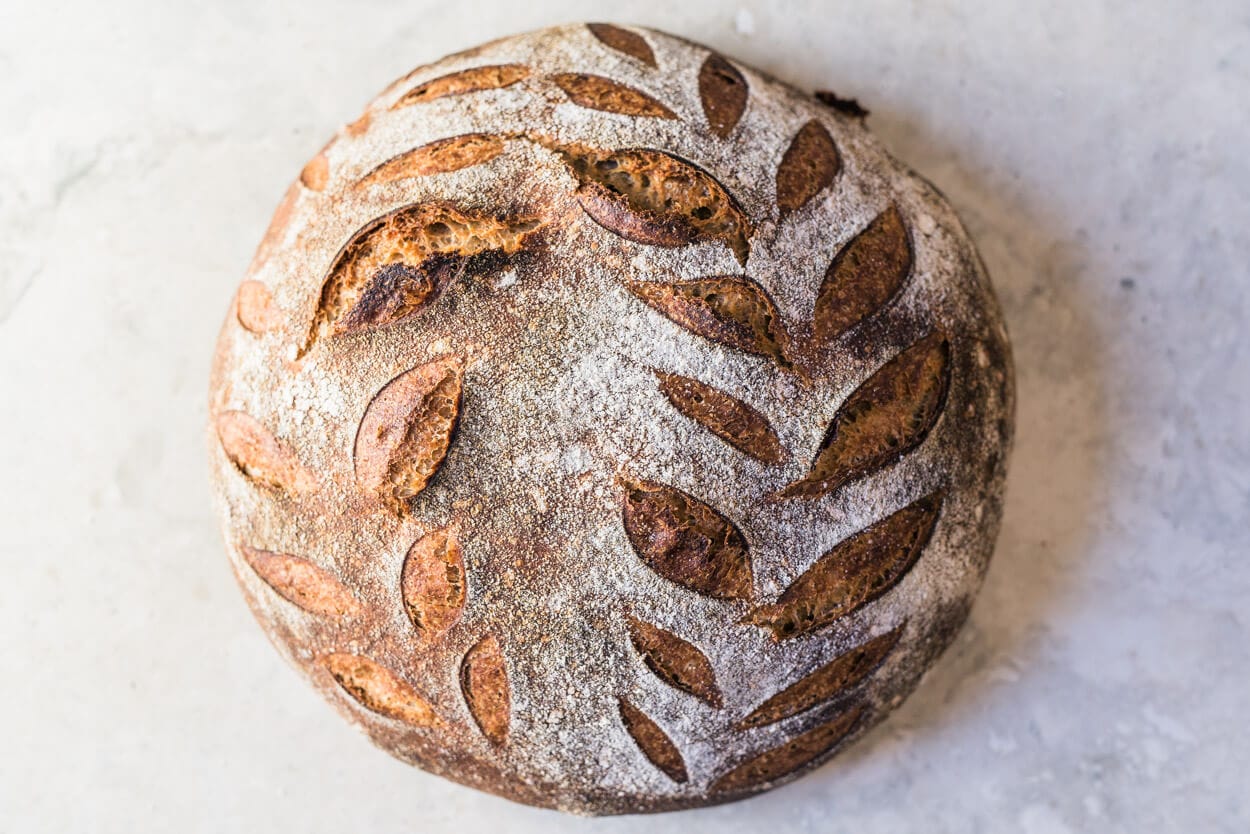
As I mentioned, earlier this crust is a particular thing. It’s thicker, for sure, but not in an unpleasant cowhide sort of way. It’s thick but soft and crackles easily as you rapidly make your way through a slice. It’s hard to compare this crust to anything else. I’m drawing blanks as I sit here trying to find an analogy for the beautiful texture. If you’ve read other posts here at my site, you’ll know that I’m a total crust snob and this bread surpasses any expectation I had at the onset.
Crumb
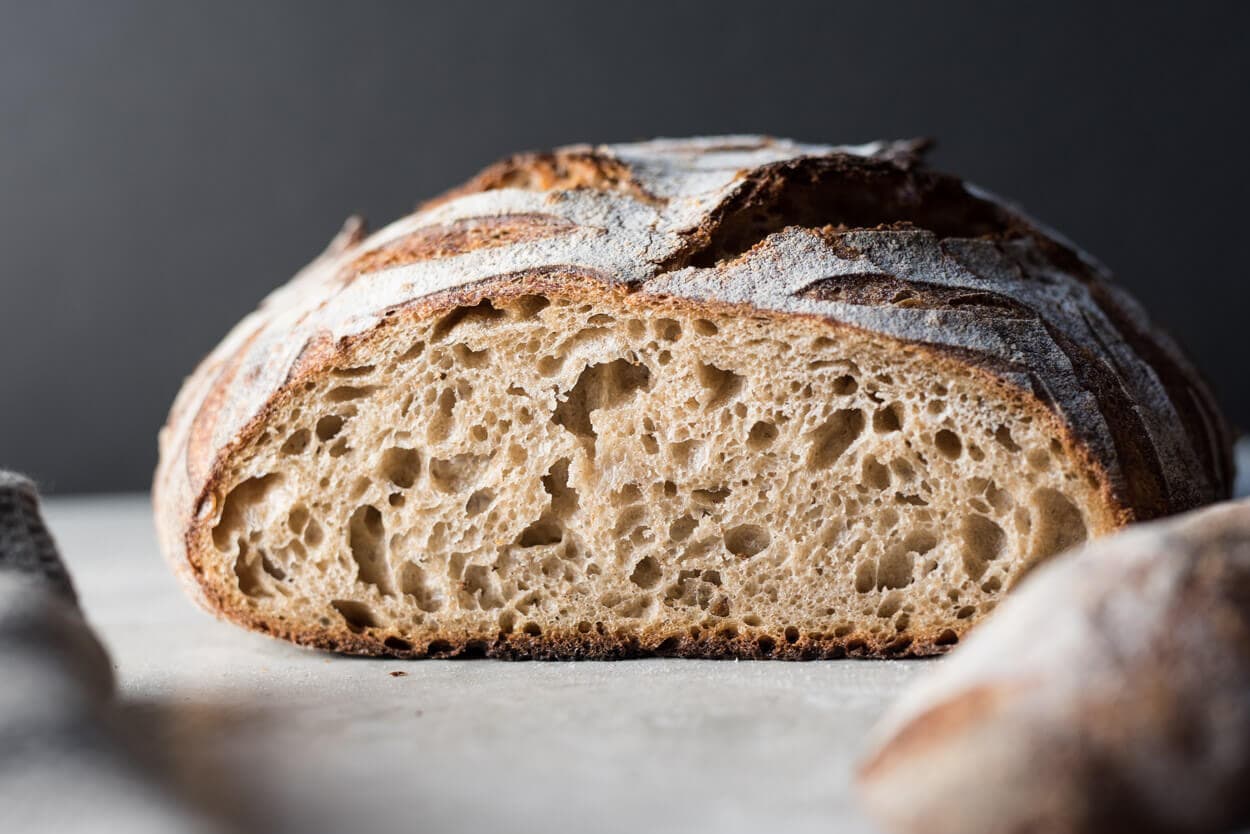
Because of the extreme elasticity of spelt, it’s known to contribute to an extremely open crumb. My formula still uses quite a bit of whole grains so don’t go into this bake expecting an insanely cavernous interior, especially with whole grain fresh milled flour. There are sections of these loaves that have a nice and open texture to them, but nothing jaw-dropping — and that’s fine. It’s light in hand, soft of texture and presents that perfect balance between a light bread that’s still perfect for hanging on to all the sandwich ingredients you could dream up.
Perhaps my favorite aspect of this crumb is that I don’t find even the slightest hint of gumminess, each flour works perfectly in balance to keep the crumb soft and chewy, but not overly so. And the taste…
Taste
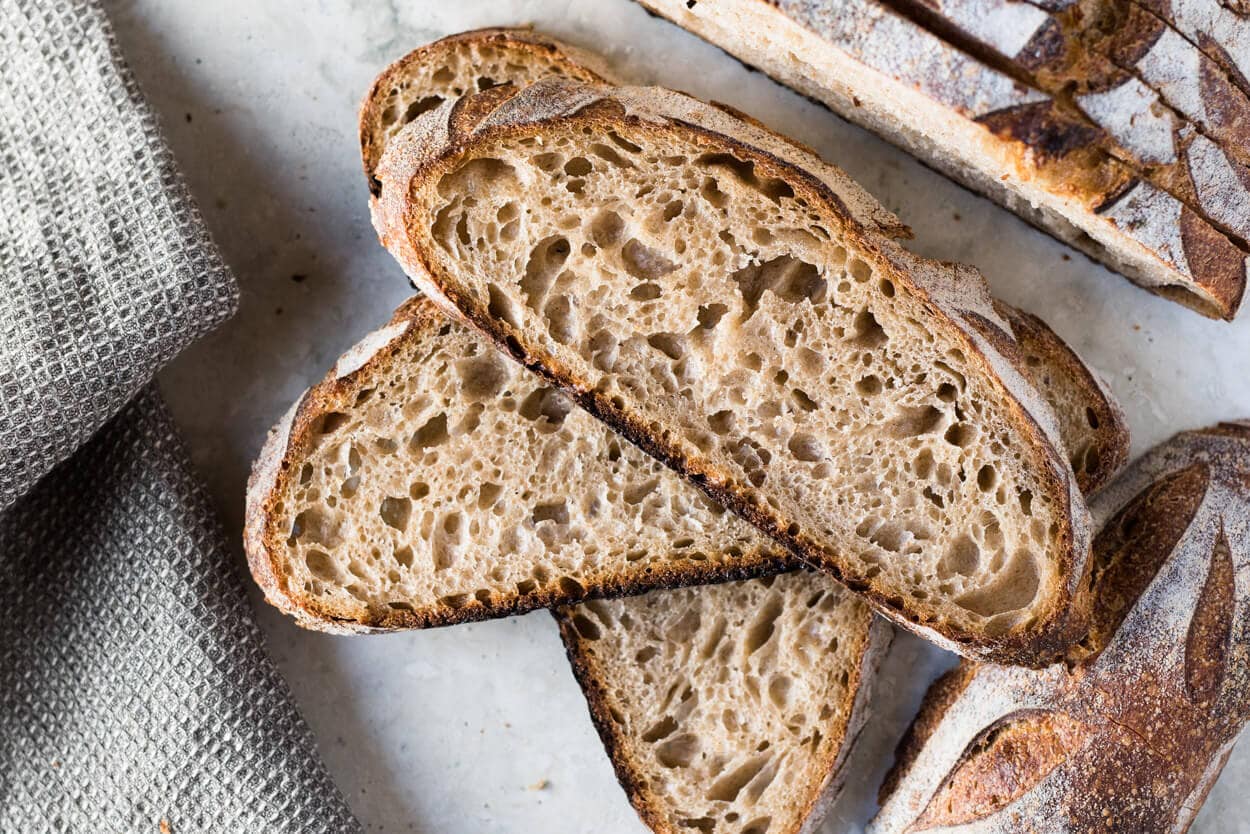
With the high percentage of freshly milled spelt and type 85 flour (remember this flour has quite a bit more of the bran/germ present than a more “white” flour, which is usually referred to as type 60 or 65) the taste of this bread is more on the whole-grain side of things with zero bitterness, which to me is just exquisite. Eating this bread a few hours post-bake is pure bliss—the crunch of the crust coupled with the soft interior and wheat overtones is sublime.
I could go on & on, but if I were selling loaves regularly, I’d use this bread cut up into little pieces as the taste test samples on my farmer’s market stand — one try and you’re going to buy it.
Spelt Flour Notes
I decided to sum up a few notes I jotted down while developing this formula and process in the hopes that after you try this bread, you go on to use spelt in your creations.
- reduce hydration a bit to offset the extreme extensibility and reduced water absorption of this grain
- pair with a relatively strong flour (in this case my type 85)
- build strength upfront through mixing, with several sets of stretch and folds during bulk
- 30% spelt seems to be the “sweet spot” to me for that balance between flavor and aesthetics
mill a little extra spelt for use in other foods such as banana bread, sourdough tea cakes (more to come on this!), and muffins.
I was worried when I placed a blind order for 25 pounds of raw spelt berries: would I like the flavor? Would it bake according to my expectations? Would the extensibility be too hard to handle? After using this grain for a while now, I can confidently say I’m glad I bought a large quantity, and a little sad I didn’t get more. Not only is spelt incredible in sourdough bread I’m discovering a myriad of creative ways to use it in my kitchen… And with each loaf, I pull from my oven I somehow feel a little more connected to those that have used spelt for thousands of years before me.
Buon appetito!
If you use this recipe, tag @maurizio on Instagram so I can take a look!


206 Comments
Hey Maurizio, I’ve been using your Spelt recipe for over a year and I love it! I recently tried some amazing sourdough that blew me away and I’d like to try and replicate it. It looks to be 100% white with a lot finer crumb but a very similar mouthfeel to the spelt. Any recommendations on which recipe to go for?
Glad to hear that, Adam! Hmm, hard to give you a recco based on that description! For me, spelt and white have such a different flavor and texture, it’s hard to find something similar to both 🙂
Sounds delicious, Rob!
Hi Maurizio, what would I have to change (hydration, proof time) to add little more spellt flour (like 50% of all flour) or/and pear pear juice for half of water? thank you for great recipe!
You’re very welcome! I’m not sure how the pear juice would affect things, but increasing the whole grain flour percentage usually means you’ll have to reduce the preferment percentage, lower the temperature, or reduce overall fermentation time.
Hi Maurizio, I’m trying pretty much this formula, with 30/30/40 spelt/rye/strong white and 80% hydration, and am getting a very disappointing bulk ferment (over 5 and a half hours at 23° C with multiple stretch and folds) and overnight refrigerator retardation, with very little growth, despite a very active (all white flour) levain. The dough in banetton is still quite dense and nothing close to my usual pre-bake size and lightness. What might be the cause of this?
My question is this. Can the loaf be reactivated by bringing up to room temperature for a while before oven, with maybe a quick dip back in the fridge to firm it up?
I have got the bread out of the fridge now, and hope to start seeing some temperature related response. So I might answer my own question. Not the first time this has happened with less than 50% white bread flour. Maybe I need to back off the spelt/rye to 20% of the total blend?
Thanks in advance!
Brian
A temperature of 23°C is pretty cool for a dough, you’d likely need to extend bulk fermentation quite far to offset that. Try warming your mixing water so your dough is around 78°F (25°C). This should help quite a bit! You can certainly warm the dough out of the fridge before baking if necessary (if you think it needs additional fermentation time).
Hi Maurizio,
Firstly, I want to thank you for all the work you put into your website. I have started baking sourdough about two months ago and it has been extremely helpful to can learn from you here.
I have made this recipe two times previously and today I repeated it for the third time, but the consistency of the dough at shaping keeps varying. I am aware that I am learning to be consistent and stick to the recipe/procedure (inc. all the relevant factors) from time to time. However, Since last time my dough was quite wet, I decided to reduce the total amount of water. Though, I still got a quite slacky dough at shaping.
Here is my question: I am using whole grain spelt. Shall I try with a mix of whole grain spelt and high extraction spelt flour? What do you use?
Also, have you been considering giving masterclasses online? If so, I would be very interested – pending timing as I leave in the Netherlands and time difference can be challenging.
Thanks a bunch in advance!
Daniela
You’re very welcome! When working with spelt I’d say 99% of the time I work with whole grain spelt (either I mill it or buy it milled). Spelt is very sensitive to over hydration so it sounds like you likely need to drop the water a bit more. I’m hoping to do more video content online, yes! I’ll announce anything in my newsletter (link is at the top of the page) 🙂
Thanks, Maurizio! I will try reducing water a bit more.
I also start suspecting that my starter is not strong enough. I got some from a colleague and was 100% rye, I did a feeding with Italian type 1 flour and the bread I got had a quite nice crumb and not sticky at all. However, as I continued to feed with type 1 my crumb turned to sticky even reducing the water a bit.
Do you think that it could help adding always some rye to the flour for the feeding? Would you use some ry also to prepare the levain?
I refresh my starter with some rye, yes. You could add some to the levain if you’d like, but it’s not 100% mandatory. It will increase fermentation activity, though! If your starter is kept at a cooler temp that will also reduce it’s vigor, try keeping it around 76-78F and see if you notice a bump in activity.
Central Milling seems to have a variety of Type 85, (Organic Malted, Organic Wheat and Organic Spelt and Malted). Which one are you using
I’m using their Organic Type 85 Malted (wheat, not spelt).
Hey! Is it possible to use spelt flour for all (starter and dough)? I’m in a food elimination phase rn and really want to try this bread.
Yes, that will work just fine!
Hi Maurizio – my apartment is generally around 68 degrees these days. Would it be ok to do an overnight levain build (i.e. 8-10 hours) given the lower ambient temperature?
I prefer to keep my levain warmer than that, around 76-78F, even if overnight, but it does depend on how much ripe starter you are adding to the mixture (the more the lower the temperature can be, within reason). If I were you, I would warm the mixing water to perhaps 80F to get the mixture nice and warm, then try to insulate the jar with some towels and an extra container to keep it warm!
Hi there, I made this loaf on the weekend, however once cooked it had a ‘flying crust’. Going into the fridge in the banneton it was holding its shape beautifully, but by morning when I turned it out it was deflated. My fridge temp is between 3-4 degrees. Do you have any thoughts on what may have contributed to the ‘flying crust’? Any advice would be much appreciated.
Usually that’s a sign of over proofing and/or over hydration. I’d first try dropping the water in the recipe by 5% and see if that helps. At the same time, pay attention to the final proof time, you might want to cut it back by a few hours to see if that helps as well! Spelt is pretty sensitive to water content, so this should get you on the right track—let me know how it goes!
Hey Maurizio! I love baking this recipe!
The flavour & texture are great! I´m just wondering if it is possible to push the fridge time a little further in order to pass in my schedule? Maybe reducing the bulk fermentation time? Ideally I would like to finish bulk fermentation at around 6 p.m. and bake on the next day at 8:30 a.m…I would really love to hear your thoughts about this situation!
Thank you in advance!
Thank you, Luiza! Yes, I’d drop bulk by 15m and get the dough into the fridge ASAP after shaping. You should be able to go to 830am next day no problem. Hope that helps!
Yes, definitely. Shape the dough and place it in its proofing basket and cover with an airtight cover. Let it sit out on the counter for 2-3 hours until a poke to the dough gently springs back, perhaps not completely filling in the indentation.
I just made this for the first time and it turned out awesome! Great rise, texture and taste. I’ve made so many of your wonderful loaves but I was wondering why this one required some additional counter time for proofing rather than going directly in the fridge? Also, when handling the dough, I found it to have a different texture than other loaves that didn’t have any spelt, almost a rubbery feel, is this due to Spelt? Thank you!
Right on, glad to hear that, Sammy! In testing, I found this loaf just needed a bit more time left out before slowing fermentation down in the fridge. It’s due to the percentage of levain in the dough and the final dough temp. All that said, it does all come down to the dough and how it’s progressing that day—some days might need less time left out before the fridge, other times more. Yes, spelt tends to increase the extensibility in a dough, that is the ability for the dough to stretch out before resisting. Thanks for the feedback and happy baking!
Many thanks for this feedback Maurizio! I have to work on understanding dough temperatures.
You’re very welcome. Check out my post on baking temperatures for further help!
I made this and it was so delicious! I used WW and KA bread flour instead of type 85, and 15% levain as recommended, and baked pullman loaves with steam (20 minutes 470, 20 min 450, and a few minutes outside the pan the brown the sides). Spelt just makes sourdough that much more sour and tasty! Next time I might reduce the water a little bit, but ultimately very happy with my spelt loaves! Thank you for the great recipe.
Right on, KM! Glad to hear it worked out so well for you. I love the idea of baking this in a Pullman as well. Thanks for reporting back and happy baking!
This week I substituted whole grain einkorn for the spelt and increased its percentage a bit. Used whole wheat flour plus a lower percentage of AP flour. Increased the percent of levain (used all of it) and kept water percentage as written.
Lovely loaves!
Sounds like a good swap to me!
Loving the flavor of the spelt flour and the texture of the crust. My crumb is *OK* but definitely not wildly open in the way that yours is! What can I be doing better here? https://i.imgur.com/aET8nuJ.jpg
Hi! Do you bake cold from the fridge or let the loaves come to room temp? Thanks!
I bake cold from frig.
Baked cold, straight from fridge, Alanna.
I’m new to your blog, and I think I’m in love!! Your blog is just about the only blog that I have found that uses type 85 flour in a somewhat easy manner. I normally do a blend of KA AP, KA bread, KA whole wheat and einkorn. With the flour shortages that be (stupid COVID), I only managed to get my hands on type 85 and rye from Central Milling, and KA AP. I figured that the 85 blend would be the best of both worlds (whole wheat and white) How easy would it be to tweak this recipe to those flours?
Thanks so much, Courtney! Sorry for the delay. Swap out the Giusto’s flour I’m using in the recipe for KA AP, use the T85 as specified, and if you don’t have spelt, use KA WW in it’s place. Will be great 🙂
I’m working on my third batch and love this loaf, both flavor and texture. Really enjoy the slap and fold but dough remains quite sticky after 5+ minutes yet does smooth out a bit.
PS. I’m using AP and 100% whole wheat along with the spelt; did decrease the last 100 g water a bit.
Try dropping the water in the recipe by 5% — that should help bring more strength to the dough.
Is it possible to replace the “slap & fold” method with putting the dough in a kitchen aid mixer with
a dough attachment?
Absolutely!
Followed the recipe to a T today but ended up getting extremely slack dough that wouldn’t hold shape 🙁 crumb was pretty dense with slightly bigger bubble towards the top… any insight what might have gone wrong? My starter was pretty active and bubbly too. Built the levain at peak rise.
Mine is very slack as well, on my second try (waiting for it to finish). Cut back on water and added WW flour to mix. 2nd batch was slack going into the oven!
I hope it turned out great, Teresa! Good adjustments.
It sounds like your dough is most likely over hydrated. Try reducing the hydration by 5% and give it another go — the reduced water should bring a lot of strength to the dough and you’ll feel it immediately. Once you find a suitable hydration, you can try to push it back up, but as you do, take note of how the consistency of the dough changes: the dough will start to slacken out as you add more and more water, this means you’ll likely have to mix more upfront or add another set or two of stretch and folds during bulk fermentation.
Try to keep everything else as consistent as possible and let me know how the next attempt goes!
Hey Maurizio. Looking forward to trying this recipe today. I’d love to know why you don’t do a true autolyse without the levain first. Planning to make it to recipe, but always curious to learn the “why.” Thank you!
Emily — sometimes if the duration is short, I’ll add the levain in to the autolyse, although not always. Given the high percentage of spelt in this recipe you could also skip the autolyse entirely if it doesn’t fit in your schedule!
Appreciate the quick response!
but why is it shorter though? i’m still confused/curious 😉
No need for an extensive autolyse with this recipe because it’ll bring a lot of extensibility to the dough, and spelt does this already!
Check out my new guide to the autolyse technique for more information.
Hey Maurizio.
Similar question below. No bread or 85. I only have 00 and AP along with spelt. Any recommendations for changes?
See my reply below, Billy!
Hey Maurizio! I have T85 on the way in the mail and have whole spelt. I don’t have bread flour, however (just AP). Could I sub AP for bread flour 1:1, or would you suggest upping the T85?
Hey Chris. Yes, I’d sub the AP for bread flour 1:1 but you might want to also consider decreasing the hydration slightly to compensate (I talk about why on my latest 100% all-purpose flour recipe. I’d say 2-5% should work!
Hi! I am just beginning bread making and your site is such a treasure trove of information! The work that you do is so detailed and amazing! 🙂
Quick question – Would it be possible to make the sourdough starter with just spelt flour? My husband has trouble digesting any other kind of wheat.
Glad my site has helped! Yes, you can definitely keep your starter using all spelt flour. Happy baking, Karishma!
If it helps I just made a sourdough starter with spelt, albiet 50/50 with plain flour as I only had 1kg of spelt, but it worked really well!
Thank you very much for this recipe! I am always using your website for my home bread baking. I find your recipes to be the best tasting and most explicit. Wanted to ask, what is your opinion of using olive oil in the dough? I haven’t tried it myself but I have a few friends who like to add 2-3 tablespoons of extra virgin olive oil to their sourdough. Would you suggest it?
You’re very welcome, Diana! I add OO to some doughs when it aligns with my goals: it’ll give the resulting loaf a softer, more pliable feel to it. Depending on how much you add you might also notice the flavor peek through, which can be nice. So I’m a fan, where it makes sense 🙂
Quick question — why place dutch oven lid next to bottom of the oven for the second half of the bake? Why not remove the lid from the oven? Thank you!!
It’s optional, I leave it in for convenience and it also adds a little more “masonry mass” to the oven to keep things warm in there when opening the door. But yes, you can certainly remove it without any problem!
There’s one good reason for me: reduces the chance of me accidentally grabbing it with bare hands while it’s still 500 degrees.
Thanks for the recipe Maurizio! I am new to sourdough baking and I baked two types of bread from your website, beginner’s and spelt. The spelt taste was amazing, even though it didn’t rise as much as the beginner‘s bread, they had nice, open crumb, but my concern for both times was very dense, gummy, heavy, sticky crumb, it has some shine due to high moist may be, is it undercooked? The spelt had nice and crunchy crust, but the next day it was even denser and heavier. I baked in Staub Dutch oven in 250C 20+35min. I cut it after 2 hours. Please help me to understand how to get more lighter, airier, not sticky crumb.
Grazie mille per l’aiuto!
You’re very welcome, Narine!
It might be that your loaves were slightly underproofed. There are a few indicators your dough could be under: explosive rise in the oven, dense interior with potentially scattered large holes, and gummy texture to the interior (like you mentioned).
Make sure to build your levain from a starter that’s strong and mature (meaning it’s risen to it’s peak height before you take some to use). From there, bulk fermentation is very important! Make sure your bulk fermentation goes sufficiently far, you want the dough to look smooth, it should have risen considerably, and have bubbles here and there. If you tug on the dough a bit it should offer resistance to your tugging, it’ll feel stronger.
A few other things it could be: over hydration (this is not likely if you had a good rise, though) and it might simply be your flour.
Good move waiting to cut as it’s best to let your loaves sit for a while so they fully set, especially with loaves containing high percentages of whole grains. It might be that you also needed to bake them longer to ensure they’re fully baked out — if you have an instant read thermometer take the temp of the loaf, it should be around 208°F or higher.
Let me know if that doesn’t help and how the next attempt goes. Chances are, it’s a small combination of each of these things, when improved upon, will yield a better bake. Have fun!
Thank you for the tips Maurizio, very much appreciated. I was following every step of the recipe, but of course, I understand that every small detail, flour quality, room temperature can change the dough characteristics. I will try again.
Thanks for sharing the recipe! Hi, I tried your recipe for the first time yesterday and the flavor is great. I didn’t get a great rise during the bulk fermentation and after the back I had a bad case of tunneling. Do you think this is a result of my starter not being active enough? Or not enough slap and folding? Thanks so much!
Hey, Robert. It might be over hydrated or under proofed dough causing your issue.
Make sure to build your levain from a starter that’s strong and mature (meaning it’s risen to it’s peak height before you take some to use). From there, bulk fermentation is very important! Make sure your bulk fermentation goes sufficiently far, you want the dough to look smooth, it should have risen considerably, and have bubbles here and there. If you tug on the dough a bit it should offer resistance to your tugging, it’ll feel stronger.
If you’re worried about hydration, drop the water in this recipe by 5% or so or until the dough feels stronger and more elastic. This can easily be done by holding back water during mixing, only adding it in bit-by-bit until the dough starts to feel too weak.
Hope that helps, let me know how the next attempt goes!
Hi! I’m just beginning my sourdough making journey! Your site has been really helpful for me and I’m so appreciative! My family has some issues with digestibility and so I’m attempting to make 100% sprouted spelt sourdough. Is there a reason that you must mix flours and cannot/don’t use 100% spelt? Is it even possible to do so?
Hey, Liz! Sure, it’s certainly possible to use 100% spelt in a recipe, but it can be challenging. I’d say if you go this route be cautious with the water in the dough as spelt — especially at 100% — can quickly become hard to work with. Start low and moderate and work you way up.
Another option is to make a 100% spelt pan loaf: the pan will help contain the dough and make it less challenging to begin with.
Hope that helps!
That is helpful thank you! Starting low would mean starting with a lower hydration percentage in the levain build or the dough formula or both? Do you have an estimation as to what hydration percentage I should start with?
Sorry, I meant start with a lower hydration and work in more water in subsequent bakes (if you even want to!). If you’re using 100% whole grain spelt, I’d likely start around 75% hydration to be conservative. If that seems high to you and your normal doughs, go down to 70% (I rarely go this low, though 🙂, but it does depend on the flour you’re using!).
I should also mention that more water does not mean better — it’s all up to your preference.
Hi There! Love your site and reference it all the time. I’ve mostly been following your Beginner Sourdough recipe and Tartine’s Country Loaf.
One of my favorite parts about baking is making a lot at once and I typically triple the bread recipes I use. Do you have any suggestions for doubling or possibly tripling this spelt sourdough recipe? Anything to watch out for?
Also, lately I’ve been skipping the overnight fridge proof and doing a room temp proof for about four hours. Is that okay for this recipe or should I stick to the overnight? I’m going to take a stab at this tomorrow with some whole grain bobs red mill spelt flour and am very excited!
I made this recipe yesterday and it might be my favorite loaf to date. I added pistachios, dried sour cherries and rose honey. I cut the hydration by 8%. The crumb is soft and not gelatinous, which I don’t love. I may have underproofed it a bit bc the crumb was a bit tight but regardless, it’s delicious. The crust was thick but not overly hard and satisfyingly shattered when you bit into it. Thanks for the recipe!!
https://imgur.com/a/OOV2ln0
That came out wonderful, Lauren! I have a loaf with pistachios I’ve been working on lately (but haven’t posted yet) — they add such a wonderful flavor! I’d say good move dropping the hydration, it looks like your flour needed that adjustment. I might suggest try reducing the proof time in the fridge perhaps just an hour to see if you get more rise/spring, it might open things up even more. Regardless, nice bake and enjoy!
I just made my second attempt at this. The first one was an epic fail – I forgot to put it in the fridge for the overnight proof. I baked it anyway, and the loaf came out dense and flat. No surprise there. This time, I followed the recipe to the letter. I didn’t have the type 85 flour, so I mixed half and half KA bread flour and KA whole wheat flour. For the spelt flour, I used Bob’s Red Mill Whole Grain Spelt flour. I used a healthy sourdough culture. Baked in a dutch oven, as per the instructions.
This loaf came out a bit dense as well. It rose pretty well in the fridge in the overnight proof, but when I put it in the dutch oven it flattened a bit. I forgot to dust the top of the loaf with flour before scoring it with my lame, I don’t think that matters – does it?
So what could I do better next time to get more oven rise and a more airy crumb? Change ingredients? Hydration? Maybe I didn’t make a tight enough skin, or maybe too tight? I have pictures I could send if there’s somewhere to post them…
Ah, bummer! I doubt the scoring caused that bad of an issue, but it will definitely inhibit rise, or rise erratically, if it’s not scored sufficiently. Dusting the top of the loaf with flour is not necessary, it’s purely for the aesthetics 🙂
It’s hard to say what caused the issue. It could be that your loaves are over proofed. There are a few indicators your dough could be going over: sluggish rise in the oven, the score on top of the dough might not open with a nice “ear” and instead just kind of fuse together, the interior will have lots of small holes and perhaps one or two large ones near the top (but no dense areas of unfermented flour), and finally the loaf could be a little on the sour side.
I generally lean towards over proofed dough if it’s a lack of rise in the oven!
Hello Maurizio,
I´m a big fan of your blog and as well of this recipe! I love spelt breads and this one is my favorite!
Although the loaves turn out to be always delicious and well-cooked, I have some Troubles with achieving a big “ear” and the extra crunchy crust. I always bake my loaves in a dutch oven and they are, like I said, well-cooked and also crunchy. But I wonder if there is a trick for getting the beautiful “ear” and crunchiness??
Thanks in advance!
Thanks, Luiza! It’s really awesome to hear that. Achieving a nice, tall ear requires a few things to be in place. First, you need to shape your loaves tight enough so there’s tension (evenly) along the outside of your loaf. This requires sufficient dough strength through the entire process, and then a relatively tight final shape. There’s a balance there, of course, as you don’t want to shape it too tight so it can’t expand or you degas it excessively. From there, you also want to ensure the dough isn’t over proofed when you go to bake. If it’s over proofed, you won’t have much “life” left in the dough to rise up optimally. Then, make sure you score in deep enough (not too deep, though) so you can sort of see an area where that tight skin will lift up and off during baking. Finally, ensure your oven (or pot) has enough steam in there so the loaf can rise fully — if your using a Dutch oven you should be just fine with that.
I hope this helps!
I decided to make this one as an Spelt Oat Porridge Sourdough and it came out very nice. Here are a couple of pictures https://imgur.com/a/xExSZe8 For some reason I have dimpling in the crust as you can see in the picture and I was wondering if this could have been from the added hydration of the oats. There isn’t any noticeable difference in the crumb by these dimples. I did drop the hydration down to 75% knowing the oats would contribute more. Any ideas?
That sounds great. Interesting regarding the dimples… It could be pockets of unmixed oats (they tend to clump and can sometimes be hard to disperse evenly throughout the dough), areas where your proofing basket liners bunched up (this has happened to me many times), or some other shaping issue. My guess here is there might be pockets of thick oat clumps there in those areas.
I have just watched the film you mentioned above and of course I started from episode third, I mean ‘Air’. Didn’t suppose I may be so moved watching it. I have been baking bread for about 3 months and that is why my expierience is not very impressive but I have some nice loaves in my “collection” as I usually work with my favourite book “Bread” by Jeffrey Hamelman. A few days ago I found your website and I am really delighted. I’ve just spent the whole Satturday learning and reading and I just can’t tell you how graterful I am. This site is just a treasure box for me.