


As the chill of winter sets in, I find myself drawn to this recipe. Vibrant and flavorful, healthful yet comforting, it is excellent at combating the cold weather, warming both your body and your kitchen at the same time. Winter urges me to bake anything and everything bread more than any other season. There’s nothing more wonderful to me than the aromas of freshly baked bread from a hot oven in contrast to the snow and howling wind outside. For this bread, I baked, tweaked, and baked again, ultimately landing on a mixture of white, spelt, rye, and whole wheat flours that produced a very craveable, satisfying sourdough bread that I cannot stop baking.
Part of this loaf’s abundant flavor is due to a little more sourness than you find in my typical recipe: a welcome addition that elevates the wholesome character of the crumb and crust. Sure, it has all the usual zest that comes with increasing the whole grain percentage, but it also has something more.
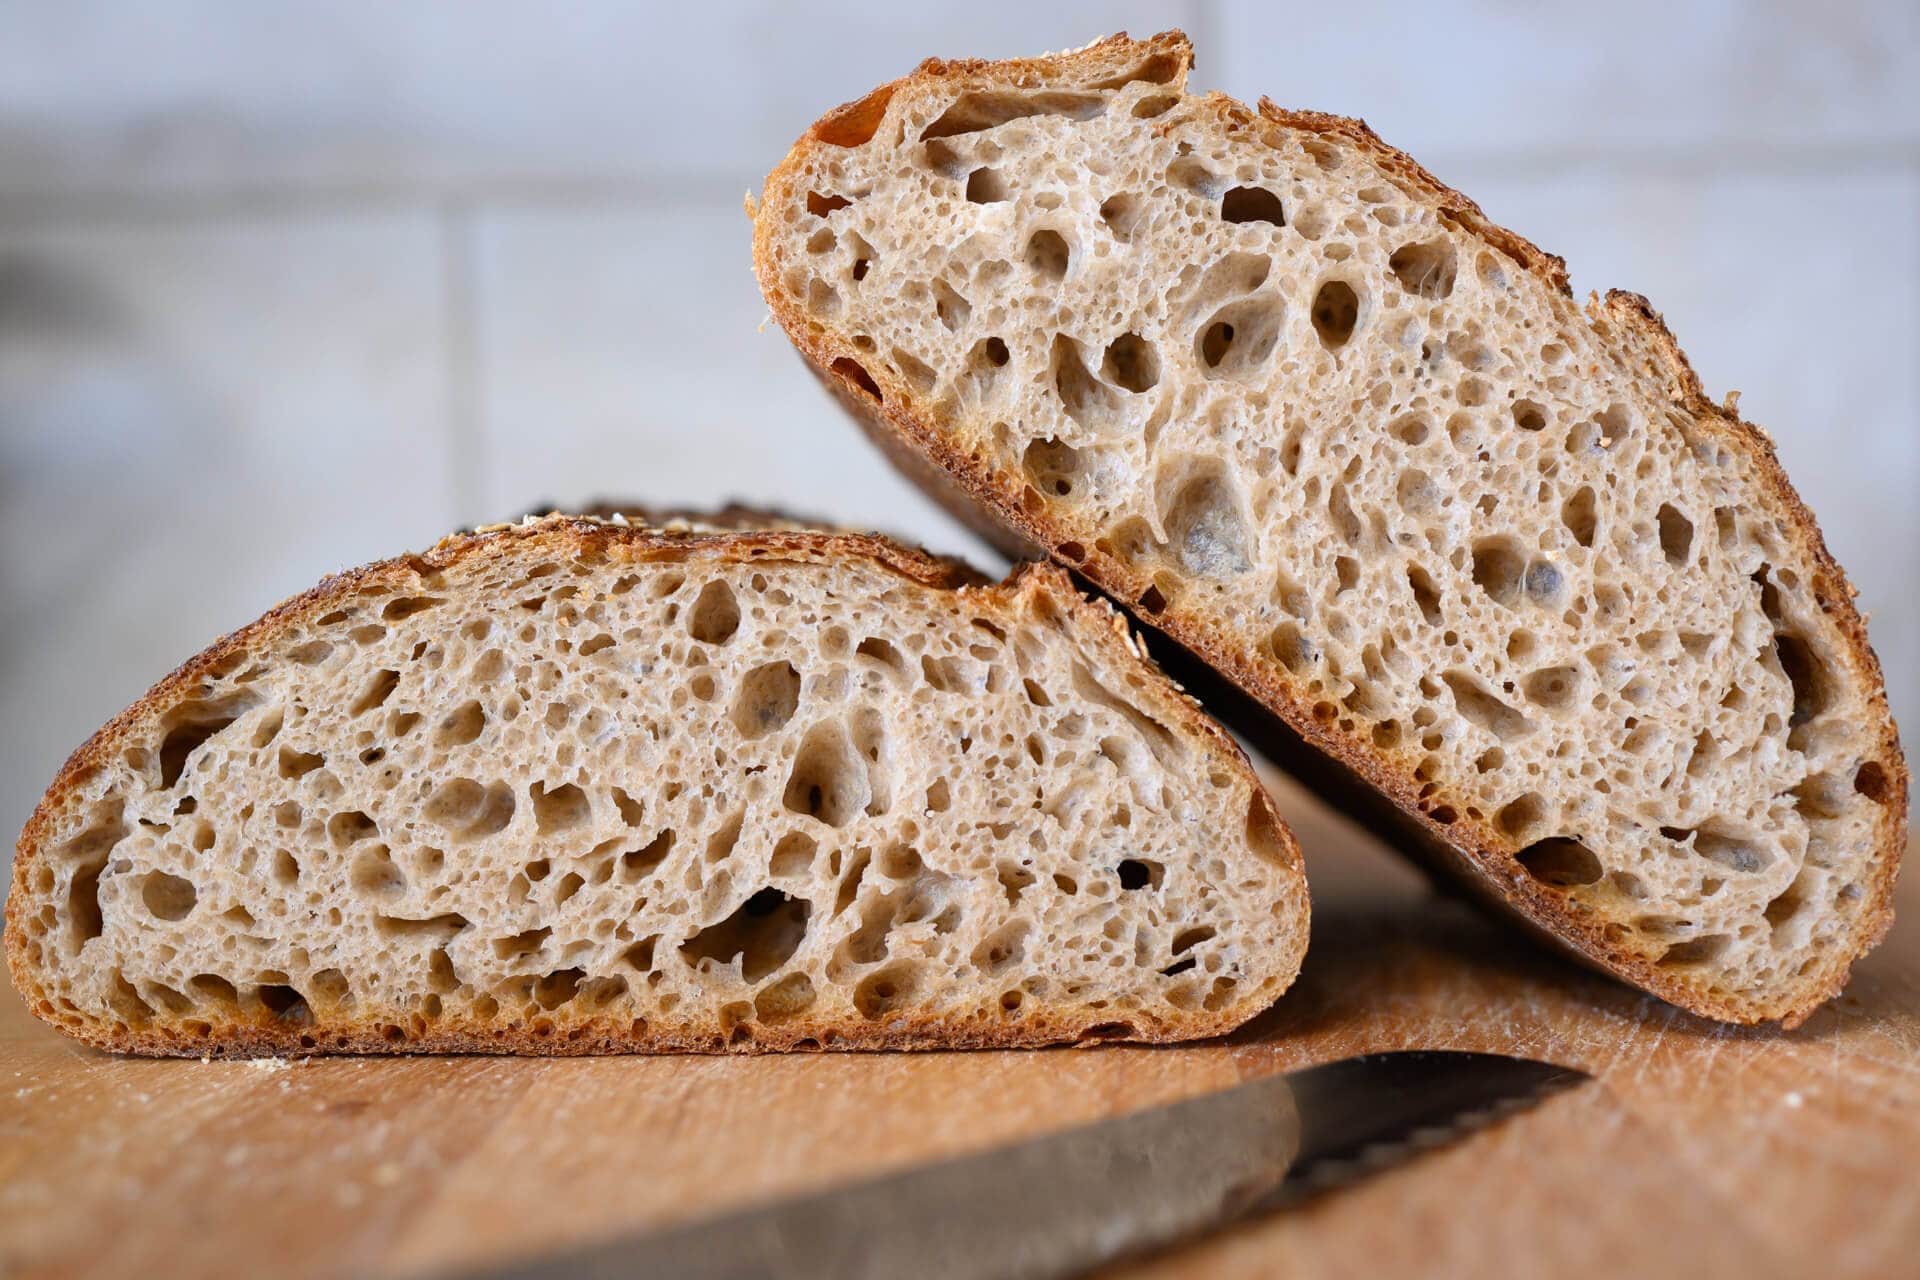
But what? What is that “something”? Is it the crust’s texture or the crumb’s tenderness altering my taste, or is it the perception of the loaf itself? Sometimes I wonder if the full range of textures, colors, and flavors I experience are genuinely there–visible to my eyes, present on my palate–or if I manufacture them when I see something mouthwatering. Perhaps this is the same way a barista might salivate at the sight of a properly pulled espresso, the aroma conjuring that recent summer strawberry, the allusion of toffee or black licorice. That “something more” seems to evolve as the loaf cools, hardens, and matures—an ever-changing kaleidoscope of flavors and textures.
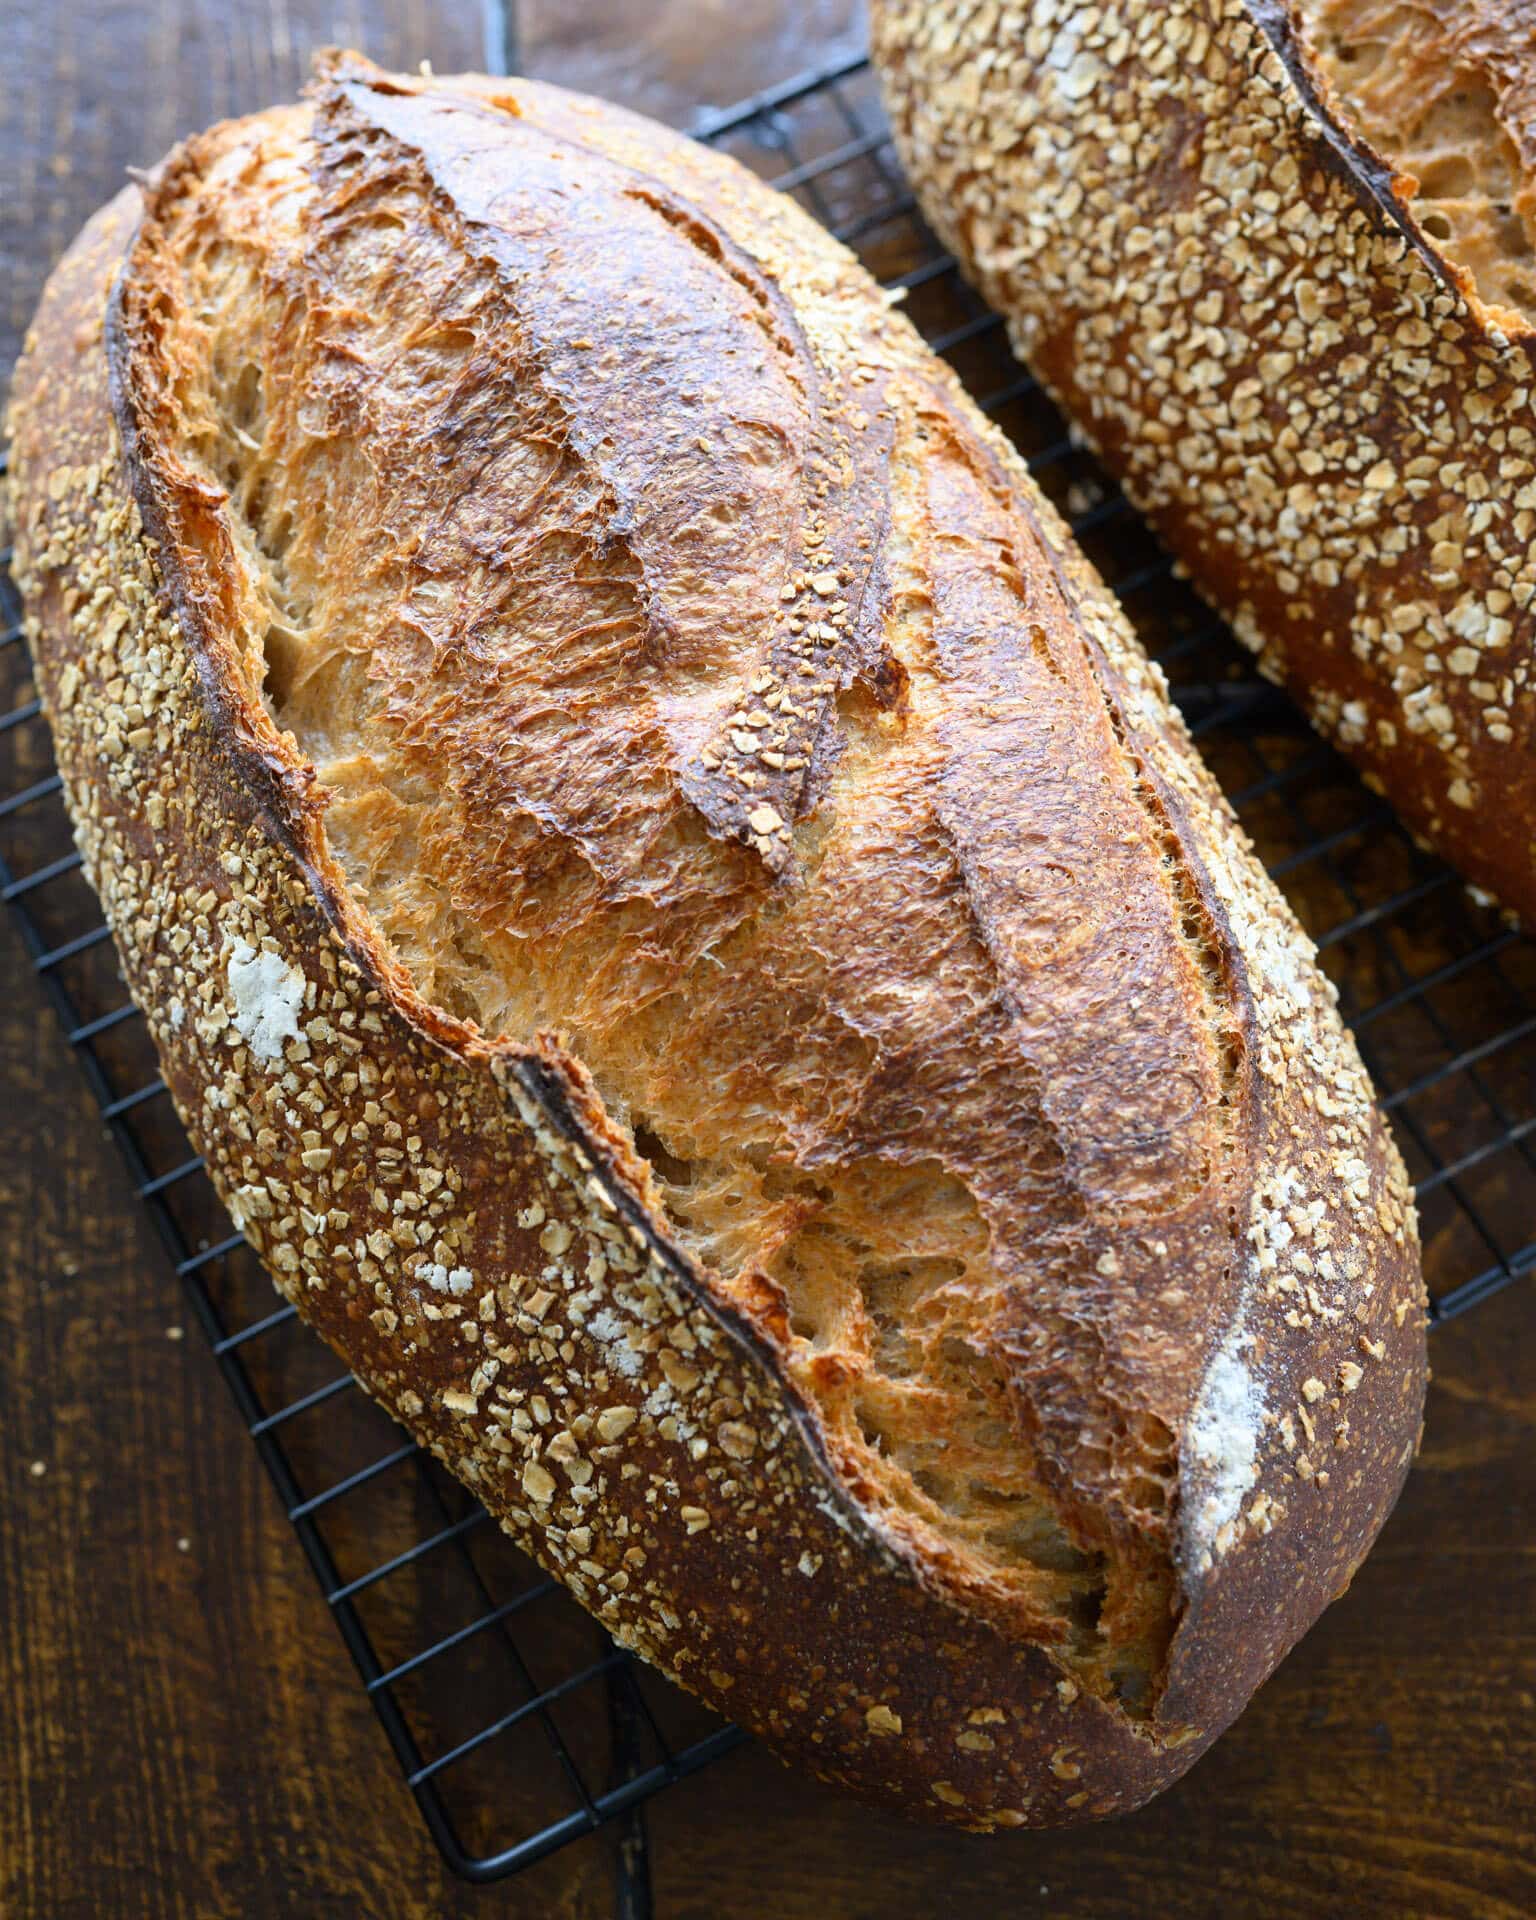
Baking a loaf of sourdough seems to be the only thing that has this effect on me. I think it has something to do with the art of the craft, the work that goes into it, and the satisfaction that results. It’s like a woodworker sitting in their precisely constructed no-nail design chair, corners fitting just so and pieces curved where they’re to be curved, straight where they’re to be straight. The pleasure of a well-executed bread is undoubtedly more than the aesthetic of it; it is also in the culmination of a detailed, devoted process that amplifies everything. Tasting how every piece is in the right groove, how the flavors and textures shift like fragments of colored glass from one bite to the next, is exhilarating.
Of course, it’s likely all of this is simply a result of my obsession with baking naturally leavened bread. But! I do proclaim that this is a great recipe that will make those who eat it smile, and you may even spy a split-second closing of their eyes as they savor the moment. This little, often overlooked token is what I look for when my kids are eating, indicating they deeply enjoy something. And I imagine that this bread will push its way to the top of your baking priorities more often than not.
Flour Selection
I love the small addition of rye flour in this recipe–it’s something you also see in my Beginner’s Sourdough Bread recipe. Even in a small percentage, rye seems to bring loads of flavor and color to the crust. And this loaf is all about flavor.
I use whole grain Red Fife for the whole wheat part of this recipe, which adds significant character to this already flavorful bread. If you have Red Fife, I’d recommend it, but if not, any whole wheat variety will also work very well.
Whole grain spelt brings a nutty, almost sweet character to the flavor profile. I use spelt often because of this addition, and in this bread, even though it’s in small quantity, it’s still a significant contributor to the overall complex flavor profile.
The white flour I use in this recipe is medium protein at around 11-12%. This would be a typical all-purpose flour or a base white flour used for bread-making. If you wanted to increase the strength of this dough and bring additional flavor and nutrition, you could substitute this white flour for a high-quality type 85 flour.
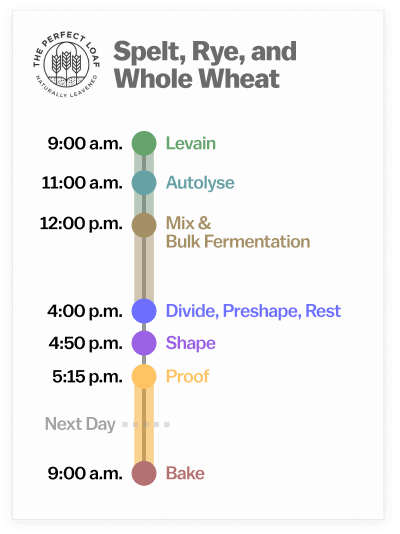
Baking Schedule
This sourdough bread recipe is made over two days, which gives the dough plenty of fermentation time, which results in a deeply complex and flavorful bread.
It’s also possible to bake this loaf all in a single day by allowing the dough to proof on the counter, shaped and covered, until the dough is puffy, relaxed, and passes the dough poke test.
Spelt, Rye, and Whole Wheat Sourdough Bread Recipe
If you want to make only a single loaf or scale this recipe up to make many more, see my guide to baker’s percentages to modify this formula.
Vitals
| Total Dough Weight | 2,000 grams |
| Pre-fermented Flour | 5.3% |
| Levain in final dough | 16.6% |
| Hydration | 85.0% |
| Yield | 2 x 1000g loaves |
Total Formula
The desired dough temperature for this recipe is 78°F (25°C).
| Weight | Ingredient | Baker’s Percentage |
| 520g | White flour (about 11.5% protein; Central Milling Artisan Baker’s Craft Plus) | 50.0% |
| 260g | Whole spelt flour (Central Milling Whole Grain Spelt) | 25.0% |
| 208g | Whole-grain wheat flour (Flourist Whole Grain Red Fife) | 20.0% |
| 52g | Whole-grain rye flour (Central Milling Whole Rye Flour) | 5.0% |
| 781g | Water 1 (levain and autolyse) | 75.0% |
| 104 | Water 2 (mix) | 10.0% |
| 20g | Fine sea salt | 1.9% |
| 55g | Ripe sourdough starter, 100% hydration | 5.3% |
Additional ingredients
Instant or rolled oats, for topping (optional)
Spelt, Rye, and Whole Wheat Sourdough Bread Method
1. Prepare the levain – 9:00 a.m.
| Weight | Ingredient | Baker’s percentage |
| 27g | White flour | 50.0% |
| 27g | Whole spelt flour | 50.0% |
| 55g | Water 1 (levain) | 100.0% |
| 55g | Ripe sourdough starter, 100% hydration | 100.0% |
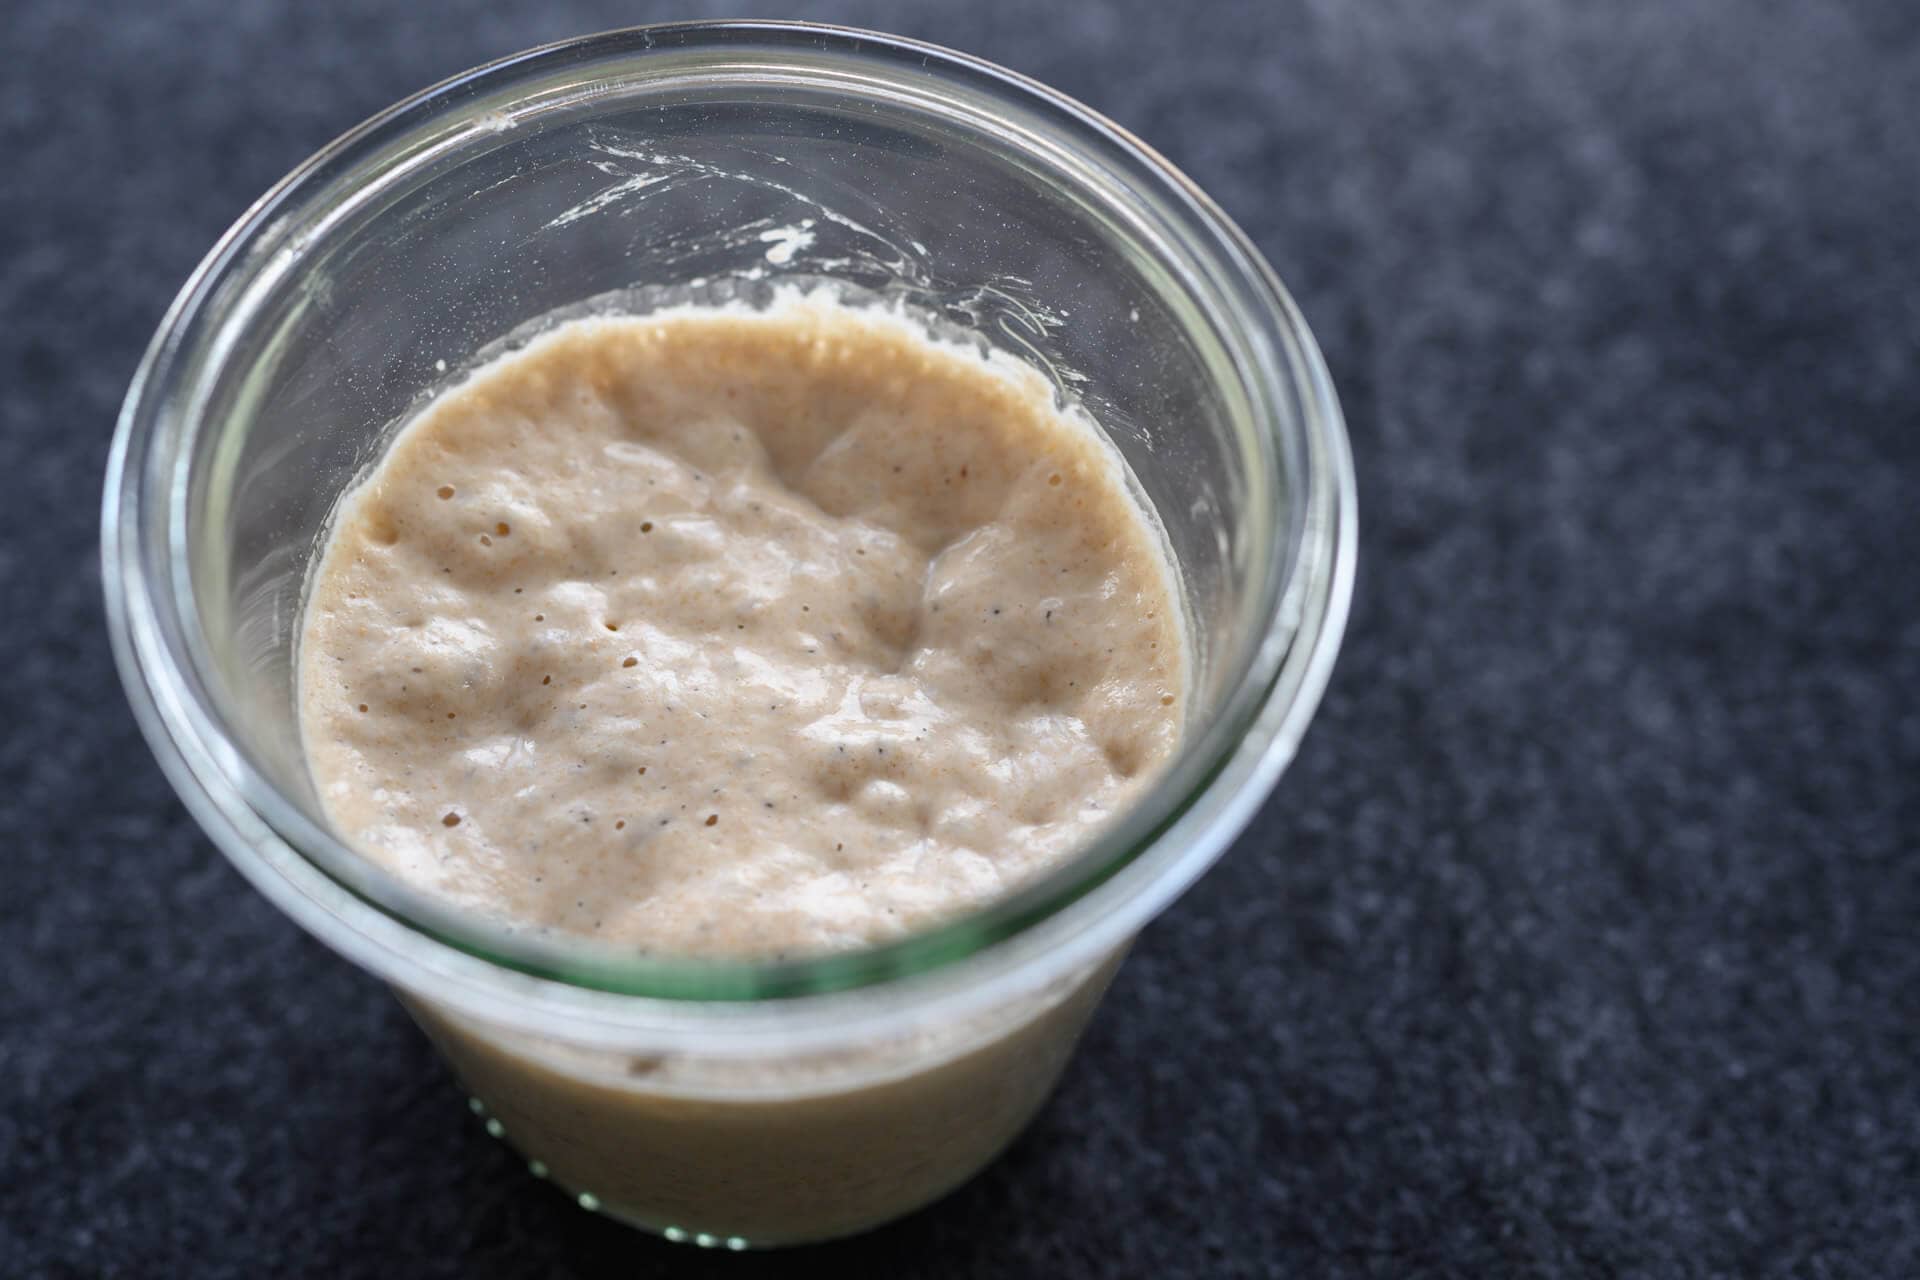
Mix the above ingredients in a jar and leave them covered at a warm temperature, 74-76°F (23-24°C), to ripen for 3 hours.
2. Autolyse – 11:00 a.m.
| Weight | Ingredient |
| 493g | White flour |
| 233g | Whole spelt flour |
| 208g | Whole wheat flour |
| 52g | Whole rye flour |
| 726g | Water 1 (autolyse) |
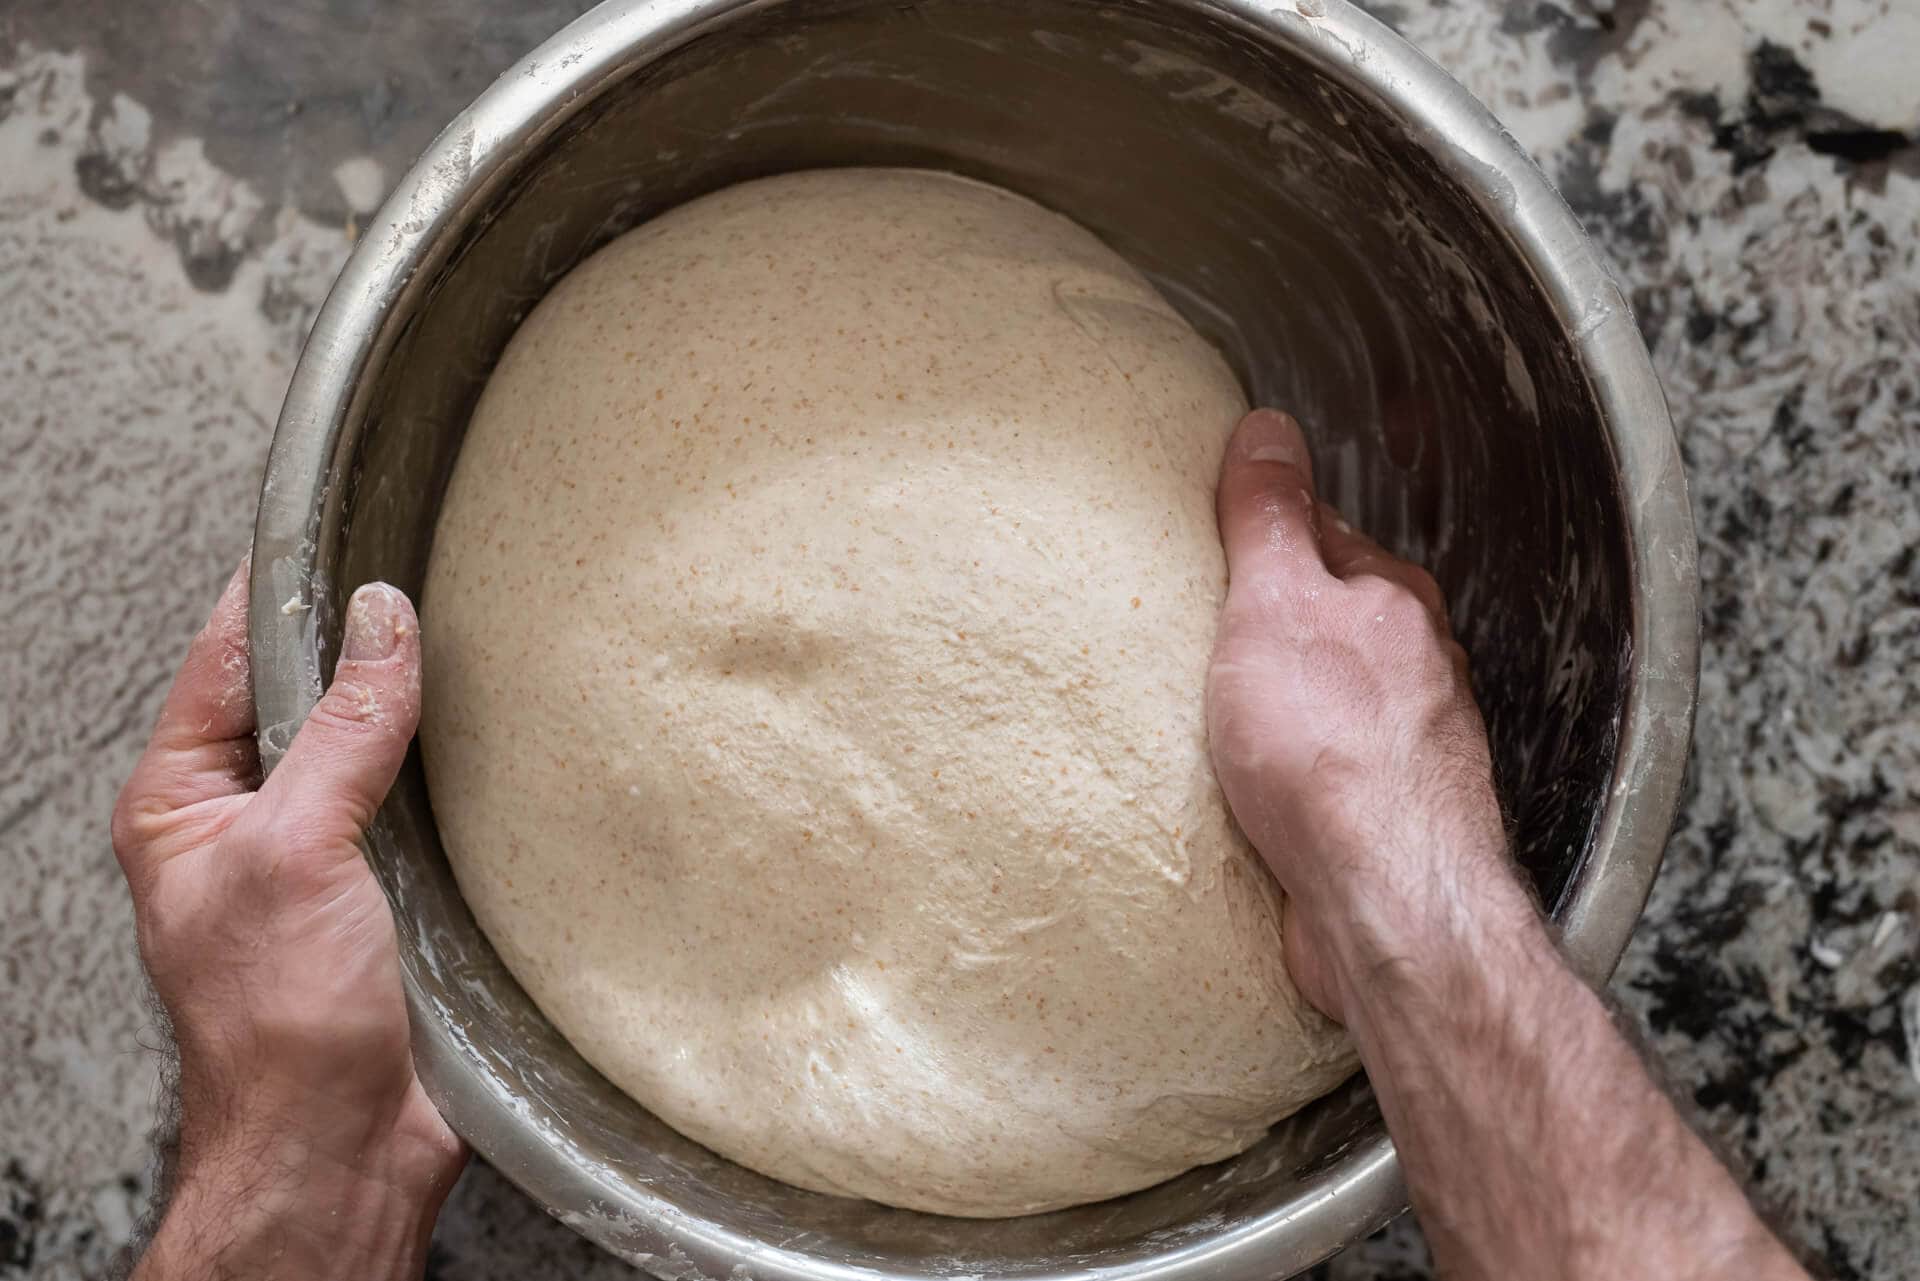
Warm or cool the autolyse water so that the temperature of the mixed dough meets the FDT (final dough temperature) of 78°F (25°C) for this recipe. Place all of the flours and water 1 in a large bowl. Use wet hands to mix until no dry bits remain; the dough will be shaggy and loose. Use a bowl scraper to scrape down the sides of the bowl to keep all the dough in one area at the bottom. Cover the bowl and place it near your levain for 1 hour.
3. Mix – 12:00 p.m.
| Weight | Ingredient |
| 104g | Water 2 (mix) |
| 20g | Fine sea salt |
| 164g | Ripe levain (from Step 1) |
Add the salt and levain to the top of the dough in autolyse, and use a splash of water 2 to moisten. With wet hands, mix thoroughly. Add the remaining water if the dough feels cohesive and it can handle the rest. Next, knead the dough for a few minutes using either the slap and fold technique or folds in the bowl. For this dough, I kneaded for about 5 minutes until the dough smoothed and became elastic.
Transfer the dough to a bulk fermentation container and cover.
4. Bulk fermentation – 12:30 p.m. to 4:00 p.m. (3 1/2 hours)
At a warm room temperature, 74-76°F (23-24°C), bulk fermentation should take about 3 1/2 hours.
This dough will require 3 sets of stretches and folds during bulk fermentation. After the first 30 minutes, wet your hands, grab one side of the dough, and lift it up and over to the other side. Rotate the bowl 180 degrees and repeat. The rotate the bowl a quarter turn and stretch and fold that side. Rotate the bowl 180 degrees again and finish with a stretch and fold on the last side. The dough should be neatly folded up in the bowl. Cover and repeat these folds every 30 minutes for a total of 3 sets of stretches and folds. Then let the dough rest, covered, for the remainder of bulk fermentation.
5. Divide and preshape – 4:00 p.m.
After 3 1/2 hours, the dough should be well-risen in the bulk fermentation container and puffy to the touch. The edge where the dough meets the container should be domed downward, showing strength and rise.
Fill a small bowl with water and place it next to your work surface. Scrape the dough onto a clean counter. Divide the dough into two equal pieces and prehsape each into a tight round.
Let the dough rest, uncovered, for 20 minutes. This is a shorter bench rest because the dough will be looser and slacker than most breads, spreading faster than usual.
6. Shape – 4:50 p.m.
I like to top this spelt, rye, and whole wheat sourdough bread with instant or rolled oats, but this step is optional. Spread an even layer of rolled oats on a clean kitchen towel or sheet pan.
I love to shape this recipe as a long, tapered batard (oval). See my process for shaping a batard or watch me shaping below for a quick tutorial.
Flour the top of each preshaped round and your work surface. Using your bench knife, flip one round over onto the floured area and shape it into a batard. Using two hands, transfer the dough top-side down to the oats, gently rocking the dough back and forth so that the oats stick. Then, flip the dough and place it seam-side-up into a prepared proofing basket.
Repeat for the other preshaped round.
7. Proof – 5:15 p.m. to 9:00 a.m.
Cover the baskets with a large, reusable plastic bag and seal shut. Let proof overnight in the refrigerator.
8. Bake – 9:00 a.m. (the next day)
Due to the large size of these loaves, they may not fit inside of a typical Dutch oven or Combo cooker. I prefer to bake them directly on a baking surface and steam my oven. See my guide to steaming a home oven for bread baking for instructions.
Place an oven rack in the bottom-third of the oven. Preheat your oven with a baking surface inside to 450°F (230°C).
Take the proofing baskets out of the fridge, uncover them, and put a piece of parchment paper over the basket. Place a pizza peel or inverted baking sheet on top of the parchment and, using both hands, flip everything over. Gently remove the basket and score the dough. I like to score these long ovals with a single long slash or a double slash.
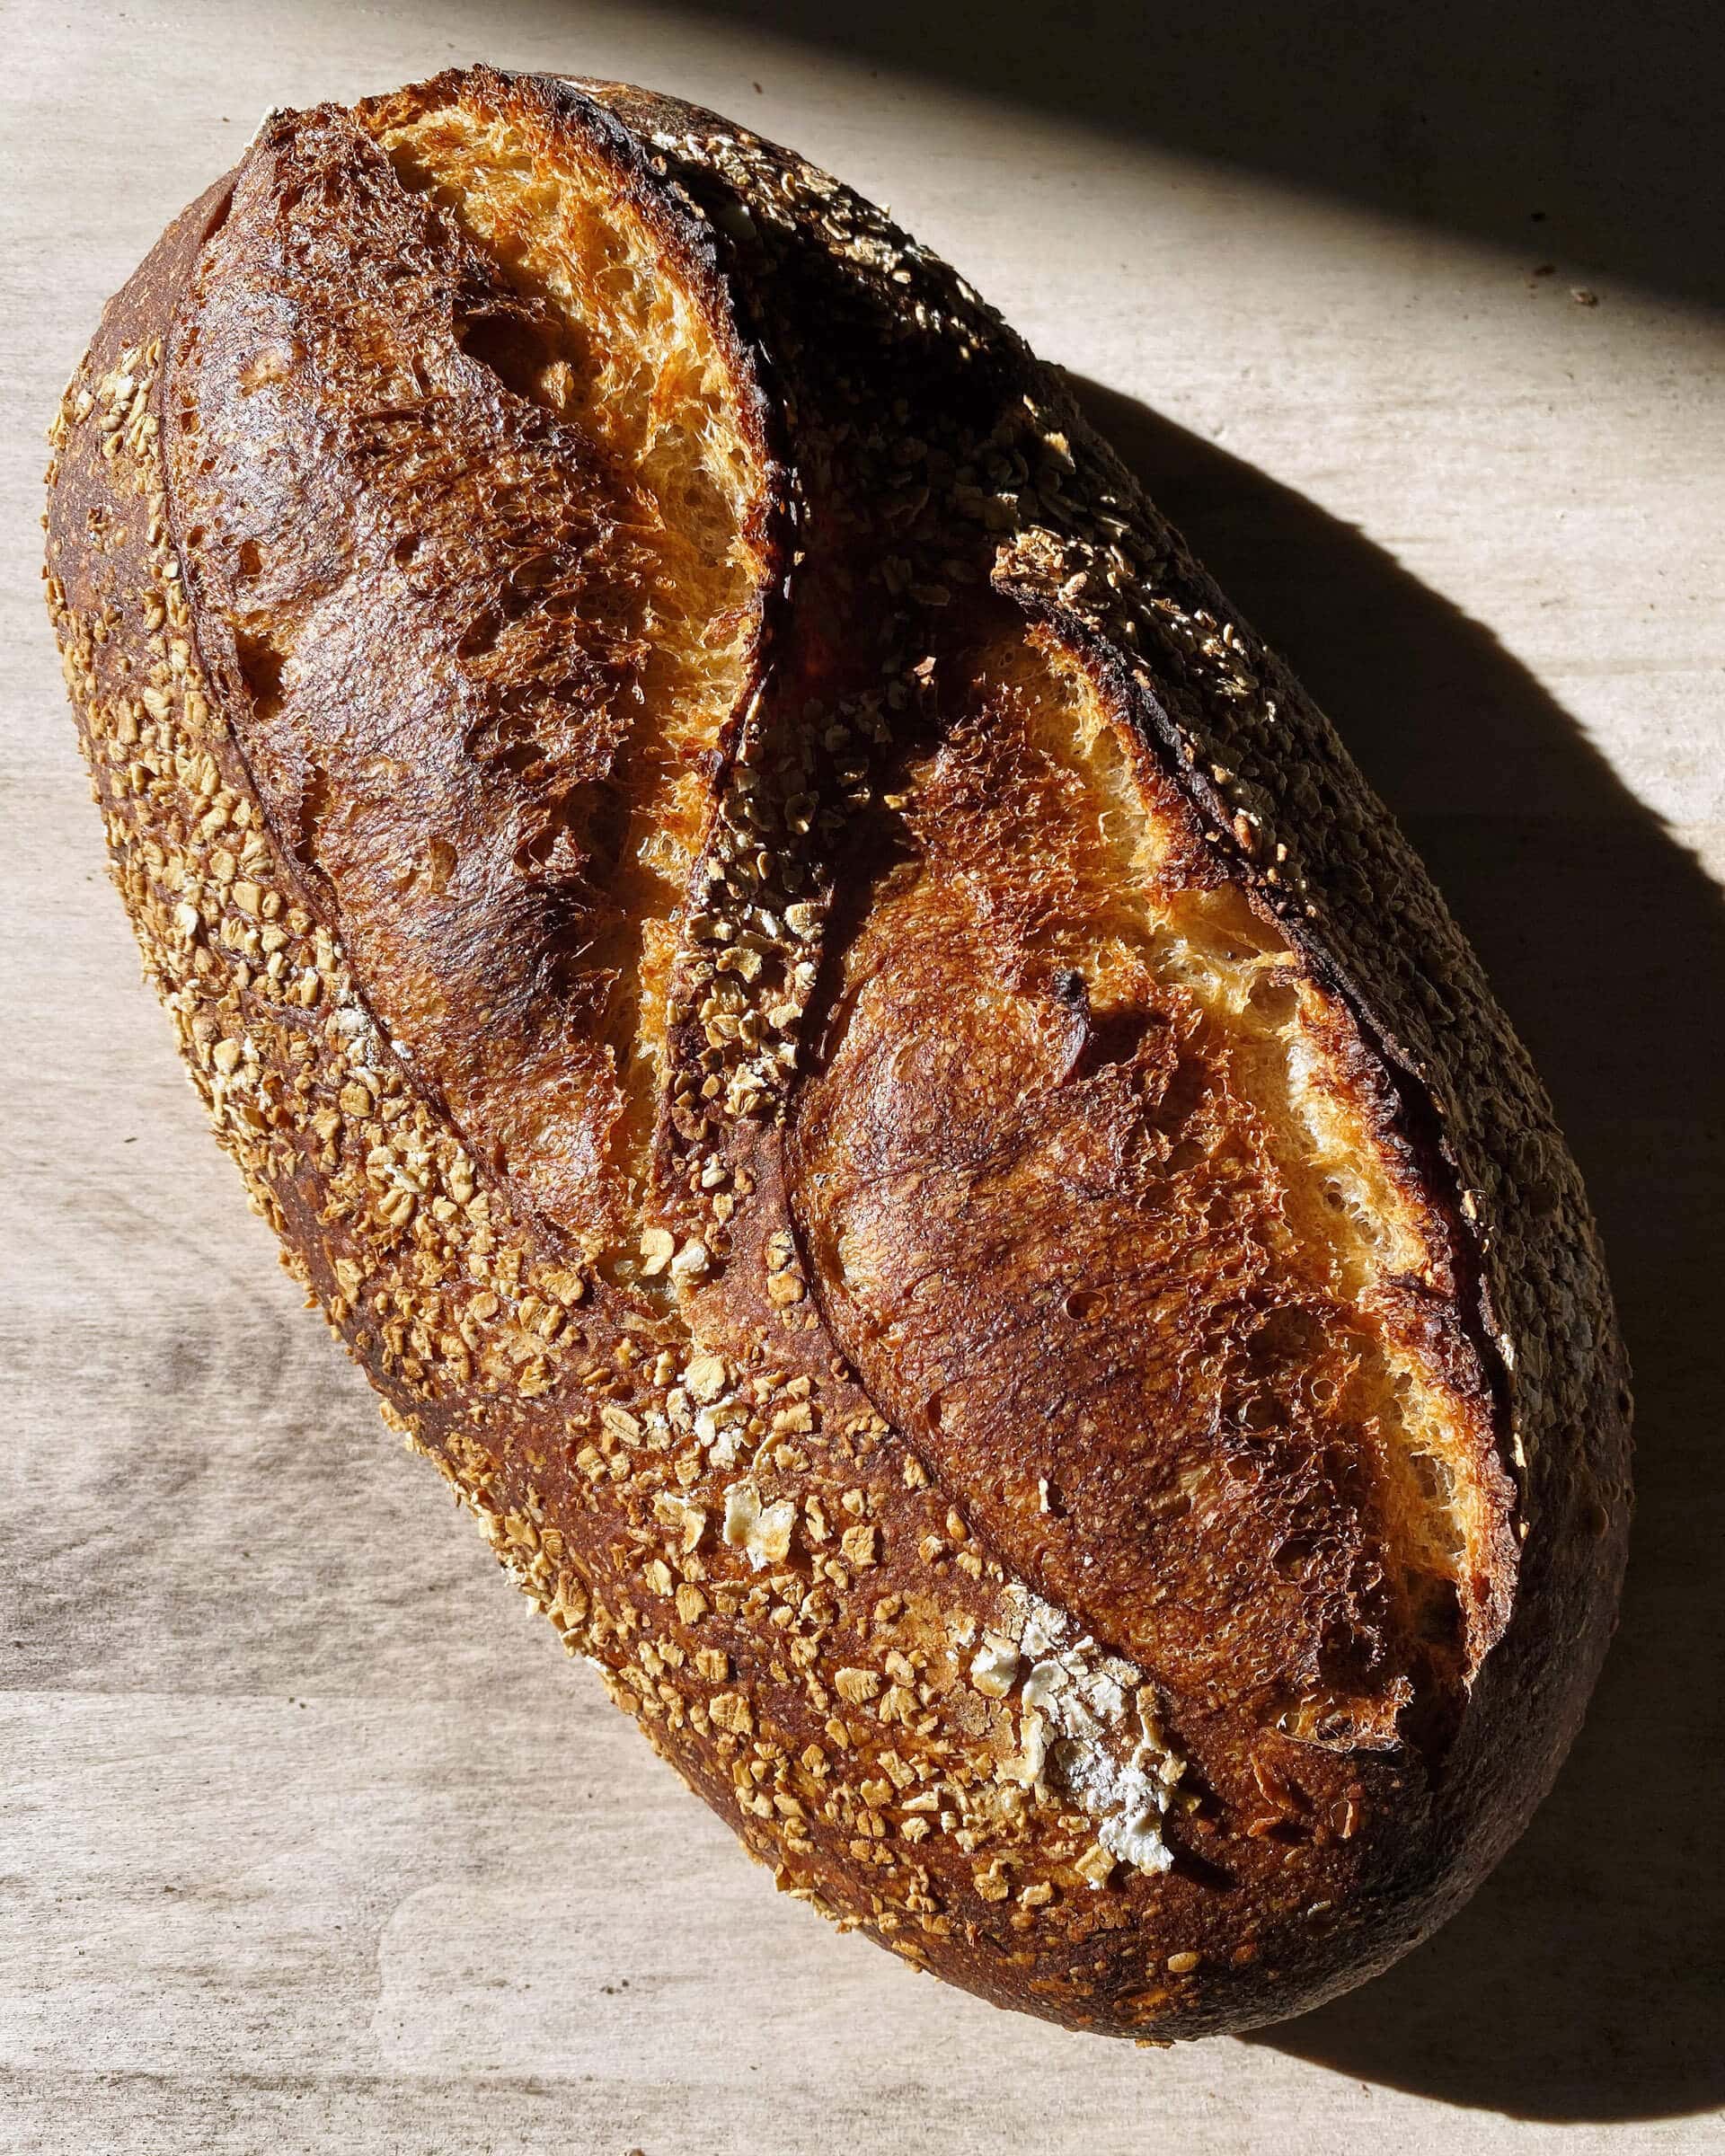
Slide the dough into the oven. Steam the oven by pouring ice into the preheated pan at the bottom of the oven. Bake for 20 minutes. Vent the oven of steam by removing the steaming pans. Continue to bake for 35 minutes more. When done, the loaf should have an internal temperature of around 204°F (95°C), and the crust should be deeply colored.
Let the loaf cool on a wire rack for 3 to 4 hours before slicing. This bread will keep well for a week or more if stored properly.
Print
Spelt, Rye, and Whole Wheat Sourdough Bread
- Prep Time: 24 hours
- Cook Time: 1 hour
- Total Time: 25 hours
- Yield: 2 loaves
- Category: Sourdough, Bread
- Cuisine: American
Description
A flavorful—and wholesome—loaf of sourdough bread with whole spelt, whole rye, and whole wheat.
Ingredients
Levain
- 27g white flour (about 11.5% protein)
- 27g whole spelt flour
- 55g water
- 55g ripe sourdough starter, 100% hydration
Autolyse
- 493g white flour
- 233g whole spelt flour
- 208g whole wheat flour
- 52g whole rye flour
- 726g water
Mix (final dough)
- 104g water
- 20g fine sea salt
- 164g ripe levain
Instructions
- Levain (9:00 a.m.)
In a small bowl or jar, mix the Levain ingredients. Cover the jar and keep it at a warm temperature for 3 hours. - Autolyse (11:00 a.m)
In a mixing bowl, add the autolyse ingredients until no dry bits remain. Cover the bowl and let rest for 1-hour. - Mix (12:00 p.m.)
Add the salt and levain to the top of the dough in autolyse, and use a splash of water to moisten. With wet hands, mix thoroughly. Add the remaining water if the dough feels cohesive and it can handle the rest. Next, knead the dough for a few minutes using either the slap and fold technique or folds in the bowl. For this dough, I kneaded for about 5 minutes until the dough smoothed and became elastic.Transfer the dough back to the bowl or to a container for bulk fermentation and cover. - Bulk Fermentation (12:30 p.m. to 4:00 p.m.)
This dough will require 3 sets of stretches and folds during bulk fermentation. After the first 30 minutes, wet your hands, grab one side of the dough, and lift it up and over to the other side. Rotate the bowl 180 degrees and repeat. Then rotate the bowl a quarter turn and stretch and fold that side. Rotate the bowl 180 degrees again and finish with a stretch and fold on the last side. The dough should be neatly folded up in the bowl. Cover and repeat these folds every 30 minutes for a total of 3 sets of stretches and folds. Then let the dough rest, covered, for the remainder of bulk fermentation. - Divide and Preshape (4:00 p.m.)
Use water and a wet hand or lightly flour your work surface (whichever you prefer) and scrape out your dough. Using your bench knife, divide the dough in half. Lightly shape each half into a round shape. Let the dough rest for 20 minutes, uncovered. - Shape (4:50 p.m.)
Lightly flour the top of your preshaped rounds and using floured hands, shape the dough into an oval (batard) shape, then place the dough in proofing baskets, seam side up. - Proof (5:15 p.m. to 9:00 a.m. the next day)
Cover proofing baskets with reusable plastic and seal. Then, place both baskets into the refrigerator and proof overnight. - Bake (The next day, 9:00 a.m.)
Preheat your oven with a baking surface inside to 450°F (230°C). When the oven is preheated, remove your dough from the fridge, score it, and transfer it to the preheated baking surface. Bake for 20 minutes with steam. After this time, vent the steam in the oven and continue to bake for 35 minutes longer. When done, the internal temperature should be around 204°F (95°C). Let the loaves cool for 3 to 4 hours on a wire rack before slicing.
Notes
If you want to bake only a single loaf, divide all the ingredients in half.
What’s Next?
If you love the nutty, almost sweet flavor of spelt flour as I do, check out my whole grain spelt pan loaf which is 100% whole spelt.
If you want to use some more rye in your baking, check out our Light Deli Rye which uses a scalded rye porridge to bring even more flavor.
Buon appetito!


340 Comments
Can I reduce the amount of salt in this recipe?
Interesting loaf – made it for the first time yesterday/today. Also first time with either rye or spelt, although my starter is rye/ww.
Super-gummy dough, making the slap-and-fold rather difficult. It rose well in the batard overnight nicely, and seemed to be decently proofed, but did lose some shape in baking (open on a pizza stone). This didn't bother me much, but…it baked up VERY dark at 450F. Any thoughts about reducing to, say, 400F and baking somewhat longer to allow the internal portion to heat up without overbaking the crust? (I like the deep, chocolatey crust…but my wife does not! Likes hers "lighter".)
Yea, I would go down to 425F to bake, sounds like it was too much in your oven. Then, keep an eye in the last 5-10m to make sure it doesn't go too far.
If the dough felt super wet and hard to handle, try easing off the hydration just a bit—even just 25g can make a difference. This dough will feel a little more "gummy," though due to the spelt and rye in there. It does take some getting used to!
Thanks Maurizio! I'm doing a "full" recipe today (last time I did just one loaf) and the results are quite a lot better so far (I paid more attention to details…and I think that is KEY!).
First, I worked the autolyse well…the last time my mix left a bit of loose flour around…this time not.
Second, I really studied the vids on "slap-and-fold" and added just over half the reserved water (so 60-70g of the 104g)…this produced a wet dough but my slap-and-fold ended up looking just like the videos (that's gotta be good, right?). Smooth and well-developed, a bit sticky, but picture-perfect. Big stretches after slapping it down and I did that for probably 7 minutes or so.
Third: Super-aware of temperature control! (It's winter and our kitchen isn't overly warm.)
After the bulk stretch and folds it is now in bulk rise/ferment in a Cambro in my oven at about 24C and has risen about 25-30% in 2 hours. Gonna wait this out a bit yet…..very hopeful!!
This was the best tasting loaf of yours that I have made. It didn't have much of a sour flavor, so I wonder if I should have extended the bulk ferment. Like most of your recipes that I have tried, the free standing loaves did not hold their form and sank info biscotti-like shapes. This isn't a problem as the short loaf slices have a high crust-to-crumb ratio!
Hey there! Ahh, so glad to hear you liked this one, it's definitely in my top 5. Usually spreading in the oven when scoring is a sign of under-strengthened or over-hydrated dough (or a combination of both, as they are related). If you find you’re still getting significant spreading, try first to add in another set or two of stretch and folds during bulk fermentation (or you can knead the dough a bit before bulk begins, check out my guide to the slap and fold kneading technique). If that doesn’t help, reduce the hydration of the dough by 2-5% to bring more strength.
Finally, it’s also possible your dough is over proofing, leading to a breakdown and excessive spread in the oven. If your dough felt strong and you shaped it tightly, try pulling back that final proof time a few hours (if you’re cold-proofing) to see if that helps. If it does, continue to dial in that proof time until you have a strong dough when baking.
I hope this helps!
Hi. Thanks for this. Trying this again after I added ALL of water2, making the dough a bit wet to handle. Didn’t harm the taste though! Was just wondering… What approximate temperature should the autolyse water be if It should match the final dough temp? How can I gauge that if the dough hasn’t been mixed? ☺️
I try to make my autolyse temp the final dough temp you're after!
I tried this recipe twice but every time my bread was sticky and gummy inside. Any ideas what could be the cause?
It sounds like perhaps your dough was slightly underproofed. There are a few indicators your dough could be under: explosive rise in the oven, dense spots in the interior with potentially scattered large holes, and a gummy texture to the interior. Finally, it’s possible the bottom of the loaf might be slightly bowed upward (like the letter “U” — the top will kind of dome).
Make sure to build your levain from a starter that’s strong and mature (meaning it’s risen to it’s peak height before you take some to use). From there, bulk fermentation is very important! Make sure your bulk fermentation goes sufficiently far, you want the dough to look smooth, it should have risen considerably, and have bubbles here and there — it should look alive. If you tug on the dough a bit it should offer resistance to your tugging, it’ll feel stronger. Give the dough the time it needs in bulk fermentation! If you have to give it another 30m or hour to see these signs, do so. It's important for this step to go sufficiently far for the dough to have enough fermentation activity before its proof.
Check out my guide to proofing for a bit more help, too:
https://slimlife.fit/guides/proofing-bread-dough/%3C/a%3E%3C/p%3E
I tried this recipe twice but every time my bread was sticky and gummy inside. Any ideas what could be the cause?
This is the most delicious bread ive ever made from your recipes.
Just made it. Really great recipe. Did yours rise enough? I think I need to lower my temp in the fridge.
I would give it more time in bulk fermentation!
So happy to hear that, Anna! It's a fav of mine, too. It's the basis for my "Rustico" recipe in my cookbook:
https://slimlife.fit/cookbooks/%3C/a%3E%3C/p%3E
Your directions say start the Levain @ 9am and Autolyse @ 11am (2 hours). The text says to let the Levain sit for 3 hours.
Seems to be a disagreement… 2 hours or 3?
Edit: Nevermind. I get it. You don’t actually use the levain until after the Autolyse (i.e., @ noon… 3 hours!) I just needed to RTFM!
Ha ha, no worries Dan! I do make mistakes, believe me 🙂
I have made this bread a few times and love the flavor. I am trying to get a more open structure in the bread. Mine has been relatively dense. One big question I have is: how to you slap and fold such a wet dough without having the dough stick to fingers to the point of not being able to continue kneading? I do work with either wet or floured hands, but the dough still manages to stick. I have watched your video carefully and it seems you have a wet dough (hence the scraping while kneading) and yet you can go on without interruption. Thanks much, Mario.
Can you sub the spelt flower for another ingredient? Can you sub white flour for bread flour?
I'd swap out the spelt for whole wheat. Yes, to bread flour!
Hello, thank you for this recipe. It’s taste delicious. I have made it about three times and have a question : could it be converted to a pan loaf? If so, do you have any suggestions on the size of pan I should use? I want to use it to make sandwiches for my family. Thanks in advance.
For the past two years, I have been baking sourdough using about 30% spelt because I love spelt. I also put in maybe a tablespoon or two of caraway seed and also I use a sprinkling of onion granules, not onion salt, and also some granules of garlic. It gives the bread a wonderful aroma, and I won’t bake my bread any other way now because I’m spoiled. I have been following your work and have your book and I’m thankful for all of your instruction and ideas because it brought my sourdough bread to another level
Hi Maurizio. I wanted to know if I can convert this recipe into a Pullman Pan and if so, how does this change the proofing time. Should I proof it until it goes over the top or do I retard this and bake with the lid on? Thanks
Hi Maurizio,
What size proofing basket does this recipe need?
I have my starter working away and plan to start baking tomorrow.
Carolyn
excellent!!!
I made this recipe for the second time today but with a twist. For the white I used my own sprouted soft white flour and the whole wheat was my freshly milled hard red. Topped with caraway seeds and rolled oats. It turned out even better than the first time. So good!
You can see it here. https://www.facebook.com/groups/2211426535791322/permalink/3329924033941561/
Love this bread! Made it twice already, and in process for a new loaf as I type.
One question- is there a way I could give it a slightly thinner, softer crust? It’s so difficult to slice, especially after sitting for a day.
ha I was just about to ask the same thing. I really love it but have a hard time with intensely chewy crusts (not just this recipe). I’ve heard from a couple sources (and had decent results) with a hotter/quicker initial steam and wondering if Maurizio has any intel there.
One way to soften the crust is to brush melted butter over the finished loaf. The crust will become more leathery rather than crunchy.
If you are making only one loaf, does that alter
The cooking time? And if it’s done completely in the Dutch oven does that alter the cooking time?
Same bake time!
I noticed that the recipe in the text calls for 30 minutes bake time with steam, but the recipe itself calls for 20 minutes with steam. My first loaf, with only 20 minutes (I was working from the printed recipe), didn’t develop the crust or bloom that I had hoped.
It should be 20m with steam! Sorry for the error, fixing now.
I’m going to mix the levain the night before and use it in the morning. It’s 60 degrees overnight in my kitchen so I’ll have it out overnight. What do you think?
That’s a bit cold… Warm the water!
Love this bread recipe! Baked it yesterday and am eating it today. Thank you for you book, your videos and your recipes!
So glad to hear this, Carolynne! You’re very welcome 🙂
this is very similar to the loaf I made yesterday! I used a recipe from a baker in Ukraine. This combination of flours produces the most wonderful, tender crumb. Thanks very much for your take on this basic but versatile bread.
Who was the baker from Ukraine if you don’t mind sharing?
It’s a delicious mix 🙂
When you shape the loaves and put in the basket “seam side down” that is the opposite way it’s normally done. Is that to keep the oats from absorbing into the dough?
That’s opposite from how I shape and proof here, I always do seam side up (unless it’s a special bread of some kind or a pan loaf). There’s no mention of “seam side down” in this post!
Maurizio, this is what it says copied and pasted from above …
“Then, flip the dough and place it seam-side-down into a prepared proofing basket.
Repeat for the other preshaped round.”
7. Proof – 5:15 p.m. to 9:00 a.m
Strange. Well, that’s a typo! Should definitely be seam-side-up. Fixed and sorry for the confusion!
Sounds great. I think I would a cold start for the bake. Probably about 50 minutes bake?
It can be tough changing seasons. The half-way point between summer & winter requires thought.
Thanks.
I’ve never been able to successfully bake with a cold oven!
Great bread! Made it with a few small changes. I used a little less spelt and added fine durum. I also added green olives and walnuts. It did not have a lot of oven spring, but in the fridge it gave a nice rise, so it turned out perfect, Thank you Maurizio!
Love those mods, I think using durum is a fantastic idea!
You say in your linked starter feeding article that it takes 10 hours (from 10am-8pm) from feeding until your start is ripe and ready to use to make a levain. And you start mixing the levain at 10am in this article, so does that mean you feed your starter at midnight the night before mixing the levain?
It depends on the temperature in your kitchen and how much starter you leave in your jar overnight. I usually feed mine at around 9pm and use it at 9am the next am.
Anyone have any advice for making this recipe with a stand mixer? I’m a little injured and I’m not sure how my wrist will hold up for to 10 minutes of slap and fold. What level of development should I be going for up front?
You certainly can, Christopher. Go for medium development.
I mix all my dough in a stand mixer. It does a great job. I then do three stretch and folds before the bulk -works beautifully.
I’ve made this a few times Maurizio and love the rich color and moisture of the loaf. Both times, however I’ve had terrible oven rise. The dough goes slack in my combo cooker. Less hydration? More kneading to promote stronger dough? Thank you for any tips or advice.
Yes, go with a reduction in hydration!
Hi, do I have to use store bought flours? I have this stone mill at home and all three types of grains too! should I just mill the whole grains according to recipe and use king Arthur’s bread flour for white flour?
Yes, that will work!
I’ve made this yummy bread a couple of times. It’s great. However, the recipe calls for using ALL the 164 g Levain, and I find that I can never transfer 100% of the levain from my container no matter how much I scrape it. (I got 156 g to transfer to the dough). Might that be why my crumb isn’t as ‘open’ as I’d like? I think I will try to change the levain to: 60g starter+30 g bread flour + 30 g spelt flour + 60 g water = 180 g levain. Then I should be able to get 164 g to transfer. Does that sound ok? Or any other suggestions to improve the crumb? The boule does rise nicely and it tastes great. [I don’t have a batard shaped Dutch oven]
That’s not a problem, it’s common to have a little less end up in the final mix. If you want, you can definitely up the levain build a bit to cover any loss. You definitely want strong fermentation in the dough!
Thanks. Would more levain (ie 164g) be helpful to have a more open crumb?
If you feel the final bread was under proofed, then yes, definitely!
my baking has really changed after I bought a challenger bread pan. I know it’s expensive, but a baker must have good tools! Something that has really helped my bread rise is the addition of a few ice cubes under the parchment I bake it on —this provides the needed steam. I am so pleased with the results!
I want to make this loaf as written, except do the “work” Wednesday night, bake Friday night.
Any thoughts the best way to achieve this? A long cold proof after shaping, or a two step process with the bulk ferment for 24 hours in fridge, then shape and cold proof? Thanks!
Hey, Dustin! You could do a cold bulk (after about 2.5 hrs warm, on the counter) then take it out, divide, shape, let proof on the counter for 1 hour, then cold proof and bake the day after.
Love your recipes, Maurizio.. I tried this interesting combo of flours this weekend, and am excited to taste it. It was very wet, but am becoming more comfortable with the high hydration recipes.. But I do have one question.. how do you know how much water your flour can handle? Is it just trial and error doing the same recipe many times? If your flour does not handle that much water, can you ever develop it enough using slap and fold or stretches?
Yes, it’s trial and error, but you can determine this during mixing based on how the dough feels!
Finished up my 1st pair of loaves with this recipe this morning. I really thought this attempt was destined to be a failure. During slap and folds, I’d build up strength, then it would fall apart. After the pre-shape and bench rest, I had two thick pancakes. I shaped and proofed overnight. Tossed the 1st in my Dutch Oven without any expectations so was very pleasantly surprised when I lifted the lid after the early part of the bake. I had a very nice looking loaf. I cut into the 1st loaf after just an hour and it had an open crumb and wonderful taste. Not sure how it turned out so good, but happy that it did. Thinking a little less hydration next time, unless you have other ideas about why I couldn’t seem to build strength.
Glad it turned out well! Yes, this can be a slack dough. I’d say drop the water some to adjust for your flour and you’re good to go!
Hi! I’ve made this bread 2 times now and LOVE the taste. I found though that after I finished cooking (tempt at 205-208) the bread is still moist inside. It is completely cooked and has a nice spring when I push the center of the loaf, but still ‘wet’. Is that normal for this bread?? I am cooking it at a lower temp because I don’t like my bottom to be too dark.
Did you cut this bread early? Be sure to let it rest at least 24 hours as I discuss in the post before cutting it—if you cut too early the interior can be gummy.
Did you mean cool 1-2 hours before slicing or a wait a full 24 hours? I don’t see where it says to wait 24 hours in the post
Maurizio, could you add that the water is supposed to be warm into the table for the levain build by any chance? I completely missed that because it’s not prominent in the recipe!
Hey, Natalie! The reason it’s not in there is that it might not always need to be warm… It depends on your kitchen! If your kitchen is cool, then yes, you’ll likely have to warm the water to reach the desired dough temperature listed in the recipe. Conversely, if your kitchen is very warm you might have to cool the water! Check out my guide to dough temperatures for more 🙂