


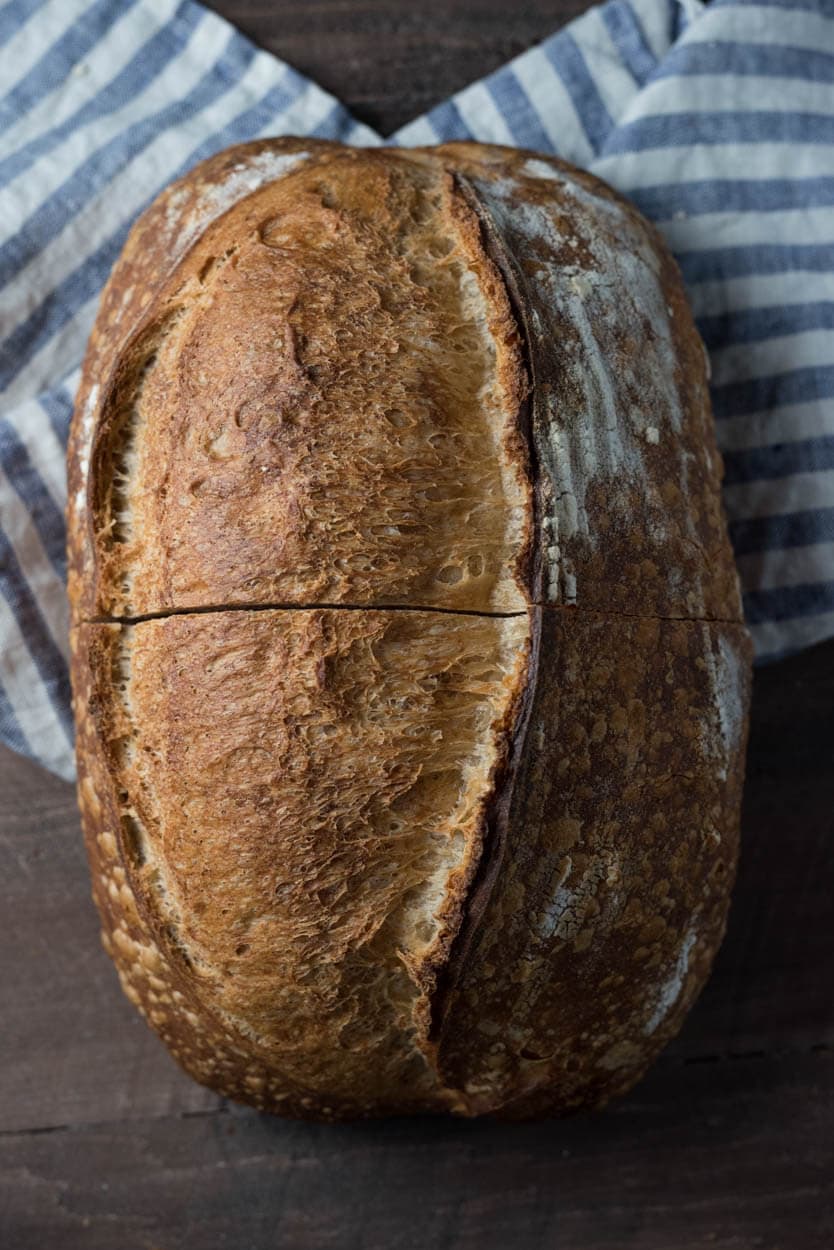
My baking focus has lately been predominantly on my sourdough starter maintenance and maximizing fermentation. And recently, I’ve made some of the best bread I can remember (I took all the bread pictures in this post with this starter). So this post is somewhat a continuation of my Managing Starter Fermentation, but in this post, I’ll focus more on the signs for spotting when a sourdough starter is ready for refreshment (ripe) and how to perform that refreshment.
Be sure to check out my post on what flour, water, and carryover ratios I’m currently using to feed my starter in my How Do I Feed My Sourdough Starter post.
There are many methods to keeping your starter healthy and in proper working order, likely as many methods as bakers. Each baker has a process for maintaining their starter according to what works for them and the bread they seek. Each starter is unique, after all: a distinctive blend of wild yeast and beneficial bacteria that has evolved in the temperature it’s kept at, the flour used for refreshments, and the time between those refreshments. I wanted to preface this article because the following is what works for me here in my kitchen and will most likely work for you as well, but I guarantee you’ll find yourself modifying my method to suit your environment. That’s to be expected. An essential requirement for a baker is flexibility and adapting techniques and inputs so everything performs optimally in your kitchen. In the end, your sourdough starter maintenance routine might be similar to mine, or it might be quite different.

I can remember back to when I first dabbled with creating my sourdough starter. I read all the books I could get a hold of; I searched online, anywhere I could find information. Once I got things up and running (using the process described in my seven steps to creating a sourdough starter entry), I followed refreshment schedules outlined in various books, and things seemed to work pretty well. But my bread didn’t improve until I modified things to suit my environment, schedule, and unique starter. As I refreshed my starter each day (feeding sourdough starter), I began to take note of things, how it looked when I neglected to refresh it for too long, how it looked after a few hours with new food, and how the smell of the starter changed throughout the day.
My goal for this entry is to convey the signs I look (and smell) for during the single-day microevolution of my sourdough starter. First, what does it seem and smell like right as I refresh it (at the start)? Then, what should it look like when I decide to refresh it again or use it for making bread? And finally, what does it look like if it’s gone too far and starts to become overly acidic? I receive frequent emails on this topic, and I hope this entry will be a visual guide to those wondering how I care for my starter.
With this post, I’m hoping to help you answer the following questions:
- What is feeding (I usually call it refreshing) a sourdough starter?
- How soon after feeding (refreshing) a sourdough starter can I use it?
- What does feeding my sourdough starter once (or twice) a day look like?
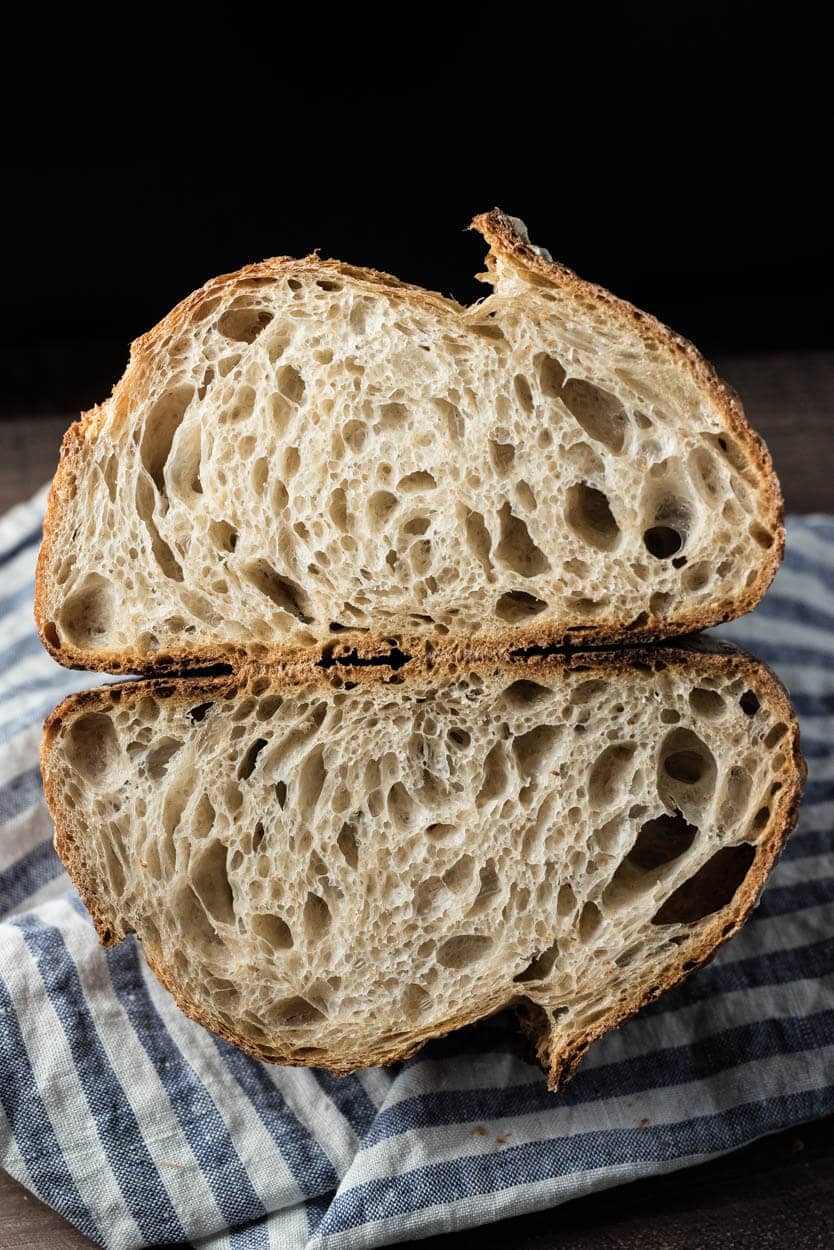
A quick note for those out there who follow my writing very carefully: you’ll notice this entire entry is about a liquid starter/levain and not about a “stiff” variety I had been baking with for almost a year. I recently shifted things back to using a liquid starter after a long while with a stiff variant, and I have to say I prefer how my bread is turning out with my change. If you use a stiff starter, some of this entry will be relevant to you, but the visual cues will be different as the consistency of your starter will be different. If you haven’t used a liquid starter/levain, I suggest you experiment with this and try it out, you might be surprised at the difference, and you might prefer it. I’m not suggesting one is better than the other, but rather a personal preference whereby I like the taste and performance of this liquid levain for the bread I’m currently baking.
If you’re curious and looking to dig more into preferments, see my guide to the differences between a sourdough starter and a levain.
Sourdough Starter Background
The key to coaxing out maximal fermentation with your starter is to be observant. Watch how it evolves throughout the day and note how long it takes to reach full ripeness: a strong sour aroma, a breakdown of the mixture, significant bubbles on top and at the sides. If it’s doing this too fast (for example, you refresh at 8 a.m., and it ripens at 2 p.m. when you’re at work), you can reduce the water temperature, change the ambient temperature, or reduce the amount of mature starter you carry over at each refreshment (this is what I do). You want to try to refresh your starter right when it’s at its peak ripeness or shortly thereafter.
The key to coaxing out maximal fermentation with your starter is to be observant.
Once you have a healthy starter showing the same signs of fermentation every day, you will be able to adopt a consistent sourdough starter maintenance schedule. I work this into my daily routine: I refresh my starter when I eat breakfast in the morning, and then I refresh again in the evening as I’m cleaning up the kitchen getting ready for bed. It only takes a few minutes (see my tips later on tools to make things easier).

Your starter will go through the following phases each day, but the times will most likely be different. For example, if fermentation is slow (due to temperatures or percentage of starter carryover, for example), then the signs I point out below might be at greater intervals, and conversely, if fermentation is fast, then the ranges will be tighter. As I mentioned initially, if you’ve not yet started your sourdough starter or received a portion from a friend, I have an intro article to creating a starter that will get you going in a few days.
Let’s look at a day in the life of my starter.
Sourdough Starter Maintenance Timeline
Before we dive into the timeline, I want to point out that below I refer to two things: my starter, which is what you’re here for in the first place, and also a levain. I talk about both almost interchangeably because mostly, they are the same thing. Your starter (mother, chef, etc.) refers to your yeast/bacteria culture you continue to refresh and care for indefinitely. In contrast, your levain is a splinter, or off-shoot, of your starter that you refresh and build only to be used in a bread recipe eventually.
For the timeline below, I used 30% whole grain dark rye flour and 70% medium-protein bread flour (similar to all-purpose, but geared toward bread baking). The percentage of flour types is really up to you; I used a little rye flour to help increase fermentation and acetic acid production, but you can use any ratio of flour you’d like (e.g., 100% whole wheat, 100% white, a mix of both, etc.). Just take note of how each flour type aids or slows fermentation.
10:00 a.m. – Sourdough starter maintenance beginning
The first step is to take your mature sourdough starter, discard some part of it, refresh it with fresh flour and water, and cover (I only loosely cover with a glass lid that does not seal tight). My kitchen is currently around 75°F (23°C), and my mixture is 70g white flour, 30g rye flour, 20g mature starter, and 100g room temperature water.
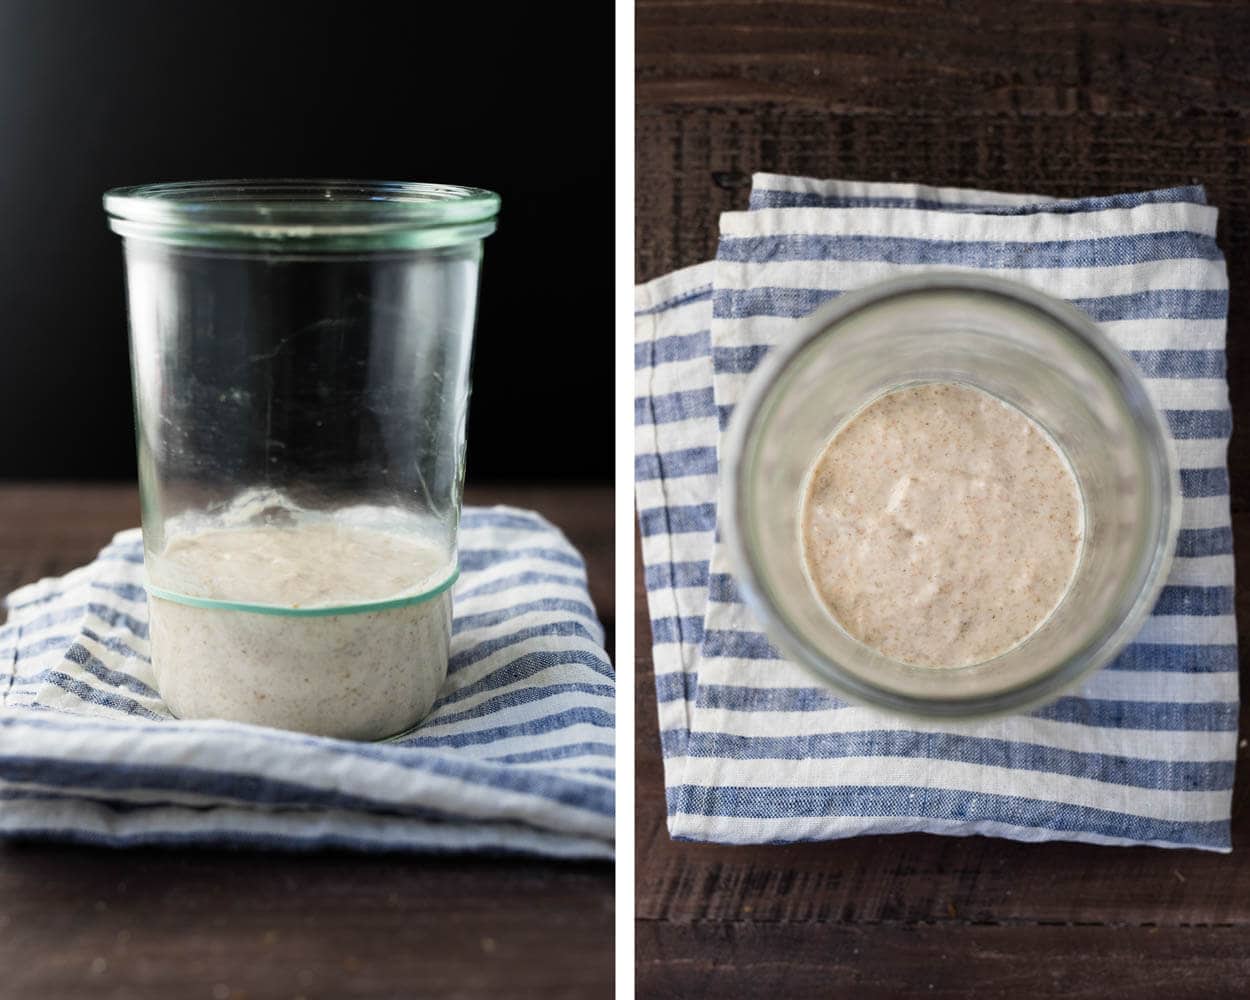
You can get a sense of how “stiff” my starter is after mixing. You want to make sure you mix everything thoroughly so it’s completely smooth with no visible clumps of dry flour.
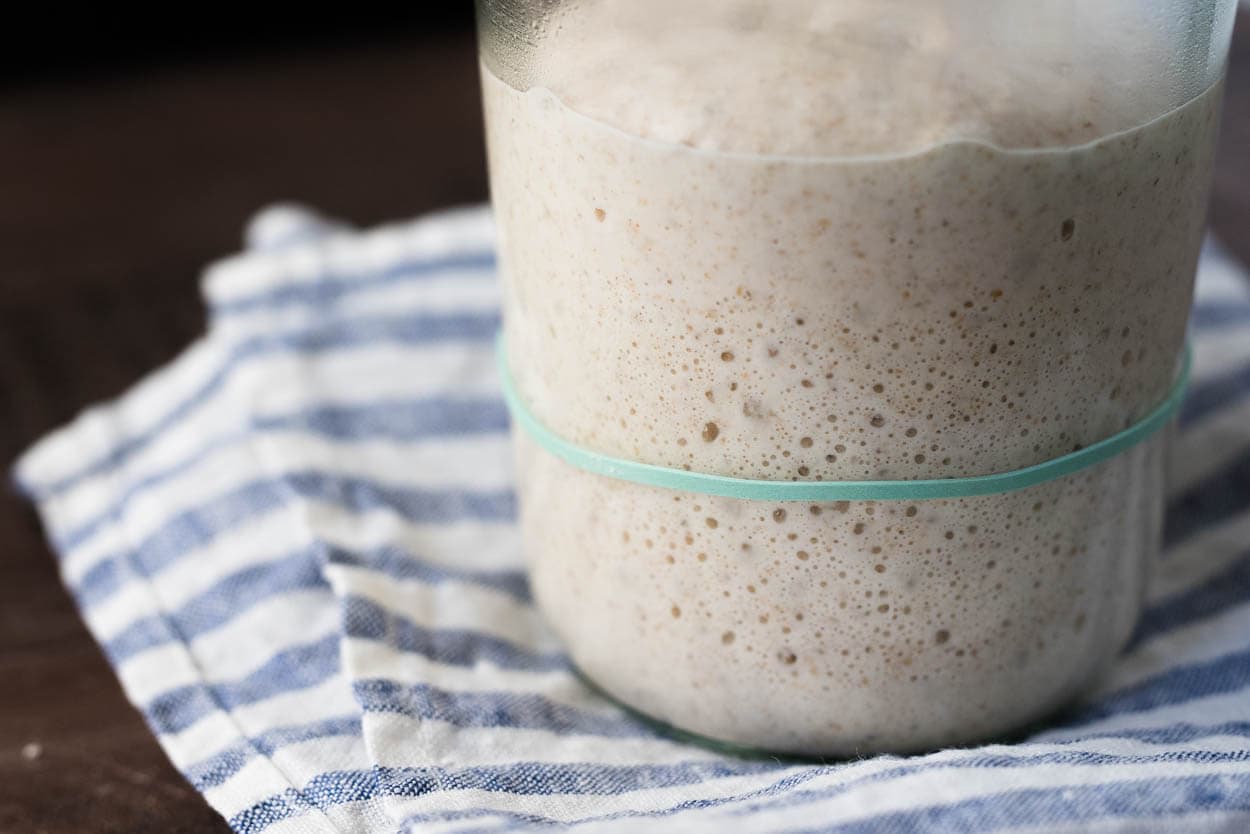
I’ve placed the green rubber band at the beginning level of my starter so we have a good sense of how far it will rise throughout the day.
12:00 p.m.
After only a couple of hours, you can see only slight activity visible in my starter. The smell at this point would be very, very sweet, and practically the aroma of flour and water. So sit tight; things are about to get more interesting.
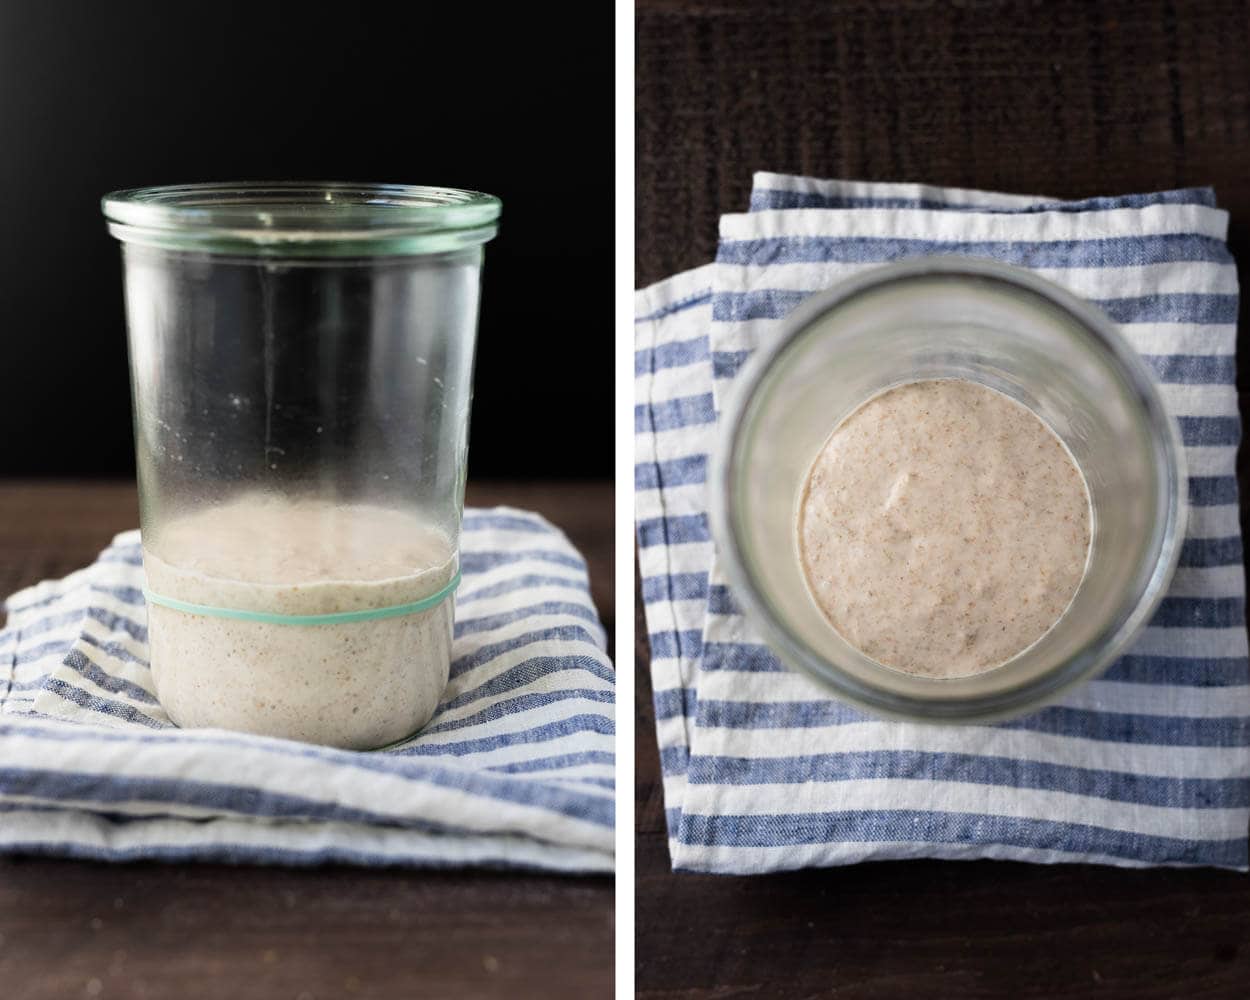
2:00 p.m.
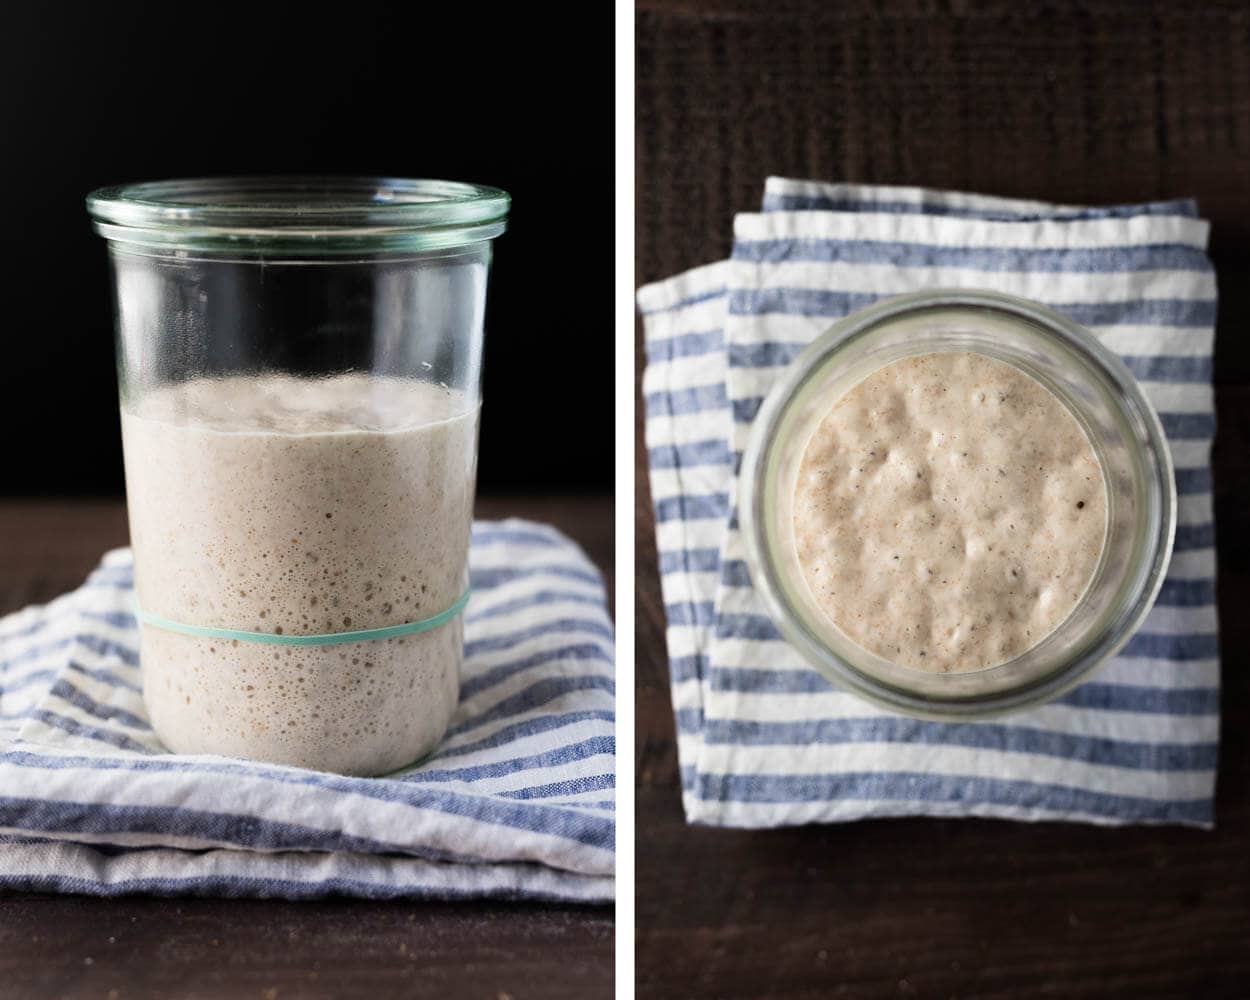
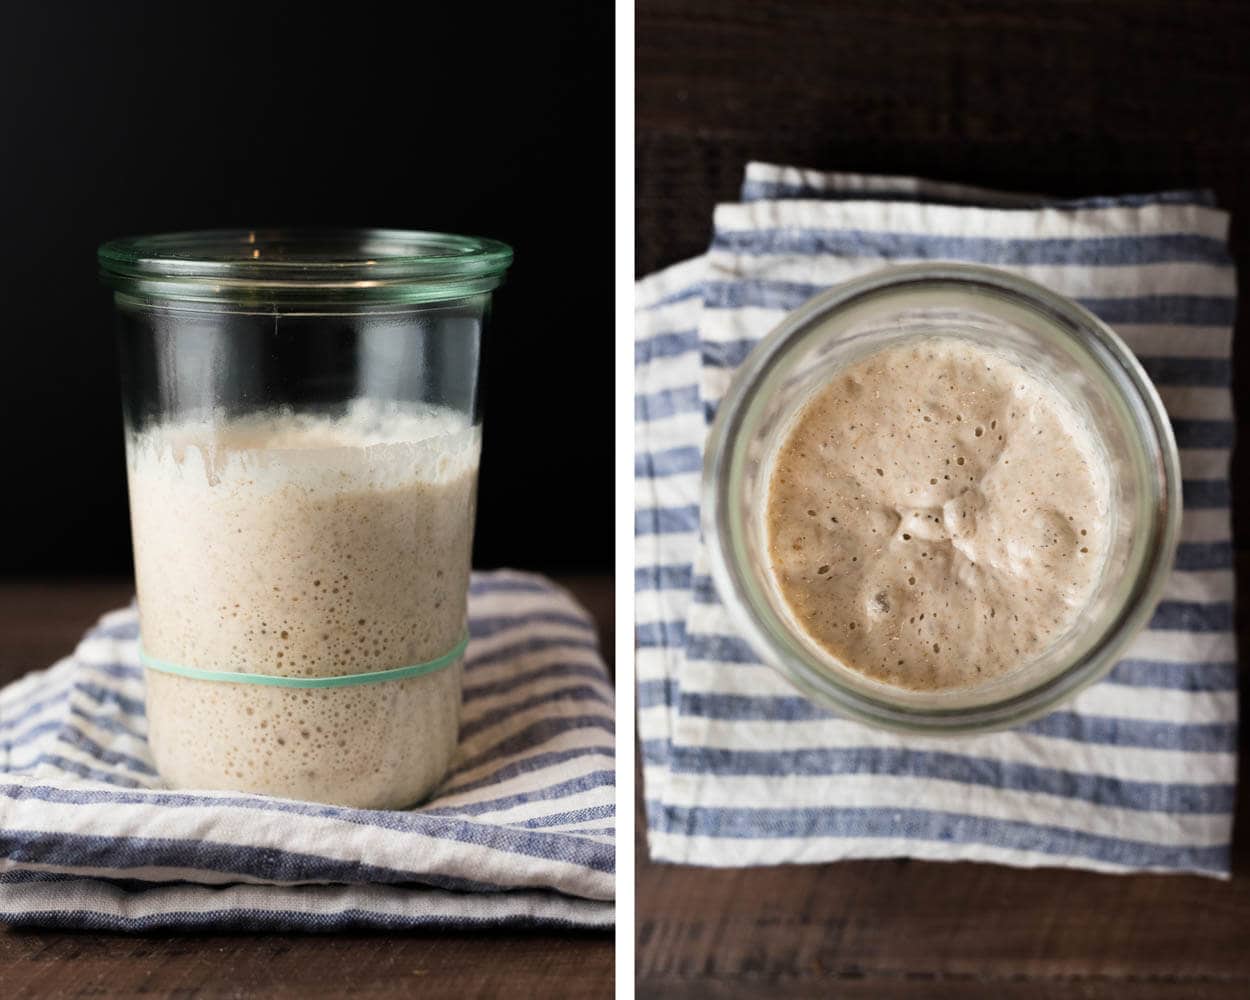
As seen below, four hours after refreshment, we have a significant expansion, a tad over 100%. In the image at right, you can see that the top is domed with a few bubbles peeking through. The mass of dough is trapping quite a bit of the gas produced through fermentation. I like to use a glass container, particularly these Weck jars, not only because it allows me to see firsthand how fermentation is progressing but also because the flared top makes sticking your hand and spatula inside very easy. I not only use these tall jars for my day-to-day starter and refreshments, but I also use them to build my levain before baking.
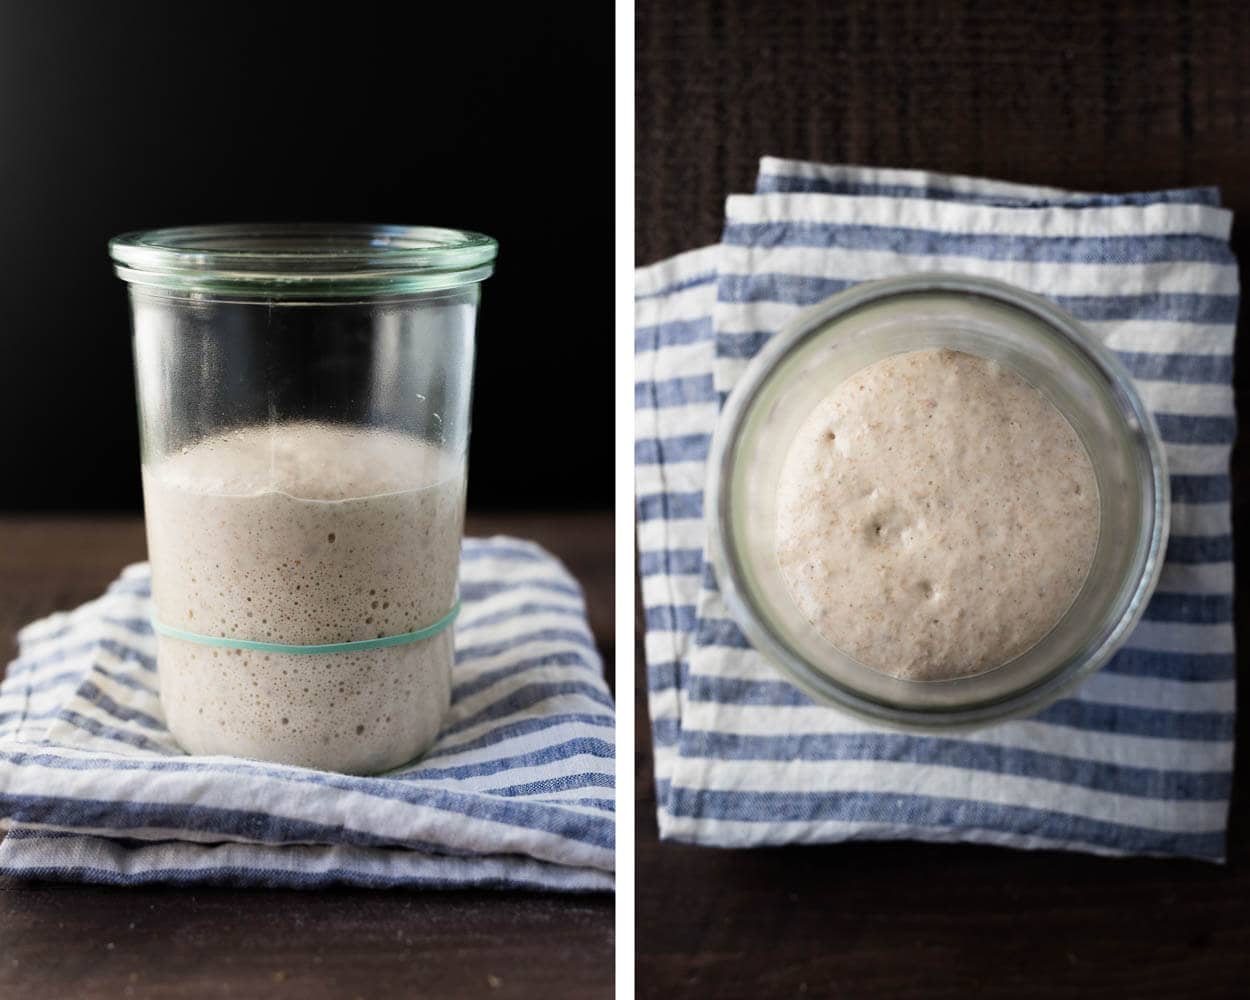
You’ll notice there’s quite a bit of activity already. Of course, after this initial explosive growth, things will slow down, but upward growth will continue for many hours.
3:00 p.m.
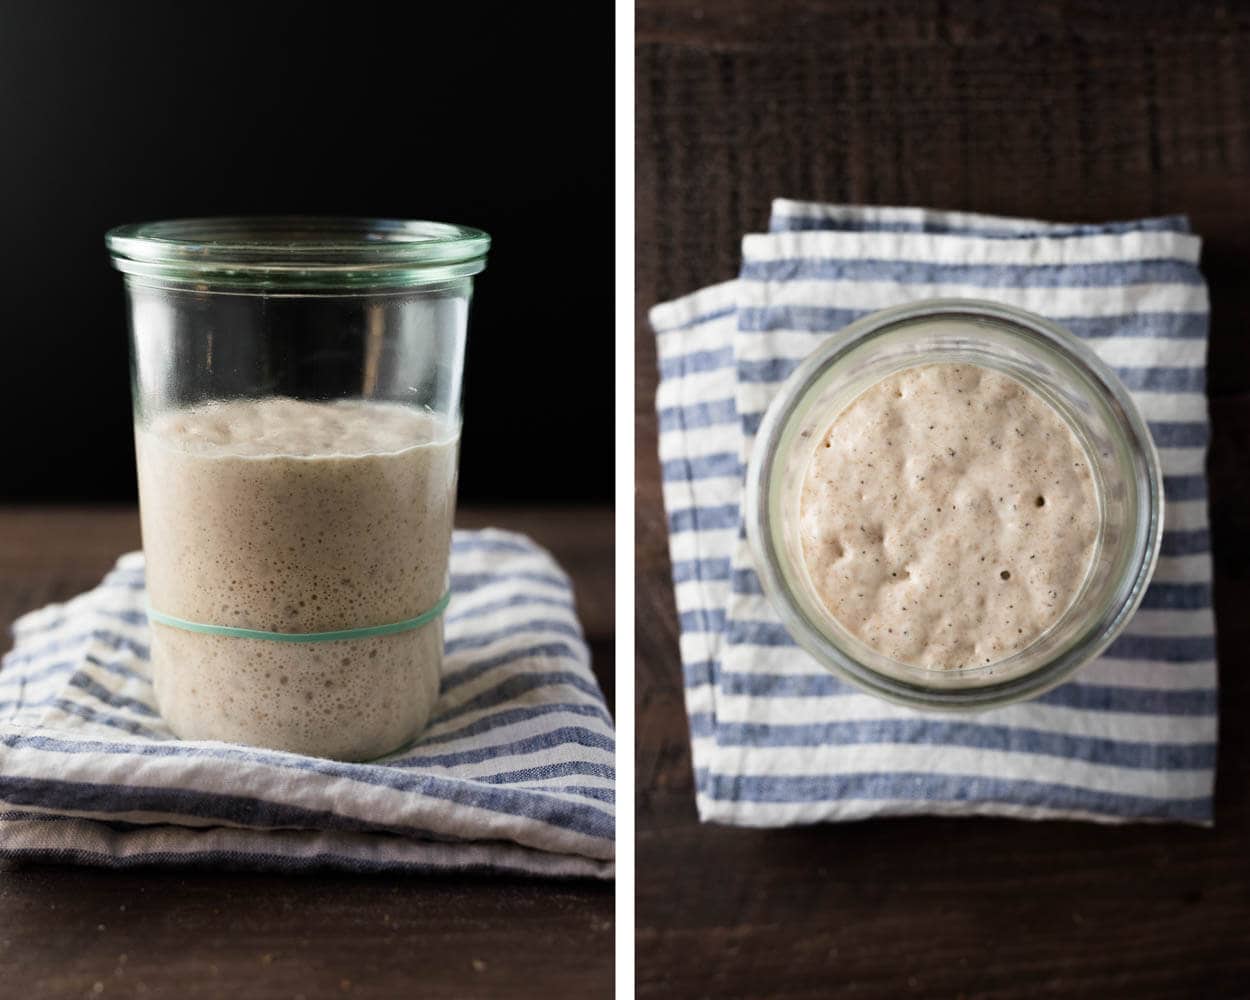
At this point, there’s only slightly more expansion than the last check-in. But, you can see many more bubbles on top and at the sides, showing signs of the momentous fermentation taking place. All of these are good signs.
When you build your levain in preparation for baking, you may not always be able to see through the side of the container; the top-down view is sometimes all you have to judge your starter’s readiness. For example, bubbles and holes on top are a good sign, but my starter is not ready to be fed or used now. If this were a levain and not my starter, and I was attempting to use this at a “young” stage, this is most likely where I would use it for mixing my bread.
Another key indicator here is the aroma: how does it smell? Is it still sweet, sourer, or very acidic and vinegar-like? At this point, mine still has a sweet aroma to it, with a very subtle backdrop of sourness starting to creep in.
5:00 p.m.
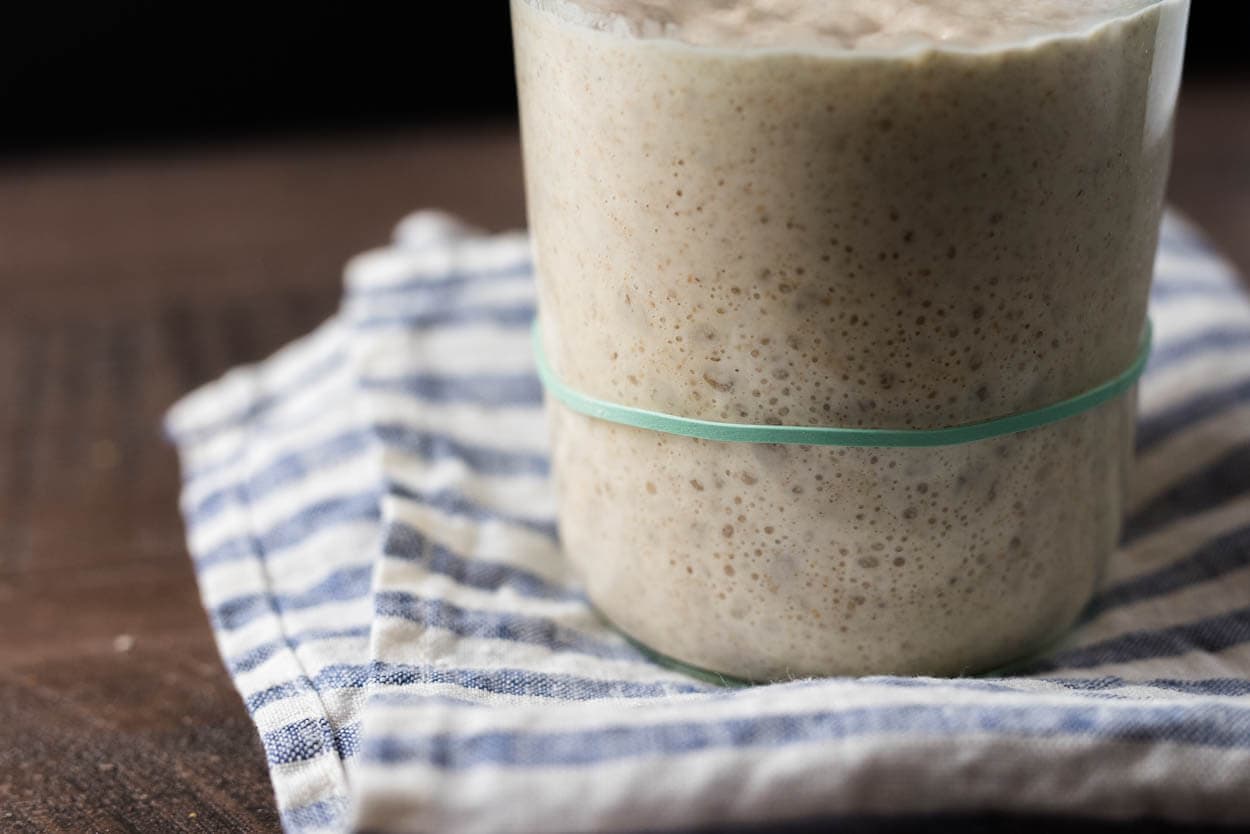
By this time, we have significantly more bubbles at the sides and the top; overall fermentation activity is much higher. If I were to describe the aroma of the starter at this point, it would still smell quite sweet at it was at 3:00 p.m., but now the sourness is starting to escalate and build.
Given the look and aroma, I can expect my starter to rapidly come to ripeness very soon.
7:00 p.m.
You’ll notice here at 7:00 p.m. any dome that was once at the top of the starter is now gone, replaced by a reasonably flat surface. The flattening of the top usually indicates upward growth has significantly slowed, and upward movement won’t be as prominent—more holes on top and more fermentation visible at the sides. We’ll continue to let it ferment.
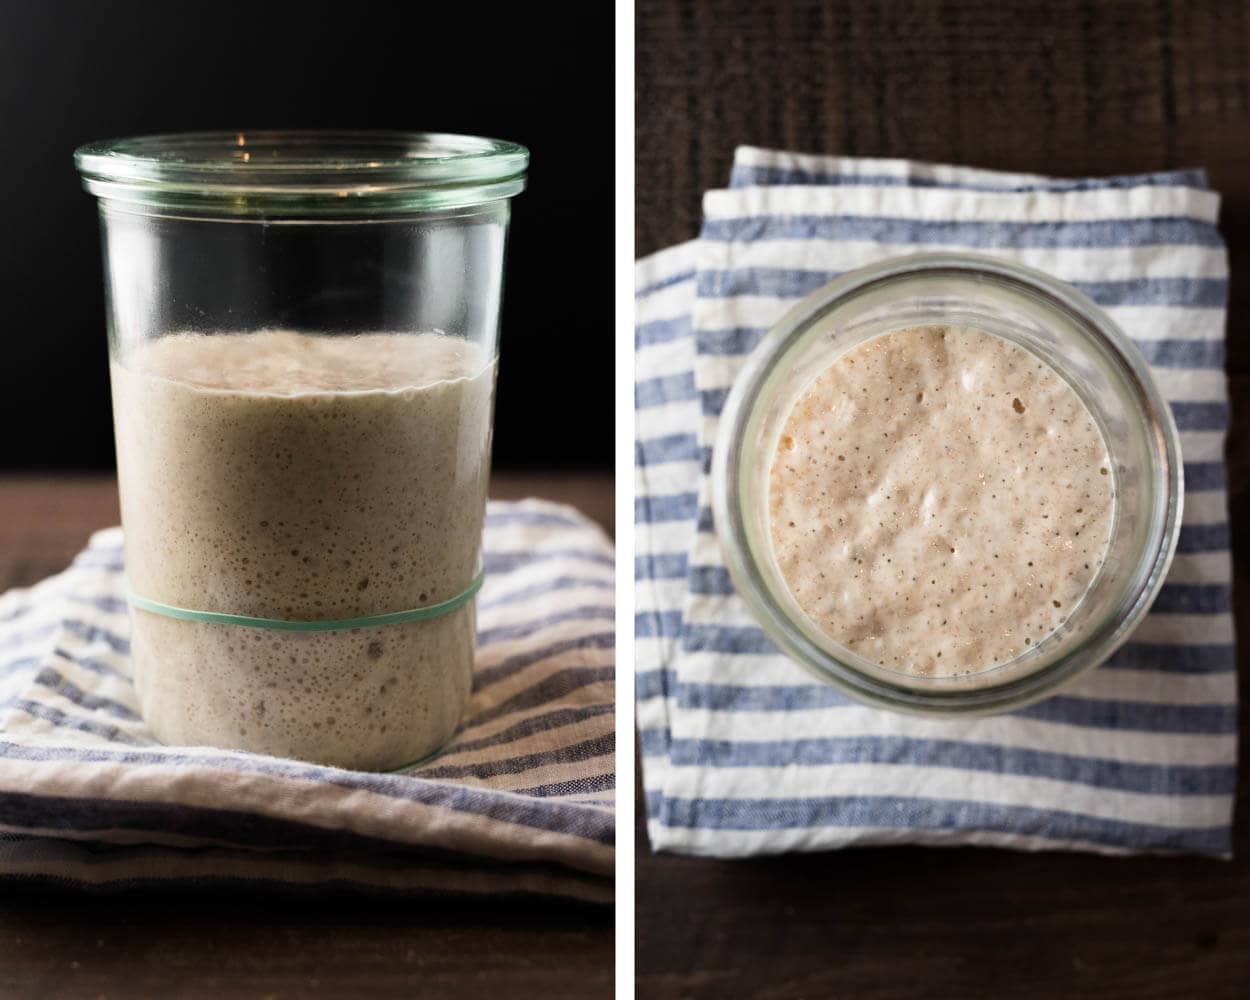
8:00 p.m. – Ripe, time to make a levain
As seen below, we still see some rise since 7:00 p.m., but not much. The top shows signs of more holes and bubbles, and the aroma is what I would describe as “ripe” and ready for use. If I were to pull back a little bit of the top, I would smell a slightly sour, vinegary smell with hints of sweetness still present.
At this point, I’d use some of the sourdough starter to make a fresh levain or use this starter directly in making bread. After making the levain, I would also refresh the starter by discarding and adding fresh flour and water.
While I find the “float test” to be misleading because it can sometimes give you false positives for when a starter or levain is ready to use, the float test would surely pass at this point.
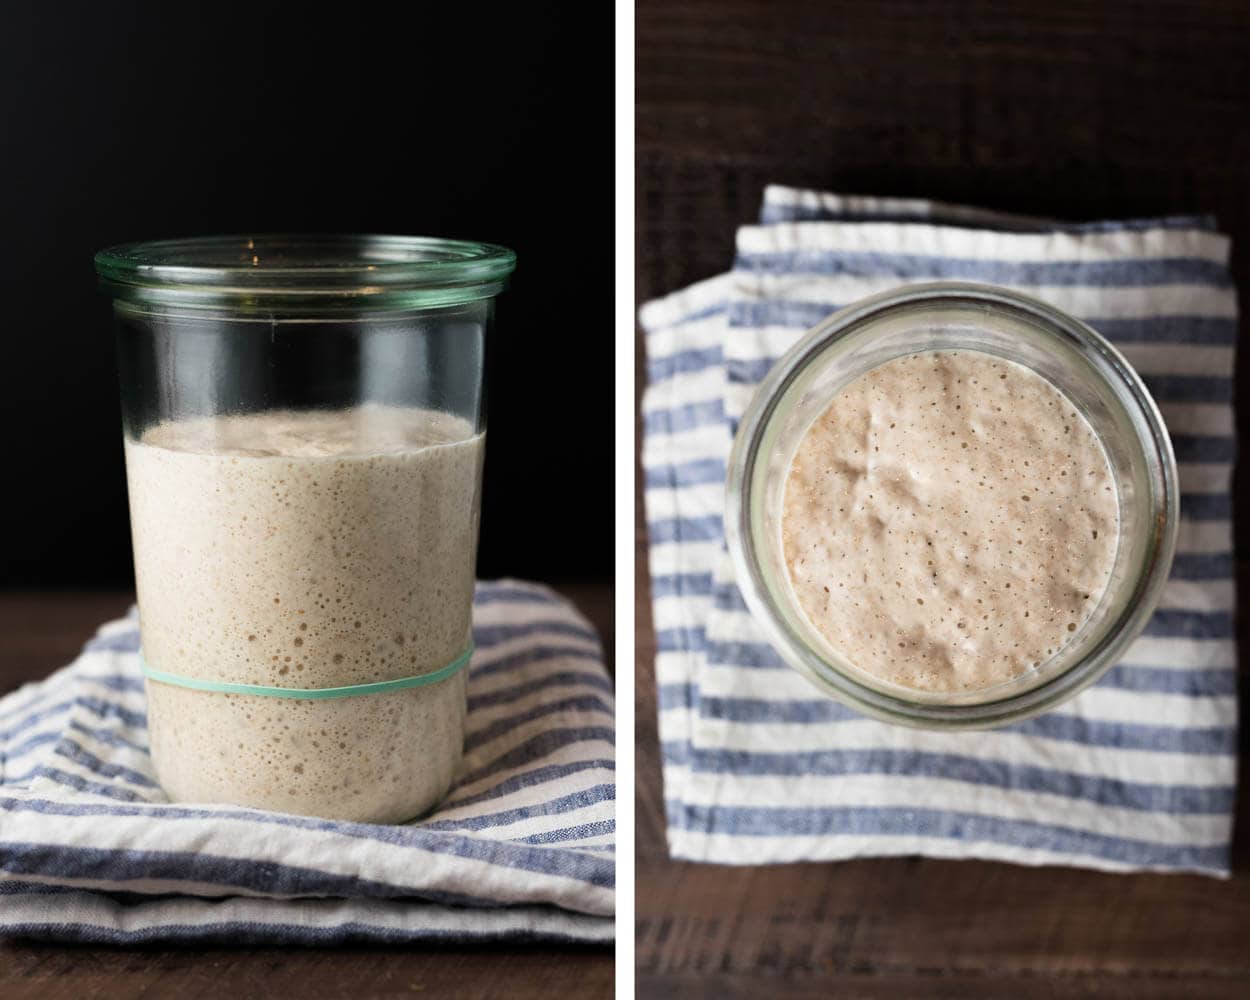
10:00 p.m. – Just past ripe
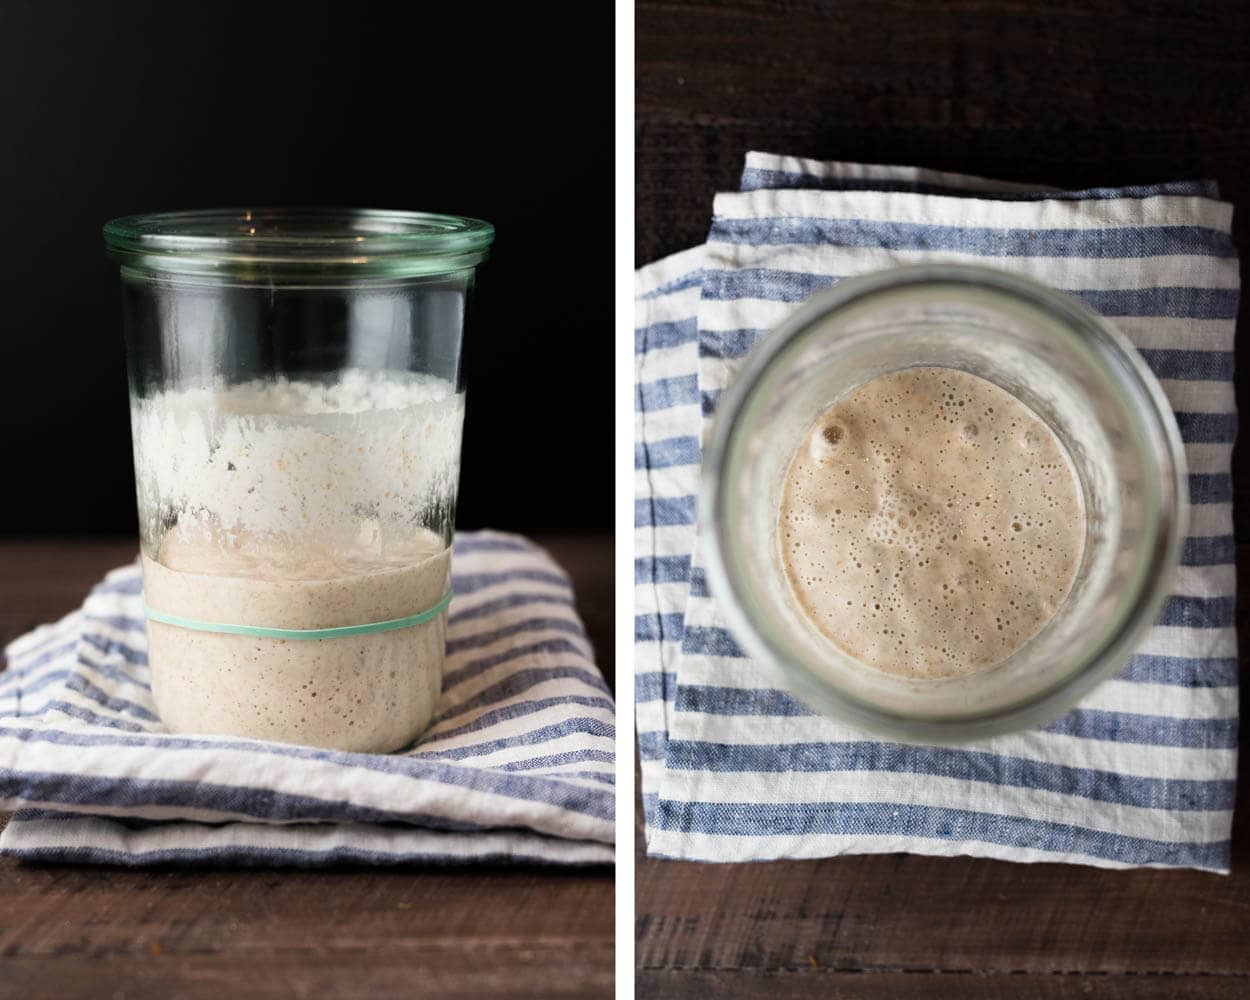
In the photo below, you can see the culture is beginning to show signs of ripeness. There are streaks at the top that indicate where the top of the starter once was, and in the top-down view, you can see the center is starting to collapse.
The fact that it’s starting to collapse is not the single most crucial factor in judging readiness. Instead, it’s the cumulative signs that are most important.
The fact that it’s starting to collapse is not the single most important factor in judging starter and levain readiness. Instead, the cumulative signs matter: a general breakdown of the mixture, a stronger sour aroma, and significant gas production.
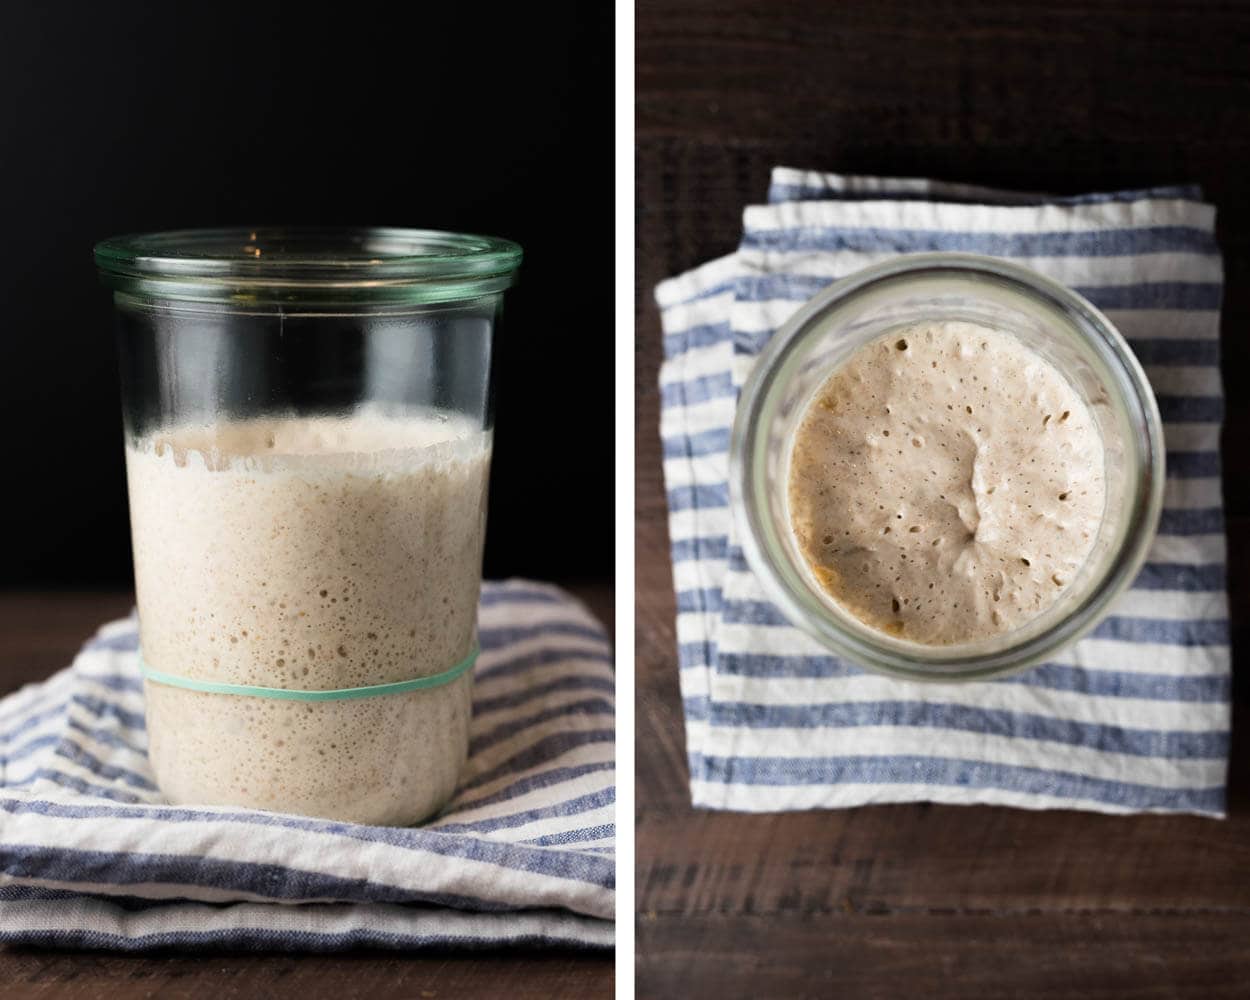
Again, if this were a levain I built in the morning to mix into bread, I would still feel comfortable using this to mix my dough. I’ve used my starter/levain at this point to make excellent bread. I’ve touched on the topic of a “young” levain in the past, but recently I’ve been using mine when it’s more fully fermented to achieve more flavor.
This time is also when you would want to refresh (feed) your starter. If you are using the correct mixture of inputs—water at a specific temperature, percentage of mature starter, and flour mixture—this time will coincide with when you want to feed it. For me, 10 p.m. is perfect as I start cleaning the kitchen in prep for bed (our little ones at home dictate my sleep/wake schedule, and thus my starter must conform).
If your starter has arrived at this point before you want it to, you can use a smaller percentage of ripe starter carryover or use colder water. If your starter is a bit sluggish and isn’t quite at this level, use a bit more ripe starter at the next feeding or use 2° to 8° warmer water.
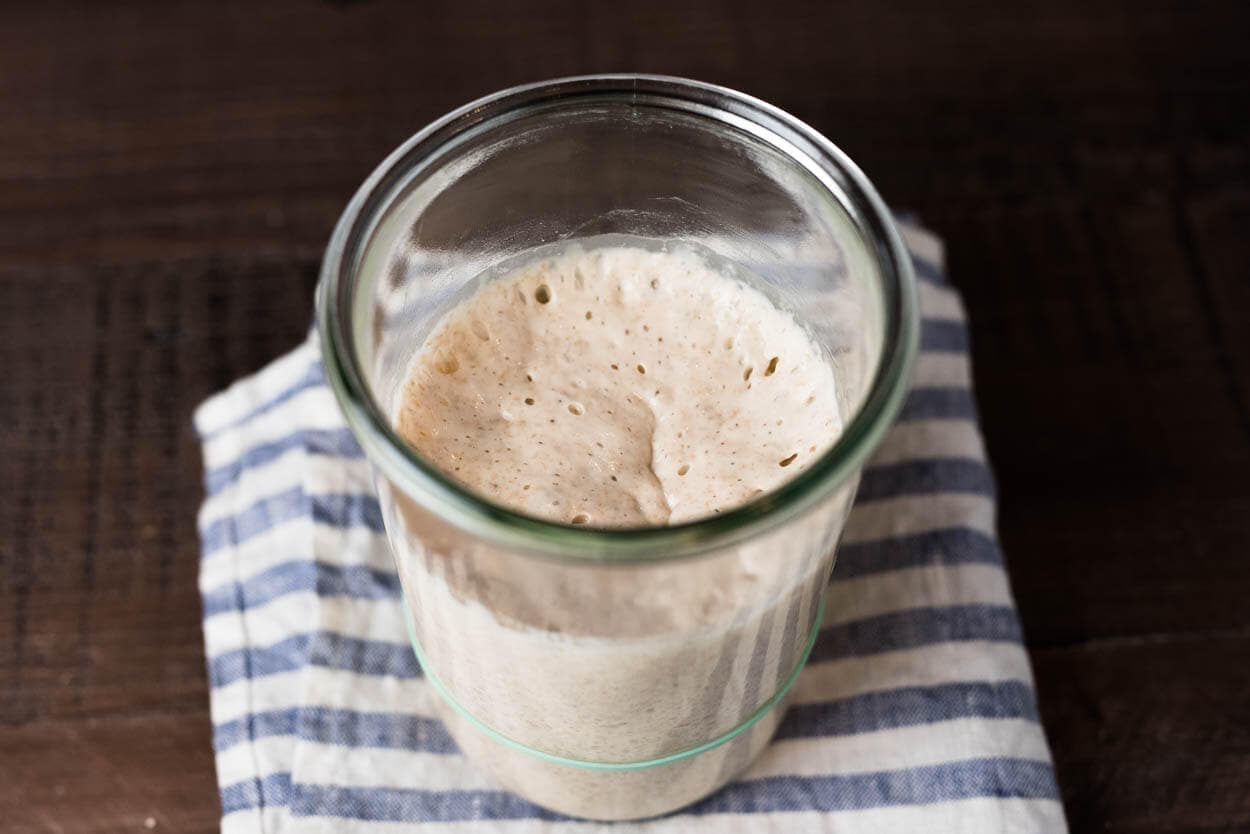
Being observant helps us help our starter to maximize fermentation activity. So, as you continue to care for your starter, take a moment before you rush through refreshments to observe the look and aroma of your starter—plan to adjust things either at the current refreshment or the next based on this observation.
11:00 p.m.
My starter continued to fall at this point, with longer streaks on the side, and the center has noticeably caved. I will normally have refreshed it by this point, but I continued to let this ferment until the morning so we can observe how it looks when it’s gone farther than I’d usually allow.
6:00 a.m. (next day)
What a drop overnight! The sides are entirely streaked with how far the starter has fallen, and the top was covered in small little bubbles. My starter has gone way too far at this point and needs a refreshment.
7:00 a.m.
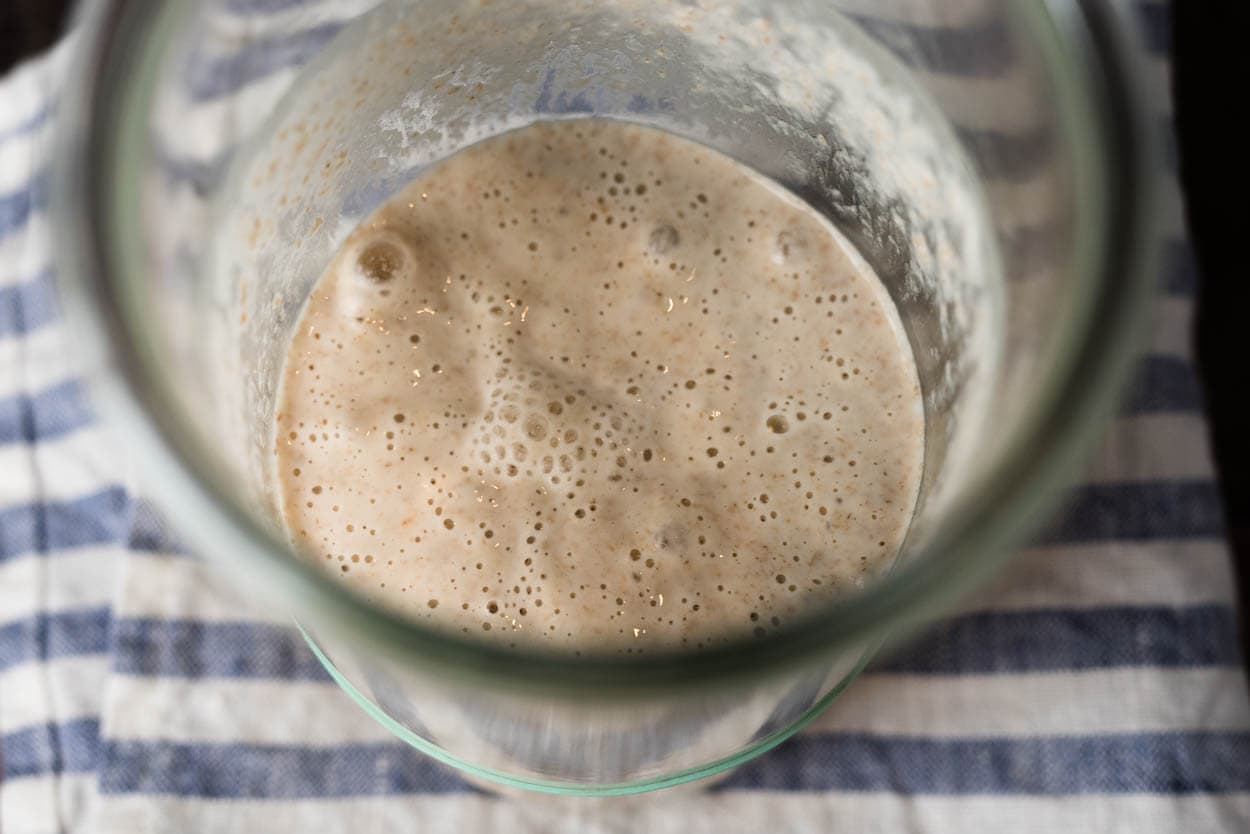
Even more collapse and more small bubbles. At this point, the aroma was very acidic, vinegary, and quite strong.
8:00 a.m.
My final timeline entry shows just how far my starter has fallen after almost 24 hours. The acidity will continue to rise, and if left for even longer, a clear liquid will form on the top (commonly referred to as “hooch”) that will be alcoholic and bitter tasting. Your starter might also look this way if you’ve left it for a long period in the fridge in “hibernation,” as I like to call it. When reviving a starter in this condition, I will pour off the clear liquid, mix the remaining, and refresh as usual.
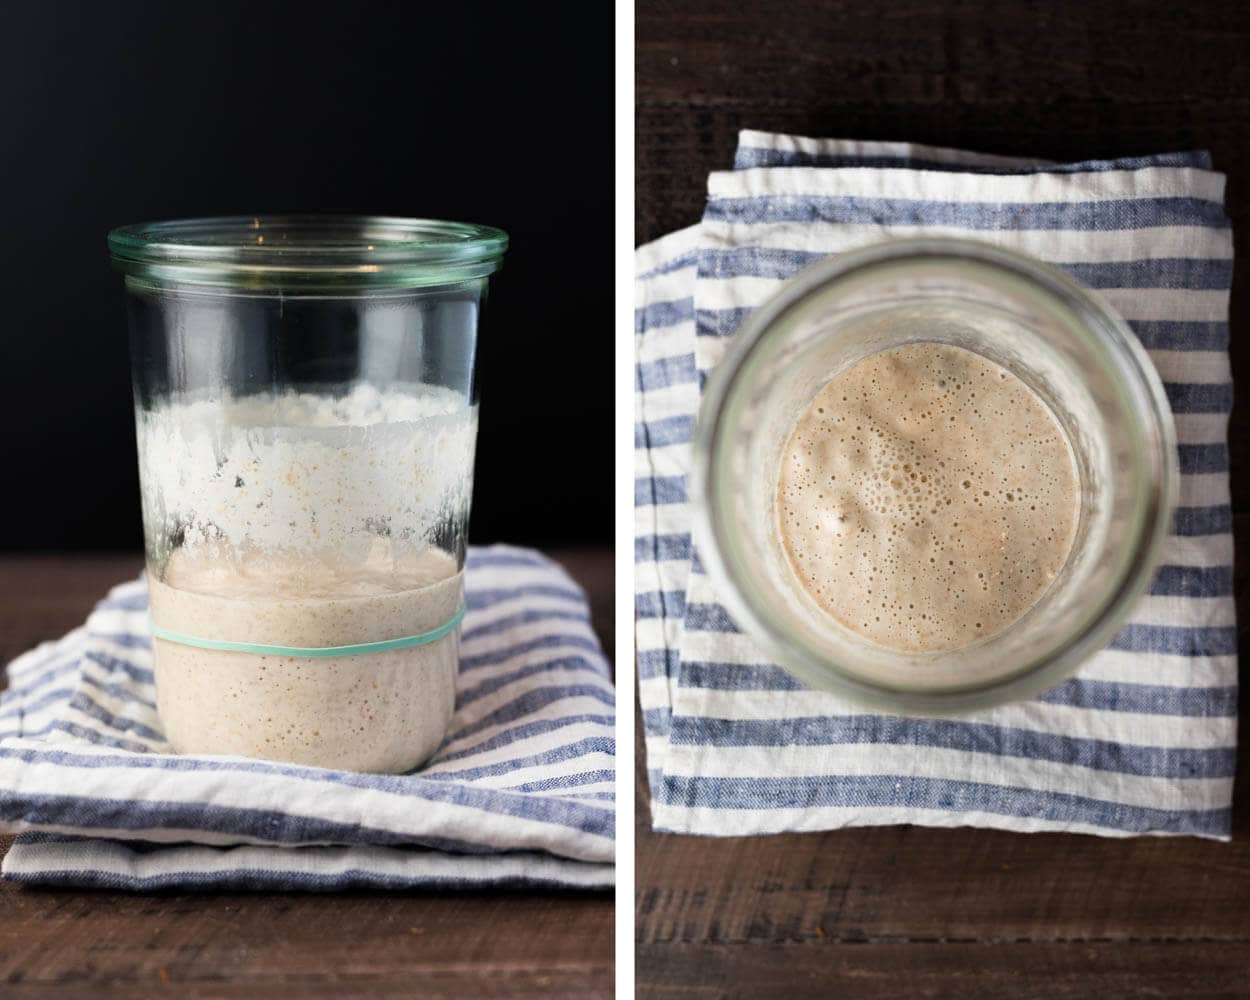
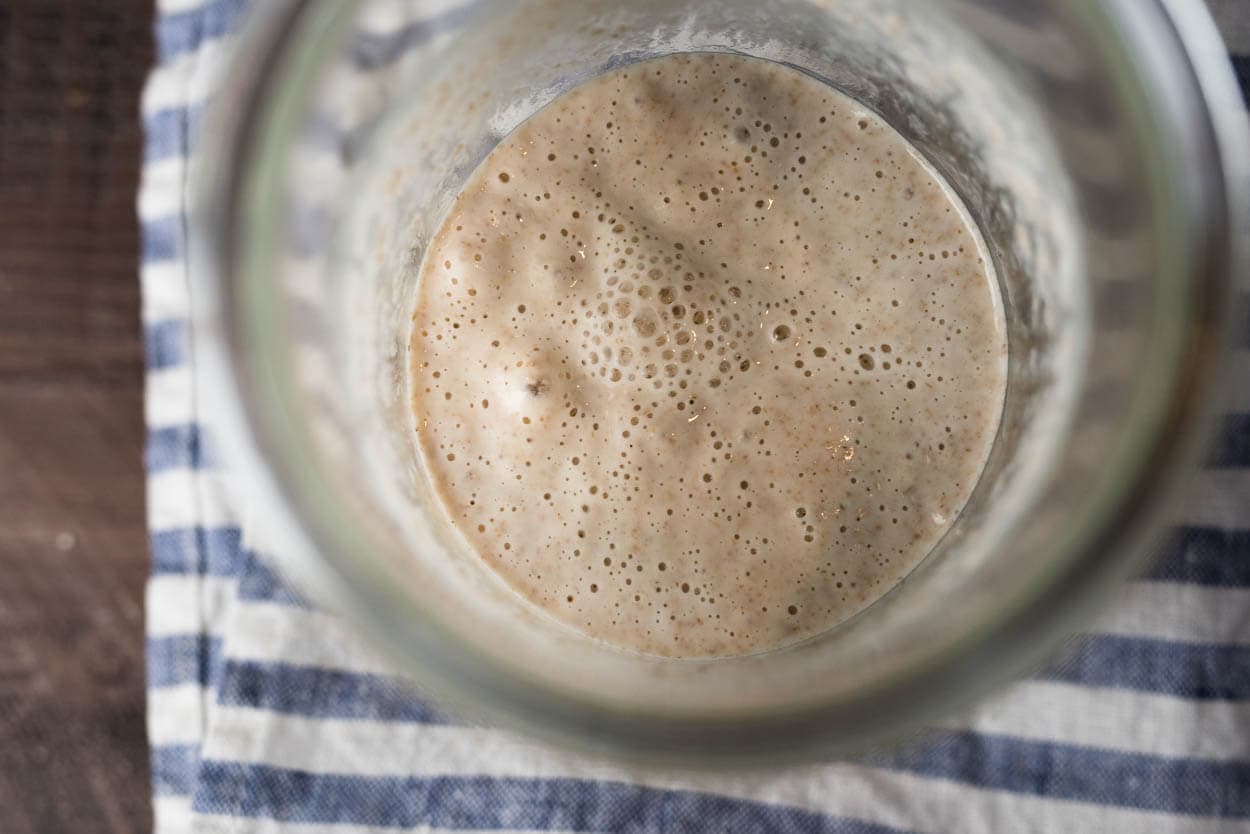
There have been times when my kitchen heated up unexpectedly, or I couldn’t get home before this had happened, and I mixed up my starter per usual, and it was just fine, but I try to avoid this scenario as much as possible.
Don’t panic if you forget to refresh your starter for a day or two! It will be just fine with a few timely refreshments and some attention.
General Sourdough Starter Maintenance Tips
See my sourdough starter frequently asked questions post for a long list of common issues, but here are a few tips that will prove helpful:
- Don’t let your starter collapse and sit for extended periods as excessive acidity will change the flavor of your resulting bread (sourer). If it’s a levain, not your starter, and it’s fermented much too fast for your schedule, you can always make an intermediate build (essentially discard and add new flour and water) and use the new build to mix
- Use your nose. Observe the aroma of your starter at each phase and get to know what a particular aroma indicates by drawing a connection between aroma and visual cues
- If your area has high chlorine levels in the water, use filtered (or distilled) water or let the water sit out on the counter overnight in a water bottle before using
- Stir your starter thoroughly until there are no clumps or dry bits of flour present
Above all, take a few seconds each time you refresh your starter to sit back and assess how things look, smell, and even taste (I don’t typically taste my starter, but many bakers do). Through constant observation and attention to small details, we can maximize fermentation in our sourdough starter maintenance routine.
Sourdough Starter Maintenance Tools
It’s funny how small tools make a huge impact when compounded over multiple times a day for every day of the year. I recently changed my stirring apparatus from an old Pyrex spatula to this newer Oxo spatula, and wow… So much wasted time cleaning that old multi-piece thing. This Oxo one is covered with silicone at the top with no seams or joints, it’s very sturdy (which helps act as a firm mixer), and you can also toss it into the dishwasher. Highly recommended.
Aside from the new spatula, I still use the same Weck jars, dark rye flour, and all-purpose flour. Head to my tools page if you’d like to see more of the tools I use for my sourdough starter maintenance.
Sourdough Starter Maintenance Wrap Up
There you have it, a day in the life of my starter and my sourdough starter maintenance routine. I hope this visual guide has helped convey the visual cues and aromas I look for at various points through the microevolution of my starter. The same signs shown above are also present when I build a levain when making bread.
Remember the methods we have to impact the fermentation rate: temperature of the water, inoculation percentage (amount of ripe starter left in the jar), flour selection (whole grain flours increase fermentation), and ambient temperature. If your starter is sluggish, increase these to speed things up or decrease them to slow things down. After a few days of experimentation, you’ll discover the right mix of each for your unique starter.
Now that your starter is on a regular maintenance schedule, don’t forget you can use the daily starter discard in many delicious things in the kitchen! Buon appetite!
For more sourdough starter guides, check out my sourdough starter guide roundup.


699 Comments
I think my only question at this point is about starter vs. levain. I am about to do my first run of a starter method, and I know that you will ultimately discard part and feed the other. Having not seen anything on this yet, my question is simply do you use the discard to form bread when you intend to make bread that day? And if so, do you feed that discard and let it ferment roughly to peak before usage? That question may be in here, but I have yet to encounter it. Thanks!
All good questions! I have answers to these (and more) over at my Sourdough Starter Frequently Asked Questions post. Take a look and let me know if you still have questions!
Hi Maurizio,
You mentioned in the article that in case the starter ferments too fast, we should reduce the water temperature, change the ambient temperature, or reduce the amount of mature starter we carry over at each feeding. I now carry a mature starter fed at 1:1:1 (50g each), how can I reduce the amount of starter I carry over at each feeding without affecting this ratio?
I would like to keep for now my starter at 1:1:1 instead of 1:5:5 or 1:3:3.
The problem I have now is that my starter (fed at 8am) fully fermented by 2pm, and I want to keep it stable with a 12hr feeding schedule.
Sorry for the late reply, Corina! To change the speed at which your starter matures, you’ll have to adjust the ratio (not just the amount of each). I’d recommend trying 1:2:2 and see if that helps slow things down enough for you. Perhaps 25g mature starter, 50g flour, 50g water. If it’s still too fast, keep reducing that 25g of mature starter carry over until it fits the timeline you’re after. This is exactly what I do! Hope that helps.
I’ve found that my starter does best when maintained at room temp and fed twice a day. To cut down on flour consumption, is it OK to maintain just 50-60 g. starter (5 g. mature starter plus 25 g. each flour and water)?
Yes, that works just as well!
Hey, Caitlin! Super sorry for the late reply. Yes, it’s totally fine if it doesnt fall in the jar, especially with lots of rye flour. This is pretty common. I hope you tried to bake with it, if you saw (and smelled) signs of strong fermentation it’s likely strong enough.
I’ve actually never given up on a starter. I have just kept it fed, used some rye flour, and kept it warm — it usually comes around. Either way, if just one of your two “experiments” takes off, just stick with that one and change the flour you use to feed it if you’d like.
Yes, my feeling is by mixing two starters the evolutionarily stronger strains of yeast and bacteria would eventually win out over the others — not a bad thing!
I’ll have to keep not of Floriole and head there when I get a chance! Thanks for the suggestion and good luck!
Hello Maurizio,
For weekend bakers like me, what do you recommend I do for my sourdough starter to preserve it and slow down activities? Do I still need to feed it daily and discard ( which I feel like a big waste) a portion? could I put it in the fridge to preserve it? What do I do to bring it back ” alive” when it is time to bake?
Thanks for your advice
Hey there! I have an article posted here on just that question — have a look at my weekend baking schedule for a few examples on how to reduce waste while still allowing for a weekly bake.
Hope that helps!
Thank you Maurizio, that all makes a lot of sense. Built the levain for a go at your higher hydration formula today, wish me luck!
Hey Maurizio!
We just polished off the second of my first two loaves made using your beginner sourdough guide and they were fantastic. I think perhaps I needed to do more stretch & folds as the crumb had only small holes, but the taste was spot on.
My biggest confusion throughout this process has been the timing. My starter has been merrily rising and falling with its 12 hour feeding schedule, but I always feel like I’m feeding it too late. By the time 12 hours rolls around again, the middle has noticeably caved. I’ve dropped the carry-over from the previous batch to 20g, with 20g rye and 80g AP in an attempt to slow fermentation.
All this means is that in the morning after the 10pm feeding, when I’m ready to build the levain, I have to be sure to wake up especially early to catch it before it gets too sour. I’m struggling to understand when I can ‘catch’ the starter at the appropriate time for things like pancakes, as I assume its unsuitable immediately after feeding.
Any guidance you can provide would be appreciated, I’m trying to get the intricacies of the starter in my head before moving on to the nuances of bulk fermentation.
Awesome, Dan! Dropping that carryover amount is the way to do it — the smaller the amount the longer the time between feedings (assuming constant ambient temperature). Another way is to cool the water used when feeding. I prefer the first approach and I’m constantly adjusting this carryover amount as the seasons change.
The best time to use your starter for making sourdough pancakes/waffles/etc. is when it’s ripe (mature). If you’re doing an overnight ferment on the batter as I show then you want to use the starter the night before when you’d normally feed it. Similarly, if you just want to mix in some ripe starter into your mix to add flavor then you’d also use it when it’s ripe in the morning. Check out my recipes for all that and you’ll see where I talk about each approach.
Finally, it’s totally fine if your starter falls by the time you get to feeding it — we just want to avoid it falling and sitting there for a very long time as this really builds up acidity in the mixture.
Hope that answers your Q’s!
Hiii Maurizio!
First I just want to say wow, it’s amazing that you so thoughtfully reply to all of these comments and questions! Thanks so much!
I’m in a bit of a rut with my starter – I’ve had her for 5 months and she’s been doing so so well, lots of activity and delicious breads. However, just a week ago I moved from Germany to the US and she’s just so sluggish and hardly rises 50% within 24 hours. I’m currently feeding a 50/50 mix of whole grain rye and APF at 74 degree room temp. I haven’t seen her at full peak yet (what I assume would be around 36 whole hours!); I’ve just been feeding it at 100% inoculation every 24 hours.
My 2 questions:
1. Can the environment and flour change have this large of an impact on a starter?
2. Do I wait for my starter to reach its peak before feeding, even if this takes 24-48 hours? Or continue to discard and feed after 24?
I’m happy to help, Caitlin! We’ve got an awesome community going here and baking, well, it’s all I ever think about 🙂
Answers:
1) Yes, the flour and water will have huge implications on your starter! The new flour you might be using will likely change the visual indicators in your starter — I see this all the time with my personal starter. Sometimes when I change to a new flour it falls readily, other times it takes longer.
2) I’ve seen starters that just wont fall, no matter how well fermented they become. They rise, perhaps not very high, and just sit there indefinitely. When this happens I usually try to assess the starter’s maturity with other means: smell, visual bubbles on top, and if you stir it, whether it stirs very easily (indicating lots of fermentation and breakdown) or if it’s still stiff (needs more time to mature).
One thing to keep in mind is temperature. If you haven’t been tracking ambient temperature (even just a casual look at a kitchen thermometer or a weather app) you might be caught off guard — the temps here in your kitchen might be lower here than in Germany (especially if you have AC here but didn’t out there). This will cause a slowdown in fermentation. It’s just something to be aware of and something that always catches us all off guard as the season changes.
Another possible issue is many places in the US chlorinate their water. Chlorine can impede fermentation to a degree, slowing things down or preventing it altogether. If you fill a jar and leave it out overnight before using it for feedings you will likely let all the chlorine dissipate and not cause any issues.
Overall I wouldn’t despair. Just know there will be changes here and adjust as necessary. Give your starter a little extra time if it needs it to fully ferment. If you never see it fall try to assess it with other signs as I described above.
Let me know how it’s going!
Hi again Maurizio!
Almost a week later and I’m still struggling a little bit with my starter(s). I decided to make one completely 100% rye and one 100% APF, mostly for a science experiment to see the difference.
With no surprise, the rye starter ferments quite nicely with lots of bubbles throughout within 12 hours, but stays domed (not quite doubling in size) for hours without growing taller and never falls. It smells quite pungent and not so sweet, almost like a pretzel. I’m thinking I’ll try to bake with this one this week, but is it okay that it doesn’t fall and that it takes such a long time for it to ferment?
On the other hand, the AP starter rises, but not very much and there’s hardly any bubbles. A full 12 hours after feeding it smells just a bit sweet, but nothing like it did a month ago in Germany. Maybe I’ve changed too many factors for it to be comparable to that starter. How do you know when to give up on a starter?
Over the weekend I visited Floriole Cafe & Bakery in the Lincoln Park area of Chicago and they were happy to give me a bit of their starter! It’s fermenting very well and it’s so interesting to smell the difference between this starter and mine. It smells like dill pickles! I am wondering what would happen if I put some of this starter in with my AP starter? Would the different bacteria and yeast cultures battle or join together to revive this starter?
(p.s. I 100% recommend Floriole if you’re in the area, they had a delicious roasted turkey sandwich on a wonderful seeded sourdough! 🙂 )
Thank you for this. My question is regarding using the starter for pizza. I use bakers weight for my crust and a 69% hydration. I’m guessing I’d use the starter to replace the yeast/sugar amounts. My question is if my recipe calls for 10g of yeast and sugar in 69% water, how do I calculate an equivalent amount of starter to use? Hope that makes sense
Hey! Yes, makes sense. So yes, if you wanted to do it 100% naturally leavened you’d leave out the instant yeast. I don’t add sugar to my dough, but you can leave it in or remove it, either way. Unfortunately there’s not hard and fast conversion between using instant yeast and sourdough — I find it best to experiment and see how it goes depending on your flour, environment, starter, and timeline. Typically I do somewhere between 10-20% sourdough starter in my mix, depending. If you want a good starting point, check out my sourdough pizza recipe!
Grazie
Thank you so much. This was super helpful!!
Okay this may be a dumb question but I’m very new to sourdough. What is the benefit of building your levain with mature starter if it’s going to get “fed” again as the levain build? If you do have fallen starter in need of feeding and go ahead and use some for a levain, will it still ferment?
There are no dumb questions! First, to answer your second question: yes, if you use some of your fallen starter to create a levain it will still ferment, it’ll be just fine. You might have a little more acidity and it might ferment at a faster pace, but it’ll be ok.
Making a levain isn’t always necessary, you could always just use your starter directly by taking some and mixing it into a dough. Essentially a starter and levain are the same thing, it’s just that a levain is used to scale up your starter to meet the requirements of a particular recipe (amongst other reasons). Have a look at my sourdough starter frequently asked questions page (scroll down a bit for this exact question) for some more explanation on all this!
Hey dude!
Are you using 50/50 white/whole for your starter at the moment? Just wanted to hear your opinion on the difference between that and 85% extraction and which you prefer and why. 😎
Yeah, I’ve switched to 50/50 white flour/whole wheat (fresh milled) lately, just for testing and experimentation. Definitely lots more activity with the 50/50 feed schedule, which has been interesting. I don’t have any conclusions to draw, yet, but I’m sure I’ll be posting something!
Seems like someone threw some magical dust into my starter and now it expands 4x in 5-6hrs with the same routine. Glad I perserved and stuck to it. But when I try baking with it using the sourdough beginner loaf from you recipe, there was uneven bloom, several bigger holes which was fine with me but the sourdough was sticky/gummy.
I think the problem lies with bulk fermentation, am wondering if it was over or under. For information, I baked at 250c (that’s the highest my oven goes) for 20 mins lid on, 230c for 30 mins lid off and 200c for 10 mins lid off, using a dutch oven.
One more thing, I was slow in shaping so the sourdough retard half an hour later than yours.
But I have been having gummy texture since I started baking sourdough.
Well that’s great news! Gumminess could be due to under or extreme over proofing — it really depends on the dough. Usually it’s due to under proofing, either from a weak or not ready starter/levain or insufficient bulk and/or proof time. Try pushing the proof longer and see if it helps. If not, go in the other direction and see if that improves.
It’s important to try and keep everything else as constant as possible, only change one thing at a time to help you diagnose!
Hi Maurizio,
My starter is more than 2 weeks old but it’s pretty sluggish and takes a long time to peak. I use a ratio of 1:1:1 with 30% rye and 70% bread flour with filtered water, it takes 10 hours to peak at room temp of 82-86F. Usually it smells really sweet when it starts to collapse. Seems to be really slow in peaking at such warm temp. Any help will be great. Thanks!
I’d expect more activity at that temp and with that much rye. There’s probably a whole host of things that could be causing the sluggishness, but as long as your seeing signs of fermentation and reliable rise & fall each day things are probably just fine. You could try feeding with 50% rye for a while to nurse it back to health if you’d like. Make sure during this time to not feed it too early, but right when you notice it starts to fall and smell overly sour. Feeding too early can sometimes be worse than feeding late: if we feed too early too often it’s possible we’re reducing the total number of yeast/bacteria numbers in the long run. I hope that makes sense. Let me know how it’s going!
Hi! New to this website and very new to sourdough, but so far enjoying both! I have ordered several of the books you recommend and am waiting on their arrival to hopefully further educate myself on this venture. I was given a starter by a friend a few weeks ago, and I’m trying to wrap my head around the whole rhythm of things. I stay at home and have 5 kids, and I would love to bake regularly – ideally replacing all the store-bought bread my ravenous kids consume with sandwiches. What I can’t figure out is how to get the right quantity of dough going. If I want to bake bread at least 3 times a week, do I still reduce the starter down to about 1/4 cup every day? The whole starter/levain thing is confusing me. Am I essentially feeding both the starter and levain on a daily basis? Also, I have been feeding my starter distilled water (but not room temp…which may be my problem) and whole wheat flour in equal weights to the starter. Is it normal that after I feed it, it looks really thick and stiff? It seems to take forever to get all bubbly. I did just read through your starter routine and found that incredibly helpful, but with every day going forward, I add to my list of questions!
Hey, Ashley! If you want to keep your starter out on the counter ready to bake, and it sounds like you probably do since you want to do around 3x a week, then yes, you discard the starter down each day when you feed it fresh flour and water.
A starter and levain and closely related. Here at my site I use the term “starter” to refer to my ongoing culture that I feed regularly and always perpetuate. A “levain,” on the other hand, is just an off-shoot of my starter — one that gets consumed in a single bake (and ultimately has the same fate of the dough mixed for that bake, to be baked in the oven). So you can think of them essentially as the same thing, since they both go through a typical fermentation “cycle,” but I always keep my starter in a separate jar that I pull from when making a levain.
It’s normal for the starter to be thick and stiff depending on how much water you are giving it. If you’d like it to be more loose and liquid, just increase the amount of water you give it each feeding.
I hope all this helps and welcome to baking awesome sourdough @ home!
Hi Maurizo!
I have a similar question and am starting to finally get the gist. I got my 100% starter from a friend and have been feeding 40g mature starter with 40g water and 40g 50/50 rye/AP. The starter matures rather quickly in my kitchen, about 4-5 hours, and I find myself feeding it 3-4 times a day. Given I only bake 1-2 times a week, I have too much sourdough discard to handle. In your post you use 20g mature starter, 25/75g rye/AP, is that a matter of adjusting the inoculation to get a rise time that works for you?
Hey, Lee! Yes, I first and foremost adjust that mature starter used to mix to lengthen or shorten the duration between feedings. Right now you’re doing a very high inoculation (the amount of mature starter added), and at that percentage I typically find my starter will ripen in about 3-5 hours (assuming room temperature or so).
I’d suggest you drop that inoculation percentage down until your starter can last between feedings to fit your schedule. Somewhere around 10-20% would work, depending on your kitchen temperature. Experiment and find what works for you!
hi Maurizio,
After some failed attempts I followed your starter instructions and my starter has predictable rise and fall, plenty of bubbles and over all looks like in your pictures and smells like you described. I think it is about 8-9 days old and floats in water when at its peak. I am a little confused about the feedings. I currently take about 75g of starter and feeed with 100g water and 100g 50/50 rye/AP. In your starter creation post day 7 ends with feeding with AP flour only but in the maitenance posts you mention feeding with 50/50 rye/AP or 25/75 rye/AP. I understand you can feed different kinds of flour but what is your currently prefered method?
Also I am thinking i would like to have a starter that is fed with 1:5:5 starter:flour:water ratio so it can build significantamount of levain in 5-6 hours before I start baking. Can you give me some advice how to go from end of your creating starter routine to the maitaining your starter routine, it is still a bit confusing to me. Thank you, love your blog! Anita
Hey, Anita! You can feed your starter whatever flour you’d like, in the end it’s about your preference, your schedule, and what you’re baking in your kitchen. I currently have switched to 50% whole wheat and 50% white flour and that’s what I’ve been feeding for a while. I change this periodically, mostly for testing so I can write more here, but also because it’s either the flour I have on hand or I’m after a certain performance/flavor for a bread I’m working with.
So, after creation choose whatever flour you’d like to feed with. I’d recommend 25% rye and 75% white flour or 50% whole wheat and 50% white — but you could also do 100% white if you’d like (again this is all up to you!). From there, you can certainly scale things up to a 1:5:5 ratio, just feed accordingly. If you notice your starter isn’t at its peak height and really well fermented by the time you do a feeding, increase the carryover amount each feeding until it gets there. Keep in mind the temperature your starter is kept at and the flour used to feed it will speed up or slow down activity: more whole grains speeds it up, warmer temps also speed it up.
I hope that helps!
Hi!
I followed the getting started steps and was seeing a fairly predictable rise by day 4-5. Up an inch and a half or so and then almost back to the starting point by the time 12 hours was up. I switched to the all AP flour per those instructions and saw bubbles, but no rise. Then I noticed that these instructions are different than the day 7 and forward instructions.
Last night I went with 50g starter, 25g rye flour and 75g AP. I saw a nice rise and fall. This morning I lowered the carryover to 30g. I have these sitting at 77F.
Here are my questions:
1- I understand that I want to use the started when it’s at it’s peak or slight after. When do I want to be feeding it though. ie. What am I aiming for at 12 hours?
2- When I’m trying to control the amount of rise, am I better off doing it by adding more carryover, or more temp or more rye flour?
I’ve read all of your starter posts, and I’m still a little confused!
Thanks!
Hey, Jackie! Answers:
1) You should use your starter when it’s at its peak. Additionally, you want to also feed it when it’s at its peak. This peak height represents the the point where your starter will be at its maximum populations of bacteria/yeast — this is the perfect time to give it fresh flour and water, or use it to make a levain.
2) I like to control the activity of my starter by first adjusting the carryover amount (less to slow, more to speed up). The temperature of the starter is also extremely important, as is the flour used to feed, and these will also effect the fermentation activity. For example, if I find my starter is metabolizing through all the flour & water I’ve given it before I can get to a feeding, I’ll usually reduce the amount of carryover down to adjust.
I hope that helps!
A “starter” is what you’ll always keep separate in its own jar, happily fed each day (or so). That’s your “mother” culture, the mixture you’ll never use in total because then you wont’ have any left to perpetuate it. You feed it regularly to ensure it continues fermenting, has the flavor profile you’re after, and is strong.
From that starter you’ll make what’s called a levain (leaven). This is an off-shoot of your starter and will be consumed in total in a single bake. The leaven has the same fate as the dough itself: to “die” in the oven when it’s baked.
Essentially the starter and leaven are the same thing, but the distinction here is that your starter is a culture you keep around and never totally use up.
I hope that makes sense!
Yes it does. Thank you for the clarification. I actually did make a second batch of bread using the leaven I had fed. While it was decent and great for toast it was not nearly as delicious as the first batch made from starter. I am on day 3 of a new starter. Hopefully it will be my “forever” starter😜
Ive got a question,
I have my batch ready to bake. But i am using a gas powered stone oven whereby heat is generated from top and bottom.
Below is a stone tile. The top is simply the usual Heating wire element. What is the recommendation for temperature of a set up like this? I get to control the Top Heat and Bottom Heat only. There is no fan.
Any advice would be much appreciated!
I’m not very familiar with an oven like this, unfortunately. I can’t really recommend a temperature as I’m not sure how the heat will effect the dough. The best thing to do here is just try what you feel like would be the right temperature and adjust as you bake. It might take a few tries, but this is the way it is with new hardware — when I get a new oven there’s always a period of adjustment! For what it’s worth, I also do not use a fan in my oven when baking bread (I don’t want to move the steam around, I want it to sit on the dough surface).
So I made my first two loaves and they were delicious. Thanks to your instructions I saved the left over portion of my leaven in the frig for 6 days and am ready to use it for two more loaves, The leaven has bubbles and has risen in the frig, I forgot to mark the original level so not sure how much. I am a little confused about my next step? Can I take it out, remove a teaspoon and feed it once and leave it over night on the counter and then if it has risen and fallen, use it to form my dough? Today is thurs. I wanted to shape bread on friday and proof overnight and bake sat. morning.. Will this be the correct process regarding the refrigerated leaven step?? Thanks for your help. Audrey
Glad to hear that, Audrey! I typically like to give my starter that’s been in the fridge a few feedings before using it to bake. I’d take it out, give it an hour or two on the counter, feed it per usual, and then when it’s ripe again, use that to make a levain to bake with, per usual.
For more info on all this, and how to use your starter from the fridge, check out my Weekend Baking Schedule. Happy baking!
are you saying I can use my leftover leaven as a starter? I did this on my second bake and the bread was just ok -not as strong a flavor and did not raise as high as my first bake. I threw away my original starter so do I need to start a new starter? thanks and sorry -seems like I can’t quite grasp this concept of starter/leaven
So I did just that, feeding it three times for the first 24 hours and it seems to be ok. I am so relieved that I don’t need to start all over again. This twice daily feeding schedule has resulted in a really active starter. All my usual recipes are producing big, puffy, holey loaves with lots of flavour. Thank you once again for your advice and a truly wonderful blog.
So I did just that, feeding it three times for the first 24 hours and it seems to be ok. I am so relieved that I don’t need to start all over again. This twice daily feeding schedule has resulted in a really active starter. All my usual recipes are producing big, puffy, holey loaves with lots of flavour. Thank you once again for your advice and a truly wonderful blog.
Glad I could help. Happy baking!
Help Maurizio!!!!! I just realised that I threw away my freshly made starter and what I have sitting on my kitchen table now is a 36 hour old one. I rotate between three Weck jars and wash them out once a day. Can I still use this for refreshing or will I have to start all over again.
Definitely use that 36 hour one, it should work just fine. Feed it per usual and try to keep it fed when it needs it — treat it like a sick child and it’ll be fine!
10g of starter in the jar is a very small amount. It would definitely look just like a smear depending on how much was on the sides of the jar, etc. This is really all that’s needed to keep your culture going! I usually drop down to 10g when it’s warm out to slow the whole process down.
You’re not doing anything wrong at all. Adjust the amount of mature starter you leave in your jar so it ripens when you are able to feed it — it’s ok if it falls before you get to it, I just don’t like to leave it too long in a “fallen” state where it becomes overly acidic.
Hope that helps!
A new new newbie and love the blog. Wish I had paid more attention to science class in school but having fun learning a new “language.” Can you show in a photo what just 10g of starter looks like. I use a mason jar and used a tare weight for the jar and put 10g of starter in the jar. It was hardly a smear. And the starter left overnight (with 100g of 50/50 flour and 100g of room temperature water) in the oven with the light on (my touch thermometer said the interior — and the dough — was 26 d Celsius). But it bubbled but didn’t grow in size like your photos. When I previously used more starter, between 50 and 10g, the starter filled the jar but it did it faster than in 12 hours. Am I doing something wrong?
After 1.5 days, I’ve refreshed the starter (without removing any of what was already in it) with 100g of flour and 100 g of water and put it back in the oven till it matures.
Last question, promise! What do you do when your levain needs at least three more hours to rise but you have to get to bed;D… Can I let it continue to do its thing in the fridge overnight, and then take it out in morning (let it sit 30min) and then use it?
Well, I ended up leaving it out (it’s about 60degrees) and it’s definitely past its prime but I’ve made delicious sourdough with levain like this before so I’ll go ahead and still use it, and then all I can do is try and try again:)
Yes, I’d say go ahead and use it! just keep an eye on the dough, it might move faster than usual. Good luck!
That can certainly be done (as well as every level between 1% to 100%, and higher). Sometimes I’ll do a 100% inoculation if I need to adjust for a shorter schedule — still works very well!
Thanks very much!
Thank you for sharing your knowledge! I read that you like 50% inoculated levain, while your starter is 20% inoculated (I’m new to this so I may be describing this wrong). Besides the higher inoculation causing a faster fermentation process, is there another reason why you like a different inoculation % in your levain? And as far as steps go, you take out what you need to build your levain and put in separate jar to ferment, while also feeding your original mother starter in the first jar, is that correct? So basically two feedings have to happen. Thanks for your help!
Hey there! Yes, I do a 50% inoculation for my levain mostly for scheduling reasons — it jumpstarts the process and produces a very active levain about 5 hours later.
That’s correct. I take out a portion to create the levain in a separate jar and then have two going at once. This isn’t totally necessary, though, it depends on how you want to do things. Some bakers never really make a separate levain, they just use a portion of their starter to mix that day’s dough. I like to keep it separate in the case I might forget to save a little of my starter and be left with nothing!
Hope that helps and happy baking!
(sorry i accidentally deleted this initially and then reposted it) Quick question: I’m guessing 100% inoculation for levain would create an
even faster process. Is there a reason this isn’t usually done?
Your pizza looks delicious! Really nice work. I’d say your Einkorn loaf looks really nice as well. It’s a hard grain to work with but the flavor and nutrition make it totally worthwhile.
Thanks for sharing — inspiring work!
Thanks!
I fed it 3 times and already had similar activity to your sourdough starter. The pizzas turned our really well, thanks a lot for your great support and ideas! I think my einkorn bread is still not as airy as yours – it seems a little too compact in the centre. Here some pics.
https://ibb.co/iY4Mnx
https://ibb.co/gOfGLH
https://ibb.co/i69bLH
https://ibb.co/h7V5Ec
https://ibb.co/jDGO0H
My bread recipe is:
– 350g wheat Type 84 / 150g einkorn / 375g water / 150g sour dough starter + salt and nuts
– rise 2 hours & kneed with further 2 hours rise time
– bake 265°C for 8 mins and further 32 mins at 230°C with a baking stone.
Thank you for the reply/information!
I’ll keep tinkering to try and get stronger lift from my starter. And saving up for that proofer!
I must have read this article multiple times in past but I can relate to it now more than ever before with my own quest to ‘understand my new starter’. The visuals are extremely helpful and self explainatory. You said it right Maurizio, being observant and attentive is the key. Thank you for all the wisdom and experience shared. Sincerely!
I’m glad I could help, Jinal! Way back in the day when I started to really pay attention to the sight and smell of my starter, I noticed my baking really went to the next level. After seeing your posts on Instagram lately I’d say you’re definitely there! Happy baking 🙂
Bacteria and yeast each thrive (metabolize) more effectively at varying temperatures. When you have drastic swings in temperature throughout the day this can favor one or the other depending on the temperature. This could mean an increase in acid production at one extreme, or an increase in gas production at the other. I find with my starter it just performs better when it’s kept at a more constant temperature. I realize this isn’t practical for many and can be hard to do! This is why I highly recommend picking up a dough proofer for your kitchen if possible!
Other than that it sounds like you’re doing the best you can to keep it at a stable temp (insulation, warm water, a warm spot away from drafts, etc.) — you might just have to adjust the timeline for your bakes to suit temperature swings. 🙂