


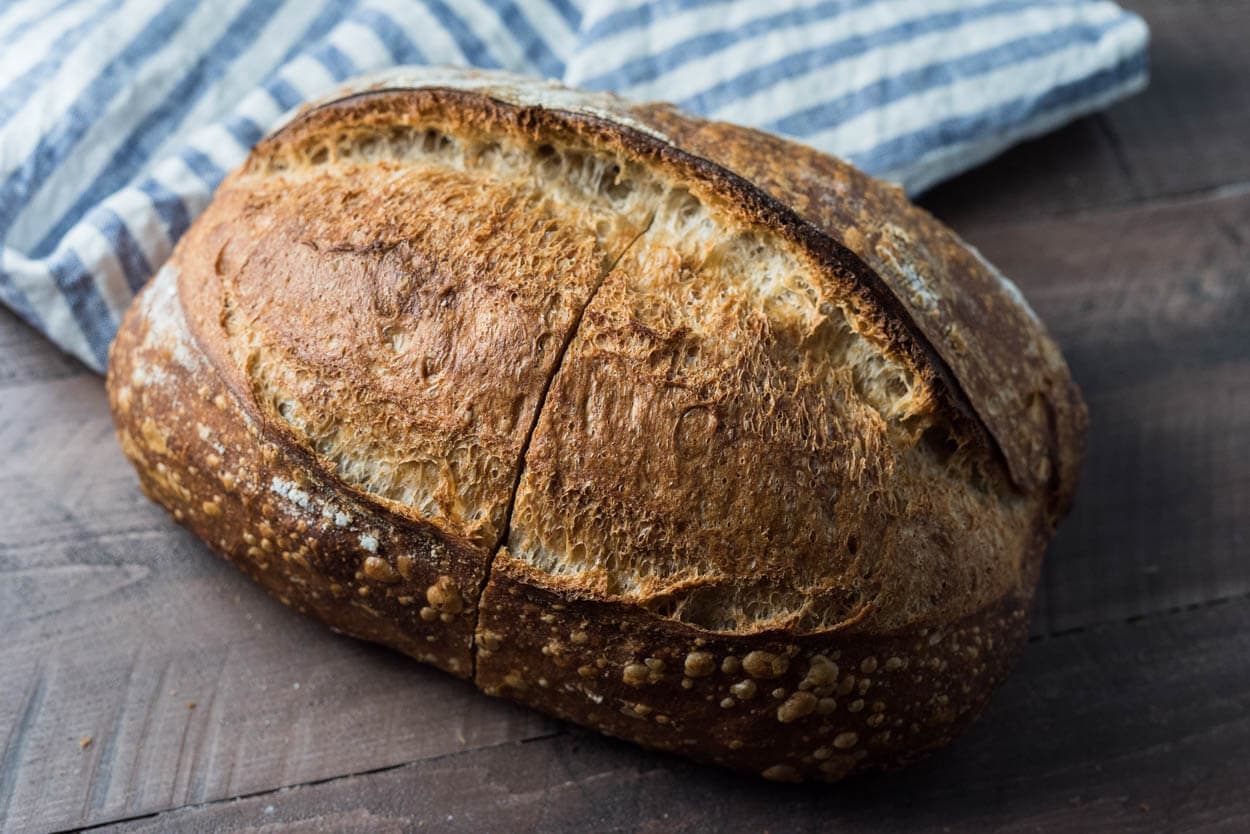
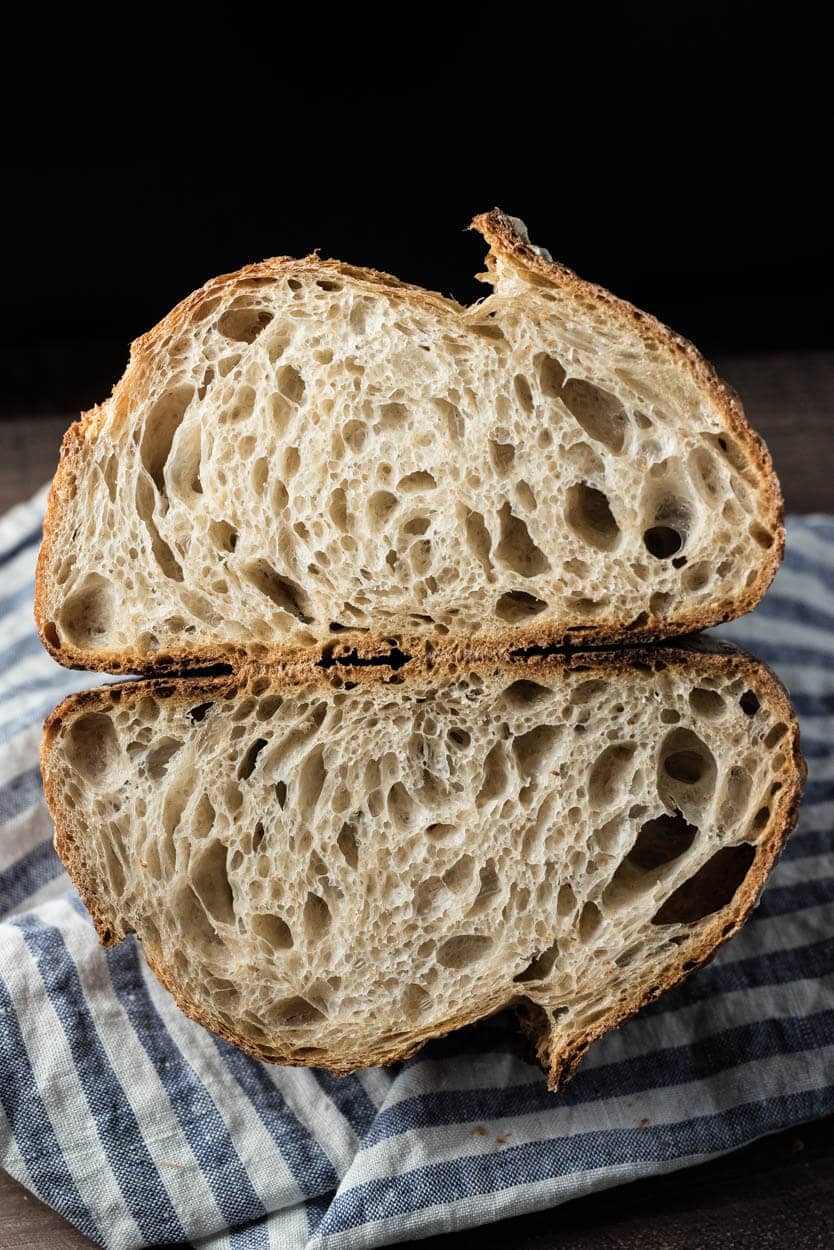
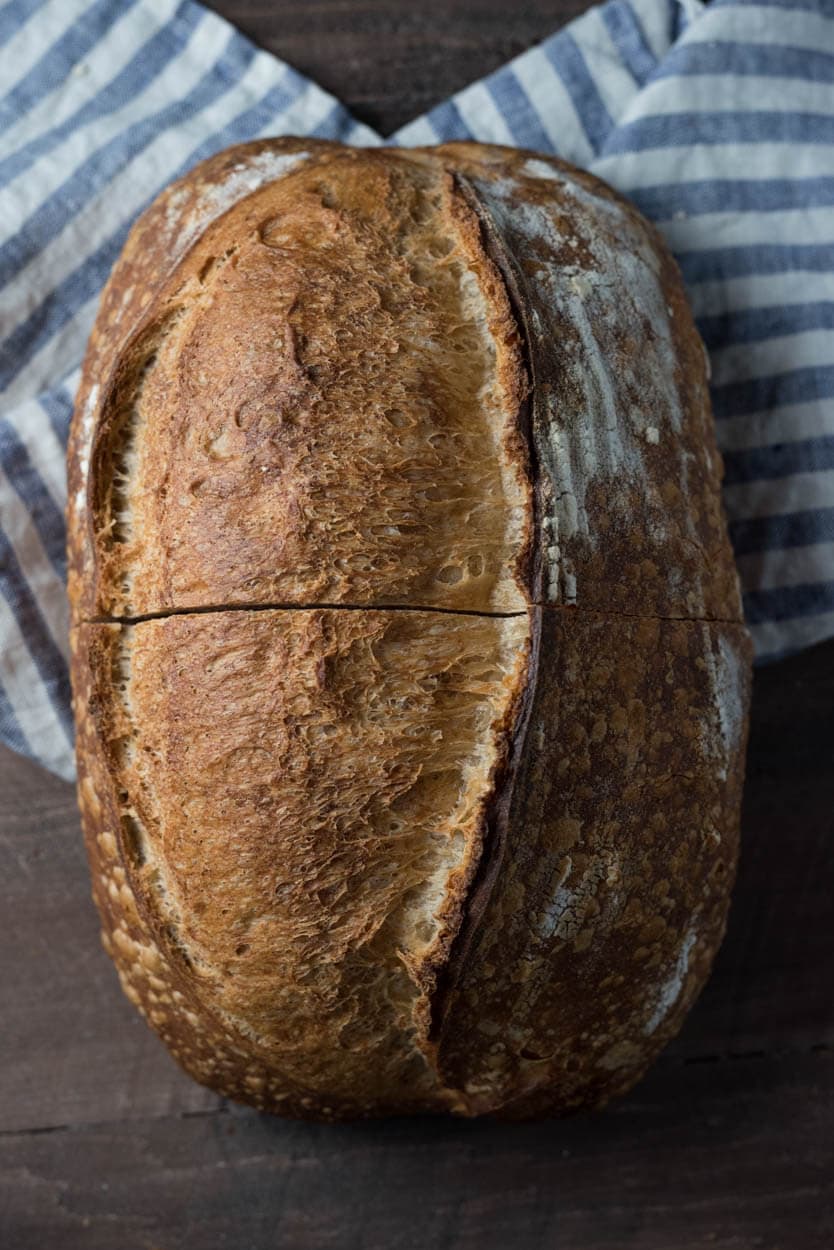
My baking focus has lately been predominantly on my sourdough starter maintenance and maximizing fermentation. And recently, I’ve made some of the best bread I can remember (I took all the bread pictures in this post with this starter). So this post is somewhat a continuation of my Managing Starter Fermentation, but in this post, I’ll focus more on the signs for spotting when a sourdough starter is ready for refreshment (ripe) and how to perform that refreshment.
Be sure to check out my post on what flour, water, and carryover ratios I’m currently using to feed my starter in my How Do I Feed My Sourdough Starter post.
There are many methods to keeping your starter healthy and in proper working order, likely as many methods as bakers. Each baker has a process for maintaining their starter according to what works for them and the bread they seek. Each starter is unique, after all: a distinctive blend of wild yeast and beneficial bacteria that has evolved in the temperature it’s kept at, the flour used for refreshments, and the time between those refreshments. I wanted to preface this article because the following is what works for me here in my kitchen and will most likely work for you as well, but I guarantee you’ll find yourself modifying my method to suit your environment. That’s to be expected. An essential requirement for a baker is flexibility and adapting techniques and inputs so everything performs optimally in your kitchen. In the end, your sourdough starter maintenance routine might be similar to mine, or it might be quite different.
I can remember back to when I first dabbled with creating my sourdough starter. I read all the books I could get a hold of; I searched online, anywhere I could find information. Once I got things up and running (using the process described in my seven steps to creating a sourdough starter entry), I followed refreshment schedules outlined in various books, and things seemed to work pretty well. But my bread didn’t improve until I modified things to suit my environment, schedule, and unique starter. As I refreshed my starter each day (feeding sourdough starter), I began to take note of things, how it looked when I neglected to refresh it for too long, how it looked after a few hours with new food, and how the smell of the starter changed throughout the day.
My goal for this entry is to convey the signs I look (and smell) for during the single-day microevolution of my sourdough starter. First, what does it seem and smell like right as I refresh it (at the start)? Then, what should it look like when I decide to refresh it again or use it for making bread? And finally, what does it look like if it’s gone too far and starts to become overly acidic? I receive frequent emails on this topic, and I hope this entry will be a visual guide to those wondering how I care for my starter.
With this post, I’m hoping to help you answer the following questions:
- What is feeding (I usually call it refreshing) a sourdough starter?
- How soon after feeding (refreshing) a sourdough starter can I use it?
- What does feeding my sourdough starter once (or twice) a day look like?
A quick note for those out there who follow my writing very carefully: you’ll notice this entire entry is about a liquid starter/levain and not about a “stiff” variety I had been baking with for almost a year. I recently shifted things back to using a liquid starter after a long while with a stiff variant, and I have to say I prefer how my bread is turning out with my change. If you use a stiff starter, some of this entry will be relevant to you, but the visual cues will be different as the consistency of your starter will be different. If you haven’t used a liquid starter/levain, I suggest you experiment with this and try it out, you might be surprised at the difference, and you might prefer it. I’m not suggesting one is better than the other, but rather a personal preference whereby I like the taste and performance of this liquid levain for the bread I’m currently baking.
If you’re curious and looking to dig more into preferments, see my guide to the differences between a sourdough starter and a levain.
Sourdough Starter Background
The key to coaxing out maximal fermentation with your starter is to be observant. Watch how it evolves throughout the day and note how long it takes to reach full ripeness: a strong sour aroma, a breakdown of the mixture, significant bubbles on top and at the sides. If it’s doing this too fast (for example, you refresh at 8 a.m., and it ripens at 2 p.m. when you’re at work), you can reduce the water temperature, change the ambient temperature, or reduce the amount of mature starter you carry over at each refreshment (this is what I do). You want to try to refresh your starter right when it’s at its peak ripeness or shortly thereafter.
The key to coaxing out maximal fermentation with your starter is to be observant.
Once you have a healthy starter showing the same signs of fermentation every day, you will be able to adopt a consistent sourdough starter maintenance schedule. I work this into my daily routine: I refresh my starter when I eat breakfast in the morning, and then I refresh again in the evening as I’m cleaning up the kitchen getting ready for bed. It only takes a few minutes (see my tips later on tools to make things easier).
Your starter will go through the following phases each day, but the times will most likely be different. For example, if fermentation is slow (due to temperatures or percentage of starter carryover, for example), then the signs I point out below might be at greater intervals, and conversely, if fermentation is fast, then the ranges will be tighter. As I mentioned initially, if you’ve not yet started your sourdough starter or received a portion from a friend, I have an intro article to creating a starter that will get you going in a few days.
Let’s look at a day in the life of my starter.
Sourdough Starter Maintenance Timeline
Before we dive into the timeline, I want to point out that below I refer to two things: my starter, which is what you’re here for in the first place, and also a levain. I talk about both almost interchangeably because mostly, they are the same thing. Your starter (mother, chef, etc.) refers to your yeast/bacteria culture you continue to refresh and care for indefinitely. In contrast, your levain is a splinter, or off-shoot, of your starter that you refresh and build only to be used in a bread recipe eventually.
For the timeline below, I used 30% whole grain dark rye flour and 70% medium-protein bread flour (similar to all-purpose, but geared toward bread baking). The percentage of flour types is really up to you; I used a little rye flour to help increase fermentation and acetic acid production, but you can use any ratio of flour you’d like (e.g., 100% whole wheat, 100% white, a mix of both, etc.). Just take note of how each flour type aids or slows fermentation.
10:00 a.m. – Sourdough starter maintenance beginning
The first step is to take your mature sourdough starter, discard some part of it, refresh it with fresh flour and water, and cover (I only loosely cover with a glass lid that does not seal tight). My kitchen is currently around 75°F (23°C), and my mixture is 70g white flour, 30g rye flour, 20g mature starter, and 100g room temperature water.
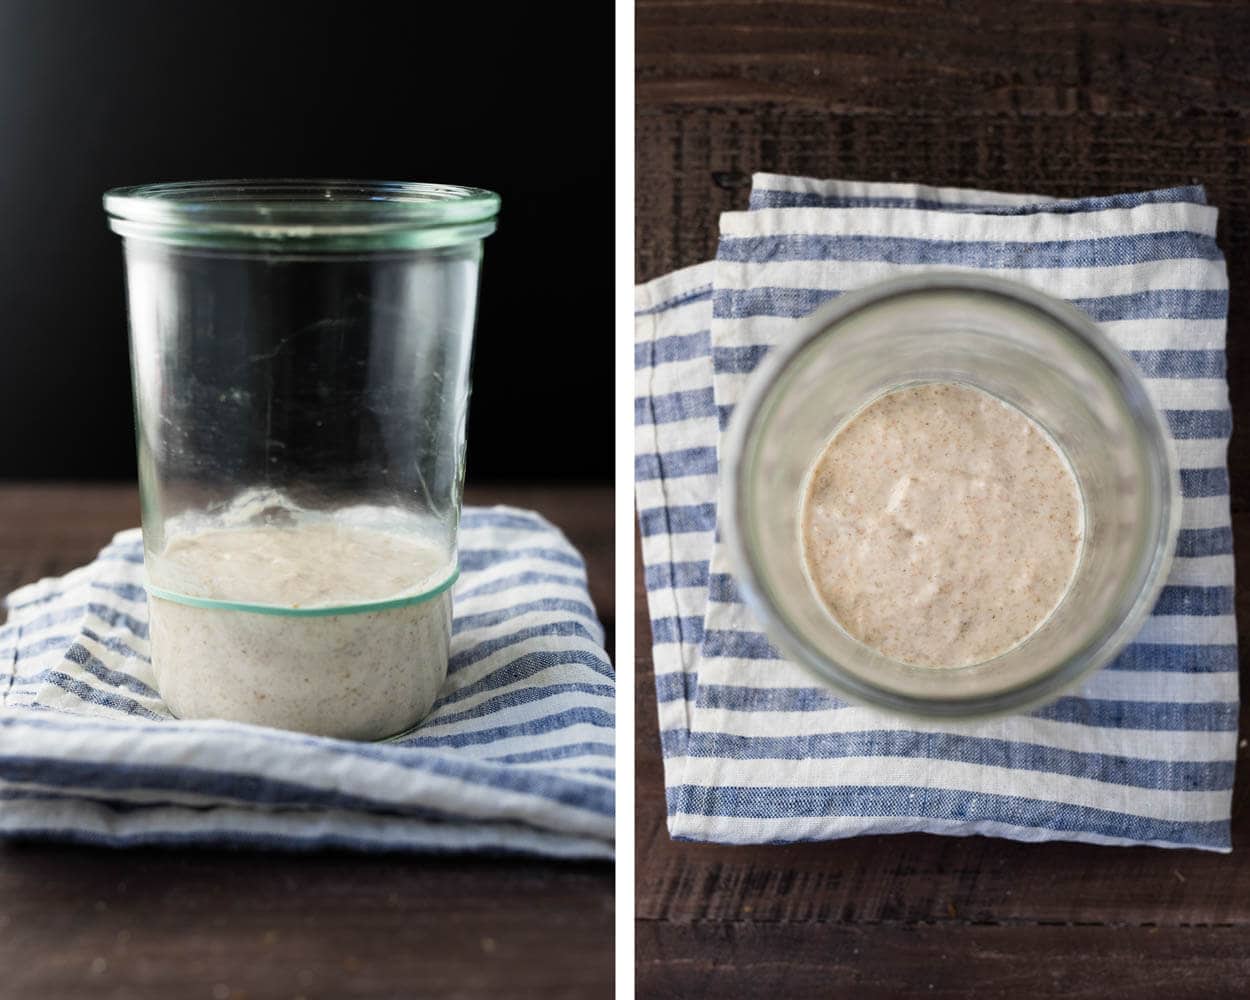
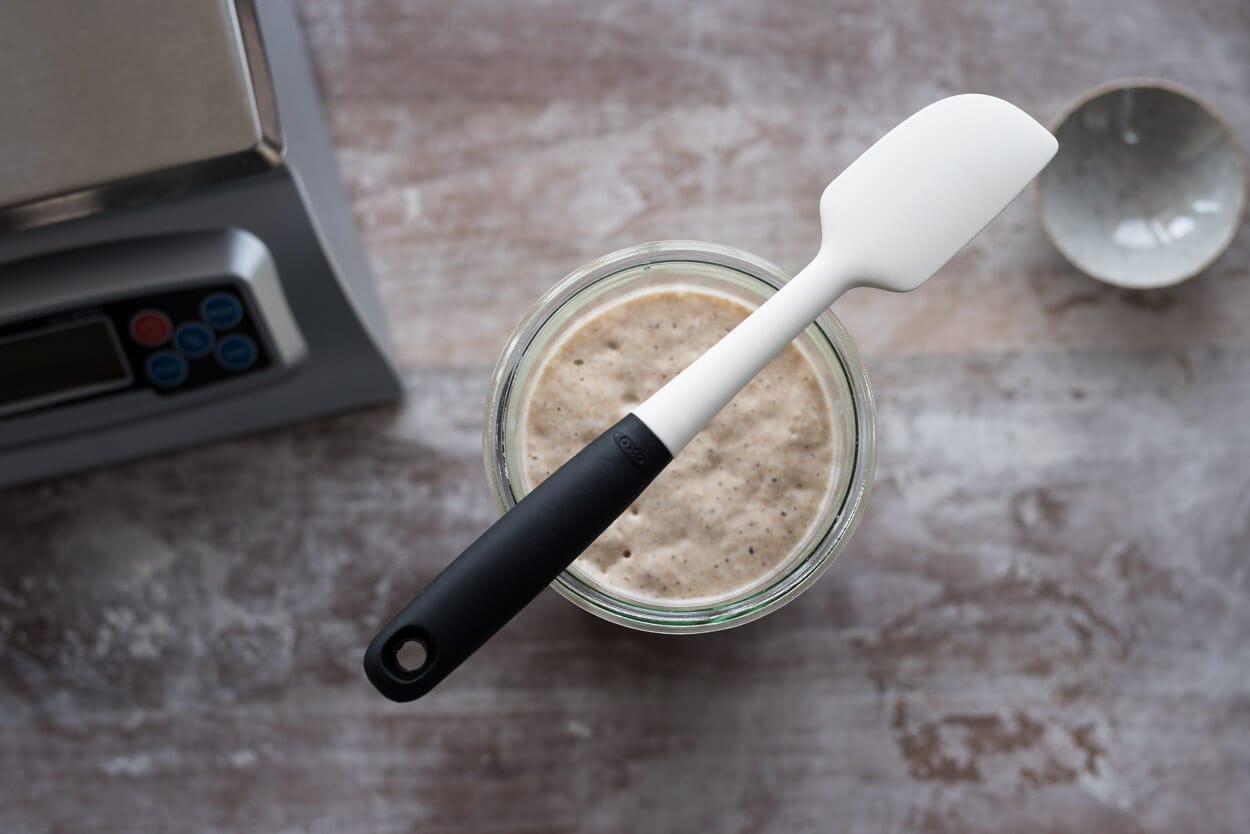
You can get a sense of how “stiff” my starter is after mixing. You want to make sure you mix everything thoroughly so it’s completely smooth with no visible clumps of dry flour.
I’ve placed the green rubber band at the beginning level of my starter so we have a good sense of how far it will rise throughout the day.
12:00 p.m.
After only a couple of hours, you can see only slight activity visible in my starter. The smell at this point would be very, very sweet, and practically the aroma of flour and water. So sit tight; things are about to get more interesting.
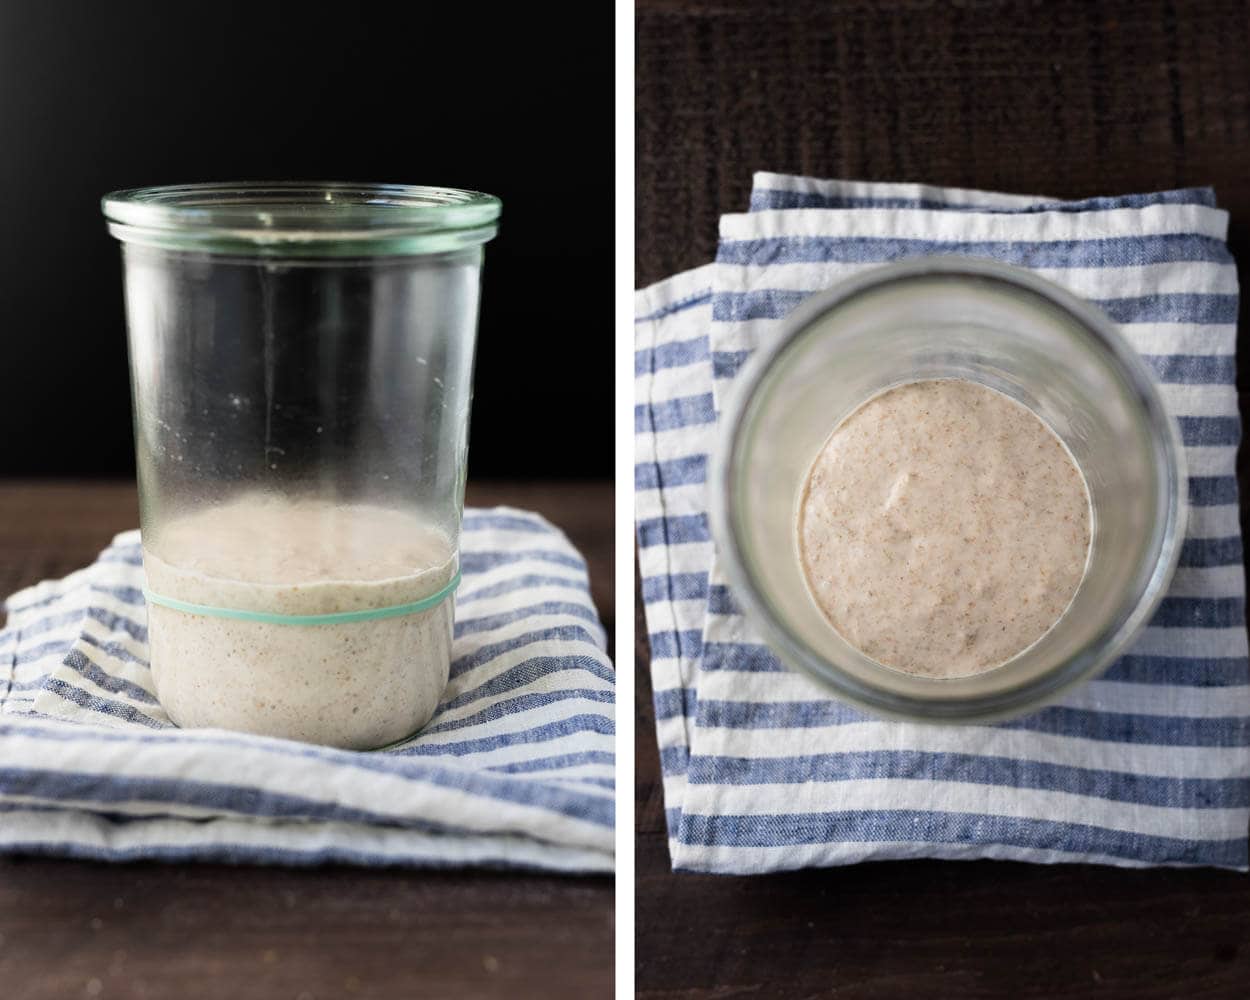
2:00 p.m.
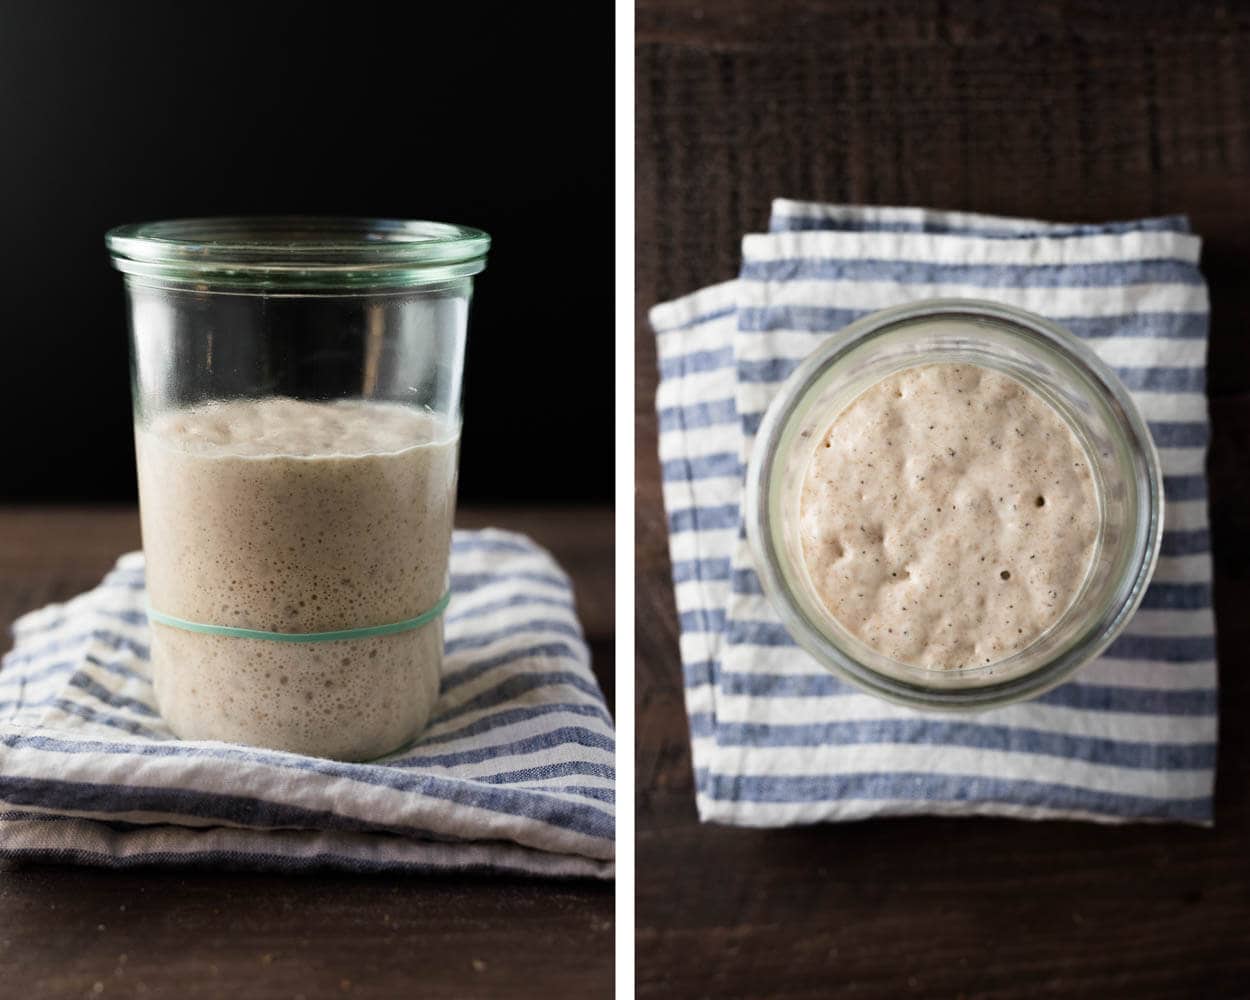
As seen below, four hours after refreshment, we have a significant expansion, a tad over 100%. In the image at right, you can see that the top is domed with a few bubbles peeking through. The mass of dough is trapping quite a bit of the gas produced through fermentation. I like to use a glass container, particularly these Weck jars, not only because it allows me to see firsthand how fermentation is progressing but also because the flared top makes sticking your hand and spatula inside very easy. I not only use these tall jars for my day-to-day starter and refreshments, but I also use them to build my levain before baking.
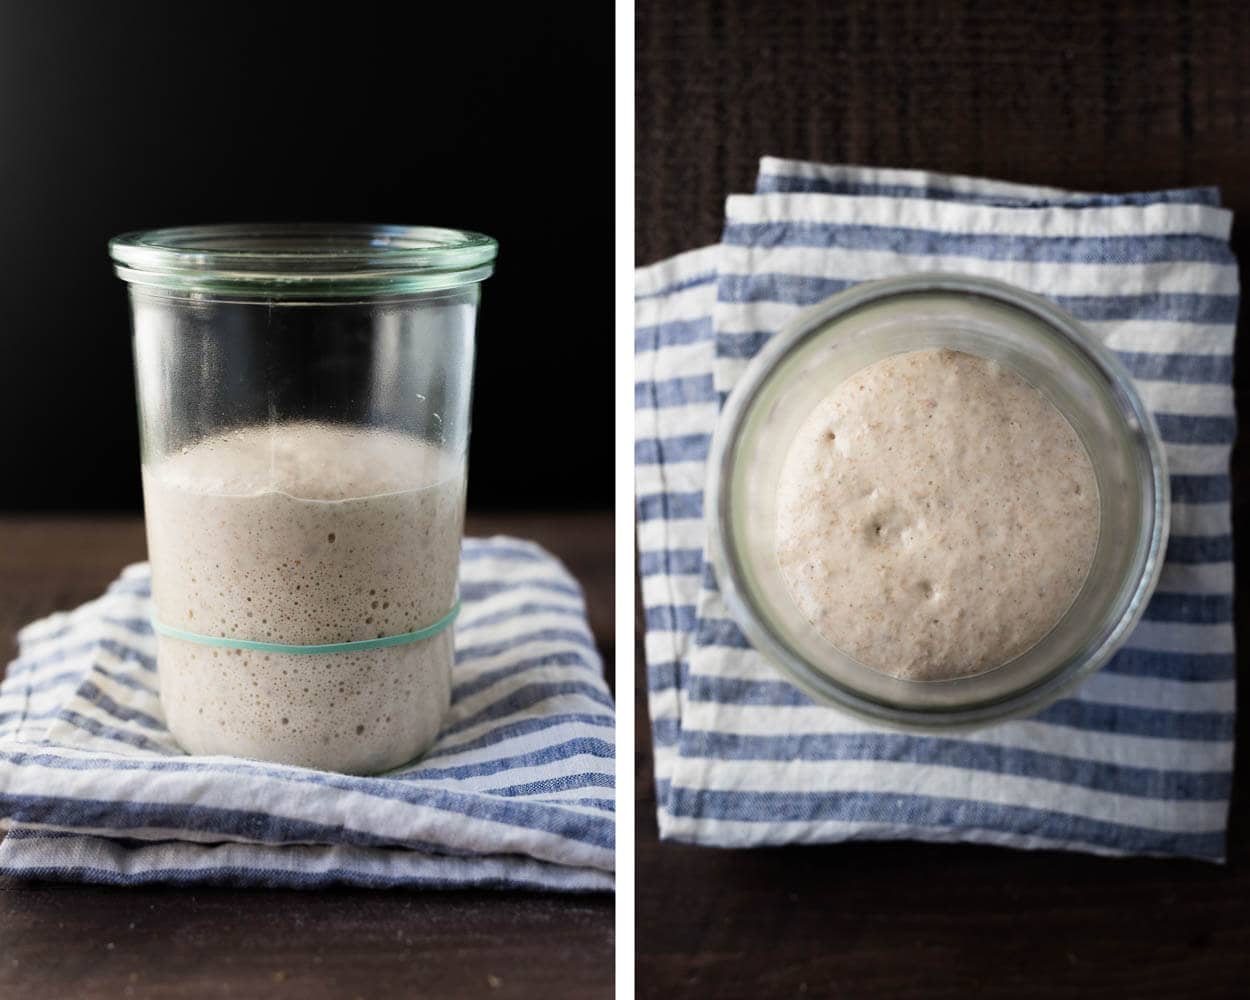
You’ll notice there’s quite a bit of activity already. Of course, after this initial explosive growth, things will slow down, but upward growth will continue for many hours.
3:00 p.m.
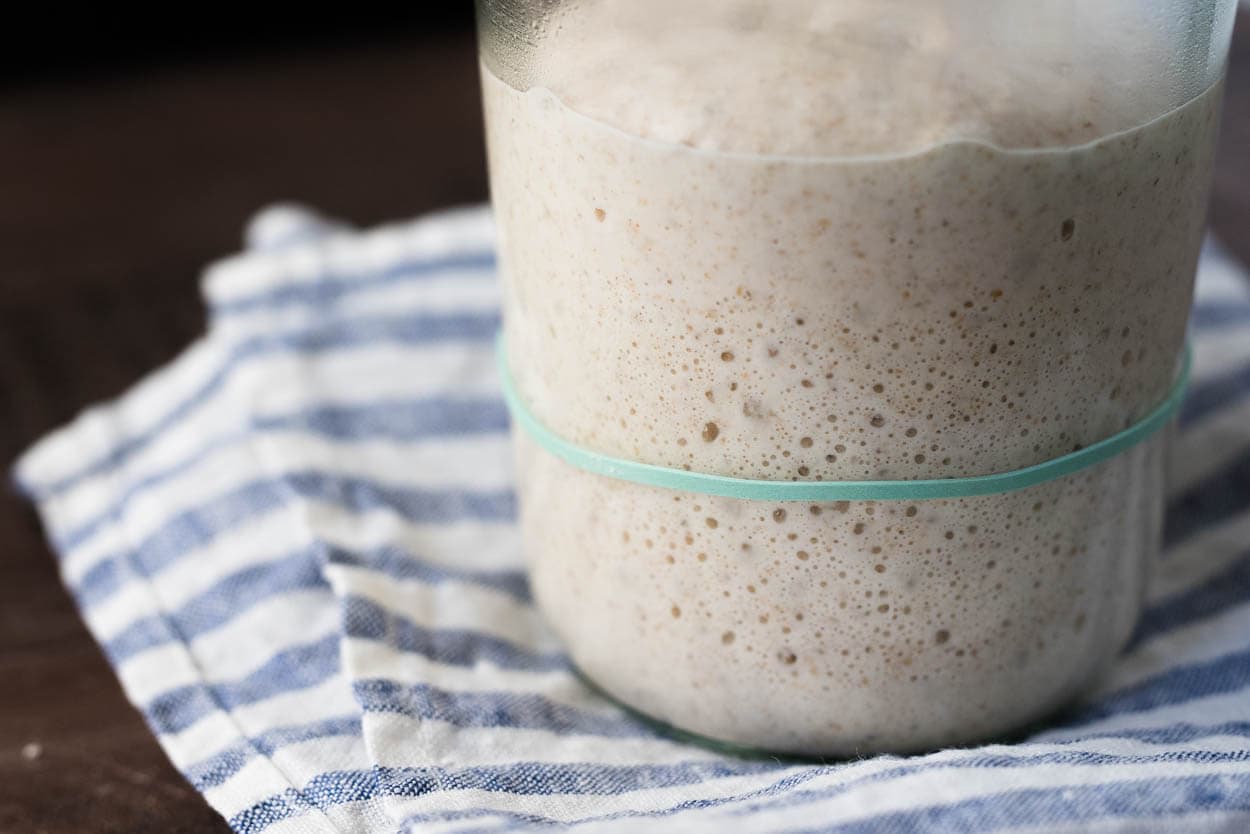
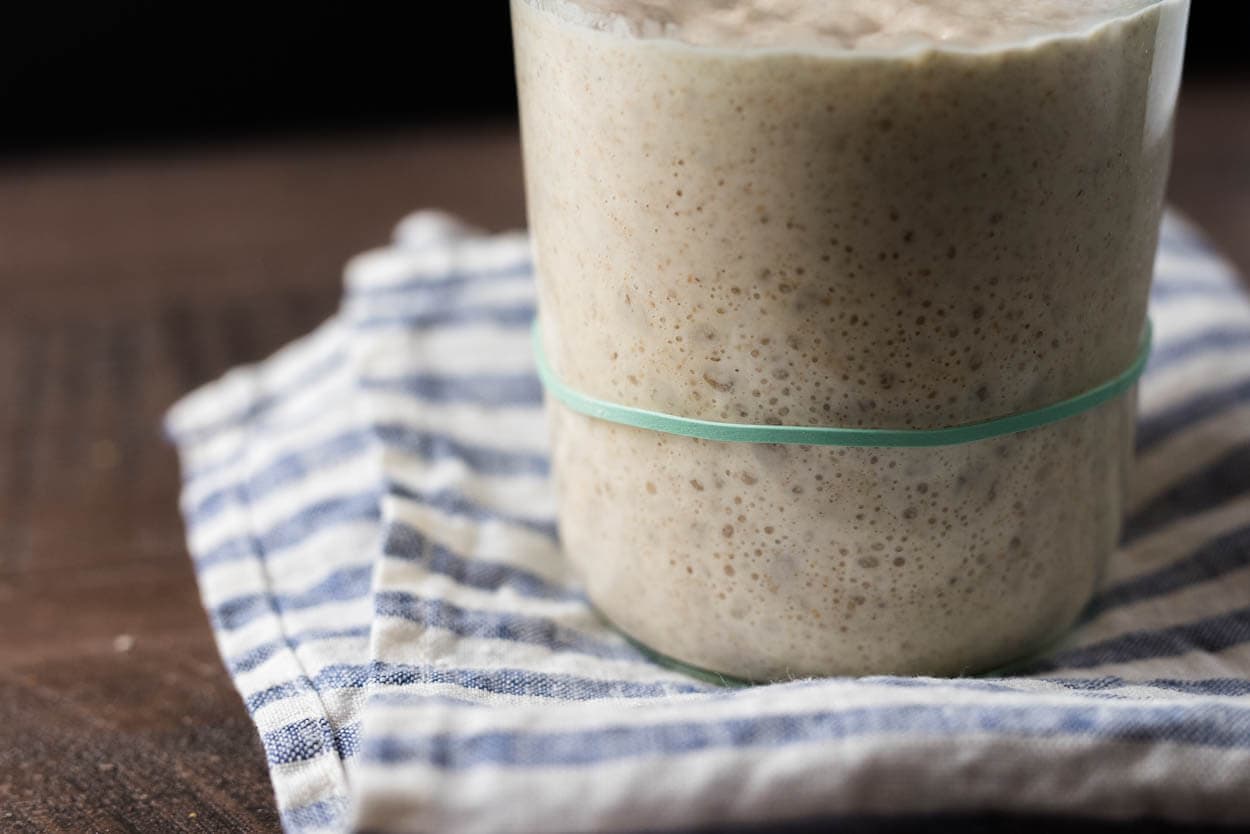
At this point, there’s only slightly more expansion than the last check-in. But, you can see many more bubbles on top and at the sides, showing signs of the momentous fermentation taking place. All of these are good signs.
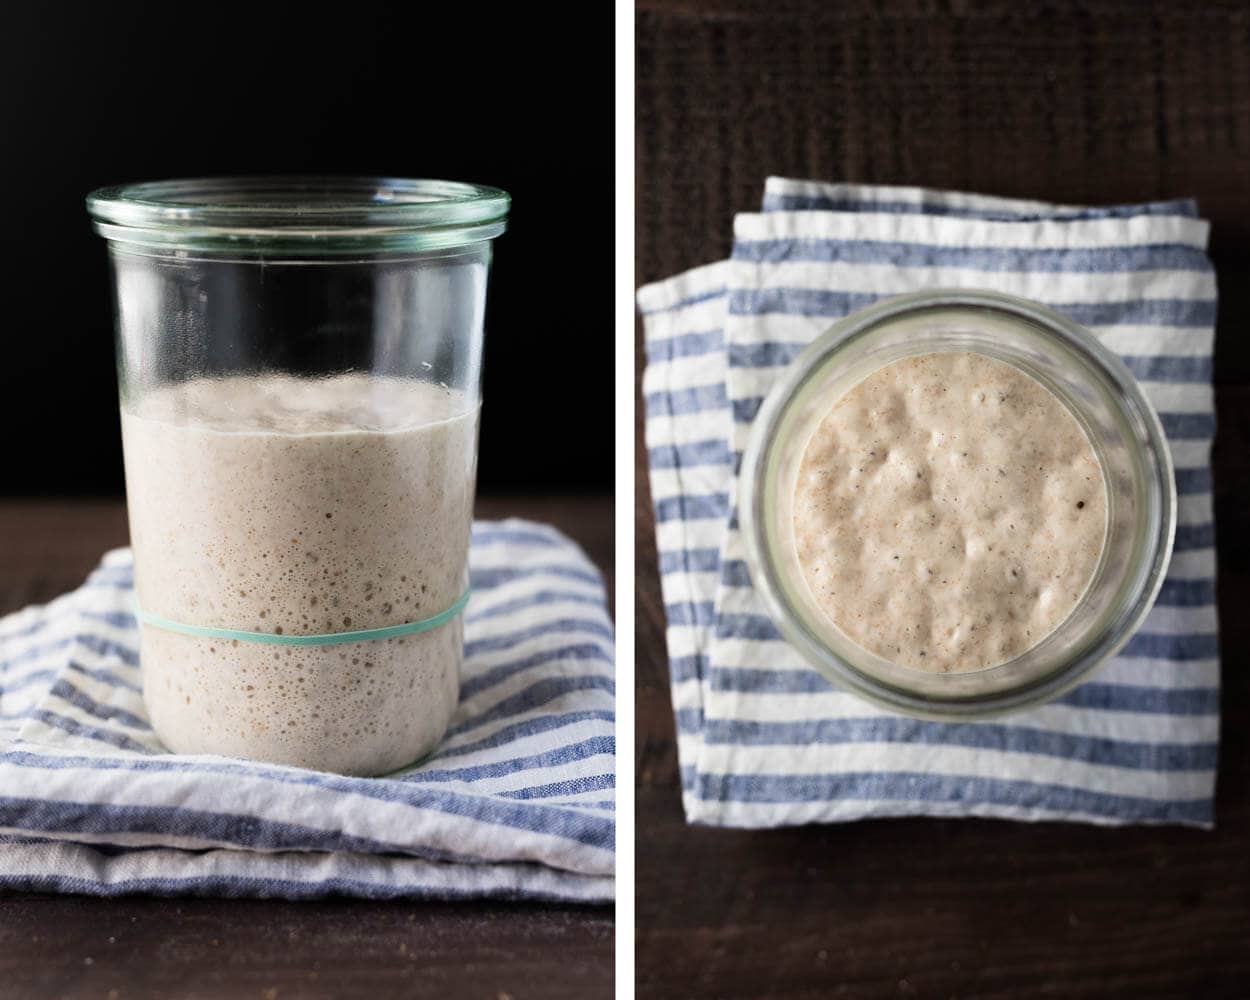
When you build your levain in preparation for baking, you may not always be able to see through the side of the container; the top-down view is sometimes all you have to judge your starter’s readiness. For example, bubbles and holes on top are a good sign, but my starter is not ready to be fed or used now. If this were a levain and not my starter, and I was attempting to use this at a “young” stage, this is most likely where I would use it for mixing my bread.
Another key indicator here is the aroma: how does it smell? Is it still sweet, sourer, or very acidic and vinegar-like? At this point, mine still has a sweet aroma to it, with a very subtle backdrop of sourness starting to creep in.
5:00 p.m.
By this time, we have significantly more bubbles at the sides and the top; overall fermentation activity is much higher. If I were to describe the aroma of the starter at this point, it would still smell quite sweet at it was at 3:00 p.m., but now the sourness is starting to escalate and build.
Given the look and aroma, I can expect my starter to rapidly come to ripeness very soon.
7:00 p.m.
You’ll notice here at 7:00 p.m. any dome that was once at the top of the starter is now gone, replaced by a reasonably flat surface. The flattening of the top usually indicates upward growth has significantly slowed, and upward movement won’t be as prominent—more holes on top and more fermentation visible at the sides. We’ll continue to let it ferment.
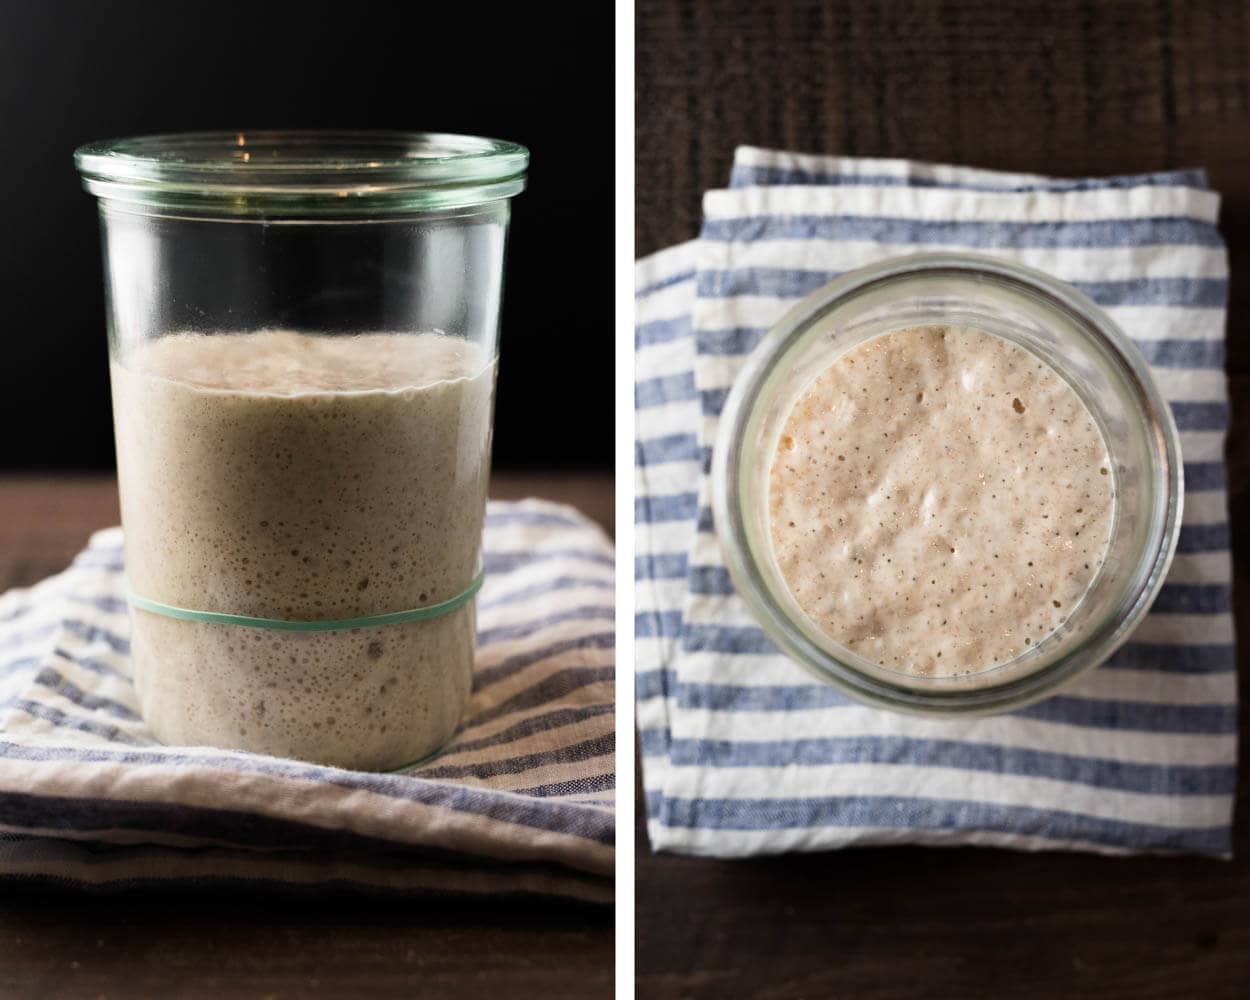
8:00 p.m. – Ripe, time to make a levain
As seen below, we still see some rise since 7:00 p.m., but not much. The top shows signs of more holes and bubbles, and the aroma is what I would describe as “ripe” and ready for use. If I were to pull back a little bit of the top, I would smell a slightly sour, vinegary smell with hints of sweetness still present.
At this point, I’d use some of the sourdough starter to make a fresh levain or use this starter directly in making bread. After making the levain, I would also refresh the starter by discarding and adding fresh flour and water.
While I find the “float test” to be misleading because it can sometimes give you false positives for when a starter or levain is ready to use, the float test would surely pass at this point.
10:00 p.m. – Just past ripe
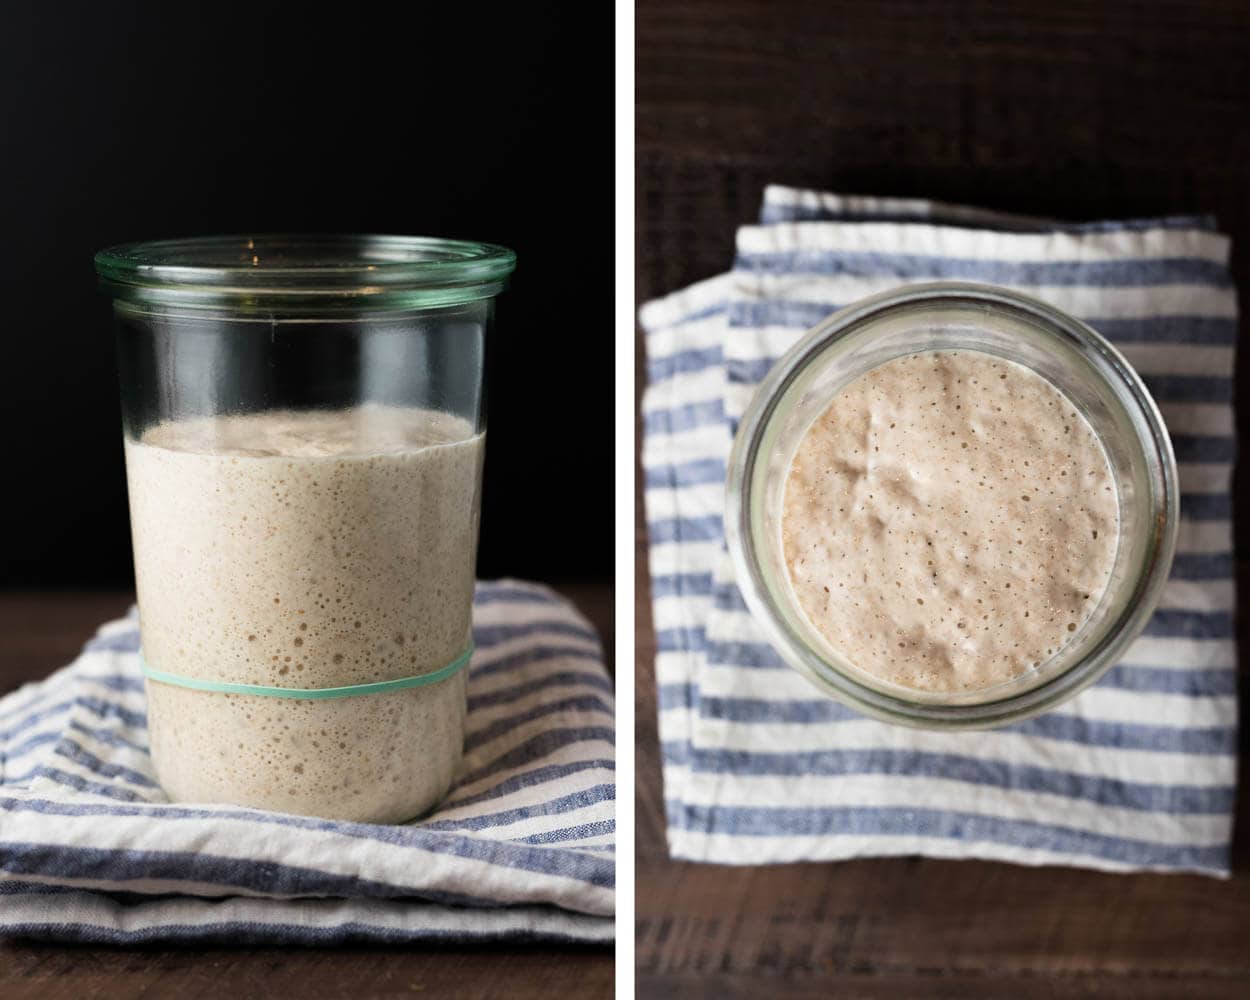
In the photo below, you can see the culture is beginning to show signs of ripeness. There are streaks at the top that indicate where the top of the starter once was, and in the top-down view, you can see the center is starting to collapse.
The fact that it’s starting to collapse is not the single most crucial factor in judging readiness. Instead, it’s the cumulative signs that are most important.
The fact that it’s starting to collapse is not the single most important factor in judging starter and levain readiness. Instead, the cumulative signs matter: a general breakdown of the mixture, a stronger sour aroma, and significant gas production.
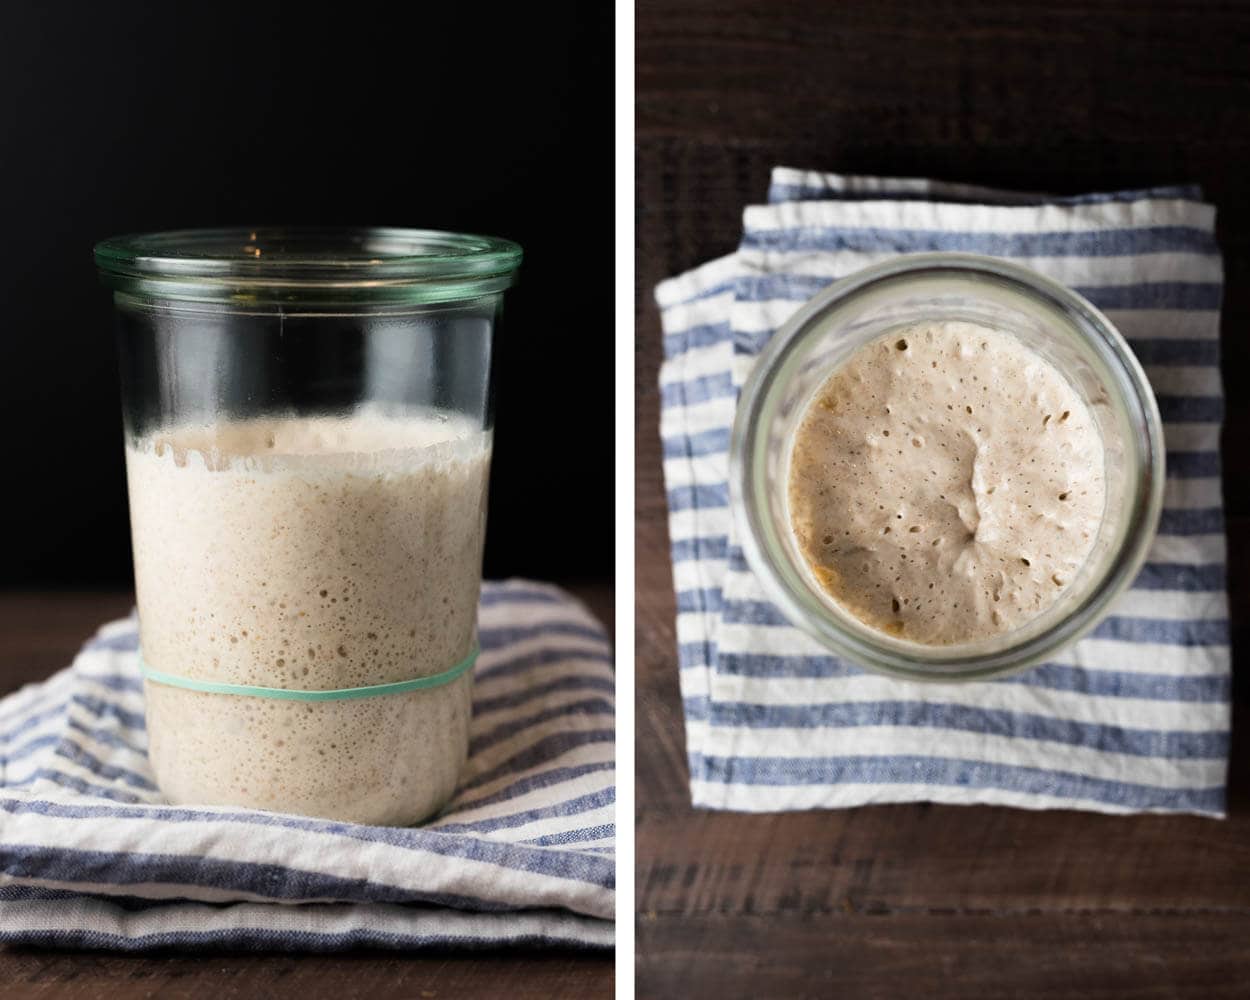
Again, if this were a levain I built in the morning to mix into bread, I would still feel comfortable using this to mix my dough. I’ve used my starter/levain at this point to make excellent bread. I’ve touched on the topic of a “young” levain in the past, but recently I’ve been using mine when it’s more fully fermented to achieve more flavor.
This time is also when you would want to refresh (feed) your starter. If you are using the correct mixture of inputs—water at a specific temperature, percentage of mature starter, and flour mixture—this time will coincide with when you want to feed it. For me, 10 p.m. is perfect as I start cleaning the kitchen in prep for bed (our little ones at home dictate my sleep/wake schedule, and thus my starter must conform).
If your starter has arrived at this point before you want it to, you can use a smaller percentage of ripe starter carryover or use colder water. If your starter is a bit sluggish and isn’t quite at this level, use a bit more ripe starter at the next feeding or use 2° to 8° warmer water.
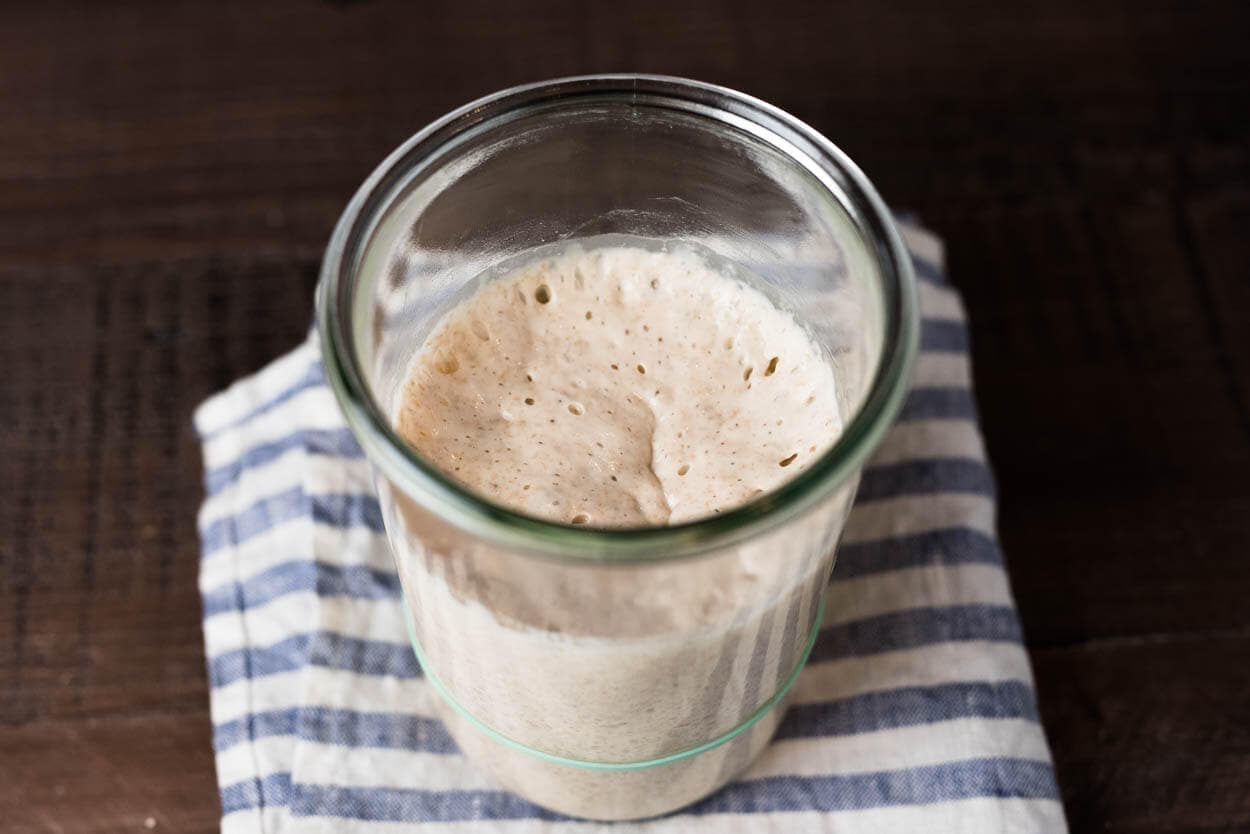
Being observant helps us help our starter to maximize fermentation activity. So, as you continue to care for your starter, take a moment before you rush through refreshments to observe the look and aroma of your starter—plan to adjust things either at the current refreshment or the next based on this observation.
11:00 p.m.
My starter continued to fall at this point, with longer streaks on the side, and the center has noticeably caved. I will normally have refreshed it by this point, but I continued to let this ferment until the morning so we can observe how it looks when it’s gone farther than I’d usually allow.
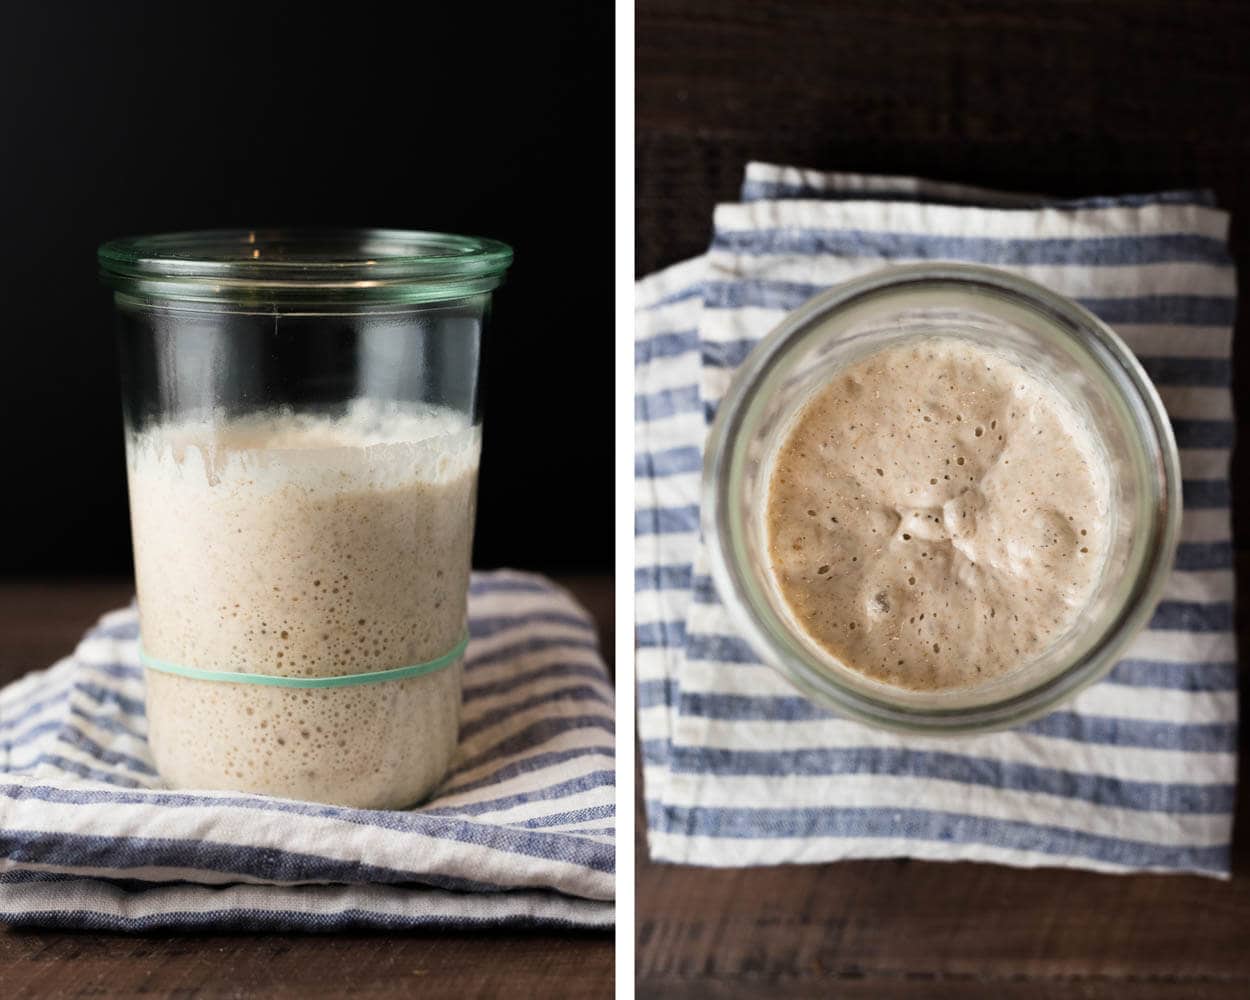
6:00 a.m. (next day)
What a drop overnight! The sides are entirely streaked with how far the starter has fallen, and the top was covered in small little bubbles. My starter has gone way too far at this point and needs a refreshment.
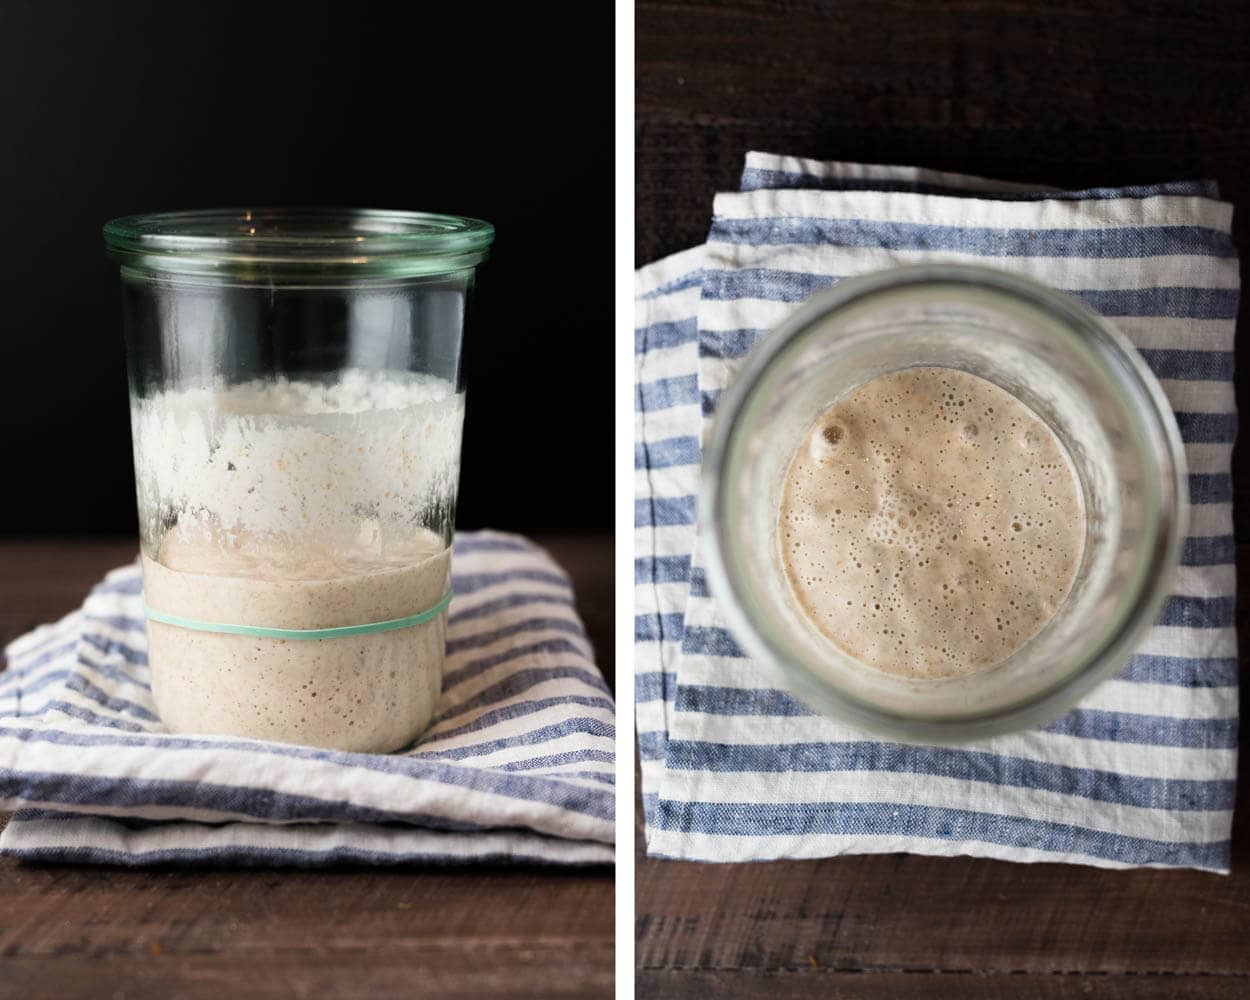
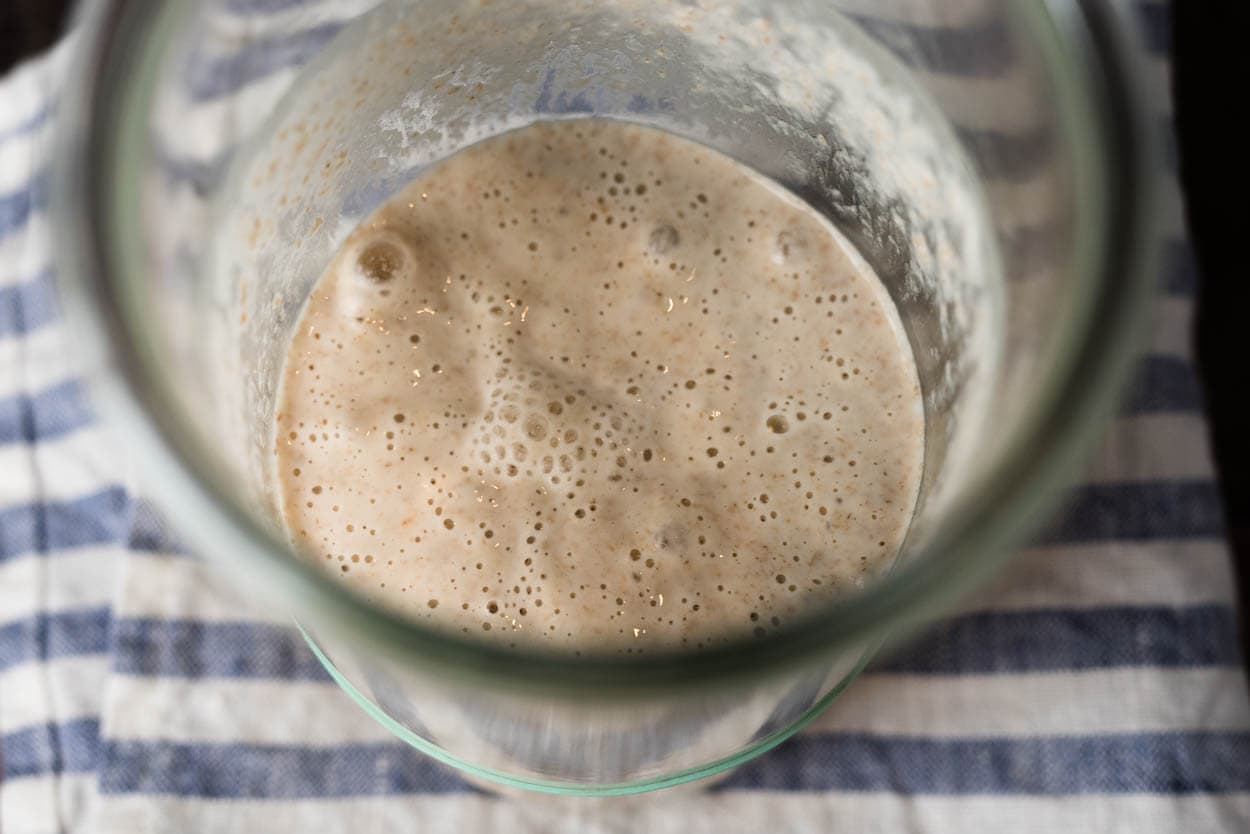
7:00 a.m.
Even more collapse and more small bubbles. At this point, the aroma was very acidic, vinegary, and quite strong.
8:00 a.m.
My final timeline entry shows just how far my starter has fallen after almost 24 hours. The acidity will continue to rise, and if left for even longer, a clear liquid will form on the top (commonly referred to as “hooch”) that will be alcoholic and bitter tasting. Your starter might also look this way if you’ve left it for a long period in the fridge in “hibernation,” as I like to call it. When reviving a starter in this condition, I will pour off the clear liquid, mix the remaining, and refresh as usual.
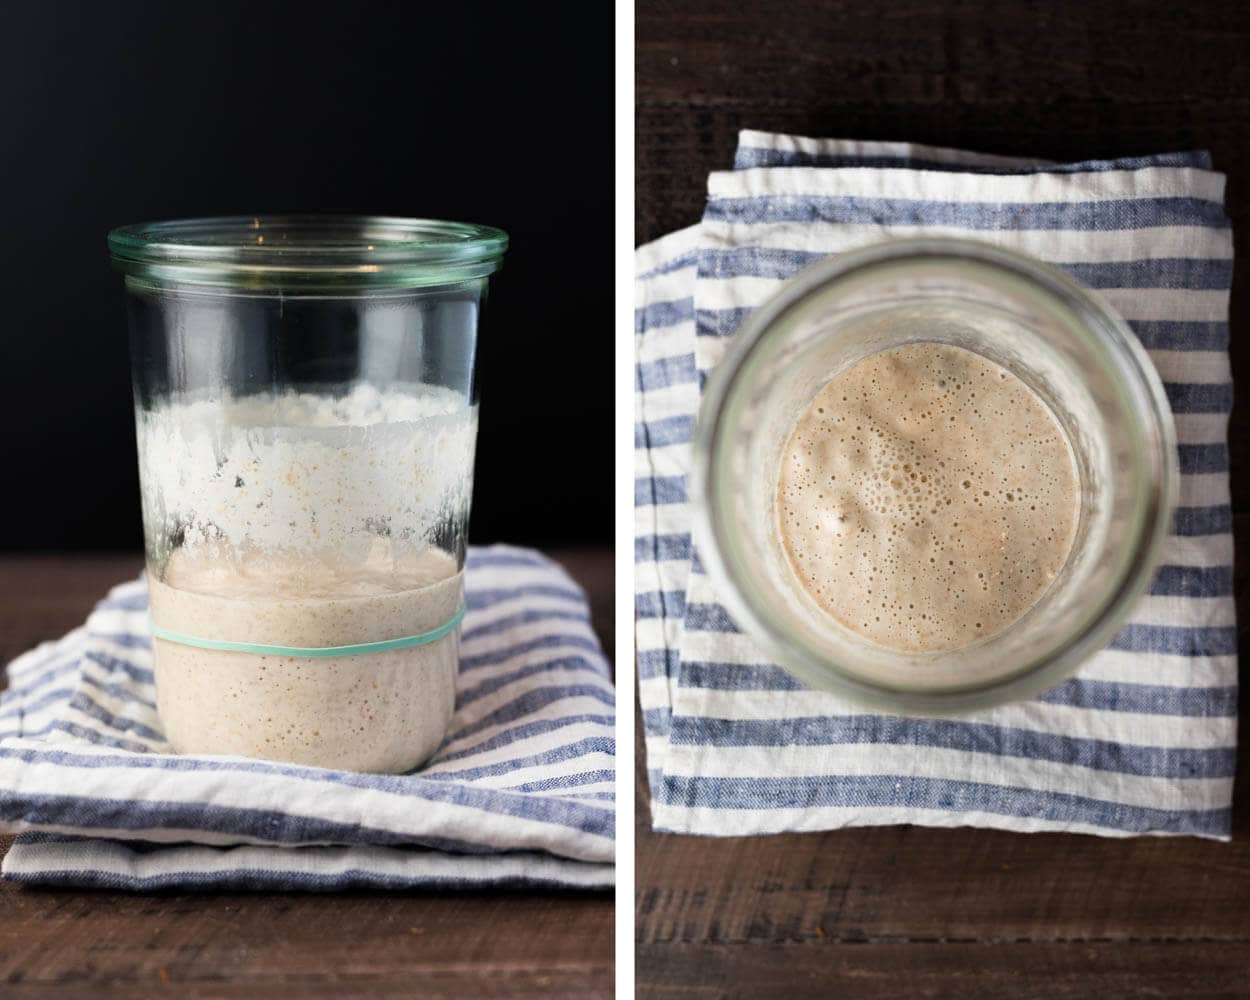
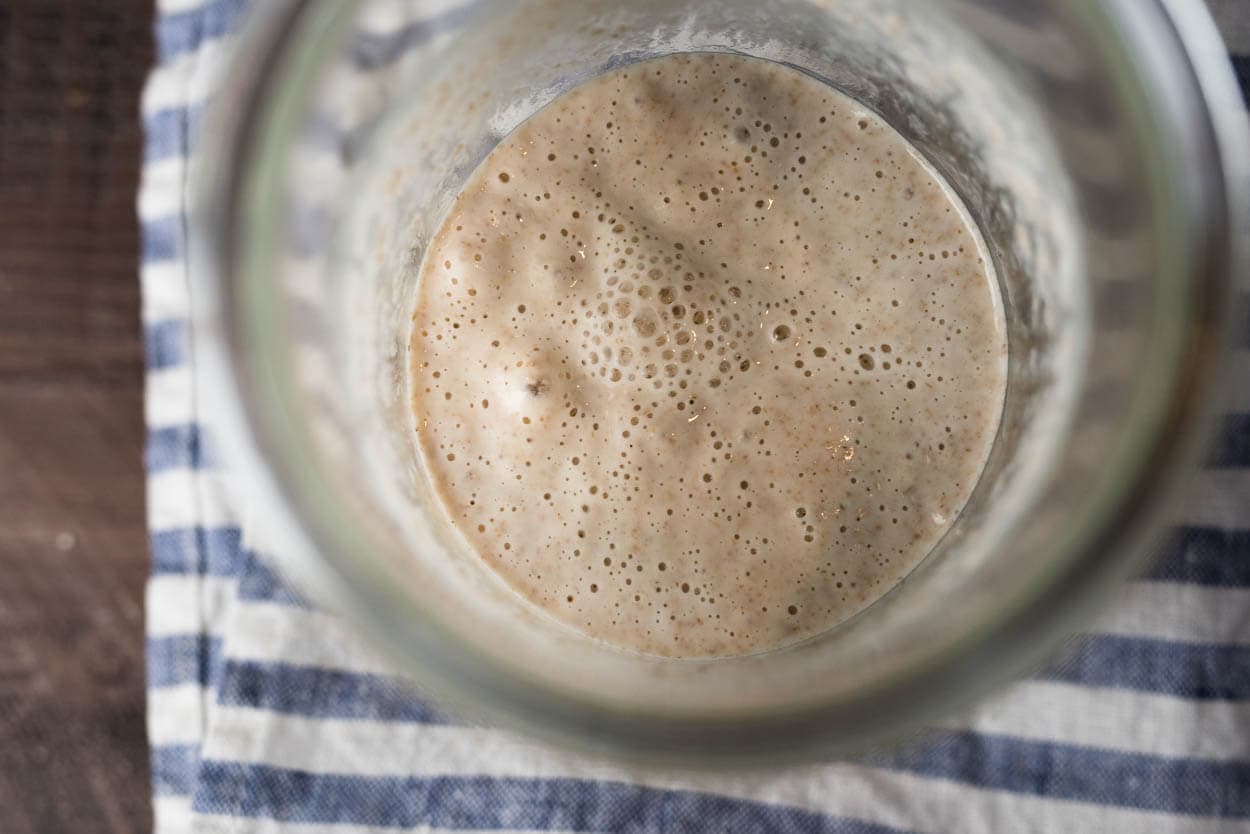
There have been times when my kitchen heated up unexpectedly, or I couldn’t get home before this had happened, and I mixed up my starter per usual, and it was just fine, but I try to avoid this scenario as much as possible.
Don’t panic if you forget to refresh your starter for a day or two! It will be just fine with a few timely refreshments and some attention.
General Sourdough Starter Maintenance Tips
See my sourdough starter frequently asked questions post for a long list of common issues, but here are a few tips that will prove helpful:
- Don’t let your starter collapse and sit for extended periods as excessive acidity will change the flavor of your resulting bread (sourer). If it’s a levain, not your starter, and it’s fermented much too fast for your schedule, you can always make an intermediate build (essentially discard and add new flour and water) and use the new build to mix
- Use your nose. Observe the aroma of your starter at each phase and get to know what a particular aroma indicates by drawing a connection between aroma and visual cues
- If your area has high chlorine levels in the water, use filtered (or distilled) water or let the water sit out on the counter overnight in a water bottle before using
- Stir your starter thoroughly until there are no clumps or dry bits of flour present
Above all, take a few seconds each time you refresh your starter to sit back and assess how things look, smell, and even taste (I don’t typically taste my starter, but many bakers do). Through constant observation and attention to small details, we can maximize fermentation in our sourdough starter maintenance routine.
Sourdough Starter Maintenance Tools
It’s funny how small tools make a huge impact when compounded over multiple times a day for every day of the year. I recently changed my stirring apparatus from an old Pyrex spatula to this newer Oxo spatula, and wow… So much wasted time cleaning that old multi-piece thing. This Oxo one is covered with silicone at the top with no seams or joints, it’s very sturdy (which helps act as a firm mixer), and you can also toss it into the dishwasher. Highly recommended.
Aside from the new spatula, I still use the same Weck jars, dark rye flour, and all-purpose flour. Head to my tools page if you’d like to see more of the tools I use for my sourdough starter maintenance.
Sourdough Starter Maintenance Wrap Up
There you have it, a day in the life of my starter and my sourdough starter maintenance routine. I hope this visual guide has helped convey the visual cues and aromas I look for at various points through the microevolution of my starter. The same signs shown above are also present when I build a levain when making bread.
Remember the methods we have to impact the fermentation rate: temperature of the water, inoculation percentage (amount of ripe starter left in the jar), flour selection (whole grain flours increase fermentation), and ambient temperature. If your starter is sluggish, increase these to speed things up or decrease them to slow things down. After a few days of experimentation, you’ll discover the right mix of each for your unique starter.
Now that your starter is on a regular maintenance schedule, don’t forget you can use the daily starter discard in many delicious things in the kitchen! Buon appetite!
For more sourdough starter guides, check out my sourdough starter guide roundup.


699 Comments
You’re very welcome and I’m really glad everything is working out for you!
You do not need to modify your starter if you don’t want to. As long as you have a healthy starter that’s rising and falling with good activity there’s no need to change a single thing if it’s making the bread you’re after. Bakers maintain stiff and liquid starters just the same and it’s really personal preference on which you like to maintain.
The one thing you need to adjust when using a stiff or liquid starter is the hydration of your final dough mix. Because a stiff starter by nature has less water you might have to add more water to your mix if the recipe calls for a more liquid starter (e.g. 65% hydration stiff starter, vs. 100% hydration liquid starter).
Hope that helps and thanks for the message!
Just to be clear, with your maintenance routine you feed your starter twice and day, once at 10am and again at 10pm? And if your making a levain the night before you bake, it’s at a prefect fermentation to be used in the evening? Thanks
That’s correct. However, that’s what works for me here, in my kitchen with my set of environmental inputs. You can start with this schedule but ultimately you’ll have to learn to read the signs (described above) to adjust your starter feeding schedule or so you can adjust the inputs and change the response by your starter.
I hope that makes sense. Really the key to maintaining a healthy and vigorous starter is to be observant and watch how its doing in your environment, then you adjust feed times, temperatures and quantities to suit your schedule.
I’ve never baked in my life, and I have a brand new starter. I began the process on 17 August 2016, using only whole wheat flour. So far it’s not really rising at all, but it’s got a decent amount of small bubbles, it gets a bit foamy, and forms hooch.
What I don’t understand is what to do with feedings when my starter isn’t rising. Say I started with 250 g starter; 250 g flour; 250 g water. If this doesn’t rise, should I still discard a lot of it prior to feeding (using the same equal weights throughout)?
I really want this to work, but I’ll freely admit I find it confusing. Any feedback is greatly appreciated!
Thanks,
Phil
Phil,
Have you had a look at my process for creating a new sourdough starter? I outline what to in the beginning days of your sourdough starter, how to feed it, and how to create the right conditions for it to grow.
You typically want to discard from your culture on a schedule, and when activity starts to increase more and more, you’ll discard more often.
Check out my guide at the link above and then let me know if you have any more questions! You can message me here or send me an email through the “Contact” link at the top of my website.
Hope that helps!
Hi, Maurizio.
Thanks for your response. Yes, I had checked out this post and found it very much worth reading, though I had already followed what seems like a slightly different method that I learned prior to coming across your site. Since I initially posted here, my whole wheat starter had two great days of doubling in size, but now it’s barely rising at all – which, according to your site, is normal. That’s good to hear.
Would you ever feed a starter without discarding anything? Or would you deem discarding a necessary component of the feeding process?
Thanks again!
I always discard when I feed. I could see the benefit to sometimes not doing that, especially if you don’t see any activity at all, but I’ve found following the schedule I posted in my 7 steps article to work out every single time for me.
When your starter is up and running you definitely want to discard a portion when you feed otherwise your culture will become more and more acidic over time.
Hi – wery good blog – thank you.
Discarding 80% of the starter every time seems a lot of waste? What are you using the discarded part for? Do you simply throw it out as waste in the process?
Thank you
Thanks, appreciate that! I actually use the discard in many other things here in my kitchen (cookies, cakes, pancakes, waffles, etc.). Have a look at my top 3 recipes for leftover sourdough starter for some ideas!
Thankyou – very nice ideas.
What do you think about starter with 125% hydration?
Hydration is really a relative thing, it depends on the flour you’re using. You can really do any hydration you want (within reason) and things will work just fine, but also 125% hydration for your flour might work just fine but for me it might be too wet and sloppy. I like to keep mine at the consistency shown here in my post, but I could go up or down and things would work out just fine.
Hope that helps!
Wow- these pictures were so useful for understanding the various stages a levain goes through! I would like understand why there is a process of “building strength” after the chef is removed from the fridge (where I keep mine) Why can’t one remove it in the morning, feed it that night and bake with it the next morning? What changes when you spend an extra day feeding it?
Thank you!
Thanks! You could definitely do that, but at least in my experience, I’ve noticed I need at least a few feedings (usually for me I’ll take it out at night to let it come up to temperature, feed before bed, then do one day of two feedings, and then it’s ready the next day) to get back up to its usual speed and strength. You want to observe it rising and falling with some predictability before using it to bake otherwise I’ve found it’s just not strong enough to fully leaven your bread. You could use it, and I’m sure your bread would turn out fine, but I’ve noticed the best results when I get my starter back to its regular rising & falling after sleeping in the fridge.
I’m sure there’s a deeper scientific analysis in here (e.g. it’s possible the number of yeast/bacteria have dwindled in the fridge, especially as your culture becomes more and more acidic as it ferments without refreshment) but I’ve only read scattered material on this and mostly go by empirical results. That extra day of feeding seems to help build up these populations and get things running faster.
I hope that helps!
Makes sense. Thanks! Also, not sure if you address this somewhere, but what do you with your chef when you go away? I have a 10 day trip next week…
I’ve mentioned it here and there but nowhere specific. I will feed about 20% of my mature starter with 100g flour and 95g water (a little drier than usual), stir it up really well and let it sit on the counter for 30 minutes. Then, pop it into the fridge and it’ll stay in there for a good while, up to 2-3 weeks. I’ve done 2.5 weeks without issue.
You might also want to write on the jar “do not throw away” in case someone at the house thinks it’s “gone bad”. Hope that helps!
Thanks. When you say 20% starter, how much is that by weight please? Do you mean 20 gms?
Thanks again
It’s 20% of the flour weight (using baker’s percentages), so if you feed with 100g of fresh flour then you use 20g starter.
Hi Maurizio, I’m new to this, and made my first loaf of wild yeast whole wheat bread this weekend. It turned out ok (but I’ll keep at it!). I have a question for which I can’t readily find an answer. I have my starter on the counter right now, as I’m preparing my second loaf of bread. I will be returning it to the fridge today and am wondering if I feed it before I put it back in there, or do I just return it (it’s currently at it’s peak fermentation rise)?
Sorry for the late reply, I’ve been out on travel!
Yes, definitely feed your starter before placing it into the fridge. You want it to have plenty of food to consume during its stay in there, even though activity is reduced it will still require fresh flour/water as fermentation slows but doesn’t stop.
I like to feed my starter when it’s at its peak, wait 30 or so minutes and then toss it into the fridge.
Hope that helps and happy baking!
So what happens if I forgot to feed it before putting it in the fridge… ? Thanks!
If you didn’t feed it then take it out next opportunity, let it warm to room temperature and feed it, then wait 30 minutes or 1 hour and place in the fridge. Your starter needs fresh water and flour while “resting” in the fridge!
Ivan — sure thing. I feed so often I kind of am able to eyeball it when it comes to leaving 20g in the jar. I use my Oxo silicone spatula to clean the sides of the jar as well as I can (the flat side of that thing really helps with this) and then I’ll take a paper towel to clean the top of the jar. I’m usually left with around 19-22g in the jar, which is sufficiently accurate for my feedings. I use the same jar each time and I change it out every 2 weeks or so if it gets really dirty.
You’re right though, 20g isn’t a lot, which is what I want! Hope that helps, let me know if you have any more Q’s.
Ciao Maurizio, I’m new to all this and only in the building of the starter phase (although I did give my first loaf a go this week). I am a little confused now as in your post of building your starter you say you leave 40g of starter behind at each feeding and then feed with 40g flour and 40g water. So is it 20g or 40g? Also, if one were to bake regularly like you do, you are feeding your starter 3x per day and using the part you are discarding for the levian. Right? Will there always be enough in the jar leaving 40g behind then feeding with 40g flour and 40g water to create a levian? I am in Perth Australia and right now it is really hot (Between 25 and 38 degrees C), my starter is moving really fast, and the first wholewheat loaf I tried this week was ok, but too sour for my liking, this means I reduce the amount of starter I carry over at the feed or is it ready to go once that starter rises and then starts to fall like yours, which for me was around day 2 or 3? Thank you for this wonderfully informative blog and all your patience..,I have noticed there are a lot of questions being asked that you have already addressed in other posts, but I guess all us newbies are looking for clarification that we are on the right track. Thank you again for your patience.
The amount you leave in the jar at each feeding will change, mostly do to the weather (if it’s cold you’ll need to leave more, if it’s warm you can leave less). The more you leave in the jar the faster your culture will reach its “peak” and need refreshing. So, you can do 20g or 40g or anywhere in between or above. There’s no set level, really, it’s up to you and your schedule. Since it’s very hot in your area right now you might want to only leave 10-20g in your jar at each feeding. Try this next time, you’ll notice it takes several hours more before your starter peaks and needs refreshment. You can use this to adjust the timing to suit your schedule.
I feed my starter 2x a day regularly and it’s how I describe up in this post. In the summer I might feed less if it’s very hot here and in the winter it might be at, or a little over, 20g. I hope this makes sense!
I’m glad to help, let me know if you have any more questions — happy baking!
Thank you for your reply. I have been leaving behind 20g and feeding 20/20 flour and water. It it happy and active and I appear to have enough to build a levian (I am on to my second loaf which is currently proofing in the fridge). Thanks again for your wonderfully informative and beautiful blog.
You’re very welcome Edwina, have fun!
Hi Maurizio,
A while back I asked questions regarding baking sour dough starter and bread. I finally had much success for several loaves. But here is what happened. I kept my starter in my living room where the wood burning stove was keeping the room at a consistent 78 degrees, I live in Canada so room temp in other parts of the house hovers around 68. But now it is early spring, too warm to put the woodstove on but still too cold at room temp. So I switched to keeping my starter, levain and bulk fermentation in my oven with the light on and door open a crack with much success.. However one day I forgot my starter was in there and turned on the oven and baked it. So I began all over from the beginning. But now its forming a few bubbles and smelling sour (day 4) but its not rising and is not thickening up.. Could it be now that spring is here with rain that the level of humidity has risen and is causing this? If not, what could be the problem? Its so disappointing since I had such nice bread before. By the way, I was following the Tartine Bread sourdough recipe plus your added tips> Should I do 25% rye and 75% AP instead?
Ah so sorry to hear that Sharon! You should definitely use some rye flour to feed your mixture when creating your starter, it will help get things moving. If you haven’t seen my guide at my site here on starting a culture it will definitely help get you started (see the pictures at the top of this page for a link). Keep feeding and discarding per the schedule and it will eventually take hold! Lots of humidity can make things difficult but it will eventually work out just fine. Keep me posted!
Hi Maurizio
I actually read that on your page and began adding 25% rye with 75% mix ap/ivory wheat and it has started to rise. Thankyou for that. Do I use the rye this way each time I discard, throughout the whole starter process?
I always use rye to feed my starter, yes. Once your starter is strong and rising/falling predictably you can change your flour to whatever suits you (schedule, flavor, and what’s on hand), just keep in mind that whole grain flour ferments faster so keep an eye on it when you change!
Thanks Maurizio, my starter has totally picked up and is fermenting so nicely now. Thanks again for getting back to me. On a side note. A while back I splurged on a Lodge dual cast iron dutch oven and that too has made all the difference. I love when Im at the halfway mark and can remove the lid to see how well its rising and if its forming ears. Its like opening a present on Christmas morning, almost every time.
Fantastic, that’s awesome to hear! I love my Lodge DO, it’s amazing (for more things than just bread as well, try French toast in there) and I use it somewhat often, especially if my dough is very wet. And yes, opening that lid… Smile every time 🙂 Happy baking!
Quick question, do you only feed your starter once after taking it out of the fridge? You mentioned that at 11pm you would normally feed it, would you discard half of you starter at that point or feed it equal part water and flour depending on how much starter you have in the jar, so measure it first and then add equal parts flour/water. What I am asking for the second feeding do you discard or not, and if not do you measure out all the starter and than give it that much flour/water.
If my starter has been in the fridge for some time, I’ll usually take it out and do feedings, before my next bake, over the course of 1-2 days on the counter until it gets back up to full strength. You always discard at every feeding. When I see my starter is at its peak, or a little thereafter, I’ll discard all but 20g of it, add 100g water and 100g flour (that’s “feeding” or “refreshing”) and wait until the next time it needs food.
Thank you so much for the reply. Why do you use so little starter 20 g. to 100 g. water + 100 g flour, what is the reasoning here, I am just curious as everyone else seems to say equal parts starter to equal parts water/flour. This blog is absolutely wonderful.
Thank you! I use so little because in my environment, and for my schedule, I want my starter to mature in 12 hours. 20% at feed time is perfect for that right now with the temperatures in my kitchen (when it’s winter I might go to 25g or 30g and when it’s summer I might go down to 10 or 15%). The more you carryover the faster your starter will “peak” as I described above, and need food — and vice versa.
Ah that makes total sense, I think I was just so focused on the equal parts I didn’t think about the actual role of the starter or what its’ doing. Thank you for spelling it out for me, now that I know the amount of starter dictates the peak time I can work on actually making a baking schedule and not just worry about the starter.
Do you have any suggestions for maintianing a starter when you aren’t feeding it everyday. i have been keeping mine in the fridge but am struggling to keep the life in it that it had when i first got the starter from my friend who makes sourdough everyday, So naturally is feeding it everyday.
Your starter will definitely not show the same strength when kept in the fridge as it does when it’s fed regularly on the counter, but that doesn’t mean you can’t use the fridge! If I’m going to refrigerate my starter for up to 2-3 weeks, I’ll use 20g mature starter to 100g flour to 85-90g water. This will mix up to be a little more firm than usual, which I find is good in the fridge. Let it ferment for 30 minutes or so, then pop it into the fridge. When you take it out (and kept around 72-78ºF room temperature) feed it 2x a day for 1-2 days before you bake with it, you’ll have built its strength back up and it should be quite active at that point.
Make sure when you plan to place your starter in the fridge, and make the mixture, use 20g of very mature starter (right before, or right after, it starts to fall as described above). You want maximal bacteria/yeast numbers.
I hope that helps!
Hi Maurizio,
I am currently using 40g starter to 40g flour to 40g water from your other post. If i am going to keep it in the fridge should I adjust to what you suggest above, 20g starter to 100g flour to 85-90g water? Also how would I know if it need to be fed again? When I am ready to bake should I go back to the 40g feeding or 20g feed?
Thanks for the wonderful and detailed instructions!
I actually just had mine in the fridge for a while and that’s exactly what I did (20g starter, 100g flour, 90g water) — works very well every time! Just let it sit out for about 30m – 1 hour after feeding and then toss it into the fridge.
I would recommend feeding it every week or two weeks. It’s hard to tell visually when it’s time to feed if it’s stored in the fridge.
When you want to bake you can return back to whatever feeding schedule works for you, your environment and your starter.
You’re very welcome — happy baking!
Hi Maurizio,
I’ve had my starter for about a month now but I haven’t been treating it as well as I should have (it seemed fine though) so I decided that I wanted to get it extra healthy, I went out and bought some rye flour and for the past few days I have been feeding it with 20g wholegrain rye + 20g plain Spelt. It smells really nice and gets some bubbles BUT it doesn’t rise at all. A couple things that I should add are 1. The Rye flour is freshly milled (on the day I started feeding my starter with it) and quite chunky. 2. Before I started this new feeding, it was being fed with wholegrain spelt and was left on the table for a few days without being fed =/ 3. I feed it with 35g of water and the temperature at the moment varies between 23-30 Celsius. Do you have any advice? Should I go back to feeding it with the wholegrain spelt (it was doubling in size but your’s seems to almost triple)? Should I try grinding the rye a bit finer?
Mia — You won’t see as much rise in your starter the higher the percentage of rye you use (especially as you get to 50%+). With the temperatures you’re seeing in your area, you should probably try to feed your starter at least once a day with enough flour and water to make it until the next feeding without turning incredibly wet/soupy and smelling very acidity/sour. 40-50g of flour, especially with that much rye and/or whole grains, will probably not make it 1 day! If you can’t feed it every day then I do recommend using the fridge (as you mentioned in the comment to Emiley), or at least try to find a cooler spot in your house and give it some more flour and water to use. The key is to try to not let it get overly acidic by sitting without a refreshment.
Nothing wrong with using rye flour. Just remember you won’t see quite as much rise as you go higher with the percentage and it will ferment faster. I’ve never used fresh milled rye to feed, but that should be fine. I’d try to mill it as fine as the spelt flour you use.
Hope that helps!
Thank you! Your advice has helped a lot!
I only bake once a week. Can I feed just once a week maybe a couple times the day before baking? Otherwise I’m wasting a ton of flour – by discarding so much starter before each feeding. I can’t get Into a rhythm of feeding my starter and not break the bank from all the waste. Help. Emiley
You can keep your starter in the fridge and only take it out 1-2 days before you bake your bread so that you can bring it back to life. Feed it as normal, use it to bake your bread, then put it back in the fridge. You could probably even work out how much of the starter you’ll need for your bread and just feed it that amount so that you are still “discarding” your starter but not actually wasting any.
Exactly what Mia said! Keep your starter in the fridge when you’re not baking and take it out a day or two beforehand — works really well 🙂
Hi Murizio, I am new, and after a week my all-purpose white flour starter is still soupy and not stiff. Is it mature? Can I bake with it? how do I make it stiff? Thanks.
It’s ok if your starter is not stiff, that doesn’t mean it wont work well it just means the hydration of your starter is higher, or the flour you’re using isn’t able to absorb quite as much water as the one I use. If you’d like to make it more stiff just use less water next time you feed.
You can bake with it when it rises and falls predictably after feeding it. That rising and falling routine is what you want, that shows you fermentation is happening on a regular schedule and your starter should be strong enough at that point to bake with.
Hi Maurizio. Thanks for an excellent article.
I am new to sourdough and I have some doubts about the procedure to maintain my starter.
I have made a starter from scratch that after 5 or 6 days growing I put in the fridge. Its been like that for a week now and I haven’t fed it since then.
I would like to make my first loaf in the following days and I would like to know what to do next. Unfortunately I don’t have a scale so I can’t measure the 20g of mature starter you said was necessary to start feeding it. Is there any way you can tell me, in terms of volume, how much 20g is exactly?
Also, should I discard the rest of the starter?
Thanks in advance!
Glad it’s helping!
I can only approximate the volume, but somewhere around 1-2 TBSP should be about 20g. Total estimate on my part, I tend to weigh everything.
Yes, discard the rest. Take the 20g of starter, put in a new, clean jar if you’d like, and feed with flour & water. Stir well and that’s it.
Hope that helps & happy baking, Delfina!
What do I do with a Levain that is over fermented , and sinks to the bottom of a float test ? Frea
Sent you a reply in my other post!
hello Mauriziu. As I see, you are following an exact amount of starter when feeding it every day (20 gr in that case). Is it important to be presistant with the amount of the starter when feeding on days when you are not pretending to bake with it? I thought that it is important to messure the amount of starter only when feeding it before baking and in any other day, just discard around half and feed it. thank you!!!
Your starter will adapt and change based on how much you feed it, the temperatures it’s kept at and the frequency you feed it (along with flour, hydration, etc.). So yes, that is an important thing! Consistency is really important to get a strong and stable starter, but seasonal fluctuations are fine. For example, in the winter I’ll typically carryover a bit more of my starter (say 30g) because cold temps slow things down and a higher starting population helps give fermentation an added bump.
Hi Mauriziu. First, Thank you so much for your time and help. those details are probably one of the main risons of having your loaf a spetacular one, rathen than just nice..
so.. If i understood well, .. (My starter is half a.p.f. half whwh 100 percent hidratation) you would than recommand feeding it regularly like that: 20 OR 30gr of starter+ 50 GR WPF+50 WHWH FLOUR+100 WATER,
Is it ok to maintain a starter feeding it just once a day?
Thank you so much!
That ratio of flour will work just fine, but it might ferment rather quickly give the high amount of whole wheat flour (50%). If you wanted to feed your starter one time per day that might move too fast, depending on the temperature you keep your starter at. The best advice I can give there is to just try it, and see how your starter responds and if it ferments too quickly reduce the amount of whole wheat flour.
It’s fine to feed once a day!
Hope that helps 🙂
That helps alot. I REALLY thank you. The site is amazing. Thank you!!!
You’re welcome 🙂 Happy baking!
Thank you for this very helpful article. I’m just starting out and have managed to get a starter going with 100% ww. The weather here has been changing rapidly and I’ve tried to up the feedings and food to go with the temp, but I’ve still ended up with an overly stinky starter. The visuals you provide are exactly what I need to know when to feed it.
You’re quite welcome JH, glad this is here when you need it! It sounds like you’re adjusting things based on the temperature, which is a good thing — that intuitiveness is a really important skill when successfully managing your starter.
Hi having just been given a great starter, but only needing to bake once a week, can I leave the mother covered in the frig, until I want to bake, then bring to room temp, feed it , allow it to ripen then , make my levain, and leave that to ripen till I mix it with other bread ingredients and the mother goes back into the frig.
Is that the correct procedure ? Thanks Fra
Freke, yes that is a good method. However, I’d recommend taking out your starter one to two days before you plan to take some and make your levain. You want a few refreshments (feedings) to help get it back up to full strength after taking it out of the fridge. When you’re done using it for baking, give it a normal feeding, let it sit out for about 30 min, and then into the fridge it goes. Hope that helps!
Hi again, after 4 days in the frig , covered and fed , my “mother” had a layer of “hooch” which I poured off.
Planning to bake in 2 days I brought it to room temp, fed it 100g White flour and 120 water.
Will feed again tomorrow and then at max rise will remove a quantity (how much .) to create my levain.
My question is, how can I hibernate my “mother” safely and for how long, and then what is the correct procedure for restoring it.
Thanks. Frea
To refrigerate your starter do a normal feeding, let it sit out on the counter for about 30 minutes, cover and place it into the fridge. The 30 minutes gives it a little time to get fermenting, but not enough to fully exhaust the food you’ve just given it (far from it).
When you take out your starter to bake, take it out a few days before and give it a few feedings until it looks (and smells) like it’s back to full strength. I like to do this for 3-4 feedings over the course of 2 days.
I hope that helps, happy baing Frea!
Hi Maurizio! As a newbie sourdough baker, i am so awed and inspired by your gorgeous bread photos. Thank you for this informative blog 🙂
I have a couple of questions about my levain and i hope you can enlighten me: I inherited a rye starter and have baked a few boules using 100% hydration levain. It was a rather stiff levain as i weighed out to all equal parts starter, flour and water. Perhaps due to the high humidity (about 70%) and warm room temperature (28 to 30 deg cel) here in the tropics (South East Asia!), the rise and fall from the second feeding is quite fast- within 2 hours for the rise and half an hour for the fall.
1. Do i start mixing in the dough when it is at its peak or is it okay to mix when it’s settled down? I tried the float test but the bulk of it floats while some bits will trail down and sink.
2. I’m not sure if the levain has been too weak to give the bread a higher oven spring and/ or the nice big open crumb like yours (probably due to my 70- 72% hydration dough?).
Taste-wise, it has been great and while the crumb is not so open, it is still soft and slightly chewy, so i think it’s not too bad so far!
Thank you 🙂
Hello, Joanna! Thanks so much, I really appreciate that.
1. Ideally it’s best to feed right when it’s at its peak, or a little thereafter. It’s ok if it’s fallen completely but it can become quite acidic at that point. I like to target just after it’s started to fall from its peak. If your starter/levain is 100% rye then you will have a hard time ever passing the float test. That test really only works with white flour and some whole wheat. Also, the stiffer your starter the less reliable that test becomes as well. It’s a good starting out benchmark but it doesnt work in every situation!
2. If your starter is rising and falling predictably then it’s surely strong enough to leaven your dough. There are a lot of factors that go into an open crumb like my bread above (flour is important also!). Lower hydration bread can definitely have an open crumb as well.
Keep practicing at making this and stay observant to how your dough looks, feels and smells throughout the process. Try to keep as many things consistent from bake-to-bake as possible and change only one thing at a time to see how it impacts your end result. And taste is definitely the most important thing, sounds like you’re doing great there!
I hope that helps, happy baking Joanna!
Hello Maurizio!
I wanted to drop in a note of thanks–a friend gave me some discard a few months ago and I’ve been baking ever since, gradually producing nicer and nicer loaves. Your blog has been so key to this process, and also particularly nice eye candy. I’ve also been making your waffle recipe quite a bit! (Nom.) I’ve recommended your blog to a lot of friends as well.
I look longingly at all the holes–oh the holes!–in your loaves, but even if I had already gotten my loaves that beautifully open, my housemate and boyfriend both prefer a more closed crumb, as they don’t like having mayo, butter, or jam fall through. *sigh* I’d like to get the loaves that way when I want to, though! My kitchen is a bit cold, and my oven a bit warm with the light bulb on, so I’ve yet to find the perfect medium. (The oven with the light on is better if I leave the door cracked open.)
Still, even not-quite-up-to-par sourdough is better than store-bought by a long chalk. I’m from SF, and it gives me such a lovely shot of the taste of growing up in the land of sourdough. And I’m having so much fun!
So thank you, I want you to know that the effort you go to sharing your own baking is so appreciated!
Thanks for the kind words and I’m glad my site has been helping you! That’s so awesome for me to hear 🙂
I have a similar problem: my wife much prefers bread that is able to hold onto everything put on it, especially butter. I try to bake one for her and my son, and one for me 🙂 Really though I’m always striving for an open crumb that is uniformly open, and that’s a difficult task.
I wholeheartedly agree, homemade bread is actually pretty easy to make and it’s so worth it, not only health reasons but TASTE! It’s leagues apart from the bagged sawdust you get at the store.
Thanks again for the note, I really appreciate that — happy baking!
BTW, Maurizio, I forgot to mention: thanks to your blog, when I saw Central Milling organic flour at Costco, I knew to purchase it at $15 for 20 pounds. 🙂 So thank you for that too!
Lucky! I WISH I could get their stuff at Costco here, I’ve never seen it. You’re welcome, enjoy 🙂
You might want to double check. I only recently noticed it!
Great article. I’m not sure if you’re responding to comments anymore, but I’m curious what you would think about a feeding schedule at a pizzeria with lunch and dinner service (i.e. lunch and dinner dough mixing for the following day). It seems you’re doing a feeding ratio of 1/5/5, one part starter, five parts flour and five parts water. It seems that sort of feeding would work well, assuming a similar ambient temperature, for a place that leaves the starter without feeding overnight and uses it for mixing the next morning. Do you agree?
Thanks! Definitely still responding to comments 🙂
I think my schedule above, with 1/5/5 will work for you if you if you plan to mix in the AM. I typically build a levain and let it ripen for about 5 hours before I mix (i.e. feed starter at night around 10pm, in the AM build levain and 5 hours later mix dough), but you could build your levain at night when you feed your starter, and using a lower inoculation percentage (instead of my 50% listed in my other recipes use about 20%) have your levain ready in the AM for your mix. Then work with your dough all morning, afternoon and then into the fridge for baking the next morning. Repeat.
Hope that helps! Your starter is a very flexible thing, it’ll work around your schedule if you feed it more/less and temperatures are workable.
Hi Maurizio,
Thank you so much for this detailed post and beautiful photos! After getting my starter up and going as a 50/50 blend of Rye and AP, I switched it to a 25/75 (rye/AP) at 100% hydration, and am feeding it in the amounts you have listed here every 12 hours. It is now about 25 days old and is doing great. It is very vigorous, tripling within ~12 hours, and looks just like your photos (although takes a little longer to peak due to ambient temp of about 69). My question now is how can I lengthen my feeding times without compromising the starter? I bake 2-4 x/week, and am very hesitant to refrigerate the starter, but am finding the twice daily feedings may not always be possible for me. Any suggestions? Will a ‘stiffer’ starter help? Also, I don’t typically “build” a levain. I simply take what I need from my starter jar, 8-12 hours after feeding, and use it directly.
You’re very welcome, thanks for the comments! It sounds like your starter is performing very well indeed — that’s great. You can do a few things to lengthen the time between feedings. I like to feed my starter at least once a day, and that is really the max you can stretch it out without refrigerating it. If you want to try and stretch it out without the fridge, try carrying over a very small amount of starter when you feed, say 5%. Some other things you can try: feed with cooler water and you can keep it in a cooler area in your kitchen. A stiffer starter should slow things down but I still find you need/should feed at about the same frequency.
If you’d like to keep it in the fridge that will work as well. Just feed with less water, let sit on the counter for 30 minutes or so, then pop into the fridge. Take it out a few days before you want to bake and ramp it back up to 2x a day feedings.
I hope that helps — happy baking!
I see you feed only a small amount, 20g starter, with 100g flour and 100g water. I feed 150g Starter with 150g Flour and 130g Water.
I feed mine in the mornings at about 11am so that I can use it at 10pm.
It all depends on the ambient temperature your starter is kept at. If it’s a bit colder where you are then using this much inoculation works really well. It also depends on the type of bread you’re baking and how much acidity you’re looking for. There’s no right or wrong way, that’s for sure!
Excellent, that’s great news! You’re very welcome, you’ll have some great bread in no time!
hi! I left the starter in the oven with the light on and the change was amazing. Also, I held some of the water back like you suggested. What a difference. It was really frustrating for me because I’ve made sourdough breads so many times in the past, but couldn’t get my culture going this time. Thank you for this blog and for all your work.
hi, I’ve been trying to make this starter but I’m having problems with it. It’s been 8 days and there are plenty of bubbles on top, it smells and tastes sour-not like vinegar but more like yogurt. The only problem is that there are barely any signs of the starter rising at all. I’m not sure what is wrong or why it won’t rise. The kitchen is pretty cool around 60F. Maybe that is the problem? I checked the temperature of the starter this morning and it was at 65F. What are your thoughts? could there be anything else wrong besides this?
Sounds like you have good activity so that’s a great sign. It could be a number of things, but first I’d say perhaps the hydration of your starter is too high? By hydration I’m referring to the percentage of water you use to feed your starter related to the percentage of flour. I tend use maintain a 100% hydration starter so I feed 100g water to 100g flour to 20-30g mature starter. The higher the water the more “soupy” it will become and could even go too far where you won’t see much rise.
65F is very chilly for your starter, this will slow things down significantly. I try to maintain mine somewhere between 72-75F. Do you have a warm spot in your kitchen you can place your starter for a few days to see if you get more rise out of it? I am sure this will fix your issue!
Hi Maurizio. I’ve been working on 3 separate starters because I have different instructions from various sources. I’m focusing mostly on getting 100% rye started. According to one source she recommends 60g of rye flour and 120g lukewarm water at 103 degrees. I found it to be very soupy and questioned it. After a few days of no activity I stirred it and drained the excess water. This brought it slightly alive. That evening I added a couple of tbsp flour and stirred it in. More activity. Last night it was time to feed it but instead of her instruction of 200% hydration I added 60g water and 80g flour. I know this sounds experimental but it doubled in size yesterday and is smelling quite sweet. Do you have any suggestions regarding feeding measurements at this time? Will it eventually make good levain still? I’m beginning to understand this rise and fall process and feeding it while it is sweet and young but do I build the levain when it is still sweet and slightly sour? I think this is what you are saying. Is the only true proof that it is ready is when I place a blob of it into water and it floats? What if it doesn’t float? I’m reading everything on your site and this blog and I’m sorry if I am repeating questions you have answered. I’m a bit slow on the intake. hahah
Hi, Sharon. Sure, keep feeding it, there really is no “right” way to get things going, only tips and suggestions to help speed up or slow down the process. I find, as many others, rye flour is pretty bulletproof — you’ll get a starter up and running eventually. If you have activity then you’re off to a good start, it’s probably already rising and falling by the time I write this. I like to feed with 100g flour and 100g water. This is a 100% hydration starter and adding more water just makes things soupy like you mentioned. If you find it hard to stir your starter you can definitely add more water, I like to go only up to 110% if it has been really dry out here (I live in New Mexico: desert). I’d also like to mention that I prefer t do a mix of rye and wheat (white flour) as rye flour ferments at quite a rapid pace and I aim to feed my starter 2x a day. I typically do 80g white flour and 20g rye flour.
As long as you have a predicable rise and fall with your starter it will perform well in making your levain, and eventually, bread.
You want to build your levain when your starter is mature, not “young” or sweet smelling. It should just begin to smell acidic, but not be overly soupy and super liquid (assuming 100% hydration here). When your starter is mature this means you will have maximum, or near maximum, population of yeast/bacteria in your culture — this is what you want when you build your levain. Your levain on the other hand, you can use this when it’s “young” (still smells sweet but you see signs of fermentation and rise) or when it’s more mature (this is what I do nowadays, I wait until it’s at it’s peak as mentioned in this post).
The float test is a good measurement when you first start baking, but eventually you’ll stop using it as you’ll eventually be able to tell when you’re starter is ready to go. If you’re using a 100% hydration starter do the float test a few hours after you build your levain, just to see if it’s floating, if it is then it’s ready to bake with. If it doesn’t float wait a few more hours and let your levain ferment some more, this will help build up more gasses in there and it will float.
I hope that helps, let me know if any of this is unclear or you have any more questions — we’ll get you sorted out!
The photos are worth more than a thousand words. thank you for all the detailed illustration. I’ve always had issues with SD starters, i’m on the 2nd day of building a new starter with your 50% rye method, looking forward to baking with it!
You’re welcome, Joshua — glad to hear things are progressing! You are definitely right, sometimes you just need a photo! Happy baking.
Longtime sourdough baker. For class will be teaching on starting, thought I’d try yours. Having lid on is new to me. Always leave uncovered, cheesecloth only. Now, 12 hours later does not look promising. Your thoughts? BTW, appreciate your lead to Weck jar–have 3 now! And your photos are to die for! Thanks…
Naomi, thanks for the comments! Lid on or off, either way works just as well (but the cheesecloth is definitely a good idea, never know what might drop in there!). Are you creating a new starter or are you just changing flour mixture? Are you using an existing starter you already have? What does it look like?
Love those Weck jars, they make things very easy!
Left the lid on till time to refresh. I’m making your starter precisely following directions. After 24 hrs. limited number teeny bubbles; went ahead & fed as directed. But leaving it uncovered this time. Think climate (am in Portland, Oregon, very rainy) may make difference. Forging ahead. Thanks for reply.
Sounds good. It will take a few days before things start moving, sometimes up to 4-5 days, but it will take hold eventually. Good luck, let me know how it goes!
Thanks for following along, glad to hear from you! When Chad talks about “young” he is indicating that the starter/levain has not reached it’s peak height and still smells sweet. This applies to both your on-going starter and a levain you build just for a single bake. In my timeline above (keep in mind this was my starter so the timeline is stretched out, for my levain with higher starting percentage of starter the timeline is reduced) I would try to time things so I would build my levain with my starter when it was around 8 or 9pm, just before it starts to decline. I notice the best results at that time, basically right when it’s at its peak. If you do see your starter begin to decline dont fret, you can still use it and it will leaven your bread just fine (I’ve done this many times). When Chad says young I believe he’s talking about even earlier in the timeline, perhaps 6pm or so.
For the bakes where I start my levain at 630am, yes, I feed my starter per usual at night before bed and try to time it so around 630 or so it’s at, or near, it’s peak ready to use in my levain. If you’re schedule is more open just feed your starter at night and then in the morning keep an eye on it from time to time, when it looks like it’s not rising any more you’re good to go.
I hope that helps, please let me know if anything is still unclear! Good luck 🙂
It sounds like you’re doing all the right things here. You definitely have a good grasp on the things you can do to speed up, or slow down, fermentation with your starter. Is there a reason you want to hit 3x a day? I typically shoot for a feeding every 12 hours — I do this every day since I bake often but I just follow the same feeding schedule when baking. My starter always has pretty strong activity this way.
The reason I ask is that I wonder if with your second feeding you’re discarding a significant amount of your starter before it has had a chance to fully ferment, or colonize, all the flour/water you’ve fed it. Essentially this would mean you’re starting with a less than mature starter for your third shift, if you will. Does that make sense? If you want to stick with 3x I would have said increase your ambient temperature or water temperature, but it sounds like you’ve tried that. Is it possible the ambient temps in your kitchen are dropping by night time and so things are slowing down?
Hi Maurizio, thanks for posting this! I had no idea that letting the starter collapse completely could negatively affect yeast growth. I’ve been baking naturally leavened bread for over a year now and I typically feed my starter once a day, or twice a day a few days before I plan on baking. I feed my starter in the morning before going off to work and I typically won’t feed it again until the following morning. I feed it with a blend of rye and all-purpose flour. I’m not going to lie, I can be pretty lazy when it comes to feeding my starter. In Robertson’s book, he says that a mature starter must be used to mix the leaven and a young leaven to mix the dough. When does a starter become too mature/ripe? Is it mature enough to use the moment it begins to collapse? Is the starter too mature or ripe to use for the leaven if I let it collapse completely? I’m going to try feeding it before it collapses and see how that goes. Thanks!
Lucia — thanks! I actually misspoke in the post about increased acidity inhibiting yeast growth. Yeast is actually able to withstand a pretty dramatic swing in pH level during fermentation. What I meant to point out there was that as fermentation continues on, and for too long, overall acidity builds up to high levels in your starter, which will impact the flavor of your bread (more sour). This is one reason why bakers such as Chad Robertson from Tartine say to refresh often to “reduce the acid load” in your starter. Sorry about the confusion.
You want to use a mature starter to build a levain as you want the maximum population of yeast and bacteria possible transferred over to the build (if you try to make a build too early you will essentially be using flour/water that isn’t colonized by yeast/starter). I find that my starter becomes too mature when, as I mentioned a bit in the post above, it really begins to fall and you see reduced activity — it’s kind of winding down. To me that is when I need to feed right away to ensure it has plenty of food to stay vigorous. I also find that if I let it collapse completely I’ve let it go a bit too far and it *can* sometimes be sluggish afterwards. These, of course, are general guidelines but I find that the visual cues of rising to a peak and then collapsing are great signposts for me to know when to feed (smelling your starter will also give you clues, does it smell super vinegary? Or is it still sweet smelling?).
I hope I answered your questions, if not feel free to ask further. Thanks for catching that error!
Thank you! That makes more sense. I’ve been so caught up with improving my shaping skills and pushing the limits of hydration that I’ve lost sight of how essential it is to carefully manage the starter. This post has inspired me to go back to square one and spend some quality time with my starter 🙂
Thanks again!
You’re very welcome and thanks again for the comments! As the name suggests, our starters are the beginning of it all and are, probably, the most important thing with baking sourdough 🙂
Maurizio & Lucia, I’ve just realized that I’ve had the same issue as Lucia. Having baked (satisfactory and consistent) sourdough bread for a year, I have moved towards shaping and hydration as a main focus of my interest. Having made good bread, I thought I was done with starter issues. You know, everything was going well. It still is – however, if you are in the search of the The Loaf, the perfect loaf, then every step of the process must be tuned up to its finest details.
Also, when I started with sourdough baking and grew my first starter from scratch, I did everything that others told me. With time, as I gained experience and confidence I’ve developed my own routine (I wouldn’t really call it a method). It’s similar to Mauritzio’s however, I don’t feed my starter twice a day. I don’t really like to discard 🙂 But, what I essentially wanted to say is that Maurizio did great job stressing how important an individuality in starter maintenance routine is.
Also, Maurizio, those photos are just as beautiful as your bread.
Thanks for the input and the kind words, Katarina! You’re right as you fine tune things each step, even the seemly small ones, have drastic outcomes at the end. It’s like most things you are trying to master, it almost becomes more complicated when you really delve into it.
You’re also right, it’s extremely important to listen to your individual starter and observe its behavior!
Happy baking 🙂
Awesome post Maurizio, such important points of emphasis with being flexible to your own environment and what inputs you can adjust to get desired results. I’ve already referred some friends to your post to help free them from the “what is the ideal feeding schdule?” / “my results don’t match!” syndromes.
I chuckled at the spatula link, I’m pretty sure I use the same one and it’s no small point. I love that it’s a solid one piece tool, clean up is such a breeze and mixing is night and day compared to a flexible spatula.
Also I’d recommend to those interested in the weck (mold) jars to purchase directly from the source, much cheaper: https://websecure.cnchost.com/weckjars.com/productsDetail.php?category=3
Sláinte!
Trevor, thanks for the comments and thanks for spreading the word! I think this post will be helpful so people can see what I talk about typically via email — a picture is worth a thousand words.
It’s true through, right? Sometimes these small tool changes make a world of a difference. That little spatula, after I used it the first time I bought it, made me do a “jeesh why didn’t I get this a year ago” comment out loud. 🙂
Thanks for posting that link to the Weck site, that’s a much better price!
Thanks again!
Hah, I agree personification helps me to either curst at, or praise, my starter when he is misbehaving/behaving 🙂
Thanks so much for the comments, Cynthia! I agree, when I use my starter right at, or slightly before, that peak I get the best results. I’ve played the refrigerator games as well — dough/starter in and out, in and out to get timing just right. I have a feeling professional bakers do the same thing. In fact, just the other day i was baking from the Bien Cuit book and the dough was moving so fast I actually put it in the freezer for 5 minutes! First time doing that and it worked perfectly.
That’s a very good question. I’m not sure exactly what 1 hour at RT would equate to in fridge-time, but I would almost say 4-5 hours in fridge is like 1 on counter. No basis for that other than when I retard in my fridge (~38ºF) I can usually go 12-14 hours, but on the counter I can only go 3-4 hours or so. There are some other minor factors to think about there, though. For example, where in your fridge? Is it close to where the cold air blows in from the compressor? I’m just thinking about the time it takes for the dough to equalize to ambient temperature in the fridge (i.e. ~72F to ~38F). Really hard to say and a really good question!
Your blog is hugely helpful & as a sourdough neophyte I follow it closely. My biggest challenge to consistent fermentation is temperature fluctuations. I heat my house solely with wood (north of Idaho/Washington in British Columbia) & in the morning my kitchen is up to 10 or more degrees cooler than at night. So far I’ve noticed my starter is very forgiving (100% rye), provided I’m vigilant about feeding. Still have a ways to go to get more open, lighter loaves, but will really watch my levain this week to time it better & might even switch up my flour in your ww recipe to use a little more white. Thanks for the reminder to observe & experiment!
Thanks for the comments! In my opinion temperature is the single biggest factor when baking. I’ve realized over and over that things just will not work if it’s too cold and my results have been consistently better if I can keep things around 78-80F. I know, that’s pretty warm, but if you can find that right spot in your kitchen, or you have a proofer, then you’re set. But yes, even in cooler temperatures, or fluctuating temperatures, if you’re observant you can be flexible and adapt to your starter. I finally found the perfect location in my kitchen that is far enough away from any heat source to get direct heat, but close enough to stay warm. Thanks again!