


Flour at the market is hard to come by these days, but even if it is at the market, this recipe comes together so quickly and with such little effort it’s hard to imagine not wanting to throw this together every day during the week (since we’re home anyway, right?). I’ve received many emails and comments from readers asking for a straightforward recipe using 100% all-purpose flour since that’s what many of us have in the pantry right now. But even when abundant flour choices return to the market, this same-day sourdough bread with all-purpose flour might become a weekly staple in your kitchen.
This recipe makes a single 900g loaf of bread all in a single day. It begins with your mature starter in the morning and ends in the late afternoon with a fresh loaf of bread ready for dinner. What could be better? And while it’s similar to my recent simple weekday sourdough, it’s just a bit different, using different flour and a modified timeline. They’re different, but both practical ways to sneak baking in more often than not.
What Makes This Sourdough Bread Recipe Easy?
- It uses only one type of flour: all-purpose white flour
- It’s a same-day bread, meaning the day you mix is the day you bake
- There is no need for a levain, use your sourdough starter in the mix
- It makes a single loaf of bread, no scaling or dividing dough
- You can add up to 15% mix-ins: walnuts, pecans, seeds, or dried fruit
- You can substitute flour: use 5% (23g) whole grain rye, or 10% (46g) whole wheat flour (remove that amount of AP flour) without modifying the rest of the formula
Flour Selection
One essential modification in this recipe versus my simple weekday sourdough (which uses all high-protein bread flour) is slightly reducing the hydration, especially if there are no whole grains in the recipe. Because all-purpose tends to mix up to a softer, slack dough, lowering the hydration brings strength and makes for a loaf with more rise and a crunchier crust.
Additionally, I reduced the autolyse time for this recipe. If you’d like to give this dough a little more strength and reduce mixing time (which is already minimal!), you could autolyse the dough for 30 minutes: Mix the flour and water in the mixing bowl and let sit, covered, until your sourdough starter is ripe and ready to use.
Flour note: If your “all-purpose” flour is lower in protein than the flour I used, King Arthur Flour Unbleached All-Purpose at 11.7% protein, you might want to keep an eye on the hydration as you’re adding water in the mix and add less if the dough feels overly wet. Also, strengthen the dough up front, either through folds in the fold or a more intensive strengthening technique.
Baking Schedule

The intention for this recipe is for it to be a same-day dough, meaning you mix in the morning, and you bake in the late afternoon. However, you can also place the shaped and covered dough into the refrigerator to finish the proof overnight (instead of on the counter). This way, you can have fresh bread for dinner on day one or fresh bread for lunch on day two.
Sourdough Bread with All-purpose Flour
For tips on how to calculate baker’s percentages or how to modify this formula, see my post on baker’s percentages (baker’s math).
| Total Dough Weight | 900 grams |
| Pre-fermented Flour | 10.0% |
| Hydration | 76.0% (this takes the water in the sourdough starter, which is about 50%, into account) |
| Yield | One 900g loaf |
Total Formula
My final dough temperature for this dough was 78°F (26°C). See my post on the importance of dough temperature for more information.
| Weight | Ingredient | Baker’s Percentage |
|---|---|---|
| 460g | All-purpose white flour, ~ 11.7% protein (King Arthur Unbleached All-Purpose Flour) | 100.0% |
| 340g | Water | 74.0% |
| 9g | Salt (sea salt) | 1.9% |
| 92g | Ripe sourdough starter (100% hydration) | 20.0% |
Sourdough Bread with All-purpose Flour Method
1. Mix – 9:00 a.m.
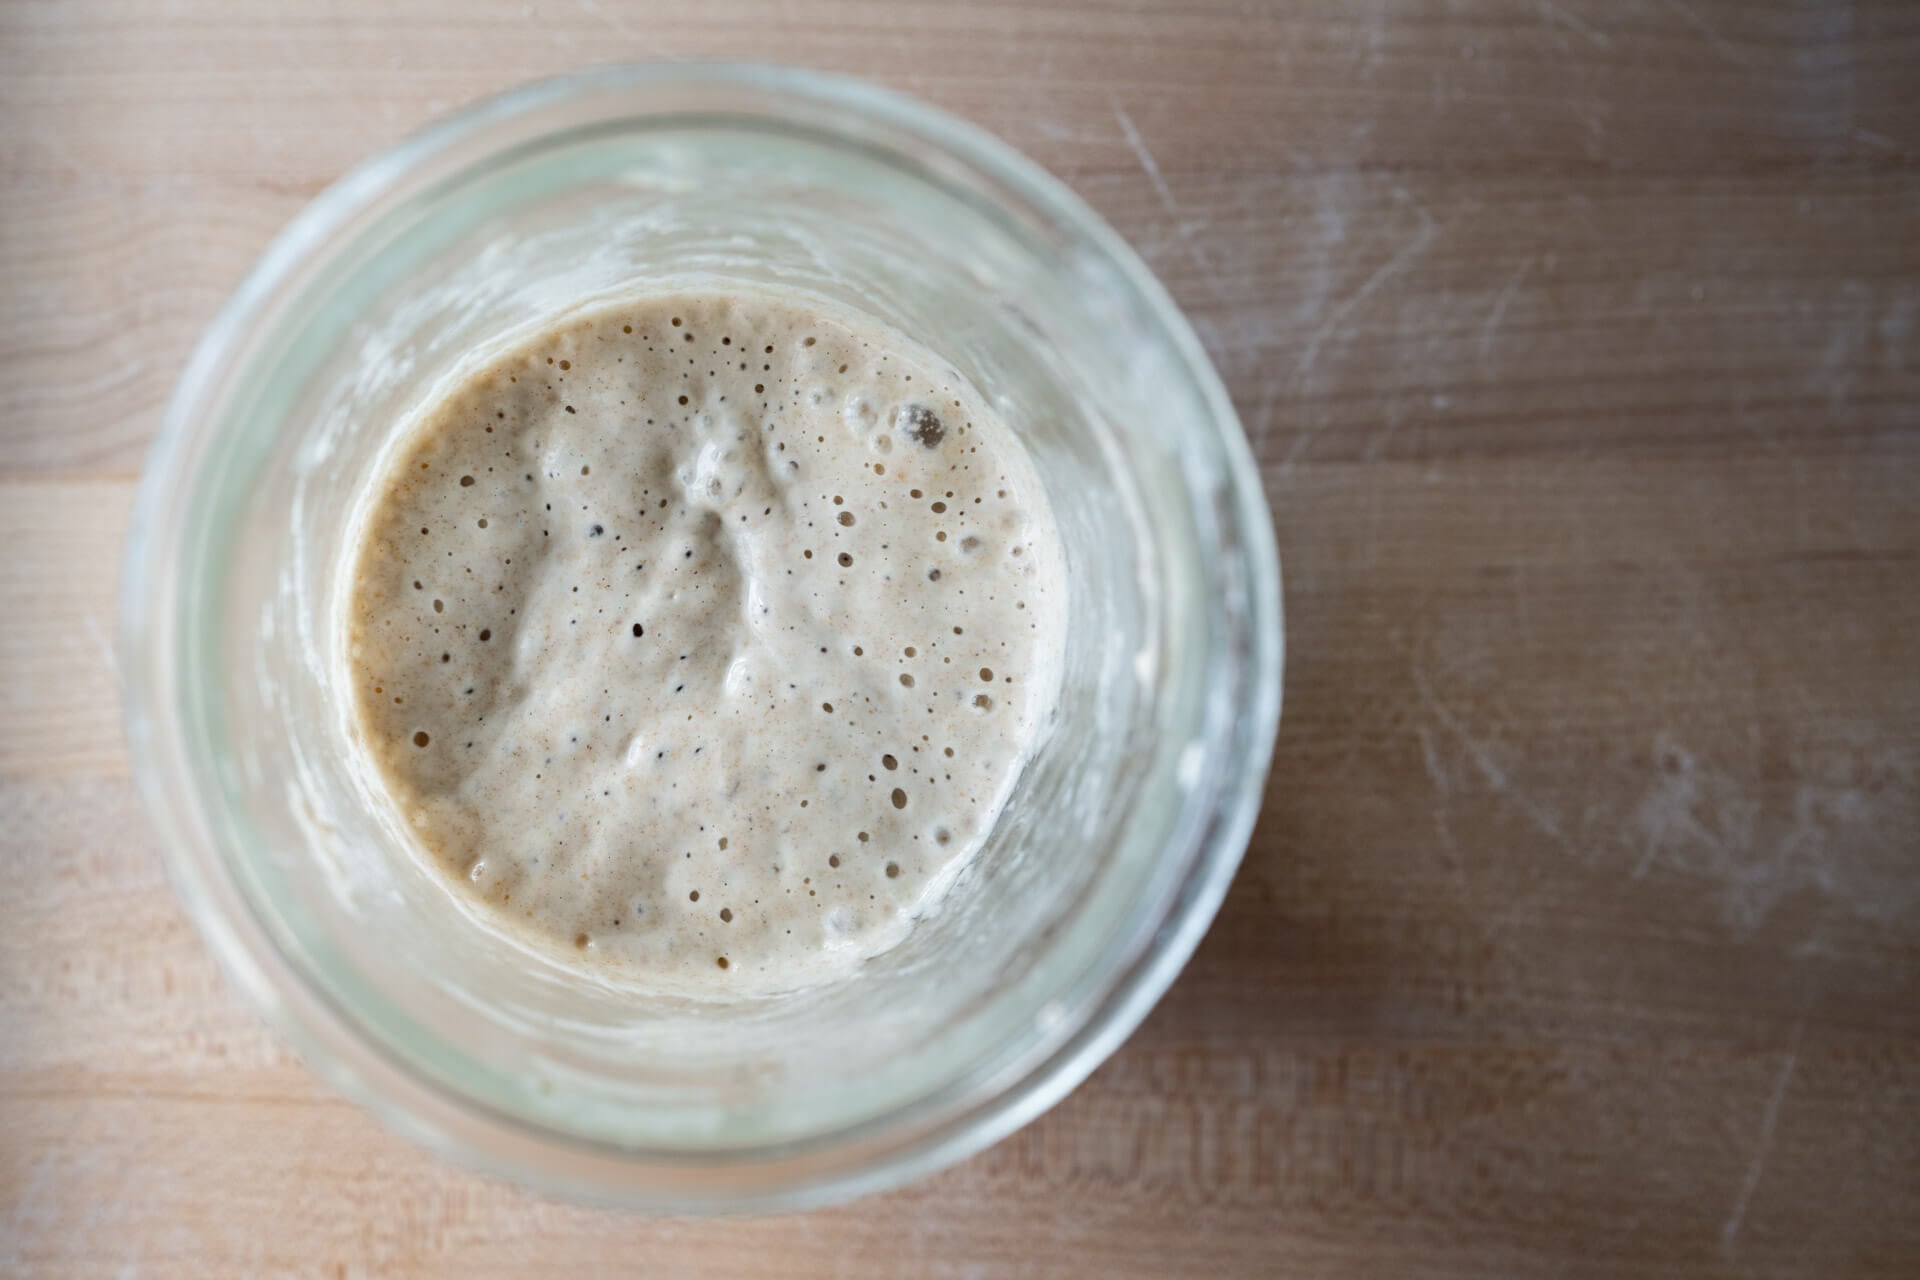
When your sourdough starter is mature (see the image, above), add the ingredients below to a large mixing bowl:
| Weight | Ingredient |
|---|---|
| 460g | All-purpose white flour (King Arthur Unbleached All-Purpose Flour) |
| 340g | Water |
| 9g | Salt (sea salt) |
| 92g | Sourdough starter (100% hydration) |
Using wet hands, mix everything — except 50g of the water (add 290g and hold back 50g) — until it comes together into a shaggy mass. I like to hold back a little of this water when mixing to pause and assess the dough: does it feel super wet and “soupy?” If so, omit the reserved 50g. If it still feels manageable, add it in slowly as your strengthening the dough in the bowl with folds.
This dough doesn’t require intensive kneading (like slap and fold) but do give it a series of folds (pickup one side and fold it over, rotate the bowl and repeat) in the bowl for 2-5 minutes until it smooths slightly and comes together in a cohesive ball.
I like to fold this dough more than my simple weekday sourdough, even though they both don’t require kneading on the counter, because this recipe is comprised of 100% all-purpose flour. I find this dough benefits from a little extra strength before bulk fermentation by performing these folds.
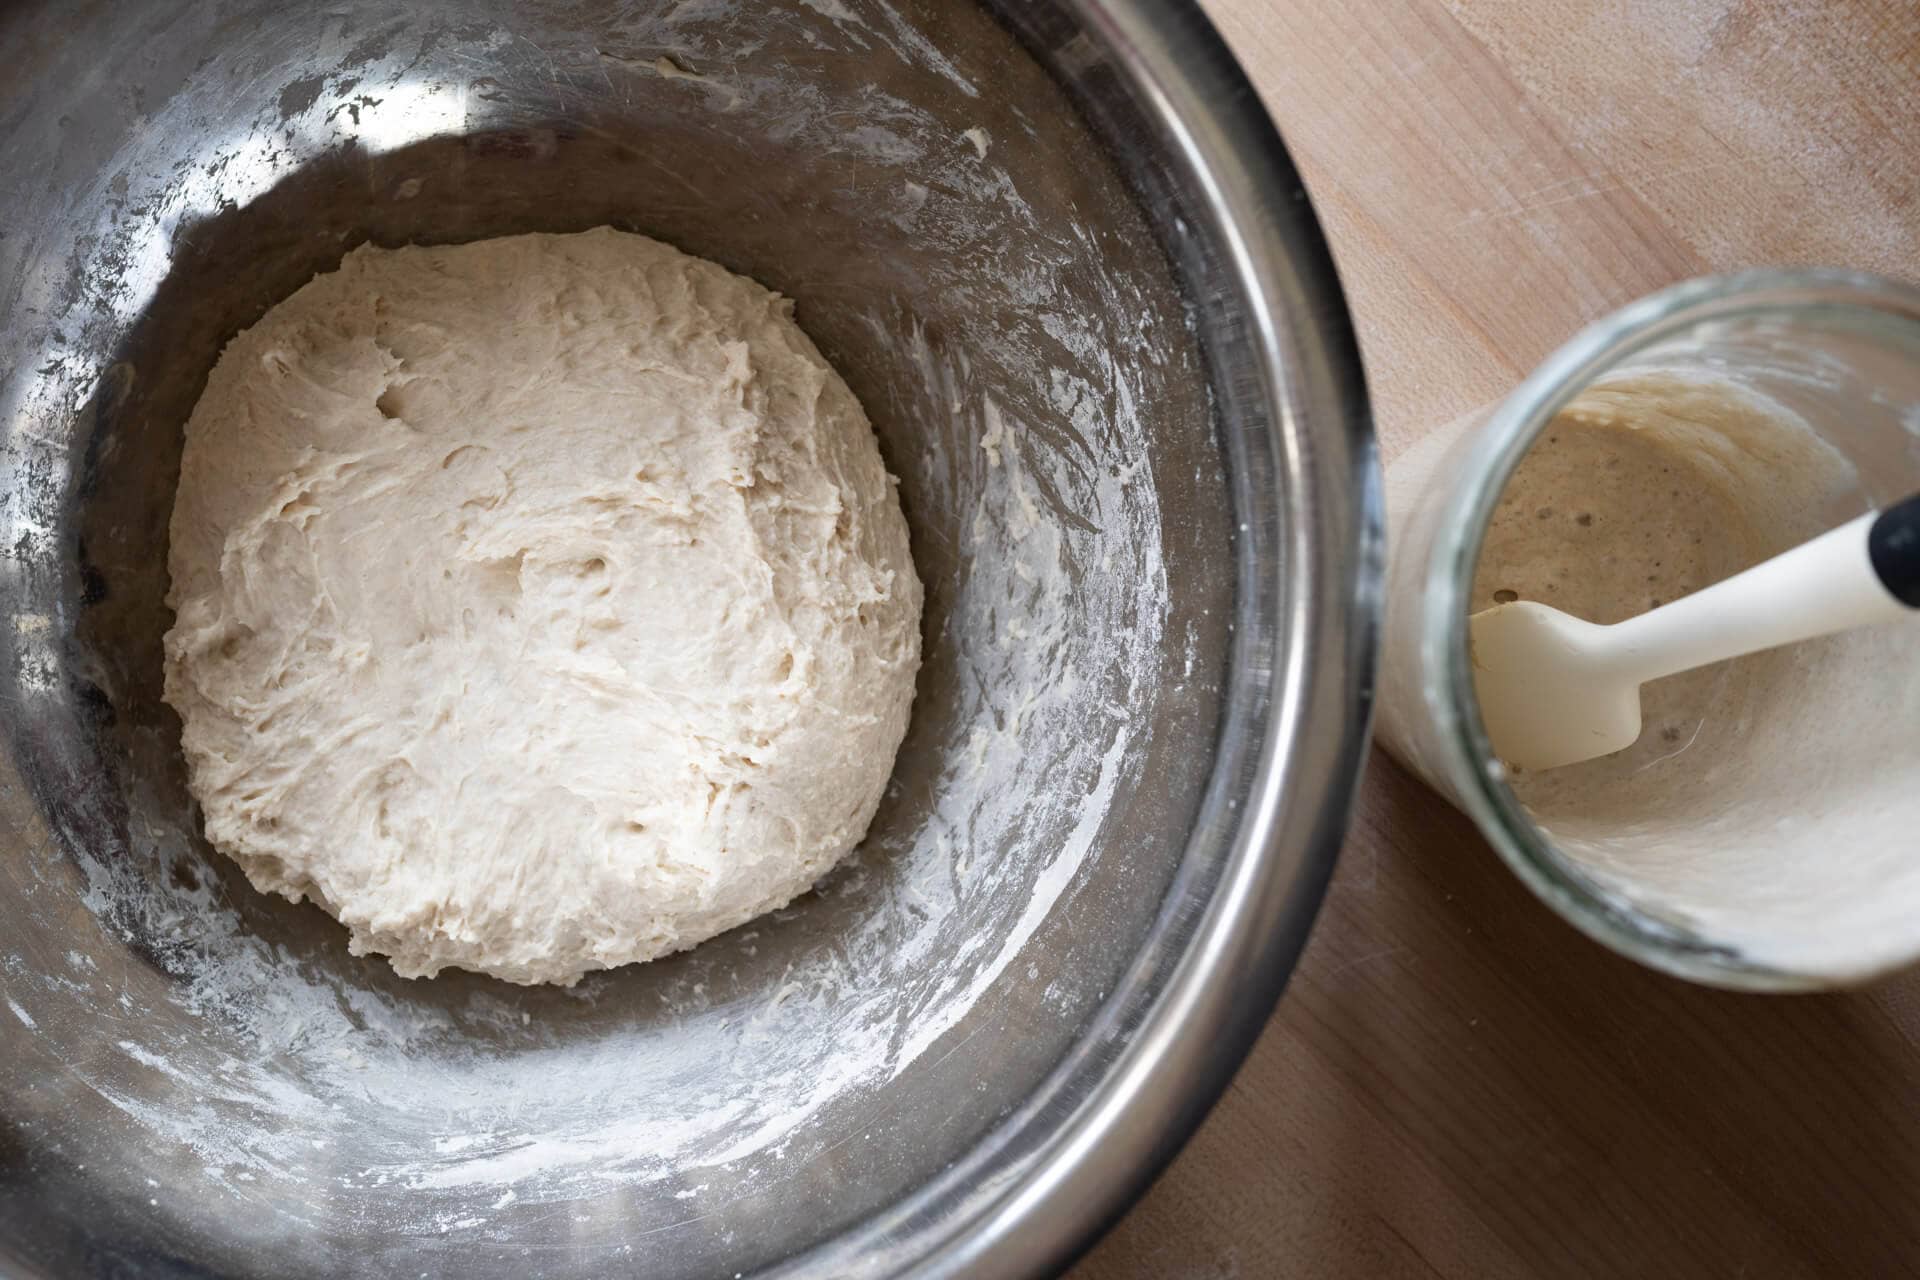
Cover the bowl with reusable plastic and keep somewhere warm in your kitchen for bulk fermentation.
2. Bulk Fermentation – 9:15 a.m. to 12:45 p.m. (3.5 hours)
At 75°F (24°C), bulk fermentation should take 3.5 hours. During this time, we will strengthen the dough through a series of stretch and folds directly in the bowl.
For each set wet your hands, grab one side and stretch it up and over the dough to the other side. Rotate the bowl 180° and perform another stretch and fold (this forms a long rectangle in the bowl). Then, rotate the bowl 90° and do another stretch and fold. Finally, rotate the bowl 180° and do one last stretch and fold.
Give the dough 4-5 sets of stretch and folds as indicated below:
| Set | Time |
|---|---|
| Fold set 1 | 9:30 a.m. (15 minutes after the start of bulk fermentation) |
| Fold set 2 | 9:45 a.m. (15 minutes after fold set 1) |
| Fold set 3 | 10:15 a.m. |
| Fold set 4 | 10:45 a.m. |
| Fold set 5 (as needed) | 11:15 a.m. (if the dough still looks slack, weak, and not showing any signs of defined edges, give it this fifth set) |
After the last set of stretch and folds, let the dough rest, covered, until the next step.
3. Preshape – 12:45 p.m.
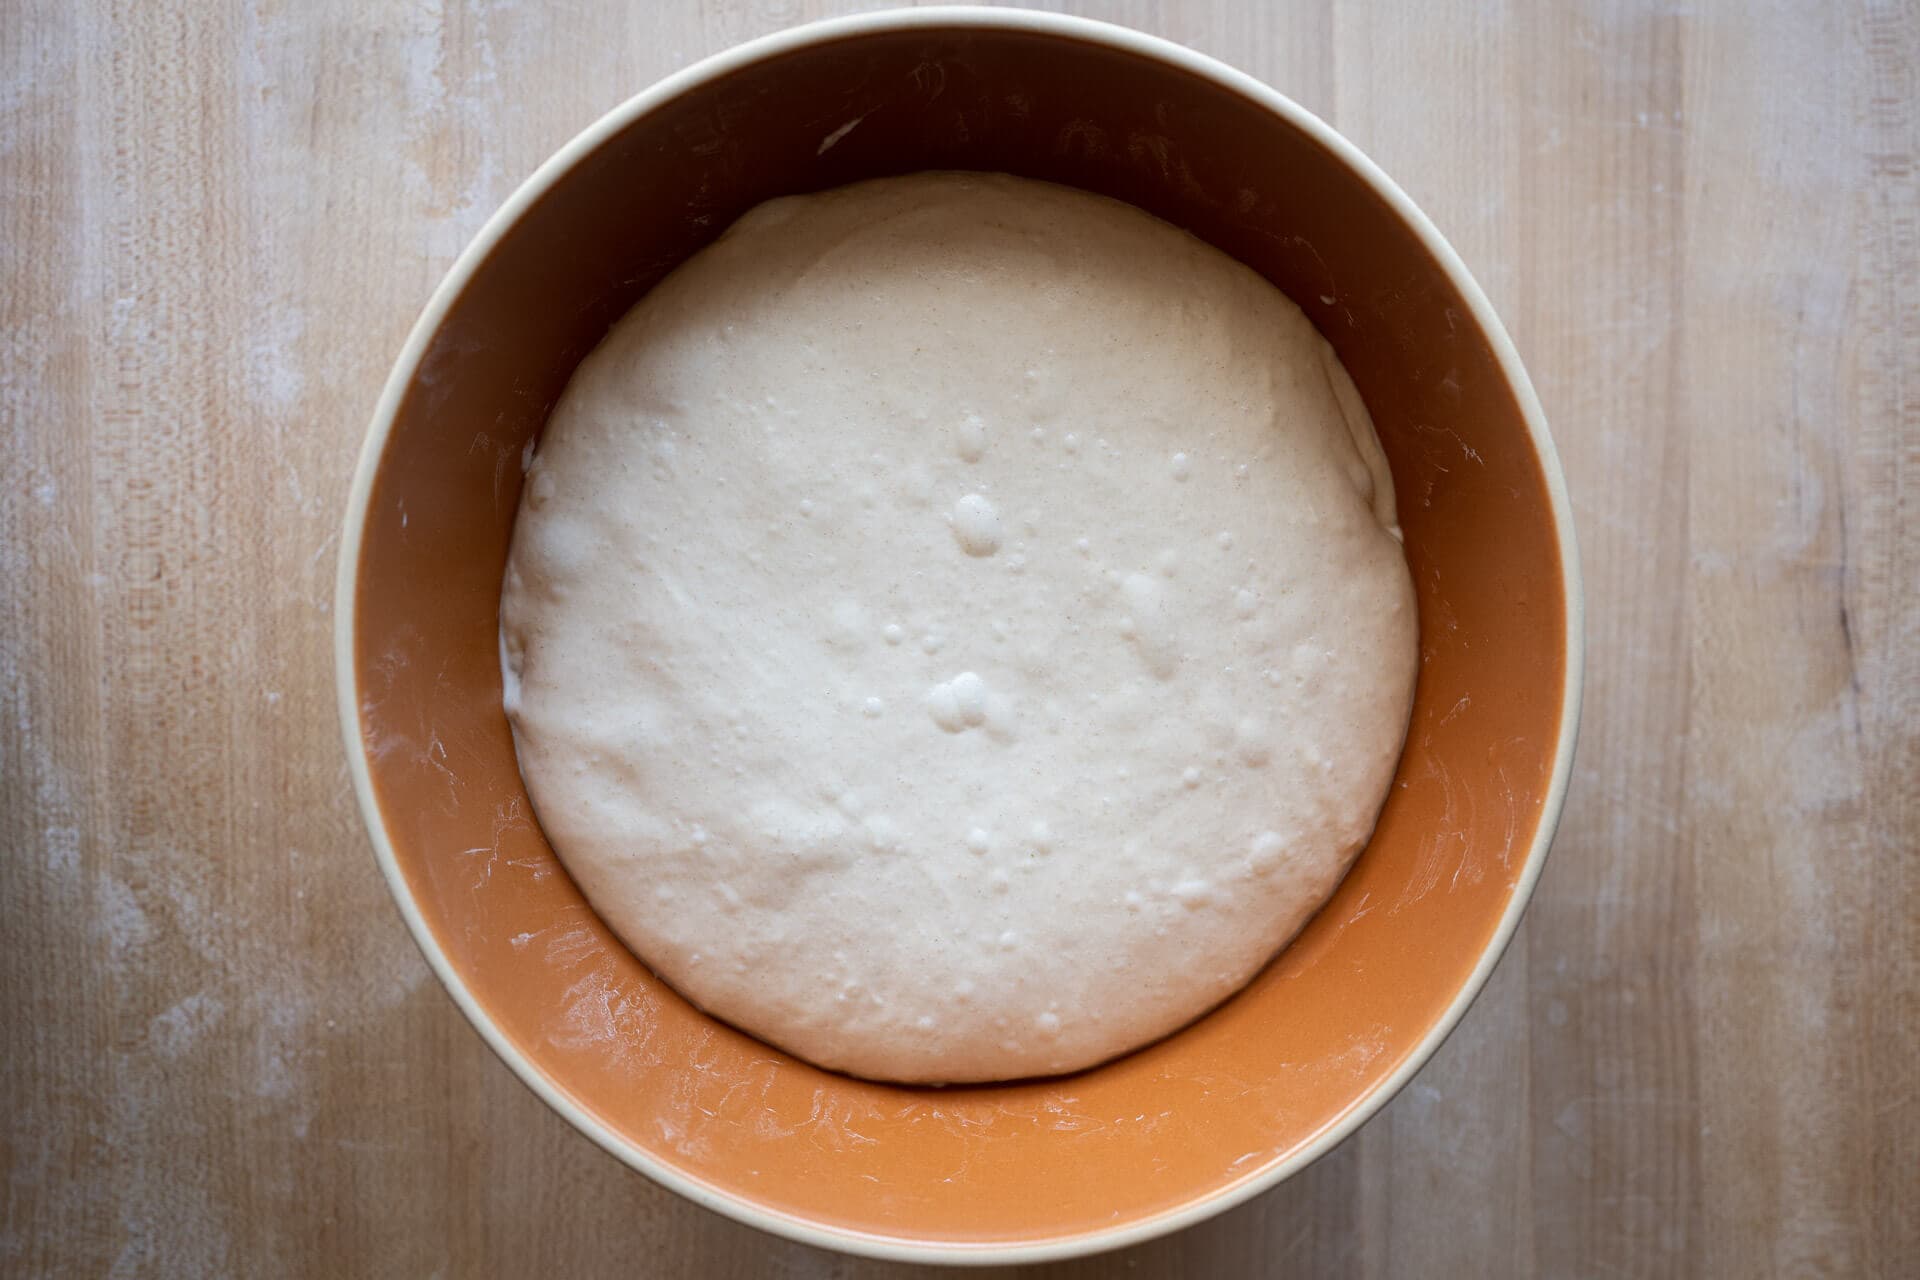
After 3.5 hours, the dough should have risen in your bulk fermentation container, smoothed out, and show bubbles on the sides and surface. You want the dough to feel more elastic and strong. It should also feel alive and aerated. I also like to look at the edge of the dough in the bulk container: it should be domed, not flat, indicating the dough needs more time to rise. A flat surface with bubbles on the dough can also indicate it was over-hydrated and too slack/weak.
Fill a bowl with some water and place it on your work surface — I use water to keep the dough from sticking on my hands and my bench knife. Scrape out your dough from the bulk container onto your dry counter. Wet your hand and top of the bench knife and gently preshape the dough into a loose round.

Let the dough rest, uncovered, for 20 minutes until its relaxed outward.
4. Shape – 1:05 p.m.
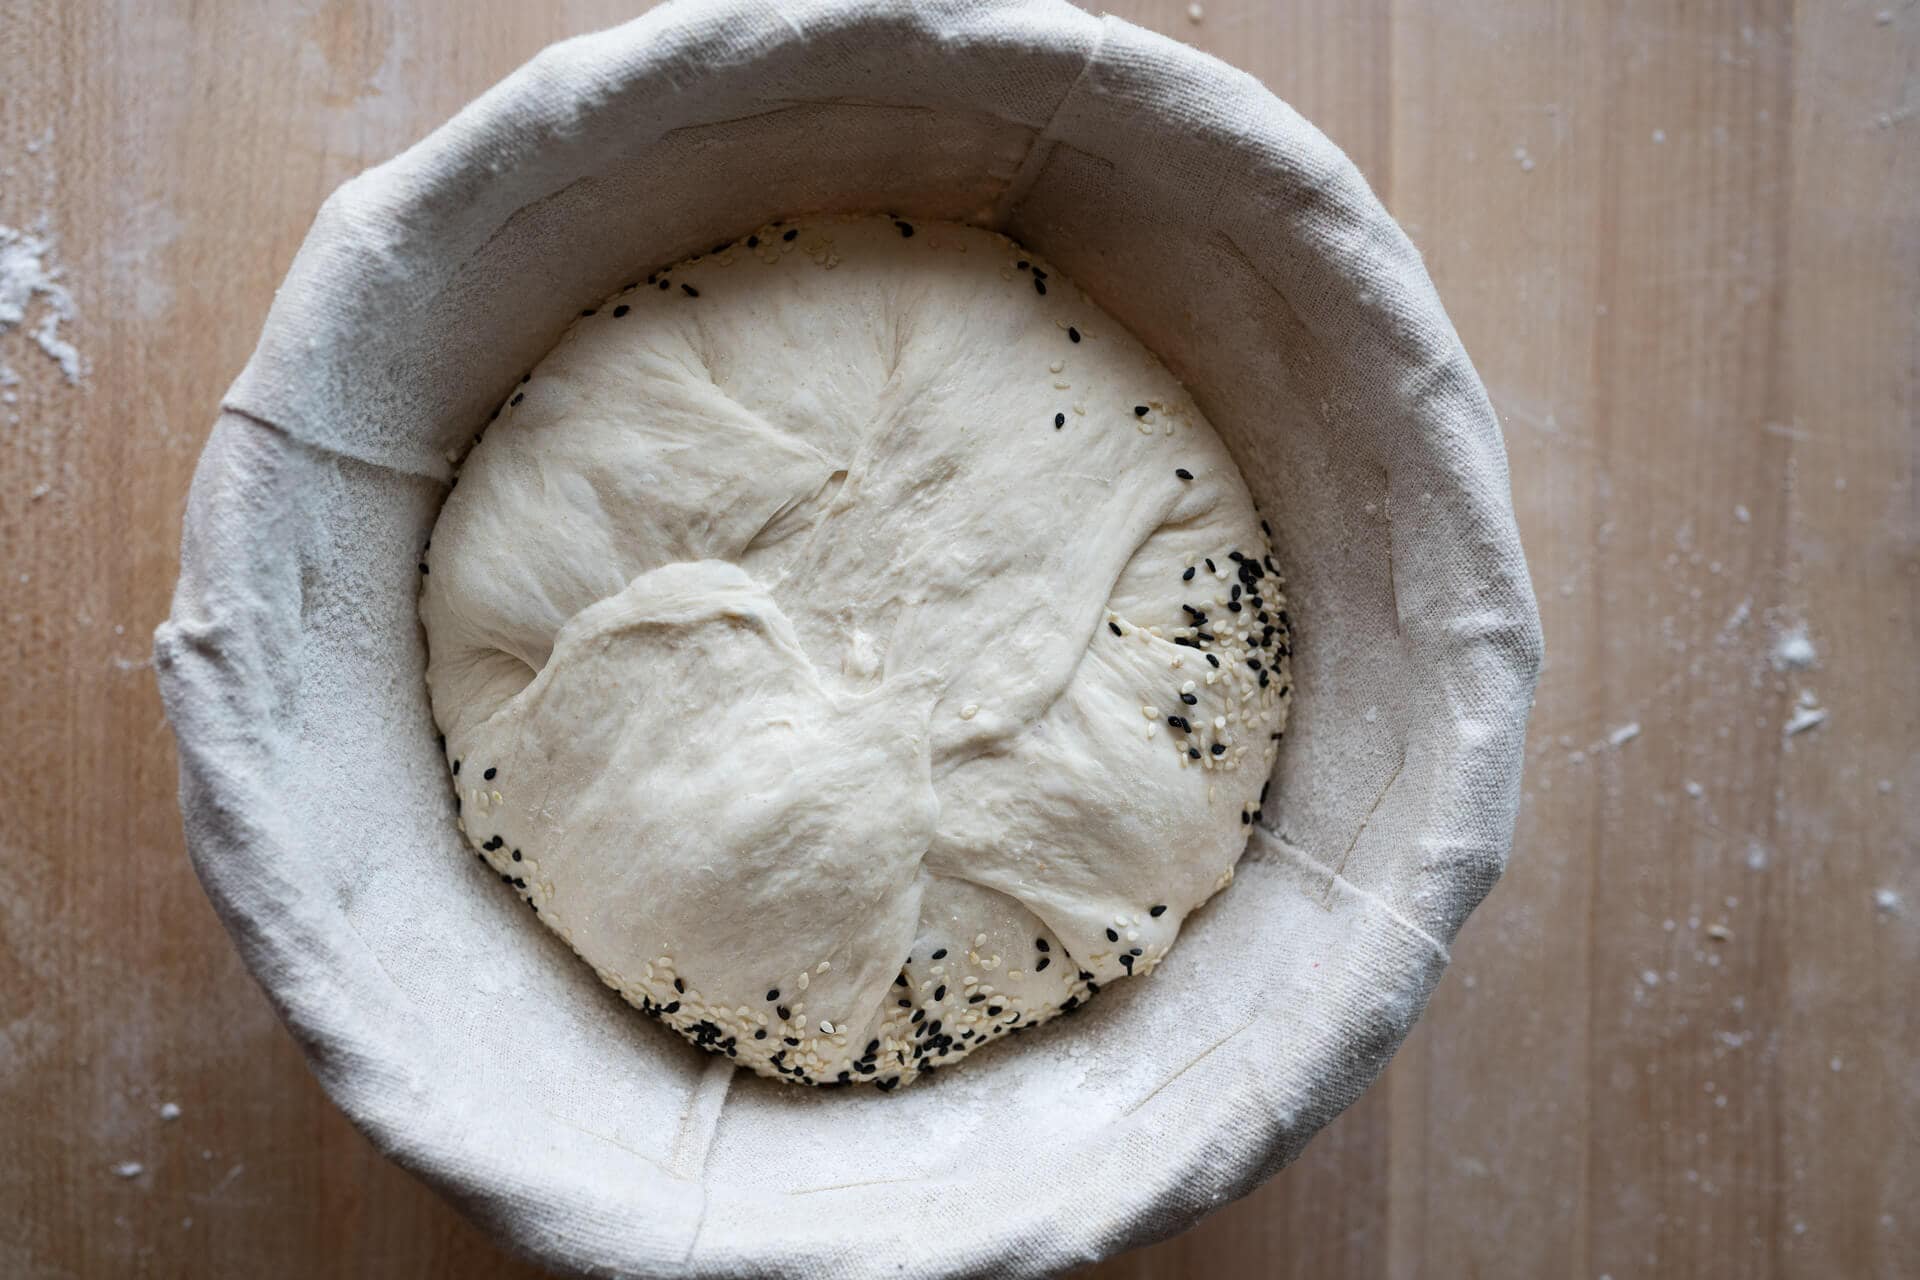
I went an extra step with this dough and coated it with a mixture of black and white sesame seeds for flavor. You can omit toppings altogether or use sesame as I did, rolled oats, flaked barley, pumpkin seeds, or anything you think would taste wonderfully toasted in the oven. Lay a towel next to your work surface and spread the topping out thinly. After you shape the dough, roll the smooth side on the towel to pick up these toppings (as shown in the video below).
Flour the work surface, your hands, and the top of the rested dough. Using your bench knife flip the round over onto the floured work surface. Next, take the left edge and fold it over midway to the right. Take the right side and fold it over the left. Take the top edge and fold it down to the middle. Pick up the bottom edge (closest to you) and fold it up over to the top of the dough but keep going until it touches the work surface, flipping everything over so the seams are now on the bottom.
Next, using both hands drag the dough down toward your body using your pinky fingers to pinch the dough between your fingers and the work surface. Rotate the dough and continue dragging to create tension on the top and outside of the dough. It’s not necessary to excessively tighten this dough (unless it feels fragile and slack to you), and as you can see in the video below, my dough was strong and did not require a firm hand to fully shape.
Read through to my guide to shaping a boule for more in-depth instruction on shaping boules.
5. Proof – 1:15 p.m. 3:45 p.m. (or when dough is ready)
Cover the proofing basket entirely and let it sit out on the counter for 2 to 4 hours, temperature depending. My dough was ready after 2.5 hours at about 75°F (23°C).
Overnight option: At this point, you can also place the covered proofing basket directly into your refrigerator and continue the process the next morning, afternoon, or even the next evening.
Use the “poke test” (as seen below) to determine when the dough is ready. While this test is not appropriate for all doughs, it’s a good test for this one because it’s made from all-white flour, has moderate hydration, and was proofed at room temperature. Notice how my pokes slowly spring back and don’t always fill in the indentation. Additional signs it’s ready are that it is well-risen in the proofing basket and quite gassy.
6. Bake – 3:45 p.m. (pre-heat oven at 3:00 p.m.)
Preheat your oven with the rack at the bottom third to 450°F (232°C). Place your combo cooker or Dutch oven inside, open, with the lid and bottom side-by-side. Review my guide to baking in a Dutch oven for in-depth details.
Cut a piece of parchment paper to fit over the proofing basket and place a pizza peel (or large cutting board) on top. Using both hands, flip the entire stack over and remove the basket.
Score the dough and load it into the Dutch oven; then, bake for 20 minutes covered. After this time, remove the lid and finish baking for 30-35 minutes or until done. The internal temp should be around 205-210°F (96-99°C).
Remove the loaf to a cooling rack for 1-2 hours before slicing. Follow my guide to storing sourdough bread to keep it fresh for the next week (or freeze for longer!).
Conclusion
What a wonderfully simple loaf of sourdough bread. I rarely bake a single loaf (unless it’s a miche), but this was so simple and so easy to put together I wonder what keeps me from making a loaf like this every day. Baking sourdough bread doesn’t have to be overly complicated; it can be as easy as mixing flour, water, salt, and your sourdough starter and giving it some guidance and time to mature into a delicious loaf of bread.
Crust
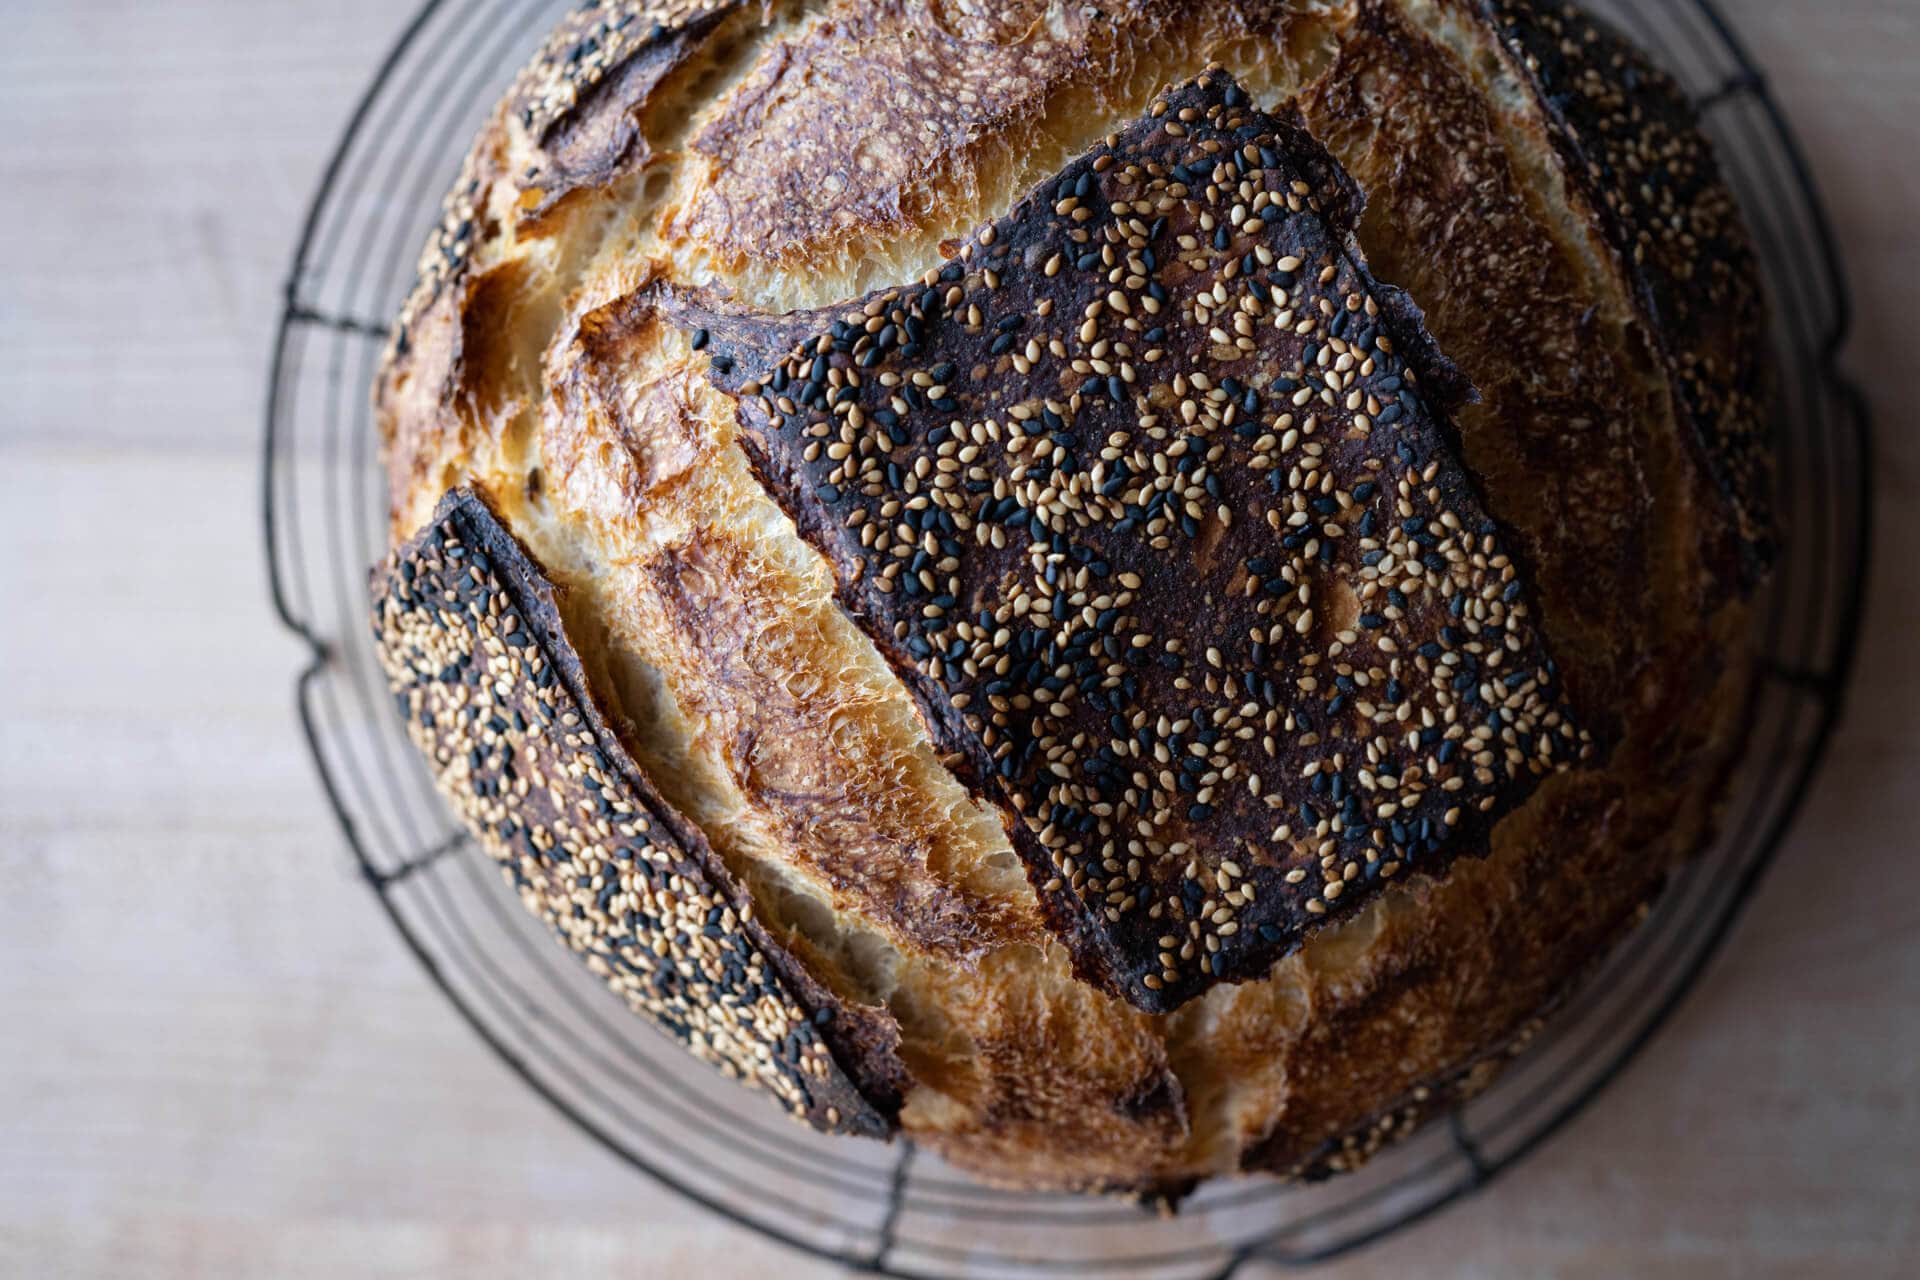
The crust was a rugged one, something I don’t mind one bit. The variegated colors from the sesame add some visual interest—not to mention tons of umami—but the color on the crust would be enough to satisfy my visual appetite. And the crust itself has all the appreciable crunch I look for in one of my sourdough loaves. And perhaps most importantly, the crust tastes incredible dipped in some olive oil—this has me yearning for the middle of summer when tomatoes will be ready in the garden.
Crumb
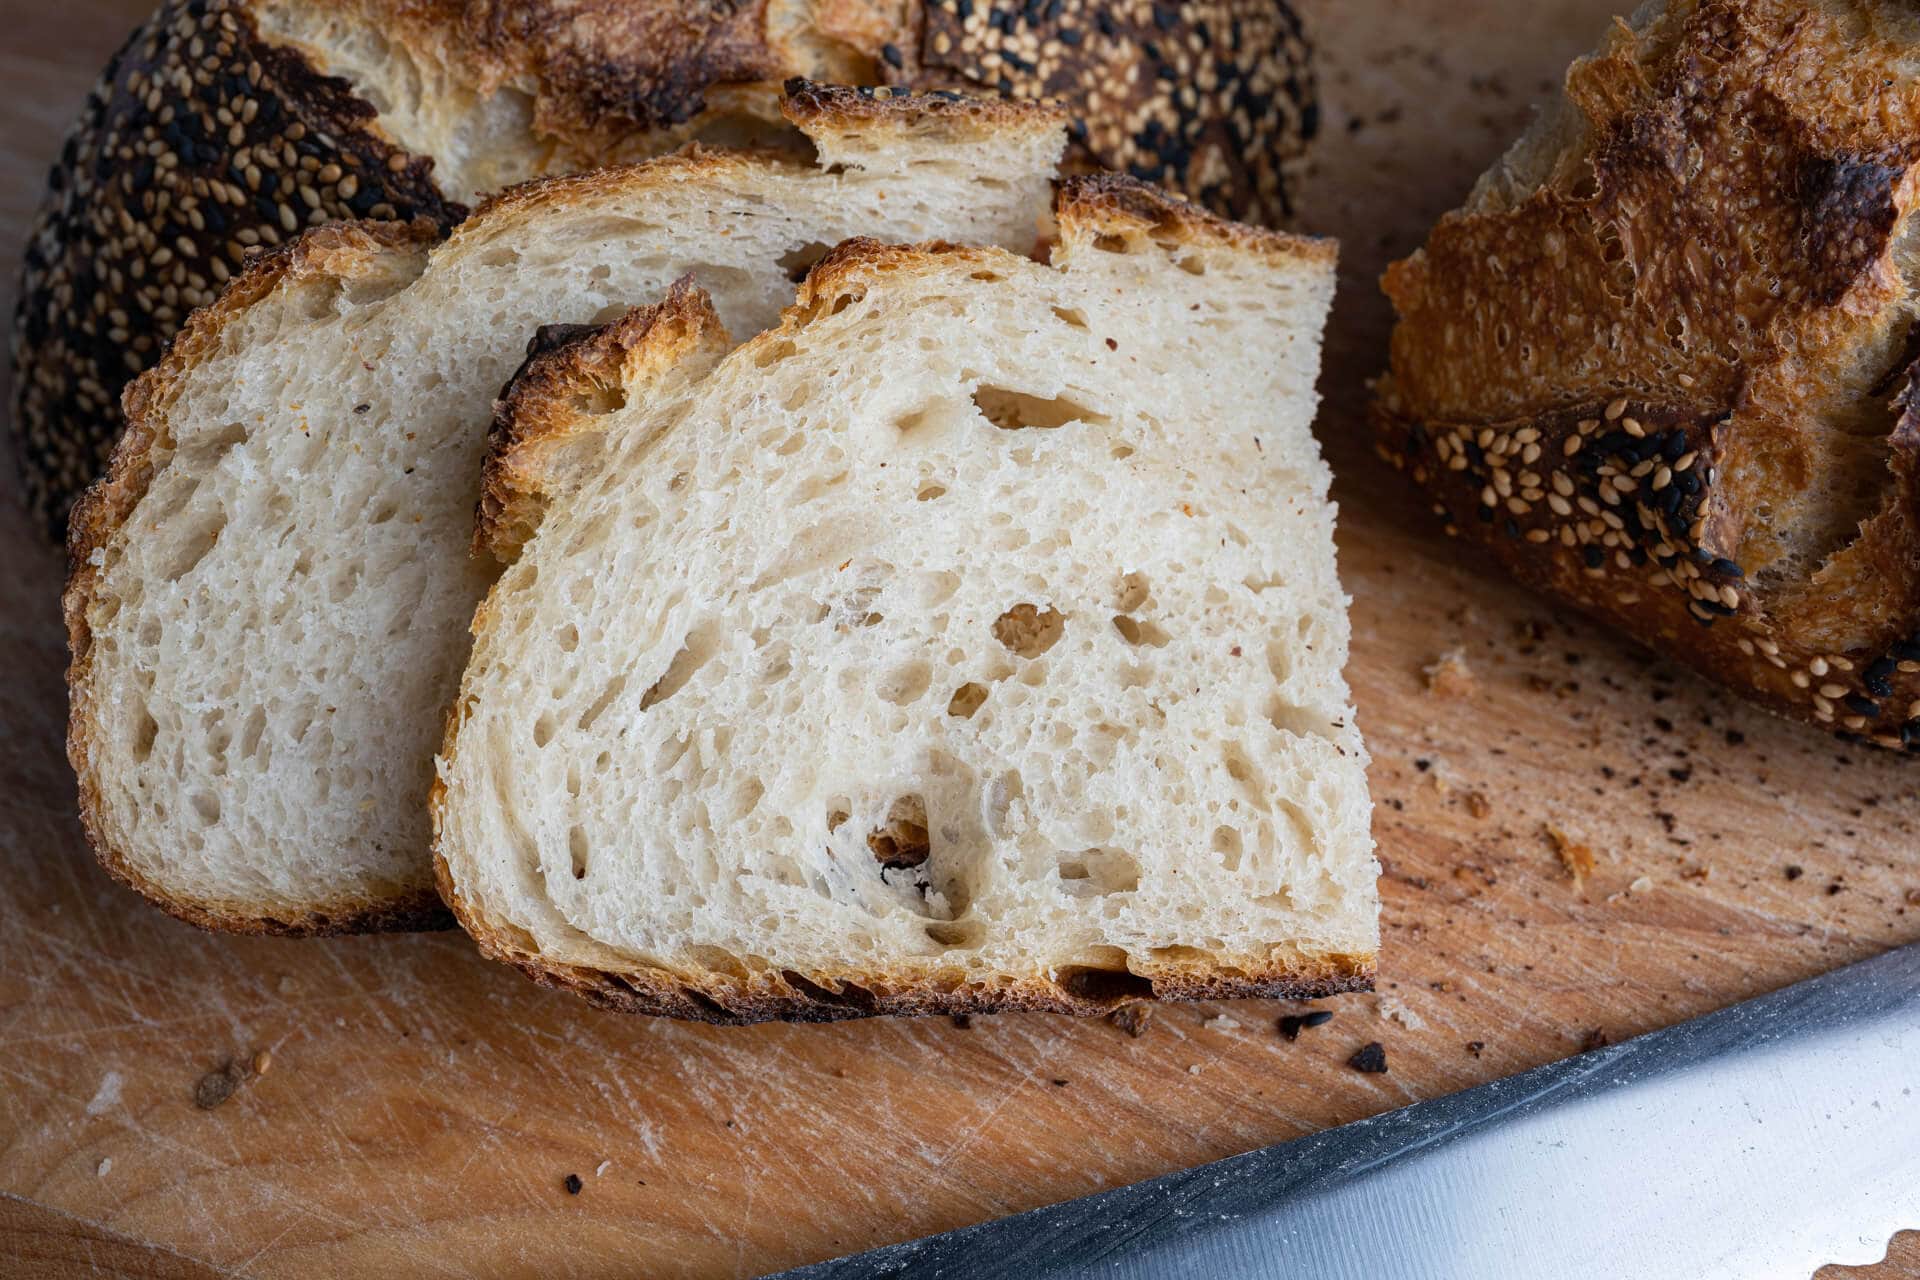
The crumb was tender, light, and wonderfully chewy. A good honest loaf of bread this is, and while not dramatically open, it’s evenly fermented and just what you’d expect—and want—from a straightforward bread recipe with minimal fuss.
Taste
Same day sourdough loaves tend to exhibit a milder flavor with reduced sourness and complexity — but this doesn’t mean it is flavorless. It’s a delicately flavored loaf with wheat flavor standing tall at the front. It still has some tinge of sourness to it, one that arrives at the very end of a bite and serves to remind you of the natural fermentation process, how healthy this bread is, and how delicious it can be when we give the dough the time to ferment properly.
Print
Sourdough Bread with All-Purpose Flour
- Prep Time: 12 hours
- Cook Time: 1 hour
- Total Time: 13 hours
- Yield: 1 loaf
- Cuisine: American
Description
My recipe for an easy loaf of healthy and nutritious sourdough bread made with all-purpose flour—all made in one day. No complicated levain steps with this recipe; just get mixing with your ripe sourdough starter!
Ingredients
Main Dough
- 460g all-purpose flour
- 340g water
- 9g salt
- 92g ripe sourdough starter
Instructions
- Mix (9:00 a.m.)
Add the Main Dough ingredients, reserving 50g of water, to a mixing bowl and mix with wet hands. Mix and strengthen the dough for 2-5 minutes, pinching the ingredients together and folding the dough over itself repeatedly until it’s cohesive and smooths. During this time, slowly add in the 50g of the reserved water if the dough feels like it can handle it: it shouldn’t be soupy or extremely wet, if it is, don’t add the remainder of the reserved water. - Bulk Fermentation (9:15 a.m. to 12:45 p.m.)
This dough will need 4 to 5 sets of stretch and folds during bulk fermentation, the first set 15 minutes after bulk fermentation begins, the second set 15 minutes after that. Then, perform the rest of them at 30-minute intervals as needed. After the last set, let the dough rest the remainder of bulk fermentation. - Preshape (12:45 p.m.)
Lightly flour your work surface and scrape out your dough. Using your bench knife, lightly shape the dough into a round shape. Let the dough rest for 20 minutes, uncovered. - Shape (1:05 p.m.)
Shape the dough into a round (boule) or oval (batard), then place the dough in proofing baskets. - Proof (1:15 p.m. to 3:45 p.m.)
Cover the proofing basket entirely and let it sit out on the counter for 2 – 4 hours, temperature depending. My dough was ready after 2.5 hours at about 75°F (23°C). - Bake (3:45 p.m., preheat oven at 3:00 p.m.)
Preheat your oven with a baking surface or combo cooker/Dutch oven inside to 450°F (230°C).When the oven is preheated, remove your dough from the fridge, score it, and transfer it to the preheated baking surface or combo cooker. Bake for 20 minutes with steam. After this time, vent the steam in the oven or remove the lid (you can keep it in the oven or remove it) and continue to bake for 30 minutes longer. When done, the internal temperature should be around 204°F (95°C).
Let the loaves cool for 2 hours on a wire rack before slicing.
Notes
- The dough can be placed into the refrigerator at the Proof step in its proofing basket and sealed bag to proof overnight. The next day, take it out and bake it straight away in a preheated oven as indicated in the Bake step.
If you use this recipe, tag @maurizio on Instagram so I can take a look!
What’s Next?
This sourdough bread with all-purpose flour is straightforward, but no less delicious, than those with complicated flour blends. If you want an even more hands-off approach to baking sourdough bread, check out my no-knead sourdough bread recipe.
On the other hand, it can be fun to experiment and discover what other flavor profiles we can draw out with a whole wheat sourdough sandwich loaf, or a fifty-fifty sourdough with 50% whole wheat—that is, once we readily have these flour choices at the market!


437 Comments
Hi Maurizio! I’ve made this recipe four times now – the first time, the loaf was perfect, but the following three, the loves were flat and dense. I increased kneading and added more slaps and folds to strengthen the dough, but still haven’t had much luck. Any thoughts on adjustments I should make?
It’s very hard to say without more details. Is it your starter? Be sure it’s rising and falling consistently each day and you’re using it when it’s ripe each day. If you do see strong rise in your dough in bulk fermentation and proof, be sure you’re not over proofing the dough if it’s warm in your kitchen.
I think my starter is stable – it’s been rising and falling consistently, and it passes the float test! Could the overnight proof in the fridge be the culprit?
If you proofed the dough on the counter AND overnight in the fridge, then yes it’s likely going too far! if you want to do an overnight proof (retard), skip the counter proof and place it right into the fridge after shaping.
It’s going straight from shaping into the fridge for about 14 hours. In the morning, I take it out of the fridge, let it sit for about half an hour, then preheat the oven with the Dutch oven inside. What am I doing wrong?!
so we don’t change the temperature after removing the lid? we bake on 232°C all the time, right?
so we don’t change the temperature after removing the lid, right? we bake all the time at 232°C, right?
That’s correct.
hi
started to bake good breads thanks to you, thanks Maurizio. today I will try to make this recipe but it is not clear enough your ways in shape step. do you think to show by video this step? for instance, what exact time do you preshaped dough put in the proofing basket? If you do, I will appreciate. Also what does all purpose flour exact mean? in definitions, It is written that consists of 20/80 rating soft and hard grains in some sources.
This recipe produced a great result for me! However, bulk fermentation step took twice as long as I would have expected given the temperature (no rise at all after all the folds), which caused some problems with timing. I am fairly sure I used my starter at its peak. Any suggestions appreciated. Could I try increasing the amount of starter that goes into the mix? Or did I likely just mess up the temperature control… Thanks!
Make a levain or a pre ferment from your starter to get the best results for a yeast bread. That way you know the yeast is ripe. Just mix some starter the night before with 80° water and 200g flour and you’re laughing. Also, Try and use bread flour because of the higher protein content it produces more gluten.
New on the sourdough journey here. Finally have a starter that is mature (or so I believe) for your baking schedule you say 9am. I’m currently feeding my starter 1x a day, usually around 9. Would I just use the amount of starter needed and then feed? Or should I go back to feeling at night as well so that by the morning it’s still risen? One more I have a starter in the fridge as well (been experimenting) how would I use that one for this recipe? Sorry have yet to make bread and all I have on hand now is rye flour and AP!
Today was my 2nd attempt. I nailed it on this one. Not quite as dark as yours but I like it that way personally. Wish we could post pictures here. I also like that you are posting internal temps. I use a probe after the first 20 minutes and it bakes to perfection.
Thank you!
Fantastic, so glad to hear that, Jeffrey! Bake till you hit your preference, as you did. Enjoy!
Maurizio….I cannot tell you how grateful I am for your site…for all you give …and for all you do to teach people this incredible craft. I am working my way through your recipes, your My Best Sourdough is a weekly event in our home….when the bake is done…the call out is…”Maurizio is in the house”!! Your Sourdough Pizza has been an absolute Godsend…yeast is the new TP in our area! Today was the Same-Day AP Sourdough… followed the recipe exactly and it turned out beautifully…wasn’t expecting such an exceptional loaf…exceptional crumb, crust, gentle flavor. Used KA Bread – 1/2 hr. autolyse – full 5 minutes Slapnfold – used a proof box – had to push the rest another 45 min. – baked in a Challenger. Your recipe instruction is just to perfection. Your 101 on Sourdough Starter has been a game-changer for me. Hoping all is well with you and yours through this challenging time. Grateful thanks, regards, Donna Thorne.
Happy to help, Donna! Ha ha, glad to hear MBS and pizza are so well received that — can’t get much more praise than that. Awesome to hear this one turned out well for you also, such an easy bake and still so good. No fuss can be fun and delicious, too! Wishing you good health and happy baking, Donna!
I made the beginner sourdough bread and it baked beautifully however when I cut it open the holes were so large you really didn’t have much bread and it was chewy. What could have happened?
Thanks Diana
Under proofed, is my guess! Make sure to build your levain from a starter that’s strong and mature (meaning it’s risen to it’s peak height before you take some to use). From there, bulk fermentation is very important! Make sure your bulk fermentation goes sufficiently far, you want the dough to look smooth, it should have risen considerably, and have bubbles here and there — it should look alive. If you tug on the dough a bit it should offer resistance to your tugging, it’ll feel stronger. Give the dough the time it needs in bulk fermentation! If you have to give it another 30m or hour to see these signs, do so. It’s important for this step to go sufficiently far for the dough to have enough fermentation activity before its proof.
If I don’t have a Dutch oven can I cook the loaf straight onto a baking stone?
Absolutely!
What if you are a lucky one with bread flour? I like this idea of a one day process.
You could do this same recipe just with a bit more water, to feel, as needed.
What if I have no bubbles, or maybe one after the bulk fermentation phase? Everything else looks good, used 10% WW.
You should see some signs of fermentation, it’s ok if there’s no distinct bubbles, but you do want to see some rise in the dough and activity throughout. If you don’t see anything, give it more time to ferment further. If you still don’t, you might have used your starter way too early and it was at its peak in the jar. Next time try to time that so you’re using it at peak readiness!
Thanks for the reply! I think the top of the dough dried out, my plastic wrap came loose, would that inhibit bubbles? It definitely has a rise. I’ll give it some more time. Thank you! Great website!
Pretty sure my starter was good, since I studied your starter guides 😀
Ah yes, if a dry crust formed on the top of the dough this could cause issues there. Definitely keep it covered tightly!
Thanks for all of the information and inspiration to try your recipes at home, Maurizio. I have what may be the most basic of questions: if I am to use a mature starter at about 9:00 in the morning, I’m probably going to need to feed it at about 6:00 to use it in time for the mixing, right? If I were to feed it before going to bed the night before, the starter would be past its prime by the time I tried to use it in the morning. “Mature” doesn’t just mean a starter that has been established, fed regularly, and resting & falling predictably, but one that is at its most active, bubbly, and voluminous stage following its most recent feeding, correct?
This is a very good point, Mark. The adjective “mature” could refer to the starter itself from when it was first mixed and not, how I typically use the term, referring to a starter that’s ripe and ready to be used in a mix. I’m going to have to rethink using the word mature, I could see confusion there.
But yes, you want to use your established starter when it’s ripe and at its peak height in the jar — the same time you’d normally give it a refreshment (feeding). If you feed your starter the night before carryover less starter at each feeding to lengthen the time between feedings if you need it to go a few hours longer before using it.
Thanks, Maurizio!
Can a 10″ Oval Banneton support 900g of dough? I’ve read they can only support 750g. I’d like to purchase one
to make betards, but all I can find are 10″ Oval Bannetons.
I think for 900g you’d likely want a longer oval basket. You could also scale down the dough to 750-800g so they would fit, though!
What size do you use or recommend? Would 11″ oval banneton work if I can find one?
Thanks. I enjoy reading your articles and I have learned lots. I have so many questions for you to be honest. Like today I made a 50% WW dough with 85% hydration. I slap and folded it after an autolyze, before and after adding salt. It passed the window pane test. Then I did 4 hour proof with stretch and folds every 30 minutes at around 75 Fahrenheit. I felt I got the timing right because of how the dough was reacting with the poke test and jigglyness. Unfortunately, the dough pancaked after preshape and final shape. So, I did one extra final shape, and it did hold better. The dough is retarding in the fridge right now. Is it okay if the dough pancakes like that or should I try less hydration next time? say 80%? How do I know what hydration I should use when incorporating freshly stone-milled WW flour? If the dough pancakes when I am ready to bake then I will shape it again before putting it in the Dutch oven.
I want to add as much local WW as I can because it tastes amazing and is more nutritious, but I’d like to see some gentle rise as well.
Sorry that this isn’t pertinent to this post.
Thanks.
Hi Maurizio – thanks for sharing this! I enjoyed baking this loaf today – I reduced the overall water amount by 20g and found the dough to have developed very well by fold #4 in bulk fermentation. Your blog has gotten me so excited about sourdough, so just wanting to share my successes from your guidance. Thanks again!
Thanks for the feedback, Allison! Glad to hear it went well — and that you made the adjustment as you saw fit! Happy to help and happy baking 🙂
I’m surprised to see you write that your AP flour is 11.7% protein. My local AP (from the Rogers mill in Armstrong, BC) is about 13%. I guess that explains why I’ve been able to use it without issue for baking bread using your regular recipes.
Yes, the term “all-purpose” is so, so vague… It’s not a good classifier, in my opinion, much better to spec out the protein percentage and ash content. But it is what it is 🙂 Yes, with 13% protein I would classify that here as “bread flour” (which, again, isn’t a good classifier!).
Another excellent loaf! I just baked 2 – if I’m going to the trouble might as well have one for freezer. One followed the AP recipe exactly, for the other I used a flour from an artisan bread bakery in CO, protein unknown, but likely higher than AP. Both are looking great! but the CO flour dough was a little bit easier to handle. For both I used white whole wheat to dust the counter when forming the loaves, made them a bit easier to work, better grip.
I’ve consistently found excellent success, less stress, and fewer burns, with proofing the formed dough overnight in the fridge and putting it straight (cold) into a cold oven the next day. Set temp to convection 475, lower to convection 450 when it beeps the end of pre-heat, then after 20 minutes remove lid and lower to 425 for rest of bake. It is way easier to slash cold dough, something I’m not very skilled at, and the oven spring is excellent! (plus, one of my favorite baking vessels is a ceramic that is developing some ominous cracks so I’m afraid to treat it like a cast iron).
A question – have you tried Anadama Bread? Back in bread machine plus instant yeast days it was one of my favorites, the internet doesn’t seem to have any creditable sour dough versions that I can find. Would love to see your take on that one (when you have a good supply of flour on hand to allow experimentation).
Stay safe and thanks so much for all you do here!
Thanks so much for all this feedback, Karen! I’ve not tried baking with a cold oven, an interesting idea indeed. I’ll have to experiment. Yes, I’ve heard of Anadama bread but I haven’t experimented with that, either. Adding to my list!
Wishing you good health and happy baking 🙂
I really liked this recipe, however my dough did turn out quite sticky after proofing overnight in the fridge (guessing I overhydrated a bit). The loaf looked great but when I cut a slice after cooling, the flavor was not there! I haven’t had this happen before so not quite sure what I did wrong – it really lacked any sourdough flavor for some reason.
Nick — sounds like a bit too much water, definitely cut back a bit next time. Yes, with a direct process (no cold proof) I find the flavor is more delicate, wheat-forward, and less sour.
Thanks for the reply! I will have to try this one again with a little less water.
Thank you so much for all that you do. Really is beautiful, dedicated craftsmanship. Please, keep it up! I also had the borderline pancake batter issue and have seen your recent 50g of water suggestion. However, my question is, would adding more starter in the mix benefit/hinder/wouldn’t matter? I’ll try again tomorrow with all your suggestions in the comment box. Thanks again!
Appreciate that, Conor. Adding more starter will likely make things worse if you maintain a liquid (100% hydration) starter — you’d be adding more water into the mix. If you have a stiff starter (50-65% hydration) it might actually help things because it’ll bring more strength to the dough. I’d hold back an extra 50g from the mix in addition to the 50g I recommend in the writeup (so 100g total). Don’t add it in if the dough feels weak. Have fun with it and let me know how it goes!
Hi there! I have my bread in the oven as we speak…Thanks for such an informative post. Just starting out in the bread world, especially sourdough.
Reading the comments I think I may have the extra hydration problem. I must have missed the part about keeping some water out this time, but hopefully I’ll still get an edible result and fix my technique for next time…
It’ll likely turn out just fine! In general, always be aware of how the dough is feeling when you’re mixing and hold back water if necessary — there’s always some measure of adjustment there! Enjoy 🙂
This didn’t work for me, after bulk fermentation the dough was about the consistency of slime and behaved as such, running all over the workspace. I followed the recipe and directions to a tee and it just didn’t work. I live in a fairly high humidity area so that may be the issue. I used King Arthur organic all purpose flour. I am now in the post shape proofing stage, I placed the slime in the Kitchen Aid, added about another 100g of flour very slowly and using the dough hook worked the slime for about 10 minutes at slow speed. This made the dough workable but still fairly runny, I added another 30g of flour to the workspace and the dough and was able to get it to hold together well enough to shape into a round. Hopefully this will produce a nice loaf, but it definitely won’t be done in a day since I’ve been working with the dough now for about 7 hours and it still needs to go through the second rise. Baking tomorrow.
Sorry to hear that, Jolly! Yes, sounds like an over hydration issue there given your location and humidity. Next time drop the water in the mix, I’d say withhold the 50g I talk about in the recipe but also reduce by another 50g before that and see if this helps.
In the morning, if your dough looks like soup in the container, you can dump it out and shape it again and bake like that OR you could shape and place it in a bread pan to bake as a sandwich loaf — that’s always my last saving grace!
After a night in the refrigerator I was pretty stoked that it was going to work, but alas not so much. After moving it from the proofing container it flattened out again and resembled a huge bially. I have reshaped, used a bit more flour and am going to give it another hour before sticking it in the oven come what may.
Hi Maurizio, your blog has been a life-changing godsend! trying this new recipe and I’ve noticed that after the bulk fermentation my. Was extremely soft, blobby, and sticky. It was still dome-shaped in the bowl and had bubbles at the edges and on the surface but as I’m letting it relax before shaping it I’m noticing that it it’s going to be difficult to work with. What did I do wrong?
Might have been too much water in the mix! Next time, omit that 50g I mention holding back until mixing.
Will do! Appreciate the personal response. 🙂 keep up the great work
PS: interesting Lee after I let it relax and came back to it it was much easier to shape especially with a little dusting of flour. I proved it in the oven with the light on but when I brought it out it was just so incredibly soft and blah be still. Threw it in the Dutch oven anyway and it came out absolutely delicious but did not rise very much during the bank. Still good though. The crowman crossed are nearly perfect just it’s rather flat in shape
trying this for the first time today. I’ve only baked 4 loaves total over working to maintain a starter regiment for almost a month. oye. getting it to a mature state at a time I can use it was troublesome, but I’m getting there. my second batch of loaves, and, particularly, my last one I baked came out great. finally! they’re a little dense still, but getting a better crumb, finally. I love the simplicity and timing of this recipe. trying it today!
Stick with it, Matt! It can be a little frustrating to get into a good rhythm at first, but you’ll get there.
I see a few questions in the comments about wet dough, and the answer has been to “leave out the reserve 50g of water.” But I don’t see anything in the recipe instructions mentioning this 50g of reserve water. Could you please explain this to me?
Sorry about that, Nelson. This wording is now in the Mix step!
Hi Maurizio, I like how simple and flexible this recipe is, I baked my loaf today. the ear, crust and color everything looks very nice except the burnt bottom. I always preheat the oven at 500 for about an hour along with the Dutch oven. I baked at 500 for 20 mins with lid on and another 10 lid off and another 10 minutes at 450 ( kinda like your 50% whole wheat temp setting), but the bottom is very dark. I wonder if I need to adjust the position of the rack or maybe even temperature? Would like to hear your advice on this matter. Thanks. ( has a fan of your work quite a while:) )
Hey, Fey. I’d say drop the preheat temp to 450F and this will help quite a bit. Also, check out my post on baking in a Dutch oven, I have a bunch of tips in there on how to reduce that burning!
Thank you so much for your reply. I will certainly try a different temp next time and maybe even use some corn meals like it suggested in the article.
I find the dough to be quite “wet”. I had a difficult time removing the loaf from the proofing basket even though I used a bit extra flour + seeds. I managed to get the loaf baked in my Lodge dutch oven. I should note that I did the room temperature, same day bake. The crust was nice and crunchy, the crumb was the best I’ve had in the 5 or so years I’ve been baking. I think I’ll knock the hydration down a bit and see what happens. Thanks for the recipe!!
Glad to hear things still turned out great, Steven! Yes, sounds like a reduced hydration will certainly help next time. Take notes on the adjustment and keep refining that water percentage added to the dough, this will help you dial it in over time with the flour you’re using! Happy baking 🙂
Glad to hear all that, Silke! Finding that perfect proof point is always a work-in-progress and we do our best to get as close as possible. Just be observant of the dough and how it feels and looks! Happy baking 🙂
When you say: You can substitute flour: use 5% (23g) whole grain rye, or 10% (46g) whole wheat flour without modifying the rest of the formula.
Does that mean I take away 69g of all purpose flour? Or add to the mix?
You’d take that amount of AP flour away, and substitute it with the amount in parenthesis (I’ll make this more clear in the post!).
HI!! I just put my loaf in my dutch oven to bake but when i flipped it out on the the parchment paper/cutting board, it started to flatted and droop down over the edge. I was able to get it into the dutch oven but it looks like a mess. What could I have done wrong in proofing that it deflated as it did? Thanks!!
Sounds like the loaf was likely not shaped tightly enough during shaping! Be sure you give it a nice, smooth skin on the dough so it holds shape all the way to bake time.
HOW DO I FIND OUT THE PERCENTAGE OF PROTEIN IN A FLOUR, SINCE IT’S NOT ON THE BAG?
Look up makers site or find articles. This one is helpful: https://www.cooksillustrated.com/articles/596-a-guide-to-all-purpose-flour-shopping-tips-the-best-brands-and-more
You’d have to contact the miller or look online, they should have it listed somewhere!
Is there the standard nutrition info box on the bag? If so, you ought to be able to figure out the percentage using that and a bit of math.
Hi Maurizio, simple question. Saran Wrap and me are not friends. When you say to cover the dough, can I use a towel instead? Thanks
Anything that will help prevent the dough from drying out. Here a towel wouldn’t suffice — I really like these reusable plastic bowl covers.
Can I substitute 50 gr. of the total white four with 50 gr. whole wheat flour? I like that touch. Thanks.
That’ll work well! If the dough feels extremely dry when mixing, adjust with more water as necessary.
Hi Maurizio, Thanks for this recipe. Made it last night and doubled for two loaves. Used Whole Foods AP (no listing of % protein) and the dough was very slack, but got the smooth dough and bubbles at end of proof. Super sticky though. In fact it stuck to my proofing basket cloths so much it was a bit of a disaster. Still, the bread tasted great. On one loaf I seeded the basket with Trader Joes “Everything Sesame Seasoning” So good! Will definitely do that again. Anyway just curious if you had any ideas on the slackness and sticking to the cloth?
I had a very similar experience. It was “soupy” – I tend to find this happens with AP flour loaves only even with 5+ turns/folds to build strength. Any ideas? Or is it just the nature of AP flour to be so slack?
I think if the flour is under 11%, like Gold Medal, Pillsbury, etc, you get the soupy mess. What he used (Central Milling Artisan Baker’s Craft) is high-protein AP, same with KAF. Next time I will hold for on some of the water, I have the lower protein CM Beehive.
Yes, hold back some of the water to help bring more strength to the dough!
Daisy: Sounds like a bit too much water for your flour. Omit that reserved 50g of water (or more) as necessary to adjust for your flour!
Will do and report back. Thank you!
Sounds like a bit too much water for your flour. Omit that reserved 50g of water (or more) as necessary to adjust for your flour!
I’m so excited about this recipe! I’m going to try it in a couple of days. One simple question…how long after I feed my starter should I use it in the recipe? If I feed it the night before, and then add it at 9am the next morning, will that be ok? Or should I feed it early in the morning, maybe 6am, and let it rise for 3 hours, and then use it in the recipe at 9am? I want to make sure it is at its peak. Thanks.
Susan — you want to use your starter when it’s mature (ripe, risen to its peak) when you use it to mix into this dough. This means if you feed normally at night and in the morning, use your starter before you feed it in the morning.
The recipe is a game changer! Made it yesterday, and it is simple, quick and divine! Came out more like a crusty french bread than a hearty sourdough, but something different is good. Had a beautiful rise and crumb, though I should have cut into it sooner when it was slightly warm because later in the day it got a bit chewy. Next time I have a slice, I’ll reheat it slightly to bring back the crispy crust. Thanks for this fabulous recipe. I’ll post a pic on Instagram. –slr
Thank you for posting this timely recipe! I was wondering if it’s possible to create a DIY bread flour by adding vital wheat gluten to all purpose flour, and what quantity you would recommend?
You can certainly augment your weaker flour to be stronger with VWG. Unfortunately, I have never used it so I can’t say!