


I’ve baked this loaf, or some variant of it, so many times I’ve lost count. This bread was born when I first got my hands dirty with flour and water. Its parent—if you could call it that—was originally Chad Robertson’s Tartine loaf with his liquid levain, brought to life, not with intensive kneading, but rather a series of folds during bulk fermentation.
My best sourdough recipe has grown since then. It has developed a personality of its own as I’ve expanded my baking repertoire and investigated the many facets of baking naturally leavened sourdough. It’s taken on and lost traits from many great bakers out there, borrowing from their inspiration and giving me a direction to raise this bread into something of my own. This bread is one that doesn’t entirely taste like anything else I’ve had, and yet, still employs many of the same processes and ingredients.
That’s one of the greatest things about bread: it can taste and look dramatically different just by changing the two hands that create it. Calling this post “my best sourdough recipe” is a lofty claim, but honestly, I do believe this is the best bread I’ve made thus far.
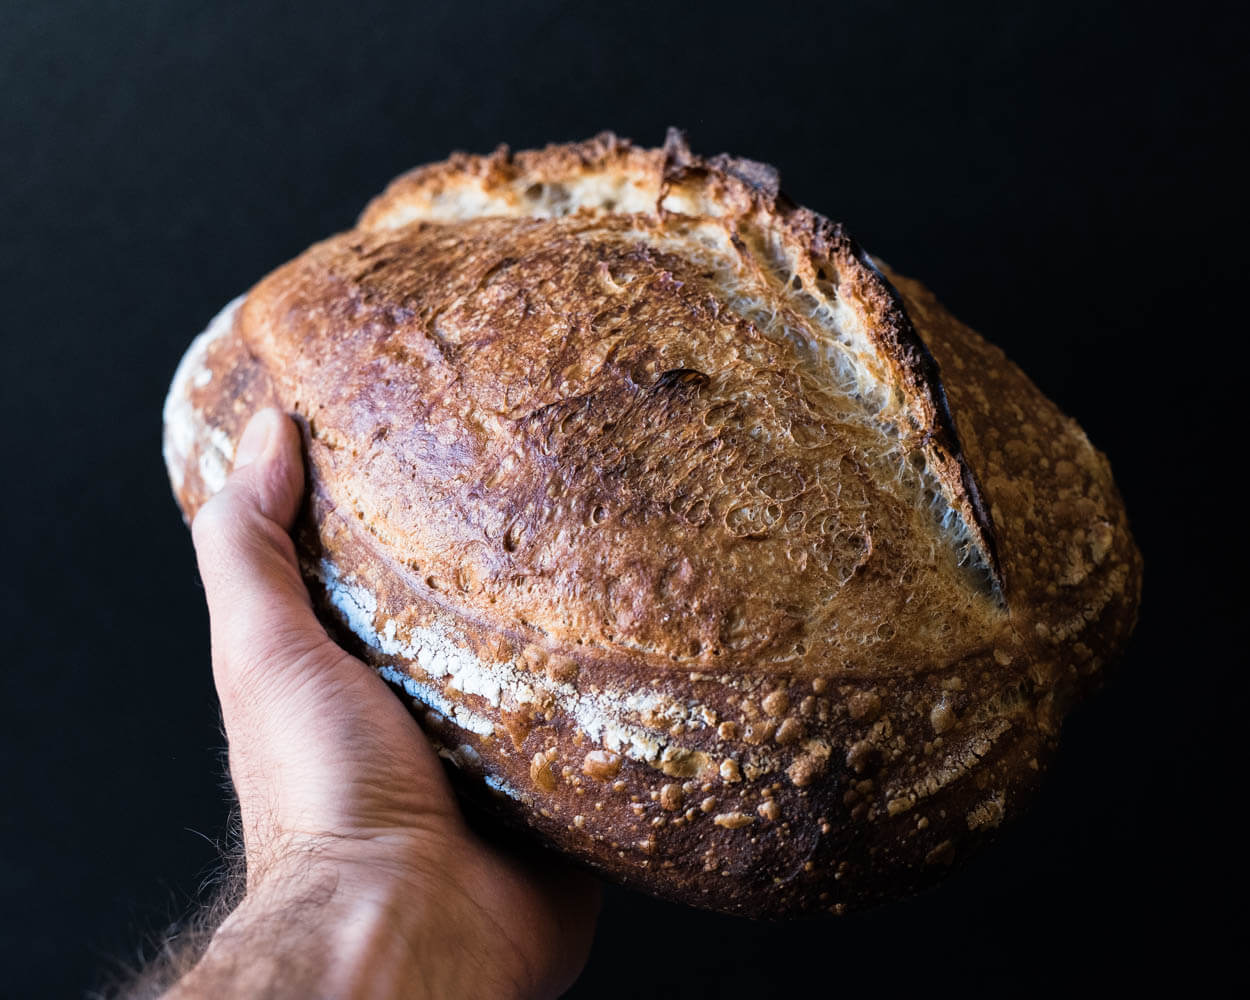
I sometimes revisit a discussion I had with a few readers of this site and their comments: “bread is just bread, it’s something to be eaten and is something life-giving, isn’t that enough?” I agree, but when something becomes a passion for you it’s important to set lofty goals and get excited when breakthroughs are made. Isn’t that the definition of a craft and the relentless honing required?
I’ve taken my best sourdough recipe from its most nascent form to its current stage and can trace through the years each change to its formula or process — and I’m sure I’ll be changing things well into the future as it continues to evolve — a work-in-progress.
Yes it’s excessive in some way, but there’s an excessiveness to ambition as well.
John Mayer
Maybe the actual recipe for this bread isn’t the most important part, but rather, the lessons and insights learned along the way as I continually hone my baking proficiency. I’m not claiming this recipe will yield the perfect loaf every single time, but I dare say it comes the closest for me—and that’s exciting.
This bread is the bread that I want to make the most often, the one my family asks for the most often, and the one I share most often. I have a special place for whole wheat bread, and taste-wise, it might make me want to call that my favorite one day, but the versatility of this bread is pretty hard to beat. In fact, I bake this so often that my freezer has an entire shelf lined with pre-sliced loaves wrapped and in bags labeled pane perfetto.
While the actual formula for my best sourdough recipe is simply a mix of flour, water, salt, and levain, there are many nuances here to pay close attention to; here are a few key things to successfully making this bread:
- An active starter
- An autolyse
- A high hydration
- Sufficient dough strength
- A warm and complete bulk fermentation
- A long, cold proof
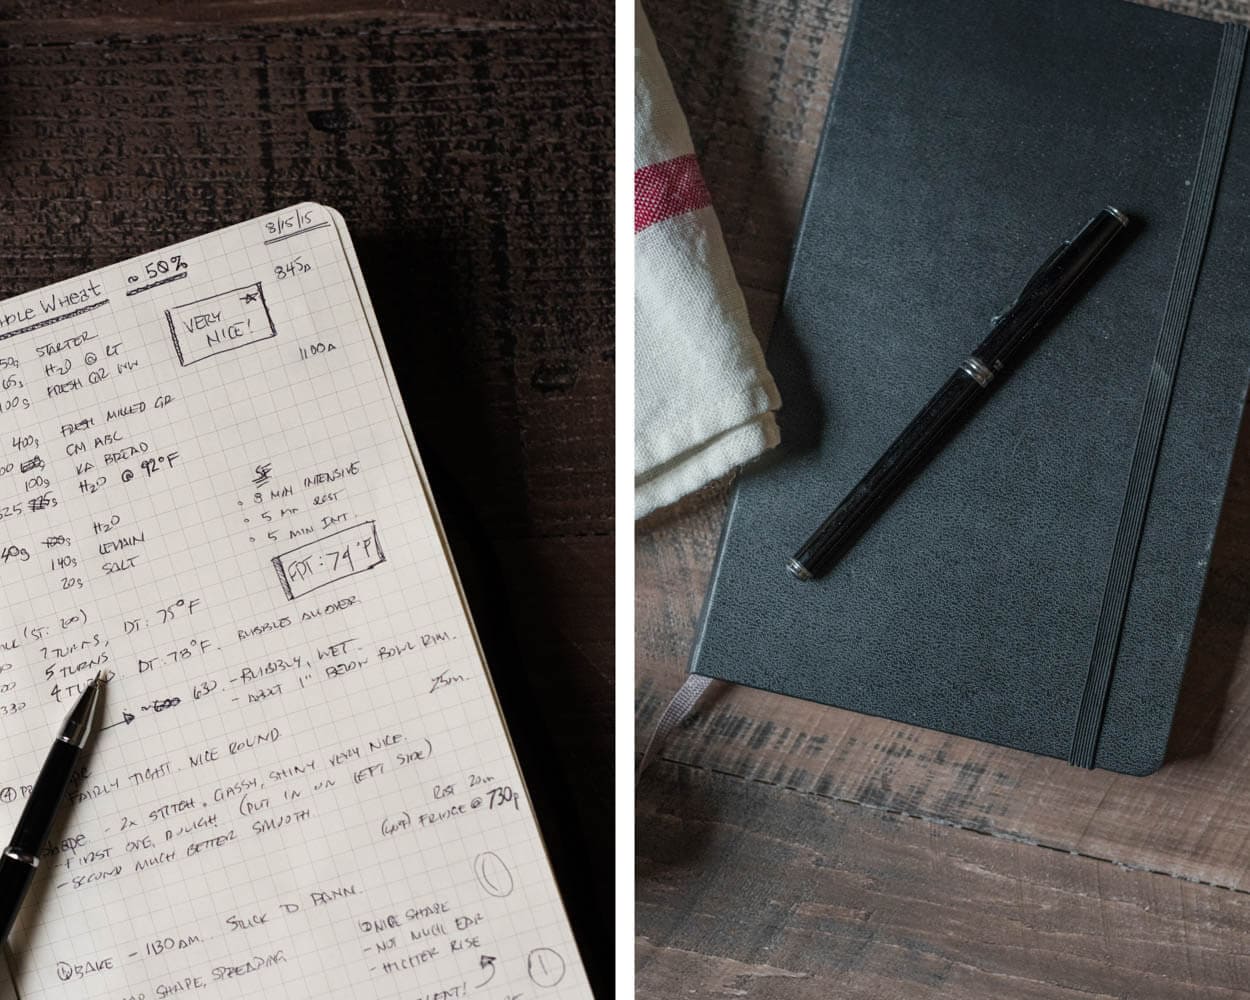
Before writing this post, I pulled out my trusty notebook (or use my free baker’s note sheet!) and paged through the handwritten (and flour-ridden) pages to find any scribbled “ah-ha” moments or little notes jotted down in the margin, along with a few curse words peppered throughout, and have bundled them up into this entry (sans curse words to keep it clean). A compendium of sorts containing my insights, breakthroughs, and ah-ha moments.
My best sourdough recipe doesn’t require an exotic blend of hard-to-find flour, a complicated multi-step levain build, or the use of a mechanical mixer. It’s built around making this bread in your home kitchen.
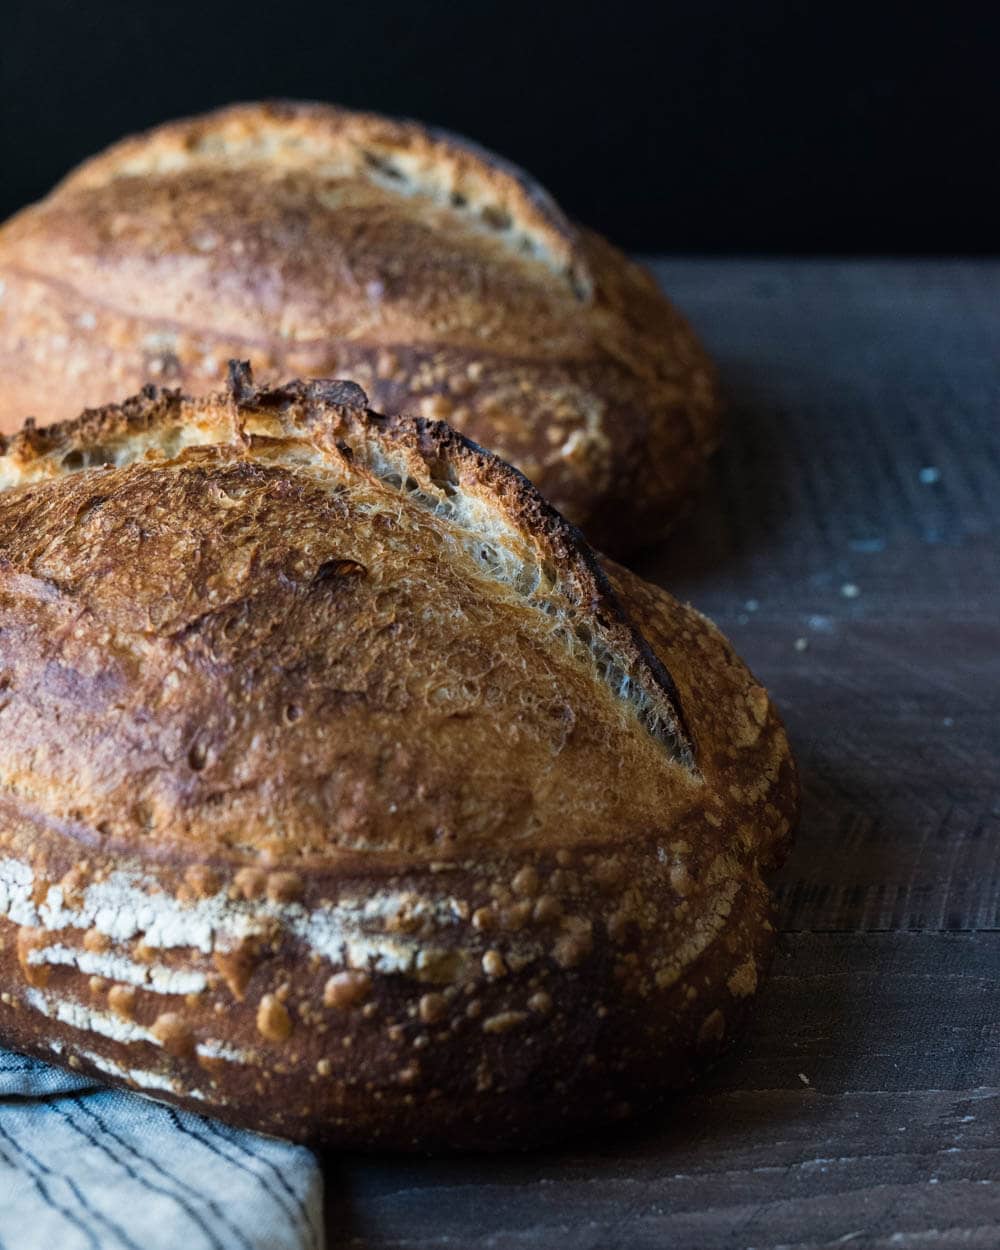
My best sourdough recipe is very highly hydrated and can be challenging. When mixing, be watchful for the signs and adjust the dough hydration to suit your environment and flour. If you’re not used to working with high-hydration dough, please start with hydration somewhere in the middle and slowly work up.
Flour Selection
I’ve tried a lot of flour out there (and am an avid user of freshly milled flour), indeed not everything there is, but I’ve ordered enough now that the UPS guy thinks I might have a bakery in my backyard. I have baked some great bread with Hayden Flour Mills, Central Milling, and Giusto’s. I’ve also had great success with King Arthur Baking high-protein white flour.
I have consistently made incredible loaves with Giusto’s flour; I only wish it were organic. Nevertheless, I find myself ordering a box of it here and there and enjoying the results every time. Of course, as I mentioned before, try whatever is local first (sadly, my source for local, organic flour is no longer available) and whatever you like.
When trying new flour, remember to hold back more water than you might otherwise, and then slowly add it in at the end of mixing or throughout bulk fermentation. Now, on to my best sourdough recipe.
Watch Me Make This From Start To Finish
I absolutely love this bread and make it often, but it can be challenging for first-time bakers. Be sure to watch my YouTube video below for a look at how I handle the dough and every step of the process.
If you’re brand new to baking sourdough, check out my Beginner’s Sourdough Bread recipe; it has in-depth information on every step in the baking process. Then come back and bake this!
My Best Sourdough Recipe
Vitals
| Total Dough Weight | 1,800 grams |
| Pre-fermented Flour | 6.4% |
| Levain percentage in final dough | 17.1% |
| Hydration | 85.0% |
| Yield | Two 900g loaves |
Total Formula
The target final dough temperature (FDT) is 78°F (25°C). This dough loves a warm ambient environment. Try to keep the dough at the listed temperatures if possible; use your oven with its light on inside, your microwave with a bowl of steaming water, or a proofer. I use my instant-read thermometer to check the dough temperature periodically throughout bulk.
For more information on how to calculate DDT, monitor temperature, and maintain temperature have a look at my post on The Importance of Dough Temperature in Baking.
| Weight | Ingredient | Baker’s Percentage |
|---|---|---|
| 852g | Medium-protein bread flour (~11.5% protein, Giusto’s Artisan Bread Flour) | 90.00% |
| 94g | Whole wheat flour (Giusto’s Organic Stoneground Whole Wheat) | 10.00% |
| 710g | Water 1 | 75.00% |
| 95g | Water 2 | 10.00% |
| 17g | Salt | 1.80% |
| 30g | Ripe sourdough starter (100% hydration) | 3.20% |
As I mentioned above, my best sourdough recipe is an extremely high hydration. If this is your first time working with this recipe, reduce the total water or hold water back during mixing to ensure your dough can handle the addition. The amount of water your dough will handle will vary based on your particular flour and environment—play it safe the first few bakes and work the water up gradually once you get a feel for the dough.
My Best Sourdough Recipe Method
1. Levain – 9:00 a.m.
Build the liquid levain in the morning and store somewhere warm around 77-80°F (25-26°C) ambient for 5 hours.
| Weight | Ingredient | Baker’s Percentage |
|---|---|---|
| 30g | Ripe sourdough starter (100% hydration) | 50% |
| 30g | Medium-protein bread flour (~11.5% protein, Giusto’s Artisan Bread Flour) | 50% |
| 30g | Whole wheat flour (Giusto’s Organic Stoneground Whole Wheat) | 50% |
| 60g | Water | 100% |
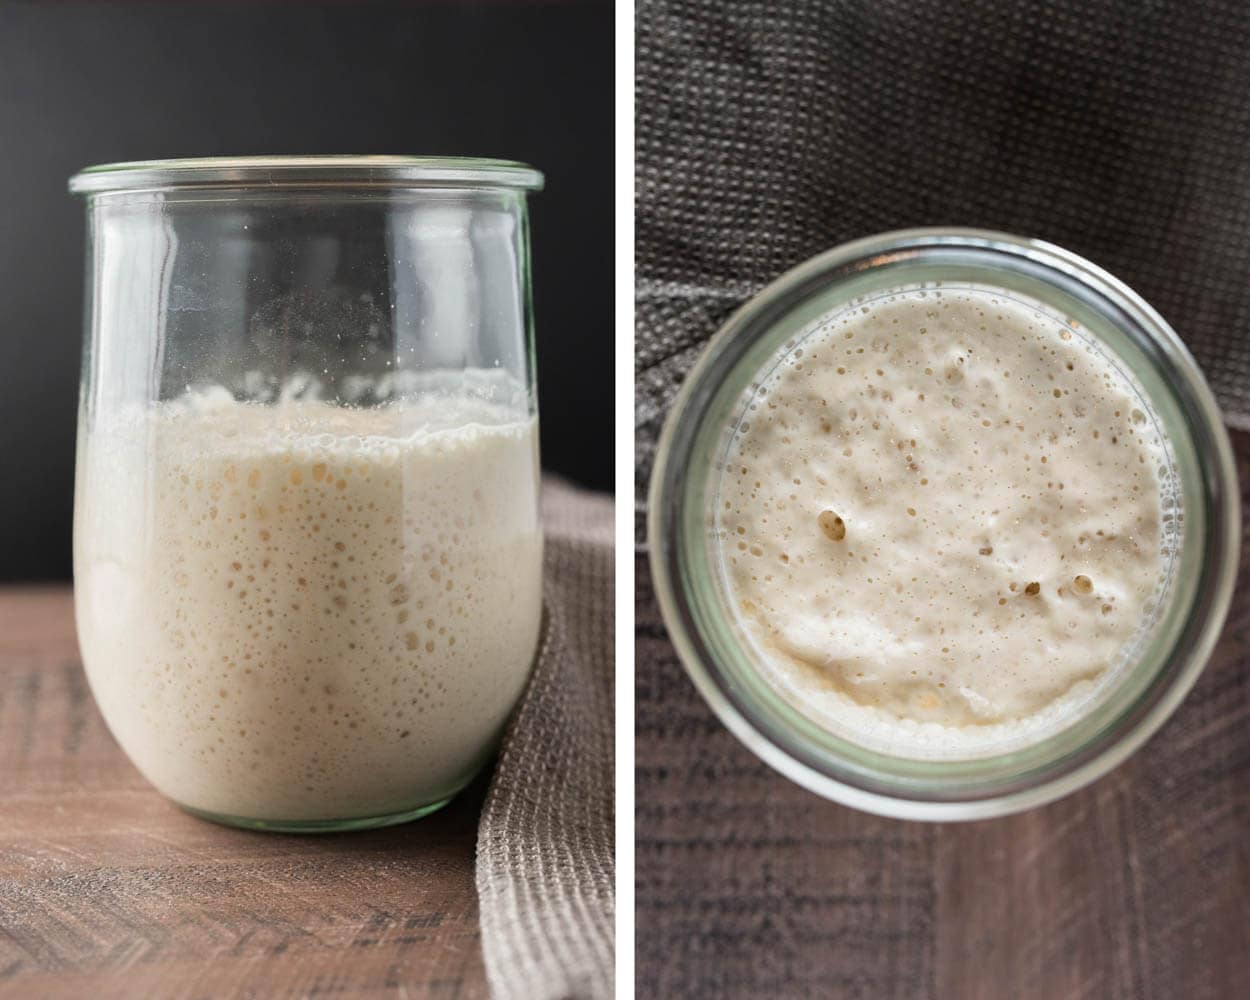
If you haven’t yet read through my post on my sourdough starter maintenance routine, check it out for some helpful hints on what to look for when your sourdough starter and levain are ripe and ready to use.
2. Autolyse – 12:00 p.m.
This highly hydrated dough can be mixed by hand or with a mechanical mixer (like a home spiral mixer). Either one will yield great results, but here, I’ll discuss mixing this dough by hand.
Mix the flour and water in a bowl until all the dry bits are incorporated, then cover. Ensure all the dry flour is hydrated—store near levain (we want the dough’s temperature to remain warm).
| Weight | Ingredient |
|---|---|
| 822g | Medium-protein bread flour |
| 64g | Whole wheat flour |
| 650g | Water 1 |
3. Mix – 2:00 p.m.
| Weight | Ingredient |
|---|---|
| 95g | Water 2 |
| 17g | Fine sea salt |
| 151g | Ripe liquid levain (see above) |
Add the ingredients to your dough in the mixing bowl that underwent an autolyse. Add the water slowly, in stages, while you’re mixing, and stop adding water if the dough feels excessively wet or soupy at any point.
Perform folds for about 2-3 minutes in the bowl. Grab under one side, pull up and over to the other side, then rotate the bowl a bit and repeat. I do this probably 30 times or so (it goes fast and easy). In the end, the dough should still be shaggy, but it will be more smooth and will start to hold itself together more in the bowl.
If you’re a fan of the slap & fold mixing technique I’ve described in the past, you can do this but be aware that it is difficult at this hydration. It’s best to first slap and fold the dough without adding all the reserved water to get the dough smooth and strong. Then, return the dough to the mixing bowl and slowly add the remaining water while folding the dough.

I find that the correct level of dough strength at this point is important. You want the dough to be smooth, elastic, and strong, but it doesn’t have to be fully developed, and it will still be shaggy. We will continue to strengthen the dough through stretch and folds in bulk fermentation.
Transfer dough to a tub or thick-walled bowl for bulk fermentation.
5. Bulk Fermentation – 2:15 p.m. to 6:15 p.m.
At 78°F (25°C) ambient temperature, bulk fermentation should go for about 4 hours. Perform six sets of stretch and folds during the bulk. The first three are at 15-minute intervals, and the last three are at 30-minute intervals. After these folds (2 hours and 15 minutes have gone by), let the dough rest for the remainder of bulk fermentation.
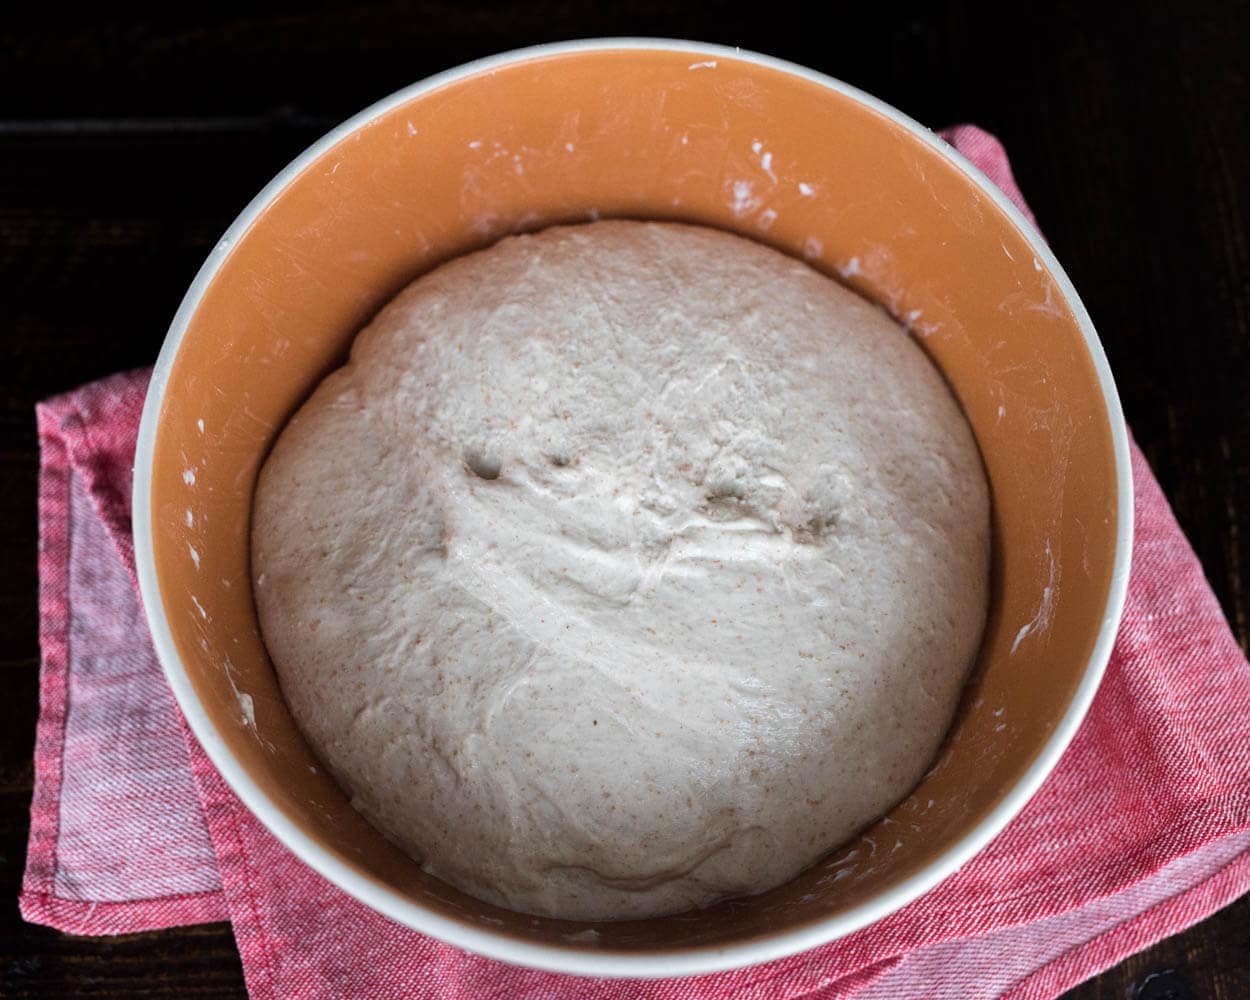
I stretch and fold more vigorously at the beginning of bulk than usual since it is extraordinarily slack and extensible (due to this recipe’s high hydration and autolyse). Pick up one side of the dough with both hands and pull it up, just before tearing, and fold it over to the other side. Rotate your container and repeat 4 or 5 times. That is one set.
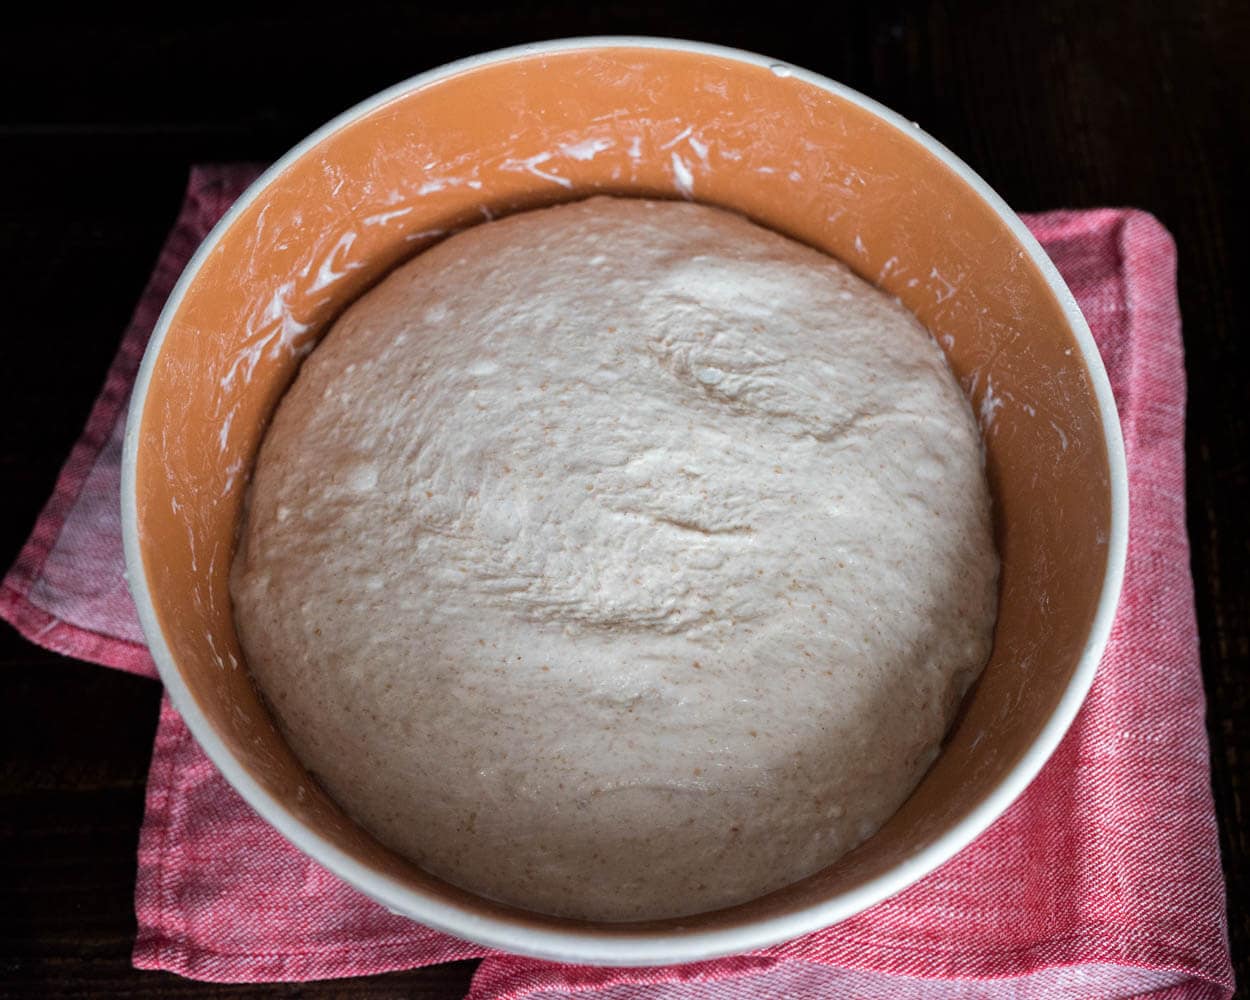
Above, you can see my best sourdough recipe dough halfway through bulk, after about 2 hours. There is no significant rise as of yet, but the edges are beginning to dome downward, and the dough’s texture is smoothing out slightly. We still have several more folds to do and more strength to build.
It is essential that the dough is kept near 78°F (25°C) as much as possible (minor fluctuations up and down are ok). If temperatures dip down too far, you might have to extend the bulk fermentation duration to compensate, and vice versa. Use your judgment, the signs described below, and be flexible.
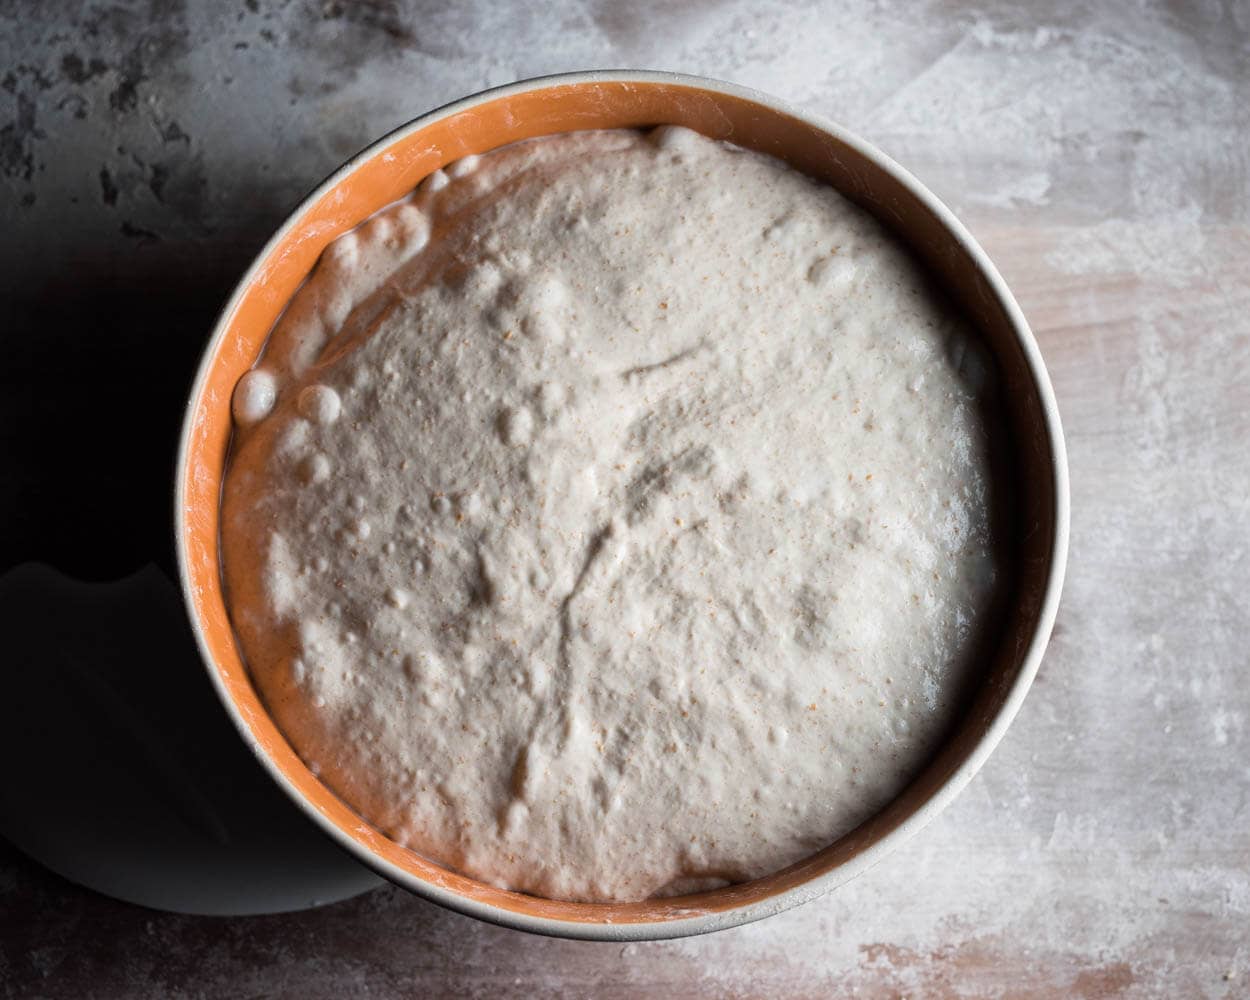
At the end of bulk, your dough should look very gassy, with some bubbles here and there, and the edges where the dough meets the bowl should be slightly domed. You can see all these signs in the image above.
When you gently shake the bowl, the entire mass jiggles from side to side—very alive. You’ll also notice that compared with the photo at the beginning of bulk, the dough is smoother and holds its edges, folds, and creases more readily (most of the bumps and ridges you see are due to trapped gasses from fermentation).
6. Divide & Preshape – 6:15 p.m.
Divide the dough into two halves and gently preshape each piece of dough into a round. Then, let the dough rest for 30 minutes, uncovered. Act quickly when handling this dough and rely heavily on your bench knife. I try to use my hands as little as possible when dealing with the dough at this point.
7. Shape – 6:45 p.m.
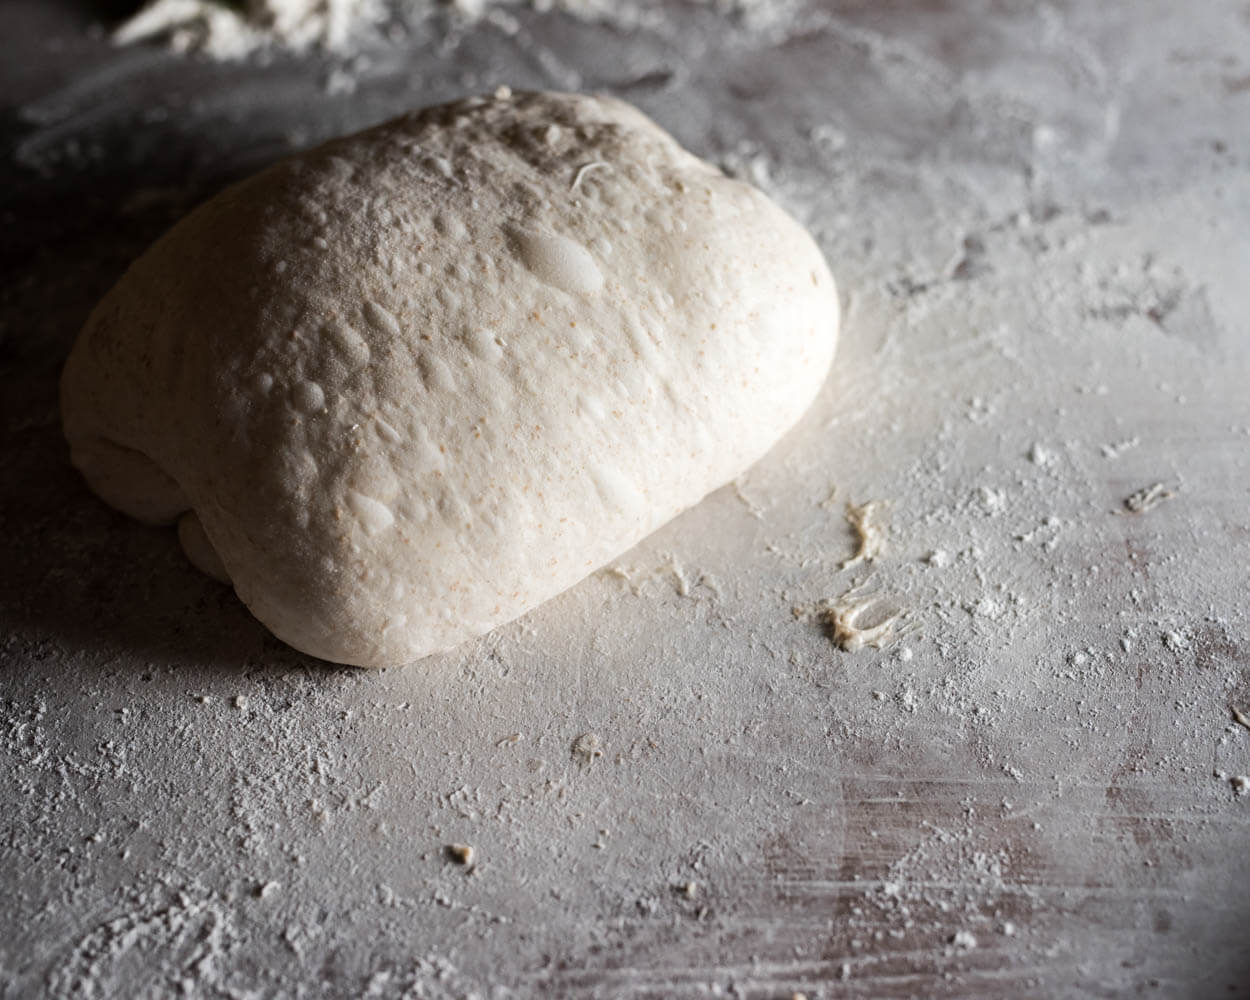
Lightly flour the top of your dough rounds and flour the work surface. With this recipe use a little more flour on the surface than normal, the dough will be extremely sticky and wet. Flip each round and shape into a batard (see notes below) or boule, whatever your preference.
Here’s a video of how I shape a bâtard. With this dough, be sure to use the “slack dough” shaping method since the dough is such high hydration.
I prefer to shape these as batards, and my shaping method is as follows:
- Flip pre-shaped round
- Fold the bottom up to about halfway
- Fold the left side over to about 3/4 to the right
- Fold the right side over to cover left
- Stretch top up & away from the center and fold down to about half (you’ll now have a “letter”)
- Grab a little of the dough at the sides near the top and stretch it over the center, so the dough crosses. Imagine lacing up a shoe where you first grab your laces and cross them over
- Repeat three times from top to bottom (the result will look like a laced up shoe)
- Take the bottom and gently roll the dough up to the top and try to seal it slightly when done rolling
Alternatively, if the dough feels pretty strong, you could shape it by “cinching” up the dough. For more instruction on how to shape this dough as an oblong loaf, see my post on how to shape a batard (with video!).
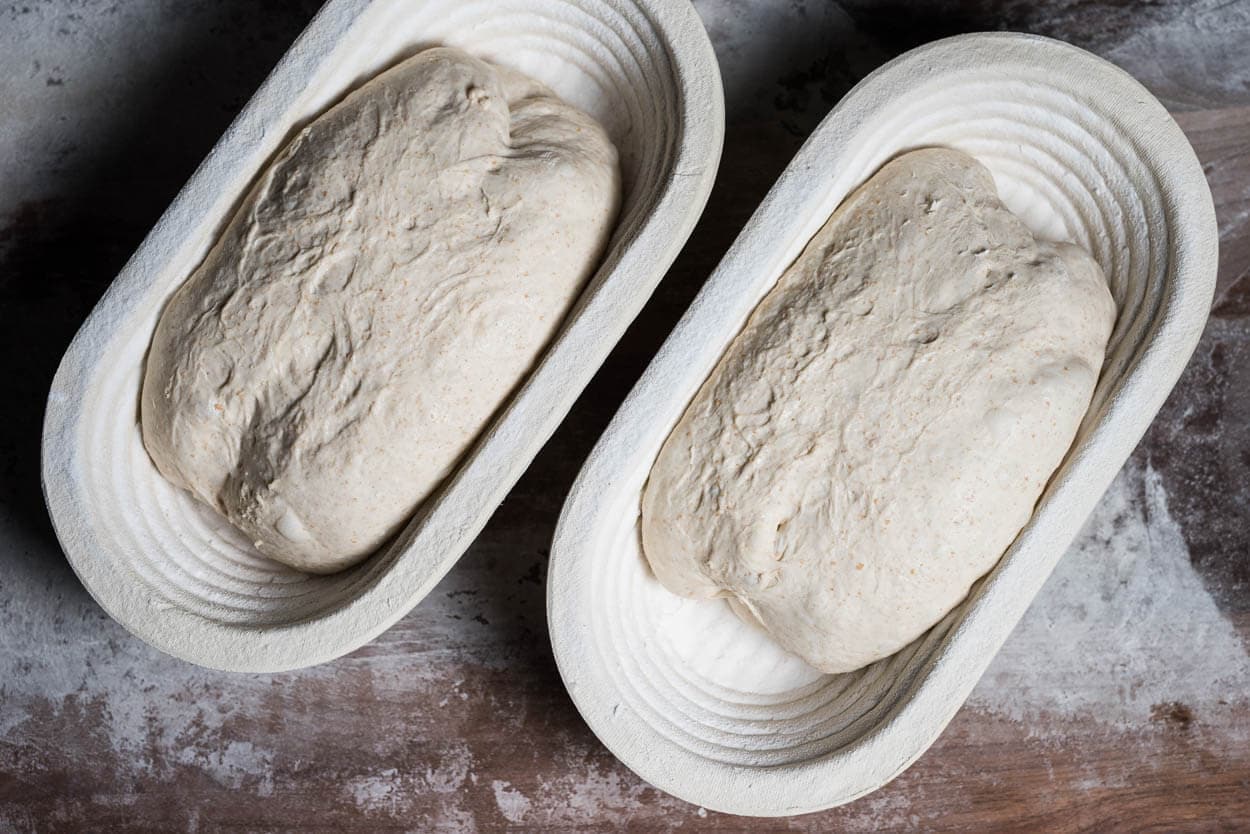
After shaping, let the dough rest on the bench for a few minutes and then place it into a banneton that is lightly dusted with white flour. You’ll see above my bannetons give the dough plenty of room to relax and expand in the fridge overnight. If your proofing container is on the smaller side, and you find your dough almost spilling over the edges, it might be time for a larger basket.
8. Proof – 7:25 p.m. to 9:00 a.m., the next day
Cover your banneton with plastic and place it in the refrigerator at 38°F (3°C) overnight.
9. Bake – Next Morning: Preheat oven at 8:00 a.m., Bake at 9:00 a.m.
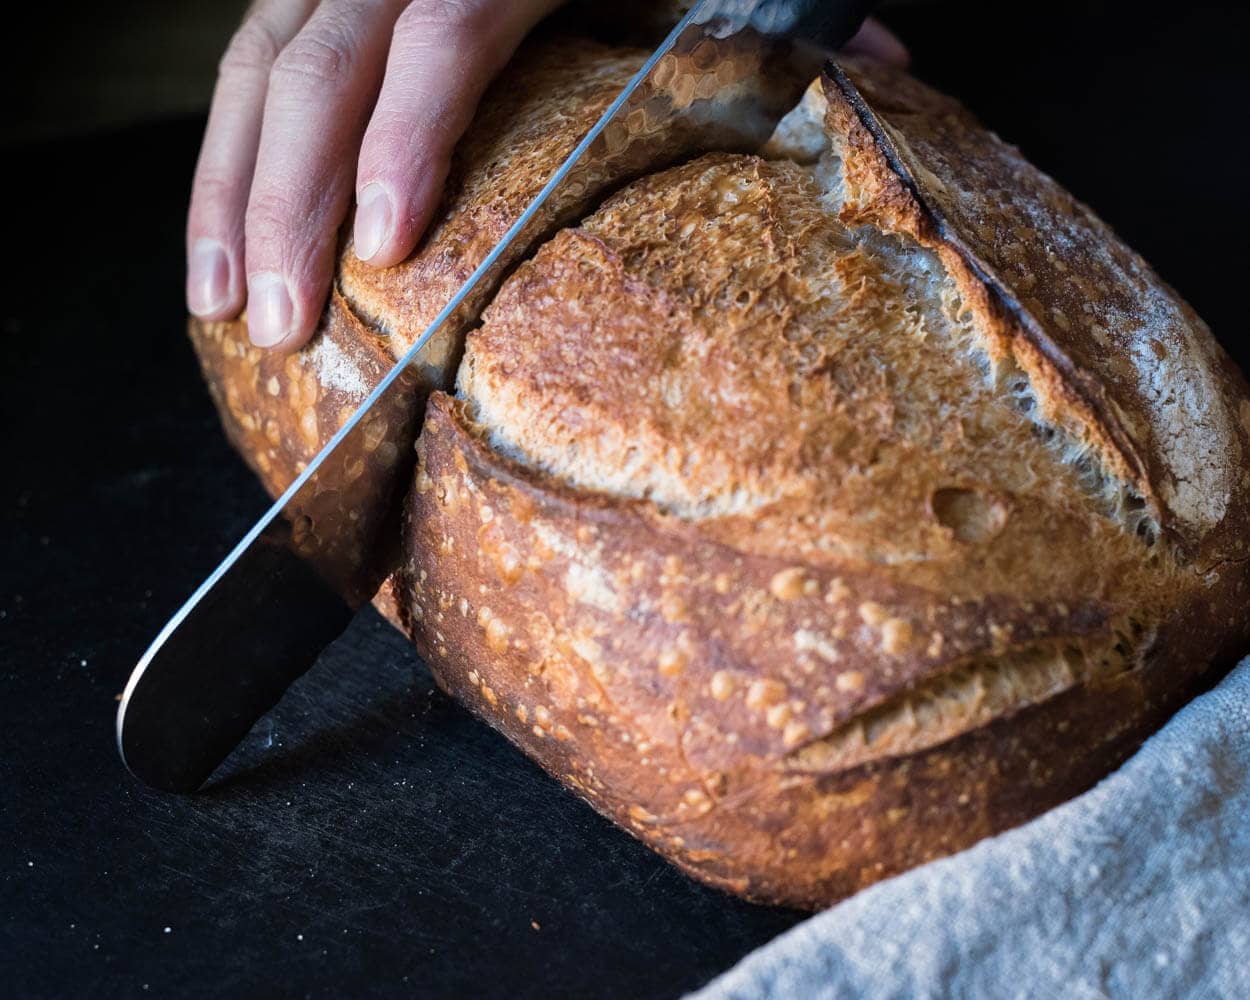
Preheat your oven to 450°F (230°C). Remove the dough from the fridge (there’s no need to let the dough come to room temperature) and uncover. I scored the dough with a single, long slash to get that dramatic opening when baked. I keep the blade at a reasonably shallow angle so the taut skin created during shaping will “peel” back as the loaf rises.
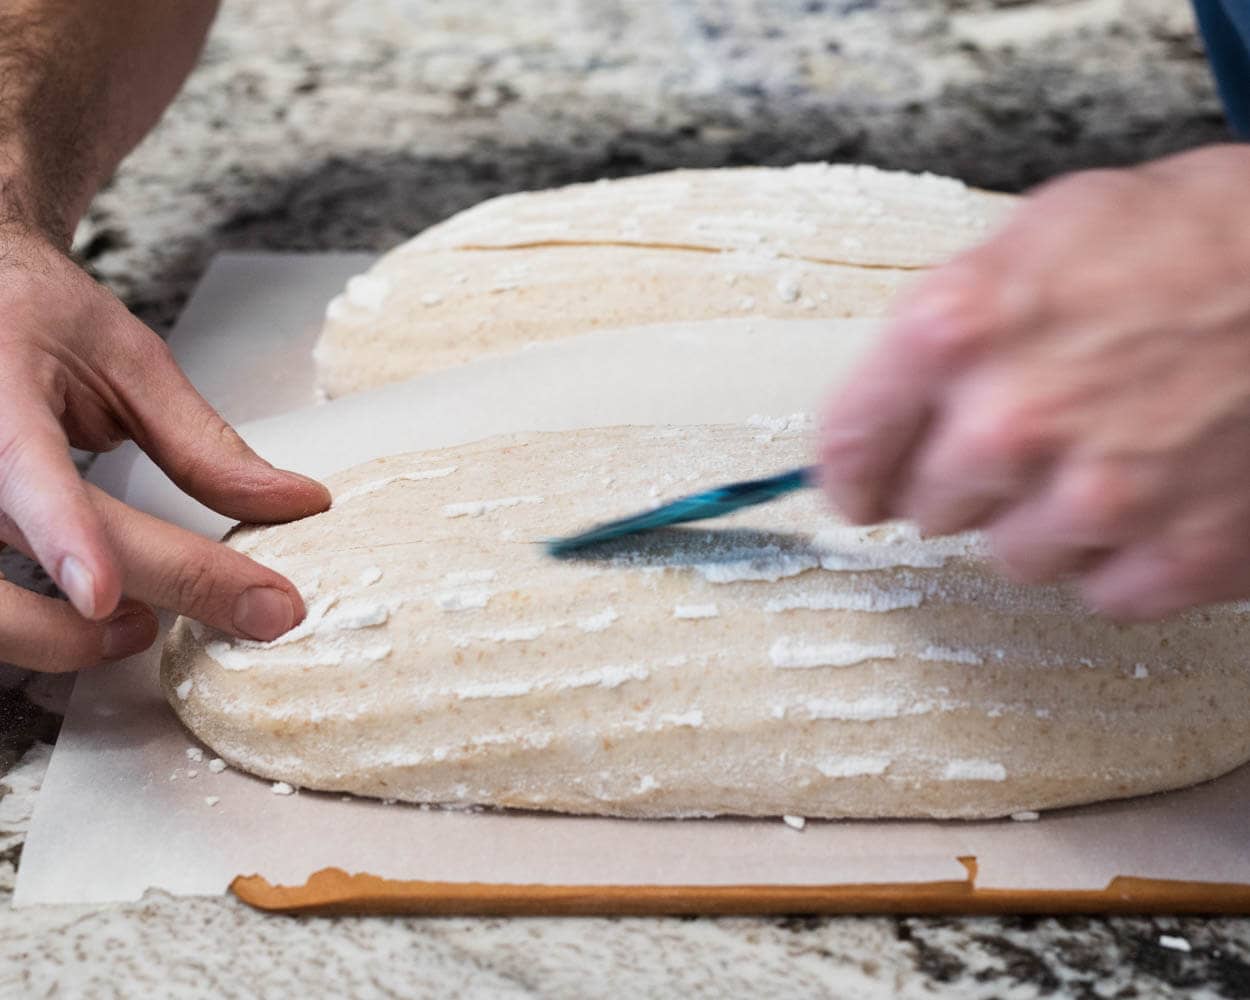
I steamed my oven in my usual way, described here in my post on how to steam your home oven for baking. But you can also bake in a pot or Dutch oven.
Bake for 20 minutes with steam, then remove your steaming pans if baking on a surface or Dutch oven/combo cooker lid. Then, bake for an additional 30 minutes until done to your liking. I like to bake rather dark, so I sometimes extend this second half of baking until I get the crust I’m looking for.
Once your loaf is done, remove and let cool on a wire rack for 1-2 hours. See my post on the best way to store the bread after it’s baked for a few tips on keeping it on the counter and freezing if you think you won’t get through both loaves in a week.
Conclusion
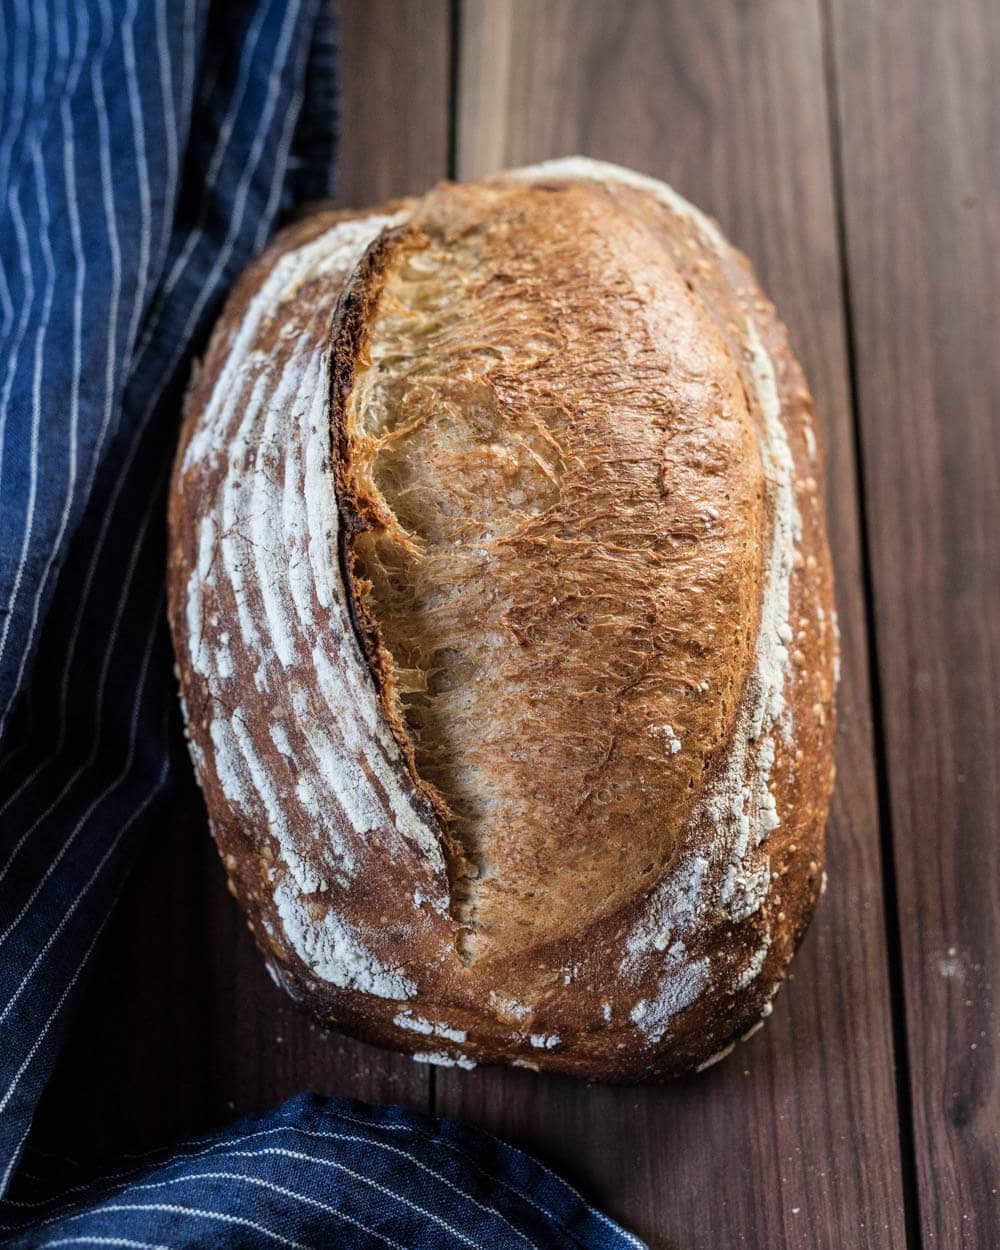
It’s hard to put into words just how much I enjoy this “my best sourdough recipe.” I bake it almost every week (sometimes multiple times if baking for friends and family), and yet every time I pull it from the oven, I smile. The crust color, the open and light interior, only the smallest perception of sour notes, and the way it crunches when toasted. I could go on and on.
The photos to follow are the results of scattered recent bakes that all followed this process exactly and have a slightly different outcome. You’ll notice some are a bit darker, some have more or less flour on them, some expand differently in the oven, and some are taller and some are shorter—that’s the nature of baking.
With baking, every single bake is different no matter how consistent you try to be. It’s the same with my Dad and his Italian restaurant, and the reason I’ll sometimes get a call in the middle of the afternoon: “hey, the pizza dough is incredible today, you should head over and grab some.”
Crust
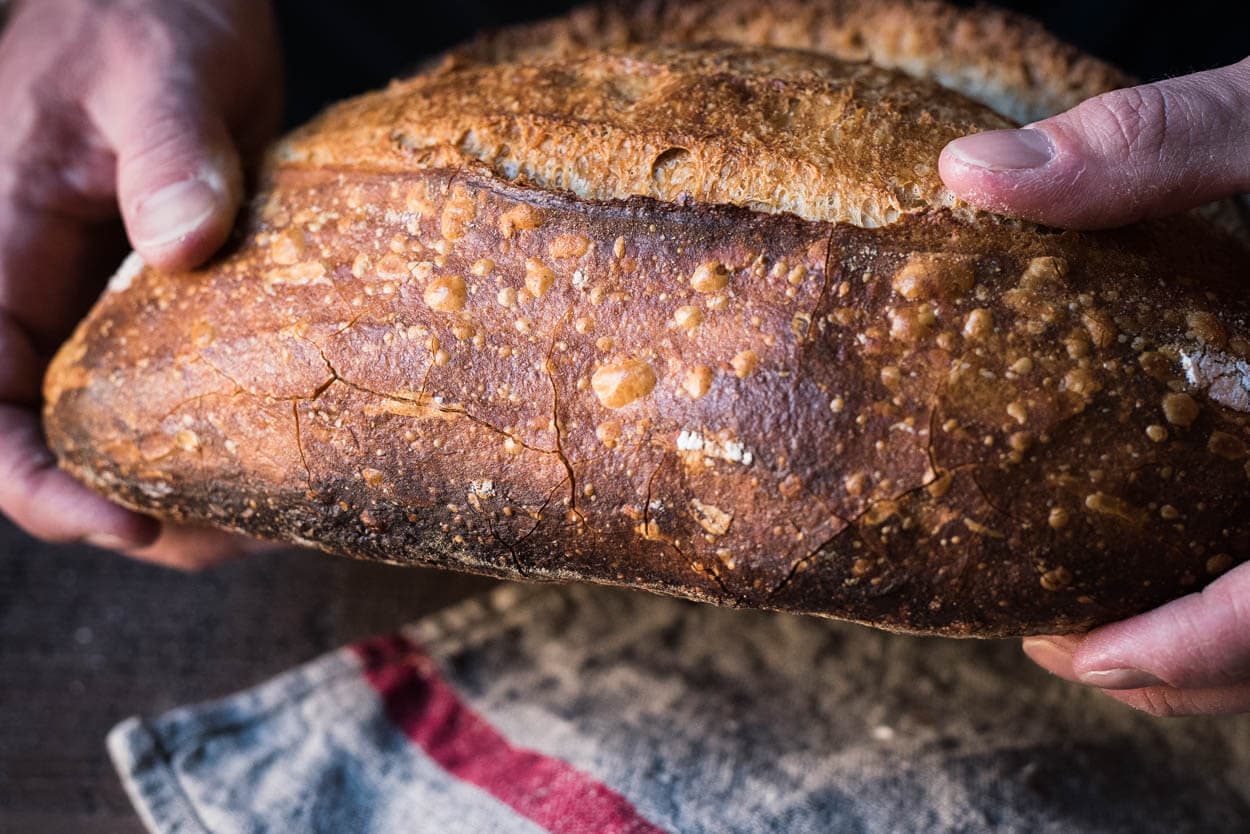
As a kid, I was known to take slices of bread, cut out the center, and eat the crust. It used to anger my family because they’d reach into the breadbasket only to find slices of only the soft parts. That’s how much I love the crust! Can you blame me, though?
I enjoy bread with a chunky, chewy crust, but this bread with its delicate and cracker-like crust takes the top spot for me. Even though I bake these rather dark, the crust remains thin and brittle, crackling under the slightest pressure. I love using the “heel” (the very end) of this bread to eat soup or combined with hefty slices of cheese. It’s delicious.
Crumb
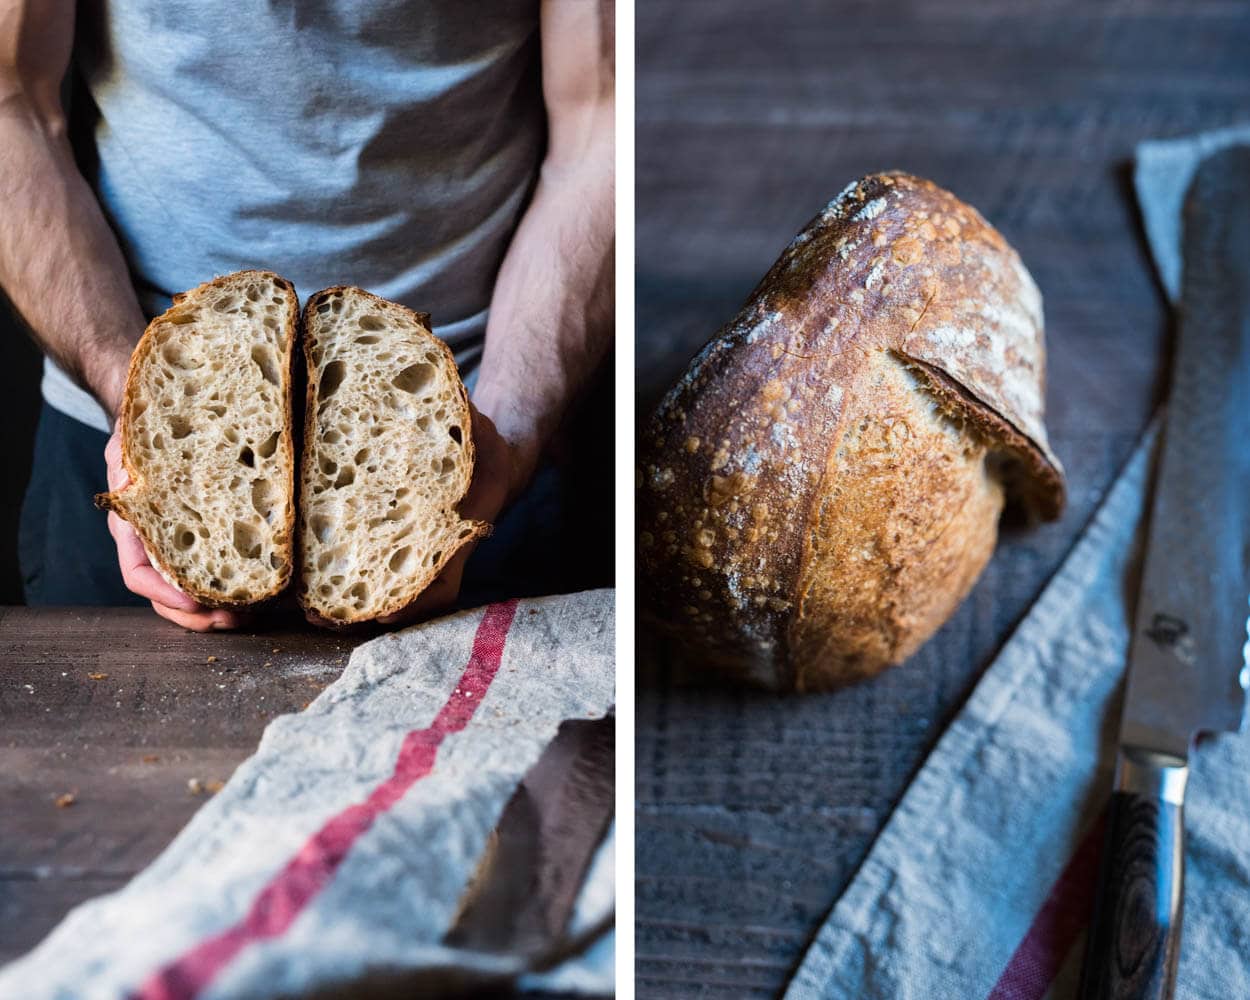
I think there’s a balance to be had with bread like this. It’s possible to let the crumb open up too much, but for me, this is just right. Scattered open areas with that translucent webbing spanning from wall-to-wall, a dynamic movement to these areas, almost show you how shaping was carried out.
Taste
This bread has an almost imperceptible hint of sour, and because of this, the wheat flavors from the flour come forward. It has an incredibly tender, soft crumb that almost dissolves in your mouth. It’s one of those rare foods whereupon taking that first bite your mouth begins to water.
In the end, bread is just bread. But it’s also the staff of life and has been for thousands of years. It’s is also more than the sum of the ingredients you add to the mixing bowl. It’s how it makes you feel when you give some to a friend, and they grin ear-to-ear as they take a big bite. It’s the knowledge that you created this thing over a few days that once was a lump on your counter and is now an incredibly delicious food meant to be shared. To me, this is real bread and my best sourdough recipe to date.
Buon appetito!
Print
My Best Sourdough Recipe
- Prep Time: 24 hours
- Cook Time: 55 minutes
- Total Time: 24 hours 55 minutes
- Yield: 2 loaves
- Category: Sourdough, Bread
- Cuisine: American
Description
This sourdough bread is one of my favorite recipes. It’s a highly hydrated dough that results in a loaf with an open and lacey interior contrasted by a thin, crispy crust.
Ingredients
Levain
- 30g medium-protein bread flour
- 30g whole wheat flour
- 60g water
- 30g ripe sourdough starter
Main Dough
- 822g medium-protein bread flour
- 64g whole wheat flour
- 745g water
- 17g salt
- 151g ripe levain
Instructions
- Levain (9:00 a.m.)
In a small container, mix the levain ingredients and keep at 78°F (25°C) for 5 hours. - Autolyse (12:00 p.m)
In a medium mixing bowl, add 822g medium-protein bread flour, 64g whole wheat flour, 650g water, and mix until no dry bits remain. Cover the bowl and let rest for 2 hours. - Mix (2:00 p.m.)
To the mixing bowl holding your dough, add 95g water (holding back any as necessary if the dough is too wet), 17g sea salt, and the ripe levain (from step 1). Pinch and mix all the ingredients together and do folds in the bowl for 2 to 3 minutes until the dough smooths and is cohesive. Then, transfer your dough to a bulk fermentation container and cover. - Bulk Fermentation (2:15 p.m. to 6:15 p.m.)
Give the dough 6 sets of stretch and folds. The first three sets are at 15-minute intervals, and the last three sets are at 30-minute intervals. - Divide and Preshape (6:15 p.m.)
Lightly flour your work surface and scrape out your dough. Using your bench knife, divide the dough in half. Lightly shape each half into a round shape. Let the dough rest for 30 minutes, uncovered. - Shape (6:45 p.m.)
Shape the dough into a round (boule) or oval (batard) and place it in proofing baskets. Cover the baskets with a reusable plastic bag. - Proof (7:25 p.m. to 9:00 a.m. the next day)
Cover proofing baskets with reusable plastic and seal them shut. Then, place both baskets into the refrigerator and proof overnight. - Bake (Preheat oven at 8:00 a.m., bake at 9:00 a.m.)
I steamed my oven in my usual way, described here in my post on how to steam your home oven for baking. But you can also bake in a pot or Dutch oven. Preheat your oven with a combo cooker or Dutch oven inside to 450°F (230°C). Remove your dough from the fridge, score it, and transfer it to the preheated combo cooker. Place the cooker in the oven, cover with the lid, and bake for 20 minutes. After this time, remove the lid (you can keep it in the oven or remove it) and continue to bake for 30 minutes longer. When done, the internal temperature should be around 208°F (97°C). Let the loaves cool for 2 hours on a wire rack before slicing.
Notes
This is a very highly hydrated dough. Don’t add in all the reserved water during mixing if it feels like the dough is becoming overly weak, slack, or soupy.
What’s Next?
If you want more help getting an open crumb with this bread, I’ve created a 100+ page book with step-by-step instructions. Learn the best flour to use, the right fermentation schedule, and all my tips in my Bread Baker’s Handbook.
Are you a TPL Member? If so, the handbook is free for you!


2,142 Comments
Hi Maurizio,
Thank you for the awesome site! My bread hasn’t had a great rise as of late. Would the flour matter in the rise? I have been using King Arthur Bread flour. Could Central Mills give a better rise? A few weeks ago I used an artisanal flour from Breadtopia and it had a much better rise and flavor!
Thank you for your time!
Hey, Harlan — yes, flour is really important! Those sound like all great flour choices, though. Instead of looking at the flour in this case you might want to look at other factors in your process and see if you can find the issue. My best advice is to try and stick to the same flour for a while so you know that isn’t a variable. Buy a bunch of the same flour, see how your bakes go, and adjust other things to improve.
There are a lot of variables in baking and by keeping as many things consistent as possible (in this case the flour) from bake-to-bake we can focus on one aspect of the bake at a time. This way we can see if the few changes we make improve the end result or do not.
I hope that helps!
I did my first loaf of sourdough bread today and it came out fantastic!! Thank you for all your guides and posts that take out some of the guesswork but also inspiring me to experiment! But I did mine today with a boule and a preheated dutch oven, did you preheat with a pizza stone or just place in on room temp baking sheet with the oven preheated with steam? Again thank you for all that you do 🙂
That’s great, Ariel! Glad to hear that. For almost all of my bakes these days I choose to bake directly on my baking stones or baking steel. You can see my process for steaming a home oven right here. Hope that helps and happy baking!
Hi Maurizio, thank you for sharing all your breadmaking knowledge with us. Today is my first try at one of your breads — Your Best Sourdough. I got started through Ken Forkish’ book and now tweaking my process using your tips and insights is fun and hopefully will improve my breadmaking . In bulk right now and looking good so far (fingers crossed). I do have one question though— I think it was in your basic recipe where you said to look for 30-50% increase in bulk. From your photos it looks like it has at least doubled. Am I misreading the photos or missing something? Thanks.
Awesome, Ray! That’s a fantastic book and a great starting point to baking (it’s one of the books I recommend on my reading list). The rise during bulk really depends on the particular dough you’re working with. Some doughs, like this one which is very highly hydrated, might not rise as much as others (and this is certainly true when working with 100% whole grain doughs). I like generally saying 30-50% just to indicate there should be some rise with lots of activity in the dough. The dough should jiggle in the bowl when you shake it and it should look nice and smooth by the end of bulk. It’ll be stronger and more elastic (the property for the dough to resist stretching out).
If you nail the final dough temp times in my formulas the times for bulk fermentation should be very close but always keep an eye on the dough and make an adjustment as necessary. Determining when to stop bulk takes some practice and experimentation, but we always want to see dough that looks alive and well fermented.
I hope that helps and happy baking!
Thanks for the quick and detailed reply. I will try to develop a feeling for the development and not be so concerned with size. As for the bake, the result was not perfect but not too bad. Maybe a bit heavy, but the taste is very good. But I didn’t succeed in developing sufficient strength, a common problem for me. When folding it seemed pretty strong — by the fourth fold of a set it was very stiff and would barely stretch, but when it came time for shaping the strength was not there. I don’t think I was over hydrated. I did 78%, reducing 5% to the compensate for the low absorbency of the flour I get here in Japan and another 5% just to be cautious for my first try. But the oven spring was good and I am enjoying eating it. Had enough success to be looking forward to my next try. Thanks for the recipe😊
Strange that the dough strength wasn’t there at the end, given it felt strong during bulk. Perhaps bulk went too far? Just keep an eye on the dough and see how it’s developing. Wet your hand and gently tug on it when you think it’s near completion. It should offer strength and resistance when it’s finished.
Keep at it — this does take practice. But! It’s always edible and alway delicious 🙂
If it is OK with you, I will post updates here as it may help someone else. I don’t think the bulk went too far — from your description it may not have gone long enough. After doing some searching and trying to separate the internet wheat from the chaff, I am thinking it may be the flour I am using — maybe its enzymatic activity it a bit too much, which apparently can adversely affect the gluten over time. I will try to find a new source for good flour, not all that easy here in Japan.
Yes, that is absolutely possible! Keep us posted on how it’s going, I’m sure others will encounter the same thing!
Sorry for the late update. I’ve been baking every week, but not anything significant to report. I think I’ve been progressing as far as feel for the dough and handling, but until now still could not develop much strength. I switched flours to a local one (about 11.5% protein) recommended by @fumigrafico, but still weak dough, way too much extensibility. Ate many tasty breads during the process, but not getting the crumb I wanted. But last bake I made a change that helped a lot — I eliminated the autolyse. Well, changed to a 30 minute rest (quasi-autolyse?) after mixing to the shaggy state, including the levain and salt. Had significantly more strength at forming. Kind of flattened out when removing from banneton and scoring, but that was probably a proofing problem. My next challenge is getting a feel for when it is properly fermented and proofed. Striving for “the perfect loaf” becomes an obsession, doesn’t it?
I also want to thank you for all your helpful replies to the comments in your posts. I have learned a lot just reading through them.
One last post about this. If I had listened more closely to Maurizio’s words, I could have saved myself many problems. You stress the importance of a lively starter. My old starter seemed OK, but it took a long time to double. I built a new one from your instructions and it made more difference than all the other tweaks combined. I now have decent strength and crumb. Maybe the old starter had developed some component that was degrading the gluten or maybe it just wasn’t lively enough. Whatever the cause, things are much better. Thanks for your help. Now if I can only improve my dough handling skills ……..
Right on, Ray, glad to hear this! Yes, a lively starter is very important! Fermentation is everything when it comes to bread.
Regarding your findings with the autolyse time change: 30 mins is still plenty of time for an autolyse and many bakers do shorter than this, it really depends on what flour you’re working with and the rest of your process. Reducing that autolyse time might have made the dough less extensible, which presented itself to you as a stronger dough. It might be that amount of time is the sweet spot for your flour. It’s yet another thing to experiment with when baking…
Have fun and thanks for the update!
Hi Maurizio!
I have tried to make this bread quite a few times. I have made tasty breads but never managed to get a really huge ovenspring. The reason for that i think is because my dough really often is overproofed. I have tried to lower the proofing time and I have tried to lower the amount of starter, but the overknight proof is somehow always to much. I have tried to make the bread resting 2 hours on the kitchentable instead successfully. Somehow In that case I got a nice oven spring. The taste is just not as developed as I want. I really don’t know what I can do better. I bake in a dutch oven and I’m feeling quite good shaping and working with this wetdough.
Thank you!
Hey, Sofus! I am right there with you, I much prefer the depth of flavor with dough that’s retarded overnight in the fridge. I’ll usually recommend cutting some of the proof time, perhaps 2-4 hours, depending on how fermented the dough is going into the fridge the night before. I also typically recommend reducing the levain percentage, but it sounds like you’ve already tried this.
If you’re leaving the dough out on the counter after shaping before placing it in the fridge, cut that rest time out and just retard it to the fridge immediately after shaping. You could also try to cut the time you spend in bulk but a short bit, perhaps only 15-30 minutes, and again get the dough as soon as it’s shaped into the fridge.
If none of these work on their own you might need to try them in combination — reduce levain, cut bulk a little short, and then cut proof a little short as well.
Let me know if any of this works out for ya!
Hi Maurizio,
This is delicious bread with a fresh baked pot of beans!
I notice that during the overnight proof in the fridge, the basket liner
absorbs quite a bit of moisture. Does this affect the crust in any way?
There’s nothing quite like pairing a pot of beans and fresh baked sourdough! One of my weekly staples for sure. I actually like the fact that the liner absorbs some of the moisture from the dough — it can be a good thing. I find it helps crisp up the crust a bit more, and in my case, usually is for the better since I push the hydration quite far.
Hi Maurizio,
I’ve been using this recipe for months now, and I have been taking my dough directly from the fridge and dropping it in my hot Dutch ovens to bake. Is that correct? A friend of mine said I should let the dough warm up before the bake, but I don’t see that step in your recipe. I have been getting awesome results without that step, but thought I’d ask.
Yes, that’s correct: I bake straight from the fridge. There’s no problem in doing this at all, and it really depends on how fermented the dough is. If it needs more time to ferment (it’s a little under proofed), you can certainly take it out to warm a bit and ferment longer before baking. I rarely find this is the case, though, because I usually push bulk fermentation quite far as well as the proof time in the fridge.
Hi Maurizio! Are you able to share how you compute total pre-fermented flour at 6.4%? Thank you!
The way I have things listed above can be a little confusing for those trying to verify the numbers. My levain build above is a little larger than what’s called for in the final dough mix to afford a little wiggle room — sometimes I find the levain needs a few more grams to cover the dough mix (levain gets stuck on the spatula, jar, etc.).
The levain called for in the dough mix is 150g (again the levain listed above is for 175g but only 150g is called for in the final mix). The levain is comprised of 50% flour (to water, in Baker’s Math), 100% water, and 30% seed starter (mature starter used to inoculate). That 50% flour is equal to 60g of actual flour — this is pre-fermented flour.
The dough mix calls for 937g of total flour. To calculate the pre-fermented flour percentage: 60/937 = 0.06403415155 = 6.4%.
I’m working on a post now that explains all of this! I also should probably update this levain to build just exactly what’s needed for the final mix to avoid confusion.
Update: I just modified the levain build as I mentioned, it now builds exactly what’s needed. Thanks, Terry!
Very helpful, Maurizio! Thank you!
Hey, what will the consequences of slapping and folding for more than 3 minutes be?
It really depends on the dough and your intention. Slapping/folding more upfront will strengthen the dough more, which might be necessary depending on the flour you’re using and the hydration of the dough. I usually like to slap/fold (or knead) in the beginning by some amount of time to try and offset the number of stretch and fold sets needed during bulk. I typically like to leave the dough untouched for the last 1-2 hours of bulk fermentation.
In the end the goal is always the same, whether we slap/fold or not: strengthen the dough just enough so it has sufficient structure to rise in oven but not so much that it’s overly strong, inhibiting rise. A good analogy is to think of the dough as a balloon: you want the dough to be extensible enough to relax out and fill with gas from fermentation, but not so extensible that it just spreads out like a pancake. Conversely, you want it strong enough to keep it together and not spread, but not so strong that it’s too rigid and won’t expand.
Ciao Maurizio, le tue preparazioni e descrizioni sono sempre magnifiche e dettagliate. Ho seguito il procedimento per l’impasto a lunga preparazione. Il risultato e la consistenza dell’impasto erano fantastici: forte, resistente ed elastico. Appena data la forma, questa si è mantenuta in modo perfetto. Un impasto del genere non mi era mai venuto ed ho dunque pensato di non ridare la forma una seconda o addirittura terza volta, come già fatto in altre occasioni. Dopo una lunga lievitazione in frigo, l’ho girato per infornarlo ed ha perso completamente la forma iniziale. E’ diventato una sottiletta. Fortunatamente è cresciuto in forno ed è uscito con abbastanza bolle, ma non eccezionali. Hai qualche consiglio per tenerlo più compatto? Grazie. Complimenti per le bellissime pagnotte.
Grazie per le gentili parole! Potrei essere che o la tua pasta non fosse abbastanza sagomata da sopportare la lunga prova o fosse troppo resistente. Ti suggerirei di provare a modellare un po ‘meglio la prossima volta e ridurre il tempo di prova di qualche ora in frigo. In questo modo dovrebbe tenere meglio la forma e alzarsi un po ‘di più. Spero che aiuti!
Grazie mille
Hi Maurizo,
I just tried this recipe for the first time and I love crackle of the crust when I bite into it. I was wondering whether you had any thoughts on how long to cool the bread before cutting into it? I’ve seen discussed elsewhere whether the amount of the time makes a difference in how it tastes and how ‘gummy’ the texture is.
Thank you!
I find cutting too early will cause the bread to be a little on the gummy side. The duration of rest really depends on the type of bread you’re baking (e.g. rye bread should wait a full day before cutting, at least), but for a loaf like this I typically wait 2-4 hours. I know, it’s a long time, but I’m in no rush, the entire loaf gets eaten no matter what 🙂
Hope that helps and happy baking!
The fact that I am incredibly old, and have been making bread for seventy years is my excuse for the arrogant attitude I brought to your discussion of the perfect sourdough loaf. After years of lecturing students on the importance of following directions, I have discovered that I’m not very good at it. But I’m keeping at it, and improving slowly. After numberless attempts, today I’ve finally produced a loaf that looks like your picture. After all that verbiage, this is my question: The crust, which was great on many of my far-from-perfect attempts, is tough, especially the bottom. Also, it’s a bit squishy and hard to slice, but that may not be unusual? I hope you are pleased, and I know I am delighted with all you have taught me, and will be continuing to teach me until I finally learn. Thank you.
Sometimes as instructors we’re the last to hear our own words 🙂 Glad to hear your baking is going well! The bottom can get tough depending on how its baked. If you’re using a Dutch oven (DO) to bake in I find that it’s hard to avoid a thick bottom, but placing a thin layer of coarse cornmeal or wheat germ on the bottom of the pan before you load your dough can help quite a bit. I also use a single layer of parchment in the pot, this helps marginally. Additionally, if your using a DO on top of baking stones there’s no need for the stones, just use the DO on a rack.
If you’re not using a DO, it might be that your rack is too close to the bottom heating element in your oven. Try moving the rack up one rung to see if that helps. Additionally, you could try adding more steam into your oven when you load your dough. Steam helps the crust set too early in the bake, which then only gets thicker and thicker as the bake continues.
Let me know how it goes, I hope one of these suggestions works out for you!
What if the dough is put directly onto a baking steel? with or without parchmrnt paper? Then how would it be covered?
You could use a very large roasting pan that encloses the dough when it’s on the baking still. Invert the pan to cover the dough to trap steam — just be sure the pan is large enough to accommodate the dough as it rises.
First I want to thank you for being a wonderful source of information. I’ve been bitten by the sourdough bug! I have a question. I’ve had my starter going for a couple of months now with no real problems but last week my starter became very sour smelling. Is it too much high protein? I’ve been feeding it a combination of whole wheat and AP flours. Cut back on the whole wheat? Thanks for your time and for providing such a wonderful resource.
Bob
Sparks, Nv
If it’s overly sour it might be due to the increase in ambient temperature as summer approaches — it might be fermenting faster than expected. You could feed it sooner, cut back a bit on the ww flour, keep it cooler, or carryover a smaller amount of mature starter at each feeding (this is what I do). I hope that helps and thanks so much for the kind words!
Hi Maurizio,
Have you ever tried baking bread directly on the baking steel; no parchment paper?
I actually have not tried this! Sliding the dough in on parchment just makes it so easy, plus, it helps insulate the dough just a bit as the BS can get quite hot.
Hello! Thank you for this great blog, I’m completely obsessed. I gave your “best sourdough recipe” a shot. I lowered the hydration to 80%.
My finished product had an incredible crust, but the crumb was dense at the bottom of the loaf and VERY open with large pockets at the top.
I use a 50/50 whole wheat/ap starter. I had an active Levain, followed all of your steps exactly. I had great strength after bulk. I shaped into boules, put on parchment paper, into a Pyrex glass bowl with a lid. Proofed for 16 hours. Cooked in a Dutch oven as per your instructions.
Where did I go wrong? The only thing I can think of is that I let my Levain ferment for too long. It fermented for 7 hours at 80 degrees.
Thank you for any help you may offer! Keep up the great blog!
Hey there! It sounds like your dough might have over proofed on you, especially if you found your levain was extremely well developed when you used it (which I find accelerates the entire timeline). I’d suggest cutting back your bulk fermentation time and/or your proof time to help with the over proofed dough. You could try 10-12 hour final proof in the fridge and see if that helps!
Hello Maurizio! Made a nice loaf using 10% less hydration as instructed (still working on my dough handling!) Had great oven spring using the dutch oven method. However, my crumb was not as open. I used my levain after only 4 hrs since it seemed ready (passed float test). Bulked for 4hrs- FDT was 78.8 degrees F. Overnight for 14 hrs. Had some big holes, but pretty tight and dense in the middle of the loaf. Was tempted to go bit longer on the bulk. I always half the recipe to make one loaf, so the growth in the bowl is a little harder to judge compared to the pictures in the recipe. In your opinion, is under proofing or over proofing during the bulk more to blame for a tighter crumb? Thanks!
Hey! Glad to hear all that. It’s hard to say whether it was over or under proofing that’s causing your issue. It might also be the flour you’re using, your handling of the dough, hydration… Several other things. If you have even fermentation throughout the loaf (meaning, consistent bubbles throughout with no very dense spots) then it sounds like you have sufficient fermentation, but perhaps the tighter interior was caused by shaping. In my experience that final shape is so, so critical because you want to impart just enough tension on the outside of the loaf to hold its shape, but not so much that it degasses the interior. It’s a tight balancing act. If you want to send over some pictures of the interior shoot me an email through the Contact link up top, I might be able to further diagnose!
Thanks Maurizio! Having trouble attaching a photo in the comments box. Any IT tips as well as baking? Thanks again!
Send me a message through that box on the Contact page just saying “hi” and then I’ll reply. From there we can email back and forth and you can send over photos!
You’re very welcome, Sune! I’m really happy to read your comment and that my bread made it to your Easter table! I wish you the best, happy baking!
Hi Maurizio,
Have you experimented with an even longer first autolyse? I love making this loaf, but I’m trying to find a way to fit it into a weeknight, so I’m thinking about making the levain and combining the flours and water in the morning and then going from there. Thanks!
Yes, I’ve done even overnight autolyse times. I find that with a mostly-white flour recipe if you lengthen the auto too far it’ll make the dough harder to mix and come together as the extensibility of the dough increases incredibly. For whole grain doughs a long auto really helps, though. Hope that helps!
Hi Maurizio,
Experimenting with my Big Baking steel. Getting good rise and blistery good crust.
Wondering, (as steam seems to speedily rise) if the baking steel would perform better
on as high of a upper rack as possible, or would center position be better?
That’s great, Patrick! I think it really depends on your oven — where the heating elements are and how tall it is. I place it near the bottom so I have plenty of room to load my dough on top, but the bottom 1/3 also seems to keep the steel nice and hot without getting too hot. If you place it too close to the heating elements it can actually get so hot it scorches your bread. You’ll have to experiment in your oven!
Hello Maurizio,
Getting a much better crust after increasing steam in oven, as you suggested. Thanks.
I notice the loaves proofed over-night in the refrigerator develope somewhat of a tough skin; is this
normal?
Glad to hear that! Make sure you cover the baskets with proofing dough with plastic liners or you will get a dried crust on the dough. I have some food-safe bags linked on my baking tools page.
Hey Maurizio,
I’m just starting out and I recently tried your beginner’s sourdough recipe. The flavor and the crust turned out great, however the inside was a little bit gummy. From the past comments, you suggest reducing the hydration (by 5%) to solve this, which I’ve yet to try. However with this recipe, the hydration is even higher than the beginner recipe. Should I reduce the hydration by a larger percentage in order to try this?
Additionally, would I be able to just change the flour used in the beginner recipe, where instead of using whole wheat, I just replace it with the same amount of dark rye flour or bread flour?
I use Robin Hood Bread Flour and Rogers Dark Rye Flour if that helps with suggestions for both the hydration percentage and the flour substitutions.
Thanks in advance, and thank you for this site!
Hey, Jefre. Yes, I’d say drop the hydration even further if you had trouble with my Beginner’s Sourdough recipe. I’d say somewhere in the 70’s would be ideal to start. Sure, you could absolutely change the flour in the Beginner’s recipe! That would work really well here, then you could increase the hydration if you desired and you saw it was possible.
Happy baking!
You’re welcome! This is a great question and one I’ve been meaning to address here at the site. When I post my formulas what you’re seeing above is the dough mix part of the formula that doesn’t include the levain (the flour, water, starter that’s used to create the levain). I have spreadsheets setup that let me come up with a formula and when I do so I plug in whole percentages (in baker’s math) for flour, water, mix-in, etc. components. These whole percentages are used to calculate the exactly how much of a particular ingredient is needed based on the total yield I want to bake (e.g. 2000g final dough weight). In the end usually these numbers are not round numbers and you’ll end up with like 877g of flour for example.
I’m working on a post that explains a lot of this including baker’s math and other formula topics. I hope this all make sense until then!
Hi Maurizio,
Great information. Using your techniques and recipes, I’ve been making some pretty good loaves. I have a conventional oven; electric element top and bottom, with oven temp. range up to 550 deg. F. The crust seems to come out rather tough, as opposed to light and crispy. Wondering if a convection oven makes a better crust, and if there is better spring to the bread with the convection feature?
Thanks
Happy to hear that, Patrick! I have never used the convection option in my oven. My thought has always been that it will likely dry out the crust on the bread even more, leading to a thicker crust. Additionally, in the beginning 20 minutes or so of the bake we want to trap as much steam in the oven as possible (if you’re using a Dutch oven the steam is trapped inside there until you uncover it). So in the end, I’ve never tested it but I don’t feel like it would help in this case.
Usually a thicker crust is due to insufficient steam in the oven — make sure you really get a lot in there!
Hello Maurizio,
I will try it, just looks so amazing and yummy. One, maybe a silly question, what is the mature starter? is this referring to the levain?
Silvia — thanks! Your starter is your on-going culture you feed each day but you never use it in total in a bake. A levain, on the other hand, is an off-shoot of your starter that will have the same fate as the dough you mix it into: it’ll cease to exist after it’s baked in the oven with your dough.
Essentially they are the same thing but I usually refer to a levain here when I’m making a small build (an off shoot) of my starter so I can scale up the quantity of my starter needed for a particular bake or change the flour composition.
The key to both is you want to use a mature starter to create and start a levain, and then use a mature levain when you mix it into your dough.
Hope that makes sense!
Hi Maurizio,
I’ve been baking this bread for a few weeks and the results are fabulous – far superior to anything we can buy. I am in Nova Scotia, Canada and our flour and climate are quite different from yours so I too reduce the water by about 100gms. My question is about clean-up. Do you have any tricks for dealing with all of those gooey jars from twice-daily sourdough feedings?
Thanks so much for sharing your experience and thanks also to all those who comment on your website. I love reading from your community of followers almost as much as I love this bread!
That’s super great to hear, Elizabeth! I usually keep my starter in one tall Weck jar. When I feed it each day I dump out the part I’m going to discard using my small rubber spatula. Then, I take a single, small paper towel and use that to wipe the spatula clean and fold it over to wipe the rim and top inside part of the jar. This way the top 1/4 to 1/3 of the jar is completely clean. Then I feed my starter per usual. The wiping ensures no dry bits of starter stay at the top of the jar and the bits of starter that are in the jar but lower get reincorporated into my starter as it rises over the course of a feeding cycle. I completely switch and clean jars about once every two weeks or so.
Hope that helps. I know half the battle baking at home is tools and how to keep everything clean!
So glad I found this recipe several months ago. It’s my go to base recipe and technique. Lately I’ve been adding Parmesan Asiago and fresh Rosemary. Have had fun adapting this recipe with many add ins, but so far the cheese herb is my fav. I also use fresh milled wheat flour, and usually up the percentage slightly but find no need to increase water. Absolutely love the dough and high hydration. It’s billowy, soft yet has wonderful gluten development making it fun to work with.
Right on, Mary! Sounds like you’re making some amazing bread and I really like the idea of rosemary + asiago — great idea. I’ll have to try that! Thanks for sharing and happy baking 🙂
Hi Maurizio
I am a New Zealander living in France. I made your bread and it was amazing. The best sourdough I have made to date. However I it was very wet and I wasn’t able to give it additional strength in the final stage to shape my loaves. They went into my lined proving baskets rather unshaped and stuck a bit to the cloth tipping them out. But still the texture of the crust, the taste and texture of the crumb, the open beautiful holes, the colour of crust and crumb were all superb. Amazing bread. My question is do you know anything about French flour because I think the final extra wetness came from the flour and I am not familiar with American flour and how it might differ from French flour. I used 600gms organic T55 and 275gms of organic T110 thinking this might be a similar balance to yours. Any help appreciated. Many thanks. Natalie.
Hey, Natalie! Glad to hear that. That flour mix sounds great but it does sound like it was over hydrated. Typically US flours are able to take on a lot more water than others around the world — I’d suggest you try my formula again but reduce the hydration by 10% and see if the dough feels stronger and more manageable to you. I don’t have a lot of experience with French flour but by your description I’d say this would help! Happy baking 🙂
Hi Maurizio,
I’m fairly new to baking, mastering a standard recipe but after a few days engrossed in your website and learning a lot I thought to try out this recipe. It was so much more hydrated than I was used to but managed to get a really good proof in my bannetton. When I came to take it out though it was hopelessly stuck to the cane which after a while of prying off the edges it had lost a lot of its shape and volume.
Is it essential to use a liner on the proofing basket/ banneton to stop it sticking? How else can I make sure this doesn’t happen again?
I’ve used these bannetons enough to break them in with good base layer of slightly hydrated flour.
Hey, Ben! When the dough is very highly hydrated I almost always use a liner — it’s just easier to remove the dough and clean the basket. When I do recipes that are lower in hydration I find a liner isn’t as necessary.
If you don’t want to use a liner you’ll have to increase the amount of flour you lay down in the basket to prevent sticking. It also helps if the dough is stronger and shaped tighter to help create that firm skin and prevent sticking.
Hope that helps!
Hi Ben
Teresa Greenway uses flour without gluten , such as Rice flour , or semolina to dust 🤙🏻
Michelle from Belgium
Maurizio,
I’m finally gettting the hang of this! I now get pretty good oven spring. I’m finding timing is important — to catch the levain while it’s stll on the rise and keep dough temperatures steady (I keep the ambient temperature in my house a bit on the cool side, so that may have been the problem.) I’m getting that nice bubbly-lookijng surface in the finished loaf.
The only issue now is that the bottom of the loaf is quite a bit more overcooked than the top, making it very hard to cut fully through the loaf. I use a dutch oven, pre-heated. Should I put a cold pizza tone on the rack underneath the dutch oven when I put in the loaf to disperse some of that direct heat on the bottom?
Super glad to hear that! Yes, catching the levain at just the right time is critical — it all starts there of course. Further, dough temperature is very important as it kind of sets the stage for bulk fermentation. If temps are too low it could really draw out bulk, requiring many more hours until the dough would be sufficiently aerated and strengthened.
The slightly more baked bottom is a very common problem when using a Dutch oven. A cold stone could work, I’ve never tried that! Usually what I’ll do in this case is to preheat the Dutch oven for less time (still preheat the oven, though). I also don’t use a baking stone in the oven at all (it retains too much eat and transfers it right to the DO) when I’m using a DO. Finally, I like to use a single or double piece of parchment paper below my dough in the DO — I place my dough on the parchment and then drag it into the preheated pot (carefully).
Another idea is to sprinkle coarse cornmeal or wheat bran on the bottom of the DO before placing the dough on top. This helps add a small amount of insulation.
I hope one of these suggestions helps!
Hi Maurizio
Your best sourdoe recipe is very good. I followed the recipe to tee. It was over hydrated however, that might have something to do with the hydration in the flour so I just poured it into a loaf pan I did all the fold and stretch and tried to get it into a loaf the best I could using your Technique and believe it or not it still came out. I’m going to cut back on the hydration a little bit next time and hopefully we’ll get something that will be a little easier to work with. I don’t have a proofing baskets yet however, I’m purchasing one or two I like the oblong baskets what size would you recommend for this recipe 10 inch 9 in 8 in? Thank you Ziggy.
Ted — yes sounds like you need a reduction in hydration the next go. This recipe is very highly hydrated! I actually like to use either 12″ or 14″ long baskets for my 700g+ batards. The dough doesn’t always fill the basket (especially if it’s less than 1kg) but shaped tight enough it has enough room to expand outward and fill in the majority of the basket. The key here is your dough needs to be shaped tight enough such that it doesn’t just spread out and become a flat pancake in the basket — it needs strength!
if you plan to do smaller loaves you could definitely get away with a 10″ basket.
Hope that helps!
Hi Maurizio,
I’m new to your page and love your work! Thank you for sharing your experiences, recipes amongst others. I’m keen to reduce this loaf as baking for myself only and with limited freezer space.
I’ve adjusted the size based on approx 350g of flour used for the bread itself, not taking into account the levain. I haven’t used too much of the baker’s percentage so wanted to check if this sounds right to you? 302g water, 8.05g salt, 49.50g levain. This is based on your %’s shown above.
Thanks!
Hey, Katherine! You’re very welcome and thanks so much for the kind words! Your numbers are a little off from what my formula states but in general it looks just fine — there’s nothing wildly out of proportion and the resulting bread should bake up great. Do keep in mind you can always halve one of my recipes here! Just divide everything by 2 and you’re good to go.
Happy baking!
Hi Maurizio. I’m trying this recipe for the first time and I’m at the step when The loaves are in the refrigerator for the cold fermentation. My question is when should I remove the loaves from the refrigerator prior to baking. Thanks you for your efforts. Your website is a real gift.
You’re very welcome, Anthony! After the long, cold proof remove the dough right before you place them into the oven. Unless they are really lacking in fermentation there’s no need to allow them to come up to room temperature before scoring and loading into the preheated oven.
Happy baking!
Follow up. As much as you glowed over this recipe, I actually think you undersold it. It is the best bread I’ve ever eaten. Taste, texture, everything! The only recipe I’ll ever you. THANK YOU SO MUCH!
Right on, Anthony! Glad to hear you enjoyed the result. I thought maybe I had over sold it, but I really do love this recipe and process — sounds like you’re sold! Happy baking 🙂
Hi Maurizio — needless to say, your blog is an incredible inspiration. I find myself wanting to make everything on it, but know I must pace myself. What are your feelings about making half recipes of some of your breads? This past weekend I made a half recipe of your high(er) hydration loaf and your cherry pecan buckwheat, both turned out with great flavor and texture — though I am still bedeviled by getting that picture-perfect open crumb. Could the recipes be negatively affected by being made on a smaller scale? Thanks much for your advice, I suspect that this will be the first of many questions.
Thanks, Madelyn! I happy to help in any way I can. It’s fine to halve any of the recipes here with a caveat: when you have a smaller overall mass of dough, fermentation isn’t quite as “stable” as it would be with larger batches. Why? It’s less thermal mass, for one, and is subject to temperature swings. If you can keep your dough at a stable temperature this can help but when I bake, I almost always at least do a two-loaf batch. Plus, it gives you a good excuse to talk to your neighbor and give them some bread if you have extra!
Hope that helps and happy baking!
Hi Mauricio! I have made your basic Sourdough with great success. I last week made the Tartine recipe for Basic Country Bread, also with some success. I am about to take on your high hydration recipe (with low expectations, as my flour options are not amazing). My weird question for you is this: why the extended pre heat time on the high hydration recipe? The Tartine recipe only suggests a 30 minute pre heat, while all of yours call for 1 hour or more. Is there a specific reason for this? Also- with a higher protein flour, do you suggest using more or less water intially? I’m using King Arthur bread and wheat flours. The protein percentage is at least 1% higher than the flours you suggest.
Thanks for your brilliant approach to baking, you make it so accessible and easy to understand!
Hey, Carmel! Glad to hear that. I typically preheat for an hour because I’ve noticed my baking stone and/or baking steel need a bit longer to get completely hot, all the way through. Do what works for you and your oven, though!
I typically find higher protein flour is able (and sometimes requires) to absorb more water overall. However, you might want to start with lower water anyways as this recipe is highly hydrated and can be challenging to start off at full water.
I’m glad you’re enjoying my site, thanks for the comments and happy baking!
Hi Maurizio! I stumbled across your website a few weeks ago. Really awesome stuff. I’ve been experimenting with sourdoughs for the past couple of months, and have had good success with beginner recipes. I decided to try out this recipe this past weekend. I used different flours due to limitations on what is available near me. I scaled back the water slightly, but I think I need to scale back even more. The dough looked great during bulk. But after being proofed in the fridge for 15 hours, I transferred the dough to parchment. It started to spread out slightly. I baked it in a dutch oven. The loaf tasted great, but lacked on the visual aspects. I’ve been trying out different scoring techniques. I’ve had success with the cross or box shaped slashes on previous loafs. The few loafs that I’ve done the side slash haven’t opened up as dramatically as your loafs. They open a couple of inches, but no where near what your able to achieve. Do you have any tips on achieving that dramatic peel? I’ve been using a straight blade. I’m wondering if a curved lame will help. Or if perhaps the dough being over hydrated limits the peel. Any advice would be greatly appreciated!
Thanks, Sean! Yes, if the dough is very highly hydrated, and definitely if on the weaker side (meaning it wasn’t strengthened fully), you won’t get much of a dramatic opening when bake. Additionally, the farther the proof is pushed the less rise you’ll typically see.
My advice would be to scale back the water some more, as you said, and also keep an eye on the dough during proof. You could cut the proof by and hour or two and see if that, in combination with less water, helps you achieve the rise you’re after.
Keep me posted!
Thanks for the tips! I’ve adjusted hydration slightly to about 83%. By doing so, and by bumping up the strength a little more during bulk, I’ve gotten much better results. My next question for you has to do with flour selection. I’ve been working primarily with King Arthur Bread and Arrowhead Mills Whole Wheat flour in my recipes. But I want to branch out more. I’ve looked up your favorite flours, Giusto’s and CM. However, the cost to ship out here is far greater than the cost of the flour itself. So I’m looking for some other options. Do you have any other favorite flours that might be more readily available? I’m on the hunt for a local source, but no luck as of yet. Any recommendations would be greatly appreciated!
Glad to hear that, Sean! You could try looking locally to see if you have any mills nearby. This would not only save drastically with shipping but also support local farmers and millers! I’m not sure where you live but there are so many great places to source flour from these days… I’m going to assume you might be on the east coast (since Central Milling is west), in which case you could look into Carolina Ground, Maine Grains, Farmer Ground, and Anson Mills. Hope that helps!
Thanks! I live in Indiana. And while I’m still on the hunt for some mills nearby, I was recommended by someone to check out Heartland Mills. I believe they are based in Kansas. Their organic UBAP Malted flour comes in at about 11.3% protein. I’m wondering if you have any experience with their flour? The shipping costs are very reasonable, slightly better than some of the east cost mills I looked up. But I wanted to see if you had an opinion before trying them out. I’m also going to try out some stuff from Anson Mills while I continue my search more locally. Thanks again!
Anson Mills has a fantastic reputation and I do keep meaning to try their flour and grain but haven’t gotten around to it just yet. I don’t have any experience with Heartland but it sounds like a great option for you! Between those two I’d say you’re set.
Hi Maurizio! i have been using this recipe for a couple of moths now. i have discovered that the hydration is to high for me. when i usually bake it i use about 100g less water and i get pretty great results most of the time. i decided to give it a try this time with the the 100g of water that i usually take out. The dough holds it shape and everything but right when i score it to put it in the oven it just fell apart. i got a great tasting bread that was very airy but its pretty flat.
something else that has been bothering me thati wanted to check with you on is that i have a large vent hole in the back of the oven. baking the brad with steam is very hard for me. is this something that you have encountered previously?
Best regards
It sounds like you’re pushing the limits of the flour you’re using — you probably should keep that 100g out, and that’s fine! Each flour is different and the capacity for hydration varies and this is normal and to be expected. Just because that 100g isn’t in the mix doesn’t mean your bread won’t taste as good, it just means the flour is different.
I have a double oven at home and I choose not to use the side that has the convection fan hole because I was always worried about excessive steam loss through there. I honestly dont know where that hole leads to but I’ve always felt that it shouldn’t be a vent or anything, it should be pulling hot air from the oven and re-circulating it. In other words, as long as your steaming fully I don’t believe it should be a problem.
I hope that helps!