


If you had told me many years ago that I could make enticingly crunchy, tender, and healthy bread at home with only a few elemental ingredients, I would not have believed you.
I would have claimed that baking bread requires a professional mixer, a specialized oven, and a list of ingredients so long your eyes start to glaze over. But now I perform this alchemy daily in my home kitchen: transforming three basic ingredients into wholesome sourdough bread. How does one begin the journey of making naturally leavened bread at home? It starts with, well, making a sourdough starter from scratch.
A healthy sourdough starter means great bread.
Despite all the mysticism and lore about creating the concoction, a sourdough starter is merely a naturally fermenting mixture of flour and water. Add water to dry flour, let it sit on the counter for a few days, and you’ll see nature weave life into a once lifeless lump: bubbles will appear and the mixture will rise.
This natural fermentation can be harnessed and (once it is stable) controlled to produce bread so flavorful and healthy that it’s hard to go back to anything else.
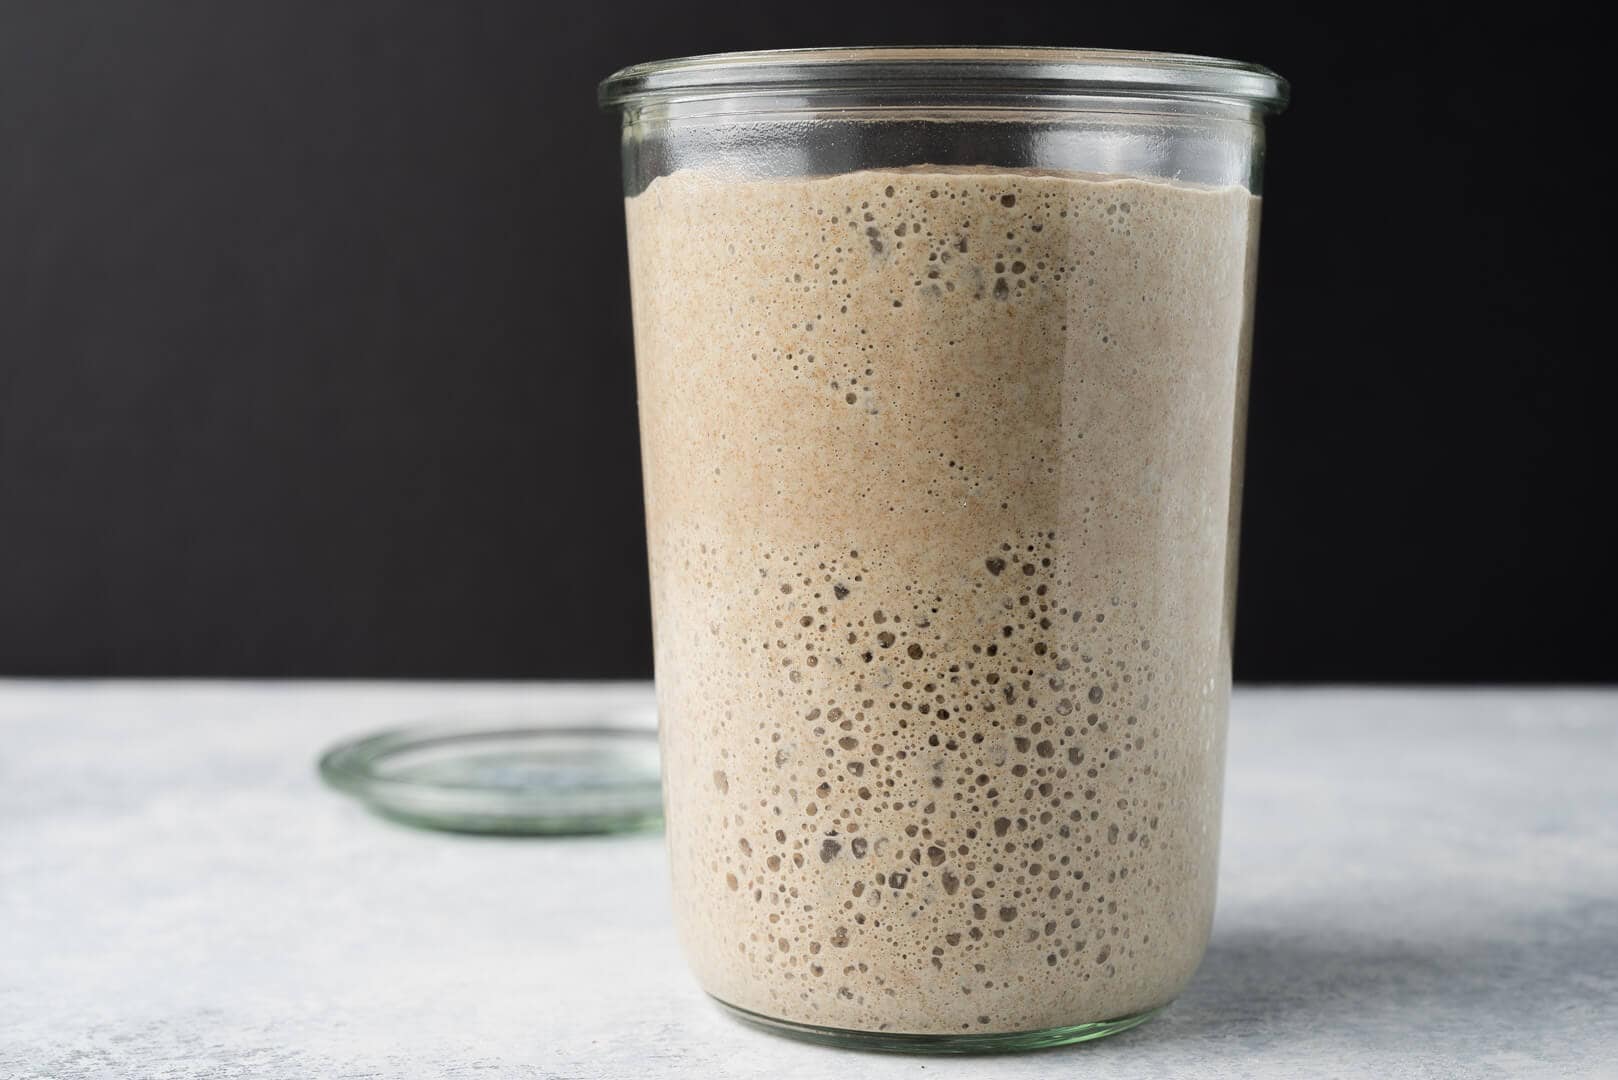
I created my sourdough starter years ago (using this sourdough starter recipe), and it’s the same one I use to this day. It’s a spoiled brat now, to be sure, thanks to all my coddling, but in exchange for my attention and flour, it stays on schedule. Besides, when I’m baking, it does the heaviest lifting (bread nerd joke, sorry). Initially, it was the quintessential rebellious child. Sometimes it wouldn’t show any fermentation activity, and at other times it was utterly unruly. Back then, I didn’t realize what it needed to thrive. I didn’t see how vital timely refreshments (also called feedings) were or how much temperature impacts fermentation.
The key to raising a well-adjusted starter is to observe its needs, give it space to grow, and adjust the refreshments to encourage maximum fermentation activity. And a healthy starter means great bread.
But first, let’s quickly look at what a sourdough starter is.

What is a Sourdough Starter?
At a high level, a sourdough starter is a mixture of flour and water that hosts a stable blend of beneficial bacteria and wild yeasts. This mixture is continually maintained with regular refreshments (or feedings) and is used to leaven and flavor new bread dough. The starter is the cornerstone of successful sourdough baking, and especially for a home baker with changing environmental conditions in the kitchen, learning how to care for and use one is the key to bread with the best flavor, texture, and keeping qualities.
A Few Tips Before We Begin
Water that’s high in chlorine or chloramine (disinfectants used by some cities to clean tap water) can impede fermentation. The night before you want to make your starter, fill a large jug with tap water and let it sit out uncovered overnight to allow any chlorine to dissipate. If your city uses chloramine instead of chlorine, letting a jar sit out overnight will not work. In this case, you’ll have to use bottled water or filtered water (if you are concerned, you can test your water with over-the-counter test kits to determine whether there are additives or other issues). Alternatively, you could use bottled spring water until you get your starter fermenting reliably, then try switching back to tap water with a portion of the starter to see if it’s able to handle the tap water (but don’t use all of it just in case it doesn’t work).
After you mix the flour and water in the jar, be sure to keep the jar lightly covered during the rest of the process. Either a porous cloth or a lid resting on top of the jar will work well. Use a container with enough headspace for the mixture to rise—I like to give at least 5-inches of headspace. Additionally, it’s a good idea to place your jar in a bowl while it’s resting in case the mixture overflows.
During the first couple of days, there’s often a surge in fermentation activity that then drops off dramatically; this situation is probably caused by other yeast and bacteria that are initially present but eventually die off. When this happens, many first-timers think that it has “died,” and they start over. Don’t be fooled by this lapse of activity; continue with the schedule and eventually, the desired yeast and bacteria will move in and stabilize the starter.
The entire process is exceptionally temperature-dependent. Instead of a typical cooler room temperature, I find a warm temperature of around 80°F (26°C) helps kickstart activity since this is near the temperature at which the bacteria and yeast are most active. A home dough proofer (which I highly recommend) and a yogurt maker are great tools for maintaining such an environment. If not, a home oven, turned off, with the light on the inside (and a thermometer to monitor the temperature), or a microwave with a bowl of warm water inside, will both work well.
For even more tips on this whole process and many things related to sourdough starters, check out my Sourdough Starter Frequently Asked Questions page →
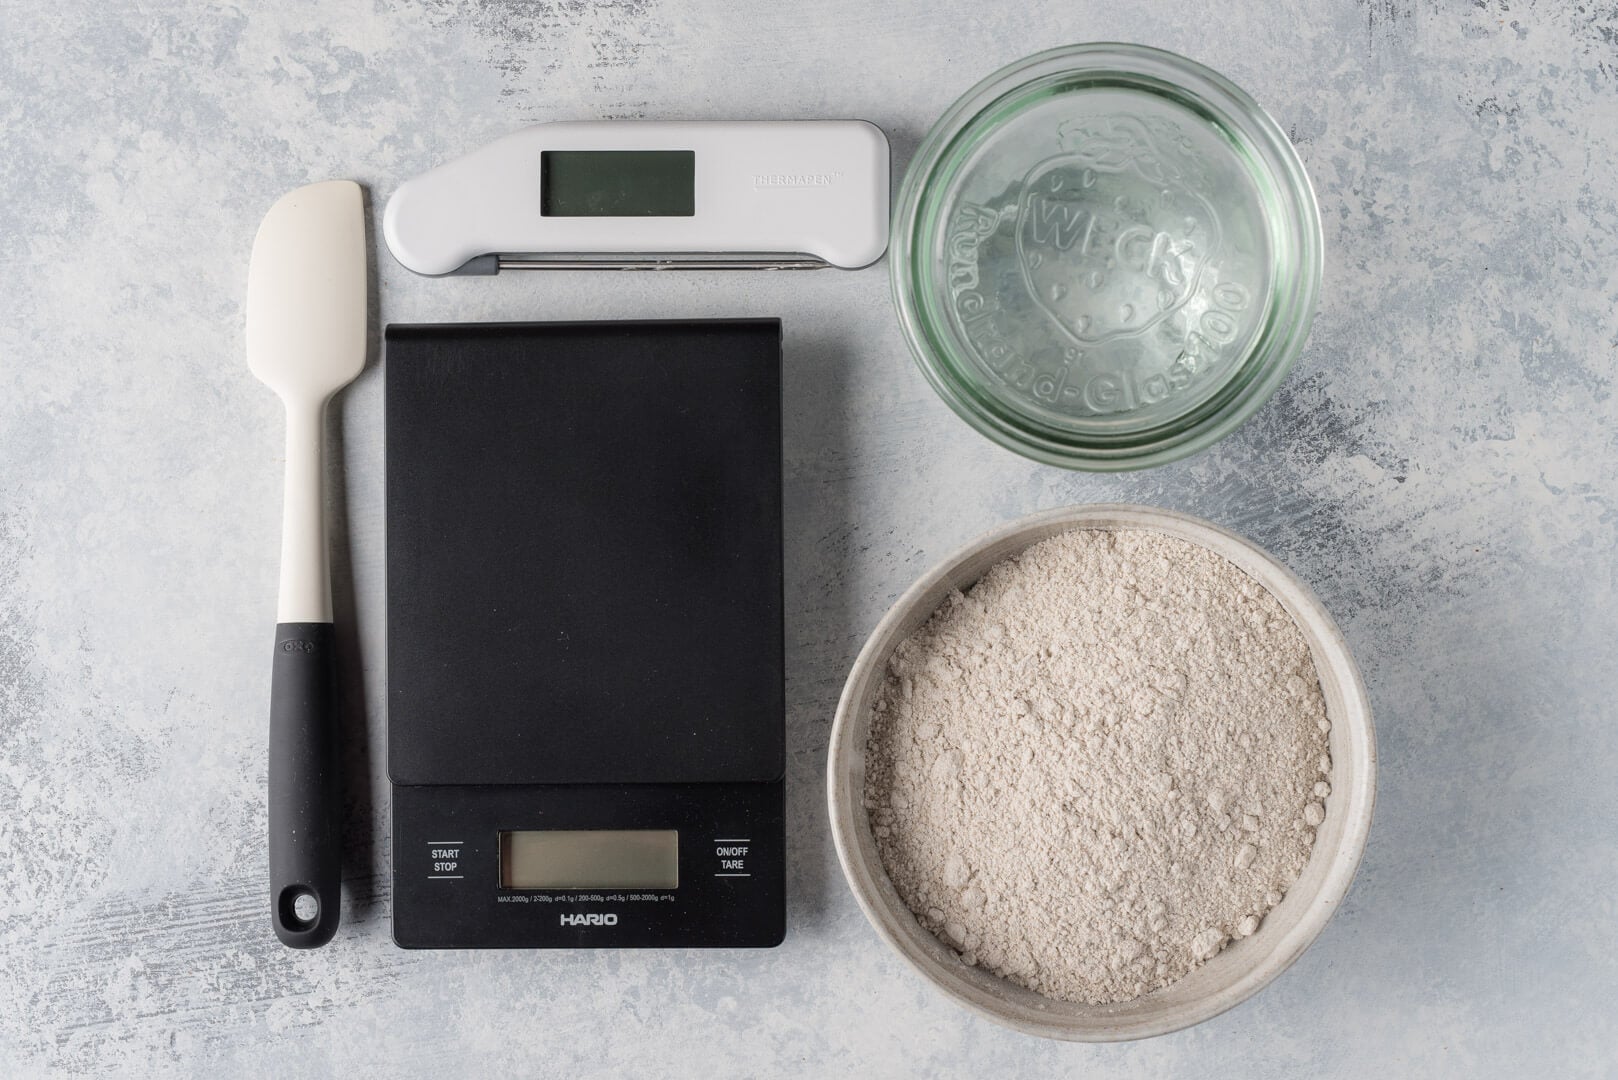
Helpful Tools to Make a Sourdough Starter
You can see a rundown of all the tools I use for baking sourdough, vetted over years of baking, over at my favorite sourdough baking tools page. Here, I list what I consider the necessary tools to get started:
Weck glass jar
Have at least two clean jars on hand. I like these Weck jars (#743, 3/4 liter jars) best because they taper out towards the top, making it easy to stir, and they don’t have any hard-to-clean lips or edges. Also, using the glass lid without the provided rubber seal and clips provides just enough of a seal to keep moisture and heat trapped inside.
I recommend using glass jars because you can easily see the fermentation as it progresses. It can also help to place a rubber band around the jar at the height of your starter after mixing so you have a visual guide for how high it rises between refreshments. Two more reasons I like these jars: they’re high quality and very economical. They are canning jars, so you can use them for many other things around the kitchen (jam, homemade pesto, dried fruit, cereals, and so on).
Silicone spatula
I use a small, firm spatula to do my feedings. It’s sturdy and easy to clean with a sponge, and if things get messy, you can run it through the dishwasher.
Scale
A kitchen scale is indispensable and guarantees accuracy when measuring the amount of flour needed for each starter refreshment. Measuring flour by volume is inherently imprecise as the amount of flour packed into a measuring cup can vary. Further, it’s a good idea to get used to using a scale for weighing ingredients, as this method is essential for improving your baking consistency.
Rye flour
Using whole grain (“dark”) rye flour helps expedite the fermentation process. In comparison to white flour, rye flour is teeming with extra nutrients that help kickstart the entire process. If you don’t have rye flour, a good quality organic whole wheat will also work well.
Unbleached, all-purpose, white flour
With my starter of 10+ years, and outlined in my post on how I feed (refresh) my starter these days, I typically refresh it with 70% all-purpose flour (or bread flour) and 30% whole rye flour. I like this mix because you get the fermentation boost from the whole-grain flour and the white flour’s increased gas-trapping ability and gluten strength. This helps me spot the signs of fermentation throughout the day and is a good compromise, using just enough whole grains without my starter getting overly acidic too quickly.
Thermometer
An instant-read thermometer will help monitor the temperature of your starter and ensure that it’s in the optimal range for increasing fermentation activity.
My Free Sourdough Starter Quicksheet
My sourdough starter quicksheet is a free, one-page printable guide to feeding, maintaining, and using my sourdough starter. Download it, print it, and keep it in your baking notebook for quick reference!
Starter Refreshment (Feeding)Schedule

In the beginning, your starter refreshments will occur just once a day. As your culture becomes more active, you’ll increase this to twice a day. Because of the frequency of these feedings, one of my goals is to help you set things up so it’s quick and easy to do your feedings and move on with your day. Once you get the hang of things, you only need about 5 to 10 minutes per day to keep your starter going–totally manageable.
A sourdough starter is very resilient. If you forget to feed it one day or feed it several hours after it needed a refreshment, don’t worry, in almost all cases it will spring back.
The following sourdough starter recipe schedule will provide you with a reliable and robust sourdough starter in 6 to 9 days. Once you have the culture stable, it will last indefinitely as long as you refresh it regularly. If you don’t plan to bake frequently, you can toss the starter in the fridge and feed it only once a week. (I’ll discuss this in more detail later in this post.)
Your schedule will follow the natural rise and fall of your starter. As soon as you feed it, the yeast and bacteria in your culture will begin to metabolize the sugars in the flour, creating gasses (among other things) as a byproduct. These gasses cause the starter to rise throughout the day as seen above. Once they subside, then the starter falls.
Daily Refreshment Process
At each refreshment, we will perform the following quick steps:
- Stir your starter a little bit with your spatula
- Place a clean jar on your scale and scoop in some portion (outlined below) from the jar you just stirred down
- Add fresh flour and water; mix well to incorporate completely
- Cover the jar loosely and let rest until the next feeding
That’s it! Once you get your process down, it should take no more than a few minutes each day.
Sourdough Starter Recipe: Making an Incredible Sourdough Starter from Scratch
Day One

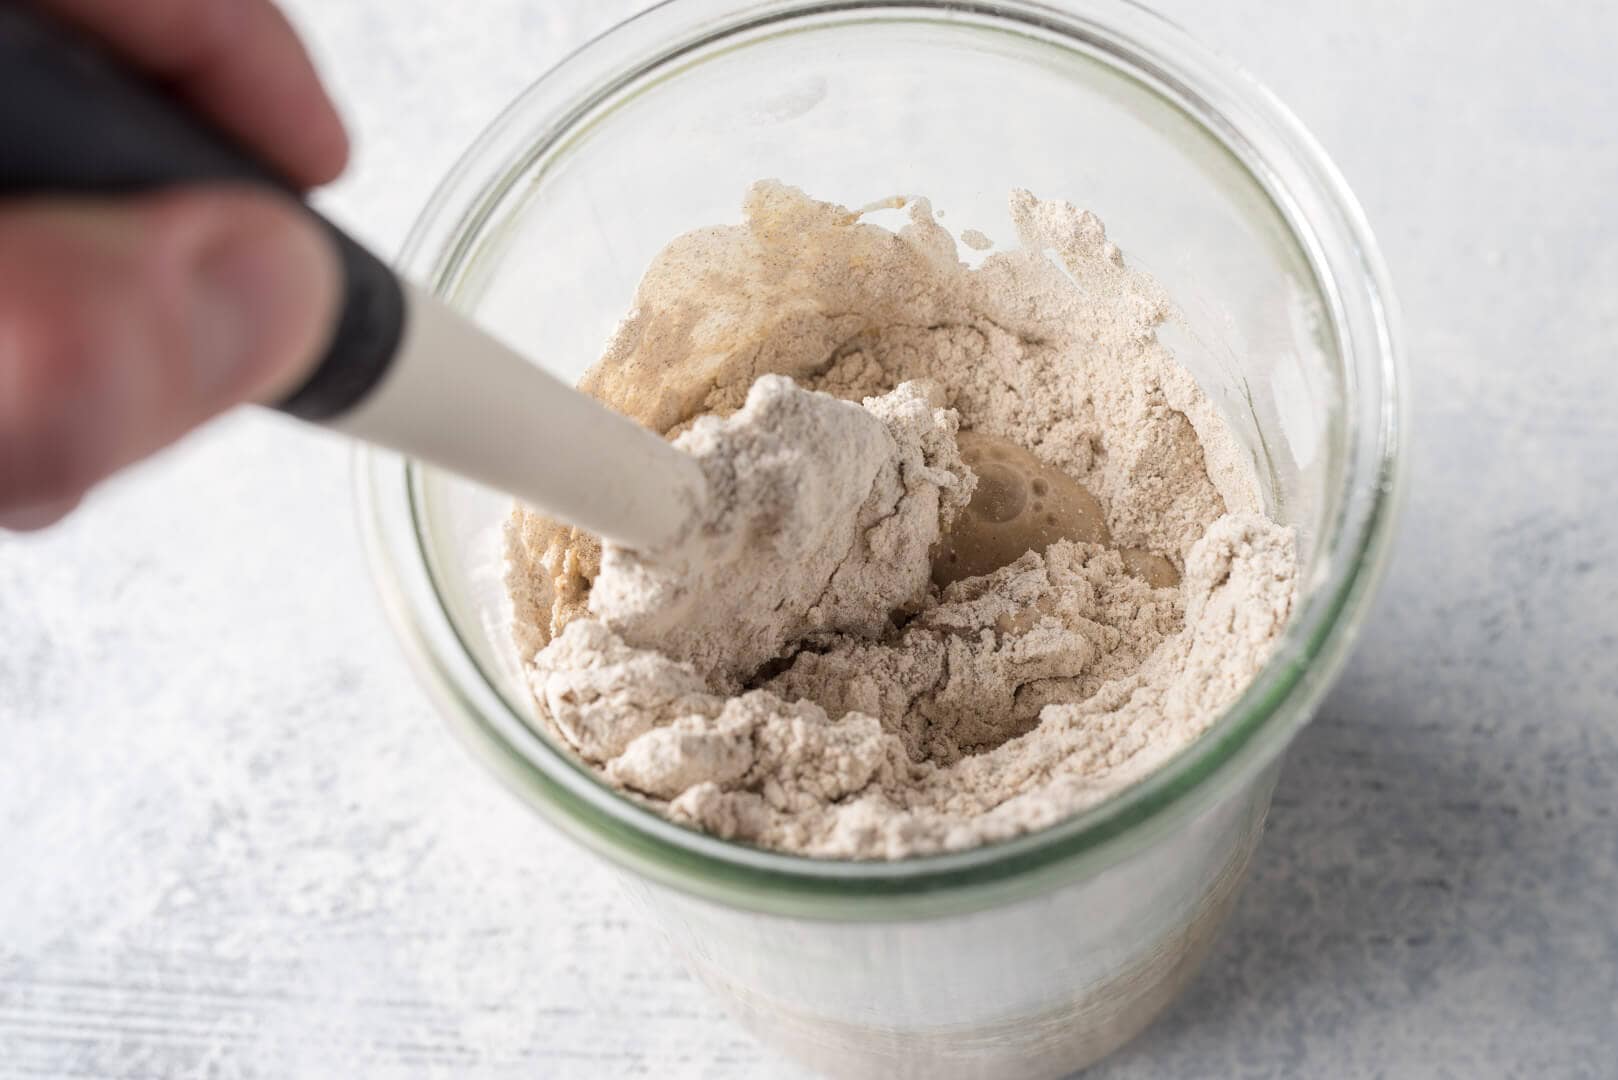
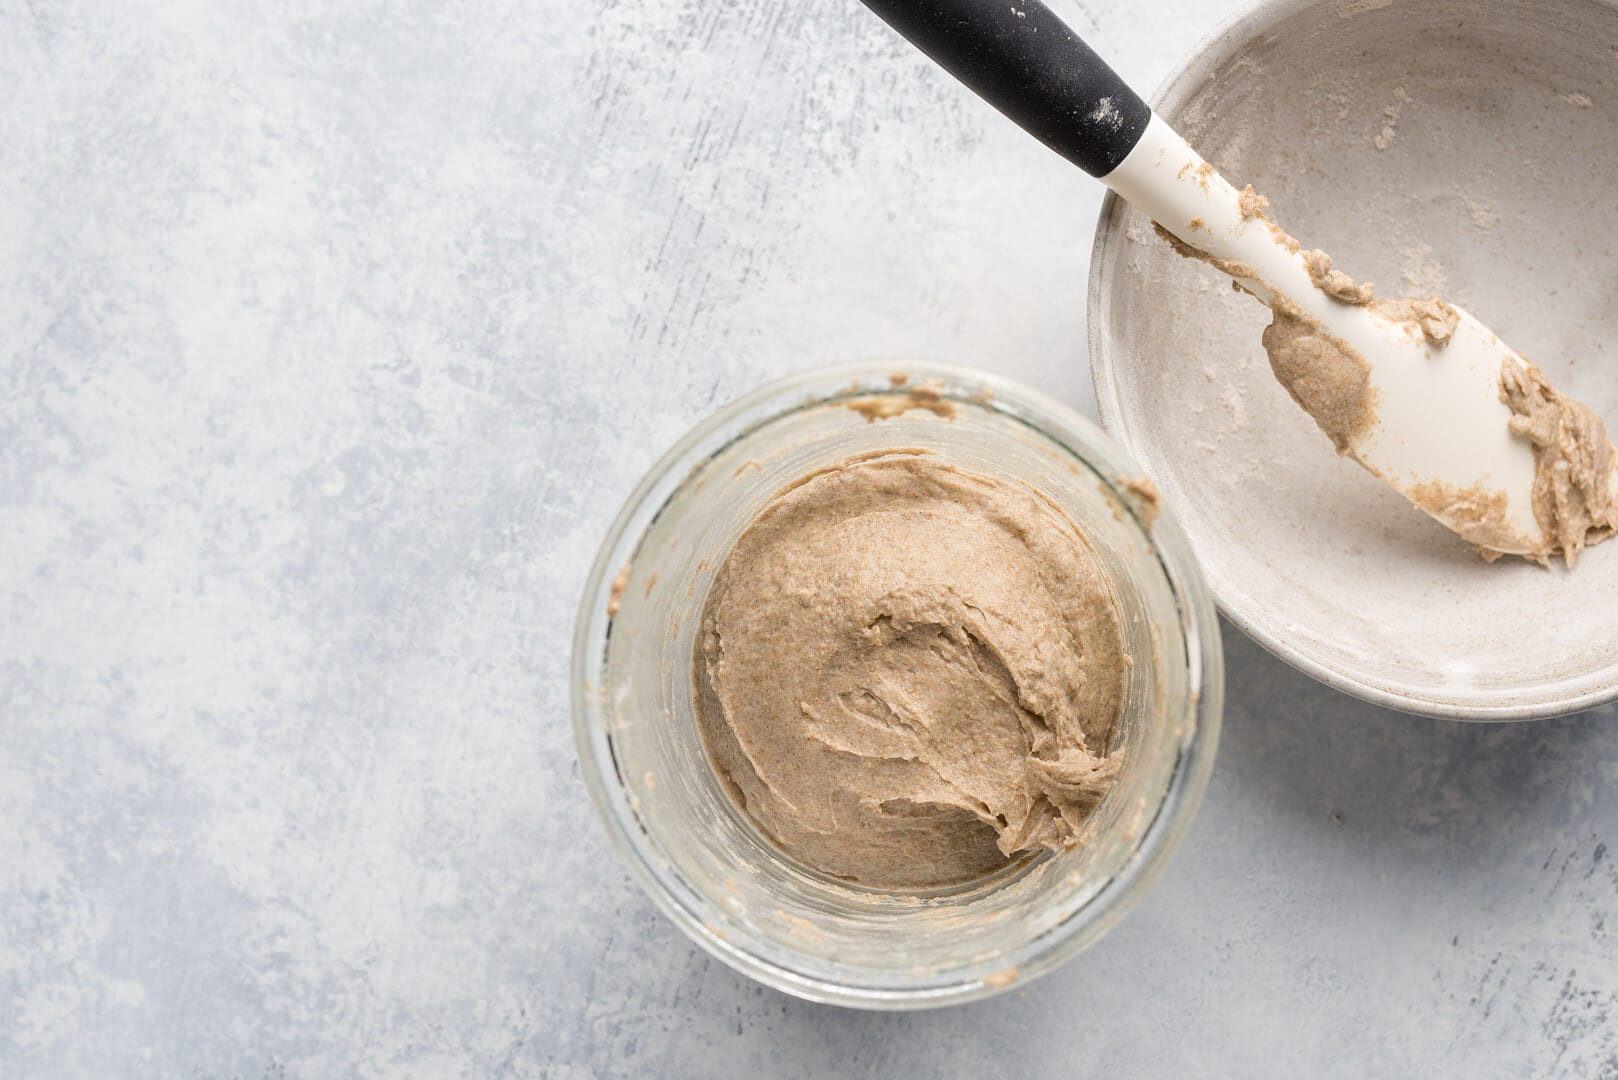
Initially, I like to use two jars for this process: each time you refresh, swap in a clean jar. Starting on Day 4, you can use the same jar: discard down and add fresh flour and water.
I first like to weigh the jars I’m using (without the lids) to find their empty weight. Then, take a permanent marker and write the jar’s weight on the bottom. This way, we know the baseline weight of the jar so we can quickly figure out how much starter to keep during each refreshment.
In the morning, place a clean, empty jar on the scale and tare (the “tare” button on your scale will zero it out after you place your jar on top. This will allow you to measure the flour and water your place in your jar and exclude the jar’s weight). To that jar, add 100 grams whole grain rye flour and 125 grams water and mix until all dry bits are incorporated. If it’s cool in your kitchen, warm the water to 80°F (26°C) before mixing. Lightly cover the jar and set it in a warm place–80°F to 85°F (26°C to 29°C) is ideal–and out of direct sunlight for 24 hours.
Day Two

You may or may not already see some fermentation activity. As mentioned above, this potential initial surge of activity is typical and should subside around Day 3. What you can see below is how my initial mixture expanded significantly (in fact it bubbled out of the jar; this is why setting the jar in a bowl is a good idea). Don’t be discouraged if the surge disappears by the third or fourth day. Stick to the schedule, and it will come back!


Place a second, empty jar on the scale and tare so that it reads 0 grams. Scoop in 75 grams of the mixture that has been resting for 24 hours. Next, add 50 grams rye flour, 50 grams all-purpose flour, and 115 grams of water. Again, if it’s cold, warm the water to 80°F(26°C).

Mix well until all dry bits are incorporated, cover, and place in the same warm spot for 24 hours. Discard the rest of the mixture in the first jar and clean it in preparation for the next day.
Day Three
In the morning, you may start to see more activity, or you may see none. You can see below that the initial surge of action I had on Day 2 disappeared. However, my mixture started to show the beginning signs of beneficial yeast and bacteria taking hold: some bubbles on the top and at the sides, rose to some degree, and it started to take on a sour aroma.

Regardless of what signs your mixture is presenting, don’t fret and stick to the schedule. Remember, if it’s cold in your kitchen, warm your water to 80°F (26°C) to help speed things along.
If a layer of clear liquid (“hooch”) forms on the top of your mixture just stir it back in and keep with the schedule.
Place a new, clean jar on the scale and tare. Scoop in 75 grams of the mixture that rested overnight and add 50 grams rye flour, 50 grams all-purpose flour, and 115 grams water. Stir until well incorporated. Cover the jar and let it rest for 24 hours.
Discard the rest of the mixture in the first jar and clean it in preparation for the next day.
Day Four
This day is the first day of the process that has two refreshments in a single day: one in the morning, and one approximately 12 hours later.
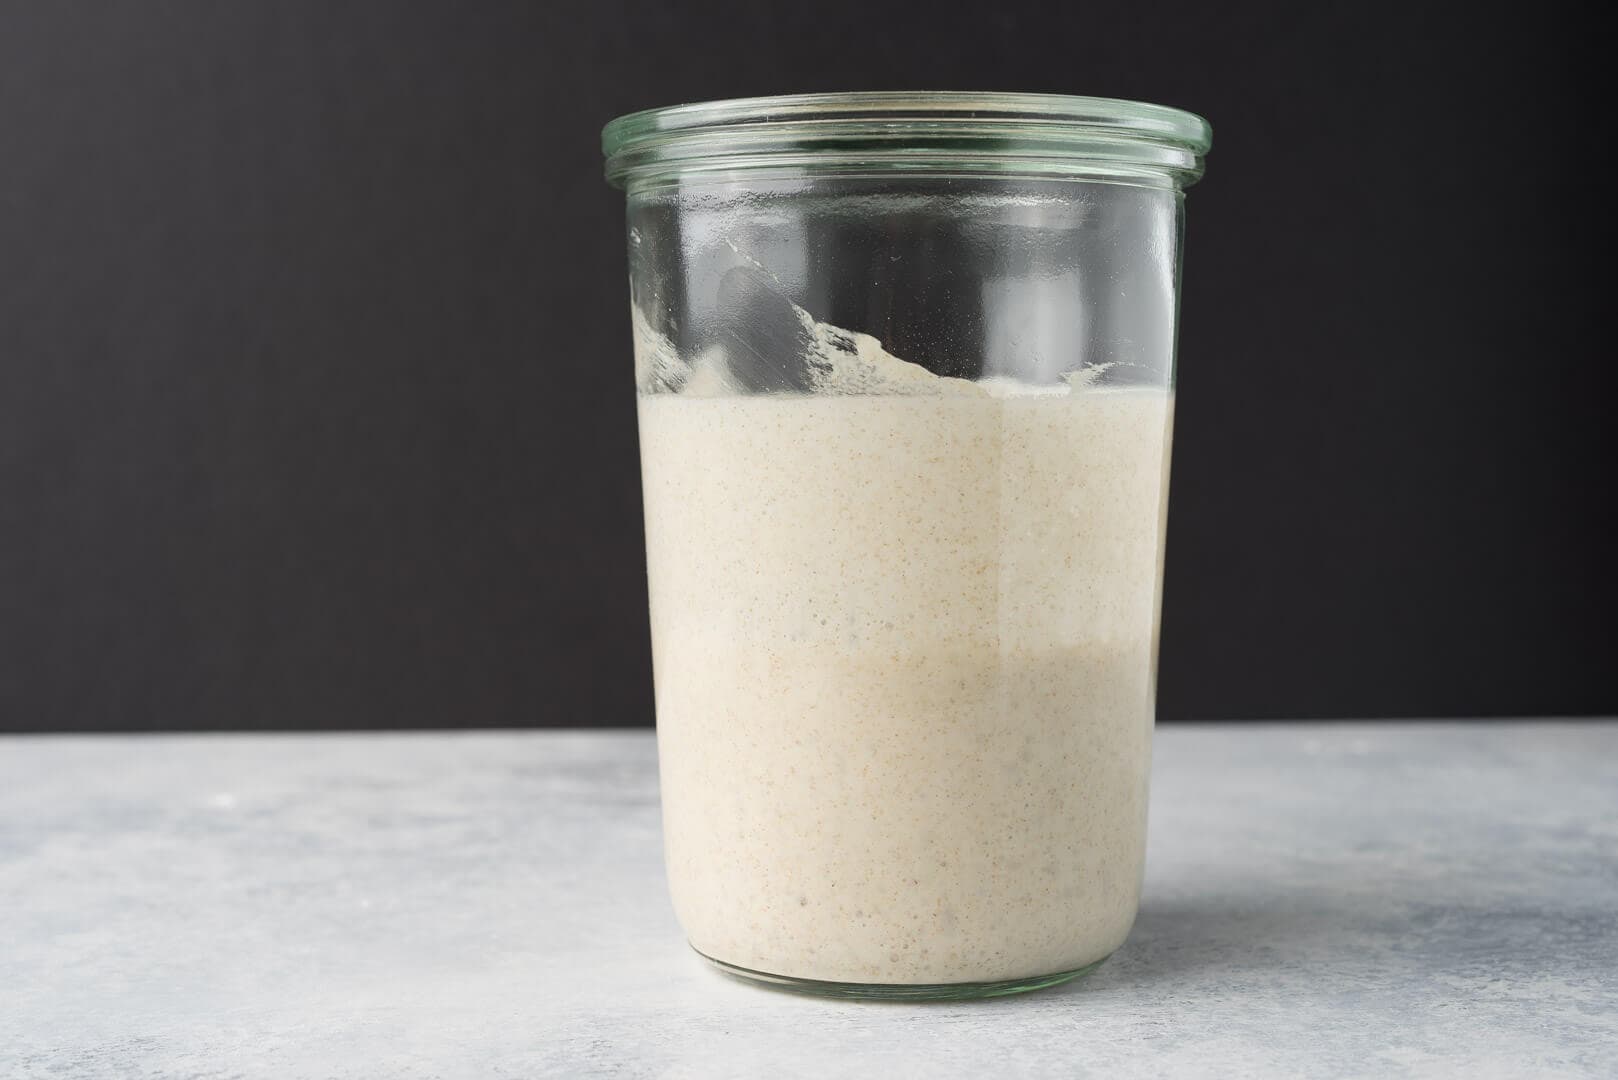
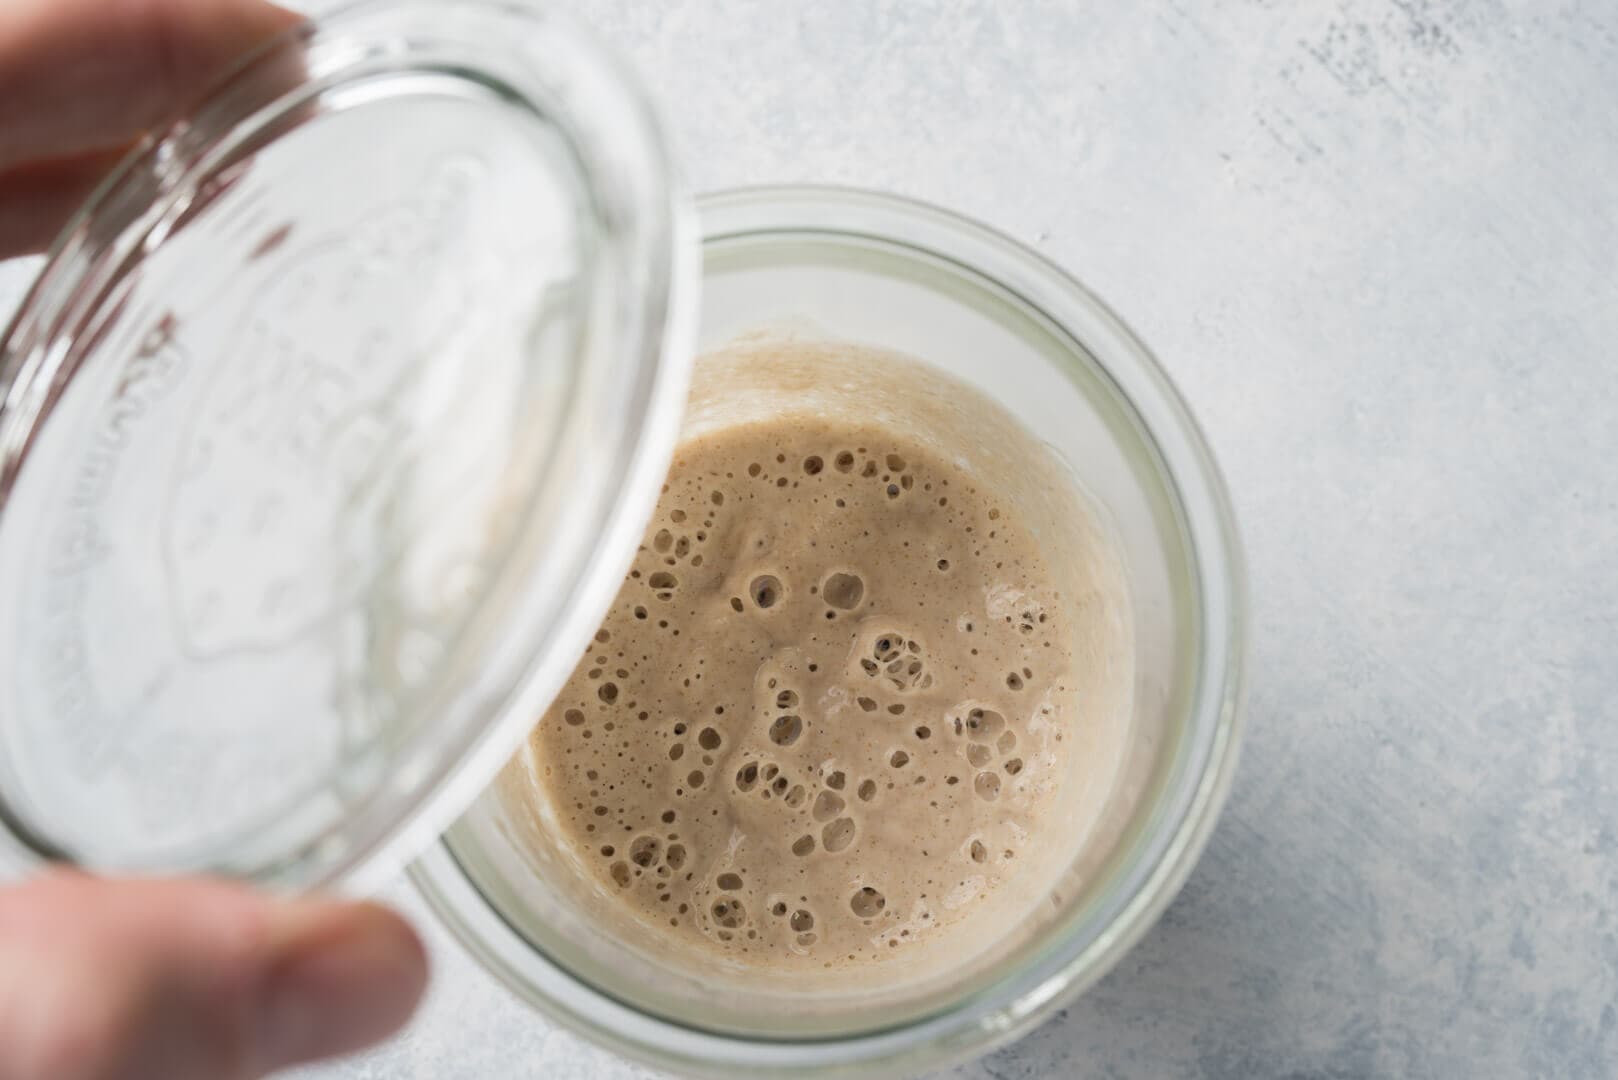
In the morning, you should start to see signs of fermentation activity if you haven’t already, and begin to see them again if you experienced the surge-and-drop that I described above. There will be bubbles scattered on the sides and top, and the level of the mixture might have risen and fallen a little (evidenced by streaks on the sides of the jar).
Refresh in the same way that you did on Day 3. Place a clean jar on the scale and tare. Scoop in 75 grams of the mixture from the jar that fermented overnight, add 50 grams rye flour, 50 grams all-purpose flour, and 115 grams water. Mix thoroughly, cover, and let rest for 12 hours.
Discard the rest of the mixture in the first jar. From here on, simply use the same jar each day (no need to switch to a clean jar) by discarding the contents down and adding fresh flour and water as instructed.
After this 12-hour rest during the day, discard the contents to 75 grams and refresh again with the same ratio of ingredients. Let the new mixture rest for 12 hours (overnight).
Day Five and Six
For Days 5 and 6, continue to discard down the contents of the jar and then refresh with the same ratio of ingredients as you did on Day 4, twice a day. You will see fermentation activity increase more and more. If you’ve written the weight of the empty jar on the bottom as I indicated on Day 1, you should know exactly how much the resulting weight of the jar plus carried over starter will be—discard down to this weight.
Keep using the same jar for these refreshments.
Day Seven and Onward
In the morning on Day 7, discard what’s in the jar down to 20 grams of the mixture. To this, add 30 grams rye flour, 70 grams all-purpose flour, and 100 grams water. Mix thoroughly, cover, and let rest for 12 hours during the day. In the evening (after about 12 hours), discard the jar contents down to 20g, add the same ratio of ingredients as earlier in the day, and let rest 12 hours (overnight).
At this point, you should see the height of your starter rise and fall in the jar predictably each day. This periodic behavior is a good indicator that it is strong enough for you to use for your first loaf of bread. If your starter is still struggling to show activity, continue the refreshment schedule with the same ratio of ingredients for another day–or even several more days–until things pick up. The process of stabilization can sometimes take longer, depending on the flour used and the environment (especially if it’s cool in your kitchen). Be patient and stick to the schedule!
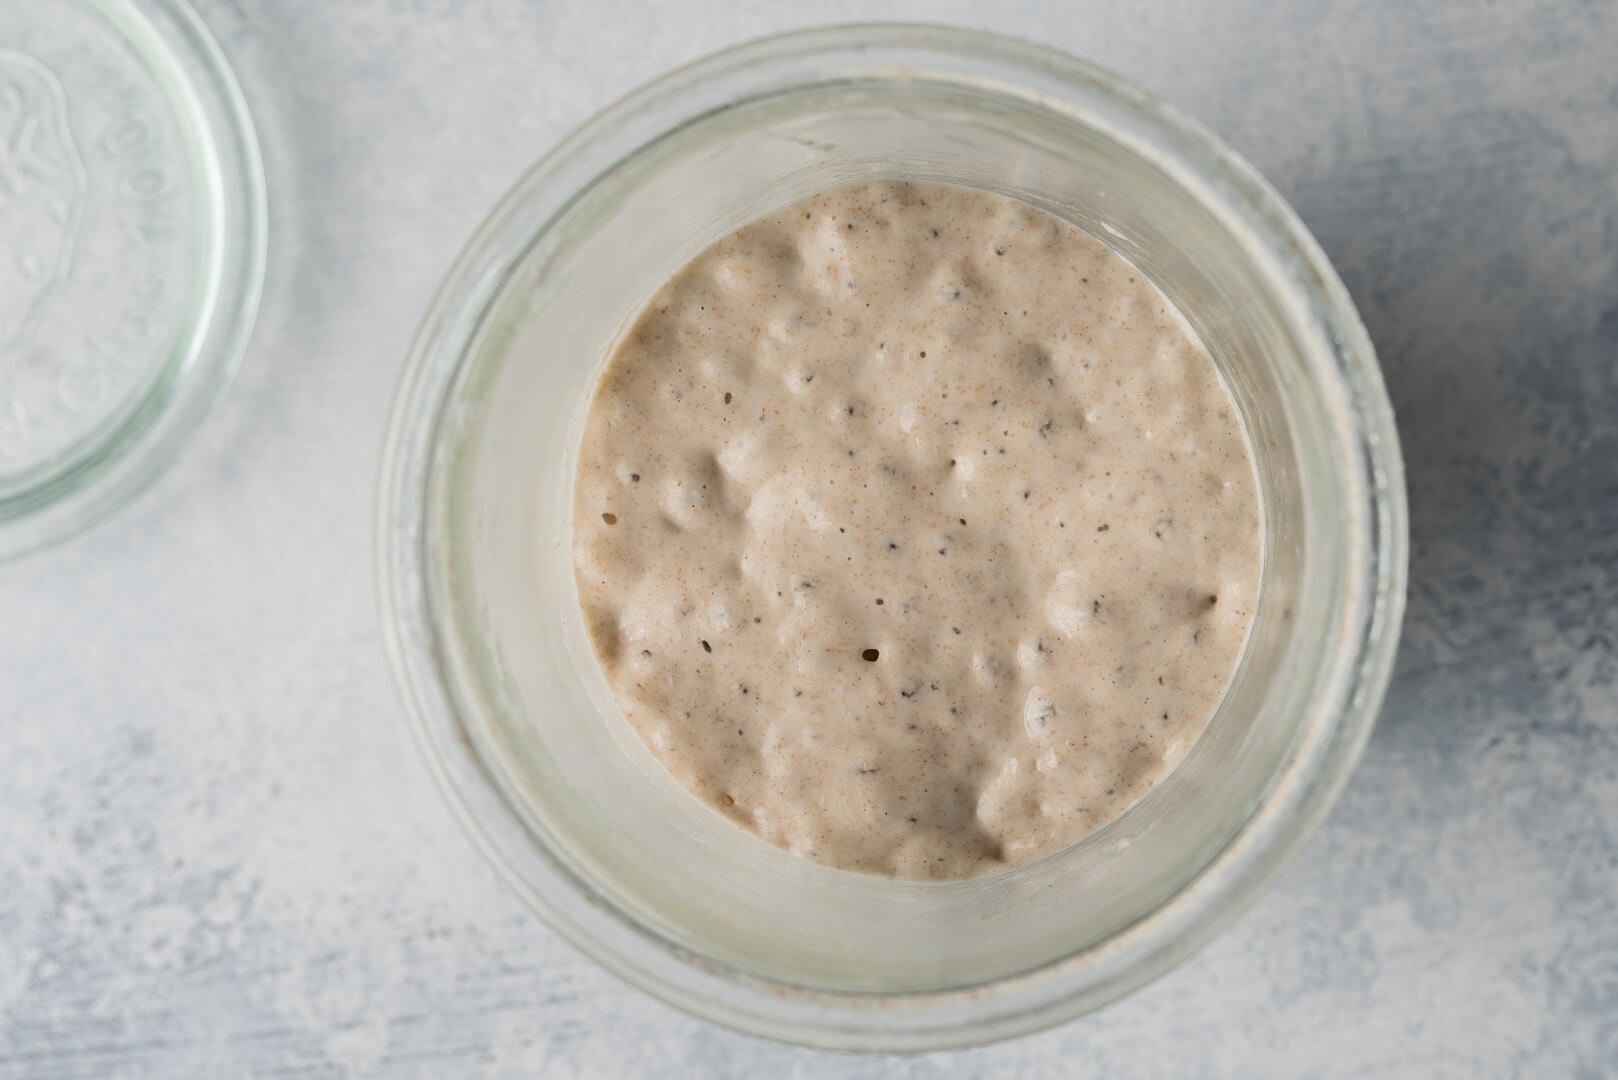
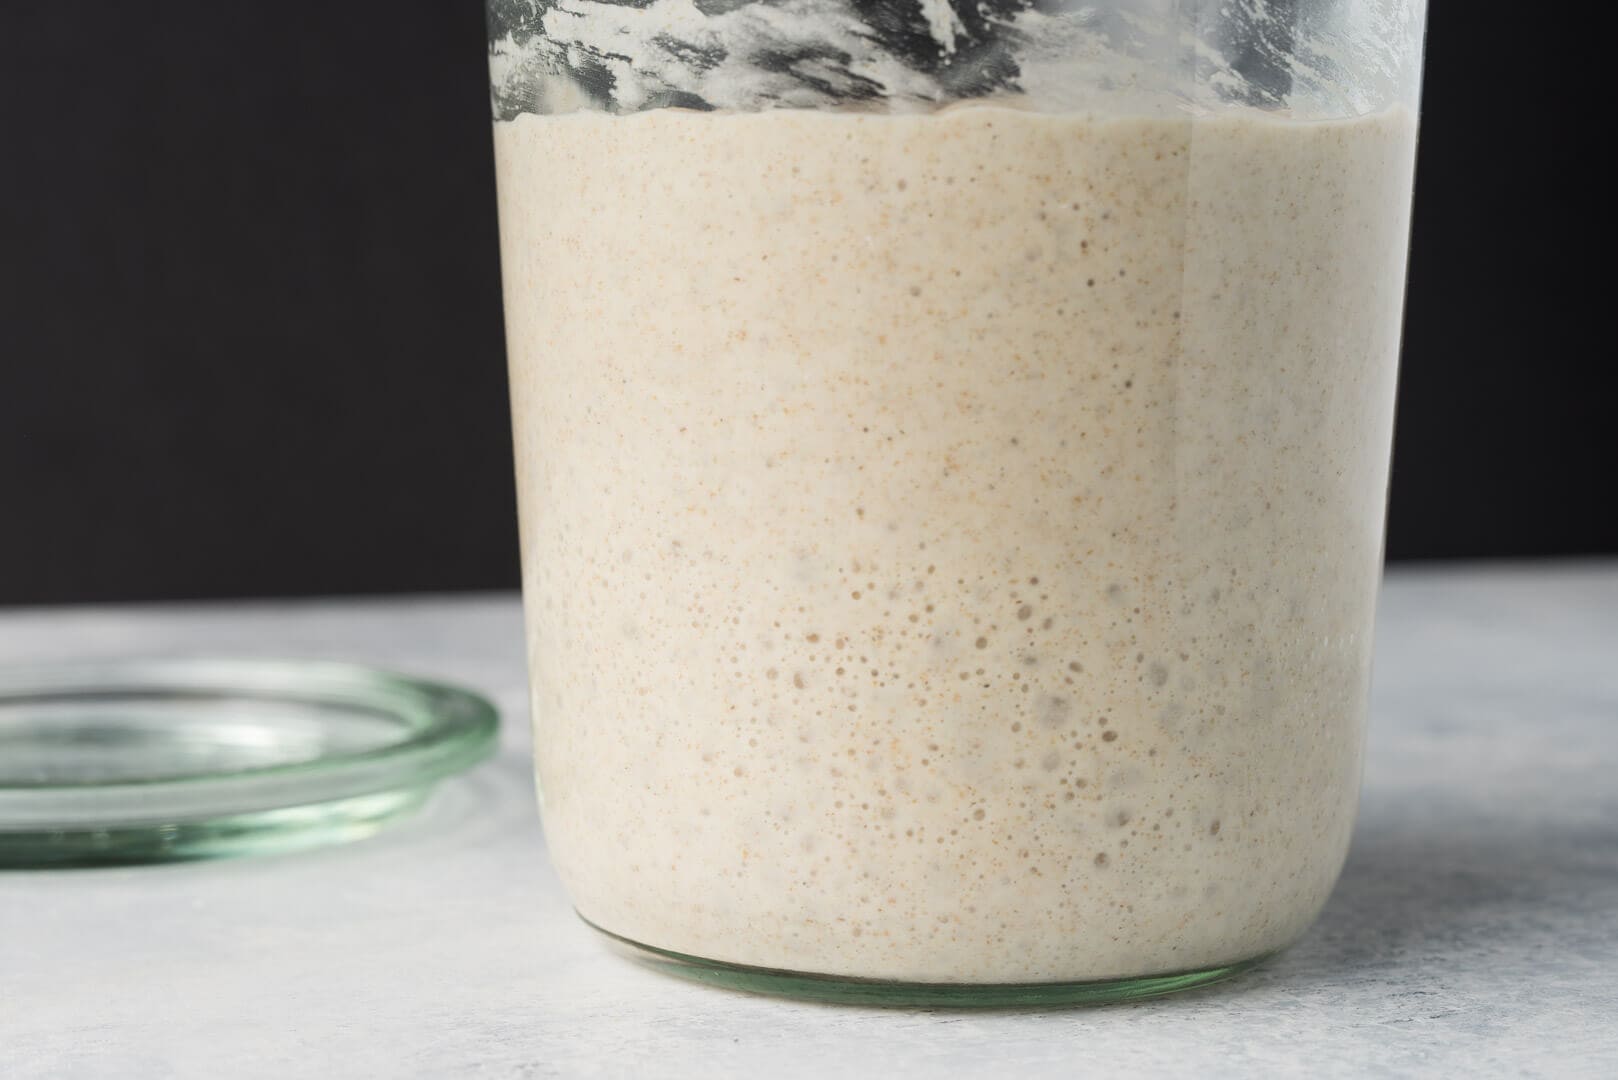
Once you get the hang of your starter and its feeding schedule, feel free to adjust the ratio of ingredients. For example, in warmer months I’ll reduce my mature starter carryover to 10g to 20g depending on the temperature. To read more about how I change these ratios and maintain my starter, check out my comprehensive sourdough starter guide page which includes my current feeding schedule, an in-depth FAQ, and more.
The starter will continue to develop flavor and strength over the next week and into the future. With an active starter, you can now use a portion of it when it is ripe. A starter is ripe when it has risen, is bubbly on the surface and at the sides, has a sour aroma, and has a looser consistency than when first refreshed.
Having issues? Check out my list of the 21 most common sourdough starter problems (with solutions) →
What is the Best Flour to Feed My Sourdough Starter?
I get asked this question often. Once your starter is rising and falling predictably, it’s okay to switch your refreshment flour to suit your preference. You can continue with a mixture of rye and all-purpose, change to 100% all-purpose white flour, or even switch to using 100% whole wheat.
There is no right or wrong flour to use when feeding a starter.
Each flour will affect the starter in a different way, changing how fast it ferments, how acidic it becomes in the same timeframe, and eventually, the final flavor profile. There is no right or wrong flour to use when maintaining your starter; it’s up to you and your starter!
Next Steps For a Healthy Sourdough Starter
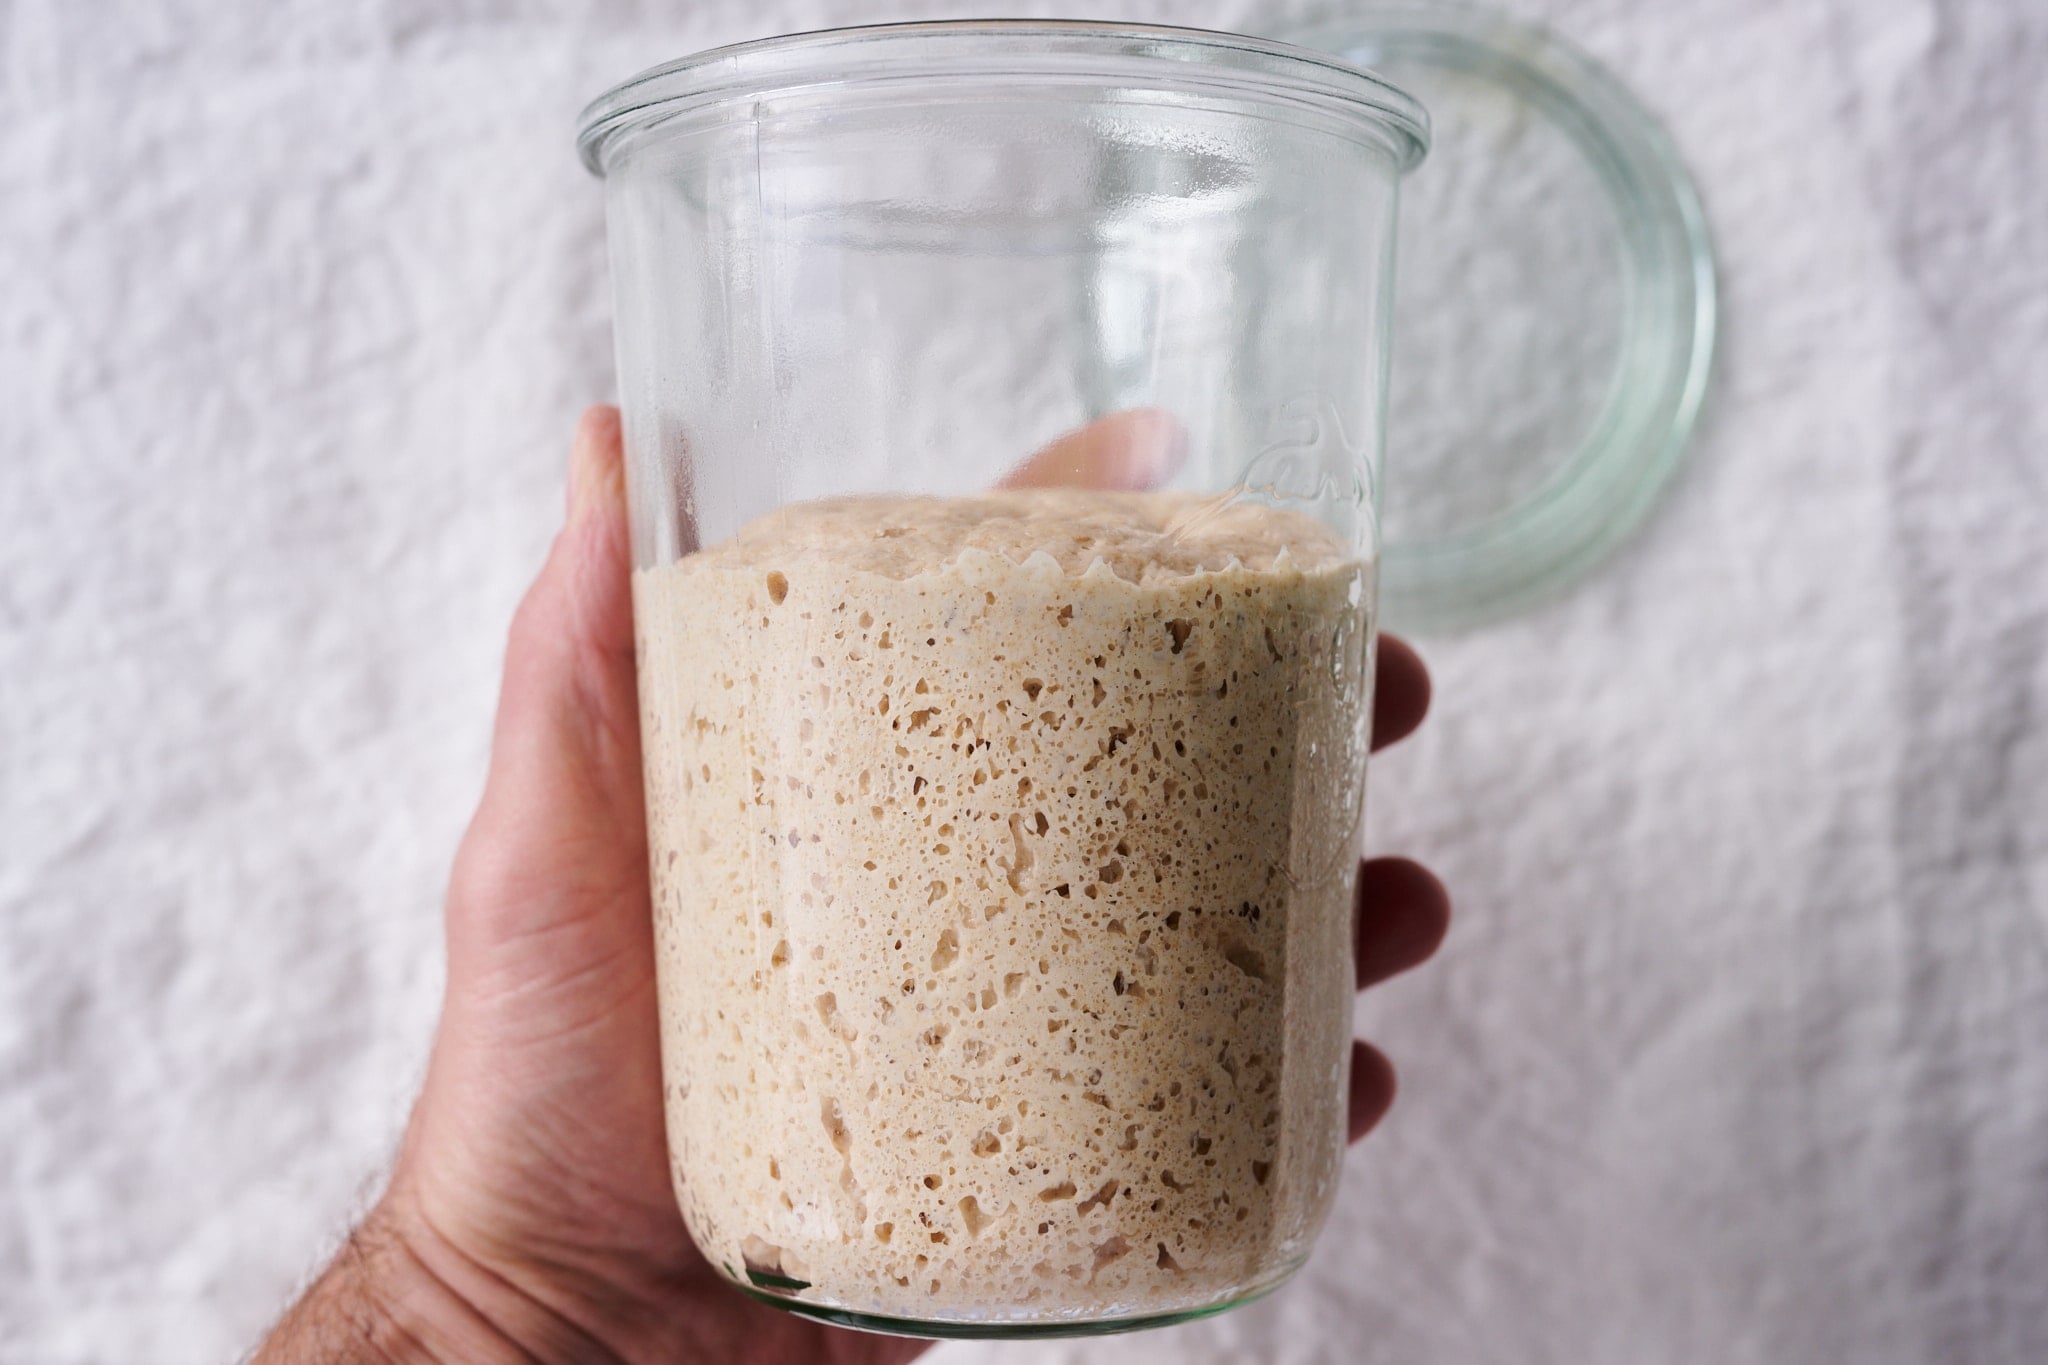
After your starter rises and falls predictably, review my sourdough starter maintenance routine for all the steps I do to keep my starter healthy. You can adjust your feeding schedule based on your baking frequency. If you can bake almost every day, you’ll want to feed your starter once daily to keep it ready-to-use shape. If you want to bake only on the weekends, you can put your starter in the refrigerator to slow down its activity.
You can also scale down your starter and maintain a smaller one. Scaling down your starter will mean less flour and water needed for each refreshment (to save ingredients). See my guide to maintaining a smaller sourdough starter for a recipe and process.
What If I Need a Break From Maintaining My Starter?
Maintaining a sourdough starter should always be on our terms, not the other way around. Maintaining a starter indefinitely can be daunting, but there are ways to put your starter on pause if you need a break from baking for a while. Remember, the refrigerator is our friend to slowing fermentation, and there are even ways to stop all fermentation activity altogether (and it can stay this year for years!).
How Can I Save Sourdough Starter Discard?
Once your starter is rising and falling predictably each day, and only then, to ensure you have the right mix of suitable bacteria and wild yeasts in the culture, you can save the discard. I keep a jar in my fridge where I collect all discards and keep them for up to 2 weeks. Then, when I want to make pancakes, waffles, or another discard recipe, I can use starter from my sourdough starter discard cache at a moment’s notice.
Final Thoughts
These days, refreshing my sourdough starter is a liturgical part of my day. It takes minutes to provide my starter with fresh flour and water. In return, my starter produces flavorful and healthy bread. I like to think it’s me making the bread; it’s me controlling fermentation, it’s my hands mixing and shaping the dough. But the reality is, I’m just a small cog in nature’s machinery. All I need to do is lend a helping hand and stay out of the way. Happy baking and buon appetito!
Print
Sourdough Starter Recipe
- Prep Time: 7 days
- Total Time: 168 hours
- Yield: 1 sourdough starter
- Category: Sourdough, Baking, Bread, Starter
- Cuisine: American
Description
This sourdough starter recipe will help you create your own sourdough starter from scratch at home in seven easy steps. Your starter is the cornerstone of great bread—once you have it showing consistent signs of fermentation each day, which takes on average 5 to 7 days, you’re ready to start baking sourdough bread!
Ingredients
- 300g all-purpose flour
- 400g whole-grain rye flour
- 800g water
Instructions
- Day One
To a clean jar, add 100g whole rye flour and 125g warm water. Mix ingredients and keep somewhere warm for 24 hours. - Day Two
To clean jar, add 75g of the mixture from Day One (discard the rest), 50g whole rye flour, 50g all-purpose flour, and 115g water. Mix ingredients and keep somewhere warm for 24 hours. - Day Three
To a clean jar, add 75g of the mixture from Day Two (discard the rest), 50g whole rye flour, 50g all-purpose flour, and 115g water. Mix ingredients and keep somewhere warm for 24 hours. - Day Four
On day four, you will give the mixture two feedings. In a clean jar, add 75g of the mixture from Day Three (discard the rest), 50g whole rye flour, 50g all-purpose flour, and 115g water. Mix and let rest for 12 hours. In the evening, after 12 hours, repeat the discarding and feeding you did in the morning. Let the mixture rest overnight. - Day Five and Six
For days five and six, continue to discard down the jar contents and then feed with the same ratio of ingredients as Day Four, twice a day. You can use the same jar for these feedings. - Day Seven and Onward
In the morning on Day Seven, discard the jar’s contents down to 20g of the mixture and add 30g whole rye flour, 70g all-purpose flour, and 100g water. Repeat this feeding twice a day, once in the morning and once in the evening, indefinitely.
Notes
You don’t have to use a new, clean jar each time you feed your starter, but I find it’s helpful to keep track of the weight of the jar so you know how much you’re carrying over.
If you use my method for creating a starter, tag @maurizio on Instagram and use the hashtag #theperfectloaf so I can take a look!
Sourdough Starter Creation FAQs
Why do you need a sourdough starter?
A sourdough starter is a continually maintained mixture of wild yeast and suitable bacteria used to seed fermentation in new dough for bread, pastry, and more.
How long does it take for a sourdough starter to be ready?
In general, I’ve found it takes about 7 days from when you first mix flour and water to when a sourdough starter is ready to be used to bake bread.
Is a homemade sourdough starter safe?
A well-maintained sourdough starter can live virtually indefinitely. The high-acid environment of the sourdough starter helps stave off any unwanted pathogens. However, if you see any signs of traditional mold (pink, white fuzzy, green), it’s best to discard the entire starter and start a new one.
Should I make or buy a sourdough starter?
While buying a sourdough starter is very easy online, it’s a very easy process to do at home! Plus, creating your own starter exposes you to the signs of fermentation, what steps you need to perform to maintain your starter, and gives you a chance to get to know the feeding (refreshment) process.
How long does it take for a sourdough starter to peak?
Some bakers use the term “peak” to refer to either the point at which a starter is ready to be used or needs feeding, or it can refer to the physical peak height of the starter in the jar. I find judging a sourdough starter’s readiness based solely on the height it has risen to may lead to using it at an incorrect time. After all, the height of a starter is simply a display of the strength and other characteristics of the flour. To determine when your starter is ready to be fed (or used for baking), look for a combination of signs: some rise, bubbles on top and at the sides, a sour aroma, and a loose consistency (it should loosen the longer it ferments). From there, use the timeframe for fermentation as a guide: at about 72-78F (22-25C) with 30-50% whole grain flour and 20% ripe starter (the seed, or inoculation), it might be ready after 12-16 hours.
Why doesn’t my sourdough starter have big bubbles?
It’s okay if your starter doesn’t have big bubbles. Large bubbles can be the result of the flour you’re using and the hydration. What’s more important overall, is to see strong signs of consistent fermentation: some bubbles, consistent rise each day, a sour aroma, a loosening in texture.
Why is my sourdough starter not rising?
It’s worrisome if you don’t see any rise in your starter, you should see some. Usually, no rise is a sign it’s not fermenting properly and needs more time to establish. Continue with the feeding schedule outlined in my guide on how to make a sourdough starter and it should begin fermenting after a few days.
What’s Next?
If you’re looking for something to make with the discarded sourdough starter that you’re generating every day, have a look at my sourdough waffles, sourdough pancakes, and sourdough banana bread.
If you need a high-level look at each step of the bread-making process, read through our Beginner’s Guide to Sourdough Bread.


2,667 Comments
I am in day Three and my starter looks AMAZING… Thanks!! Greetings from Norway.
Really glad to hear that, Livo! Happy baking!
Is room temperature critical for getting a starter going? I can do about 74 degrees but worry that is not warm enough. Any help would be much appreciated as is your fantastic site!
Hi, Barbara! Room temp will be just fine (74°F is great). If you don’t see significant activity after several days you could also try warming up the water used when feeding a few degrees in the microwave and see if that helps speed it up a bit more — but really, those temps should be just fine. Have fun!
I started my very first starter today! I love to bake bread and recently bought a mill and wheat berries. When preparing my starter, I also prepped the next 3 days of rye and all purpose flour in a ziplock bag to help speed the process when feeding. I realize there’s nothing I can do about it now, but is that something that’s ok to do? I would prep just a few days of feed at a time.
That’s great to hear! Also awesome that you picked up a mill. Sure, it’s totally find to mill a few day’s worth of grain and store it for feedings. Your starter will love that fresh milled flour. Happy baking!
Hey Maurizio,
I was wondering what to do with the starter when I travel. Do you have any advice for leaving it (unfed) for over a week? Thanks!
Hey, Carina! I have information on this over at my sourdough starter FAQ, scroll down to where I mention refrigerating my starter.
I’m currently working on a follow up post on this with even more information!
Maurizio, I used your previous recipe to make a starter from scratch last Sept. It has been a strong and reliable starter ever since. I have made your Beginner’s Sourdough recipe every weekend since then with great results. I am not sure I understand this change in procedure. Why use two jars and why make so much more starter? I still use the 40 grams of 50/50 Rye/White to 40 grams of starter and 40 grams of water. I think the old way is a lot easier and you’re throwing away less starter. Is there anything wrong with the way I continue to maintain my starter?
Glad to hear things have gone so well for ya! I still have my old post up (there’s a link at the top of this one) if you need a reference. There is nothing wrong with my old method at all, it’ll keep your starter nice and healthy without any issues. As I’ve written above, there’s really no right or wrong way to keep a starter — it’s a very personal thing and revolves around your baking schedule, the type of bread you’re after, and your environment.
I updated this post after years of tinkering with creating a starter and some of the changes here were done to help people who have struggled in the beginning to get things going. By increasing the quantities (not that much, really!) the chances for success for me have gone up dramatically — most likely due to the fact that is just a higher concentration of good bacteria/yeast in the higher amount of grain, but also other minor factors such as the maintenance of thermal mass with higher quantities, etc.
All that said, stick with what works for you. The changes were targeted to newcomers and, I hope, will help everyone create a sourdough starter even easier.
Thanks for the comments and happy baking!
I’m impatient. Can I buy sourdough starter so I can bake a loaf today? Or buy a suitable yeast without relying on what’s in the air? Is there any residual (viable) yeast in bread I buy?
You can buy sourdough starter online at various places like King Arthur Flour. There’s no residual starter in bread since it’s been baked in the oven.
Hello,
how long does it generally take your starter to get that really sour taste? I LOVE extra sour sourdough. I had one going, and baked like crazy for a couple months. The bread was amazing but not very sour, buuuut then I forgot about my start and threw it out a couple+ weeks later. Ready to start again!!
Thanx!!
A starter should be ready to go after about 6-9 days, depending on the activity you’re seeing. There are a lot of factors that go into creating a new one (as mentioned above) so the time is different for everyone. However, once your starter is rising and falling predictably it should be able to produce whatever bread you’re after: sour or not very sour. In other words, in my experience once your starter is ready to bake with, you can make the bread as sour as you want.
That said, there are a few things you can do to try and increase the sourness of your bread. First, you want to use your starter, and levain, when it’s very ripe. If it rises up to a certain height, let it sit there for a bit before you use it. If it starts to fall that’s ok too, just try to catch it right before, or after, it falls. That mature, ripe starter/levain has much more acidity than if used when it’s more on the “younger” side. Just be weary that your dough fermentation rate might be a bit faster than previous, keep an eye on it during bulk fermentation and divide the dough when it looks ready.
Additionally, you could try using some rye flour in your final dough mix. Rye helps stimulate more acid production for a more sour flavor. I wouldn’t go overboard on the rye, though, as the more you include the more dense your loaf will be. It’s up to you on the percentage, but even 5% plays a big role.
Finally, if you can try to push the cold proof in the fridge. There’s a limit of course, but if you could go even a few more hours you should notice more sourness.
I hope that helps!
I just got your email a few days ago about establishing a starter from scratch. I tried multiple times a year ago in the winter and failed miserably. So in the meantime I have been buying bread from the local wood fired oven bakery located just over the ridge into Tennessee named Smoky Mountain Bakers. Their products are superb. But in the winter it is a bit of a drive and we have to deal with mountain weather. I wanted to return to baking my own bread. So this time I am starting with distilled water, using my oven as a proofing box, and starting with 100% rye flour that is stone ground. We are at 4000 ft elevation and it is bitter cold on Beech Mountain, NC. but I will give it another try. I have never had problems creating a starter from scratch when I lived in other places…I even had great success in Riyadh, Saudi Arabia when I lived there. Wish me luck.
Most likely the issue was temperature-related. Try to keep that mixture warm and source the best flour you can (fresh milled and organic is awesome!). Stick to the schedule, sometimes it can take longer, especially if it’s cool, but the steps in this post will definitely get you there.
I live at 5280 ft. and it took me a few weeks to get my starter going 5 years ago but since then I’ve realized how important rye flour and warm temperatures are. Good luck and keep me posted!
Thanks. I will keep you posted. Keep up the good work.
At the end of day 1 some changes. I got kicked out of the oven that has a proofing setting on it. My wife wanted to bake some quiche…so I had to move out. I used an unheated styrofoam cooler and towels inside to make a proofing box for the jar. That cooled off too quickly. So this morning I used a seed bag intended to heated in the microwave and placed around your neck for muscle comfort in the styrofoam proofing box. That shouldl give gentle heat for a much longer time…I theorize. The starter looks exactly the same this morning as it did yesterday morning when I initially made it up. I am going to leave the day 1 mixture go for a long time before I refresh it today on day 2. One question. I used my thermometer when I was in the oven and it was warmer than I expected. Before I got kicked out, the proofing in the oven reached 93F before I opened the door to cool it off to 80 to 85 F. Do you think this killed the starter with too high of a temperature?
At the end of day 2 I am starting to become optimistic! I checked my makeshift styrofoam cooler (aka proofing box) and voila, a huge overflow of the starter. A big laundry pile of towels, but the starter is alive and I hope happy and well. I answered my own question from the above post. Short times in the low 90’s F do not seem to destroy the culture. The most important benefit to maintain a warm proofing box is the gentle heat source in the form of a seed bag muscle relaxer. A minute or two in the microwave then into the proofing box and it keeps the warmth for about 5 or hours. The styrofoam and towels keep the heat inside the box quite well. Lets hope the next day goes as well.
Wow, love the ingenuity in building that proof box! Really great. 93°F definitely will not kill your starter, I believe that happens somewhere just over 100°F (I’ll have to look up the exact temp). Keep to the schedule, it sounds like you’re well on your way — awesome!
Sad news. Following the same regime there is no activity for two days. I will continue to perform the replenishment to continue possible growth, but I am a bit disappointed.
Two days isn’t enough time to see activity for most people in most environments. Stick to it and you’ll see some activity happen!
Thanks for the advice to keep to it. Here is what I learned about my mountain environment for developing a starter. The use 100% AP flour does not provide enough strength and nutrients. I ended up with All Purpose/Rye/Pumpernickel at 33/33/33 percent mixture. Distilled water. Proofing box with very gentle heat, do not go much over 90F. The culture is now vigorous and it rises to 3X in about 4 hours. So I can now transition back to baking. My wife asked if I was ever going to bake any bread?
Hah! Right on, Robert, thanks for the updates. That mixture sounds great, lots of nutrition in there for your starter. Time to satisfy that request from your wife, and I’m glad to hear your well on your way. Happy baking!
Thank you for this update about your starter. I am new to baking bread sans bread maker and began your starter beginning of December 2017. I chose to use 100% rye flour as I had read that would be ok to do. I did read in some older comments here that the rye flour would not have quite the same rise.
I am looking forward to any updates on working with 100% rye or whole grains.
I am wondering why this update to the starter has you using more water than flour at the beginning and each of the feedings. I do see that from 7 days on you then recommend keeping the flour and water feedings equal.
Can you share more information about this? The why’s?
Great questions, Kellie! In the beginning of the process I found that water helps increase the potential bacterial / yeast activity in the mixture (probably because water helps increase their access to fresh food, flour). Once things get established more and more we can dial back the water — but that’s not necessary. You can keep your starter at whatever hydration you’d like in the end, I just find in the beginning a higher percentage of water helps move the process along.
Once your starter is established feel free to change to whatever flour type you’d like (in any percentage) and even change the hydration. Personally, I’m constantly changing the hydration percentage of my starter somewhere between 90% and 100% depending on the flour I’m using and the season. It’s incredibly dry here in the winter so I tend to increase the hydration slightly so the end mixture is at the consistency I’m after. And what’s the right consistency? There’s not right answer to that — it’s whatever you prefer. I find a looser consistency is easier to stir and maintain.
I hope that helps!
Thank you, that does help! As a beginner, I am interested in the why’s. In the long run, those answers will help me figure out what I need to do and where I can experiment a little.
By the way, I made your sourdough starter cinnamon roll recipe for Christmas. I do not own a stand mixer and I made a double batch. My fiancé and I each had a bowl doing the hand mixing. He said he would much rather he had gone out to scoop poop, we have horses, than do the work it took to mix that dough.
I might be getting a stand mixer for my birthday this month.
When I rolled my dough out, I saw where we did not get the butter entirely incorporated in the dough. The cinnamon rolls did turn out very good, all I could say was yum with each bite, but I am betting they may have been just a little better if mixed better.
That’s the key to baking great bread: understand the principles behind each step of the process and you’ll end up with an increase in consistent results. Baking requires the baker to monitor many variables throughout the process and being able to adapt to changing conditions is key!
Yes, mixing enriched dough by hand can be seriously challenging. I do not blame your fiance for making those comments one bit! A mixer is super, super handy with this type of dough. Glad they turned out pretty well, though! Next time you’ll nail it.
Happy baking.
Thank you for all of the information you give. Your website has made it so easy to get started!
Is there a reason why you don’t recommend sticking with rye flour? I feed my starter with rye exclusively — when mixing my dough it generally is a pretty small (~5%) proportion of the total weight, so I don’t ‘think’ it should seriously affect the texture etc of the breads. On the other hand, I never get the gluten formation (at least that is how I think of the problem) that I see in your pictures, so maybe the flour used in the starter is part of the problem? To explain the gluten comment a bit further, I never get those great big bubbles in the finished bread — it’s always a much tighter structure with very even though small bubbles.
No reason at all, rye flour will make a fantastic starter! In fact, nutrient-dense rye is what I use when my starter sometimes is sluggish and needs a pick up.
I don’t see any reason why a rye starter would create a more dense loaf of bread. The amount of starter that ends up in a final loaf is such a small percentage even it wouldn’t have a huge effect at all. I’d look to other potential issues!
Hi Maurizio, Thanks for sharing your knowledge! I’ve been working with sourdough for about 7 months, and am absolutely fascinated. I’d like to make a GF sourdough…. any experience? Thinking coconut flour, as I’m in the Caribbean. Thanks!
Hey, Britta! I have no experience with GF sourdough, sorry about that. I think something like coconut, almond, or even oat, flour would probably work really well. You could also play with buckwheat flour — it has a strong flavor but sure tastes awesome!
Have fun and happy baking!
Hi Maurizio! I started making my sourdough started based on your old tutorial three days ago. And now you switched everything in this new tutorial. Should I restart? Or continue with the 40g equal parts recipe you had before? Why did you change it?
I updated this post with new findings over the years and some new photos and tools I find make things easier. That said, the original article is still very good and will also work very well!
Thank you 🙂
Hi Maurizio, Happy New Years to you and your family…
Question: Is the starter ready to use when it is doubling in size after a couple of hours?
Happy New Year! It’s not so much the doubling in size as it is the reliable doubling in size around the same time each day. You want to see consistent rise and fall of your starter over the course of a couple days to indicate a stable culture of yeast/bacteria. It’s possible when you first create a sourdough starter you could see a doubling in size caused by other bacteria/yeast we’re not looking to keep in the long run — this activity usually dies off after a day or two. This is why the consistent rise and fall is key.
Hope that helps!
Yes, it does… Thank you!
on day 3 here (feeding @ night and keeping in my stove with the light on. OMG this smells like really stinky FEET right now. i’ll keep going, hopefully it starts smelling better as it develops.
is it possible my rye flour is “bad”? it’s pretty old, but i’ve been keeping it in the freezer. i’ve been using bottled water.
Hah! That smell is pretty typical with rye flour, nothing to worry about. It’s definitely possible for flour to “go bad” as it will expire after a while. I’d say stick to it and it should turn around.
Good Evening – have been seeing lots of bubbles and doubling (sometimes tripling) of my starter in the past 24-48 hours. feeding 2x day still. but it’s not passing the float test for some reason? i’m going to keep on chugging. just confirm for me, this starter “should” pass the float test when it’s fully ready use, correct?
i mean, it looks very similar to the pic at the top of this post right now, but no float!
There are many reasons it might not pass the float test (especially if a high percentage of rye flour is used, as rye has different gluten properties and will not trap gasses as well as traditional wheat). I usually look for a predictable rise and fall when creating a new starter. It should start out sweet smelling and eventually smell like yogurt or slightly sour. Along with this, it should rise some percentage and then eventually fall.
The predictable rise and fall, each day around the same time (assuming all else is the same day to day), tells me it’s ready to go. If you’re seeing this then it’s ready to bake with — even if it doesn’t float.
ok well its definitely doing that! i will give her a whirl in my next bake – thanks!!
Hi Maurizio!
I just started my first ever starter yesterday and, as many others have written, the activity is already really showing! i have been checking the starter a lot day today and the rising and falling have been visible throughout the whole day. I keep the starter in our wood boiler room, so its nice and warm in there. But, it kind of smells like beer, not really alcoholic, but more like a malt-y smell. Is this normal? and should i already start feeding it 2 times a day if its rising under the day and has fallen before i go back to sleep? 🙂
Kind regards,
excited baker from Sweden
Those smells are pretty typical in the beginning. I’d say stick to the schedule as outlined above, that initial surge of activity can be other bacteria/yeast we eventually want to “die” off. After 4-5 days if your starter is fermenting faster than expected (it’s falling by midday or so) then definitely bump up to 2x feedings per day.
Hope that helps, Mel!
Okey great! Then i’ll stick to the 1 feeding a day for now 🙂 Thank you for answering so quick, have a great day!
Awesome read! I have a sourdough starter that I got from my father in law. It originated in Alaska, travelled to England and then I brought it to China. I used some flour that I found out later was bread flour, but had lots of additives such as amalyse enzyme. Since then it has worked fine (in terms of rising and making bread), but the smell is a off. It doesn’t smell the usual sourdough tangy nearly sweet smell, but smells more like nail varnish remover! I have a feeling it may be due to some of the additives (I only used that flour once and then have been using plain flour for about a month). Any ideas as to what I could do to resurrect it? I may try a new starter, but love the story and journey this one has been on, and would hate to say goodbye to it. Its also one of the strongest and most resilient starters I have had!
That heavy acetone smell can sometimes happen if it goes too long between refreshments. When that happens over here I usually discard all but a small bit of it, feed it with fresh flour and water, and try to keep an eye on it over the course of the day. Try to keep it warm (76-78°F) and also use some whole grain rye flour, if you have it, when doing the feeding. When you see it reach up to it’s maximum height, feed it again. Treat it like a sick child and give it a little extra care! Do this for a few days, it should come back to full strength.
Good luck!
I have had the nail polish remover smell in my starter. Now I know why. Good to know my starter is needing more frequent feedings.
Hi maurizio, another question, how do I keep the sides of my jar clean because I had some mould growing on the side so I spooned some starter out and discarded the rest and washed the jar. There wasn’t much activity after day 3 so yesterday I put my jar in a fuzzy sock and this morning there were lots of bubbles!
You can either keep two jars and alternate between the two (washing the other when you empty it to the new one) or, do as I do, and use a paper towel to thoroughly wipe the sides of the jar clean. If you wipe, you can get quite a bit out, all the way down below the level of where the starter will rise, this way when it rises it kind of reincorporates the mixture back into itself.
Hope that helps!
I’ve only got the one jar so what I do is just scoop (or sometimes pour) the starter into a soup bowl. Then wash the jar and scoop the required amount from the bowl back into the jar. Compost the leftovers (or pancakes for lunch).
Two things… My starter was looking great on day 3; lots of bubbles and even saw some rising. Now on day 5 it looks sort of “flat”, not much activity. Any thoughts? Secondly, when you get to two feedings per day, are you still discard 40g at each feeding (80g a day)?
Just stick to the feeding schedule, it will rise eventually.
As James said below: stick to the schedule and keep feeding, it’ll eventually take hold and pick up. Yes, still discarding the same amount each time you do a feeding.
Check out my Sourdough Starter FAQ for more questions and answers like this!
Hi maurizio, is it ok if I start with 20g of apw/rye flour and 20g water instead and same for my feedings? I don’t want to discard that much starter as I only bake once a week. I had a starter but I didnt like it so I baked for one last time last week and tossed the tiny bit left.
Sure, you can definitely feed with less into the future. I do recommend, though, that when creating a new starter you might want to use more flour in the beginning. It would probably still work with less but it might take longer. Happy baking!
Hi maurizio, I’m now on day 9 of feeding, my starter had some great activity on day 3, but then after that it just seems to have stopped rising no matter how many times I feed it. What an I doing wrong? (It’s around 60 degrees here where I live right now) I’ve also used water thats a bit warmer
That’s typical, the initial surge of activity and then it drops off. Stick to the schedule listed above, but it might take longer for you since it’s extremely cold in your kitchen. At 60F it might take 1-2 weeks for a starter to take hold, you really want to keep that mixture warm! 78° – 80°F would be ideal. The colder it is, the longer the process will take!
Hi Maurizio! Thanks again for the great website. I noticed that your 3/4 L Weck jar weighs 311g without the lid while mine weighs 417g without the lid. Wondering if there are different thicknesses (that word sounds weird) to Weck jars. Also I used 100% whole grain rye flour in my starter and noticed that your picture had a bag of a blended rye/whole wheat flour. Would this have any affect on fermentation? I did notice that my starter wasn’t as stiff as yours looked (and did not rise as much as yours during fermentation). Thanks!
Hey! No worries on the jar weight difference, I have some here that weigh over 400g as well — perhaps a difference in production lines from Weck. 100% whole grain rye flour is actually even better to use. You’ll likely see less rise than what I show here due to the nature of rye, but there will be more nutrition which is a great thing. I’ve actually been working on an update to this post where i now use 100%whole grain rye and have seen even better results. Stick to the feeding schedule and hopefully but now you already have your starter up and running. Happy baking!
hello Maurizio! thank you for the wonderful article! I have a questions, you recommend start feeding the starter twice a day starting from day 5 in proportions 40/40/40. is it possible to keep on feeding once a day, but in different proportions, I mean 20 (starter) and 40/40 (flour and water). or it is better to feed 2 times a day? thank you for your reply.
Yes, you can definitely change the feeding frequency based on the ratio of mature starter you keep around. I prefer to feed 2x a day but it’s not absolutely necessary and it depends on how your starter is performing — essentially you need to feed it when it requires a refreshment. If you keep a small percentage of starter around at each feeding it will take longer to mature (assuming all else is equal) and thus might only require one feeding a day.
Have a look at my sourdough starter maintenance routine for more information on this!
thank you very much Maurizio! I have read the article you mentioned. your articles help a lot! thank you for sharing your experience!
Happy to help! Have fun and happy baking 🙂
Thanks so much for all of the advice! I must confess that I am terribly lost on how you move from the starter stage to the weekend baker stage/mature starter stage. Here you recommend discarding and starting with 40g of starter daily, keeping the ratio of water and flour equal with starter. In your sourdough starter maintenance routine you start with a ratio of 20g starter to 100g flour and 100g water. At what stage do you make the jump from 40g to 100g? I can’t seem to figure out how to get from initial starter to mature starter and how the feeding schedule changes from those stages. Sorry for my ignorance but after reading multiple posts here I just keep spinning in circles and need some direction please 🙂
Hey there! Once you have your starter rising and falling predictably each day you can modify the amounts you have in your jar to whatever suits you, your environment, and your starter. Once you create your starter, switch over to the maintenance guide feeding amounts and adjust things (times, weights, etc.) to suit your starter as I discuss in that post.
I hope this helps!
This is a great question and I didn’t intend for the two guides to be performed back-to-back, but I can definitely see the benefit in a guide like this here (for the future I’ll have to work on this!).
Thanks very much! I am going to start from scratch with your starter post and then try to follow it closely so I can track it more accurately. I appreciate your help and blog! Tons of wisdom! I hope to take even a fraction of it in!
Hello!
I’m on Day 3 of my starter and have run into something I haven’t seen discussed before.
Day 1: Used 100g KA bread flour and 100g during water at a temp of 72. I put it in a cold oven with rhe light on and it was about 60. 5 hours later it hd risen by half and was covered with bubbles.
Day 2: It was filled with bubbles and had more than doubled. I put a spoonful in a glass of water and it floated! So, I added the same amounts of flour and water, same temps, everything was exactly thw same. That afternoon it had already doubled and I had to move it to a larger (clean) jar.
Today: It had lost a lot of volume and bubbles overnight. I fed it again, same as before, but it’s not rising at all, although it does have a few bubbles.
Any idea why this has happened? Thanks for any advice you can give me!
HELLO!
I’m totally new to this but I came across a possible answer for you. It is in Peter Reinhart’s latest book “Bread Revolution”. Here is what he says on page 9-10 of Chapter 2. He says “Speaking of the dormant phase, don’t be fooled by the bubbling of the first day or two. This doesn’t mean the starter is active; rather, it’s probably evidence of leuconostoc or other bacteria. The starter will go through a seemingly dormant phase in which you might think something has gone wrong. This is just a transitional period during which the starter is slowly acidifying and the wild yeast and lactic acid bacteria are slowly multiplying. Again continue to aerate faithfully, and wait for the signs of well-established fermentation, probably 5-9 days into the process.”
This was my experience exactly. Looked like it started good then not much until day 9 when suddenly….bang!
Wow. Thank you so much, John! This is exactly what I needed to hear. If this activity is normal then I’m totally fine with it and will continue with the feedings as I was and wait *patiently* for it to take off again. It’s extremely helpful to know the reason this happened because I am new to this whole process, too.
Thanks again, and good luck with yours!
Katie
Katie — @johnvanderlaan:disqus answer is exactly spot-on: that initial burst of activity is totally normal and will sometimes subside where you’ll see a lull for several days before activity returns. This is totally normal, stick to the feeding schedule and it’ll turn back around!
Thank you, Maurizio! Yes, it’s day 8 for me and my starter did, in fact, take off. It has consistently doubled the last two days, and passed the “float” test this morning but I am going to keep feeding it for a day or two before I try to bake with it. I really appreciate all the great information I’ve gotten from this board!
Here is something else I found very helpful. Day by day , for 14 days, watch 3 slightly different starters develop. https://www.youtube.com/watch?v=BIFPzoFeioQ&list=PLDqMWhgSTguGZFILq0CwgMyIZ-GgAkT3z
Hi! I’m on Day 5 of the starter and there is no activity. I’m using 100% whole wheat flour. No bubbles or anything since I started it (it looks like day 1)It is about 65 degrees in my house and I try to put it in the warmest place I can possibly find. What can I do?
Hey there, Nancy! Sorry for the late reply. 65°F is super, super cold. It will take a long time to see any activity at this temp, you need to try and keep it somewhere warmer if you’d like to speed up the process. I know this temp is high, but 80°F is really the ideal temp to kick start things and get a strong starter going. If you don’t have a spot at that temp, warm up the water used to do feedings and even keep the mixture in your oven with the light on — these will help immensely!
Hello,
Your article is very detailed and the process is beautifully described.
I prepared the starter about two days ago. About 26 hrs from the first mixing of ingredients I did the first feeding.
Its about 12hours from the first feeding that the level of the starter has more than doubled and it smells very off (almost vomit-ish). Should I keep it for another 12hrs before feeding or should I feed it now or has the starter gone bad?
Also, I have kept the starter in a sealed jar.
Is it necessary for the starter to breathe air continuously?
My flour mix is : 50% all purpose flour + 50% whole wheat flour
Thanks, Rohan. Stick to the feeding schedule as long as you don’t see any mold forming it will be fine. A sealed jar is perfectly fine, it does not have to be exposed to air.
Check out my Sourdough Starter Frequently Asked Questions for more questions & answers to help you get started!
Hi Maurizio!
I started my starter about a week ago with your 50/50 rye AP blend. I had a lot of activity on the first few days and since then it’s not been as bubbly and has taken on an almost vomit-y sour stomach smell. It also seems kind of soupy. Our kitchen has gotten a little colder, but I try to keep my starter in a slightly warmer environment. Would you suggest throwing it away and starting over or waiting this vomit-y soupy period out? Many thanks for your fabulous blog!
Update: i started feeding it 2x a day and it started bubbling more and smelling more yeasty/fruty! Looking forward to baking with it soon!!
Hey, Zoë! Yes, definitely keep pushing on and stick to the feeding schedule. It’ll turn around, that initial period where activity seems to stop is totally normal. Keep at it!
Hi Maurizio!
I’m a decent home baker with commercial yeast and I’ve decided to try to develop my own starter. For about a month I’ve been mixing starters and feeding them, first with the instructions right out of Chad Robertson’s book, Bread, and then when that didn’t work starting with your methods. Every starter (there have been at least 8) has ended up with a very faint white fuzzy mold across the entire top – it isn’t isolated to one spot or another. I’ve tried sterilizing my equipment, getting new flour, using tap water, tap water left out overnight, and bottled/distilled water. I’ve tried your 50/50 rye/AP blend, a 100% rye blend and the Robertson 50/50 ww/white blend. Sometimes the white mold comes on day 2; sometimes it comes on day 6. I’ve tried transferring the starter into a clean container with every feeding and I’ve tried keeping it in the same jar. Is this faint white mold harmful, or could I be continuing to grow and use this starter? If it is harmful, what the heck can I do to stop it? Thank you so much for such a great blog and I really hope you know what I should do!
Hey, Tori! Bummer about the mold! If you see a white fuzzy mold it is not safe and I would not continue using that starter, I would create a new one and pitch that one.
I would suggest using my method with two modifications:
1) Make sure your jar is covered with a loose fitting lid. Discard, feed with water and flour and then cover it until the next feeding.
2) Stir your starter periodically during the time between feedings. The cause for mold is likely exposure to air (and it’s probably humid where you are), stirring will help reduce the contact between flour and air. I’d say stir it every hour or two — this will take some experimentation.
If it’s very hot and humid in your location you could try mixing with a little cooler water. Try to keep the mixture around 78-80°F at maximum!
Hope this helps, I know it can be discouraging but stick with it!
Thanks so much for your advice. I’ll start over tomorrow morning and let you know how it goes in a week or so!
Hi I am a novice Baker. I want to know how much starter is required for a 500gm loaf? In your recipe u mentioned to always discard starters and keep 40gm and then add 40g. So I guess we need to bake only with 80g plus at the end. Is it sufficient ? I will appreciate your response. Thank you very Much for posting so elaborative.
Best regards : Manila
Manila, hi! There’s no set amount of levain needed for a bake, it depends on many factors and what type of bread you’re after. If you’re working on a new recipe I’d say a safe starting point would be 20% levain in your mix (for a 500g loaf as you said that would be 100g); from there adjust up and down depending on how the dough progresses and if the flavor is where you want it.
Hope this helps!
Hey Maurizio! Due to a lot of life changes, my starter went the way of all things…so I used your instructions to start a new starter. On day 8, it’s looking pretty good, although not nearly so good as your pics, so I’m going to carry on three times a day feedings until it looks stronger. (Wish i could post you a picture!) Just wanted to say thank you again for such a great resource for sourdough bakers. I’ve been dreaming of walnut and dried sour cherry sourdough bread for Thanksgiving and Christmas… 🙂
Oh…and there’s a new boyfriend. Guess what? He doesn’t like holes in his bread either! Geesh! lol
Hopefully by now your starter is rising and falling predictably! It’s ok if it doesn’t look exactly like mine, it’s just important that you see the cues listed above during the entire process of fermentation from first feeding to maturity. We really just want to see that strong rise and fall in the jar, then it’s ready to go.
Hah, sorry to hear about your boyfriend and his bread “issues.” I’d say make it anyways and get him used to it 🙂 My wife used to hate crunchy bread because she was only ever used to that junky white bread from the store — I kept at it and now she can’t imagine going back to that stuff.
Happy baking!
I think I can talk him into that…but where do I get these men?! 🙂 The starter is doing really well, I’m having a few problems with oven spring, but I think that’s more that I haven’t been allowing enough time for a good long cold proof, so i think that’s working itself out again as I FOLLOW YOUR DAMN DIRECTIONS. 😉
Oh, and Costco has Central Milling organic unbleached AP in again! Yay! Can’t remember exactly how much it was (since I would have paid quite a lot more for it), but it’s something between $10-15 for 20 pounds. Now, if we could just get them to carry the Artisan’s…
Hah! Oh yes, that long cold proof is vital — dough is on its own schedule and we just kind have to listen to what it says 🙂
I wish I was so lucky as to have access to CM flour at our local Costco. Even though it’s never been in stock here I still check every. Single. Time. Perhaps one day.
Do you ever ask if they can bring it in? Someone told me that if enough people ask, they’ll have their buyers bring in a product…
No, but that’s a great idea. Next time I’m there!
Thank you so much for all the details! I attempted to follow Tartine Bread’s methods and flopped once I began the process after discarding a portion of my initial starter batch. As detailed as that book is, there are some key points missing that I needed to be successful. Luckily, I stumbled upon your blog! I am on day 5 of babying my starter and this AM it smelled just like nail polish which I thought was a strange smell for flour, water, and yeast. I think I will go ahead and feed a second time starting today. My main question – since I’ve started this process, I’ve discovered that it may actually be more convenient to flip my feeding schedule to the evenings since try as I might I very rarely make it back home from work 8 hours after I do a feeding in the AM. So, do I need to start over or is there a way to train my starter to accommodate an evening schedule? Also, for the days with three feedings, are you suggesting another feeding at 4 hour intervals? For example, I feed my starter at 8:30 am on the days with one feeding. I will (attempt) feed again around 4:30 pm (it may end up to be around 6 or 6:30 pm – big deal?) on the day with 2 feedings. On the days with three feedings, should this scenario be 8:30 am-12:30 pm-4:30 pm or is it okay to stretch it out a bit? I would prefer a less sour outcome overall.
Again thanks for attention to detail and for putting this info out on the public domain!
Hi Maurizo, thank you for this detailed instruction. I’ve started doing this since 28/9/2017 and after 2.5 days, my starter has already doubled in size with a lot of medium size bubble at the bottom but no vinegary or any other smells, it’s just still “flour smell”. Should I start feed my starter twice at this stage or what until day 4-5?
I would stick to one feeding a day until you notice it starts to fall before you get to it. Even if you did switch to 2x a day it would probably still be fine, though! Hope it’s going well.
Hi Maurizio :-). The recipe looks great, but I think there´s missing information about different flour absorbability. I fed the starter for over a year successfully and I tried different approaches and also different types of flours (wheat, spelt…all with success :-)) and every flour I had to fed differently (different grams of water and flour). I decided to improve every step of preparing the dough so I read articles over the internet and your looked very good so I have decided to give it a try. So I have tried your recipe (but I am using only whole grain rye flour, because it turned out to be the best option) and used 40g of whole grain rye flour and 40g of water and I wasn´t able to even stir it. It was so stiff, that it would not do anything. So I tried different approach (by experience) and mixed 20g of flour and 40g of water and it looks much better. It created the mound as described in recipe, but maybe I would have to add a little bit less flour next time and it will be ok. I only want to point out that every flour is different and have different absorbability of water. Sometimes it would be stiffer and sometimes it would be more liquid. I think consistency (the mound) is more important than exact grams, but maybe I am wrong. I think it could help someone, who can have the same problem. What do you think about that? Did you use every time the same rate 1:1 flour to water over the years? I am curious about that 🙂
Very, very good points there Jan. I mention this in other posts here but I should make it clear here as well. You’re right: each flour takes on water in a different way and the hydration or flour amount need to be adjusted for that. I actually will change the amount of water I use to feed my starter based on the batch of flour (and even the seasonal weather) I’m using — sometimes it’s exactly 40g, sometimes it’s 45g, and sometimes it’s 35g. So yes, you can adjust either the flour or the water amount so the starter is the consistency you want — more stiff or more liquid.
Thanks for pointing this out, I’ll go back and add this clarification to the post in the hopes it’ll help others in the future. Happy baking, Jan!
I am following your recipe for sourdough starter to a T and I am on Day 5. When I went to feed it this morning it had a strong smell, like acetone or paint thinner. It’s very bubbly and rising some. I have read that if I feed it more that smell would disappear. Tomorrow on Day 6 is when you say to do 2 feedings… just wondering if I should feed it twice today or wait till tomorrow. I would hate to have to discard this now since it seems to be going so good. Thanks for your help 🙂
Yes, if you smell that I would proceed to 2x feedings a day. Don’t discard it, things sound like they’re on the right track. Just keep up with the feedings and it’ll eventually become more and more regular. Hope that helps!
I got to day 5 using a different recipe before I found your page. There seems to be a lull, still bubbles on top but not as much rise or frothiness. I think it may be due to the temperature where I live, it was hot when I began but we’ve been overcast for 4 days now, Will the activity return if I keep it warmer where my starter sits?
Mike, Your’ comment is like I made it. (a different starter. a lull. a downturn in temps/weather. little rise, but still some bubbles on top.) I’m at 70Farenheit where My starter is, but that IS a touch low from what I’ve read from Maurizo , he sez +76F- 80something) — I’m thinking of putting Mine in the oven with the light Only on and see if it takes it from the dull-drums… But something else I read (again I think it was Maurizio) is that the 1st more furious activity is like ALL kinds of Bacteria (alot of it NOT the kind you are looking for) , but when the acidity (you were probably able to smell it) rose it killed most of the “Bad” Bacteria off (which it Should) leaving less but most “good” bacteria—You are now trying to build THAT “good” bacteria back up to desired levels. Also, if like me, and your’ starter began with whole wheat, but you have have been moving it back to general multi-purpose flour, the bacteria can metabolise the Whole wheat Better than the Multi-purpose–But supposedly the starter will become accustomed to the the multi-purpose eventually–I read of one gal that was 10-12days in before hers came around… PS–Mine was at 6days yesterday, and I Made a pizza shell with 8ounces of discard–The Better Half and I agree it was likely the BEST Pizza shell we had Ever had…. 🙂
Keeping it warmer is definitely better — you’ll see much more activity, and when your starter is established and rising/falling predictably it’ll need refreshments faster and be more vigorous. It’s ok if you see a lull, keep feeding and it’ll eventually take hold.
Have a look at my Sourdough Starter FAQ for answers to more questions just like this, Mike!
Hello Maurizio. (from Montana,USA) I have recently begun a starter(it’s now at day 6, got some bubbles, but kinda in a lull compared to a coupla days ago). I did not use the recipe in the thread above here, although after reading this, I think I WILL make a Second starter using your’ instructions, and Call HIM “George” (I named this all multi-purpose flour one I doing now Georgette–could’nt tell you why, just when I Feed “Her”, she seems like Georgette…) The Thing IS, In Your’ above Tutorial (which I think Awesome and about as “OCD” as me, and I’ve got a set of those Weck Jars coming- LOL) You Keep mentioning 40grams this 40grams that—BUT, On MY Scale, that 40grams translates as a MERE 1.3-1.4 ounces (by weight) and THAT Can’t be right. What scale of measurement are you using that YOUR 40grams is likely something more like 4ounces in MY world ???? Scratching my head…
Hey, Chuck! I think the names sound good, sometimes their personality lets you know what they want to be called 🙂
For me, 40grams on my scale is 1.41 ounces. This should be the same for all scales if calibrated correctly!
Salute and Thanx Maurizo, alot of recipes I’m seeing (some of which I’ve used) are usually calling for 8oz or even 16oz starter(that’s ALOT of grams, so I’m building/maintaining 4oz/4oz/4oz at feeding)—But I think I’m realizing, that the NEED in those recipes for so many grams reflects a process other than You are using, and that YOUR’ Process just requires less starter via levian build, thus smaller amounts to build/maintain. Ps–definetly personalities going on with starters…I’m starting to view it like a beloved pet with varying needs and moods. I’ve got to deal with temps too(like Mike)–I get lotsa bubbles but have’nt had a REAL rise since like day 3or4 (all white multipurpose I have seen work well for tastes in pizza crust) and I suspect the constant 70F just is’nt enough–but I’m also not sure what the impact of Very fall like weather at 3000ft in a Rocky Mtn Valley is having on Georgette either…
That’s exactly the way to see it: each starter is different and you learn to read its signs and signals for when it needs food. Seasonal changes affect this as do flour types and environment. Keep an eye on it and give it what it needs! Happy baking 🙂