

If you had told me many years ago that I could make enticingly crunchy, tender, and healthy bread at home with only a few elemental ingredients, I would not have believed you.
I would have claimed that baking bread requires a professional mixer, a specialized oven, and a list of ingredients so long your eyes start to glaze over. But now I perform this alchemy daily in my home kitchen: transforming three basic ingredients into wholesome sourdough bread. How does one begin the journey of making naturally leavened bread at home? It starts with, well, making a sourdough starter from scratch.
A healthy sourdough starter means great bread.
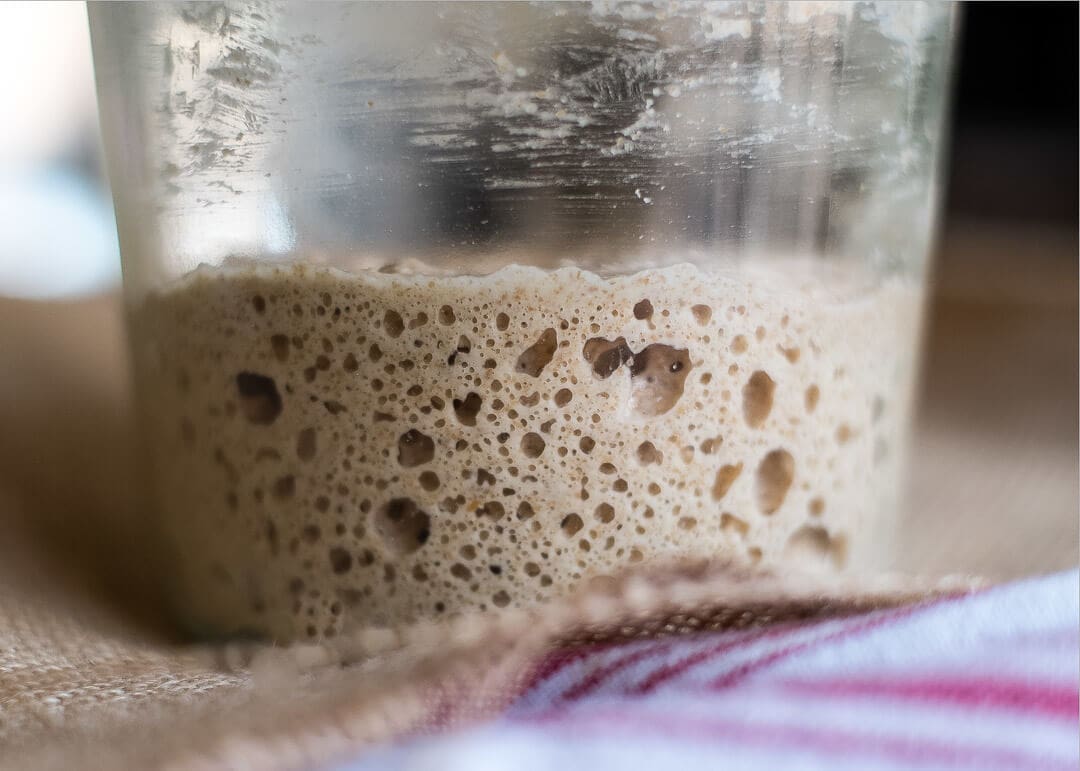
Despite all the mysticism and lore about creating the concoction, a sourdough starter is merely a naturally fermenting mixture of flour and water. Add water to dry flour, let it sit on the counter for a few days, and you’ll see nature weave life into a once lifeless lump: bubbles will appear and the mixture will rise.
This natural fermentation can be harnessed and (once it is stable) controlled to produce bread so flavorful and healthy that it’s hard to go back to anything else.
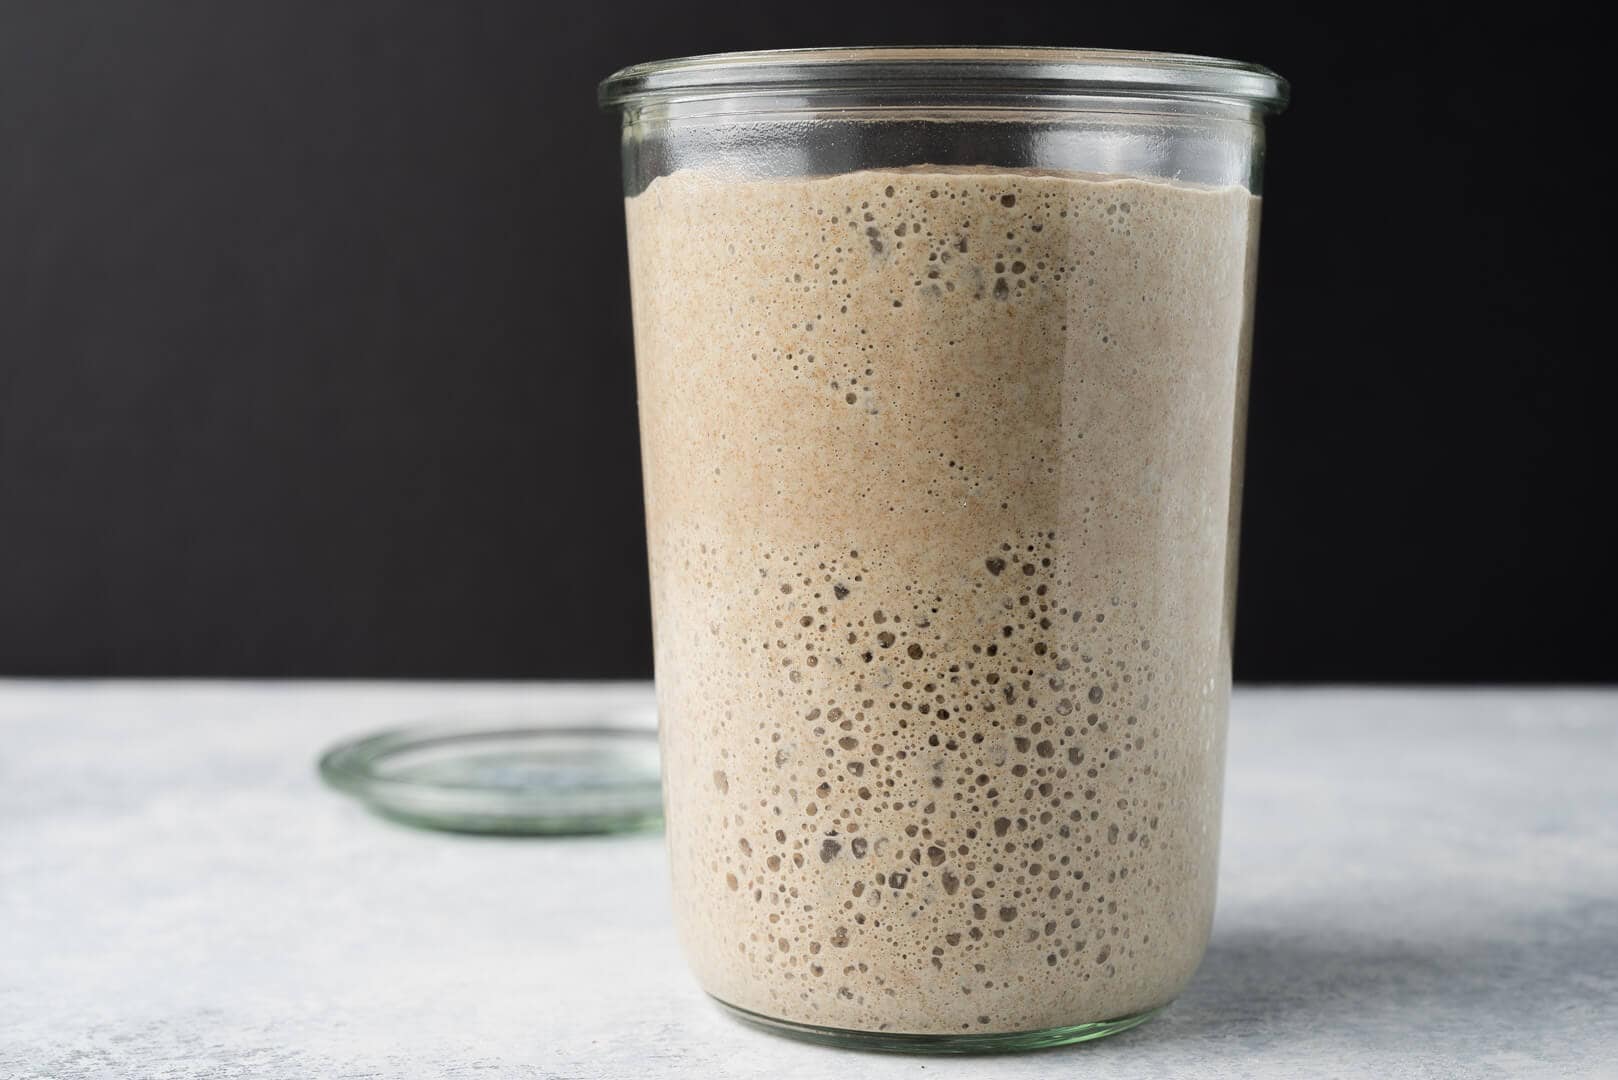
I created my sourdough starter years ago (using this sourdough starter recipe), and it’s the same one I use to this day. It’s a spoiled brat now, to be sure, thanks to all my coddling, but in exchange for my attention and flour, it stays on schedule. Besides, when I’m baking, it does the heaviest lifting (bread nerd joke, sorry). Initially, it was the quintessential rebellious child. Sometimes it wouldn’t show any fermentation activity, and at other times it was utterly unruly. Back then, I didn’t realize what it needed to thrive. I didn’t see how vital timely refreshments (also called feedings) were or how much temperature impacts fermentation.
The key to raising a well-adjusted starter is to observe its needs, give it space to grow, and adjust the refreshments to encourage maximum fermentation activity. And a healthy starter means great bread.
But first, let’s quickly look at what a sourdough starter is.
What is a Sourdough Starter?
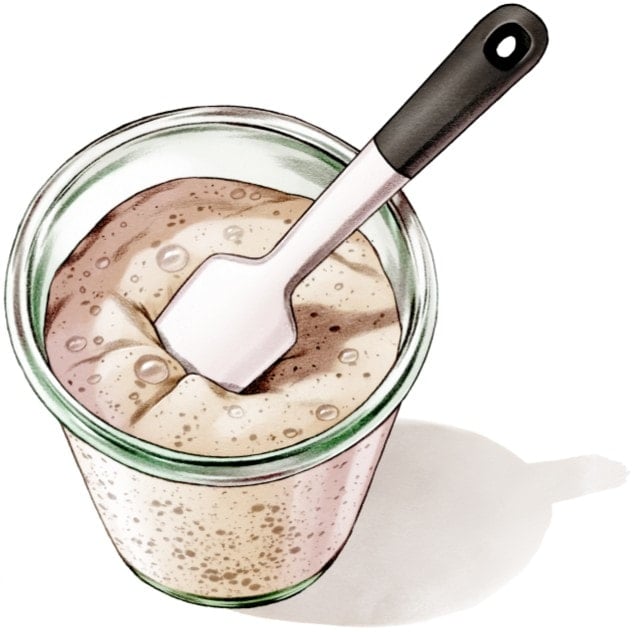
At a high level, a sourdough starter is a mixture of flour and water that hosts a stable blend of beneficial bacteria and wild yeasts. This mixture is continually maintained with regular refreshments (or feedings) and is used to leaven and flavor new bread dough. The starter is the cornerstone of successful sourdough baking, and especially for a home baker with changing environmental conditions in the kitchen, learning how to care for and use one is the key to bread with the best flavor, texture, and keeping qualities.
A Few Tips Before We Begin
Water that’s high in chlorine or chloramine (disinfectants used by some cities to clean tap water) can impede fermentation. The night before you want to make your starter, fill a large jug with tap water and let it sit out uncovered overnight to allow any chlorine to dissipate. If your city uses chloramine instead of chlorine, letting a jar sit out overnight will not work. In this case, you’ll have to use bottled water or filtered water (if you are concerned, you can test your water with over-the-counter test kits to determine whether there are additives or other issues). Alternatively, you could use bottled spring water until you get your starter fermenting reliably, then try switching back to tap water with a portion of the starter to see if it’s able to handle the tap water (but don’t use all of it just in case it doesn’t work).
After you mix the flour and water in the jar, be sure to keep the jar lightly covered during the rest of the process. Either a porous cloth or a lid resting on top of the jar will work well. Use a container with enough headspace for the mixture to rise—I like to give at least 5-inches of headspace. Additionally, it’s a good idea to place your jar in a bowl while it’s resting in case the mixture overflows.
During the first couple of days, there’s often a surge in fermentation activity that then drops off dramatically; this situation is probably caused by other yeast and bacteria that are initially present but eventually die off. When this happens, many first-timers think that it has “died,” and they start over. Don’t be fooled by this lapse of activity; continue with the schedule and eventually, the desired yeast and bacteria will move in and stabilize the starter.
The entire process is exceptionally temperature-dependent. Instead of a typical cooler room temperature, I find a warm temperature of around 80°F (26°C) helps kickstart activity since this is near the temperature at which the bacteria and yeast are most active. A home dough proofer (which I highly recommend) and a yogurt maker are great tools for maintaining such an environment. If not, a home oven, turned off, with the light on the inside (and a thermometer to monitor the temperature), or a microwave with a bowl of warm water inside, will both work well.
For even more tips on this whole process and many things related to sourdough starters, check out my Sourdough Starter Frequently Asked Questions page →
Helpful Tools to Make a Sourdough Starter
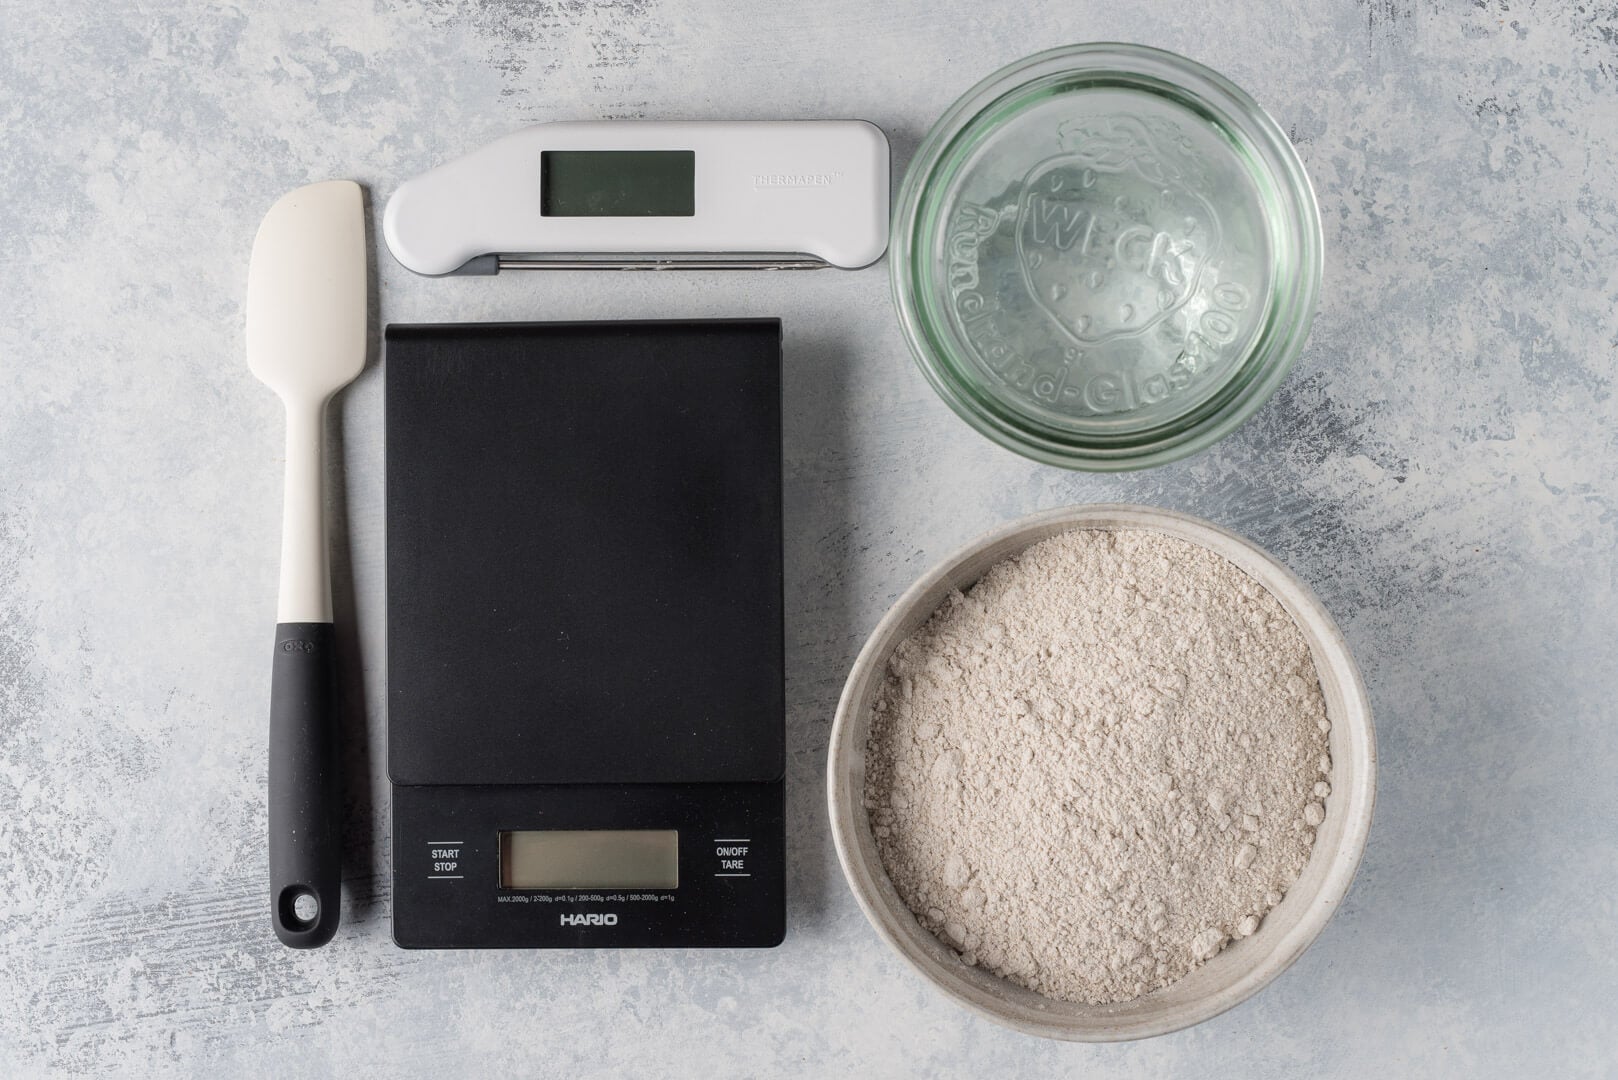
You can see a rundown of all the tools I use for baking sourdough, vetted over years of baking, over at my favorite sourdough baking tools page. Here, I list what I consider the necessary tools to get started:
Weck glass jar
Have at least two clean jars on hand. I like these Weck jars (#743, 3/4 liter jars) best because they taper out towards the top, making it easy to stir, and they don’t have any hard-to-clean lips or edges. Also, using the glass lid without the provided rubber seal and clips provides just enough of a seal to keep moisture and heat trapped inside.
I recommend using glass jars because you can easily see the fermentation as it progresses. It can also help to place a rubber band around the jar at the height of your starter after mixing so you have a visual guide for how high it rises between refreshments. Two more reasons I like these jars: they’re high quality and very economical. They are canning jars, so you can use them for many other things around the kitchen (jam, homemade pesto, dried fruit, cereals, and so on).
Silicone spatula
I use a small, firm spatula to do my feedings. It’s sturdy and easy to clean with a sponge, and if things get messy, you can run it through the dishwasher.
Scale
A kitchen scale is indispensable and guarantees accuracy when measuring the amount of flour needed for each starter refreshment. Measuring flour by volume is inherently imprecise as the amount of flour packed into a measuring cup can vary. Further, it’s a good idea to get used to using a scale for weighing ingredients, as this method is essential for improving your baking consistency.
Rye flour
Using whole grain (“dark”) rye flour helps expedite the fermentation process. In comparison to white flour, rye flour is teeming with extra nutrients that help kickstart the entire process. If you don’t have rye flour, a good quality organic whole wheat will also work well.
Unbleached, all-purpose, white flour
With my starter of 10+ years, and outlined in my post on how I feed (refresh) my starter these days, I typically refresh it with 70% all-purpose flour (or bread flour) and 30% whole rye flour. I like this mix because you get the fermentation boost from the whole-grain flour and the white flour’s increased gas-trapping ability and gluten strength. This helps me spot the signs of fermentation throughout the day and is a good compromise, using just enough whole grains without my starter getting overly acidic too quickly.
Thermometer
An instant-read thermometer will help monitor the temperature of your starter and ensure that it’s in the optimal range for increasing fermentation activity.
My Free Sourdough Starter Quicksheet
My sourdough starter quicksheet is a free, one-page printable guide to feeding, maintaining, and using my sourdough starter. Download it, print it, and keep it in your baking notebook for quick reference!
Starter Refreshment (Feeding)Schedule
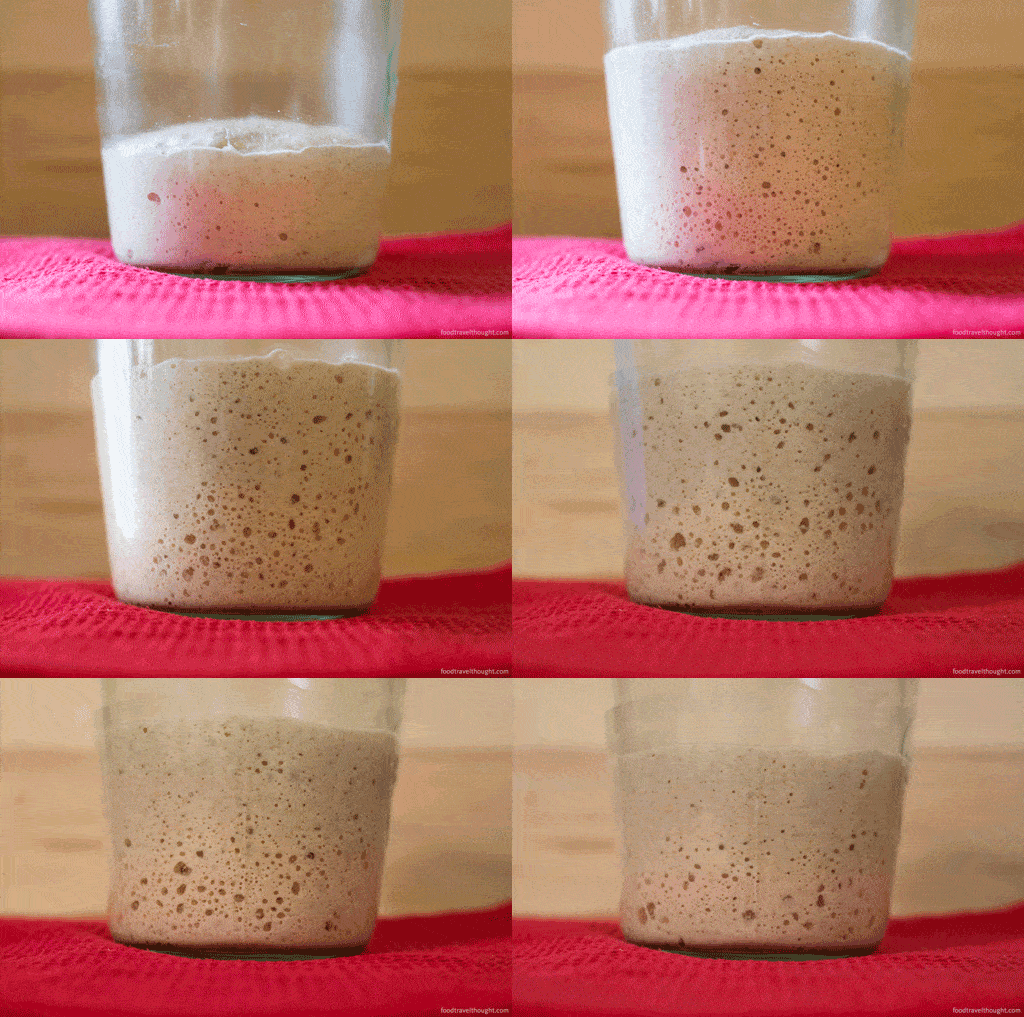
In the beginning, your starter refreshments will occur just once a day. As your culture becomes more active, you’ll increase this to twice a day. Because of the frequency of these feedings, one of my goals is to help you set things up so it’s quick and easy to do your feedings and move on with your day. Once you get the hang of things, you only need about 5 to 10 minutes per day to keep your starter going–totally manageable.
A sourdough starter is very resilient. If you forget to feed it one day or feed it several hours after it needed a refreshment, don’t worry, in almost all cases it will spring back.
The following sourdough starter recipe schedule will provide you with a reliable and robust sourdough starter in 6 to 9 days. Once you have the culture stable, it will last indefinitely as long as you refresh it regularly. If you don’t plan to bake frequently, you can toss the starter in the fridge and feed it only once a week. (I’ll discuss this in more detail later in this post.)
Your schedule will follow the natural rise and fall of your starter. As soon as you feed it, the yeast and bacteria in your culture will begin to metabolize the sugars in the flour, creating gasses (among other things) as a byproduct. These gasses cause the starter to rise throughout the day as seen above. Once they subside, then the starter falls.
Daily Refreshment Process
At each refreshment, we will perform the following quick steps:
- Stir your starter a little bit with your spatula
- Place a clean jar on your scale and scoop in some portion (outlined below) from the jar you just stirred down
- Add fresh flour and water; mix well to incorporate completely
- Cover the jar loosely and let rest until the next feeding
That’s it! Once you get your process down, it should take no more than a few minutes each day.
Sourdough Starter Recipe: Making an Incredible Sourdough Starter from Scratch
Day One

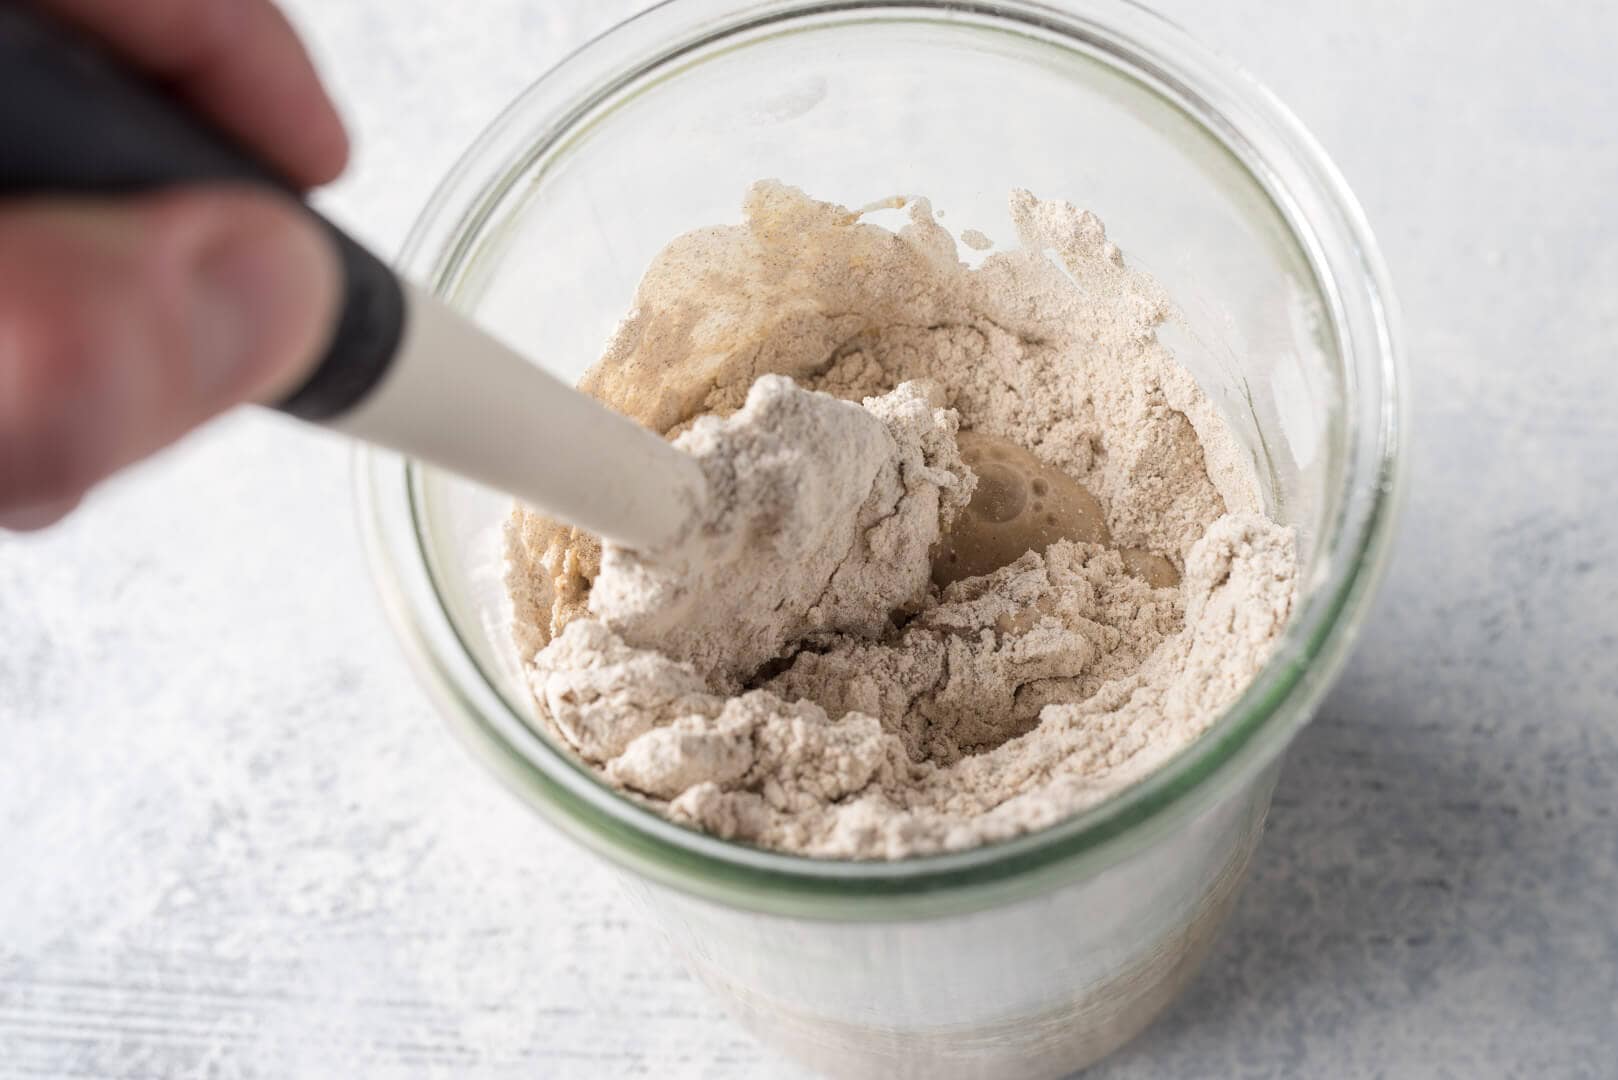
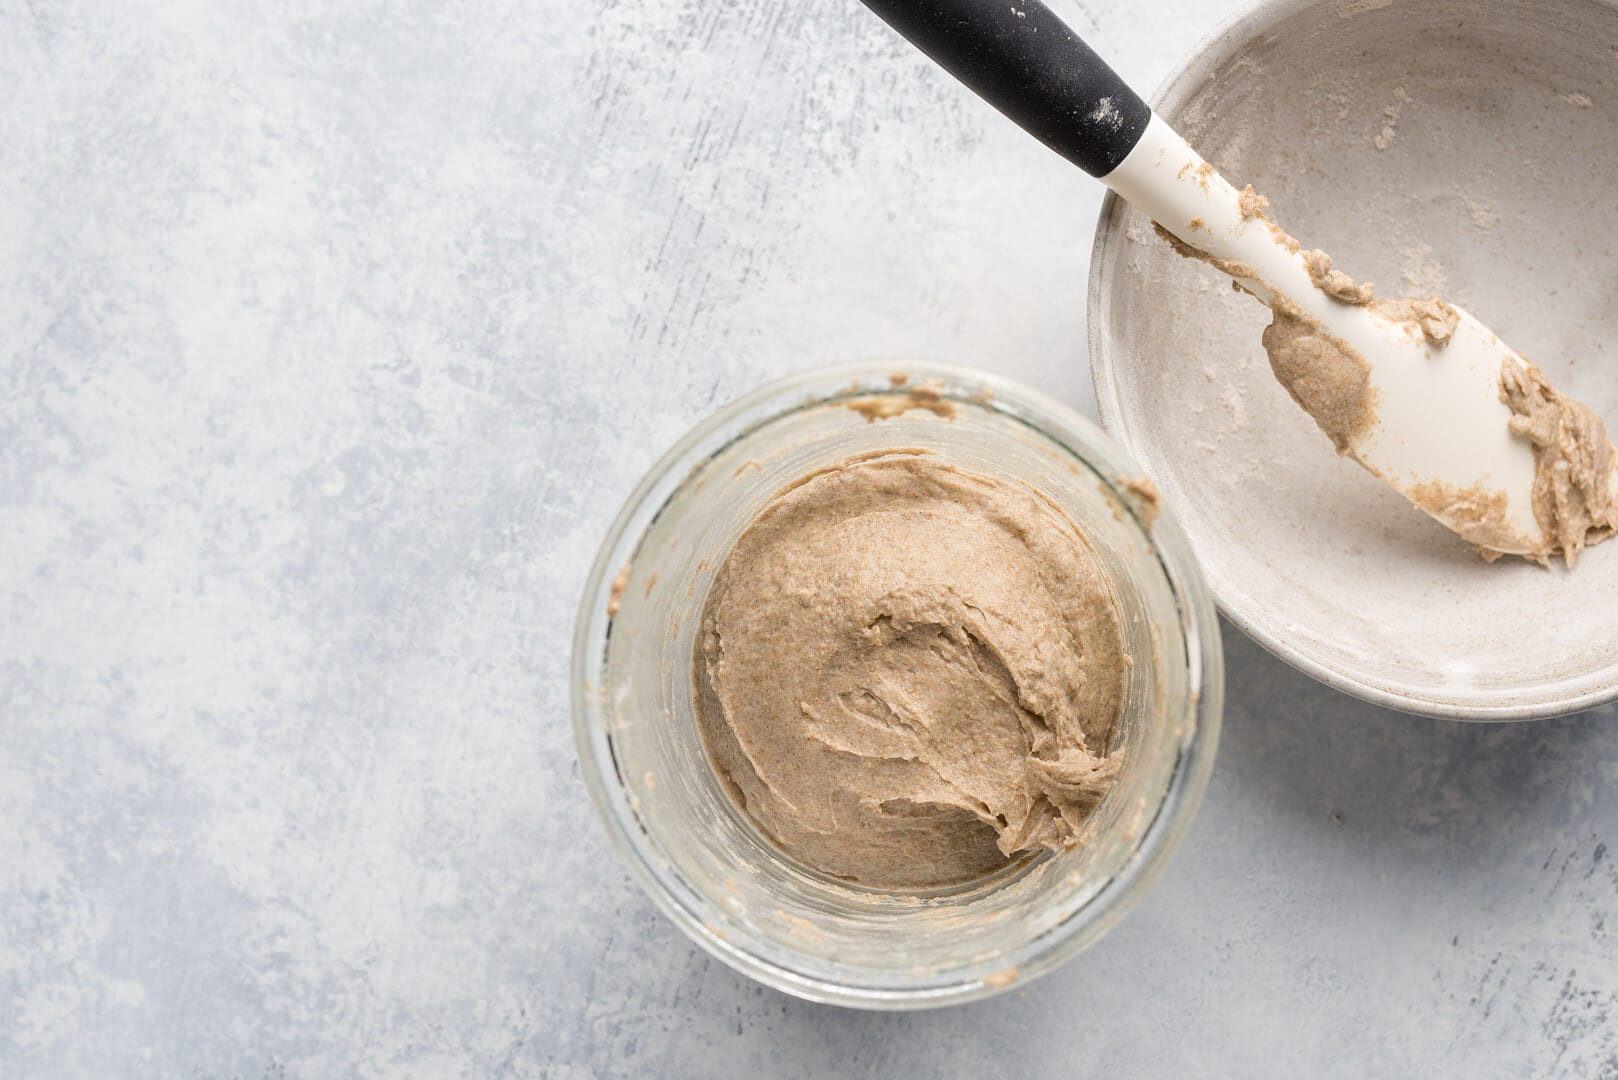
Initially, I like to use two jars for this process: each time you refresh, swap in a clean jar. Starting on Day 4, you can use the same jar: discard down and add fresh flour and water.
I first like to weigh the jars I’m using (without the lids) to find their empty weight. Then, take a permanent marker and write the jar’s weight on the bottom. This way, we know the baseline weight of the jar so we can quickly figure out how much starter to keep during each refreshment.
In the morning, place a clean, empty jar on the scale and tare (the “tare” button on your scale will zero it out after you place your jar on top. This will allow you to measure the flour and water your place in your jar and exclude the jar’s weight). To that jar, add 100 grams whole grain rye flour and 125 grams water and mix until all dry bits are incorporated. If it’s cool in your kitchen, warm the water to 80°F (26°C) before mixing. Lightly cover the jar and set it in a warm place–80°F to 85°F (26°C to 29°C) is ideal–and out of direct sunlight for 24 hours.
Day Two

You may or may not already see some fermentation activity. As mentioned above, this potential initial surge of activity is typical and should subside around Day 3. What you can see below is how my initial mixture expanded significantly (in fact it bubbled out of the jar; this is why setting the jar in a bowl is a good idea). Don’t be discouraged if the surge disappears by the third or fourth day. Stick to the schedule, and it will come back!


Place a second, empty jar on the scale and tare so that it reads 0 grams. Scoop in 75 grams of the mixture that has been resting for 24 hours. Next, add 50 grams rye flour, 50 grams all-purpose flour, and 115 grams of water. Again, if it’s cold, warm the water to 80°F(26°C).

Mix well until all dry bits are incorporated, cover, and place in the same warm spot for 24 hours. Discard the rest of the mixture in the first jar and clean it in preparation for the next day.
Day Three
In the morning, you may start to see more activity, or you may see none. You can see below that the initial surge of action I had on Day 2 disappeared. However, my mixture started to show the beginning signs of beneficial yeast and bacteria taking hold: some bubbles on the top and at the sides, rose to some degree, and it started to take on a sour aroma.

Regardless of what signs your mixture is presenting, don’t fret and stick to the schedule. Remember, if it’s cold in your kitchen, warm your water to 80°F (26°C) to help speed things along.
If a layer of clear liquid (“hooch”) forms on the top of your mixture just stir it back in and keep with the schedule.
Place a new, clean jar on the scale and tare. Scoop in 75 grams of the mixture that rested overnight and add 50 grams rye flour, 50 grams all-purpose flour, and 115 grams water. Stir until well incorporated. Cover the jar and let it rest for 24 hours.
Discard the rest of the mixture in the first jar and clean it in preparation for the next day.
Day Four
This day is the first day of the process that has two refreshments in a single day: one in the morning, and one approximately 12 hours later.
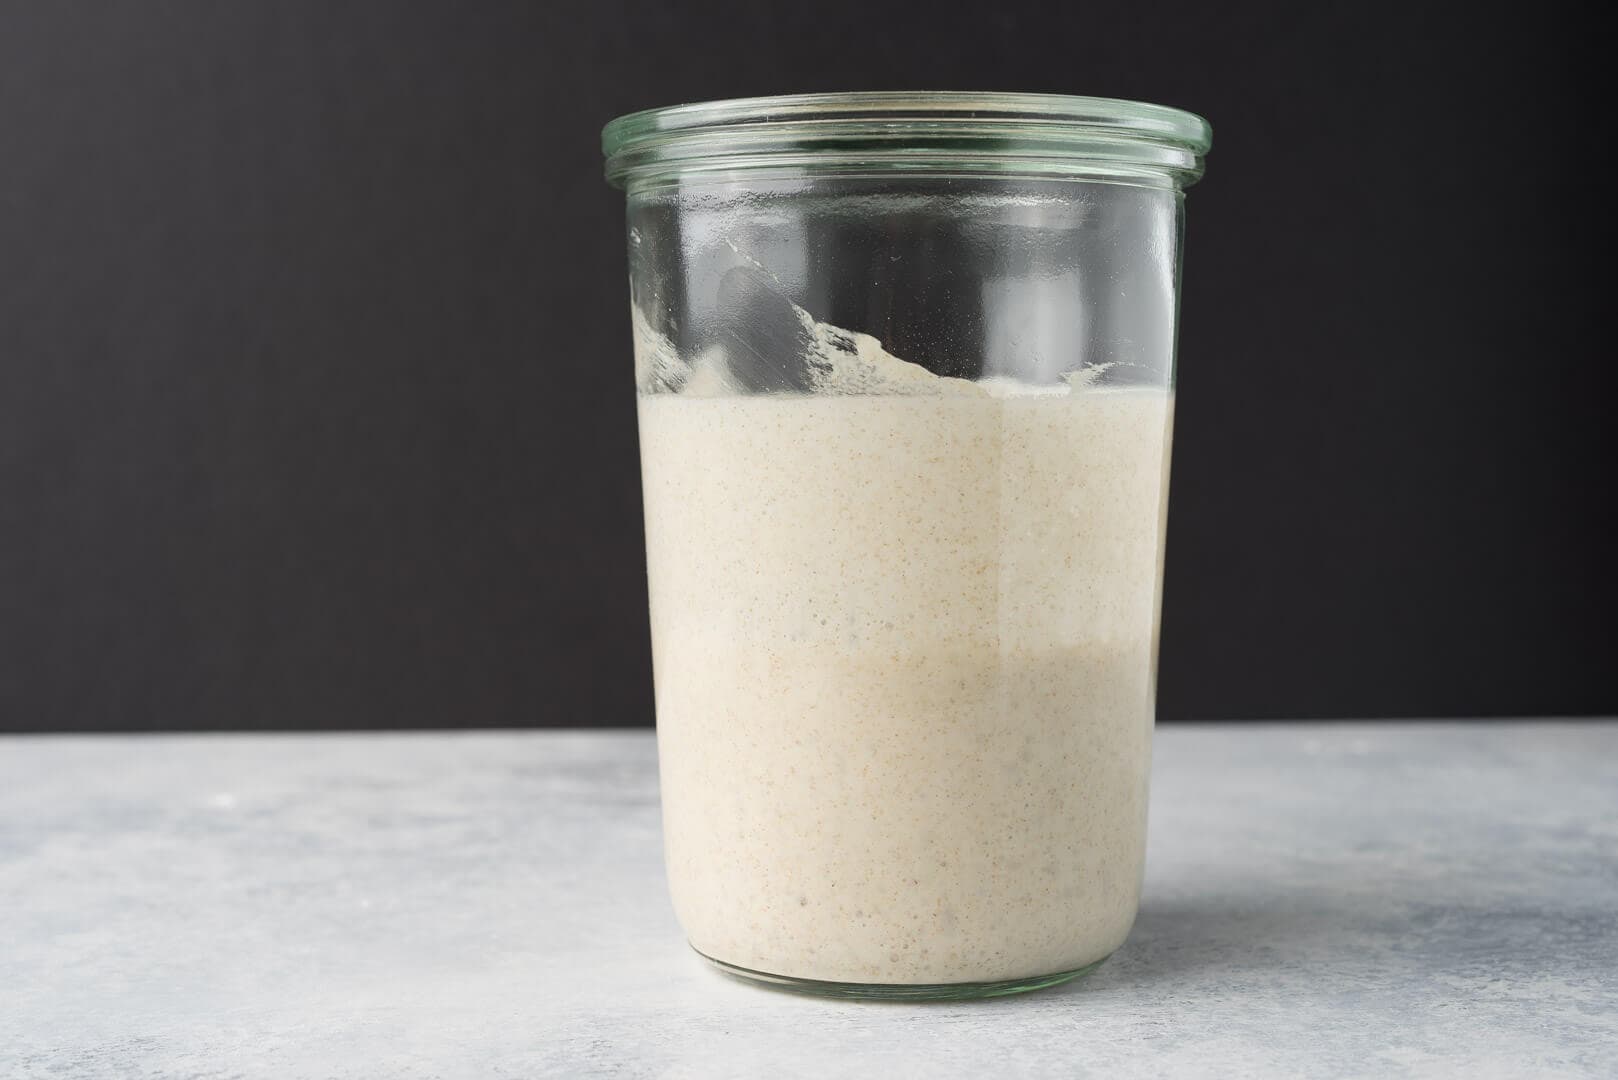
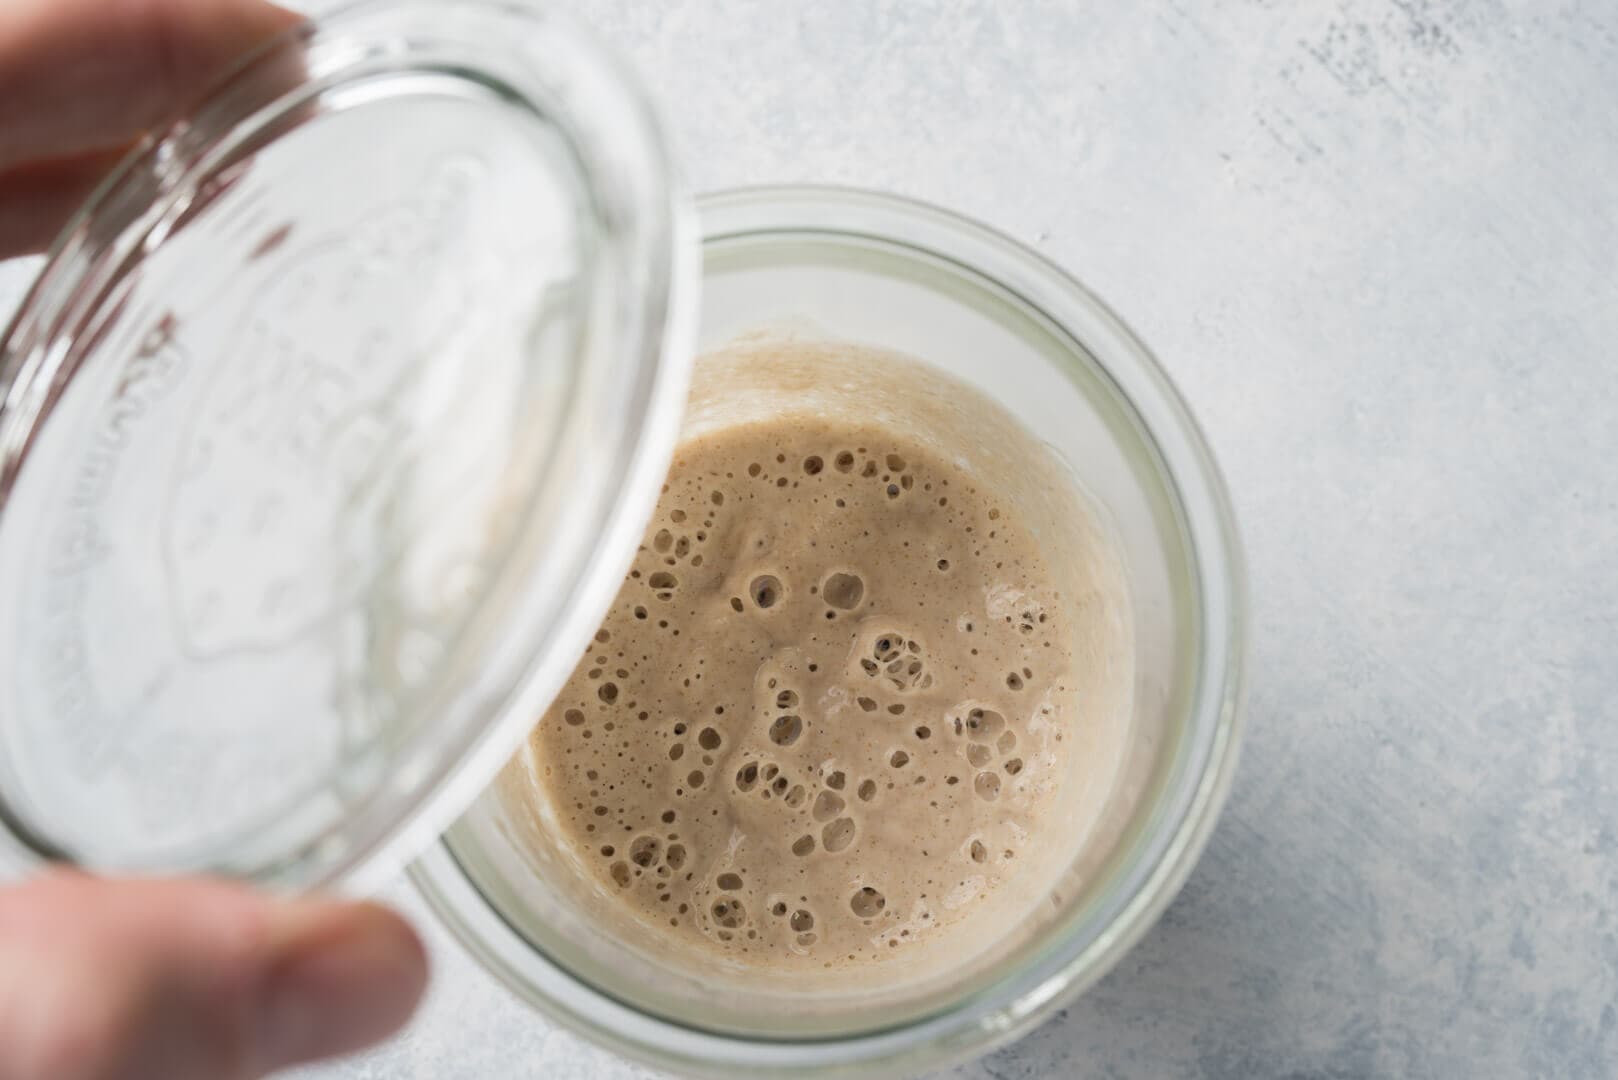
In the morning, you should start to see signs of fermentation activity if you haven’t already, and begin to see them again if you experienced the surge-and-drop that I described above. There will be bubbles scattered on the sides and top, and the level of the mixture might have risen and fallen a little (evidenced by streaks on the sides of the jar).
Refresh in the same way that you did on Day 3. Place a clean jar on the scale and tare. Scoop in 75 grams of the mixture from the jar that fermented overnight, add 50 grams rye flour, 50 grams all-purpose flour, and 115 grams water. Mix thoroughly, cover, and let rest for 12 hours.
Discard the rest of the mixture in the first jar. From here on, simply use the same jar each day (no need to switch to a clean jar) by discarding the contents down and adding fresh flour and water as instructed.
After this 12-hour rest during the day, discard the contents to 75 grams and refresh again with the same ratio of ingredients. Let the new mixture rest for 12 hours (overnight).
Day Five and Six
For Days 5 and 6, continue to discard down the contents of the jar and then refresh with the same ratio of ingredients as you did on Day 4, twice a day. You will see fermentation activity increase more and more. If you’ve written the weight of the empty jar on the bottom as I indicated on Day 1, you should know exactly how much the resulting weight of the jar plus carried over starter will be—discard down to this weight.
Keep using the same jar for these refreshments.
Day Seven and Onward
In the morning on Day 7, discard what’s in the jar down to 20 grams of the mixture. To this, add 30 grams rye flour, 70 grams all-purpose flour, and 100 grams water. Mix thoroughly, cover, and let rest for 12 hours during the day. In the evening (after about 12 hours), discard the jar contents down to 20g, add the same ratio of ingredients as earlier in the day, and let rest 12 hours (overnight).
At this point, you should see the height of your starter rise and fall in the jar predictably each day. This periodic behavior is a good indicator that it is strong enough for you to use for your first loaf of bread. If your starter is still struggling to show activity, continue the refreshment schedule with the same ratio of ingredients for another day–or even several more days–until things pick up. The process of stabilization can sometimes take longer, depending on the flour used and the environment (especially if it’s cool in your kitchen). Be patient and stick to the schedule!
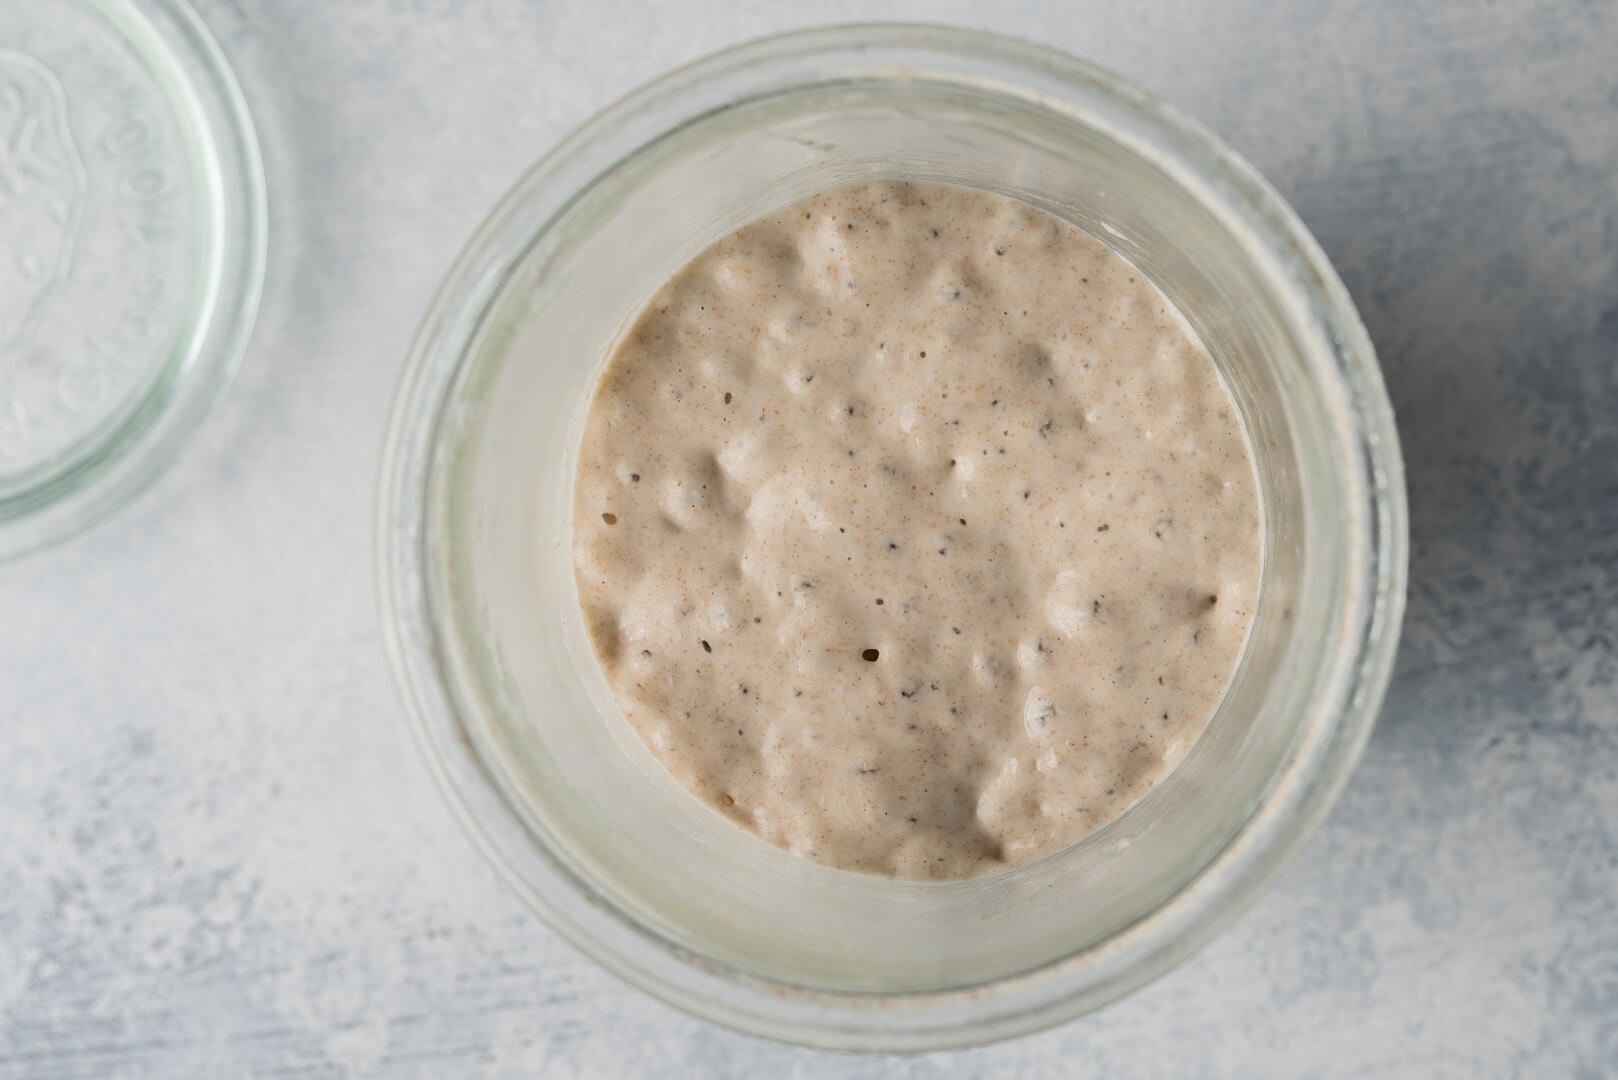
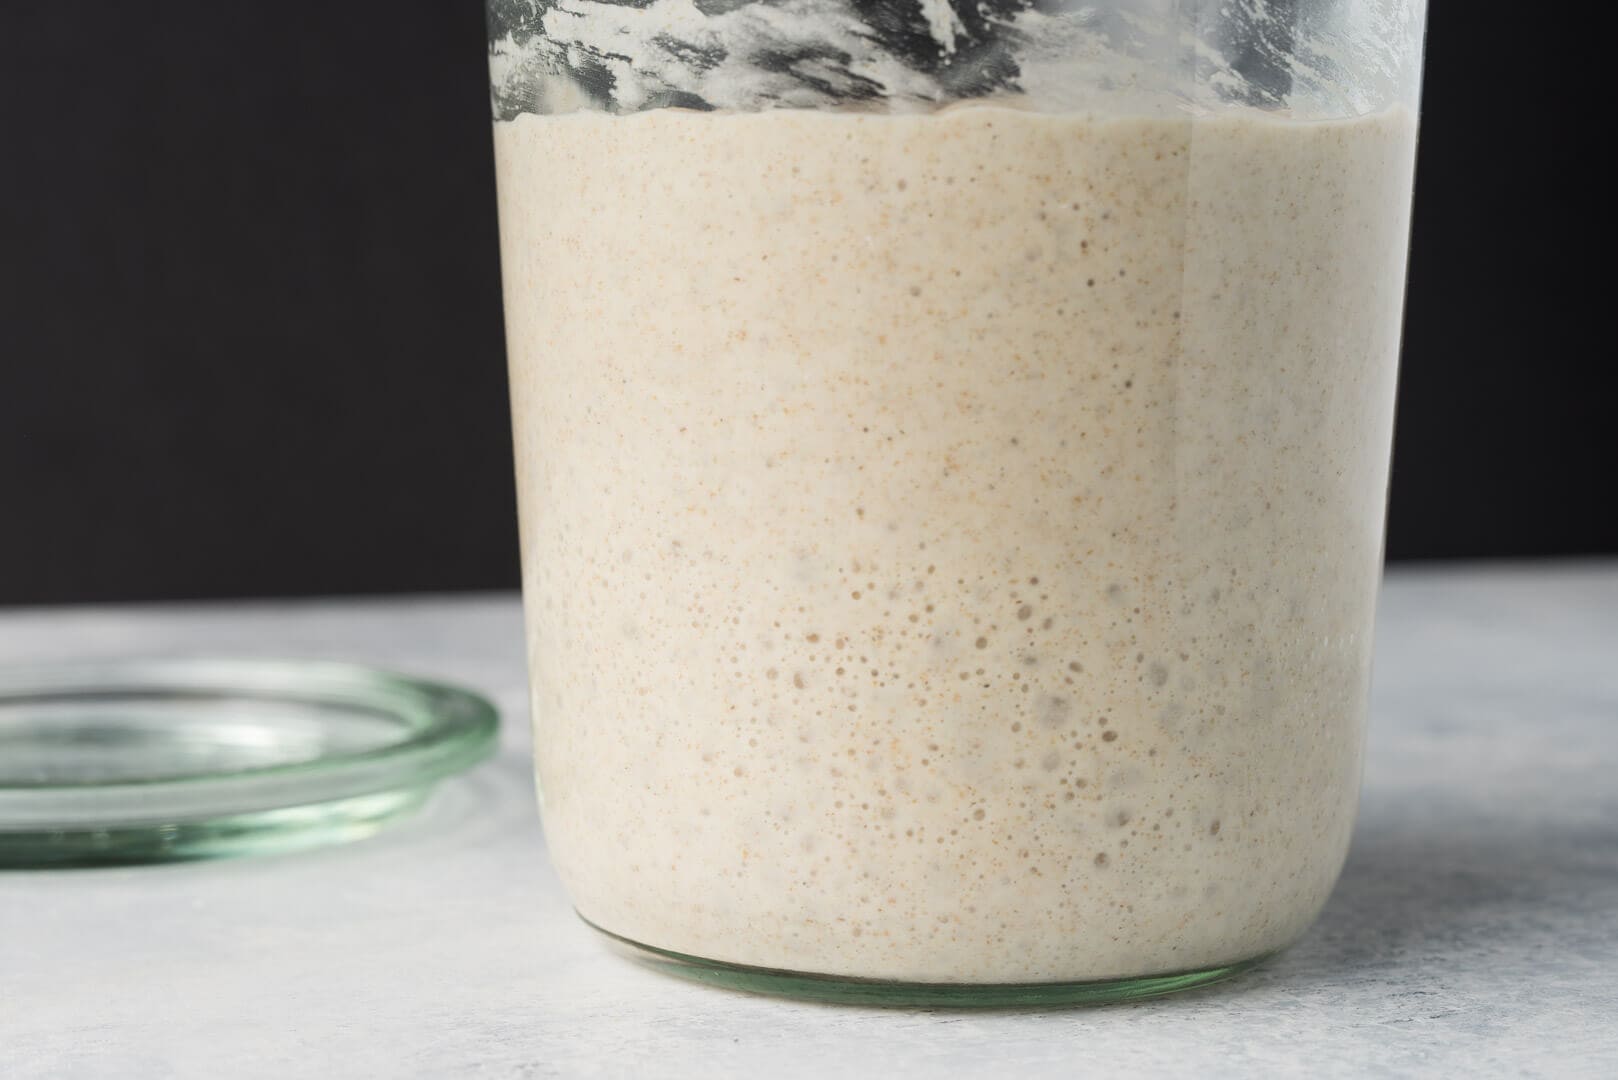
Once you get the hang of your starter and its feeding schedule, feel free to adjust the ratio of ingredients. For example, in warmer months I’ll reduce my mature starter carryover to 10g to 20g depending on the temperature. To read more about how I change these ratios and maintain my starter, check out my comprehensive sourdough starter guide page which includes my current feeding schedule, an in-depth FAQ, and more.
The starter will continue to develop flavor and strength over the next week and into the future. With an active starter, you can now use a portion of it when it is ripe. A starter is ripe when it has risen, is bubbly on the surface and at the sides, has a sour aroma, and has a looser consistency than when first refreshed.
Having issues? Check out my list of the 21 most common sourdough starter problems (with solutions) →
What is the Best Flour to Feed My Sourdough Starter?
I get asked this question often. Once your starter is rising and falling predictably, it’s okay to switch your refreshment flour to suit your preference. You can continue with a mixture of rye and all-purpose, change to 100% all-purpose white flour, or even switch to using 100% whole wheat.
There is no right or wrong flour to use when feeding a starter.
Each flour will affect the starter in a different way, changing how fast it ferments, how acidic it becomes in the same timeframe, and eventually, the final flavor profile. There is no right or wrong flour to use when maintaining your starter; it’s up to you and your starter!
Next Steps For a Healthy Sourdough Starter
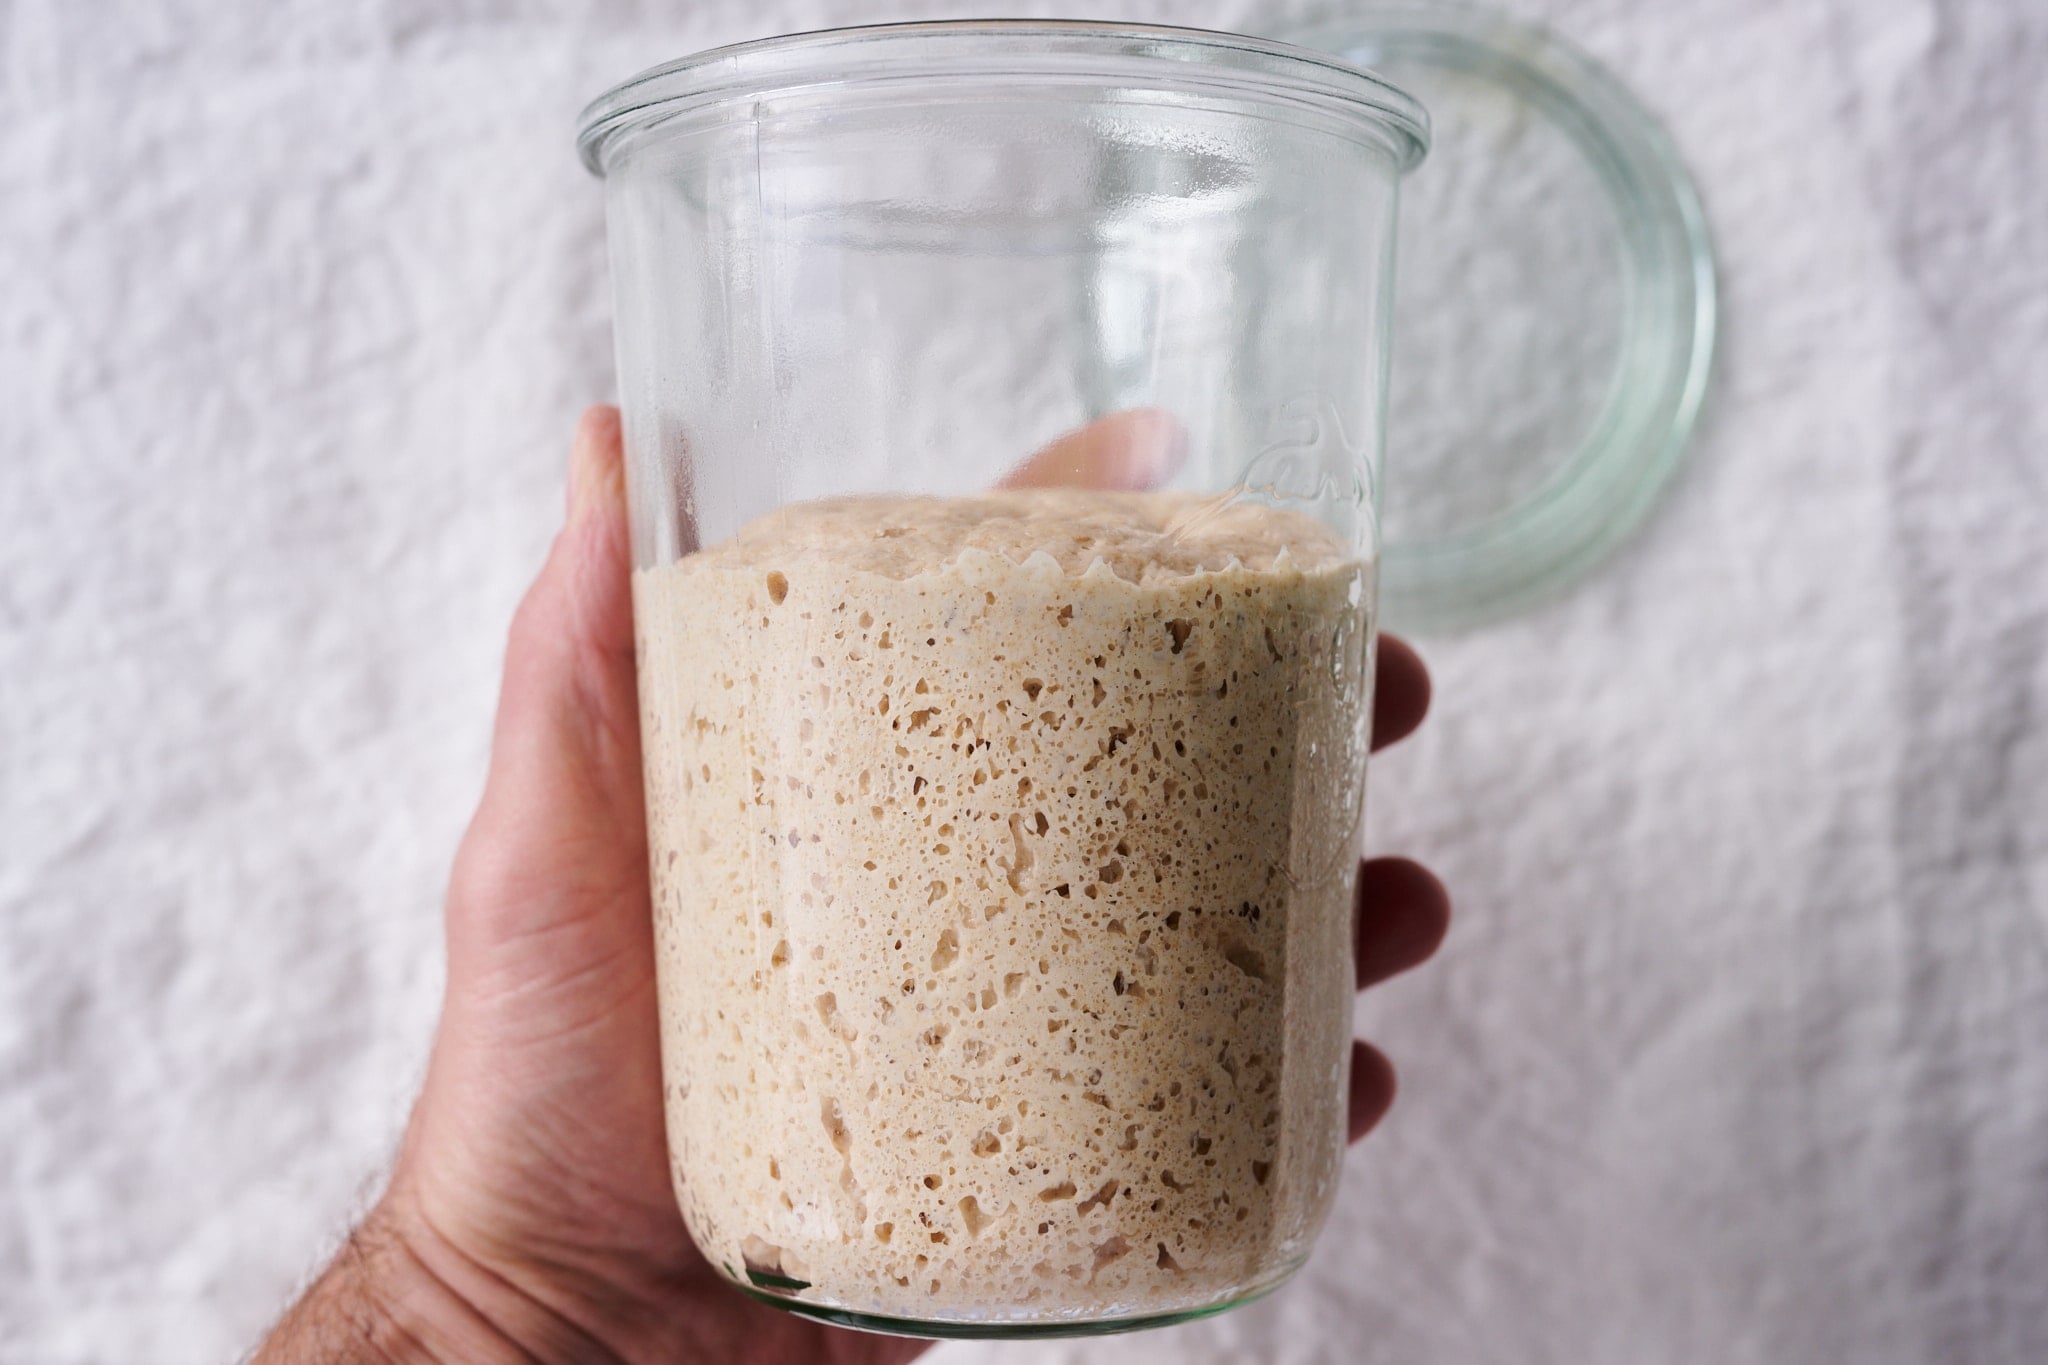
After your starter rises and falls predictably, review my sourdough starter maintenance routine for all the steps I do to keep my starter healthy. You can adjust your feeding schedule based on your baking frequency. If you can bake almost every day, you’ll want to feed your starter once daily to keep it ready-to-use shape. If you want to bake only on the weekends, you can put your starter in the refrigerator to slow down its activity.
You can also scale down your starter and maintain a smaller one. Scaling down your starter will mean less flour and water needed for each refreshment (to save ingredients). See my guide to maintaining a smaller sourdough starter for a recipe and process.
What If I Need a Break From Maintaining My Starter?
Maintaining a sourdough starter should always be on our terms, not the other way around. Maintaining a starter indefinitely can be daunting, but there are ways to put your starter on pause if you need a break from baking for a while. Remember, the refrigerator is our friend to slowing fermentation, and there are even ways to stop all fermentation activity altogether (and it can stay this year for years!).
How Can I Save Sourdough Starter Discard?
Once your starter is rising and falling predictably each day, and only then, to ensure you have the right mix of suitable bacteria and wild yeasts in the culture, you can save the discard. I keep a jar in my fridge where I collect all discards and keep them for up to 2 weeks. Then, when I want to make pancakes, waffles, or another discard recipe, I can use starter from my sourdough starter discard cache at a moment’s notice.
Final Thoughts
These days, refreshing my sourdough starter is a liturgical part of my day. It takes minutes to provide my starter with fresh flour and water. In return, my starter produces flavorful and healthy bread. I like to think it’s me making the bread; it’s me controlling fermentation, it’s my hands mixing and shaping the dough. But the reality is, I’m just a small cog in nature’s machinery. All I need to do is lend a helping hand and stay out of the way. Happy baking and buon appetito!
Print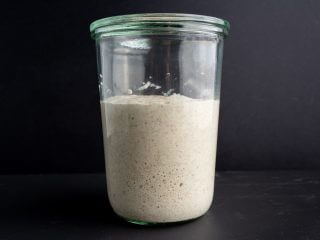
Sourdough Starter Recipe
- Prep Time: 7 days
- Total Time: 168 hours
- Yield: 1 sourdough starter
- Category: Sourdough, Baking, Bread, Starter
- Cuisine: American
Description
This sourdough starter recipe will help you create your own sourdough starter from scratch at home in seven easy steps. Your starter is the cornerstone of great bread—once you have it showing consistent signs of fermentation each day, which takes on average 5 to 7 days, you’re ready to start baking sourdough bread!
Ingredients
- 300g all-purpose flour
- 400g whole-grain rye flour
- 800g water
Instructions
- Day One
To a clean jar, add 100g whole rye flour and 125g warm water. Mix ingredients and keep somewhere warm for 24 hours. - Day Two
To clean jar, add 75g of the mixture from Day One (discard the rest), 50g whole rye flour, 50g all-purpose flour, and 115g water. Mix ingredients and keep somewhere warm for 24 hours. - Day Three
To a clean jar, add 75g of the mixture from Day Two (discard the rest), 50g whole rye flour, 50g all-purpose flour, and 115g water. Mix ingredients and keep somewhere warm for 24 hours. - Day Four
On day four, you will give the mixture two feedings. In a clean jar, add 75g of the mixture from Day Three (discard the rest), 50g whole rye flour, 50g all-purpose flour, and 115g water. Mix and let rest for 12 hours. In the evening, after 12 hours, repeat the discarding and feeding you did in the morning. Let the mixture rest overnight. - Day Five and Six
For days five and six, continue to discard down the jar contents and then feed with the same ratio of ingredients as Day Four, twice a day. You can use the same jar for these feedings. - Day Seven and Onward
In the morning on Day Seven, discard the jar’s contents down to 20g of the mixture and add 30g whole rye flour, 70g all-purpose flour, and 100g water. Repeat this feeding twice a day, once in the morning and once in the evening, indefinitely.
Notes
You don’t have to use a new, clean jar each time you feed your starter, but I find it’s helpful to keep track of the weight of the jar so you know how much you’re carrying over.
If you use my method for creating a starter, tag @maurizio on Instagram and use the hashtag #theperfectloaf so I can take a look!
Sourdough Starter Creation FAQs
Why do you need a sourdough starter?
A sourdough starter is a continually maintained mixture of wild yeast and suitable bacteria used to seed fermentation in new dough for bread, pastry, and more.
How long does it take for a sourdough starter to be ready?
In general, I’ve found it takes about 7 days from when you first mix flour and water to when a sourdough starter is ready to be used to bake bread.
Is a homemade sourdough starter safe?
A well-maintained sourdough starter can live virtually indefinitely. The high-acid environment of the sourdough starter helps stave off any unwanted pathogens. However, if you see any signs of traditional mold (pink, white fuzzy, green), it’s best to discard the entire starter and start a new one.
Should I make or buy a sourdough starter?
While buying a sourdough starter is very easy online, it’s a very easy process to do at home! Plus, creating your own starter exposes you to the signs of fermentation, what steps you need to perform to maintain your starter, and gives you a chance to get to know the feeding (refreshment) process.
How long does it take for a sourdough starter to peak?
Some bakers use the term “peak” to refer to either the point at which a starter is ready to be used or needs feeding, or it can refer to the physical peak height of the starter in the jar. I find judging a sourdough starter’s readiness based solely on the height it has risen to may lead to using it at an incorrect time. After all, the height of a starter is simply a display of the strength and other characteristics of the flour. To determine when your starter is ready to be fed (or used for baking), look for a combination of signs: some rise, bubbles on top and at the sides, a sour aroma, and a loose consistency (it should loosen the longer it ferments). From there, use the timeframe for fermentation as a guide: at about 72-78F (22-25C) with 30-50% whole grain flour and 20% ripe starter (the seed, or inoculation), it might be ready after 12-16 hours.
Why doesn’t my sourdough starter have big bubbles?
It’s okay if your starter doesn’t have big bubbles. Large bubbles can be the result of the flour you’re using and the hydration. What’s more important overall, is to see strong signs of consistent fermentation: some bubbles, consistent rise each day, a sour aroma, a loosening in texture.
Why is my sourdough starter not rising?
It’s worrisome if you don’t see any rise in your starter, you should see some. Usually, no rise is a sign it’s not fermenting properly and needs more time to establish. Continue with the feeding schedule outlined in my guide on how to make a sourdough starter and it should begin fermenting after a few days.
What’s Next?
If you’re looking for something to make with the discarded sourdough starter that you’re generating every day, have a look at my sourdough waffles, sourdough pancakes, and sourdough banana bread.
If you need a high-level look at each step of the bread-making process, read through our Beginner’s Guide to Sourdough Bread.


2,663 Comments
Awesome guide. One thing I wanted to point out:
> Water that’s high in chlorine can impede fermentation. Before starting this process, fill a large jug with tap water and let it sit out uncovered overnight to let any chlorine dissipate. Alternatively, distilled water could be used in lieu of tap water.
I recently learned that many municipal water supplies now use chloramine instead of chlorine to disinfect water. If that’s the case then letting the water stand overnight won’t remove it, but you can easily remove it with vitamin C (e.g. lemon juice). See this document from the San Francisco Public Utilities Commission: http://www.sfwater.org/modules/showdocument.aspx?documentid=4125
Thanks for that information, Dylan. I’ll update my post to include that information. I’ve been told by a few other readers that their city also uses chloramine instead of chlorine!
Quick question that I didn’t see onyour FAQ: I bought bleached all-purpose flour rather than unbleached (rookie move, right?). Will this mess up my starter? I am using dark rye for the second flour and on my first feeding of day 4 I had very few bubbles in the mixture, though I could smell some fermentation. This is my first starter. Should I start over?
I wouldn’t use bleached flour for that part of the starter flour requirement. I’d suggest picking up some unbleached and just continue from where you’re at in the process, if that’s possible!
Hi Maurizio!
Why did not you you start with equal amounts of water and flour and for feeding too?
I find a little extra water at the beginning helps increase the activity in the mixture due to increase mobility for bacteria/yeast in the mixture. If you want to use equal parts, that works too!
Hey Maurizio!
Everything was going really smooth for me and my starter until day 4 when two refreshments routine began.
I encountered a problem since my kitchen is somewhat cold, and days were cold too, I had around 21ºC (70ºF) where my starter was lying and living.
After four refreshments it looked and felt like I got back to where I started on day one, I was thinking that my starter is not able to eat through all that flour within 12 hours so I’m actually overfeeding it in that temperature, it wasn’t raising anymore and barely any bubbles were seen.
What I did is I waited longer after I fed it in the morning, I decided that I won’t feed it until it rises up what became around 30 hours of waiting time, but finally it moved, next feeding after that 30 hours was a bang, couple hours after refreshment starter was twice the size and the smell is finally really nice.
Thanks for all the great content, please keep it up because it’s a pleasure to read your posts!
Right on, you did exactly what I would have recommended, Łukasz! With temps that low it usually takes longer for your starter to churn through the food provided. Great job and happy baking!
i am so excited every time i go through this process. maybe 8x. the bread is getting better and better BUT i am unhappy with the bottom of my loaves. they look black and are too hard. i have ceramic dutch ovens and oven rack in middle.i lowered the temp this time and baked about 70 mins. please advise thank you for sharing your knowledge!!
Bummer, Sally! We’ll get you back on track.
Try preheating the oven with the Dutch oven (DO) at a lower temperature to help reduce the bottom from burning too much. Perhaps preheat at 475ºF. If you still get a slightly burned bottom you could sprinkle in some coarse wheat germ or cornmeal into the DO before placing the dough inside, this will help insulate the dough just a bit.
I would also recommend you not place the DO directly on a baking stone. Try placing the stone on the bottom rack and then a few rungs up use another wire rack to hold the DO. This way you won’t get so much direct bottom heat from the heating element. The stone on the bottom will also act as a buffer and prevent too much immediate, direct heat from the element — it should radiate out more consistently through the bake.
In general, I notice when I use a DO to bake I tend to get a slightly more baked bottom than sides and top — this is just the nature of using the DO, in my experience.
Let me know if this helps!
I found your website while searching “Bland Sourdough” I am going to try feeding one of my (I have 4) starters with the 50/50 Rye and AP flour to see if I can get some flavor.
I’m not sure why my site came up from that search, I think my bread has tons of flavor 🙂 Good luck with the starter, let me know if you have any q’s!
Lol, I think I may have been looking for a better starter. So far so good. It bubbled up great and fell back down. I am going to do another feeding today. Since I was using my starter, how many feedings would you recommend I do before I try baking a loaf.
Ah, I see! I usually recommend to wait until you see a reliable rise and fall in your starter each day. Typically 7-10 days after beginning this process, but it could be shorter or longer depending on temperatures, flour, and environment. Look for those strong signs of fermentation consistently, and reliably, each day!
I am a rank beginner, just on the fourth day of my first starter. I am interested in eventually making your waffle and pancake recipes. My question is how do you end up with a cup and a half of starter using your sourdough from scratch recipe? Also what is meant by a stirred down starter? I am assuming you are stirring the bubbles out of a mature starter.
Thanks so much for your site, it is what got me interested in actually doing this.
“Stirred down” just means exactly that: you stir the starter with a spatula to get it to fall and condense in the jar. When I’m going to make the pancakes or waffles I’ll usually feed my starter a little extra flour and water the day before in the morning so I have enough by the night time. If you find you’re a little short, don’t fret, just use what you have and can spare (don’t forget to keep some starter in the jar so you can perpetuate your culture) and mix it up — it’ll ferment just fine overnight. Have fun and enjoy, Lyndon!
Hello, this is great info, thanks!
I began making a starter about a week ago (before coming across your post), but it is not doing so well – every time I go to feed it, it has the watery substance on the top layer. I’ve been adding 1/2 cup organic unbleached bread flour and 1/3 cup filtered water every 12 hours – I haven’t been disgarding any of the mixture either, and it has been sitting on my countertop with a cheesecloth on it – my house is at about 23 degrees C. How would you suggest I strengthen my starter using your method?
Thanks,
Sylvia
Hey, Sylvia! Usually that thin, clear liquid on top is what’s referred to as “hooch.” It’s an alcoholic byproduct of fermentation and could indicate your starter is doing just fine and fermenting quite a bit before you can get to it. If you have a chance to check on it during the day see if you see the typical signs of fermentation: starts out sweet smelling and rather shaggy, transitions to more sour smelling and smooth, bubbles throughout, and finally well-risen with lots of bubbles and a sour smell. After that it’ll usually drop in the jar for a while.
If you don’t see or smell these signs through the day you might still be in the very beginning steps of the whole process. Stick to the stage where you’re feeding part rye flour and give it timely feedings — try to keep it warm, around 26°C if possible. I hope this helps, let me know how it’s going!
Hi!
Thank you so much for this wonderful guide. My first sourdough starter absolutely failed on me the first time round but I just had to try again after reading your wonderfully detailed guide. However, I have been having some problems with my starter recently. I haven’t been having any problems from day 1 to day 6/7, having nice rises, bubbles and sour smells. I understand that the rise was expected to be smaller when changing to 100% AP flour and as expected, there was only ~40% rise after the first feeding of 100% AP flour on day 7 and 25% rise after my second feeding on day 7. No worries about that.
However, ever since then, my starter has only risen about barely 5% and i could hardly see any bubbles. This has been the case even after I tried to incorporate increasing amounts of rye flour back into the next few feedings in 12hr intervals. Now my starter just looks dead, with no bubbles, looking very thick, pasty and gummy and almost no rise at all. I have no idea how to and whether I should continue from here. Is my starter dead already?
You’re very welcome, Kel! That’s interesting. I would stick with the feeding schedule at the point where you still have some rye flour in the mix. Keep feeding it that way for a few days and see if that helps (hopefully you’ve done this, I’m a bit late in getting back to you!). That change in activity could actually be a good thing. Keep me posted!
I’m about to embark on this journey. As I have some rather old bread flour I’m wondering if I can use it or do I need to buy fresh stuff. Also, I have the perfect size, good quality plastic containers and wonder if I can use them?
I would definitely pick up some fresh flour. It could possibly worth with the flour you have, but I say if you’re going to start this process pick up some fresh flour to give your culture the best possible chance. Plastic containers are just fine. Good luck, let me know how it goes!
In the end I ordered some starter online and have now achieved wonderfully active starter. And I bought new flour – I’ve gone through heaps of it. The problem I’ve had is the bread being a bit doughy – is this to do with the cooking?
That works! I’m not sure what you mean by “doughy” but if it’s gummy inside it could be due to various factors.
If the hydration is too high for your dough it can lead to an overly wet interior. If the dough feels “soupy” or very “slack” then try pulling back the water percentage by 5% and see if that helps.
Make sure to bake your loaves completely. The interior should register around 208°F or higher.
If your loaf is under proofed then this will typically lead to a gummy or “wet” textured interior. Make sure your starter and levain are very vigorous and strong when you use them. This is very important! From there, make sure to bulk ferment your dough fully (use the images you see in my posts to guide you on what the dough should look/feel like). You want the dough to be alive and aerated before you divide and shape. From there, a full and complete proof is also very important.
Let me know if you have more questions!
Hi Maurizio,
Thank you for what you do! Your instructions are perfectly detailed and concise – very much appreciated.
On day 7, I fed my starter 100g all purpose flour, 50g mature starter, 100g water, and the rise & fall of the starter throughout the 12 hours decreased significantly from the previous days. At the end of day 7, for the second feeding, I did 75g all purpose, and 25g rye – is that ok? Should I not be worried about the decrease in activity on day 7?
That’s to be expected. When we take our rye flour the fermentation activity in the starter will definitely decrease (whole grain rye flour has tons of nutrients for our starter). Either way is ok, you can keep rye a part of your feeding schedule or you can remove it — it’s really up to you!
Does this mean we still stick with the 12 hour feeding schedule even though the activity has slowed dramatically? My concern is the fermentation can’t keep up with the feeding and will disappear. How do I know it’s ok to continue feeding?
Your website and instruction are the best I’ve found online! Thank you!
The schedule might change, it depends on the flour, temperature, and vigor of your starter. Have a look at my sourdough starter maintenance routine post for an in depth look at how I can tell when it’s time to feed my starter!
Thank you!
Is it possible to scale back the amount of mature starter, water, and flour to end up with less discard each feeding? Or will that affect the performance of the starter?
It’s definitely possible to do that. I find, though, at some point the mixture gets so small it can be hard to judge readiness and it might go too far without notice!
Hi Maurizio
Thank you for all your information love your website. For the life of me I can’t find the recipe for your stiff starter anywhere which you refer to in your 100% whole wheat sourdough recipe. Any help would be appreciated.
Thanks
Hey, Marilyn! I don’t have a post yet on my stiff starter, it’s something I’ve been meaning to get to. The process is very similar to how I treat my liquid starter I just use about 65% water at each feeding and mix/knead it by hand to incorporate.
Thank you Maurizio appreciate you getting back to me.
Hello!
I’m loving this guide; it’s very intuitive and is by far the best guide I could find online for making a great sourdough starter!
My question is: If I wanted to switch my starter from 50% whole wheat and 50% all-purpose to 100% whole wheat, how would I do that? What measurements should I feed it? How long should I wait between feeds?
Thank you so much!
You can switch over without any problem. I’d recommend starting with 10g mature starter, 100g whole wheat, and 100g water to start. See how long your starter goes at those ratios before needing a feeding. Depending on the temperature in your kitchen it might not be a full 8-12 hours, in which case you’ll have to feed sooner. You can lengthen the time between feedings by reducing that 10g mature starter carryover at each feeding, perhaps down to 5g, and see how that works out.
Thank you for this guide, it’s really helpful to have so much detail.
I am in the fifth day and I am not seeing much bubbling and it doesn’t seem to be rising. I do get some (some times a lot) of transparent (kind of brownish) liquid on top. Also, the starter is not very thick.
My house is not very warm (around 70), but I am using warm water. Also, instead of rye, I am using wholemeal spelt flour.
Should I stick to the schedule or should I do something to fix it? Should I go back to feeding once a day until I see more activity?
Thanks
I’d say stick to the schedule. Hopefully you’ve done this and by now your starter is alive and kicking. If you’re still struggling see if you can locate some good, wholemeal rye flour and keep warming that water!
What if I’m seeing the same results in your day four on my day three before it’s reach the 24hr mark (about 12hrs sooner than my 3rd day feeding)? Should I still wait till it’s reached the 24hr mark for day three and feed as you recommended or should I feed it now since it’s eaten through all it’s food? I’m concerned it will develop a hooch before its next feeding. If it does, is that ok? Please help!
Yes, I’d still stick to the schedule I’ve listed here. It’s ok if a little hooch builds up on top, it won’t be a big problem.
Thank you!
Hi Maurizio, just listened the The Kitchen Counter episode you were featured on and really enjoyed it.
I started baking sourdough about 2-3 months ago and I love it. The one problem I consistently am having is the level of sourness – I want it more sour! The outcome I’ve been getting is the flavor of a french bread with a very subtle sour flavor. I’ve played around with the amount of water to flour ratio during feeding, have tried extending the bulk proofing process to almost 4.5 hours, and proofing in the fridge from anywhere between 12-48 hours and nothing seems to help. I’m using a starter with only all purpose white flour and have tried a whole wheat variation as well (no luck there). I’ve heard incorporating a portion of rye flour to the starter feedings may be the solution so that’s what I’ll try next but curious on your suggestion(s). Thank you!!
Really glad to hear you enjoyed the episode! It was fun recording that.
Sounds like you’ve tried all the right things so far. I would recommend building a levain with at least 50% rye flour to see if that helps. Also, add a smidge of rye to the recipe you’re working with as well, perhaps 2-5%. Even with that little amount in there it’ll really help boost the sourness in the loaf. From there, if you still want more sourness extend that cold proof time like you did until it’s just right for you.
Let me know how it goes!
Thank you so much. I baked a couple loaves over the weekend and they are perfect – highly sour just the way I was aiming for. Seems like the 50% rye levain and 5% rye to the recipe is what I needed. Thanks again for your advice!
Curious about the starter – the recipe has us discarding most of it as we establish the yeast, and then all but a tablespoon to make the bread? Do you save the starter that the recipe says to discard all but a tablespoon of, store that discarded portion in the fridge and use it for your next loaf? Or do you use the left over leaven for the next liaf? Thanks for any advice!
Once you have a starter that’s reliably rising and falling each day, it’s able to be used to make bread. What I do is take a small amount of my starter, use that to create a levain (leaven) which will then be mixed into a dough for a single bake. The starter continues to be fed indefinitely in a separate jar.
In other words, I always have a starter fermenting, getting fed, and kept separately in its own jar. When I want to make some bread, I use a portion of the starter to make a levain in a separate jar. This levain will be consumed and used in total in that bake (and will “die” in the oven with the rest of the dough).
I hope that makes sense!
You state: ” Based on your baking frequency, you can feed your starter once a day or use the refrigerator slow it down.” But in your maintenance guide it is clear that letting it go 24 hours without feeding will produce the hooch which is not desirable. When would it be ok to regularly be feeding it only once a day?
You can adjust your feedings to allow for one a day by changing temperature, mature starter carryover, and/or flour type. The way I typically “slow” my starter down is to carryover less mature starter at each feeding, sometimes all the way down to 5%. Of course this also depends on the ambient temperature in which your starter is maintained. For example, a starter kept at 70°F will be quite a bit slower to work its way through fresh food than one kept at 80°F. Therefore, you could use a combination of temperature and carryover percentage to lengthen the time between feedings.
Finally, keep in mind that feeding with more whole grains will also increase activity in your starter. This is another tool you can use to adjust the fermentation timeline.
I hope that helps!
Hi, Maurizio.
I’m doing my first starter and everything is happening very fast. In fact, in the sixth day it overflowed the jar after the second feed (75 grams original, 50 grams rye flour, 50 grams all-purpose flour, and 125 grams water). Is everything right with my starter? Should I change something? I’m from Brazil and here is hot… something like 77º F. Thanks a lot!
77°F is a really good temperature for starter maintenance. If you see your starter rising too fast and fermenting too quickly reduce the amount of mature starter you carry over at each feeding — this will slow the entire process down a bit. Everything sounds like it’s just fine, you just have a very active starter, which is great!
Hi, Maurizio.
Thanks a lot!
And congratulations: the blog is very good. We have a lot of information and great pictures.
Hi!
I’m on day six and my starter looks like your photos! It never overflowed the jar but it’s rising an inch or so and falling back down to almost where it started over the 12 hours.
Thank you for your meticulous instructions!
I tried making your donut recipe last week though without succes.
I’d been cultivating a sourdough starter from the Bourgon bakery cookbook and used it. The dough didn’t rise at all!
I wasn’t surprised since that starter was never very bubbly and didn’t look anything like your photos. I always finishes with a Silly putty type texture. Very stretchy and sticky. You can’t pour it, you have to start pouring and then cut off a piece as it’s falling.
I’m curious – is it just a hydration level change? It’s also all AP flour.
I’ve kept it and I’m feeding it from the fridge once a week. I’m looking forward to trying both bread recipes and seeing the difference. (And in another few days I’m trying the donuts again!).
Here are the Bouchon instructions. I’d love to hear your thoughts.
Combine 250g water and 250g flour
Wait 24 hours
Combine 150g (liquid) levain, 250g water and 250g flour
Repeat step 3 every 12 hours for 2 weeks
It’s likely that your starter wasn’t strong enough or maintained with sufficient feedings. Those ratios might result in a starter that’s very acidic, but it really depends on your environment (especially ambient temperature) and the flour you’re using. It sounds like you probably didn’t have enough fermentation activity in the bomboloni dough to sufficiently strengthen and leaven the dough. That recipe is highly contingent on a starter that’s strong and performing well!
Have a look at my baking guides, specifically my sourdough starter section, and try to stick to one of those feeding schedules and ratios for a while. Then give it another shot and let me know how it goes!
Hi, great page!!! So far i understand your
text you are using a rye flour based starter for all types of bread? You do not
set up separate starter cultures, one with wheat flour for wheat
flour based bread and a second with rye flour for rye flour based
bread? Can you please comment on this?
Regards
Thank you! Some bakers do prefer to keep a strict rye starter for rye breads which is just fine. I personally don’t do this, but if I were to bake rye bread more often I’d likely do so!
Hi there! I recently moved cross country and had to leave my faithful starter behind, and now am trying to begin anew. This is the first starter I have ever tried to begin myself, as the other was rescued from a friend.
As I’ve seen in a few other comments, I’m concerned about my starter. I’m on day 9, and I have not seen very much activity since day 7. The most activity I have seen was that glorious day 3 surge to the point of overflowing, but as you have predicted in your post, it was not sustained in days thereafter. Days 4-7 saw slight rises (no falling), ever decreasing as the days passed. I’m feeding it 2x daily with 50/50 rye/white, diligent in heating my water to 80F each time…but my poor little starter has had no rise in two days. When I feed it, there are big bubbles throughout, smells strongly of ferment, and has broken down to a very nice gummy consistency, so I know it’s active… what do I need to look for before I begin to my first bake in my new home? And why is my starter having such a difficult time rising?
Thank you very much in advance; your website is a beautiful baking jewel.
It sounds like you’re paying attention to all the right things here, it might just be taking longer for your culture to get going. What you want to see is a consistent rise and fall each day with your mixture. It should rise up as it’s fermenting over the feeding period and then eventually fall back down. The smell should change over the course of the time period as well — it’ll change from almost sweet (when first mixed) to increasingly sour. This consistent behavior is usually the best indicator your starter has developed the right mix of bacteria/wild yeast we’re looking for.
Just curious: are you leaving your water out overnight, or for 24 hours, before using it to feed your mixture? Another thing you could try here is to buy a couple gallons of distilled water from the store and use that to feed. Sometimes municipal water supplies can have chlorine or other things that can inhibit fermentation.
I hope this helps, keep me posted!
I had been leaving my water out overnight-24 hours before using, but at your suggestion, I’ve been using store bought distilled water for the past 5 days. Still no luck! My starter rises maybe half an inch – no more, sometimes less – and doesn’t fall back down. My house is usually mid-high 70s, so I do keep the starter in a warmer area… There are nice big bubbles, the consistency has been changing from thick when first fed to gummy after 12 hours, but the smell is changing very little. I am getting that almost-sweet smell at feeding, and it is souring over the 12 hours, but very little souring. I’m perplexed, and also can’t help but feel as though I’m wasting flour on a hopeless starter, but I’m not looking forward to starting all over, especially since I don’t know what to do differently next time round.
I’m experiencing the exact same situation. Hopefully Maurizio can help!
Stephanie — sorry to hear that! I wrote back some suggestions to Anita, above.
I had the exact same issue. The solution that seemed to work for me was to reduce to one daily feeding (rye and all-purpose ) for a couple of days until I got nice rises. Then shifted to two daily feedings (all-purpose) for a couple of days until the rise was consistent. Baked my first bread a couple of days ago and it turned out great!
Thanks for that info, Jakob!
Ah, bummer to hear that, Anita. Sometimes it just takes quite a bit longer to take hold. Have you tried using another flour type? I definitely recommend sticking with a good whole grain rye flour (even better if it’s organic) until you start to see some activity. Perhaps try a different white flour as well — you want to find some that’s not overly high in protein and is unenriched.
Make sure the area where you’re keeping your starter isn’t too high. 76-82°F would be great, even up to 90°F is ok but that’s getting a little up there.
I know it seems like a waste but once you get your starter going it’ll all be worth it. Please keep me posted!
Hi Maurizio! Thank you for the wonderful posts! The photos are super helpful. I’ve been cultivating my starter for the past week and it’s been fermenting very well (and quickly due to the warm climate and humidity). By Day 4, it was already rising and falling predictably. On Day 6, it was overflowing in the jar and needed feeding by 4pm and again by 11pm. During the 11pm feeding, I switched to 50g starter, 100g flour (75g AP, 25g wheat) and 100g water for the first time. It hardly rose overnight (only 5-10%) and so this morning (Day 7), I returned to the rye and fed it with 50g starter, 50g rye and 50g AP. It’s 1pm now and it’s already risen significantly. While I do want to slow down the fermentation slightly to avoid having to feed it 3x/day, what would you suggest to ensure that it continues to rise and fall normally? It’s difficult to monitor temperature but I’ve tried placing it in a cabinet or in the oven (turned off) to slightly reduce temps. I know that rye certainly encourages activity but is it common to see such a significant decline (barely any rise at all) after cutting out rye from the feedings? Should I just stick with the rye feedings to ensure activity?
Glad I could help! You should still see plenty of rise when switching to 100% white flour. I’d suggest feeding with rye flour for another week or so until it’s nice and strong, then try switching back over the course of a few days. Reduce the rye flour percentage by 1/3 each day until your using 100% white flour. Note that you can really feed your starter any flour you’d like. If you want to continue feeding with rye (even if it’s just a small percentage) you can always do that. You could also mix white and whole wheat.
Hope that helps!
This is so complicated.
When I’m creating a starter from scratch I don’t measure or weigh. I use a spoon of white rye flour and some filtered water twice a day and stir to a smooth consistency.
I discard half the amount when feeding and because it’s such a small amount there’s hardly any wastage. I use a glass Pyrex bowl and a tea towel to cover.
After about 6 days it’s vigorous and healthy. No special jars or scales are needed. I also make an ultra simple loaf too. It’s a good idea to store some starter in the freezer as it freezes perfectly.
I don’t know why sourdough sites make things so overly complicated.
Sourdough can be as simple or as involved as you’d like, it sounds like your process works very well! I personally like to weigh my ingredients, monitor fermentation and temperature closely using a few essential tools — over the years I’ve noticed this helps me produce more consistent bakes with little guesswork. Each baker has their approach, though, and I know many bakers who don’t weigh anything, don’t take any temperatures, and have the most minimal of tools. And this is great! There are many, many ways to make great bread and what works for me might be overkill for you, or others. That’s the beauty of baking bread though, isn’t it? We’re all making the same bread, just a myriad of different ways.
Thanks for the comments and happy baking, Rosa!
Hi Maurizio! I found your blog while attempting to google some solutions for sourdough starter issues. I attempted to make the levain from Forkish’s FWSY book and I don’t think the levain is going according to plan… not to mention I really hate the large amount of waste following Forkish’s instructions. Is it possible to par down the levain to something smaller so I am using less flour each time I feed it and in turn tossing out less levain each time? (Last feeding was 150g levain, 100g whole wheat, 400g 550 flour, 400g water)
I’ve also run into the issue that the structure of the levain doesn’t seem to be developing. The levain hasn’t risen past day 3, and each day I uncover the container to feed the smell is very sour and pungent. It seems it is way too sour and the levain is incredibly soupy. I’ve tried to be consistent with the water temperature during feedings, whereas I can’t control the room temperature much (Europe, weather transitioning to spring, no AC)… Can the soupy, pungent levain be rescued and scaled-down?
Thank you!
I haven’t had any luck with the sourdough starter in FWSY, either. And I’m with you – I hate the amount of waste! Looking forward to seeing what Maurizio says.
Reply is above 🙂
Hey, Meg! Keep in mind there is a difference between what I typically refer to as a “starter” (your ongoing culture, the “mother”) and what’s called a “levain” (or leaven, which is an offshoot that’s used in total in a single bake). Yes, his recipes typically have pretty large levain builds. All of my formulas here at my website make a levain only to the size needed in the recipe. In other words, you’ll make a levain and use it in total in that day’s bake.
Yes, your starter can definitely be rescued! Use a little less water to feed it until it’s at the consistency you’re looking for. I like mine a bit more stiff (but still around 100% hydration) and that’s usually what you’ll see here. Have a look at my sourdough starter maintenance routine for a real in-depth look at maintenance: when to feed, how to mix, etc.
Hope this helps!
Hi Maurizio! I would like to begin my question with utmost thank you for your wonderful blog.
I began my sourdough starter endeavor in last December, but with no success yet. Recently I encountered your blog, fortunately, and I am following your recipe, desperately hoping to succeed this time.
I am on day 9 now, and I have been following your recipe quite thoroughly; I have been using dark rye flour, unbleached multi-purpose wheat flour and filtered water at 79~82°F, and I have kept the jar at about 80°F. Also, I thoroughly followed your ingredient ratios and feeding schedule. Almost similar tools.
I should confess that I have used 80% of your recipe but with same proportions; you suggested 100g (rye flour) : 150g (water) on day 1, but I used 80g (rye flour) : 120g (water). You suggested 75g (mixture) : 50g (rye flour) : 50g (all-purpose flour) : 125g (water) on days 2~6, while I used 60g (mixture) : 40g (rye flour) : 40g (all-purpose flour) : 100g (water). I wish this did not cause any problem.
Feedings seemed quite OK until day 3. On day 2, the starter rose by 130% (I mean, the volume of the starter increased from, say, 100 to 230), and I did the feeding. On day 3, the starter beautifully surged out of the jar, and I did the feeding.
And then came a very quite period. I had no rise on day 4, and 5~10% rise on days 5 and 6. Not much smell, not many bubbles. (Yes, I did two feedings on days 4~6.)
Since my starter looked so weak, I decided to keep using the ratio for days 2~6 – 60g (mixture) : 40g (rye flour) : 40g (all-purpose flour) : 100g (water) – on days 7 and on, while your recipe tells me to switch to a new ratio from day 7.
On day 7 the starter rose by 10~15%, and by about 20% on day 8, but today it rose by about 60%! With some bubbles. One big problem is that the starter rises but does not fall. No periodic behavior.
Do you think my starter is still alive? How long should I keep feeding this starter? In case I keep feeding it, which ratio should I apply? The ratio for days 2~6 or the ratio for days 7 and onward? Would it be better to give up and start over?
I desperately look forward to your diagnosis and advice.
Thank you so much again.
You’re very welcome, glad to have you along! Your adjustments during the process were perfect, that’s exactly what I would have recommended to you should you have emailed me. It sounds like your starter is perfectly alive and well, I hope you’ve been continuing to feed. It’s OK if it doesn’t fall — you want to see signs of strong fermentation and a consistent behavior each day.
Even if your starter doesn’t fall down you’ll notice that when it’s “mature” or “very well fermented” it’ll be easier to stir, a little soupy, weaker than when you first mixed it up. This is a good sign that the mixture has broken down significantly due to fermentation and usually this is about when it’ll fall in the jar. Try to determine this best time since you’re not able to go by a rise and fall: use smell, bubble activity, consistency of the mixture… Whatever helps you determine when it’s mature.
I hope this helps and thanks again for the kind words!
Dear Maurizio.
Thank you so much for your kind reply! I did not expect that you would really reply to me since I thought you would receive thousands of requests. I am also very thrilled that you said my starter is alive and well.
Yes, I have been continuing to feed. Now I am on day 14, and I feel I am a little lost and I am wondering where to go. My starter has been showing a stable pattern, but I am not sure if I may describe it as ‘active’ or ‘promising.’ I am still using the sam ratio (the ratio for days 2~6) twice a day, and since day 9, my starter rises steadily between feedings, and rises by 70~80% right before feeding. It does not fall at all, however. I get quite many bubbles, and it ‘feels’ easier to stir, a little soupy, and weaker than I first mixed it up. But I am not sure if it is mature enough because, well, I have never experienced ‘good’ signs, nor seen a mature starter. Anyway, I will not give up, and will follow your advices until I determine when it is mature. My plan is to keep using the current ratio for one more week (14 more feedings) and will try to bake a sourdough bread next weekend. In case I fail with the current starter, I plan to start over, this time using rye flour only.
(For your reference, I attempted to switch to the next ratio on day 10, calling it ‘P-B,’ where ‘P’ comes from ‘Perfect loaf’ and ‘B’ means second trial. I call the one I am still working on as ‘P-A.’ The starter P-B stopped showing sign of life after 2 days, and I stopped feeding it after five days.)
May I ask two more questions regarding flour? (1) What do you mean by ‘all-purpose white flour’? I am in Korea, and they sell ‘strong,’ ‘medium’ or ‘weak’ wheat flour depending on the amount of gluten, and the one I have been using is ‘strong all-purpose’ wheat flour. Is this OK? Or, is any wheat flour OK? (2) I have one big question regarding the relationship between the flour used in starter and the kind of sourdough. Are starters made with different flours different? Or are all starters the same? If I use rye flour in making starter, can I use it only in rye sourdough? Can I use wheat flour only in wheat sourdough? Or, can I use any starter in making any sourdough?
Thank you so much again.
You’re very welcome! Not a problem. Yes, continue with the feeding schedule. To me it sounds like your starter is perfectly alive and is able to leaven dough no problem — I’d say you’re ready to try baking with it.
Your questions:
1) “All purpose” here in the USA is typically a flour that has “medium” protein and strength, somewhere between 11% – 13% protein (or somewhere near there). It’s typically what’s used for most baking applications here and what I like to use as the base for my bread recipes. It’s probably fine to use your “strong all-purpose” but I would likely choose the medium version instead — either way though, I’m sure that’s just fine.
2) Some bakers prefer to be very strict about it and use a starter with the same flour as the final bread. For example, a proper rye bread baker might choose to only use a 100% rye flour starter to make their rye. They do this for various reasons including flavor and performance. I’m a little more lenient in all of this and almost always use my main starter for all my breads here. In the end, the choice is yours!
I hope this helps! If you have any more questions feel free to send me an email through the Contact link up at the very top. Happy baking!
After successful, beautiful results on my loaf, I ended up using every bit of starter. Now I am having to start from scratch again with starter. Do I have to discard starter back to 25g? The first time I read your recipe/routine it was 40/40/40 each day, without discarding all the way back to the original amount. I end up with just barely enough starter to make my leaven.
You don’t have to discard all the way down — do what works for you and your baking!
Thank you so much for getting to my question. I am creating a new starter from scratch. No problem now.
Hi Maurizio, could I get your input on this? I started the starter 9 days ago. In the first few days, it had a very gummy, stretchy texture, and now it is more like a thick batter, no longer gummy. It is bubbling slightly and has a fermenting odor, but doesn’t seem to be rising and falling I have been feeding with all-purpose flour and tried adding some whole wheat flour to see if this would make any changes. The temperature in my home is in the low 70s. Am I doing something wrong, or should I keep going with this one? Thank you!
Hey! Keep going with the schedule. Hopefully by now it’s taken hold, but if not keep at it. Lower 70’s can be a little cold and it might take a few more days to get going.
Hi, Am so excited, the loaf was amazing. Cant thank you enough. Am getting to understand her better with each passing day and increase in summer temps here in India.
Super glad to hear that, Nandi! High temperatures can be challenging — just do everything you can to slow the process down: use cooler water, keep your flour in the fridge… Whatever works. Happy baking!
Hello – I came across your post last night when I was troubleshooting an issue with my starter. I’m at day five and it seems to be going well (lots of rising, some bubbles) BUT the recipe I’ve been following doesn’t use a clean jar for each feeding or wasn’t good at specifying this step. So what’s happening is I’m not discarding enough and then adding flour and water to the original jar which contains too much starter. So this morning, I measured out four ounces into a clean jar, fed that jar, then discarded about 18 OUNCES from the jar I’ve been using. (Insert face palm!) Is my starter salvageable now that I’ve discovered that I need a clean jar each time and my ratios were totally out of whack or should I just start over? Thanks for any tips!
Hey there, Patricia. Totally salvageable. Just continue with the feeding schedule with your new clean jars and all will be ok. As long as you had enough of the mixture in the jar each time you did a feeding you’ll have enough carryover to get a culture going.
Good luck and happy baking!
I live in Mumbai and this being summer, it is not only very warm but very humid. My question is how do I manage my starter, starting day one in a 33-35 degree Celsius temperature. Would the fermentation work? Would it not start stinking? Recently I tried fermenting, and there was a strong sour odor from the dough in about three hours (it was in an airtight container, which I think was part of the problem, also I had used yeast) and then I refrigerated it.
In hot climates like that you can try adding a small percentage of salt to your starter to help temper fermentation. You could start by adding 1% salt to your starter when you do a feeding and see if that helps slow activity enough to prevent your starter from becoming overly acidic too fast. In addition, try using cooler water if you can when doing feedings.
Hope this helps!
I did not add salt, and am continually watching temps in the kitchen. The time required is shorter too, for feeding and chose times of day to feed.
Hi Maurizio, thank you so very much for your reply, Hadn’t gotten around making the starter yet, but I am starting the starter today! Super Excited. I am going to use 100% whole wheat and take in your suggestions. Thank you once again for the reply! 🙂
Im so happy thus far. My starter is looking good and I even baked 2 times. Now I’m confused as to maintaining the starter. (Coco). The temperatures will only rise in India. So it will go in the fridge. But what do I do when I want to bake bread tomorrow. Confused me.
Glad to hear that! Have a look at my guide on sourdough starter maintenance, it should give you some ideas on how you can adapt to overly warm ambient temperatures. Essentially you’ll need to carry over only a small bit of your mature starter each feeding (it might be very, very small for you).
If you’re finding your culture matures too fast you could also feed with cooler water and even add a very small bit of salt to the culture. Salt will help temper fermentation and bring it under control — just don’t use too much, perhaps 1%.
Hope that helps!
Hi
I am on day 8 My starter doubles in size- that is it rises. But does not fall. There are lots of little bubbles but since I switched to 2x a day feeding of white flour only the mixture is getting thick and pasty. Is this what should happen? My temp is about 75 but over the heating vent where it’s stored but the kitchen is pretty cold. Thanks for any advice you can give me.
It’s ok if it doesn’t fall, many readers have experienced this as well. I’ll also see this with my starter if I mix it up more firm than usual. Just take note of how it changes over the course of a feeding, it should show signs that it’s become ripe and mature by the end: slightly sour smells, bubbles throughout, and if you stir it it’ll be much weaker and more loose.
WOW! Your description of results vs time table was spot on.
Started “George” on Sunday. Second day was really exciting–lots of action. Days 3, 4 & 5 not so much. In fact, I thought George was dead this a.m. (morning of day 6).
I persevered and today at the evening feed (day 6), wow. George was at least 6x as big as he was this morning.
Believe the schedule folks. It works like a charm!
Len
Excellent! Glad to hear that, Len. Sometimes it takes a little extra time but it’ll happen 🙂 Happy baking!
This whole blog is so helpful. I had sour soupy failures trying to follow other instructions for sourdough starter and your primer with photos and tips is fantastic. Thank you! The temperature discussion and chart of how to retard or accelerate activity really helped. Higher temp and spring water did the trick. I just fed Seymour this evening and I look forward to my first bake and sourdough waffles. However, the bottled spring water is not something I want to continue to use (for lots of reasons), so I’m going to do a controlled water experiment where I put a equal amounts of healthy starter in small jars and feed them with flour and (1) tap water (my water really smells and tastes of chlorine), (2) Brita filtered tap (which seems to significantly reduce the chlorine smell in our water), (3) rested overnight tap, and (4) bottled spring water. You say to simply leave tap water out overnight, but don’t mention boiling it. Some blogs say boil it and leave it out to reduce chlorine. Have you tried both methods? Perhaps I should add that to my water test…
Sounds like a great experiment! As far as I know boiling the water won’t help dissipate chlorine, but I could be wrong about that. Hopefully just straight tap water will work well for you, it might be quite the hassle to have to boil water each week for feedings! Another option might be to buy a big jug and refill it each week at the grocery store — places like Whole Foods have a filtered water tap where you can fill.
I have a feeling your home filtered water will work well, though!
So, the experiment with water resulted in…no difference at all! Straight tap, boiled and rested overnight tap, Brita filtered tap, Poland Spring bottled: four jars, same temperature waters, same flour, same starter, same warm shelf over radiator. All four jars looked and smelled exactly the same over 12 hours, rose the same way, bubbled the same way. I think for the initial starting of the starter, the spring or filtered water is needed (I had failures with my tap water before), but perhaps once the yeast are collected and fed over a week, they can withstand tap. Very interesting experiment. I’m switching to the Brita filter and leaving it out overnight for temperature adjustment and dissipating chlorine. Straight tap comes out quite cold, so the water rest overnight is useful for temp control.
Very interesting! I think you’re right — once a fledgling culture gets hold, the beneficial bacteria/yeast in the culture is able to withstand any other pathogens that might enter. Further, the acidity produced as a byproduct helps stave off any invaders as well.
Thanks for the update on all this!
Re: water temps. I use brita water kept in the fridge. If it’s fridge cold, I nuke a cup of water for 14 seconds on high. If it’s just been filtered straight from tap, I’ll nuke it for 12 seconds. More times than not the final nuked temp is 79o-80oF. Every time.