

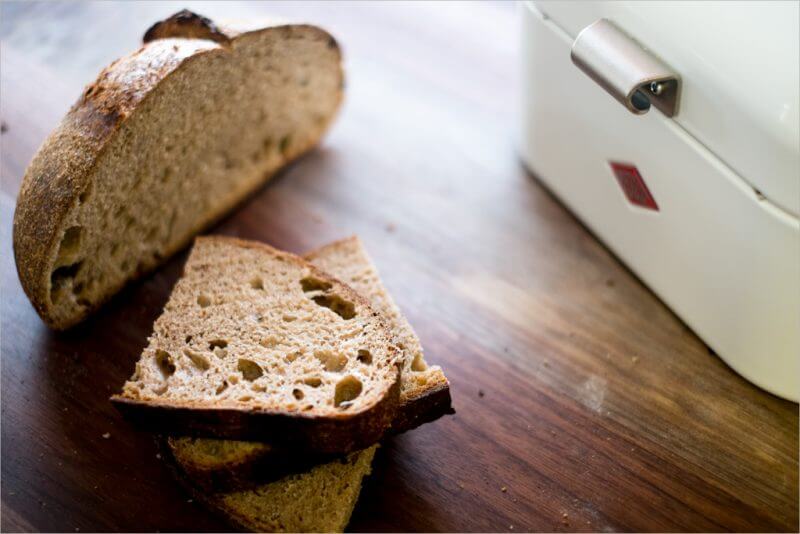
I have to warn you a bit here at the beginning: this whole wheat sourdough is a little more involved than some of my previous loaves. While I think it’s achievable for a beginner baker to experiment with, it may take a few tries before your results are to your liking. However, this should not dissuade you from attempting! Making a whole wheat loaf will provide an exciting flavor profile and added nutrients not customarily found in straight white bread.
I based this recipe on Chad Robertson’s Ode to Bourdon recipe found in his Tartine Nº3, a book dedicated to ancient and whole grains. My take on this has some slight modifications I’ve found to work well for me and my starter; I hope they help you as well.
So, I’ve been practicing this whole wheat sourdough for quite a while now trying to get things working the way I’d like. I usually mix in an experimental batch of bread here and there to keep things exciting and to speed up my learning, but this whole wheat bread has a purpose.
My wife has recently taken up the quest to remove most refined carbs, processed sugars, and other heavily processed foods from her (and subsequently my) diet. We’ve always been healthy eaters, but this is another step further in trying to keep things simple and use the most basic of ingredients possible. Since I make two loaves of bread every two weeks or so, I’ve decided to mix in a whole wheat version with as much whole grains as I can (there is still room for me to add even more whole grains in the future) this turns out not to be as easy as one would think!
Whole wheat sourdough bread is an entirely different beast when it comes to baking. Many of the plastic-bagged-breads you’ll find at the store that is “whole wheat” contain a bunch of additives to get it to rise high and taste sweet. Who wants all that added junk anyways? Let’s make our whole wheat bread.
Maybe I should start with a brief background on whole wheat flour, some challenges to overcome, and how it differs from white flour.
Whole Wheat Flour, What’s the Big Deal?
The word “whole” refers to the fact that all of the grain (bran, germ, and endosperm) is used and nothing is lost in the process of making the flour. This is in contrast to white, refined flours, which contain only the endosperm.
Wikipedia
Whole wheat flour retains the bran and germ, the two most nutritious parts of the wheatberry. These two, while desired for higher nutrition, causes issues when baking bread. Namely, when doing turns and working your dough, they will cut through your developed gluten strands as you’re doing your turns, weakening the loaf and preventing a higher rise during baking. It’s ok though; we can work around this somewhat with a very gentle hand when doing turns and interacting with the dough.
In addition to these troublemakers reducing overall rise, they also absorb much more water than just the endosperm. We’ll have to compensate for this by increasing the overall hydration of the dough.
One more thing to keep in mind: whole wheat flour ferments much faster than white flour. Due to the increased nutrients (bran & germ) your starter will go into overdrive when fed with so many goodies. Keep an eye out during your bulk fermentation step; things can go too far very fast. If you’re using a clear-sided container be on the lookout for those bubbles on the sides and bottom, they are a good indicator of when fermentation is rapidly increasing.
So in review:
- the bran and germ will effectively cut through your developed gluten strands, so be gentle with turns and shaping
- the bran and germ absorb more water than the endosperm; we’ll likely need to increase hydration
- whole wheat flour increases fermentation activity
Let’s get baking this whole wheat sourdough bread!
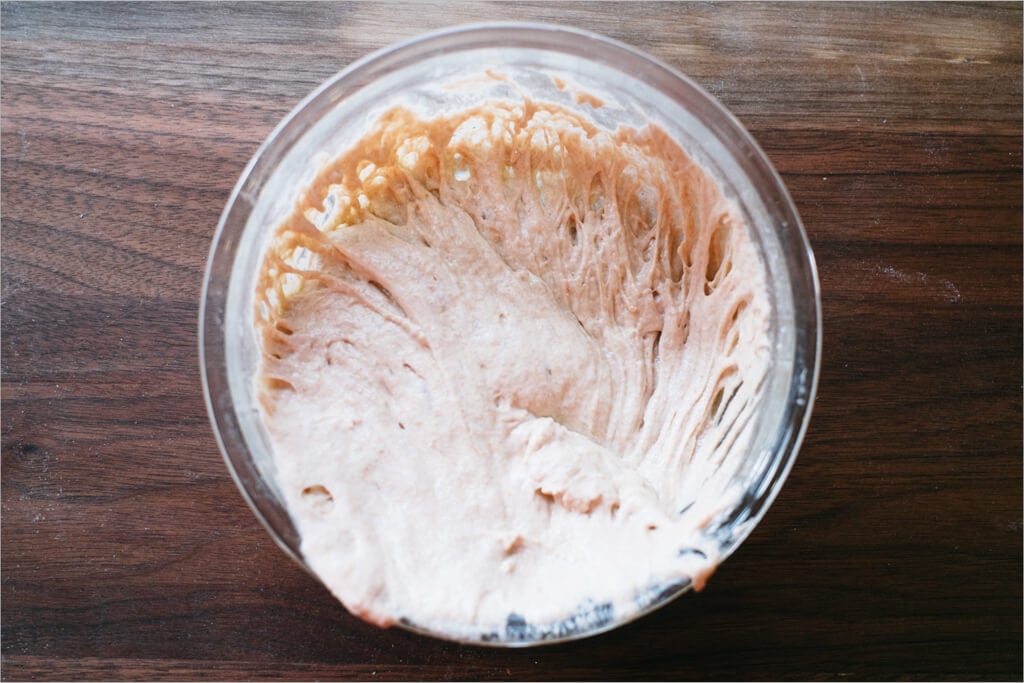
Prepare the levain – 10:00 p.m. (night before)
A slight modification to my regular 100% whole wheat levain, I do a 50/50 mix of all-purpose and whole wheat here to more closely follow Chad’s recommendations in his new book.
| Weight | Ingredient | Baker’s Percentage |
|---|---|---|
| 40g | Mature sourdough starter (100% hydration) | 50% |
| 40g | Whole wheat flour | 50% |
| 40g | All-purpose flour (medium-protein bread flour) | 50% |
| 80g | Water | 100% |
After mixing the above in a glass container, cover and set in a slightly warm area in your kitchen overnight.
Autolyse – 6:45 a.m.
Ingredients:
A few new things I’ve added to this whole wheat sourdough bread that are different from my previous entries: wheat germ and high extraction flour.
Wheat germ is a part of the wheat berry that contains a high amount of essential nutrients (Vitamin E, folate, zinc, etc.) and is an excellent source of added fiber. I’ve experimented with using wheat germ in the past and have had great success with increased fermentation (remember my comment about more nutrients for your yeast to consume?). I honestly think this recipe would do just fine without it if you don’t have it on hand.
If you buy wheat germ in bulk, remember to keep it refrigerated for long periods. It can go rancid much faster than other flour.
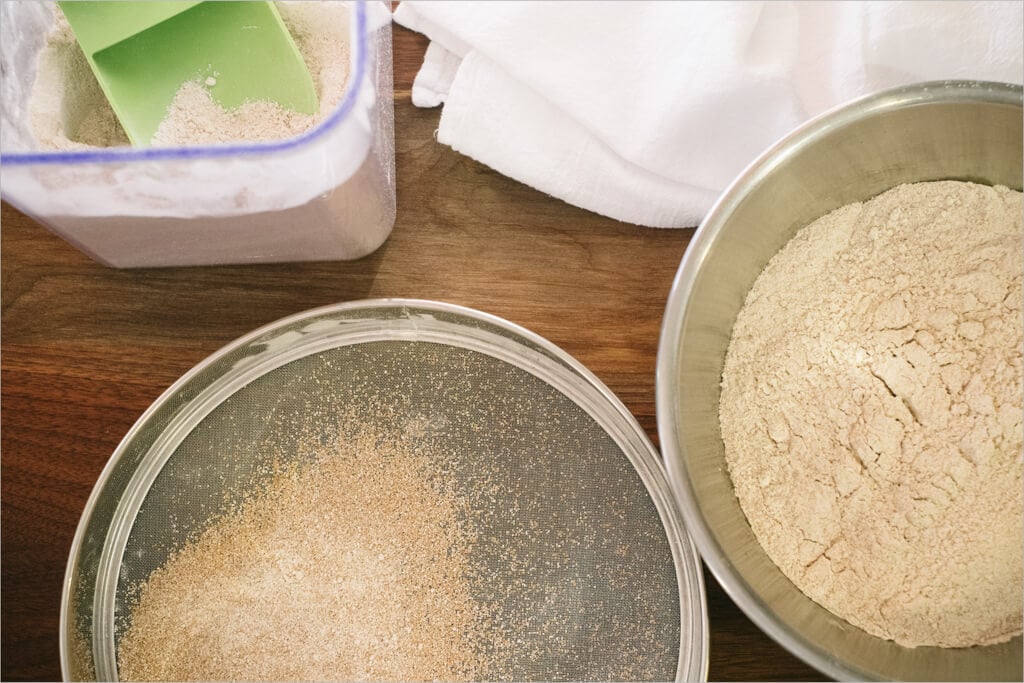
High extraction flour is easy for you to make at home; you only need one piece of equipment: a flour sifter. This sifter is the one I use, but there are many out there. The process for making high extraction flour is easy, pour some of your whole wheat flour on top of the sifter and shake so the fine particles drop down through the mesh while some of the more coarse bran stays on top. In Chad’s book, he doesn’t quite explain why he uses this high extraction flour in all of his recipes, but I can guess that it’s to remove the more intense bran pieces to prevent the severe cutting of any developed gluten.
The astute reader might say to themselves: “hey, you made a big deal about retaining all the essential nutrients in whole wheat flour, now you’re removing all of the bran from this whole wheat sourdough bread!” Well, I suppose that statement does hold some merit. However, keep in mind we are not removing all of the bran, just the huge particles. With this high extraction flour, you’re going to be somewhere between whole wheat (100% of the wheatberry retained) and sifted white flour (only the endosperm). So, in the end, this bread will have significantly more nutrition than 100% white bread, especially since the wheat germ is added as an ingredient.
With that out of the way, let’s see the full ingredient list:
| Weight | Ingredient | Baker’s Percentage |
|---|---|---|
| 200g | Levain | 20% |
| 250g | All-purpose flour (Sangre de Cristo white flour) | 25% |
| 250g | Whole wheat flour (Bob’s Red Mill whole wheat flour) | 25% |
| 500g | High Extraction Bob’s Red Mill whole wheat flour | 50% |
| 50g | Wheat Germ | 5% |
| 19g | Salt | 1.9% |
| 950g | Water | 95% |
In addition to ingredient changes, we’re going to change up the method just a tad. The normal autolyse time of 30-45 minutes is about to be increased on you to a full 2 hours. Increasing the autolyse time helps to soften and add extensibility to your dough, which is very important with whole wheat bread. If you were to do a short autolyse time of, say, 30 minutes, you’d notice the dough would be tough to mix and turn. It’s super elastic, meaning it springs back when you stretch it out. You want it to be more extensible (meaning it stretches out without too much resistance without tearing), so you get a higher rise at bake time. Check out my full guide to the autolyse technique for more on its benefits.
The best way to plan for this extended autolyse is to simply do your mixing for it 2 hours before you know your starter will be ready. For me, I mixed up my flour and water for the autolyse at 6:45 a.m. and it was ready by 8:45 a.m. when my starter is ripe and ready to go.
Two-Hour Autolyse:
- Create your 500g high extraction flour by sifting your whole wheat flour. The flour that falls through the sifter is what you’ll use now, the coarse bran that remains on the top can be reserved and used to coat your bannetons to prevent sticking instead of using white rice flour
- Add 850g water to your mixing bowl
- Add in 500g high extraction flour, 250g white bread flour, 250g whole wheat flour, and 50g wheat germ
- Mix until all the dry flour is incorporated
- Cover with plastic wrap and keep the bowl covered in a warmish place in your kitchen
Again, for such a long autolyse you do not want to add anything except flour and water. And a shot of the dough after the two hour autolyse:
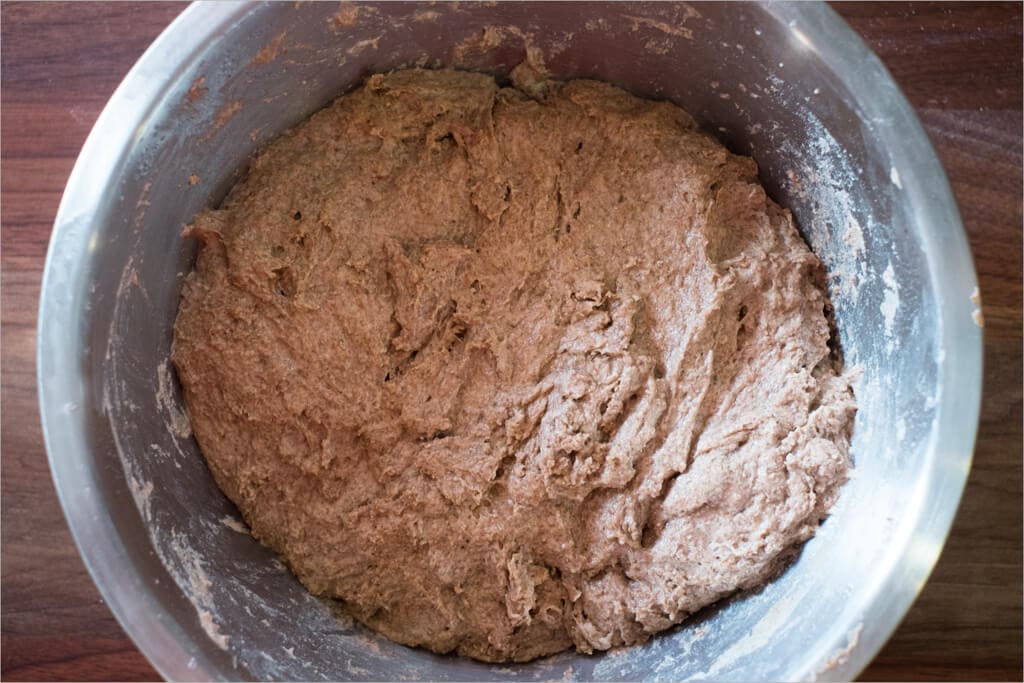
After two hours, unwrap and add:
Dough Mix:
Final dough temperature: 76°F (24°C)
- 200g levain
- 18g sea salt
- Pour on the remaining 100g of water
- Mix with your hand until the mass becomes a bit “sticky” and water is worked in
- Transfer to your bulk fermentation container
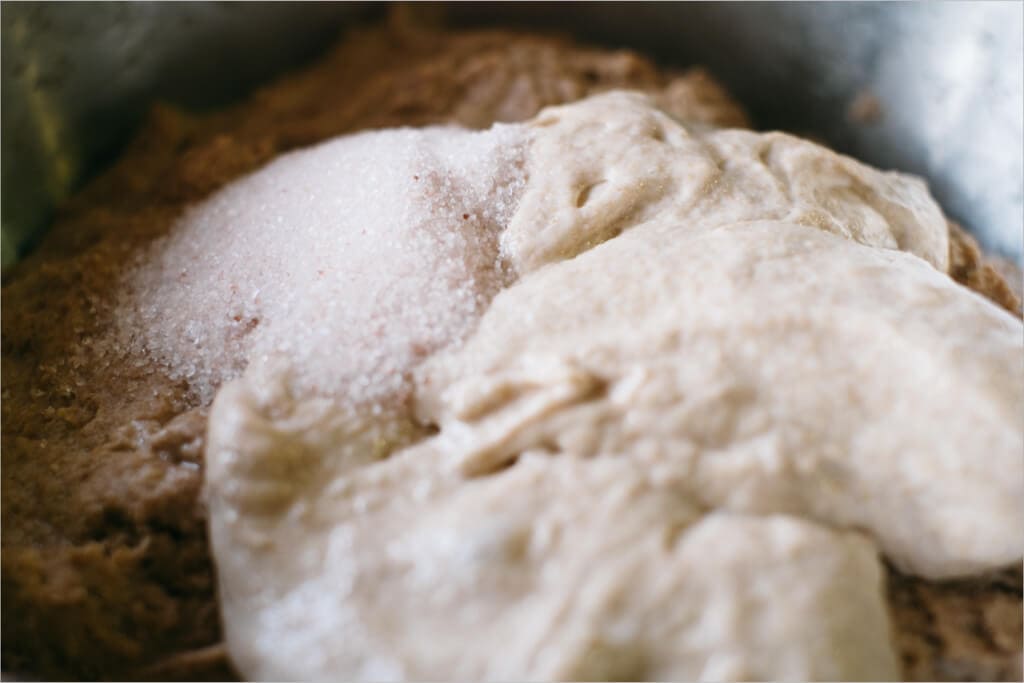
My final dough temperature was a little on the cool side, but not drastically so. This might mean a longer bulk fermentation, but we’ll have to read the dough and adjust.
Bulk Fermentation – 8:45 a.m.
As I mentioned at the beginning of this whole wheat sourdough post, we want to stretch and fold very gently to avoid tearing the dough.
- 9:15 a.m. – Turn Set 1
- 9:45 a.m. – Turn Set 2
- 10:15 a.m. – Turn Set 3
- 10:45 a.m. – Turn Set 4
- 11:15 a.m. – Turn Set 5 (very light set of turns)
- 11:15 a.m. – 1:00 p.m. – Rest on counter untouched
Note that a “set” here is four stretch and folds, one at each cardinal direction. I reach under my dough, pull up, and fold over the other side. I do that four times. For this loaf in step 6, I only did three very light turns, the dough was strong enough, and I did not want to risk tearing.
Here’s a snapshot during the bulk with a couple more folds to go:
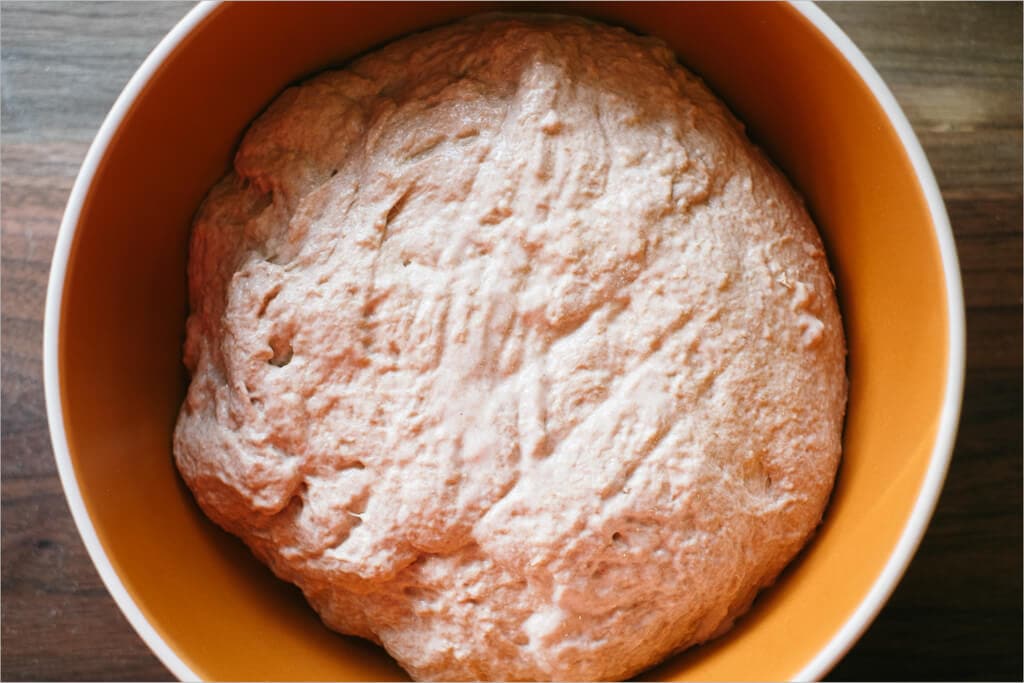
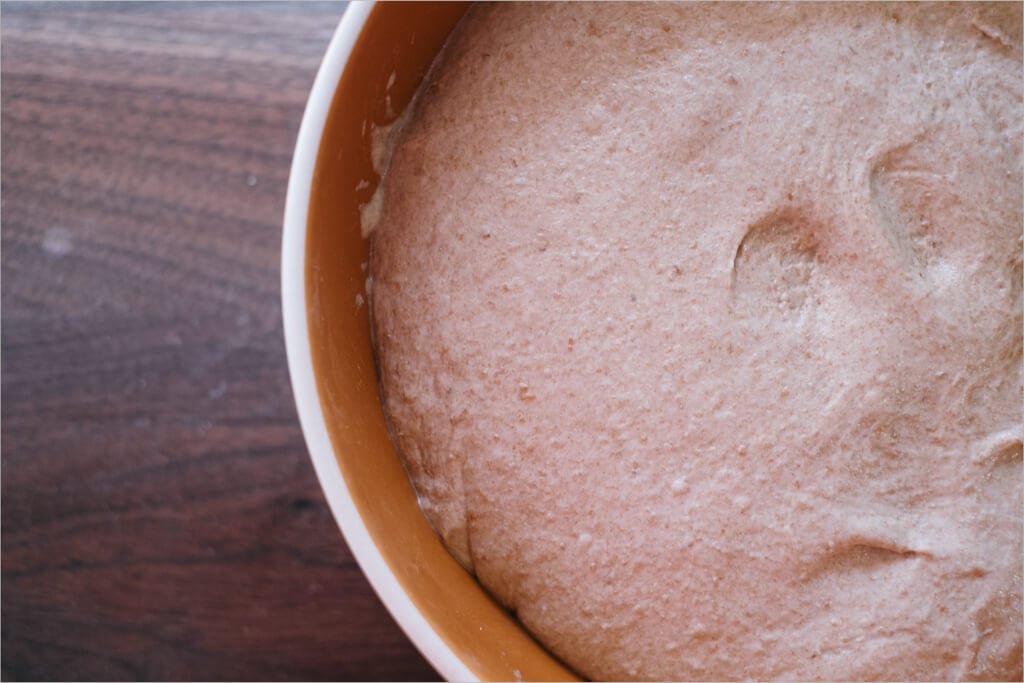
By the end of bulk fermentation, the dough looked a little puffy and jiggly in the bowl. You won’t see as much puff as you would with white bread, but the dough should not look like it’s completely flat in there. You want a little rise in the center, or in other words, it holds its shape more than when you started.
As you can see below there is some life to it:
Pre-shape – 1:10 p.m.
Take the dough out of the container onto your work surface and sprinkle some flour on top before dividing. Divide the mass into two halves and lightly spin each half with your dough knife in one hand and your other hand to create some light tension on the top of the rounds. Let this pre-shape rest for 20 minutes.
Lightly dust your two linen-lined bowls with the bran you’ve reserved when creating your high extraction flour. Alternatively, you can use white rice flour.
Shape – 1:30 p.m.
I decided to do both whole wheat sourdough loaves as boules for this recipe. Creating a boule for me is much more straightforward and I didn’t want to handle the dough too much. I’d recommend you take this course as well.
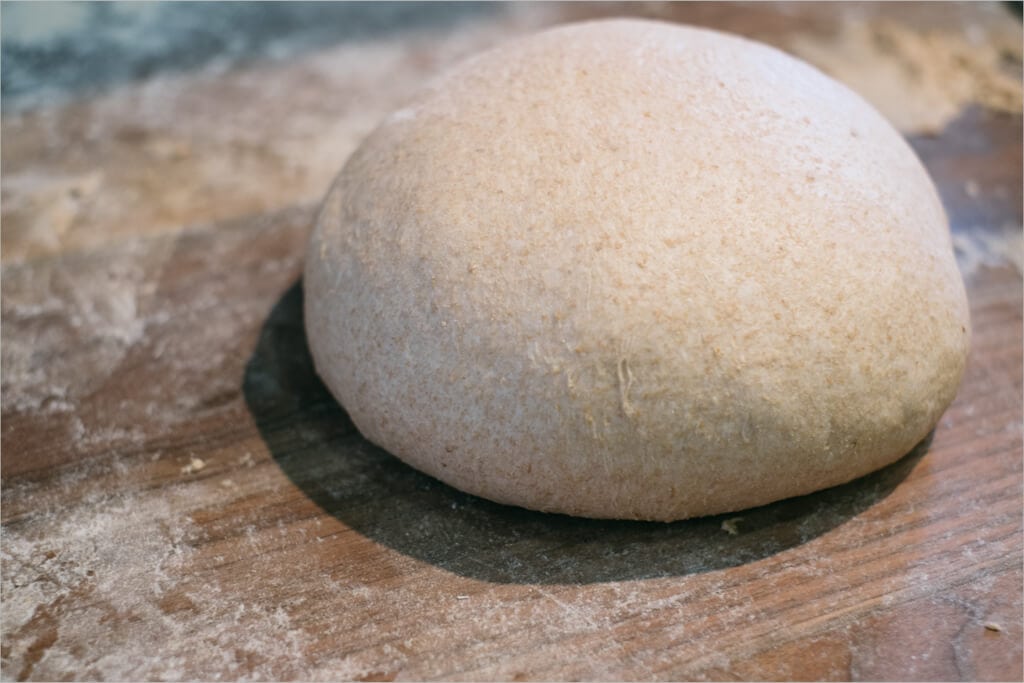
Make sure to create a nice taut surface on your boules to ensure they have that desired oven spring. You don’t want to overwork them and press out all the gasses, but you should have a nice tight skin on the outside. Practice here is key.
Have a look at my guide to shaping a boule for more pictures and instruction.
Proof – 1:45 p.m.
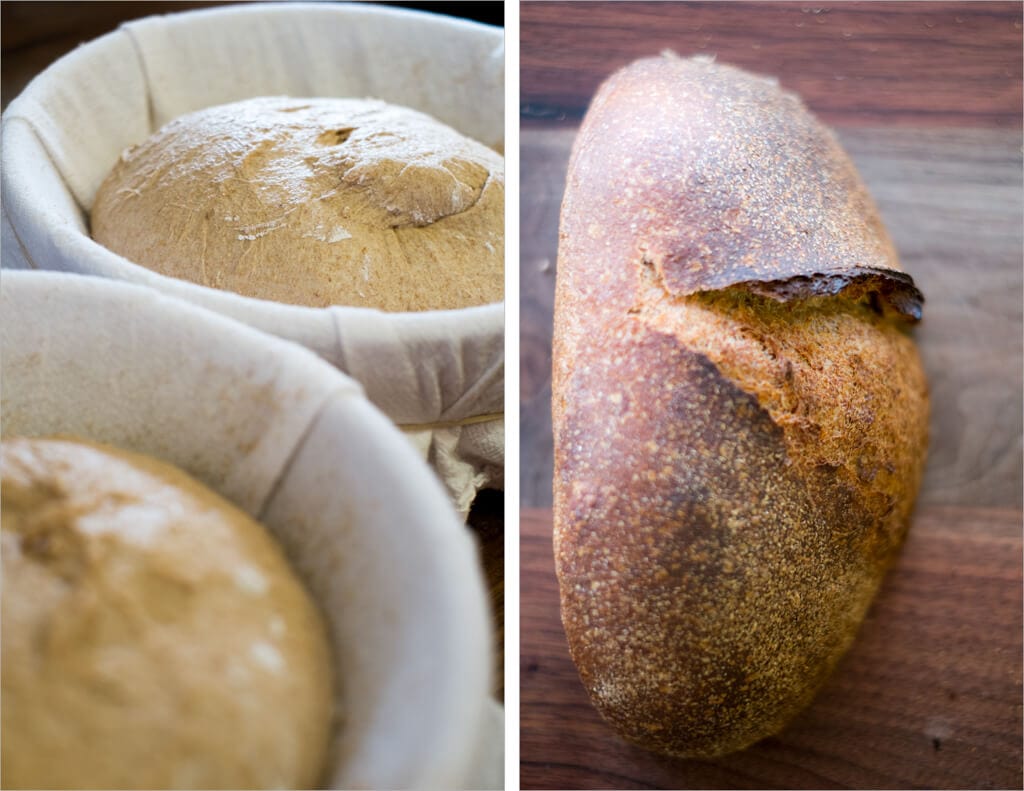
After you’ve shaped them into nice taut boules, gently place them into their bannetons and pop ’em in the fridge for their proof.
Score + Bake – 7:30 p.m. (the SAME day, at night)
So normally, I would have tossed the boules into the fridge and gone about my business, knowing they wouldn’t be ready until the morning. We’ll keep in mind what I said up above that whole wheat flour ferments at a rapid pace. To ensure I did not overproof my dough, I performed the “poke test” several times throughout the day and evening. At about 6:30 p.m. I noticed the loaves looked ready to go; the finger poke sprung back slowly and did not fill in. Bake time!
Preheat your oven to 450°F (230°C). I baked following my guide to baking with a Dutch oven (or combo cooker).
After one hour, take one of your loaves out of the fridge and cut a piece of parchment paper to place on top of the basket containing the dough. Take your peel and then put it on top of those two and quickly invert it so the dough is now resting on the parchment paper and the peel.
When scoring these whole wheat loaves, don’t go too deep! Since there is less rise than with white bread, you want to score lighter than you normally would so you can coax out a bit more rise while still guiding the loaf in the direction you want. On one loaf I did a very light “X” shape and the other my usual crescent slash. Both came out very nice.
Place the dough into the combo cooker, cover with the lid, and bake for 30 minutes at 450°F. After this time, take the lid off the combo cooker and bake for an additional 30 minutes until done. Let the loaves cool on a wire rack until fully set, 1-2 hours (see my guide to storing bread for why).
Conclusion
I was not expecting such a nice rise from these whole wheat sourdough loaves. I mean, really, I was totally shocked and very pleased. I have baked many whole wheat loaves that have come out a little on the flat side and these just made my day. The taste is just sublime! Such a complex flavor with a hint of sourness at the back. I’ve definitely found a whole wheat recipe that’s so good it will be my main go-to recipe for my family’s weekly whole wheat sourdough loaves.
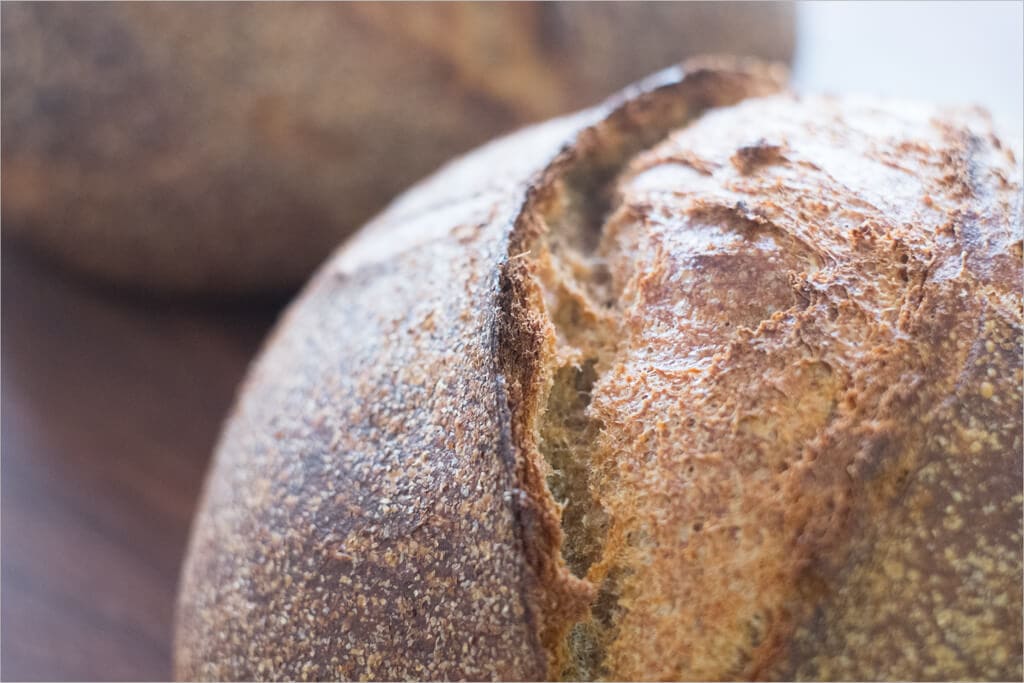
Crust
Nice and thin and very soft. The coloring is just great and the cracks and fissures are much more than I had expected. It’s not overly hard rustic like my country loaf, perfect for sandwiches and cheese plates.
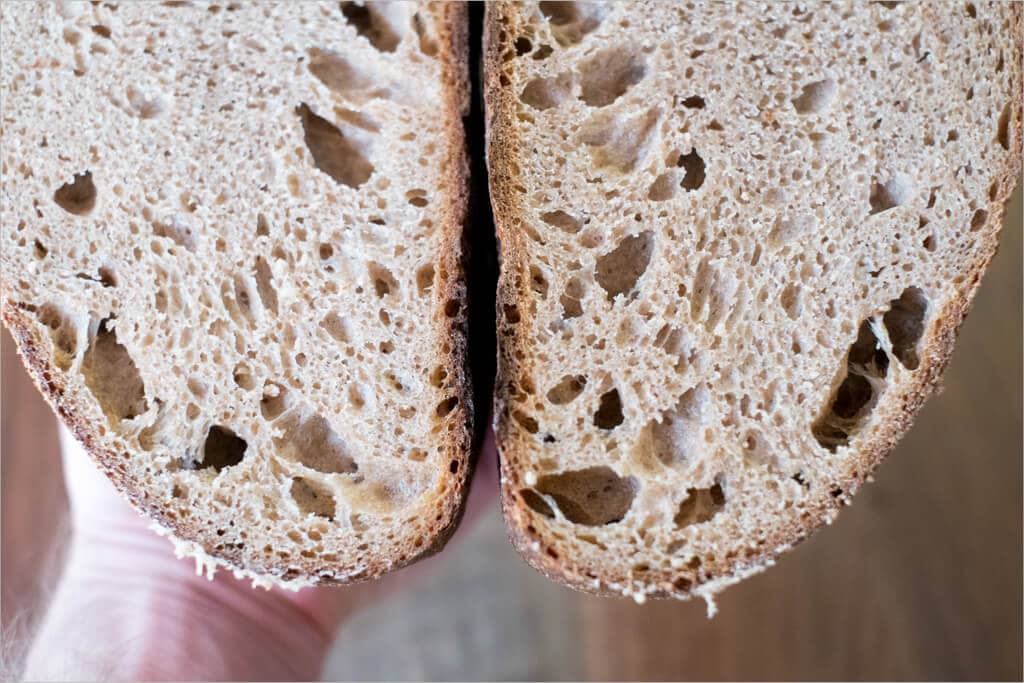
Crumb
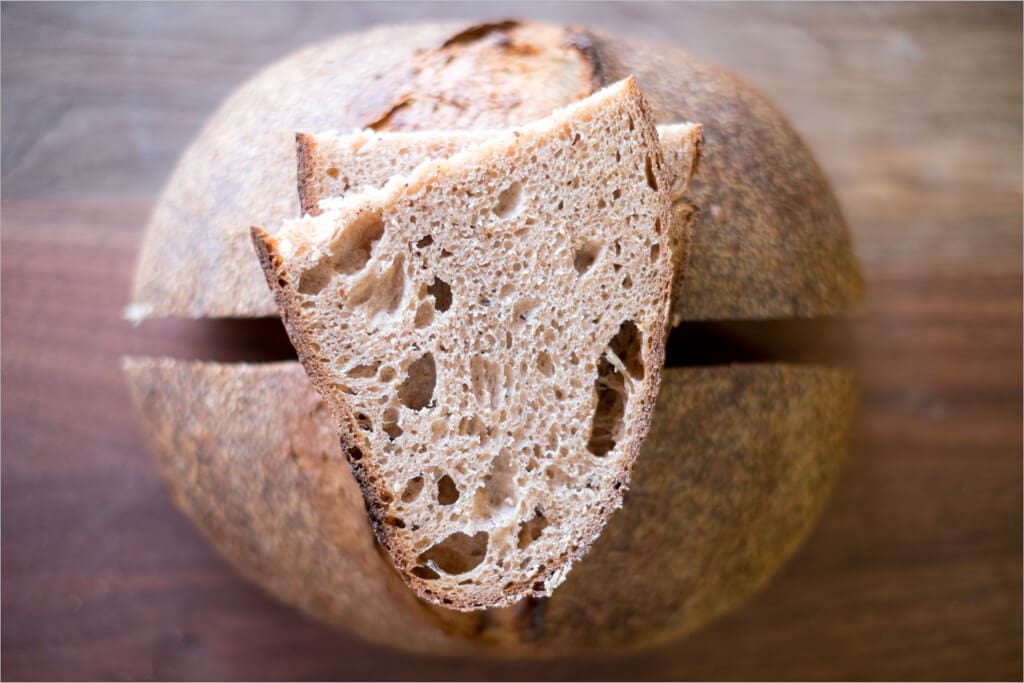
Nice and soft with a good spring to it. The crumb could definitely be lighter, more moist, and a little more open. I’ll continue to work on this in future bakes with better shaping and tweaks to the ingredient list. This crumb is just perfect for sandwiches.
Taste
So tasty guys, really, it’s very good. This is a great departure from my normal country loaves and really mixes things up. The complex taste of the whole wheat brings something to this loaf I’m not used to after baking white bread for so long. Now I’m going to have to bake 4 loaves every two weeks just so I have both options at each meal…
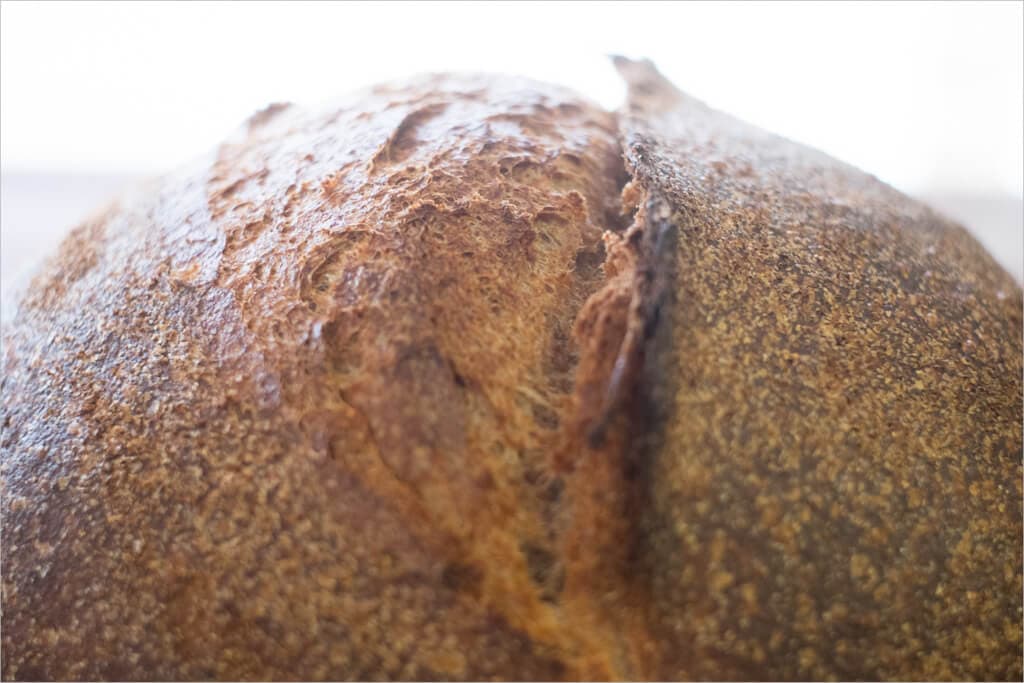
After much practice, I’m finally headed in the right direction with this whole wheat sourdough bread. In future bakes I’ll try to open the crumb up more to obtain a lighter loaf, play with varying autolyse times, and I also would like to try using hard white wheat instead of red wheat to see the effects on flavor and even texture.
Buon appetito!
If you use this recipe, tag @maurizio on Instagram so I can take a look!


42 Comments
Can you use King Arthur's Whole Wheat Flour instead? Know its a bit finer than the Bobs Red Mill one listed for the recipe?
Hi Maurizio,
So, I was about to make this recipe this morning with Bobs Red Mill Stone Ground 100% Whole Wheat flour, and my sifter (#40) only extracted like, 1% of the bran/germ!. (only 6g bran/germ from 600g of flour) And from everything i’ve been reading, It should be extracting in the neighborhood of 10-13% …
Can I still use this flour for this recipe? Or do I need to buy the #60 sifter?
Thanks!
That should be fine. If you can find a #50 sifter it might help next time, too!
Hi Maurizio! I love your recipes!
I’m pretty new at sourdough baking, and have been improving thanks to you.
I also decided to start using healthier ingredients so I got a mockmill to start milling my own flour.
My question is, can I use different types of fresh milled grains to make this recipe, it calls for a little all purpose white flour, and added wheat germ. How can I substitute that with home milled?
Thanks
Yes, you can absolutely do this, Gina!
Hi Maurizio,
I have a bag of T85 flour from Central Milling that I can’t quite figure out what to do with. Could I use it in this recipe in lieu of sifting?
Thanks!
Yes, absolutely! Also, I have many recipes scattered through the site using CM T85, it’s one of my favorite flour varieties to use. Check out my spelt sourdough as an example!
Hi. I have baked 3 other recipes on your site and they were all really good. I made this whole wheat recipe today and I have to say this is a beautiful loaf of bread. I too was surprised at the oven rise. The bread is light and airy and full of flavour. Thank you for all of your recipes. I trust them and rely on them now as a go to for sourdough. I will definitely be contributing to the website. Your site isn’t cluttered with ads and pop ups. I love that. Thank you again. 🍞
So glad to hear you liked this loaf! You’re very welcome, I’m happy to have helped. Thanks for the feedback and the contribution—here’s to many more awesome bakes!
You should update this recipe. I just mixed the levain and its so so so much. 250g more than needed. Your recipes are really great and I’ve gotten a lot of amazing loaves, but this feels like a huge waste. I dont have a receptacle that will hold this much levain haha
Hey, Timothy! I actually updated this recipe early last week with a smaller levain build, it should have come in around 200g (which is what’s called for in the dough mix)!
Oh man, I just refreshed the page and saw that. Guess I’d had the tab open since before the update! Thanks!
Hi Maurizio, I had a lot of leftover Leven from this recipe that wasn’t used. Is that normal? Did I do something wrong? Thank you so much for this post and the site in general. I’ve used it so much in the last few months and just love it!
You didn’t do anything wrong, I used to build my levain in this way to have extra. I’ll update this post to eliminate that extra! You’re very welcome and happy baking!
I just baked this recipe for Thanksgiving. Firstly, it’s delicious, even though my timing ended up being way off. Secondly, the recipe still contains an abundance of extra levain, which I usually keep my starter pretty small. A special note that only half the levain will be used in the recipe (or just editing it to be smaller) would still be useful. Thanks!
Happy to hear that, Peter! Fixing the recipe now 🙂 Happy holidays!
Hi Maurizio this looks fabulous!! I’m so encouraged at seeing a whole wheat sourdough with such a nice rise and crumb. I’m a beginner (but a bit of science nerd) and have tried your Beginner’s Sourdough and Simple Weekday Sourdough, and they turned out great but not perfect and I think it’s partly because in place of American whole wheat flour, I use the Indian whole wheat flour (atta) since I have a giant bag of it. It is stone milled as a whole grain (no bran-germ separation at any point) and much finer; also the stone milling generates a higher temperature than roller milling which may ruin some of the starches. It’s not supposed to be a bread flour, but a few internet bakers say it works great for sourdough. I’m wondering if you have tried it, or plan to try it sometime? (I will happily send you a bag 😊) Or do you have ideas on what changes I can make to use it in place of American whole wheat flour? Thanks!!!
Hey, Ashima! I’m familiar with atta and have heard other bakers have used it successfully in baking bread. I’ve had some here in the past and we usually make roti with it — I’ll have to try baking with it! It’s a surprisingly fine flour, that’s for sure. I’d say give it a try, you could mix 50% white flour with 50% atta to give it some strength and help keep a light loaf, then slowly work up the atta percentage over time.
Thanks!! Keeping an eye out for atta sourdough!!
Hi Maurizio, I’m a beginner and am very excited to start using my now ready starter (created using your invaluable guide!)
I am a little confused by the timings of this recipe: Mix The Flour And Water & Autolyse is at 8:30 A.M which you write needs to be 2 hours, however this is followed with Bulk Fermentation at 8:45 A.M. Should the mixing of the levain and bulk fermenation be occurring at 10:30am? And then from when should the sets of turns commence? Many thanks for your help 🙂
Sorry about the confusion! Start mixing the autolyse at 645am, then do the rest of the mix at 845am once your levain is ready. I’ve updated the post!
Hi Maurizio!
I’ve made your beginner sourdough 3 times now with great success! Between those 3 bakes I’ve relocated from New York to Hong Kong. The bread flours available here are either refined ones from Japan/Korea (and I suspect lower in gluten?) and wholewheat or malthouse varieties from the UK. How would you modify whole wheat sourdough ratios with these ingredients? Is there a reason why you use “white bread flour + ww flour” instead of “ww bread flour + ap flour”? thank you!
Hi Maurizio!
Your blog has been my saving grace during my personal bread baking renaissance, thank you for all the hard work and dedication you put into it! Quick question, I was wondering if you’d ever experimented with re-milling the extracted large pieces of bran (from the “high extraction” method you mentioned) and then re-incorporating them into the bread? I see on your 100% WW sourdough recipe you reconstitute it with water and add it back in, but was wondering if the bran was simply milled finer, would it still cut into those nice gluten strands we’re always trying to cultivate? Thanks Again!
Claire — really glad to hear that! That’s a great idea and I have seen it done before but I’ve not personally done this. The mill I have mills my flour extremely fine so I’m pretty happy with the results, but I would imagine re-milling would help make the flour even finer with less cutting action. It would be a fun experiment to do!
am i correct that your hydration here is much higher than Chad’s Ode to Bourdon in Tartine No 3? He lists 85% hydration and you’re going all the way up to 95%. or are you measuring it differently some how?
Yes, I’m definitely pushing the hydration in this recipe! Lots of whole grains and the ones I used for this were able to take on quite a bit of water. If 95% seems too high for your flour dial it back and add it in as you notice it’s able to handle it. You can always add more water, hard to remove it 🙂
Ciao Maurizio, I have a question regarding quantities. You might have addressed this somewhere, but I just can’t find it. My question is, if your recipe calls for 200g levain, why do you mix 200g of each flour plus 200g water with your 50g starter? Wouldn’t it yield more than 200g? And what do you do with the rest? discard it?
Yes, that’s correct. I actually no longer do this — when I make a levain I make only what’s required for the recipe (plus a little extra just in case). If you look at more of my recent recipes you’ll see the levain build is quite a bit smaller. One reason to make extra like this is to give yourself a little buffer if you don’t get to using your levain at the right time as there will be a little extra food for your starter to consume.
Feel free to reduce the levain build in this recipe to suit!
Hi Mauricio – thanks as always for your great posts! My schedule for breadbaking is to prepare the levain and autolyze right before bed and then start the bulk fermentation early the next morning so that I can have the loaves proofing in the fridge by noon or so when I go to work. Do you have any suggestions on how to adapt to this timetable? Is it okay to autolyze for this long, and if it’s cool (55-60ish degrees), is it okay to let the levain build that long? Thanks!
Benjamin — you’re welcome! That schedule definitely sounds good, just make sure the percentage of mature starter you use to make your levain is around 20% or so, that should get you 10-12 hours of a fermentation window before it’ll be ready to use (depending on the flour choice you use). You want the levain to be expanded and bubbly when you are about to use it, but you don’t want it to have significantly fallen and become extremely sour smelling. It should still smell slightly sweet with hints of sourness.
I hope that helps!
Such an awesome blog, I'm totally inspired! I have a similar question as Benjamin. If we do the autolyse the night before, can we just put it in the fridge? Would there be too much fermentation? I also see that in your 95% whole wheat recipe there is a six hour autolyse, that's a night of sleep so might be a better two day recipe?
It's so much fun to dive into all of this — thank you so much!!!
You could do this! There's no fermentation during the autolyse step usually since I don't usually include the levain (preferment) in the dough during this step. If it is added, then I would not do it overnight in the fridge.
Instead, I'd just skip the autolyse if you're trying to save time! Here's more about why:
https://slimlife.fit/guides/how-to-autolyse/%3C/a%3E%3C/p%3E
Great recipe. I think I’ve made it 4 times now. The first time it was pretty good, but with an undercurrent of bitterness. Enough so that I was thinking I should just stick with the country loaf. It was especially disappointing since I was using some fancy organic stuff in a cloth bag. But then I read that bitterness indicates the flour is old. I found out there is a small flour mill not far from here that is very popular with artisanal bakers. Bought a small bag of whole wheat from them, and it was completely different. No bitterness at all.
Megan,
Wow 4 times, that’s great practice. You’re right, you can really pull out some bitterness with so much whole wheat, you do have to be careful. I’ve also heard that stale flour can lend bitterness to your result but haven’t ever experienced it — glad to hear this could really be the cause!
I’ve been using some locally milled white flour and I’ve experienced much better bread with it, I really think local is the way to go if you’re lucky enough to have a mill nearby.
Out of curiosity, did you do an overnight autolyse with this bread? I’m not sure if you’ve seen my newer post on 95% whole wheat, but I’ve found an overnight autolyse makes the result even sweeter.
Thanks for sharing and happy baking!
Great bake, as usual! Regarding the levain mixing comment, I read “somewhere” that if you beat the levain, actually with a mixer, with water & a small amount of the flour it opens the crumb. Anyone ever heard of this? Also, I noticed that you replaced the white whole wheat with white flour. Any particular reason? And, have you ever tried sifting all of your wheat flour? Just wondering what that would be like 🙂
ml
Thank ya!
I’ve never read that comment about mixing the levain in with a mixer, an interesting concept. I definitely try to do as much as I can with just my hands, but this might be something worth trying out at least once.
The reason I didn’t use white whole wheat is simply because I didn’t have any on hand. I just found that you can actually get King Arthur White Whole Wheat at Whole Foods, so I’ll pick some up and try with this flour next time.
I have not tried sifting all my whole wheat, again, another good suggestion to try out! With even more high extraction flour I would think the crumb would open up even more with the trade off being less nutrients in the final loaf. Maybe using the white whole wheat adds enough nutrients to offset the loss there, just a thought 🙂
In all your recipes you add your leaven to a large mixing bowl and then you pour in H2O and mix with your hands until it is completely dissolved. That definitely helps to evenly distribute microorganisms later in the dough.
Maybe in this last case you leave a little bit more reserved water (150ml?) that’s added after autolyse.
Amazing blog btw.
Exactly what I was thinking as well — that’s a great suggestion. I’m going to give it a shot next time I bake this bread.
Thanks, really glad you’re enjoying my write-ups!
You want to dissolve the levain in water to ensure the culture is more evenly dispersed throughout your dough when you do mixing. This way you do not have a bunch of levain never mixed in with other parts of the dough!
The crumb is lighter and more evenly open if you dissolve levain in water.
That is a great suggestion, thanks! I assume you mean to dissolve the levain with the reserved water that’s added after autolyse. I’ll give that a shot the next pass at this bread.
Thanks for the comments! I was also very surprised at the quick proof time, good thing I was checking. I’m definitely going to play with this some more and try to let it go just a bit longer… I’m hoping that will open things up a bit more. Do you have any other findings with this loaf? Anything else besides the rye starter helping things out?
Thanks for the correction on the bake times, that would lead to a seriously dark loaf 🙂
I’m going to give the sesame wheat loaf a go here very soon. I’ve done the recipe in the first Tartine book and it came out very good. I’m eager to give this one a shot.
Thanks again and happy baking!