


Spelt found its way into my baking rotation ages ago and has since become a regular in many of my recipes. It has an unmistakable flavor that permeates and pervades a loaf of bread, much like warming butter on the stove seems to occupy a house all at once. And while I’ve been keen on the nutritious grain for years, I’ve never ventured down the path of a 100% whole grain spelt pan loaf. Let’s change that.
Keeping with my recent predisposition towards baking in pans—see my recent pain de mie and my barley pan loaf—I just knew spelt would lend itself nicely to the confines of a rectangular pan, especially since I like to push pan loaves to high hydration. So my first trials with this recipe were structured around increasing the water at each attempt, but after several iterations, I found myself preferring previous results with lower hydrations: more doesn’t always mean better.
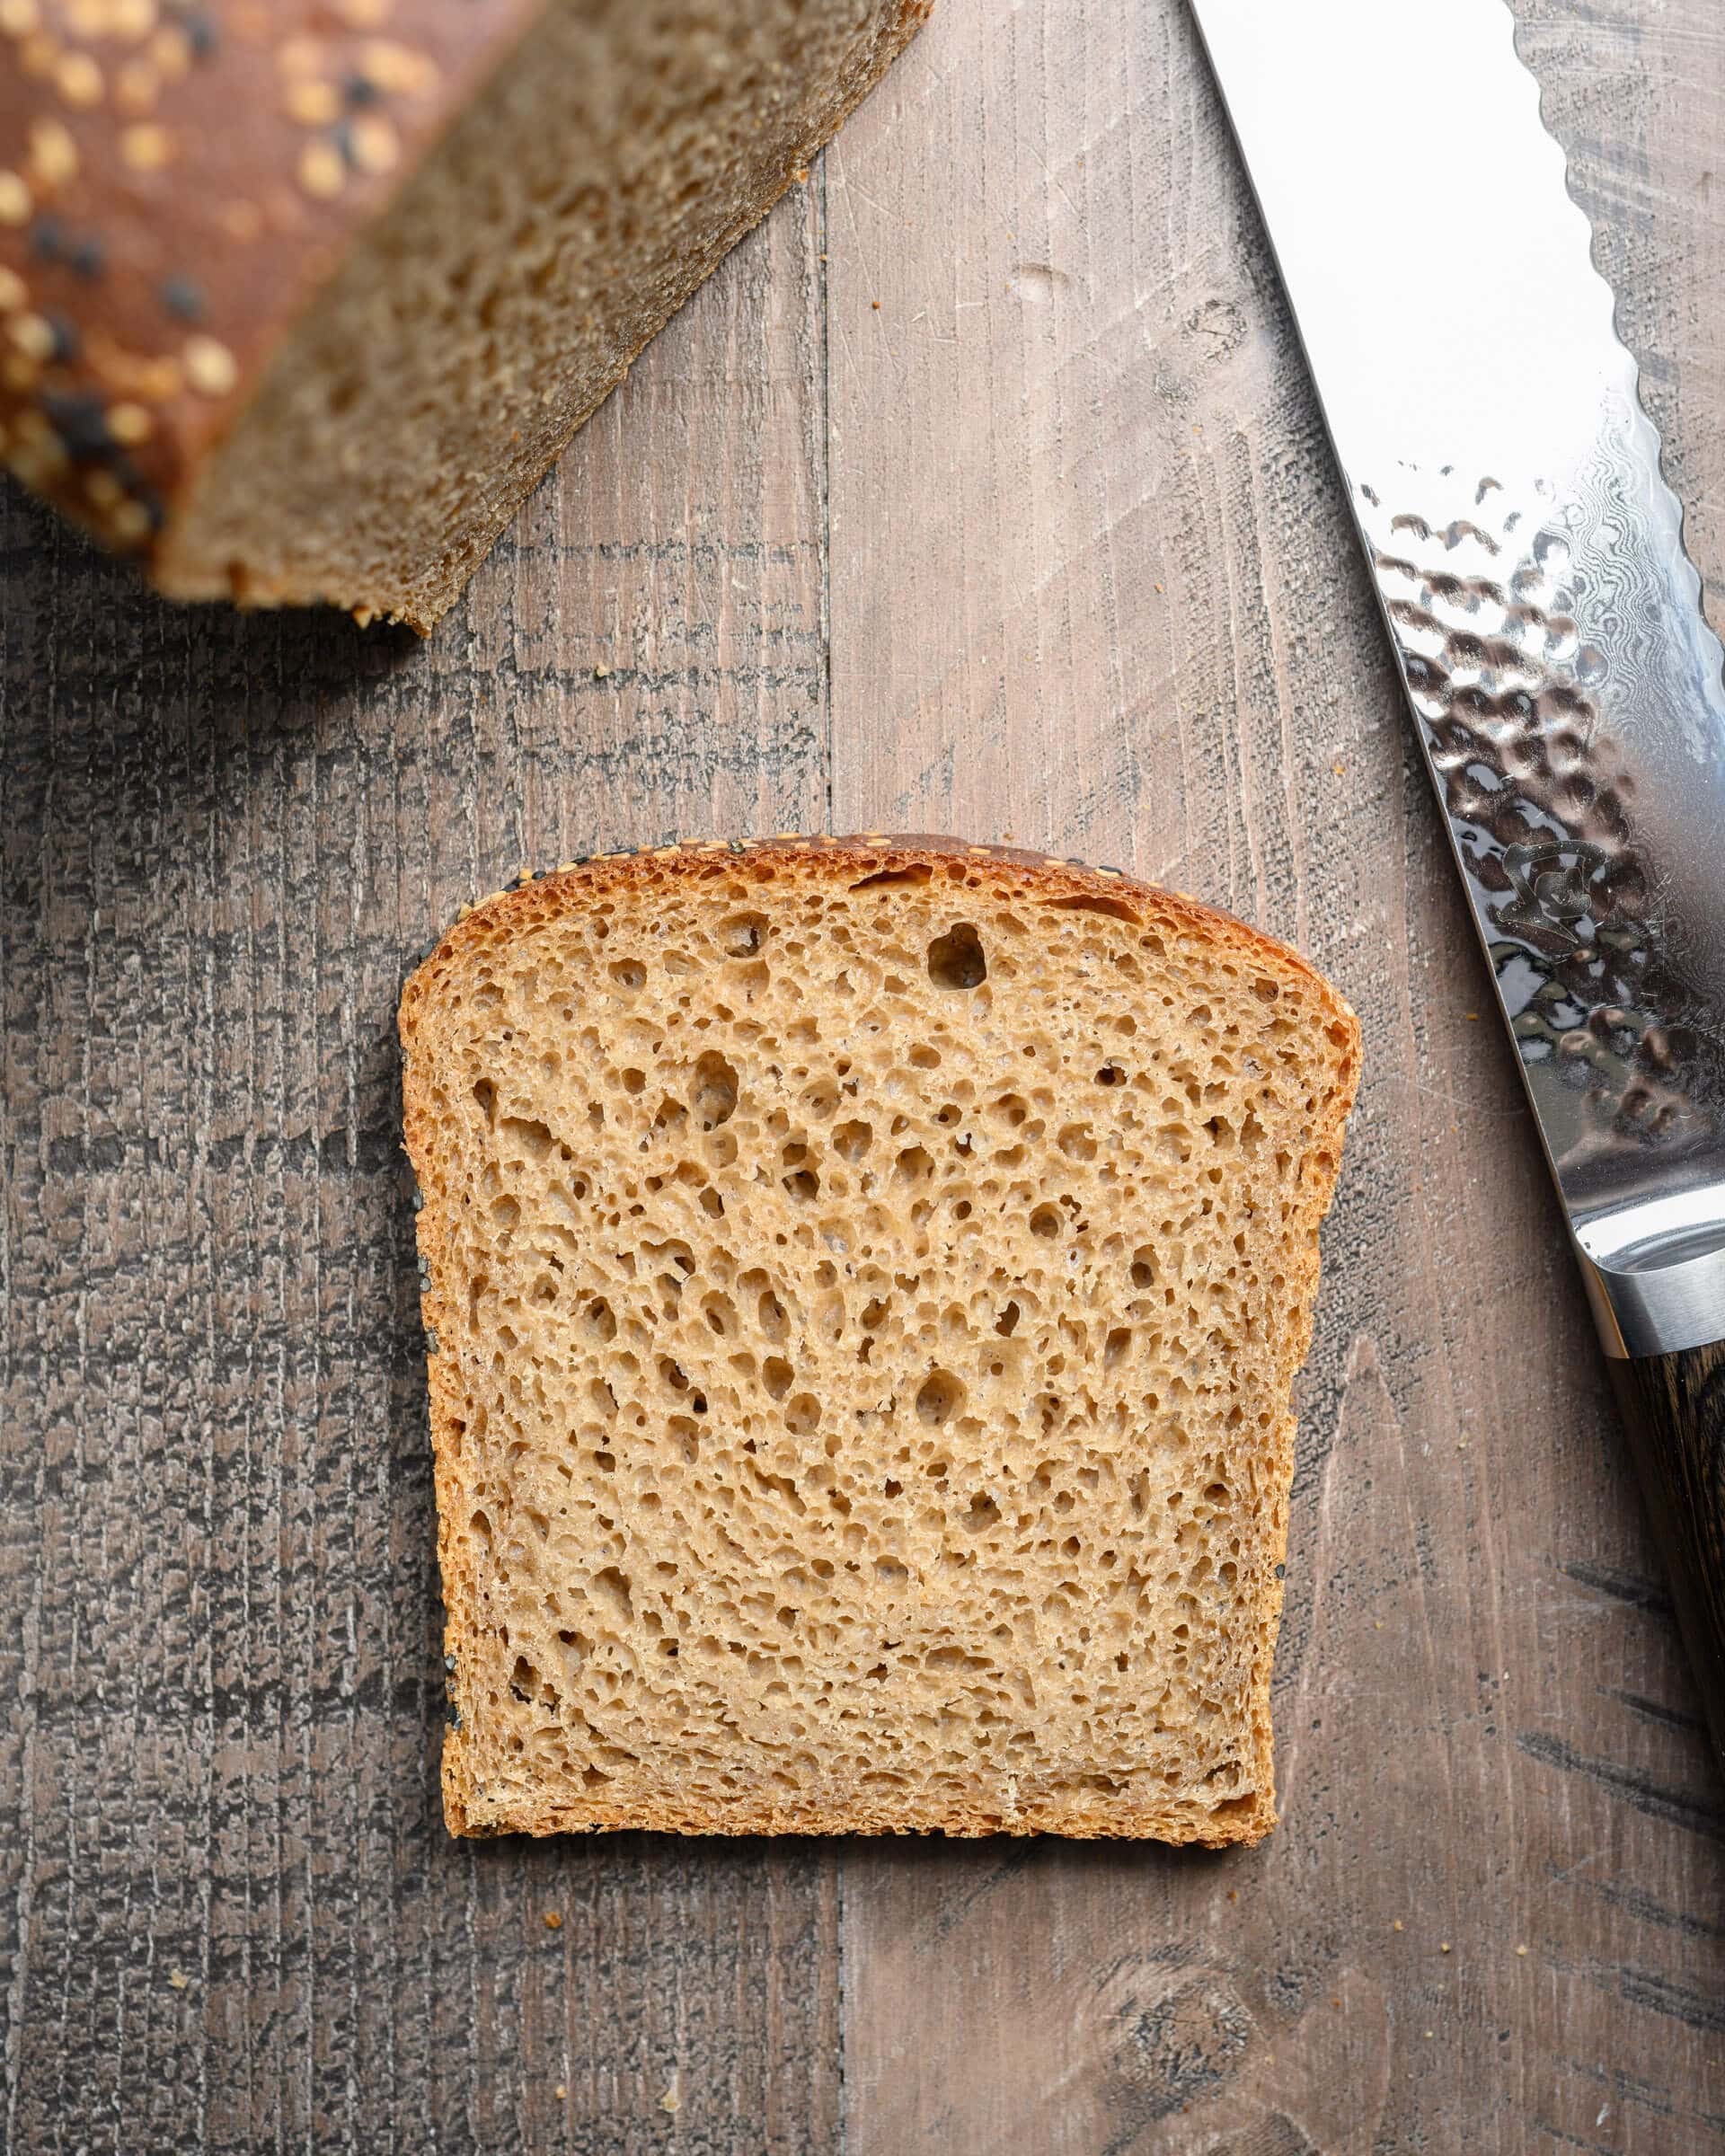
As you can see in the image above, the interior on this loaf with hydration at 80% resulted in a crumb that was very tender and custard-like. While this is typically what I’m after with a hearth loaf, I found the texture to be a little off even if the flavor was quite good. In later tests, I reduced the hydration down from 80% to 75% (stopping at each digit along the way), finally achieving a loaf that was fluffier, lighter, and more delicate—just the result I had envisioned. The difference in results is subtle but noticeable.
As always, be sure to adjust the hydration of this recipe to suit your flour, starting low and working up.
Fiddling with the hydration in any recipe is always a back-and-forth play. There’s a fine line between just hydrated enough, and gone too far. And while this recipe clocks in at 75% hydration, keep in mind there is also honey and olive oil added to the dough, two more forms of liquid. Be sure to adjust the hydration of this recipe to suit your flour, perhaps starting at 70% hydration if you’re working with new flour.
So why 100% spelt flour? A recipe such as this has been mulling around in my head for a while, but additional motivation came in the form of several emails I received on the nutritional benefits of spelt flour when used in a whole grain sourdough bread.
Spelt and a Low FODMAP Diet
Certain foods high in FODMAPs (fermentable oligosaccharides, disaccharides, monosaccharides, and polyols), which are carbohydrates, can be responsible for discomfort in those who have trouble digesting/absorbing them in their small intestine, particularly those who have IBS or other gastrointestinal disorders. While I don’t have IBS or suffer from a food-based allergy or illness, I can sympathize with those in that situation.
Traditional sourdough bread made with whole grain spelt flour can classify as a low FODMAP food, conforming to the diet. This isn’t to say spelt itself is low FODMAP, but when the grain is used in a traditional sourdough bread (with is lengthy natural fermentation), it is better tolerated. This is promising for those who strictly adhere to a low FODMAP diet, potentially allowing them to eat bread—something on the do-not-eat list—in moderation.
And in addition, spelt has higher levels of protein than modern wheat, is a good source of dietary fiber, vitamins, and minerals. Plus, it just tastes great—when you take a bit of this bread your body just knows it’s healthy.
Whole Grain Spelt Pan Loaf Recipe
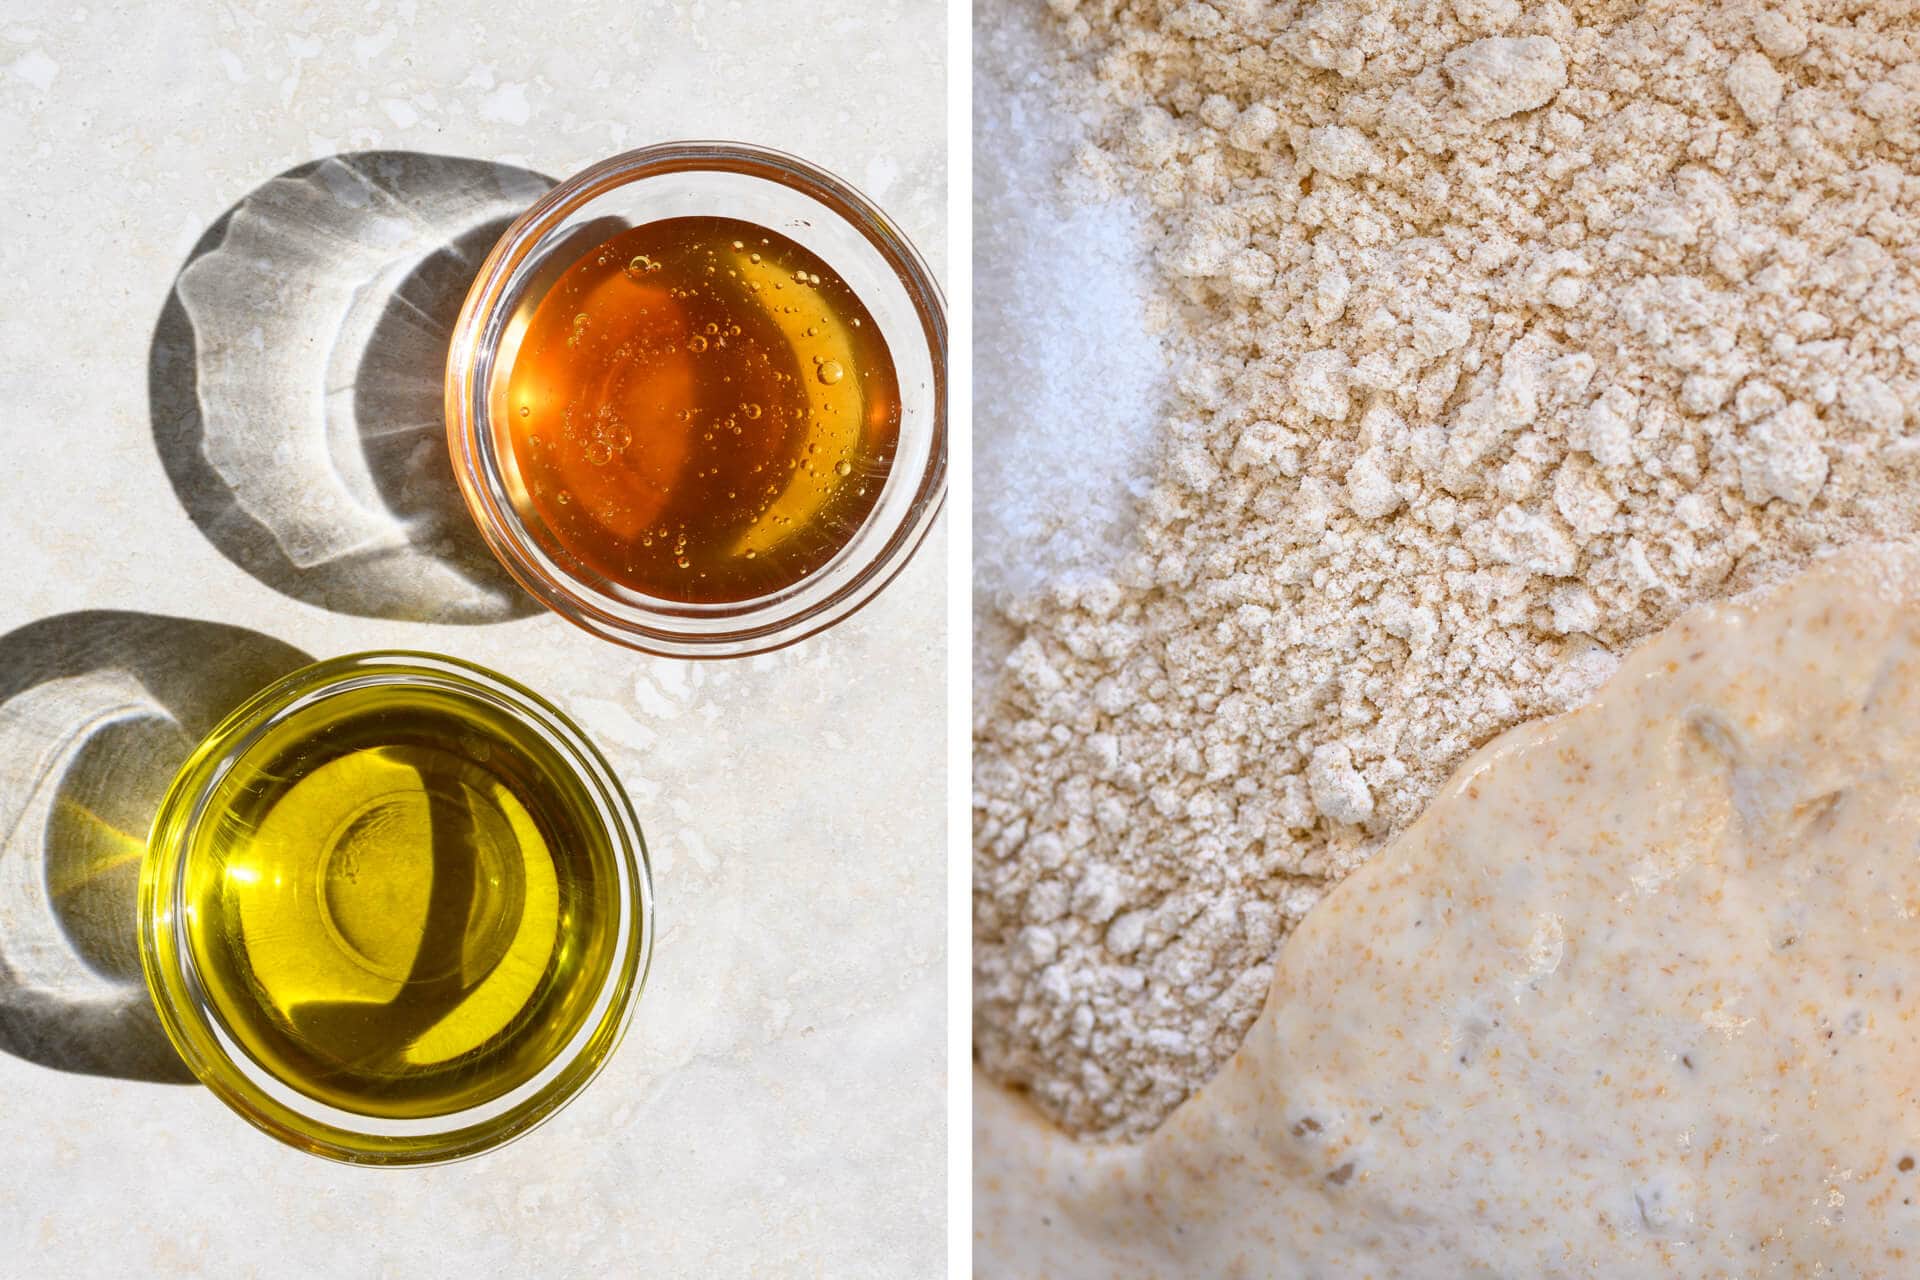
The quantity of extra virgin olive oil and honey in this recipe is right in balance: you will taste a hint of sweetness from the honey and a slightly fruity flavor and a soft texture from the olive oil. I toyed with lower percentages of each (little impact) and higher percentages (too overpowering) and settled on just the right amount. Additionally, I increased the salt percentage from my typical flat 2% to 2.2% to help draw out more of the whole-grain flavor.
Note that honey is not a low FODMAP food, but the honey used in this recipe can easily be replaced, 1-for-1, by pure maple syrup.
Depending on the size of your baking pan, you might need to adjust the total weight of this dough, or split it into two loaves. See my guide to shaping a pan loaf for various pan sizes and dough weights.
I used my 8.85″ x 4.7″ x 4.7″ bread pan for this bake.
Vitals
| Total Dough Weight | 1,400 grams |
| Pre-fermented Flour | 5.50% |
| Hydration | 75% |
| Yield | One 1,400 g pan loaf |
Total Formula
| Weight | Ingredient | Baker’s Percentage |
|---|---|---|
| 745g | Whole grain spelt flour (Central Milling Whole Spelt Flour) | 100.00% |
| 558g | Water | 75.00% |
| 37g | Honey (substitute for pure maple syrup for a low FODMAP option) | 5.00% |
| 37g | Extra virgin olive oil | 5.00% |
| 16g | Salt | 2.20% |
| 6g | Sourdough starter (100% hydration) | 0.83% |
Levain Build
Note that only a small amount of sourdough starter is needed for this recipe. Overnight, this small bit of starter, fresh flour, and water, grows to an 80g levain mixed into the final dough. See my guide to the differences between a levain and sourdough starter for more information.
| Weight | Ingredient | Baker’s Percentage |
|---|---|---|
| 6g | Ripe sourdough starter (100% hydration) | 15.00% |
| 41g | Whole grain spelt flour (Central Milling Whole Spelt Flour) | 100.00% |
| 41g | Water | 100.00% |
Dough Formula
The target final dough temperature (FDT) is 78°F (25°C).
Note that the baker’s percentages listed below are with respect to the final dough ingredients and do not take into account the levain.
| Weight | Ingredient |
|---|---|
| 704g | Whole grain spelt flour (Central Milling Whole Spelt Flour) |
| 518g | Water |
| 37g | Honey (substitute for pure maple syrup for a low FODMAP option) |
| 37g | Extra virgin olive oil |
| 16g | Salt |
| 88g | Ripe liquid levain (see above) |
Method
1. Liquid Levain – Night before mixing, 9:00 p.m.
Add the called for mature sourdough starter, water, and flour listed in the Levain Build section above to a clean jar. Mix well and cover overnight.
2. Mix – 9:00 a.m.
When your levain is mature and ready to be used, add the flour, levain, honey, extra virgin olive oil, salt, and water to a mixing bowl. Usually, I hold back enrichments (EVOO, honey) from a dough until after strengthening (read why, here), but this dough came together without issue when everything was added at the onset. Using your hands, mix everything until it comes together into a shaggy mass. Continue to stretch and fold the dough over itself in the bowl to build strength, it will transform from sticky and shaggy to smooth and elastic over the course of 4-5 minutes.
Transfer the dough to a container for bulk fermentation and cover.
3. Bulk Fermentation – 9:15 a.m. to 12:45 p.m.
During the three and a half hour bulk fermentation, give the dough four sets of stretch and folds. The first set will be 15 minutes after the start of bulk fermentation, then every 30 minutes thereafter. Let the dough rest after the last set of stretch and folds for the remainder of bulk fermentation.
4. Preshape – 12:45 p.m.
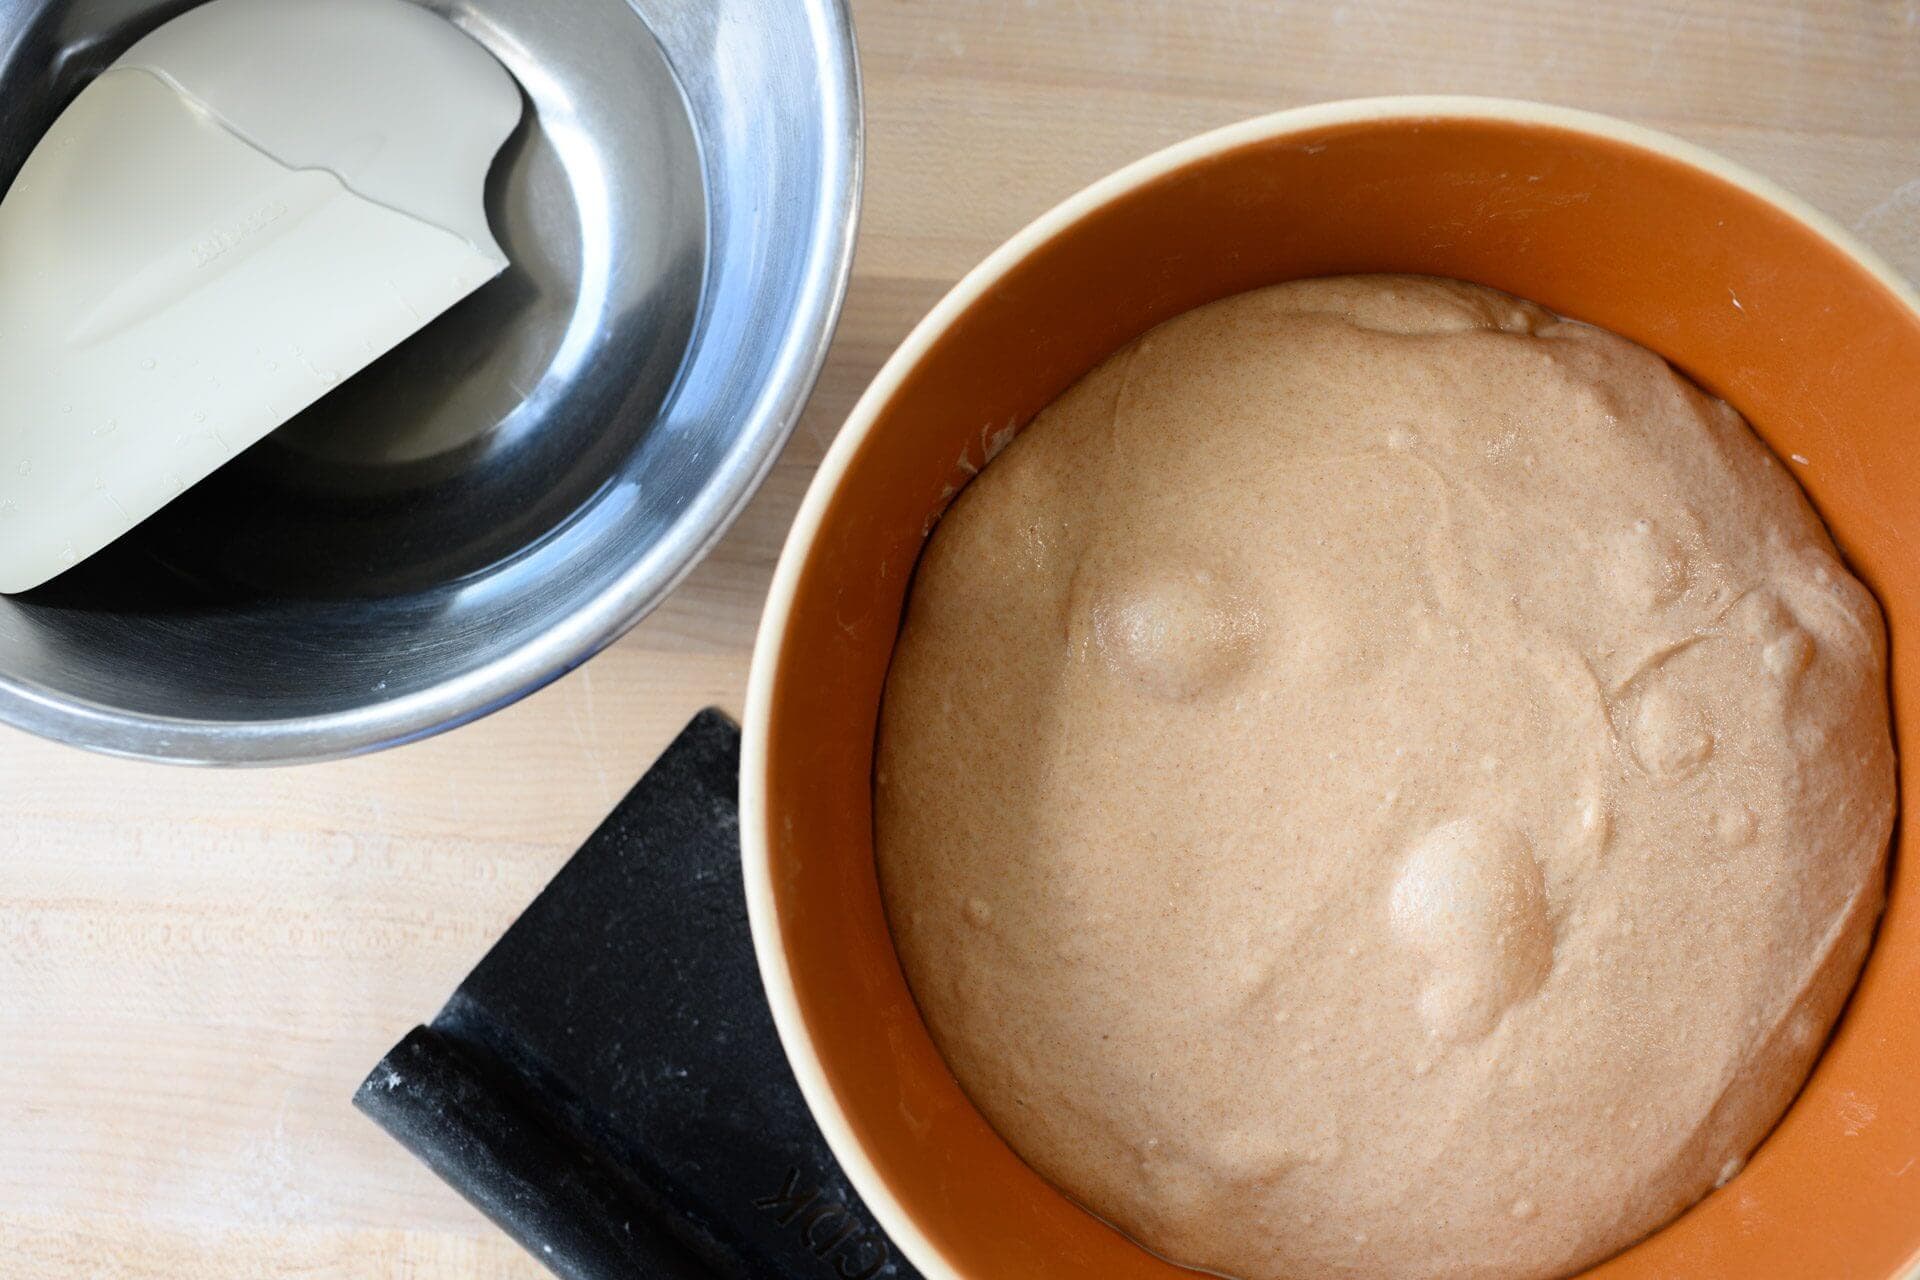
I find it easier to preshape this dough using water on the bench and hand instead of flour. Fill a bowl with a little water and place it near your work surface. Gently scrape out your dough from the bulk container onto your dry counter. Using a wet hand and bench knife, preshape the amorphous blob into a very taut round.
Be sure to preshape this dough rather tight to give it extra strength and to prevent excessive spreading on the counter.
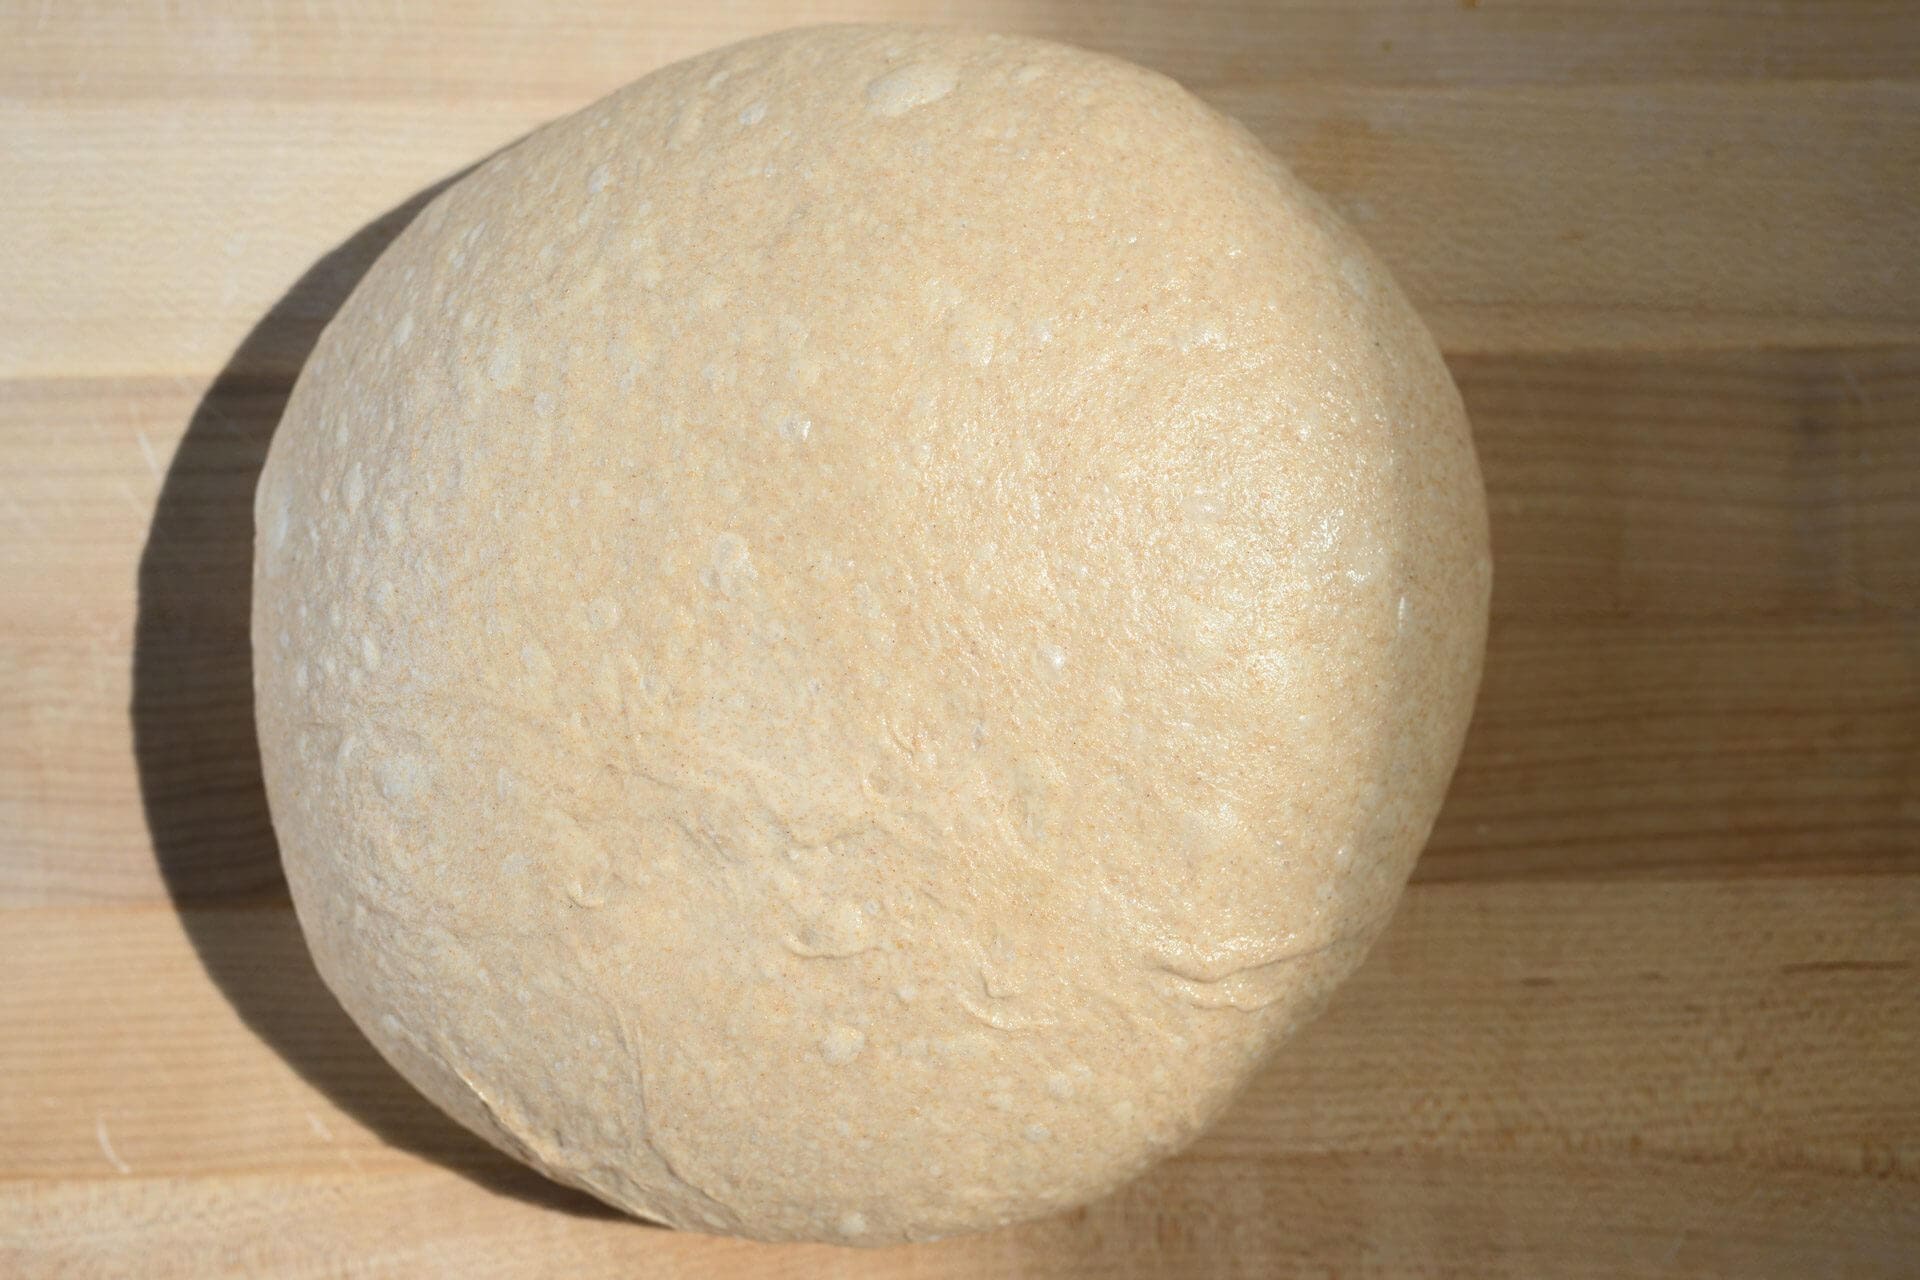
Let the dough rest, uncovered, for 20 minutes.
5. Shape – 1:05 p.m.
If your baking pan is not non-stick, lightly grease the interior of the pan with oil.
Depending on how slack your dough is, this can be a slightly challenging dough to shape. Liberally flour your work surface and the top of the preshaped round with whole-grain spelt flour, and shape quickly, tightly, and confidently.
I shaped this dough following my guide to shaping pan loaves.
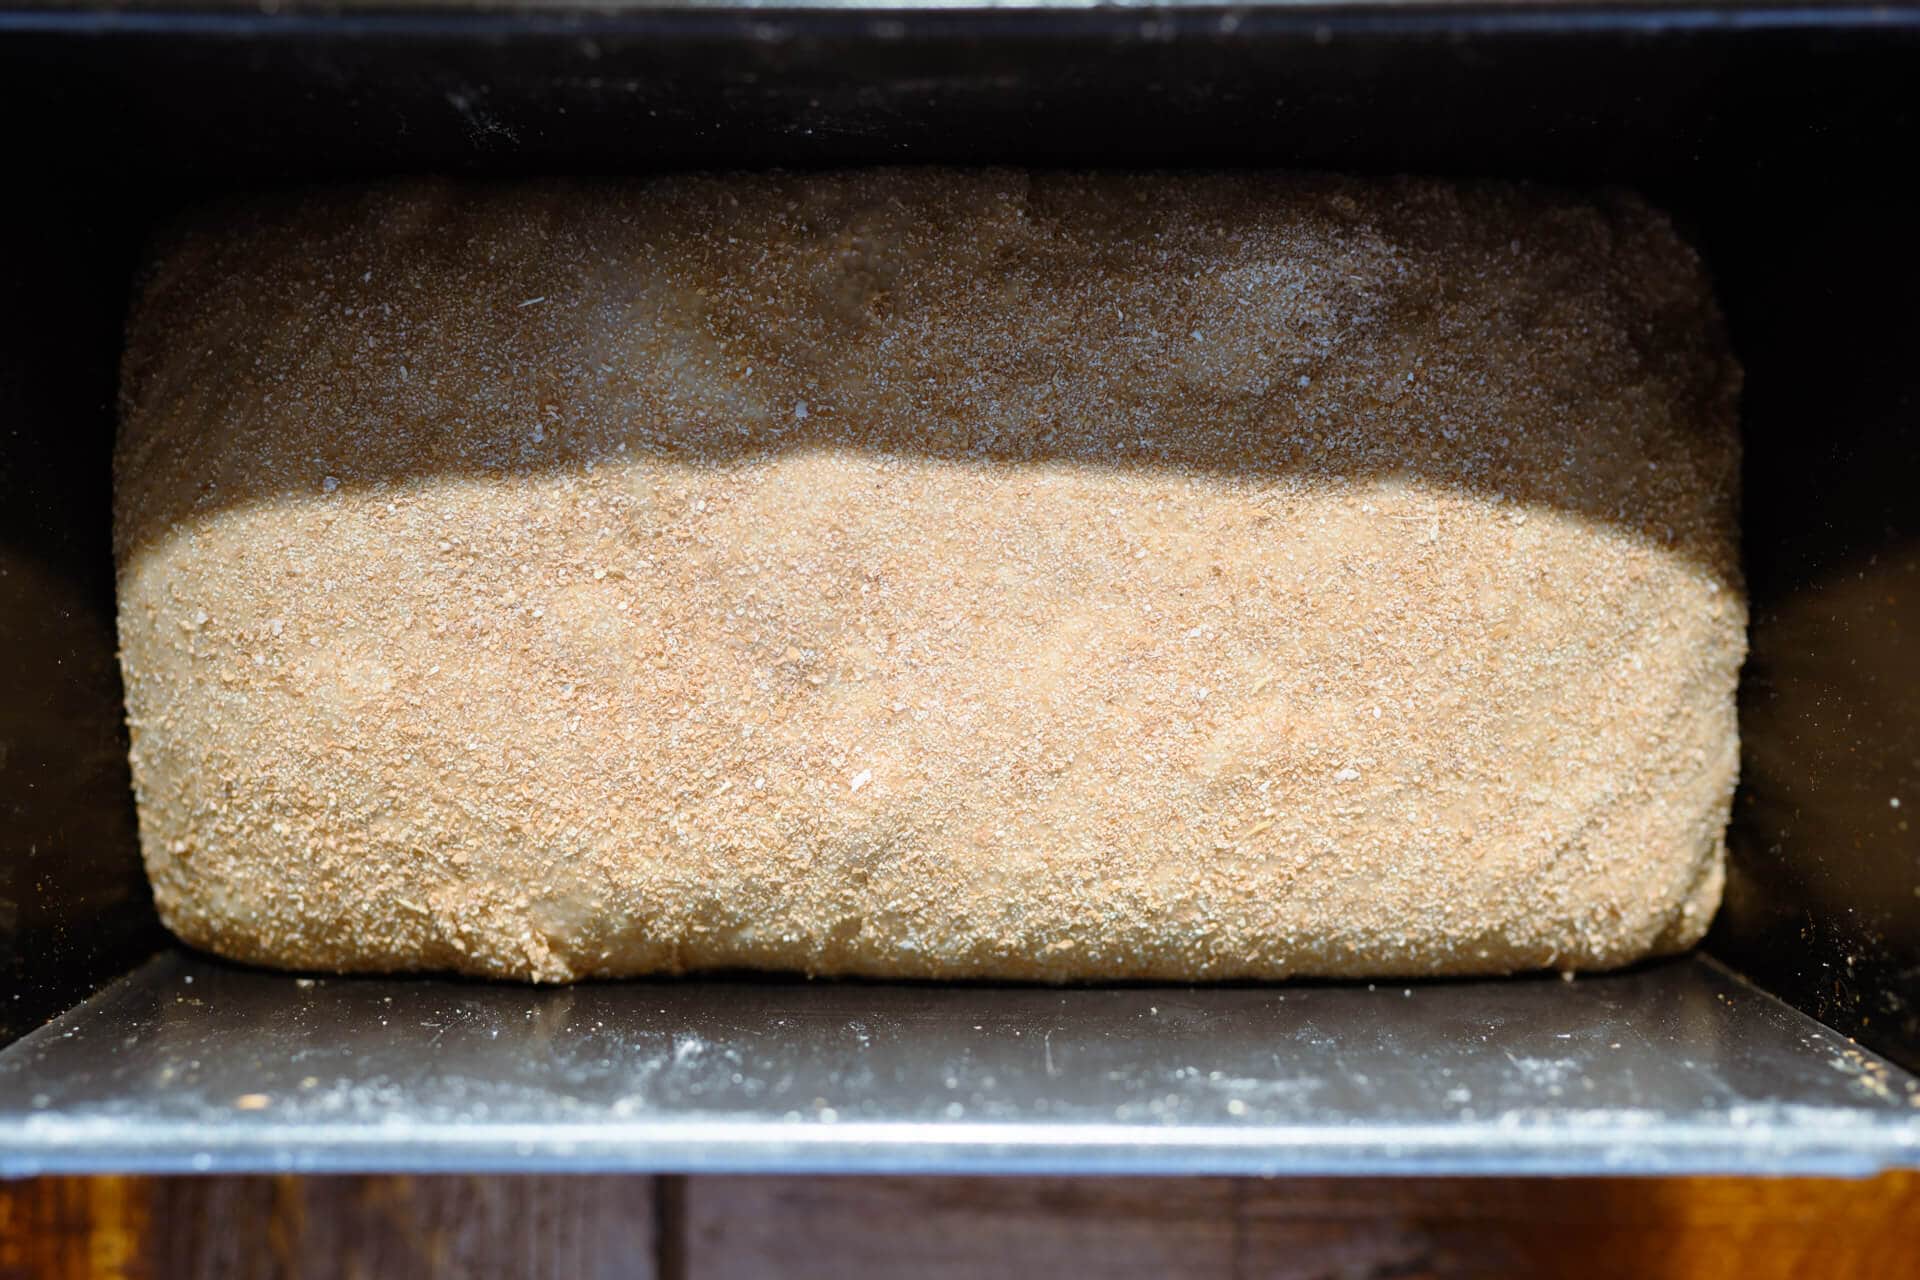
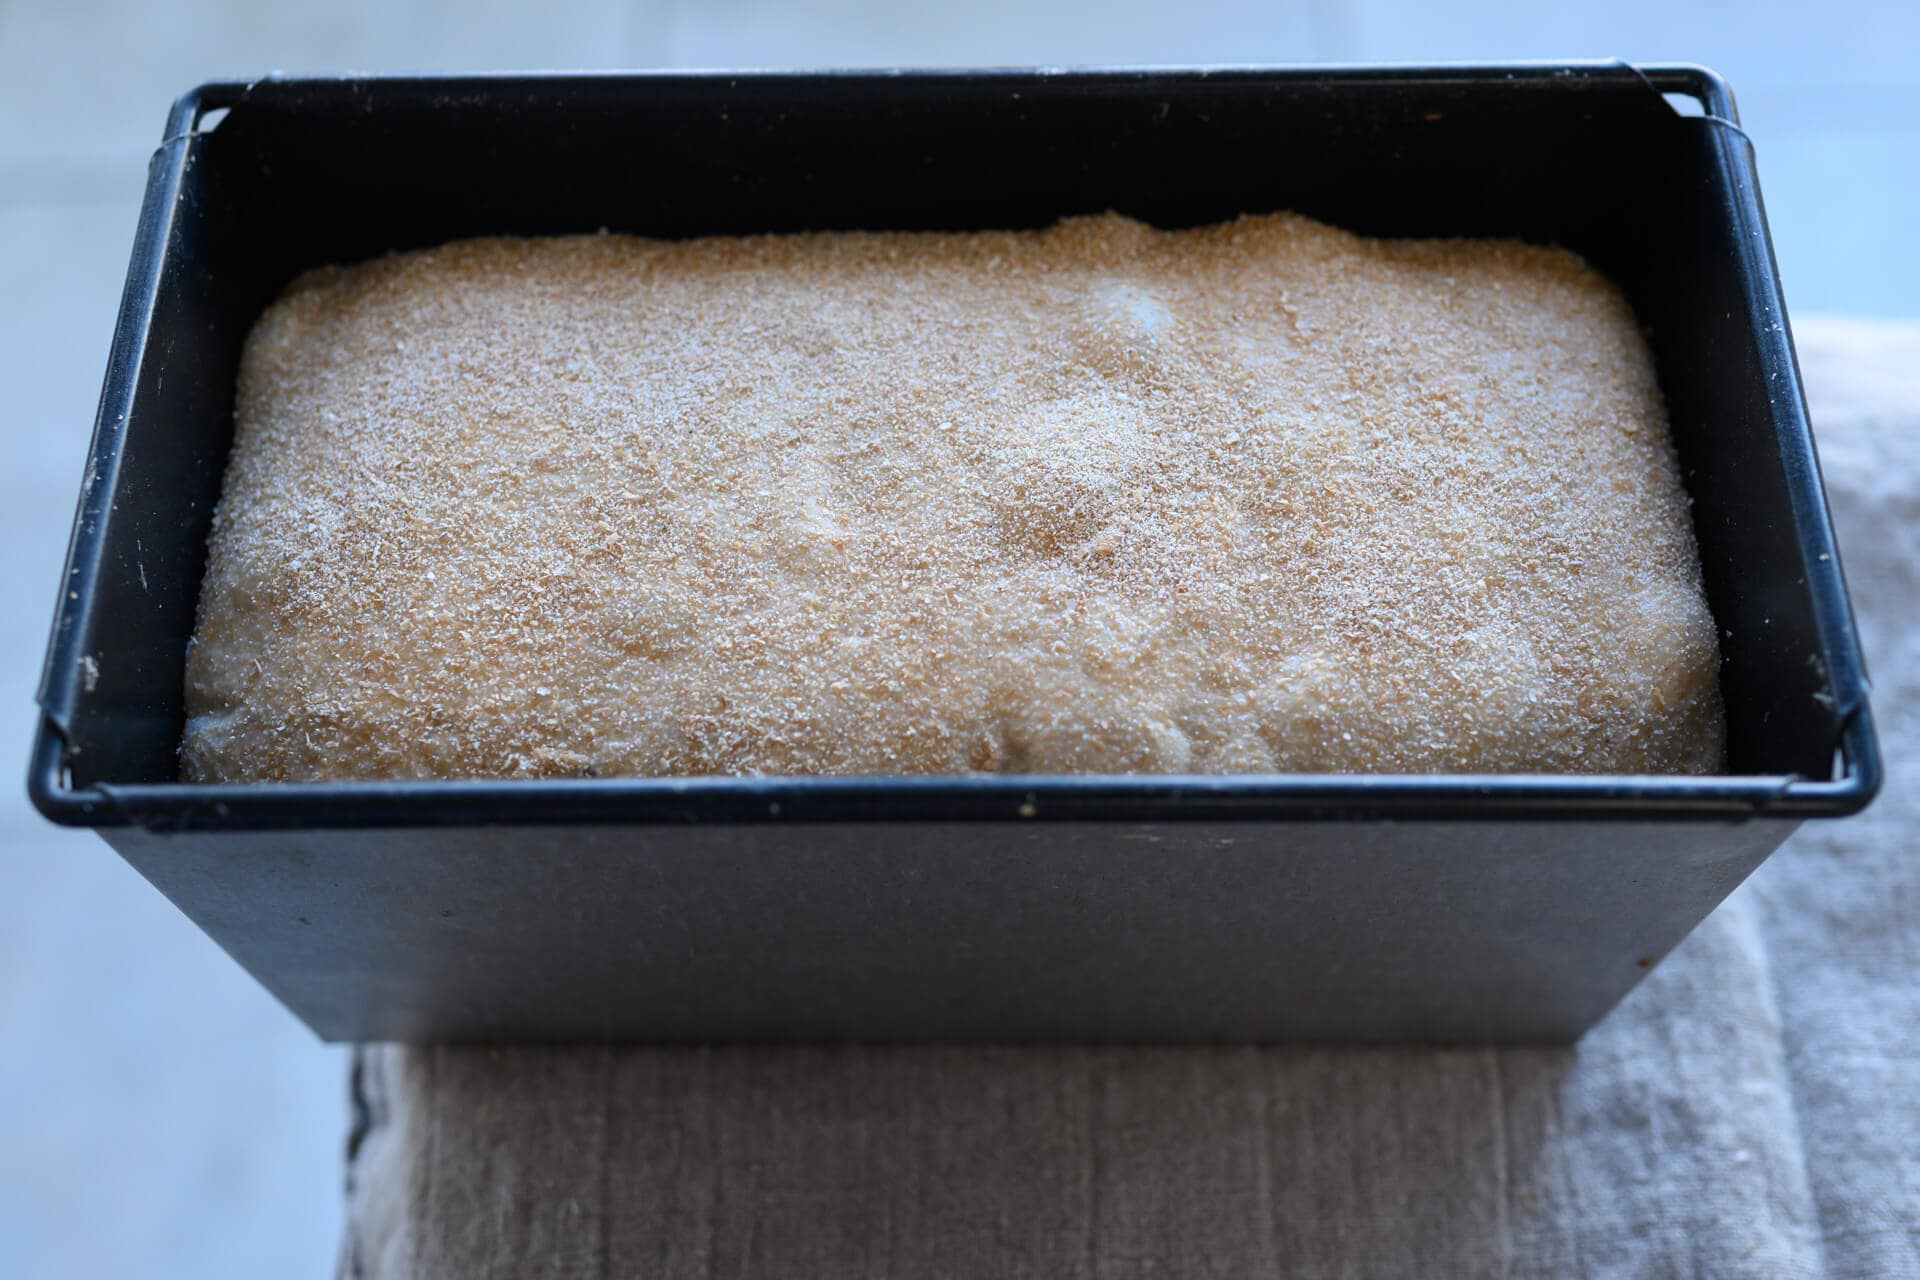
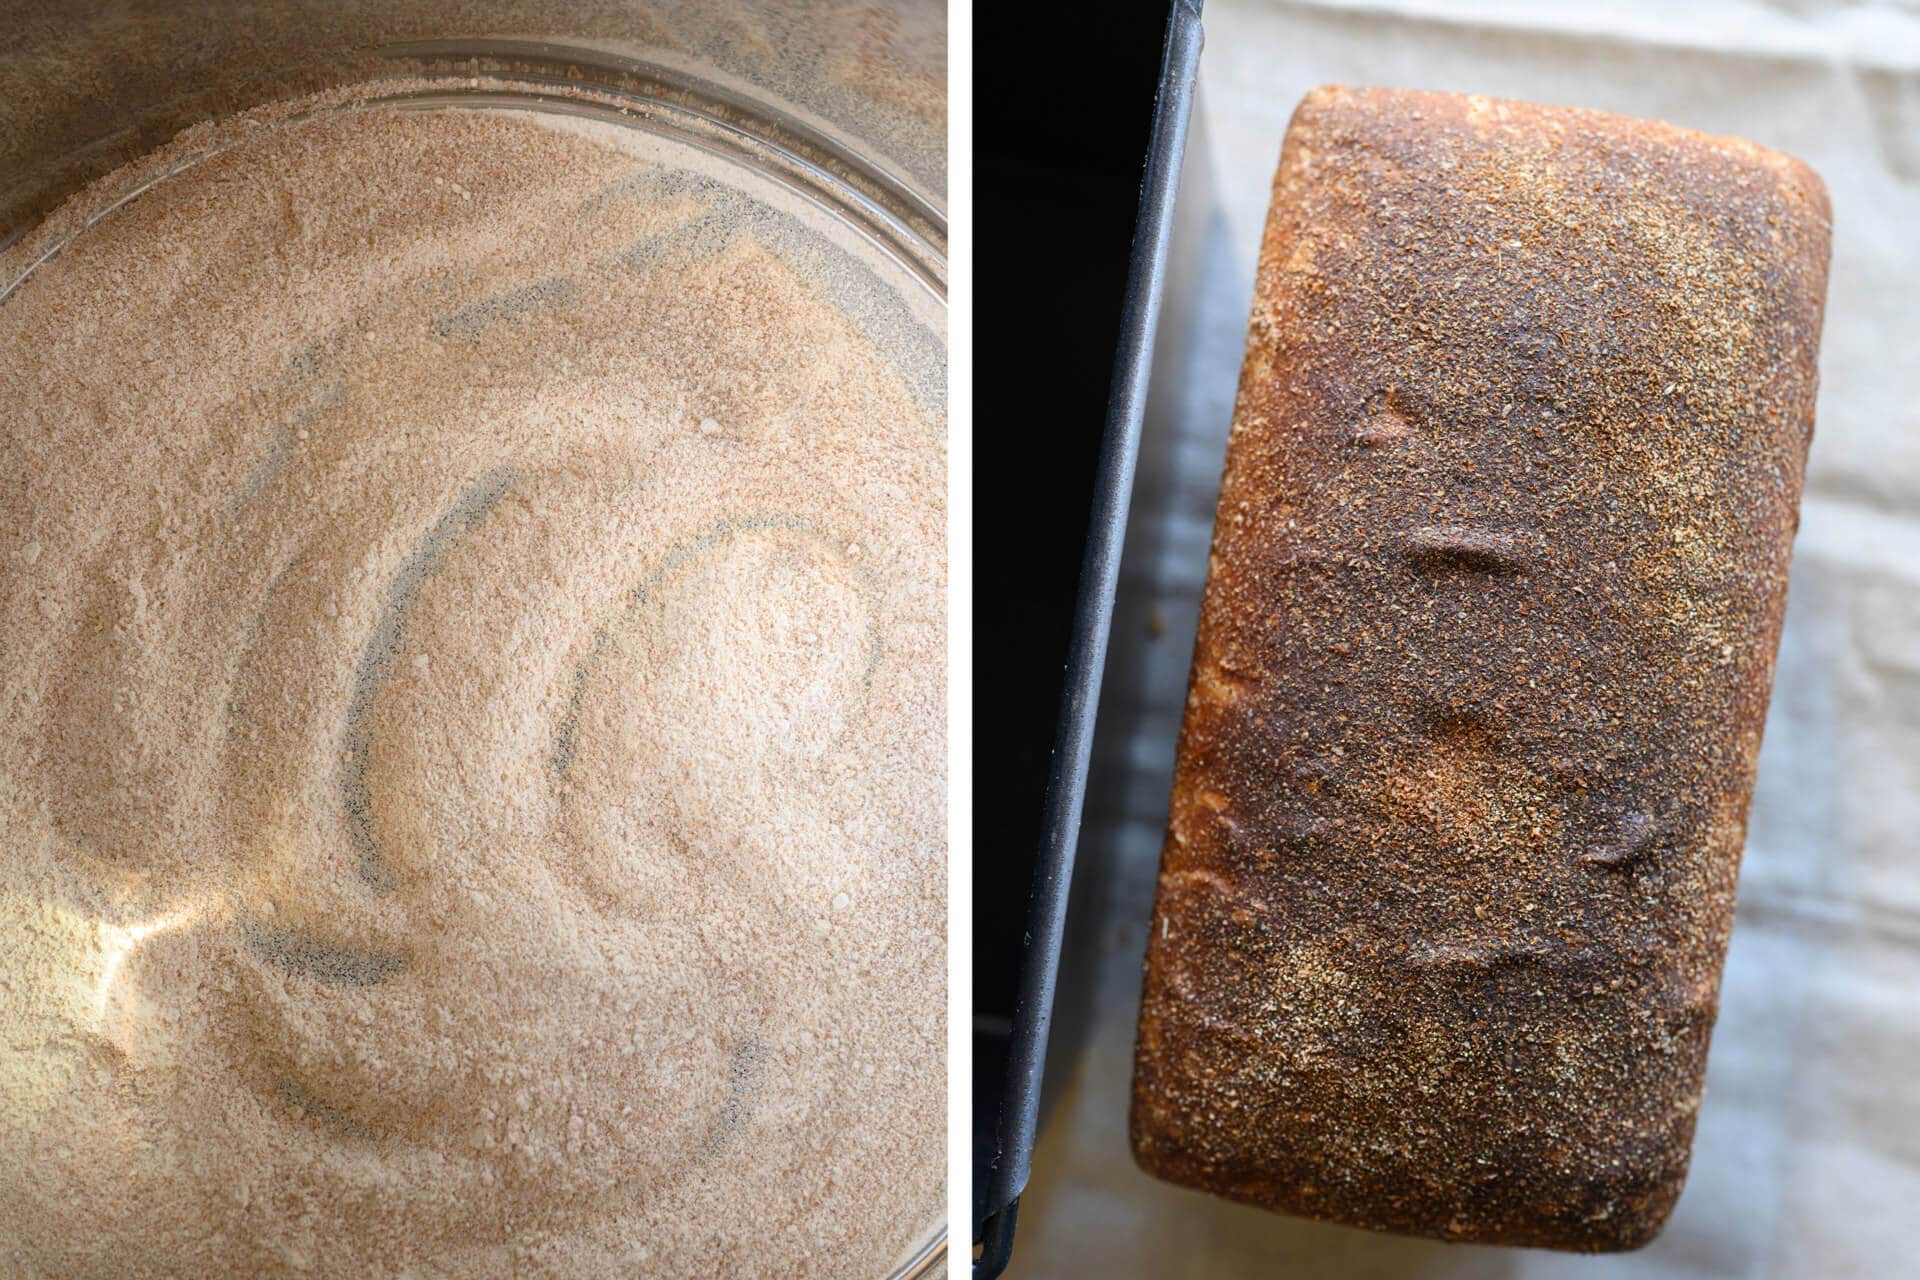
As you can see above, I milled some fresh spelt flour and sifted out the large bran pieces to use a topper to this dough after shaping. Not only does this added bran give the loaf extra texture, but it also brings extra nutrition. Feel free to use instant/rolled oats (as I often do), seeds, or simply use nothing.
After shaping your dough tightly, quickly roll the smooth (top) side on a pile of the sifted bran resting on a towel, then place the shaped dough in the pan.
6. Proof – 1:15 p.m. to 2:45 p.m. (or until ready)
Cover the pan with a reusable plastic bag and proof for 1-2 hours, temperature depending. For me, at my kitchen temperature of 76°F (24°C), it took one and a half hours for this dough to fully proof.
Give the dough a poke periodically with a wet finger. This dough should pass the “poke test” when it’s ready to bake: a firm poke should show an impression in the dough that springs back very slowly, perhaps not quite filling the indentation.
7. Bake – 2:45 p.m. (pre-heat oven at 2:15 p.m.)
Preheat your empty oven (there’s no need for a baking stone for this bread) to 450°F (230°C).
I used my typical oven-steaming method for this loaf but did not use the pan with lava rocks. I boiled water and poured it over rolled-up towels in a pan and placed the pan at the bottom of my oven before loading the dough. Additionally, I sprayed the top of the dough with a handheld mister a few times after loading it into the oven.
When your dough is fully proofed, place the steaming pan into the oven and your dough pan on a rack above. Spray several times into the oven chamber with a handheld spray bottle and close the oven door.
Drop the oven temp to 425°F (218°C) and bake for 20 minutes with steam. After 20 minutes, remove the steaming pan and bake for an additional 25-30 minutes at 425°F (218°C). After that, when the dough looks well colored on top and the interior temp registers around 205°F (96°C), remove the loaf from its pan and finish baking in the oven directly on the oven rack for 5 minutes for more color.
Finally, remove the loaf from the oven and let it cool on a wire rack for at least 3-4 hours before slicing.
Conclusion
This whole grain spelt pan loaf with honey and olive oil fills the kitchen with the deepest, richest aroma as it bakes. The aroma lingers hours after baking as its diffusive aroma pulls you ever closer, like sirens from an island. And in much the same way, there’s little you can do on approach, you’ll just have to have a slice—maybe two.
Further, a good slather of salted butter seems to draw out more nuance, melding with the fruity olive oil and sweet honey in a concert of mouth-watering flavor. I think this bread might be one of the most versatile and flavorful whole grain sourdough recipes I’ve ever baked.
Crust
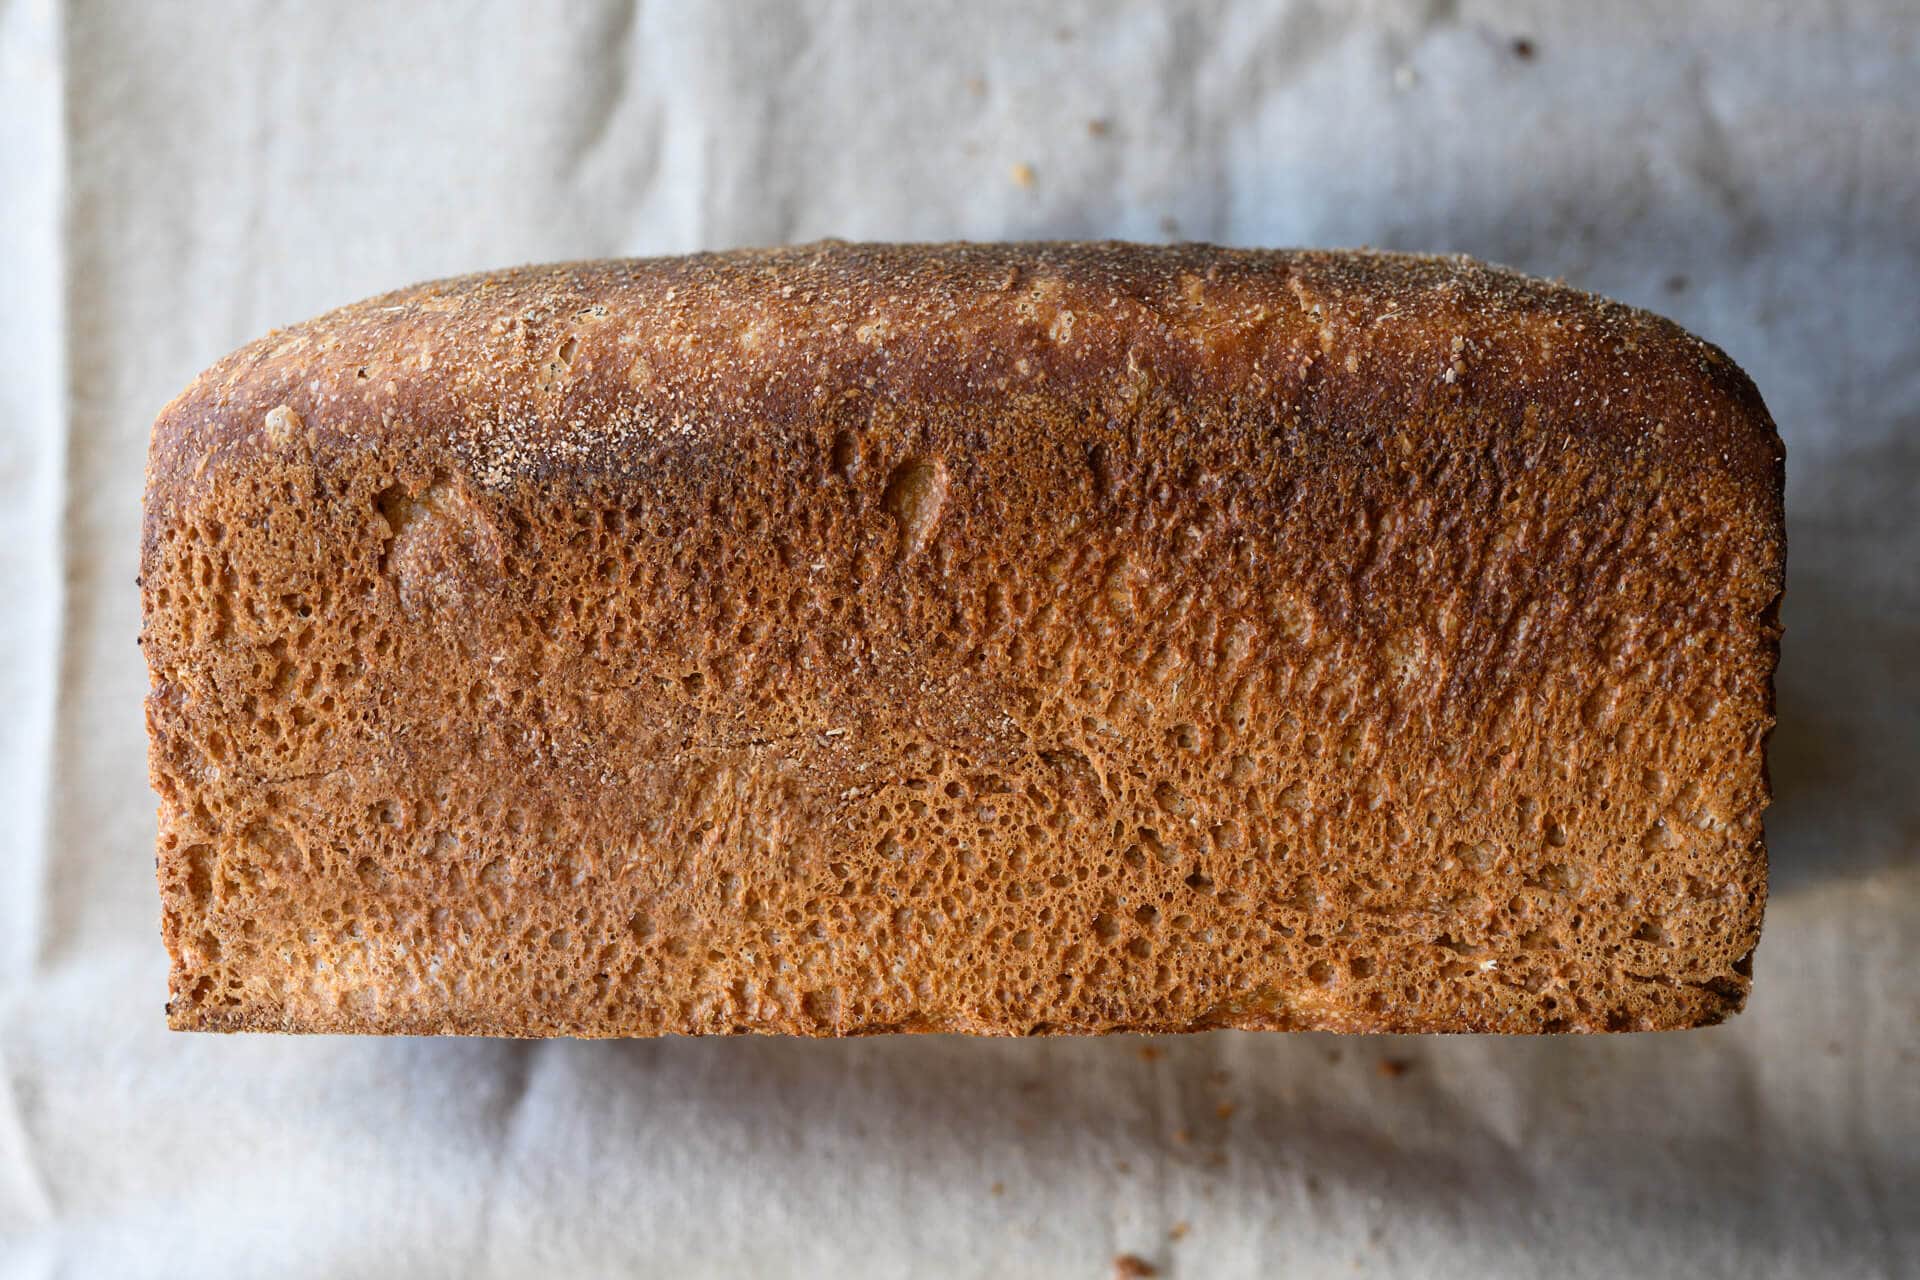
The crust bakes up golden brown, is beautifully thin (especially for a 100% whole grain bread), and brings forth just a hint of honey. As usual, I’ve been milling lots of fresh flour here in my kitchen and sifting off some of the bran to use as a topper was a useful way to add texture and nutrition to this pan loaf.
Crumb
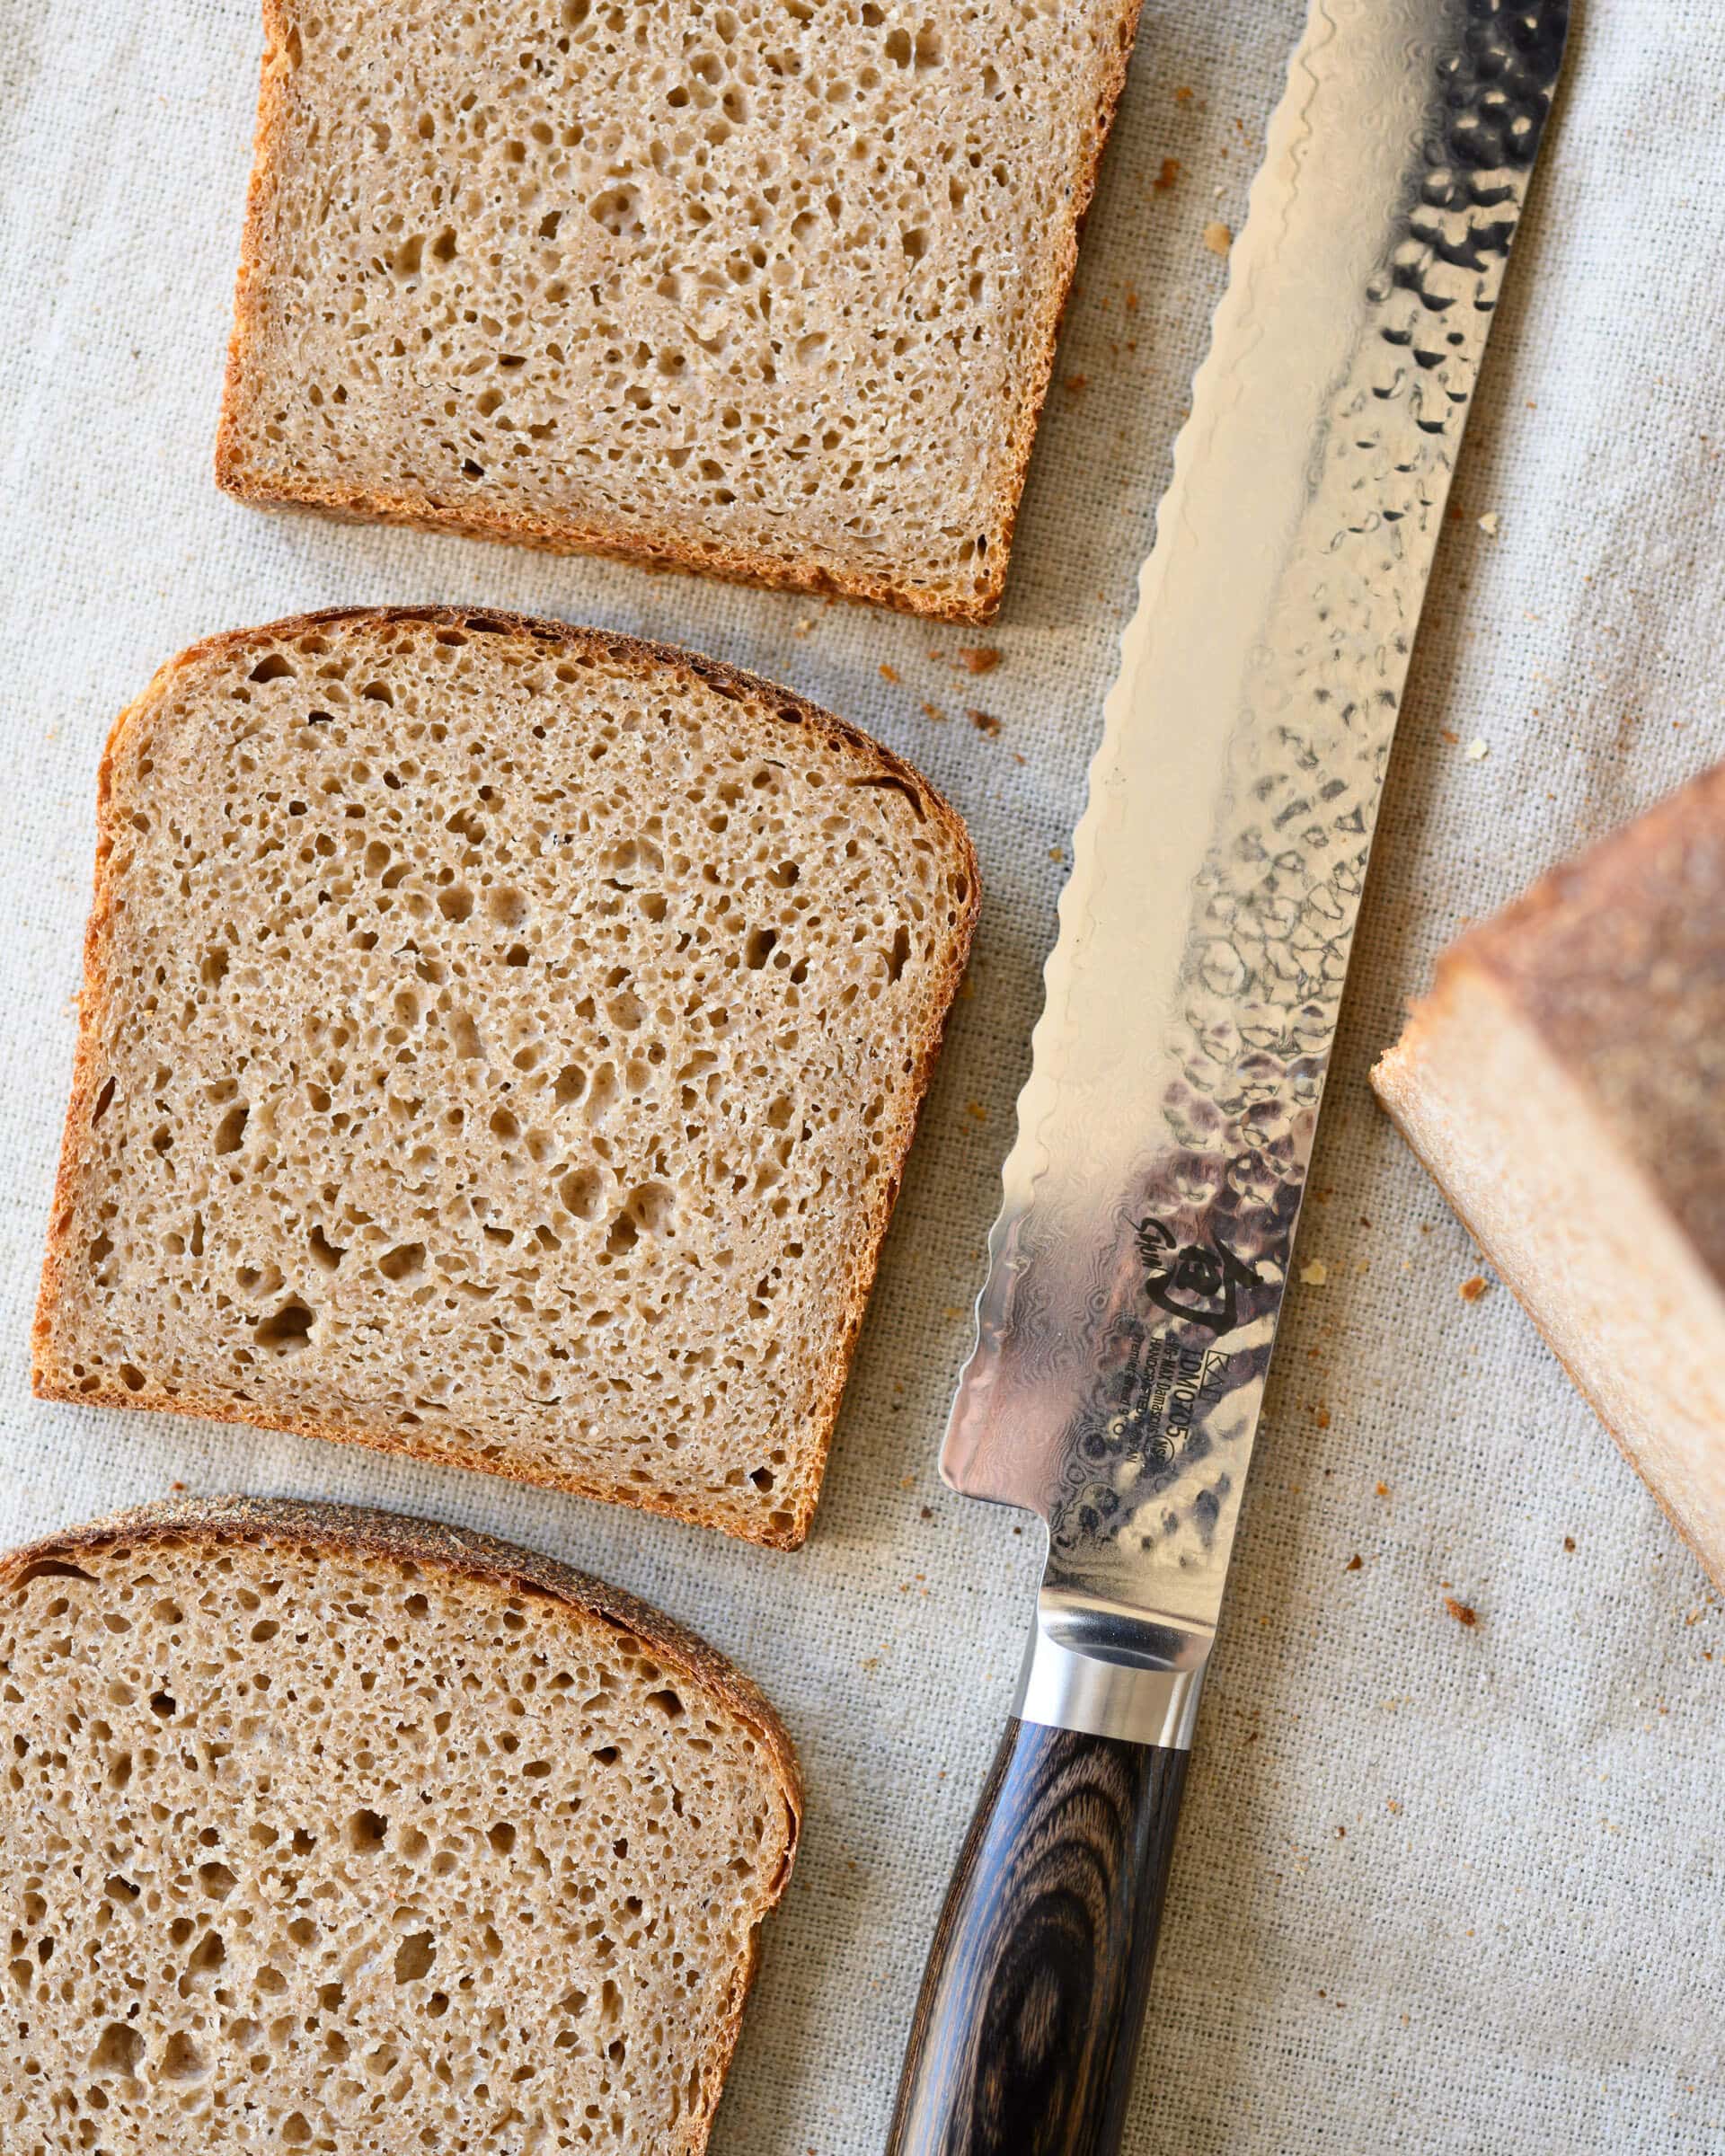
The crumb is superbly light and fluffy, soft and pliant. However, uncut the loaf feels rather heavy in hand but slicing in reveals the truth: each slice is airy and just-tight-enough for toast and sandwiches.
The extra virgin olive oil helps bring a measure of softness to the crumb, and at 5%, it is just right—any more might be too soft.
Taste
The slight fruitiness from the olive oil pairs well with the sweetness from the honey—but more than this, the spelt itself brings so much flavor this bread is a smash hit here in my house. When your family gets close to devouring a 1400g loaf in two days, you know you’re on to something.
I think this bread might be my new favorite whole grain pan loaf. There, I said it. Buon appetito!
Print
Whole Grain Spelt Pan Loaf
- Prep Time: 24 hours
- Cook Time: 55 minutes
- Total Time: 24 hours 55 minutes
- Yield: One 1400g pan loaf
Description
A deeply flavorful whole grain spelt pan loaf with a touch of honey for sweetness.
Ingredients
Levain
- 6g ripe sourdough starter
- 41g whole grain spelt flour
- 41g water
Main Dough
- 704g whole grain spelt flour
- 518g water
- 37g honey
- 37g olive oil
- 16g salt
- 88g ripe levain (above)
Optional
- Coarse wheat bran or rolled oats for topping
Instructions
- Levain (Night before 9:00 p.m.)
Add the levain ingredients to a jar and mix well. Leave to ferment overnight. - Mix (9:00 a.m.)
When your levain is mature and ready to be used, add the Main Dough ingredients and the levain (from step 1) to a mixing bowl. Using your hands, mix everything until it comes together into a shaggy mass. Continue to stretch and fold the dough over itself in the bowl to build strength, it will transform from sticky and shaggy to smooth and elastic over the course of 4-5 minutes. Transfer the dough to a container for bulk fermentation and cover. - Bulk fermentation (9:15 a.m. to 12:45 p.m.)
During the 3.5 hour bulk fermentation, give the dough four sets of stretch and folds where the first set is 15 minutes after the start, then every 30 minutes thereafter. After the fourth set, let the dough rest, covered, until the end of bulk. - Preshape (12:45 p.m.)
Gently scrape the dough out of the bulk fermentation container to an unfloured work surface and preshape tightly into a taut round. Let the dough rest, uncovered, for 20 minutes. - Shape (1:05 p.m.)
Shape the dough into a long tube and place in the loaf pan. Top with coarse bran or rolled oats, if desired. - Proof (1:15 p.m. to 2:45 p.m., or until ready)
Cover the pan with reusable plastic and proof on the counter for 1-2 hours until the dough is very soft to the touch. - Bake (2:45 p.m.)
Preheat empty oven to 450°F (230°C). Drop the oven temp to 425°F (218°C) and bake for 20 minutes with steam. After 20 minutes, remove the steaming pan and bake for an additional 25-30 minutes at 425°F (218°C). After that, when the dough looks well colored on top and the interior temp registers around 205°F (96°C), remove the loaf from its pan and finish baking in the oven directly on the oven rack for 5 minutes for more color. Finally, remove the loaf from the oven and let it cool on a wire rack for at least 3-4 hours before slicing.
Notes
- For a low FODMAP option, substitute out the honey for pure maple syrup.


200 Comments
I assume the time listed for the bulk fermentation is approximate and that you need to judge when it’s done based on the way it looks. Mine was not bubbly and jiggly after 3.5 hours, so I’m deeming it not ready!
Hey Maurizio,
I picked the spelt loaf recipe out of your book to bake today and just noticed noticed that it differs quite a bit from this recipe. I was wondering last night as I prepared the levain, what the benefit was for making it stiff over 100% hydration. This morning I milled the spelt and because it was freshly milled I was concerned that I needed a little extra strength in there since the spelt is already so extensible so I swapped out 200g of the spelt for bread flour. It turned out great and I couldn’t help but test one of the warm loaves as I always do with a new recipe. I really like that I can do the whole thing in one day other than the levain the day before.
So I was wondering why you changed up the recipe and what advice you have if using freshly milled spelt?
Hey, Tracy! This is just a different recipe, even though they’re the same at heart. I prefer a stiff levain when working with whole grains and especially freshly milled flour, though both will give good results. The stiff levain brings a lot of strength to the dough!
Thanks so much and congratulations again on the book. It is so beautiful and well planned out. Not to mention the fabulous recipes. 🙂
Thank you, really appreciate that, Tracy!
3rd times a charm. For my ON Canada Spelt I am playing with 65-70% hydration as the dough was too wet. So for anyone struggling with this the lower% worked well for Canadian Spelt. Also at 21-24c ambient temp my dough took 4.5hrs to proof. It was done bulk at 3.5hrs like the recipe but I was under proofing it by only doing 1-2hrs. It was bursting along the side and gummy. Once I proofed it for longer it worked great. Also I prefer a lighter colour to my loaf pan crust so in my gas oven I baked at 375f for 65 min with foil tenting the top. It came out beautiful and light coloured and the crumb is nice and light too. Plus I think the longer proof enhanced the SD flavour. So don’t be afraid to proof it for longer if you need to! I didn’t know it was best to let it rise to just at or above the pan rim. Once I did this it turned out great!
So glad to hear this worked out well for you, Lolla! Nice adjustments there to suit your kitchen 🙂
Hey Maurizio,
Thank you so much for this recipe (and all the others, too)! I made this for my friend who was on the FODMAP diet and she really liked it. My family loved it, too, and I made a second batch (1 1/2 times your recipe) yesterday, put the loaves in the pans in the fridge right after shaping and baked them this morning. The kitchen is still filled with the most wonderful aroma.
I have one question though: my dough didn’t burst and it rose beautifully in the pans. However, I have rather big-ish holes on the sides and on the bottom of my two loaves (both times I’ve made this bread), instead of the fine pores that adorn your loaf. Any idea why that might be? Did I not proof it long enough, or too long? Did I over hydrate? Or could the permanent baking foil I’m using to line my stainless steel pans be the culprit? I’d appreciate any insights you might have~
Here’s how it looks: https://ibb.co/pKnHM09
Can you do this recipe without the honey?
You sure could. Or you could use barley malt syrup in its place.
Do I need to change anything to the recipe since I do not use pullman pans at my restaurant but bannetons?
Yes, if you’re baking this free-form (outside of a pan), you’ll hve to reduce the bake time (assuming the loaves are about the same weight).
Have you baked this one in your Pullman pan? Thinking of trying that tomorrow! Just got a bag of spelt from Central Milling. I’ve never baked with it before!
Yes, it’ll work well in there!
I brought some farro flour home from Italy- can I replace the spelt with the farro in the same proportions?
I’d say yes, would be delicious.
This bread came out so good after 2nd try, my first really successful sourdough loaves! Thank you for great instruction. My loaf pans are small so I split into 2 loaves and first time I made, was afraid to overbake and ended up underbaking -resulting in gummy loaves, which we of course still ate😉 This time I baked them for the full time as directed but turned heat down to 400 a little bit after I took steam out, delicious and nicely baked much more airy than first time. Also I used date syrup for sweetener which went well with the olive oil😋
Oh that sounds awesome, Midori! Love those mods 🙂
Oh man, how I miss your recipes 🙁
Recently diagnosed as diabetic, looking hopelessly for a real bread recipe. Tried doing almond flour and coconut and psylium and nothing looks and tastes like real bread. I buy a whole wheat bread which has only 38.8% flour in it and wonder how is it possible? I REALLY NEED your brains 😔😭 to conquer this mission… I understood that spelt is the best option for diabetics.
This bread will work for you! It’s 100% whole grain spelt, incredibly healthy (and delicious, too)!
I’ll try this one, maybe i’ll change the honey to chicory syrup or date honey which has less carbs
I’ve been making your sourdough sandwich loaf with tangzhong recently and it is amazing! I’m a novice baker, but it has turned out well every time. I recently purchased some white spelt flour (whole wheat wasn’t available). Do you have any recommendations for how to use that in this recipe? Reduce the water by a certain amount maybe? Thank you Maurizio!
Awesome, so glad to hear that, Chris. Yes, like you said, I’d probably reduce the water by 5-8% to adjust. I would hold back some of the water in mixing, too, just to be sure it doesn’t get over hydrated–spelt is notorious for quickly over hydrating!
Thanks for the response! I made this recipe last weekend, and followed your advice with the hydration – I dropped the water down to around 480g. I split it into two 8.5×4.5×2.5 pans. It turned out great (maybe a little flat, but not too dense) – the family really enjoyed it! Instead of baking with steam, I just went with an egg wash. Is this an acceptable method for this bread? I also noticed that while proofing there were some large bubbles forming on the surface (almost like a pizza crust). Based on your pictures, maybe that is to be expected, but they did burn a bit. Thanks again for creating such an amazing resource!
Egg wash is totally fine!
Great recipe! I was pretty casual with the amounts (a little more starter, much more water) and used 75% spelt 25% red wheat (ran out of spelt.) Added olives and fresh rosemary. I also did the second rise in the fridge overnight, plus a few hours in 79F. Oh, and I also split the dough into two smaller loaves. I baked one of them today and it was amazing (took less time of course since it’s a smaller loaf). Perfect crust and crumb. I plan to bake the other in a few days. Do you think the dough will hold up in the fridge for 3 more days? If a good recipe is measured by how resilient it is to readers messing it up, this one is 100% in my book 🙂
Right on, David! Sounds like you made some confident moves, that’s great. Three days is a long time, expect a more sour flavor and less rise, but it should work. And thanks for the kind words, I would add that an experienced baker knows the right moves! Great job and enjoy 🙂
Hi again! I wanted to ask what could a gap underneath the crust indicate ? Could it be overproofing even though the loaf has risen well ? Or could it just be a bubble that i should have burst before baking?
Thank you!
Hey, Maria! Could be either of those, but for me, I usually see that when I’m getting close to over proofing.
Got it! Thank you so much:)
Hi Maurizio, This is one of my favorite recipes. I love spelt and this bread just has great flavor and texture. I too have had issues with the blow out, so I will extend my bulk. I wanted to ask what some good additions would be for this loaf? I was considering sesame seeds or sunflower seeds. Would those work? If so, what amount would be good?
Thanks so much
Glad you like the recipe, Mandy! Sorry for the delay. Yes, I’d push the proof longer if you’re seeing erratic fissures happening. Yes, I’d say those seeds would be great. I’d probably start at 15% , but you could get some inspiration for my other loaf that uses those mix-ins: my sunflower and sesame sourdough bread. Hope that helps and happy baking!
Awesome, thanks so much!
Hi Maurizio, Thanks for this amazing website.. The recipes are very straightforward and easy to follow.. However, Im struggling with this one.. I keep getting the ‘blow out’ on the sides.. First time, I think it was under proofed (although I don’t understand the science behind it, if you have any sources I’d love to read more).. I repeated it and I was happy with how it fermented but it still blew up and I’m wondering if its the size of my pan; I have a 8″x4″x2.something” and another 13″x4″x4″ USA pullman loaf pan.. Should I try it again in the bigger pan?? Of course they always taste awesome!!
Hey, Maha! Usually those blow outs is from under proofing, in fact, this is almost always the case. Try pushing your bulk fermentation farther as well as your proof. In addition, make sure to steam the oven when you first load your dough. I would also try the larger pan!
Hi! Thanks for all of the wonderful recipes and guidance here. I would like to make this with sunflower seeds. Would that be likely to cause problems? If not, when should I add them?
Also, I would like to not use any sweetener—does the honey provide non-taste attributes?
Thanks once again, I have been baking no-knead bread with a smidge of yeast for many years but just started with sourdough using your weekday recipe/timeline. I so appreciate your clear explanations and advice!
You’re welcome, Linda! Shouldn’t be an issue adding sunflower seeds. You can add them at the very end of mixing or during the first set of stretches and folds in bulk fermentation.
The honey will help increase fermentation in this dough, yes. You can omit, just give the dough more time if it needs it during bulk fermentation.
Sorry for the delay and happy baking!
Thanks so much! I am loving your other recipes as well, including beginner/weekday loaves and the blueberry muffins—everything works great, and the explanations are so clear. This is an amazing resource!
🙌🏼
Hi Maurizio,
I’ve tried to make this loaf several times and I’m having a couple problems. First of all, I’m using 9 x 4 x 4 pullman pans, doubling the recipe for two loaves. They are rising nicely, but I cannot seem to get the bread to bake through completely. I baked them at 425 for 50 minutes and the tops start to burn but the middle bread temp does not get past about 180. As a result, the crumb comes out gummy/wet. Also, the tops are blowing out despite my scoring them. I see from other posts that this could be due to under-proofing. So, I’ll try to extend the bulk fermentation. Any thoughts on what I could adjust fto improve the baking/crumb? The flavor of the bread is amazing…..Thanks so much for your wonderful recipes!
Hey, David. I’d say drop the temp a little more, try 400F, and bake for longer. It’s ok if the internal temp doesn’t get all the way up to 205F or thereabout, it may never reach this temperature. But I’d say it should at least get to 195-200F.
Hi Maurizio,
first of all: thanks so much for this amazing recipe. Everyone in the family loves it! A question in regards to the burst on the side that seems to happen a lot: would you recommend extending the bulk fermentation or the proof if that happens (or both)? I’ve baked this bread three times so far and only once did it not burst. Every time I kept the 3.5 hours bulk fermentation and then let it proof for a lot longer than two hours as the dough rose rather slowly.
Thanks heaps and greetings from New Zealand!
Glad to hear that, Ven! As I mentioned to Maria blow, splitting and bursting is usually a sign of under proofing. This might be the case for you as it’s probably cold in your location at this time of the year. Watch that dough temp and try to get it close to the final dough temp listed in the recipe! That’ll help get it on track. If the FDT comes in low, extend bulk fermentation as necessary until the dough is nice and active and ready to be divided.
Hi Maurizio,
I made this dough yesterday, but added 80gr more water than the one indicated (by mistake)! Bulk ferment for 3.5 hours- preshaping and shaping was a complete mess! Cold proofed in the fridge and took it out today in the morning and let it rise and proof even more. Left it for a long time (around 4.5-5 hrs, ambient temperature 26 degrees!!)
There is a burst on the side of it.would that be because of overproofing? Haven’t cut it yet as it is still very warm but after checking the internal temperature with the probe, i could tell it is dense.
My question is what would the schedule be if i’d like to make it on day 1 and bake it on day 2? Should i shape it and cold proof OR put it straight in the fridge after bulk ferment and shape on day 2?
If i don’t want to top it with bran or oats, should i egg wash to get a shiny crust?
Thank you so much!
Usually a burst indicates under proofing… But it could be other things as well!
For two day, I would shape it then place it into the fridge to proof overnight.
Yes, you can do an egg wash for a shiner crust. If you go that route, no need to steam the oven.
Thanks for the reply! I love this loaf and i keep making it! Today i encountered a new issue. While proofing, the dough splt quite badly! What could be the reason for that? Thank you!
hello and thanks for the recipe – do i need to score (i read some people experienced unexpected bursts)?
thanks!
You can always score if you’d like! However, the reason for the bursting is most likely due to under proofed dough. If you push the proof on this loaf, you should have gentle and controlled rise in your dough, even without scoring.
thank you Maurizio. I only have 9x5x2.5 loaf pans so i divided the dough into two. I put it in the fridge in the banneton after the final proof and will bake it tomorrow or the day after. Hope that’s ok.
First, thanks so much, Maurizio, for this fabulous site. Yours is the first I turn to for inspiration and education. This formula is in the oven at the moment. I scaled to 1000 gr for my large USA Pan. Used sprouted spelt and added about less 7% of the water indicated. It looked good going into the proofer and seemed strong after the stretch and folds but it was in bulk for a total of 5.5 hrs!! I was able to shape it and proofed for just under 1.5 hrs (I was getting nervous!). Put it into the oven with steam and just pulled out my steaming pan… It has a side blow out. Under fermented??? under proofed??? HELP! I love spelt and want to make this one of my regulars.
You’re welcome and thanks for the kind words, Susan! That sounds like too long in bulk fermentation given my formula—definitely drop that bulk down to 4 hours max as long as it’s hitting the same final dough temp I have listed in the recipe!
Thank you for the quick response. Yes, I mixed by hand and hit 78F on the nose. Despite the blowout, the bread was delicious!
I just made this last night. Tastes great but the bread came out a bit gummy in the middle and had a tighter crumb than the one pictured in your post. It also exploded out a bit while baking. Could the gumminess be a result of under proofing considering the loaf blew out like that? Or something else would be the issue?
Yes, I’d say under proofing especially if you saw a “blow out,” as they say.
Would a 13x4x4 Pullman pan work?
Definitely! I typically do around 1300g for that pan.
Great, thank you!
I just finished tasting a slice of this bread, it’s amazing! I made it with sprouted spelt and the flavor and texture were beautiful! Thank you for sharing this recipe and sharing the things you’ve learned!
You’re very welcome and I’m super happy to hear that, Shanta! Enjoy 🙂
I was really excited to try this recipe but I don’t think it worked for me 🙁 My dough was too slack… couldn’t hold its shape at all. Wonder what went wrong?
Sounds like over hydration, Nichole! Sorry to hear that. Hold back 10% of the water next attempt, that should give you much more strength.
hello maurizio thanks for all the information!! i bakes this pan loaf today , i didn’t score it but the dough cracked , it didn’t hold its smooth shape … can i ask you what might have caused it ? i suspect i used too much levain cause i downsized the dough for my pan and forgot to downsize the levain too . thank in advance keep up the good work!
You might have needed to score in deeper! It might also be lack of steam in the oven.
Hey Maurizio, if this recipe were scaled to fit a (9x4x4) Pullman pan, would it work to use the lid for steam rather than the steaming setup you describe here? Just trying to reduce complication, though I know that’s not always possible or advisable.
That would work! If you use the lid, you won’t need to steam since it will trap any inside the pan.
Awesome, thank you!
Hi Maurizio! Love this bread 🙂 Could you add the PRINT feature?
Glad to hear that, Margie! Yes, it’s next on my list (working my way through all my posts!) 🙂
Done!
I made this bread with organic spelt flour that I get from a local mill. I followed your instructions but somehow my crumb was a lot denser than yours. Also, the bread really rosed a lot during the baking process in the oven. I am not sure what I did wrong.
It’s hard to say what happened, Maribel! My feeling is it might have over proofed on you by the time you got it in the oven.
Hi! I would love to try out this recipe, but my schedule does not permit me to bake on the same day. May i know if this loaf can be proved in the fridge overnight instead of at room temperature for two hours? Thanks!
Hi again! I read the earlier Q&A and found the answer =)
I am writing this as I’m indulging in a slice of this wonderful bread topped with a thin slather of butter, homemade plum marmelade and a dash of salt. I’ve also baked your walnut and cranberry one this morning, saying to myself it has to be the best loaf yet. But honestly, this one is EVEN better and is by no doubt the tastiest sourdough I’ve ever made. Taste of wholegrain spelt and subtly sweet-sourness from honey and olive oil delivers absolutely spectacular complexity. All I can say is thank you for sharing this recipe! Would love to say more but I’m afraid I have to go now and eat some more, for there will be none left by the dawn…:)
Ha ha, thanks so much for the feedback, Jakob! So glad to hear my recipes have been working well for you. I trust the loaf is likely completely gone by now, but nevertheless, enjoy!
I just made this loaf! I didn’t have spelt, so I used white whole wheat instead and was impressed with the final product. However, I’ve been having an issue baking in general with the weather changing (I live in Michigan). My house is pretty cool, and it takes forever for my bread to ferment. And proof. I let this bulk ferment for an extra hour and a half, and it proofed for an hour and a half. The loaf rose well, TOO well, and busted out the top. Was it under proofed? Do you have suggestions? Thank you!
Hey, Taylor! Yes, it sounds like your dough was under proofed—a typical symptom is a loaf that rises somewhat erratically in the oven and potentially bursts out the sides and/or top. Try to warm your mixing water so your dough ends up at a warmer temperature at the end of mixing, this will help keep bulk fermentation on track. You could also look into picking up a dough proofer, a super handy tool if you find yourself baking often. Hope that helps and happy baking!
Hi Maurizio! Currently proofing this dough and very excited to see how it turns out. I’m wondering why you didn’t do an autolyze with this dough? Is that standard for spelt? And can you give me some pointers on how to tell when the spelt preferment is ripe? mine had already fallen a little when I woke up this morning (maybe because I used fresh-milled grains) – do you think the results will be ok? Thank you!
Awesome, Tara! Check out my guide to the autolyse technique for why I didn’t (but sometimes do) use it in my recipes. For the preferment, look for a very loose consistency, bubbles on top and sides, a sour aroma, and signs of good rise. The fact that it fell in the jar is a good indicator things are on track, but doesn’t necessarily mean it’s ready (or not)—it’s more of a combination of all these things!
I think it will be just fine even though it fell before you got to using it.
I made this recipe with freshly milled spelt and it turned out really tasty. Now I’ve acquired a bag of Khorasan which I’ve never used before. My family eats a lot of sandwich bread, do you think I could make this recipe with Khorasan? Thanks for any thoughts you have!
Glad to hear that, Mary! You certainly could. You will almost certainly need to adjust the hydration of the loaf with the new grain, in my experience khorasan can take more water than spelt. Hold back water during mixing and add it in as necessary!
Have wanted to try this recipe for a while, wanted to bake something with all spelt! Haven’t cut into it yet so don’t know how the crumb is, but for some reason the dough basically didn’t rise at all in the tins (I waited way longer than what you suggest), but at some point when poked the indent never recovered fully, so i thought the dough was proofed, although with close to no visible rise. I haven’t baked tinned loaves before (apart from rye bread, which rose well!), and normally I do a cold retard, unlike this time, so could be wrong with the poke test interpretation… Then in the oven had a very good oven spring and the crust burst open (should have scored it!). Do you think I underproofed it, after all? Thank you!
Here is the crumb shoot, looks quite nice nice I think, and it’s really tasty of course! https://photos.app.goo.gl/dV1oM1kKc8AKaugr5
Yea, it actually looks pretty nice! It looks like you have good fermentation in there, I’m wondering if the dough was just too hydrated and you never saw significant rise. You could try dropping the water a bit next time, perhaps 2-5%, and see if you see some more volume gain in the loaf! Either way, it does look tasty—enjoy!
Thank you! It didn’t feel too hydrated at all, wasn’t too sticky and was very easy to shape, with a little water, like you suggest in the recipe. Somehow when I try proofing bread at RT (with wheat breads I’ve only tried on a couche, with baguettes or ciabattas) I never notice significant rise, for baguettes I had to switch to a cold retard to get a good oven spring too. At least the spring was good here, so the result is nice!