


When I think of pastry that’s delicious and elegant—yet uncomplicated in execution—these sourdough chocolate knots will henceforth forever rise to the top. Their contortions paint chocolate through the knot in a candy cane-like design, providing a little extra flourish that elevates their deliciousness—we do eat with our eyes first, after all. But by taking a naturally leavened enriched dough and rolling it out thin, cutting it, and then twisting it, the result is more than just their charming looks: an intertwining of sweet, butter-enriched dough with chocolate that, when exposed to the heat of the oven, melts just enough to amplify its nutty and roasted coffee flavor further.
The dough and the filling are a marriage of two buttery things that sum to a result greater than their parts.
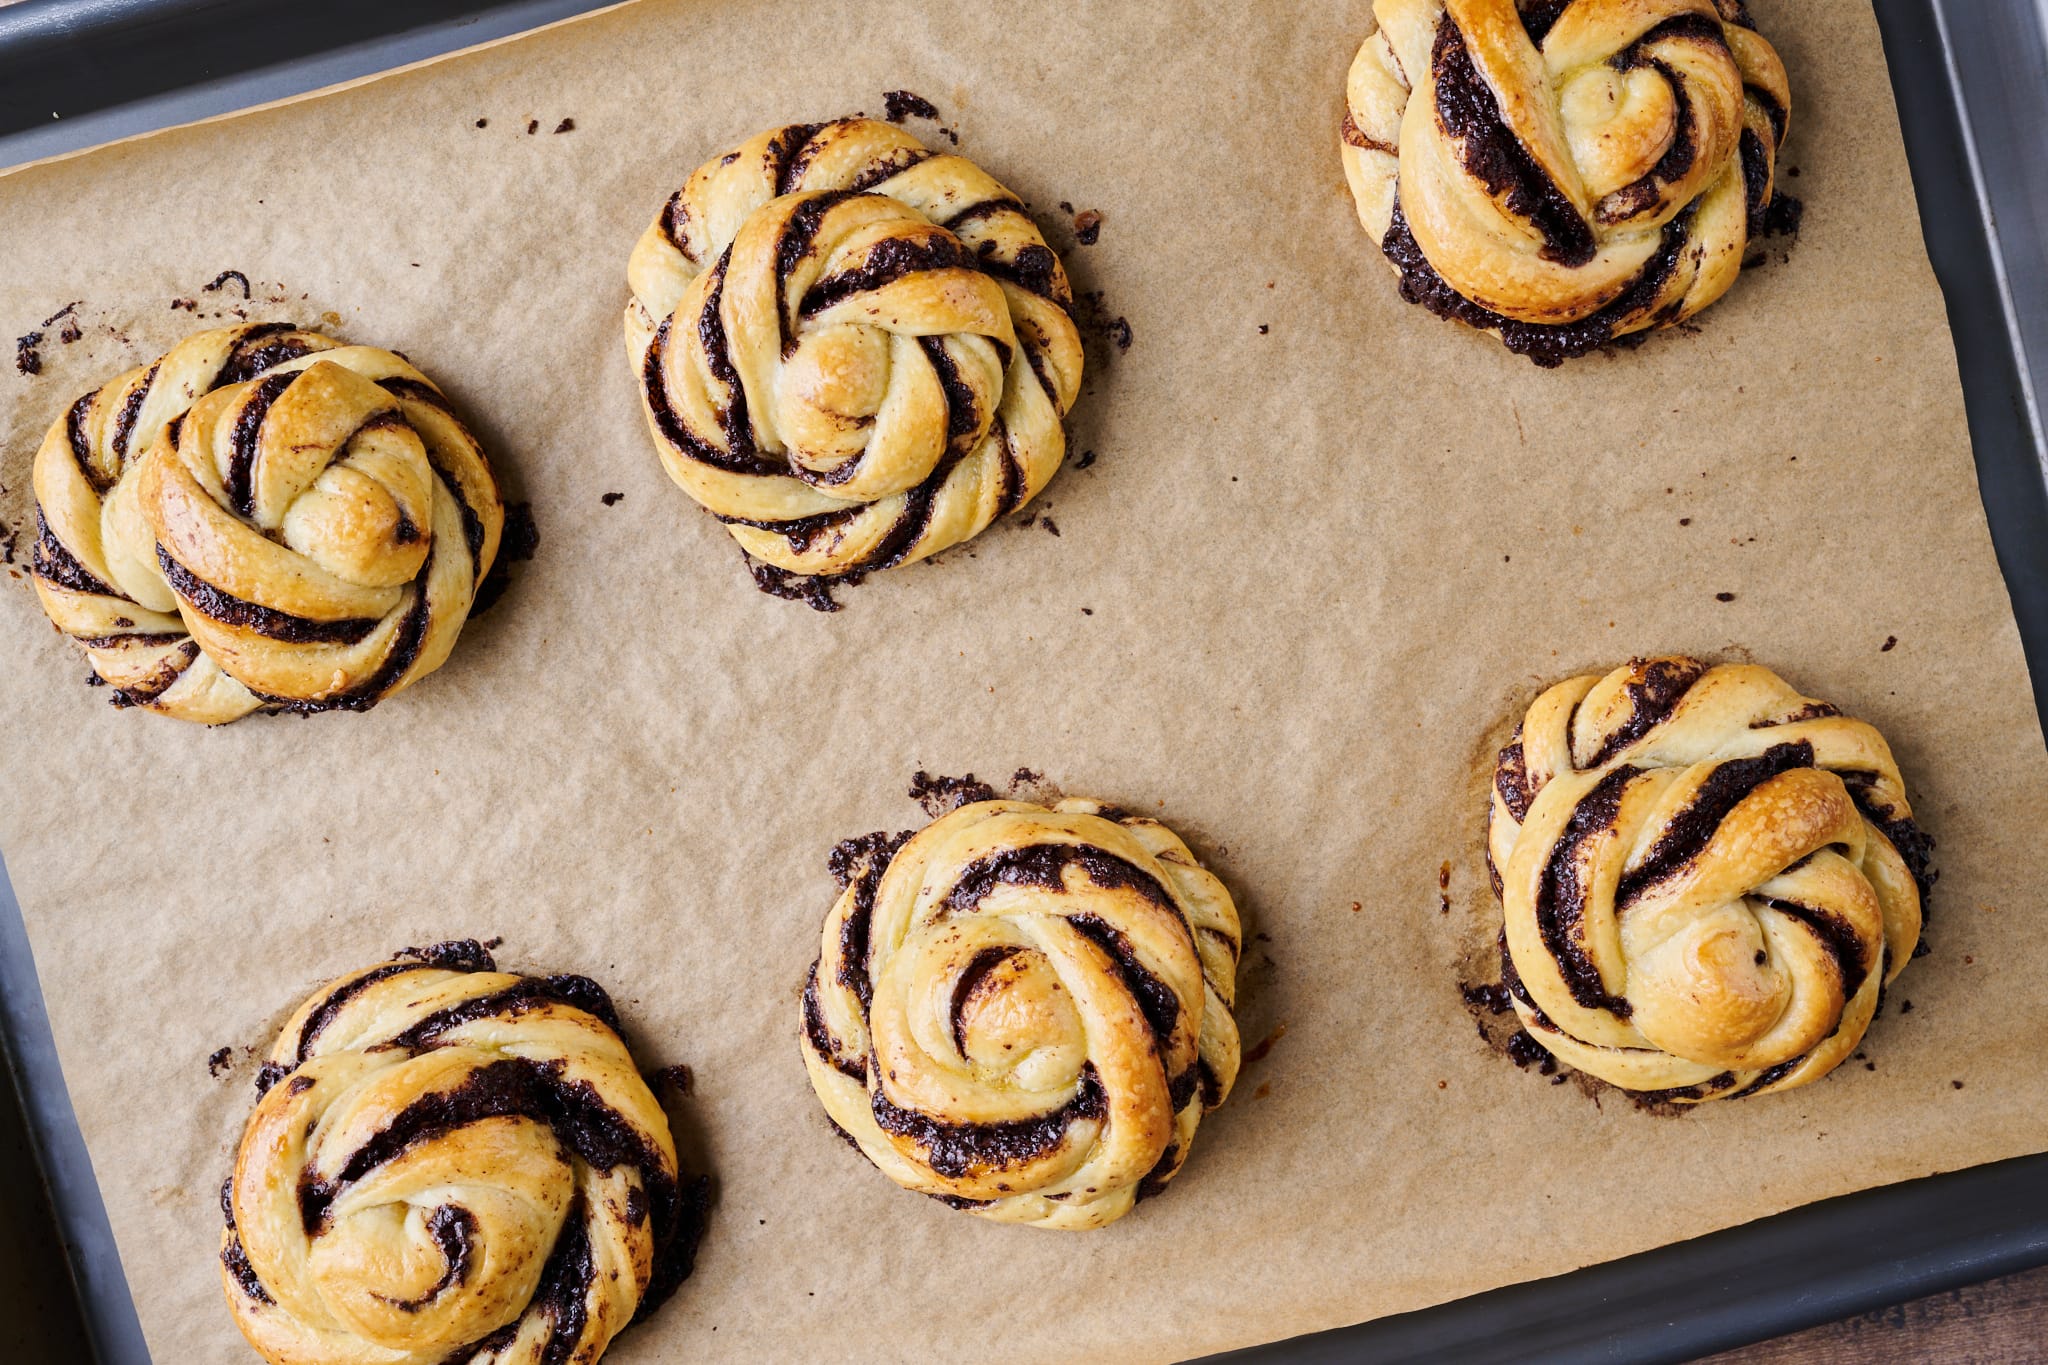
I’ve been working with chocolate often in the past few months, as my chocolate sourdough bread is evidence, and I’m absolutely okay with that. It’s a given working chocolate into pastry such as these chocolate knots, but one must have the right chocolate to take any pastry (or bread) from good to great.
Flour and ingredient selection
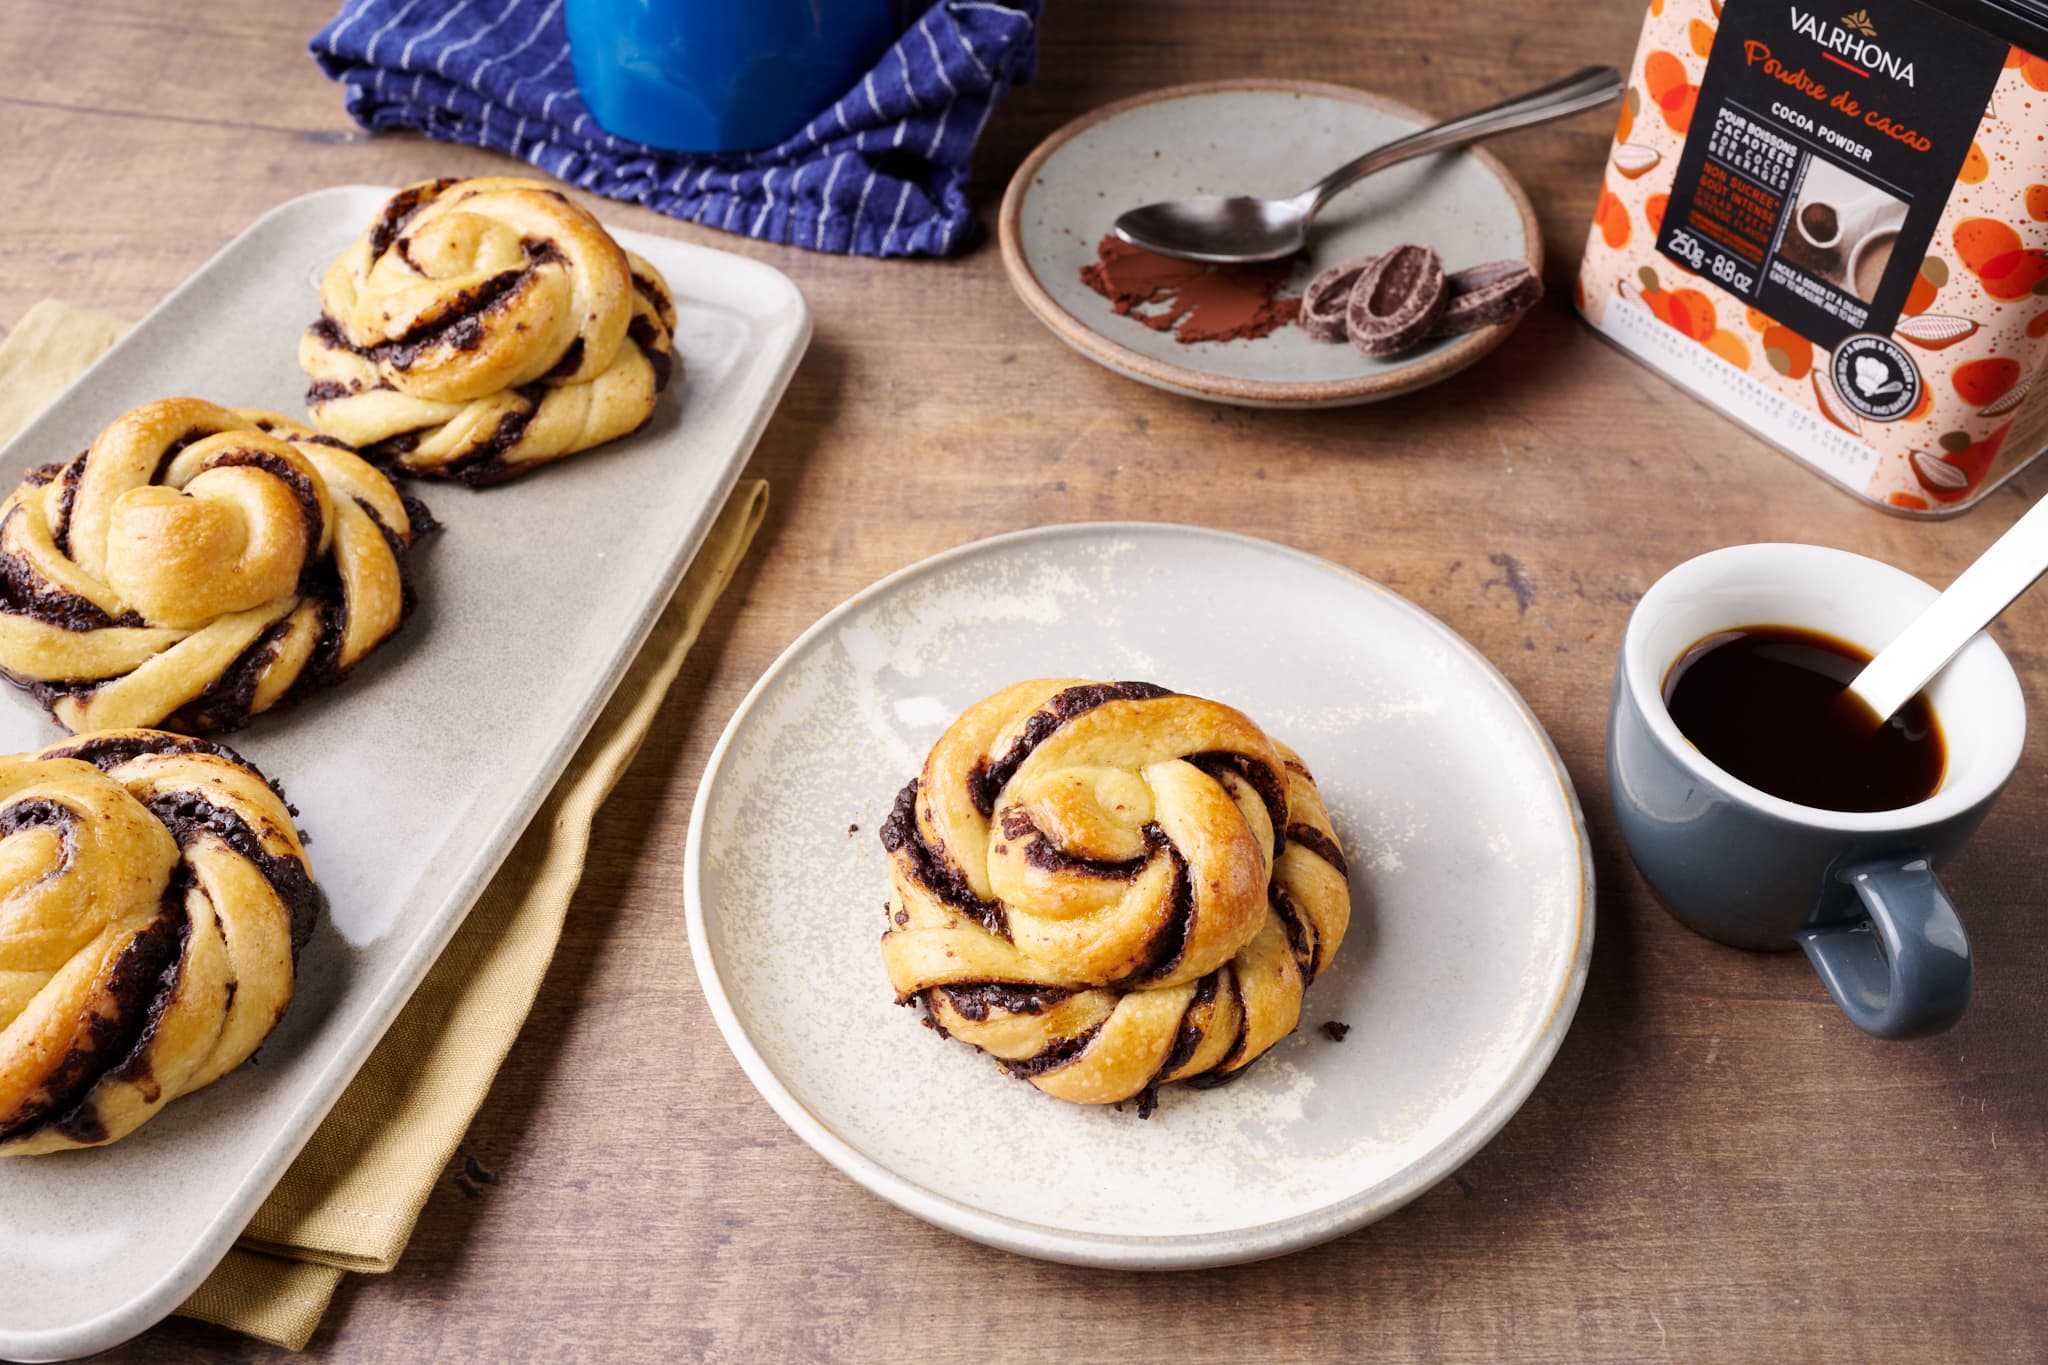
This recipe was sponsored by Valrhona, makers of my favorite chocolate for baking. For years, Valrhona has been a staple in my kitchen, used in everything from sourdough chocolate chip cookies to pastry (a chocolate bomboloni filling is one of my favorites).
For these sourdough chocolate knots, I wanted to incorporate their rich cocoa powder and their Grand Cru Caraïbe baking chocolate. Caraïbe is 66% cacao and has a wonderful roasted coffee and nut flavor that complements the overall flavor profile in these naturally leavened sweets.
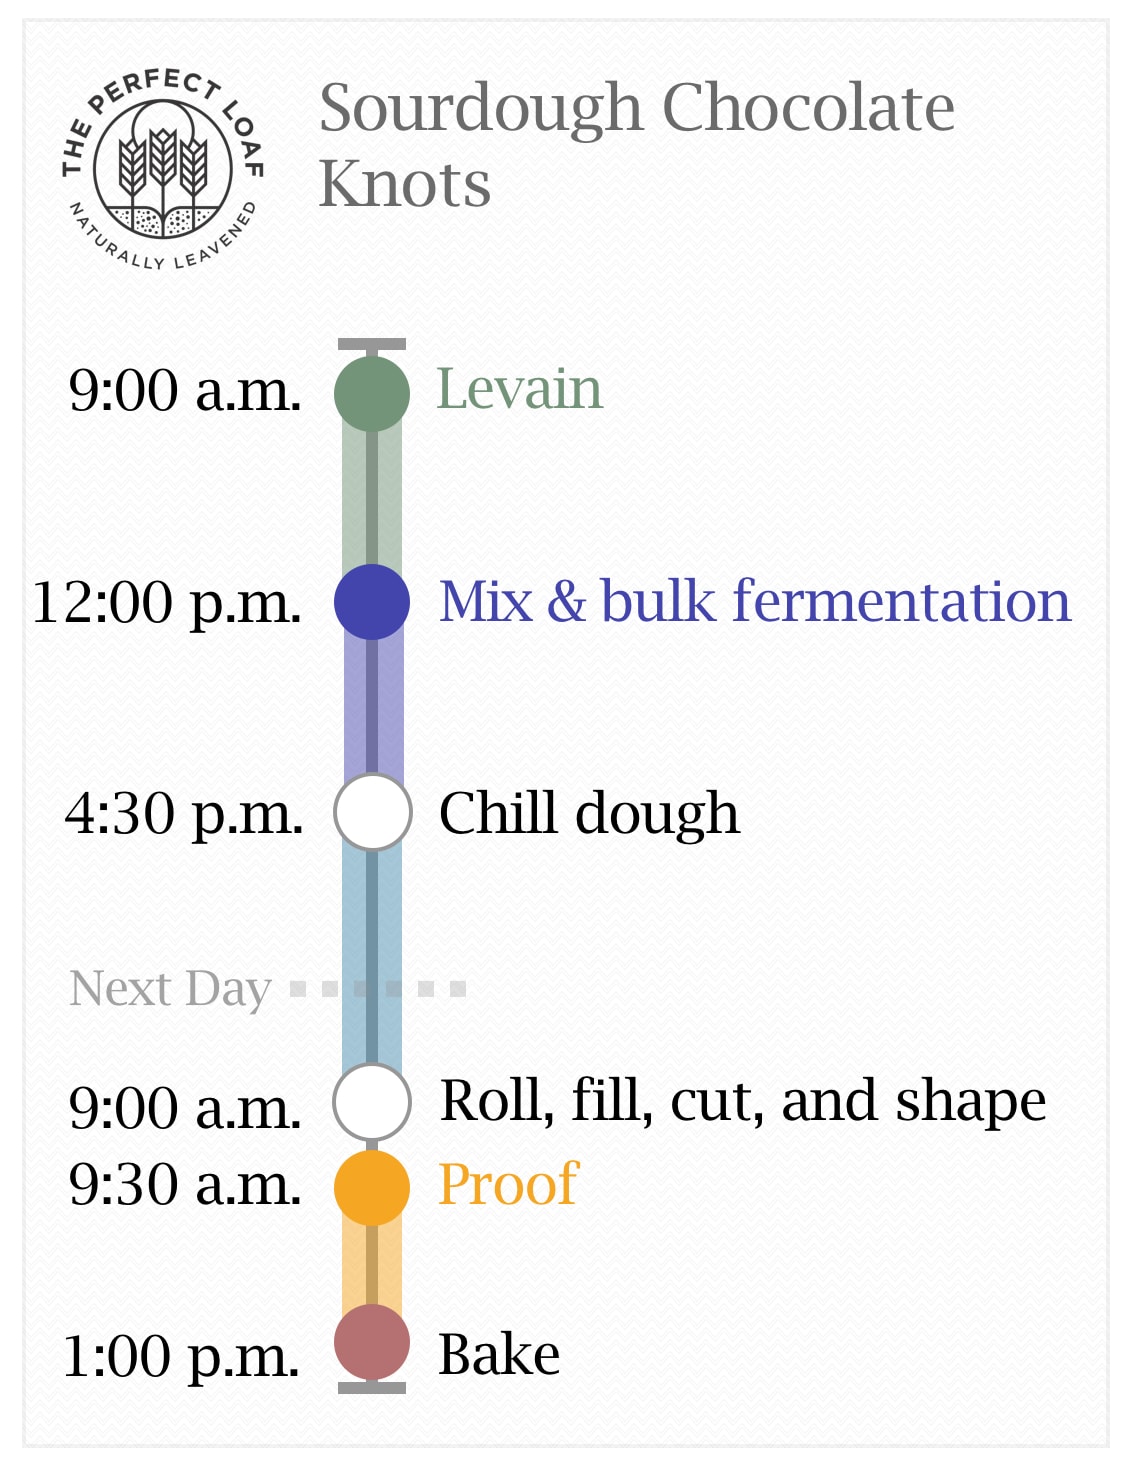
Baking schedule
These sourdough chocolate knots are made over two days, but there are options for adjusting the schedule.
Same day option: While the recipe calls for chilling the dough at the end of bulk fermentation in the refrigerator overnight, you could shorten this step to make the knots in a single day. However, I’d recommend at least chilling the dough for one hour or until the dough is firm and cool to the touch. Then, proceed with the recipe as directed. Chilling the dough makes rolling, filling, cutting, and twisting the dough possible.
Bake early on the second-day option: Chill the dough at the end of bulk fermentation for an hour instead of overnight, then proceed to shape the knots. Cover the sheet pans with knots and refrigerate them overnight. The next day, take them out and let them proof for several hours until puffy to the touch. This two-day process will mean you can have the sourdough chocolate knots ready for baking earlier on the second day.
Sourdough chocolate knots formula
Vitals
| Total dough weight | 800 grams |
| Pre-fermented flour | 12.0% |
| Hydration | 36.0% (water only) |
| Levain in the final dough | 40.9% |
| Yield | 12 chocolate knots |
Total formula
Desired dough temperature: 78°F (25°C) (see my post on the importance of dough temperature).
Main dough
| Weight | Ingredient | Baker’s percentage |
| 367g | High-protein white flour (about 12.7% protein; King Arthur Bread Flour) | 100.0% |
| 92g | Unsalted butter | 25.0% |
| 88g | Whole milk | 24.0% |
| 51g | Egg, beaten (about 1 large) | 14.0% |
| 18g | Superfine sugar (Caster sugar) | 5.0% |
| 132g | Water | 36.0% |
| 7g | Fine sea salt | 2.0% |
| 44g | Ripe sourdough starter, 100% hydration | 12.0% |
Filling
| Weight | Ingredient |
|---|---|
| 110g | Granulated sugar |
| 75g | Unsalted butter |
| 70g | Valrhona Carraibe 66% baking chocolate (or any dark baking chocolate cut into pieces for melting) |
| 25g | Valrhona Dutch Processed Cocoa Powder |
Topping (egg wash)
One whole egg, 1 tablespoon whole milk, and a pinch of salt.
Sourdough chocolate knots method
1. Prepare the levain – 9:00 a.m.
Mix the following ingredients in a jar and leave them covered at a warm temperature, 74-76°F (23-24°C), to ripen for 3 hours.
| Weight | Ingredient | Baker’s percentage |
| 44g | High-protein white flour | 100.0% |
| 44g | Water | 100.0% |
| 44g | Ripe sourdough starter, 100% hydration | 100.0% |
2. Mix – 12:00 p.m.
| Weight | Ingredient |
| 323g | High-protein white flour |
| 92g | Unsalted butter |
| 88g | Whole milk |
| 51g | Egg, beaten |
| 18g | Superfine sugar (Caster sugar) |
| 88g | Water |
| 7g | Fine sea salt |
| 132g | Ripe levain (from Step 1) |
Note: Warm the milk in the microwave or over the stove, as necessary, to help meet the final dough temperature of 78°F (25°C).
First, cut the butter into 1/2″ pats. Set them on a plate to warm to room temperature.
To the bowl of a stand mixer fitted with the dough hook attachment, add the flour, water, milk, egg, sugar, salt, and ripe levain. Mix on low speed (STIR on a KitchenAid) for 1 to 2 minutes until the ingredients come together and no dry bits remain. Next, mix on medium speed (2 to 3 on a KitchenAid) for 5 to 7 minutes until the dough smooths and begins to cling to the hook. If the dough is too dry, add a splash of milk as necessary to soften, but be conservative.
Let the dough rest in the bowl for 10 minutes.
Turn the mixer on low speed (STIR on a KitchenAid) and mix for 2 to 4 minutes until the dough gains more strength and begins to cling once again to the dough hook. Next, with the mixer running, add the room temperature butter, one pat at a time, waiting to add each pat until the previous one is fully absorbed. Adding all the butter will take 5 to 8 minutes. In the end, the dough will be very soft, and it won’t completely remove from the sides of the bowl. Transfer the dough to a bulk fermentation container and cover.
See my guide to mixing for more information on the best way to strengthen your dough.
3. Bulk fermentation – 12:30 p.m. to 4:30 p.m. (4 hours)
At a warm room temperature, 74-76°F (23-24°C), bulk fermentation should take about 4 hours. If your kitchen is cooler, place your bulk container in a small home dough proofer, or extend the bulk fermentation time to give the dough more time to ferment. The dough is ready when it is smooth, puffy, and well-risen.
This dough needs one set of gentle slaps and folds during bulk fermentation. After the first hour, gently scrape the dough out to the work surface. Using damp hands, pick up the dough at the sides, slap it gently down on the counter, stretch it back toward your body, and then fold it over. Rotate both your hands, pick up the dough at its sides, and repeat the same gentle slap and fold over. Repeat these slaps and folds a few times until the dough is smooth on the top and holds itself on the counter, after 4 to 5 times. Then, using a bench scraper, transfer the dough back to the bulk fermentation container. The dough should be neatly folded up in the bowl.
Let the dough rest, covered for the remainder of bulk fermentation.
4. Chill dough – 4:30 p.m. to 9:00 a.m., the next day
After 4 hours, the dough should be risen in the bulk fermentation container and be slightly puffy to the touch. If the dough is still dense and tight, give it another 30 minutes to rise further and check again.
Place the covered bulk fermentation container into the refrigerator for at least 1 hour or overnight (my preference) to firm the dough, making it easier to roll and cut.
5. Roll, fill, cut, and shape – 9:00 a.m.
Line two 13 x 18-inch sheet pans with parchment paper.
Take out the covered bulk fermentation container and let it warm for about 30 minutes until the dough feels cool to the touch but is pliable.
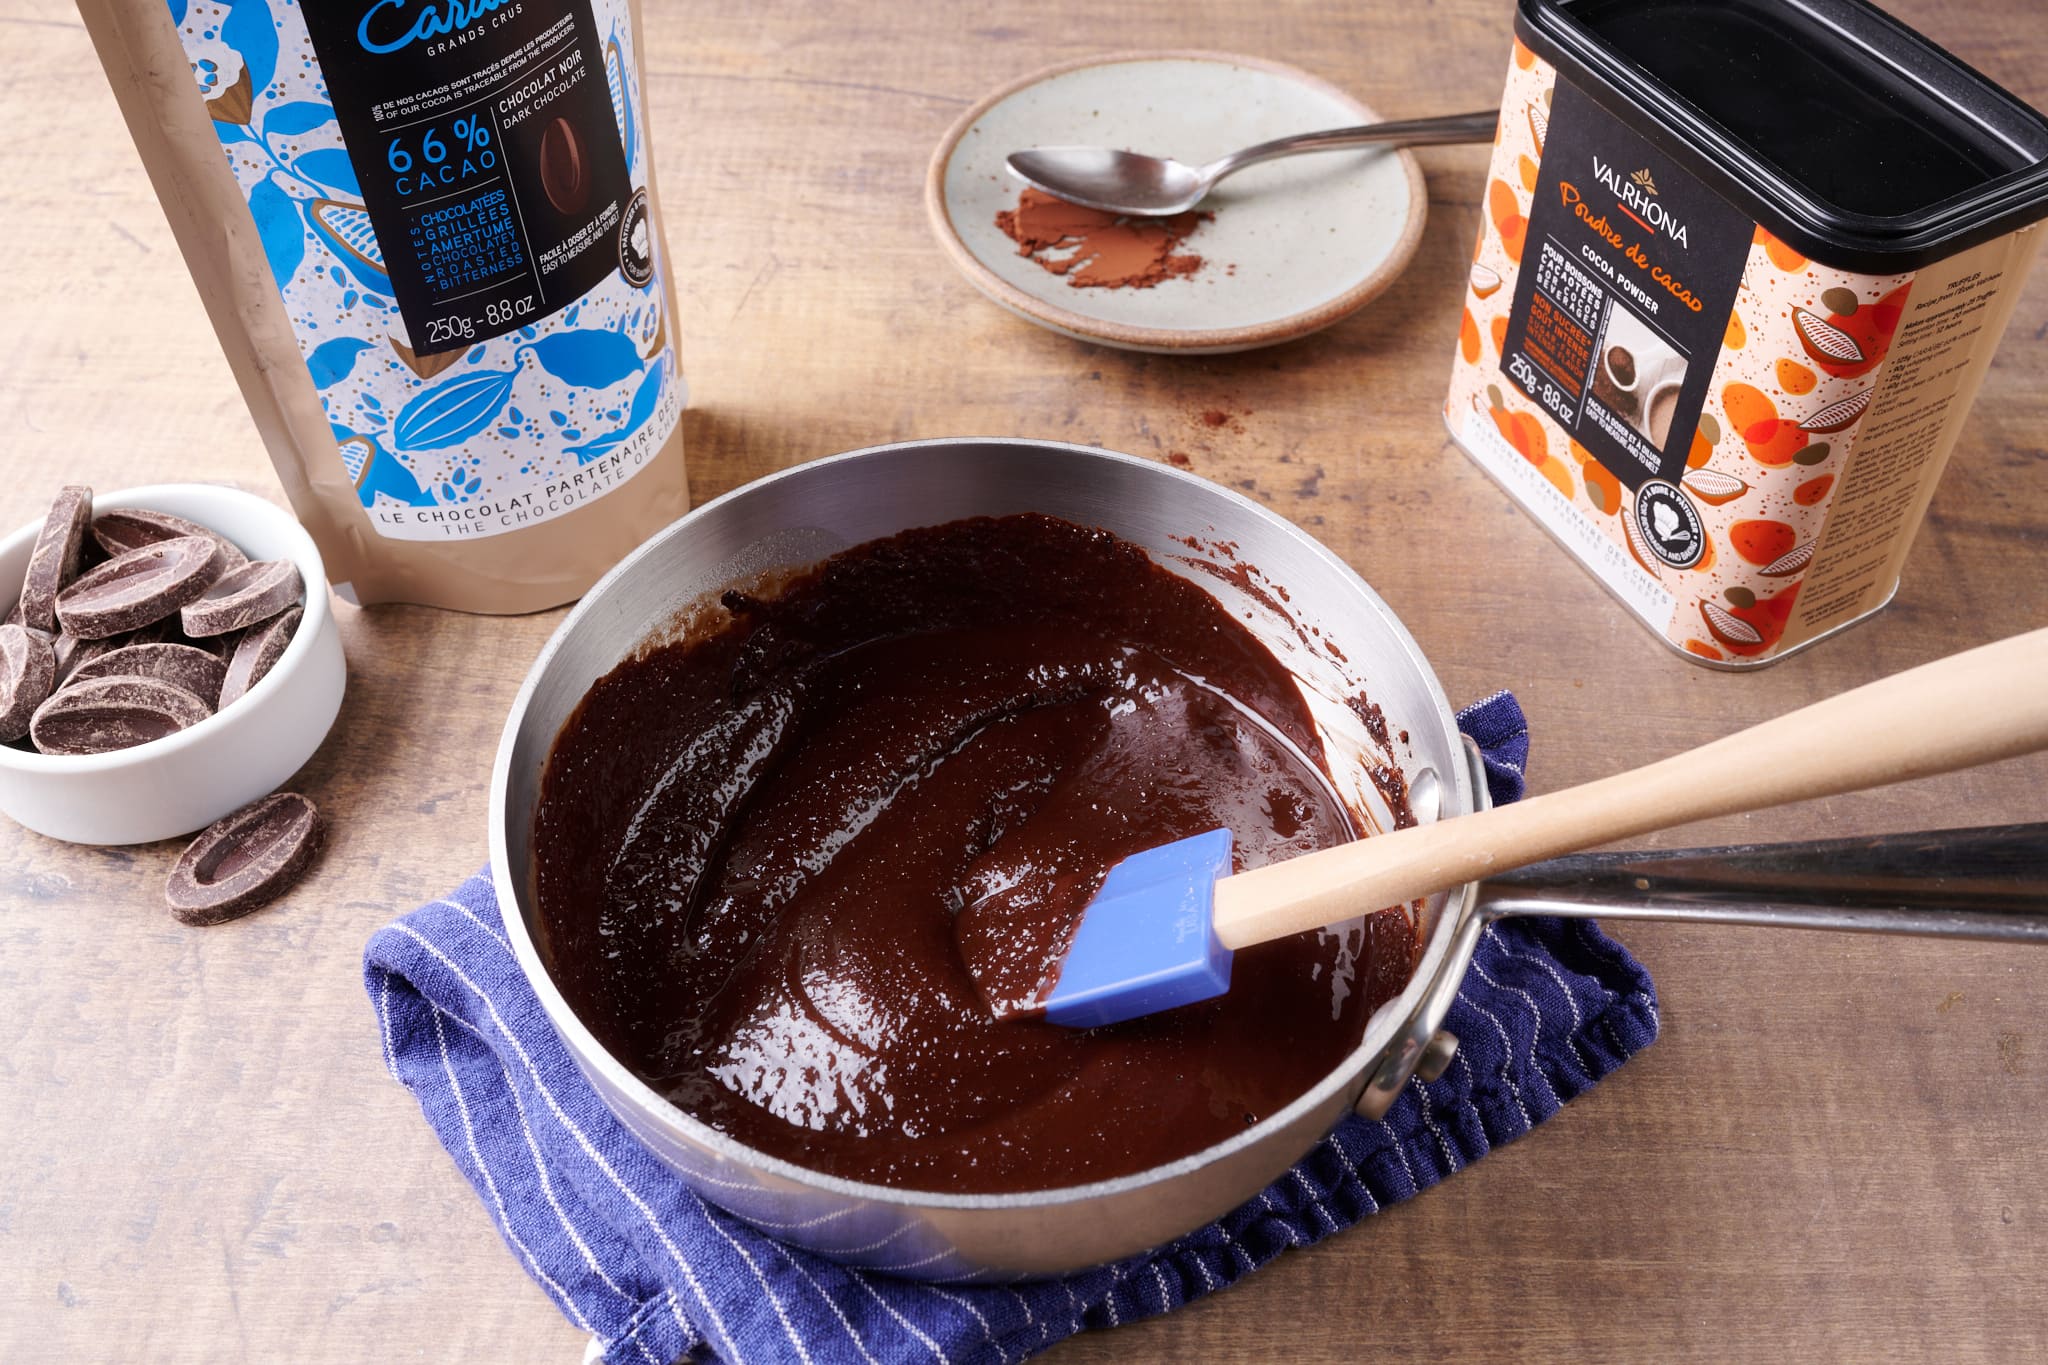
In the meantime, prepare the chocolate filling.
| Weight | Ingredient |
|---|---|
| 110g | Granulated sugar |
| 75g | Unsalted butter |
| 70g | Valrhona Carraibe 66% baking chocolate |
| 25g | Valrhona Dutch Processed Cocoa Powder |
In a medium saucepan, melt the butter. Remove from the heat and add the sugar and baking chocolate pieces; stir everything together while the chocolate melts until everything comes together and smooths. Add the cocoa powder and whisk the mixture into an emulsion using a handheld whisk. Set aside to cool until ready to use.
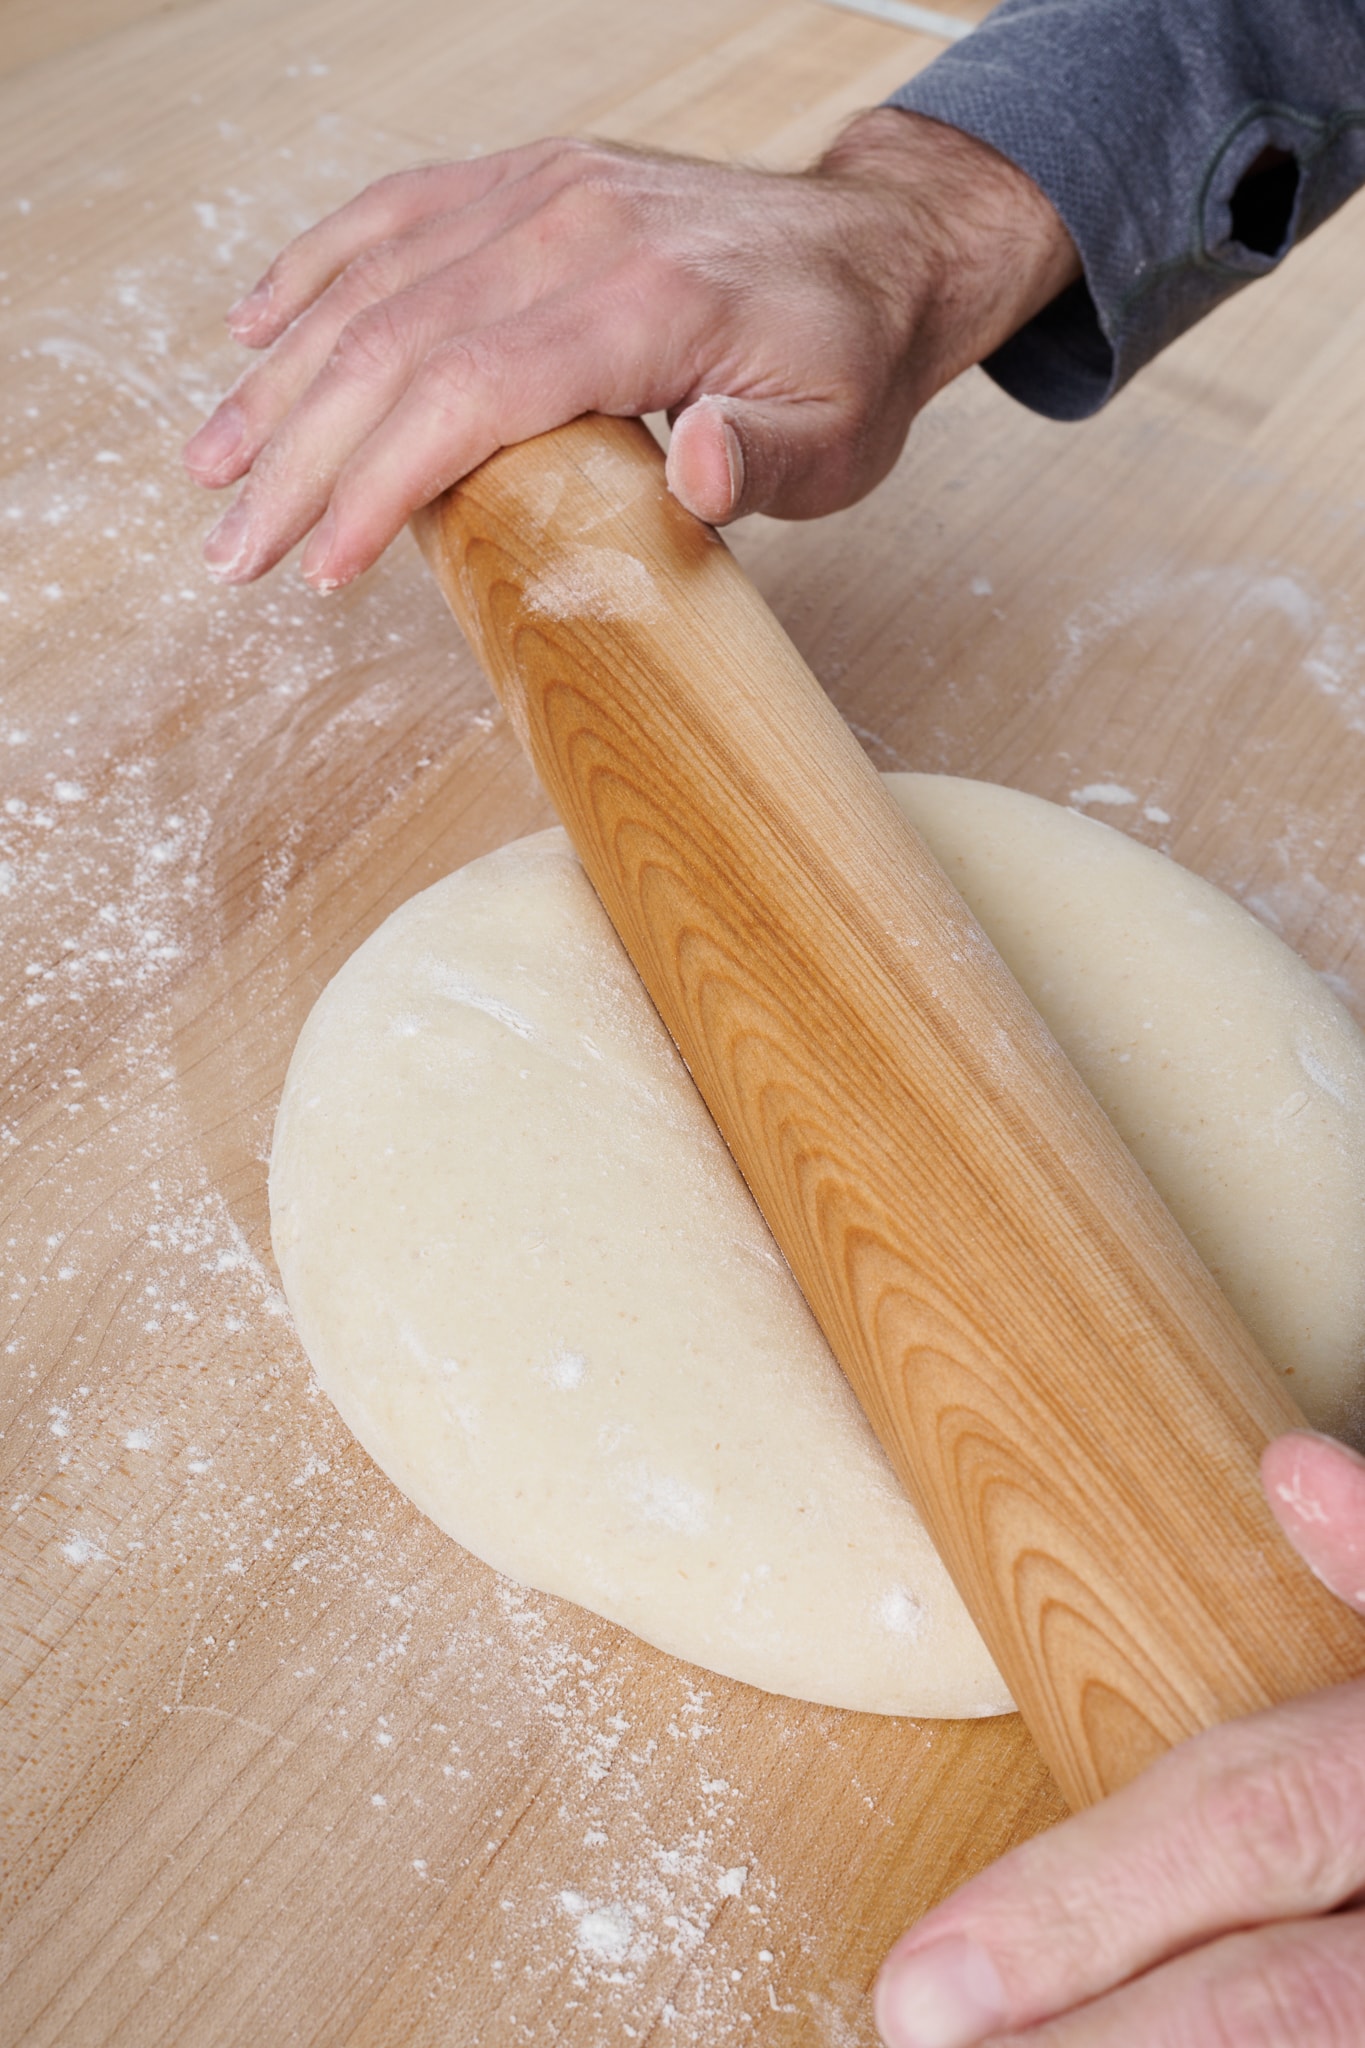
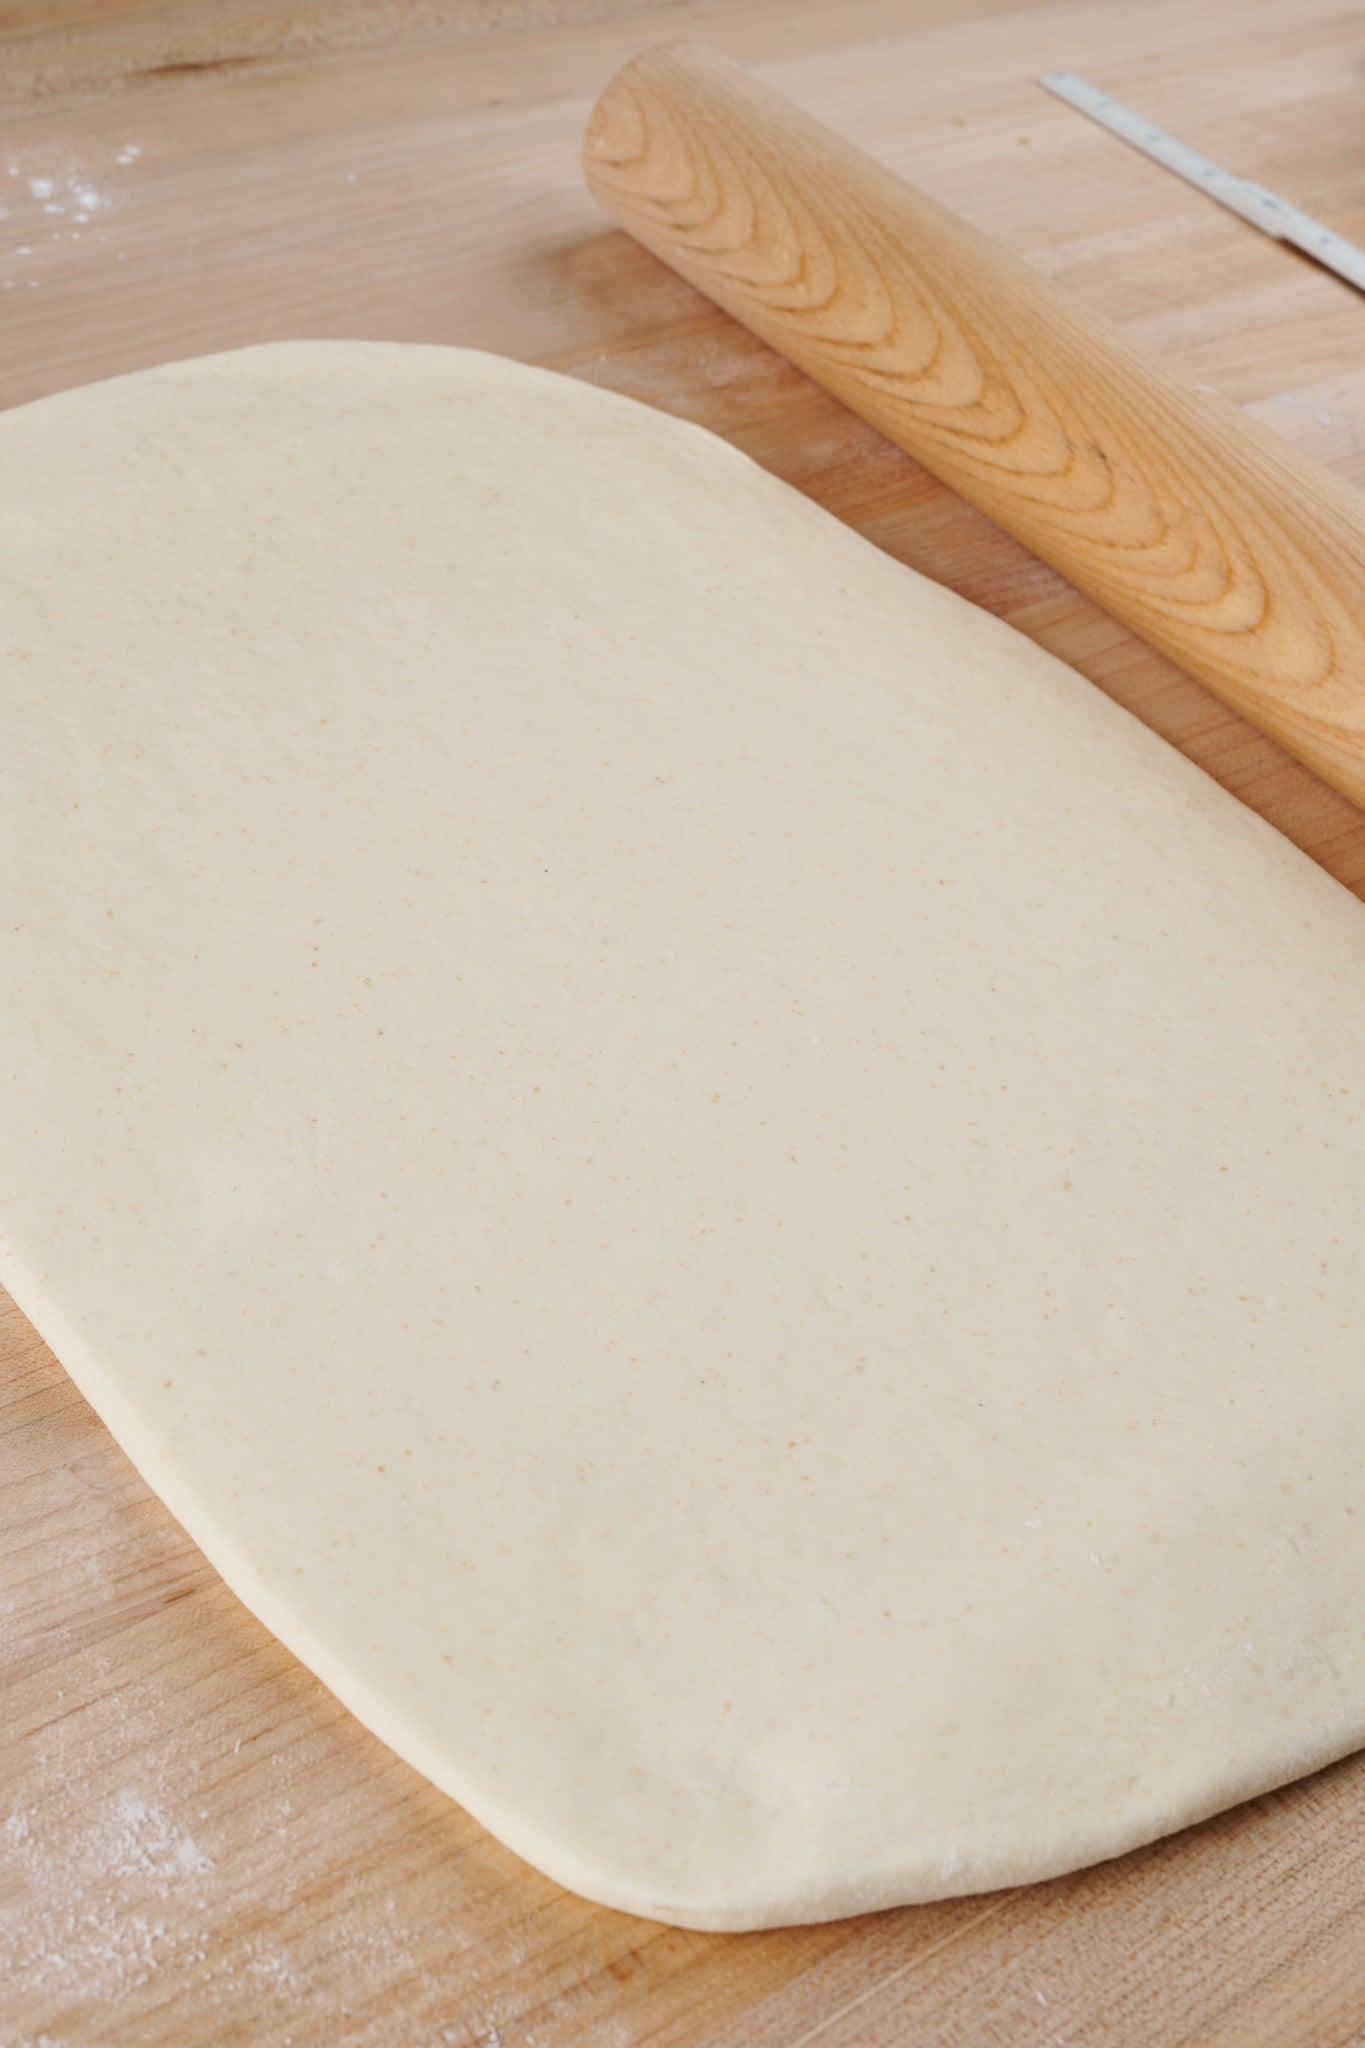
Uncover the dough and liberally flour the top and your work surface. Scrape out the dough to the floured surface, and using a rolling pin, roll out to a rectangle that’s about 12 x 17-inches with the short end nearest your body.
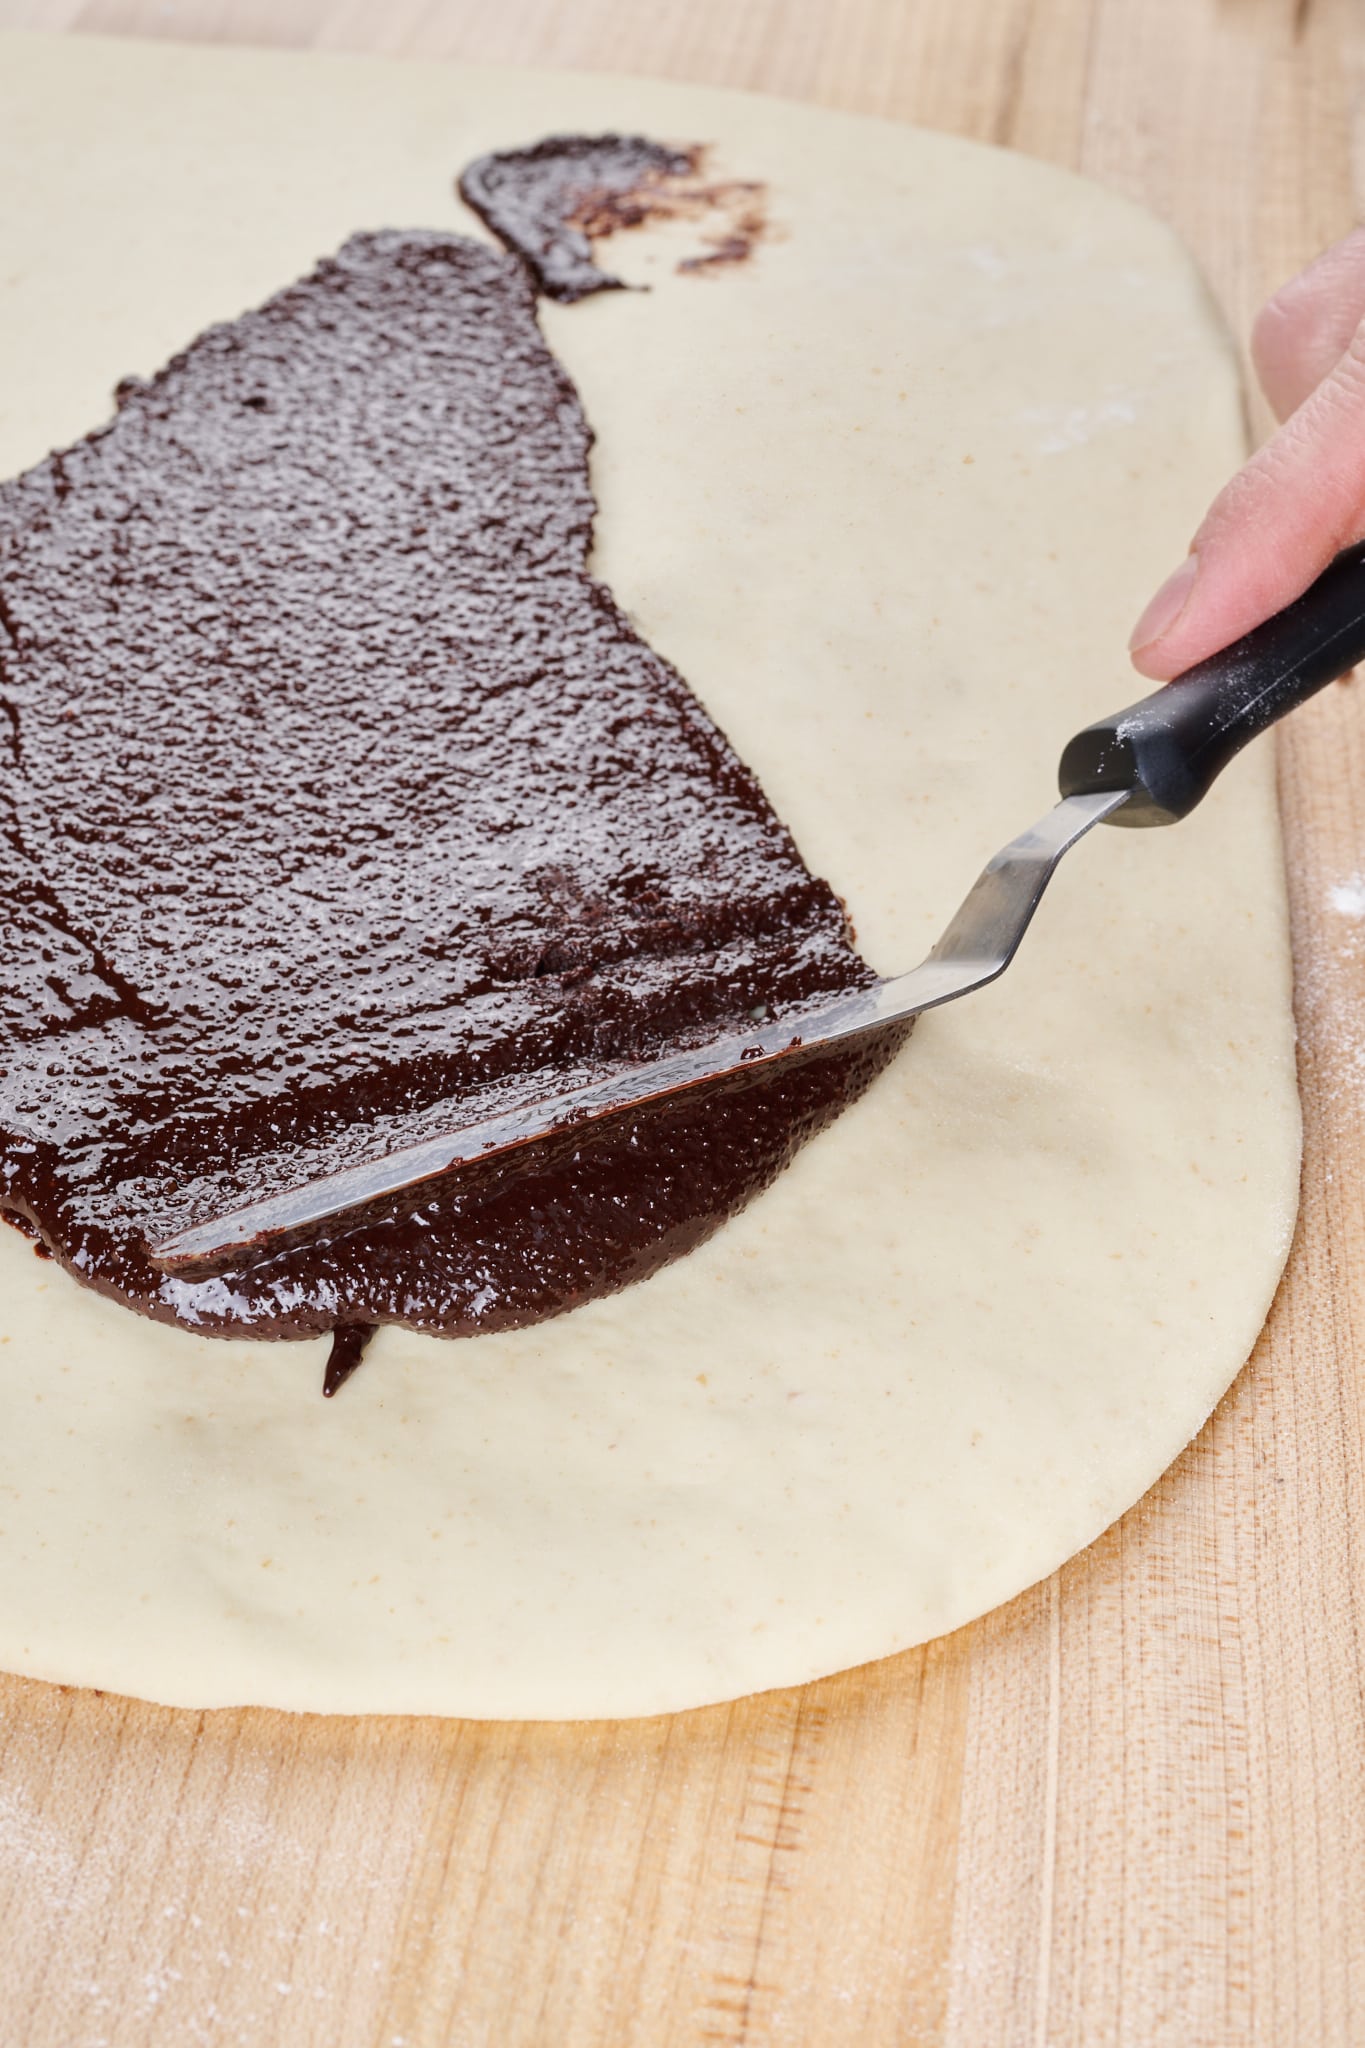
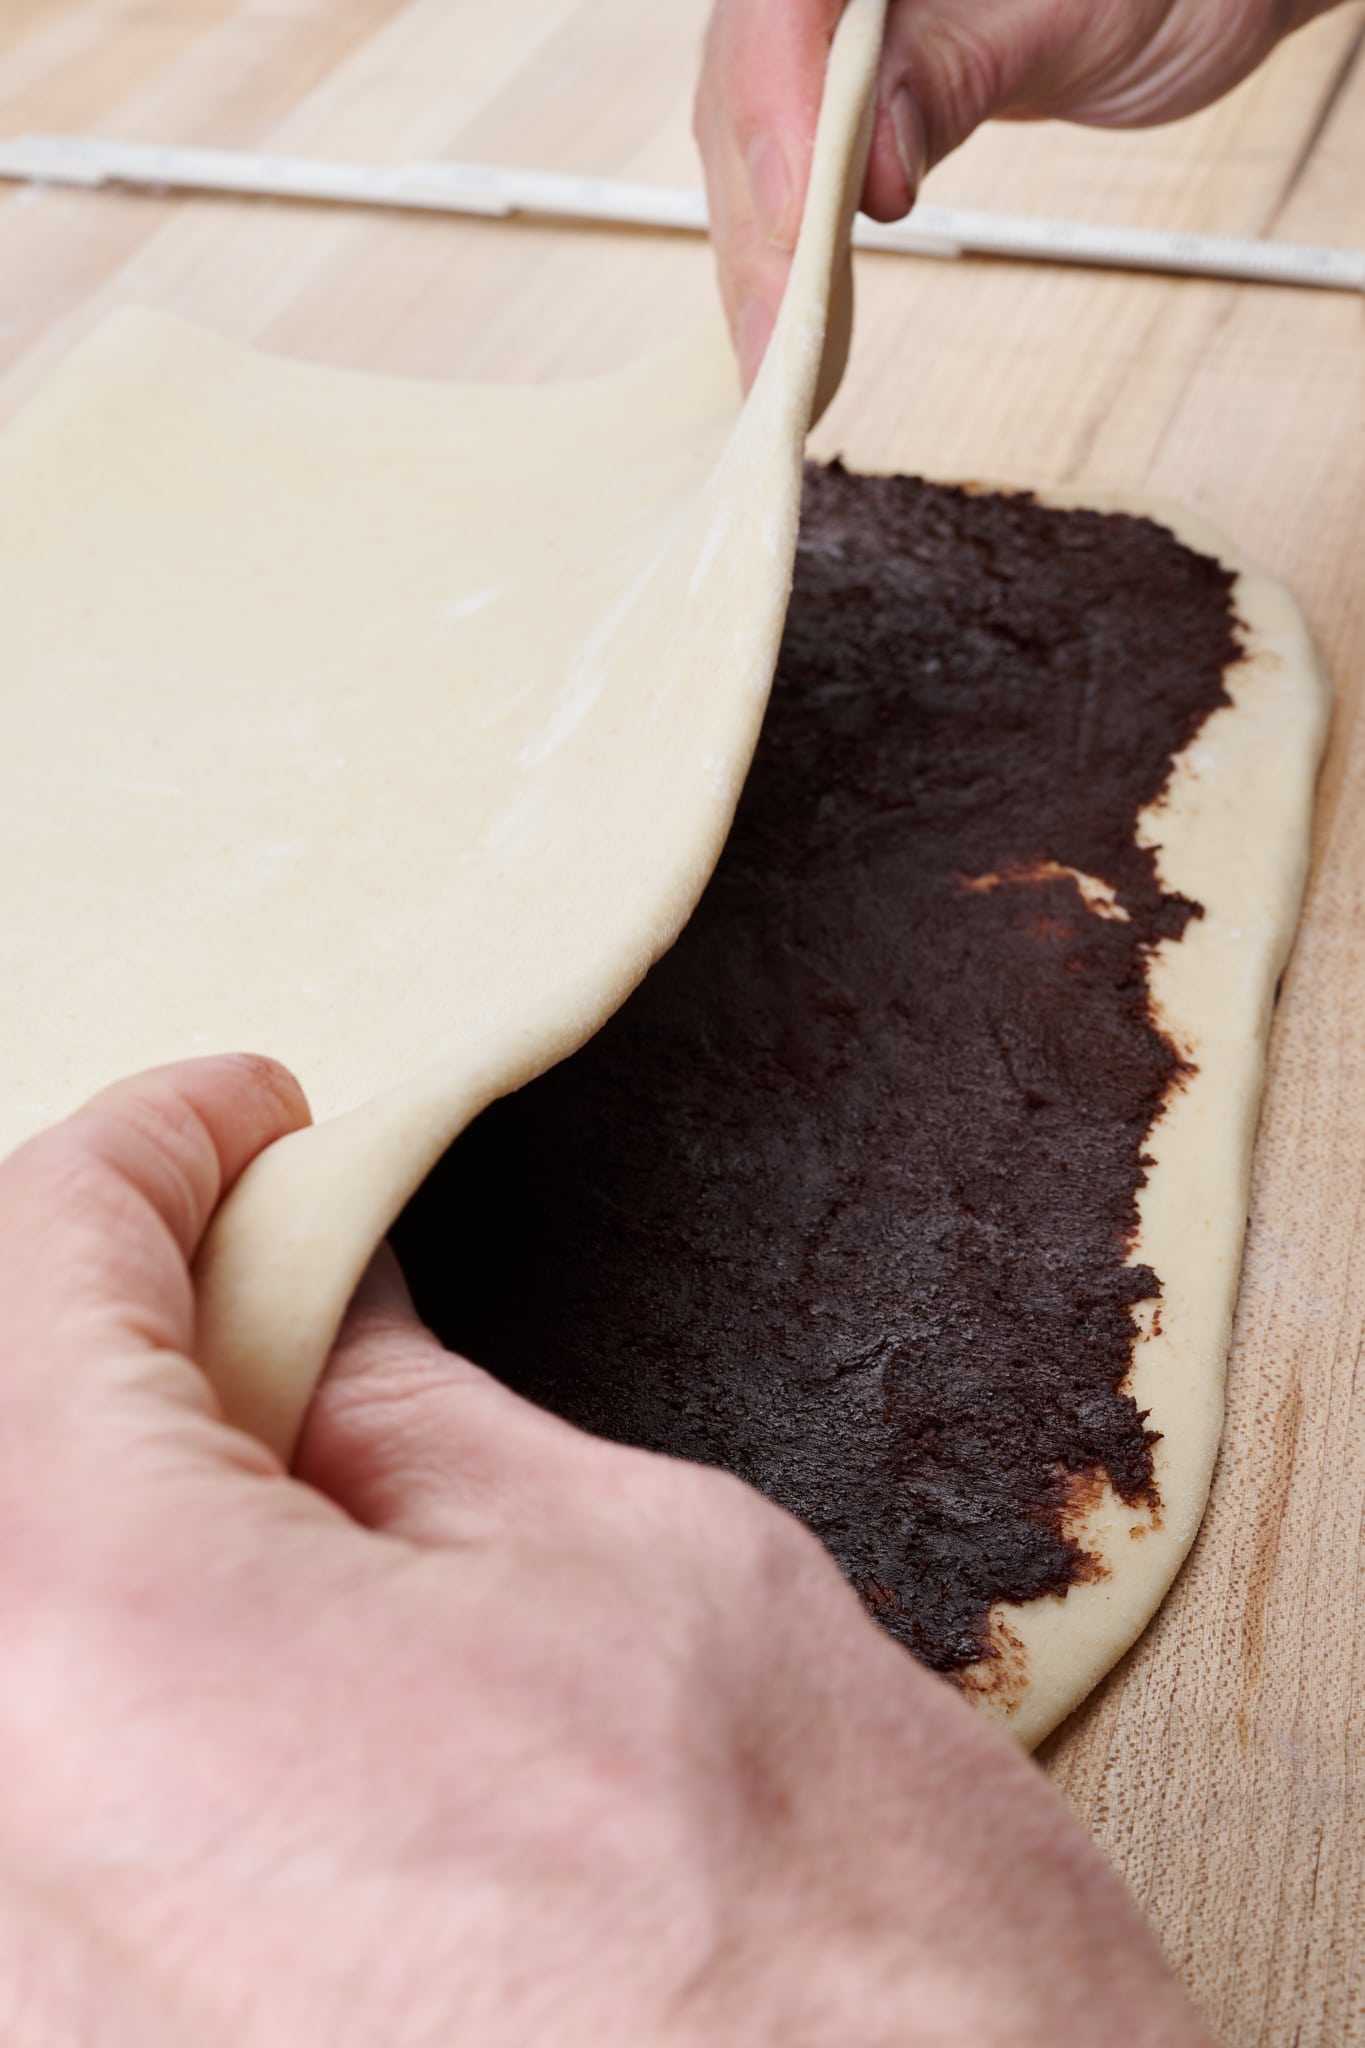
Using a small offset spatula, spread a thin layer of the chocolate filling evenly over half of the dough closest to your body (you may have some chocolate filling leftover). Fold the top half of the dough down over the chocolate. The width of the dough should be 12-inches; if it’s longer, use a knife to trim the ends; if it’s shorter, gently stretch the dough to 12-inches.
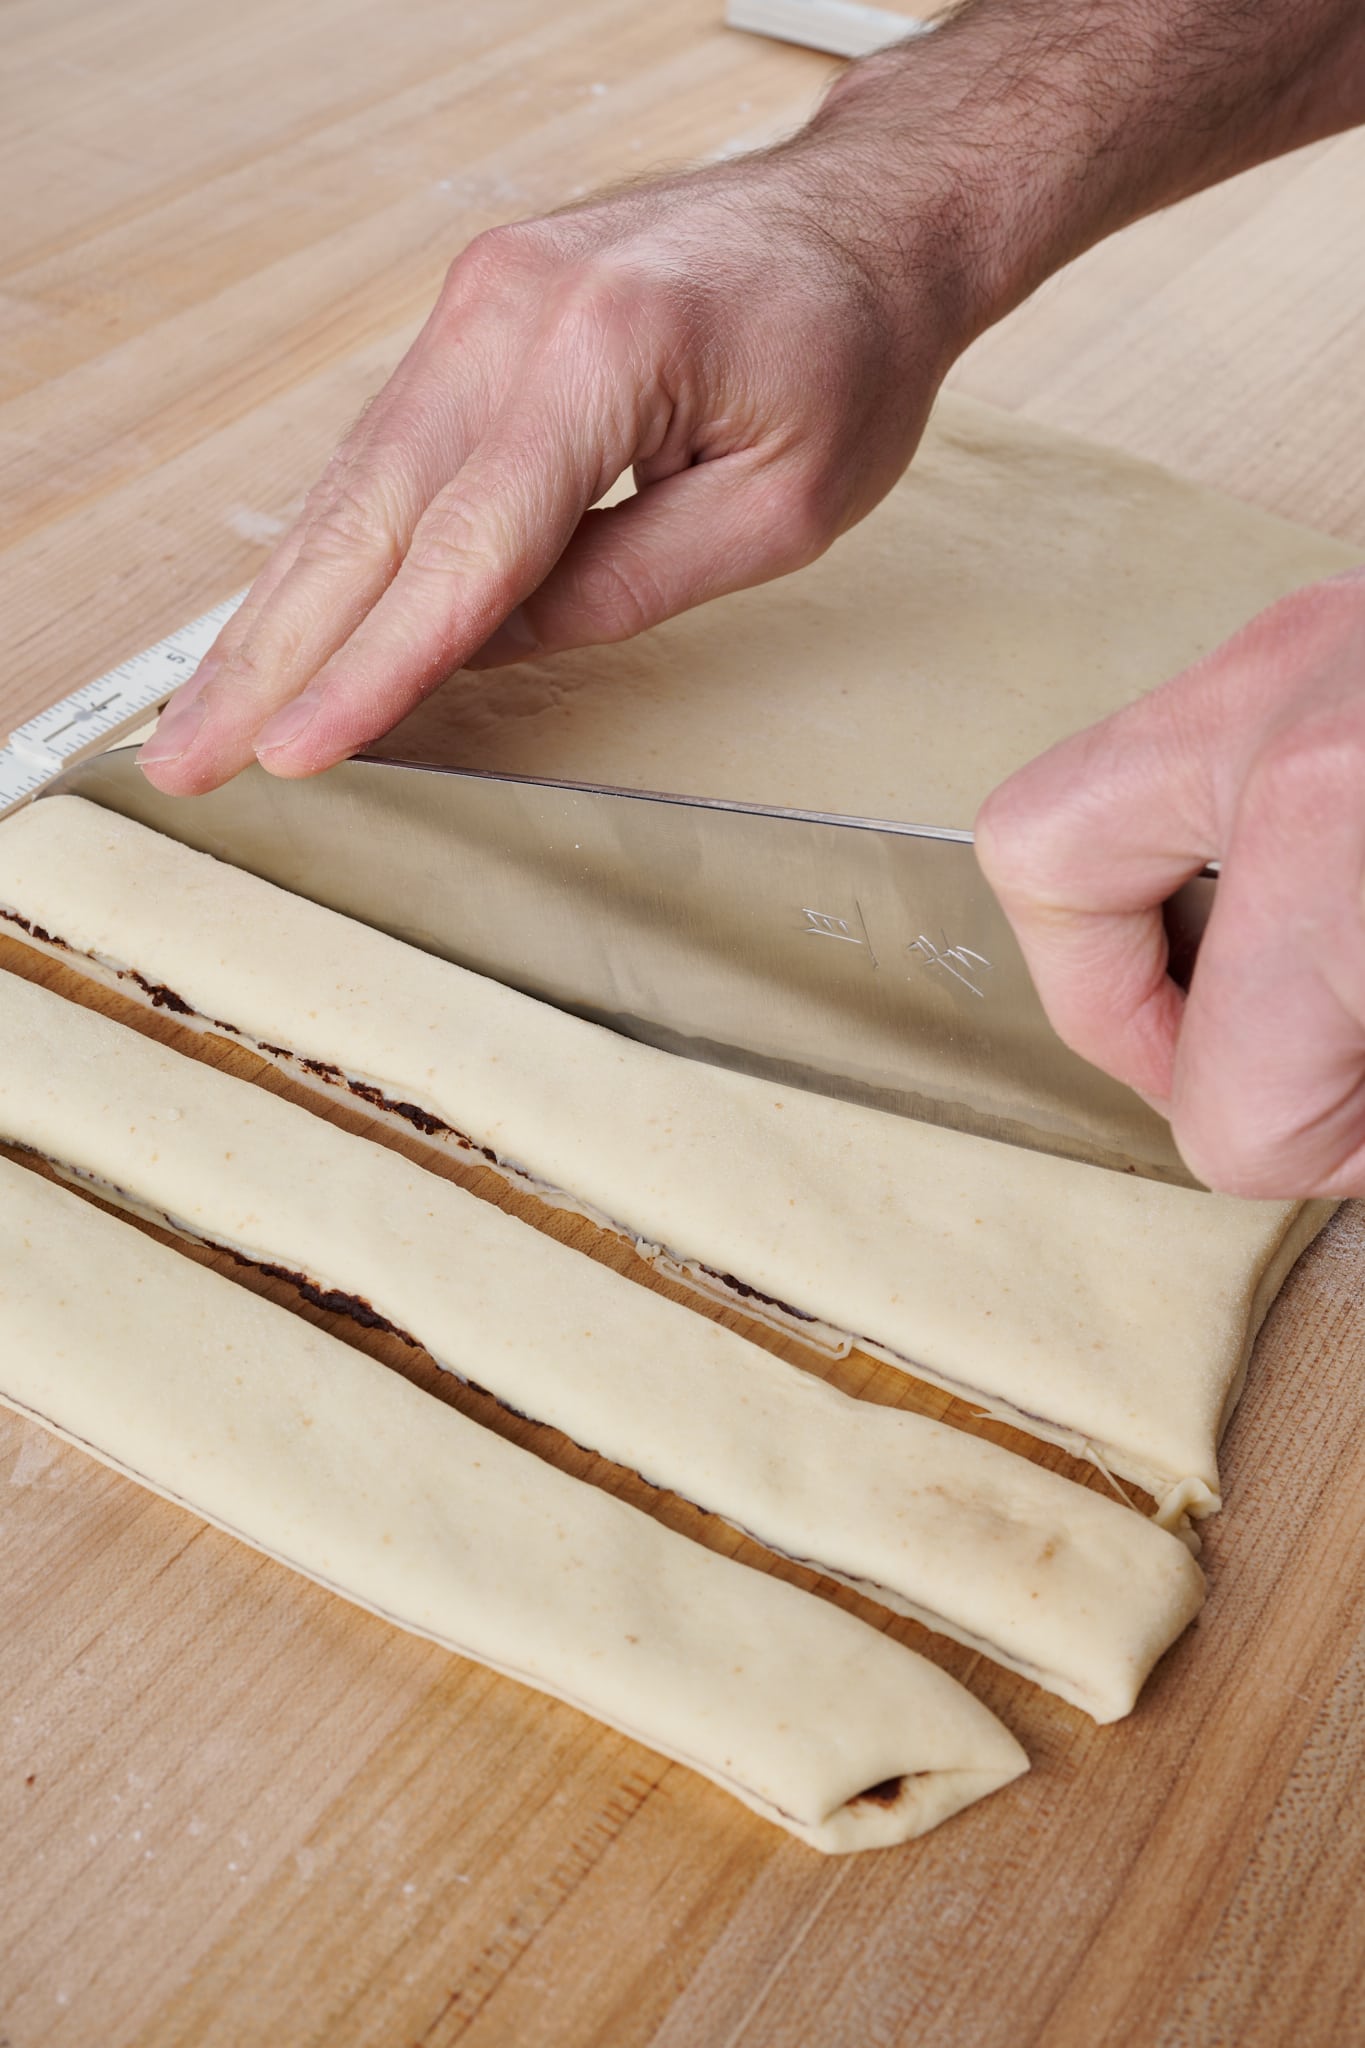
Using a knife, cut the dough into twelve 1-inch strips about 8-inches long (imagine the dough looks like very long piano keys).
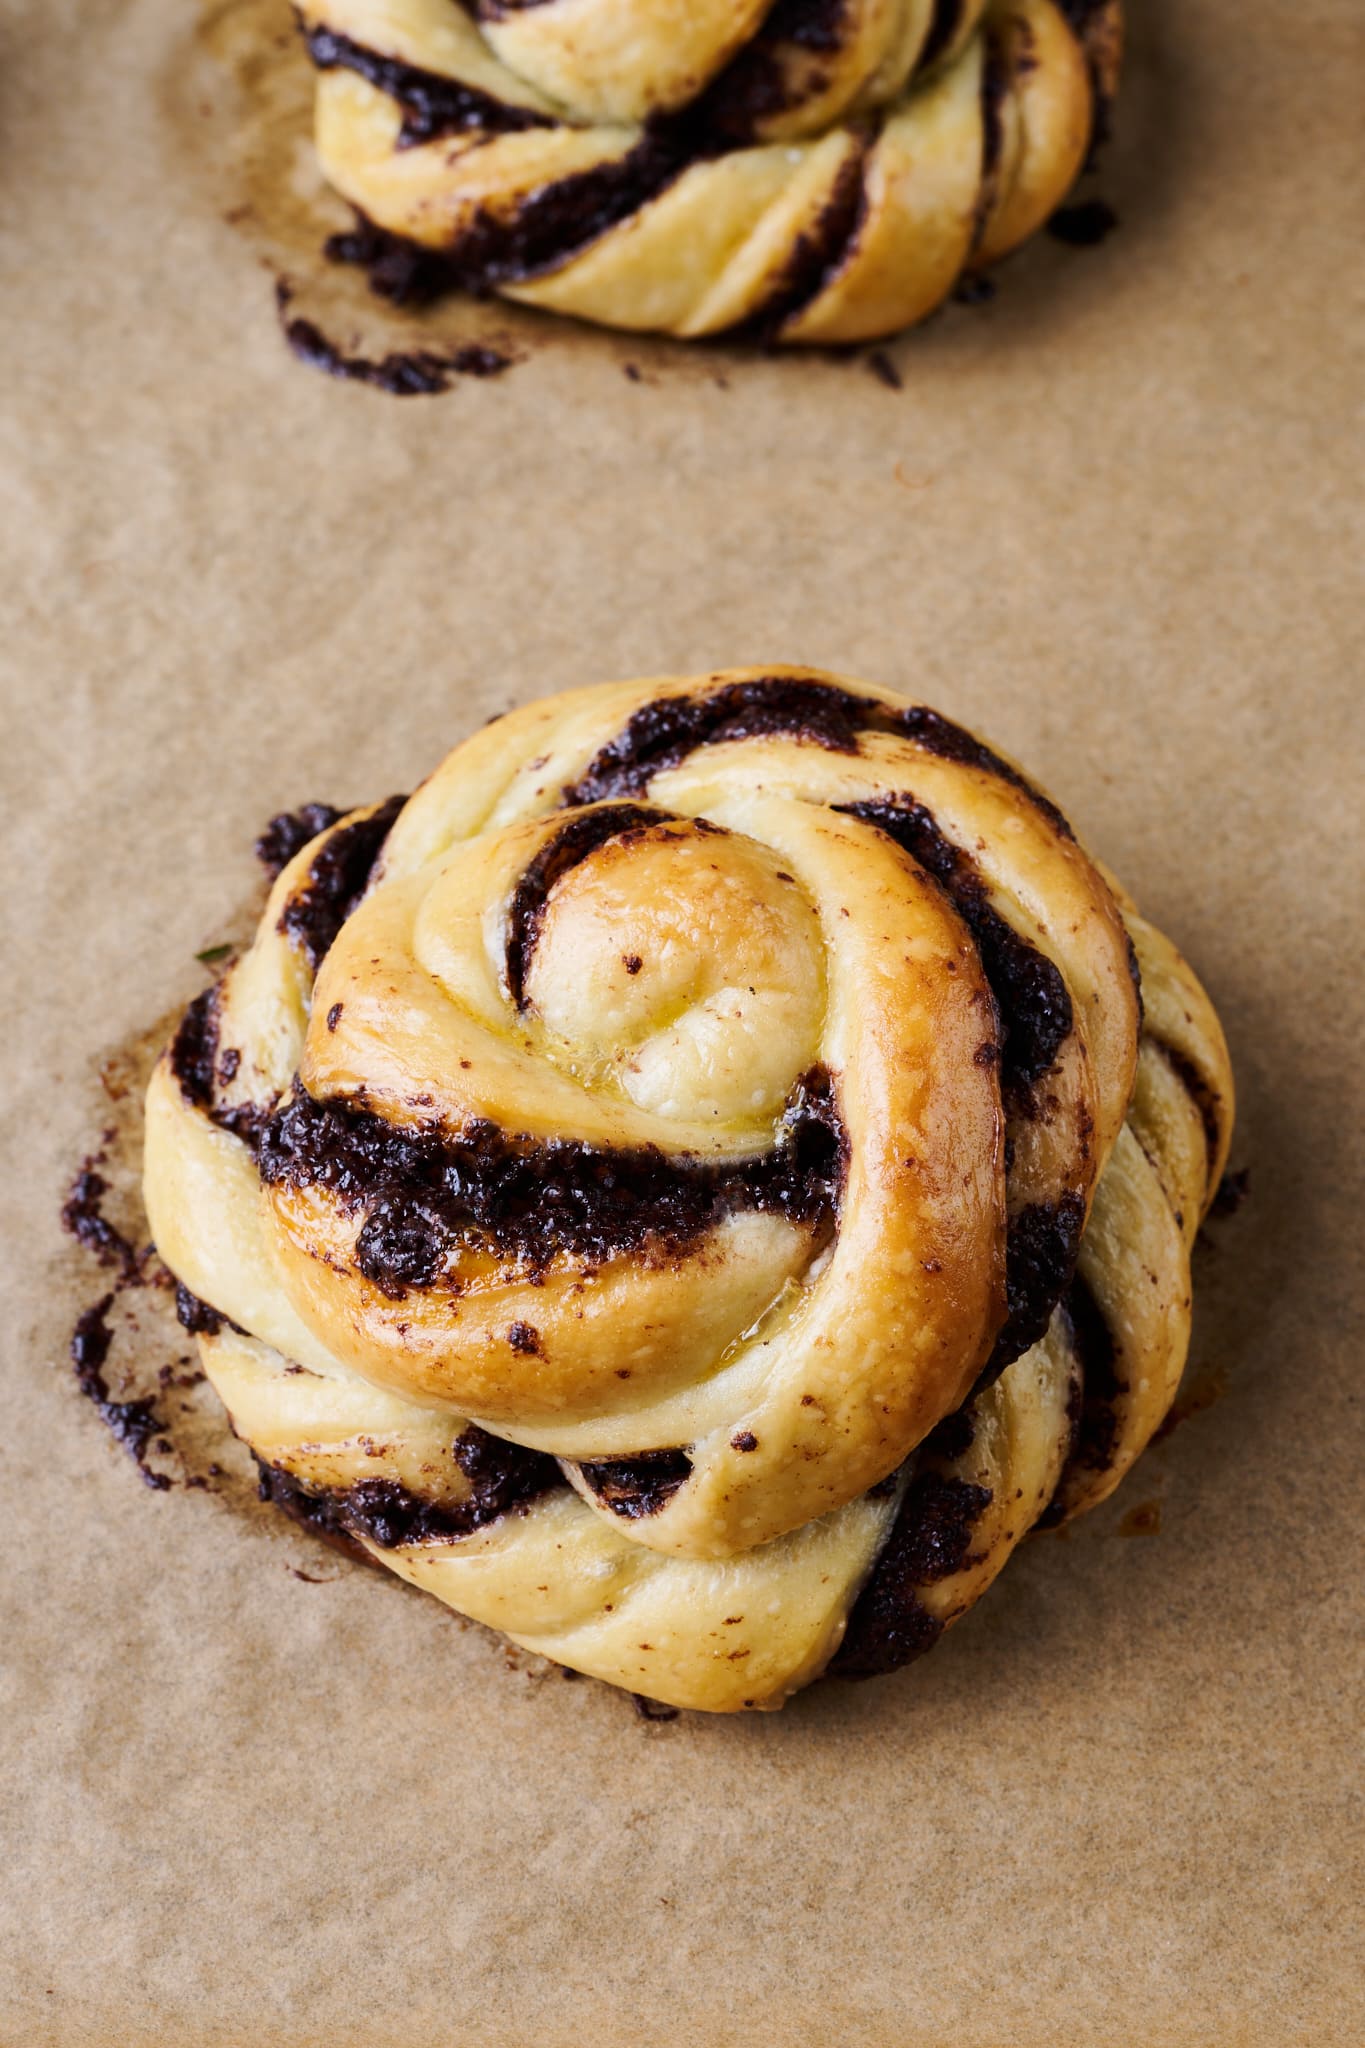
Using the knife, start about 1-inch from the end of each strip and cut each in half vertically to make two long strips that are still connected at the far end (the dough will now look like a pair of chopsticks that are at first connected at the far end). With your index finger and thumb, grab the far end that’s still connected with one hand and with the other hand the end of the two strips. Gently twist each end, so the whole thing begins to spiral (the cut will make the two strips twist independently, creating more twists). Once the entire thing is twisted, begin to roll the strip with your far hand around itself to make a snail-looking shape. Once you reach the end, tuck the end under the center, so it stays put.
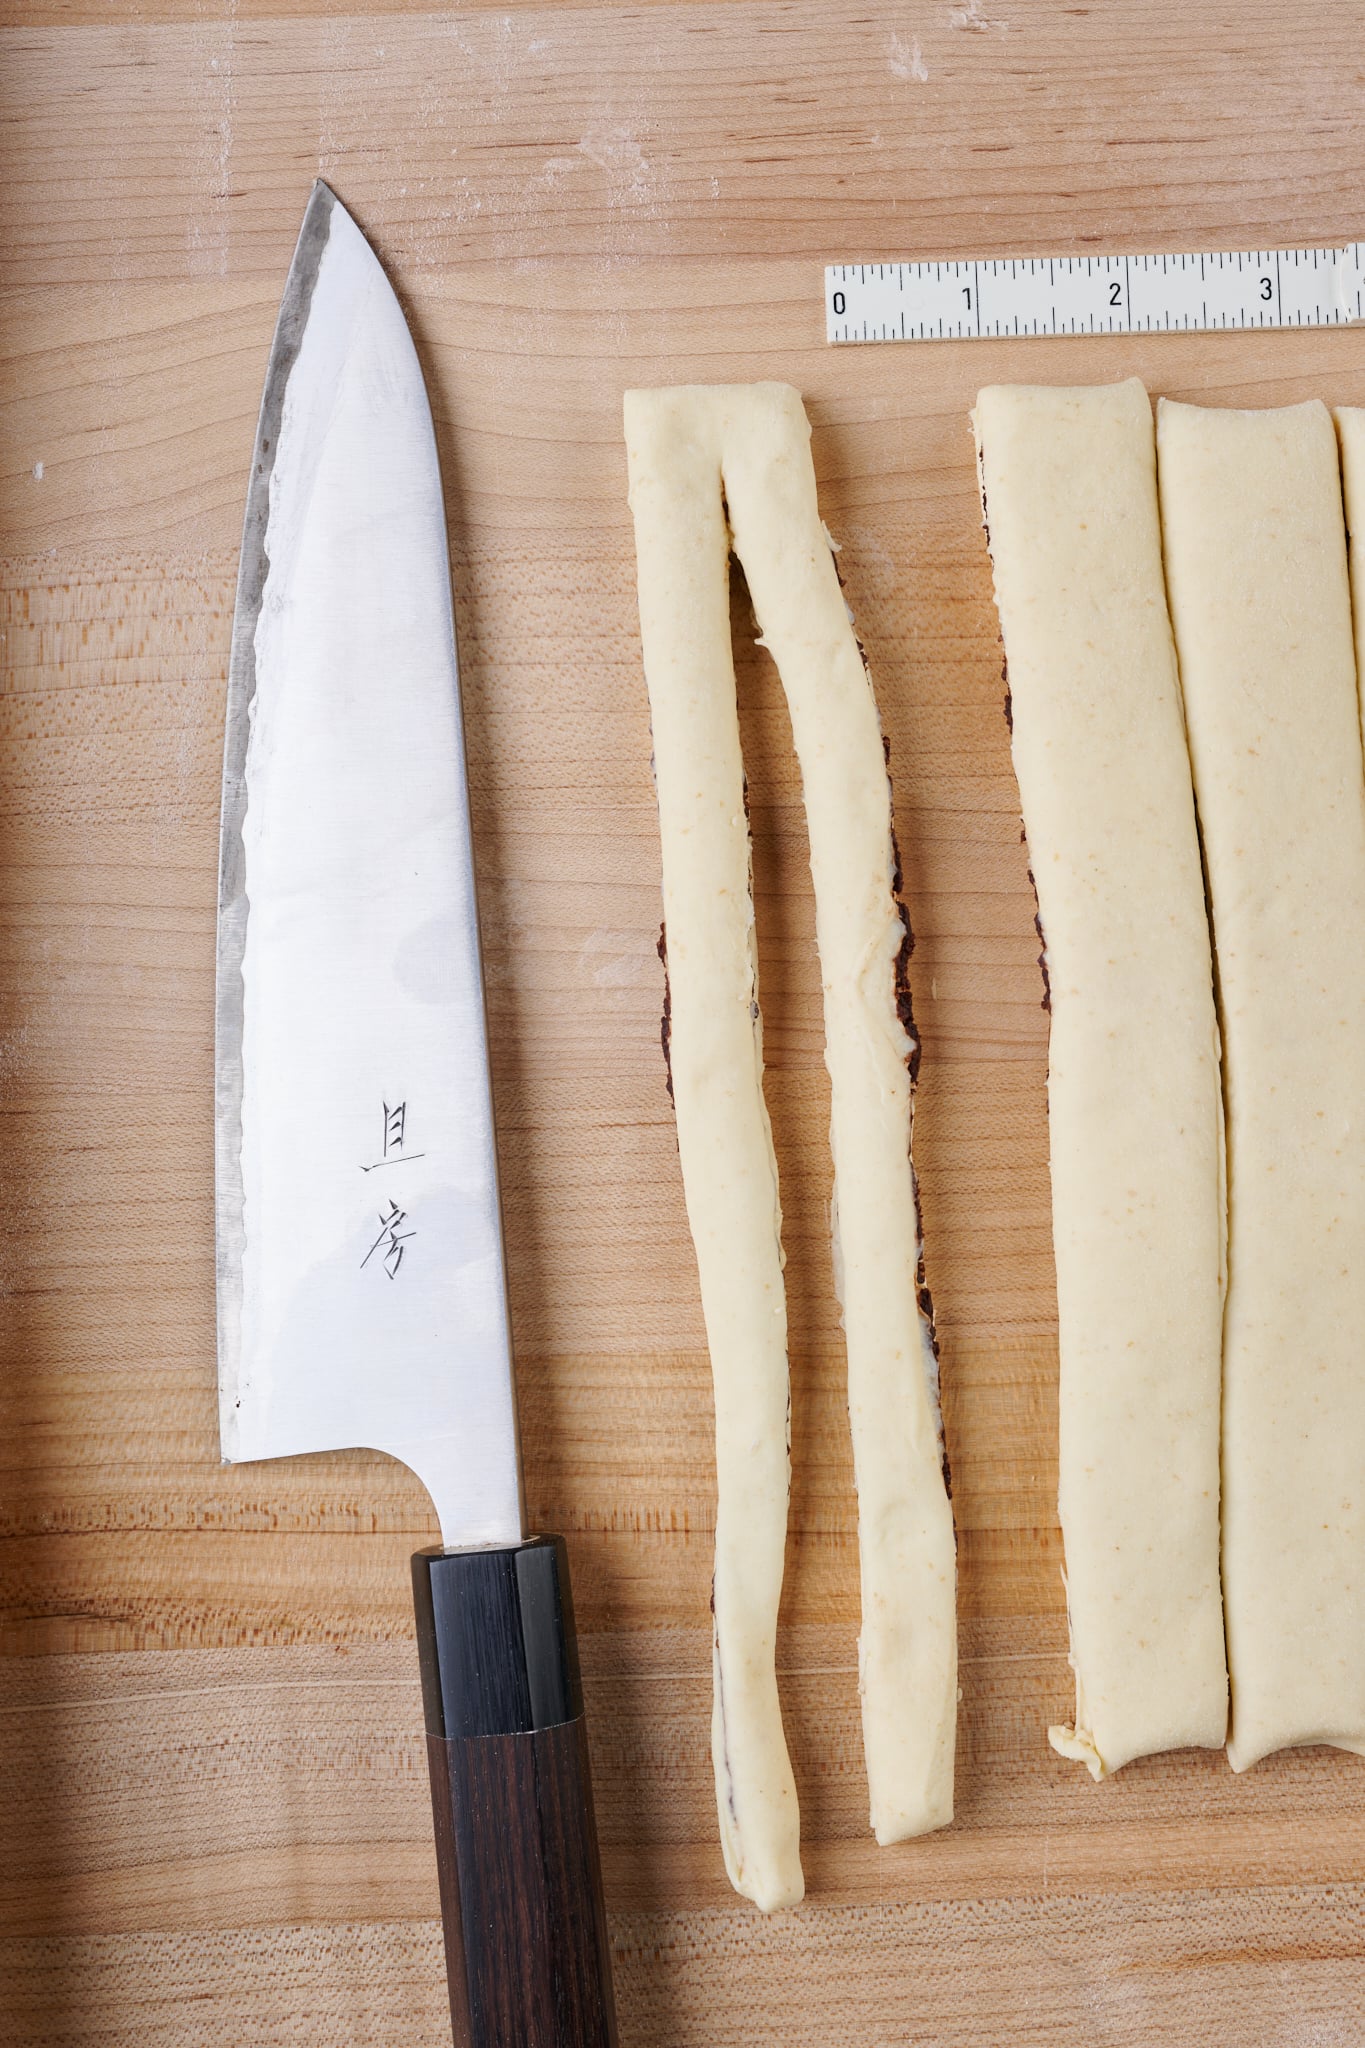
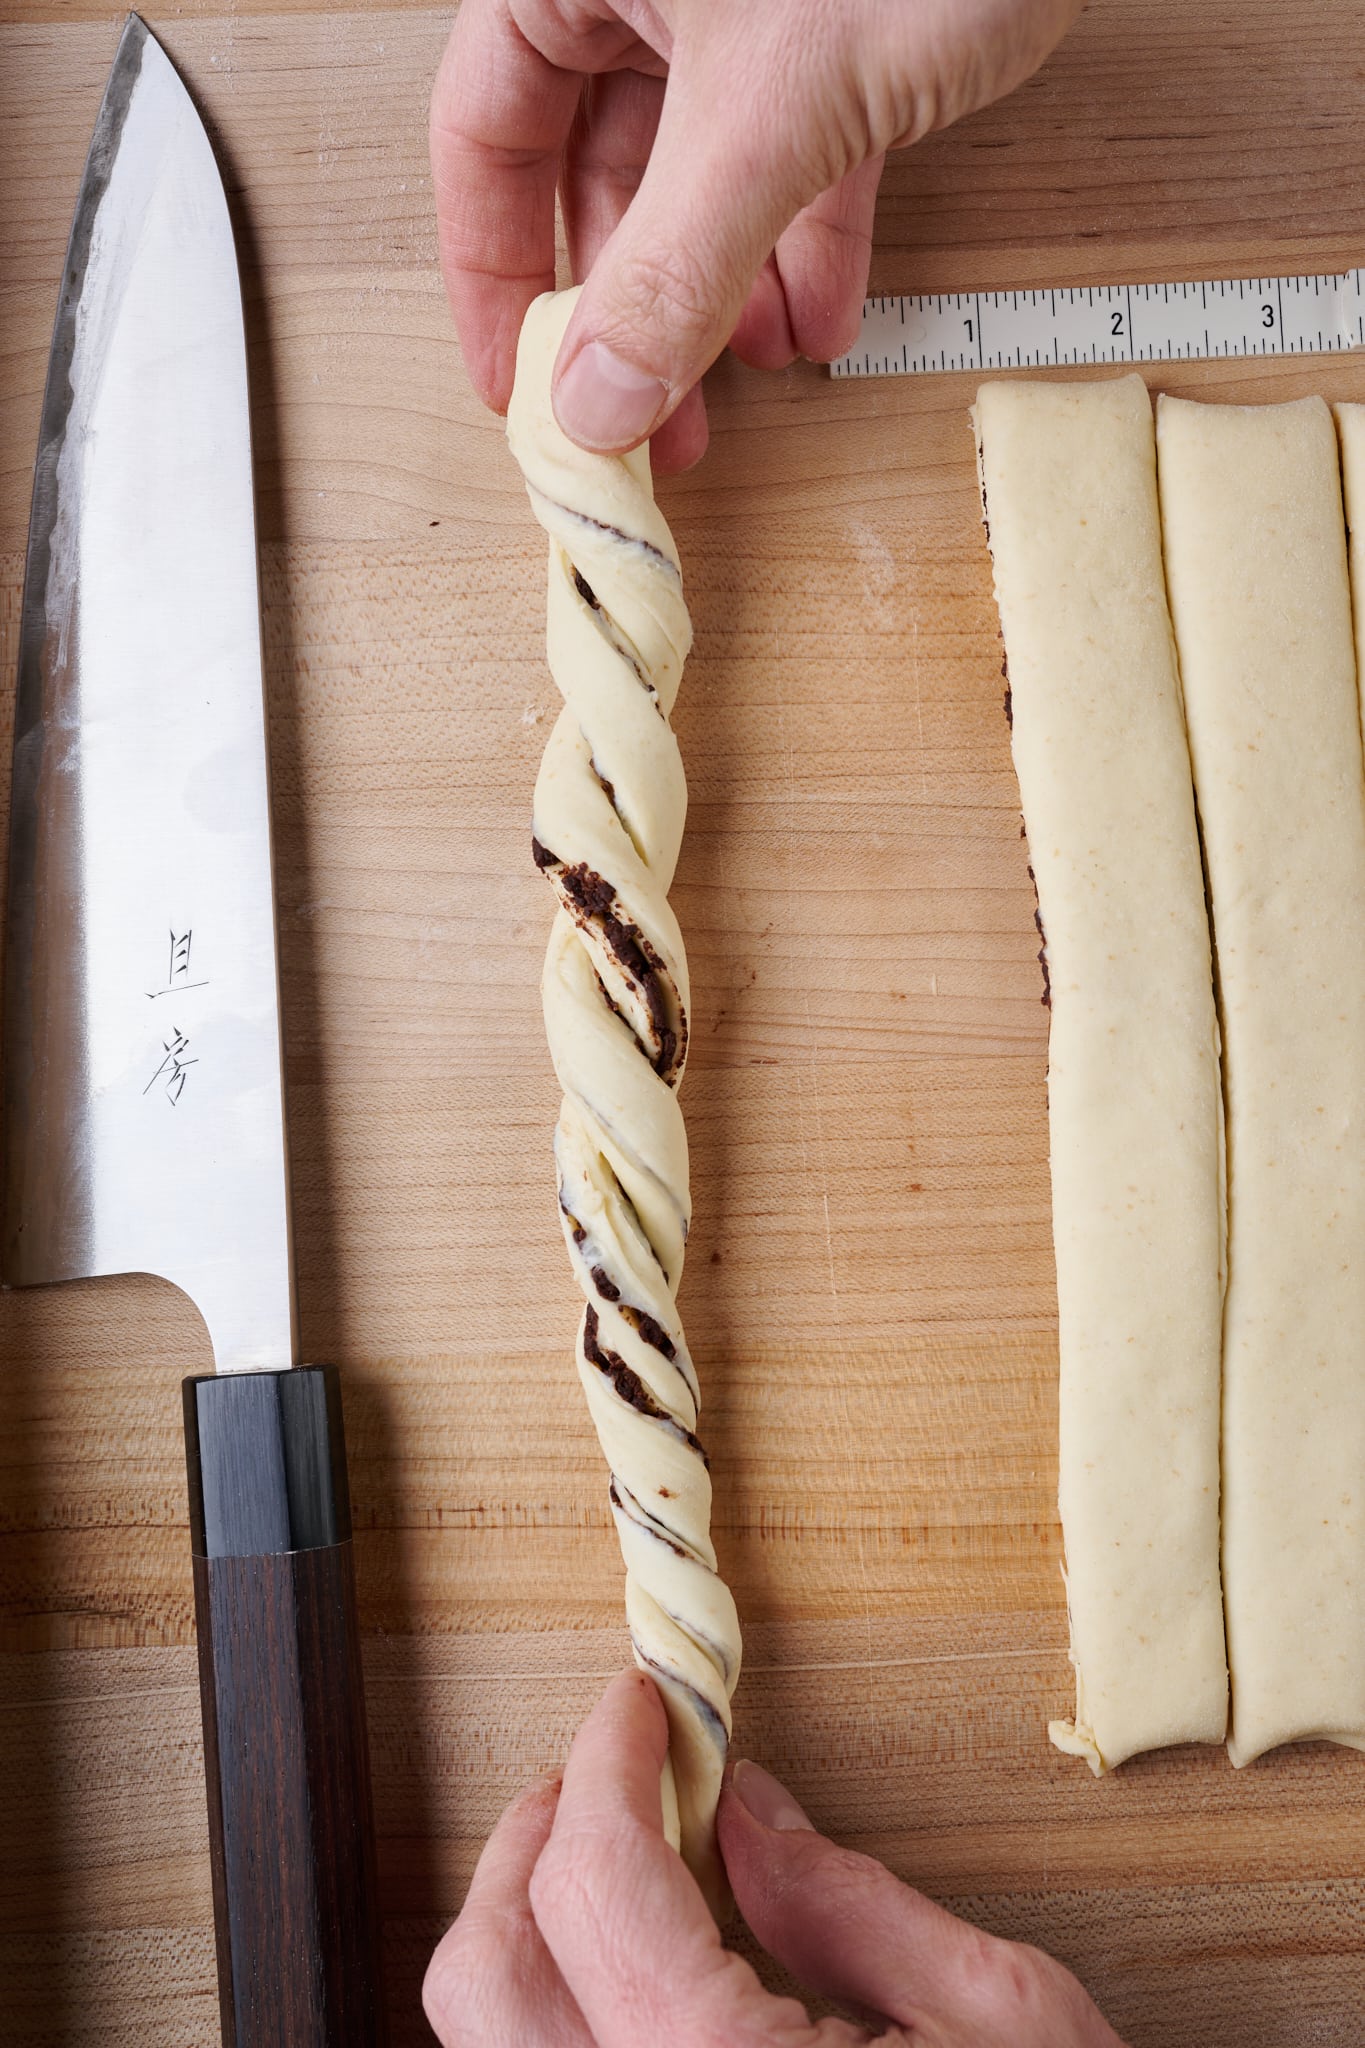
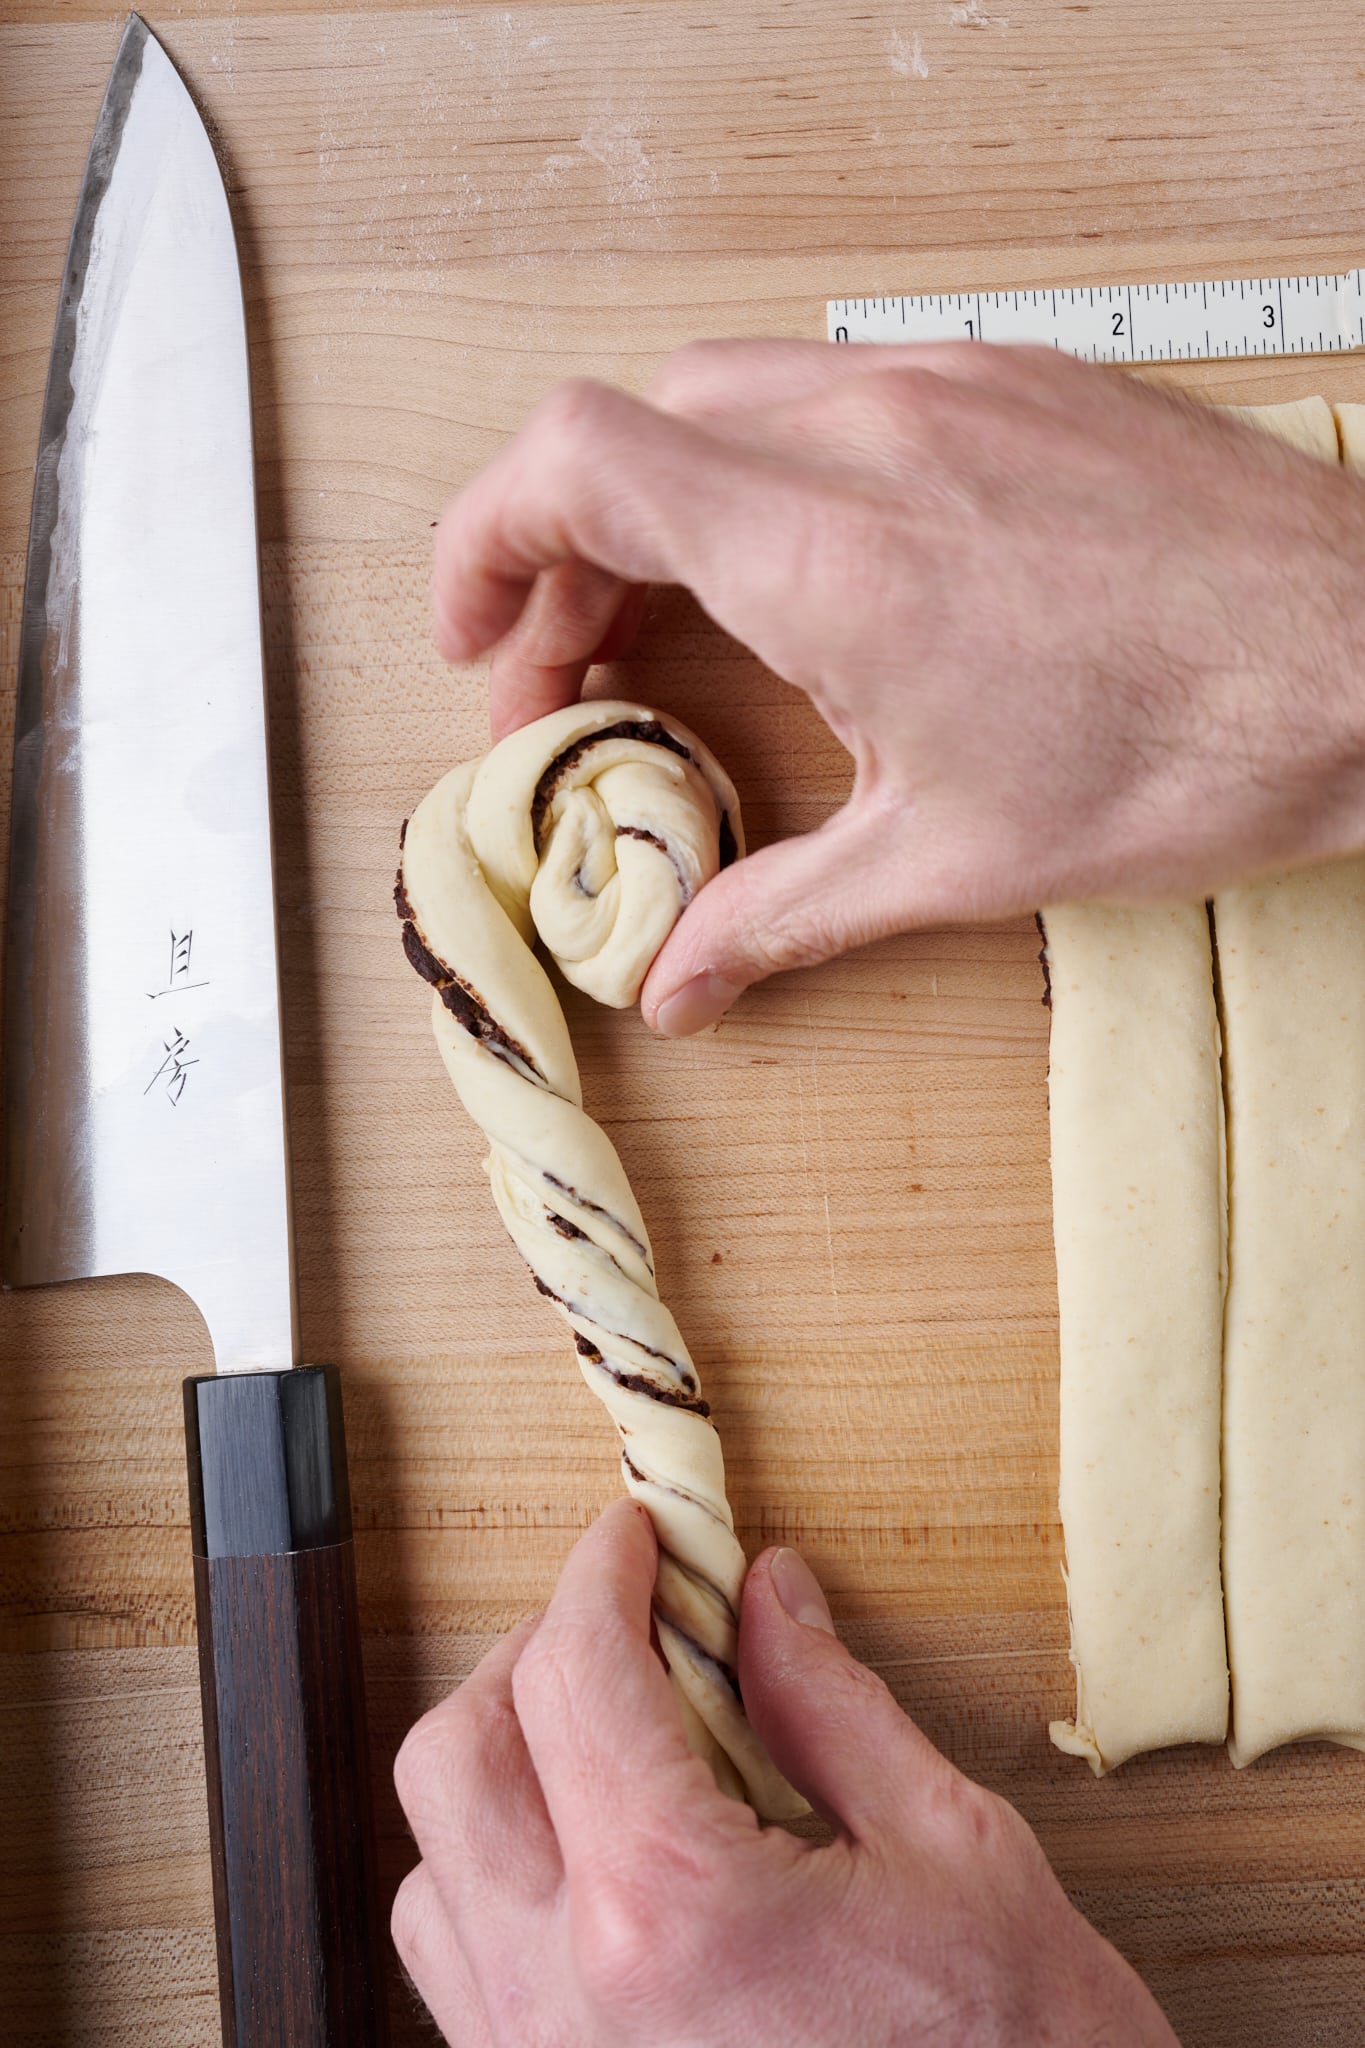
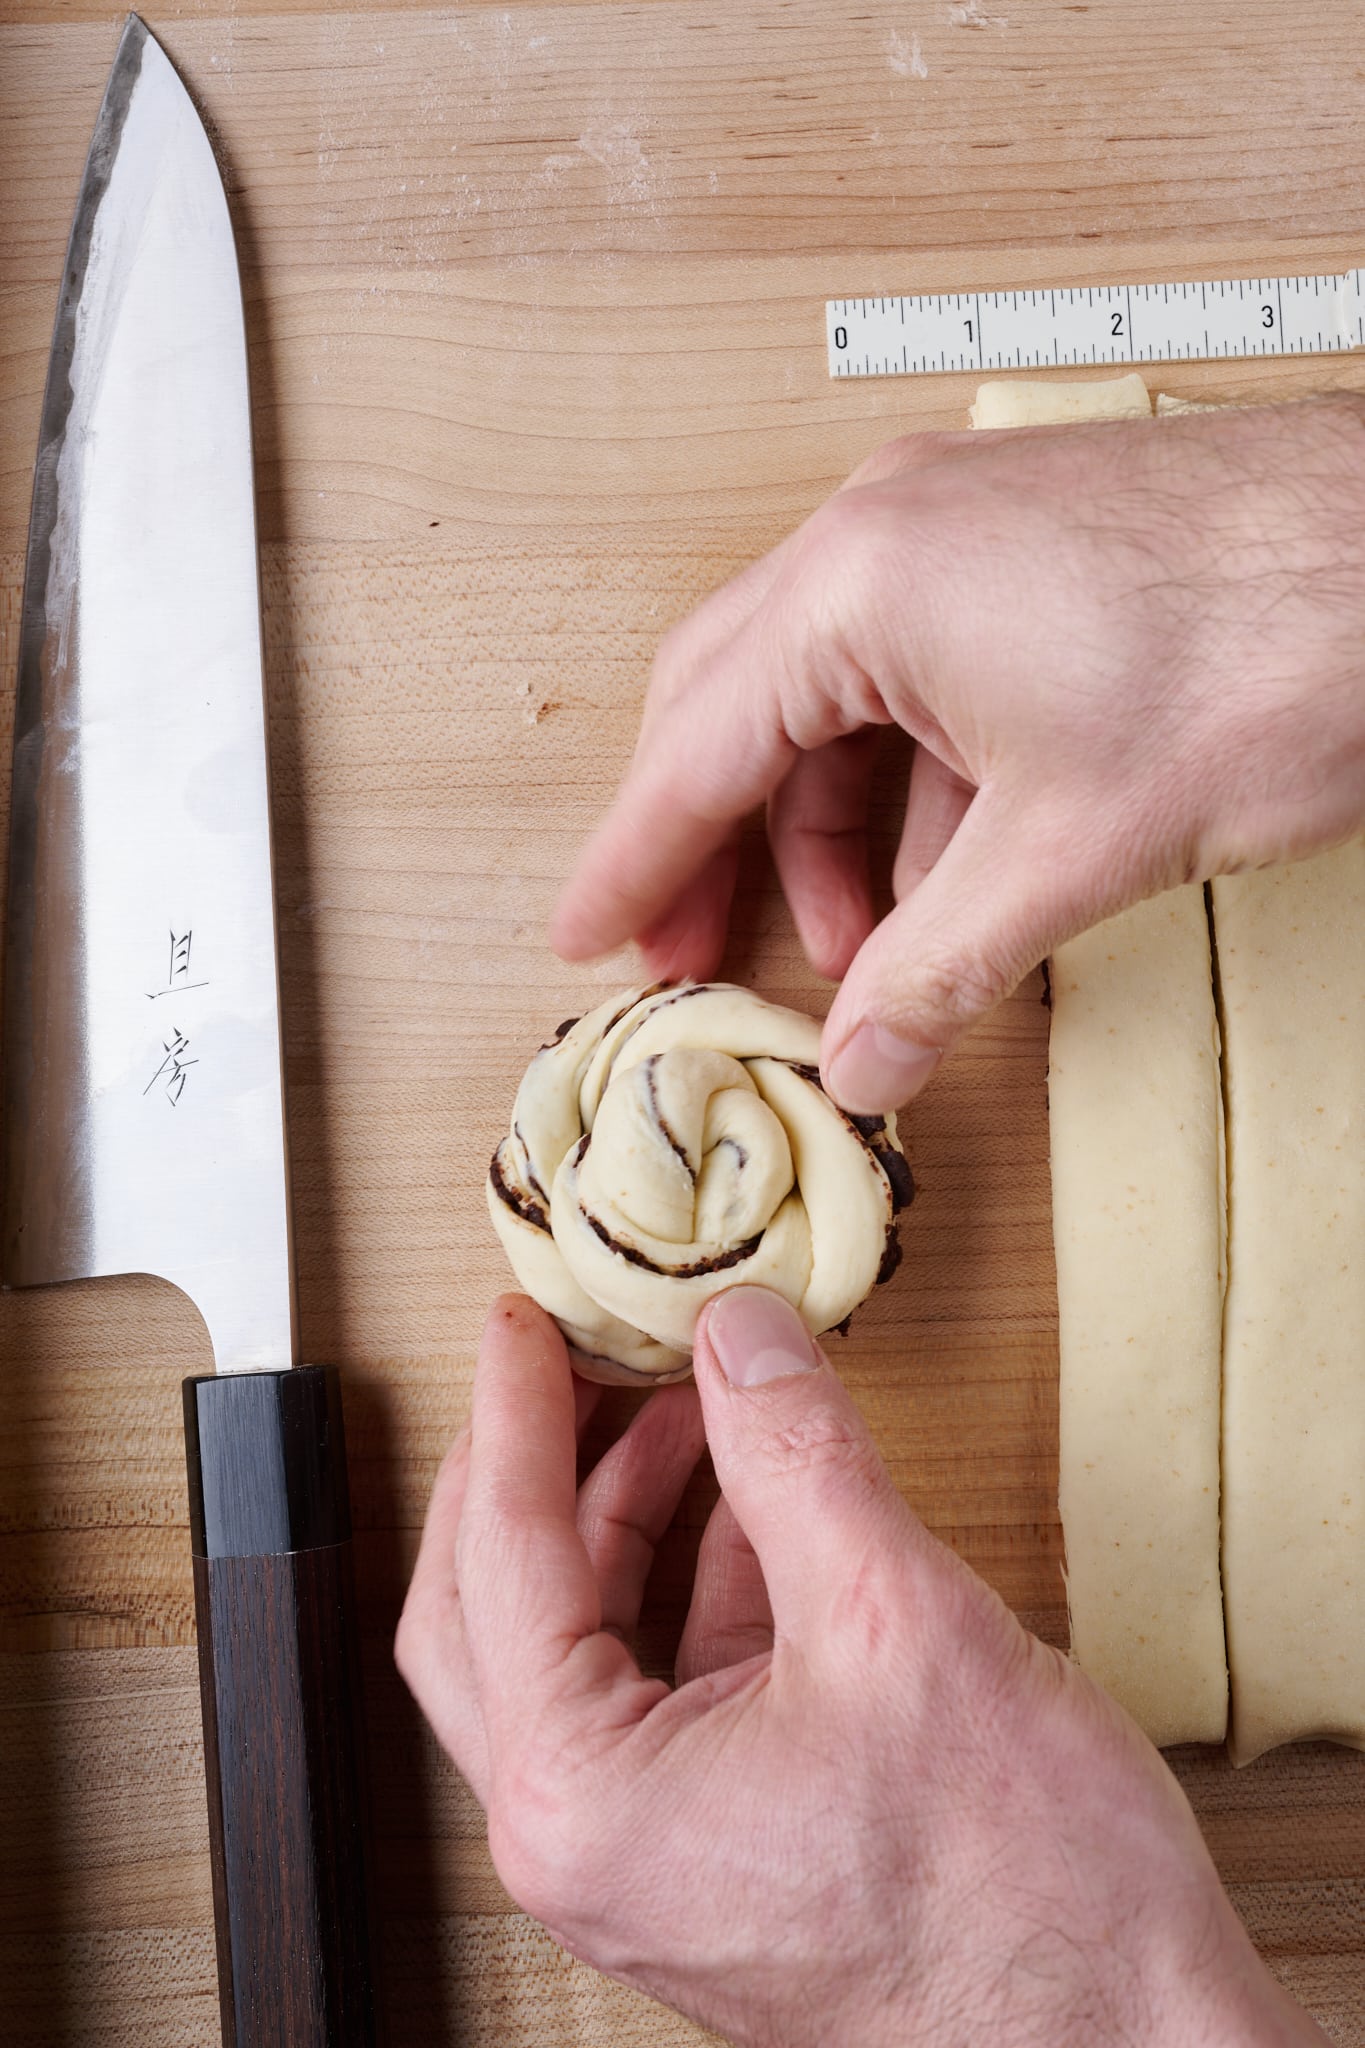
Transfer the knot to a baking sheet. Repeat for the remaining strips, placing six knots evenly spaced on each baking sheet. Cover the sheets with a large plastic bag or reusable sheet pan covers.
6. Proof – 9:30 a.m. to 1:00 p.m. (3 1/2 hours)
At warm room temperature, 74-76°F (23-24°C), this dough should take 3 ½ hours to fully proof. If your kitchen is cooler, expect it to take longer.
When fully proofed, the knots should be very soft to the touch (a poke will feel like poking a marshmallow).
7. Bake – 1:00 p.m.
Preheat the oven with one rack in the top third and one in the bottom third to 375°F (190°C) for 30 minutes.
In a small bowl, whisk together a whole egg, a small pinch of salt, and 1 tablespoon of whole milk. Uncover the dough and brush on a light layer of the egg wash, taking care not to drench the knots. See my guide to topping bread dough for more information on egg washes.
Slide the pans into the oven. Bake for 20 minutes, rotating the pans top to bottom and front to back halfway during this time. After 20 minutes, turn the oven down to 350°F (175°C) and continue to bake for another 10 to 12 minutes until the tops of the knots are a light golden brown. Take care not to overbake these; they should still be soft.
Remove from the oven and let cool for 10 minutes. These knots are best served warm but can be kept in a covered container for up to 3 days, reheated before serving.
Print
Sourdough Chocolate Knots
- Prep Time: 28 hours
- Cook Time: 32 minutes
- Total Time: 28 hours 32 minutes
- Yield: 12 chocolate knots
- Category: Pastry, Dessert
- Cuisine: American
Description
These naturally leavened sourdough chocolate knots are a delicious little treat perfect for breakfast, brunch, or even dessert after dinner. Inside, they’re filled with rich and delicious Valrhona chocolate.
Ingredients
Levain
- 44g high-protein white flour
- 44g water
- 44g ripe sourdough starter, 100% hydration
Main dough
- 324g high-protein white flour
- 92g unsalted butter
- 88g whole milk
- 51g egg, beaten
- 18g superfine sugar
- 88g water
- 7g fine sea salt
Filling
- 110g granulated sugar
- 75g unsalted butter
- 70g Valrhona Carraibe 66% Baking Chocolate
- 25g Valrhona Dutch Processed Cocoa Powder
Topping
One egg, 1 tablespoon whole milk, and a pinch of salt for the egg wash
Instructions
- Levain – 9:00 a.m.
Mix the levain ingredients in a jar and leave them covered at a warm temperature, 74-76°F (23-24°C), to ripen for 3 hours. - Mix – 12:00 p.m.
First, cut the butter into 1/2″ pats. Set them on a plate to warm to room temperature. To the bowl of a stand mixer fitted with the dough hook attachment, add the flour, water, milk, egg, sugar, salt, and ripe levain. Mix on low speed for 1 to 2 minutes. Next, mix on medium speed for 5 to 7 minutes until the dough smooths and begins to cling to the hook. Let the dough rest in the bowl for 10 minutes. Turn the mixer on low speed and mix for 2 to 4 minutes. Next, with the mixer running, add the room temperature butter, one pat at a time over the course of 5 to 8 minutes. Transfer the dough to a bulk fermentation container and cover. - Bulk fermentation – 12:30 p.m. to 4:30 p.m. (4 hours)
Give the dough one set of gentle slaps and folds during bulk fermentation. After the first hour, gently scrape the dough out to the work surface. Using damp hands, pick up the dough at the sides, slap it gently down on the counter, stretch it back toward your body, and then fold it over. Rotate both your hands, pick up the dough at its sides, and repeat the same gentle slap and fold over. Repeat these slaps and folds a few times until the dough is smooth on the top and holds itself on the counter, after 4 to 5 times. Transfer the dough back to the bulk fermentation container. Let the dough rest, covered for the remainder of bulk fermentation. - Chill dough – 4:30 p.m. to 9:00 a.m., next day
Place the covered bulk fermentation container into the fridge overnight. - Roll, fill, cut, and shape – 9:00 a.m.
Line two 13 x 18-inch sheet pans with parchment paper. Take out the bulk fermentation container and let it warm for 30 minutes. Prepare the filling: in a medium saucepan, melt the butter. Remove from the heat and add the sugar and baking chocolate pieces; stir everything together while the chocolate melts until everything comes together and smooths. Add the cocoa powder and whisk the mixture into an emulsion. Set aside to cool until ready to use. Uncover the dough and liberally flour the top and your work surface. Scrape out the dough to the floured surface, and using a rolling pin, roll out to a rectangle that’s about 12 x 17-inches with the short end nearest your body. Spread a thin layer of the chocolate filling evenly over half of the dough (you may have some chocolate filling leftover). Fold the top half of the dough down over the chocolate. The width of the dough should be 12-inches. Using a knife, cut the dough into twelve 1-inch strips about 8-inches long. Using the knife, start about 1-inch from the end of each strip and cut each in half vertically to make two long strips that are still connected at the far end. Gently twist the strips so the whole thing begins to spiral (the cut will make the two strips twist independently, creating more twists). Once the entire thing is twisted, begin to roll the strip with your far hand around itself to make a snail-looking shape. Once you reach the end, tuck the end under the center, so it stays put. Transfer each piece to a baking sheet, six pieces on each sheet. Cover. - Proof – 9:30 a.m. to 1:00 p.m. (3 1/2 hours)
At warm temperature, let the dough rise. - Bake – 1:00 p.m.
Preheat the oven with one rack in the top third and one in the bottom third to 375°F (190°C) for 30 minutes. In a small bowl, whisk together a whole egg, a small pinch of salt, and 1 tablespoon of whole milk. Uncover the dough and brush on a light layer of the egg wash. Slide the pans into the oven. Bake for 20 minutes, rotating the pans top to bottom and front to back halfway during this time. After 20 minutes, turn the oven down to 350°F (175°C) and continue to bake for another 10 to 12 minutes until the tops of the knots are a light golden brown. Remove and let cool for 10 minutes.
Chocolate sourdough knots FAQ
What else can I fill these knots with?
A sugar-cinnamon mixture would also be wonderful; see my sourdough babka for a recipe for this filling. Additionally, I could imagine these tasting delicious with Nutella, ground hazelnuts, or pecans added to the chocolate filling listed in the recipe.
Can I proof these overnight in shape?
Absolutely. After rolling, filling, and cutting the dough, shape the dough into knots as described in the recipe. Then, cover the baking sheets and place them into the refrigerator overnight. The next day, take the sheets out and let proof at warm room temperature until ready (I would imagine 3 to 4 hours would suffice). See the Baking Schedule section at the beginning for more information.
What’s next?
Fancy more chocolate? Check out my dark chocolate-cherry sourdough bread for an entire loaf—and I’d use Valrhona in that loaf, too.
Or go all in and make some sourdough starter and discard chocolate chip cookies (they’re easy to make but so delicious).
Buon appetito!


91 Comments
Just wondering: would it be possible to use pistachio cream in stead of chocolate?
Oh gosh, yes please.
Yikes! The chocolate filling gave me all sorts of problems! The sugar was staying very grainy and not dissolving, and I wonder if using a higher fat (therefore, less water) butter was the problem? Also, maybe dissolving the sugar into the hot butter before adding the chocolate and cocoa with be better? I tried adding a bit of cream to help the sugar dissolve, but that just caused it all to seize up, so then I added a bit of boiling water and whisked like heck I until it became almost like hot fudge. Hoping it will still be usable as the filling!
I replied to you in your other comment, Ginny! (It's okay for the sugar to be a bit grainy, it'll melt in the oven.)
I am experienced sourdough baker and regularly make enriched doughs and twisted cardamom buns. This is by far the worst bread recipe I have ever tried. While I love both bread and chocolate in my experience they simply do not mix because the heat required for baking good bread burns the chocolate. I have a fan oven so I reduced the temperature by 25C and reduced the cooking time, instead testing the bake with a thermometer. Despite this the chocolate filling all melted and ran out of the twists onto the baking sheet where it formed burnt, gritty pools. The buns are largely hollow inside because the chocolate all melted out. In my view this recipe is fundamentally misconceived and you are doing your sponsors no favours by encouraging people to burn the heck out of their chocolate!
Hey Sarah! Oh gosh, so terribly sorry to hear about these issues here! I'm wondering, what chocolate did you use? It sounds like it melted way too fast and became far too watery. Many others have baked this recipe without issue as well… I'm wondering why yours liquified so quickly.
I had a similar result just now with the chocolate running out (not all but a good amount). I did have to use guitard baking chocolate as it was a last minute things and I couldn’t get Valrhona. Could that be why? My rolls also look much puffier than your pic.
You must have done something wrong because they were perhaps the yummiest knots I’ve every made!
I'm planning to make these soon, but I'm not able to find that specific chocolate without having to have a large quantity shipped to me. What would be a close substitute?
Hey Jennifer! For the "baking chocolate" use any chocolate you'd use for choc chip cookies. The other chocolate in the recipe can be any cocoa powder you use for brownies.
Thank you! They turned out nicely for a first go at them! The dough was a bit on the sticky side when it came time to cut and twist. Gotta love Florida humidity 🙄 I'll pop them back in the fridge for a few minutes before cutting next time. These definitely have become a quick favorite!
Great call, the fridge will definitely help there Jennifer. Happy baking!
I am making this recipe for the first time and struggling with the after slap and fold "dough is smooth on the top and holds itself on the counter." I have slapped and folded the dough easily 50 times at this point and it is still sticky and certainly does not nicely fold or create a smooth top as it sticks to the counter. It does kind of hold shape, but after 10 minutes it's sinking back into the bowl. I measured everything to the tenth of a gram and used high protein flour. The dough is silky, but super wet so when I read the next step mentioning puffed and not dense (or leave another 30 minutes) I don't know how this dough will ever get there, but it could be what my perception of what that means for the dough. There is later mention of a heavily floured work surface, so maybe this is right?
It should definitely be a soft dough, CJ. How did they turn out?
This was amazing! I was wondering if I could make the dough into a sandwich bread?
I haven't tried this but I am confident it would work 🙂
Hey! These turned out so wonderfully and the dough was spectacular! I was wondering if I could make it into a loaf of sandwich bread? If so how?
Hi, these were amazing! I was wondering if you could use your the dough to make a loaf of bread? If so how would you do it?
They are amazing but for some reason they were over done in my electric oven. I guess either reduce time or temperature in oven.
Ahh, bummer, Ruth. Yeah, a little less bake time and you'll be golden (🙂).
I made these the other day and they were amazing! My husband devoured them and is asking for more. I’m thinking of trying to change up the filling, 1 option a fig jam and pear filling, or berry jam, so many options, THANK YOU!
Oh those filling sound samazing! Thanks, Mindy!
Hi these sound delicious but I don’t have a stand aid,is it possible to mix by hand ?
Yes, you certainly can. Just do the slap/fold kneading technique to strengthen the dough before adding the butter.
These are really delicious, I made them last year for a New Year’s party and were great! Maurizio I hope you revisit this recipe soon and update the filling so that you don’t end up with too much – I always forget to not add the whole amount and it ends up a complete oozing mess while cutting. Also think I should do as others suggest and freeze the dough post filling/pre cutting, as you do with the cinnamon/cardamom buns and babka. I added a bit of cinnamon and cayenne to the chocolate filling and shaped the twists into hearts for Valentine’s Day this year, we’ll see how well they keep their shape in baking!
Cheers as always for encouraging kitchens covered in flour and smelling delicious ❤️
Thanks so much, Quincy! Ah yes, I will update this with the filling changes soon!! Happy Valentine’s Day 🙂
Hi @maurizioleo:disqus! Dough looked great throughout process, puffed up huge within 10 min of baking, but flattened out a bit. Is that normal for this recipe or do you think it could be a proofing issue? My buns were slightly smaller (made 13) and baked off very quickly. They browned much more than anticipated during the first 20 minutes, so I reduced to 325 and baked for 4 more minutes before I felt they were colouring too much and had to remove from the oven.
Hmm. My feeling is it might have been underproofed. It should puff, but not excessively! I hope they still turned out delicious for you. Happy V-Day!
They were delicious!! Will try a longer proof next time. Thank you so much and happy vday!!
They were delicious!! Will try a longer proof next time. Thank you so much and happy vday!!
Hey Maurizio! These look delicious and fun to make. How can I change the schedule to have them freshly made for breakfast (around 8am)? Thanks.
You could shape them, put them on the pan and cover, then take out early to finish proofing. You’d need several hours though!
hi can you please tell me how much levain? it is not included the main dough ingredient list. thank you!
The entire levain, should be around 130g.
These just came out of the oven – pretty good! They came out a tad dry and the chocolate filling was a bit grainy (not like the gooey chocolate center I was imagining). Not sure if these outcomes are expected for this type of recipe or if I might have made some errors? Thanks!
They might have baked too long, they shouldn’t be dry! The filling is a tad grainy, yes.
Made these for the first time today. DEFINITELY not for novice bakers – which I am not.
The dough is very soft and finicky. Even with ample flour on my work surface, it stuck like crazy! I ended up moving the folded, filled dough to a dusted piece of parchment and chilling it again – better, for handling, but it still softened quickly.
For next time I plan to work with 1/2 the dough at a time. Also let the filling cool a bit more. Though this is also tricky, because if it cools too long, it hardens.
These are DELICIOUS and so worth working on to get the techniques down!
Great work with refrigerating the dough! That helps tremendously. They’re super delicious, but yes, a bit of work. Which I think is absolutely worth it 🙂
These sound amazing! I always do sourdough cinnamon buns but these sound next level. Do you think layering these sideways in a bundt pan would work? My kids love the idea of pull apart bread and looking for new ideas to put in the bundt!
That would be amazing, Lauren!
Do you have any recommendations on how I could replace egg in this recipe and would that work as an in general for your other recipes with egg?
Thank you so much 🙂
I’ve not tried this, but I’ve heard a vegan-style “flax egg” works really well as a substitute!
Have you ever used a simple Bob’s Red Mill Egg replacer? It works quite well for all intents and purposes, but I try to use less-processed (and organic) things when I can.
A flax egg is quick and easy. I highly recommend grinding flax seed fresh to use. If you use preground flax, the egg does not have the gooey, sticky qualities we seek in the “egg”. If you make a flax egg out of freshly ground seeds, they it behaves very similarly to a thick, beaten egg. Quite remarkable actually!
I’ve made your babka several times, so excited to try these for a group lunch this week! I’m hoping to make these slightly smaller/more snackable, probably rolling the dough out to the same shape but folding along the long side to make ~17 knots. Do you have recommendations for bake timing at the smaller size, or an internal temperature to check for?
These are so tasty! I don’t measure the internal temp on these, they do bake rather quickly if they’re smaller and spaced out well. Just bake them according to the directions above, pulling them out when they’re just starting to turn a little golden!
These are awesome. I started them at about 3:00 p.m. so I was done shaping them at about 11:30 p.m. My Ankarsram mixer really helped. After shaping I left them on the counter over night as my kitchen is usually about 67 deg.C. I baked them about 8:00 a.m. the next morning. My daughter-in-law Instagram-ed them calling them mini babkas.
I think mini-babka is a perfect way to describe these! Glad they worked out well for ya, Mark 🙂
I made these today and they turned out decent. Didn’t have a stand mixer with a dough hook so did everything by hand. Used Whittaker’s Dark Ghana chocolate as I’m not sure where to get Valhrona here in New Zealand. I found they became golden brown a lot sooner than expected (maybe my oven runs a little hot?) so had to cut the cooking time slightly. Was easier to make than I was expecting. Thanks for the recipe. Will enjoy having these for breakfast over the next few days.
Glad they turned out pretty good for you, Archie! It might be that your oven runs a little hot, or simply how they were shaped. If they were a little smaller they might color faster. Easy fix either way, just reduce that total bake time and you’re “golden.” 🙂
Enjoy!
Does the started have to double here or can I just add it after three hours?
It doesn’t have to double but it needs to be very ripe!
Made them for the second time. This time without filling. They ended up proofing shaped on my counter from 2:30 to 9:30pm. The house temp was 74 degrees. Don’t think they over proofed, the dough was still bouncy. Baked them as directed except I kept them for 8 mins at 350 and I think 5 minutes would have been enough since they were more brownish instead of golden brown. Still came out pretty good, the third time they will be even better and one day just perfect. Thank you Maurizio for coming up with these delicious knots on sourdough, I’m excited to keep on trying. Next time with home made Nutella 😉
Really great modifications there, Anush! Yes, they really want a warm temp to proof, given the 74F temp in your kitchen, I’d expect they would need a bit longer. Nutella is a good, good idea 🙂
Can I make the levain the night before?
Yes, you can, Camille. If you do, drop the amount of starter you add to 10% of the total flour in the levain. I like a short-running levain here to ensure the sour flavor is minimal, but overnight probably won’t hurt!
They are shaped and in the fridge for baking in the morning. I somehow only cut 11 portions, so each one will be a little *extra*, which is definitely the theme of these knots: They are **extra** can’t wait to eat them!
Sounds delicious!! Hope you liked these 🙂
A cooled down filling is paramount. I did not let it cool out and it really gave me a hard time shaping these😄
Looking forward for baking in a hour 🤩
Ahh, yes that’s super important. I hope they still came out great, Tobias!
Big hit with my family! Not too sweet and good texture. Thanks!
So glad to hear you liked them, Sarah!
I just baked these today and have to say they are my favorite sourdough pastry I’ve ever made (and I’ve made quite a few in these last 7 years). Thank you for this amazing recipe!
Wow, huge praise—so glad they turned out well for your, Maren!
Good morning Maurizio! I am concerned about sticking during the last proof. What do you use to cover the knots?
Good morning! I like to use these reusable baking sheet covers, they pop on a half sheet pan and have plenty of height. Very convenient.
Hi there Maurizio, thanks for this recipe. I’ll give it a try no later than tomorrow. I spot a difference btw your written procedure regarding the flattening of the dough : you write 12’’x24’’, but on the 2nd picture, you mention 10’’x24’’ if I’m correct. Can you explain that ?
Daniel, Liège, Belgium
Sorry about the, Daniel! It’s 12×17″.
Hi Maurizio! I made the dough without adding the water because I didn’t realize it was missing until too late… and after 4 hours it really hasn’t risen much. Could that be because of the lack of hydration?
It will contribute, yes, but as long as the dough wasn’t super stiff, it should still work out for you. Keep it warm and give it a little more time to rise! It should feel a little puffy when it’s ready.
Thank you!!
You’re welcome, let me know how they turn out!
OH my gosh, I read your comment and realized I somehow also missed the water. And its a significant ingredient! Thanks for asking the question so I also could read the response. Geez.
Hi Maurizio! What about the 88 g water? When did you put it and
where?
Sorry about that, Brigitta! Add the water in the Mix step along with the milk and other ingredients.
can you share your suggested storage for these chocolate sourdough knots. thanks so much! looking forward to baking them this week.
I keep them covered and on the counter, then reheat gently in the oven (or a few seconds in the microwave)!
Omg! On tomrrow’s baking schedule!!!!! Cant wait to give it a try!!! 👌🏻
Let me know how they turn out for you, Michel!