


Mix whole dark rye flour and water with your hands, and you’re immediately plunged into an intense sensory experience. Earthy aromas swirl about as a dough texture that’s not unlike wet concrete starts to form. When the gray paste squishes and squashes through your fingers, you begin to hear whispers from somewhere in your head: How can this dense, shreddy coalescence make a cohesive, airy, and crusty loaf of sourdough rye bread?
This bread steals your attention—it’s all you’ll think about at breakfast, lunch, and dinner.
The answer, as is the case with many of the recipes you’ll find here, is fermentation. But also, while all rye flour lacks the same glutenous characteristics of wheat flour (especially high-protein white flour), it has pentosans. Pentosans are polysaccharides that absorb copious amounts of water, which steam in the oven during baking, puffing up the dough. They also form a gel network that helps trap the gaseous byproducts of fermentation. Finally, pentosans help the starches gelatinize during baking, which sets the soft, airy structure of rye-based bakes.
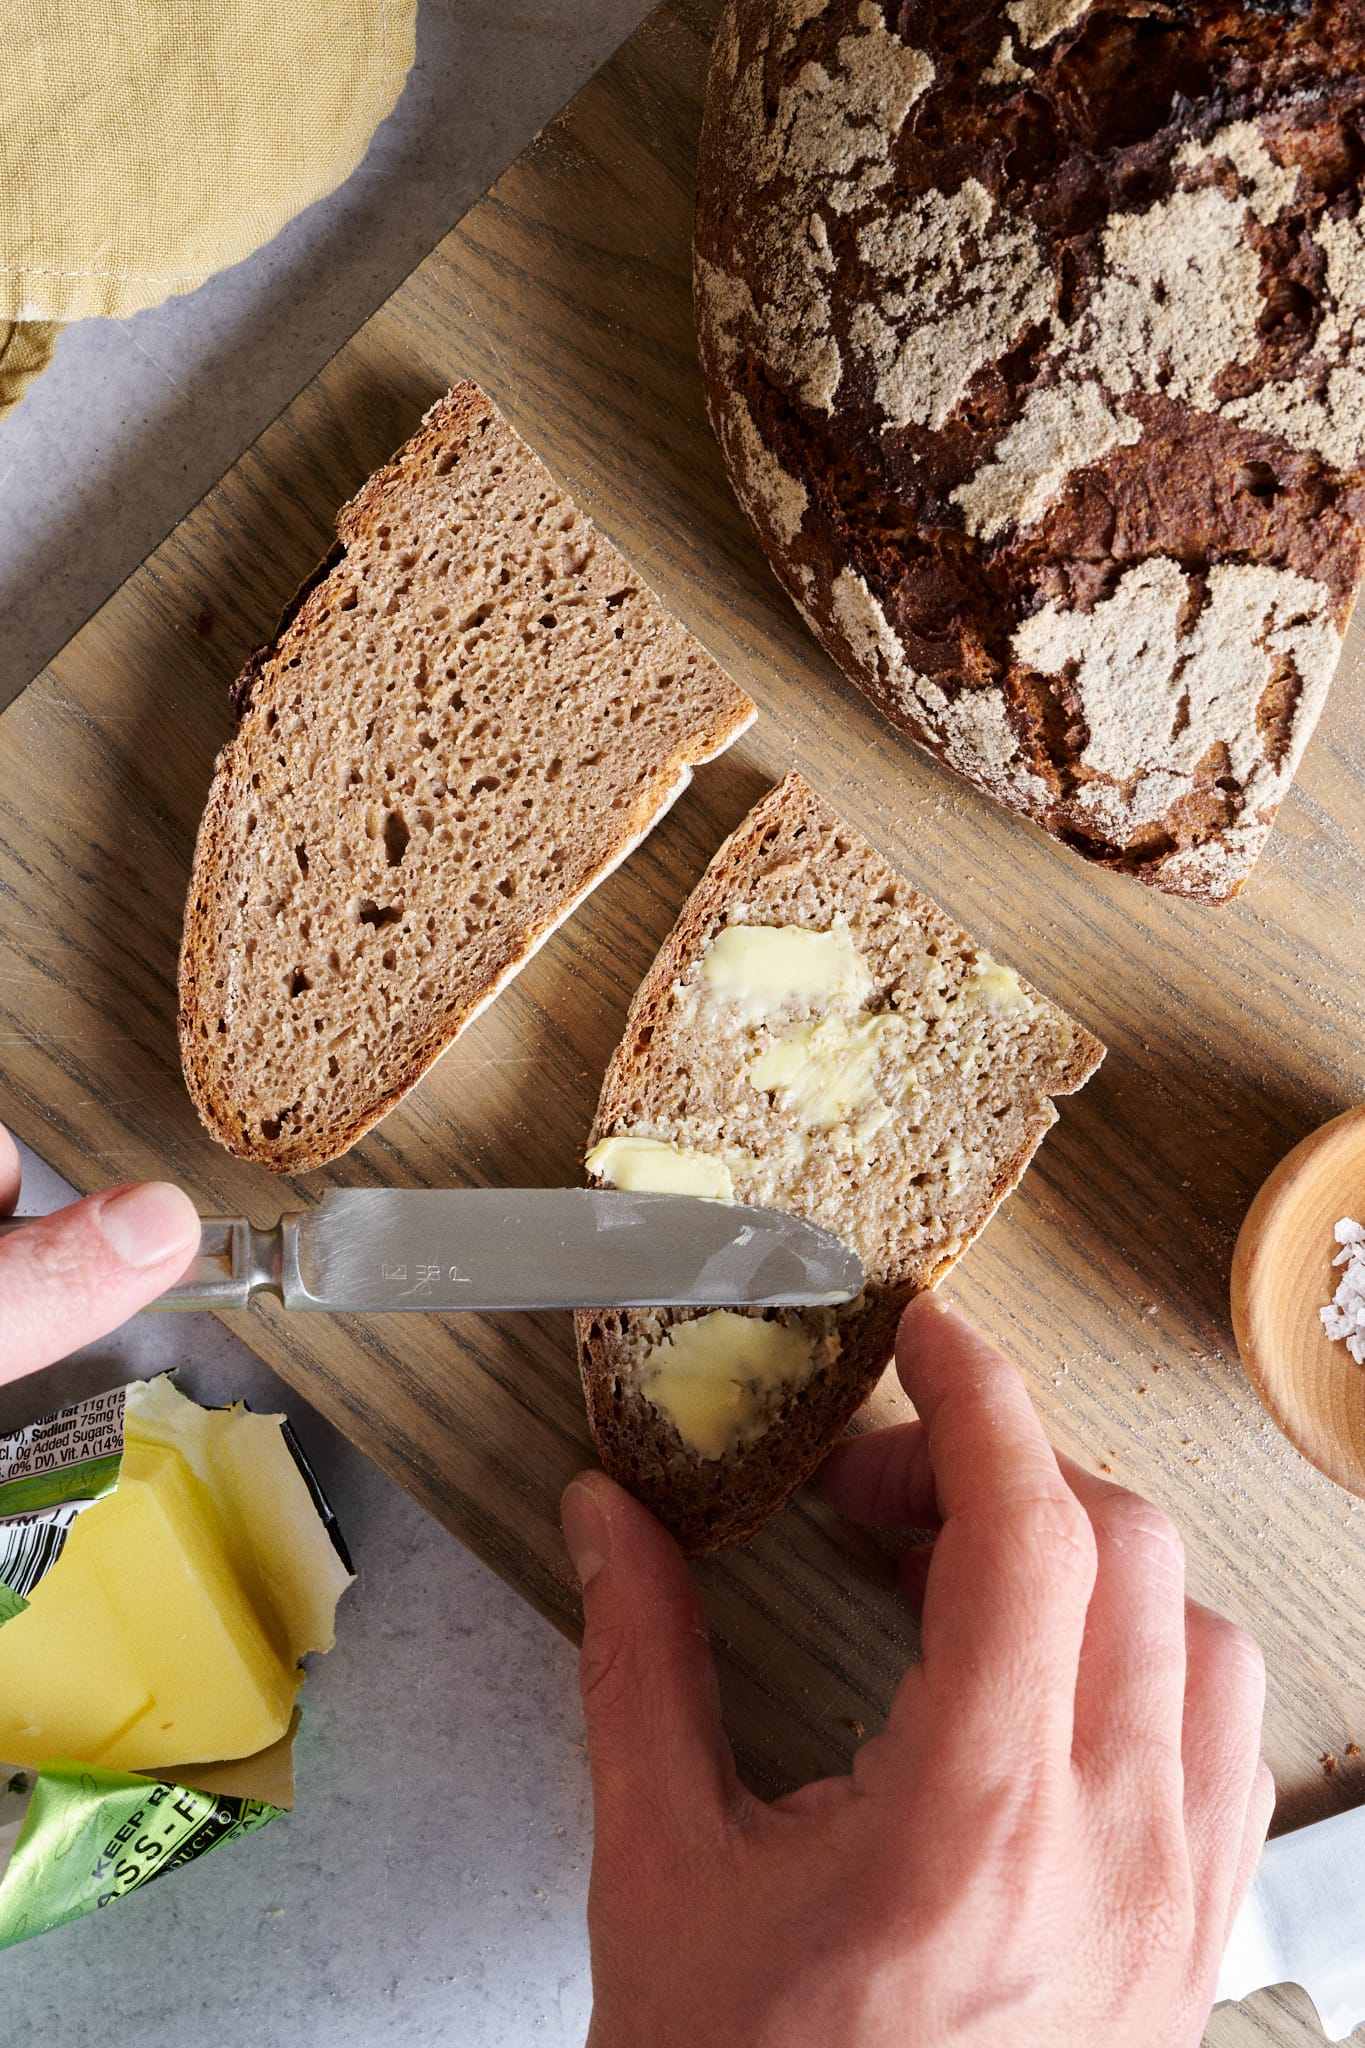
But the stars of the show with rye bread (as I’ve come to sincerely appreciate over the years I’ve baked it at home), are its captivating aroma and robust malty flavor. This bread steals your attention—it’s all you’ll think about at breakfast, lunch, and dinner. If you work from home, be prepared to hear its call from the kitchen when you least expect it. You’ll want it sliced thin and topped simply with good salted butter. You’ll want it to accompany your smoked salmon. You’ll begin to want it with just about anything you have in the fridge.
Here are a few important details I’ve found when making any sourdough rye bread:
- Use a large preferment; at least 40% of the total flour is fermented ahead of time
- When using whole-grain rye flour, increase the hydration dramatically for the best texture
- Employ a short bulk fermentation and short final proof
Instagram Walkthrough
Click play below to watch me make this sourdough rye bread on Instagram.
Why is a Large Preferment Necessary with Rye Bread?
One thing you’ll notice with this sourdough rye bread, and with almost every sourdough rye bread, is the incredibly large preferment relative to the total flour in the recipe. When making proper rye, it’s necessary to ferment a large percentage of the flour in the recipe beforehand.
Why? The large preferment ensures that when the dough is mixed (either by hand or machine), it has a high acidity (low pH) from the start. This low pH inhibits excessive amylase enzyme activity, preventing excessive starch breakdown, especially during baking. If rye doughs are not properly acidified with sourdough, this starch breakdown will result in bread with a gummy interior and a separation between the top crust and interior of the loaf.
In this recipe, I call for 45% of the total flour in the levain, and while this may seem like a lot compared to other sourdough recipes here at The Perfect Loaf, it’s actually rather moderate compared to other rye recipes such as a multi-stage vollkornbrot or 100% whole-grain rye like the roggenvollkornbrot in my cookbook.
Finally, the large preferment also means that much of the flour in the recipe has fermented for a long period of time, which gives it time to build up copious amounts of organic flavor compounds. This flavorful mixture directly translates into the final dough.
Flour Selection
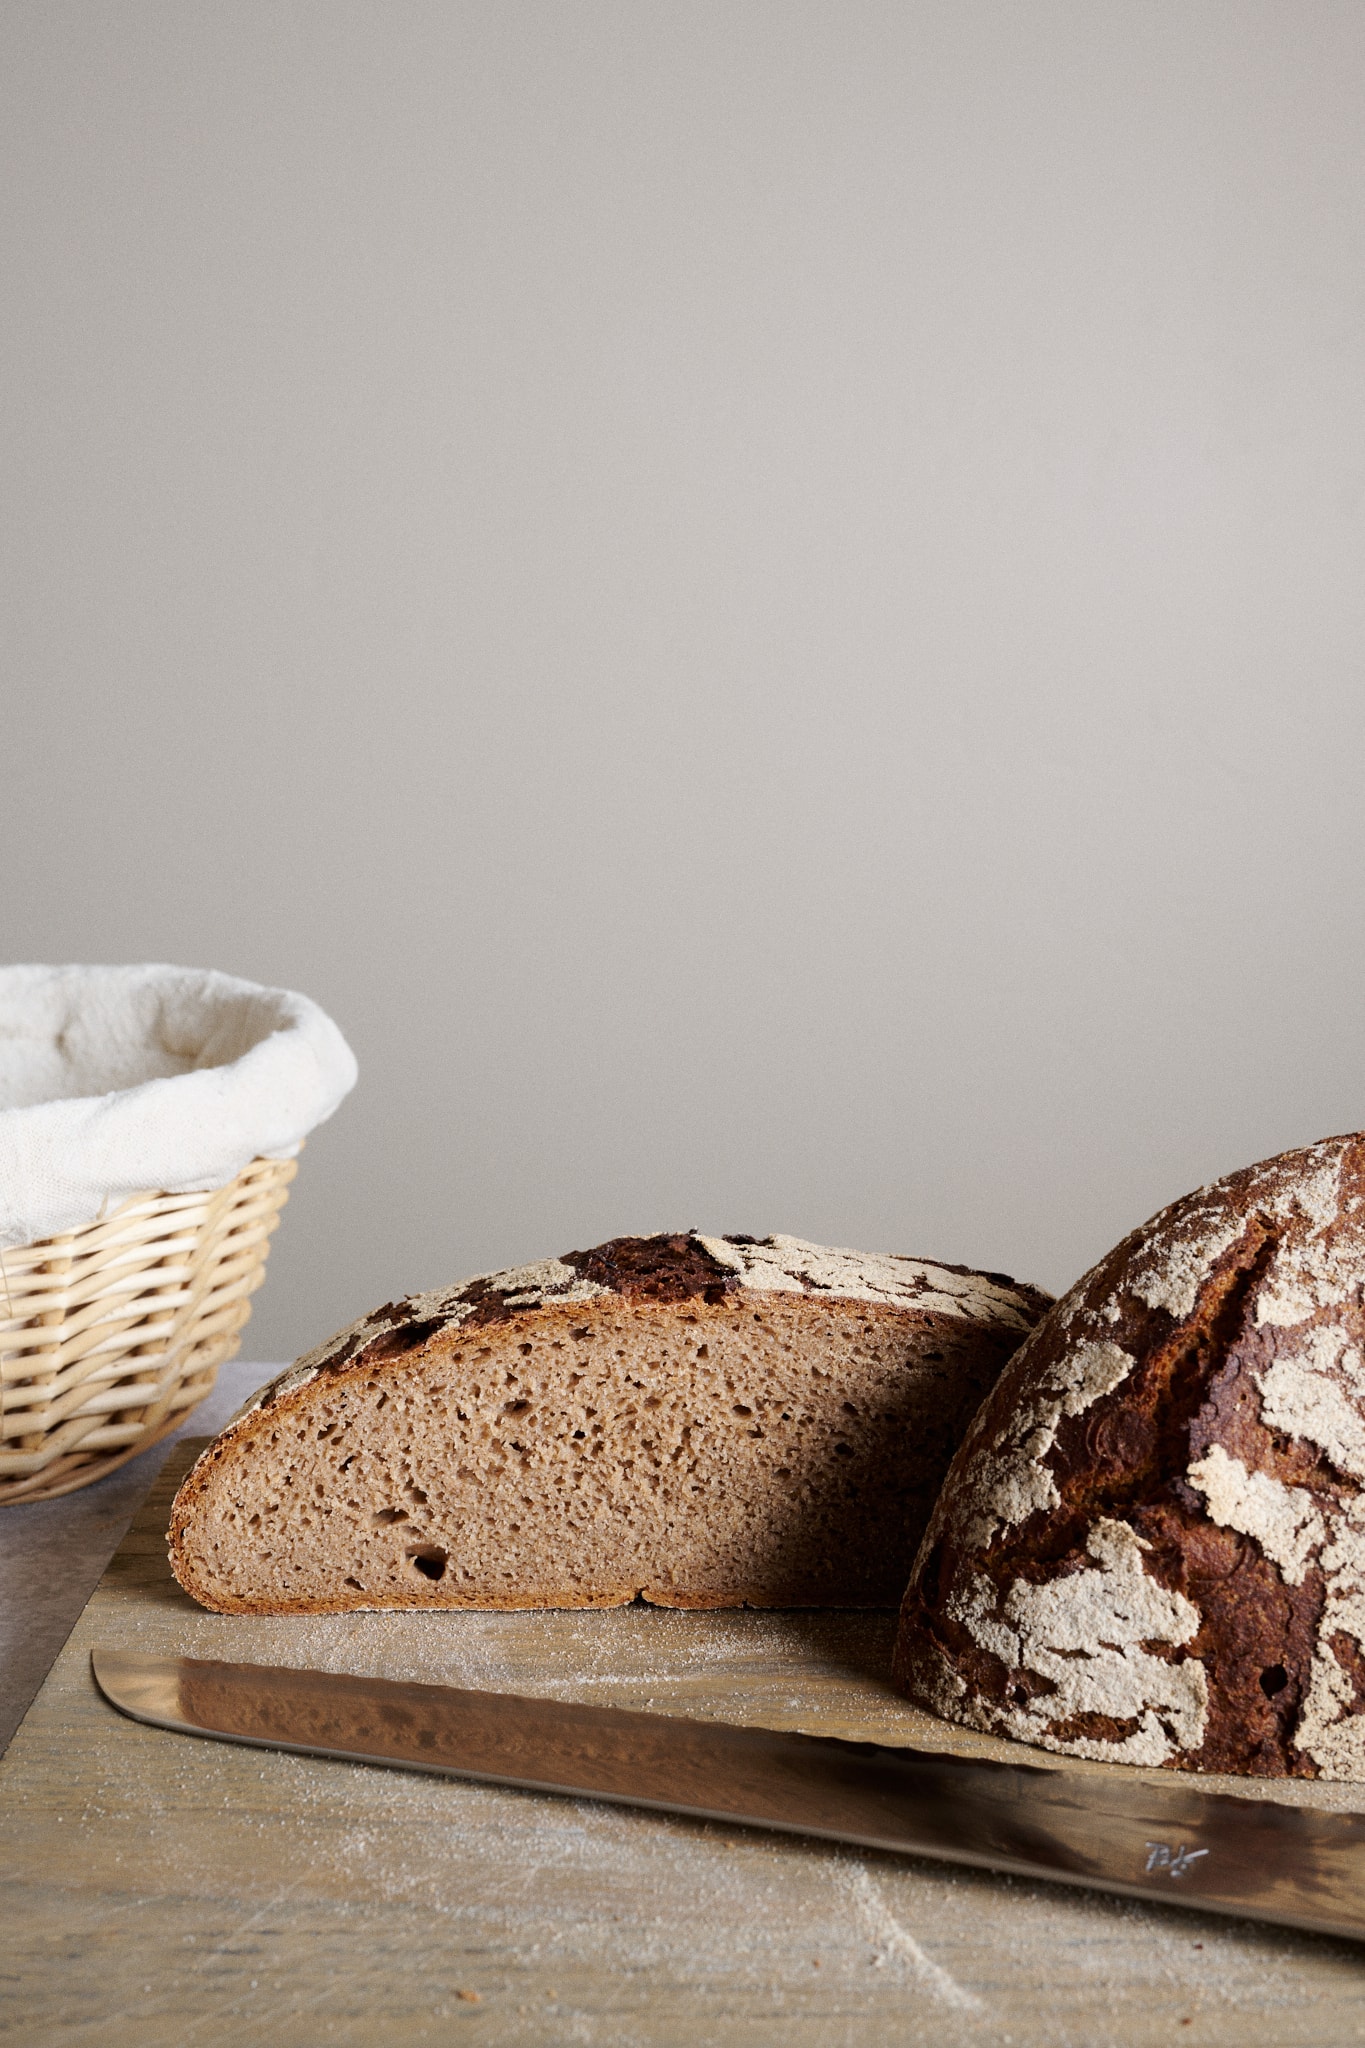
This sourdough rye bread calls for whole dark rye (the same flour you might find in rugbrød, Danish rye bread). This means the flour is not sifted and contains the entire rye berry. Keeping the bran and germ brings increased flavor to the final loaf, specifically, a more earthy and robust flavor profile that’s a touch nutty. Additionally, by keeping the bran and germ, the resulting sourdough rye bread will have more fiber, be richer in nutrients, and keep you full longer.
In addition to the whole rye, I call for 10% high-protein white bread flour to help lighten the loaf just a bit. This higher protein flour brings a touch of airiness and openness to this rye, making for the perfect counterbalance to the dark, heavy rye. If you don’t have any high-protein white flour on hand, feel free to use medium-protein or all-purpose flour.
For a closer look at what makes rye so great (and so delicious), see The Whys of Ryes →

Baking Schedule
The incredible thing about making sourdough rye bread with lots of rye flour and a large preferment is that the schedule is relatively short and the loaf is easy to make. The preferment (levain) runs overnight for 12 hours; the next day, after a short mix, fermentation time, and bake, you’ll have a loaf of rye bread cooling on your countertop.
Sourdough 90-Rye Bread Recipe
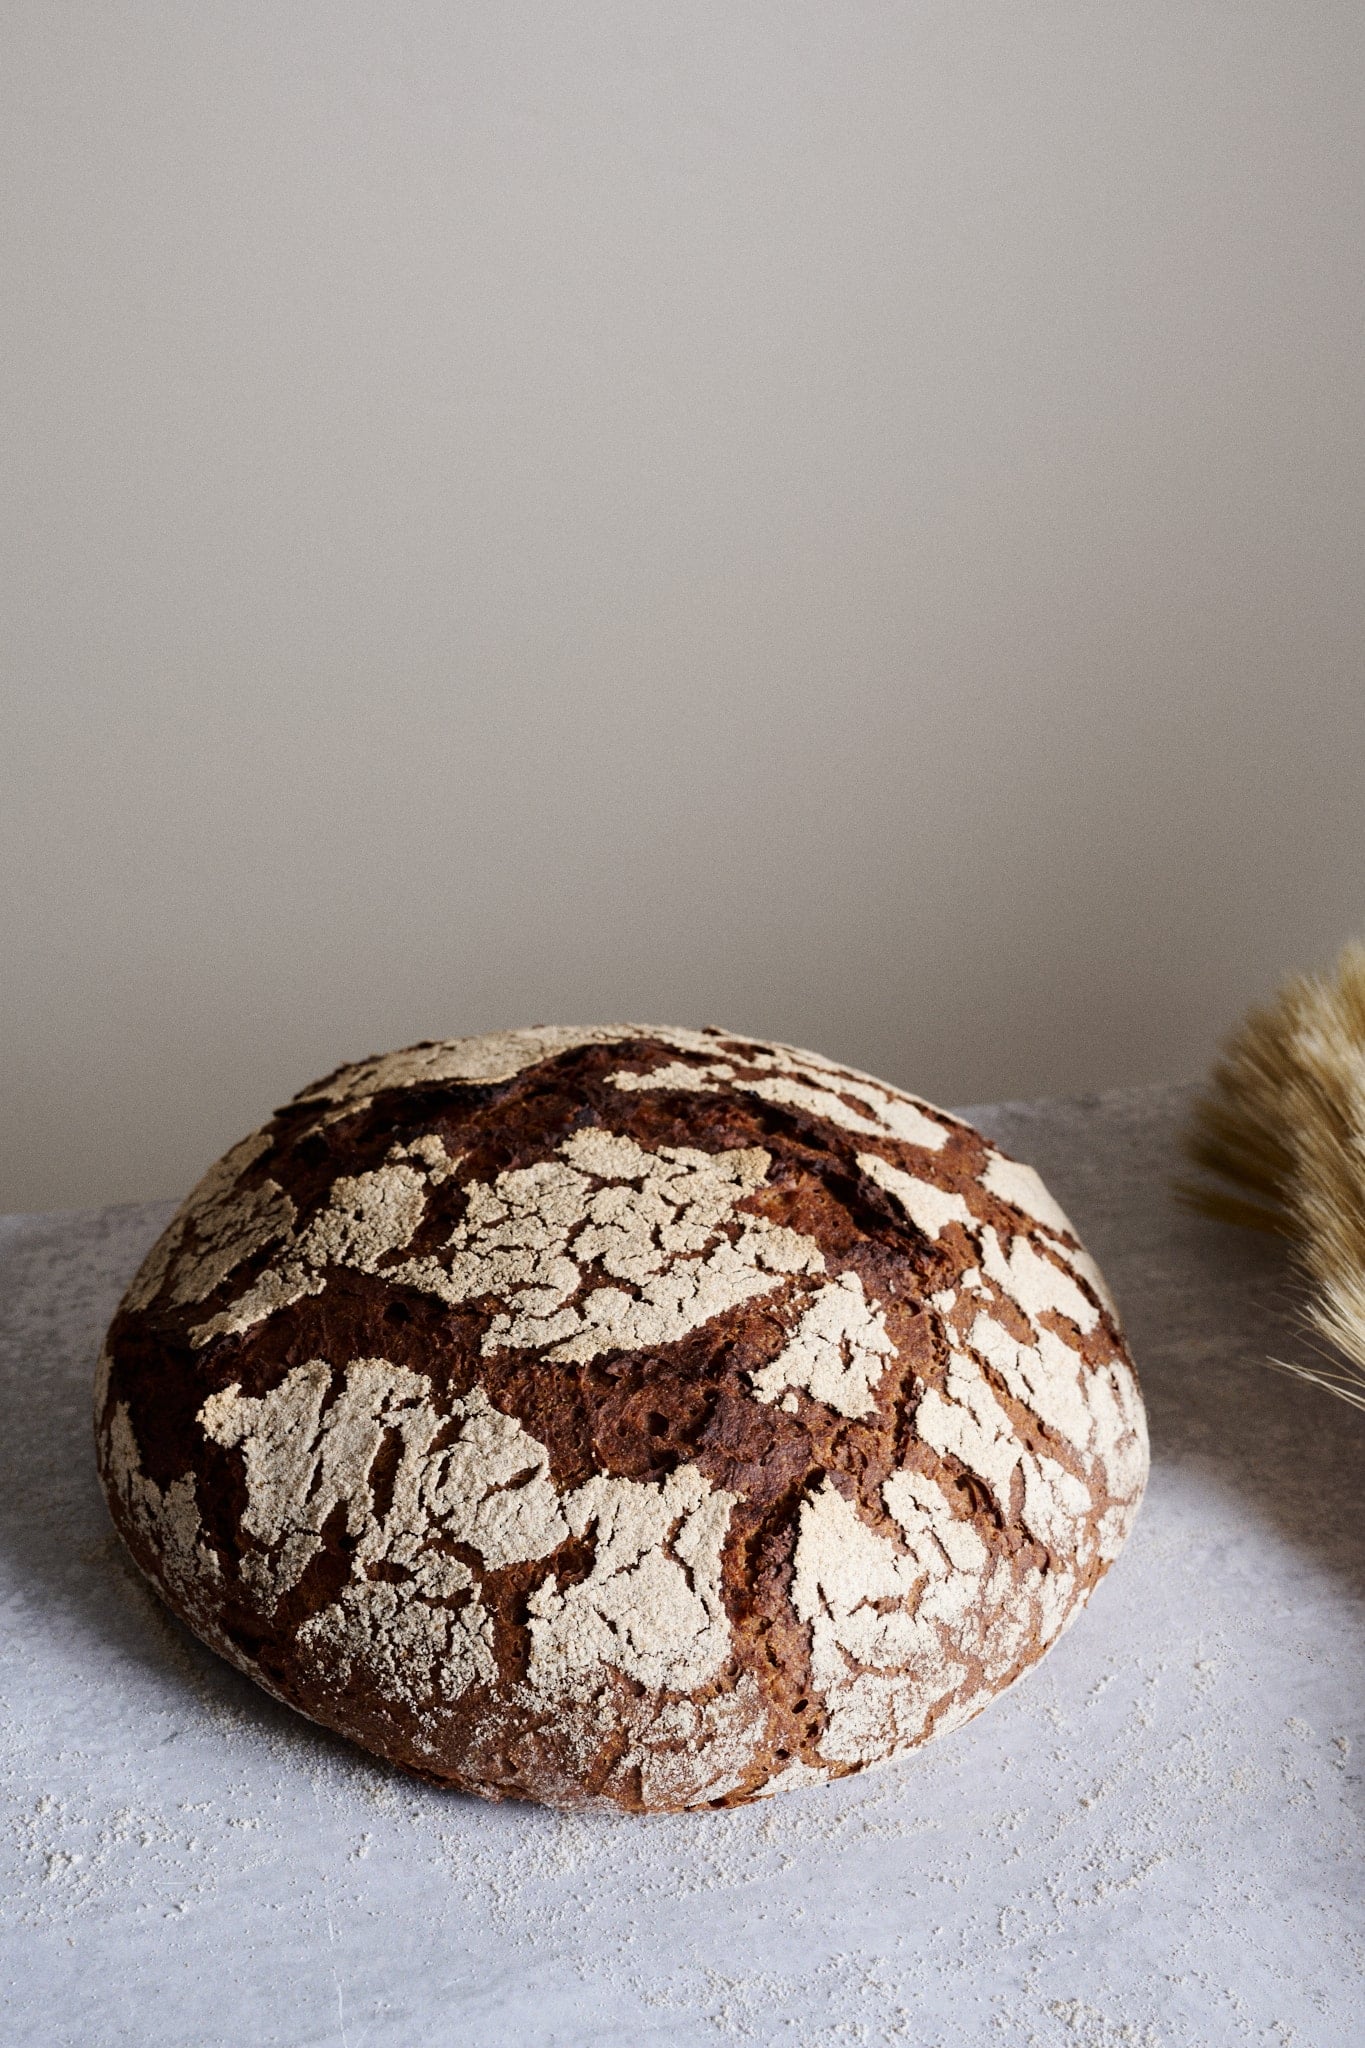
This 1,200-gram loaf is large, but it’s the perfect size for a week of eating. If you want to scale the recipe up, including doubling the recipe, use baker’s percentages.
Vitals
| Total dough weight | 1,200 grams |
| Pre-fermented flour | 45.0% |
| Hydration | 90.0% |
| Yield | 1 loaf |
Total Formula
This total formula table shows all the ingredients you need to make this sourdough rye bread. In the Method, below, the ingredients will be broken down into exactly what you need for each step.
Desired dough temperature: 82°F (28°C).
| Weight | Ingredient | Baker’s Percentage |
|---|---|---|
| 544g | Whole rye flour (Central Milling Organic Whole Dark Rye) | 90.0% |
| 60g | High-protein white bread flour (~12.7% protein, King Arthur Bread Flour) | 10.0% |
| 544g | Water | 90.0% |
| 11g | Fine sea salt | 1.8% |
| 41g | Ripe sourdough starter, 100% hydration | 6.8% |
Sourdough 90-Rye Bread Method
1. Prepare the levain – 9:00 p.m. (the day before mixing)
| Weight | Ingredient | Baker’s percentage |
| 272g | Whole rye flour | 100.0% |
| 272g | Water 1 (levain) | 100.0% |
| 41g | Ripe sourdough starter, 100% hydration | 15.0% |
Mix the ingredients in the chart above in a large jar or medium bowl and leave them covered with a lid or reusable plastic bowl cover at a warm temperature, 74-76°F (23-24°C), to ripen overnight.
Note that this is a very large levain, so be sure your container can hold the ingredients plus a little room for expansion overnight. My favorite container for this size levain, seed soakers, and other large preferments, are 1-quart round Cambro Camwear containers.
2. Mix – 9:00 a.m. (the next day)
| Weight | Ingredient |
| 272g | Whole rye flour |
| 60g | High-protein white bread flour |
| 272g | Water |
| 11g | Fine sea salt |
| 585g | Ripe levain (from Step 1) |
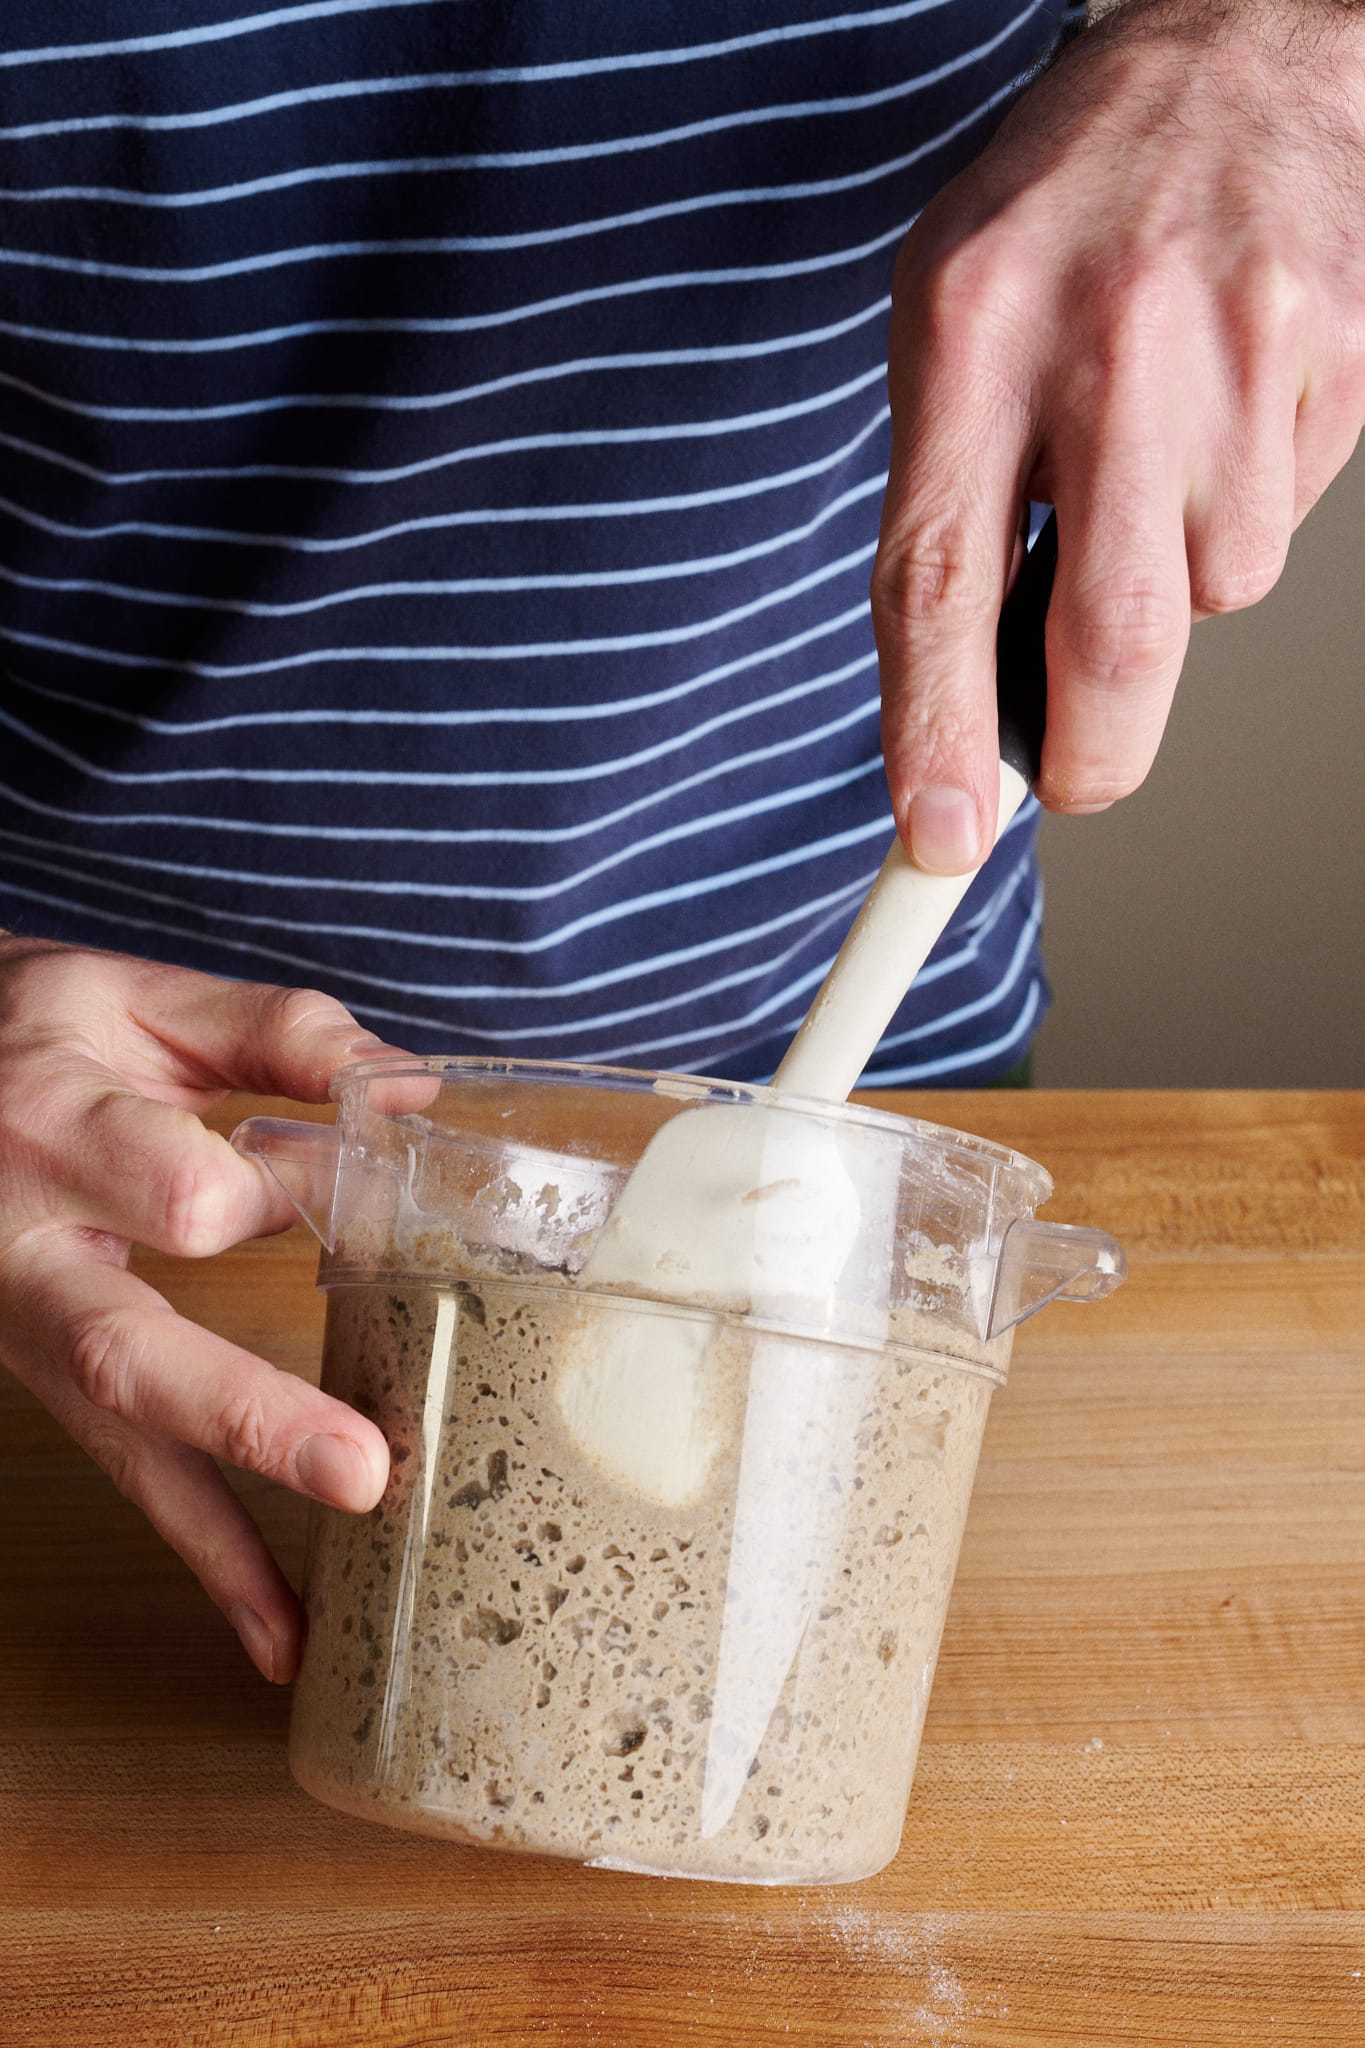
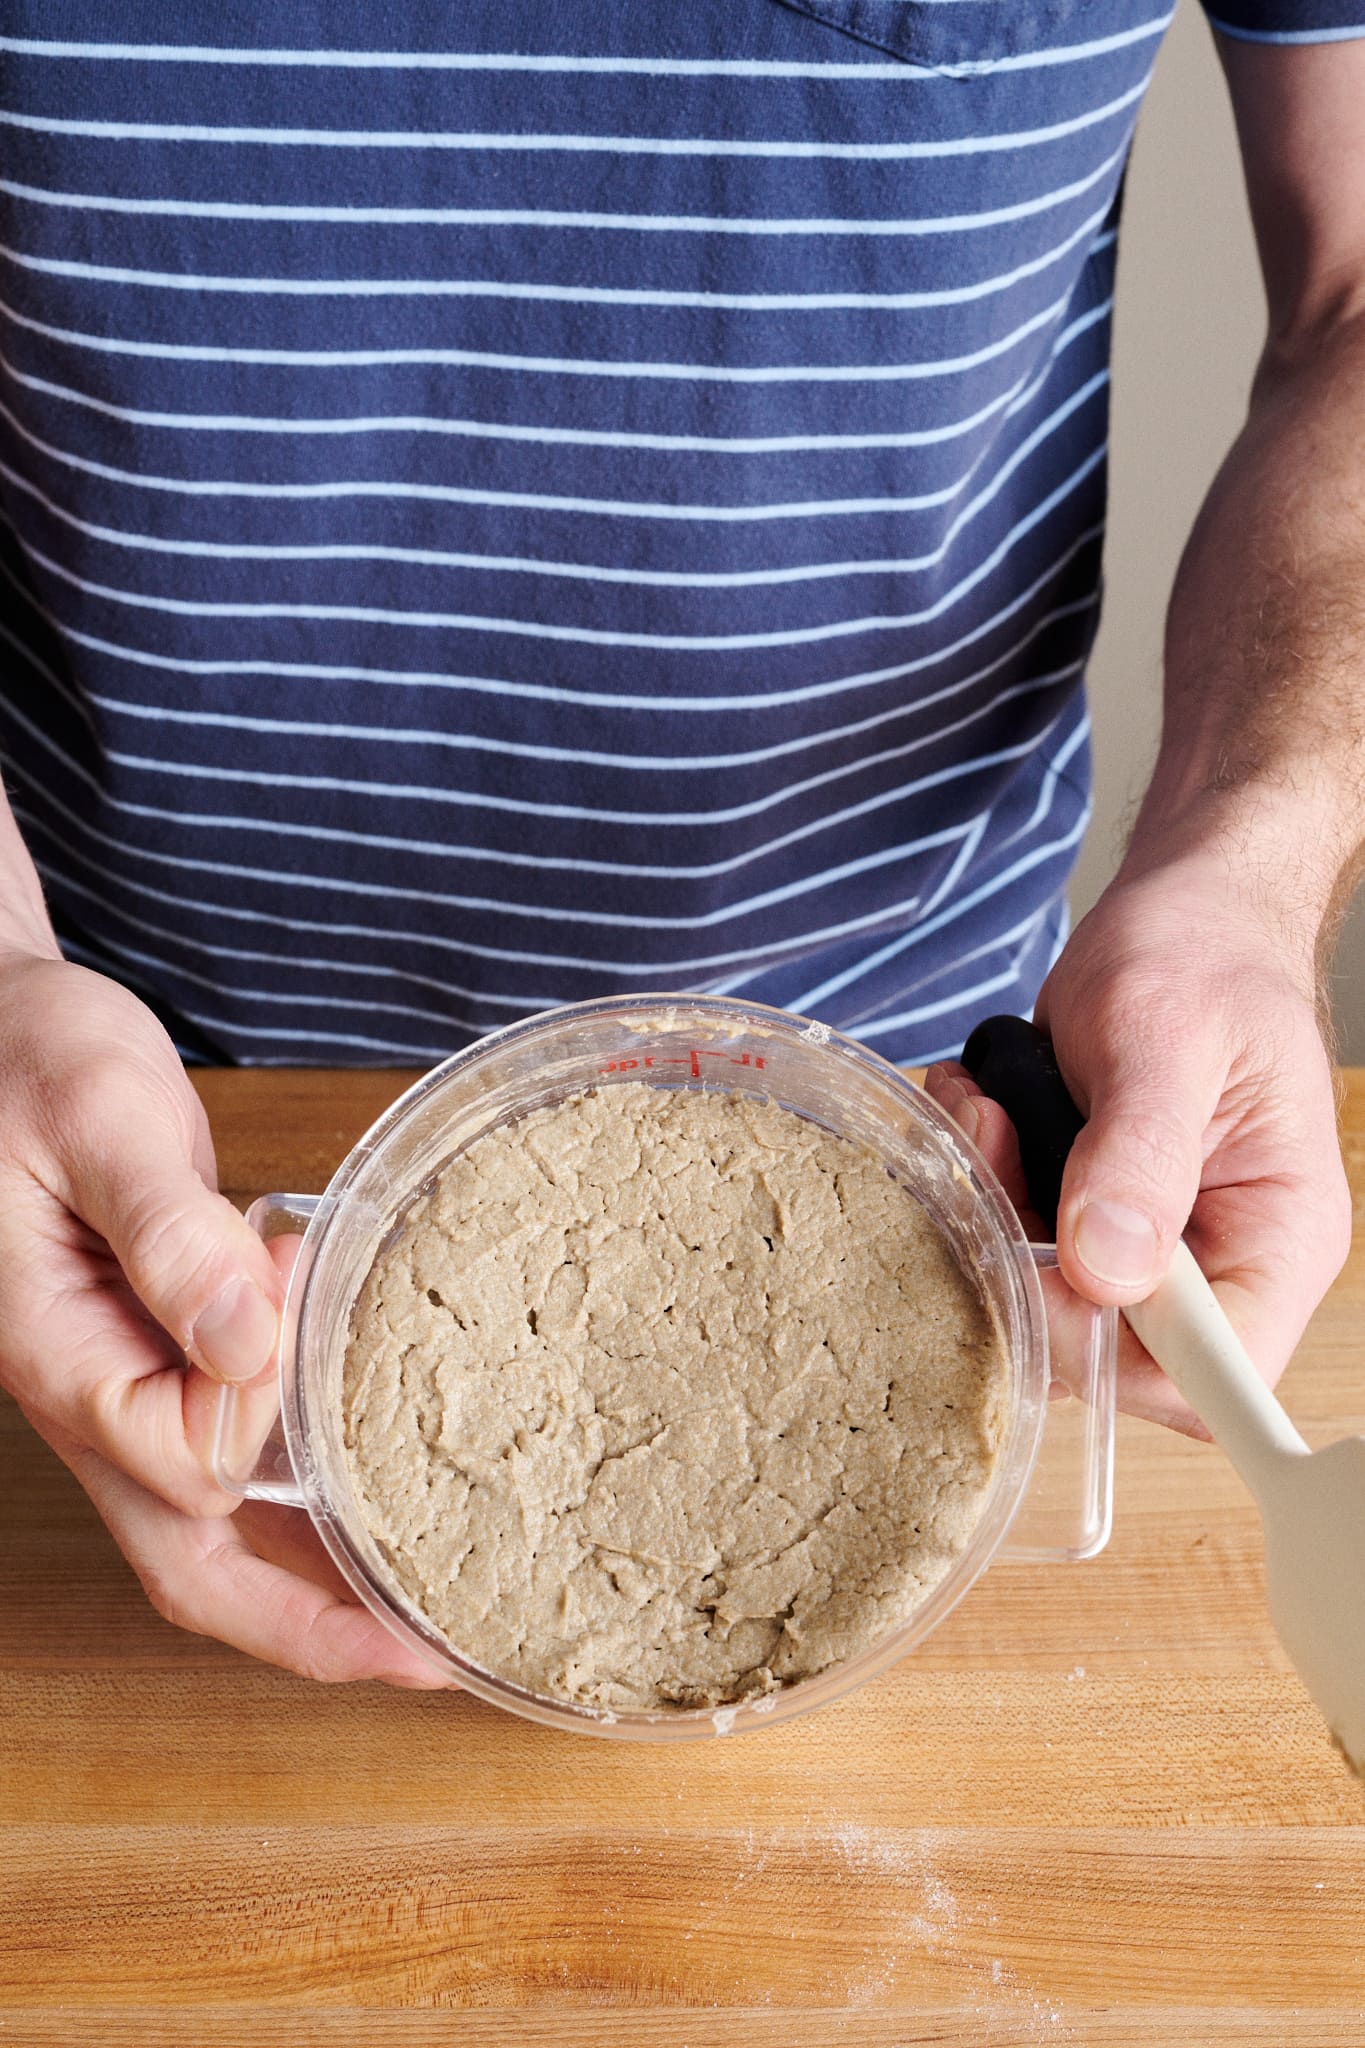
In the morning, the levain should have risen and aerated significantly (see below). The aroma of the levain will almost be earthy with fruity overtones, similar in a way to dark red wine.
With this rye dough, it’s important to hit the desired dough temperature (DDT) of 82°F (28°C). This is warmer than typical bulk fermentation temperatures here at The Perfect Loaf, so warm the mixing water as necessary to ensure the dough ends up at that temperature (see the guide to dough temperatures for a handy chart and calculator for figuring out this water temperature).
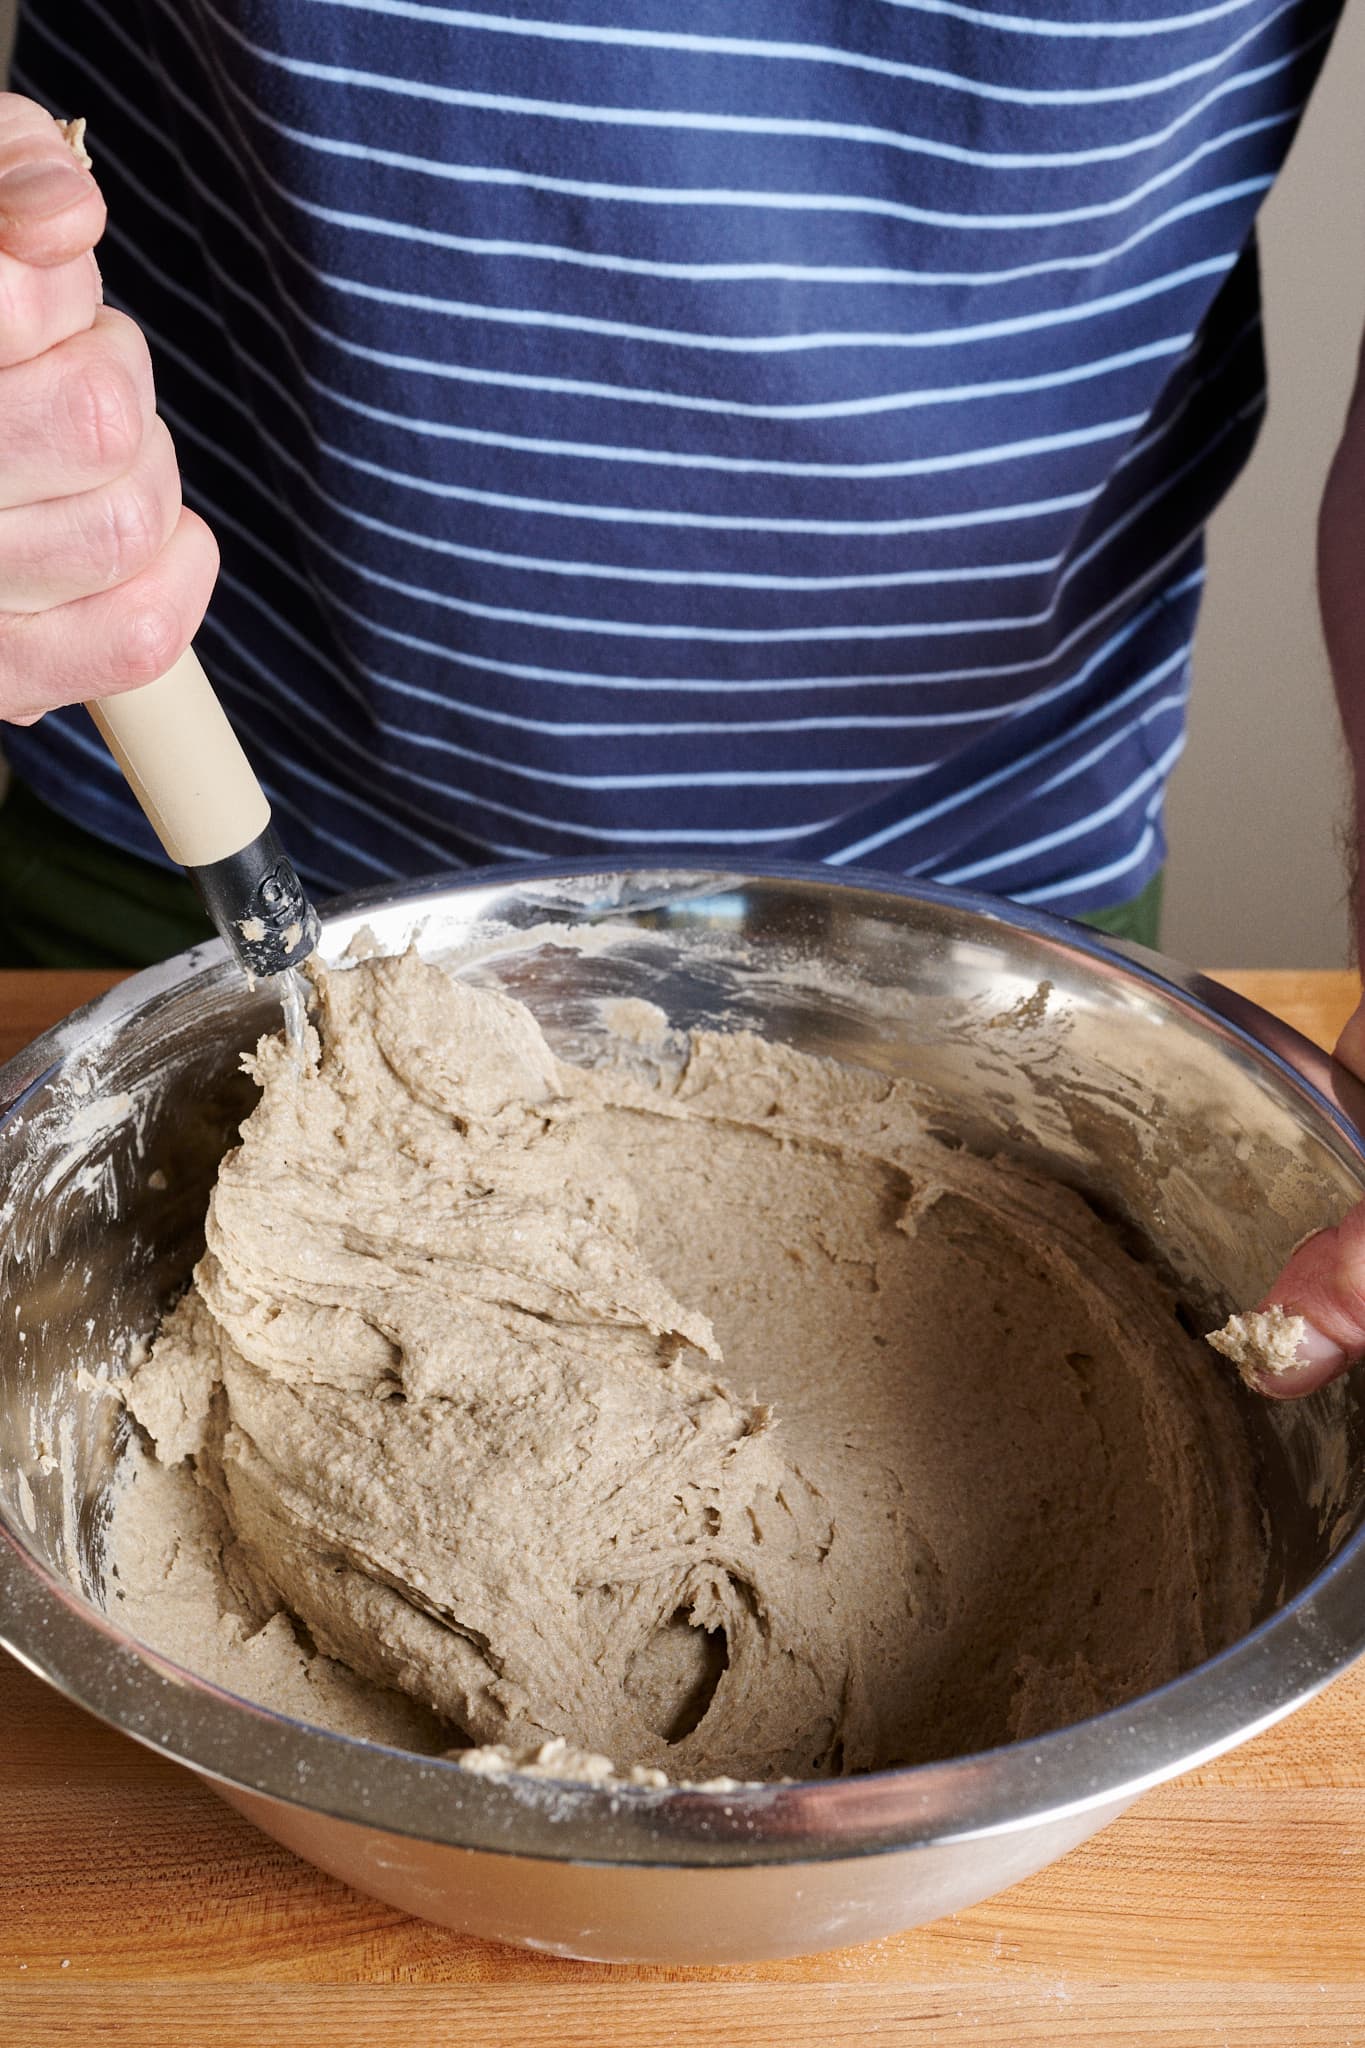
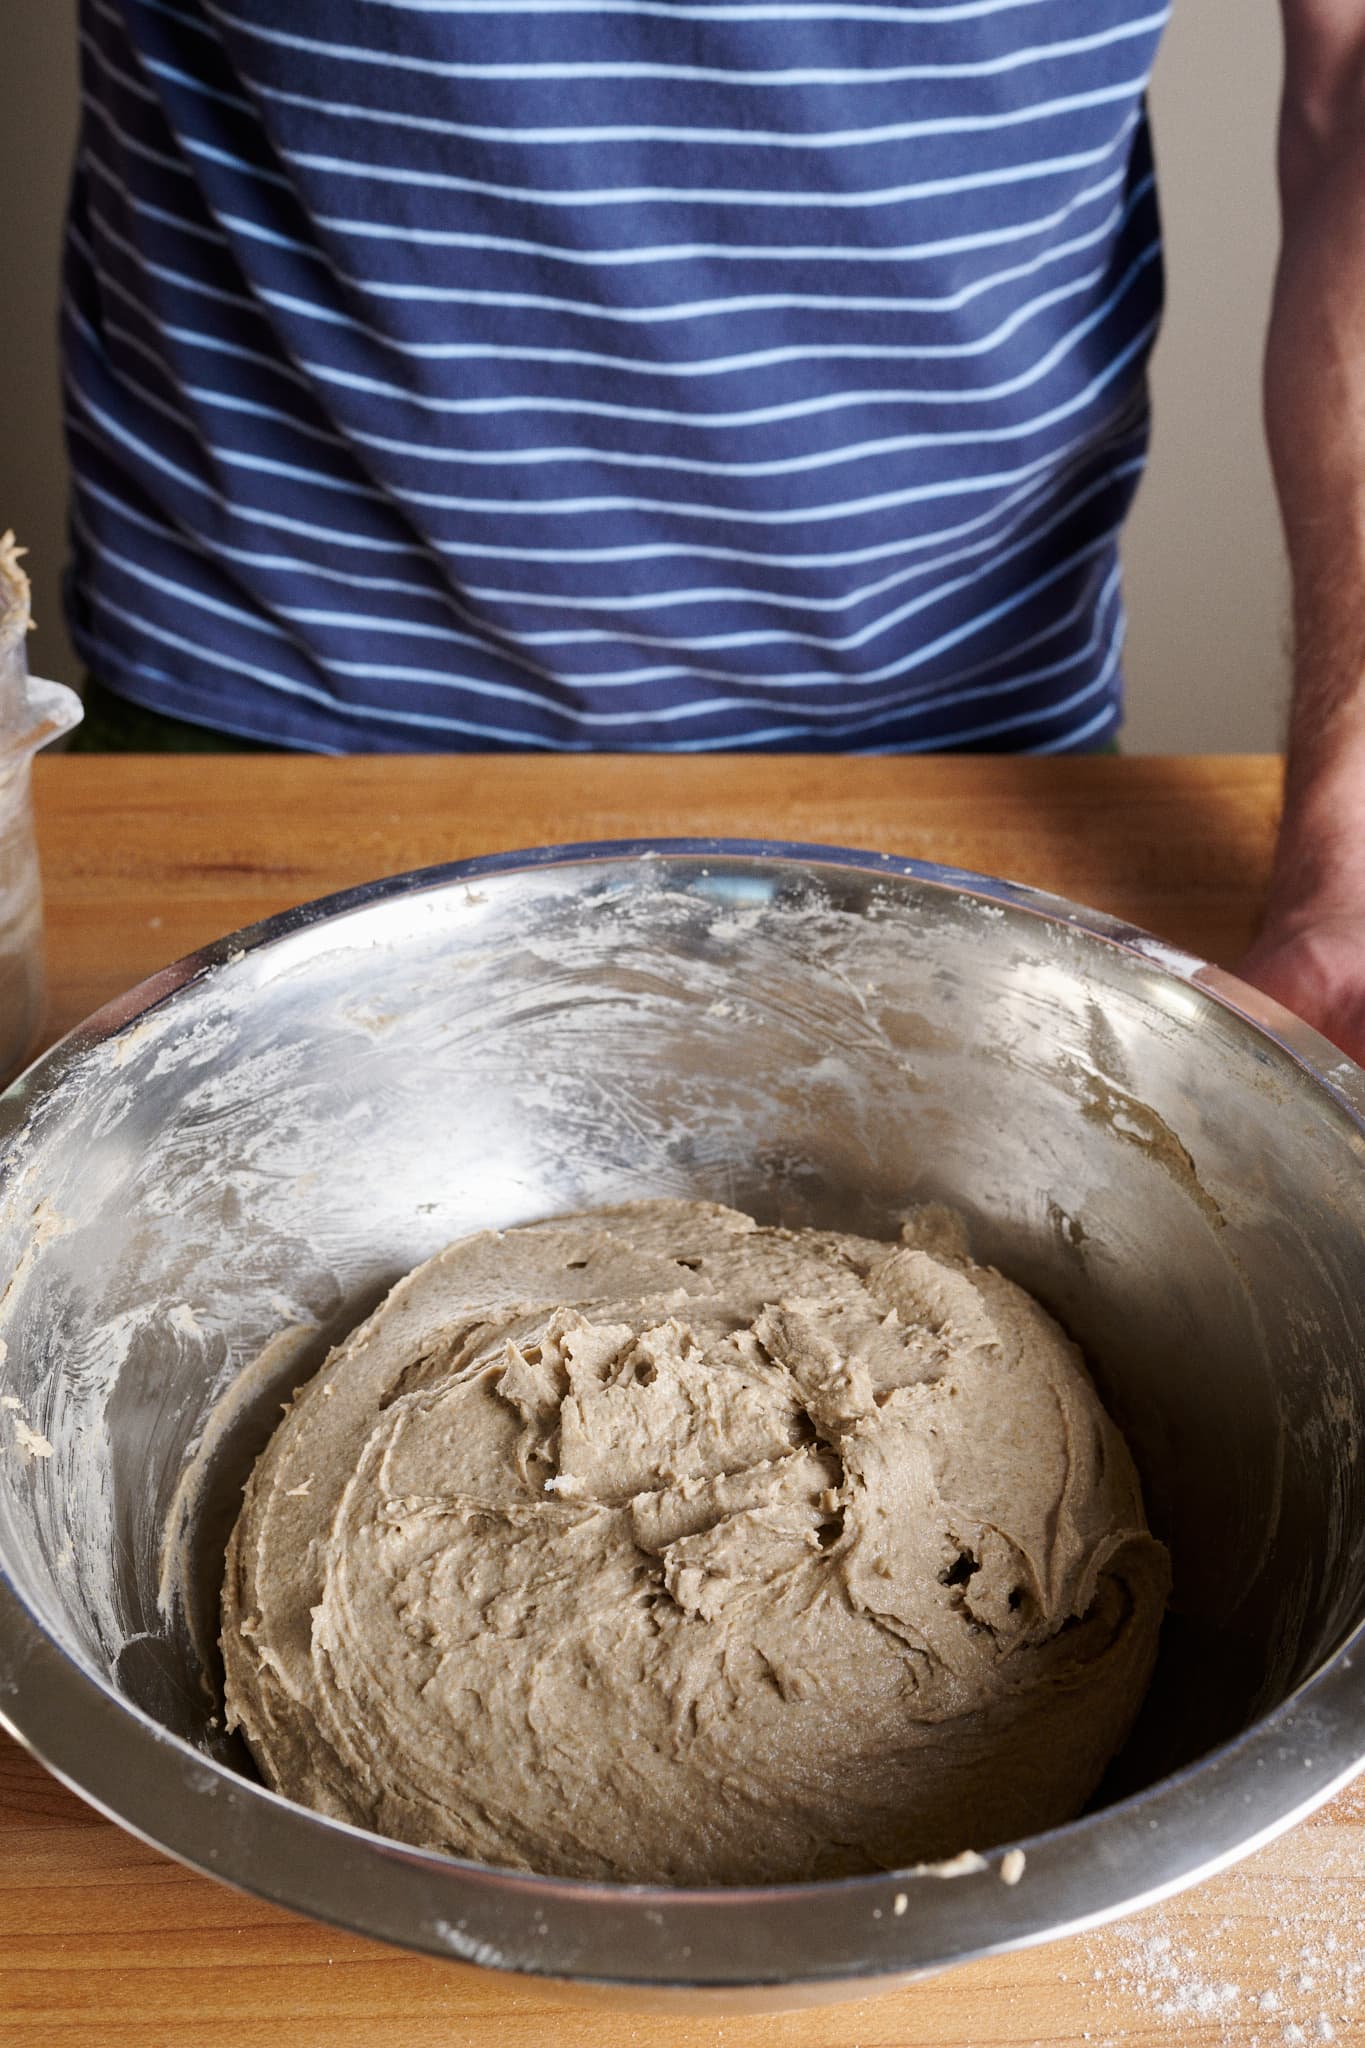
Hydration Note: As with any bread recipe, you might need to adjust the dough’s hydration to suit your flour (especially if baking in a humid environment. When mixing, hold back a little of the water and add it only if the dough feels like it can handle it (look at the images below to help judge the consistency).
Place the flour, water (see note above), salt, and levain in a large bowl. With wet hands (or, my preference, using a sturdy dough whisk), mix thoroughly until no dry bits remain (see below, left). Rye does not benefit from mixing and kneading in the same way as wheat due to its low gluten content. Therefore, it’s only necessary to mix this dough until no dry flour remains.
Gather up the dough into a ball in the center of the mixing bowl (see below, right). Take the dough’s temperature to record the final dough temperature, and then cover.
3. Bulk Fermentation – 9:15 a.m. to 9:35 a.m. (20 minutes)
At a warm room temperature, 74-76°F (23-24°C), bulk fermentation should take 20 minutes (yes, it’s short!). Because this dough is primarily rye flour, it doesn’t benefit from strengthening and therefore does not require any stretches and folds during this time.
4. Shape – 9:35 a.m.
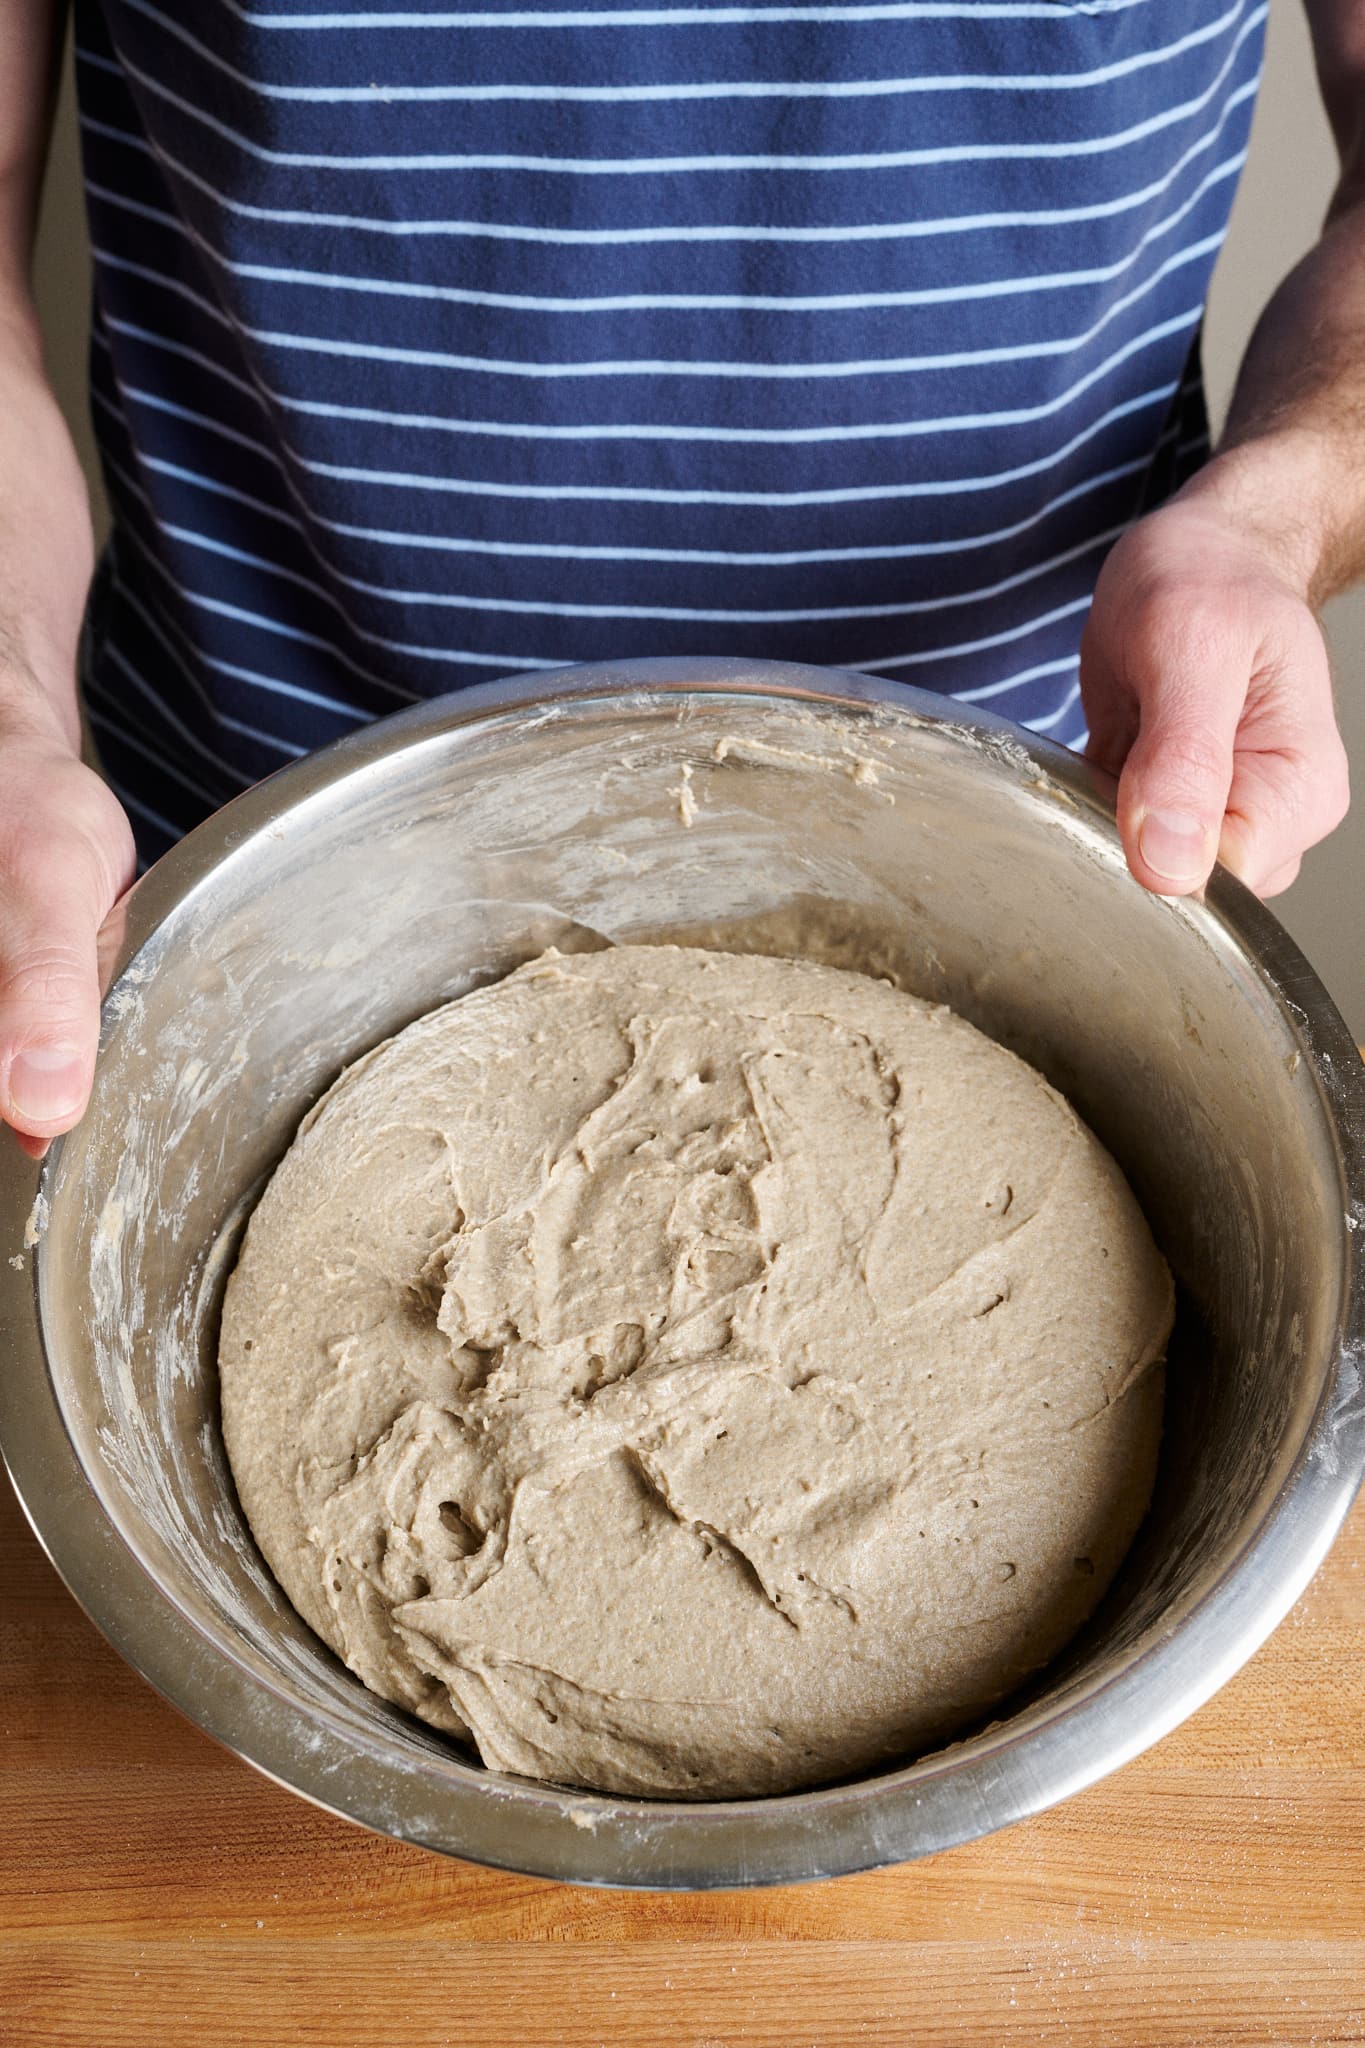
Note that if your final dough temperature was below 82°F (28°C), you might need to extend bulk fermentation. The dough is ready to shape when it has expanded (about 20%), has smoothed, and feels slightly puffy to the touch (see below).
Prepare an 8-inch round proofing basket or banneton by liberally dusting on whole rye flour. Be sure the entire surface area of the basket’s interior is covered with flour.
This dough is very sticky, so it’s important to use enough rye flour on your work surface and handle the dough as little as possible. The more you handle the dough, the faster it absorbs the dusting flour and becomes sticky.
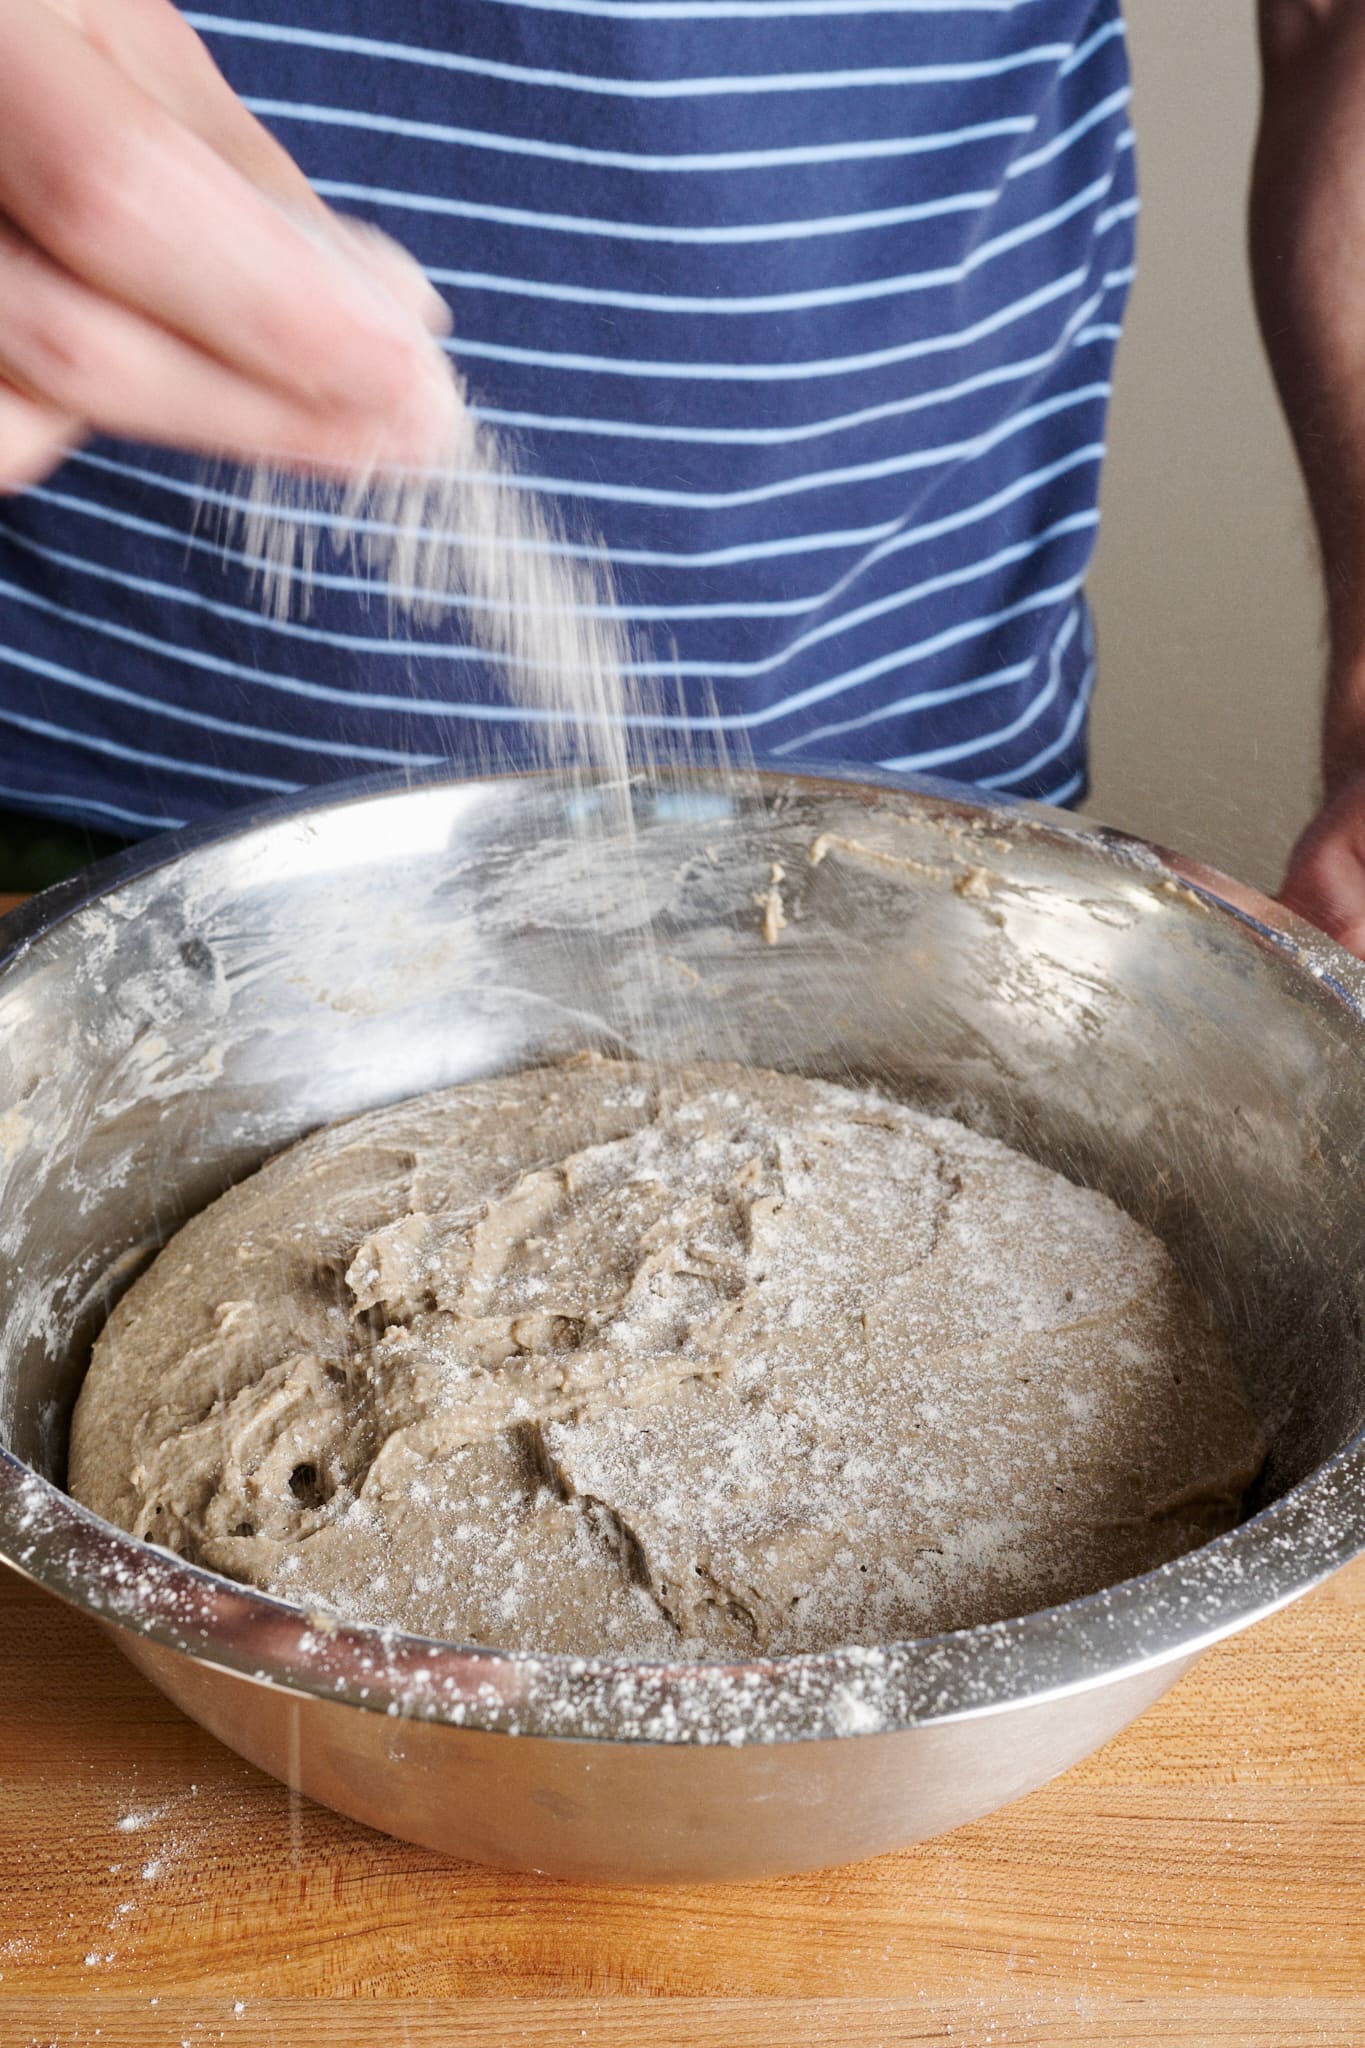
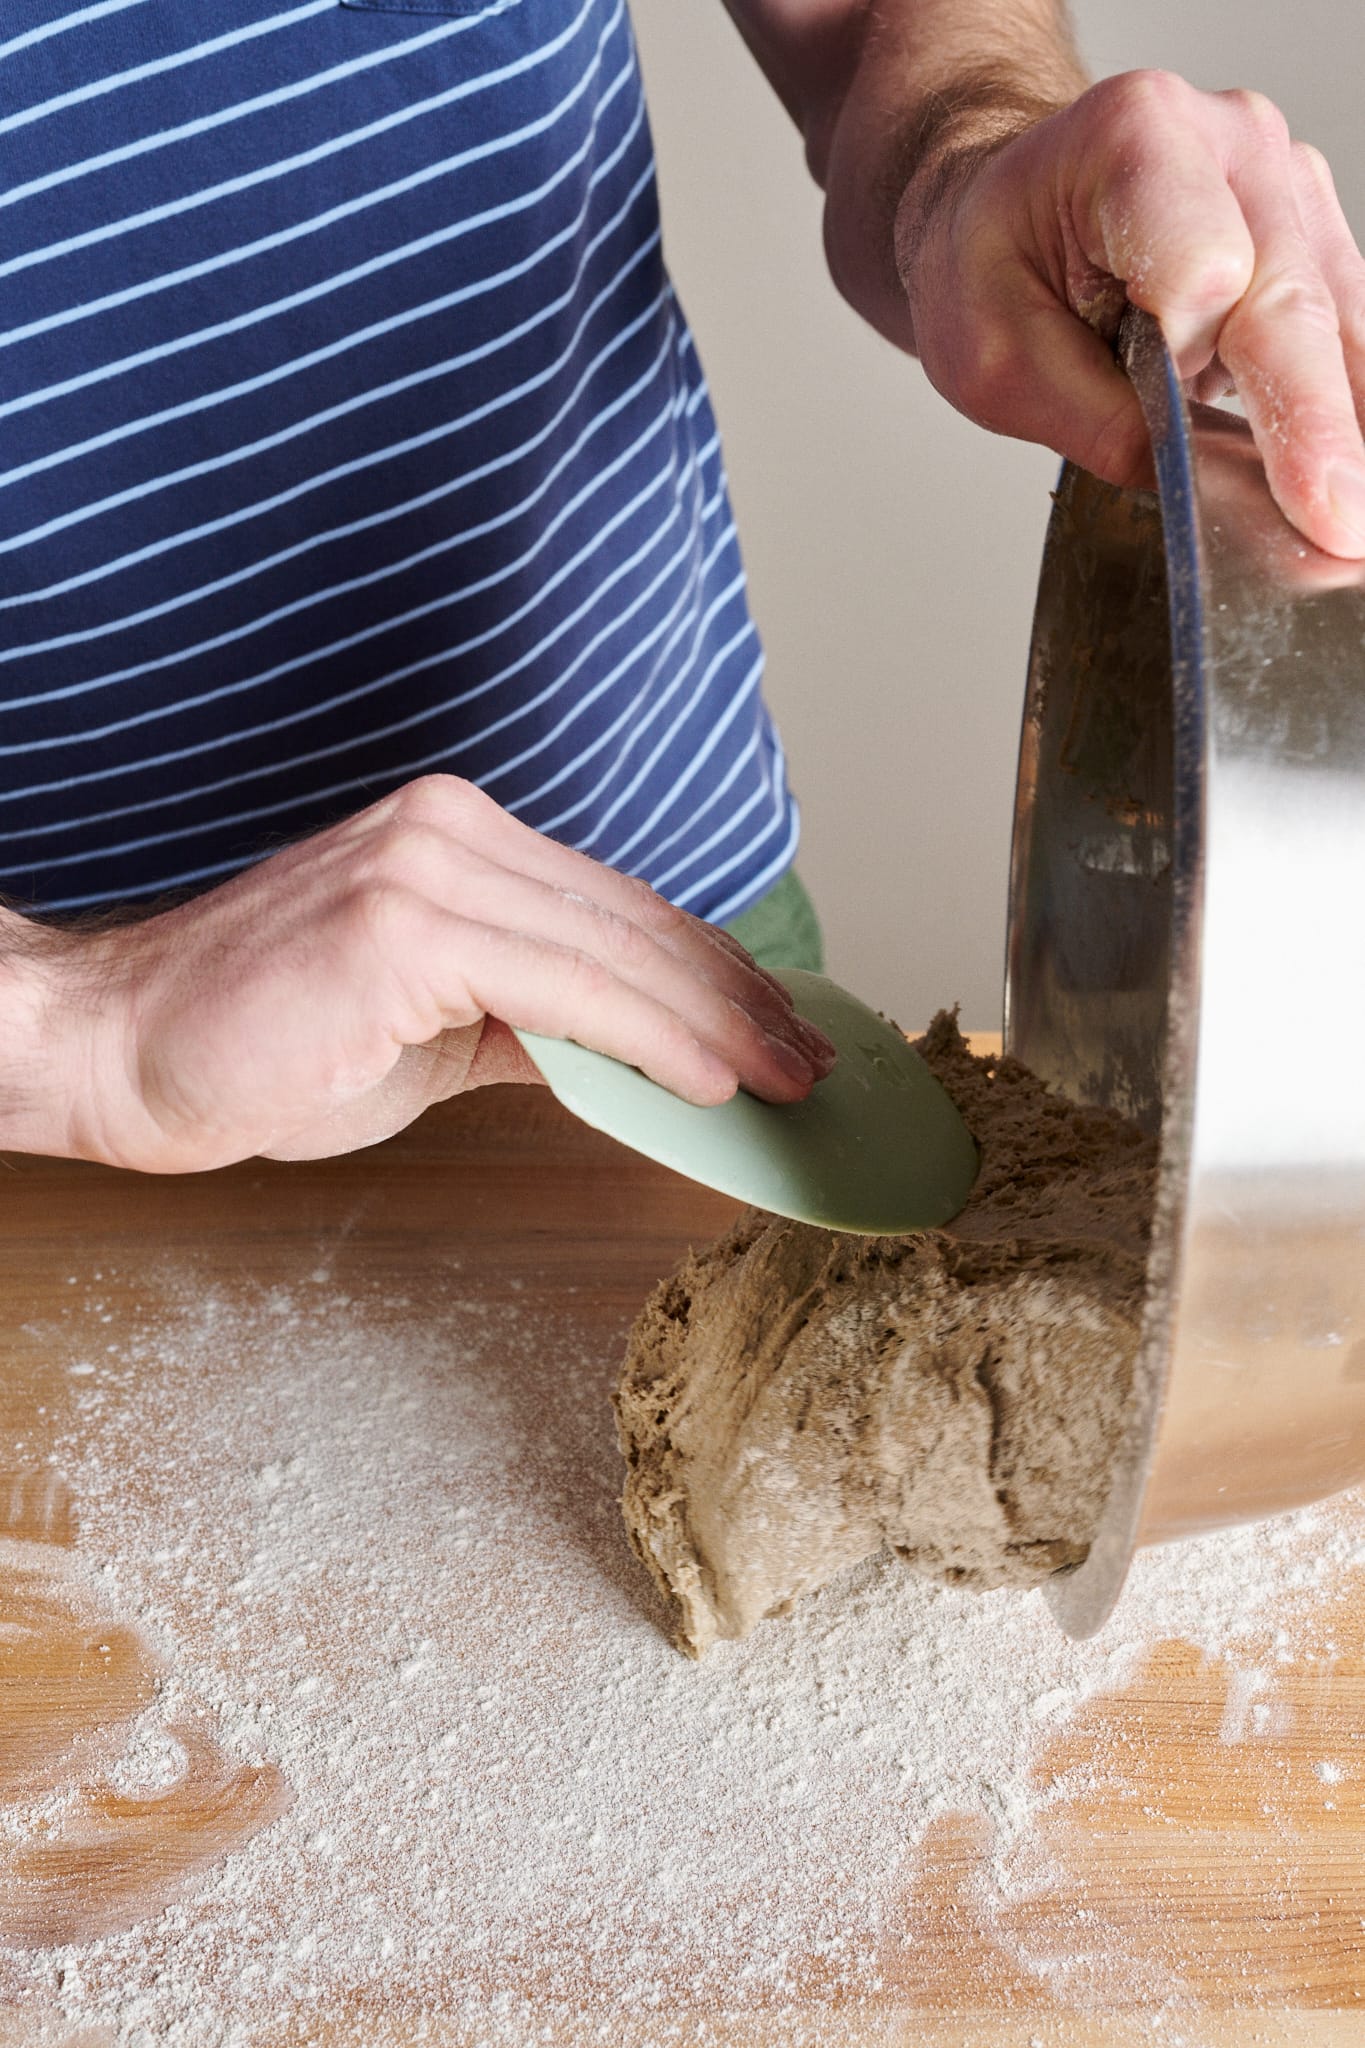
Flour your work surface, the top of the dough in the large bowl, and your hands. Scrape the dough onto the floured work surface with the floured top of the dough facing down.
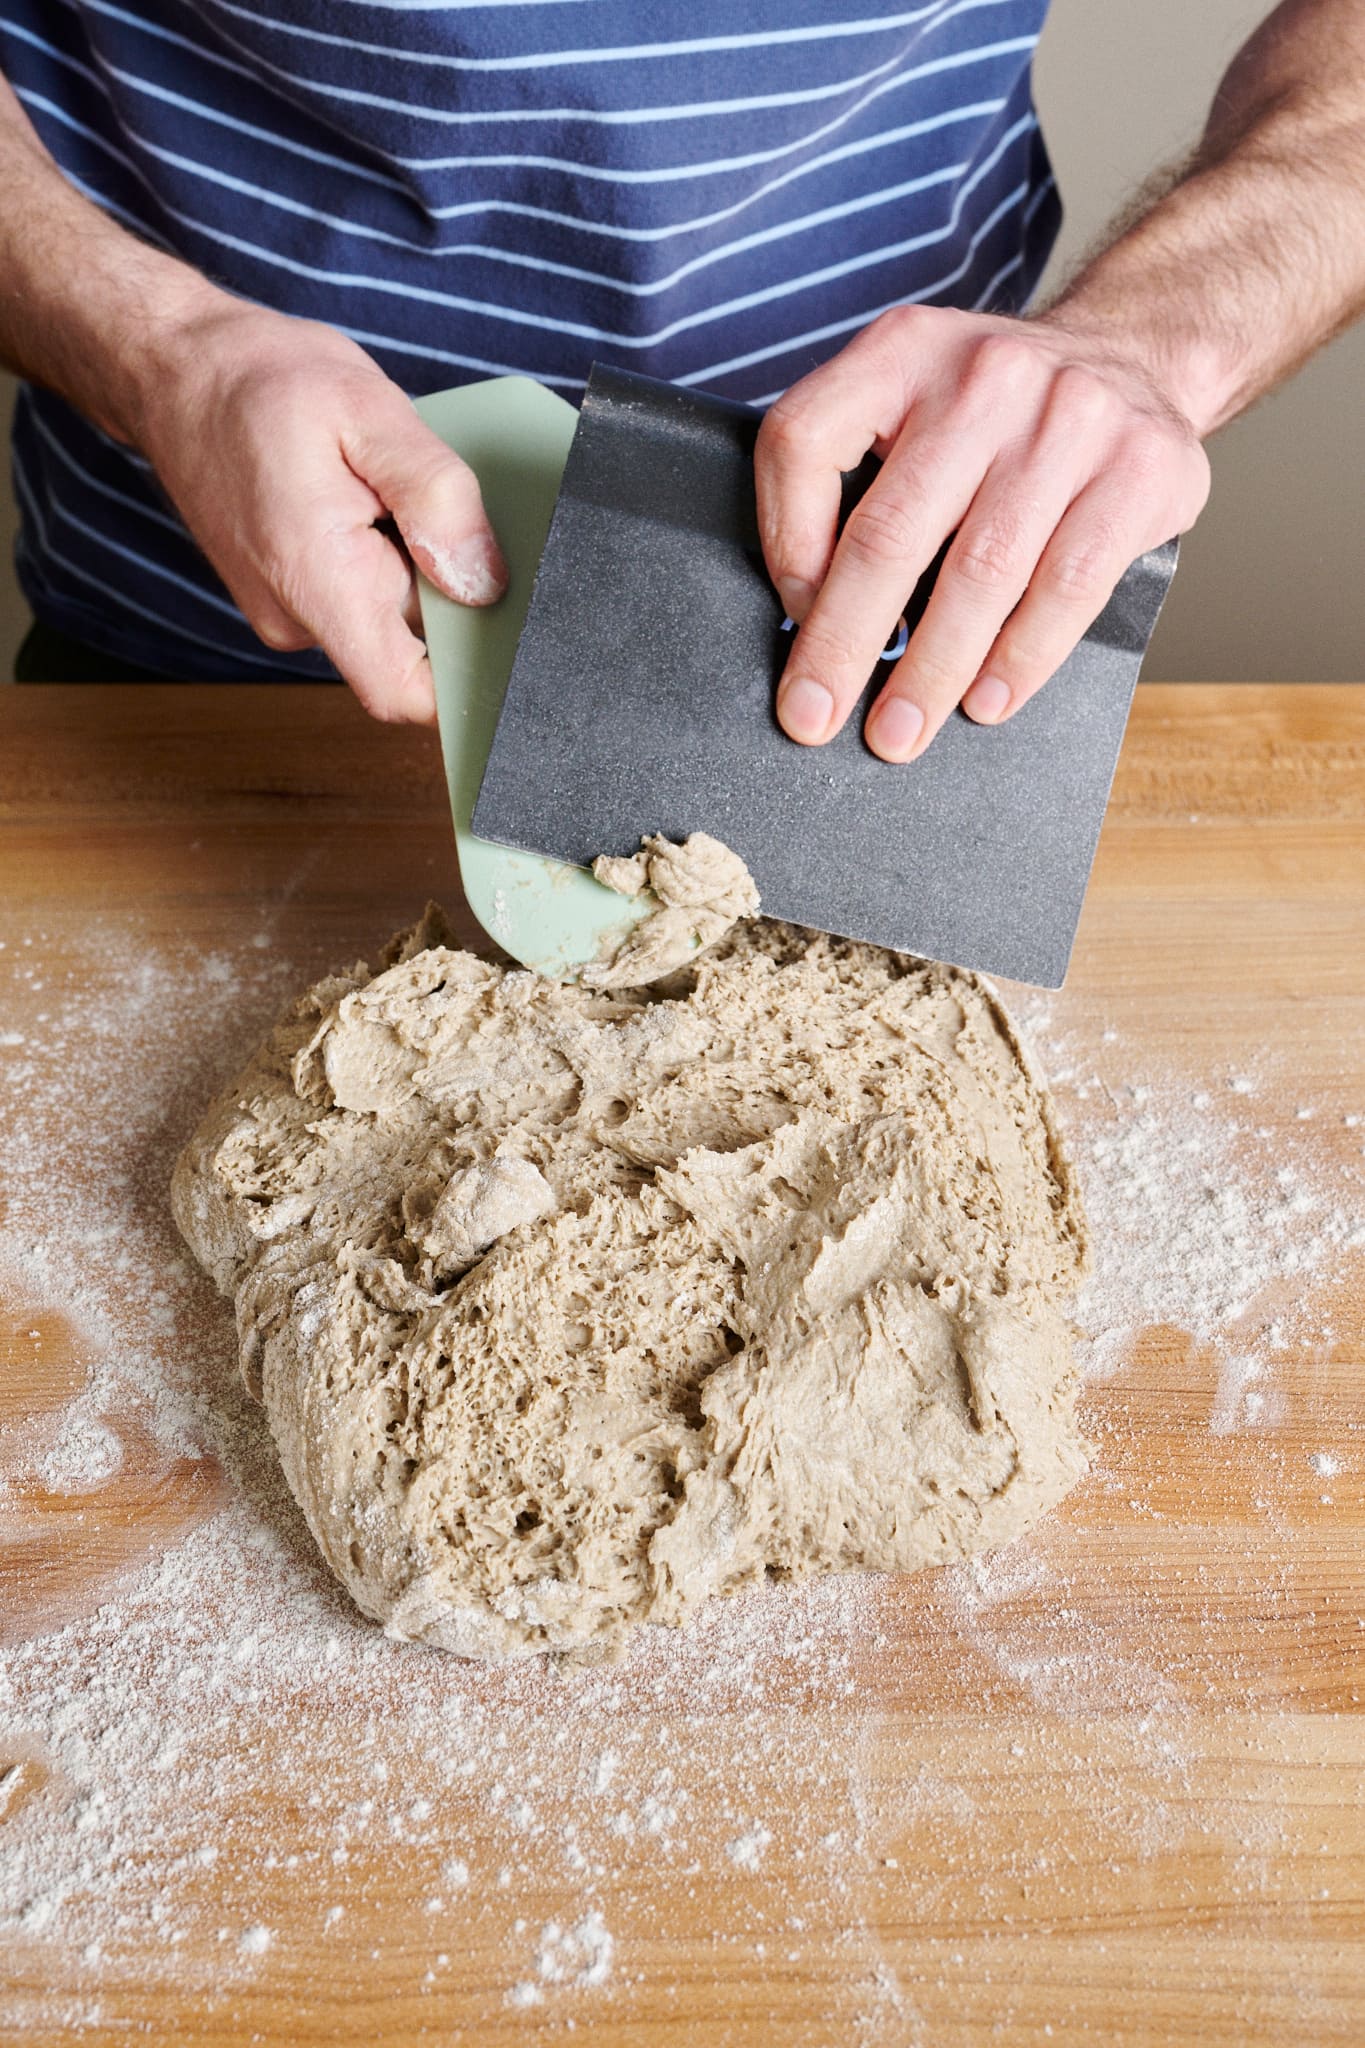
Using your bench scraper, fold the left side of the dough over to about the middle. Then, use the scraper to fold the top (twelve o’clock) down to the middle. Repeat for the right side and bottom. You should now have a folded-up shape that loosely resembles a square in front of you.
Using your floured hands, flip the dough over and quickly and confidently round it until it gets into a rough ball shape. It does not have to be a perfect ball. Just do your best to gather it with as few motions as possible.
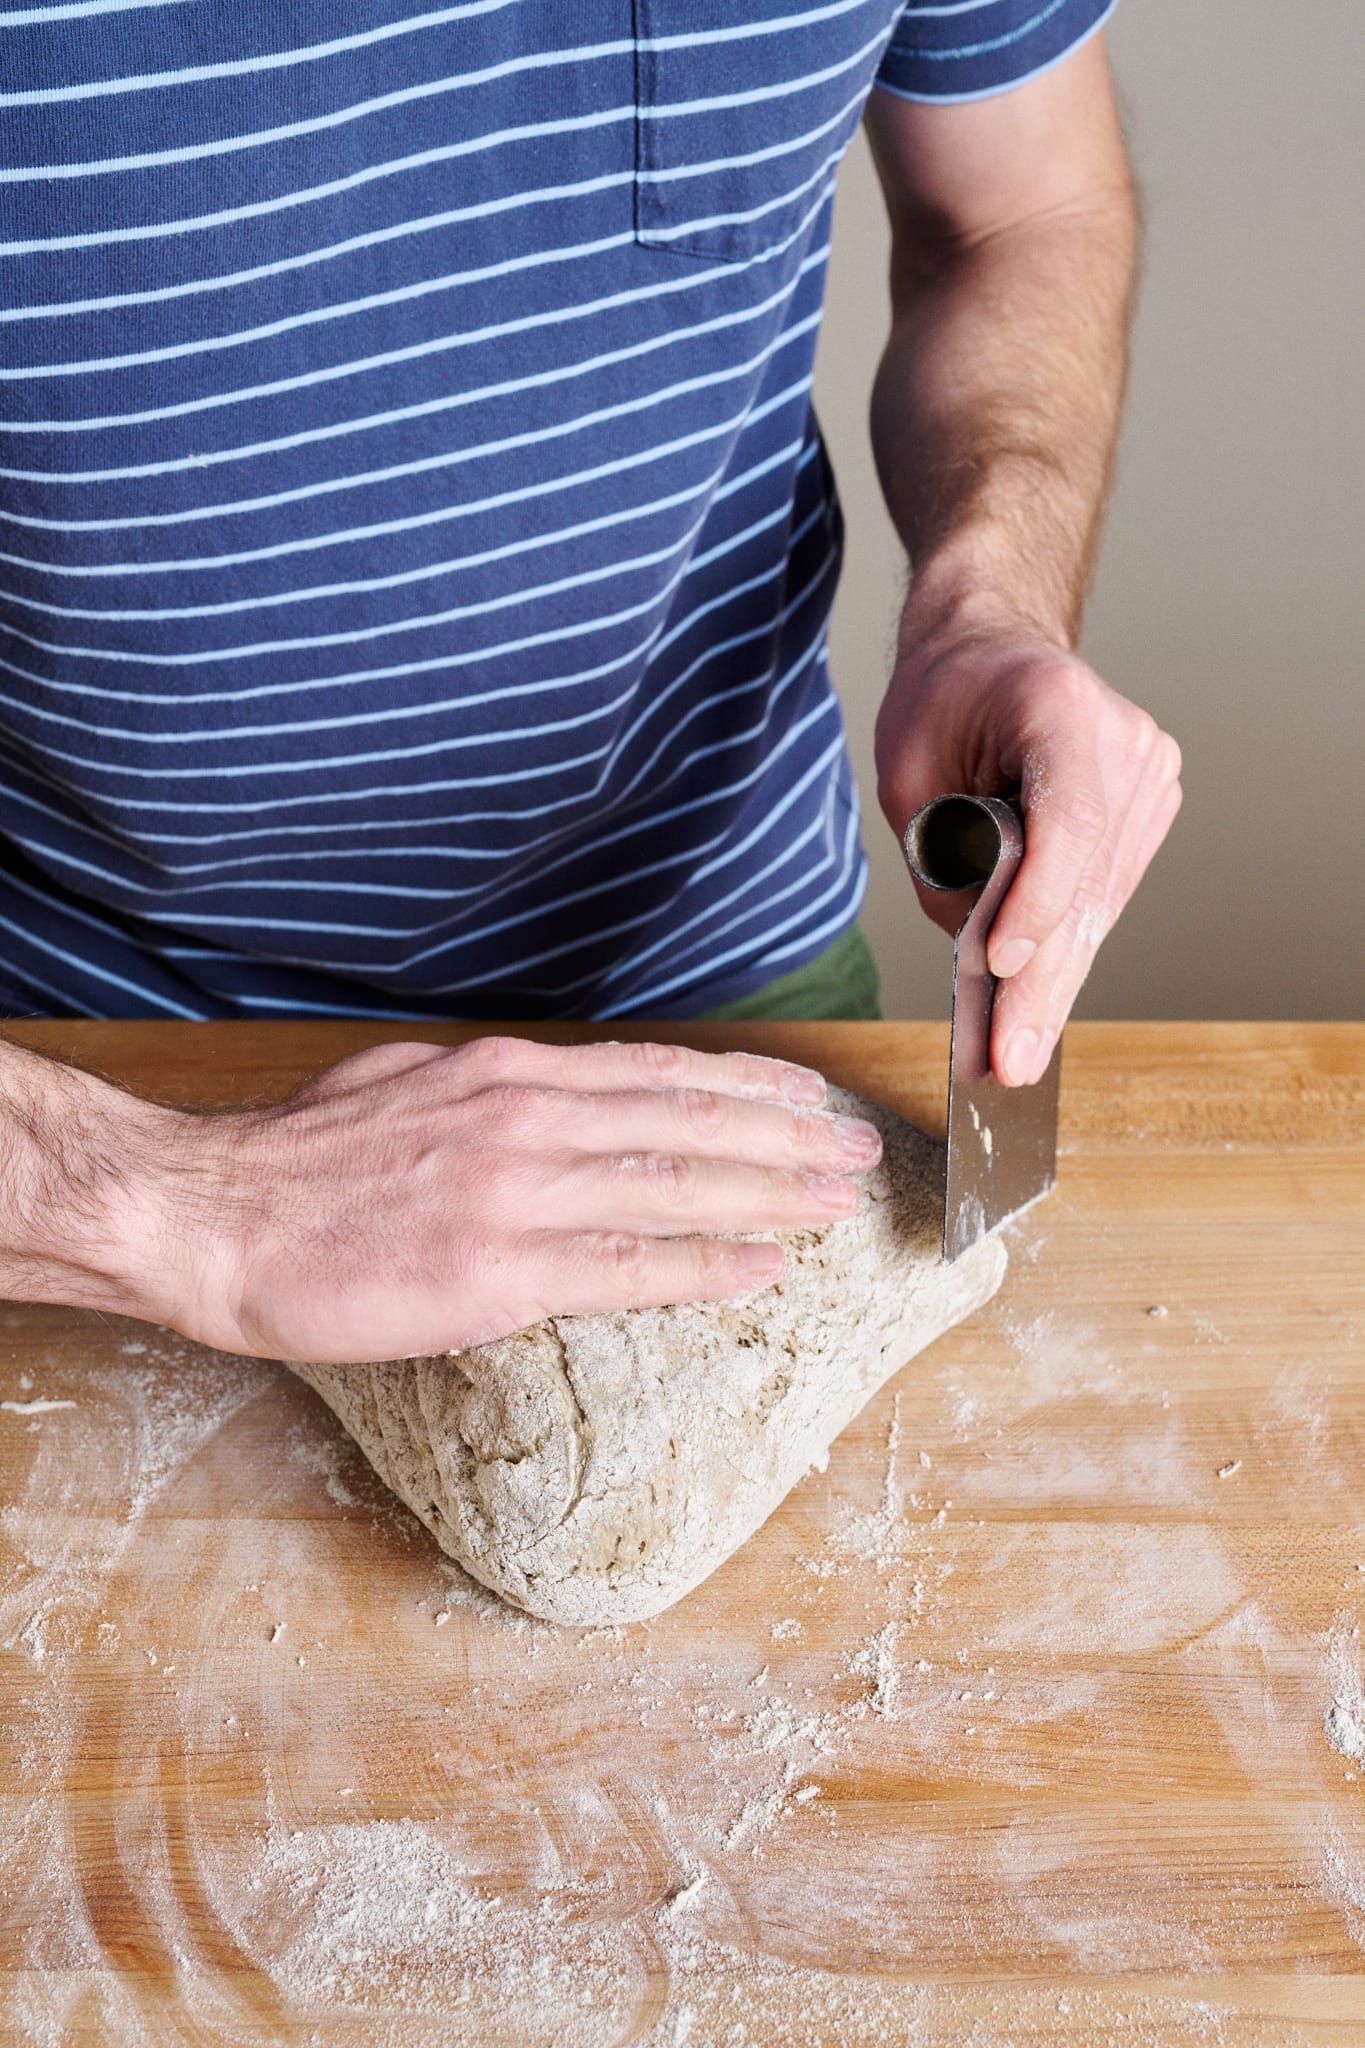
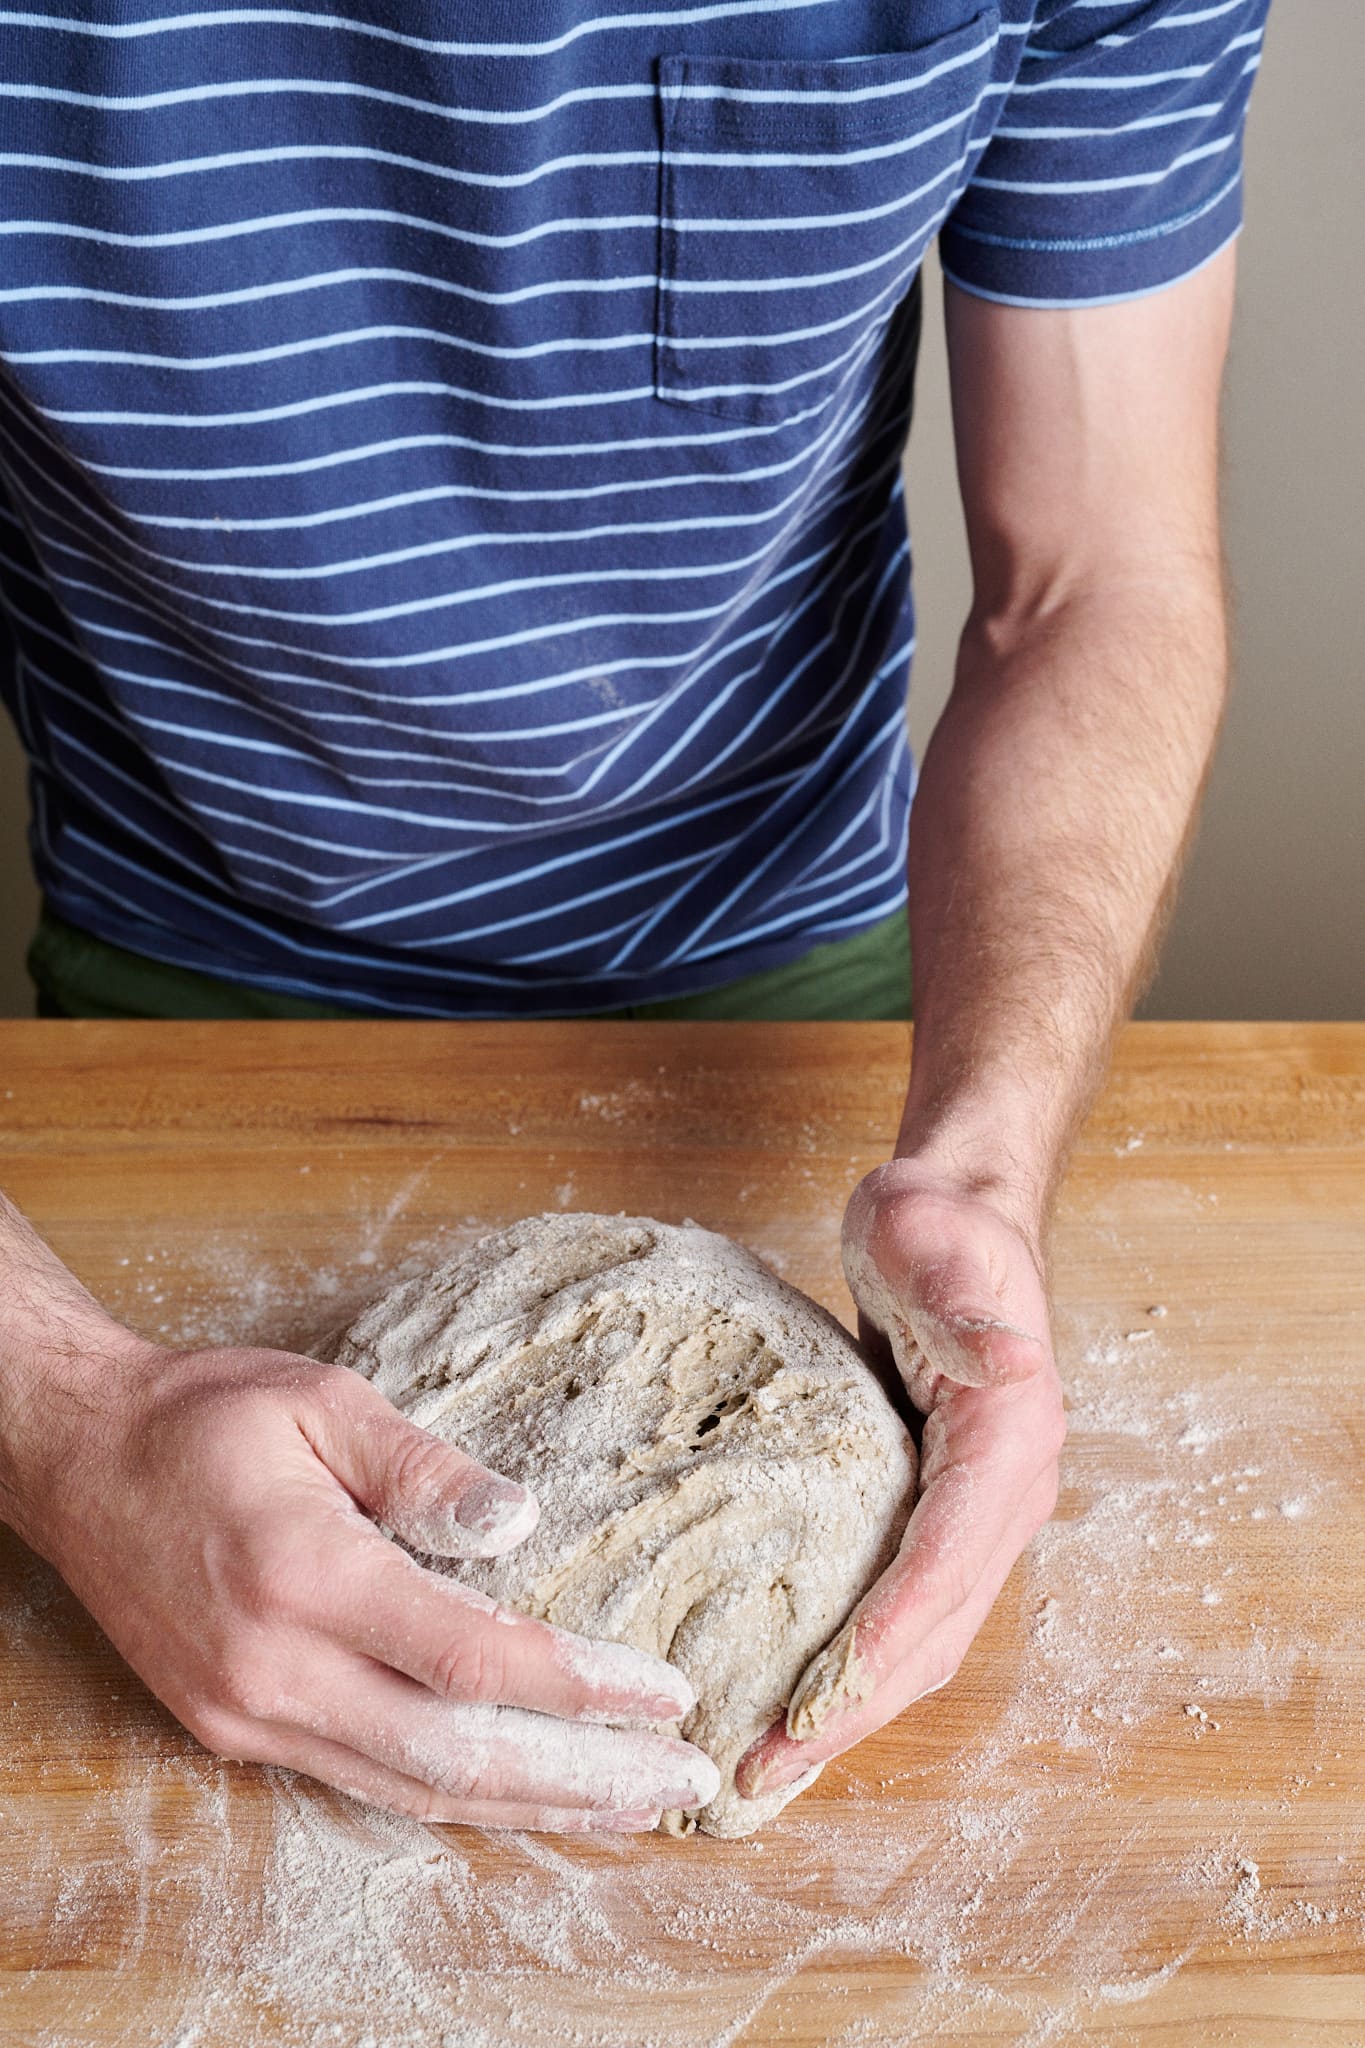
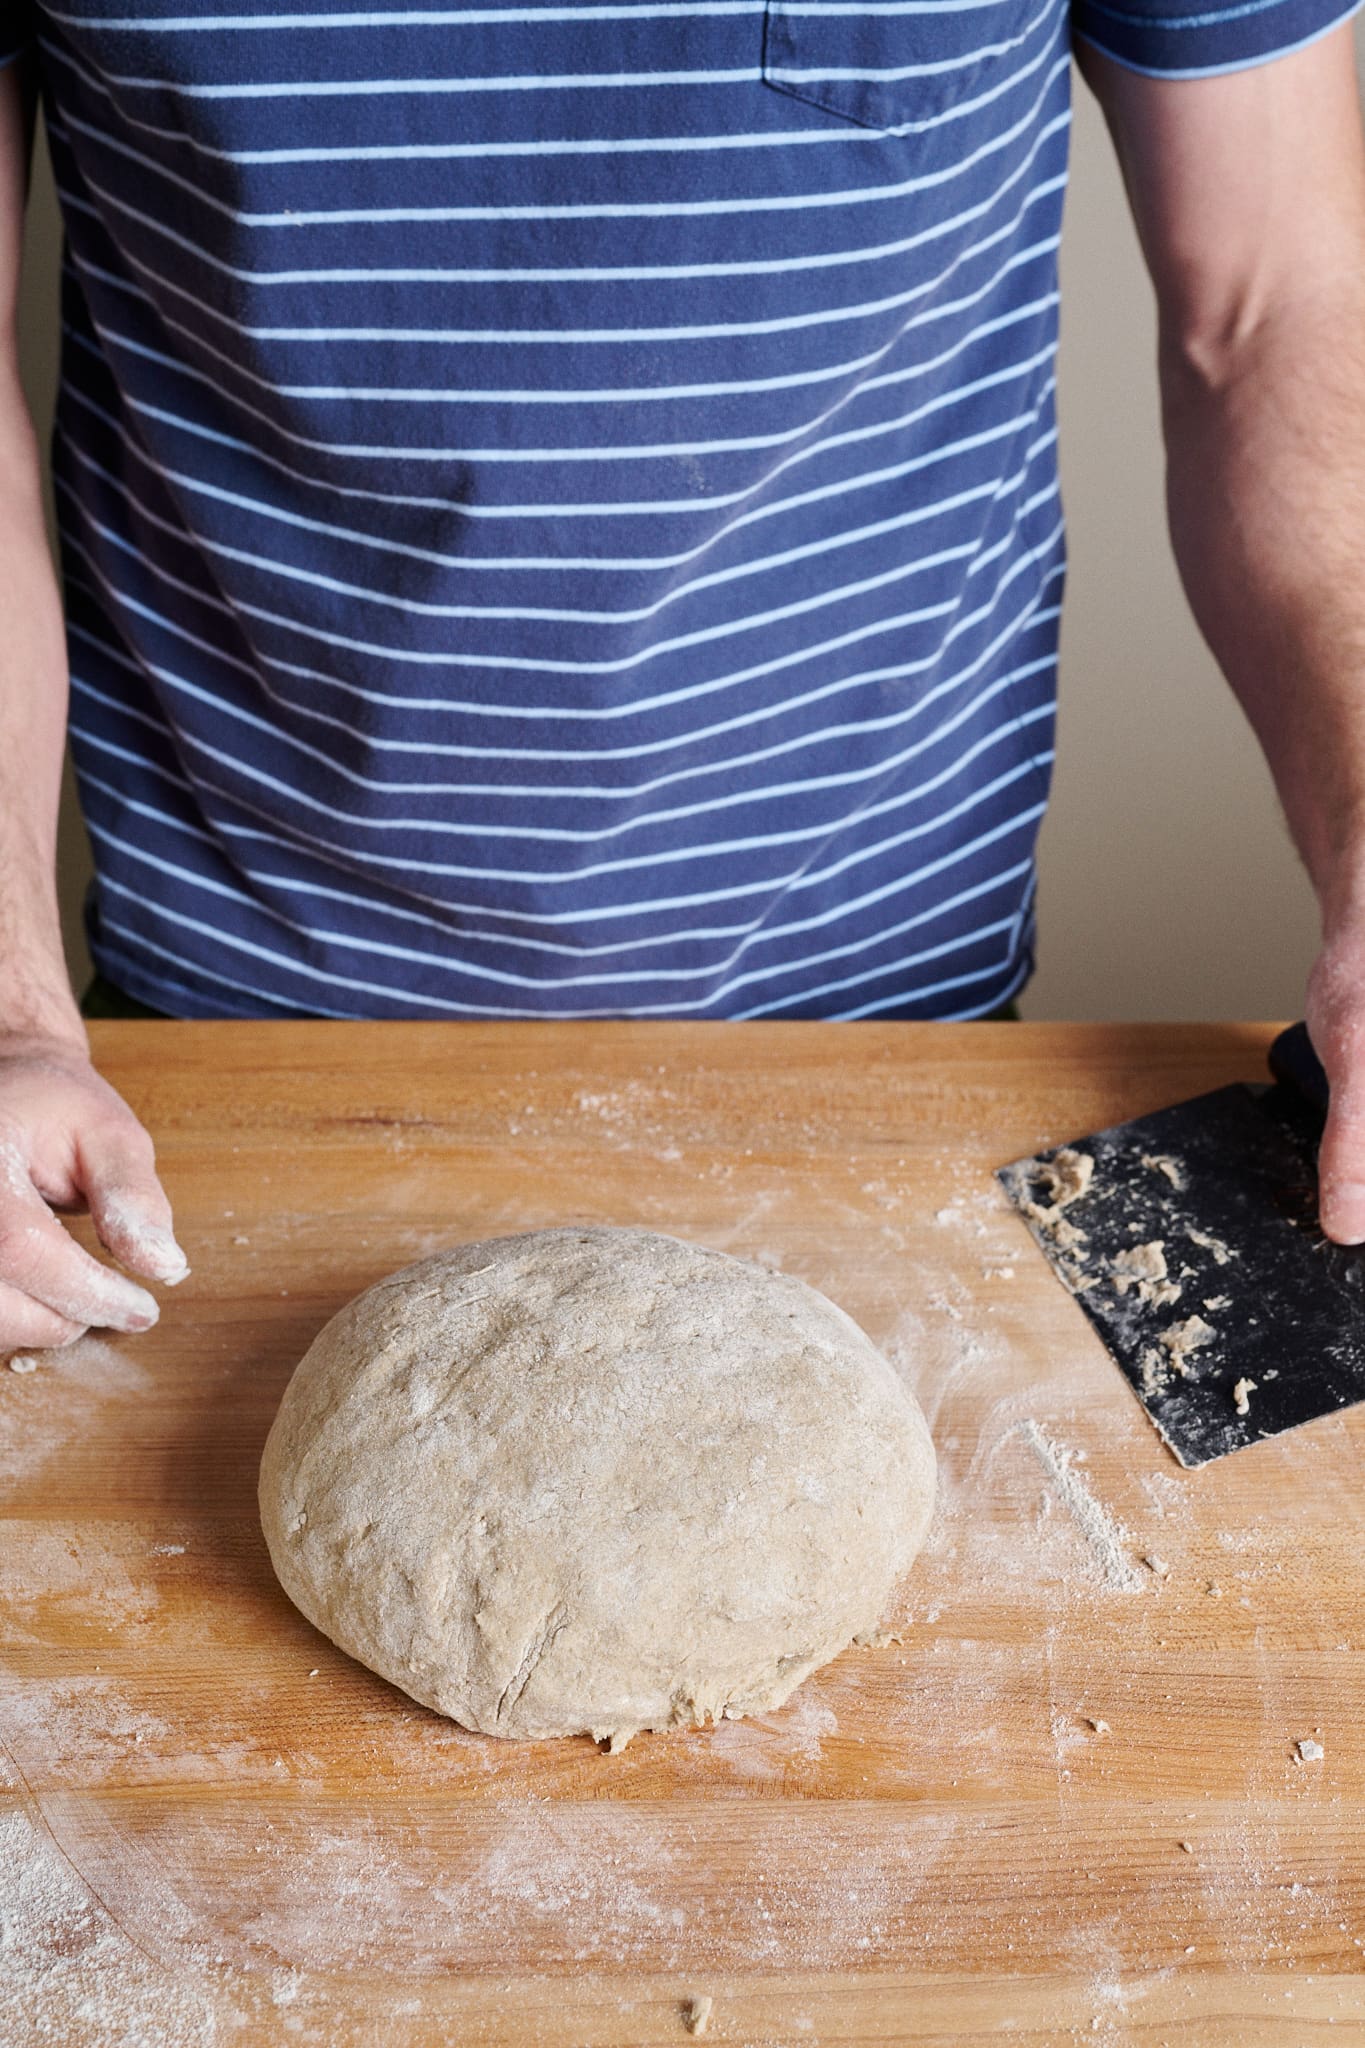
Using your bench scraper, scoop up the dough and place it seam-side-down into the prepared proofing basket.
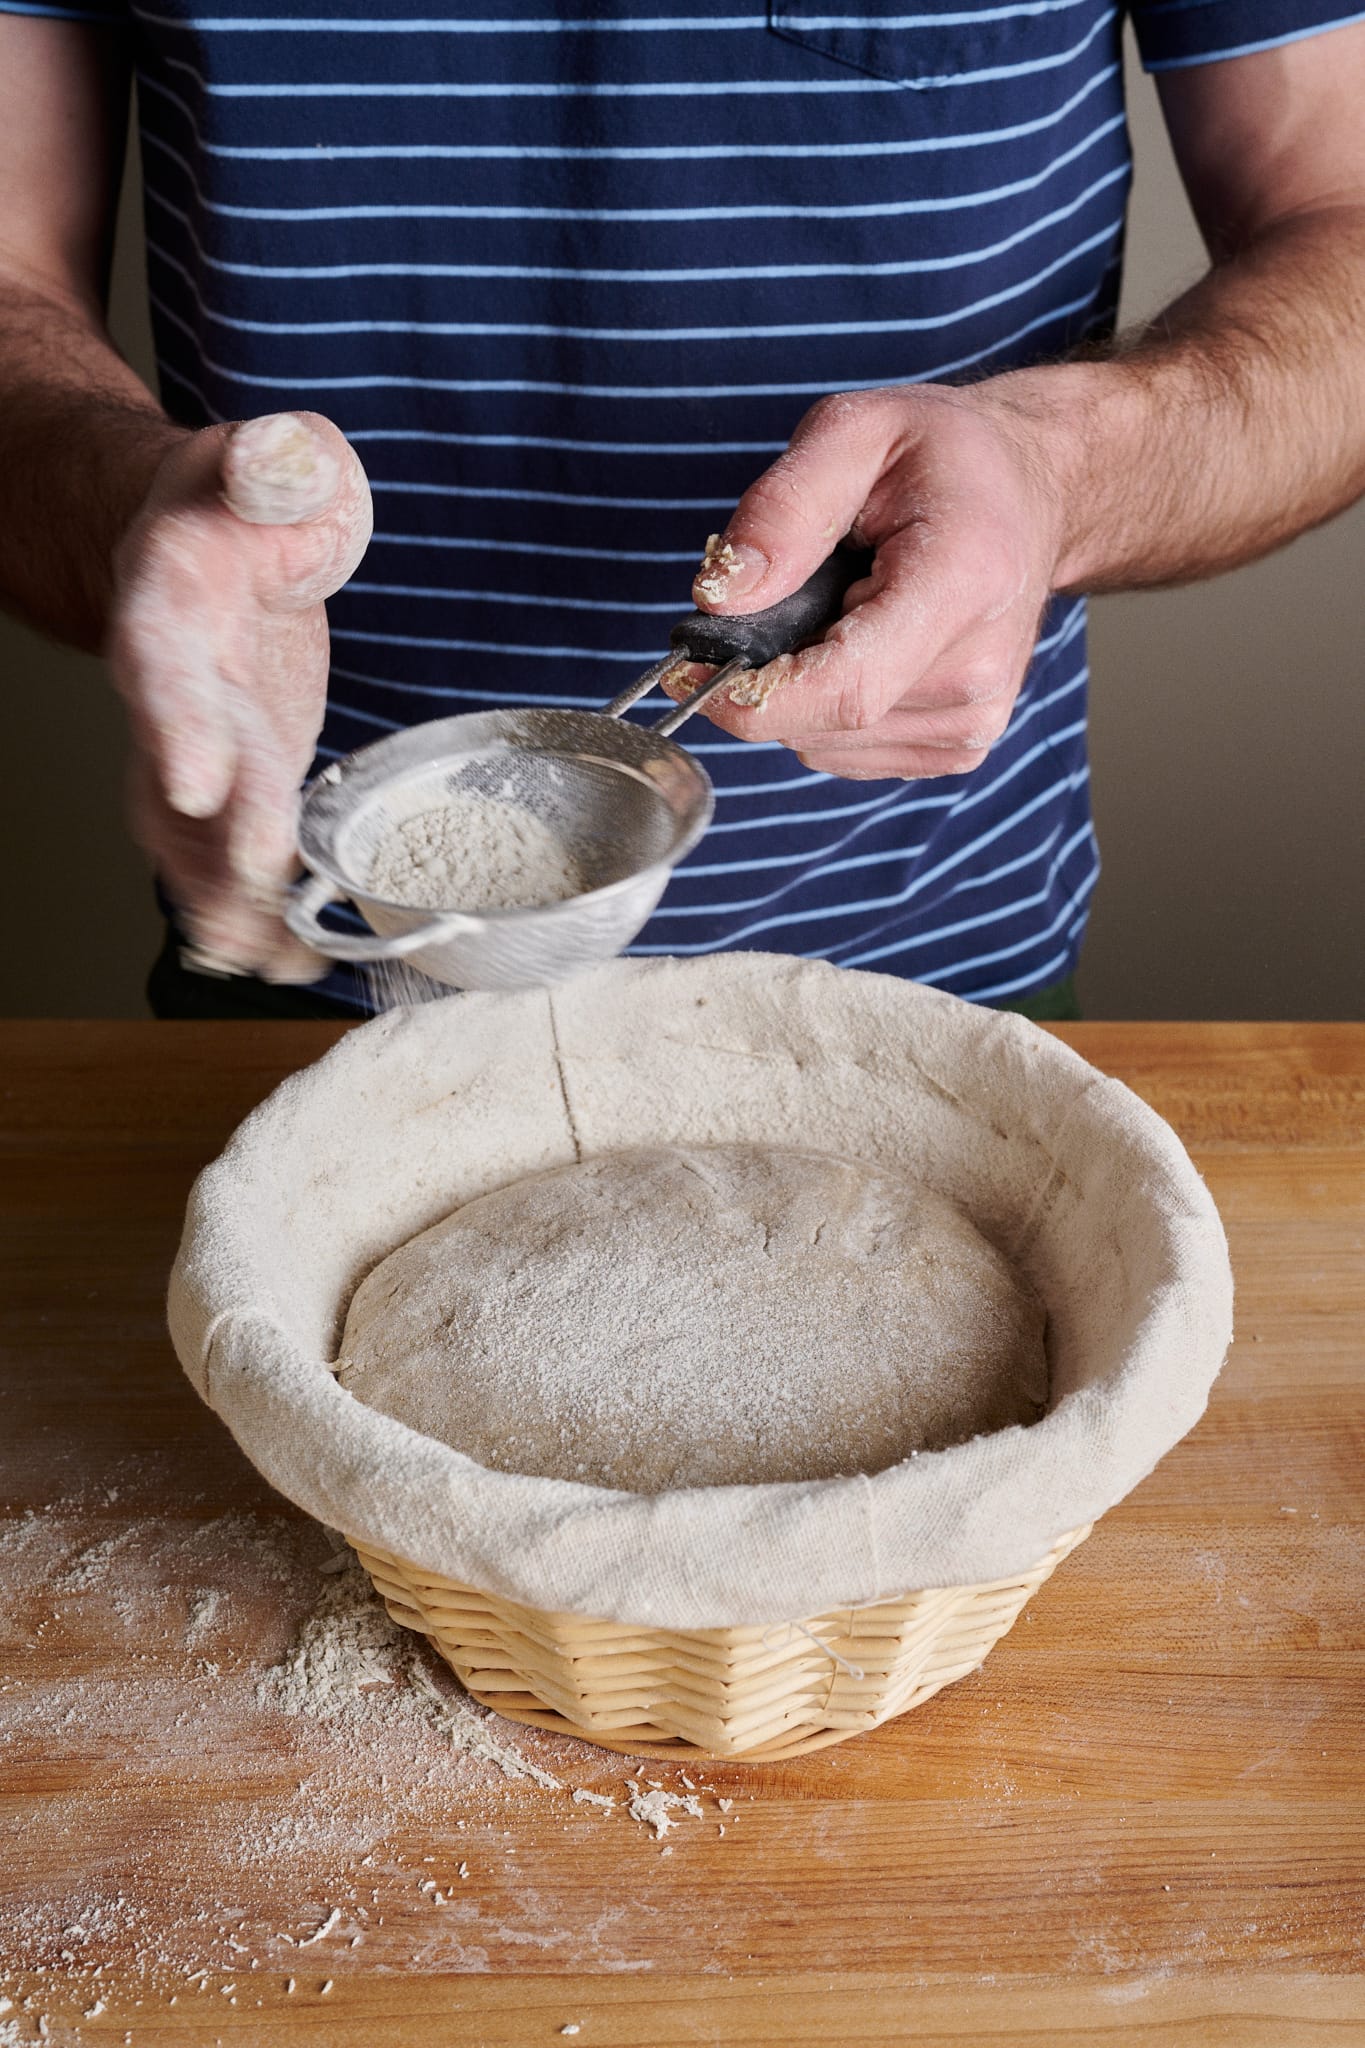
Dust the top of the dough with more whole rye flour in an even layer. This will eventually crack open as the dough proofs. Cover the basket with a reusable plastic cover for an air-tight seal.
5. Proof – 9:45 a.m. to 10:45 a.m.
At room temperature, this rye sourdough bread will take 1 hour to proof.
During this time, preheat your oven with a baking stone or steel on a rack in the bottom third to 450°F (230°C).
6. Bake – 10:45 a.m.
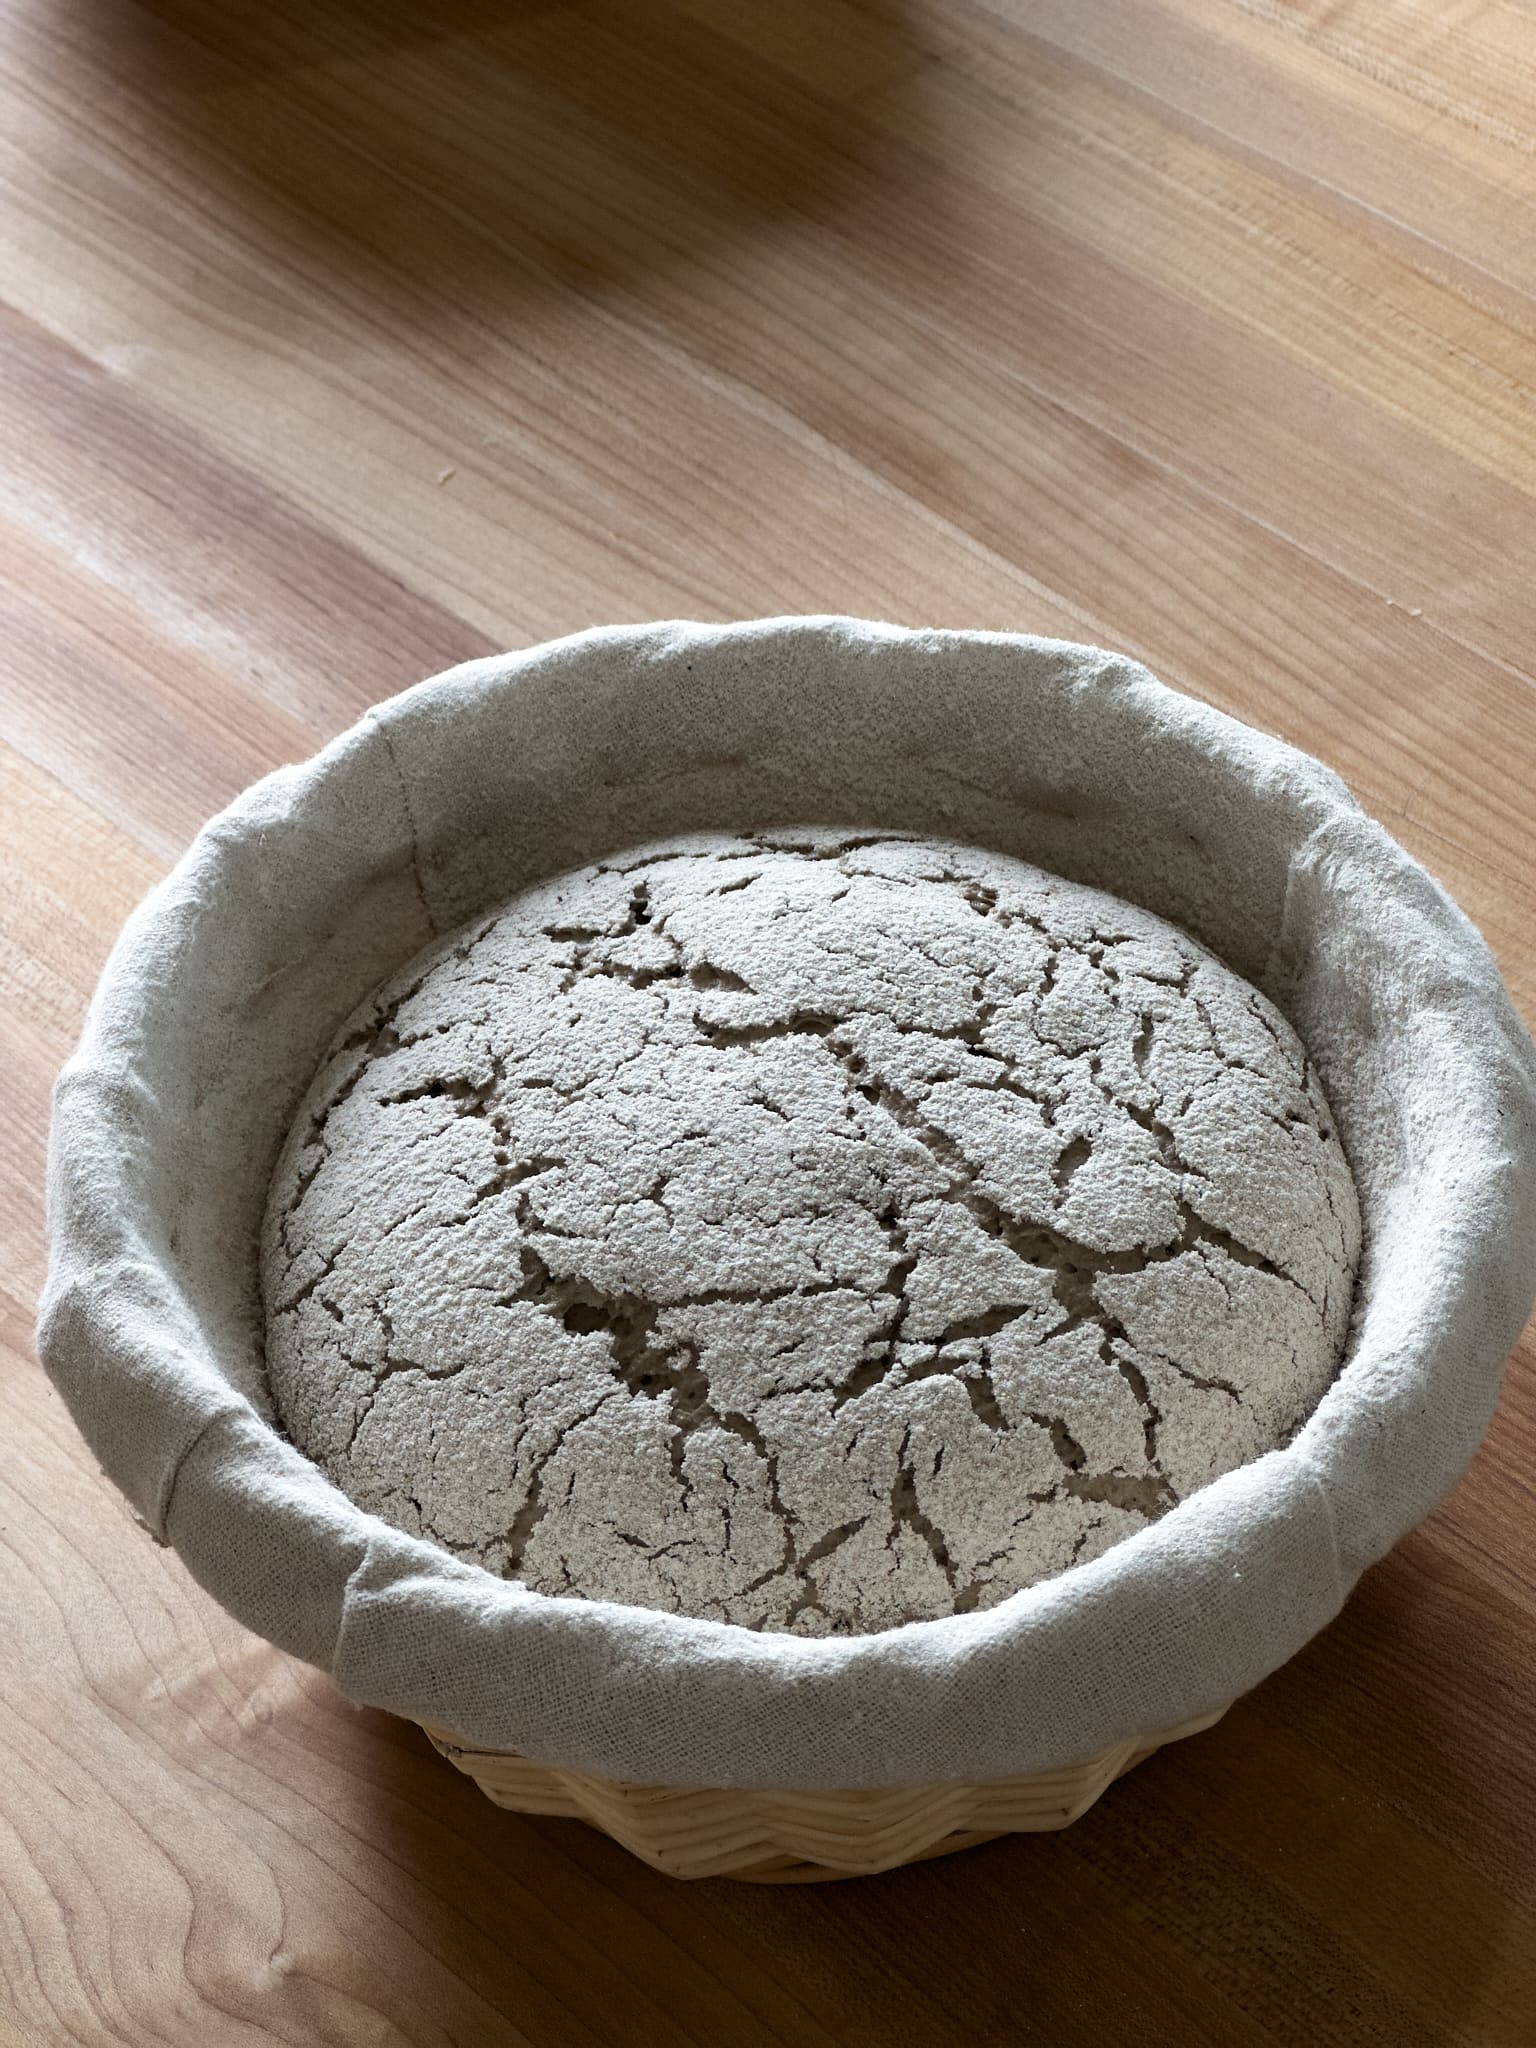
The rye dough is ready to bake when it is puffy to the touch and has cracks that are at least ½-inch wide all over the top (see below).
Place a piece of parchment paper on a pizza peel or inverted baking sheet. Tip the dough out of the basket into your hand and quickly invert it over the parchment paper seam-side down.
Slide the dough onto the preheated baking surface, steam the oven, and bake for 30 minutes. After this time, reduce the temperature of the oven to 400°F (205°C) and bake for 30 to 35 minutes longer, until the crust is deep golden brown and a knock to the bottom sounds a bit hollow.
Let the bread cool on a wire rack for 30 minutes. Then, to ensure the interior is fully set, place it inside a plastic bag or cover it with baker’s linen and let it rest for 24 hours before slicing.
Print
Sourdough 90-Rye Bread Recipe
- Prep Time: 14 hours
- Cook Time: 1 hour
- Total Time: 15 hours
- Yield: 1 loaf
- Category: Lunch, Dinner
- Cuisine: German, Danish
Description
This freeform rye is made with 90% whole-grain rye flour for an intensely aromatic and flavorful loaf of bread. Perfect for open-faced sandwiches or topped with good salted butter, it’ll be an instant favorite and a new staple in your baking quiver.
Ingredients
Levain
- 272g whole rye flour
- 272g water
- 41g ripe sourdough starter (100% hydration)
Main Dough
- 272g whole rye flour
- 60g high-protein white bread flour
- 272g water
- 11g fine sea salt
- All the levain
Instructions
- Prepare the levain – 9:00 p.m.
Mix the Levain ingredients in a large jar or medium bowl and leave them covered with a lid or reusable plastic bowl cover at a warm temperature, 74-76°F (23-24°C), to ripen overnight. - Mix – 9:00 a.m. (the next day)
Warm the mixing water to 82°F (28°C). Place the flour, water, salt, and levain in a large bowl. With wet hands (or, my preference, using a sturdy dough whisk), mix thoroughly until no dry bits remain. Gather up the dough into a ball in the center of the mixing bowl (see below, right). - Bulk fermentation – 9:15 a.m. to 9:35 a.m.
At a warm room temperature, 74-76°F (23-24°C), bulk fermentation should take 20 minutes (yes, it’s short!). No stretches and folds are necessary. - Shape – 9:35 a.m.
Prepare an 8-inch round proofing basket or banneton by liberally dusting on whole rye flour. Be sure the entire surface area of the basket’s interior is covered with flour. Flour your work surface, the top of the dough in the large bowl, and your hands. Scrape the dough onto the floured work surface with the floured top of the dough facing down. Using your bench scraper, fold the left side of the dough over to about the middle. Then, use the scraper to fold the top (twelve o’clock) down to the middle. Repeat for the right side and bottom. You should now have a folded-up shape that loosely resembles a square in front of you. Using your floured hands, flip the dough over and quickly and confidently round it until it gets into a rough ball shape. Using your bench scraper, scoop up the dough and place it seam-side-down into the prepared proofing basket. Dust the top of the dough with more whole rye flour in an even layer. Cover the basket with a reusable plastic cover for an air-tight seal. - Proof – 9:45 a.m. to 10:45 a.m.
At room temperature, this rye sourdough bread will take 1 hour to proof. During this time, preheat your oven with a baking stone or steel on a rack in the bottom third to 450°F (230°C). - Bake – 10:45 a.m.
Place a piece of parchment paper on a pizza peel or inverted baking sheet. Tip the dough out of the basket into your hand and quickly invert it over the parchment paper seam-side down. Slide the dough onto the preheated baking surface, steam the oven, and bake for 30 minutes. After this time, reduce the temperature of the oven to 400°F (205°C) and bake for 30 to 35 minutes longer, until the crust is deep golden brown and a knock to the bottom sounds a bit hollow. Let the bread cool on a wire rack for 30 minutes. Then, to ensure the interior is fully set, place it inside a plastic bag or cover it with baker’s linen and let it rest for 24 hours before slicing.
Notes
Be sure to let the loaf cool at least overnight before cutting to ensure the interior isn’t gummy.
Hydration Note: As with any bread recipe, you might need to adjust the dough’s hydration to suit your flour (especially if baking in a humid environment. When mixing, hold back a little of the water and add it only if the dough feels like it can handle it (look at the images below to help judge the consistency).
Sourdough Rye Bread FAQs
Why did the top crust of my rye bread separate from the interior?
The top crust, also known as the “flying crust,” can separate if the levain (preferment) is not fully ripe when it’s mixed into the dough. Be sure the levain has a full 12 hours at a warm temperature to ripen, erring on the side of overly ripe than under. Another cause of the flying crust is dough that’s overhydrated. The dough should feel soft, wet, and sticky but not soupy or loose (more like hummus than pancake batter).
Can I use pumpernickel flour for this rye bread recipe?
My preference for this recipe is finely milled whole dark rye flour, but whole grain pumpernickel, which is usually milled a little more coarsely, will also work well. If using pumpernickel flour, consider increasing the hydration of the recipe by 2 to 5%.
Why is the interior of my rye bread gummy?
If rye bread is cut too early before it has had a chance to set fully, typically 24 hours or more, the interior can be gummy and stick to, or streak, the sides of your knife when slicing. Additionally, this can also happen if your dough was not properly acidified. This can happen if your levain was not fully ripe when it was used or your dough was not proofed long enough.
Is rye gluten-free?
No, rye is not gluten-free. While it does not have the same gluten content and characteristics of wheat flour, resulting in tall loaves of bread, it still contains gluten.
Can I bake this rye bread in a Dutch oven?
Yes, absolutely. Steam this dough the same way you would any other. This means keeping the lid on and tightly sealed for the first 20m of the bake. Keep an eye on the loaf near the end to ensure the bottom of the crust doesn’t get too colored in the Dutch oven (which can happen, especially with a longer bake time).
What’s Next?
For a rye pan loaf intended for Danish-style open-faced sandwiches, see my Rye Sourdough and Smørrebrød recipe.
Or, if you’re looking for a large freeform loaf with just a touch of rye, my Spelt, Rye, and Whole Wheat Sourdough Bread is loaded with flavor but light and airy.
Thank you to Michael Shulze (Brotbruder) for your help with this recipe!


224 Comments
Although I would not score this loaf next time to get a better domed top – I’m happy to say it didn’t seem to affect the crumb. It was worth the wait to cut after 24 hours! Love the suttle sour notes and moistness of this bread; it turned out soooo good! Thank you for this great recipe and easy to follow instructions. This is now my favorite loaf! https://uploads.disquscdn.com/images/5f98a23c5d076f0e89e827b1185b572c13d7396f9ef7b21078e3fae59b0e38f6.jpg
Glad you liked the result! Buy yea, there's no need for a score on this dough, the fissures open up naturally in the oven (which gives it that crackled look). Enjoy, Tammy!
I love this recipe – the boule is in the oven and smells delicious!
I think that there is one thing I may have done wrong – in that I made the score too deep for this high hydration rye sourdough. After the 39 minutes and removing the Dutch oven cover it looks a little flat on top. After researching I found tips saying not to score high hydration rye loaves too deeply as it lets too much air escape too quickly. Would you agree? Hoping it still comes out good!
Hey Tammy! I don't score this dough before baking!
I've made your rye bread and we love it. I don't start or bake anything early in the morning so am still juggling the timing since since my proof oven temp hardly goes below 79 degrees and our house is cold. I'm currently looking for a sourdough Swedish Limpa recipe, so am going to try adding the spicing to your recipe.
Super happy to hear that, Karey! A few bakers have requested Limpa, I need to get working on this 🙂
Hi,
this is my first attempt at a rye loaf. And the leaving seems like it's much less wet than yours. It's almost the consistency of wet sand when I'm done mixing it? Is this an issue of different floors or am I over thinking things?
I usually say "wet concrete," but it's sounding similar. Maybe try slightly less water next time you mix this to see if it helps. Check out the Instagram video I have up there in the post, you can see the consistency of the dough!
thank you for the reply, I just want to make sure you're saying that if my levain seems more dry than yours looks than I should try it with less water?
Oh sorry I thought you meant the main dough! If the levain is more dry, yes, add more water until it softens up. You need it to be able to be mixed thoroughly!
Hi Maurizio, its my first attempt in making a rye loaf. I have pumpernickle coarse rye on hand did a little google search and the googler is saying they are not one in the same. Being that pumpernickle is the darkest of the two. What would you recommend. TIA
Nevermind i just read your suggestion. Thanks for always having the answers.
You bet, always here to help, Kennedy!
Dough was really difficult to shape. Probably over hydrated but I think I’ll stick with heavily rye loaves in a baking tin. Mine turned out looking like a cow patty but it is very delicious if hearty.
I love the cookbook and this site btw! Keep up the good work and will keep trying! 🙂
Thank you, Bert! Keep at this one. It takes a little recalibrating to be able to read the signs for what's right, but the flavor is incredible.
Another good way to do it, and I do this for my other doughs exclusively!
Hi –
In Step 1, the 3rd ingredient is 272g of Water 1 (levain), I interpreted this as meaning 272g of water, but is this supposed to be a 1:1:1 mixture of starter, flour, and water (91g of each?)? I used 272g of rye flour, 272g of water, and 41g of starter (starter made up of: 125g water, 125g starter, 125g rye flour mix), let it sit overnight for 12 hours, and then an additional 3.5 hours, but didn't get much of any rise.
Any tips would be appreciated.
Hey Matt! That "Water 1 (levain)" means just water, water that is used in the levain. Sorry for the confusion there. You'll also see "Water 1 (mix)" and other things in parenthesis to indicate where it's used. I did this in my cookbook.
I tell you what to add to a small bowl for the levain in step 1, the levain step. Mix all those up and keep it warm overnght (or use warm water to mix as I talk about). You definitely want to see it rise, be bubbly, and have a sour aroma before you use it!
Just took the Sourdough 90 – Rye Bread out of the oven. Looks good but a not as domed as yours lol! It was very sticky and a bit tough to work with even though I used a fair amount of flour on my hands and the counter. Other than likely being a bit dense, I’m sure it’ll taste great!! Any suggestions?? On to Baker’s Sourdough Discard Banana Bread later! Thanks..
Hey Jeffrey! You might try letting bulk fermentation go a little longer. The dough should be puffy when you go to work with it at the end of bulk (See my photos in the post). You were probably very close!
I was very happy with how my loaf looked and tasted even though I cut it sooner than 24 hours ( I missed that )
Super glad to hear that, Crystal! I just love this bread. I hope you had a slice with some cultured butter on top… and a little sprinkle of salt 🙂
Hi! I love your book and recipes. I was also excited to try this one because I have a bag of King Arthur’s Flour pumpernickel flour and thought this would be perfect. I just cut into my bread this morning. First, I was concerned because I didn’t get much of any oven spring. When I cut down the middle, it was very gummy and dense. Not sure what I did wrong. It’s not really edible as is. Any suggestions on what I can do with it?
Hey Marie-Pierre! Sounds like fermentation might not have been on point for the dough. As I mentioned to Ken, below, it's super important for the levain for this dough to be really well fermented. Check out my Instagram story in the post above when I open the levain and put my spatula into it, see how aerated it is? That's super important. I feel like your dough wasn't fermented enough!
Maurizio, I like your recipe and instructions. I'm 90% happy with the result. Where I wasn't duplicating you exactly was that I came to the party with a ripe sourdough starter (Levain?) that I had working for a week. I believe it was ripe (took a small amount, dropped it in a bowl of water and it floated right away.)
So, when I got to your #4, Shape, it hadn't expanded much at all and was much too loosy to shape into a square. I tried going for 82 degrees, but it may have been less. Would up wrestling the blob into a bread pan where I could then score it. After the first round of baking at 450, the bread easily came out of the pan and I finished by putting it on a well-preheated ceramic stone. The result looks good: shaped like a bread pan rather than the banneton I was able to use for proofing. Suggestions?
Hey Ken. Interesting. I wonder if maybe the hydration was too high? It sounds like fermentation was strong in your starter. I would highly recommend making the levain as I specify in the post, it's important for it to be of that size and that ripe when mixing into this dough (otherwise you could get little to no rise, or a collapse).
How do I steam my oven? What is a pizza peel? Do I have to put dough on a preheated baking sheet to bake or preheat my Dutch Oven before adding dough. You stated to reduce heat to 400 after 30 mins of baking, so what temp did you bake it at for the first 30 mins? I have never made this type bread before and I find the instructions for baking confusing. Also, what is meant about the hydration of the dough. How do I determine the hydration? Thanks
Hi, Linda, I'm not Maurizio, and I'm not affiliated with The Perfect Loaf in any way, but I am an avid amateur bread baker, so hopefully I can help answer some of your questions.
First, it seems like you are new to baking artisan bread, or at least new to the approach that Maurizio follows, which tends to be more technical than most other sourdough blogs I've seen. I would highly recommend perusing the many guides that Maurizio has written, as they will likely answer most of your questions. For example, he has an entire guide on how to steam your home oven (and perhaps he will add a link to that guide in a future update to this post): https://slimlife.fit/baking-with-steam-in-your-home-oven/%3C/a%3E
Second, it's important to note that this Rye Sourdough recipe is NOT a beginner's recipe. If you haven't had much experience baking artisanal sourdough bread before, I would recommend finding a somewhat simpler recipe to begin with, either here or on another reputable website such as Breadtopia or King Arthur Baking. If you have, and it’s just the terms that are confusing, I will do my best to clarify those below.
1) Hydration refers to how much water is in the bread dough relative to the amount of flour. It's typically written as a percentage by weight, so a dough with 75% hydration is dough where the weight of the water is equal to 75% of the total weight of the flour. The higher the hydration, the wetter and stickier the dough will feel as you work with it. In the Dough Vitals section of the post body (not included in the recipe card), Maurizio states that this dough is 90% hydration, which is very high.
2) If you've ever seen someone making pizza in a brick oven, then you've seen a pizza peel, even if you didn't know it was called that. The pizza peel is the big wooden paddle that the pizza is placed on, which is then stuck in the oven, and the pizza slides off to bake. Smaller peels are available for home bakers to purchase, but I tend to use a baking sheet flipped upside down with a piece of parchment paper on top.
3) If you use a baking sheet, you don't need to preheat that. If you use a Dutch oven, you can preheat it first if your Dutch oven can handle being preheated empty. Mine cannot, so I place my shaped boules into it cold, spritz the inside with water, put the cover on, then place the whole thing into the oven. I usually give it an extra five minutes or so with the lid on before I take the lid off.
4) In Step 5 of the recipe (Proof), Maurizio states to preheat the oven to 450 F while the shaped dough is proofing. (I agree that it would be helpful to have this restated in Step 6, Bake.)
I hope my answers are helpful to you, Linda! Good luck with your bread baking!
Hey Linda! You can use my steaming technique, here:
https://slimlife.fit/baking-with-steam-in-your-home-oven/%3C/a%3E
As for the hydration, go with what I have listed in the recipe and see how the dough feels once you mix it up. It should feel like "wet concrete." But, it should not feel soupy or overly wet, then add more flour. It should be okay as it is, though!
I just started baking sourdough bread based on instructions from your website a month ago, and it has changed my life! Thank you! I ordered the cookbook too and look forward to exploring it. This rye loaf came out perfectly on my first try. It made my German family very happy. I am wondering whether you have a recipe for Bauernbrot? It normally has about 40-50% rye flour and the rest wheat. It's my favorite type of bread, but I don't see anything like that on your website? Thanks.
Hey there, Kelly! Oh gosh, thanks, means a lot to hear my site as helped and that you've ordered my cookbook (which is in German now, too!). I don't have a rye recipe for that in my book, unfortunately. But I'll work on it for the website.
I do have several other rye recipes in the book, including a 100% rye. Let me know how you like it once you flip and bake through!
Hey Maurizio, thanks for your reply. I tinkered with the Rustico loaf and made it a combination of rye and white flour and it was just the "Bauernbrot"-style loaf I was hoping to create! Thanks for giving me the tools in the book to feel confident tinkering! I also tinkered with the cinnamon roll recipe and have been adding sliced apples on top of the brown sugar layer, and no icing, and they are amazing. I just baked the best sourdough recipe for the first time… oh my, it is delicious! The main thing left I would love to learn to bake are breakfast rolls. Do you think I could use any single-loaf recipe and divide it up before the cold proof into 12 or 16 rolls, and bake for a shorter time period? Would appreciate your thoughts on non-enriched rolls. Thank you!!
Hi Kelly, I have lived in germany and have a love for Bauernbrot. Made rustico from Maurizios book yesterday and gave me memories of this bread. Care to share how you tinkered with rustico to make it even more like bauernbrot?
Can you please explain how 20 minutes is enough to develop enough gluten strength which is required at the beginning of the shaping step?
Rye has dramatically lower gluten content than wheat, there's nothing really to develop here!
Thanks for the reply!
How do you manage to do the folds as in " folded-up shape that loosely resembles a square " without tearing the dough without any gluten strength?
You kind of use your hands or bench scraper to hold the dough and fold it over. Imagine like folding play-doh or wet concrete. It just plops over and folds under. You don't need gluten strength for this, the dough will sort of stick together as you're doing it.
I just started my first loaf using this recipe this morning, but just realized that I have an appt right during the time that I should start baking. Can the levaining stage go longer? Can I slow this down by increasing the ferment or proof time? Can the dough be placed in the refrigerator?
This is a very temperamental dough, Shane! I would put it into the fridge and hope for the best 🙂
Everything went pretty well, except shaping was a bit fraught, and transferring the dough to the baking cloche. That said, although flatter than your photos, there was a nice crumb, and the flavor was nice and sour, fantastic. Going to try again with slightly less hydration (I used KP Pumpernickel flour and their bread flour). In the meantime, it's been fantastic for snacking with some sweet butter and flake salt, and with some smoked salmon. Will keep working on it!
Right on, Katherine! It takes a bit of practice to handle this type of dough, and really, the less interaction you have with it, the better. You'll get more rise in the end. The flavor is exceptional, though!
I was really excited to try this recipe but I guess it is beyond my skill level. I couldn't even get the dough to come together & out of the bowl. Not sure what I did wrong, I followed the recipe exactly. I didn't see any other commenters with the same problem.
Ahh sorry to hear that Izzy. Was the hydration too high for the rye flour you're using? It's a challenging dough because rye does not stick together in quite the same way. You have to sort of touch it less/just enough to get it into shape. Also, use more rye flour on your hands and the work surface to help keep it nonstick! Then, move quickly. You can do it.
would you post a recipe for marble loaf or should we just make a batch of light rye and 90% rye and combine them?
I've been wanting to work on that, Jennifer. Will get to it!
I've got this loaf in the oven, and all has gone well — mostly. Anyone have any advice on how to transfer the loaf from the proofing bowl to the parchment paper without it completely deflating? My loaf had risen beautifully with lovely cracking all over the top, but then it just got completely squashed when I tipped it out of the bowl onto my hand. I ended up having to set it down seam-side up, and then pick it back up and flip it. My beautiful round loaf in the bowl ended up going into the oven looking more like a puffy, oblong pancake. Maybe my hands are too small and I should have used a plate or something?
Put the parchment paper over the bowl and hold it tight from the sides, flip onto counter and then using the parchment edges pick it up and put it in the dutch oven or whatever. Goolgle it and you'll find heaps of videos if my explanation wasn't clear enough
You can place a piece of parchment over the bowl, then put a pizza peel on top of that. Flip the whole stack over. then, flip that over into the Dutch oven or onto your baking surface.
Me too! Help!
I’ve tried to make 2 rye loaves. The first was rather flat and I decided that I hadn’t left it to prove until the cracks were 1/2 inch thick so have just done a second loaf doing this and it too over 2 hours to get to this stage – is that ok? I went to flip it and it just fell apart! It’s in the oven but again quite flat …- I wonder if the hydration is too high Maurizio? Also I’m using a Dutch oven
I am very excited to make this as my love affair with rye takes off:) do you use a 100% rye starter? I read elsewhere that you have a 30% rye 30% white starter, do you use that here as well?
I do not use a 100% rye starter for this bread, but you can certainly do so!
Thank you!
I'd like to add caraway seeds. When should I do this?
Hey Sue, add caraway into the flour mix!
Do you have suggested time/temp for baking this bread in a pullman pan? I’ve done 400F for 35 min followed by 350F for 1.5 hr with lid on the entire time as suggested in your smorrebrod recipe. It ends up just a tad gummy (even though i always wait 24 hr before slicing).
Hmm. This is quite a bit of dough, I would say that it would be at least 1.5 hrs. I’m wondering if the gumminess was from another issue? You want the internal dough temp at end of baking to be around 204F, if you check that and bake till then you should be good!
Can I use a pullman pan?
Yes, see my advice above.
Can I use a pullman pan for this recipe?
You can make this bread, Dody! I wouldn’t be afraid of the hydration, most of the time you’re not handling the dough. I’m not exactly kneading it in the video, just getting it into shape. You don’t have to do this, you can just scoop it out and drop it right into the pan 🙂
Hi Maurizio! Is there any chance this recipe will work with normal dark rye flour instead of the whole rye?
They are one in the same!
Oh okay awesome! Thank you Maurizio!
Very surprised! The total weight for the contents of the levain is 585 gm (272 flour + 272 water + 41starter), yet in step 2 you call for 585 gm of the levain! Naturally, some will be eaten up overnight while it ripens. I have made this twice, and never have more than 570 levain in the morning. I have made this up with my ripe starter – is this what you intended, or should I just go with the 570?
It’s okay to be a little short, Andy. Use all the levain you have and do your best to scrape out all the bits from the container.
I was thrilled to find this recipe on your site. I have been making almost the identical bread for years and we love it at our home. My levaine has a higher hydration, but I use more flour in the final mixture, so it ends up being about a 50/50 rye to water ratio. Instead of white flour i use whole spelt and I bake it in a loaf pan simply because it makes it easier to slice. I slice the loaf placing parchment paper between each slice (so they don’t stick together) and freeze. We love it toasted to different intensities.
What I especially love about this rye bread is that it is very forgiving. It was the first bread I ever baked when I began my sourdough bread journey about 8 years ago. At first it turned out pretty flat and dense . But as my starter improved and I experimented with hydration levels and different rye flours, it became taller and lighter. But from the beginning it was delicious. I have also discovered that not everyone appreciates the special flavor of rye.
Sorry for getting carried away. Just love that rye!
Thank you for all your great recipes. I have learned so much from you!
I really appreciate all of this; thank you for your comments! I felt like I was on the journey with you 🙂 I agree with all you said; this is a very special bread and extremely delicious—if you like the robust flavor (which, by the way, even if you don’t like it, it’ll grow on you, and eventually, you’ll develop an even deeper appreciation).
Happy to help and happy baking!
Exactly what I wanted to know. I prefer to use a loaf pan and would love to substitute spelt for white as I mill all my own flour. Did you change the baking times and temps? Thanks
Making this loaf this weekend for St. Patrick’s Day to make reubens with. I have a baking stone and the equipment needed to steam my oven, but was wondering if using a Dutch oven would also work and if I should change the baking time?
That’ll work, too. Baking time should be very similar!
Hello Maurizio,
I’ll be making this tomorrow, so, my question to you is, what temp should I set my Brod and Taylor, to proof the dough? Just purchased it and not quite there in using it?🤪
I rely on your site heavily for my sourdough baking journey, and am constantly reading your recipes, directions etc! Thank you so much for a very well informed, detailed site.
Hey there! Sorry for the delay. I’d set it to 78F, this dough needs to be quite warm. Be sure to warm the mixing water to hit the final dough temp listed above in the recipe, too.
Awesome recipe! Turned out fantastic and sooo delicious! I didn’t quite follow your baking schedule and had to put my leavain in the fridge overnight because it was ready for mixing the dough, but too late in the day. The next day, I brought it back to room temperature and continued with your baking schedule. I used my Emile Henry bread baker with lid on for 30 min at 450 and then lid off at 400 for 30min. When it was done I took it out of the oven and put the lid back on and left it on for 12 hours. I have to say … I was too impatient to wait 24 hours so I cut into it at the 12th hour mark and I am happy to report that my loaf is perfectly baked without any gumminess! Thanks for sharing! I will definitely make this one again, even though it’s a sticky mess!
Amazing, so glad this worked out well for ya, Stephanie! It’s a sticky dough indeed. Part of the fun 🙂
So happy to hear that, Carol! Thank you and glad you liked it!
I was skeptical the whole time I was making this bread. It felt like I was trying to bake a massive amount of starter (I have a rye starter) but was happily surprised when it came out of the oven and even more so after tasting it following the 24 hour rest. I have a cold kitchen so I put the dough in the oven and set to “proof” for the bulk fermentation. I struggled the most with trying to shape the “dough” and put it in the proofing basket. It was a hot mess but after dumping it in, it did start to settle and rise, creating those rustic cracks in top. I watched the short video after the fact and noticed that Maurizio did a bit of kneading to shape the dough. I’m going to try that next time. But honestly, the bread came out exactly as pictured. It’s a denser bread which is to be expected. We had people over for brunch and served it with smoked salmon and cream cheese which was perfect! Another fantastic recipe!
Love your story and so glad the recipe worked out well for you. It’s a very different kind of bread and process that takes a little getting used too—it almost goes against bread instincts in a way! Yes, I knead it a bit to get it to come together, which may not have come across in the written instructions (will update).
Maurizio, firstly love the detail and complexity of your recipes. My loaf came out delish! I do have a question in general I’d like to ask. I live in upstate NY. We are at a considerably lower elevation than you, and of course a completely different climate. I’m wondering if I should be altering the hydration of recipes to compensate for the above factors. Any advice would be greatly appreciated. I’m a pro at following a recipe, but a complete novice at bakers math!
Thanks for the comments, Ashley, appreciate that! Yes, always be ready to adjust the hydration to suit your flour. I live in a very dry climate but try to “even” the recipes out a bit for most people, but even so, paying attention to how your dough is feeling (and using the descriptions and photos/videos I post here) should help give you a sense for how the dough should feel. This is also why I recommend holding back some of the mixing water when mixing dough, that gives you a chance to adjust the dough’s consistency.
Hope that helps and happy baking!
I also live upstate. (Hello, neighbor!) I love Maurizio’s recipes; most of the bread I bake is taken directly or, at minimum, inspired by what I’ve learned here. You asked about hydration so thought I might mention that I am never able to add the suggested extra water, and often reduce the water from the “Mix” portion of the recipe by 20 -30 g, holding it off to the side until I see if it’s needed. I rarely need to add it.
Love this bread site. Been baking away here and I’m pretty confident now with my Tartine country boules and sourdough pointy sticks.
First bake with this rye turned out pretty good, tastes amazing anyway. Outside crust is excellent but the inside of the bread though is quite soft. It’s even beyond gummy, more like doughy and raw-ish. Like there’s some pilling when I cut it and the little pills are like soft putty. I did get fairly good rise and baked to 205° internal temp and waited 26 hours before cutting.
Maybe less water in the dough next time?
Yes, reduce the hydration next time to better suit your rye flour, that’ll help immensely! Glad the site has been helpful. Let me know how the next attempt goes!