


I have childhood memories of my dad trying desperately to grow fig trees (as if he knew I’d one day make this fig and fennel sourdough) in our backyard here in the dry and hostile desert. Every couple of years he would plant a new tree, watch as it would grow a few seasons, shed some fruit, and then inevitably a cold winter would come along and take all that hard work like it never existed. Nowadays each winter he covers his fig trees with burlap and Christmas lights that are ever-on (yes, it’s true) to keep them warm. A real Italian Christmas tree, if you will. They seem to live a bit longer but they definitely do not thrive like they do in a temperate climate.
With all this reminiscing, and since I talk about my dad I wanted to give you a mental image of him and us back then, you’ll have to bear with me through the next photo…

You can see my dad in full Italian glory (don’t tell him I’m posting this) there back in the ’80s with his chain, pack of cigs, and mustache. I’m the little chap in the lower-left covering my ears for who knows what reason, little brother in upper-right and mom to the right. I think we were out at the zoo in Italy, one of those zoos where you drive through in a rickety car. Man those were fun. Ok back to the bread at hand.
Who can blame him for trying to grow this beautiful fruit, though? Figs are delicious. Each summer, we would wait semi-patiently for these trees to bear fruit. Each trip to the backyard was first checked with an “are they ready yet?” as we passed by the tree. My dad would invariably say, “no, not yet,” as he pinched them gently. When the wait was finally over, everyone would merely snack on the sweet little fruit straight from the source, but sometimes we would use them in our cooking, and sometimes we would even make jams & preserves. Fresh fig jam smothered over a slice of good, rustic bread: yes.
This bread recipe, initially inspired by Josey Baker’s in his fun and approachable book on baking, transports me back to those childhood days. I’ve used fennel in the past for my Golden Raisin + Fennel recipe, but these two unlikely flavors somehow pair together very well and remind me of my old house as a kid while fusing it with a decidedly Italian flavor. A savory and sweet bread that isn’t too much of either, but just enough of each.
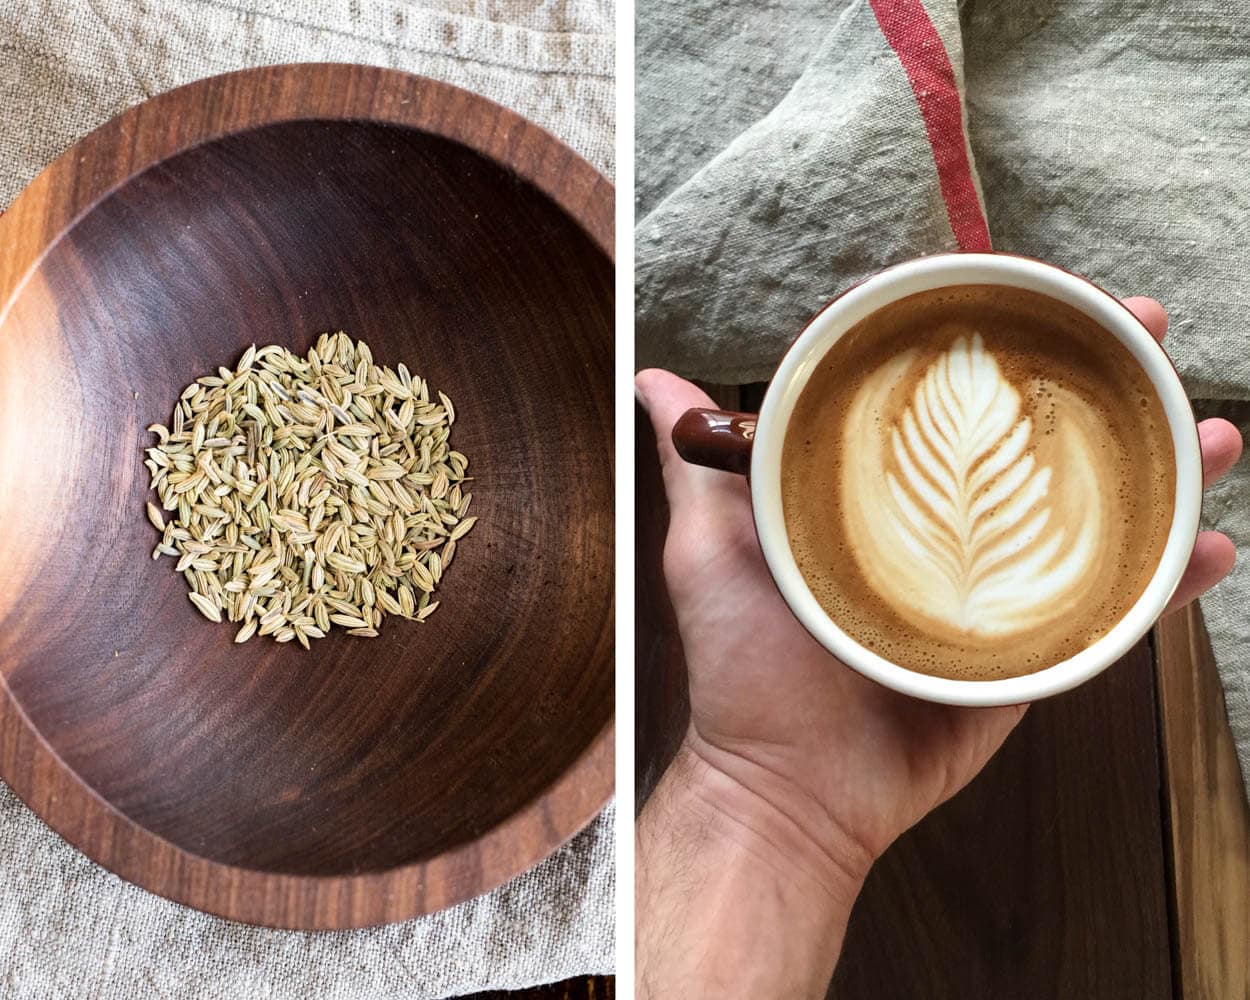
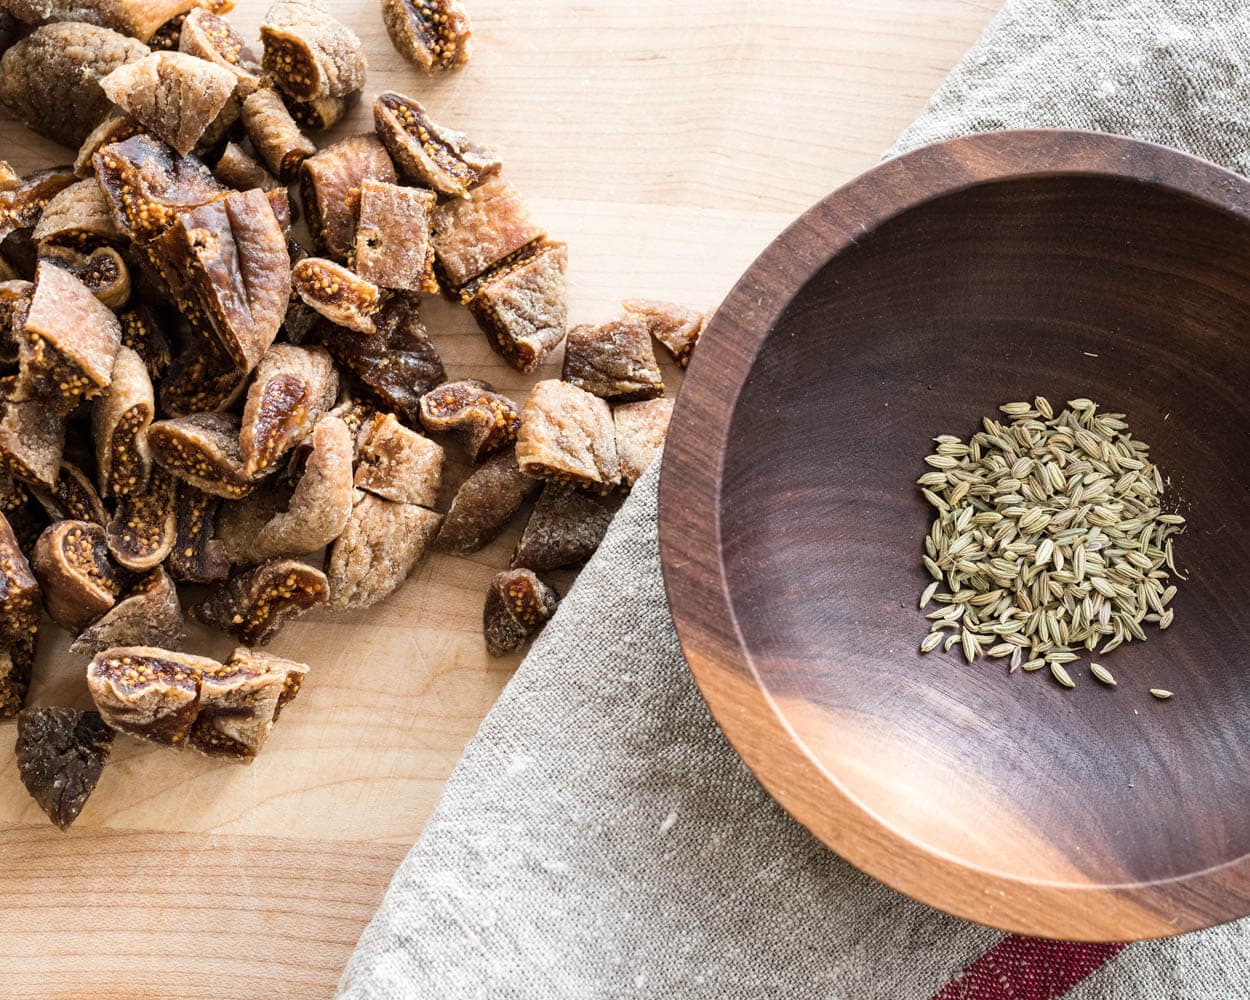
The stress here is you try to find some delicious figs. Not an easy task out here to be sure, but there are options online for organic, moist figs. If your figs are extremely dry, soak them in warm water for 30 minutes until they are soft and pliable. Unfortunately, figs are one of the most perishable fruits; I guess everything delicious is fleeting, indeed.
And with all that, on to the fig and fennel sourdough.
Flour Selection
After baking this recipe several times, I found myself gravitating toward using a strong flour for the base. I chose King Arthur Bread Flour because it has a high protein content, around 13%. This strong flour helps add structure to this fig and fennel sourdough, especially with so many heavy figs.
I usually either have whole wheat or rye flour in my recipes to add some flavor complexity but also to boost fermentation and enzymatic activity. However, given that this recipe tends to proof at a breakneck pace I decided to omit all whole wheat (save for the whole wheat in my levain) and rye flour.
Prepare the 100% whole wheat stiff levain – 10:00 a.m.
Gather the following and mix. This levain is a stiff variety at 65% hydration. If you’re using to a liquid levain, it may feel strange to you to almost knead the mixture. Alternatively, you could up the hydration percentage to reach your usual liquid levain feel.
| Weight | Ingredient |
|---|---|
| 100g | Central Milling Hi-Pro Whole Wheat flour |
| 50g | Ripe, stiff starter |
| 65g | Water |
Keep your levain in a warm area and wait about 4-5 or so hours until it’s ripened enough to leaven your dough. If you’re curious, see my post on the differences between a starter and a levain.
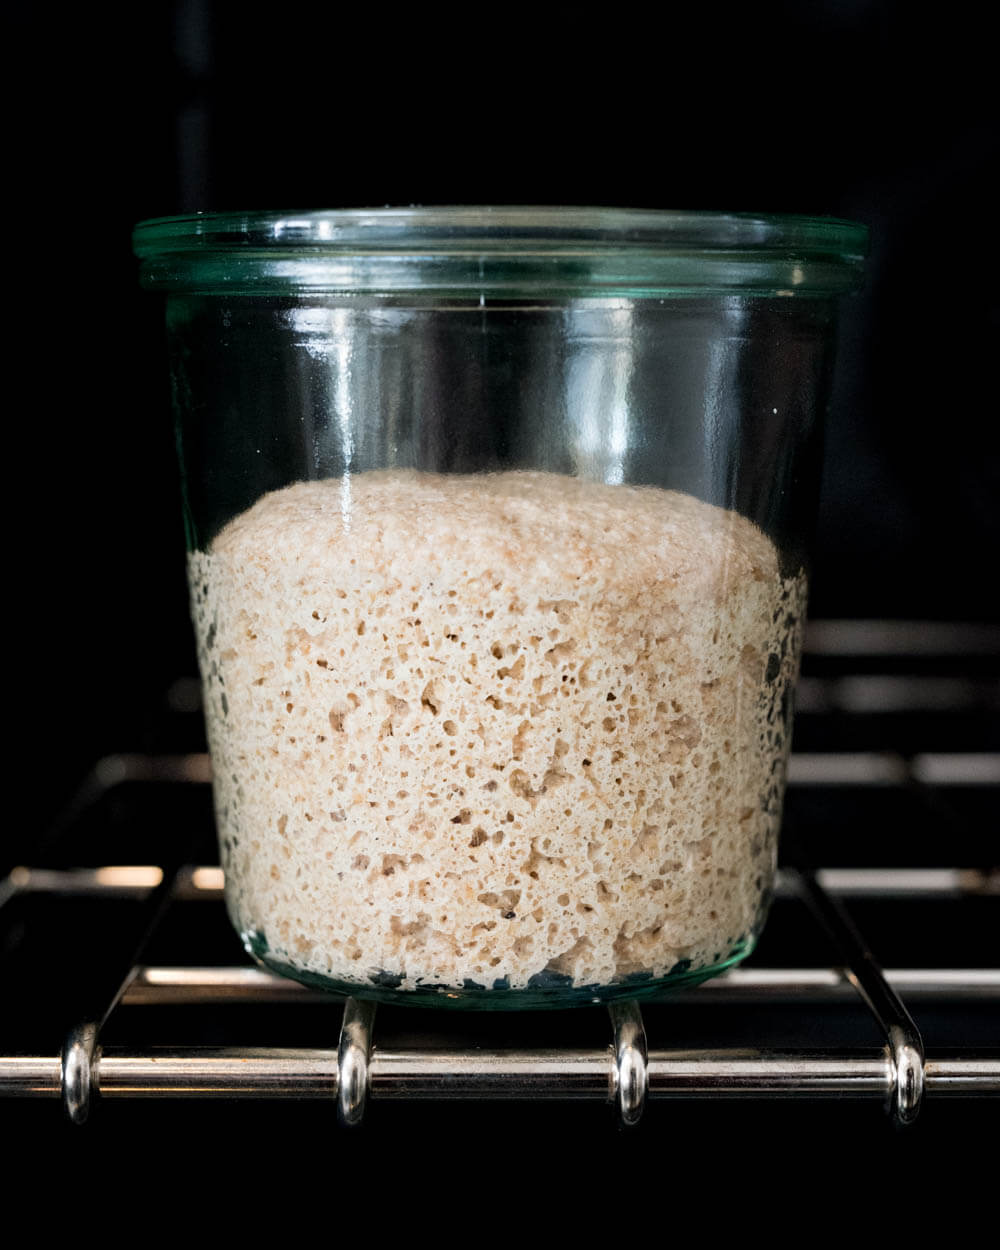
If using a stiff levain you want to use after significant expansion has taken place, but there is still a domed top (i.e., your “stiff ball” has not yet collapsed in the top-middle). If using a liquid levain you want bubbles on top and throughout and still a sweet smell to it, but almost tangy.
Autolyse – 1:00 p.m.
We will do a two hour autolyse with this dough. I find the added extensibility gained by a relatively long autolyse helps when incorporating the chopped figs. This is mainly a personal preference; you could cut this down to 45 minutes or an hour if you’d like.
Ingredients:
Gather the following:
| Weight | Ingredient | Baker’s Percentage |
|---|---|---|
| 808g | High protein bread flour, 13% protein (King Arthur Bread Flour) | 85% |
| 150g | Lower protein bread flour, 11-12% protein (Central Milling Type 70 Malted, or King Arthur All-Purpose Flour) | 15% |
| 850g | Water | 85% |
| 20g | Fine sea salt | 2% |
| 150g | Ripe levain | 15% |
| 5g | Crushed Fennel Seed | 0.5% |
| 400g | Dried Figs | 40% |
Perform the following for your autolyse:
- In a thick bowl add all the flour
- Add 800g of your water (the rest is reserved until later when we add in the levain & salt after the autolyse)
- Mix these ingredients by hand until all the dry bits are incorporated
- Cover with wrap and keep near your levain until mix time
Mix – 3:00 p.m.
After our autolyse has finished break up the stiff levain on top of the dough, pour about half of the remaining warm water on top to help dissolve things.
I mixed for about 8 minutes, in the bowl, using a combination of the “pincer” method and stretch and folds. A “pincer” motion is bringing your index finger and thumb together as you work from one side of the dough to the other, when you reach the end we do a stretch up and fold over. Do this over and over until you feel the ingredients have been incorporated thoroughly, after, you can merely do stretch and folds until the dough starts to feel a little more extensible, a little stronger.
After about 8 minutes of mixing, pour on your 20g salt and pincer through the dough to mix well. I mixed for an additional 2 minutes with salt added until the dough breaks up and then comes back together.
| Final dough temperature: | 80°F (26°C) |
Bulk Fermentation – 3:10 p.m.
Transfer your dough to a container to be used during bulk fermentation and let rest for the first 30 minutes.
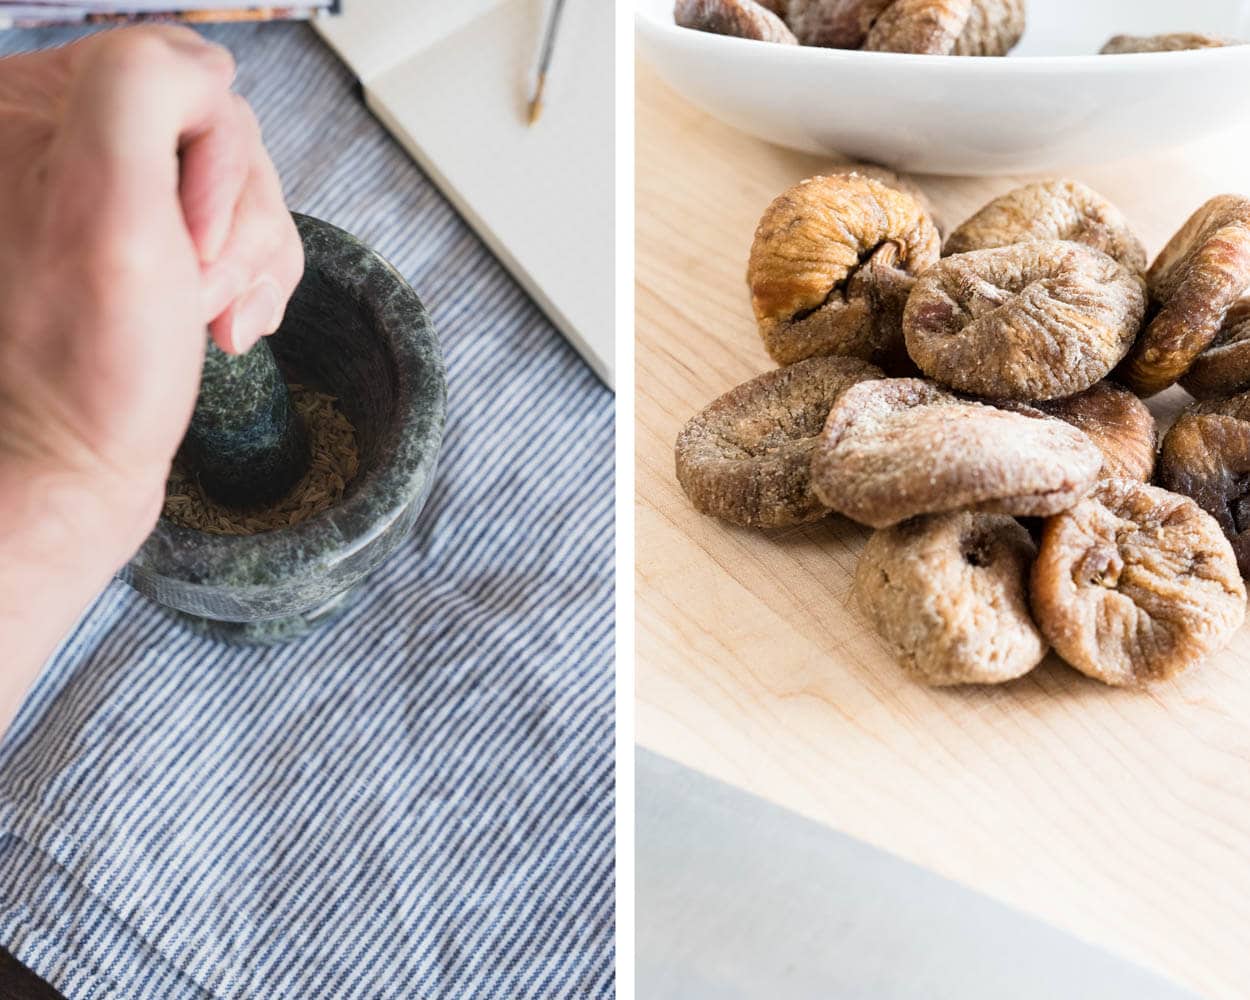
As I mentioned at the beginning, if your figs are super dry you might want to soak them now, this will give them ample time to rehydrate before you fold them in after that second set of turns. Additionally, you can use your mortar & pestle to crush your fennel seed at this point into a fine powder.

After the first 30 minutes have passed, perform your first set of stretch and folds (number 1 below).
- 3:40 p.m. – Turn Set 1
- 4:10 p.m. – Turn Set 2 – After this set gently fold in your drained & chopped figs and crushed fennel seed until well distributed
- 4:10 – 6:40 p.m. – Rest in container untouched
Pre-shape – 6:40 p.m.
Deciding when it is time to stop bulk fermentation and begin your preshape takes a bit of practice. Typically it’s around 4 hours, but it can depend on many factors, such as final dough temperature, ambient temperature and percentage of levain used in the mix. The dough should look jiggly, risen by some percentage (around 30-40% is a good general rule) and it should hold its shape in the bowl. You’ll see a slightly domed top, especially where the dough meets the bowl’s sides. For me, bulk was a little over 3 hours.
Be flexible here. If your dough looks like it’s moving faster than your normal baking schedule it might be wise to cut bulk as short as necessary.
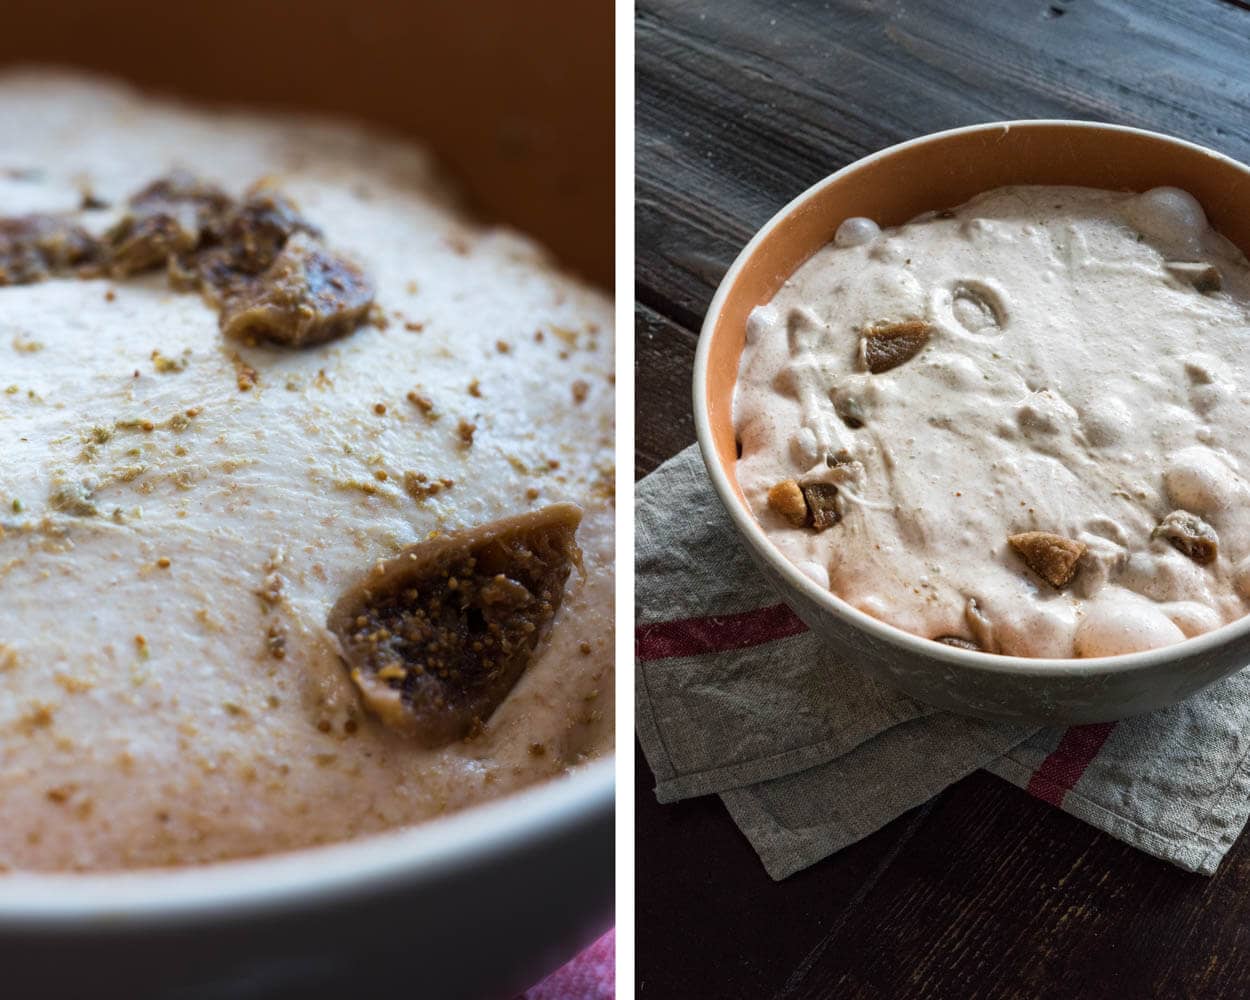
Take the dough out of your bulk container and divide the mass into two halves. Pre-shape into two loosely shaped boules to rest for 25 minutes. Cover with inverted bowls or damp towels to keep the resting dough moist.

Shape + Proof – 7:05 p.m., Then in Fridge Immediately After
After your pre-shape rest, shape each dough mass into whatever shape you prefer, boule or batard. If you have any figs popping out, try to poke them back into the dough. It’s not critical, but sometimes these figs at the outside will scorch a bit in the oven.
Using linen-lined baskets for this recipe is a good idea. Figs will be moist and can create a mess.
Pop them into your baskets, cover with wrap & toss them into the fridge immediately. This recipe moves fast, and we want to get the dough’s temperature down as quickly as possible. I almost like to think of the proof for this recipe just the same as a 100% whole wheat sourdough: fermentation moves at quite the clip.
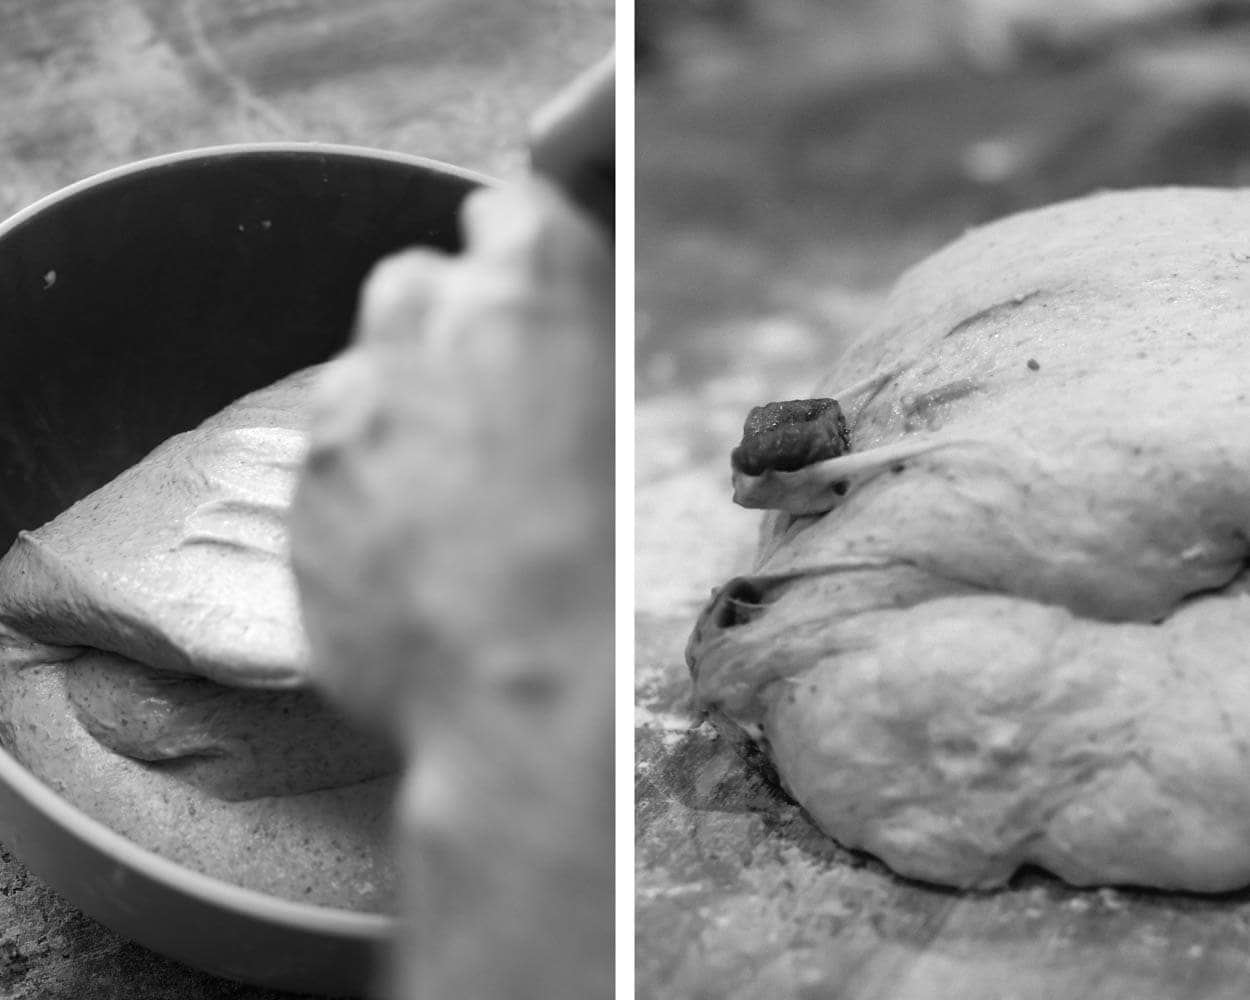
Even in the fridge, you will need to keep an eye on this dough, it can over-proof on you very easily. Each time I have baked a “fruit” loaf I worry about the cold retard in the fridge. You might not be able to go a full 12 hours in the fridge (at 38°F/3°C). See my note on this at the very end.
Score + Bake – around 7:00 a.m.
During this bake, my loaves colored rather quickly on the outside so I dropped the temperature down in increments:
- 20 minutes @ 450°F/232°C w/ steam
- 35 minutes @ 450°F/232°C dry oven (remove Dutch oven lid or any steaming pans)
Keep an eye on the bread as you get close to the end, it can color and burn on you rather quickly.
Nowadays I almost always bake without a Dutch oven, but the choice is yours. If you’d like to learn how to bake directly on stones and generate steam, check out my previous entry on Baking With Steam in Your Home Oven. After baking these loaves, wait a couple of hours before slicing into them to let everything set.
Conclusion
A vibrant taste with this fig and fennel sourdough, but it does not push things too far. We find ourselves eating this bread very simply with no toppings save for a pad of good quality salted butter or a few slices of salted prosciutto. It is not too sweet, but the salty-sweet combination is just divine. Somewhat counterintuitively this bread is of a very rustic nature. You’d think with the chopped figs and delicate fennel seed you’d have a delicate loaf, but the result is more of a hearty loaf.
But before we get to the success, let’s look at an outtake in developing this fig and fennel sourdough recipe. I mentioned previously to watch your dough as this recipe, with those sweet and starchy figs, can quickly overproof. Here’s a shot of one of my loaves that unfortunately went a bit too far. It still baked up ok, but the crumb was not as open as I’d like and overall a more compact loaf with the less-than-stellar rise.
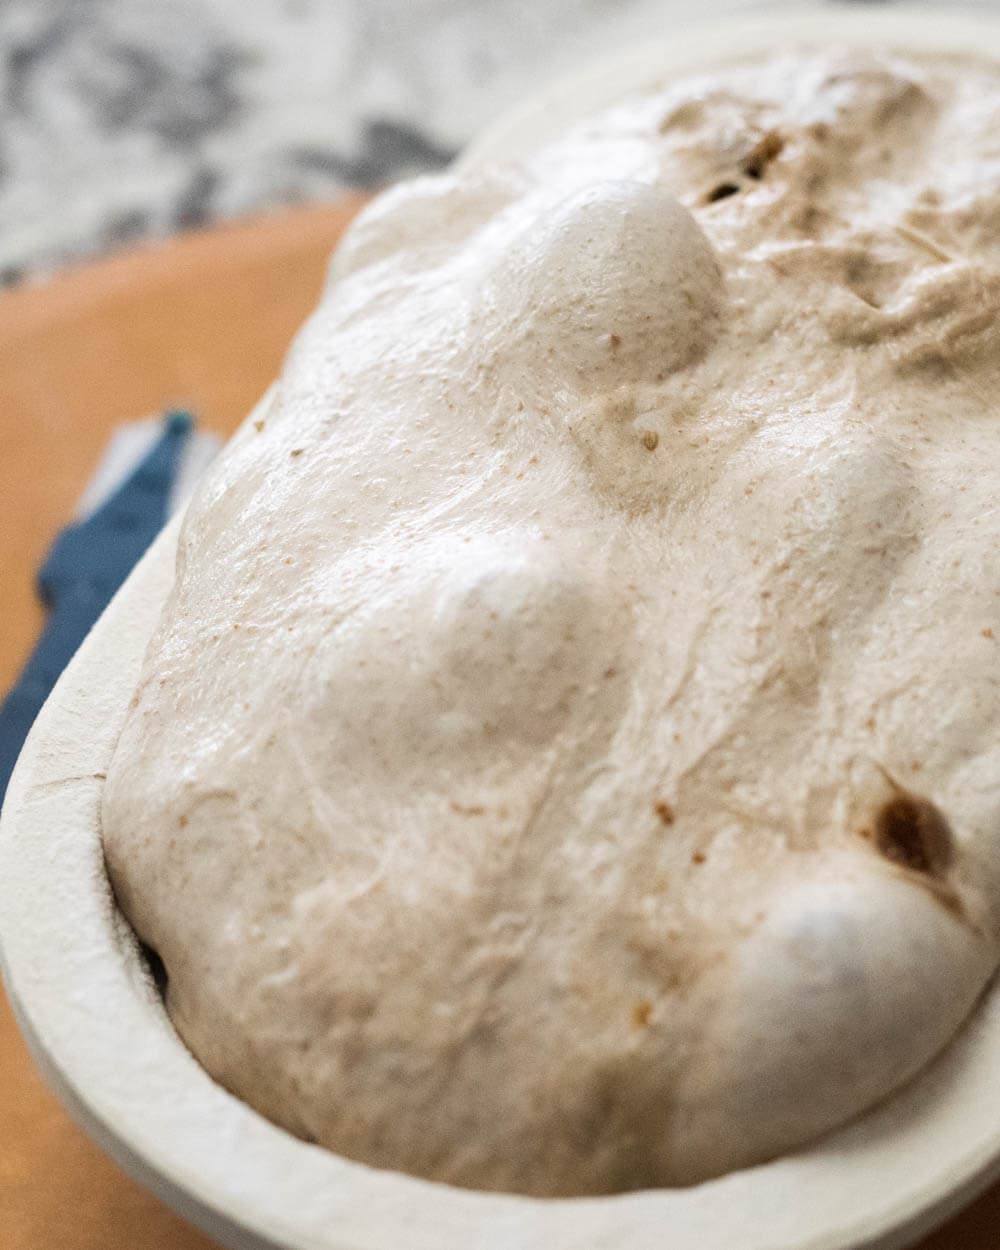
Now that’s fermentation. Watch this dough, even in the fridge! Alternatively, you could let proof at room temperature for a few hours and bake it straightaway sans the cold retard.
Crust
Crackly. Thin. Colorful. All adjectives I’d used to describe the crust on this fig and fennel sourdough. You almost wouldn’t know of the beautiful fruit inside this bread except for the few figs that pop out to let you know there is something else going on inside. The thin crust can easily be torn, and you’ll find yourself doing just that to get another piece that may have a hidden fig inside.

Crumb
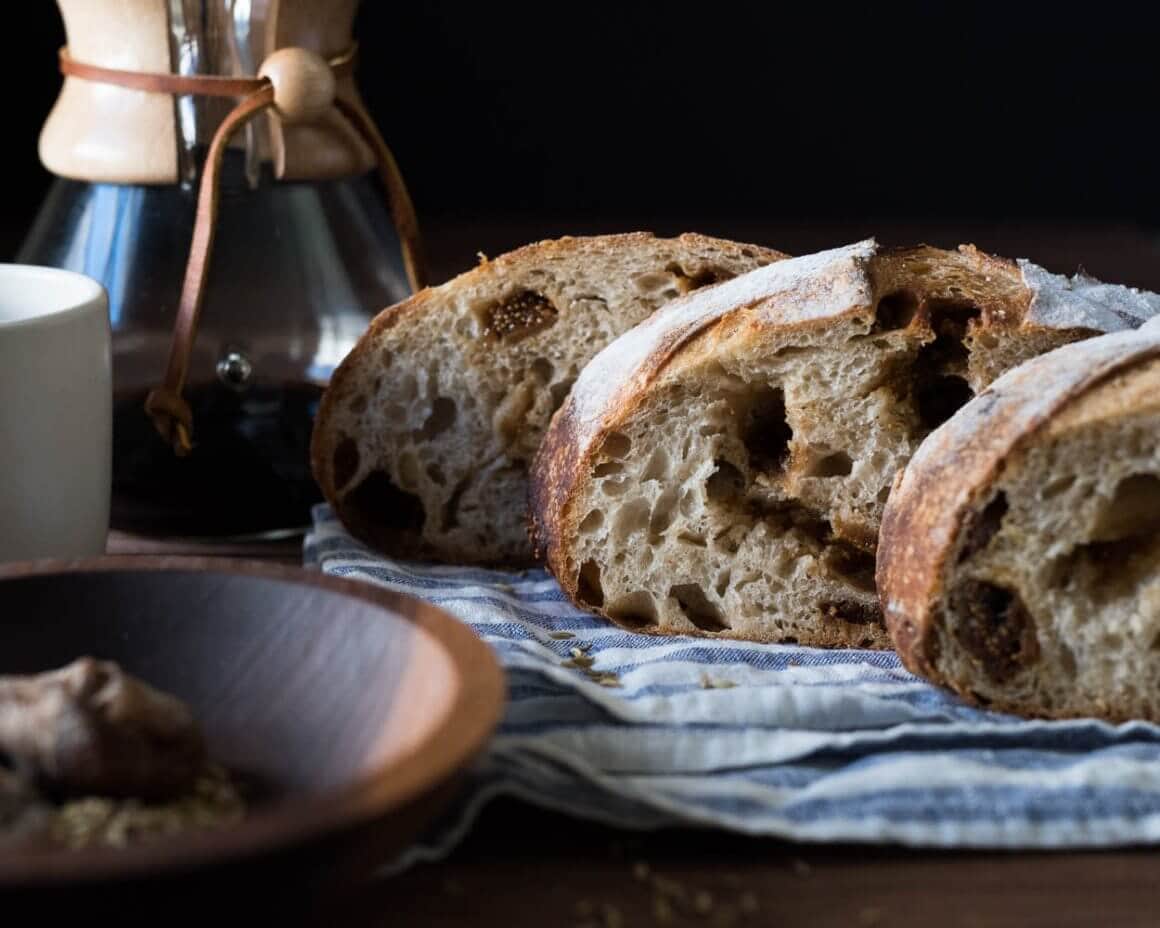
A heavy loaf in hand, and rightly so with around 400g of figs. The interior stays moist for days and is very tender. If I had to place an adjective on the crumb to sum it up: delectable. As you slice, you’ll dig into caverns of figs, sometimes yanking them out of their hiding spot and sometimes slicing right through them. A very rustic loaf!
Taste
The aroma of fennel at each slice hits you first but is only barely noticeable when taking a bite. I like it this way. When you snag a fig, it’s a surprise as the bread isn’t utterly laden with them to overpower things. A perfect balance between the two.

These two loaves found their way over to my parent’s place for lunch. As we ate the loaf of fig and fennel sourdough bread straight from the cutting board, I looked outside to see my dad’s latest fig tree with not one but a cluster of figs coming into the season. It seems that he has finally arrived on that perfect maintenance schedule for his tree, and I found myself walking outside to pinch them to see if they were ready… no, not yet.
Buon appetito!
If you use this recipe, tag @maurizio on Instagram so I can take a look!


91 Comments
Hi Maurizio. I started the Fig bread too late in the day perhaps, because the levain didn’t get to the right point for over 6 hours. Now – at 9:30pm – it looks just perfect. But I can’t complete the bread tonight. I’m going to refrigerate the levain overnight and start in the morning perhaps. Any tips on the levain to refresh it so I don’t have to start it all over? I’ve made this bread before but don’t remember the levain being this dry. Thanks for your help!
Hello Maurizio! Do you think I could make this recipe with fresh figs? Would I need to change anything in the recipe? Maybe the water because fresh figs would have more water than dried? Thank you!
Hey, Sarah! I think fresh figs would probably break apart quite a bit in the dough… I’ve not tried using fresh, but I think dried would probably be better!
Thank you! I decided to make your Sunflower and sesame sourdough bread instead. And I have a batch of your simple Focaccia going to put the fresh figs and fennel on 🙂
Ah, that’s such a good one! And focaccia, can’t ever go wrong with that–enjoy, Sarah!
I made this recently and the taste is delish, what a perfect combination! I used fewer figs and added in some walnuts, hitting about the same grams. My round boule definitely suffered more spread than the cherry pecan buckwheat I made last week. After I added the water (and I did hold some back), I noticed the dough stayed very ‘sloopy’ – sloppy but not quite soupy. So then, I pulled up the recipes for cherry pecan buckwheat and cranberry walnut to compare, since figs are fruit. This is even higher hydration. After reading the other comments, I know I could hold back hydration, but would more stretch and folds help? Thank you for your recipes, comments, and help!
So glad to hear it turned out well for you, Susan! Yes, I’d go with a reduction in hydration and then give it another set or two of stretches and folds for more strength as well. This is a wet dough, but it should still be manageable!
Thank you Maurizio, I love this recipe and so do my bread customers! It’s one of my favorite recipes of yours, so much flavor and so versatile! I’ve made it many times over the past year and where I can’t seem to improve is in the crumb. The loaves don’t come out as airy or spongey as your photos or my other breads. When I take them out of the fridge to bake, they look like they haven’t proofed all the way but I leave them around 20 hours in the fridge. I don’t think they are over-proofed because I know what that looks and feels like! When I score the loaves I can tell it’s not proofed enough- or at least that’s what my amateur eye thinks. Any thoughts? Thank you in advance! Liza
Glad to hear that, Liza! This is a challenging dough to open up and it really relies on having a strong flour if that’s what you’re after. I find most times I bake this the interior is a little more closed—the mix-ins are heavy! I’m ok with this since the flavor and texture is wonderful. If you’re looking for more openness try mixing in a portion of higher protein flour to see if that helps. It’s also important to be really gentle with this dough to avoid degassing it. Hopefully this helps!
Oh, and I’m planning on revisiting this writeup and recipe really soon with some improvements I’ve made over the years since first posting it. Stay tuned!
Thanks so much for your reply Maurizio! Yeah, I’m happy with it too even though it’s more closed and I do use a high protein flour but what I just reread in your recipe notes is to stop doing turns on the dough! That I had not seen before! Looking forward to your new notes. Thanks for all your work on this site.
You don’t mix the Levain in until 3:00? I wait and don’t use it until after the autolyse stage? Do I mix the salt with any water? Also I have fresh fennel leaves, could I use those somehow? I also have anise seeds. Which would be best?
That’s correct, use the levain later and it doesn’t go into the autolyse. You can dissolve the salt in the water if you’d like, I usually pour the water right on the salt once I add it. I’m not sure about fennel leaves, I’ve not tried that! The seeds really carry quite a bit of flavor.
Thank you for your quick reply, I’m about to start the bread in a few minutes. I was mistaken, I meant I have Tarragon leaves which also have a licorice flavor. I do have Fennel seeds after all, so I will use those. I love adding flavors to sour dough and hope I do your recipe justice, I will let you know.
I’m can’t believe I never replied with how delicious, and perfect this bread turned out! I’ve made it many times in two years and it’s one of the best breads. We love to toast it for breakfast with just salted butter on it. BTW we lived in the 505 for 15 years and still visit often.
Wow ! Made these loaves yesterday and they are just fabulous ! Thank you Maurizio! I did it all in one day but I may try an overnight proof next time; thanks especially for all your notes and heads up about watching the fermentation on this one!
Happy to hear they turned out great, Daniella! Enjoy 🙂
Hi Maurizio! I just pulled my first Perfect Loaf out and it is BEAUTIFUL! Thank you for that. Now, on to inclusions: Any reason not to use fennel tea instead of water? Can you please post a video on adding inclusions to the dough so we see how you deal with stretch & fold with all the goodies loaded? MANY THANKS.
Will do, Jay! A “fennel tea” would be great, and would likely infuse the flavor more throughout the loaf.
Maybe I missed something, but I didn’t see anything in the instructions about when to add the second half of the reserved water.
Add it as necessary through mixing, but it sounds like your dough had plenty of water in it! I’m just about to revise this recipe to make the hydration a little more approachable and update the steps 🙂
My dough was sooo wet. I checked a bread calculator and this recipe is 90% hydration if you use normal starter. My dough was like cake mix, no strength.
I poured it into a bread tin.
I let it rise overnight and baked it in the morning. Surprisingly it turned out great. Moist crumb, thin crunchy crust. Delicious.
I used figs I dried at home from our tree. I doubled the fennel. I used a bit of rye and whole meal flour.
Thanks for that feedback, Taryn! Yes, it’s a wet dough—I’m going to be revising this formula soon to drop the hydration and make the mix a little more “smooth,” if you will. Sorry for the frustration!
wish I saw this before I baked! Turned out pretty well anyway, but the dough was very difficult to handle. Good thing I didn’t soak the figs! They turned out very juicy.
Hi Maurizio, You have been such a great help with my bread journey and today I made the fig loaf with bread flour and all purpose flour. I am not sure if I over proofed it but the dough was very wet and and I could not shape it. I have tried a lot of your recipes with all purpose flour and regular starter and they all came out quite well. I am wondering if you have any suggestions as I love figs.I used anise seeds instead of fennel. Worth trying.
It sounds like your dough is most likely over hydrated. Try reducing the hydration by 10% and give it another go—the reduced water should bring strength to the dough and you’ll feel it immediately. Once you find a suitable hydration, you can try to push it back up (if desired), but as you do, take note of how the consistency of the dough changes: the dough will start to slacken out as you add more and more water, this means you’ll likely have to mix more upfront or add another set or two of stretch and folds during bulk fermentation.
Try to keep everything else as consistent as possible and let me know how the next attempt goes!
I’ve never been the biggest fan of figs but this recipe makes me nostalgic for when I used to pick figs from trees on the side of the road in Jerusalem with my best friend
A wonderful memory I’m sure! 🙂
Of all of the recipes I’ve made on your site this is def one of my faves. Heavenly! If I’m using 100% hydration starter how do I adjust? I’m still getting used to baker’s math :/
So glad to hear that, Christine! No worries, just hold back a little of the water when you go to make the levain to make it more stiff. I’d add all the same as I have above in the levain section, but instead of adding all 65g of the water, do like 40g and see how it feels. It should be stiff enough you have to kind of knead it by hand in a bowl a bit, but it should still come together. Add a splash of water here and there if it’s not coming together. Don’t worry too much about the hydration difference there!
Hi there, have been really excited to make this recipe but I am still just a little confused about using a stiff starter. I have an active liquid starter which i have tried to create a stiff levain from using the measurements you have mentioned in your comments above but I wasn’t seeing any activity. Does this need a few refreshes before it will work?
Hi Maurizio. I hope this comes across as sincere rather than mean-spirited or backhanded (because I honestly cannot thank you enough for building up this wonderful blog), but man, the improvement in your teaching skills has been dramatic over the last few years.
This recipe is one of the few real duds for me, with the other one being your ciabatta, though in that case the problem isn’t with the explanation as in this one but rather its the methodology – I’m a hardcore hand-knead only baker and that recipe was perfectly manageable once I got a bowl with taller sides.
You’ve gotten so much better at describing what it is a baker should be looking out for at each step of the process that this recipe now kind of sticks out like a sore thumb given how vague it is in the “Mixing” phase.
[Brief aside, but the other thing that’s frustrating about this recipe, and it’s something that you acknowledged was an issue with your older recipes, is the ~65g of wasted levain]
I followed it to a T but “(…) a little more extensible, a little stronger.” leaves SUCH leeway that my dough ended up weak and it never came together and was simply a soupy mess, from start to finish. I figured that, because of the hydration level, there was only so much to be done in the “Mixing” phase, strength-wise, and that the magic would happen during bulk fermentation, much like in your “Best Sourdough” (a high-hydration recipe that truly showcases the miracles that time works on gluten), except somehow with even less stretching and folding. Alas, this did not come to pass (I salvaged it by adding 400 -400!- grams of flour, and 260 g of water when I was going to divide, kneading it all together, slapping and folding and then running it through a short fermentation cycle before fridging it – it baked up fine, not great).
Contrast this with your “Rosemary and Potato Loaf” recipe (or the aforementioned “Best”, though that one was posted just 4 months after this one) and the difference in teaching quality comes into sharp focus. The R&P is a pretty similar dough (low mechanical mixing during bulk, additional starches that feed the dough, though there is a considerable gap in hydration between the two) but you’re so careful and detailed in your description of what the dough looks like throughout each stage that that recipe is impossible to mess up.
I re-made this recipe by following the technique for the R&P (except I respected the inclusion of the add-ons after the second set of stretch-and-folds as instructed here rather than before starting bulk fermentation as in the R&P) and it came out perfect: big holes, big bite, moist, not gummy, just delightful.
Just wanted to congratulate you on really honing your craft, both as a bread-maker and as a teacher. You’ve come a long way and I’m sure you’ll go further still. I wish you nothing but the very best.
Hey, Jeremy! Sorry for the late reply and thanks so much for the comments and the feedback — I don’t see what you’ve written as “bad” at all, in fact, it’s that kind of feedback that helps me focus down on what helps readers, pushing me to improve even further. In reading through this post after reading your comment, I agree, there’s much left to be clarified! Especially in mixing. As you can imagine, trying to convey the details of making bread with text, pictures, and even video, is tough! There’s a lot going on, a lot of nuance, and much of the process is so tactile choosing the right words is difficult. I like to think I’ve also gotten better at this over the 7-8 (!!) years I’ve been writing, but even so, one or two recipes still could use a revamp.
I think I’ll take your advice and spend some time going through this recipe with some updates. The beautiful thing about the web is that I can update, if this were in a book then I’d have big trouble!
Again, thanks for the feedback, Jeremy and happy baking 🙂
I had the same issue with my dough. A soupy sticky mess. I think it had to do with rehydrating my figs, which added to the water %.
@maurizioleo:disqus do you have a list of common baking problems and solutions? Would be great to have a section on the website.
Thank you
As an Italian who’s ancestry hails from the Piedmont region in northern Italy, Figs are Foods of the GODS!
I have to agree with you there 🙂
Good Morning, Have really enjoyed all the breads in you website and am baking a Fig/Fennel as we speak.(I’m thinking many of us from Italian background must have the experience of a fig tree in our grandparents backyard. I surely did and also have one in mine as well!!)
Two questions- 1) often times, when following your recipes, I would rather have three smaller loaves, what would your suggestions
be as far as baking times?
2) if I were making a basic sourdough and wanted to bake it in a loaf pan, suggestions for baking times as well?
Mille Grazie!
Thanks for the feedback, Rose! Yes, we all have that fig tree we remember fondly 🙂
If you divide the dough into three smaller masses and you bake them all at the same time I’d expect the overall time to most likely go down. Because they’re smaller they should bake through and color faster on the exterior. It’s hard for me to give exact times or even a guess, but I’d start with the times and temps I have listed here and just keep an eye on them midway through that second phase of the bake.
I find that a loaf pan usually needs a slightly lower temperature but baked longer. I’d start with lowering the highest temp here by 25°F, then extend the bake until it’s done. Use an instant read thermometer to check the interior of the bread near the end, it should be around 210°F or higher.
I hope that helps and have fun!
Hi Maurizio, I have been baking sourdough bread for a few years now in search for that wonderful crust, and your recipes have definitely brought my breads to the next level! Thank you for putting this beautiful site together. Even when I am not baking it’s a pleasure to read with a cup of coffee, today accompanied by a slice of the fig and fennel bread which I baked this morning. Thank you for the inspiration!
Ahh that’s so great to hear, Hermione! I’m glad you’re enjoying my website; it sure is fun for me to share my bakes and it’s such a great community here — talking bread is always interesting! Happy you enjoyed this recipe, it’s definitely a hit over here 🙂
Happy baking!
This was the fourth of your breads that I baked. We loved them all! I would cut the figs into smaller cubes next time, though, they tended to fall out when I sliced the bread.
For full disclosure, I used Robertson’s lower energy mixing technique for Tartine breads – all that slapping is not really my thing.
Thanks for sharing this nice family story, I enjoyed reading it.
Smaller chunks sounds like a great idea. I do like the presentation sometimes with the larger bits, but it does make slicing more difficult. Plus, I always pick up the ones that fall out, even if it’s not my slice 🙂 Really happy to hear you enjoyed this bread, happy baking!
you say”Keep your levain in a warm area and wait about 4-5 or so hours until it’s matured enough to leaven your dough.”,but then don’t add it to autolyse until 3:00 – 7 hours later. Would it have gone to far my then?
Hall, I add the levain to the dough that’s been autolysing at the “3. Mix” step at 1:00 p.m. My levain was ready to use at that time, which was about 5 hours after building it. Use your levain when it looks (and smells) ready based on the cues I talk about above — 7 hours might be just fine, especially if temperatures in your kitchen are cooler than over here.
Hope that helps!
Hi Maurizio, I’m excited to find your blog and get back to baking after a 3 year laps, and now for the 1st time with sourdough! Started the fig & fennel recipe at 7:45 AM it’s now noon and the levain is just beginning to raise. For the 1st 2 hour I had my proofer set at 75f then cranked it up to 80f. I’ll check it in an hour.
Questions on timing, I’m a little confused about.
At 12:00PM you say “will do a two hour autolyse”, then one hour later at 1:00 you say the autolyse has finished. Maybe that’s because you do suggest a 45min to one hour proof would be OK.
At 4:35 you shape + proof then into fridge for 12 hours or maybe only 10 hours because it can over proof very easily. At 10:50 AM it’s time to score + bake. That’s more than 16 hours later. In the comments section you tell Susan the proofing in the fridge could be extended to 20 hours. Hope you can help me out here, for the next time I bake this bread.
Thanks for the great, and I mean great, blog. I hope to be attempting many of the breads.
When I learn how I’ll include my picture.
…oh, I see autolyse is done at 1:00 Mix
Hall, glad to have you along! You’re right, I had some typos in there with my timing. I looked back at my notes and fixed the timeline above! Sorry about the confusion. Be weary about extending the proof time too long with this particular dough, it does depend on how fermentation is progressing for you but the added fruit (and their sugars) really shorten the overall timeline with this dough.
Hope this helps and thanks for the comments!
It’s 1:00 Pm I’ll e-mail you a photo of my levain.
Not only are you a great baker, you are a great storyteller and have a way with words. Definitely going to try this one out.
Thanks so much Chris, I really appreciate that! I hope you like this one, such a good combination of flavors here!
Me again. Hope I’m not bothering you too much. Obviously, I’m onto the next loaf (in my mind, at least). This one is definitely on the horizon. I’m wondering why, for this recipe, you chose to use a stiff starter for this recipe? If I’m not mistaken, I thought I had read somewhere in your blog that you preferred a liquid starter. Just curious. Thanks again for all the amazing and detailed formulations. Also… loved the 80s pic. I”m a child of the 80s as well and my Italian father rocked a similar look… especially the mustache. Thanks in advance!
I’ve gone back and forth between types of starters. I used to use a stiff starter/levain for a long while and switch back to a liquid one. It’s been a constant experiment for me 🙂 I find a stiff starter is good for some applications (it’s great when there’s a large percentage of fresh milled flour) and a liquid one has its uses as well. Honestly I think either way is good, use what you have and just adjust the hydration of the recipe as necessary (your levain will have less water for a stiff variant, you might need to adjust the recipe to suit!).
My Dad really was the quintessential Italian 80’s father — sounds like we have a common history!
Maurizio, kobbanwa! It’s been awhile since I baked a good loaf of sourdough. Life kept getting in the way. This weekend I tackled some new recipes- such as this. Fabulous, really really enjoyed it. Thank you for sharing it and sharing memories with us. I can just picture your Italian Christmas tree in the yard! Haha and the 80s, man! Gotta love the 80s. My father had a similar look. And carried a little boombox with him in half the pics 😂
I had a question about something and perhaps you can help. Today I also attempted a roasted garlic and rosemary loaf. Something went wrong…Terribly wrong. Do you think any of your speciality ingredient formulas could easily be adapted to those add ins? I am quite happy with the ones you have. But my husband has been asking for the rosemary garlic. I feel so bad my fig loaf turned out beautifully. Where as the rosemary garlic did not. So I’m going to attempt a redemption loaf tomorrow.
Anyway, thank you again! And (a very belated) congratulations on the saveur award are in order! That is awesome and well deserved! 🍻 🎉
Yes, sometimes life interrupts our baking sessions but sometimes we just have to push back 🙂 The 80’s were pretty amazing, I have to say. I love the idea of carrying around a little boombox, maybe we need to bring that back!
I’m not sure why you had trouble with the garlic / rosemary loaf. I have not baked with garlic in my sourdough but I don’t see why it should present a problem. I’d treat it like any of these “ingredient” loaves and mix in some percentage and tweak up/down from there. Perhaps there was too much water in the dough? I’m late to reply to this comment so I hope you’ve figured out the issue! Garlic and rosemary naturally go so well together I can just imaging how amazing that loaf would taste.
Thanks so much for the kind words, I really appreciate it! Happy baking 🙂
just made your recipe.. how can I show you a picture of the breads… they came out scrumptious
Excellent! I’d love to see, send me an email: maurizio (at) theperfectloaf.com
I don’t have “Malted Flour”. But I do have bakers malt from King Arthur in my pantry. How much malt would I add to a cup or xxx ounces or grams of flour? Would it vary if I was using all home milled grains? BTW…Your photos are exceptional. I want to lick my monitor every time I scroll down the page. Thanks for the thrill!! At my age, you don’t pass on getting a good lick now and again! 🙂
Ha ha, thanks I appreciate that!
Sure, their malt will work well (I’m assuming it’s diastatic malt). I like to use around 1% in my final dough mix. If you use too much your dough will become slightly gummy in texture. I use the same amount when using fresh milled flour. I don’t add any malt when I know the flour I’m using already has it (most “bread” flours already have it included).
Let me know how it works out!
I have some sourdough starter that I’ve nursed along for years. I am now back into baking breads and just wanted some clarification.
Q: When you refer to “stiff starter”, that would be what I call a “fed” starter; fortified 4-5 hours before with fresh water and flour?
Q: Should I keep my starter fed with all-purpose flour and not home milled red hard wheat (100% unsifted)? I prefer my milled hard wheat, but wondered if I will see a difference over time.
Thank you for your thorough and thoroughly entertaining blogs. You’ve lured me back into baking once again!
Roger the Dodger
Southampton, New York
What I mean by “stiff” is around 65% hydration (e.g. 65g h20 to 100g flour).
You can feed your starter fresh milled flour if you’d like, I do from time-to-time, but I like the more mellow fermentation aged flour brings. I find that feeding your starter with fresh flour really amps up fermentation and forces me to feed more often. There was a period of time I fed my starter with only fresh milled flour and everything was just fine — up to you!
I’m glad you’re enjoying the site and I feel great that I brought you back into baking awesome sourdough at home! Happy baking 🙂
Thank you, Donna!
Absolute beauty 🌹♥️
Hi, your bread is simply breath- taking bot in texture and colour. I am green with envy.
I am a novice and am dying to try baking your bread. How do you achieve such great big air holes.
They are wonderful,
Susan
Thanks, Susan! Larger open areas in your sourdough are created through several things: sufficient strength in the dough (achieved through mixing and stretch and folds, strong fermentation in your starter, a full bulk fermentation step and a full proof. It definitely takes practice, but it’s something everyone can achieve. At first I would focus more on being observant with your sourdough — watch how the dough looks and feels at each step through the process. Take notes. After baking for several years now I’ve determined the most important piece of advice I can give is to be observant.
Thank you for your wonderful recipes and the beautiful pictures!! Your pictures and instructions are very helpful since I am new at baking bread (a beginner for four yrs). I have been baking this recipe every time I need to bake a couple loaves of bread. My husband loves my breads now! 🙂 Wishing you and your family Happy Thanksgiving!! -Cecilia
Cecilia, thank you so much I appreciate that! I’m glad my instructions here have helped. Like you I’m hooked on this bread, I’ve made it many times now and it’s always a winner. Thanks for the comments and happy Thanksgiving to you and yours!
Thank you for this beautiful post! I love the family stories and the Italian heritage that you incorporate into this and other posts here and on Instagram. Two questions: 1) can you use fresh ripe figs? The markets here in California are filled with ripe Black Mission Figs right now, but yours looked dry. I’m wondering if these will be too moist? 2) What’s the exact quantity of figs you used in the recipe? I didn’t see it in the ingredients list, but in the crumb comments at the end, you say “around 400g”. Thanks again for all the effort you put in to your blog and for sharing — we beginners really appreciate it!
Sonia thanks for the kind words! My Italian heritage has shaped me into who I am today, only right I share a bit of that!
1. I think yo could use fresh figs but I’d be worried they might break apart very easily in the dough. As you know the interior can be extremely moist. I’d almost suggest just baking a normal country sourdough recipe and then slicing them up for a topping 🙂
2. I can’t believe I didn’t add the figs to my recipe up there! I fixed it. I used about 400g of dried figs (weighed after removing their little stem).
You’re welcome, glad you’re finding the site helpful! Let me know if you do venture into baking with fresh figs, I’d love to know the outcome.
Hi Maurizio, After reading your comments and eating a few more ripe figs (they’re so good right now!), I decided not to try it with fresh figs. I also had a good discussion with a farmer from Knoll Farms at the SF Ferry Building this weekend and he agreed the ripe figs would break apart too much in the dough. He was very excited when I told him about the bread recipe I wanted to try and I purchased some good dry figs from him, so I’m almost ready to give it a try. I do have another question as I gather the ingredients — what’s the purpose of the type 70 malted flour and is there any substitute? Happy to order it and give it a try, but I’m curious how you decided on the flour mix and if you have any idea what would happen if I went with all bread flour. Appreciate any guidance you can offer.
BTW, I did make regular sourdough this weekend and topped with fresh figs and proscuitto — delicious!! 🙂
I use the T70 flour to add a little extra fermentative and enzymatic activity to my dough, to get a nice caramelized crust. You can think of T70 as “almost whole wheat”, so you get a little of the benefits of whole wheat (taste, fermentation boost) without pushing things too far. You can safely omit the T70, or you could use a smaller portion of 100% whole wheat, like 5-10% (even rye flour would be good here). But yes, all bread flour would work just fine.
Great, I’m glad the regular recipe works so well! Figs and prosciutto, perfect! Let me know how this one turns out — happy baking Sonia!
Hi Maurizio,
Beautiful fig loaves!! I wish I could taste those. I have a few questions for you:
1. Why didn’t you do any slap and fold?
2. Why are you using a stiff levain now?
3. Are you baking without the Dutch oven just to bake multiple loaves at once or do you get a better oven spring this way?
–I baked my best loaves yet by following your “less levain” recipe. Thank you so much for your wonderful blog!
Noah – thanks! Answers below:
1. I actually have done this recipe both ways, slap/fold and just turns in the bowl. Both work just fine, I didn’t s/f this time because I was using so much bread flour, which is incredibly strong. You can feel the gluten strengthen up very fast in the bowl. Either way works, though!
2. I’ve really just been experimenting with a stiff levain these days, and I like the maintenance schedule it provides (it can go longer between feedings). There are some other benefits as well, and I’ll get into those in a post I’ve been working on for a while (hopefully it’ll be out soon!).
3. I’m baking without the Dutch oven so I can fit larger loaves in my oven. I started to reach the capacity of my DO and needed to find a way to bake larger and more loaves at a time. I have a post here at the site that shows my steaming method if you haven’t seen it yet.
Glad you like my “less levain” recipe! It’s my go-to 🙂 Thanks for the kind words about my site!
Hi Maurizio,
Can you tell me where I can get some instructions on how to slap and fold, and turns in the bowl?
What does stiff levain mean? I need some basic knowledge and instruction (pictures or videos) on the
Techniques you have used. I hope you will be able to help me and guide me in the right direction.
I have made a few loaves of sour dough bread but could never achieve the big holes like your bread.
Not only are the holes big but there are so many of them. Incredible.
Also my bread was not sour enough. Could it because my starter is new/fresh, only a few weeks old.
Waiting eagerly for your reply.
Thank you,
Susan
Susan – since you are just beginning I might suggest to avoid doing any slap/fold to start. Just focus on developing dough strength in the bowl during bulk fermentation through “stretch and folds”. I would highly recommend you pickup Ken Forkish’s book Flour Water Salt Yeast. It’s a GREAT introduction to baking sourdough. There are many pictures throughout that explain stretch/fold and other techniques (I am working on videos and pictures for these but do not yet have them posted). That book will be an excellent compliment to my site.
You can make your bread more sour by using more levain in your bread when you mix. I typically use around 20% but you could up this to 25%. Also, instead of this you could leave your dough longer in the refrigerator. For example, instead of proofing in the fridge for 12 hours overnight, you could extend this to 20 hours and bake closer to the evening.
I hope that helps!
Hi Maurizio,
Thank you for your recommendation, I have just bought the book.
I cannot wait for your videos and pictures on techniques. This is what all
new-comers to bread-making need desperately, especially the videos.
Instead of writing a book, what don’t you produce a CD (or even two) on
“The techniques for sour dough bread-making”. It would be a hit as we can all learn from watching the videos. Better than just photographs. I am sure you have already considered this.
I will certainly leave my dough longer in the fridge, in the hope that they will turn a little more sour.
Thanks again for all you advice and help.
Susan
You’re very welcome. I’ve definitely given thought to making a few baking videos and hopefully those will come here sometime soon 🙂
As much as I love my baking bowl, a lovely one like yours, I think I will ferment in my calibrated container for awhile, until I get the “feel” for fermentation that you have. Thanks for the tips! Love the personal touches.
My Heath Ceramics bowl is one of my favorite things to make bread in! But yes, using a ruled container will definitely help quantify your bulk a bit easier. If I’m doing a recipe that’s completely unknown I’ll typically use my ruled Cambro. You’re welcome, thanks Margie!
Ditto the comments! Great post Maurizio.
Amazing post! Hadn’t been here in a little while and am so impressed by everything – the photography, story telling, writing, the end bread results, the site design. Can imagine how long it took you to set up and arrange all those shots. Really enjoyed the whole experience!! So good! Congrats!
Taking these photos is half the fun for me 🙂 Thanks for all the kind words, hope to hear from you again soon!
Gee I love your work! Beautiful story, beautiful bread! How do you keep that starter jar so clean? 🙂
Thank you!
It’s easier to keep the jar clean when you have a stiff starter. Each feeding you can almost pull the entire thing out with little left on the sides!
Hi again Maurizio, just planning to make this and wondered if I’ve missed something in the formula, from what I see flour adds to 95%, what makes up the remaining 5% flour content? Maybe I’ve just skipped over it too quickly or are you somehow working back to the stiff starter? Thanks:)
No, you are correct, I had a typo in the table (after all this time!). Thanks for pointing that out, it’s now fixed. I hope you like this bread, it’s so good. Happy baking!
LOL! Only noticed as I was scaling up and working out my formula! Cheers.