


I could probably pull out hundreds of gems from Hamelman’s essential reading, Bread, and each time I go back to reference something my eye catches one that strikes a chord. Attentiveness, now that is an essential thing with baking. You don’t realize just how vital it is to step back for a second and observe what you, and the dough, is doing from time to time. Does it look alive and puffy? Does it look like it has enough strength? Are you mixing to sufficient development and enough rise during bulk fermentation? In this post on country sourdough with less levain and a longer autolyse we’ll look at all of this.
First learn the basics—good mixing techniques, proper fermentation, and skillful baking. How do you learn these? By repetition and attentiveness. Make sure patience is part of your ingredient list.
Jeffrey Hamelman
Baking can be a haphazard endeavor: you can measure out the ingredients, throw them into a bowl, get your hands dirty, and watch as the magic happens later in the oven. You’ll get good bread, better than what you’d get in most grocery stores in those plastic bags for sure. But when does good bread become great bread? I believe it comes with a little time, some practice, gathered experience, attentiveness, and if you are lucky, hands-on instruction. If you’re like me and have never had formal baking training, most of these things have to come from within, from your practice & process.
When it comes down to it, baking is a personal thing. I’ve read many places and listened to many talks where bakers can be quoted saying something of the sort: “no two bakers bake alike.” Reading books on baking and flipping through many pictures of those open crumb loaves with nice dark glistening crusts, you start to tell yourself “hey I can do the same thing right from home.” Well maybe you can, maybe you can’t, but the important thing is to find your process and your method, and make bread how you like it. That’s great bread.
There are so many variables to baking it’s impossible to lay down a set of rules that, when followed, will result in the same loaf each time. It just won’t happen. The best we can do is increase the consistency of creating great bread. Every loaf won’t be the same, every crust won’t shine the same way, and every crumb structure won’t line up the same way, but we do our best to stay consistent and make the most excellent bread we can. And in the very end of things, bread is bread; it’s a staple of food that’s been around for almost as long as we have. It’s meant to provide sustenance and nourishment, not sit on the wall like art.
With all that said, I still search… I still work at my process and my technique. I always read and research. That’s part of the fun for me as a home baker; it’s a science experiment that never ends and one that makes me and others around me happy to eat the results.
In this entry, I baked upwards of 8 loaves over the past few weeks with the following process in search of that great bread. Testing, reading, experimenting and talking bread with some of you out there (hat tip to the ever-helpful Margie). All this research and experimentation has produced some of the best loaves I’ve churned out yet. The following entry catalogs my findings with increased autolyse time, decreased pre-fermented flour, and building more strength at the front of the process instead of later during bulk fermentation.
An excessive use of yeast will always be to the detriment of the finished product. Rather than giving your bread a lot of yeast and a little bit of time, reverse that and give them a little yeast and a lot of time. The results will be worth the change made.
Jeffrey Hamelman
Thoughts on increasing autolyse
As mentioned in my whole wheat post increasing your autolyse time will change the way your dough feels when you start to mix as you’ll notice it has elasticity and strength early on even before intensive mixing/kneading. It starts the gluten formation process early and begins to smooth the dough, but it also helps bread with a higher percentage of whole grain to fully hydrate before fermentation begins.
Reducing levain
When I started out baking, and you can see this in many of my beginning Tartine posts, I would typically increase the levain percentage sometimes all the way up to 25%. This was partly to compensate for my starter not having enough strength, but also because I had this idea in my head that more levain means a more open crumb. That’s not true, as it turns out. I’ve found that with only 15% levain (that’s 150g) I get just as much rise and fermentation activity with the possibility of having a more open crumb. It may mean you have to let the fermentation go just a bit longer, but it will be worth it to take your time and let your baking assistant (read: starter) leaven that dough and build up some exceptional taste.
First, if you’re brand new to baking sourdough, you might want to check out my Beginner’s Sourdough recipe, it has longer in-depth explanations on every step in the baking process!
Prepare the levain – 6:30 a.m.
Prepare the following right after you get up in the morning:
| Weight | Ingredient |
|---|---|
| 25g | Ripe starter |
| 50g | Giusto’s whole wheat flour |
| 50g | Giusto’s artisan bread flour (medium protein bread flour at 11-12% protein) |
| 90g | Water |
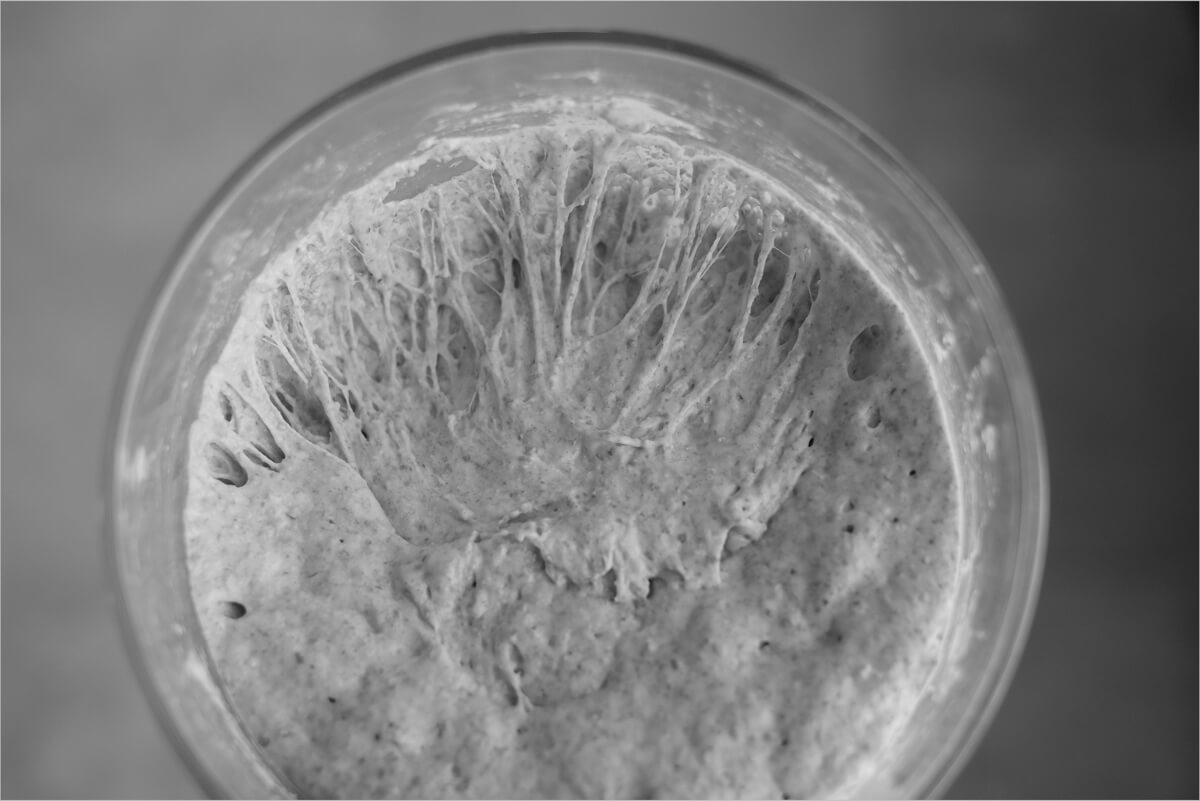
Keep it in a warm area in your kitchen for about 6 hours if your kitchen is around 78°F (26°C) if it’s a bit cooler where you are you might need to go a little longer. Watch your levain and read the signs: smell, bubbles on top, volume.
Autolyse & Mix – 9:30am
We’re going for a 3 hour autolyse for this bake. You might want to experiment with autolyse times to suit your flour and preference — I’ve found an autolyse really helps with doughs that have high whole grain percentages or high amounts of strong high protein flour. Take notice how different the flour feels when you autolyse for an extended period like 3 hours versus a short 40 or even 60-minute duration. It’s quite astonishing.
Note that this autolyse is without any levain (or salt) added to it as your levain isn’t even ready yet—it is only flour and water. We start the autolyse 3 hours before we anticipate our levain to be ready. You should be good to go doing this at 9:30 a.m. and if your levain isn’t ready at 12:30 p.m. or so no worries, keep the autolyse going until it is ready.
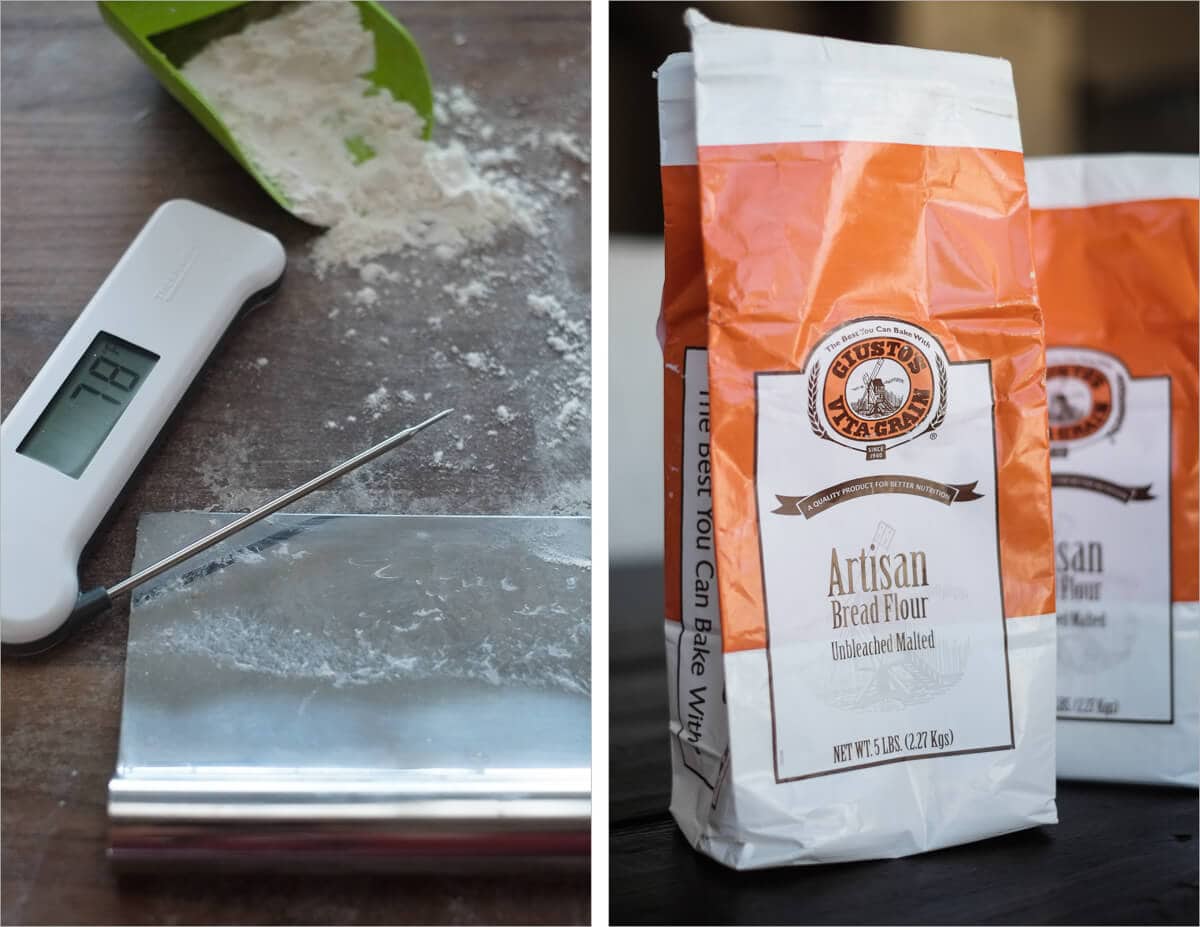
By the way, I just recently picked up a Thermapen after many days contemplating the purchase. Wow. I can’t believe I’ve been baking this long without this thing; it’s a real piece of equipment. No longer do I have to wait for the cheaper thermometer to settle down and finally arrive on a temp, this thing is instant!
Ingredients:
Gather the following:
| Weight | Ingredient | Baker’s Percentage |
|---|---|---|
| 100g | Giusto’s whole wheat flour | 10% |
| 900g | Giusto’s Artisan Bread Flour | 90% |
| 800g | Water | 80% |
| 20g | Fine sea salt | 2% |
| 150g | Ripe levain | 15% |
Perform the following for the autolyse:
- In a thick bowl add your 900g white bread flour and 100g whole wheat flour
- Add 700g of your water (the rest, 100g, is reserved until later when we add in the levain & salt after the autolyse)
- Mix these ingredients by hand until incorporated. Remember at this stage we are not looking for any gluten development really, make sure all the dry bits of flour are hydrated
- Cover with wrap and keep near your levain for 3 hours or so
Mix after your 3 hour autolyse – 12:30 p.m.
First, a little info on my new mixing experiment I alluded to earlier…
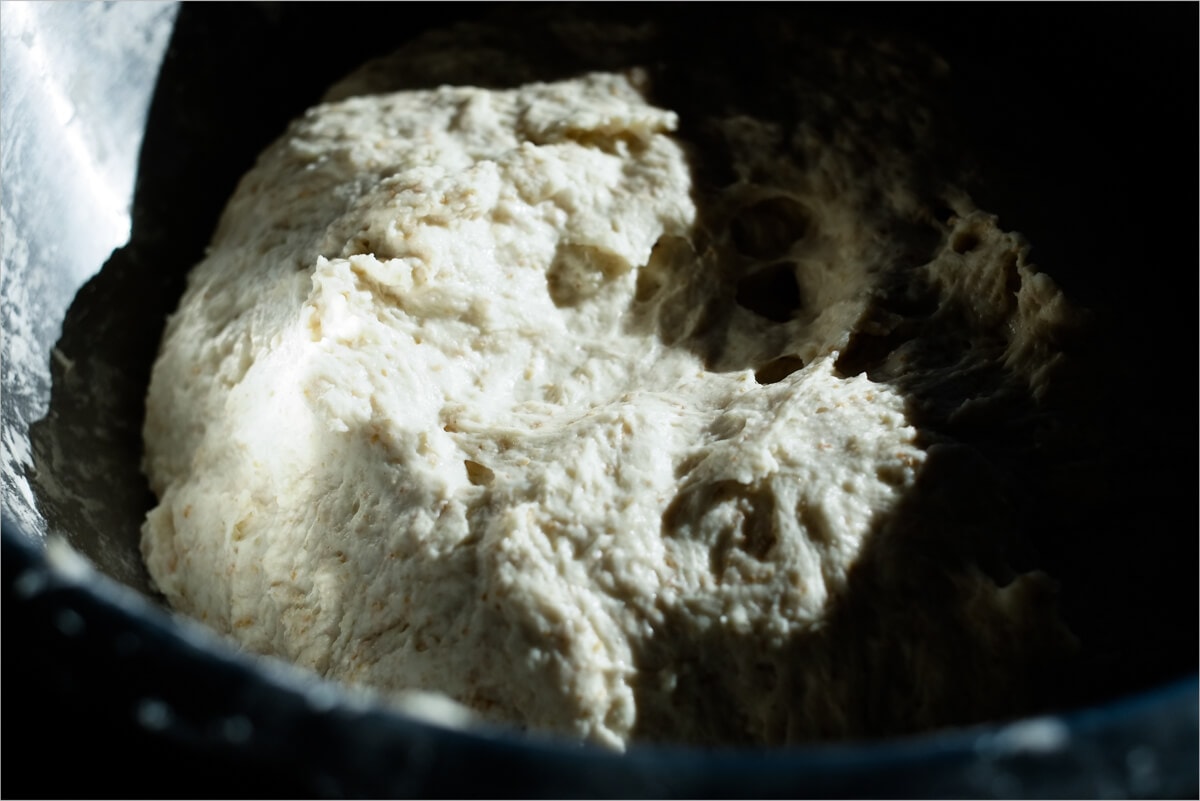
I mentioned, in the beginning, we were going to develop the dough a little bit farther at mix than usual. The goal is to develop the gluten in the dough early instead of later, just enough so it has enough strength to hold onto any gases produced during fermentation. Enough so that we only need two or three more normal sets of stretch and folds during bulk (instead of the typical 6). What does this mean for us and the dough? Well, this means we would leave our dough untouched in the bulk container for much longer near the end. My thoughts and the thoughts of many books & bakers out there is that if you’re looking for a more open crumb, you want to handle the dough even less towards the end of bulk.
After reading posts online, and discussions with a few other bakers out there, I’ve been experimenting with different mixing techniques. Lately, I’ve been successfully using the “slap and fold” method publicized by Richard Bertinet. This method is a great way to develop the gluten in your higher hydration dough. I’ve done it many times now, and it does take practice — at first, it’s tricky as the dough breaks apart, sticks to your hand, and generally acts like a savage animal. With each successive attempt, it gets easier and easier as your confidence builds. At every, well, slap and fold, the dough just starts to feel stronger and stronger, it begins to take on some cohesion and a subtle sheen on the outside. You need to work it until you get to this level, which for me was around 6 minutes in total.
If you’re not interested in trying a new mixing technique, you can do the same method as you would during stretch and folds at bulk time. Grab under the dough and fold it back over itself, then turn the bowl a bit and repeat. Keep doing this until the dough comes together and starts to feel a little bit stronger and a bit more sticky. You’ll notice how it starts to get a little harder to stretch out and fold over.
Now, let’s get started.
Add your 150g levain to the top of your dough and cut it in with your hand. It will kind of break apart but then come back together again after some mixing. Use a little of your 100g water reserve to get things going. Once this is mixed in, add your 20g salt on top and repeat. If it feels like your dough is super sloppy and breaking apart, don’t add the entire 100g reserve.
Now is the time to do your slap & fold (or your preferred mixing technique) to the point where the dough starts to show a bit of strength to it. Stay attentive and watch as you’re proceeding with the mix, the dough will change right in front of your eyes. After mixing the following were my measured temperatures:
| Final dough temperature: | 76°F (24°C) |
Bulk Fermentation – 12:40 p.m.
Transfer your dough to a clear container to be used during bulk fermentation and let rest for the first 30 minutes. After the first 30 minutes do a few sets of stretch and folds until the dough feels and looks strong enough. For me it was:
- 1:10 p.m. – Turn Set 1 (reach under with one hand and pull up and over to the other side, rotate your bowl and do this four times for a set)
- 1:40 p.m. – Turn Set 2
- 2:10 p.m. – Turn Set 3
At this point the dough started to hold its shape in my container— it was holding together a little bit in the center of the bowl, and you could see some defined lines and edges. It is possible one more set would have worked out just fine, but I decided to stop and let the dough rest untouched for the rest of the bulk step.
Pre-shape – 5:10 p.m.
Take the dough out of the container onto your work surface. Divide into two halves and lightly spin the dough in little circles across your work surface with your bench knife in one hand and your other empty hand—kind of like turning a car’s steering wheel. Let this pre-shape rest, covered with a damp towel or inverted bowl, for 20 minutes. My dough had a nice taut skin on the outside with bubbles just wanting to escape but couldn’t quite make it out of the gluten jail I’ve built for them. Sorry guys.
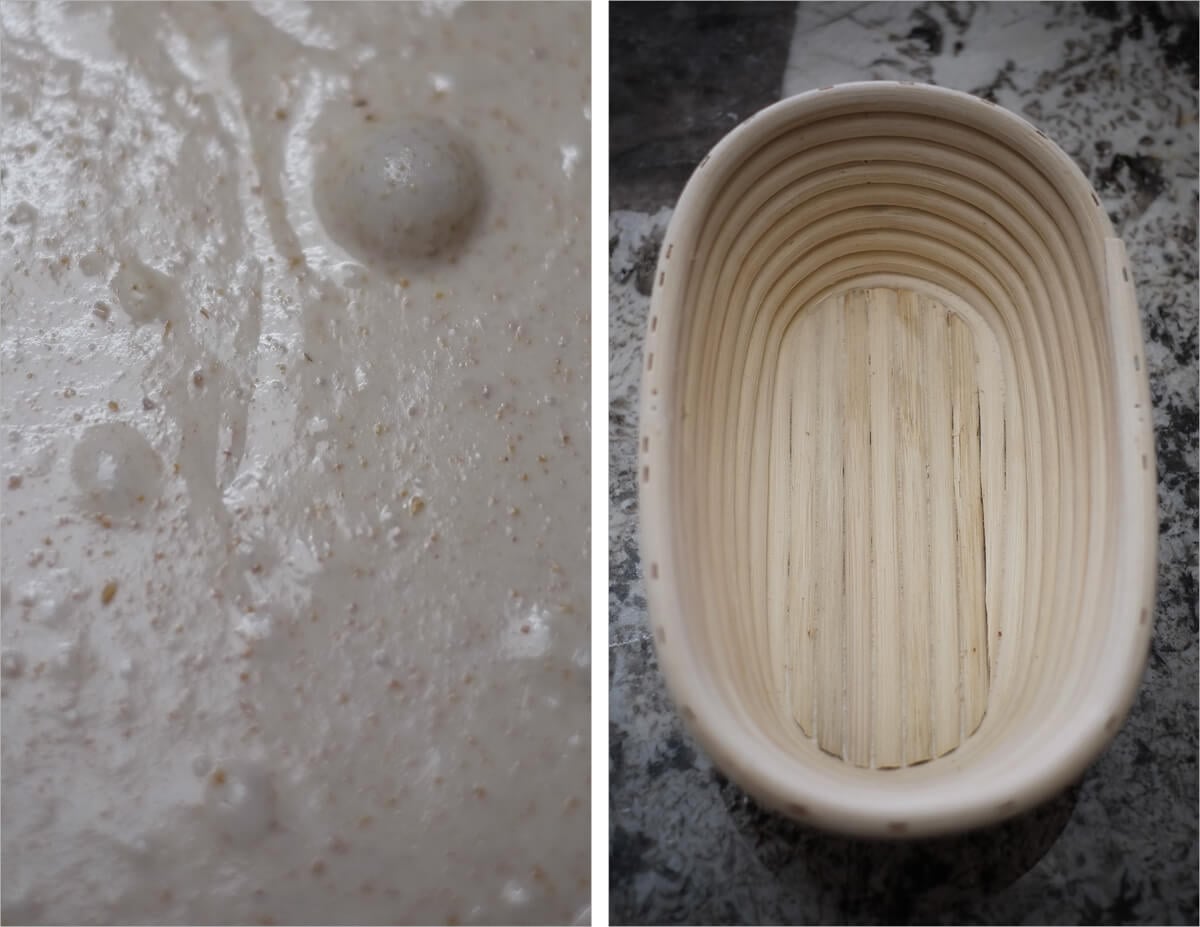
Lightly dust your proofing bannetons with white rice flour in preparation for the next step. If you don’t have bannetons, you can just use any small bowl around your kitchen.
Shape + Proof – 5:30pm
Shape each half of the dough as you’d like (I chose batards, I can’t get enough of that shape). You want a gentle and confident hand here to shape in as few touches as possible but still get that taut skin on the outside. I know that’s easier said than done, especially at this high of hydration. Practice!
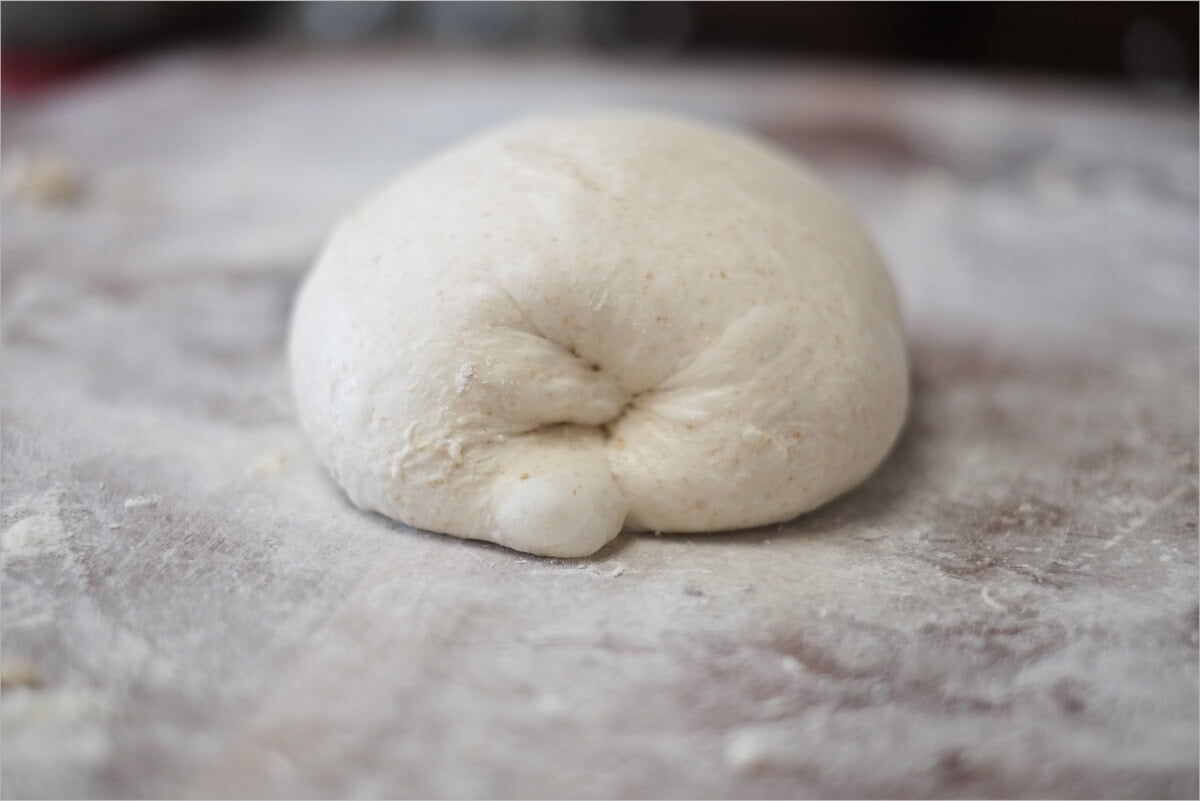
After shaping, I let my two batards rest on the counter for 2 hours at room temperature (around 76°F/24°C, a little on the warm side even). Because we’ve reduced the amount of levain from the typical 20% to 15%, we give these a little extra time here to develop flavor, gas, and even some strength. More time is always a better thing when making bread. Don’t rush things but keep an eye on your dough, you don’t want it to go to full proof otherwise you won’t get any oven spring in the morning.
After about two hours on the counter, place your baskets in plastic bags and into the fridge to proof overnight, we will bake these in the morning.
Score + Bake – 8:30am
See my post on baking with a Dutch oven (or combo cooker) for a more in-depth discussion on the baking process below.
In the morning, preheat your oven to 450°F (232°C). I usually leave the shallow side facing up on the left, and the deeper side on the right facing down but I’m also left-handed.
After one hour, take one of your baskets out of the fridge and cut a piece of parchment paper to place on top. Take your peel and then put it on top of those two and quickly invert it, so the dough is now resting on the parchment paper and the peel. If, like me, the dough had risen over my small banneton and I couldn’t rest the pizza peel on top without squishing the dough. No worries just use your hands and quickly turn the banneton over and lightly drop your dough onto the peel. Don’t squish, compact, drop, smash, bite, lean on or punch down your dough.
Score the top of the loaf with your desired pattern. If you’re following my lead with the typical “crescent” slash, make sure it’s very horizontal to the dough, move quickly, and score rather deeply.
Take out the shallow side of your Dutch oven and drag in your dough. Quickly place the pan back in the oven, cover with the deep side, and bake for 20 minutes. After 20 minutes, open the oven and take off the deep lid of the Dutch oven (set it next to the other half inside the oven). Then, bake for an additional 35 minutes or so, until the bread is to your desired doneness.
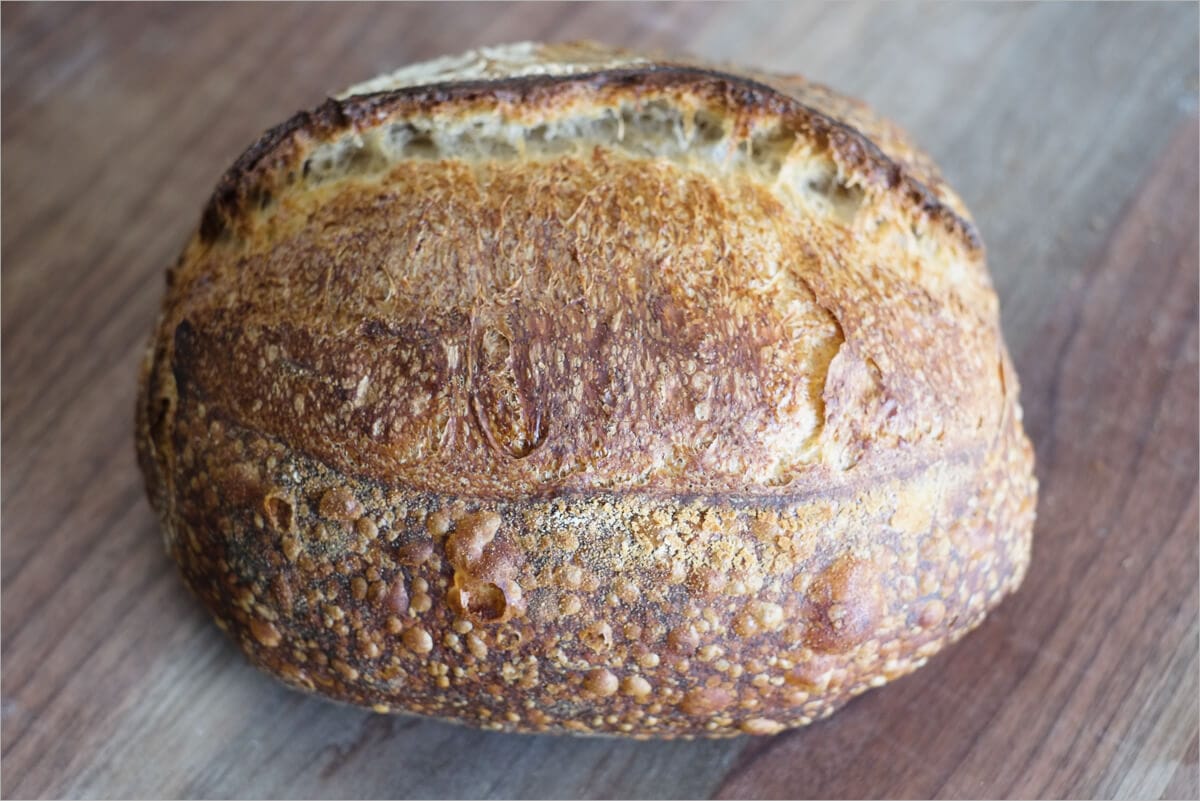
When your finished, the loaf should almost float in your hands. It will be very light, airy, and with a crackling crust.
Conclusion
I’m impressed with this Giusto’s Artisan Bread flour. I have a few more millers (some with organic flour) I’m going to try here coming soon, just for comparison and experimentation, but this is my leading favorite.
“Don’t rush your bread,” I could hear Chad Robertson or Jeffrey Hamelman tell me right now. Well, I think their whispers are correct. A long autolyse, a healthy mix, a lengthy bulk with low levain, and a long overnight proof led to a great bake. And while I don’t think a lengthy autolyse is good for every bread and every style of baking, it sure worked with this loaf.
Crust
Thin, cracks abound, crunchy and yet somehow soft. The colors were eye-catching and ran the gamut from dark at the flat areas to super light in the fissures. The bottom of the loaf was cooked well, almost too well. It might do to turn the heat down just a tad near the end, for my oven at least.
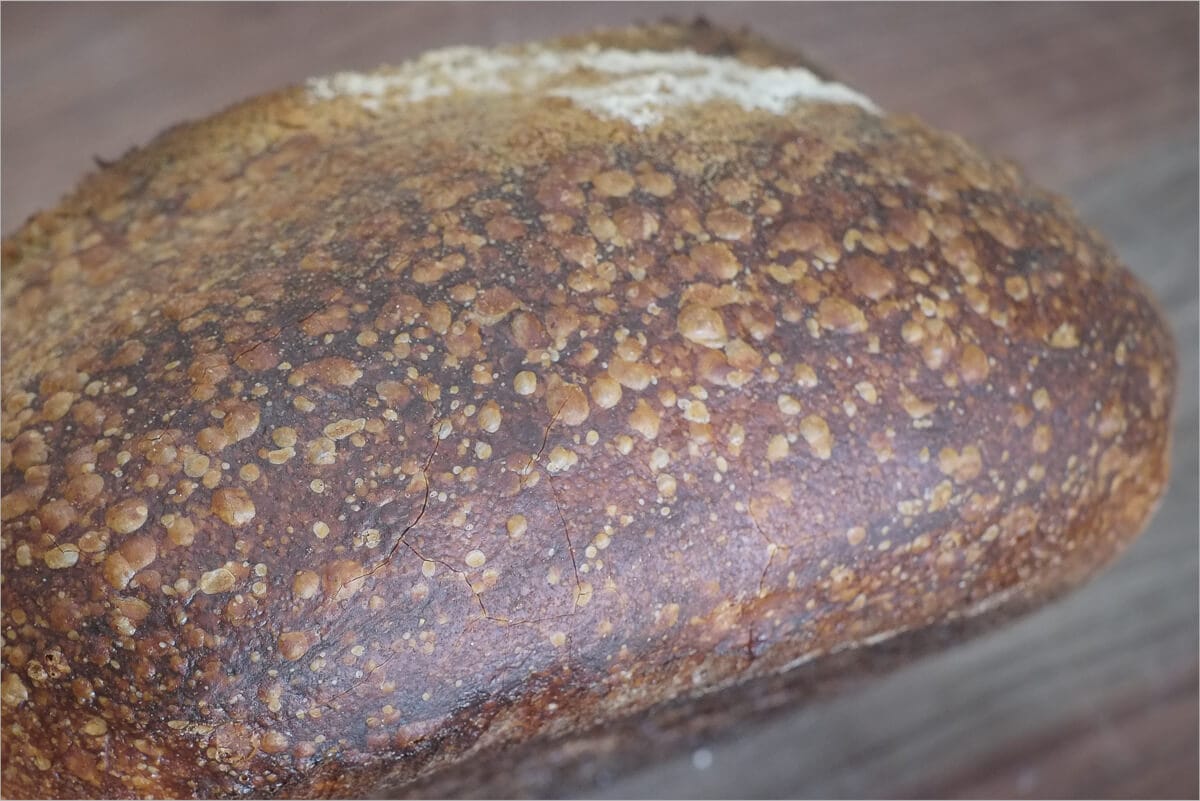
I took so many pictures of the final loaves that I couldn’t quite decide which were the best to post, and thus the abundance you see here. I can’t get over the look these–the colors, the detail–they have that texture that seems to defy my camera — almost too much detail going on.
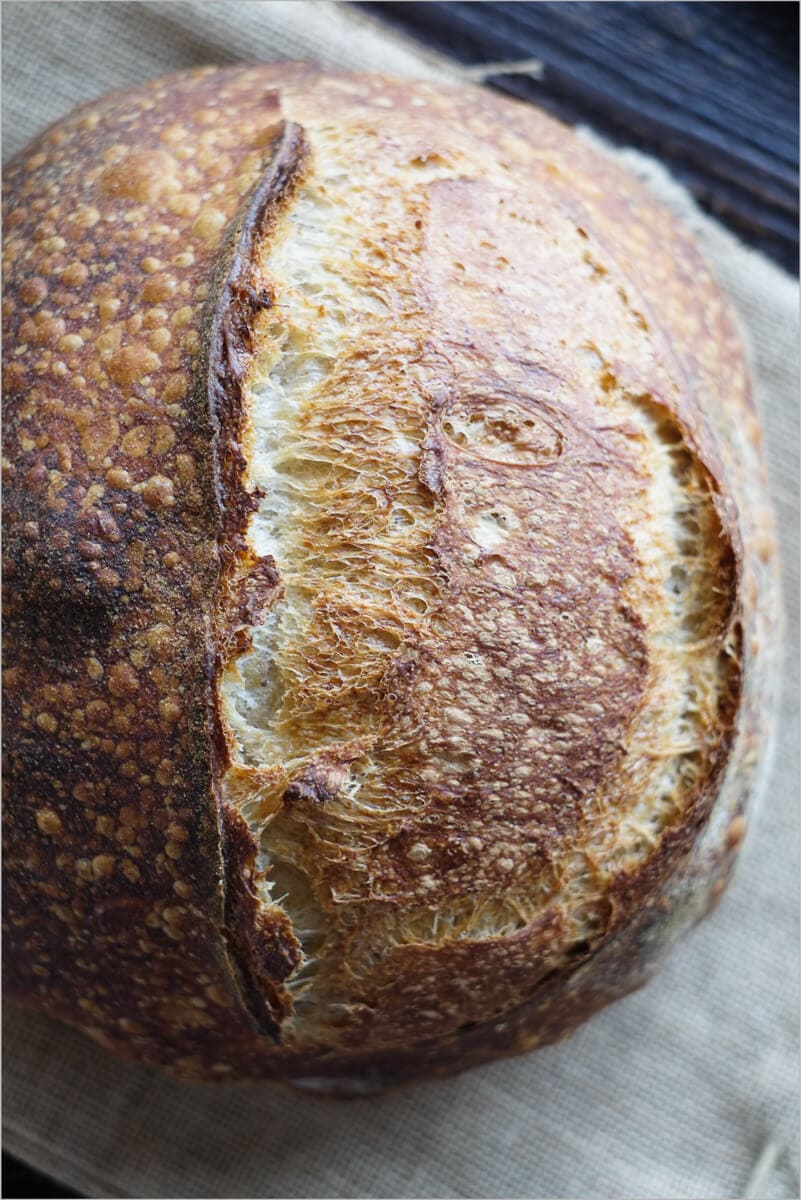
Now that’s some movement, wouldn’t you say? Awesome! It almost looks like the surface of some unexplored distant planet.
Crumb
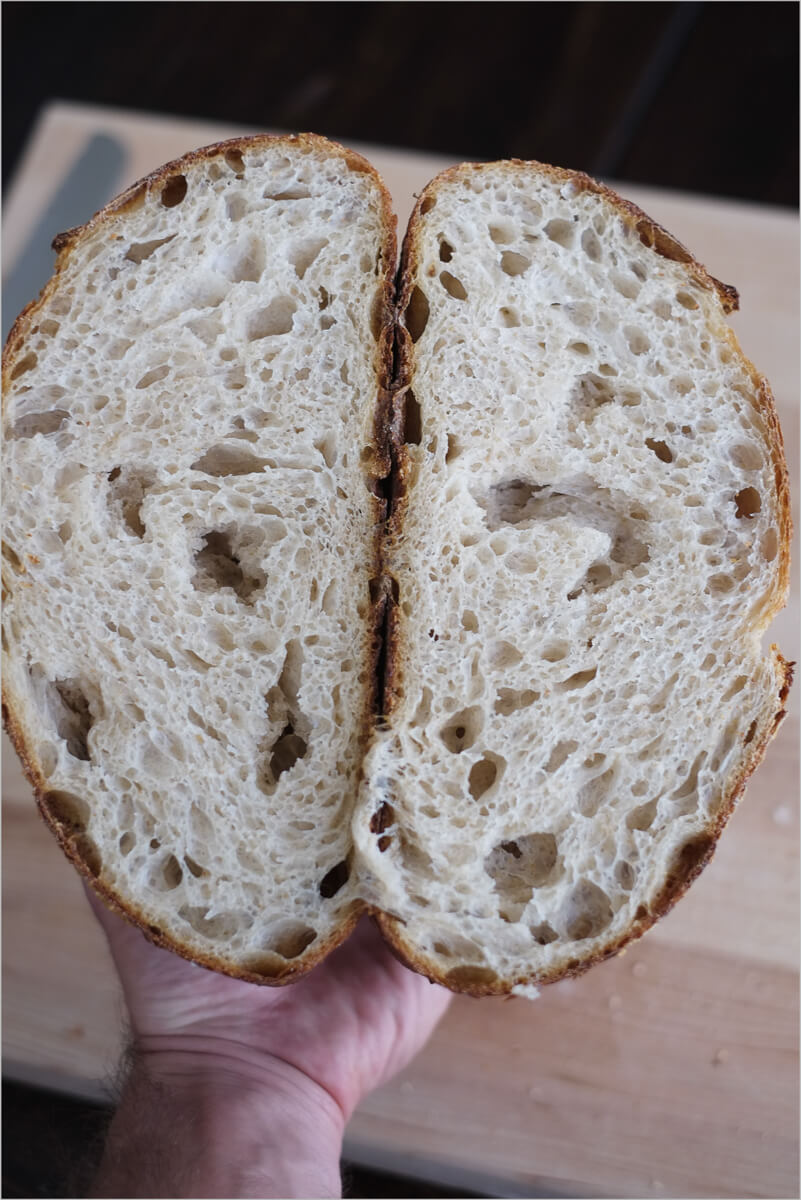
Soft, light and open. Holes all over the place: some large, some small, but very scarce are the areas that were just dense dough. I could do with some more of the large variety, and I’m confident I’ll get more of those as I practice with this method. The reduced levain and longer duration without any interaction helped open things up and create a more airy crumb than I’ve previously been able to achieve. All while keeping the sourness to an absolute minimum.
Taste
The best tasting white country loaf I’ve ever made. No doubt about it. The reduced levain, increased autolyse time and high-quality flour have helped to make these loaves some of the greatest I’ve produced. There was the subtlest of sour flavor present, so subtle that my family asked if these were even sourdough loaves. I’ve mentioned it before, but this is how I like bread.
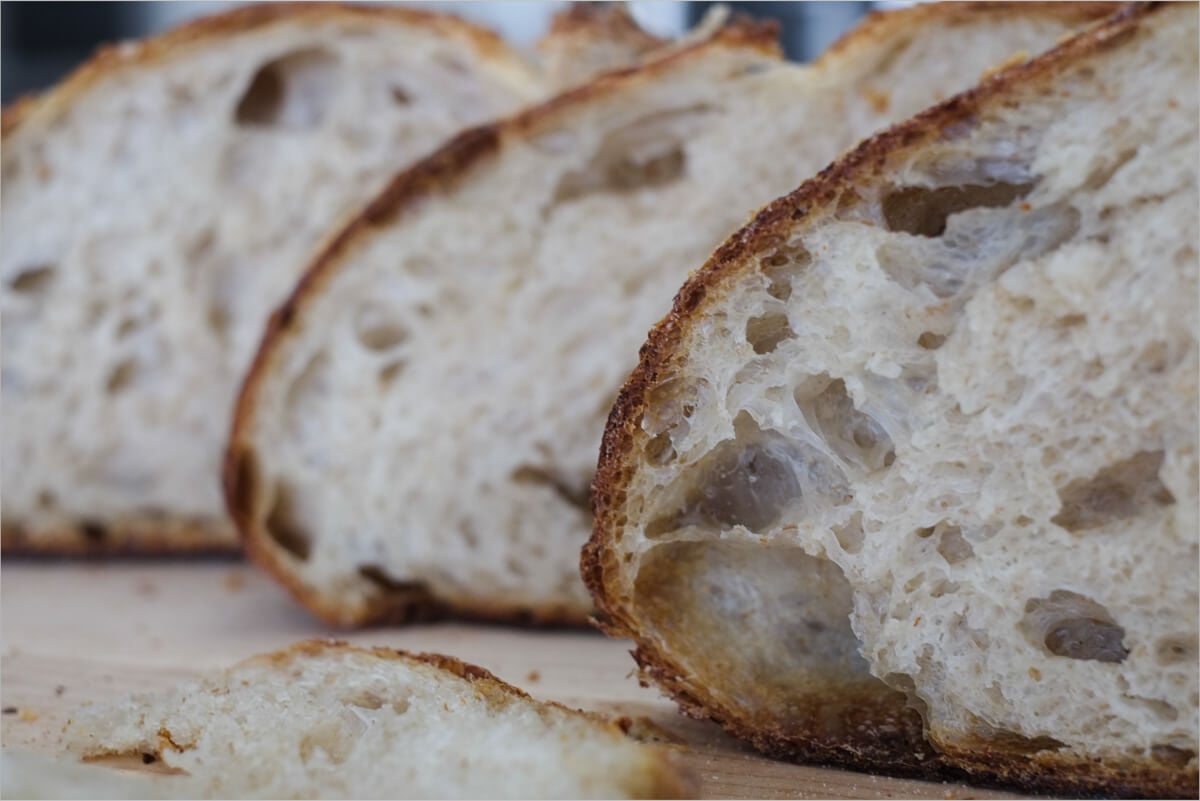
I don’t know how many loaves of bread I’ve tossed into, and pulled out of, my oven at this point but I can say to me this is great bread — what does great bread mean to you?
If you use this recipe, tag @maurizio on Instagram so I can take a look!


245 Comments
Hi Maurizio – I’ve been following your website for recipes and techniques for many bakes. I don’t do social media so please feel free to share the links to my last 2 bakes of this particular recipe. The high hydration makes the most luxurious crumb ever!
https://imgur.com/gallery/qBtAj6z
https://imgur.com/gallery/d6FwBZZ
Both of those bakes look really nice, nice work, Chris! You’re right, a little extra water really goes a long way to a super tender interior. Enjoy and thanks for sharing those!
I just made this bread. Started yesterday and finished today. I mistakenly added all the water to the autolyse step. My dough was very wet and sticky even after adding a little more flour. I worked with it, but wasn’t very confident it would turn out. After proofing in the refrigerator overnight, I still didn’t think it would turn out. It was the best loaf of sourdough bread I have ever made.
Some of my best bread has been dough I thought was a “failure” — sometimes it takes pushing the envelope to discover something new! Glad to hear that, Denise. Enjoy!
Super happy to hear that, Debbie! You’re very welcome and here’s to many more awesome bakes in the future!
What is the purpose of this:
“open the oven and take off the deep lid of the Dutch oven (set it next to the other half inside the oven)”
I mean, currently I am bakng my loaves in a heavy stockpot, but the instructions seem…. superfluous?
Ive been working on my first few loafs and have ventured into the area of using rye flours. Is there anything specific I need to modify when switching recipes from mainly white to a 50/50 white/rye split?
That will be quite a different bread — the more rye you add in to the mix the denser the end product will become. This is due to the nature of rye itself, it’s different than wheat in that it won’t for the same gluten structure to trap gasses produced during fermentation as traditional wheat. That does not mean the bread won’t be fantastic and very delicious, just expect a different structure in the result.
I’d say in general, increasing rye might also mean an increase in dough hydration and usually increased fermentation activity in the dough. Keep an eye on the dough during bulk and if it’s moving quite fast, divide as early as necessary. Next time drop the levain percentage to accommodate that.
Hi Maurizio, I am going to try your Country Sour Dough this weekend. I have had moderate success over the past 6 months since starting out on this sour dough adventure!! Your recipe looks and sounds great, and I am hoping for better outcomes with my oven spring, more open crumb and just an all around better loaf!! In your final shaping step listed above (around the 5:30 pm mark), you mention letting the batards rest on the counter for 2 hours…I just want to confirm that this is resting on the counter IN their respective bannetons and not just resting on the bench? I’m sure that is obvious to many…I just want to be super clear!! Thanks for all of your information, pictures and time that you spend sharing your craft of sour dough bread. It is greatly apppreciated. Stewart
I just completed baking (and tasting) this recipe, and I think it may be one of my best attempts since starting sourdough baking in earnest a few months ago. My only disappointment in the result was, I ended up with a load that was quite flat. The crust was great, the crumb was one of the most open I’ve ever achieved, and the flavor was delicious. I know it’s impossible to address all variables here on a forum post, but any suggestions on what might cause a low rise? The dough actually rose over my banettons during the shape and proof, but the dough was very jiggly when it came time to put it in the cloche. As soon as I put in the preheated cloche, the whole dough mass began to deflate and spread all the way to the edge of the bottom half of the cloche. Any common causes that come to mind? I did a lot of slap and fold post autolyse, and a lot of stretch and fold during bulk fermentation. I would say I did at least twice as much as what you outlined in the recipe, but I still couldn’t a tight dough; nothing near what you show in your photo in the shape + proof section above. I would say that may crumb and crust color are very close to your photos, but my rise is very disappointing. Any tips you might be able to provide would be greatly appreciated.
Thanks,
Mark
Hey, Mark! It sounds to me like your dough was over hydrated (and thus very slack, weak, but resulting in an super open interior). I’d try to dial back the water, perhaps 10%, and see how it goes next bake. That was good intuition to add more mixing time but it might have just been that your flour isn’t able to take the same hydration as outlined in my recipe — and that’s ok, it just requires some adjustment. Every flour is different!
Give that a try and see if the dough holds shape better. It should feel stronger right away, and you might not need to slap/fold as much.
I gave your guidelines a try and though I did every step before the bake at room temp, it turned into the “juiciest” sourdough leavened loaf I’ve ever eaten. Beautiful springy crumb, fresh and perfect in flavor. I have never autolysed that long before, but I think it produces exceptional qualities in the crumb.
Ciao Maurizio,
My autolyse lasts usually 1-1,5 hour,but after reading tartine-bread.blogspot.com I was surprised to find out that Chad Robertson autolyse was 8 hours placed on a high shelf where its warmer.It seems that warm temp. makes the dough more extensible (I didnt know that).
After 8 hours as you also say that the dough might slacken out too much and I suppose smells ripe and sour.
I would like your opinion on the benefits (if there are any )of such a long autolyse.
Grazie paisa’.
How long is too long for the autolyse? I like making the leavin before work friday morning, then coming home and mixing, bulk fermenting, folding, and placing in the bannetons (in the fridge) overnight. Sadly, I feel as though I get home too late for there to be enough time in the bulk ferment. My theory is to try mixing everything (except salt and leavin) before work so that the autolyse would happen at the same time the leavin was building. Have you had any experience with this? It would be roughly 8-10 hour autolyse. Maybe I could throw it in the fridge? Interested to hear your thoughts on the topic. Thanks!
Thanks for this post. Am trying a longer autolyse as I write this. I am a stroke survivor who has found time to bake, and I am truly happy to have come to your site. Thank you so much.
You’re very welcome, Julius! Glad to have you along, baking at home sure is a wonderful thing. Happy baking!
Just some info to share with everyone: I have been baking the 1000g flour/800g water for a few months. With the cold weather arriving I have been doing a long bulk ferment, at least 12 hours at around 50-55 degrees.
I had a hunch I was over proofing as my last few batches have been dense – decent oven pop but not a very open crumb. This time I did not proof the dough in the fridge after shaping – baked it right away.
Result – best batch since the summer. Great oven pop with a nice open crumb. However – weaker sour taste than I would have liked – perhaps due to the elimination of the fridge proof? Anyway, if you can do the bulk ferment at a cool temp it might be worth the experiment.
Thanks for that update! You’re right about the lack of sourness and taste complexity: the elimination of the cold proof will reduce the amount of organic acids produced in the dough (which means a “cleaner” flavor with less sourness). I also find that the cold proof helps improve the color of my crust.
Still, a same-day loaf of sourdough is super delicious, it just results in a different flavor profile — which is pretty awesome if you think about it.
Cheers!
Hey there-
Very informative article. Really appreciate it. I am just starting to try and wrap my head around the sourdough/levain technique so forgive me if this is a stupid question (or if you have answered it already).
In your recipe you have 1000g of flour and 800g of water plus the 150g of leavin. Why is the flour and water from the last prep of the levain not counted towards the overall recipe? I think I have seen some recipes where the amount of flour and water in the levain is accounted for to equal that final quantity of 1000g. (Hopefully that makes sense). Again, just trying to wrap my head around all of this-not questioning your method at all.
Thanks!
Thanks, Nick! That’s correct, technically the flour and water in the levain should be counted toward the total dough calculation — I didn’t account for that when I wrote this article so long ago because that’s how I learned. Since then, and in more recent posts here, I do account for this water and flour and include it in my tables.
Sorry about the confusion!
Maurizio
Great job on your website. Information is engaging and well presented. Descriptions, copy, images. All done well.
Over the weekend, worked on this recipe with great success. In the past it has been “hit or miss” results for this recipe, Country Sourdough. I originally thought that using less levain will reduce the desired effects, open crumb, strength and lift to “The Perfect Loaf”. Used your information with a few tweaks as needed and loaf came out picture perfect and tastes amazing. Just wanted to say a quick thanks.
Thanks so much Dave, I really appreciate that! Glad to hear this recipe has worked out well for ya. That’s one reason why I posted this: it seems to have a counter intuitive feel when reading, but when you actually work through it the results are pretty fantastic. Thanks for the update and happy baking!
Good Afternoon,
I don’t often write comments about anything but, I had to write and say I baked The Country Sourdough with less Levain this morning after a long and lazy prep yesterday.
I have been to many tutorials on how to make Sourdough, I have been baking for many many years but nothing has come near the deliciousness of this bread.
It didn’t rise as much as I would have liked but, who gives a fig? it’s fabulous. What made you experiment with the reduced Levain and longer Autolyse?
I didn’t do the slap and fold I just did the up and over, I was a little worried that I had not stretched it enough.
I needn’t have worried, the taste is perfect.
I can’t wait until my husband tries it, heavenly.
Thank you.
Hello, Ann! So, so glad to hear this recipe worked out well for you! No worries about the rise — taste is king. Plus, there’s always something to work on in each loaf, that’s part of the process (and what keeps me obsessed!).
I had thought about experimenting with reducing the levain for quite a while before writing this post thinking that my dough might have benefitted from longer fermentation time with a smaller starting percentage instead of rushing the dough. Increase the autolyse time also helps slacken the dough some, and with higher protein flour this helps quite a bit.
Happy baking, Ann!
Hi Maurizo, Having just seen my 2 baking results this morning Im absolutely delighted & I just wanted to compliment & thank you for this amazing sourdough recipe & very well thought out and informative website . I’ve only really got into the wonders of bread baking & most particularly sourdough in the last 3 months so Im a beginner but an ambitious and tenacious one ! Its the schedule & precise instructions that are so on the money with regard to the outcome at every single stage which , given the fact Ive tried quiet a few books & other blogs /websites with varying degrees of success , yours is head and shoulders above them all !!! thanks again
Thanks, Damian! I really appreciate that and I’m happy to hear your bakes have turned out so well. There sure are a lot of moving pieces when it comes to baking sourdough and I hoped to help others with my website when I created it so many years ago. Glad to hear this is happening!
Thanks again and happy baking 🙂
Hey Maurizio! I’m looking to make this loaf with 100% white flour (except for what is in my levain.. which is 50/50 white/ww). I’m doing this as the first loaf in a sort of experiment for a friend who has some digestive issues when it comes to bread. Any suggestions or changes you’d make to the process since I’ll be using all white flour? Thanks in advance.
Hey, Rebecca! You shouldn’t have an issue changing to all white. I’d suggest holding back a little bit more of the water, say 50g, during mixing and then add that in if it looks like the dough can take it. Whole grains can take on more water than a more white flour, so the dough may not need all the water outlined in my recipe above.
Have fun, it should work out just fine. Happy baking!
Mario,
I am not getting the raised ears and open crumb I would like. I am using 70/30 white/wwheat and 82-3% hydration. My starter is good and the ferment and shaping seem fine, I use a 2 hour room temp proof then a 12 hour fridge: to bake, a 500 oven and a dutch oven. Any thoughts would be appreciated. thanks…nicholas
I meant Maurizio
This could be due to many things in the process! With limited information I’m kind of guessing but it could be that your loaves are over proofed. There are a few indicators your dough could be going over: sluggish rise in the oven, the score on top of the dough might not open with a nice “ear” and instead just kind of fuse together, the interior will have lots of small holes and perhaps one or two large ones near the top (but no dense areas of unfermented flour), and finally the loaf could be a little on the sour side.
Hello Maurizio,
Thankyou so much for all the tips and encouragement you share as we all have a go at perfecting our sourdough breads. I have just for the third time tried the long autolyse/ less levain approach and quite pleased. Great taste as I am not a fan of too sour and the crumb is almost there. I have a great cross section if that is the right term of irregular but evenly dispersed holes except for one area. The sides and base of the loaf spring beautifully and after the bread has cooled and one touches this part of the bread it is tender. In comparison, to a region directly under where I scored the bread, out to lets say about 1/2 inch to an inch each side where it becomes dense and that has no tender rebound with tight small holes.
The bread had a 12 hour overnight retard/proof in the fridge so I don’t think I have over or under proofed. The only two reasons I have come up with is maybe my shaping technique or the heat transfer to the interior of the loaf has not quite enough oomph. The loaf is 1kg in dough weight.
What do you think about my theory? Am I on the right path?
Thanks for your time Maurizio and the very helpful encouraging website that you share.
Cheers Melissa
Melissa, you’re very welcome! Really happy to hear your bakes have gone so well. I too find that area to be one of the hardest spots to open up (also I find the bottom middle can get tight occasionally). Usually I attribute the tightness to shaping or scoring. More often than not on the loaves I don’t quite hit the mark when shaping I’ll see this type of tight center.
It’s possible it’s a heat related issue but not likely. As long as you’re preheating your oven hot enough and heat is fairly evenly distributed I’d first look at other causes before thinking it’s a heat problem.
I hope this helps in some way!
Thank you for your feedback Maurizio! I believe you are right because I just made bread this morning and for this bake I divided my loaves into 600gm weights and have the same issue. My theory being that trying a smaller dough weight and even baking one loaf at a time in my home oven could maybe allow more heat to get in to the interior….. yet that same tightness and dense region is still there despite a super hot oven and really allowing the stone to recover and heat up fully before the next loaf. So it comes back to my shaping and scoring. Such a process of discovery hey!
Thanks for your time Maurizio and for sharing your observations too.
Have a lovely day
Melissa
Baking is always a process of discovery! It seems like there’s never an end to the things one can learn — which is why I keep doing it 🙂 You’re very welcome, have a great weekend!
Hi Again Maurizio….I got it this time…it was the shaping!!
Right on, glad to hear that!!
Thank you for the great post! I got so excited about this method of creating sourdough bread that I started immediately. It’s now midnight and I am waiting to do the last of the folds before the rest then proofing. Could you tell me what steps have enough flexibility that I can leave for eight hours (work!) and come back to finish things off? As it stands, It seems that I can only create my sourdough on a weekend. At what point in this process can I comfortably leave the bread for a while? Thanks!
Right on! Really the best place to leave the dough unattended for that duration would be during the cold proof in the fridge. It’s also possible to do a “cold bulk fermentation” where you keep the dough in the fridge during bulk and then take it out to warm up, preshape and shape. Then you’d proof the dough on the counter for a few hours and bake. I’m working on a post about this and should have it up sometime soon!
Also, you might want to check out my Weekend Baking Schedule guide where I talk about fitting all this into a busy work schedule!
Curious, why do you leave the dutch oven lid inside the oven after taking it off?
You can take it out, no problem at all. I leave it in there because it’s additional, heated mass that can help retain and radiate heat in the oven in a (somewhat small) attempt to prevent heat loss when the door is opened.
Hi Maurizio, I’m a bit confused as to how the levain became 150g when the starter is 25g, the flours 100g and the water 90g. Which makes 215g. I don’t really get bakers math so I apologize in advance if I sound ignorant. I’d like to apply you 15% recommendation to the recipe I’ve been using. Could you kindly clarify please? Thank you!!!
The levain build is actually more than you need for the recipe. You make a little more and only end up using 150g (or 15% of the flour weight) in the final dough mix. If you want you can build the levain so it makes exactly what’s called for in the dough mix (150g) and no more, just try to keep the same percentages of everything when making the levain.
Hope that helps!
Ah, I see! Thank you! I tried this recipe, substituting 20% of the white flour with brown rice flour and the bread came out beautifully. Thanks again!
That’s great! You bet, enjoy 🙂
Thanks for explaining this. I was confused by the levain quantity as well.
Hi Maurizio – been baking bread for 2 months now with 98% of my info coming from your site. Thanks! For those of you at a high altitude (I am at 8,000ft just outside of Taos), I have had the most consistent results with the “high hydration” recipe. I go 90/10 white/wheat instead of 70/30 and I bake at 500 degrees covered for 20min and then 15min uncovered in a dutch oven. I also bake in a bread pan using a second one as a cover. I have been proofing in glass bowls using cheese cloth impregnated w.flour between the dough and the glass. Always get great oven spring. For more “sour” I do a long cold bulk fermentation. 10-12 hours at about 50 degrees and then a shorter proof in the fridge (6-8 hrs).
Right on! I’m down in Albuquerque so not quite as high as you guys up in Taos, but I do find I usually have to adjust my baking times/temps from recipes online.
I’ve been playing with a proof schedule much like yours and I’ve been getting some nice results! That proof at 50F helps develop the dough further but slows the process down quite a bit. I’ll definitely be posting on this when I get a good schedule going.
Thanks for the comments and I hope you’re enjoying our awesome Spring weather right (when it’s not windy)!
Made this country loaf today and it tastes great! I was able to achieve the most oven spring I have ever gotten however when I cut the loaf open there was one giant bubble running straight through the middle, from the bottom to the top of the loaf. Any idea what may have caused this?
Super glad to hear that, Megan! A large bubble like that usually means the dough was underproofed, and further, incredible oven spring in the oven can also indicate this. Give the dough enough time during bulk fermentation (and try to keep that dough around 78ºF if possible) and also make sure to perform a full proof as explained here. Keep pushing that proof time each bake if you notice the dough still has the same interior and explosive rise. The longer you let the dough ferment the less the rise in the oven so we want to find that sweet spot between too much rise (under proof) and no rise (over proof).
Hope that helps!
Would it work if I prepared the levain and autolyse the night before? I think it will work best with timing for a Saturday morning start. Would it cause fermentation in the autolyse too much or sourness?
You can definitely do this but I prefer to keep my autolyse to only a few hours or so, overnight works but the dough might be very extensible and it might require additional strengthening via mixing or stretch/folds. I would recommend building your levain the night before (with less mature sourdough starter mixed in so it takes longer to mature) and then do the autolyse right when you wake up. Then, after an hour or however long you want to autolyse, you should be good to go. It might take a little practice to get the timing correct so your levain is ready when your dough is done with autolyse.
Note that since the autolyse stage doesn’t have any levain or starter mixed in fermentation will not begin (unless it spontaneously ferments which is very much not typical in a home setting).
I just shaped it and it was very sticky and it doesn’t have a very nice skin. What do you think I did wrong?
I just cut it open and it tastes great but isn’t very tall. It got a good oven proof but it just so flat when I put it in the oven that even with the oven proof it still isn’t very tall.
It could be that the dough was over hydrated if it felt like it just was overly sticky and didnt come together. I would try reducing hydration just a bit, say 5-10%, next try and see if that helps. Over hydrating can definitely cause lackluster rise in the oven! Also, make sure you perform a complete bulk fermentation and look for the signs I show and talk about throughout my site!
Do you have to bake it with a Dutch oven or can you use the steam technique.
You can use either a Dutch oven or my steaming technique!
Nice post Maurizio.
I am going to try some of these techniques on a stiff starter. I’ve been trying to get a nice rise with a 45% hydro starter (madre), but I found that rise fell shorter than I expected because I didn’t perform a proper bulk, which was silly not to do. These sourdoughs and natural levains really require time to properly develop and I often try to perform 1 hour rises with my levain (as shortcuts) as I would with commercial powdered yeast.
Thank you! Yes, you definitely need to take the time necessary for your dough to develop properly, there are no shortcuts. With a stiff levain/starter I notice fermentation slows just a bit so it’s even more critical to let your levain have sufficient time with the dough. Happy baking and thanks for the message!
Thanks for the response. I was really happy I tried this. I tried extending my autolyse to 3 hours and proofing for 5 hours. I was really happy with the results.
I have a question: When a recipe calls for butter or olive oil in the bread mix, do you mix that in the dough mix from the start, or do you usually add oil/butter during autolyse or proof time? I always feel if I am doing something wrong when I have oil and or butter in my dough mix during proofing time, because it’s a little more challenging to handle by hand for folds and even sometimes shaping.
Excellent, glad to hear that!
I don’t have a lot of experience with enriched dough but when I have made brioche in the past I always add the oil/butter in at the beginning. You really need to work that into the dough, especially butter, so doing it upfront is almost necessary. That’s my experience, at least! After adding the butter in you definitely need to try and keep that dough on the cooler side so it doesn’t melt out…
What could you do to make it more sour?
A few things:
– Use more whole grains in the mix instead of the white flour (try a little rye flour). The more the whole grains the more acidity produced by beneficial bacteria.
– Let the dough ferment longer in the fridge for its final proof (try 1-4 more hours). The longer the fermentation time the more acidity generated.
– Use a higher levain percentage in your mix than I use here (just keep an eye on the dough so it doesn’t overproof)
Thanks a lot can’t wait to see how it turns out.
I have recently also adjusted my starter feed time to the morning, before I saw your blog incidentally, and found much better results due to the lower likely hood of over proofing.
I was contemplating doing an autolyse exactly as you’ve detailed here – I’m glad it worked out with such positive results for you! I’m definitely going to extend mine from 1 hour to 3 thanks to your experiences. I’m so surprised that a reduced levain produces such strong results as well – may experiment with that as you’ve done here too.
You’ve definitely got a new follower in me now though!!
Super glad to hear all this Akhil, thanks for the comments and message! Nowadays I almost always do a 2 hour autolyse, but sometimes more or less depending on the flour used. I find using the least amount of levain the better, in most cases!
Happy baking and have fun with the experiments!
I just put my loaves into the fridge tonight at 7 pm … my question is what is the… min… max… times that I can leave the bread in the fridge for the final rise
Paul — it depends! There are a lot of factors that go into how long your dough can proof in the fridge. I think 12 hours is a good benchmark but you can go up and down there a few hours typically without too much harm. I find that some flour allows a longer final proof, it’s able to withstand fermentation much better and you’ll still get a good rise even if you push it to 16 hours or more. See how your loaves bake up after 12 hours and if it looks like they are “erupting” when you bake them (dramatic rise with fissures all over) then your dough might be under proofed and that’s a sign you could let them go longer. If rise is sluggish and where you score your dough is more of a “spreading” instead of nice spring then you should pull back a few hours and see if that helps.
I hope that helps!
here are a couple of good youtubes on pre shaping and final shaping
https://www.youtube.com/watch?v=vEG1BjWroT0
and
https://www.youtube.com/watch?v=J9pAObqHzXI&t=2778s at about 33:50
Thanks for sharing these, Paul! They are both great, really big fan of Mac at the SFBI.
I am having GREAT success making this bread! Not as pretty as yours but the flavor is outta site good… I would like to adjust the twang and am not sure where to do it… I would like just a little LESS twang…
1) Do I adjust the bulk ferment to a shorter time
2) Adjust the fridge time to a shorter time
3) Use less start
4) Use a younger start
5) use a wetter or stiffer starter
Thanks
That’s great! To reduce sourness you can:
1) Do I adjust the bulk ferment to a shorter time — this won’t be the most effective way to reduce sourness.
2) Adjust the fridge time to a shorter time — yes, this is one of my preferred methods, within reason. Your dough still needs proper fermentation, but reducing proof time can reduce sourness.
3) Use less start — yes, you can reduce levain in your mix but again, you still need to ensure your bread ferments enough.
4) Use a younger start — yes, this will transfer less acidity to your dough mix and should be less sour.
5) use a wetter or stiffer starter — no, I haven’t notice any effect on sourness with this, in my experience.
Another option is to use less whole grains as these will add acidity (due to the higher acidity produced through fermenting such grains).
Hope that helps!
I came to this post from the one where you discussed having to make altitude-related tweaks to your recipe in order to get good oven spring. Would you say that this recipe works well at altitude, as well? Or would it be better to stick with the other? I’m having good flavor and crust, but my oven spring is lacking here in Denver.
Yes, all the recipes here at my site will work well at high altitude (especially my bake times and temperatures). I live down in Albuquerque, NM and we are about 5,000ft. up as well. Everything works out! If you’re not getting good spring in the oven have you tried proofing a little less? I notice if I proof too long, longer than the dough can handle, my oven spring will suffer as a result. It could also be your dough doesn’t have enough tension on the outside created during shape (you’ll see this clearly if your dough spreads right when you load it into the oven). Hope that helps!
thank you so much for this post! I have been practicing a batard shaping technique similar to the “stitching” method and was curious if you do the final shaping then place directly into baskets or if they are simply on the counter when you say “After shaping, I let my two batards rest on the counter for 2 hours at room temperature”. I have seen several videos of professional bakers shaping in this method then setting the forms aside, not going directly into baskets. Thanks again!
You’re welcome, Joe! After I shape them into batards I might let them sit for a few minutes on the bench but generally they are straight into their baskets to hold their shape (and then either left on the counter to proof a bit more or straight to the fridge). I think some professional bakers let the shaped dough sit on the counter just as a matter of their process: they are shaping potentially hundreds of loaves and it might make sense to shape them all, then basket them all (my guess!). Hope that helps Joe, happy baking!