

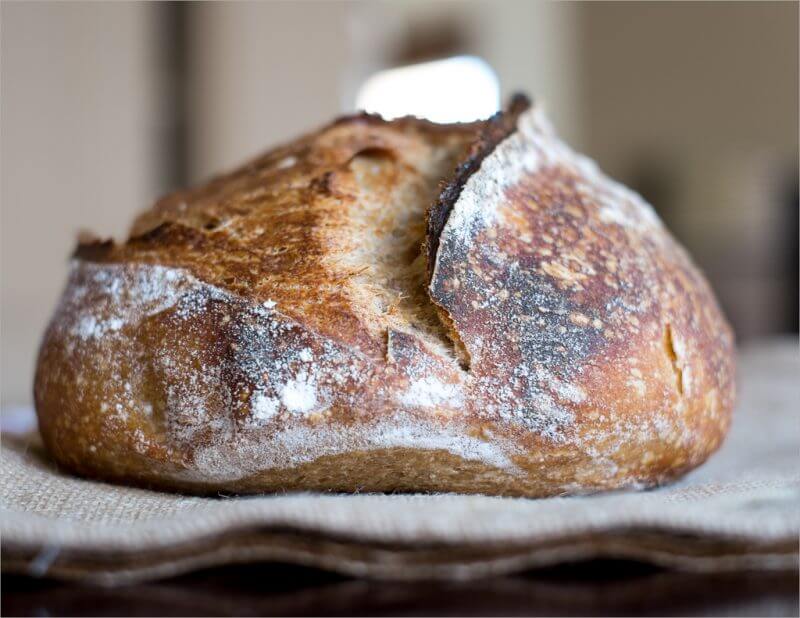
Sometimes when you are trying to get good at something, and really excel, you have to start over and re-evaluate everything, a return to basics if you will. I decided to re-read the instructive sections in Tartine and bake my next loaf as if it were my first.
That said, I couldn’t completely start from scratch of course, but I’ve left out a lot of “experiments” I’ve done recently and went straight to the basic ingredients. One thing I kept from my experiments is my percentage of increased levain: 25%. This is only 5% higher than Tartine’s formula but due to the cold weather we’ve been having a little extra levain helps offset this somewhat. If you’re interested in reading more about dough temperature and how important it is, head over and read through my guide on The Importance of Dough Temperature.
Prepare the leaven – 11:30 p.m.
The night before, when your sourdough starter is at a nice and ripe stage, mix the following and set out on the counter overnight.
- 25g ripe sourdough starter (again, here I’ve increased the leaven by 5g over the Tartine formula)
- 70g all-purpose flour
- 70g whole wheat flour
- 140g water
Mix the flour and water, autolyse – 9:00 a.m.
In the morning, check on your leaven and see how it has done overnight. It should have visible bubbles on the top and as you pull a bit back and take a sniff, it should smell a little like vinegar. Good, we’re ready to go.
If you’re unsure about the difference between a starter and a levain, see my guide post!
Ingredients:
- 250g (25%) levain
- 800g (80%) white bread flour
- 200g (20%) whole wheat bread flour
- 20g (2%) salt
- 700g and 50g water (75%) in reserve for the next step
Method:
- Add 250g leaven to your large mixing bowl
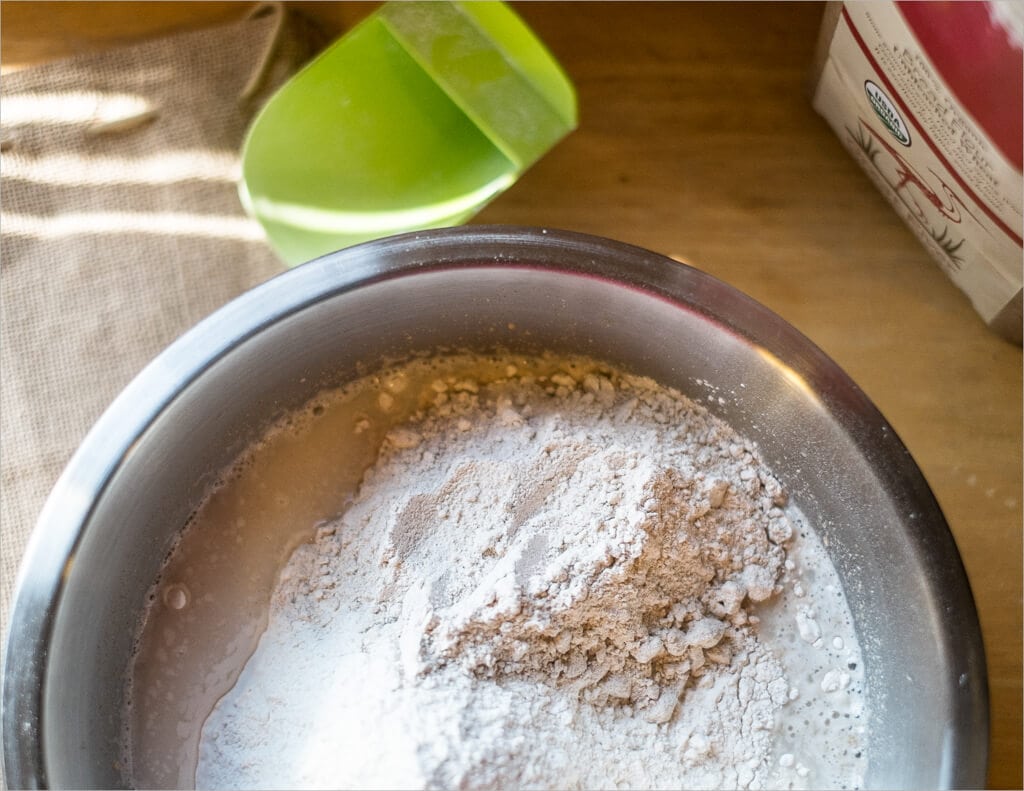
- Pour in 700g water at about 80°F and mix with your hands until the leaven is completely dissolved
- Add 800g white flour and 200g whole wheat flour and mix with your hand until all the dry bits of flour are gone
- Cover your bowl with a towel and let autolyse for 30 minutes
- After 30 minutes, add 20g salt to the dough and slowly pour the remaining 50g of 80ºF water on top. Squeeze the dough with your hand to incorporate the salt throughout
- Now reach your hand under the dough and pull the side up and over onto itself. Continue to do this as you spin the bowl; grab, pull, and push. Do this until the dough comes together and becomes super sticky and comes together
- Transfer your dough to your plastic or glass container, set a timer for 30 minutes
Bulk Fermentation – 10:00 a.m.
During the bulk fermentation step you want to do six sets of stretch and folds, spaced out 30 minutes apart. The first four sets should be vigorous: you really want to grab the dough from the bottom of the container, pull it up high, and then tuck it in on the other side.
- 10:00 a.m. – stretch & fold set 1 (a set consists of 4 folds, one at each direction: north, south, east, and west)
- 10:30 a.m. – stretch & fold set 2
- 11:00 a.m. – stretch & fold set 3
- 11:30 a.m. – stretch & fold set 4
- 12:00 p.m. – stretch & fold set 5
- 12:30 p.m. – stretch & fold set 6
- 12:30 p.m. – 2:00 p.m. – rest on counter untouched
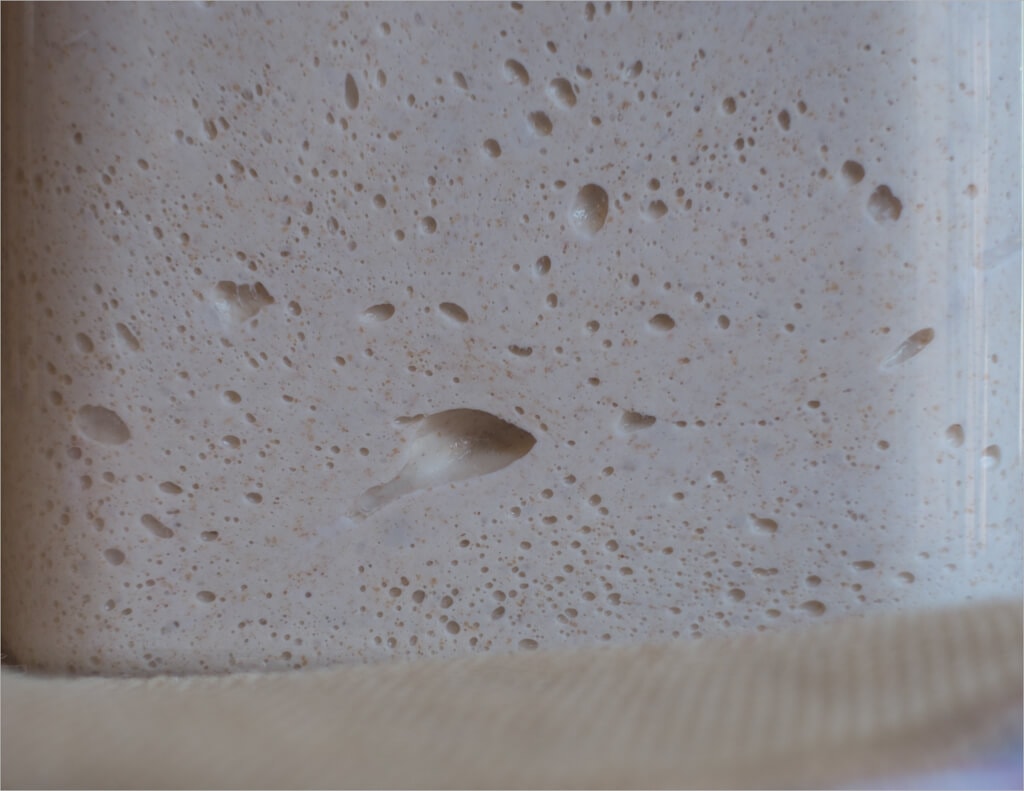
Step 7 above was needed as I noticed my dough was just not developing fast enough. If the temperature in your kitchen is on the lower end (low 70°F’s) it might take a bit longer. You can tell when your dough is ready when it’s risen about 30% and you see little air bubbles throughout. Another test I do is to lift the container, tilt it to the side, and see if the dough releases easily from the sides of the container. If it does, then it indicates it’s developed enough and is strong.
This dough felt nice and strong at around 2:00 p.m., I could see it come off the sides of the container easily and it had risen to the top almost touching my plastic cover. Here you can see the pockets of fermentation activity throughout:
Pre-shape – 2:05 p.m.
Take the dough out of the container onto your unfloured work surface and sprinkler some flour on top before dividing. Divide the mass into two equal halves and flour the top of each half. Flip one half over using your dough knife and your hand, then gently bend the 4 sides of the dough from under to the top. Using the knife flip the mass so the new seam is on the counter and spin it a few times to create a bit of tension. Set a timer for 35 minutes and let it bench rest.
Shape – 2:40 p.m.
The resting dough should have spread out some on the counter. Flour the top of one of the boules and flip it over with your lightly floured hand and dough knife. Take the part of the dough that’s closest to you and fold it up and over in half. Take the part that’s to the right, stretch it out as far as it will stretch, and fold it up and to the left. Repeat with the left side and the side of the dough farthest from you. Then take the edge that’s closest to you, pull it up and over again towards the back. When doing this last move you will lift the entire dough up and over until the seam side is now down on your work surface.
Spin the dough using your two hands to shape into a boule. As you slightly pick up the dough and spin it, the bottom snags the unfloured work surface and creates tension. I do this several times to create a very taught surface on the top of the boule sometimes small air bubbles will be visible.
Proof – 2:55 p.m.
Place towels into small mixing bowls, or bannetons, and dust with white rice flour. These baskets will hold the dough as they proof in the fridge overnight.
For one of these boules I decided to try out a rectangular banneton I’ve had sitting in my cupboard for some time. I essentially placed the boule in the banneton like usual, but because of the shape, it ended up forming more of an elongated shape (a batard) than a pure round boule. Place both of the baskets into the fridge for an overnight proof, a chance to strengthen and build taste complexity.
Score + Bake – 7:30 a.m.
Gather your tools (see my Tools Page for links to these items):
- Blade for scoring dough before baking
- Parchment paper
- Pizza peel
- Baking stone
- Oven mitts
- Lodge Combo Cooker
In the morning get your oven ready: place your pizza stone in your oven at the middle position and preheat it to 450°F (230°C).
Take one of your loaves out of the fridge, cut a piece of parchment paper and place on top of the basket. I then place a the pizza peel on top of the parchment paper (and basket) and invert the whole thing quickly to get the dough out of the bowl and onto the paper and peel.
Get your razor blade out and score the top of the loaf to allow the bread to expand while rising in the oven. For the rectangular loaf I did a single slash down the middle starting from the very top to the bottom. You want to try to score at a very horizontal angle to the dough, I’d say around 40°.
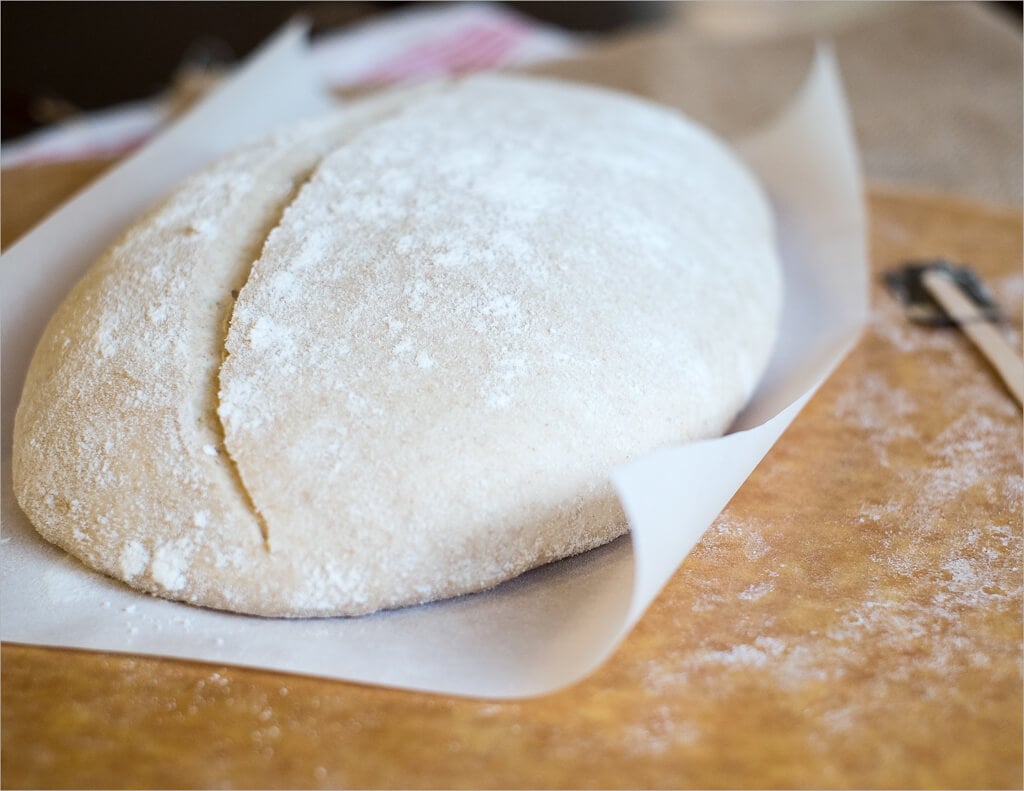
Place the dough into the combo cooker and bake for 20 minutes. I made this loaf just barely small enough to fit in my combo cooker. I got worried after I took this out of the basket and saw how much it had risen. Whew.
After baking for 20 minutes, open the oven and remove the top of the combo cooker (be extremely careful here to not burn yourself) and bake for an additional 35 minutes. These times reflect my constant tinkering, trying to get the crust to darken but not quite burn. I’ve noticed one thing is pretty consistent with new bakers, they always start by undercooking loaves and as they continue to bake they get darker, darker, and darker still.
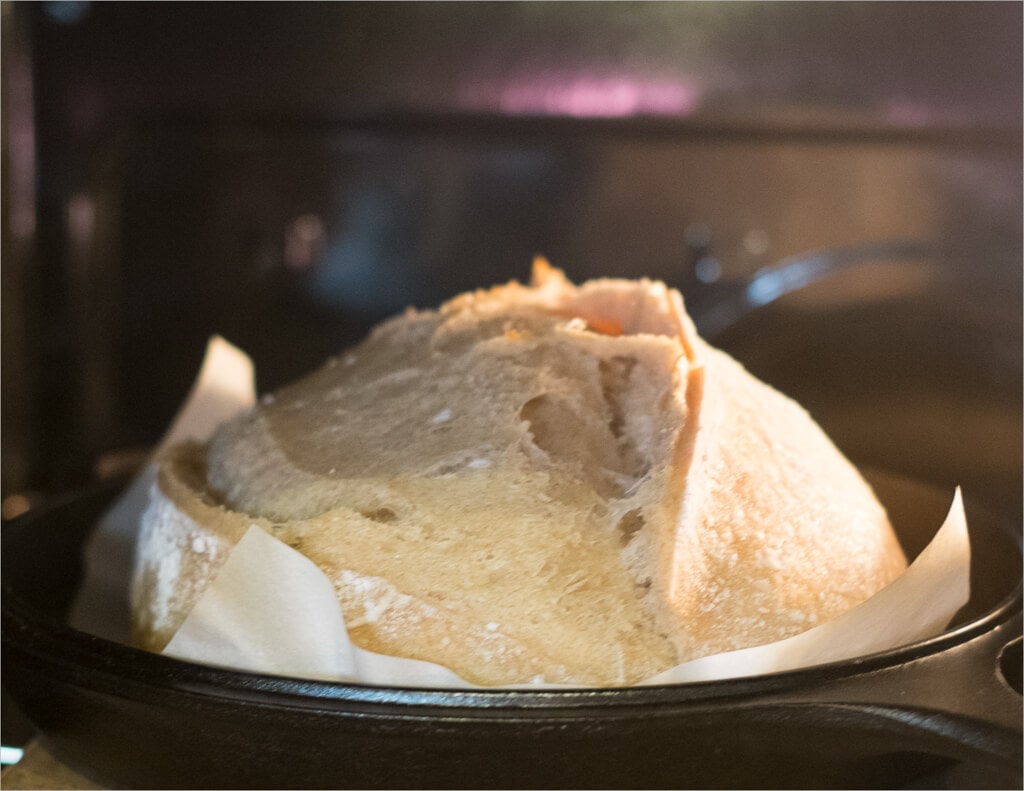
There’s just something exciting about taking the lid off your dutch oven and finding excellent oven spring underneath.
Conclusion
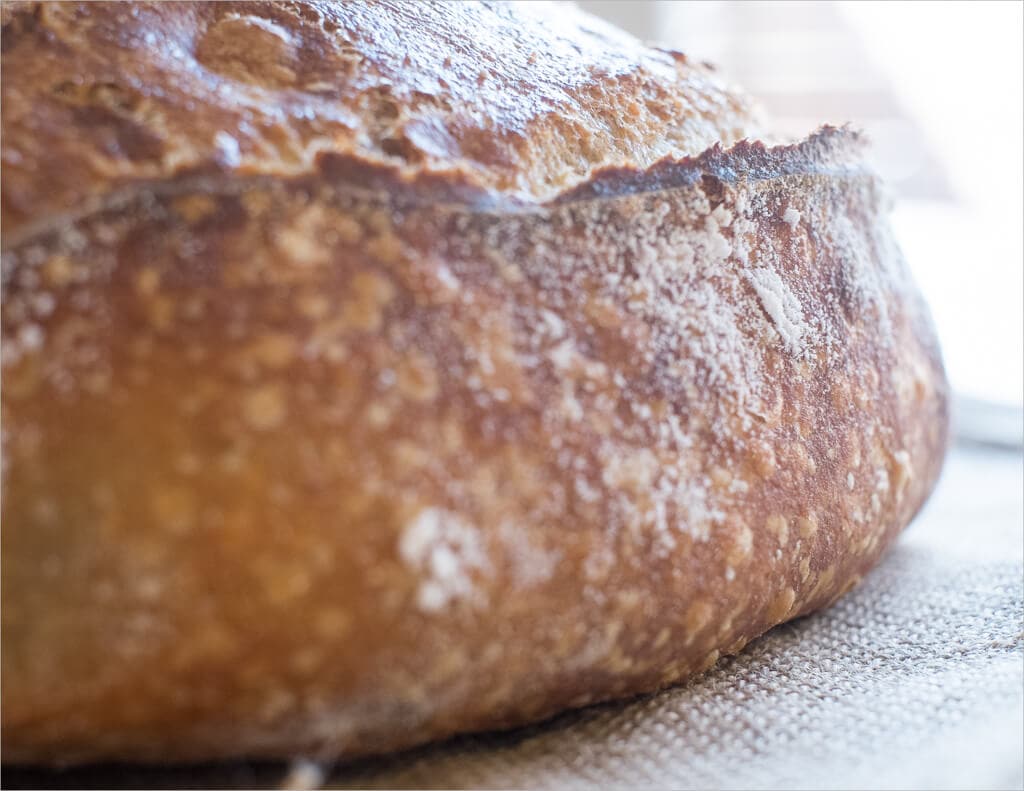
Crust
Super thin, shatters on every bite. The color is perfect, a bit of scorching on the top with light colors inside the fissure. You can also see below I’ve managed to obtain some blistering on the outside — excellent.
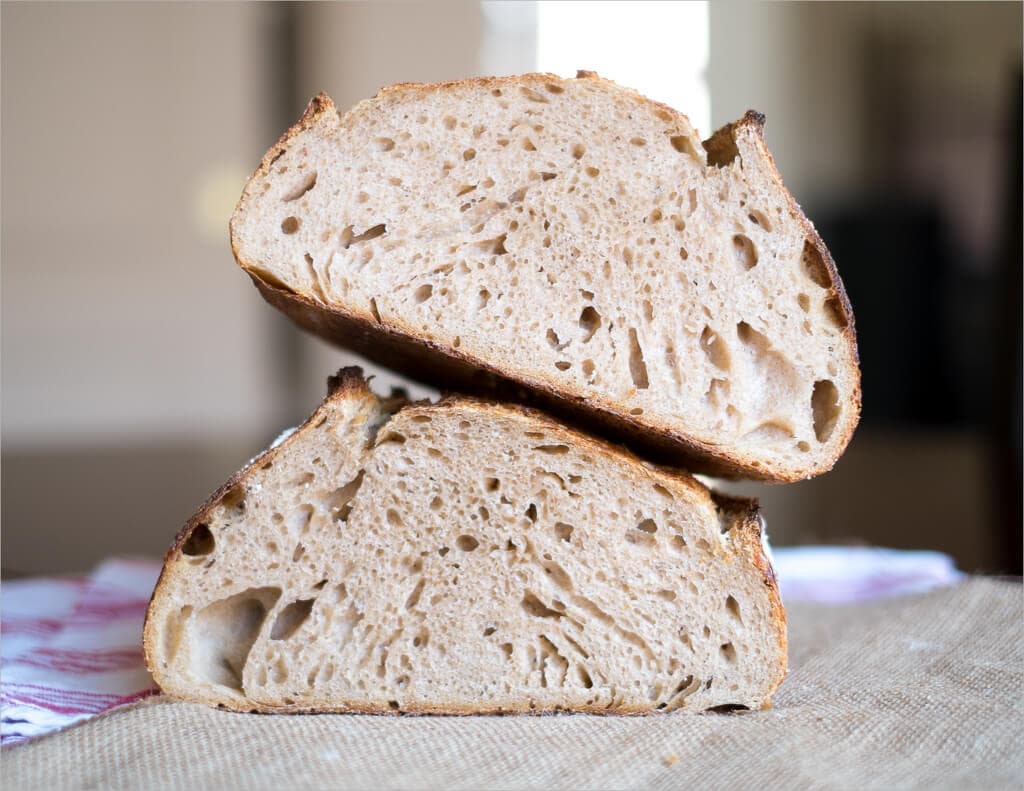
Crumb
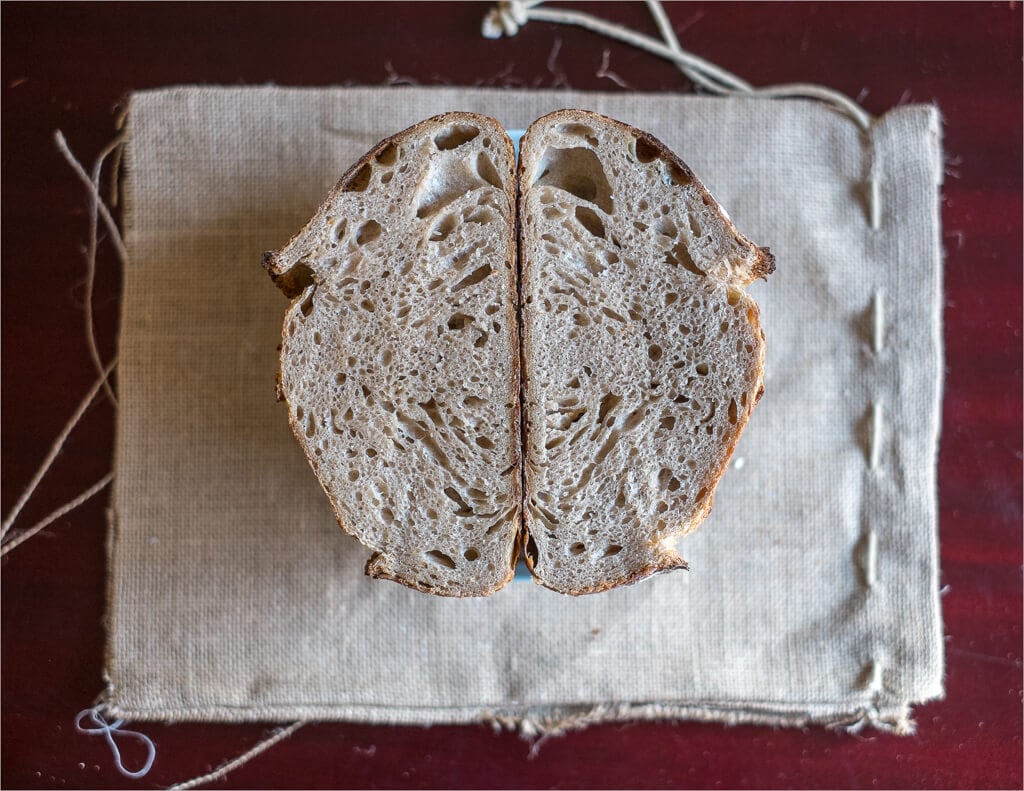
Nice and airy! Finally, some great fermentation activity inside and the upward movement is very welcome indeed. The bread rose up nice and high and I just love the little “hook” on top where the score ran down the center.
Taste
A slight hint of sour, just enough to let you know this is a sourdough loaf. The overnight proof added some excellent complexity without overpowering the rest of the flavor of the loaf.
A return to basics was one of the most enlightening things I’ve done recently with my baking. I’ve realized that there aren’t any secret tricks to coaxing your bread into rising high with an open crumb, you simply need to trust your experience, intuition, and method.
Now that you’ve got this bake down, have a look at a newer approach where I modify the amount of levain used, tweak the autolyse time, and get some insanely amazing results! I like to call it my sourdough with less levain and longer autolyse. Still no “tricks” here, just tweaking parameters to help get that bread a little higher and a little more open.
Buon appetito!
If you use this recipe, tag @maurizio on Instagram so I can take a look!


120 Comments
Why does bread shrink after baking?
As the crumb and crust cool, they'll contract. I love the sound of this 🙂
Hi,
Thank you so much for all this wonderful information! If you’re not going to proof it over night, can you bake it just after the second proof?
Hello,
Thank you so much for all this wonderful information. If you are not going to proof overnight, can you bake just after the second shaping?
Yes but let proof 1-3 hours until ready. It should pass the poke test:
https://slimlife.fit/how-to-use-the-dough-poke-test/%3C/a%3E%3C/p%3E
Hi Maurizio! I’m just curious in this recipe how often you feed your leaven? I feed mine daily in the evening, but not sure that it peaks fully by the time I wake up. What does your starter look like when you use it in this recipe? Has it started to fall? Is it on the verge of falling? Thanks!
Answers to all your questions are on my starter feeding post, here!
Maurizio, I’m wondering why the “Tartine recipes” which you are referencing here seem to be the only ones I’ve seen with the levain added for the autolyse. I’ve checked all my other books and just wondered why Chad adds it ..unless it’s to speed up the process for home baker ? I’ve been baking bread for 2 years and I find your recipes, videos and now your book to be my “go to “ source. Thank you. (I have the Joe Ortiz’ book The Village Baker from 20+ yrs ago when I saw him give a demonstration, never imagining I’d ever get into baking my own bread) Of course I’m now hooked.
Could be many reasons why they do that in their recipes, but my feeling is it’s to make things easier and quicker for the home baker. It’s not “wrong” to do so, you just need to keep that additional fermentation time in mind. That said, I rarely add the preferment to my autolyse time, as you likely know.
Ahh, thanks so much, I’m glad my help here and in my cookbook has helped! Glad to have you along, Suzanne 🙂
Hi Maurizio, I have been working on technique and proportions a lot the few loaves [6] i’ve made so far. In the end, i have a great starter i have been feeding for the past two months. it rises strongly when i feed it twice a day, but when i make my levain [with all purpose flour [unbleached] and whole wheat], my levain takes a long time to rise compared to my starter i feed daily. i have a bread proofer with the temp set at 78 degrees and after 5 hours the levain doesn’t rise as strong as my starter. when i get to bulk fermenting my dough does not rise that much after the 5 hours of bulk ferment or it rises very slowly. like maybe a couple millimeters after 5 or 6 hours. should i be using more starter or less white flour in my mix. any tips you have would be great.
Hi Maurizio, thanks for the incredible tips and detailed steps. I have been baking SD for almost a year. Somehow, I have been getting slight gummy loaves no matter what flour I used. Recently changed to strong canadian bread flour but still gumminess in it. I understand that underproofed loaf will produce gummy loaf but i have overproofed loaf that is also gummy. I did 1 SnF, 1 Lamination, 2 coil folds within 3 hrs, rest untouch for 1,5hrs -2 hrs depending on temp. Shape and retard overnight in fridge for 12-14 hrs under 4C. Hydration is between 75%-78%. The alveoli is not as open but the crumb is still airy and soft. What have could I have done wrong?
Tartine is “fermentolyse” for 40 minutes not 30.
Yes, slight time difference there but same idea!
Wrong. Tartine is 25 to 40 minutes. So I’d say “30” minutes is well within that range.
One thing I found is that when my starter gets very vinegary, the pH drops to the point that the gluten reaction cannot complete and never develops, or during the bulk fermentation the acid production lowers the pH and the gluten you had developed breaks down, never to be rebuilt (adding bicarbonate to raise the pH doesn’t allow the gluten to reform). What I have had success with is raising the pH in the starter, before mixing all the ingredients. While I no longer have access to a microbiology lab where I can find out what bacteria populate my starter, I’m fairly certain that having a bacteria that produces more acetic acid than lactic acid can push the pH too low for gluten preservation. When my starter gets too acidic, I go back to my “fridge” starter and start my “countertop” starter over again.
Yes, it’s definitely key to keep that pH high. Frequent and timely refreshments keep that in check!
I think i have a problem with my sourdough, the only bubbles are on the top of the mixture. I think its ruined. It. Im wondering if i should start over. Please help!
It’s likely just fine, Pat! Feed it once a day on a regular schedule for a few days. Try and try to keep it warm and use a little rye flour for each feeding as well. Once you see it get back to strength, modify it to suit your schedule according to my starter maintenance guide. Let me know how it’s going!
Hi Maurizio, thank you for this exercise in baking. As I progress through each bake, I am learning more and more. At first, the advice to practice – practice held minimum weight because I thought that I would just be practicing incorrect technique. But what I am finding is that sheer practice reveals technique, and that development towards better loaves becomes self evident through trial and error. I have been baking from your site and working through Ken Forkish’s book at the same time, applying techniques as I learn them. Tartine arrived last week and I am reading it cover to cover. So, you can understand why this recipe was so appropriate. Your explanations provided so much clarity, especially the shaping at bench rest and then the shaping prior to placing in the baskets for final proofing. This bake also provided me with great clarity on the texture of the levain. I now have a sense of the texture, and can manage it in my fingers. It really has a more substantial bulk to it that I didn’t realize before. It was always just too loose before – perhaps this was liquid levain!
I do have a question here related to this bake. Why do you heat the pizza stone if you are using a combo cooker?
You’re very welcome, Shirley! You’re absolutely right and put it very well: practice reveals technique. This is so true with baking. I used to use a pizza stone with my combo cooker but have since found it not necessary—you’re absolutely right, no need for the pizza stone at all! I hope your baking is going well, keep at it and you’ll notice how proficient you’ll become in no time. Happy baking!
Thank you for your website it is an incredible resource!
I have a question please: what is the best way to trouble shoot what goes wrong? My doughs always flatten out when I arrive at pre-shaping and shaping. Not sure if it’s gluten structure or over-proofing, what should i try?
I tried this recipe and am new to sourdough. Haven’t completed a really successful loaf yet, on the 9th attempt right now.
I followed this recipe to minute detail, including the water temperature. My dough was over-fermented (I think) unfortunately when it came to pre-shaping and shaping, as there wasn’t any gluten structure left to hold the shape. That is my guess at least because when I tried to re-knead the dough (to turn it maybe into a focaccia) the dough didn’t gain any strength anymore, so my guess is the yeast already digested the gluten? Any advise where I can go from here?
Also, do you sell anything I can buy to support your website?
Thanks and best!
I was having the same issue a while back and after tasting my starter, I thought it was quite acidic. Short of forking out a couple hundred dollars on a good pH meter, I tried litmus paper first and found my starter was about a pH of 3-4. It was hard to decide because of the thickness of the starter.
Anyway, I added a 1/4 teaspoon of Sodium Bicarbonate (baking soda) and tried using that starter with the “Back to Basics” recipe and ended up with an easy to handle and well structured gluten that made a beautifully risen loaf.
Once your pH has reacted with the gluten enzymes, that reaction is irreversible, and no amount of Sodium Bicarbonate will undue the damage, so the pH must be corrected before the starter is added.
I’ve also added baking soda to the flour, but too much will alter the much sought after flavor from the sourdough starter’s flora. Still a lesson in progress!
Hi Maurizio – Just curious why this loaf is viewed as more challenging that the beginner’s loaf, given that the beginner’s has a 78% hydration and this one is only 75%? Is it just in the mixing/levain (this one has you had mix the water and levain while the other adds the levain after the autolyse)? Thanks! Lorraine
This was written back in 2013, what was once challenging is now not so much 🙂
Hi Maurizio! Is there ever a situation, in which the shaped dough would not go directly from refrigerator to oven? I’m trying to gauge how I would know it has proofed enough in the refrigerator overnight.
If I uncover the dough in the morning and it’s dense, lifeless, not well risen. You won’t see a lot of rise in the fridge overnight, but it should feel airy and light. It’s pretty rare for me not to bake straight from the fridge since I typically push bulk fermentation quite far, but it does happen. Just the other day I was doing an enriched sandwich loaf and it really didn’t look sufficiently light and risen to me, I let it sit out another 30 minutes and that fixed it right up. Baking is always an exercise in flexibility!
Hi Maurizio – I have recently begun the sourdough journey, baking successfully a few loaves now (including your beginner’s loaf -thanks!). So I have been looking at a few of your other bread recipes to decide what’s next. I have both white bread flour and whole wheat flour, but not whole wheat bread flour, and as all flour is hard to come by right now, I am wondering how or what to alter the recipes accordingly. I have had trouble finding what the difference to baking is between the two bread flours. Any clarification would be helpful; otherwise I might have to settle on your recently posted 100% AP flour recipe. Thanks!
My sourdough bread with AP flour is a great recipe to be sure! But the difference between whole wheat bread flour and bread flour is that the WW BF is whole grain flour, meaning it has all the bran and germ present in the flour whereas the BF is white flour (most bran/germ sifted out). The WW BF can be used anywhere you see whole wheat here at my site, which is all over the place!