


If you had told me many years ago that I could make enticingly crunchy, tender, and healthy bread at home with only a few elemental ingredients, I would not have believed you.
I would have claimed that baking bread requires a professional mixer, a specialized oven, and a list of ingredients so long your eyes start to glaze over. But now I perform this alchemy daily in my home kitchen: transforming three basic ingredients into wholesome sourdough bread. How does one begin the journey of making naturally leavened bread at home? It starts with, well, making a sourdough starter from scratch.
A healthy sourdough starter means great bread.
Despite all the mysticism and lore about creating the concoction, a sourdough starter is merely a naturally fermenting mixture of flour and water. Add water to dry flour, let it sit on the counter for a few days, and you’ll see nature weave life into a once lifeless lump: bubbles will appear and the mixture will rise.
This natural fermentation can be harnessed and (once it is stable) controlled to produce bread so flavorful and healthy that it’s hard to go back to anything else.
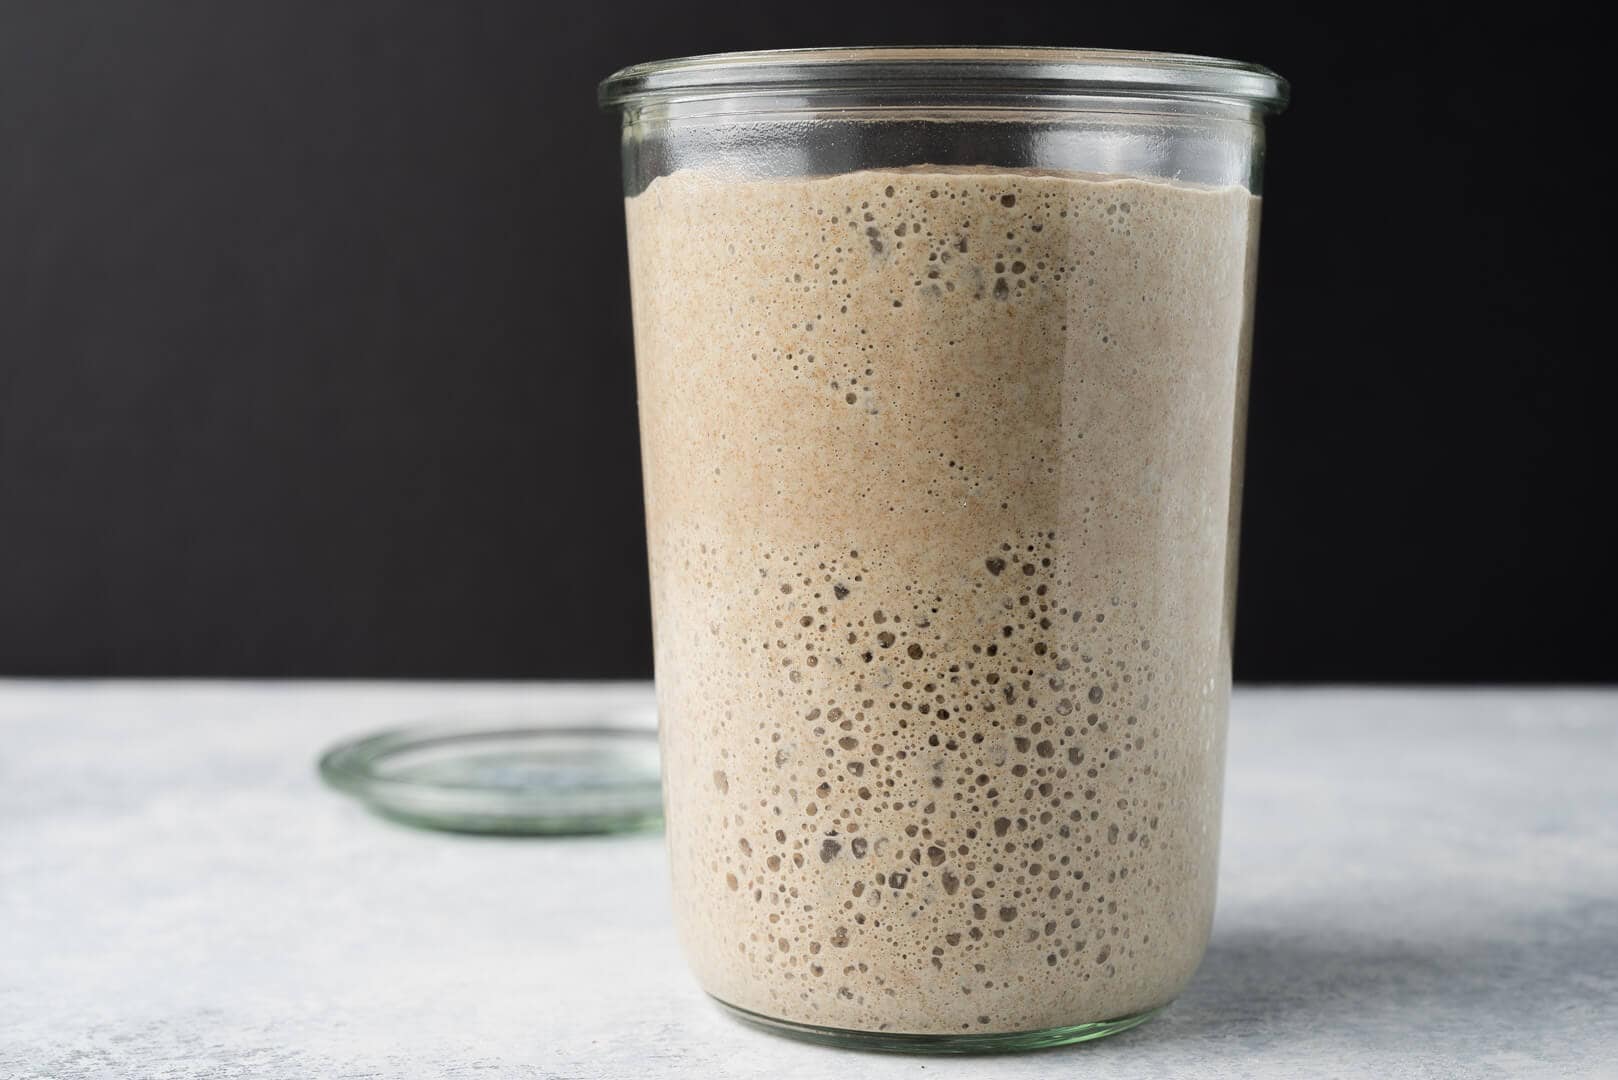
I created my sourdough starter years ago (using this sourdough starter recipe), and it’s the same one I use to this day. It’s a spoiled brat now, to be sure, thanks to all my coddling, but in exchange for my attention and flour, it stays on schedule. Besides, when I’m baking, it does the heaviest lifting (bread nerd joke, sorry). Initially, it was the quintessential rebellious child. Sometimes it wouldn’t show any fermentation activity, and at other times it was utterly unruly. Back then, I didn’t realize what it needed to thrive. I didn’t see how vital timely refreshments (also called feedings) were or how much temperature impacts fermentation.
The key to raising a well-adjusted starter is to observe its needs, give it space to grow, and adjust the refreshments to encourage maximum fermentation activity. And a healthy starter means great bread.
But first, let’s quickly look at what a sourdough starter is.

What is a Sourdough Starter?
At a high level, a sourdough starter is a mixture of flour and water that hosts a stable blend of beneficial bacteria and wild yeasts. This mixture is continually maintained with regular refreshments (or feedings) and is used to leaven and flavor new bread dough. The starter is the cornerstone of successful sourdough baking, and especially for a home baker with changing environmental conditions in the kitchen, learning how to care for and use one is the key to bread with the best flavor, texture, and keeping qualities.
A Few Tips Before We Begin
Water that’s high in chlorine or chloramine (disinfectants used by some cities to clean tap water) can impede fermentation. The night before you want to make your starter, fill a large jug with tap water and let it sit out uncovered overnight to allow any chlorine to dissipate. If your city uses chloramine instead of chlorine, letting a jar sit out overnight will not work. In this case, you’ll have to use bottled water or filtered water (if you are concerned, you can test your water with over-the-counter test kits to determine whether there are additives or other issues). Alternatively, you could use bottled spring water until you get your starter fermenting reliably, then try switching back to tap water with a portion of the starter to see if it’s able to handle the tap water (but don’t use all of it just in case it doesn’t work).
After you mix the flour and water in the jar, be sure to keep the jar lightly covered during the rest of the process. Either a porous cloth or a lid resting on top of the jar will work well. Use a container with enough headspace for the mixture to rise—I like to give at least 5-inches of headspace. Additionally, it’s a good idea to place your jar in a bowl while it’s resting in case the mixture overflows.
During the first couple of days, there’s often a surge in fermentation activity that then drops off dramatically; this situation is probably caused by other yeast and bacteria that are initially present but eventually die off. When this happens, many first-timers think that it has “died,” and they start over. Don’t be fooled by this lapse of activity; continue with the schedule and eventually, the desired yeast and bacteria will move in and stabilize the starter.
The entire process is exceptionally temperature-dependent. Instead of a typical cooler room temperature, I find a warm temperature of around 80°F (26°C) helps kickstart activity since this is near the temperature at which the bacteria and yeast are most active. A home dough proofer (which I highly recommend) and a yogurt maker are great tools for maintaining such an environment. If not, a home oven, turned off, with the light on the inside (and a thermometer to monitor the temperature), or a microwave with a bowl of warm water inside, will both work well.
For even more tips on this whole process and many things related to sourdough starters, check out my Sourdough Starter Frequently Asked Questions page →
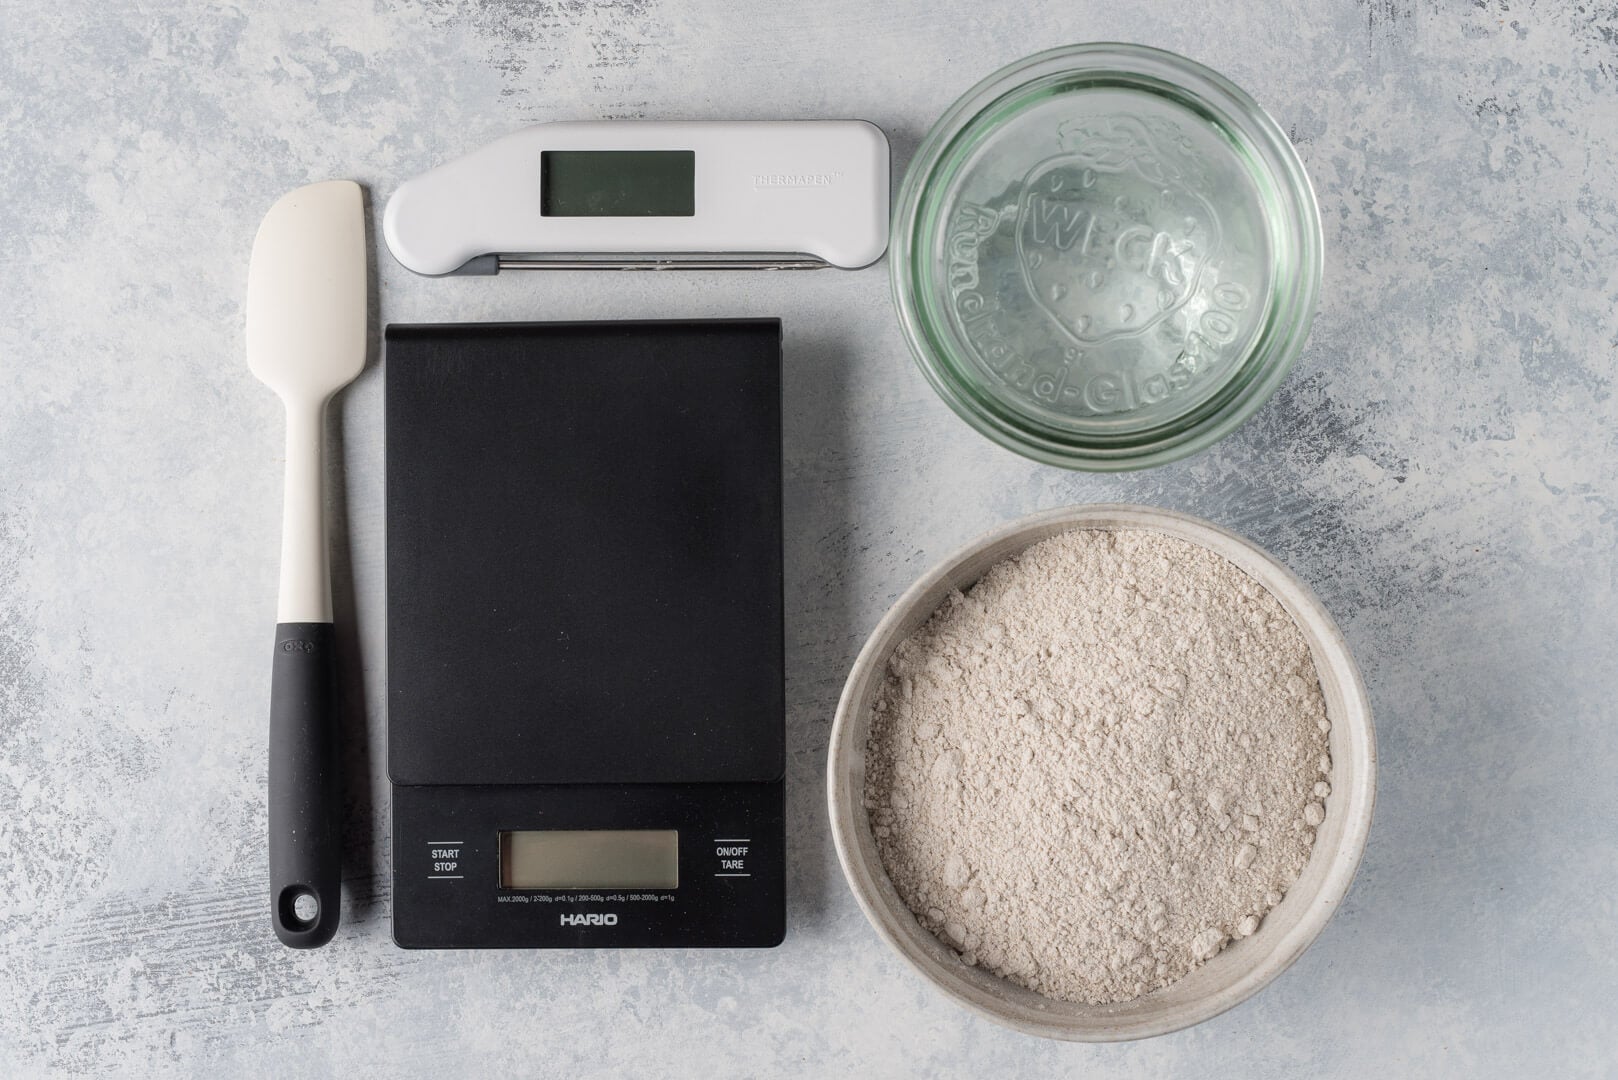
Helpful Tools to Make a Sourdough Starter
You can see a rundown of all the tools I use for baking sourdough, vetted over years of baking, over at my favorite sourdough baking tools page. Here, I list what I consider the necessary tools to get started:
Weck glass jar
Have at least two clean jars on hand. I like these Weck jars (#743, 3/4 liter jars) best because they taper out towards the top, making it easy to stir, and they don’t have any hard-to-clean lips or edges. Also, using the glass lid without the provided rubber seal and clips provides just enough of a seal to keep moisture and heat trapped inside.
I recommend using glass jars because you can easily see the fermentation as it progresses. It can also help to place a rubber band around the jar at the height of your starter after mixing so you have a visual guide for how high it rises between refreshments. Two more reasons I like these jars: they’re high quality and very economical. They are canning jars, so you can use them for many other things around the kitchen (jam, homemade pesto, dried fruit, cereals, and so on).
Silicone spatula
I use a small, firm spatula to do my feedings. It’s sturdy and easy to clean with a sponge, and if things get messy, you can run it through the dishwasher.
Scale
A kitchen scale is indispensable and guarantees accuracy when measuring the amount of flour needed for each starter refreshment. Measuring flour by volume is inherently imprecise as the amount of flour packed into a measuring cup can vary. Further, it’s a good idea to get used to using a scale for weighing ingredients, as this method is essential for improving your baking consistency.
Rye flour
Using whole grain (“dark”) rye flour helps expedite the fermentation process. In comparison to white flour, rye flour is teeming with extra nutrients that help kickstart the entire process. If you don’t have rye flour, a good quality organic whole wheat will also work well.
Unbleached, all-purpose, white flour
With my starter of 10+ years, and outlined in my post on how I feed (refresh) my starter these days, I typically refresh it with 70% all-purpose flour (or bread flour) and 30% whole rye flour. I like this mix because you get the fermentation boost from the whole-grain flour and the white flour’s increased gas-trapping ability and gluten strength. This helps me spot the signs of fermentation throughout the day and is a good compromise, using just enough whole grains without my starter getting overly acidic too quickly.
Thermometer
An instant-read thermometer will help monitor the temperature of your starter and ensure that it’s in the optimal range for increasing fermentation activity.
My Free Sourdough Starter Quicksheet
My sourdough starter quicksheet is a free, one-page printable guide to feeding, maintaining, and using my sourdough starter. Download it, print it, and keep it in your baking notebook for quick reference!
Starter Refreshment (Feeding)Schedule

In the beginning, your starter refreshments will occur just once a day. As your culture becomes more active, you’ll increase this to twice a day. Because of the frequency of these feedings, one of my goals is to help you set things up so it’s quick and easy to do your feedings and move on with your day. Once you get the hang of things, you only need about 5 to 10 minutes per day to keep your starter going–totally manageable.
A sourdough starter is very resilient. If you forget to feed it one day or feed it several hours after it needed a refreshment, don’t worry, in almost all cases it will spring back.
The following sourdough starter recipe schedule will provide you with a reliable and robust sourdough starter in 6 to 9 days. Once you have the culture stable, it will last indefinitely as long as you refresh it regularly. If you don’t plan to bake frequently, you can toss the starter in the fridge and feed it only once a week. (I’ll discuss this in more detail later in this post.)
Your schedule will follow the natural rise and fall of your starter. As soon as you feed it, the yeast and bacteria in your culture will begin to metabolize the sugars in the flour, creating gasses (among other things) as a byproduct. These gasses cause the starter to rise throughout the day as seen above. Once they subside, then the starter falls.
Daily Refreshment Process
At each refreshment, we will perform the following quick steps:
- Stir your starter a little bit with your spatula
- Place a clean jar on your scale and scoop in some portion (outlined below) from the jar you just stirred down
- Add fresh flour and water; mix well to incorporate completely
- Cover the jar loosely and let rest until the next feeding
That’s it! Once you get your process down, it should take no more than a few minutes each day.
Sourdough Starter Recipe: Making an Incredible Sourdough Starter from Scratch
Day One

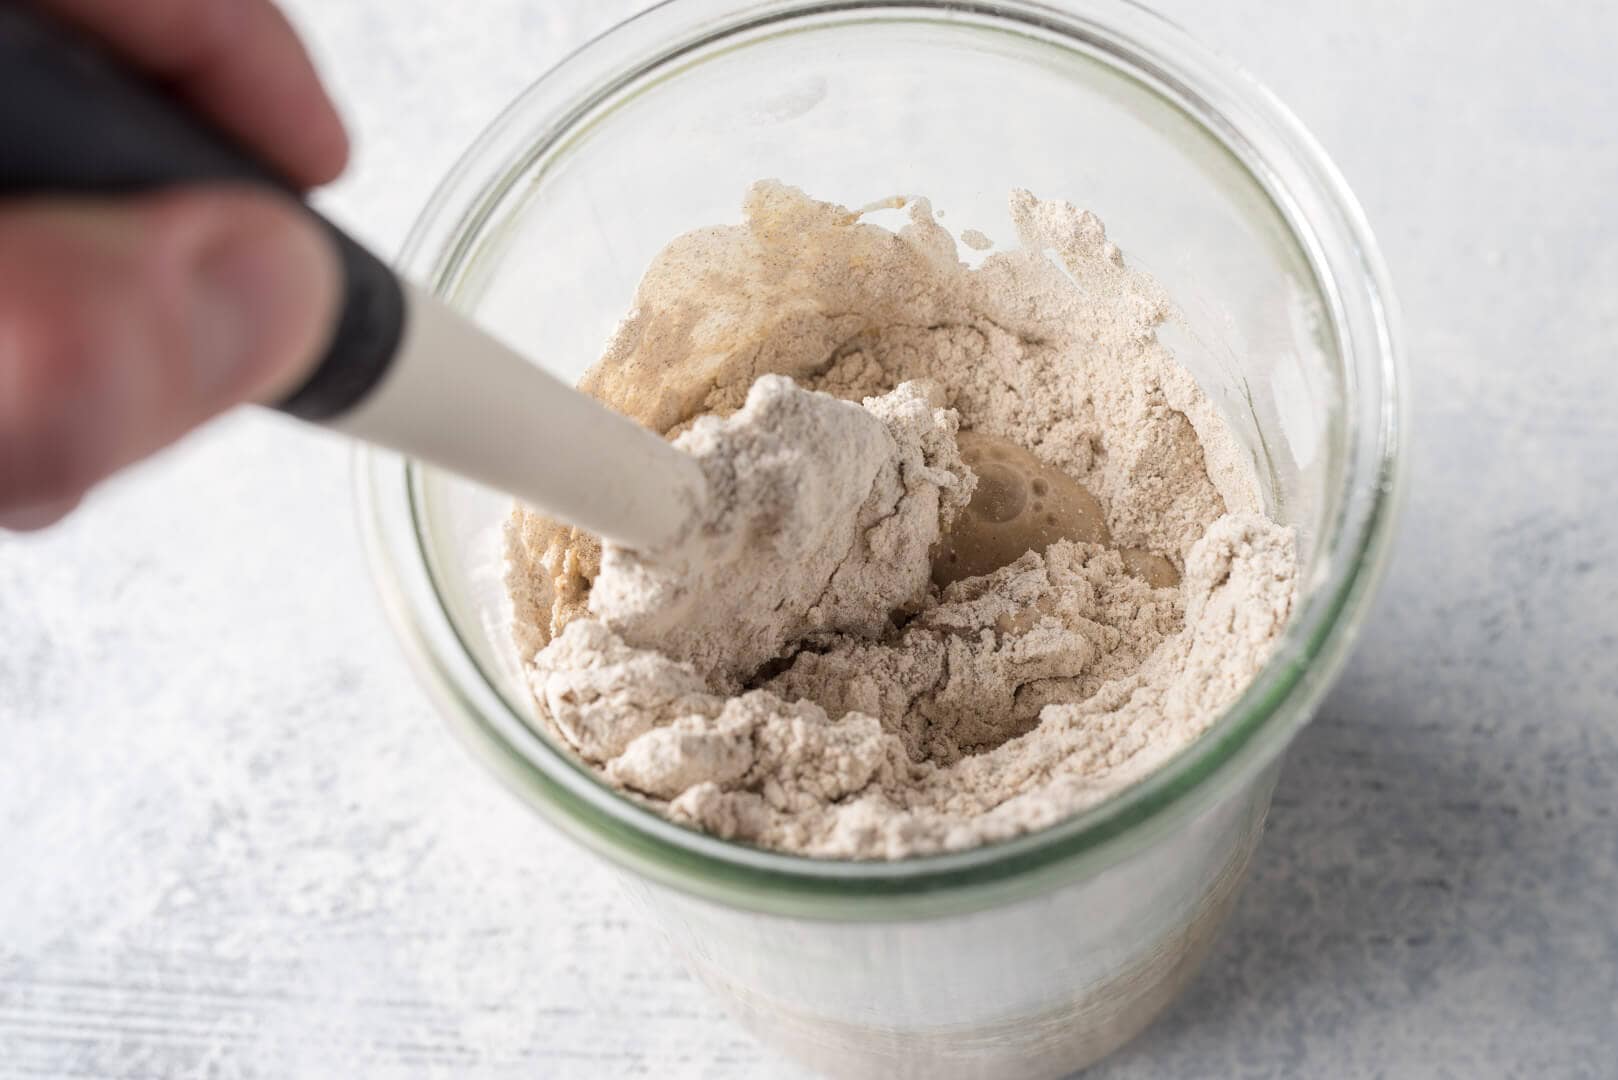
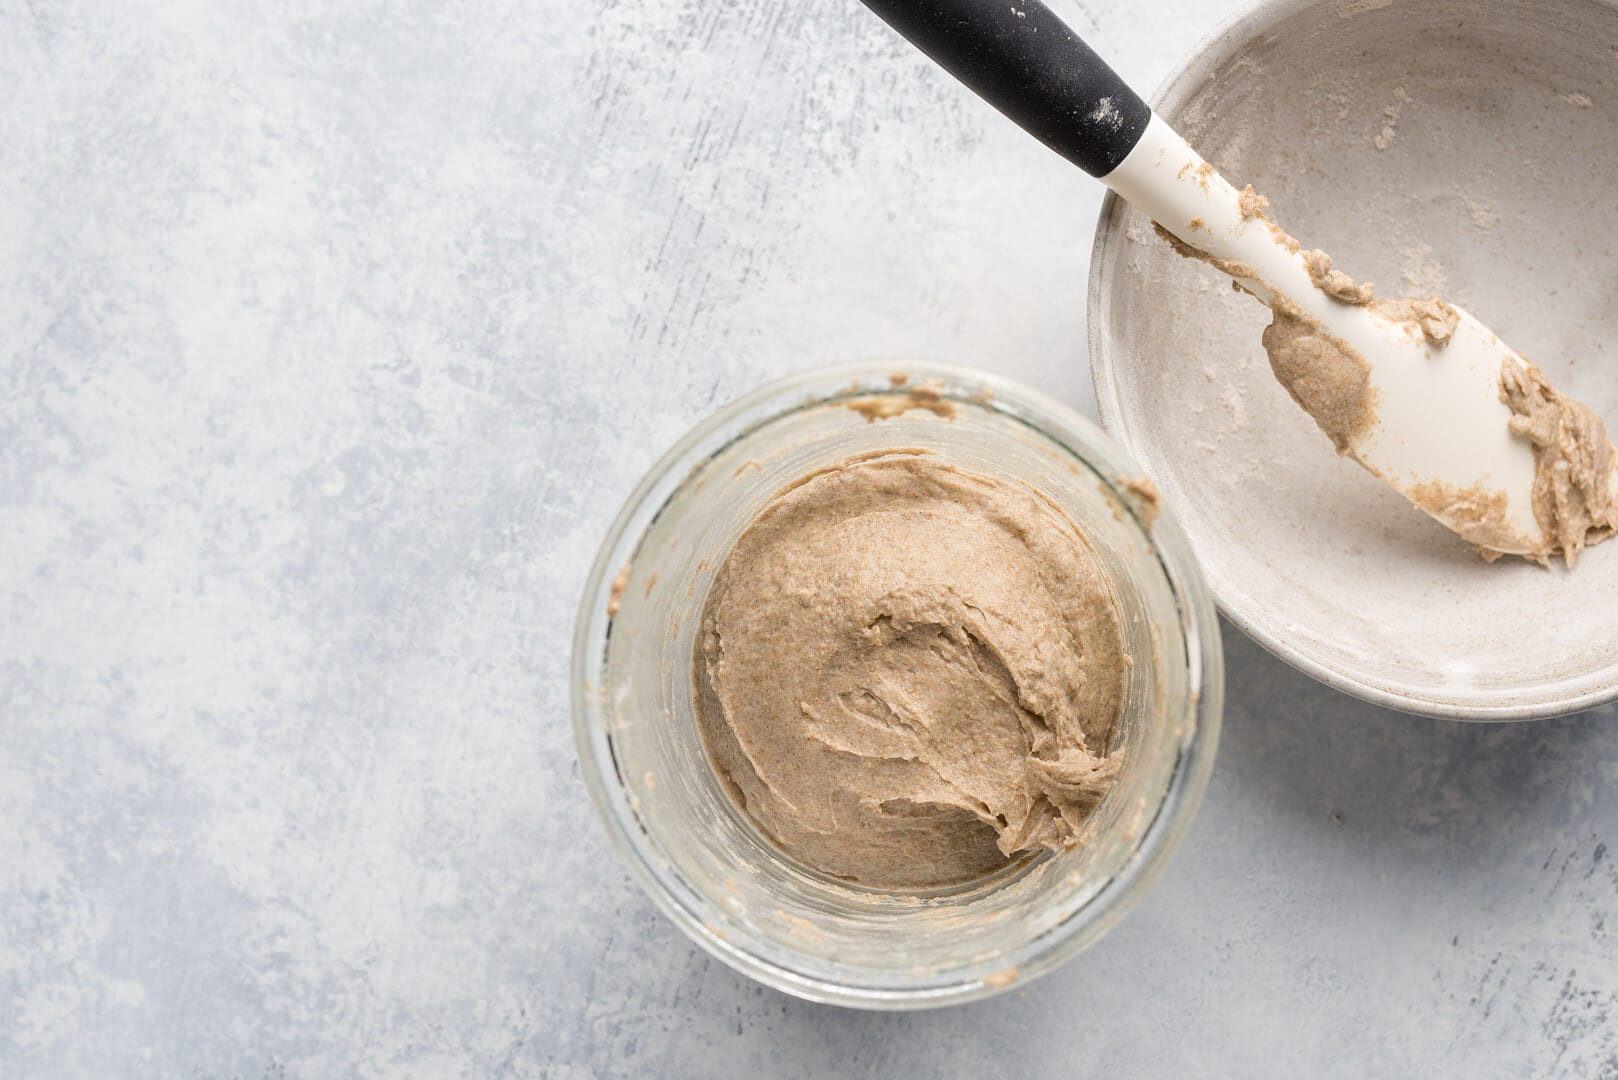
Initially, I like to use two jars for this process: each time you refresh, swap in a clean jar. Starting on Day 4, you can use the same jar: discard down and add fresh flour and water.
I first like to weigh the jars I’m using (without the lids) to find their empty weight. Then, take a permanent marker and write the jar’s weight on the bottom. This way, we know the baseline weight of the jar so we can quickly figure out how much starter to keep during each refreshment.
In the morning, place a clean, empty jar on the scale and tare (the “tare” button on your scale will zero it out after you place your jar on top. This will allow you to measure the flour and water your place in your jar and exclude the jar’s weight). To that jar, add 100 grams whole grain rye flour and 125 grams water and mix until all dry bits are incorporated. If it’s cool in your kitchen, warm the water to 80°F (26°C) before mixing. Lightly cover the jar and set it in a warm place–80°F to 85°F (26°C to 29°C) is ideal–and out of direct sunlight for 24 hours.
Day Two

You may or may not already see some fermentation activity. As mentioned above, this potential initial surge of activity is typical and should subside around Day 3. What you can see below is how my initial mixture expanded significantly (in fact it bubbled out of the jar; this is why setting the jar in a bowl is a good idea). Don’t be discouraged if the surge disappears by the third or fourth day. Stick to the schedule, and it will come back!


Place a second, empty jar on the scale and tare so that it reads 0 grams. Scoop in 75 grams of the mixture that has been resting for 24 hours. Next, add 50 grams rye flour, 50 grams all-purpose flour, and 115 grams of water. Again, if it’s cold, warm the water to 80°F(26°C).

Mix well until all dry bits are incorporated, cover, and place in the same warm spot for 24 hours. Discard the rest of the mixture in the first jar and clean it in preparation for the next day.
Day Three
In the morning, you may start to see more activity, or you may see none. You can see below that the initial surge of action I had on Day 2 disappeared. However, my mixture started to show the beginning signs of beneficial yeast and bacteria taking hold: some bubbles on the top and at the sides, rose to some degree, and it started to take on a sour aroma.

Regardless of what signs your mixture is presenting, don’t fret and stick to the schedule. Remember, if it’s cold in your kitchen, warm your water to 80°F (26°C) to help speed things along.
If a layer of clear liquid (“hooch”) forms on the top of your mixture just stir it back in and keep with the schedule.
Place a new, clean jar on the scale and tare. Scoop in 75 grams of the mixture that rested overnight and add 50 grams rye flour, 50 grams all-purpose flour, and 115 grams water. Stir until well incorporated. Cover the jar and let it rest for 24 hours.
Discard the rest of the mixture in the first jar and clean it in preparation for the next day.
Day Four
This day is the first day of the process that has two refreshments in a single day: one in the morning, and one approximately 12 hours later.
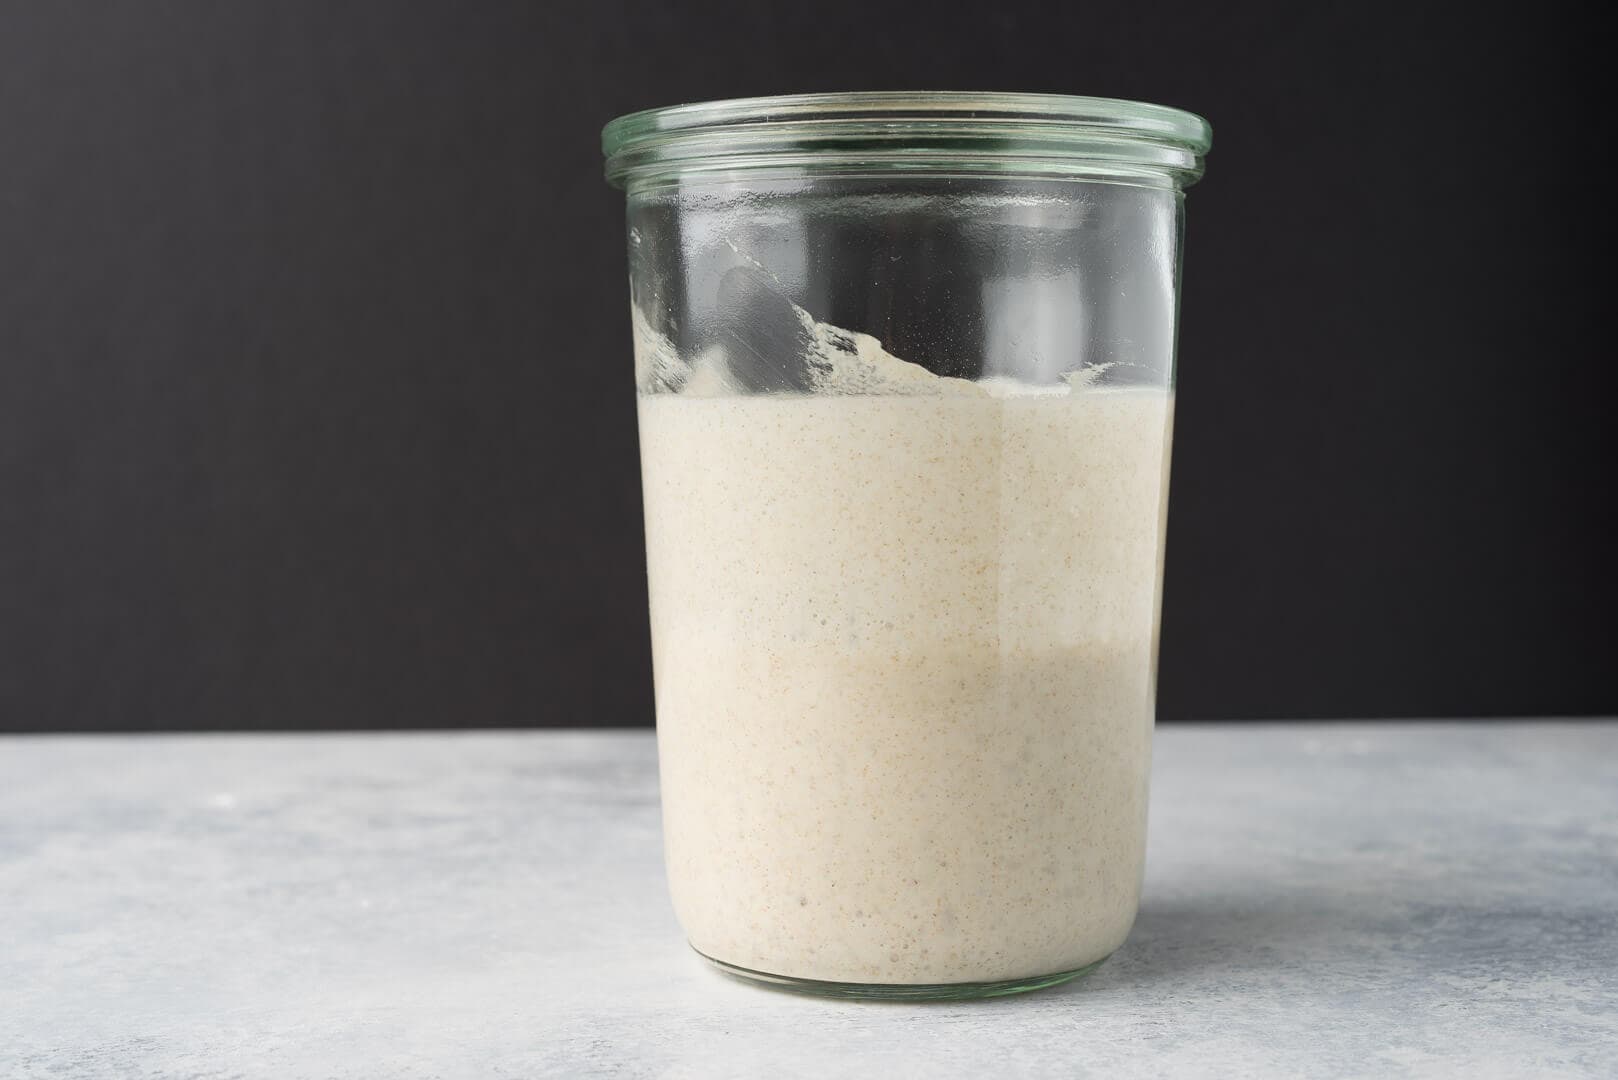
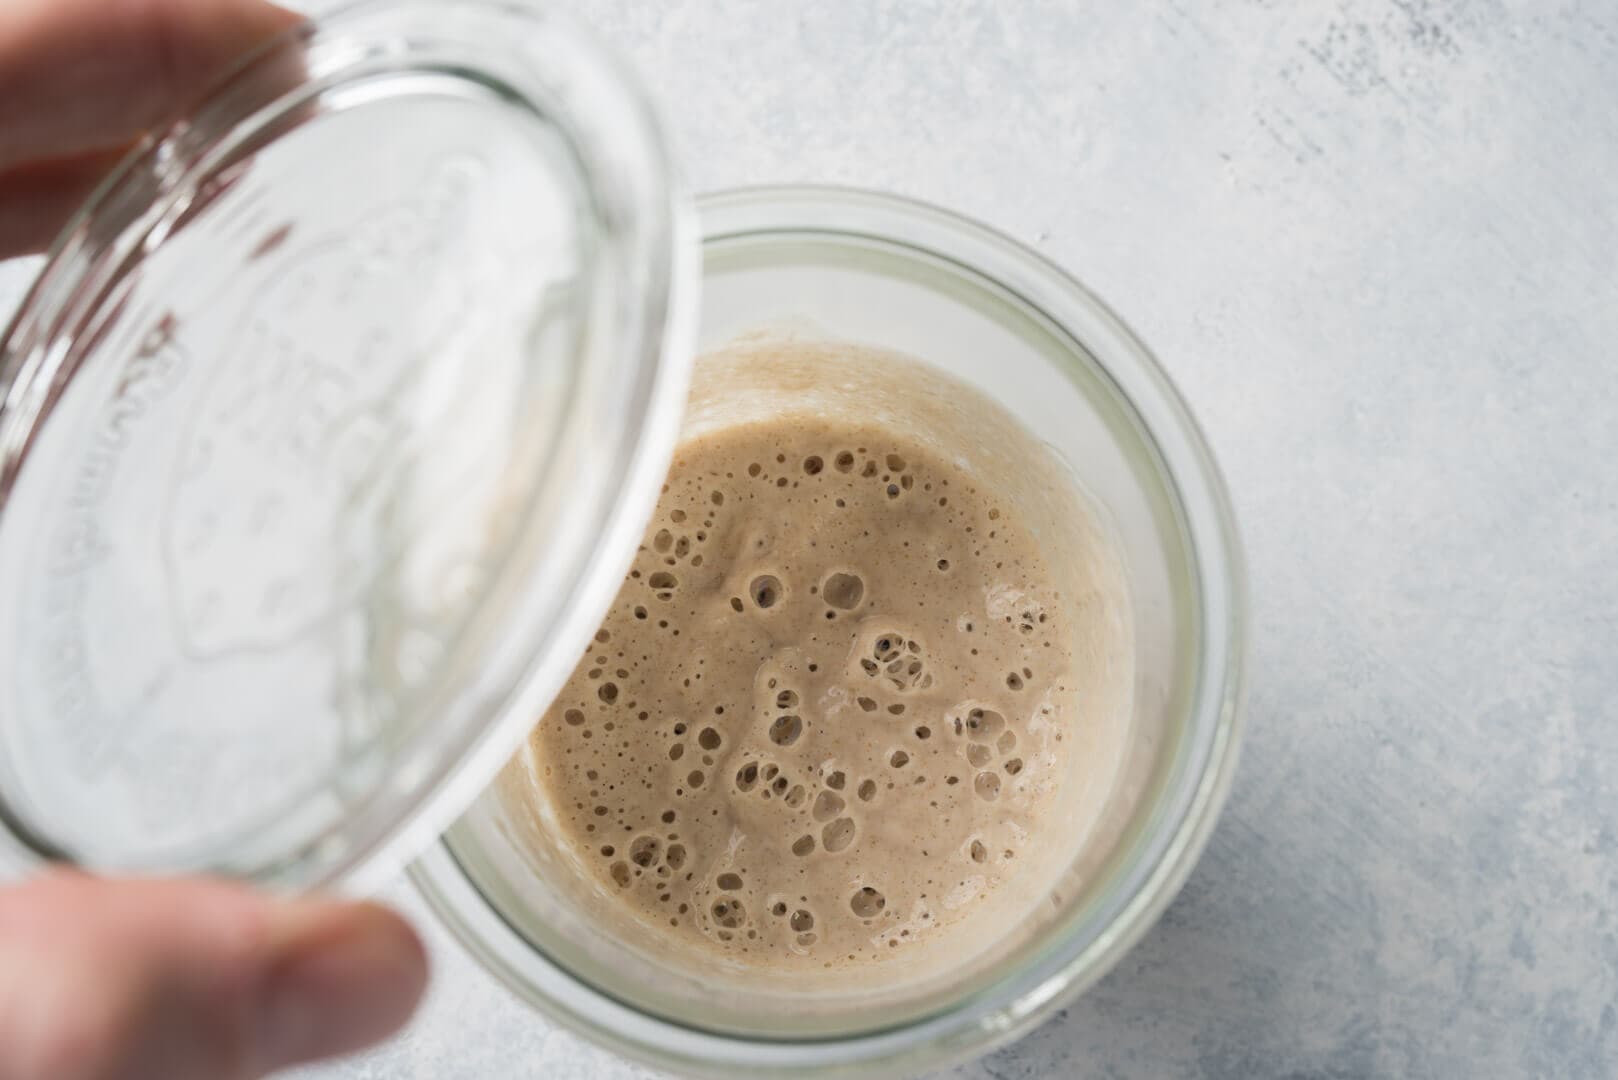
In the morning, you should start to see signs of fermentation activity if you haven’t already, and begin to see them again if you experienced the surge-and-drop that I described above. There will be bubbles scattered on the sides and top, and the level of the mixture might have risen and fallen a little (evidenced by streaks on the sides of the jar).
Refresh in the same way that you did on Day 3. Place a clean jar on the scale and tare. Scoop in 75 grams of the mixture from the jar that fermented overnight, add 50 grams rye flour, 50 grams all-purpose flour, and 115 grams water. Mix thoroughly, cover, and let rest for 12 hours.
Discard the rest of the mixture in the first jar. From here on, simply use the same jar each day (no need to switch to a clean jar) by discarding the contents down and adding fresh flour and water as instructed.
After this 12-hour rest during the day, discard the contents to 75 grams and refresh again with the same ratio of ingredients. Let the new mixture rest for 12 hours (overnight).
Day Five and Six
For Days 5 and 6, continue to discard down the contents of the jar and then refresh with the same ratio of ingredients as you did on Day 4, twice a day. You will see fermentation activity increase more and more. If you’ve written the weight of the empty jar on the bottom as I indicated on Day 1, you should know exactly how much the resulting weight of the jar plus carried over starter will be—discard down to this weight.
Keep using the same jar for these refreshments.
Day Seven and Onward
In the morning on Day 7, discard what’s in the jar down to 20 grams of the mixture. To this, add 30 grams rye flour, 70 grams all-purpose flour, and 100 grams water. Mix thoroughly, cover, and let rest for 12 hours during the day. In the evening (after about 12 hours), discard the jar contents down to 20g, add the same ratio of ingredients as earlier in the day, and let rest 12 hours (overnight).
At this point, you should see the height of your starter rise and fall in the jar predictably each day. This periodic behavior is a good indicator that it is strong enough for you to use for your first loaf of bread. If your starter is still struggling to show activity, continue the refreshment schedule with the same ratio of ingredients for another day–or even several more days–until things pick up. The process of stabilization can sometimes take longer, depending on the flour used and the environment (especially if it’s cool in your kitchen). Be patient and stick to the schedule!
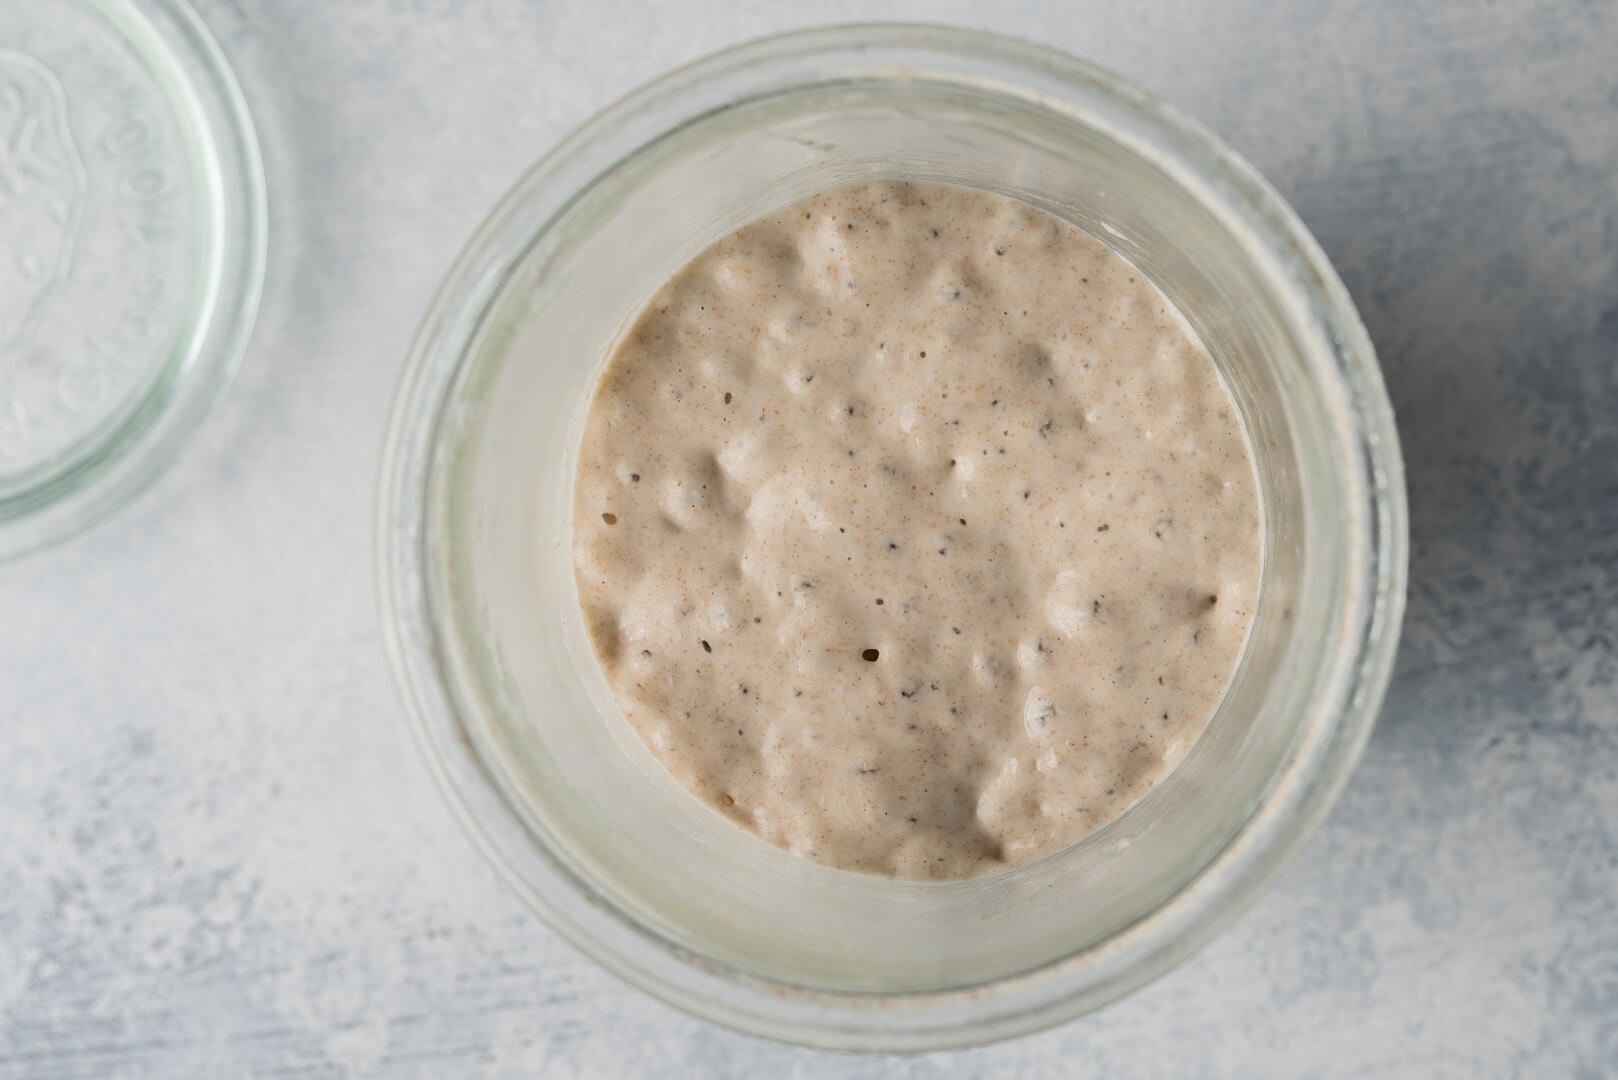
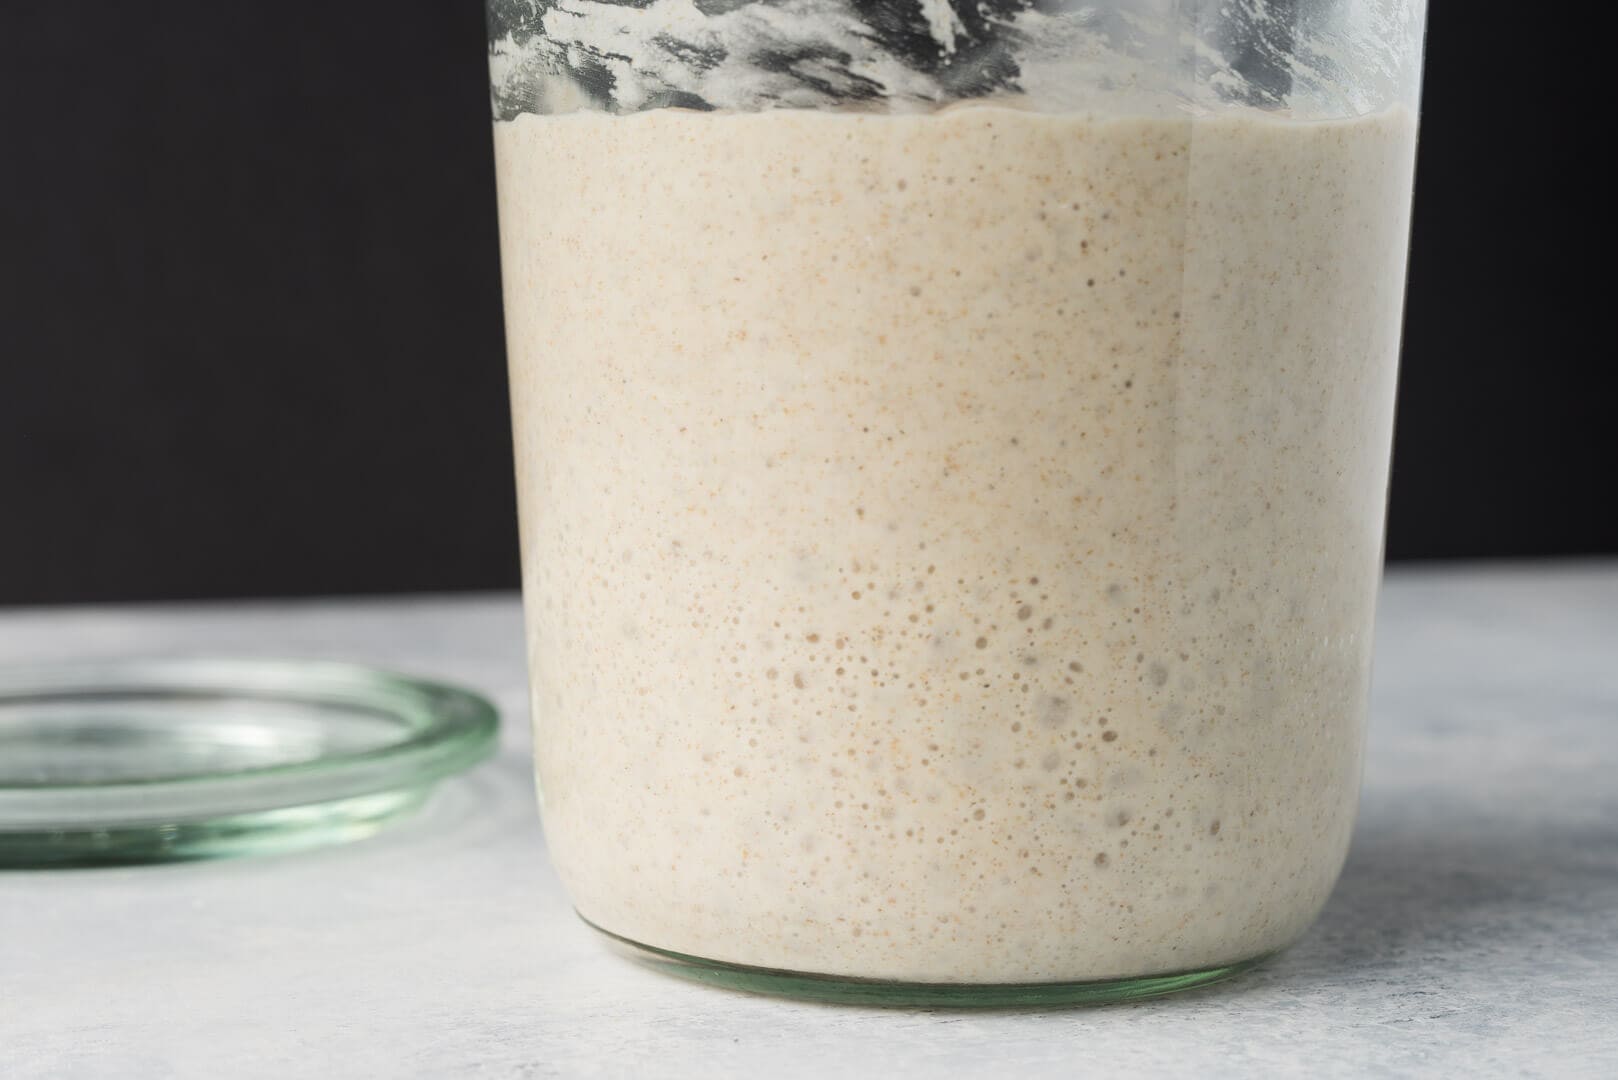
Once you get the hang of your starter and its feeding schedule, feel free to adjust the ratio of ingredients. For example, in warmer months I’ll reduce my mature starter carryover to 10g to 20g depending on the temperature. To read more about how I change these ratios and maintain my starter, check out my comprehensive sourdough starter guide page which includes my current feeding schedule, an in-depth FAQ, and more.
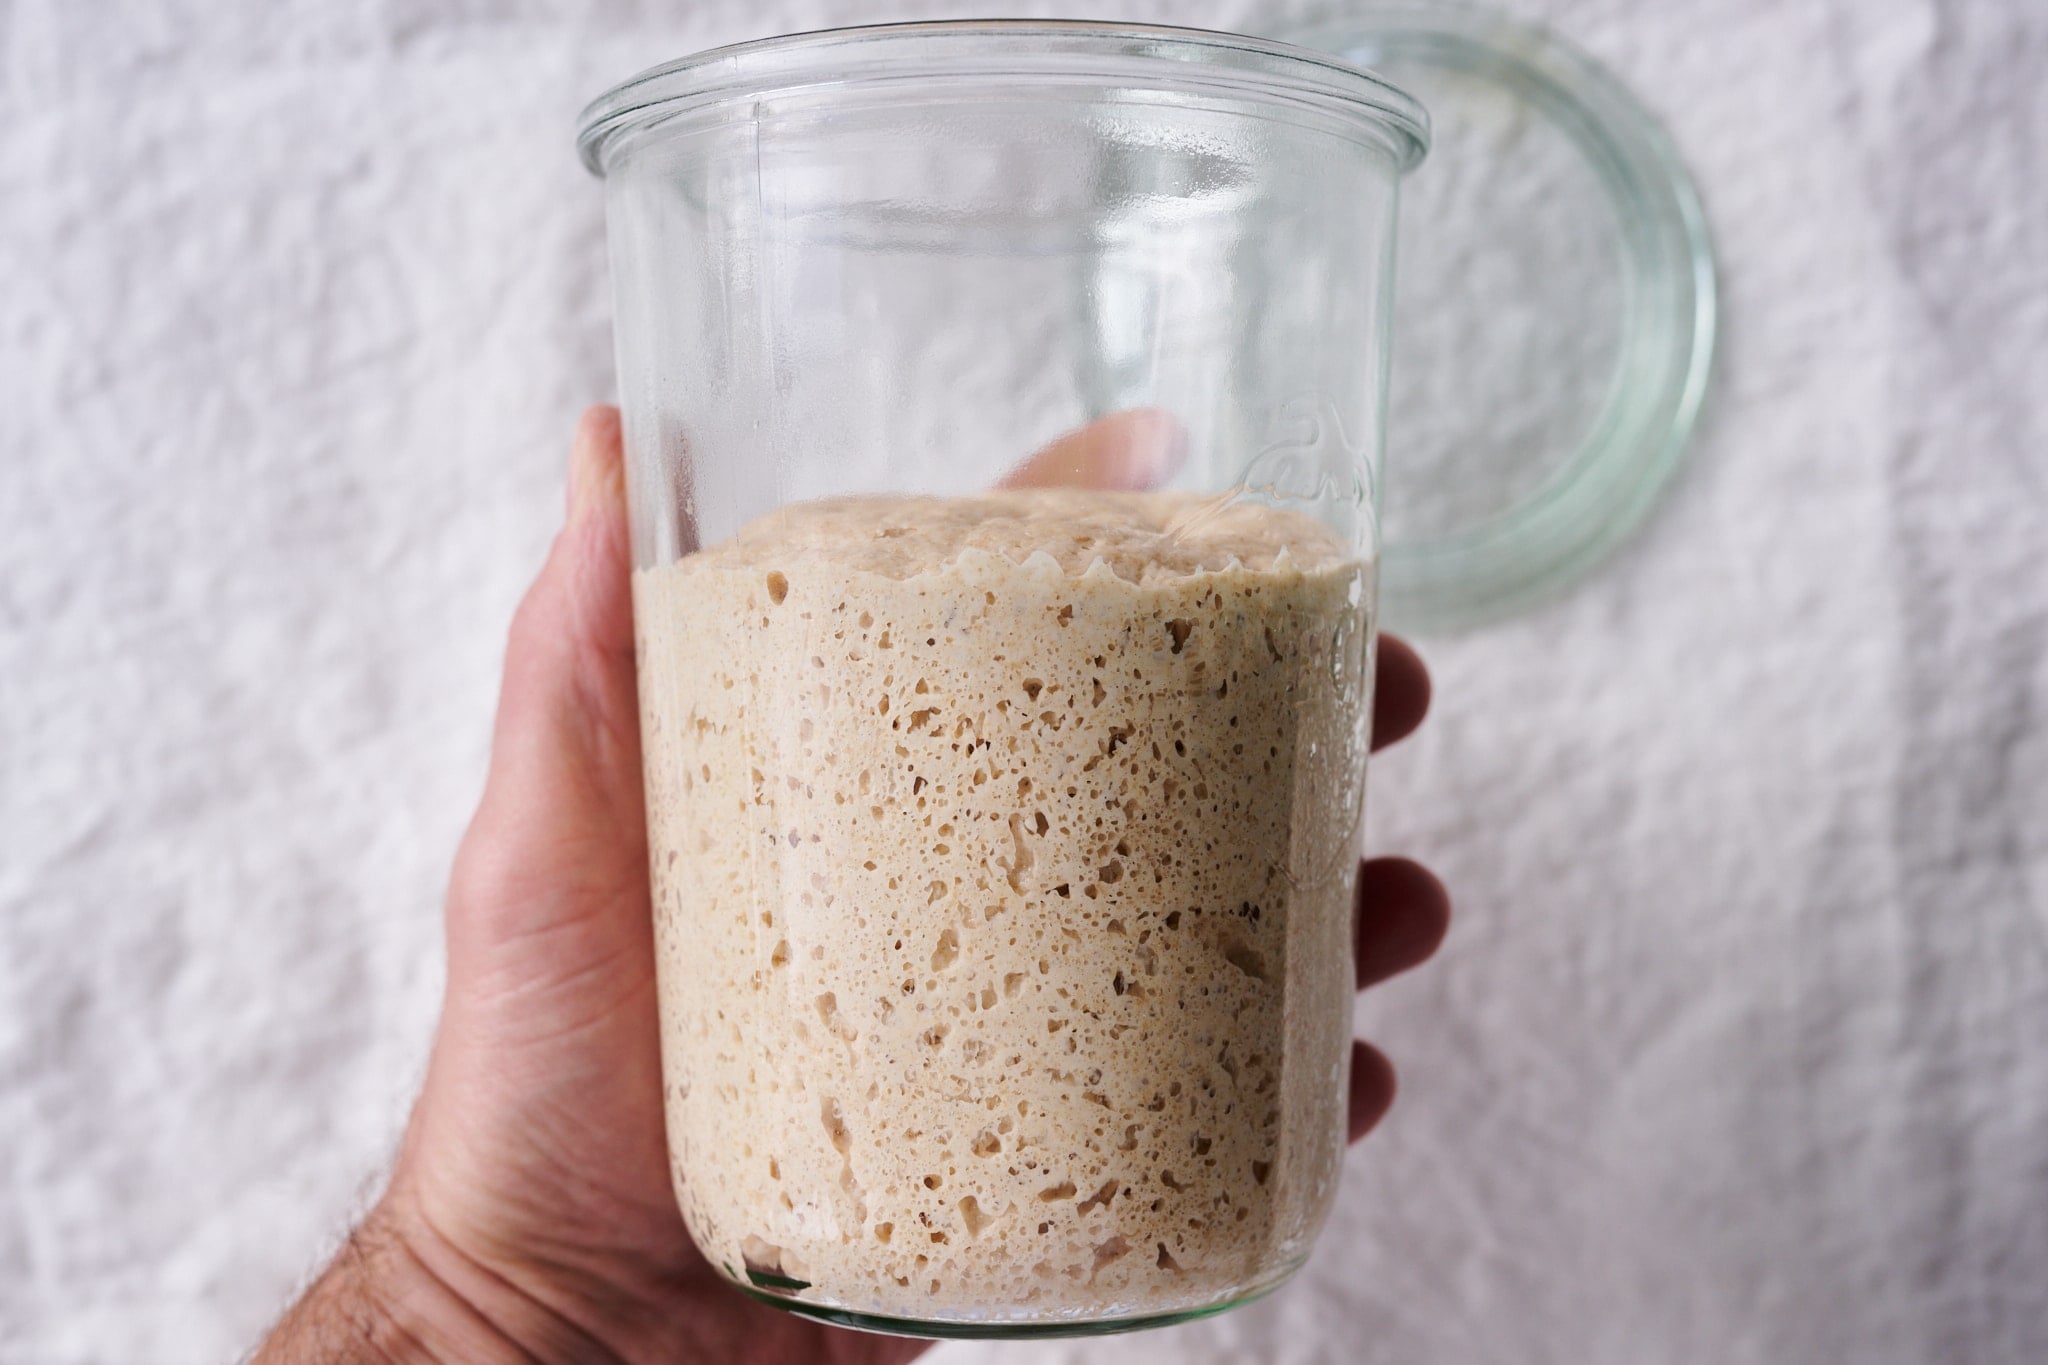
The starter will continue to develop flavor and strength over the next week and into the future. With an active starter, you can now use a portion of it when it is ripe. A starter is ripe when it has risen, is bubbly on the surface and at the sides, has a sour aroma, and has a looser consistency than when first refreshed.
Having issues? Check out my list of the 21 most common sourdough starter problems (with solutions) →
What is the Best Flour to Feed My Sourdough Starter?
I get asked this question often. Once your starter is rising and falling predictably, it’s okay to switch your refreshment flour to suit your preference. You can continue with a mixture of rye and all-purpose, change to 100% all-purpose white flour, or even switch to using 100% whole wheat.
There is no right or wrong flour to use when feeding a starter.
Each flour will affect the starter in a different way, changing how fast it ferments, how acidic it becomes in the same timeframe, and eventually, the final flavor profile. There is no right or wrong flour to use when maintaining your starter; it’s up to you and your starter!
Next Steps For a Healthy Sourdough Starter
After your starter rises and falls predictably, review my sourdough starter maintenance routine for all the steps I do to keep my starter healthy. You can adjust your feeding schedule based on your baking frequency. If you can bake almost every day, you’ll want to feed your starter once daily to keep it ready-to-use shape. If you want to bake only on the weekends, you can put your starter in the refrigerator to slow down its activity.
You can also scale down your starter and maintain a smaller one. Scaling down your starter will mean less flour and water needed for each refreshment (to save ingredients). See my guide to maintaining a smaller sourdough starter for a recipe and process.
What If I Need a Break From Maintaining My Starter?
Maintaining a sourdough starter should always be on our terms, not the other way around. Maintaining a starter indefinitely can be daunting, but there are ways to put your starter on pause if you need a break from baking for a while. Remember, the refrigerator is our friend to slowing fermentation, and there are even ways to stop all fermentation activity altogether (and it can stay this year for years!).
How Can I Save Sourdough Starter Discard?
Once your starter is rising and falling predictably each day, and only then, to ensure you have the right mix of suitable bacteria and wild yeasts in the culture, you can save the discard. I keep a jar in my fridge where I collect all discards and keep them for up to 2 weeks. Then, when I want to make pancakes, waffles, or another discard recipe, I can use starter from my sourdough starter discard cache at a moment’s notice.
Final Thoughts
These days, refreshing my sourdough starter is a liturgical part of my day. It takes minutes to provide my starter with fresh flour and water. In return, my starter produces flavorful and healthy bread. I like to think it’s me making the bread; it’s me controlling fermentation, it’s my hands mixing and shaping the dough. But the reality is, I’m just a small cog in nature’s machinery. All I need to do is lend a helping hand and stay out of the way. Happy baking and buon appetito!
Print
Sourdough Starter Recipe
- Prep Time: 7 days
- Total Time: 168 hours
- Yield: 1 sourdough starter
- Category: Sourdough, Baking, Bread, Starter
- Cuisine: American
Description
This sourdough starter recipe will help you create your own sourdough starter from scratch at home in seven easy steps. Your starter is the cornerstone of great bread—once you have it showing consistent signs of fermentation each day, which takes on average 5 to 7 days, you’re ready to start baking sourdough bread!
Ingredients
- 300g all-purpose flour
- 400g whole-grain rye flour
- 800g water
Instructions
- Day One
To a clean jar, add 100g whole rye flour and 125g warm water. Mix ingredients and keep somewhere warm for 24 hours. - Day Two
To clean jar, add 75g of the mixture from Day One (discard the rest), 50g whole rye flour, 50g all-purpose flour, and 115g water. Mix ingredients and keep somewhere warm for 24 hours. - Day Three
To a clean jar, add 75g of the mixture from Day Two (discard the rest), 50g whole rye flour, 50g all-purpose flour, and 115g water. Mix ingredients and keep somewhere warm for 24 hours. - Day Four
On day four, you will give the mixture two feedings. In a clean jar, add 75g of the mixture from Day Three (discard the rest), 50g whole rye flour, 50g all-purpose flour, and 115g water. Mix and let rest for 12 hours. In the evening, after 12 hours, repeat the discarding and feeding you did in the morning. Let the mixture rest overnight. - Day Five and Six
For days five and six, continue to discard down the jar contents and then feed with the same ratio of ingredients as Day Four, twice a day. You can use the same jar for these feedings. - Day Seven and Onward
In the morning on Day Seven, discard the jar’s contents down to 20g of the mixture and add 30g whole rye flour, 70g all-purpose flour, and 100g water. Repeat this feeding twice a day, once in the morning and once in the evening, indefinitely.
Notes
You don’t have to use a new, clean jar each time you feed your starter, but I find it’s helpful to keep track of the weight of the jar so you know how much you’re carrying over.
If you use my method for creating a starter, tag @maurizio on Instagram and use the hashtag #theperfectloaf so I can take a look!
Sourdough Starter Creation FAQs
Why do you need a sourdough starter?
A sourdough starter is a continually maintained mixture of wild yeast and suitable bacteria used to seed fermentation in new dough for bread, pastry, and more.
How long does it take for a sourdough starter to be ready?
In general, I’ve found it takes about 7 days from when you first mix flour and water to when a sourdough starter is ready to be used to bake bread.
Is a homemade sourdough starter safe?
A well-maintained sourdough starter can live virtually indefinitely. The high-acid environment of the sourdough starter helps stave off any unwanted pathogens. However, if you see any signs of traditional mold (pink, white fuzzy, green), it’s best to discard the entire starter and start a new one.
Should I make or buy a sourdough starter?
While buying a sourdough starter is very easy online, it’s a very easy process to do at home! Plus, creating your own starter exposes you to the signs of fermentation, what steps you need to perform to maintain your starter, and gives you a chance to get to know the feeding (refreshment) process.
How long does it take for a sourdough starter to peak?
Some bakers use the term “peak” to refer to either the point at which a starter is ready to be used or needs feeding, or it can refer to the physical peak height of the starter in the jar. I find judging a sourdough starter’s readiness based solely on the height it has risen to may lead to using it at an incorrect time. After all, the height of a starter is simply a display of the strength and other characteristics of the flour. To determine when your starter is ready to be fed (or used for baking), look for a combination of signs: some rise, bubbles on top and at the sides, a sour aroma, and a loose consistency (it should loosen the longer it ferments). From there, use the timeframe for fermentation as a guide: at about 72-78F (22-25C) with 30-50% whole grain flour and 20% ripe starter (the seed, or inoculation), it might be ready after 12-16 hours.
Why doesn’t my sourdough starter have big bubbles?
It’s okay if your starter doesn’t have big bubbles. Large bubbles can be the result of the flour you’re using and the hydration. What’s more important overall, is to see strong signs of consistent fermentation: some bubbles, consistent rise each day, a sour aroma, a loosening in texture.
Why is my sourdough starter not rising?
It’s worrisome if you don’t see any rise in your starter, you should see some. Usually, no rise is a sign it’s not fermenting properly and needs more time to establish. Continue with the feeding schedule outlined in my guide on how to make a sourdough starter and it should begin fermenting after a few days.
What’s Next?
If you’re looking for something to make with the discarded sourdough starter that you’re generating every day, have a look at my sourdough waffles, sourdough pancakes, and sourdough banana bread.
If you need a high-level look at each step of the bread-making process, read through our Beginner’s Guide to Sourdough Bread.


2,663 Comments
Hi there! I have a starter in progress and am so excited to get baking.. must be patient though… I am on day 7 and am following your instructions to a t, but things have been progressing very slowly. It is a bit cool in my house so the starter was sitting at about 68-70 degrees for about 5 days. I finally found a random cupboard that is 74 degrees inside. I am seeing lots of activity inside when I pull it back, and some small bubbles on the sides through the glass, and a strong vinegar smell, but it hasn’t been rising and falling at all. Should I keep feeding once per day until I see signs of a rise and fall? Or should I move to 2 feedings per day anyways? Thanks so much!
PS I was reading an overwhelming amount of blogs/books on sourdough, my head was spinning. Another blog said their best advice was to find one guru and stick with them and their methods. You are my guru, can’t wait to bake my way through your site!
Hey! Yes, please keep at it, it will take hold eventually. I would say if you’re not seeing significant activity just stick with once a day. 74ºF is good but even a few degrees warmer would speed things up a bit more, but if that’s what you have to work with it’ll happen eventually! Hopefully by the time you read this you’ll already have strong activity going 🙂
Ha ha, so glad to be your guru! We’ll definitely get you going, thanks so much for the kind words!
Ok so here I am at day 13. It rises very well, coming to its peak around 8 hours after feeding. But it never really falls. There is residue on the side of the jar that shows it falling about a centimetre, and it sits about 2 1/2 inches in the jar. The very strong vinegar/alcohol smell has subsided and now smells vinegary and a bit milky when I go to feed it every morning. 2 days ago it was looking strong and I decided to progress to 2 feedings that day, but after that it wasn’t rising as much as it used to, so I have been back to one feeding for the last 2 days. How much should it really fall? I am using a larger jar than you (Ikea 1 litre jar). The bubbles on the top and sides look like your day 6 pictures.
That’s great! It’s very possible your jar might be a bit too big, in terms of width, to really notice that much of a fall. If you have a tall jar that is more slender you might be able to see more fall and rise action. In fact, if you have a jar like this I’d recommend using it for now just so you can see how things progress.
It falls quite a bit for me in my jars, but they are pretty slender and tall. That is good you’re seeing bubbles and you’re taking note of the change in smell over the course of the day. You really want to find that point where it starts smelling sour (from sweet) — it kind of smells like fresh paint almost — so you can determine the point to feed. It can be a little challenging in the beginning to notice the change in your starter over the course of a day but try to stay observant and watch how it changes. If you’re home on the weekend with it check in every hour or two and take a look, a smell, and see how it’s progressing.
I had a similar problem ….. old homes tend to be cool or drafty. I put my starter jar inside an old wool glove I cut and made a “cup coozy” out of and it went crazy. That little extra warmth was all it needed.
Great idea!!
Thanks so much for this! I followed your instructions precisely and on day 3 I already had a starter that looked like your day 7! I’m super excited about this as I’ve never had a starter actually be successful previously.
Super glad to hear this!! Hope it’s progressing well for ya 🙂
Hi, your blog and tutorials are great!
I try do my starter, twice! All my efforts ended in trash. Firstime, My starter died, no bubbles, no riseing, but strong vinegar odor. Secondtime, after 2 days it was on right way, small bubbles, light odor,but after 4days i found layer of mold. I used 70% of rye flour and 30% of spelt flour. Room temperature is 21°C. Please, can you help me, what i do wrong?
Sam from Slovakia
Thanks I appreciate that! If you find mold on there you definitely want to start over, that’s a good move. I would suggest try using filtered water (bottled if you have it) for a while when creating your starter to see if that helps. Also you could stir your mixture midway between when you first feed it and your next feeding, this will help prevent mold from forming on top. Keep a loose-fitting cover on your jar as well, like I show in my pictures, to prevent excessive air/moisture from entering.
21ºC is a little on the cold side, you really want to try and keep things around 25ºC if possible (the warmer the more activity you’ll see). You can heat a little bit of water to about 25-26ºC and use that for feeding to see if that helps or try to find a warm spot in your kitchen to keep your starter, it should get things going faster.
I hope that helps!
Greeting from England!
Great learning here mate.. so I run a pizza resturaunt baking pizza and bread using a woodfired oven and have decided after 2 years of using commercial yeasts it’s time to make my own sourdough. After a month or so of messing around with making starters (believe me each room/fridge has little jars or bowls hiding. my boss is starting to worry) i think im savvy enough with a basic understanding of how this works.. what I would like to ask you – and sorry if I missed the point – is that, if you are making fresh batches of pizza dough/bread everyday.. can one starter keep up if you are feeding 2/3 times a day.. and i guess im wonderi g at which point of the day would be best to extract however much ‘leaven’ you would need.. e.g. if i needed say 1kg of starter i would take that and leave 500g starter feeding 500/500 to replenish ready for on another 24 hours time??
Thanks in advance and as i said beforw some brilliant advice
Hey there Joshua! A sourdough starter can definitely “keep up” with daily production, you just need to get a feeding schedule planed out to work with your needs. I like to use my starter to build a leaven when it’s at its peak maturity (meaning it’s risen to the highest point it’ll rise, smells slightly sour, and ideally is just about to start falling), this way you’ll get close to maximal yeast/bacteria numbers to inoculate your leaven with. If you haven’t had a chance yet check out my starter maintenance routine to get an idea of what my starter looks like when I feed it (which is also when I’d use it to build a leaven).
What you’ll end up doing is feeding your starter with the right amount of carryover starter, flour and water so that it matures right when you’ll need to build a leaven and so it’s large enough to provide the necessary mature starter to cover your leaven needs. All these numbers depend on your environment (especially ambient temperature), flour choice and your individual starter. You’ll get the hang of this and build up an intuitive understanding for manipulating each of these over time to suit your requirements.
I hope that makes sense! It’s hard to give exact numbers and advice without your production schedule, but I think that should give you an idea on how to go about scaling things up and/or setting up a schedule!
Hi Maurizio!
Most recipes have either rye or wheat starter, and you have rye-wheat, so I am confused. Do you use it for both rye and wheats breads? Does it work fine for wheat bread using rye starter?
Hello, Anna! You don’t have to stay exclusively wheat or exclusively rye, a mix is totally fine. I use my rye/wheat starter for all types of bread (rye breads included). Once you have your starter up and predictably rising and falling you can also change the flour ratios to whatever you want and whatever you prefer (e.g. all wheat, or all rye, …)
Hope that helps! Happy baking 🙂
What are some breads made with sour starters? I am in Principles of Artisan Breads class and I’m so confused right now and have a research paper due.
I’m not sure what you’re asking exactly… you can use your starter to make any type of bread. It’s typically called “sourdough bread” if using a natural leaven like I discuss here.
Hey! This is such a great tutorial! I am on day 3 now and just realized I will be out of town this weekend. I have a question about how to handle being gone – I can take it with me (via car), but I am going north and am not sure if elevation affects it. Otherwise, I could leave it alone from Friday afternoon through Sunday afternoon (days 6, 7, and 8). If I leave it alone, should I put it in the refrigerator?
Thank you, glad you’re finding it useful! The elevation won’t affect it, if you want (and don’t mind the hassle), bring it with you!
If you leave it alone for several days I’d probably recommend you store it in the fridge. However, you might actually be better off just starting the process over if you won’t be able to feed it. Putting it in the fridge probably won’t do any harm, really, but it will probably delay the process anyways.
If it were me I would bring it with or start over when you return! Have a good trip 🙂
Hey Maurizio, thanks for your reply! I have another question for you. My starter seems like it died. It was bubbly and looking awesome but now it’s just flat and it looks like it has bubbles on the bottom but none on the top. It also smells pretty sour. Any ideas about what could have happened?
Sure thing! This is a common situation. Have you had a chance to look at my Sourdough Starter FAQ? I have this question in there (plus a whole lot more)!
Hi Maurizio.
Happy I bumped into your website! I am an absolute beginner in this and I have been following your starter recipe step-by-step using 100% rye flour. My started came alive in the second day, almost doubled in volume but since it doesnt rise (maybe just a little bit, but nothing significant). I am now in the sixth day, its consistency looks ok to me. It has this gummy-like, sticky texture (if thats an appropriate jargon, i hope you know what i mean) and it smells like beer maybe with some sweet tones too. Any idea if that sounds normal to you please, is my started dead? I live in London and temperatures at the moment vary between 17-21C.
Last question: If I understand well, you end up with120gr of starter in the jar. Thats the 40gr carryover plus the 40+40 flour and water of the feeding. If the recipe calls for more than that, ie 200gr, 250gr of starter, how you handle this please?
Many thanks!
George the process you are experiencing so far is normal. I talk about that “dead” period that will sometimes happen at my Sourdough Starter FAQ (check that out you’ll find some useful information in there!), keep at it things will turn around.
The important thing with your starter is to maintain the same ratio of ingredients (the same percentage of flour, percentage of water, same percentage of mature starter), not the actual quantities. If you need more levain scale everything up in the same ratios so you’ll have the amount of levain you need for the next bake.
Hope that helps, happy baking!
Thanks a lot for you reply Maurizio! Your advice and your time you have spent sharing your knowledge is highly appreciated.
Hi Maurizio. I’m making starter for the first time. Today is day 3. There is a dark liquid ring around the bottom of my glass jar. Is this normal?
I don’t usually see a dark ring like you’re describing here. Make sure you mix things up really, really well so no bits of flour remain unmixed or dry. Keep an eye on things and if your culture starts to smell really, really strange or show odd colors (green, dark brown, etc) you might want to consider starting the process over again.
Thank you Maurizio for you advice. I did just as you said and started over. Once again it is day 3. My starter looks great! It shows lots of activity and signs of fermentation. I have no more liquid separation. I did 2 things differently. I moved the jar from the counter top into the pantry for a more stable climate. I also purchased the pyrex spatula which is a must have for thorough mixing. I have 1 more question though. Is there a big difference between using light rye flour as apposed to dark rye flour. Thanks so much for our time!
Excellent, that’s great to hear! Your modifications sound perfect. There is a difference between dark and light rye flour: you can kind of think of it as the same difference between whole wheat and white wheat. The light rye flour has parts of the bran/germ sifted out, meaning some of the deeper flavors and nutrition. That’s not to say light rye is bad in any way, just different. In terms of your starter and using light rye it means there will be slightly less fermentation activity — which isn’t bad either, just different.
Hope that helps!
Thanks Maurizio! Sorry for the typo. I meant “your time” not “our time”. So is it possible at this stage of my starter to switch to the dark rye/apw flour mixture?
I would switch once your starter is rising and falling predictably, this way you know for sure it’s not only strong enough to bake with but also changing flour will not be an issue.
Great! There is still hope for my perfect loaf! Thank you so much. I’m so glad I found your website. I’ve been wanting to make sourdough bread for a long time and now I have the tools and knowledge to make it. Once again, thank you!
You’re very welcome, glad I could help and you’re finding my website useful! Everyone should make sourdough at home 🙂
Happy baking!
When do u add the yeast?
There’s no commercial yeast used here, only wild yeast which is actually already present naturally on the grain itself. We mix the flour with water and feed it daily to cultivate a wild yeast culture (with wild yeasts and beneficial bacteria) that will eventually turn into a predicable and stable “sourdough starter”. This starter is the basis for baking sourdough bread. Hope that helps!
Ah HAH!!! Now I understand. I’ll be starting mine this weekend. Thanks for the clarification.
Off to the store to get some rye flour.
Have fun with it and happy baking!
Thank you, Maurizio, for giving me the confidence to start the starter with limited time! I only have two weeks between travelling and I think I might get a few loaves before I’m on the road again. I also wanted to share my experiences with building the starter – maybe they can be of help to others.
I was trying to build a 100% rye starter in a very cold kitchen (16-17C) so I was using 30C water for feeding and microwaving a kitchen towel to keep things cozy but nothing (literally, not a single bubble) happened for 5 days. I really wanted to be patient but I’ve got limited time before I have to abandon the project so I re-read the post and changed two things: put the jar with the starter in the oven with the light on (23-24C) and started using bottled mineral water instead of Brita-filtered tap water and after just two days I’m on twice-daily feeding with the starter bubbling away and rising and falling happily, I’ll be baking on Sunday. Hurrah! I don’t want to jinx it but I’m so happy to see progress I really wanted to say thank you and share the solutions that really made a change. I owned a starter twice and baked semi-regularly a couple of years ago but haven’t had a schedule (or a kitchen) that would allow me to maintain it so now I’m excited like a kid before Christmas.
Sorry for the late reply (I’ve been on travel)! I hope the bake went extremely well for you and thanks so much for sharing the information about the water change and temperatures, I’m sure that will help others following in your footsteps. Have fun on travel and keep in touch — happy baking!
Thank you for your post. I am about to embark on my first attempt at making starter so that I can make sourdough bread. I have wanted to do this for a long time, and your post seems to make it clear as to how to do it. Does it matter what type of jar is used for the starter? Instead of glass, can I use plastic? Will that affect the taste or something?
That’s great to hear! It doesn’t matter what type of jar you use, I find glass to be easiest for cleaning but plastic will work just as well!
Thank you for answering all these questions, including mine. I have another question. We will be leaving on a sailboat to do a trip around the world. I like the idea of using a dutch oven to bake the bread in. What size dutch oven do you use? Do you bake the bread in the dutch oven on the stove top or inside the oven?
You’re very welcome! Wow, I’m jealous of this trip 🙂 I use a Lodge 3.2 qt combo cooker when baking in a pot — it’s a fantastic piece of equipment that can be used for much more than bread in the kitchen. I use it inside the oven.
I wish I would have waited for your reply. I went ahead and bought a dutch oven but I like your combo cooker! Thanks again, Maurizio!
No worries, they all get the job done! Glad I could help 🙂
Amazing post, Maurizio. Thank you so much for the precise instructions; as an engineer myself, I really appreciate it 🙂 I’m on day 7 and getting ready for a bake tomorrow!
Like many commenters below, I also feel bad wasting so much starter every time it needs to be fed. Do you think this starter could be used for home made pizza? I generally use dry yeast, but I’d rather re-use the starter I’m discarding and I’d love to hear from you if you have any experience with it.
Thanks so much Peppe, really appreciate that! And hello to a fellow engineer!
Yes, you can definitely use the discard from this starter to make pizza — in fact I do this at least once a week. I’ve been working on my sourdough pizza recipe and I hope to have it posted here sometime soon. I’m almost there with it.
In the meantime have a look at my recipes for pancakes, waffles and banana bread and also pastry dough — all of these things are fantastic with some of your extra sourdough starter!
Thanks again for the comments and happy baking!
Thank you for a great, informative site. Just a comment about water:
I live in Johannesburg, South Africa and tried several times unsuccessfully to get a starter going. One day I read a comment that any water will work, “you don’t need Evian”. The next day I bought a bottle of Evian water and my starter took off like a rocket.
In my case, when all else failed, Evian worked.
You’re very welcome, glad it’s proving useful!
Thanks for the comments that’s very, very interesting. I’ll have to remember to suggest this if there’s anyone ever having unexplained issues. I do know that, at least here in the USA, chlorine levels can be quite high and the water most times should be left out on the counter overnight to let it dissipate.
Thanks again and happy baking!
Hopefully it will help others. I knew the flour was good, temperature was right, the only unknown was water.
HI Maurizio! this is going to be my first attempt at a sourdough starter. My question is after day 7 do I discard the starter to the weight of 40g each time?? And also if i do will the starter grown big? Some recipes call for 2 cups of starter and im just wondering how i am going to get 2 cups by discarding the rest? And also what can I do with my discarded starter and suggestions? Like i said Im a total newbie here. Thanks for your help.
Hello! After the 7 days, which could be more or a little less (you want to see your starter rising and falling predictably, this is a good indicator it’s strong enough to bake with), you will still discard a large portion of the culture each time you feed it. Have a look at my post on my sourdough starter maintenance routine for some ideas on how much to discard and how much to keep. 40g is a good rule of thumb but it depends a lot on how much you’re feeding, temperatures in your kitchen, flour selection, etc.
When you’re going to make a levain (or leaven) for a bake you will want to take a portion of your mature starter to make that levain. This is usually discarded when you’re just feeding each day, but when you’re going to bake the discard is what you use! I hope that makes sense. If you need more mature starter to make your levain than you typically have you can scale everything up to make sure you have enough.
For example: I mention keeping around 40g and feeding with 40g water / 40g fresh flour, keep this same ratio and scale everything up until you get to the amount you need for a bake. If you need 200g mature starter to make a levain, just double everything (keep 80g starter and feed with 80g water/80g flour) so you have 200g mature starter you can take from your mature culture in the morning/evening.
Hope that makes sense! Happy baking 🙂
Also, head to my Recipes page and scroll down to “Other foods with sourdough starter” for some ideas on what you can make with discarded starter!
Hey there Maurizio! This is a great guide. Unfortunately though, I’m having trouble getting my starter going. After the first 12 hours I’m seeing my starter double in size. Then 12 hours after my first feeding, the starter triples in size. After that things go downhill, and after each feeding I’m seeing very little activity until I finally declare it a failure. I’ve started over about three times now…
I’m using a 100% rye starter. My only thought is that maybe my apartment is getting too warm during the day; it’s probably in the upper 70s (no A/C so not much I can do). Any thoughts on what the problem is? Thanks!
Hi and thanks, I appreciate that!
Have you had a chance to take a look at my recently posted Sourdough Starter FAQ? I have a few answers in there that might help you!
Sometimes you’ll see this initial surge of activity that wanes after a day or so. Keep with the feeding schedule and it will eventually pick back up. I would recommend doing a 50/50 flour blend with 50% all purpose white and 50% rye, but if you only have rye that should work fine as well. Upper 70ºF’s is actually perfect temperature!
Check out my guide and let me know if you have any more questions!
Great! Thanks for the feedback. I’ll give it another go this week.
Hi Maurizio, first off thanks so much for this detailed guide, making a sourdough starter seemed so intimidating (I’ve only been baking bread for about 2 months) but your guide helped so much. I’m on day 7 of my sourdough starter and I’m on my second day of feeding it twice a day. The problem is because I live in a really hot climate (33deg C right now) my starter is rising and falling in about 7 hours (peaking at the 4-5h mark). Does that mean I have to feed it every 4h? I sleep more than 4 hours every night (haha) so it would be quite hard for me to keep to that schedule. You mentioned that to make it slow down I could feed it more each time (or reduce the amount of starter carryover). So if I leave 40g starter, feed 60g flour and 60g water would that still be a 100% hydration starter, and would that be a good idea? Thanks so much.
You’re welcome, glad you’re finding it useful!
I’d recommend reducing the amount of starter carryover. Because it’s so warm I would try 15g carryover and then 60g flour and 60g water (100% hydration = 60g flour / 60g water). If it’s still peaking and falling before you can get to it you could up the flour and water to 100g each.
That should work out just fine! Happy baking 🙂
Hi Maurizio, I really loved your explanation, and it inspired me to an idea, forgive me if it sound silly this is my first starter, can I avoid discarding by doubling feeding sessions through out the day? this is what I’m thinking: today was the second day and it was 12 hours feeding system, so tomorrow every 6 hours? it’s unpractical but it save the waste and I’m planning on keeping it up for 4 days because I live in a very hot climate and I think I can make the starter ready to bake within that period. what do you think?
You’re very welcome! You can adjust the feeding schedule and amounts however you’d like! Just remember you want to discard quite a bit at each feeding to reduce the overall acidity in your culture, otherwise this acidity will eventually follow through to your baked loaves.
Feeding every 6 hours is fine as well, just make sure you give it enough flour & water to get to the next feeding.
Hope that helps!
Holy Smokes Maurizio… Strike me dead if you need to… BUT is anybody making bread?? YIKES… AND BLESS YOUR JOBS HEART… for answering the same question at least. :-)&$#:-) times… YIKES… I guess I do the same thing too… what do you think you need to do??… do I need to go on some valium to settle my poor little micro brain down… it helps if you put your “tongue in cheek” when you read this… lol
🙂
Hello Maurizio
Started your starter yesterday,should i keep discarding and only be left with jar weight + the 40g of starter and then give the new feeding of 40g+40g. I dont see u mention it after day 4,and your photos looks like it”s getting more and more,with no discarding.
I have read a 100% hydration of the starter is when u discard and feed only the amount that is in there,thats including the water. Example
In your step,u have 40g after we discard then we add 80g(40+40) but is 100% not equal parts. Meaning the feed should be 40g ,20g flour and 20g water should feed the 40g starter.
Yes, always discard down to just 40g carryover starter plus jar weight. It looks like the amount is growing more and more because activity in the culture is increasing and so the level of my starter began to rise higher and higher (this is a good thing).
I see what you mean about this not being exactly a 100% hydration starter with these feedings. The important thing to keeping a 100% hydration starter you feed it with equal parts water and equal parts flour. It may not be exactly 100% hydration at the beginning (when you factor in the carryover amount in the jar as you mentioned) but after several days of feedings the starter will eventually take on 100% hydration because that’s what you’re feeding it with. So yes, there will be a little bit of time where there’s a lag but eventually it’ll get to 100%. This same logic applies when you’re converting over a starter from, say, 65% hydration to 100% or vice versa.
I hope that makes sense and helps!
Hi Maurizio, first off — I love your blog! So informative! I’ve tried making my own sourdough starter and completely failed so when I came across your blog, it re-inspired me to try my hand at making starter again. I’m on day 6 right now and did a feeding in the morning, but in general I’m not noticing the starter falling the next morning. There are definitely lots of bubbles and activities but yesterday morning and this morning it just appears that the start has risen, but not fallen. Do you think I should go ahead and do two feedings? Does the fact that I just used only dark rye matter? I also noticed that while the entire starter has lots of air pockets there aren’t as many bubbles on the surface as the ones in your photos. Thanks for the help!!
Hi there Karen — thank you for the kind words! In the beginning you won’t quite see the activity I show here at the end, it takes a little while to take hold and get strong enough to bake with.
It’s good that you’re seeing some bubbles, even if it’s not quite rising and falling. Keep with the schedule and up your feedings to 2x per day since you indicate there are lots of bubbles and you’re seeing activity.
The reason we increase our feedings is because once fermentation does start to happen we need to provide more food (flour & water) for your culture before it runs out. We always essentially try to time feeding our culture so it’s just about to run out of food (which is when it starts to fall in height) when our next scheduled feeding time is.
I hope that makes sense, let me know how it’s going and if you have any more questions!
Can I make this with whole wheat flour + rye flour instead of white flour + rye flour?
Just saw the answer in a previous question! I’m excited to start my whole wheat starter!
Right on! Have fun and happy baking 🙂
Thank you so much for your blog and all your advice. After several failed attempts at making my own sourdough starter, I decided to give it one more shot after reading this post. I am now on day 7, just did my second feed for the day and things seem to finally be moving along as they should be! I used the 50/50 mixture of rye flour and organic unbleached while flour and used pineapple juice instead of water for the first two days. That seems to have helped. On days 3 thru 5 the scent of the starter was so pungent and honestly quite horrible but yesterday and today I have noticed a huge improvement. The starter is also rising to its peak in 6 hrs then starting to fall. I live in a tropical climate and my kitchen is always quite warm so instead of looking for the warmest spot I try to find the coolest spot to leave the starter. Everything ferments faster here! Hopefully in the next few days I can make my first sourdough loaf with this starter.
Thanks for the comments and I’m glad to hear your starter is beginning to take off — that’s exciting and always great news. Baking in warm environments can be challenging to be sure, just keep an eye on your dough temperature (when you get there) and if things get too warm you an always keep some water in the fridge to help cool (and slow) things down.
Happy baking!
Hi! This is the second time I am trying this 7 steps, and both time the same things happen: it gets very nice and aromatic and lots of bubbles, but it doesn’t fall. It will rise, but then it will not fall. What does this mean? Should I wait to feed it until it does fall or just always do 12 hours? I did one in the winter and then scratched it and now it is the summer and hot in the kitchen between 70 and 80 F, and same thing, lots of rising, but no falling…..
-Katie
Hi, Katie! Have you tried letting it ferment past the 12 hours? That time is just a guideline, it could be shorter or longer for you depending on various factors (flour use, ambient temperatures, the culture itself). Try to find a warm spot in your kitchen and keep it there — around 76-80ºF would be perfect. Should definitely see it fall after some time, especially 12 hours.
Give it some time, it will fall if it’s rising! Hope that helps, let me know how it goes 🙂
Thanks! I have been doing feelings at 7 PM at night so I may try to wait a little longer to see. There are so many beautiful bubbles and it smells great just the lack of falling is the only issue. I will see what happens if I wait past the usual feeding. This morning it had risen more than it has yet so hopefully that’s a good sign!
I will keep you updated. Thanks for your help and beautiful blog
Hi, Maurizio,
So I waited and didn’t feed it at the usual time and when I woke up this morning to feed it instead of last night, it really didn’t seem like it had fallen! But there was the thick, hard crust, that developed on the top. Could that be preventing it from falling or preventing me from seeing if it did fall? How do I prevent that crust from forming because underneath it looks great but the top seems to stop me from seeing bubbles/potentially stop me from seeing it fall?
Thanks!
Do you have a lid on your jar? Try keeping a loose-fitting lid on top there to help reduce that drying out, that could definitely be causing the issue. On My Baking Tools page you’ll see the Weck jars I use, I just sort of leave the glass lid on there without clamping it down. This lets gas escape if necessary (otherwise pressure will build up as fermentation proceeds) but prevents too much air from getting in and drying things out.
It sounds like everything is moving along well for you besides this hard top issue, that’ll get straightened out!
Thank you! Now I have another question. Everything has been going really great and it’s really really vigorous activity. It smells INCREDIBLY vinegary like hurts my nose vinegar smell. I only have time to feed it twice a day because I work in the mornings and then don’t get home until 8 hours later. Today I had off so it was my first time trying to feed it three times, and it started to smell heavily like vinegar even just 3 hours after my second feeding. What does that mean?
Alos, I want to put it in the fridge soon since I will not be baking everyday. When is a good time to put it in the fridge in terms of when it was fed? I probably will be baking on Wednesdays, prepping on Tuesdays, so what would be a good schedule and when should I put it in the fridge to not have to feed it everyday since I won’t be baking everyday?
Usually when you get that sharp, acidic smell it indicates your starter needs a feeding earlier. Temperatures might be high in your kitchen, or things are just moving at a faster pace. You could try reducing the amount of mature starter you keep after discarding. For example right now it’s about 76ºF in my kitchen so I’m only keeping 15g of my mature starter and then feeding it with 100g flour and 100g water. This lasts about 10-11 hours for me before I get that acidic smell and it starts to fall.
If you used your starter to make a levain on Tuesday right after making your levain feed your starter with fresh flour and water, let sit out 30 minutes on the counter and then pop it into the fridge. Next Sunday or Monday take it out of the fridge sometime during the day, give it an hour or two and then feed it per usual. Feed it 2x a day until Tuesday again and repeat. That should work really well!
When you remove some of the starter to get it back to 40g do you discard that amount? So happy I stumbled upon your blog!!!
Hi, Heather! Glad to have you here 🙂 Yes, discard the amount of starter you remove. You can either choose to compost it or even use it in other foods; see my other recipes for pancakes, waffles and banana bread — they’re awesome!
Happy baking!
I’m on day two of my starter and it looks to be developing well (bubbles, smell), but it is seeming very watery. Any thoughts? Should I do less water than the 40g on my next feeding?
Mine did the same thing. I just added a few more grams (3-4?) of flour like it says and it worked perfectly. Even though it stays at 100% hydration, it seems like it gets thicker over time. Mine’s been around for about 2 weeks now and it’s much firmer than it was at day 2.
That’s the way to do it: just increase/decrease flour until your starter gets to the consistency you’re looking for. There is really no “right” or “wrong” way for it to look, it’s how you prefer and what makes things easier for you. Variations in flour from bag-to-bag can also play a role, sometimes a bag of flour requires a little more water than the previous, and adjustments can sort that out.
Thanks for the comments!
Thanks for the feedback. I know these starters are forgiving, but this wouldn’t be my first failed attempt so I want to get it right this time around.
See my reply below if you don’t get a notification!
I’m on day six and it’s working nearly exactly as this post describes. I am SO excited to make my first loaf. However, I don’t think I’ll be baking as often as every few days, but I’d like to be able to bake the next day whenever I do want a loaf. Is it possible to alter the amount of starter and feedings by, say, half? As in, I only increase the starter to 40g when I want to bake and 20g the rest of the time? Thanks for the help!
That’s fantastic! Hopefully by now you’ve got yourself a strong performing starter.
It’s possible to carryover a very, very small amount of mature starter to each feeding (and potentially also add more flour at each feeding, providing more “food”) but you’d have to play with this. Temperatures also come into play here quite a bit, if it’s really warm then that speeds up fermentation, and conversely if it’s chilly that slows things down. You can always try it out, perhaps make a second “test” jar with some flour and a small percentage of mature starter and see how long it takes for your culture inside to rise all the way to the top and then begin to fall (indicating it needs a refreshment).
Alternatively you can also use the refrigerator if you plan to bake only once or so during the week, or go stretches of several days without baking and dont feel like feeding your starter. Once you’ve mixed up a refreshment feeding just stick it into the fridge and it can stay in there resting for weeks at a time. When you want to bake again take it out a day or two beforehand and feed it regularly to get it back up to speed.
Hope that helps!
My ambient temp has been around 76° for the entire life of my starter, but it seems to be getting stronger every day. The bubbles are growing in size and it’s peaking sooner. I’ll be resuming school soon and need to get it to a twice a day feeding schedule. I tried reducing carryover from 40g to 30g, but that seemed to only give me and extra hour before it starts to fall again. It wants to be fed well before the 12 hour mark. How can I correct this? I know using less starter and cooler water are options, but what is the limit for adjusting those variables down?
On a positive note, since my starter was SO much stronger on the second bake, the loaves rose at least 50% more and the dough was significantly easier to work with during shaping. I was pretty surprised at how the fermentation increases the strength of the dough!
In the summer I typically go as low as 10-15g carryover, and for me in my kitchen (which is about 74ºF) that lasts a little over 12 hours. There are a lot of factors that go into this including flour blend types, temperatures of course and also environment. Keep playing with the carryover percentage (I feel like 5-10g is probably the lowest to go) and see if you can stretch it out longer. Like you mentioned another thing is to use cooler water if possible/easy but also find a nice shaded spot in your kitchen which would also help.
Sounds like your starter is getting quite strong which is fantastic! Yes, the organic acids produced through fermentation will strengthen your dough quite a bit — it’s incredible!
Happy baking!
Hi having a little trouble getting my starter going. I live in Brisbane Australia where it’s currently winter and the temperature is sitting between 9-25 degrees Celsius. I haven’t got my starter rising and falling yet but there are a few bubbles and a vinegary/sour smell. It’s been 9 days and I’m worried I will have to start again. Is the temperature something that could be slowing the progress or should I just be more patient and wait for more activity ?
Cheers Susie
Hi, Susie! Yes, temperature plays a huge role in creating a starter. The warmer the temperature the more fermentation you’ll see (within reason). Somewhere between 75ºF and 82ºF would be good range to shoot for. Do you have a warm spot in your kitchen you can put your culture? I like to take a little ambient thermometer and place it around my kitchen to see where warm spots are.
You won’t have to start over, just find a warm spot. Alternatively you could warm up the water you use to do your feedings to this temperature and that’ll help.
Keep me posted!
I’m following these directions for my first starter. I couldn’t find rye at my grocery store so I’m trying a starter that is 50/50 Whole Wheat (some bran sifted out) and White, and 100 Whole Wheat (some bran sifted out).
I’m on day three and I can see the 50/50 starter as risen and fallen, but the 100 has risen without falling yet. I’m wondering if this is because the 100 starter has more nutrients in it then the 50/50 so the mixture is lasting longer?
Or is it because the 50/50 culture is developing faster and depleting the food source quicker ( if that makes sense).
Also as far as leveaning bread, is it better to have a starter that rises quicker?
I almost always see more rise from starters that have more white flour versus a 100% ww one. This is probably due to the nature of white flour and its ability to rise higher than whole wheat (which has more bran/germ, causing a lower rise).
Your whole wheat starter will definitely ferment faster than the 50/50 and if all else is equal it should deplete the provided food (flour/water) faster. Whole grains ferment faster than non, like you said, it’s due to the additional nutrition in the flour (more bran/germ).
I wouldn’t say a starter that rises quicker is better for making bread, but strong fermentation is always a good sign. You want your starter to rise and fall predictably after you’ve fed it, visible gas bubbles on the sides and top, and the “correct” smells (sweet just after feeding that progressively gets sour as it consumes food) are a all good signs.
I hope that answers your questions, let me know if you have more or I’m unclear! Happy baking 🙂
Greetings Maurizio, hope you enjoyed your weekend. Just curious… Have you ever experimented with using grapes or red cabbage leaves when you start a new starter? A friend mentioned that there is wild yeast in the grapes that makes for a very active starter. Thank you in advance!
Hello and thanks! No I haven’t tried using grapes or red cabbage. I’ve heard of this, though and I do know there are wild yeasts on these items as well. Would be fun to experiment with that.
I’ve found creating a starter fro rye flour to be pretty straight forward and have done it a few times at this point — works really well!
Another question: when attempting 100% rye flour starter, it gets moldy on top after several days. However I didn’t feed twice a day, just once. Is it possible that a 100% rye starter is just too difficult without any wheat flour? (allergic to wheat and spelt). That said, this post gives me hope!
I’ve never made a 100% rye starter but this is definitely possible. Make sure you’re feeding and discarding according to the schedule in this post. You can also stir your starter halfway through the time when you feed and when you feed again. This stirring helps to prevent the top part of the starter from being exposed to air too long which can develop mold especially if your environment is very humid and warm. Try to keep your starter around 80ºF max temperature and keep it covered with a towel or loose-fitting lid (so gasses can escape, if necessary).
Really though the stirring should help with this problem!
In an effort to not waste any flour: What do you do with the discarded, partially fermented rye/water mix when starting the starter? Is it good enough to make an easy waffle recipe with? What would you suggest, so as not to waste?
Hi! You can follow my recipes to make banana bread, pancakes and waffles, all very good!
Hello there! I’ve spent the last hour or so reading through your blog and feeling jealous of your bread. I’m a gluten-free baker experimenting with sourdough…I’ve had pretty good success, but I don’t think I’m getting the maximum lift out of my starter. You’ve given me some great ideas for creating a better starter (though it looks like I’ll have to throw out my current starter and begin all over again)…Thanks for the help and I’ll be surely coming back to your blog in the future!
Thanks for the comments! You don’t need to throw out your starter, if it’s rising and falling just use a small amount of that and feed it regularly. I have a post on maintaining my sourdough starter, if you haven’t read that take a look! Just use a small amount of your starter and feed per that schedule for a few weeks. You should notice significant activity and reliability.
Good luck and let me know if you have any issues!
Hi, buddy. Tks for the recipe and instructions. We’re going well on day 3. Just a doubt. When I stop discarding and just add flour and water?
Tks again.
Sure thing! You never stop discarding, you’ll always discard a portion of your mature starter and feed it with fresh flour and water. If you never discarded you’d end up with quite a large amount in your jar! But further, that part you discard has a lot of acidity built up and eventually your bacteria/yeast will exhaust all the fresh food (flour/water) you’ve given it. Carrying over a small amount and adding new flour and water keeps your culture going with new food.
Hi Maurizio–
Was glad to find out that you also live in New Mexico! Makes sense that your guidelines make far more sense to me than the others I’ve come across.. 1:1 ratio between flour and water always develops a hooch for me. I have to do roughly twice the amount of flour.
So, Ive just started my process- 5 days in, and I’ve exclusively been using spelt flour because I haven’t found any rye in SFe markets. I think I finally have my ratios worked out, and bubbles seem to be spread throughout. It does seem generally pretty sour smelling though– like green fruit.
RE: Chad of Tartine’s quote about determining the hunger of the starter by smell, vinegar means “hungry”, yes? So right after feeding, it should be *sweet* from new mixture of flour and water?
Also, I’m a little confused on the baking component. So, is it okay to just have a shallow dish with water at the bottom for steam, and then on top: either baking stones to place the bread on OR a dutch oven? I have a very small propane oven, so I’m not even convinced a dutch oven would fit inside… I’ll have to measure.
Hello there fellow New Mexican! Sorry for the late reply I was out on travel.
Yes, when your starter has fermented for a while and is “mature” it’ll start to smell more and more sour. When you do a feeding immediately after it’ll smell sweet — mostly because there is only a small percentage of your mature starter used to feed so most of the sour (acidic) parts have been discarded and fresh flour mixed with water smells quite sweet.
You’re right: a small pan at the bottom with water or ice that steams will be plenty to give your bread enough rise. You might also want to lightly mist the top of your dough with a hand mister to add a little extra moisture into the oven.
You either use the pan + water and baking stones OR the Dutch oven (you can put the Dutch oven on the stones if you’d like, but the pan is not necessary). The DO will trap the steam released from your dough and create a nice humid environment as long as the top is on and relatively sealed. The pan with water helps emulate the same conditions.
I hope that helps! Happy baking 🙂