

If you had told me many years ago that I could make enticingly crunchy, tender, and healthy bread at home with only a few elemental ingredients, I would not have believed you.
I would have claimed that baking bread requires a professional mixer, a specialized oven, and a list of ingredients so long your eyes start to glaze over. But now I perform this alchemy daily in my home kitchen: transforming three basic ingredients into wholesome sourdough bread. How does one begin the journey of making naturally leavened bread at home? It starts with, well, making a sourdough starter from scratch.
A healthy sourdough starter means great bread.
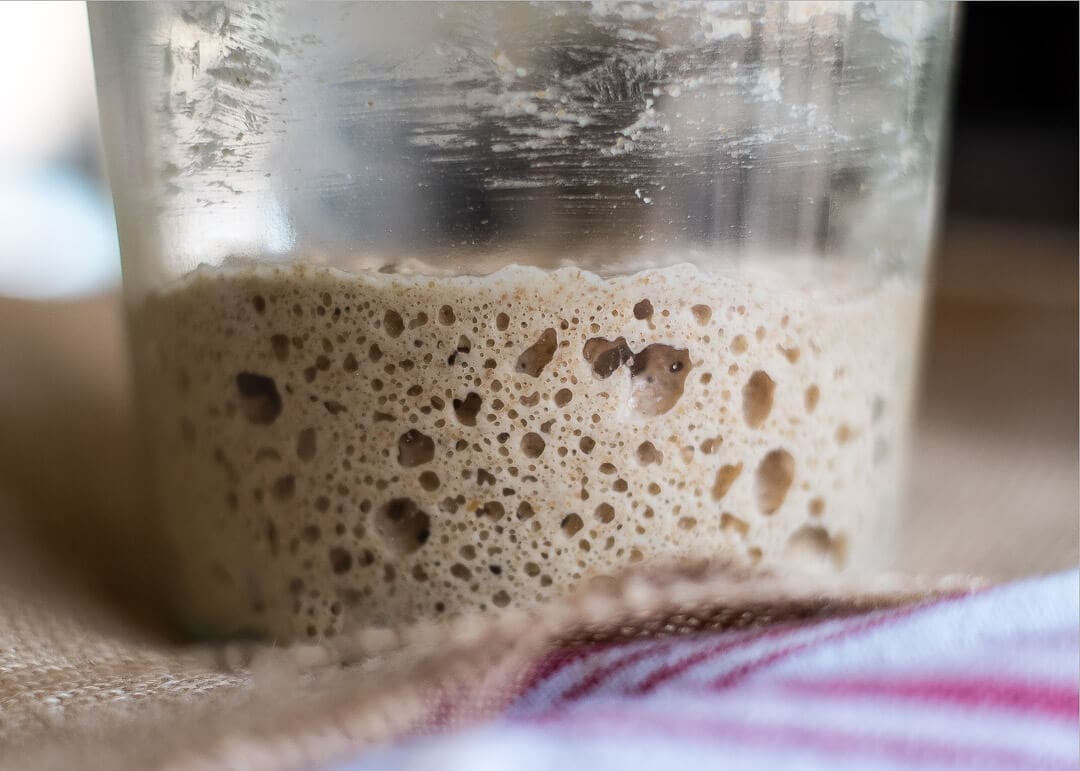
Despite all the mysticism and lore about creating the concoction, a sourdough starter is merely a naturally fermenting mixture of flour and water. Add water to dry flour, let it sit on the counter for a few days, and you’ll see nature weave life into a once lifeless lump: bubbles will appear and the mixture will rise.
This natural fermentation can be harnessed and (once it is stable) controlled to produce bread so flavorful and healthy that it’s hard to go back to anything else.
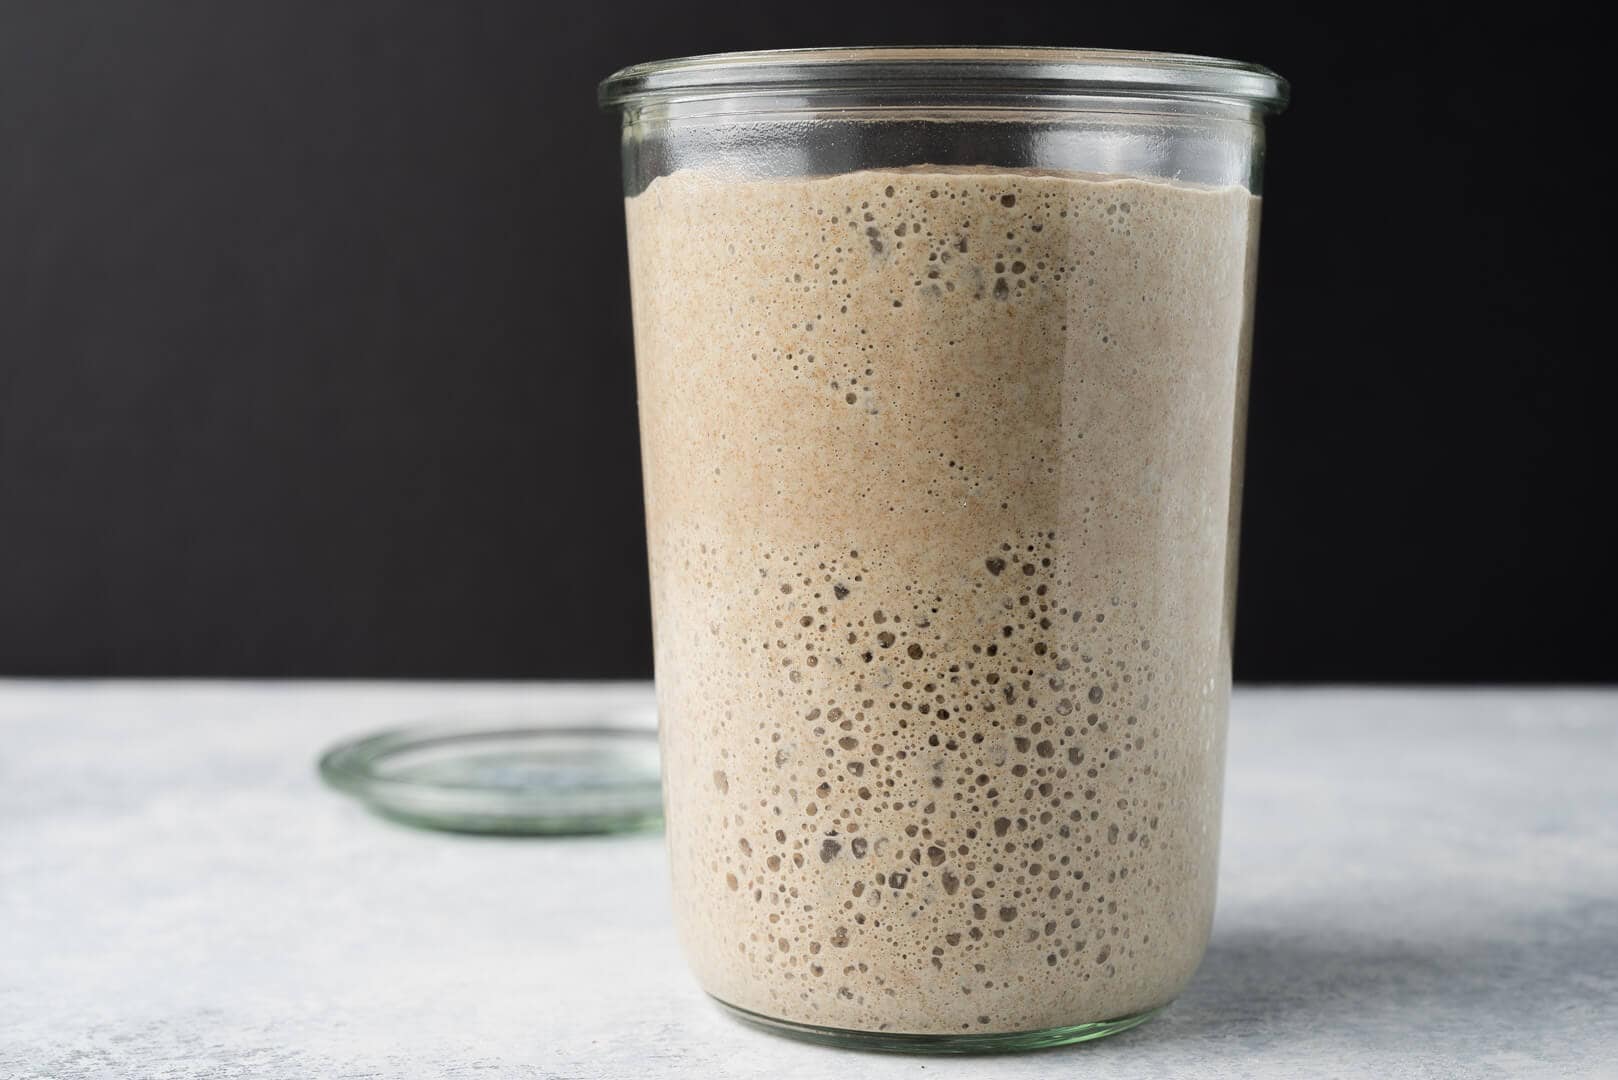
I created my sourdough starter years ago (using this sourdough starter recipe), and it’s the same one I use to this day. It’s a spoiled brat now, to be sure, thanks to all my coddling, but in exchange for my attention and flour, it stays on schedule. Besides, when I’m baking, it does the heaviest lifting (bread nerd joke, sorry). Initially, it was the quintessential rebellious child. Sometimes it wouldn’t show any fermentation activity, and at other times it was utterly unruly. Back then, I didn’t realize what it needed to thrive. I didn’t see how vital timely refreshments (also called feedings) were or how much temperature impacts fermentation.
The key to raising a well-adjusted starter is to observe its needs, give it space to grow, and adjust the refreshments to encourage maximum fermentation activity. And a healthy starter means great bread.
But first, let’s quickly look at what a sourdough starter is.
What is a Sourdough Starter?
At a high level, a sourdough starter is a mixture of flour and water that hosts a stable blend of beneficial bacteria and wild yeasts. This mixture is continually maintained with regular refreshments (or feedings) and is used to leaven and flavor new bread dough. The starter is the cornerstone of successful sourdough baking, and especially for a home baker with changing environmental conditions in the kitchen, learning how to care for and use one is the key to bread with the best flavor, texture, and keeping qualities.
A Few Tips Before We Begin
Water that’s high in chlorine or chloramine (disinfectants used by some cities to clean tap water) can impede fermentation. The night before you want to make your starter, fill a large jug with tap water and let it sit out uncovered overnight to allow any chlorine to dissipate. If your city uses chloramine instead of chlorine, letting a jar sit out overnight will not work. In this case, you’ll have to use bottled water or filtered water (if you are concerned, you can test your water with over-the-counter test kits to determine whether there are additives or other issues). Alternatively, you could use bottled spring water until you get your starter fermenting reliably, then try switching back to tap water with a portion of the starter to see if it’s able to handle the tap water (but don’t use all of it just in case it doesn’t work).
After you mix the flour and water in the jar, be sure to keep the jar lightly covered during the rest of the process. Either a porous cloth or a lid resting on top of the jar will work well. Use a container with enough headspace for the mixture to rise—I like to give at least 5-inches of headspace. Additionally, it’s a good idea to place your jar in a bowl while it’s resting in case the mixture overflows.
During the first couple of days, there’s often a surge in fermentation activity that then drops off dramatically; this situation is probably caused by other yeast and bacteria that are initially present but eventually die off. When this happens, many first-timers think that it has “died,” and they start over. Don’t be fooled by this lapse of activity; continue with the schedule and eventually, the desired yeast and bacteria will move in and stabilize the starter.
The entire process is exceptionally temperature-dependent. Instead of a typical cooler room temperature, I find a warm temperature of around 80°F (26°C) helps kickstart activity since this is near the temperature at which the bacteria and yeast are most active. A home dough proofer (which I highly recommend) and a yogurt maker are great tools for maintaining such an environment. If not, a home oven, turned off, with the light on the inside (and a thermometer to monitor the temperature), or a microwave with a bowl of warm water inside, will both work well.
For even more tips on this whole process and many things related to sourdough starters, check out my Sourdough Starter Frequently Asked Questions page →
Helpful Tools to Make a Sourdough Starter
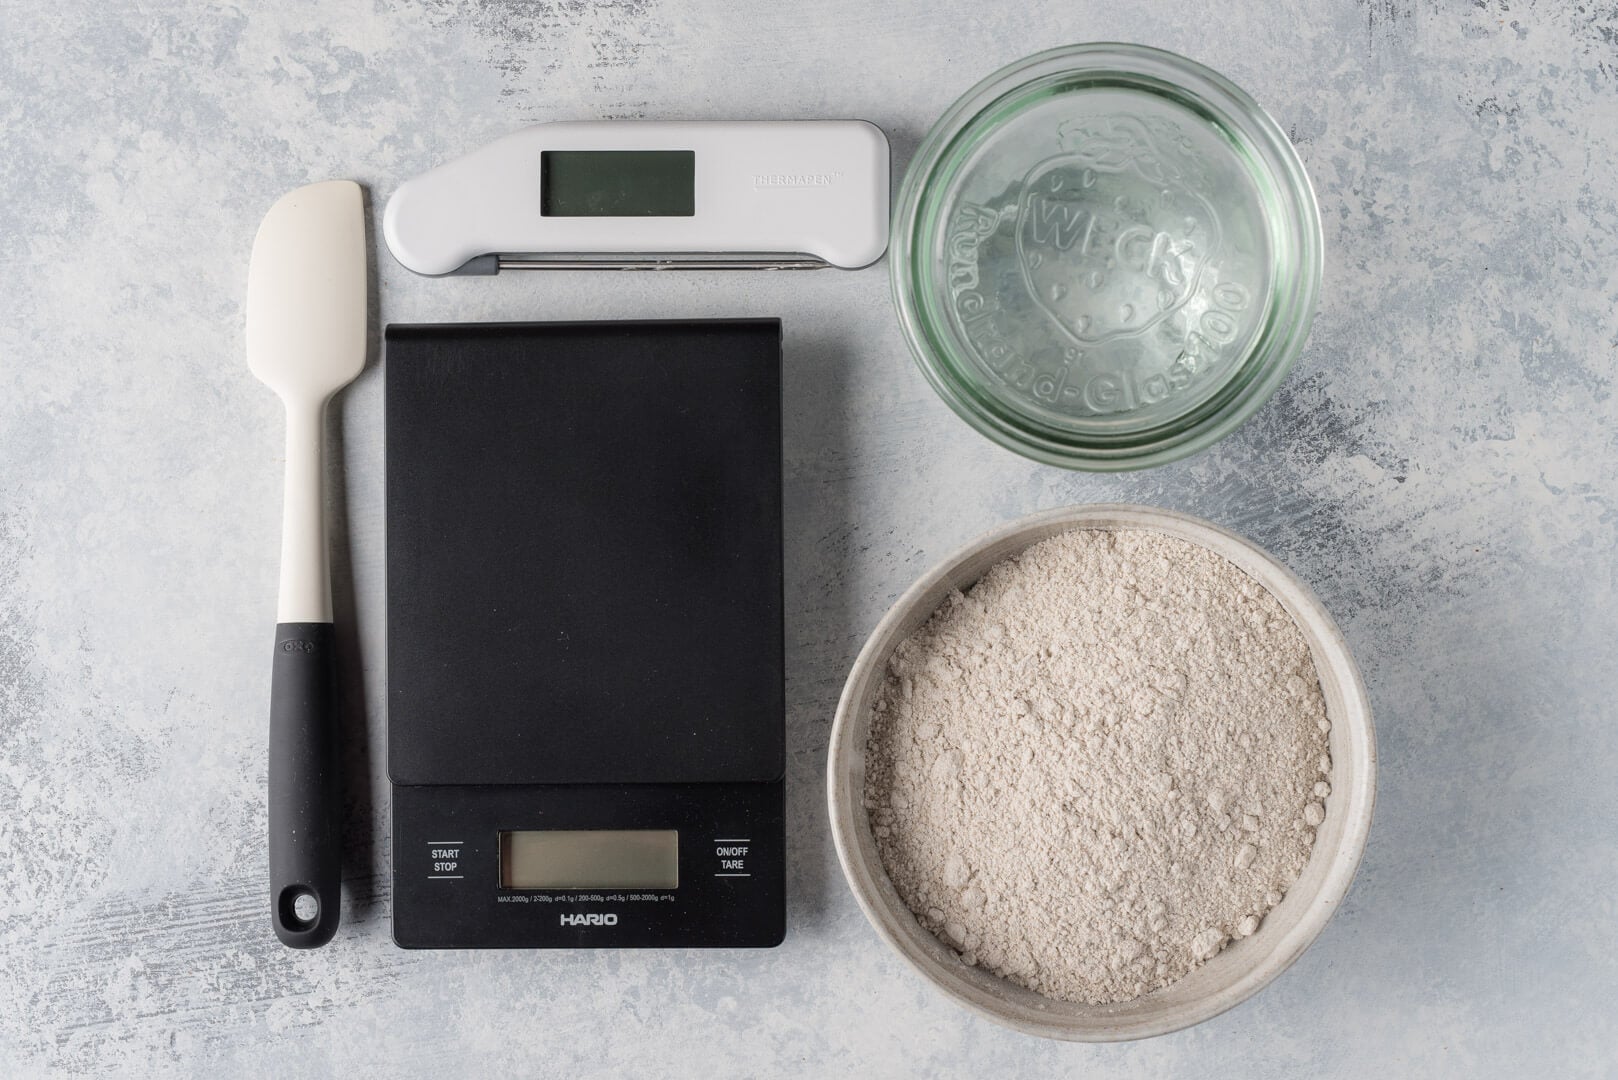
You can see a rundown of all the tools I use for baking sourdough, vetted over years of baking, over at my favorite sourdough baking tools page. Here, I list what I consider the necessary tools to get started:
Weck glass jar
Have at least two clean jars on hand. I like these Weck jars (#743, 3/4 liter jars) best because they taper out towards the top, making it easy to stir, and they don’t have any hard-to-clean lips or edges. Also, using the glass lid without the provided rubber seal and clips provides just enough of a seal to keep moisture and heat trapped inside.
I recommend using glass jars because you can easily see the fermentation as it progresses. It can also help to place a rubber band around the jar at the height of your starter after mixing so you have a visual guide for how high it rises between refreshments. Two more reasons I like these jars: they’re high quality and very economical. They are canning jars, so you can use them for many other things around the kitchen (jam, homemade pesto, dried fruit, cereals, and so on).
Silicone spatula
I use a small, firm spatula to do my feedings. It’s sturdy and easy to clean with a sponge, and if things get messy, you can run it through the dishwasher.
Scale
A kitchen scale is indispensable and guarantees accuracy when measuring the amount of flour needed for each starter refreshment. Measuring flour by volume is inherently imprecise as the amount of flour packed into a measuring cup can vary. Further, it’s a good idea to get used to using a scale for weighing ingredients, as this method is essential for improving your baking consistency.
Rye flour
Using whole grain (“dark”) rye flour helps expedite the fermentation process. In comparison to white flour, rye flour is teeming with extra nutrients that help kickstart the entire process. If you don’t have rye flour, a good quality organic whole wheat will also work well.
Unbleached, all-purpose, white flour
With my starter of 10+ years, and outlined in my post on how I feed (refresh) my starter these days, I typically refresh it with 70% all-purpose flour (or bread flour) and 30% whole rye flour. I like this mix because you get the fermentation boost from the whole-grain flour and the white flour’s increased gas-trapping ability and gluten strength. This helps me spot the signs of fermentation throughout the day and is a good compromise, using just enough whole grains without my starter getting overly acidic too quickly.
Thermometer
An instant-read thermometer will help monitor the temperature of your starter and ensure that it’s in the optimal range for increasing fermentation activity.
My Free Sourdough Starter Quicksheet
My sourdough starter quicksheet is a free, one-page printable guide to feeding, maintaining, and using my sourdough starter. Download it, print it, and keep it in your baking notebook for quick reference!
Starter Refreshment (Feeding)Schedule
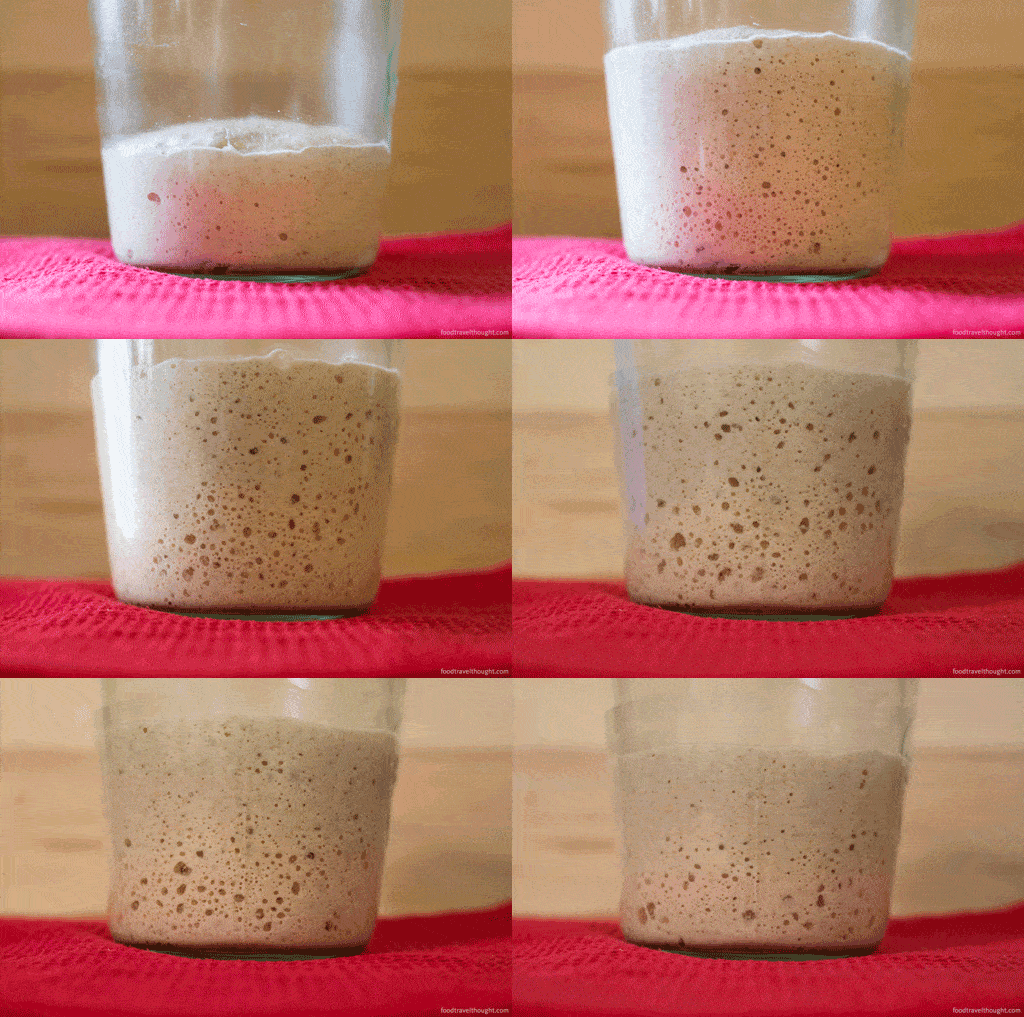
In the beginning, your starter refreshments will occur just once a day. As your culture becomes more active, you’ll increase this to twice a day. Because of the frequency of these feedings, one of my goals is to help you set things up so it’s quick and easy to do your feedings and move on with your day. Once you get the hang of things, you only need about 5 to 10 minutes per day to keep your starter going–totally manageable.
A sourdough starter is very resilient. If you forget to feed it one day or feed it several hours after it needed a refreshment, don’t worry, in almost all cases it will spring back.
The following sourdough starter recipe schedule will provide you with a reliable and robust sourdough starter in 6 to 9 days. Once you have the culture stable, it will last indefinitely as long as you refresh it regularly. If you don’t plan to bake frequently, you can toss the starter in the fridge and feed it only once a week. (I’ll discuss this in more detail later in this post.)
Your schedule will follow the natural rise and fall of your starter. As soon as you feed it, the yeast and bacteria in your culture will begin to metabolize the sugars in the flour, creating gasses (among other things) as a byproduct. These gasses cause the starter to rise throughout the day as seen above. Once they subside, then the starter falls.
Daily Refreshment Process
At each refreshment, we will perform the following quick steps:
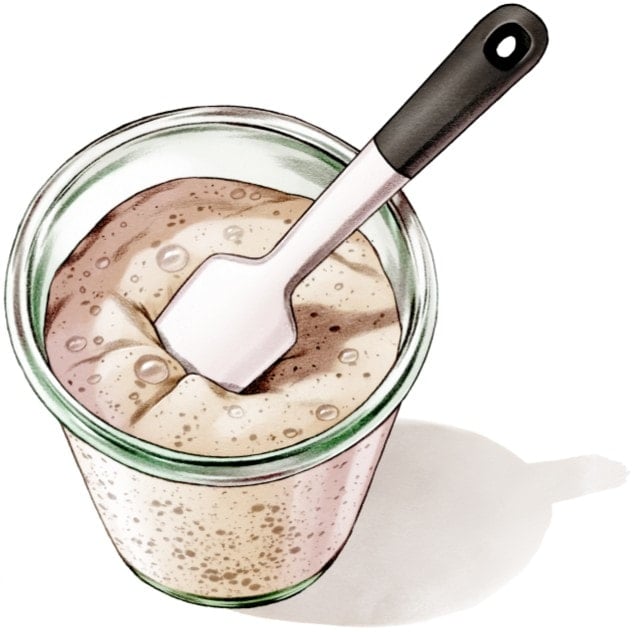
- Stir your starter a little bit with your spatula
- Place a clean jar on your scale and scoop in some portion (outlined below) from the jar you just stirred down
- Add fresh flour and water; mix well to incorporate completely
- Cover the jar loosely and let rest until the next feeding
That’s it! Once you get your process down, it should take no more than a few minutes each day.
Sourdough Starter Recipe: Making an Incredible Sourdough Starter from Scratch
Day One

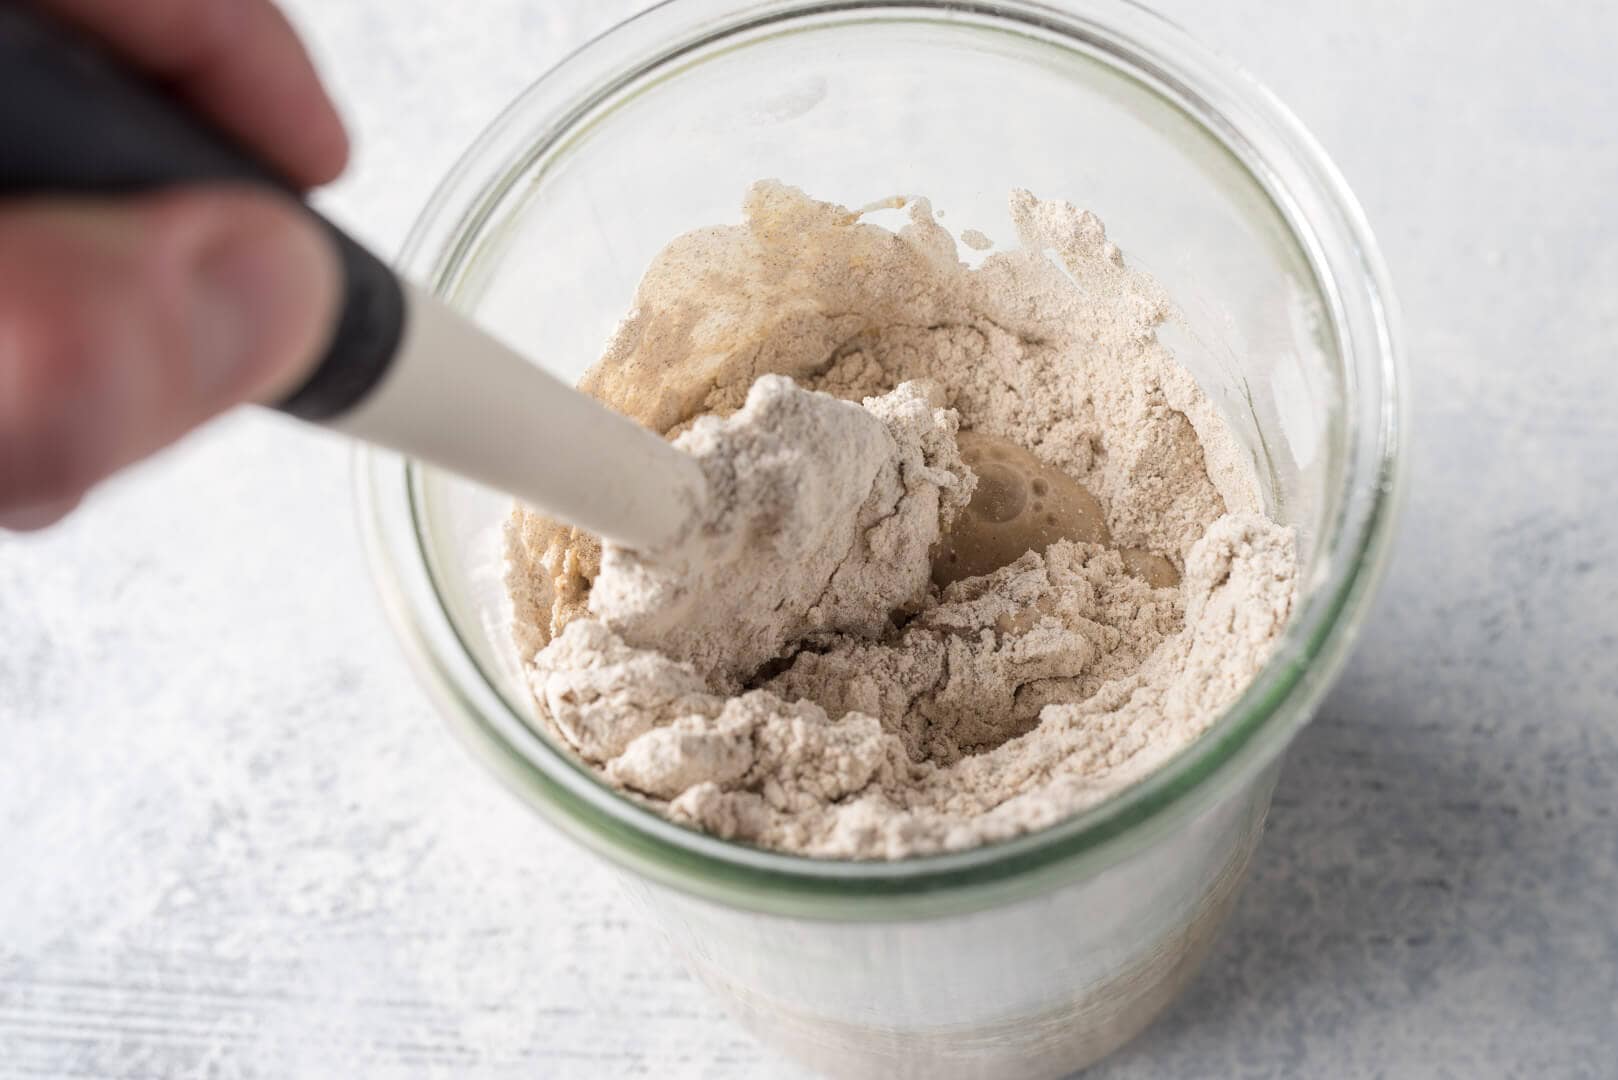
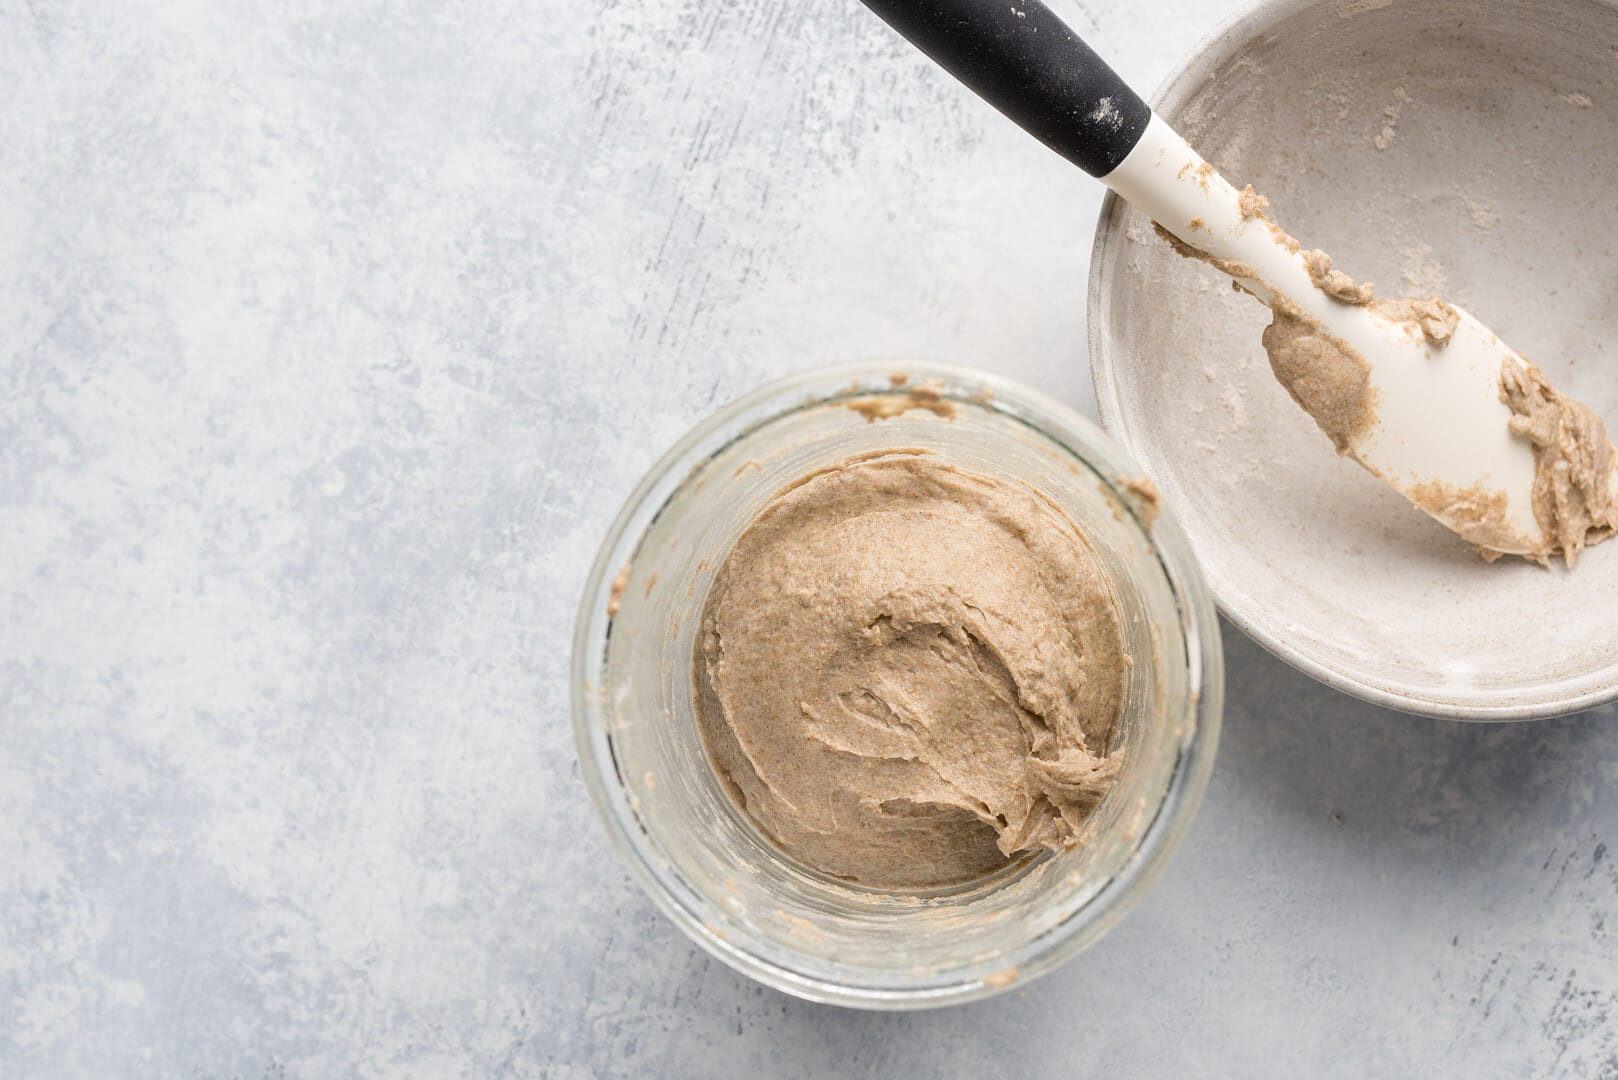
Initially, I like to use two jars for this process: each time you refresh, swap in a clean jar. Starting on Day 4, you can use the same jar: discard down and add fresh flour and water.
I first like to weigh the jars I’m using (without the lids) to find their empty weight. Then, take a permanent marker and write the jar’s weight on the bottom. This way, we know the baseline weight of the jar so we can quickly figure out how much starter to keep during each refreshment.
In the morning, place a clean, empty jar on the scale and tare (the “tare” button on your scale will zero it out after you place your jar on top. This will allow you to measure the flour and water your place in your jar and exclude the jar’s weight). To that jar, add 100 grams whole grain rye flour and 125 grams water and mix until all dry bits are incorporated. If it’s cool in your kitchen, warm the water to 80°F (26°C) before mixing. Lightly cover the jar and set it in a warm place–80°F to 85°F (26°C to 29°C) is ideal–and out of direct sunlight for 24 hours.
Day Two

You may or may not already see some fermentation activity. As mentioned above, this potential initial surge of activity is typical and should subside around Day 3. What you can see below is how my initial mixture expanded significantly (in fact it bubbled out of the jar; this is why setting the jar in a bowl is a good idea). Don’t be discouraged if the surge disappears by the third or fourth day. Stick to the schedule, and it will come back!


Place a second, empty jar on the scale and tare so that it reads 0 grams. Scoop in 75 grams of the mixture that has been resting for 24 hours. Next, add 50 grams rye flour, 50 grams all-purpose flour, and 115 grams of water. Again, if it’s cold, warm the water to 80°F(26°C).

Mix well until all dry bits are incorporated, cover, and place in the same warm spot for 24 hours. Discard the rest of the mixture in the first jar and clean it in preparation for the next day.
Day Three
In the morning, you may start to see more activity, or you may see none. You can see below that the initial surge of action I had on Day 2 disappeared. However, my mixture started to show the beginning signs of beneficial yeast and bacteria taking hold: some bubbles on the top and at the sides, rose to some degree, and it started to take on a sour aroma.

Regardless of what signs your mixture is presenting, don’t fret and stick to the schedule. Remember, if it’s cold in your kitchen, warm your water to 80°F (26°C) to help speed things along.
If a layer of clear liquid (“hooch”) forms on the top of your mixture just stir it back in and keep with the schedule.
Place a new, clean jar on the scale and tare. Scoop in 75 grams of the mixture that rested overnight and add 50 grams rye flour, 50 grams all-purpose flour, and 115 grams water. Stir until well incorporated. Cover the jar and let it rest for 24 hours.
Discard the rest of the mixture in the first jar and clean it in preparation for the next day.
Day Four
This day is the first day of the process that has two refreshments in a single day: one in the morning, and one approximately 12 hours later.
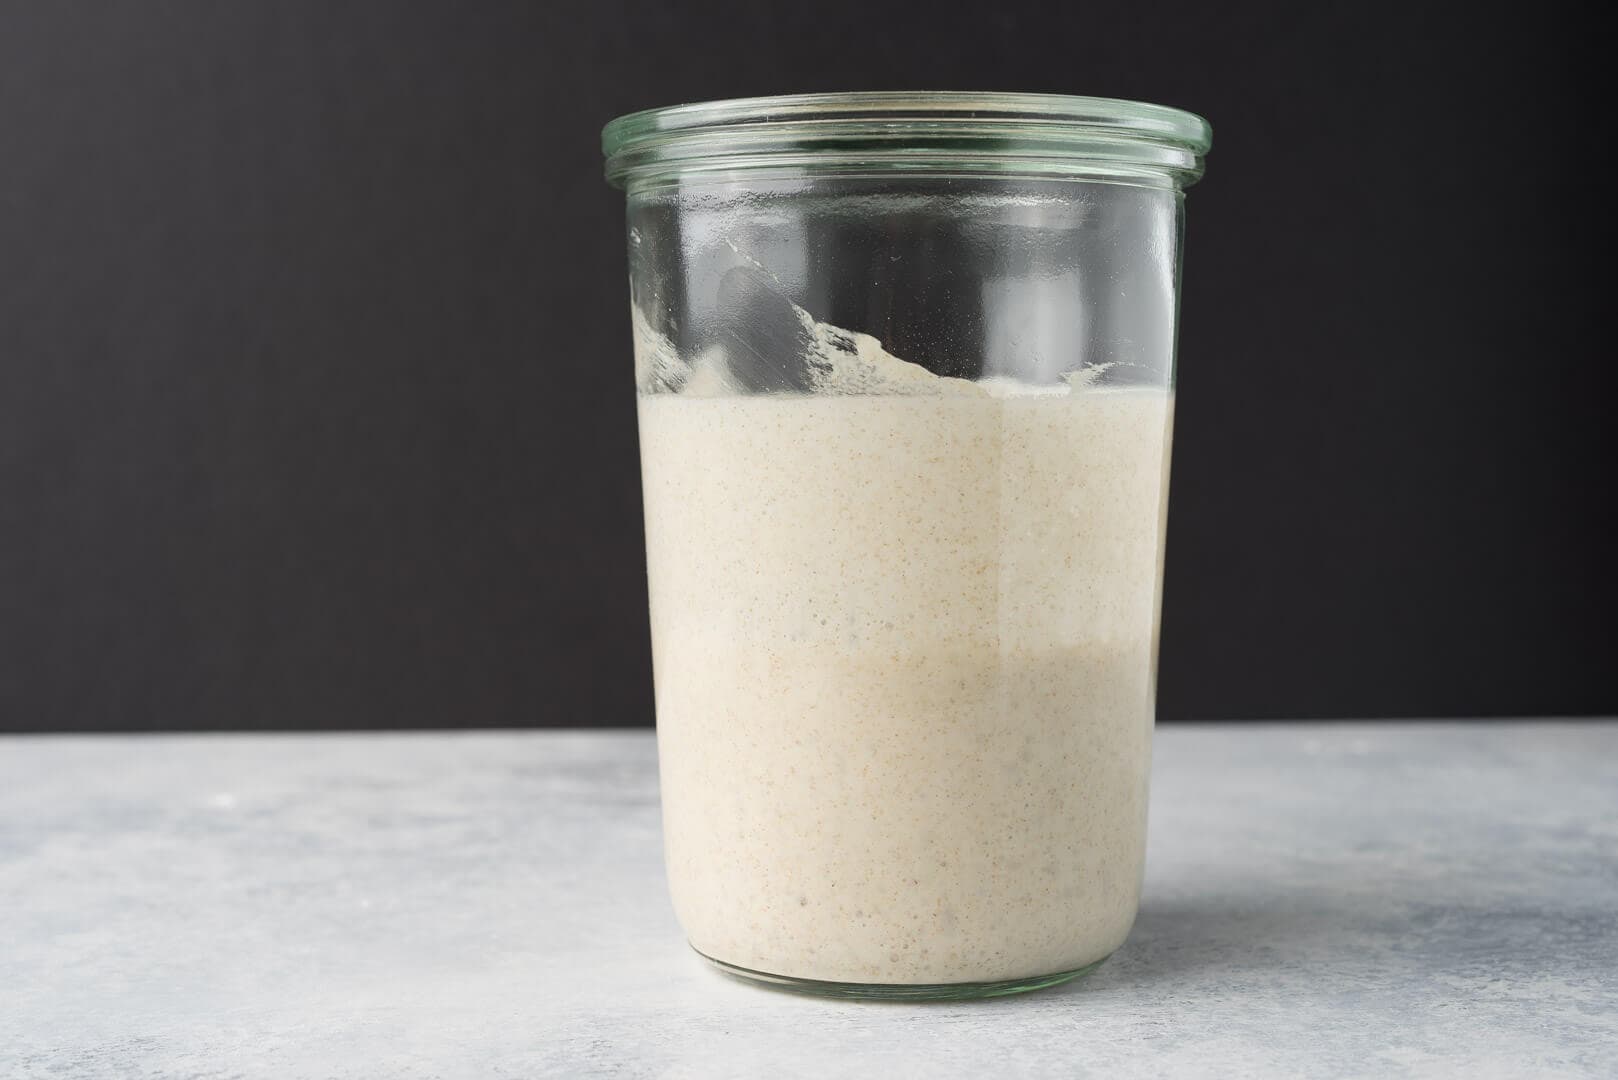
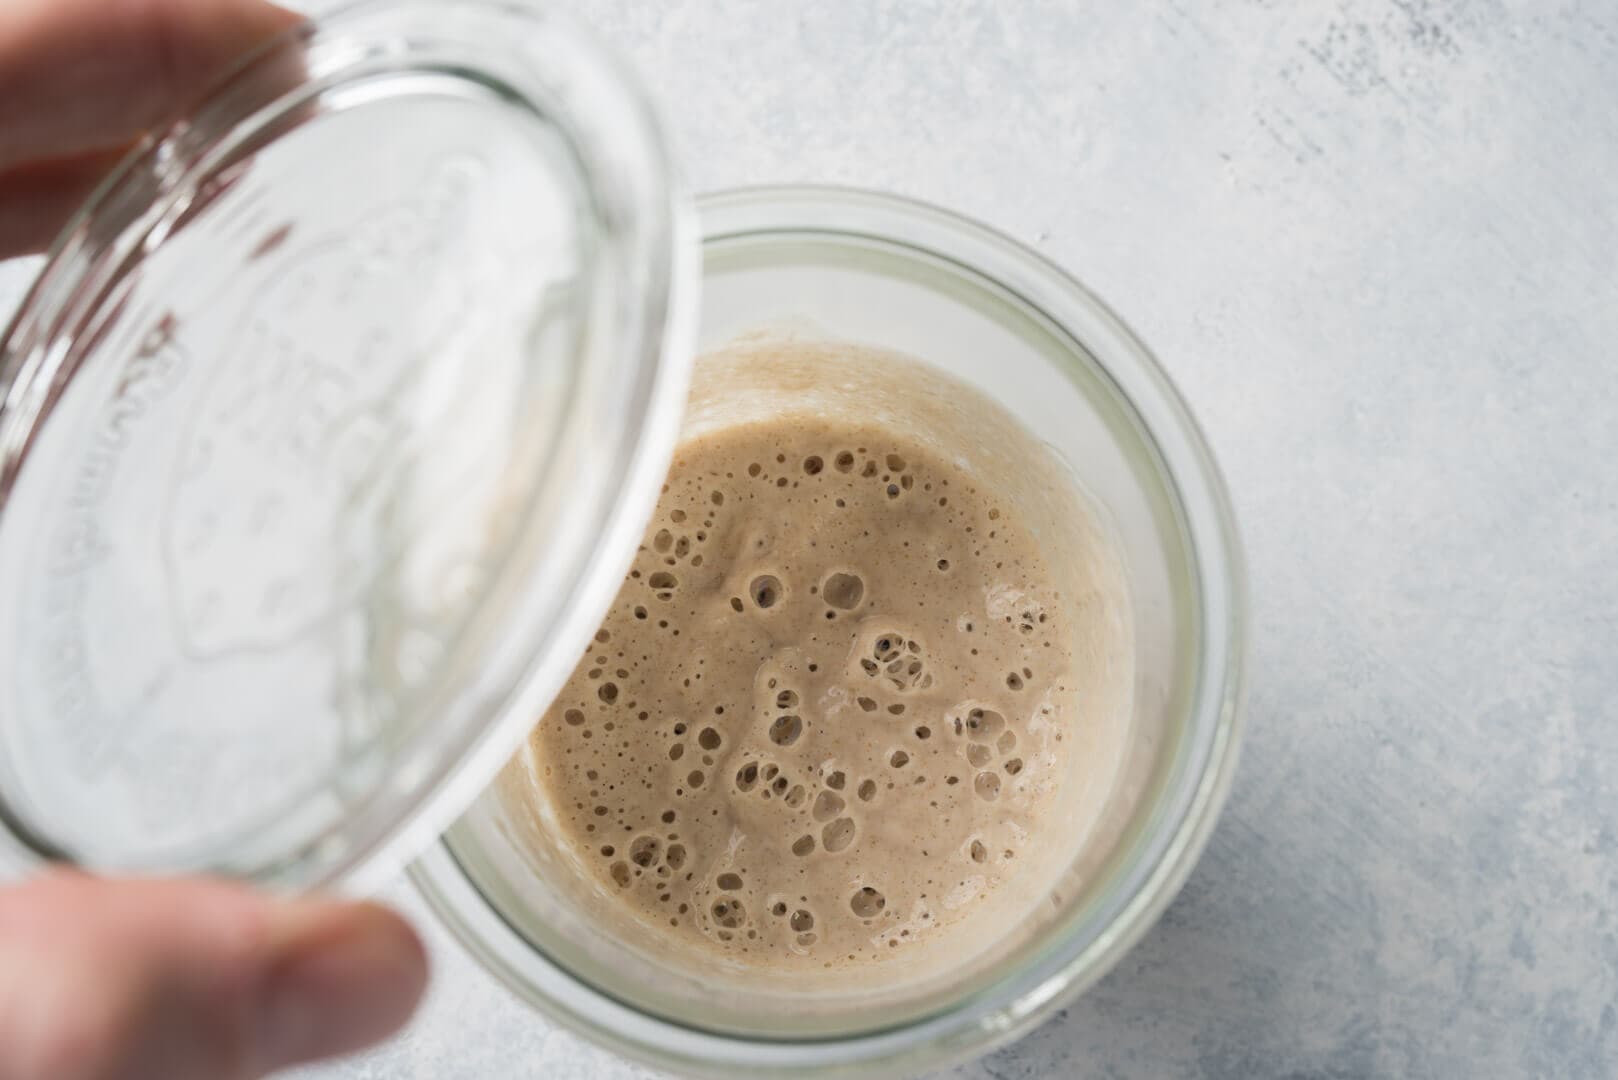
In the morning, you should start to see signs of fermentation activity if you haven’t already, and begin to see them again if you experienced the surge-and-drop that I described above. There will be bubbles scattered on the sides and top, and the level of the mixture might have risen and fallen a little (evidenced by streaks on the sides of the jar).
Refresh in the same way that you did on Day 3. Place a clean jar on the scale and tare. Scoop in 75 grams of the mixture from the jar that fermented overnight, add 50 grams rye flour, 50 grams all-purpose flour, and 115 grams water. Mix thoroughly, cover, and let rest for 12 hours.
Discard the rest of the mixture in the first jar. From here on, simply use the same jar each day (no need to switch to a clean jar) by discarding the contents down and adding fresh flour and water as instructed.
After this 12-hour rest during the day, discard the contents to 75 grams and refresh again with the same ratio of ingredients. Let the new mixture rest for 12 hours (overnight).
Day Five and Six
For Days 5 and 6, continue to discard down the contents of the jar and then refresh with the same ratio of ingredients as you did on Day 4, twice a day. You will see fermentation activity increase more and more. If you’ve written the weight of the empty jar on the bottom as I indicated on Day 1, you should know exactly how much the resulting weight of the jar plus carried over starter will be—discard down to this weight.
Keep using the same jar for these refreshments.
Day Seven and Onward
In the morning on Day 7, discard what’s in the jar down to 20 grams of the mixture. To this, add 30 grams rye flour, 70 grams all-purpose flour, and 100 grams water. Mix thoroughly, cover, and let rest for 12 hours during the day. In the evening (after about 12 hours), discard the jar contents down to 20g, add the same ratio of ingredients as earlier in the day, and let rest 12 hours (overnight).
At this point, you should see the height of your starter rise and fall in the jar predictably each day. This periodic behavior is a good indicator that it is strong enough for you to use for your first loaf of bread. If your starter is still struggling to show activity, continue the refreshment schedule with the same ratio of ingredients for another day–or even several more days–until things pick up. The process of stabilization can sometimes take longer, depending on the flour used and the environment (especially if it’s cool in your kitchen). Be patient and stick to the schedule!
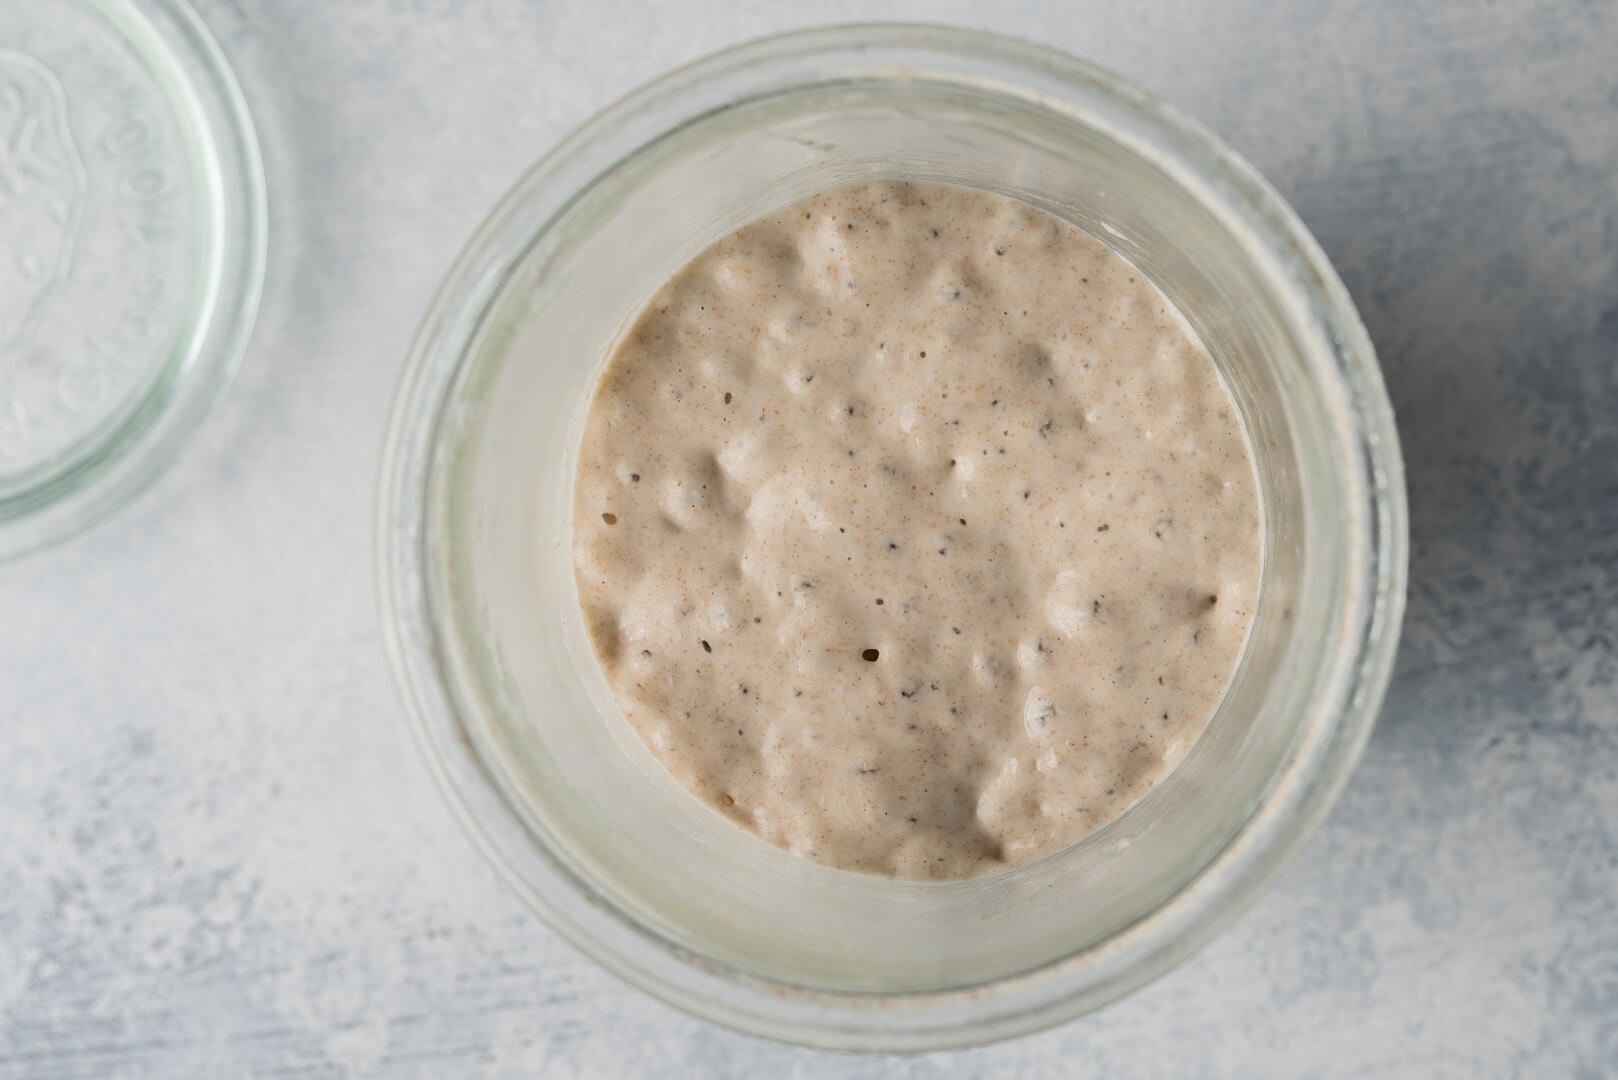
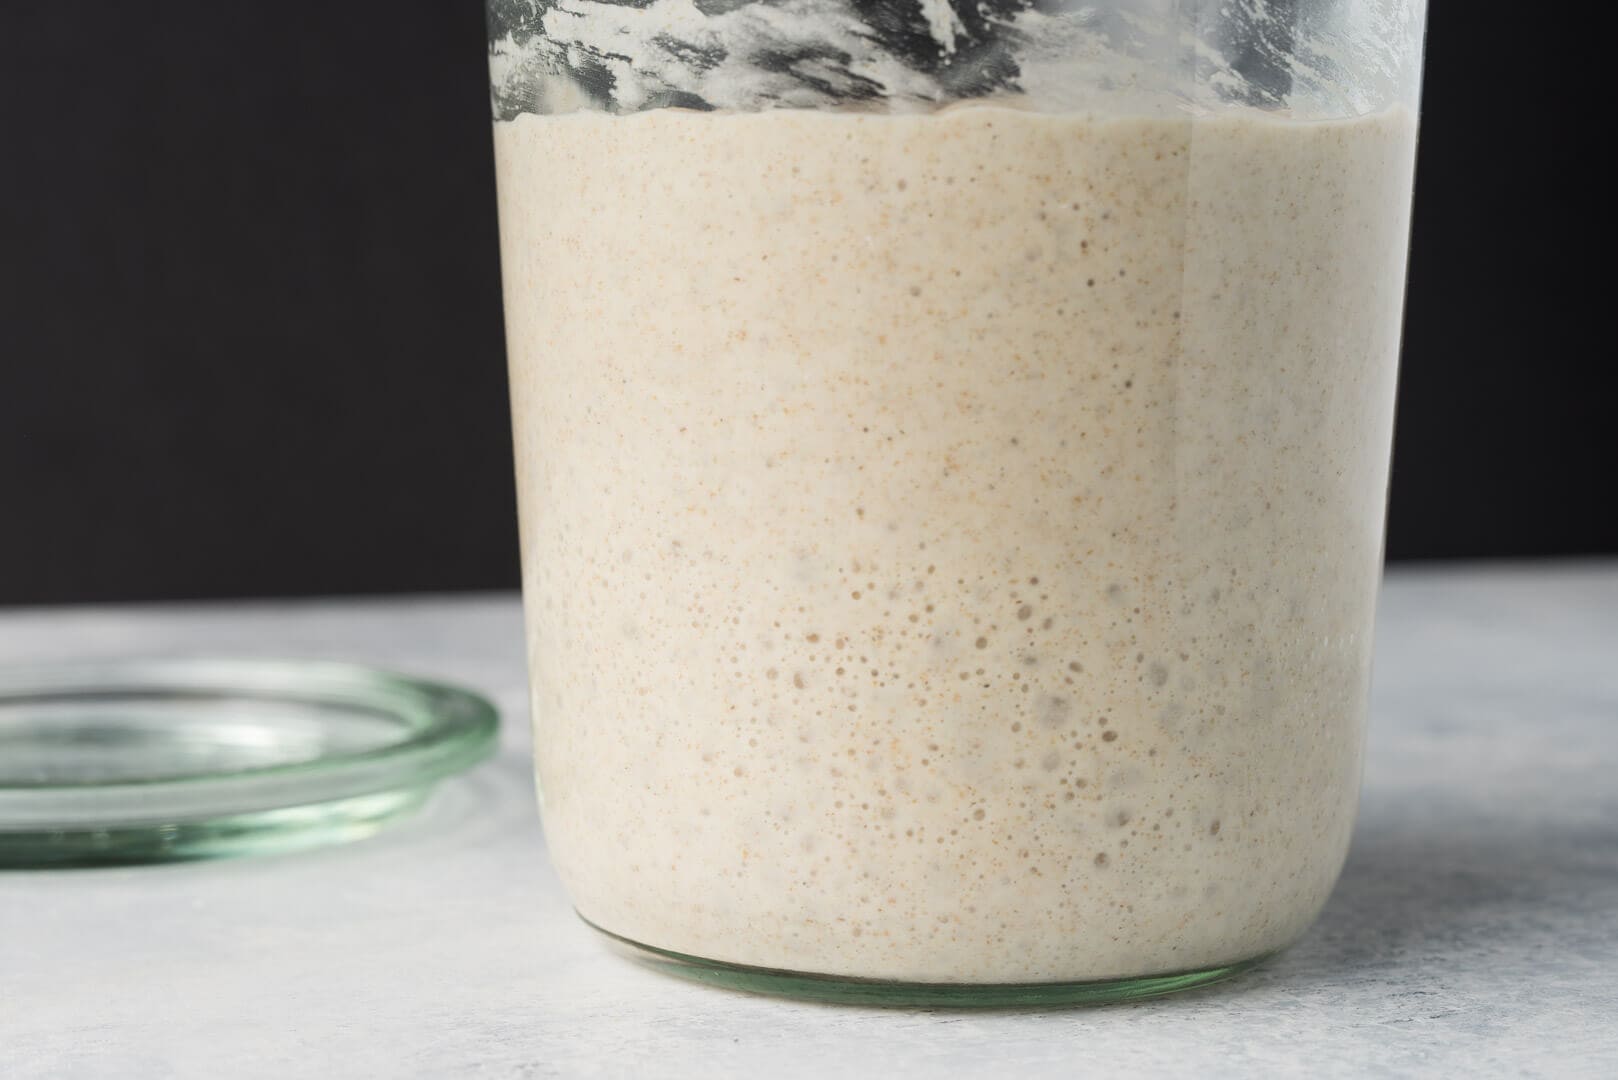
Once you get the hang of your starter and its feeding schedule, feel free to adjust the ratio of ingredients. For example, in warmer months I’ll reduce my mature starter carryover to 10g to 20g depending on the temperature. To read more about how I change these ratios and maintain my starter, check out my comprehensive sourdough starter guide page which includes my current feeding schedule, an in-depth FAQ, and more.
The starter will continue to develop flavor and strength over the next week and into the future. With an active starter, you can now use a portion of it when it is ripe. A starter is ripe when it has risen, is bubbly on the surface and at the sides, has a sour aroma, and has a looser consistency than when first refreshed.
Having issues? Check out my list of the 21 most common sourdough starter problems (with solutions) →
What is the Best Flour to Feed My Sourdough Starter?
I get asked this question often. Once your starter is rising and falling predictably, it’s okay to switch your refreshment flour to suit your preference. You can continue with a mixture of rye and all-purpose, change to 100% all-purpose white flour, or even switch to using 100% whole wheat.
There is no right or wrong flour to use when feeding a starter.
Each flour will affect the starter in a different way, changing how fast it ferments, how acidic it becomes in the same timeframe, and eventually, the final flavor profile. There is no right or wrong flour to use when maintaining your starter; it’s up to you and your starter!
Next Steps For a Healthy Sourdough Starter
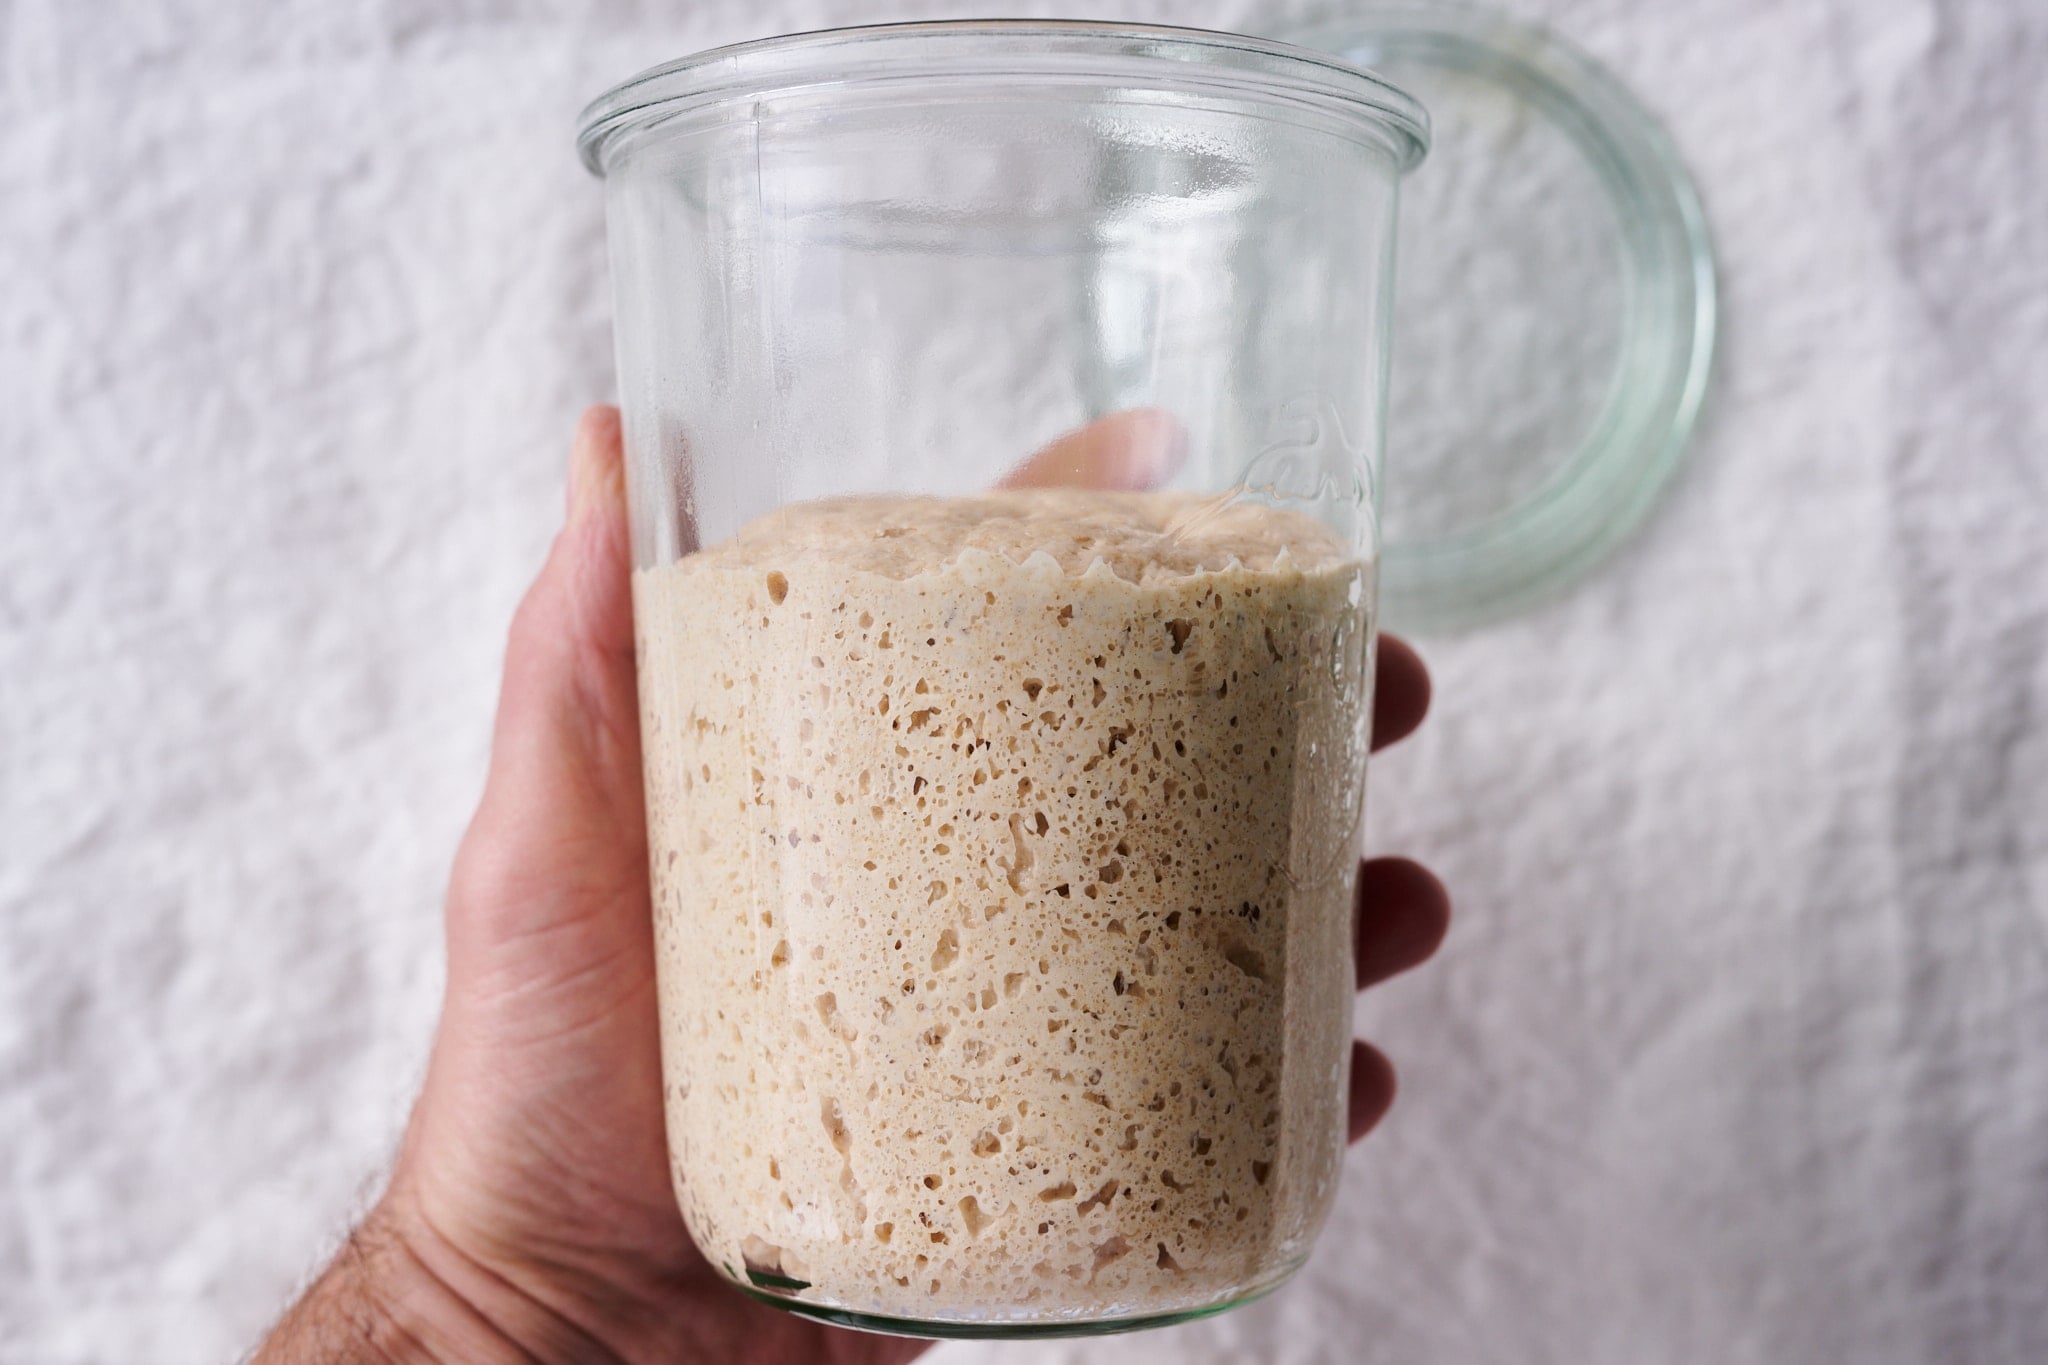
After your starter rises and falls predictably, review my sourdough starter maintenance routine for all the steps I do to keep my starter healthy. You can adjust your feeding schedule based on your baking frequency. If you can bake almost every day, you’ll want to feed your starter once daily to keep it ready-to-use shape. If you want to bake only on the weekends, you can put your starter in the refrigerator to slow down its activity.
You can also scale down your starter and maintain a smaller one. Scaling down your starter will mean less flour and water needed for each refreshment (to save ingredients). See my guide to maintaining a smaller sourdough starter for a recipe and process.
What If I Need a Break From Maintaining My Starter?
Maintaining a sourdough starter should always be on our terms, not the other way around. Maintaining a starter indefinitely can be daunting, but there are ways to put your starter on pause if you need a break from baking for a while. Remember, the refrigerator is our friend to slowing fermentation, and there are even ways to stop all fermentation activity altogether (and it can stay this year for years!).
How Can I Save Sourdough Starter Discard?
Once your starter is rising and falling predictably each day, and only then, to ensure you have the right mix of suitable bacteria and wild yeasts in the culture, you can save the discard. I keep a jar in my fridge where I collect all discards and keep them for up to 2 weeks. Then, when I want to make pancakes, waffles, or another discard recipe, I can use starter from my sourdough starter discard cache at a moment’s notice.
Final Thoughts
These days, refreshing my sourdough starter is a liturgical part of my day. It takes minutes to provide my starter with fresh flour and water. In return, my starter produces flavorful and healthy bread. I like to think it’s me making the bread; it’s me controlling fermentation, it’s my hands mixing and shaping the dough. But the reality is, I’m just a small cog in nature’s machinery. All I need to do is lend a helping hand and stay out of the way. Happy baking and buon appetito!
Print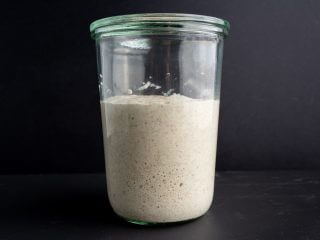
Sourdough Starter Recipe
- Prep Time: 7 days
- Total Time: 168 hours
- Yield: 1 sourdough starter
- Category: Sourdough, Baking, Bread, Starter
- Cuisine: American
Description
This sourdough starter recipe will help you create your own sourdough starter from scratch at home in seven easy steps. Your starter is the cornerstone of great bread—once you have it showing consistent signs of fermentation each day, which takes on average 5 to 7 days, you’re ready to start baking sourdough bread!
Ingredients
- 300g all-purpose flour
- 400g whole-grain rye flour
- 800g water
Instructions
- Day One
To a clean jar, add 100g whole rye flour and 125g warm water. Mix ingredients and keep somewhere warm for 24 hours. - Day Two
To clean jar, add 75g of the mixture from Day One (discard the rest), 50g whole rye flour, 50g all-purpose flour, and 115g water. Mix ingredients and keep somewhere warm for 24 hours. - Day Three
To a clean jar, add 75g of the mixture from Day Two (discard the rest), 50g whole rye flour, 50g all-purpose flour, and 115g water. Mix ingredients and keep somewhere warm for 24 hours. - Day Four
On day four, you will give the mixture two feedings. In a clean jar, add 75g of the mixture from Day Three (discard the rest), 50g whole rye flour, 50g all-purpose flour, and 115g water. Mix and let rest for 12 hours. In the evening, after 12 hours, repeat the discarding and feeding you did in the morning. Let the mixture rest overnight. - Day Five and Six
For days five and six, continue to discard down the jar contents and then feed with the same ratio of ingredients as Day Four, twice a day. You can use the same jar for these feedings. - Day Seven and Onward
In the morning on Day Seven, discard the jar’s contents down to 20g of the mixture and add 30g whole rye flour, 70g all-purpose flour, and 100g water. Repeat this feeding twice a day, once in the morning and once in the evening, indefinitely.
Notes
You don’t have to use a new, clean jar each time you feed your starter, but I find it’s helpful to keep track of the weight of the jar so you know how much you’re carrying over.
If you use my method for creating a starter, tag @maurizio on Instagram and use the hashtag #theperfectloaf so I can take a look!
Sourdough Starter Creation FAQs
Why do you need a sourdough starter?
A sourdough starter is a continually maintained mixture of wild yeast and suitable bacteria used to seed fermentation in new dough for bread, pastry, and more.
How long does it take for a sourdough starter to be ready?
In general, I’ve found it takes about 7 days from when you first mix flour and water to when a sourdough starter is ready to be used to bake bread.
Is a homemade sourdough starter safe?
A well-maintained sourdough starter can live virtually indefinitely. The high-acid environment of the sourdough starter helps stave off any unwanted pathogens. However, if you see any signs of traditional mold (pink, white fuzzy, green), it’s best to discard the entire starter and start a new one.
Should I make or buy a sourdough starter?
While buying a sourdough starter is very easy online, it’s a very easy process to do at home! Plus, creating your own starter exposes you to the signs of fermentation, what steps you need to perform to maintain your starter, and gives you a chance to get to know the feeding (refreshment) process.
How long does it take for a sourdough starter to peak?
Some bakers use the term “peak” to refer to either the point at which a starter is ready to be used or needs feeding, or it can refer to the physical peak height of the starter in the jar. I find judging a sourdough starter’s readiness based solely on the height it has risen to may lead to using it at an incorrect time. After all, the height of a starter is simply a display of the strength and other characteristics of the flour. To determine when your starter is ready to be fed (or used for baking), look for a combination of signs: some rise, bubbles on top and at the sides, a sour aroma, and a loose consistency (it should loosen the longer it ferments). From there, use the timeframe for fermentation as a guide: at about 72-78F (22-25C) with 30-50% whole grain flour and 20% ripe starter (the seed, or inoculation), it might be ready after 12-16 hours.
Why doesn’t my sourdough starter have big bubbles?
It’s okay if your starter doesn’t have big bubbles. Large bubbles can be the result of the flour you’re using and the hydration. What’s more important overall, is to see strong signs of consistent fermentation: some bubbles, consistent rise each day, a sour aroma, a loosening in texture.
Why is my sourdough starter not rising?
It’s worrisome if you don’t see any rise in your starter, you should see some. Usually, no rise is a sign it’s not fermenting properly and needs more time to establish. Continue with the feeding schedule outlined in my guide on how to make a sourdough starter and it should begin fermenting after a few days.
What’s Next?
If you’re looking for something to make with the discarded sourdough starter that you’re generating every day, have a look at my sourdough waffles, sourdough pancakes, and sourdough banana bread.
If you need a high-level look at each step of the bread-making process, read through our Beginner’s Guide to Sourdough Bread.


2,663 Comments
Why can’t you use American weights and measures?
Hey, Nancy! Sorry, I’m just so used to using the metric system and it’s so easy to convert between units (grams to kg, etc.)!
Question from out in left field here. I am very interested in sourdough baking as I LOVE the flavor, but my wife has celiac disease and cannot have any wheat, rye or barley. Can you recommend a suitable gluten free flour mix to meke good sourdough?
I know King Arthur has good options!
My starter was doing great up to day 4, doubling in volume within 24 hours. After the second feeding on day 4, it no longer rises. I’m on day 6, it was fed about 8 hours ago and in a warm location (77 degrees) and has maybe risen 5% in volume. I’m using KAF whole wheat and bread flour, and tap water (which is very neutral and I use it for brewing without and adjustments). Only notable change was switching to a new bag of whole wheat flour. Should I keep going with the schedule or go back to once a day feedings until it’s more robust?
I’d switch back to 1x a day feedings!
In theory, could I make a sourdough starter with all wheat berries, like hard white or hard red, and skip the all purpose flour? Thanks for the article! Very informative!
You can make a starter with all whole grain flour, yes!
Hello – thank you so much for these detailed instructions. I forgot to feed my starter on day two. Can I resume the schedule now, almost 48 hours later?
Thank you.
Yes, absolutely, Kate!
Hi Maurizio…
How are you ? I Trust that you are keeping well.
I have a question regarding the discarded flour mixture. Can we use the discarded mixture soon after it is discarded or should we wait for a certain amount of time before we can use it for making other recipes ?
Cheerio !
S. Radhakrishnan / Divya Raheja
Chennai, India
I would wait until at least day 7, but the key is you want to see the same rise and fall of the starter each day, then you can use the discard in other recipes.
Hi Maurizio… Our Sourdough Starter is ripe and ready for baking ! Divya and I have been feeding it regularly twice a day and it has a very predictable rise and fall. We plan to bake our very first Sourdough Bread next Wednesday (20/09/2023). Yay ! Now, my question is: How do I prepare the Levain ? On the day before, do I feed my Sourdough Starter as usual and take a small portion for making the Sourdough Bread ? Or, do I take a small portion of the active Sourdough Starter that has been fed 10-12 hours prior ? If so, what quantity of Levain do I need for the dough ? I am so confused. Please help.
I am new to all this and slightly confused. When I start to use the same jar ( day 4?) Am I now taking out the top 75g and discarding thus, and adding the 100g flour to what remains, or am I taking out enough to leave 75g in the jar?
Thanks
That’s right, on Day 4 leave 75g of what’s in the jar inside there, scoop out the rest.
I’m on day 5. My starter has bubbles on the top after 12 hours but is covered in water and not rising. When I stir it back in the starter is basically a liquid. Should I add less water in the next feedings or continue with 100g flour 115g water? Thank you in advance !
Less water will be just fine!
I’m on day 2. I don’t see any rise. Do I still do the day 2 steps?
Yes, stick with it, Sheri!
I’m on day 6 of a new starter, and have very little activity despite following everything to a tee. My starter is at 80 to 82F. My water is alkaline though, is that somehow to blame? Am I neutralizing the pH every addition in a way that inhibits the activity?
Hmm. I would use regular spring water (bottled) for a while instead and see if this helps! I’ve not tried doing this with alkaline water.
To any reading this, don’t get scared off by all the details. Its very forgiving. I’ve had my starter living for years, probably over a decade. I keep it in the fridge and feed once a week. AP flour. I don’t weigh anything, I keep the consistancey similar to a pancake batter or a bit thicker. When its time to feed I put half, which is maybe an inch into a pint sized mason jar, add about 1/4 cup flour to both and warm water, a little less than 1/4 cup and stir both. I don’t measure accurately, but again, I keep the thickness the same or similar. I return the starter to the fridge and leave the mason jar on the counter for bread baking, sometimes the next day, sometimes the same day. I’ve rushed the mason jar starter sometimes by using it to make bread after 3 or 4 hours, or sometimes till the next day. I’ve used it when it has risen considerable and used it when not risen much at all….The bread is great every time. Experiment and have fun. Thanks Maurizio, great website.
You called it exactly, thank you 🙂
I’ve left a silver spoon in my starter for a couple of days. The spoon now has small patches of green around the edges. Is it safe to use please.
Hmm. I wonder if a reaction took place there. I would probably create a new one! You definitely do not want to use any metal that is reactive since a sourdough starter is acidic.
Hi Maurizio. If I want to start baking bulk, say 10 loaves a day, what would be the best means to get enough starter ready for the bake?
Scale your starter up over the course of several days until you have enough to cover your requirements. You can double it each day, it’ll grow quickly 🙂
Thank you for the guide. I’m on day 8 and my starter only rises about 3/4” passed the rubberband. I switched to filtered water and store the Weck jar in the microwave where I have checked the temp to be 77 F. Been doing 2 feedings / day with 20g starter, 30g dark rye, and 70 g AP with 100g water. It smells “sour”and there are some bubbles. Do you recommend I start over or keep going? Thank you.
Definitely keep going, Jay! All the signs are there, it might just need a few more days. Also, try reducing the water just 5g and see if the mixture is stronger and rises higher. Not necessary, but it’ll help you see what’s happening a little more easily.
I kept a starter previously for almost 3 years. Life got in the way, my Mum got sick and and I sadly let my starter die. It was a big regret I beat myself up about and have really missed making sourdough. I have used your method this time for my starter. Already, this one looks off to a better start! Lots of activity, lovely sour smell since day 4. The main differences seem to be that with my old one I started it on only bread flour and didn’t discard for the first few days or so? I was never entirely happy with its strength so have high hopes this time! Super excited to make some sourdough again and get to know my new starter 😊.
Right on, sounds like you’re starter is moving along so that’s great. Stick with it! Yes, I like to add some whole grain rye, I find it really helps get things going. Have fun 🙂
Day four of your starter and mine was raring to go. I made my dough with the discard from the 2nd feeding on day four, bulk ferment followed by and overnight cold ferment, and just took it out of the oven. Fabulous! It’s as active as my 15 year old Italian culture.
I used freshly milled rye.
That’s awesome to hear, CJ! Pretty quick, and that sometimes happens 🙂 enjoy!
Hi Maurizio, Thanks for this detailed guide to start my own Sourdough journey. I had one question. is it important to use the Rye flour to make the starter? Can we use wheat flour or all purpose flour instead? or are there any other substitutes?
Rye flour really helps get things going, but if you don’t have any, whole wheat flour will work, too. It’s possible getting a starter going with just AP flour, too, but it may take a little longer (or may not!).
Thanks a lot. This really helps.
Is it possible to just feed one times per day after the week process? Thanks
Yes, absolutely possible. Leave less starter in the jar so it’s not overly ripe after 24 hours and/or keep it cooler.
Hi Maurizio,
I am on Day 2 in the evening after a 8:00 a.m. feed. The temperature in my starter box is 74.9. My starter is starting to overflow a bit – yikes! Do I just let it do it’s thing and continue with the directions for Day 3 tomorrow?
Thanks!
Yes, keep with it, Margie!
Hi Maurizio, I have just got to the end of day 7. Im a bit lost and would love some advice.
My starter only rises which a little between each feed (about 1/4) before it starts to sink, it has never doubled.
My house is fairly cold so I tend to keep it in the oven with the light on most of the day and then in the cupboard at night. The top always gets nice a bubbly and there are some tiny bubbles on the sides but never large bubbles. I use a mix of plain white and whole wheat flour. My main question is – does it matter that it never doubles?
Not a huge deal that it doesn’t double. I would not worry about this, Jessica. The flour you might be using has a huge impact here. As long as you’re seeing signs of good fermentation each day you’re doing just fine!
Hi! I’m on day 8 and used whole wheat flour instead of rye for the recipe. I haven’t gotten any rise so far. On day 7 I accidentally used the same ratios as days 5-6. Now I’m wondering, should I continue with the day 5-6 ratios for replenishment until I get rise, or switch to the day 8 one in your schedule? Thank you!
I would stick with days 5-6. I hope by now it’s picked up!
Hi, I’m on day 8 and have a few bubbles but not a big rise. It was rising before I changed the ratio on day 7. Should I go back to feeding once a day at day 5/6 ratio or continuing feeding at day 7 ratio twice a day?
I only bake bread about once a week so once the starter is developed, can I keep it in the fridge and feed it once weekly? Do you recommend continuing with a mix of AP and Rye or can I switch to just AP? If so, can you please tell me the flour to starter to water ratio would I use? Thank you so much for your great information and hard work.
Yes, I’d drop back to 5/6 days. If you want to bake only once a week, check out my weekend baking schedule.
Or, you can use something like the Sourdough Home to keep it cool, but not cold.
Thank you so much for your reply.
If I have understood you correctly on day seven you have 200grams of sourdough starter – or levain? – does that mean I can now extract 100grams, for example, and use it to make some levain bread? Your recipe differs significantly from that suggested by Ken Forkish – my only other major reference at this stage – both in terms of the amount of ingredients – Ken suggests using and wasting a lot of flour which I’m not keen on – and the amount of time taken to arrive at the end point.
Yes, Kens’ recipe uses a lot of flour… After day 7 or so, once your starter is fermenting predictably each day (you’ll see and smell the same signs) you can use some to make a levain and bake with it.
You’re very welcome, so glad it’s working for you! Those sheet’s are not quite ready yet, though I do have lots of other tools in the member’s perks page! Thank you SO much for being a member, it really means a great deal (and so sorry for the late reply)!
I screwed up. Wondering if it can be fixed or if I should just start over. On day two, I fed according to the day three schedule, thusly giving all purpose flour too early. Should I just continue on with the schedule?
Don’t start over! Keep going with the schedule.
Hi! This is by far the best step by step guide for sourdough I’ve come across. I do have a question about days 7+. When we only use 20g of the mixture, it feels like sooo little. Can you explain how that works how it’s enough? I’m so nervous I’m going to mess up by new baby starter. Thanks so much!
Hey there! Thanks so much. Yes, you only need a small amount in the jar since it’s left to ferment for 12 hours or more—that’s plenty of time for it to work its magic.
Hi from North Queensland, Australia! We have super warm weather here in the tropics and I’m wondering if our heat of a general 30 degrees C means I should feed it more often? I haven’t quite figured out a way to cool it down in my house. In Summer it can get up to 38 degrees. Thanks so much for all your info, you are my favourite sourdough person to go to for amazing detailed help!
That’s quite warm! I would use cool water to do my feedings to help offset that. But yes, the warmer the weather, the more feedings youll need to do. You might need 3 a day.
Thank you! Let me know if you have more Qs 🙂
Hello and thanks for the full details.
this is my starter’s day #8 and still few bubble on top and no rise at all or visible to me.
shall I go on as day number 7 routine or go back to day # 6 amounts?
Stick with 1 feeding a day for a few more days!
Hello! I followed the starter recipe closely. But twice now, my starter has gone bad. I see fuzzy things on the surface. What am I doing wrong?
Try stirring your starter halfway between each feeding to help reduce the chance mold can form.